cygnusx1
Free Member
-
Joined
-
Last visited
Everything posted by cygnusx1
-
-
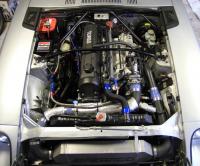
There is definitely no differential mount problem in the ZX. Nissan addressed the differential mount issues that plagued the Z. I would definitely recommend poly in the ZX suspension, along with springs and struts, as it's a "softer" riding car than the Z, to begin with. That is, if you are after sports car handling.
-
The mechanical 240Z clock sound, the doors closing..
-
Absolutely, the BMW's can't compare to the reliability of the Japanese jewelry cars, but, BMW manages to retain a "driver's car" feel, that makes the Z cars so appealing. If I purely wanted reliability and almost zero risk, financially and mechanically, I would not buy a BMW, but then again why would I own a Z?
-
Sounds good so far. Before you button up, confirm all the marks, and make sure the rotor points just past the #1 sparkplug on the distributor cap.
-
Mike, there is a staggered setup you can run. I have the staggered 162 wheels from a 330 that will be going on my 330xi. http://www.e90post.com/forums/uploadedimages/wheels/162a.jpg 18x8 front 225/40-18 18x8.5 rear 255/35-18 0.23 % overall diameter difference which is well within the BMW spec. BMW sells Xi cars with this setup. Read here: http://www.e90post.com/forums/showthread.php?t=362505 I often toss around the idea of selling one of my Z cars, and replacing it with a Z4....
-
Dave's fail proof timing method. No BS. 1) Put the crank timing pulley at TDC (by hand using the timing marker on the timing cover) Install the cover temporarily. 2) Line the cam sprocket mark up with the mark on the from of cam tower 1. (look through a hole in the cam sprocket to see the marks) There are three marks, with a new chain use mark #1, and dowel hole #1 on the sprocket. 3) Install timing chain, taking care to watch the mark on the cam sprocket. Disregard any shiny or marked chain links they are not important and can go anywhere. If it's off by a few teeth, take off the sprocket and " inchworm" the chain a tooth at a time until it lines up. (chain tensioner keeper tool firmly in place) 4) Place your dist cap on the dizzy and mark where the #1 spark plug falls, on the body of the dist. then remove the cap. 5) Install the dist drive gear, and the dist (with the rotor in place). Is the rotor pointing at the mark you made on the dist? If not, pull down the dist shaft and rotate as needed. (you want the rotor about ten degrees past the mark you made, for the built in timing advance) 6) Done. Warning: When you rotate the cam and the crank independently, you need to go gently so as not to smack the valves into the pistons. (remember when the first two cam lobes are up, you are near TDC.) End goal: Timing Pulley at TDC "0" mark. Cam Sprocket hash mark is line up with tower hash mark. Rotor points near the #1 spark plug wire on the cap.
-
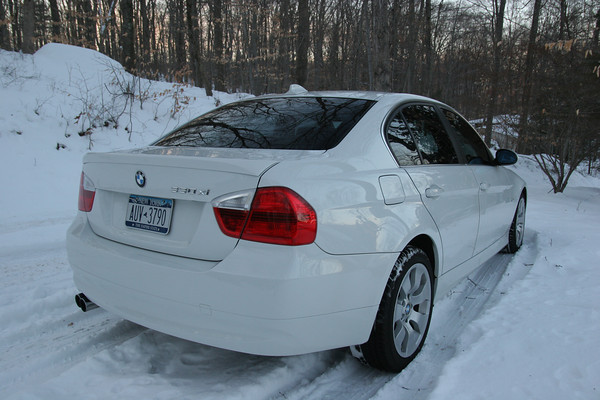
The only problem I had with my 330 is when it locked me in the car with failed lock actuators....I discovered this also locked the gas cap permanently when the attendant couldn't open it. I called the dealer from inside the car while at the gas station, where I needed to fill up. They told me that the gas cap had an emergency release handle inside the trunk. My reply was: "Where's the emergency release handle for the driver?" Silence.
-
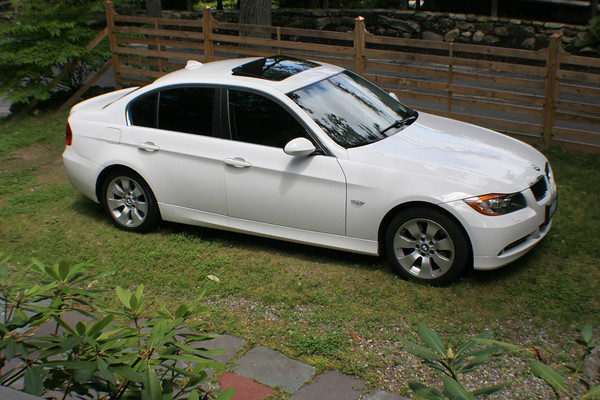
Arne, I don't like most of his work, but the flowing lines on this 3 series are sensual and they seem to all have a purpose. The points where lines start, to where they end, and the path they take, seem to all have a rime and reason. I get a lot of compliments on it and I just want to bow my head down and say: "This one's not mine. I had nothing to do with the way it looks." unlike the Z cars, which I can say I built myself. ..again IMHO. Art is never right or wrong. You are not alone. Many people never liked Chris Bangle's work. Goertz's work on the Z, on the other hand....(flame suit on just kidding stop! no! please noooooo_! ahhhhhh) Back to the original post...I worked for BMW for a few years, at a dealer, and I got to drive a lot of the 80's models. Honestly, what felt most like my 280Z was a mid 80's 325is. Handling, ergonomics, engine, gearshift... I got a similar feeling to my stock 280Z (with upsized tires) at the time. Why Datsun and BMW go hand in hand? Straight-six, rear drive, driver's cars, "tech-saavy" attractiveness, similar balance, sharp looks.
-
Love my 2006 330xi. 6 speed, with a straight six, and Winter package. It has been an excellent car for the past 20k miles that I have owned it. Very fun to drive but could use another 100 or so horsepower on top of it's 255. It's a HEAVY car, but thats what makes it so solid and quiet. The sport seats are perfect, and it has all the cool bells and whistles. I bought it after I went shopping for a new Subaru to replace my dead WRX. This CPO was much cheaper than a new WRX, and it only had 42k miles on it in 2010 when I bought it. The build quality is sooo much better than the Subie. My only dislike is that some people automatically consider me a "snob" because of it. I could care less about the badge, it's a WELL built car and is really fun to drive...and it has a straight six! I also think Chris Bangle hit the mark on this design. It's gorgeous, IMHO.


-
The ultimate family car for sure. I will never forget my first track day with my Z, when one of those pulled up. The guy opened the tailgate, pulled out an aluminum jack, and four racing slicks. I thought WOW, instant race team, in a wagon!
-
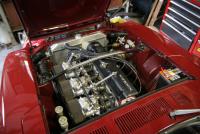
Two different approaches.
-
Lee that looks amazing. I am sure you will be able to hear the car rusting, it will be so quiet....well maybe not rusting. Not when it's THAT clean. I didn't do any noise insulation or damping per se. I can stand the road noise, and the engine noise. I can't stand the squeaks and rattles which psychologically detract from the build quality impression. I am sure however, that what you did will accomplish BOTH tasks; reducing external noise, and minimizing vibration-induced interior noises. NICE!
-
Since both of my Z cars are in a fairly stable states now #knocks on wood#, I decided to make them sound and feel more like, or rather, less like, a tin box of bolts. I am writing today, about this months long journey, to summarize my path to success, that was achieved today. One must first understand that I do have a mildly stiff setup in both cars, with poly bushings everywhere, low profile tires, and choppy roads. Oh, and no radio. It's a recipe for rattle and creak. Little by little I have had great success in chasing most of the creaks away. 1) Back-coating the plastic interior panels with spray undercoating. 2) Grease all the plastic rivets upon reassembly. 3) Snug down every nut, bolt, and screw you can find. 4) Push, pull, bump, tap at almost anything in and outside of the car that you can, and listen closely for creaks. Remedy as needed. 5) Use a thin coat of THICK damping grease at the hatch guides, the rubber blocks on each side of the hatch opening, and the latch hook. 6) Rub a light coat of oil on the hatch strut piston, and it's hinges. 7) Rub down all the weather seals with your favorite lube marinade. 8) Take out all the loose crap in the car, or stuff it in compartments wrapped with rags. 9) Of course make sure all the suspension joints are well lubed. 10) Look for loose wires and harnesses. Secure with zip ties. They can vibrate and cause mystery buzzing sounds. 11) Adjust latches for solid fits at the doors and hatch. 12) I found that the plastic escutcheon plates that snap into the interior door pulls rattle. Remove them, wad up a piece of masking tape on the back, and snap them back in. 13) This one was odd and annoying. I had the loudest CREEK-SNAP-CLICK coming from somewhere up at the passengers roof line, over side window....read below. I thought it was the plastic panel that houses the dome light. Nope. Then I thought it was the quarter window. Nope. I could not duplicate it in the garage. It only happened when I drove. In a desperate attempt to recreate it, I pulled up hard on the right rear wheel arch and POP. There it was! Coming from around the drip rail area. When I pushed down on the drip rail it popped again. Repeated this until I moved to the interior. I grabbed the vinyl covered roof liner edging on the passengers side with my fingertips and pulled down. CREEEEEEK. Bingo. I got it. Somehow the roof skin and the interior roof "lip" thingy were making a sound together. I took my WD40 nozzle and poked it deep in the crack at the edge of the roof liner and sprayed along the seam, as if to chase out roaches. Nailed it! It's gone. I took a test drive and it sounds as tight as my BMW in the 240Z now. I suppose having a partner to ID the noises while you drive would be VERY helpful. I did not have that luxury for this. I hope this helps someone. :stupid:
-
Do it. Fires up like a modern EFI car. Photos on the way. Aluminum stock, bike brake cable, and a few little things. [ATTACH=CONFIG]52658[/ATTACH]
-
hahaha so the "day-night" mirror, field of view discrepancy, is not only in my Z. Thanks for the article.
-
Paint insulation is negligible in this case. It's like peeing in the ocean...unless you are either Paul Bunyan, or painting with asbestos, it won't make a difference.
-
Impreza has a boron steel roll hoop under the roof skin that passes through the B-pillars. They are tough cars. I agree, ALWAYS strap yourself in.
-
Just in case, I wanted to bring this to light. It may be helpful. http://www.drivetrain.com/parts_catalog/manual_transmission_overhaul_kits/nissan_f5w71_overhaul_kit.html
-
I would use brake specific paint on those parts.
-
You have to measure the the synchros. That's about all that wears out besides bearings. If you don't see chunks missing from any gears they are probably fine.
-
Bad grease! I want to put in my experience on this one. I too had the boots disintegrate right off of a set of new tie rods. It took about 1.5 years for it to happen. It was due to using inappropriate grease. Whatever grease I had used, dissolved the rubber. Subsequently, I only use Mobile1 synthetic grease. FWIW, you can buy poly tie rod boots. They are usually included when you buy a full poly bushing kit for the car. I have always done my own tape measure, string, and test drive alignments with much success on a Z car. Use the center steering lock as a reference.
-
Incredible! I feel like throwing a party. I can't imagine how happy you are.
-
For $1000 you can buy 6-10 used transmissions, just to put it in perspective. Good luck with yours, and I am sure it's likely fine as-is.
-
Is it rated for very high temperatures? Why not use brake paint?