DHA280Z
Free Member
-
Joined
-
Last visited
-
Thank you for the hint. I will check the transistor wiring in the FSM. great to be in the same time zone!!
-
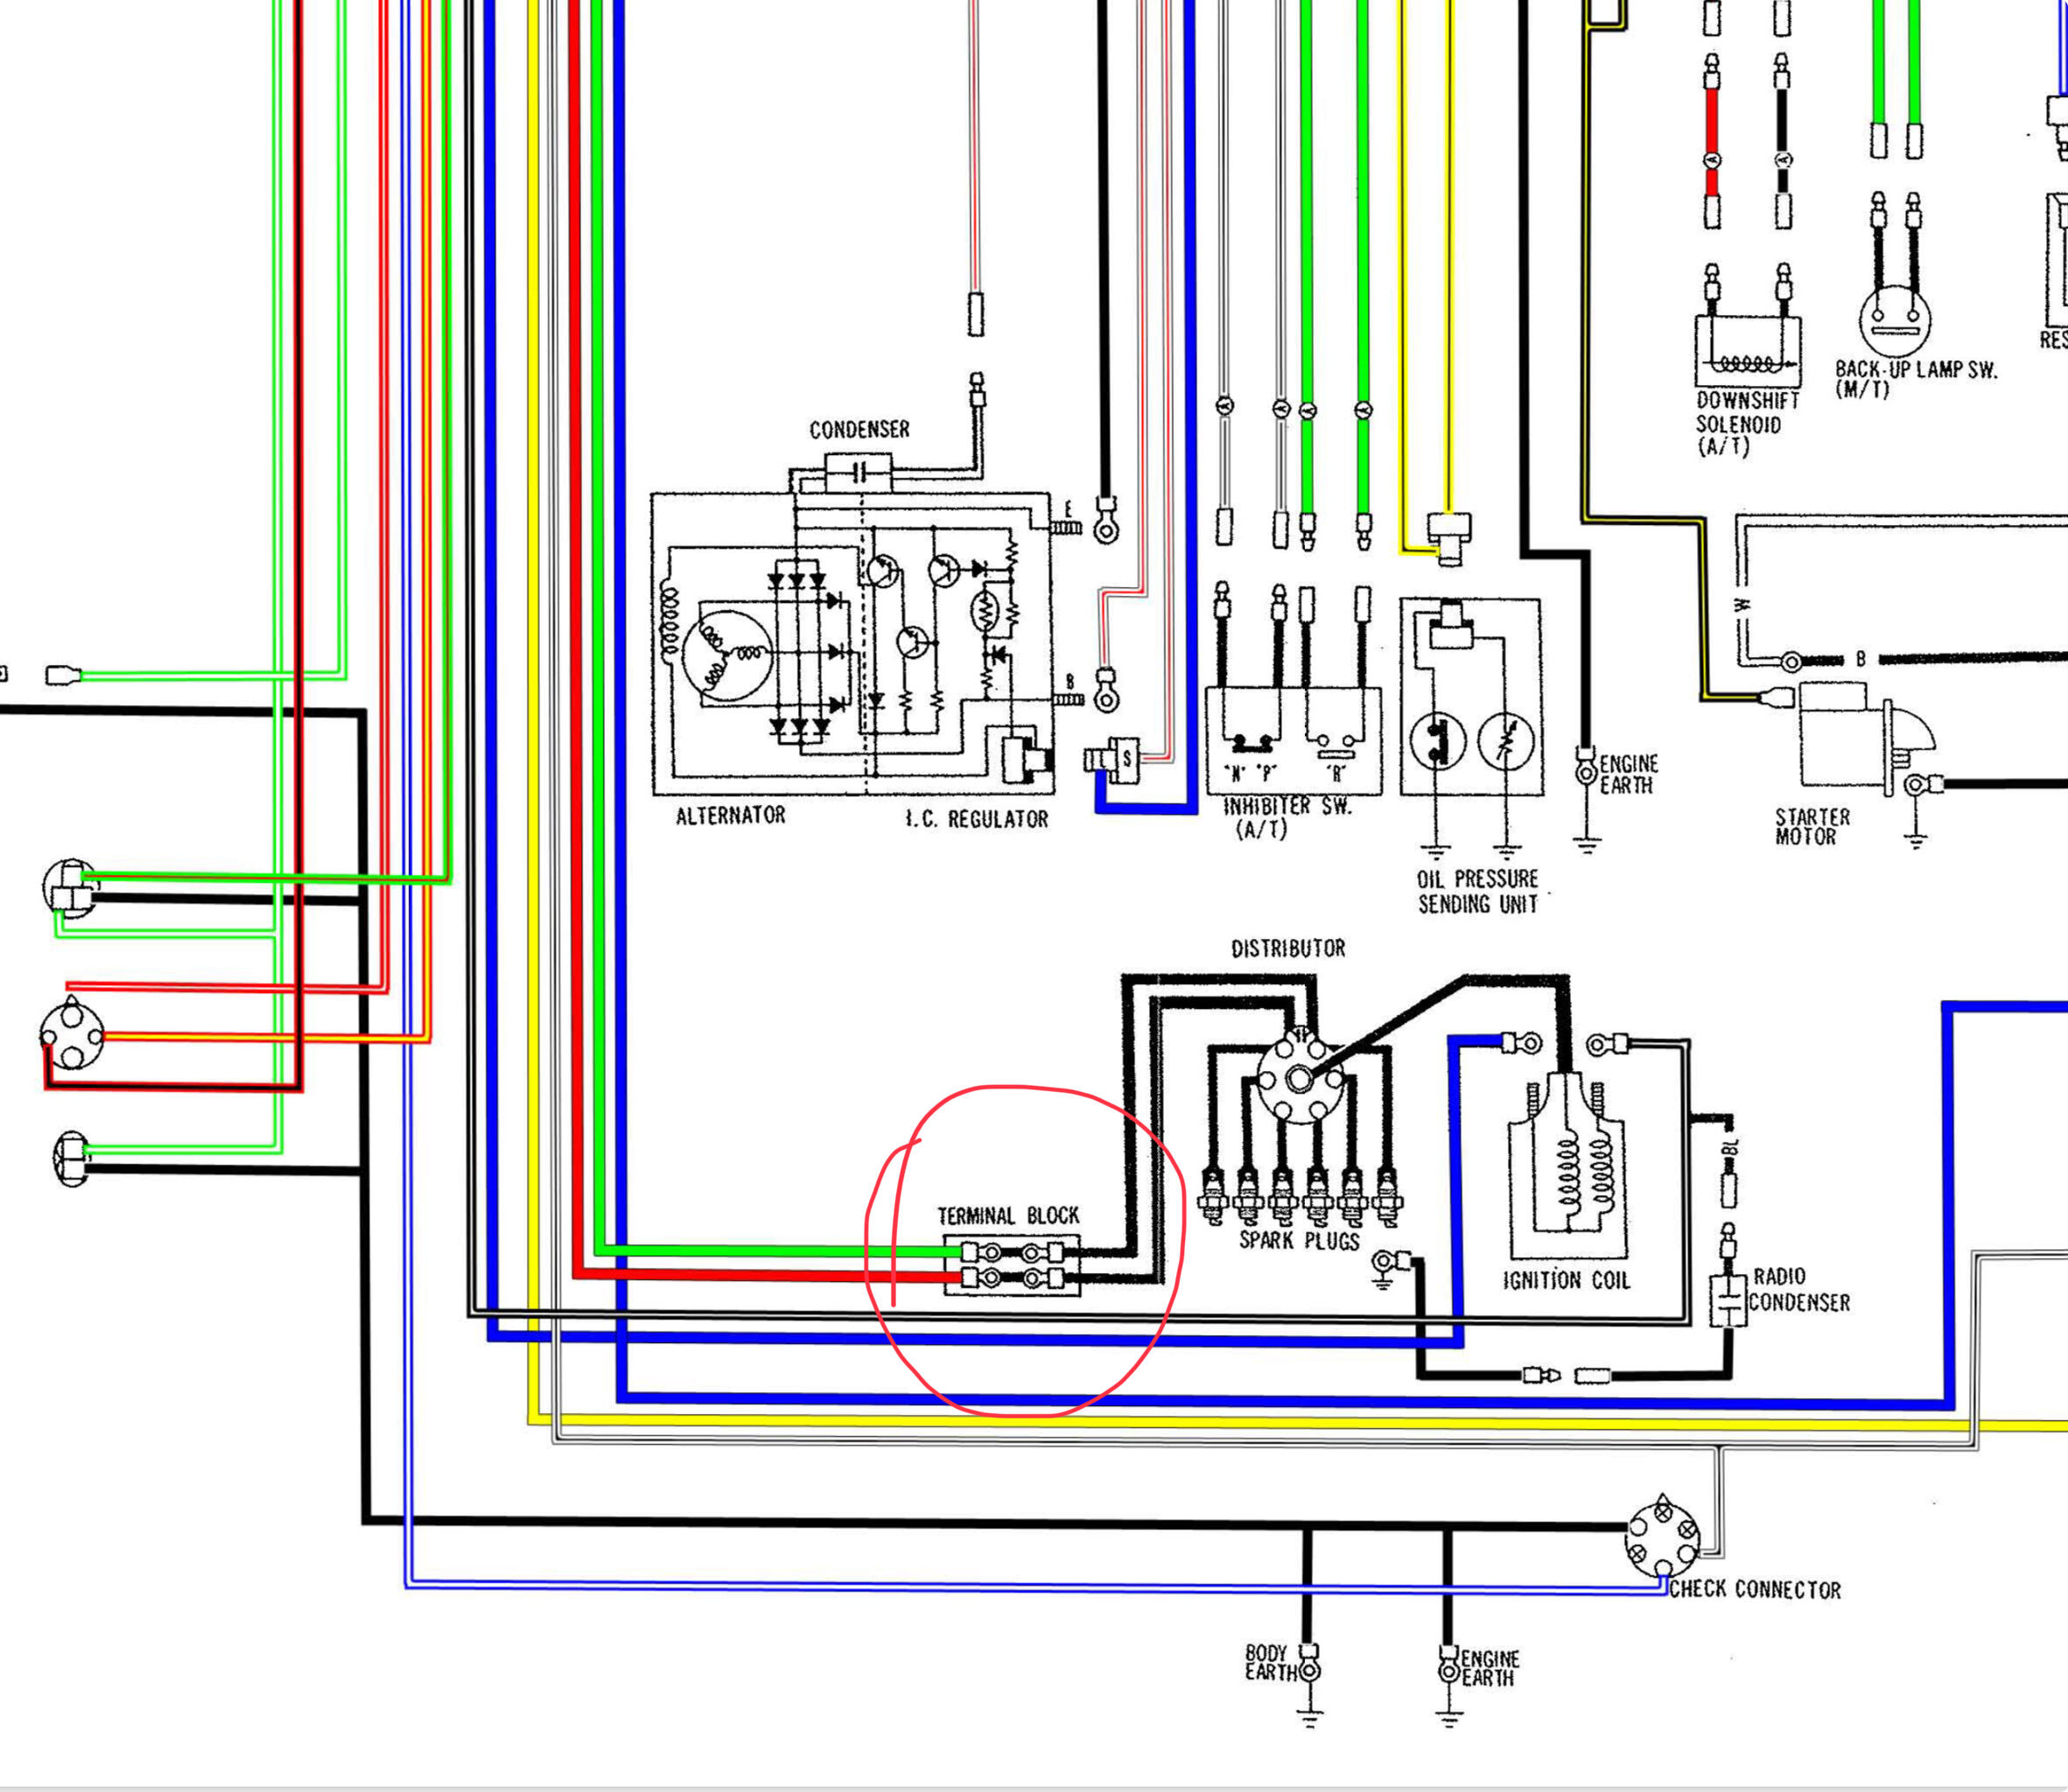
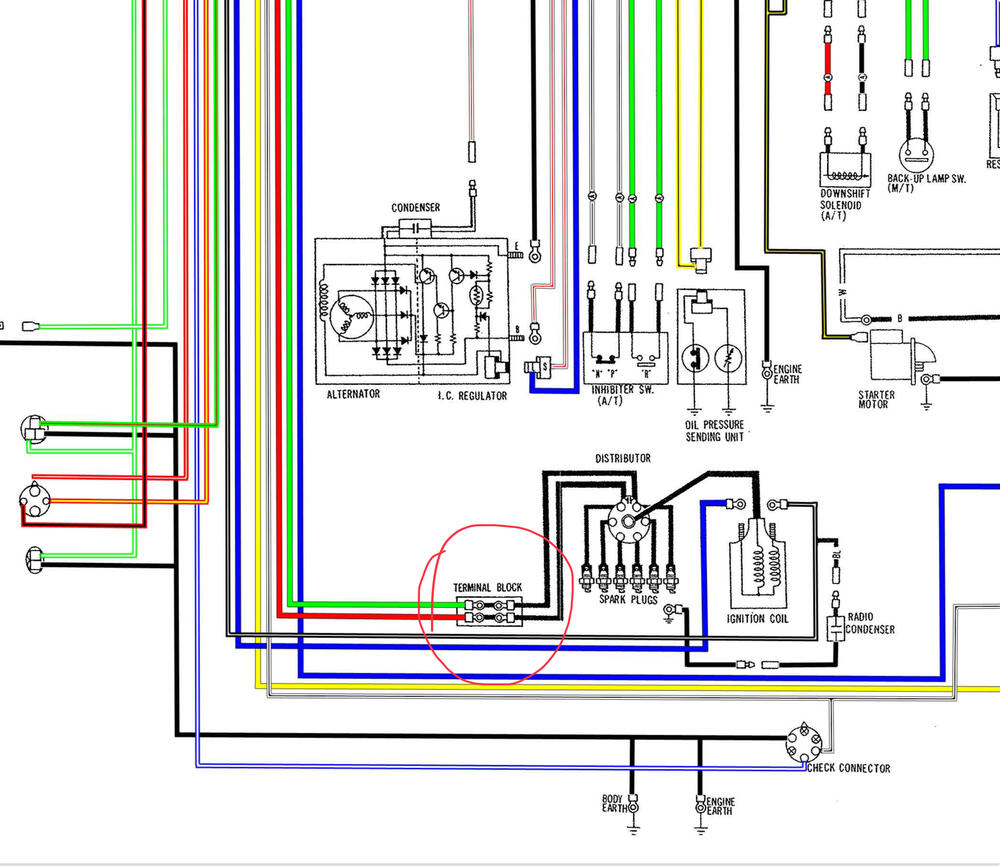
I will try this fix. may ias what you did with red&green block terminal wires, these used to connect to the distributor? The 123ignition distributor connects directly to the coil and ground, so far leaving these two wires unused. When I connected them to the +- in the coil, nothing happens. Should those be reconnected after the installation of the condenser? See figure
-
Hi Paul Prince, could you post some pictures of the wring of the condenser? I have the same issue but I am keeping the original EFI system. my tacho doesn’t work . 280Z - 1978
-
Hi Matthew, did you installed the AC hoses kit from Godzilla? Any reporting on your experience? Ordered a kit two weeks ago from them but they seem more slow than a snail… the items have not even shipped after I placed the order more than two weeks ago… cheers, DHA
-
Indeed, it looks out of mars, perfect tool for such job!!
-
Indeed No Harbor Freight stores, but those pliers are also for sale here…😄
-
After several frustrating attempts and hours of back pain, I figured out a faster and easier way for REINSTALLING the clevis pins for both, brake booster and clutch master cilinder. Inserting the pin might actually takes a couple of minutes for the brake booster and bit longer for the master cilinder but it required a few previous steps that might take 1 hour. 0. Remove driver seat, your back will love it! Is only 4 screws. Is very important that you can see the location where the pin goes. I tried the Braille method… it won’t work! 1. Grind both pins conic… this facilitates guiding and inserting the pin into the holes of pedal lever and the connecting rode to booster and clutch master cilinder (see picture); 2. Keep lose the set of nuts fastening booster and clutch master cilinder (the loser the better but keep the nuts in the bolts). This enables to easily move the connecting roods and make their holes match the holes in the pedals; 3. Add a bit of grease to both pins, this helps sliding the pins while lubricating them for future operation; 4. Proceed to insert the pins, wiggle the pin vs the connecting rod. You will be surprised how easy each pin find its place; 5. Use a long pointed but small vice-grip pliers to reinsert the R clips; the booster clip must be gripped on it round bit flat to the pliers teeth. For the clutch master cilinder, perpendicular to the pliers teeth, be careful don’t press too much otherwise you will deform the clip. For both clips rotate the pins, so that you can see pin-hole. 6. Retighten clutch master cilinder and booster and the job is done! this requires to have some light source, and still, much parsimony needed. This part of rebuilding all that is in the engine bay has been the most difficult! Pfff!

-
I am in this stage 😅, I was looking for a smart trick, someone in high school gave me the nickname “manotas”. So, no hope, at least I got a laugh while reading the tread…
-
-
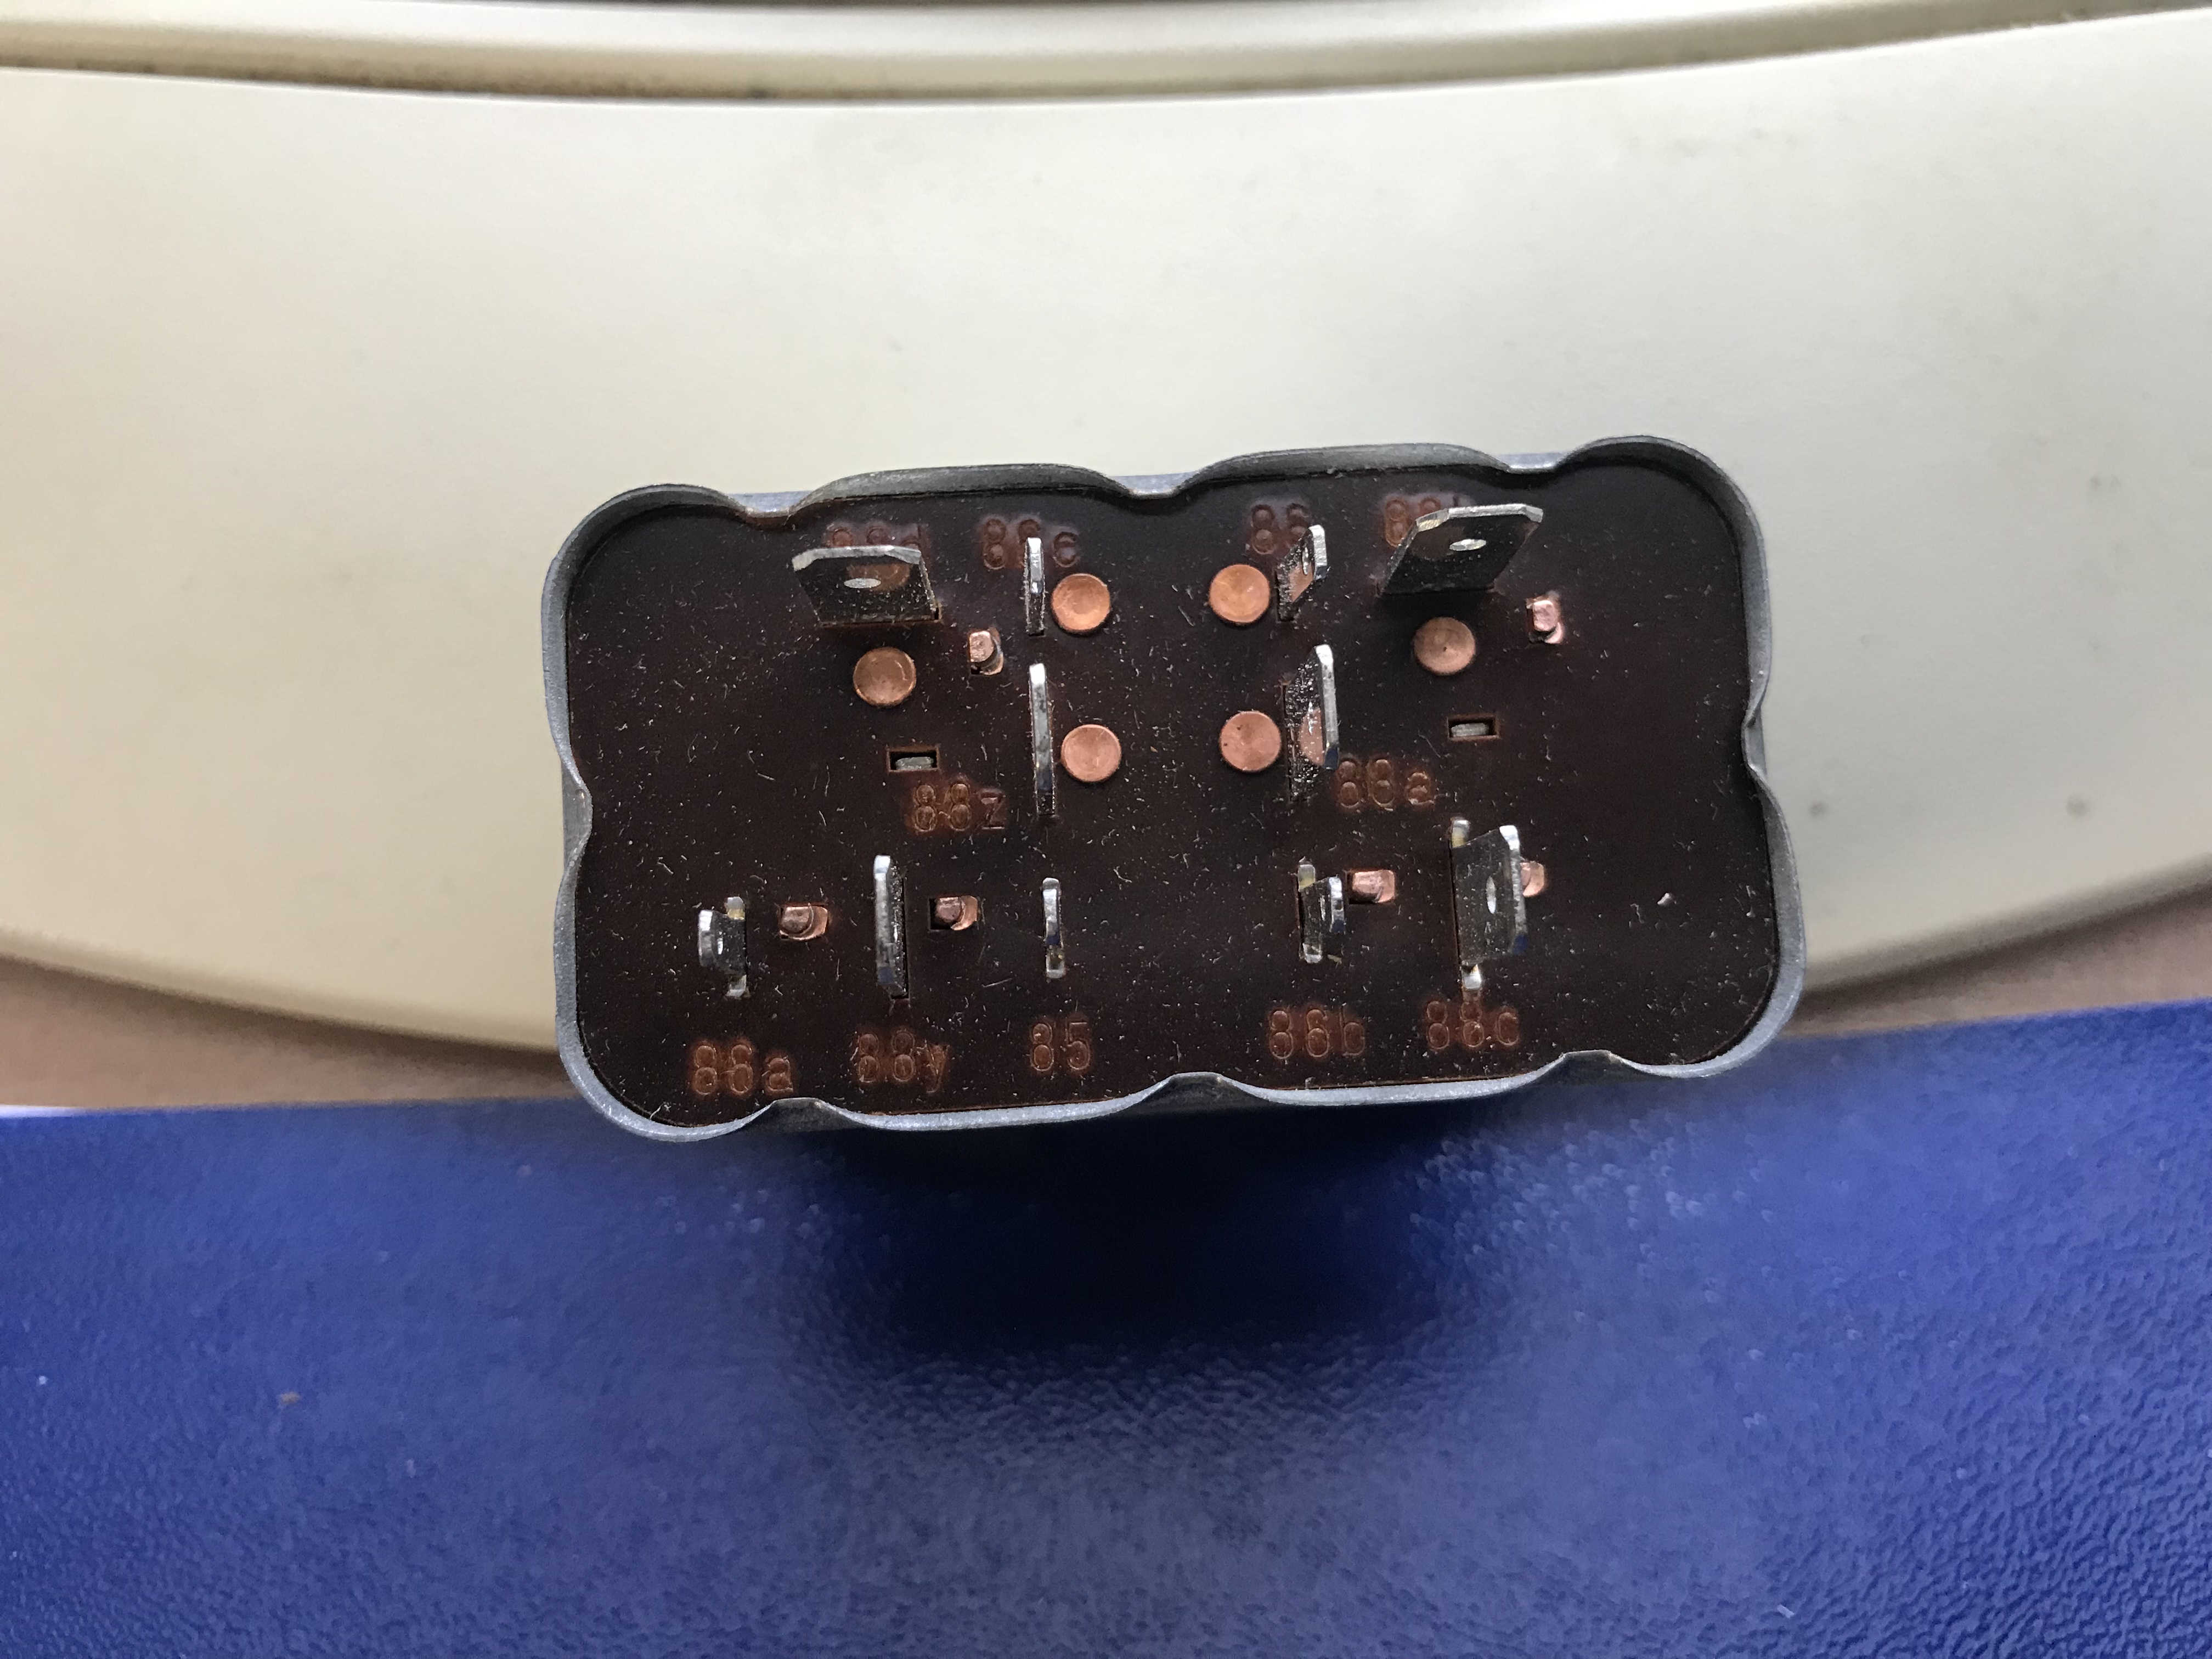
gratuitous prejudice there is an answer to that, relevant in the case that someone actually needs the relay https://www.hemmings.com/stories/article/the-lucas-jokebook notice that the relay was made in Germany
-
Hi All, I have one new replacement made by Lucas (German brand) for the relay AI3 000 002. I bought for my Datsun280Z/78 but afterwards realized that for the 78 model is different. If anyone needs this relay drop me a line. Cheers,


-
-
-
-