


jmortensen
Free Member
-
Joined
-
Last visited
Everything posted by jmortensen
-
How to use the top of the plate as a template to cut, and a discussion as to whether to install the plate on top of or underneath the strut tower: http://forums.hybridz.org/showthread.php?t=102847 If you're using the same plates in the thread above, you don't need any of your stock spring insulator parts. I'm not following the question you asked about the "section rewelded above". If you're sectioning the struts, I'd suggest that you section them first. You should cut the original spring perch off, then grind off the weld smooth, then section (I like to section right up at the top about 2" down, just a bit below the step in the tube thickness). After you've cut out a section that is appropriate for the struts you're using, weld the housing back together and grind your weld smooth, then slide the adjuster over the strut tube with the adjuster spun all the way up and install the strut insert. Set your spring on the lower perch and put the top hat on, and the plate too. From here what I do is push everything up so that the adjuster hits the spring and the spring hits the top hat and the top hat hits the camber plate. Mark where the adjuster is on the tube, and that's where you want to weld your spring perch on. Unless you're planning on preloading the spring, putting the perch there will allow you the maximum amount of height adjustment, going from everything touching but not preloaded and down from there.
-
What do you need to know?
-
If you did, you could just run longer bumpstops and limit the amount of suspension travel, if there was a reasonable amount up to the point where the tire hit the fender.
-
I'm not sure how Dave did this, but I'll tell you how I did it, as I think my way is the "proper" way. I cut and welded, then put the suspension and wheel on the car without the spring and compressed it all the way and made sure there was tire clearance. There wasn't. So I cut and welded more. The second time I had enough clearance. If you don't have enough clearance then when the tire comes up it will hit the flare (which is less resilient than the tire) and potentially also hit the metal edge of the fender. We've all seen what happens when people run tires that are too wide for stock fenders: the fender cuts a nice groove in the tread of the tire. That is what you should be trying to avoid, and if there is a gap to the tire at the "proper" height, then the flare should be adjusted for length, not its mounting point. I think I got my methodology from John Coffey. Here's some pictures on his Beta Motorsports webpage: http://www.betamotorsports.com/services/Flares.html Looks like very nice work Dave!
-
Good tip on the new nut: get a nut from a 280ZXT. It doesn't need to be peened, so if you ever have to take it back off you don't need to grind the peened area again.
-
Follow the Atlantic Z car suggestion. If you don't do that first and just take the nut off with an impact gun, you'll wipe all the threads off of the stub axle from the peened section on out (done that one myself). I've heard people say you can take them off by hand without removing the peened part of the nut, but I've never tried that. Another source for the stub axle is zbarn.com.
-
Shouldn't be too hard to find on one of the forums. I'd try a non-tech post or WTB ad at www.hybridz.org since a lot of V8 guys upgrade the the Modern Motorsports units. You could upgrade too, or just replace what you have with stock if you're not racing the car or installing a torque monster engine.
-
 Congrats. Very cool car.
 -
The gland nuts should be TIGHT with one or two threads visible. If no threads are visible then it is likely that the nut hit the strut housing before it tightened on the strut insert. As Nissanman suggested, a large washer under the strut should fix the problem if that is it. They can also back off if you don't tighten them down enough, so I'd try tightening it through the spring first and see if it is loose. I don't know the torque spec on the gland nut, but I always to RFT on those.
-
The G Machine bushings leave very little room for shimming the rod back and forth. The adjustable rods suggested above are a better answer. You can even up the caster settings and call it a day, but I'd try for 4 degrees on both sides if you're going with something adjustable. The more caster the harder it will be to steer and the better the front end will turn (generally speaking). Do be conscious of the turnbuckle length. If you have to screw one side way out to get the setting you want, you might consider getting a little longer turnbuckle on that side. More threads showing on the rod end and TC rod is weaker.
-
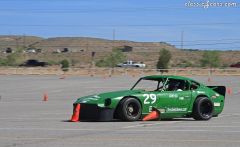 Interesting wide 5 setup in front.
 -
I don't know how easy it is to do, but you might see if you can check if the same part got a different number in later transmissions. The ball bearing at the end of the 280ZX R200 diff is NLA, but the same exact part for a Z31 is still available. Or you could reuse the old nut. They have so many problems backing off I was planning on reusing mine and spot welding it on. Or cut the nut in half and double nut it instead of staking.
-
How long ago did you read that they were NLA? I got one for an 80ZX trans probably 2 years ago through Courtesy Nissan.
-
That's too bad. Now that I know that I don't like it because it could potentially be a good idea but isn't and instead of form following function it's form following gimmick.
-
I'm not in the market for that vehicle at all, but I think it's kinda cool looking, and the anti blind spot rear is form following function. I think they might be a little late to the party with the Xb and Honda boxy little thing (can't remember the name) having been out for a couple years, but I do think the Cube is the coolest looking of the three.
-
The R200 uses a solid spacer and not a crush sleeve, so torque isn't that critical as long as it is tight enough not to back off. In other words, the torque on the nut doesn't set any clearances inside the diff. If it's tight, those clearances don't change whether the torque is 40 ft/lbs or 200 ft/lbs. Use a strong impact to take it off (you can just hold the flange with a gloved hand while hitting it with the impact), and then put red loctite on the threads and put it on TIGHT with the impact. I know my IR 231 puts out ~150 lbs of torque, so I just set it on 5 and laid into it, then ran some air out of the system to kick the compressor on, waited until it filled up then laid into it some more. Ran it like that for years, until I recently pulled the LSD, the pinion was still nice and tight and worked fine. Crush sleeve diffs are different and the pinion bearing preload changes with the torque on the pinion nut. They don't really have a set torque value either, you torque them until you get the preload you want, not to xxx ft/lbs.
-
Some tips on getting the pivot offset right: http://forums.hybridz.org/showthread.php?t=104151 Getting the offset right really makes it easier to spin the car around. Steve Parmley has an outrigger that he put on his with barbell weights, so as the weight changes (due to adding a roll cage) he can adjust via the barbell weights. Mine started out bottom heavy and is now top heavy due to the cage, but I can still spin it myself, although it does take some effort. If I recall correctly, Steve has said he can spin his with one hand. This thread has some pics, and also a worm drive from a winch used to turn the car: http://forums.hybridz.org/showthread.php?t=145644
-
Ball joints and tie rod ends are the first culprits to check. Then bushings. Bushings are a pretty big job if you get a "master kit", search here and you'll find lots of tips that will save you time and effort, especially in the rear control arms area. Hint: spindle pin puller.
-
http://www.engineeringtoolbox.com/ethylene-glycol-d_146.html In racing most places won't let you run antifreeze, because if you bust a hose or spring a leak it is very slippery on the track. Water + water wetter is the usual way to go for that application. While I agree that running without antifreeze is generally a bad idea for a street car, antifreeze is not the best solution in terms of actually cooling the engine and isn't even allowed on most race engines. Your radiator is pressurized to increase the boiling point of the coolant. Even if you're just running water, you'll be able to push it way past 212 with a proper cap. Zs have 13 lb caps if I recall. According to this chart, a 13 lb cap plus atmospheric pressure of 14.7 is going to give a boiling point of around 245 degrees. Higher pressure caps are out there too if needed. http://www.engineeringtoolbox.com/boiling-point-water-d_926.html
-
How many times did you have to order to get the right parts? After ordering several times from Rebello and never getting the right parts on the first try I found out about Todd @ Wolf Creek. He's never sent me the wrong stuff. Rebello was great for advice, but pretty when it came to the actual business transaction.
-
Tip for getting the car on and off: Get two engine hoists, and two load levelers. Hook one up to each end. This is SOOOOOO much easier than using a jack and a bunch of wood.
-
Spider gears would be my bet. Ring and pinion makes noise when you're going straight. Spider gears only when turning. U joints in my experience make noise on accel and decel. Wheel bearings sometimes make noise when turning, sometimes you can tell which side bearings are going by swerving back and forth like in a slalom. Grinding though sounds like spider gears to me, not U-joints which are usually more of a repetitive clunk.
-
I got the wrong impression that you didn't do your own work from this post: When I built my motor $200 was HARD to come by, and when I had a couple hundred bucks the last thing I wanted to do was spend it on parts that wouldn't make the car faster. $200 is a couple new shocks, or a camber plate and coilover sleeve for one corner of the car, or half the cost of a light flywheel. I'm not going to push the issue any further, but you can expect that the next time someone says you HAVE TO replace the rockers, I'll probably say something about it. Diseazd, you should seriously consider those 44s...
-
You asked for it: Here's the old build: http://videos.streetfire.net/video/2000-autox-indisde-and-outside-I-think-my_8051.htm In that form I placed 2nd out of 175 cars at an autox, 2nd out of 65 at a track day, and 12th overall at a Porsche Owners Club time trial (fastest non-Porsche, 170+ cars total). And here's what I've been working on for the last few years: http://forums.hybridz.org/showthread.php?t=117235 http://forums.hybridz.org/showthread.php?t=95739 http://forums.hybridz.org/showthread.php?t=92629 http://forums.hybridz.org/showthread.php?t=103817 http://forums.hybridz.org/showthread.php?t=106974 http://forums.hybridz.org/showthread.php?t=89111 http://forums.hybridz.org/showthread.php?t=105596 http://forums.hybridz.org/showthread.php?t=111435 http://forums.hybridz.org/showthread.php?t=110536 http://forums.hybridz.org/showthread.php?t=110536 http://forums.hybridz.org/showthread.php?t=129154&highlight=a-arm+toe+link&page=6 What you're not seeing there is the all aluminum 5.3L V8, the 10" front and 12" rear wheels, the Hoosier 23x9.5x15 and 23.5x12x15 slicks, IMSA rear flares, the 12" brakes, fiberglass hood and hatch, etc. Sure it's not done yet. But when it is, I think I'll take you up on your challenge. 2200 lbs, 5.3L V8 with ~350 whp. This isn't about who has the biggest **** though, its about whether or not you NEED to replace the rockers when you replace the cam. In my experience (not theory) you do NOT need to replace or resurface the rockers. Experience > theory. Show me the post from someone lamenting the fact that they didn't resurface the rockers. One more thing I did repeatedly that you're not supposed to do is pull the cam towers without pulling the head. Did it BOTH times I replaced the camshaft. One more internet imperative that doesn't stand the test of experience. Hey, if you want to upgrade your intake, I'm selling my 44's on ebay right now: http://cgi.ebay.com/ebaymotors/ws/eBayISAPI.dll?ViewItem&item=270402375374&ssPageName=ADME:L:LCA:MOTORS:1123
-
One more thing--I think if you look on zcar.com you'll find Norm's writeup on resurfacing your rocker arms yourself. I believe he used a flat concrete slap and some emery cloth. Yet another DIY method that has been decried as horrible and insufficient, and yet he is the 12 second SU dude...