a7dz
Free Member
-
Joined
-
Last visited
Everything posted by a7dz
-
-
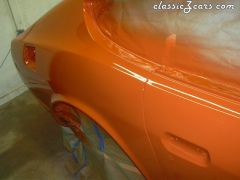
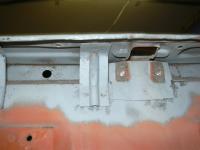
Here is the rest of the repair as I completed it. Note I did weld the sill in solid to stop the water traps. I did fair in all the sill area before paint but do not have those pictures with me. Just a note I had no intention of removing this sill when I started. Sure am glad I did, a rust time bomb waiting to go off. The avator picture is the same car.

-
Here is the under structure. Before and after I sand blasted them.


-
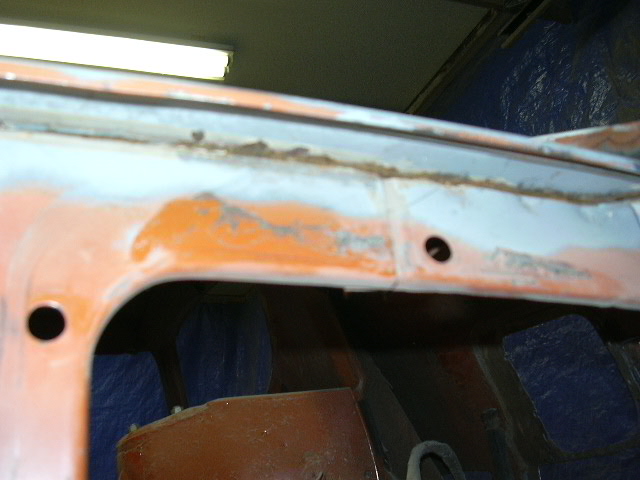
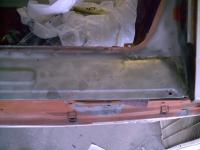
Nick; Here are some pictures to show you what E is talking about. Mind you my hatch did not appear as rough as yours on the top surface. These are pictures I took after I sandblasted the sill area. Note the rust in picture three between the sill and the area above the tail light cut out. Next post will show the area after I removed the sill.


-
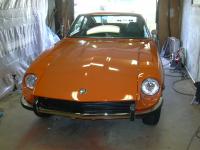
Welcome still getting the finishing touches on my 70.
-
Might want to PM Arne on the radiator. He has a new one that might have been clear around the block a couple of times.
-
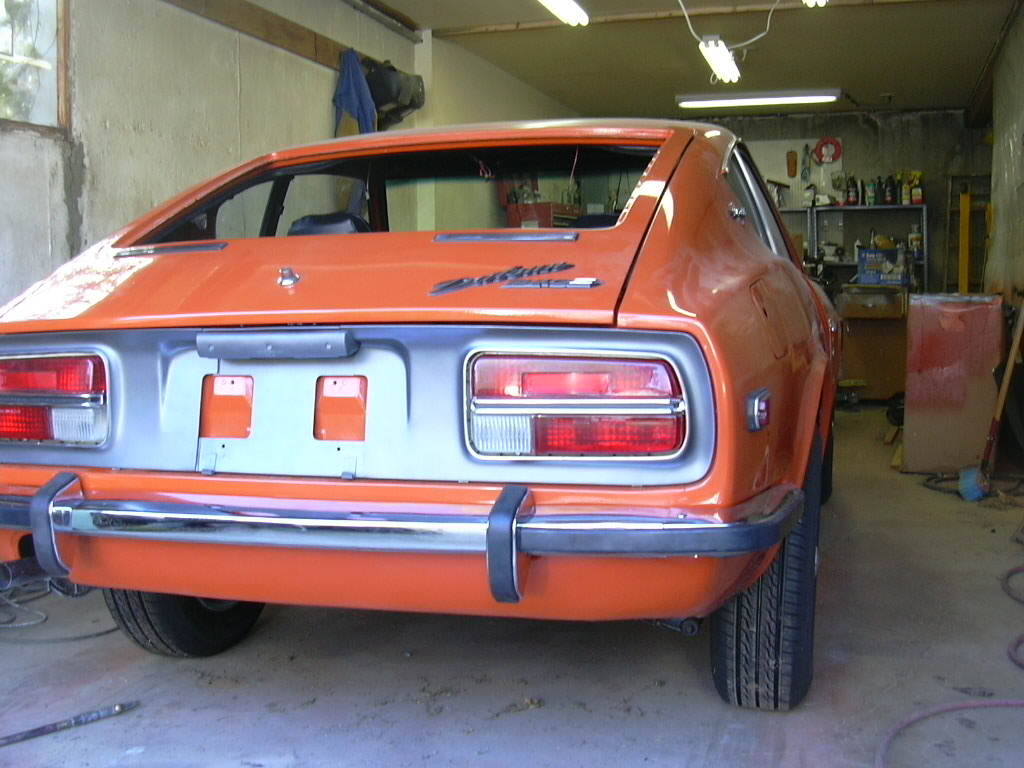
Getting closer every day getting itchy to get her running. I cleaned the gas tank for the second time per the tank sealer instructions. Should have the tank in next week. Sure would be sweet to hear her run next week end. That would put it right at two years since I tore her clear down. It takes some time to get the tank dry again after you rinse the soap and phospheric acid out of them. Just got the chrome pieces back onto the tail lights look like new. Here are the latest pictures.


-
I would flange the roof and over lap the welds gives you a little more room to adjust the two pieces as necessary to get the roof to lay right. Then weld the donor piece in solid using the stitch welding method. I would ask the guy doing the work his thoughts also.
-
The head liner won't show the slight juggle of the sheet metal. It covers up bigger variances in the roof structure already on the stock installation.
-
After doing the quarter repair and straighting the roof on my 70. It appears to be the best practice to just do the metal. It will take a little effort to get the lay out right but, most practical as the structure of the door frames has not been compromised.
-
I tend to lean towards Ron's Idea of just replacing the metal that was cut out. Not disturbing the door posts or windshield frame.
-
I have got two solid years in my 70, doing the repairs that will be required to bring your car up to safe to drive. My car had no where the damage to the under seat frame rail. You can say that there is not much damage to the rockers or fender wells but, my experience with these cars is once you cut into them the amount of repair required grows every day. To make your car safe looks to me that the right frame rail needs to be replaced from the radiator support to the firewall / floor board after that is all replaced. If you have the space and equipment to do this along with the down time of the car go for it. Other wise find a better car to start with. If the truth be known when I started mine and if I had not bought it from my mother and kept it in the family all these years I would have scrapped this one. It has turned out to be a beautiful car. Benefit from my learning’s and make the hard decisions up front. Listen to the over all message here. Do you have the skill, tools, space and time to take this on? Because you are asking these questions I have to agree with the guys above. Look for another car you will be both money and time ahead. I will not tell you how much money I have in the repairs on this one. It adds up in a hurry!!!
-
Please follow this link to see these pictures inserted in the text as the work was done: http://www.classiczcars.com/forums/showthread.php?t=28644
-
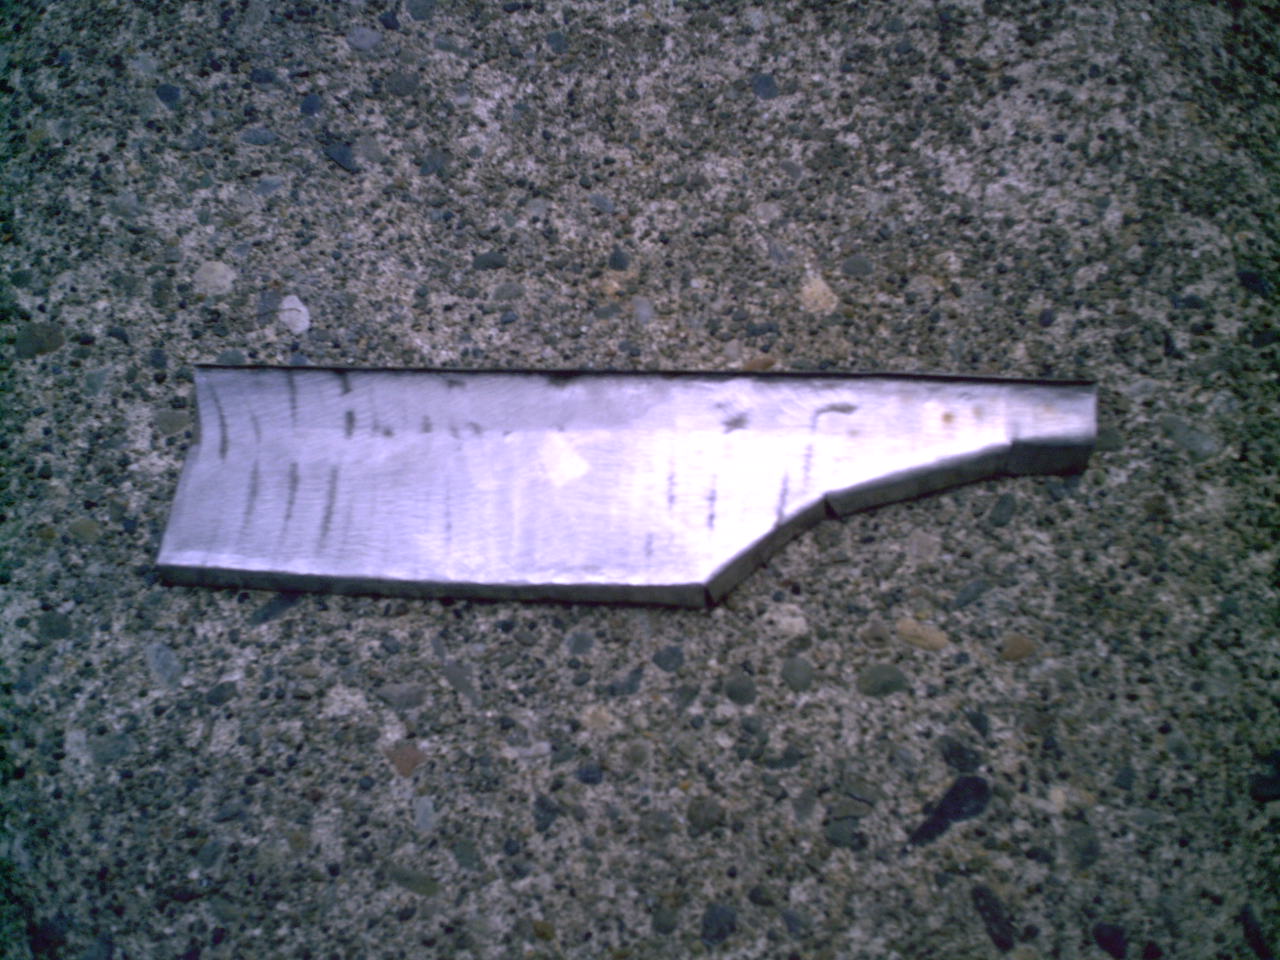
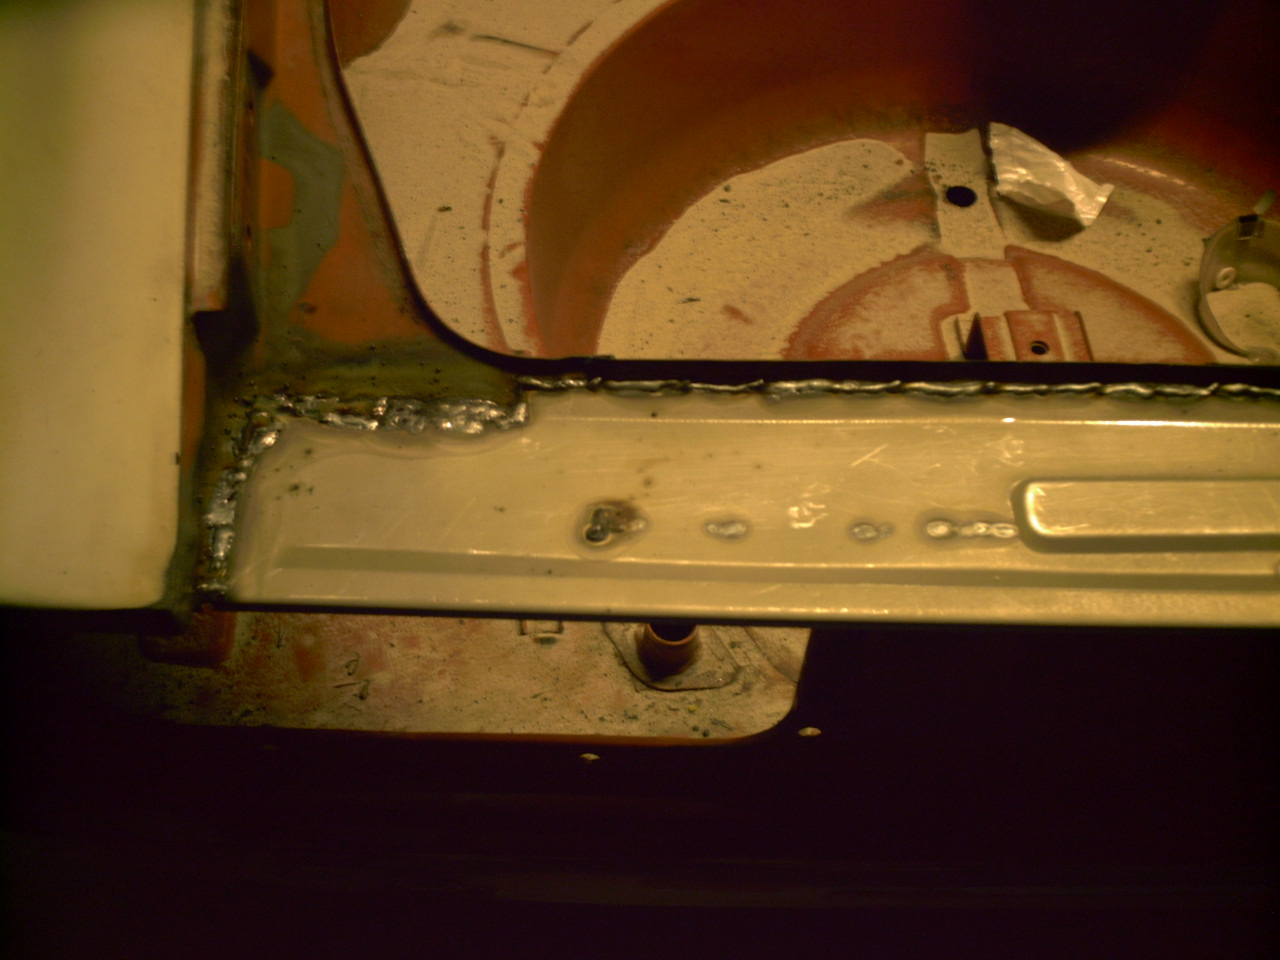
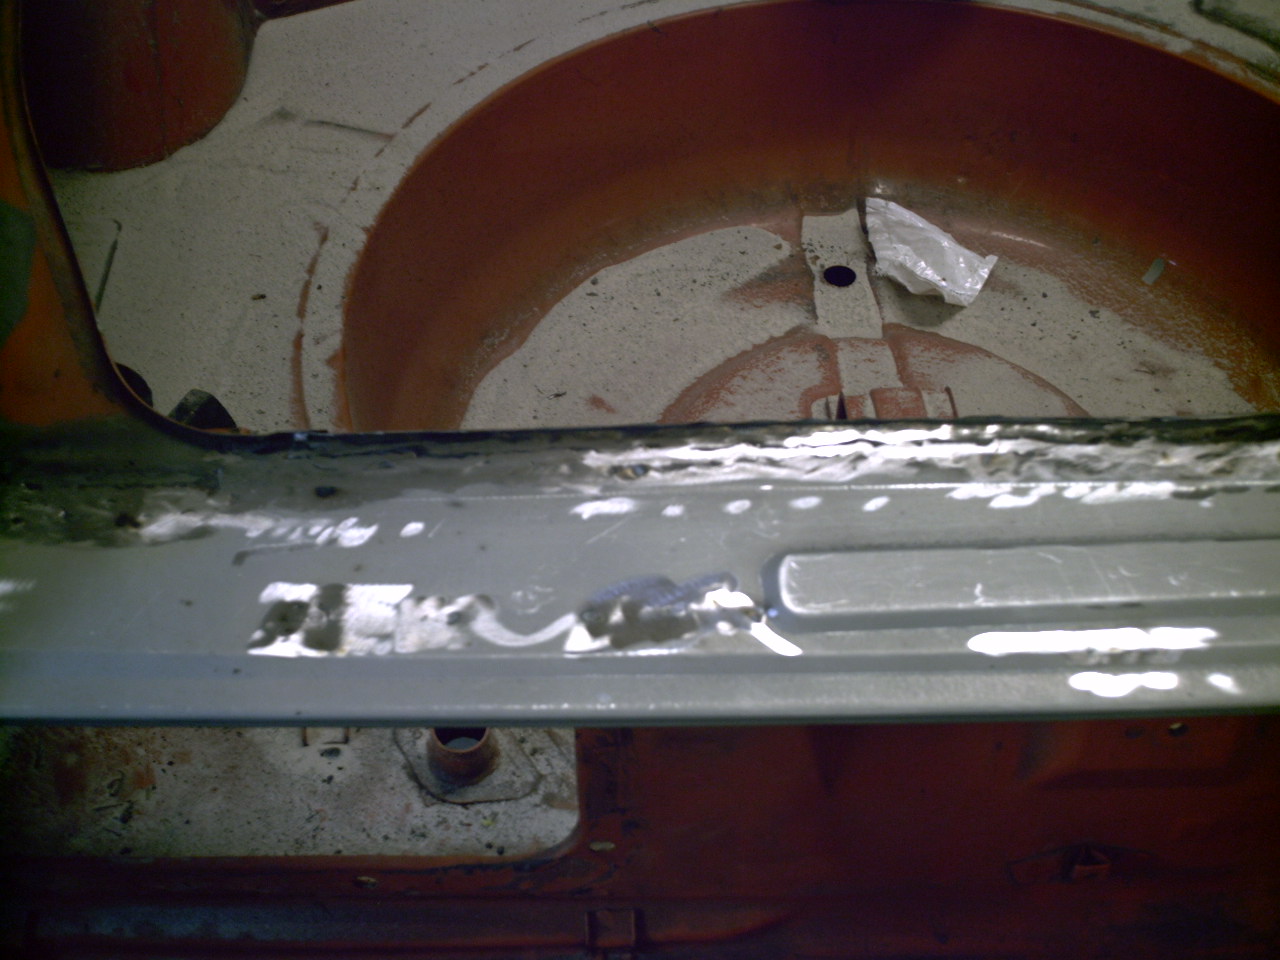
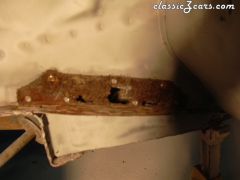
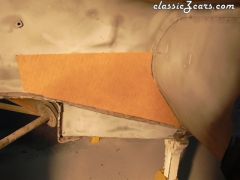
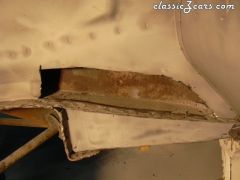
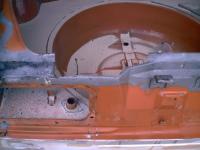
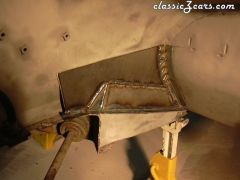
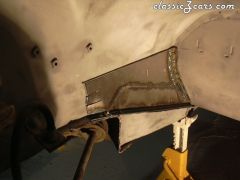
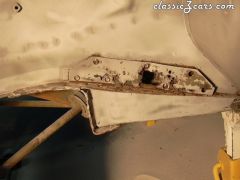
Wheel well Frame Repair One of the common rust areas on the 240Z is in the front wheel wells just aft of the torsion rod fitting on the frame. There is a doubler / stiffener spot welded to the inner wheel well that traps water between the two pieces of metal and rusts from the inside out. When I first looked at the wheel well I saw this image: As I started cleaning the inner fender well getting ready to repaint and seal the fender well. I find that the doubler had failed and was eaten away from the inside. Leaving a mess that looks like this: I will not repeat the next thoughts that went through my mind. You can fill those in for yourself. After a few minutes and some regrouping I decided to go ahead and remove all the under coating. I got out my rubber gloves paint stripper and putty knife and removed all the undercoating. That exposed more rusty metal which lead to getting out the sand blaster and cleaning the entire wheel well. I then cut the spot welds holding the doubler on: Leaving this damaged area: I cut the damaged area out. Sandblasted and treated the area in the boxed frame with Phosphoric acid. I then cleaned the area with Marine clean and then Metal Ready getting ready to refinish this area after the repair was complete. I then cut a cardboard template out to fit over the cut out area. I then cut a piece of 16 gauge flat sheet steel to match the template approximate size of 8†X 16â€. Fit the first piece to fit against the floor board and then attached a ½†x ½†angle to the new plate following the contour of the floor board. Notching the angle as needed to follow the bends. I matched the height of this piece to match the top of the sheet metal on the other side on the inner fender well to gain maximum strength when I welded the pieces together. Cut another piece of 16 gauge metal 3†X 12†and bent a ½†lip 90 degrees. Fit it up to the angle along the floor board and against the top flange of the frame rail to replace the original doubler. This doubler I welded solid all the way around. I then slotted the front edge to follow the contour of the wheel well frame bent the pieces to fit the contour. Rechecked the fit and then clamped it into place and welded the built up pieces into place.
-
Wheel well Frame Repair One of the common rust areas on the 240Z is in the front wheel wells just aft of the torsion rod fitting on the frame. There is a doubler / stiffener spot welded to the inner wheel well that traps water between the two pieces of metal and rusts from the inside out. When I first looked at the wheel well I saw this image: As I started cleaning the inner fender well getting ready to repaint and seal the fender well. I find that the doubler had failed and was eaten away from the inside. Leaving a mess that looks like this: I will not repeat the next thoughts that went through my mind. You can fill those in for yourself. After a few minutes and some regrouping I decided to go ahead and remove all the under coating. I got out my rubber gloves paint stripper and putty knife and removed all the undercoating. That exposed more rusty metal which lead to getting out the sand blaster and cleaning the entire wheel well. I then cut the spot welds holding the doubler on: Leaving this damaged area: I cut the damaged area out. Sandblasted and treated the area in the boxed frame with Phosphoric acid. I then cleaned the area with Marine clean and then Metal Ready getting ready to refinish this area after the repair was complete. I then cut a cardboard template out to fit over the cut out area. I then cut a piece of 16 gauge flat sheet steel to match the template approximate size of 8” X 16”. Fit the first piece to fit against the floor board and then attached a ½” x ½” angle to the new plate following the contour of the floor board. Notching the angle as needed to follow the bends. I matched the height of this piece to match the top of the sheet metal on the other side on the inner fender well to gain maximum strength when I welded the pieces together. Cut another piece of 16 gauge metal 3” X 12” and bent a ½” lip 90 degrees. Fit it up to the angle along the floor board and against the top flange of the frame rail to replace the original doubler. This doubler I welded solid all the way around. I then slotted the front edge to follow the contour of the wheel well frame bent the pieces to fit the contour. Rechecked the fit and then clamped it into place and welded the built up pieces into place.
-
One of the first cars I rebuilt. I remember one trip out fishing in Northern Washington where the throttle cable broke. Drove her 70 miles home using fishing line run under the hood and around the windshield. I think that was back in 1969. Broke down so often before I redid her. I received a "T" handle from my brothers for Christmas that year with directions on how to bolt it to the front. Then just pull it home like a wagon. And we think Z cars are small.
-
I am with Carl. I have replaced all the emblems on my car with new ones mostly plastic. I still have the metal ones and will keep them for displays later.
-
-
From the album: Left frame
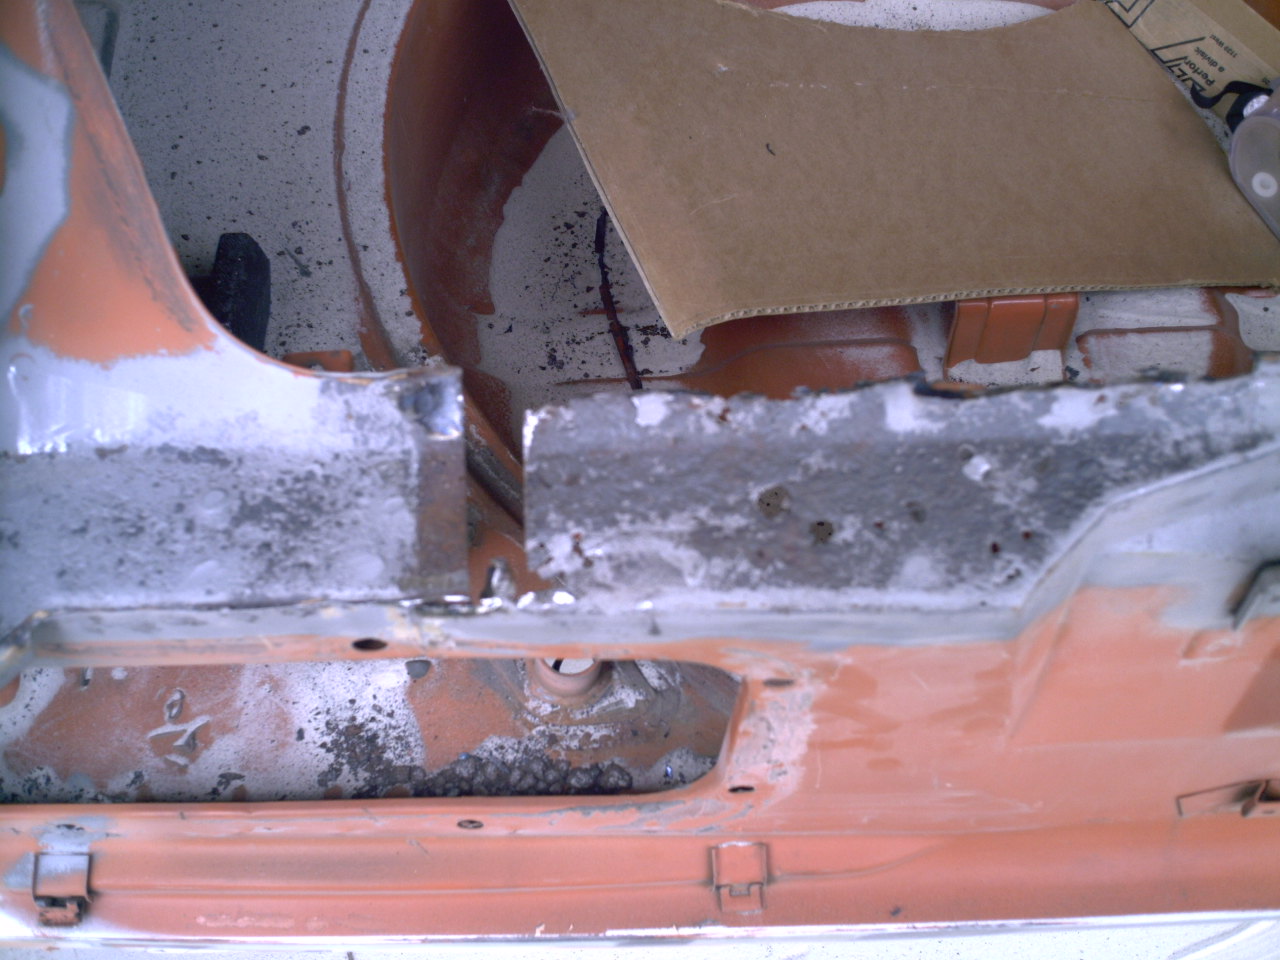
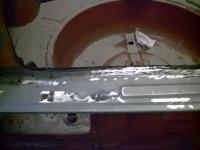
Replacement metal fit to firewall and frame rail. -
 Replacement metal fit to firewall and frame rail.
 -

From the album: Left frame
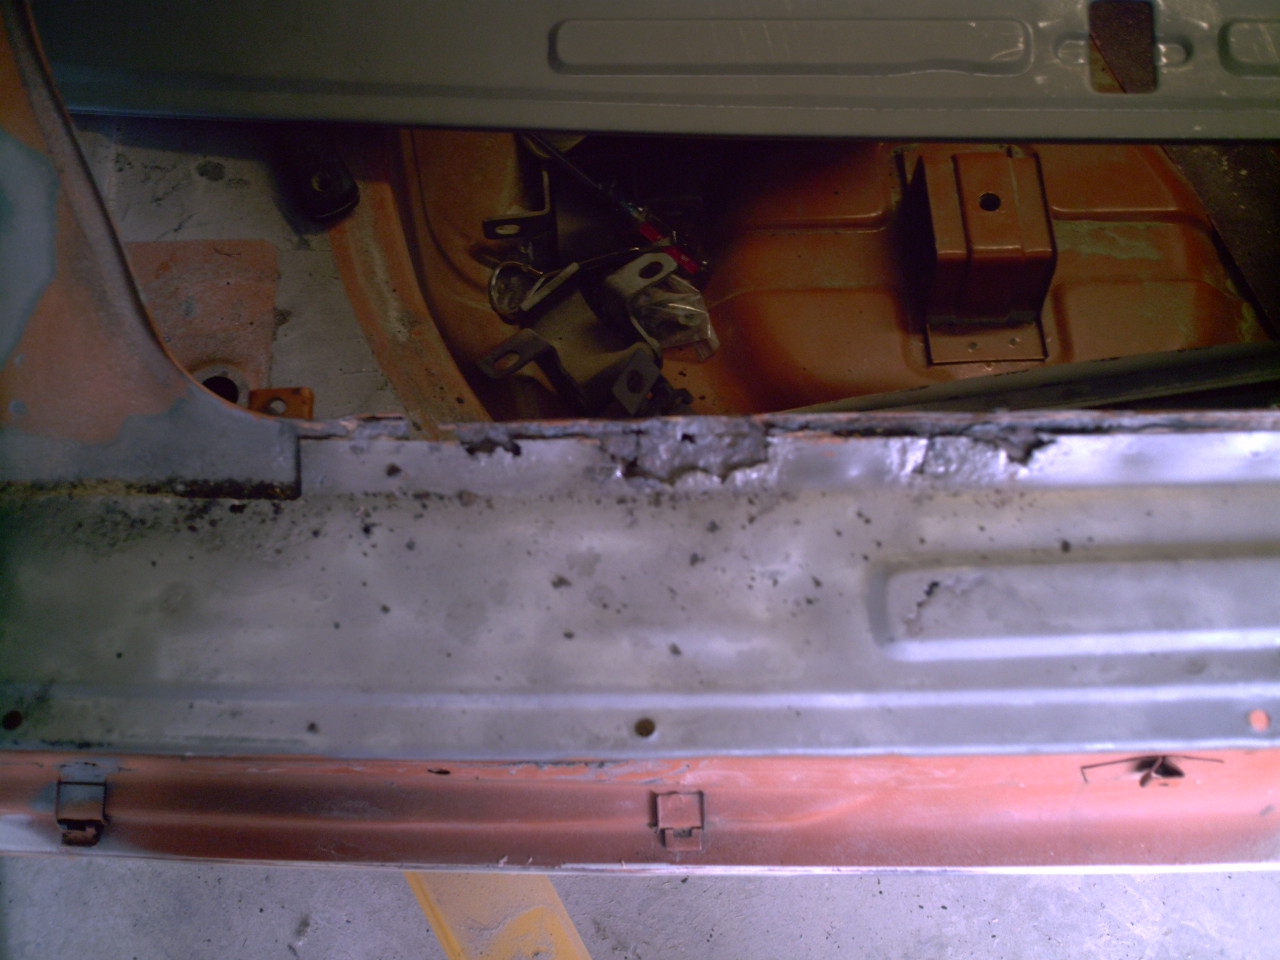
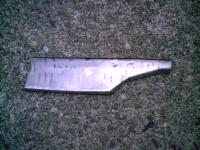
Metal slotted to allow replacement metal to follow wheel well contour. -
 Metal slotted to allow replacement metal to follow wheel well contour.
 -

From the album: Left frame
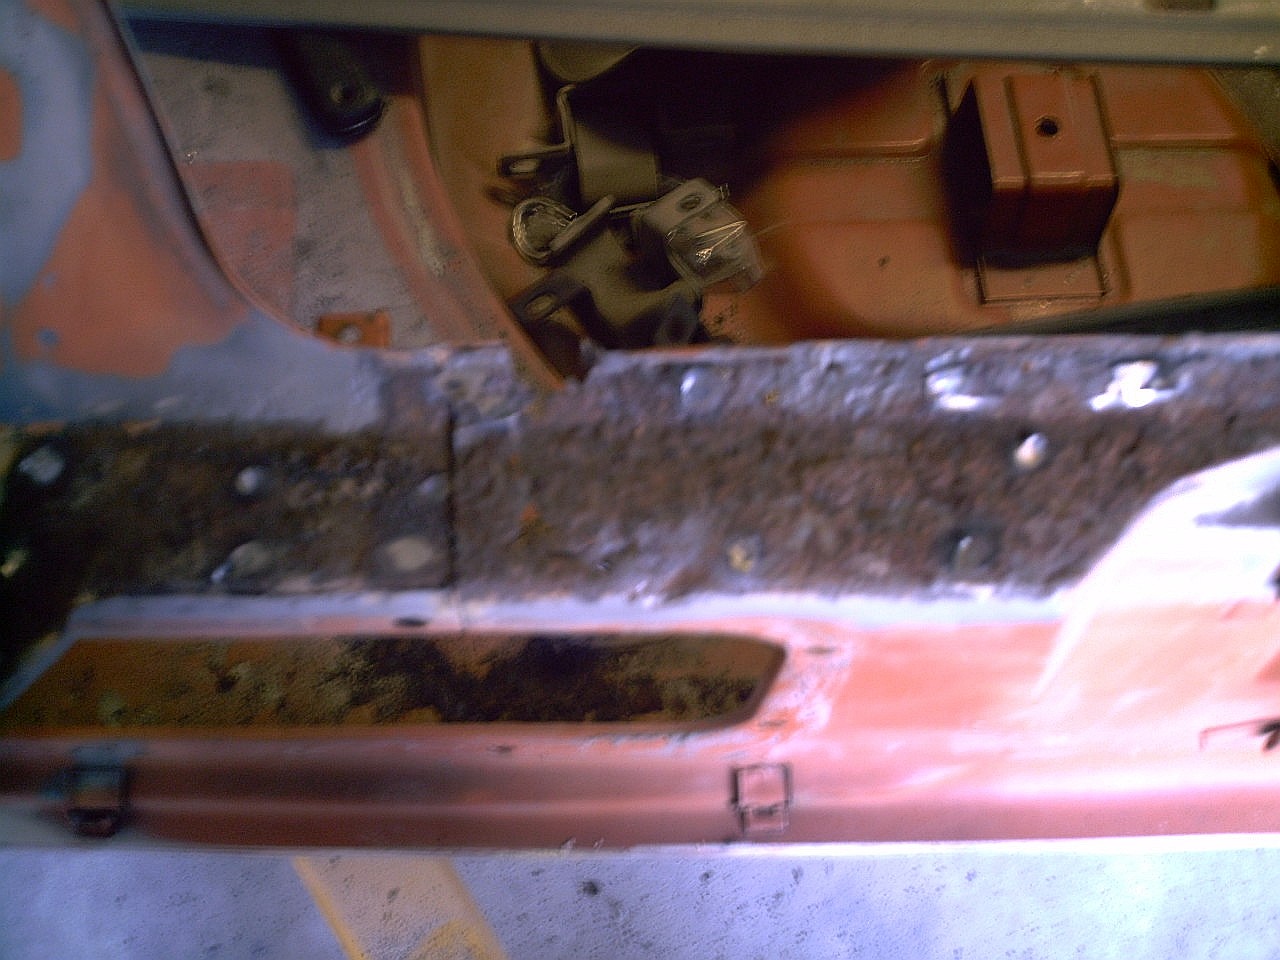
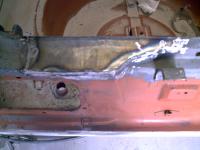
Common rust damage common to doubler after of torsion rod fitting. -
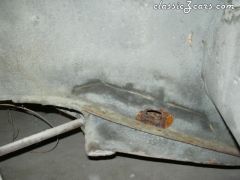 Common rust damage common to doubler after of torsion rod fitting.
 -
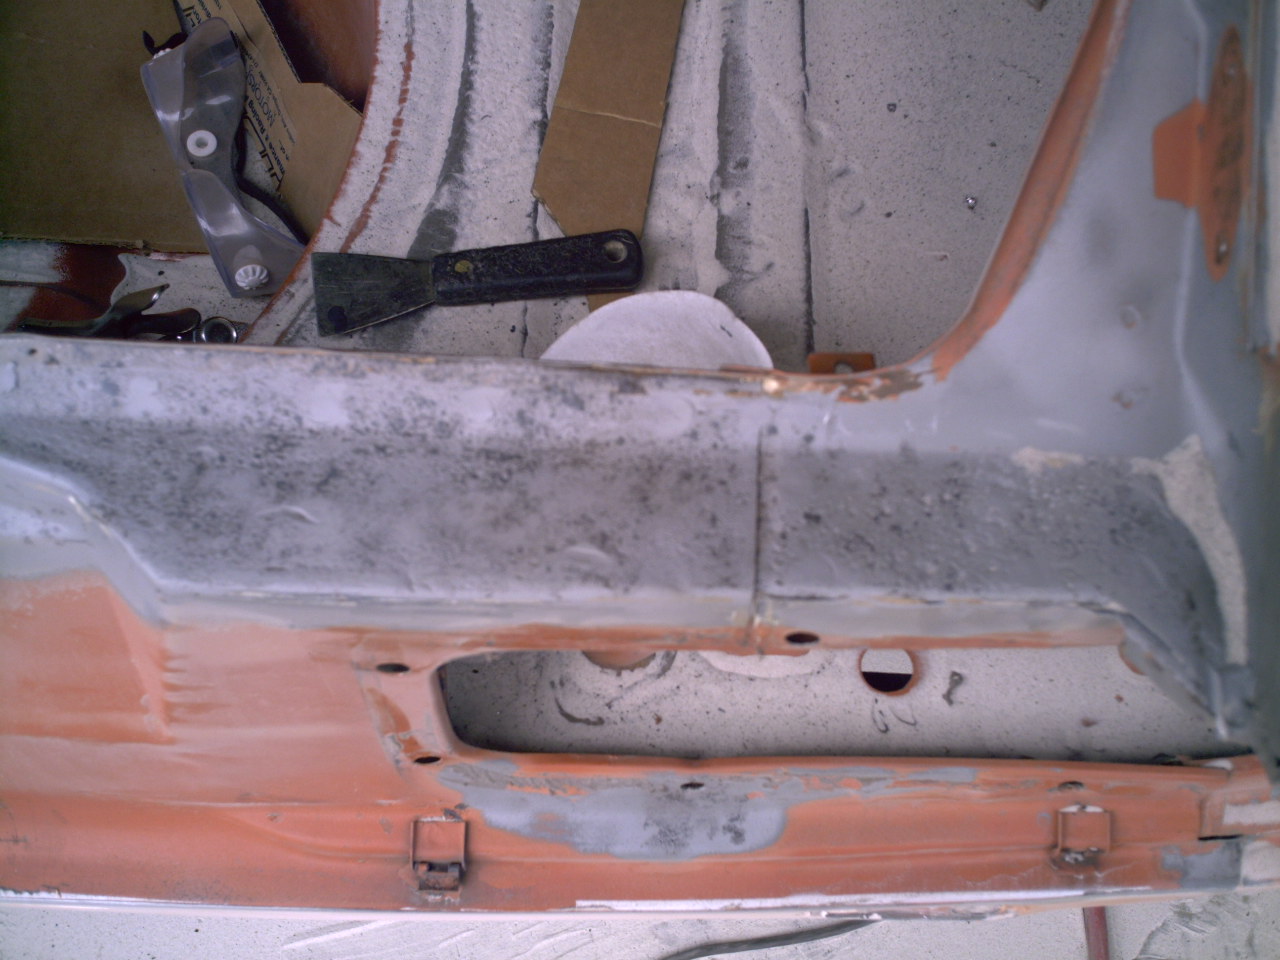
From the album: Left frame
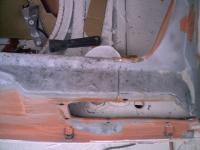
Damaged area after sand blasting.