HusseinHolland
Free Member
-
Joined
-
Last visited
Everything posted by HusseinHolland
-
 Worked on the AC hose routing & accumulator placement today. The bulkhead fitting was the wrong size, so I had to cut it & add a center section to space it out, used the factory cover plate as the template after welding, cleanup & paint, adding a closed cell foam seal determined the most suitable location for the accumulator. This will likely need revision when the drivetrain swap happens high side hose routing, with orifice tube & trinary switch crimped the line fittings Made the (Volvo) accumulator mount bracket work - modded the brake master heat shield (from a '78) to accept the accumulator bracket Low side hose goes from #12 fitting to #10 line. This is I made years back for the X1/9/Honda setup Made sure throttle link clears the AC hose throughout it's arc of travel bracket needs another support here to prevent unwanted flexing Have to cut up the compressor bracket & rework with Volvo rubber mount isolated ears
 -
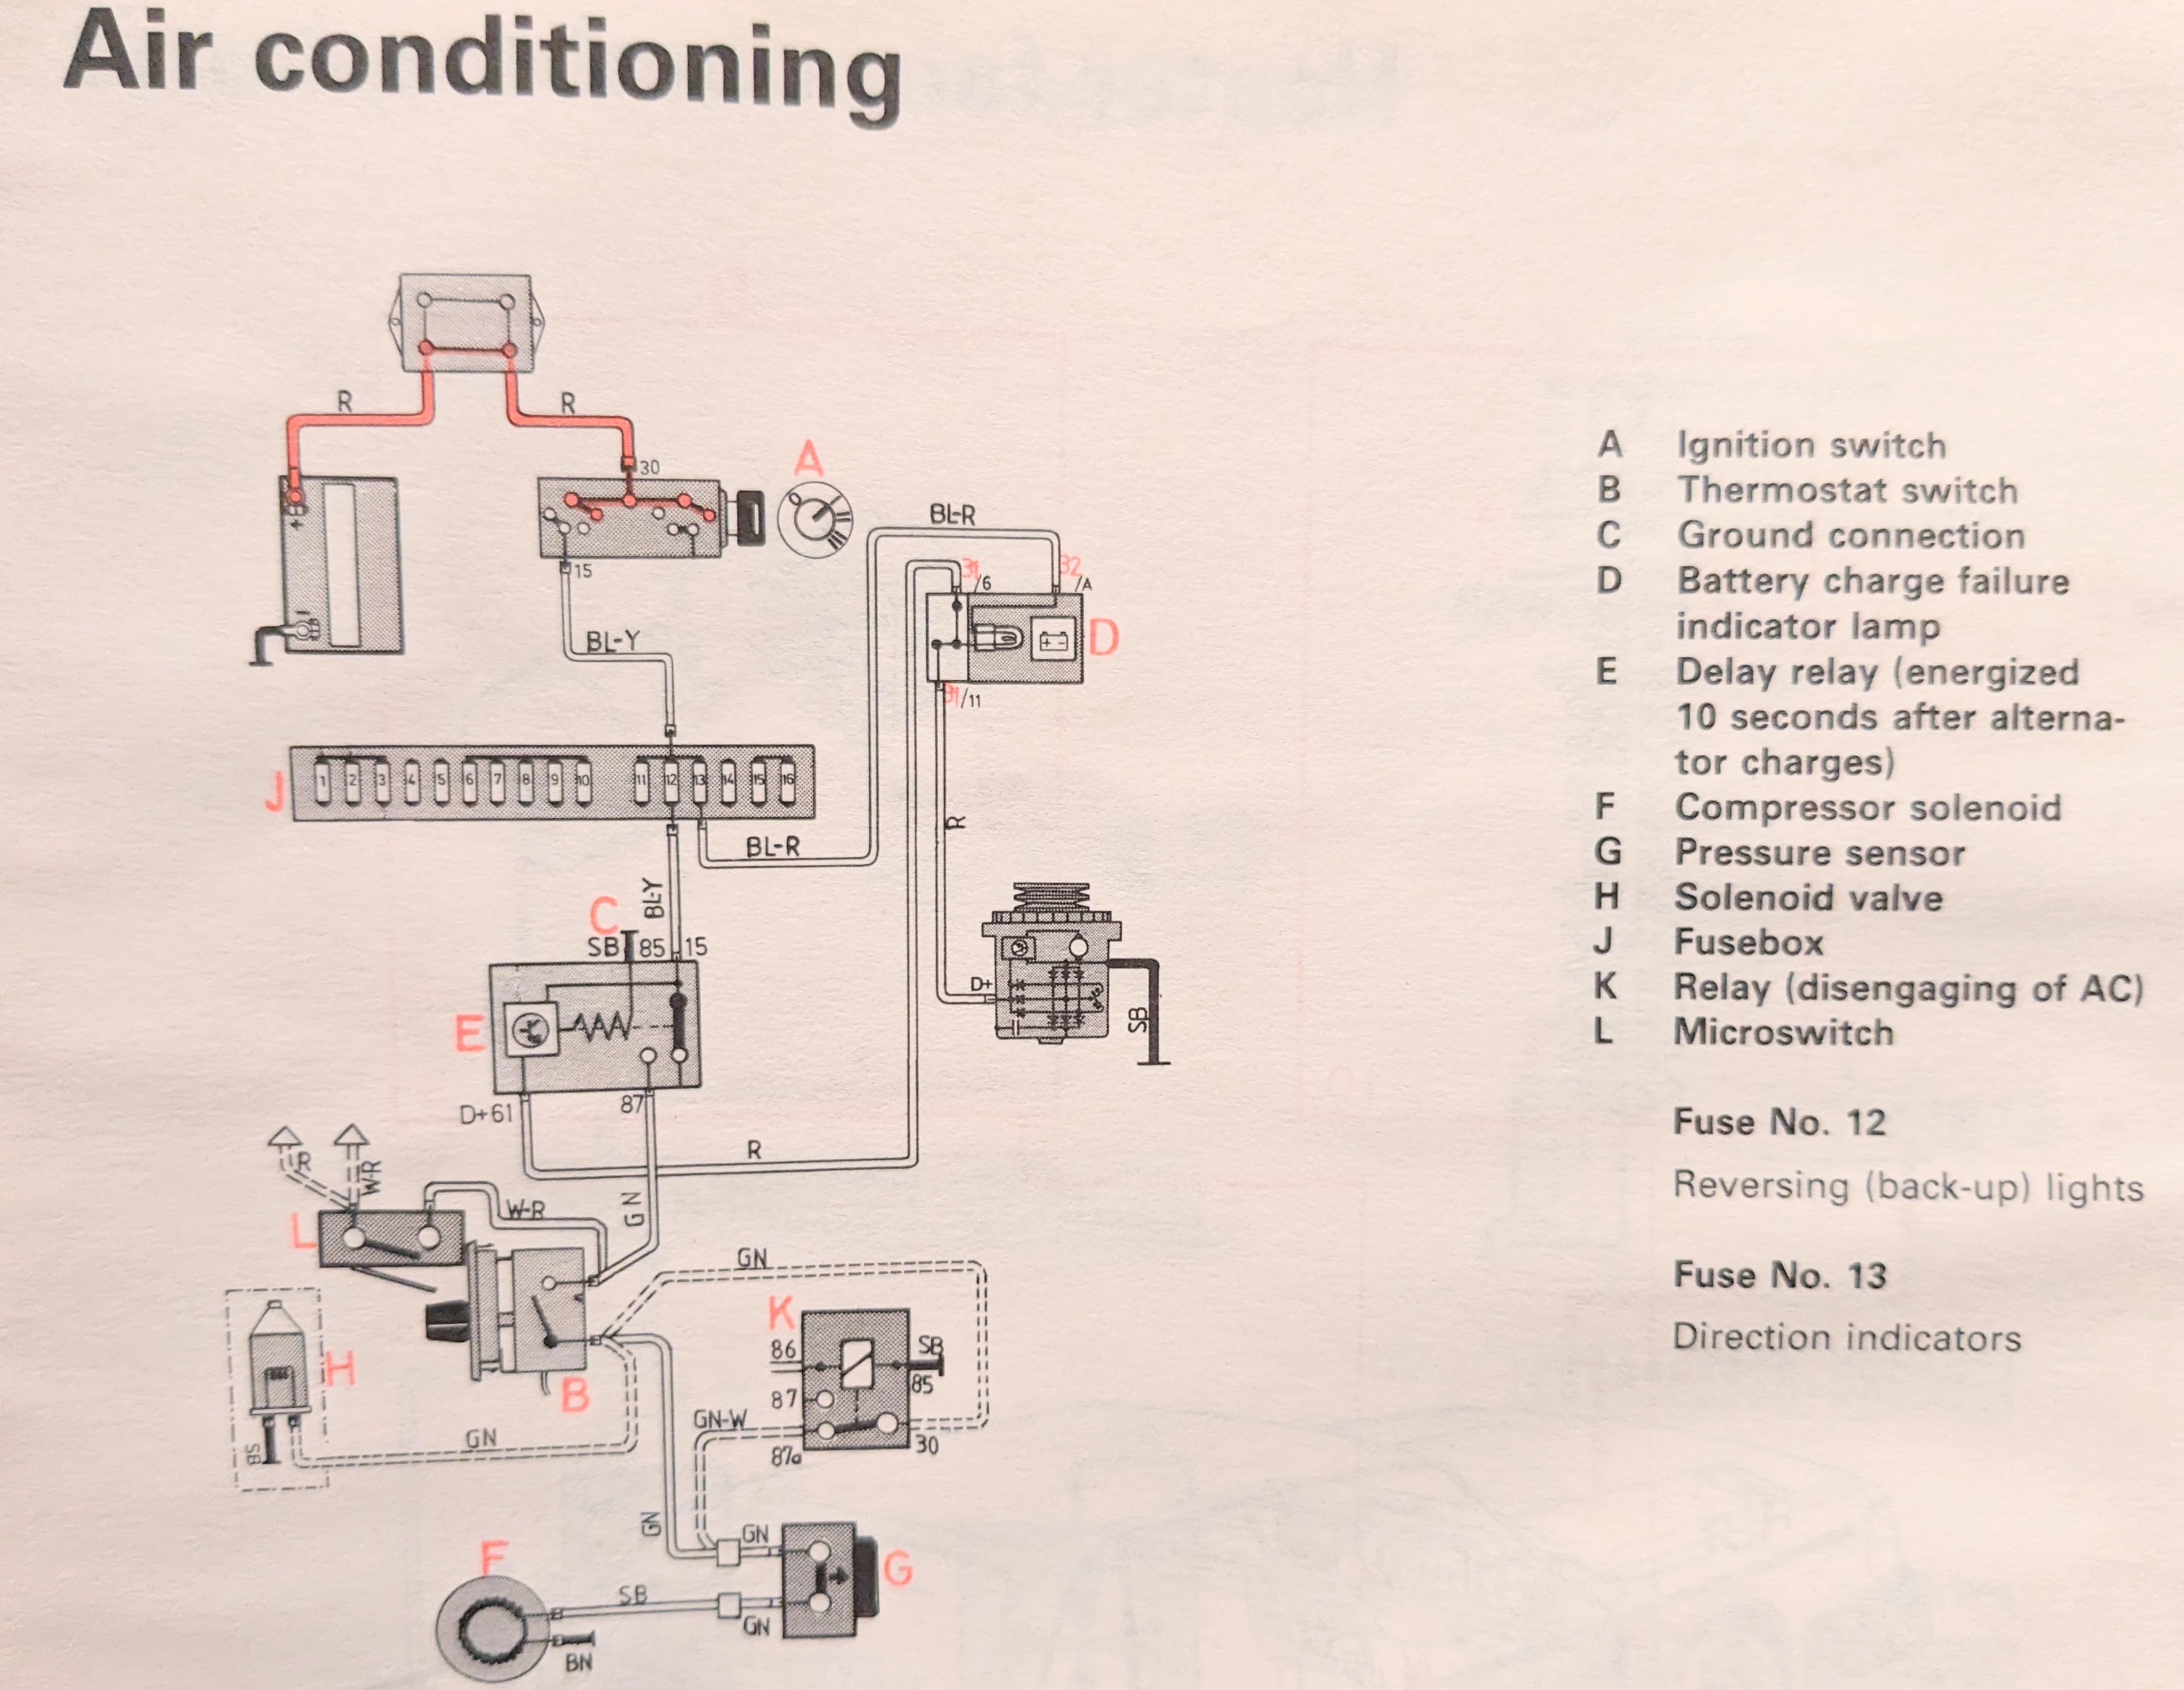
I actually want the 4 speed fan option 🙂 - the after market cut off switch I would then eliminate. The fan I will wire to run at lowest speed when the AC is engaged, like my X1/9 I'm also going to add the delay relay (E, #1363449) that Volvo used in the 80's, prevents the AC running until the alternator is charging. This model also used the same thermostat switch (B) as the aftermarket setup so I will incorporate that

-
That makes more sense. Any chance you have an extra 4 speed switch? 🙂
-
Yeah, it just would make more sense to have a switch that turned the (blower) fan on with AC engagement, rather than one than disables the AC thermostat if it's NOT on. Do you know if the fan speed resistor is different for AC models? I'm wondering if it's worth playing with differing fan speeds than provided.
-
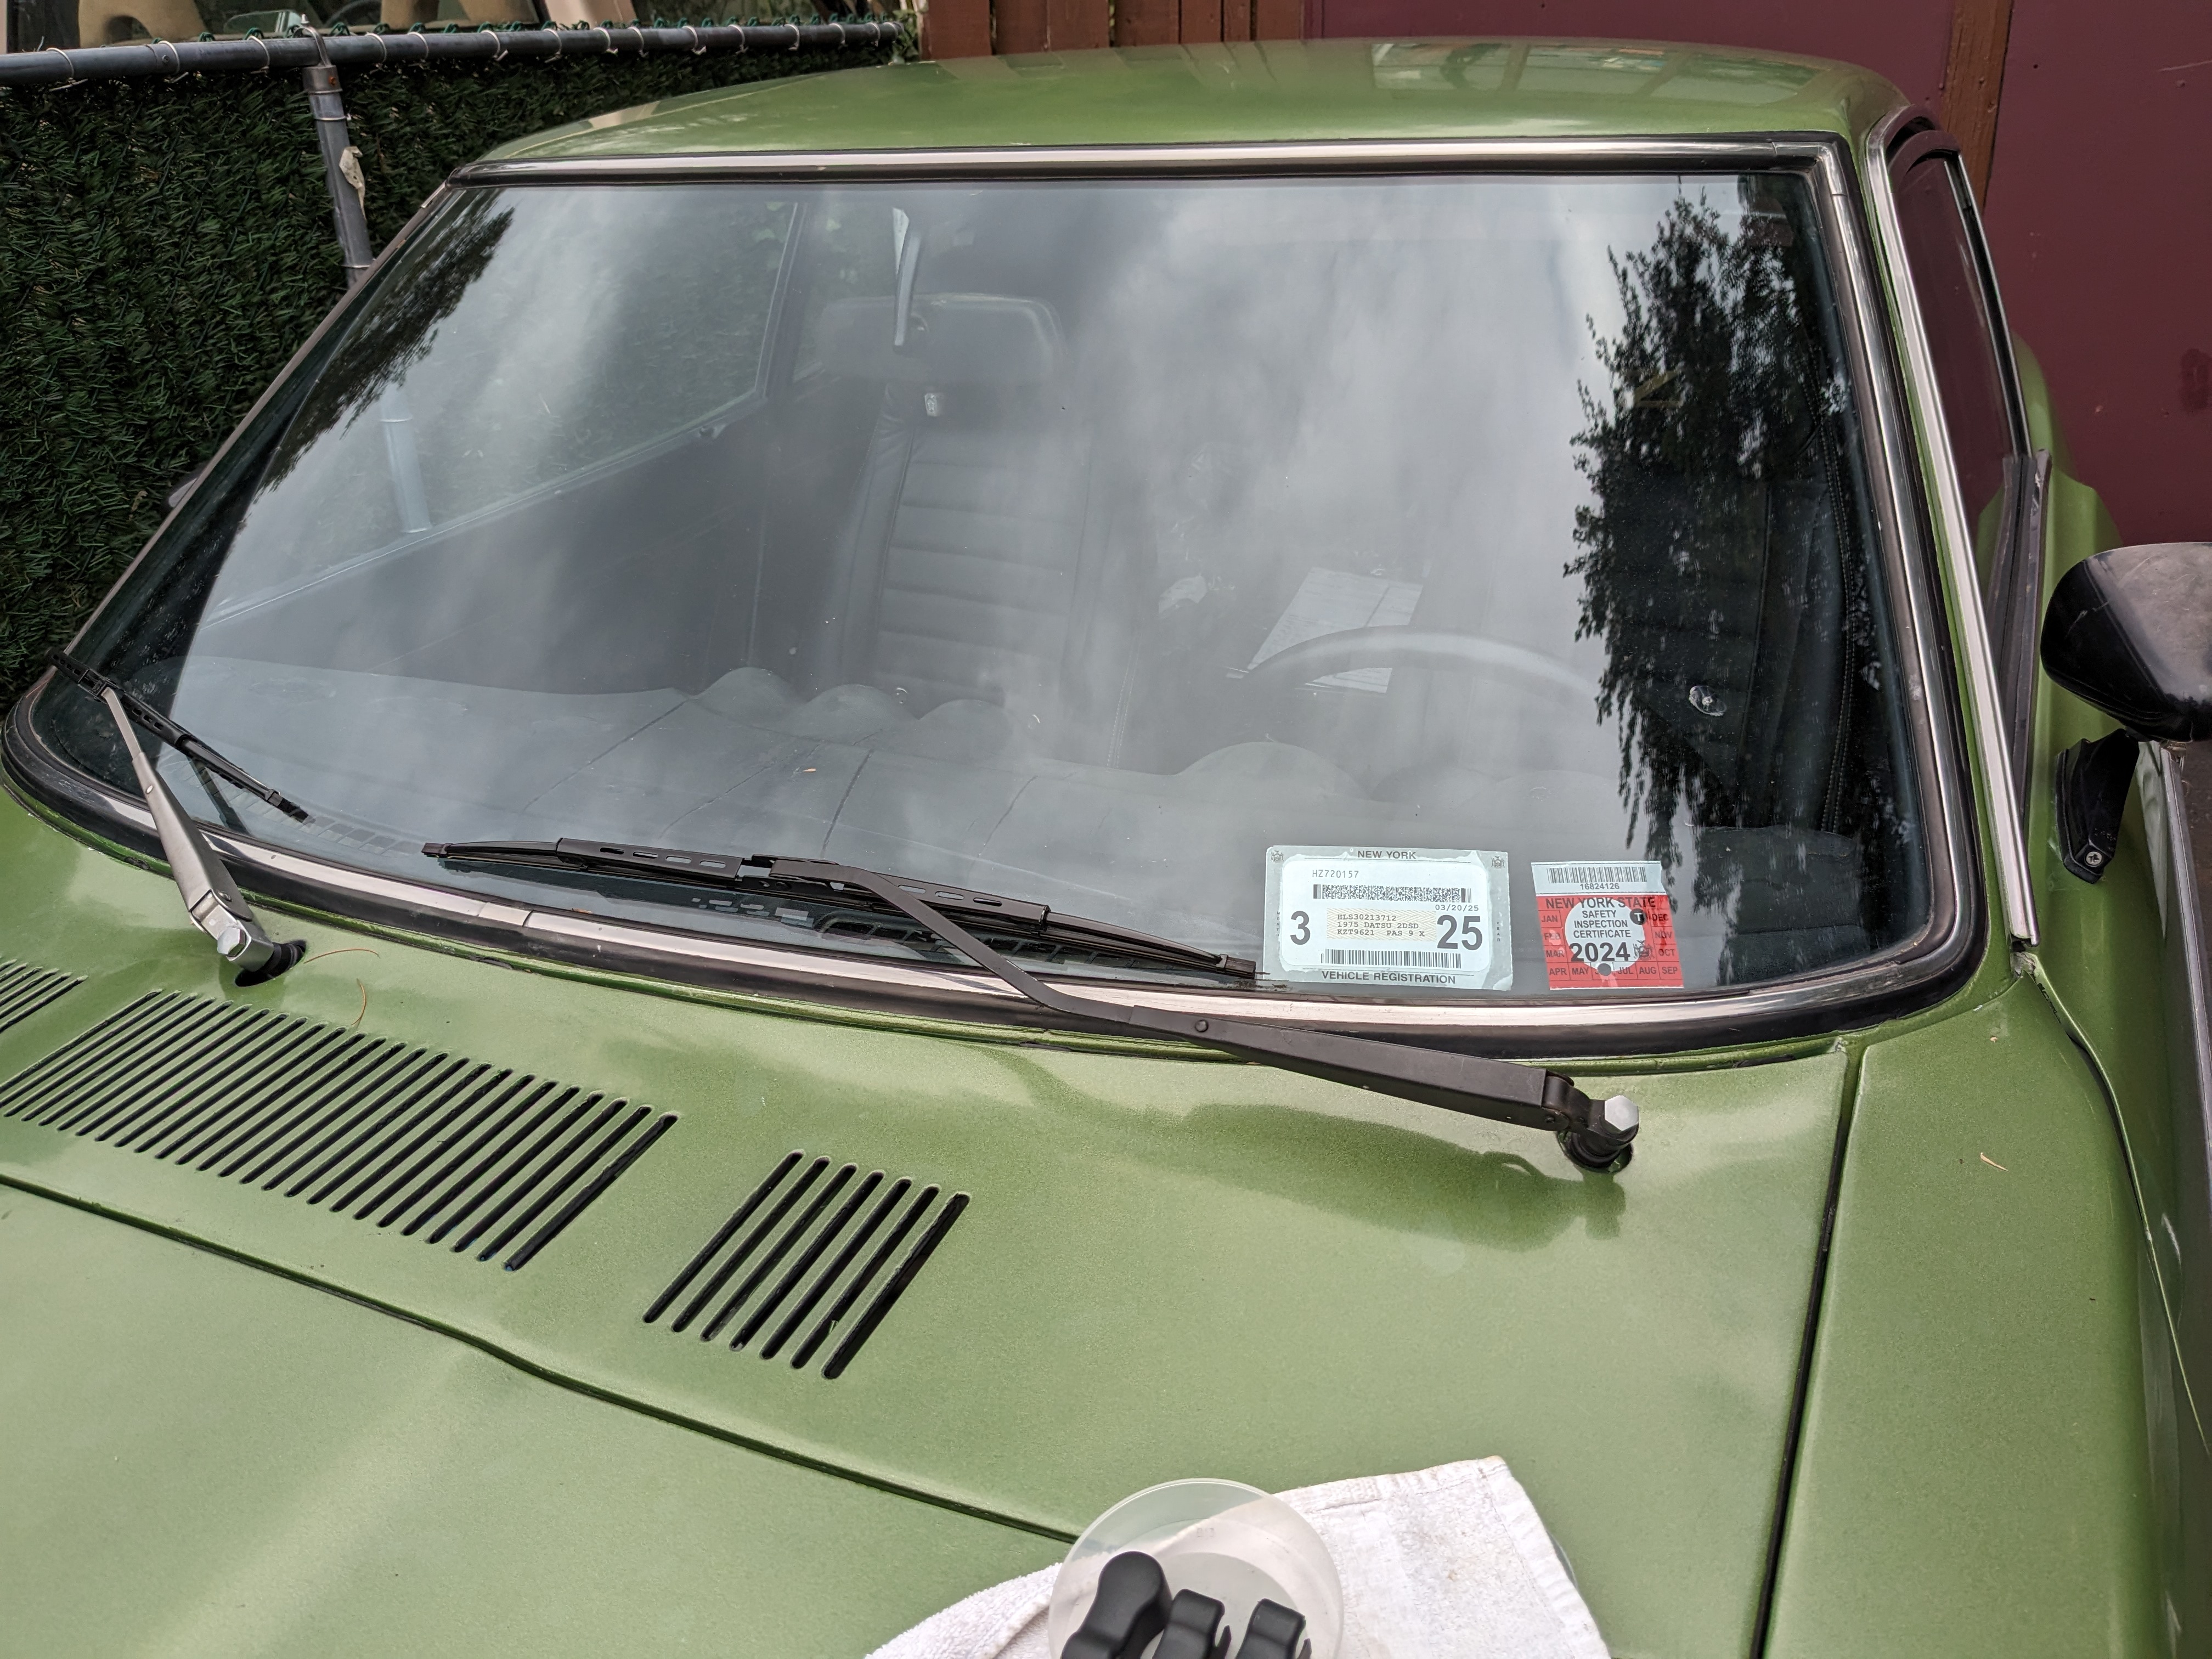
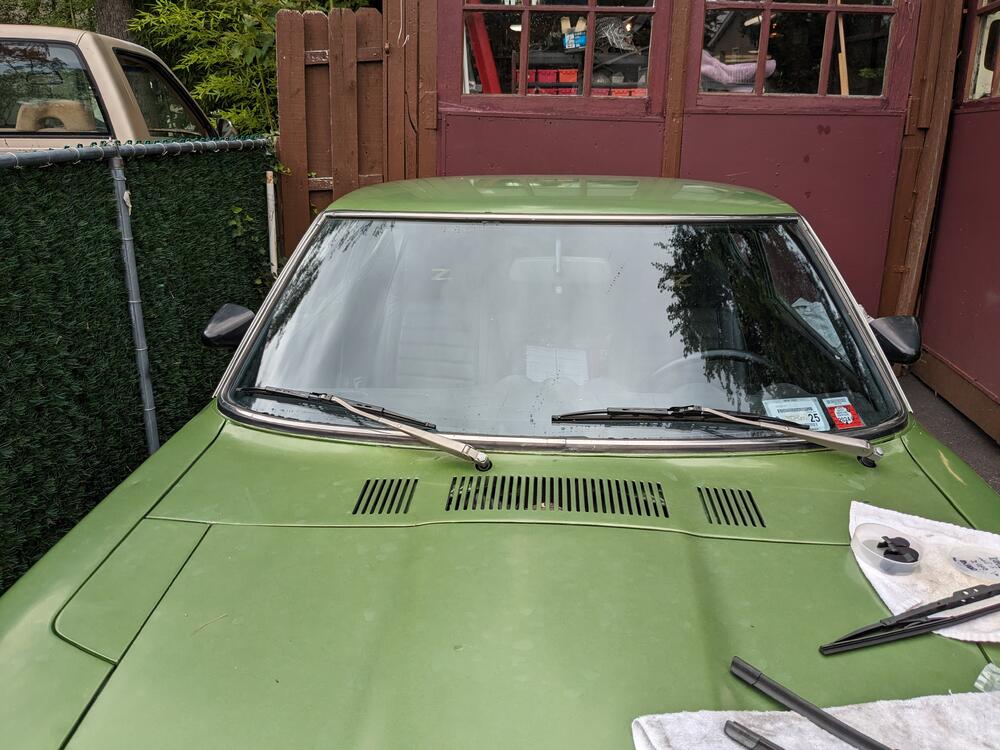
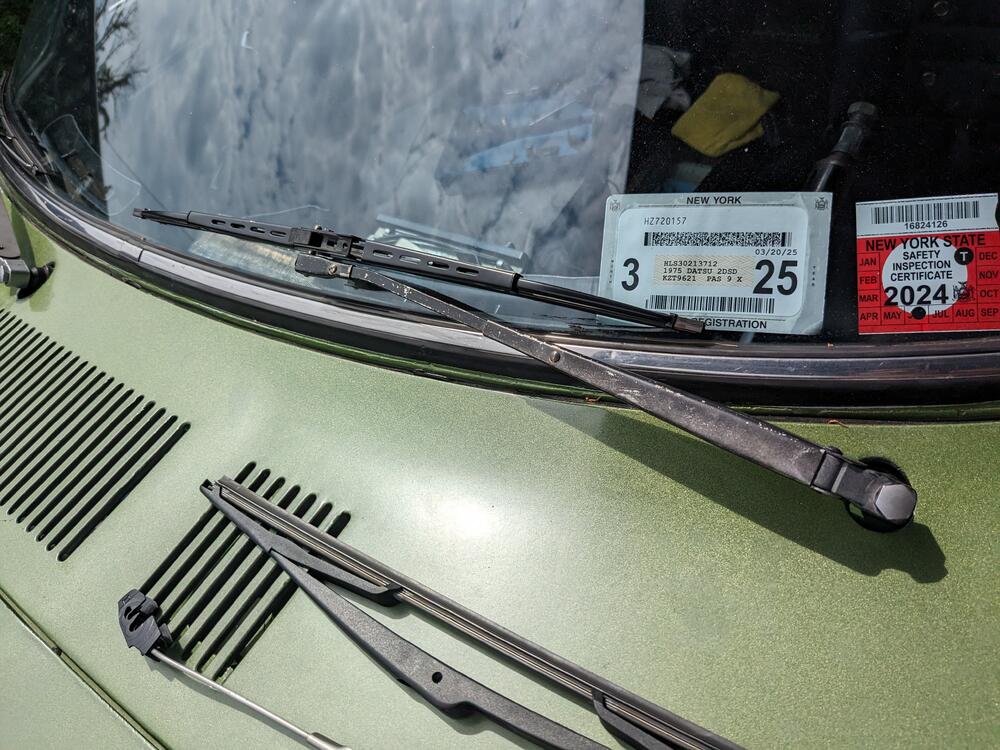
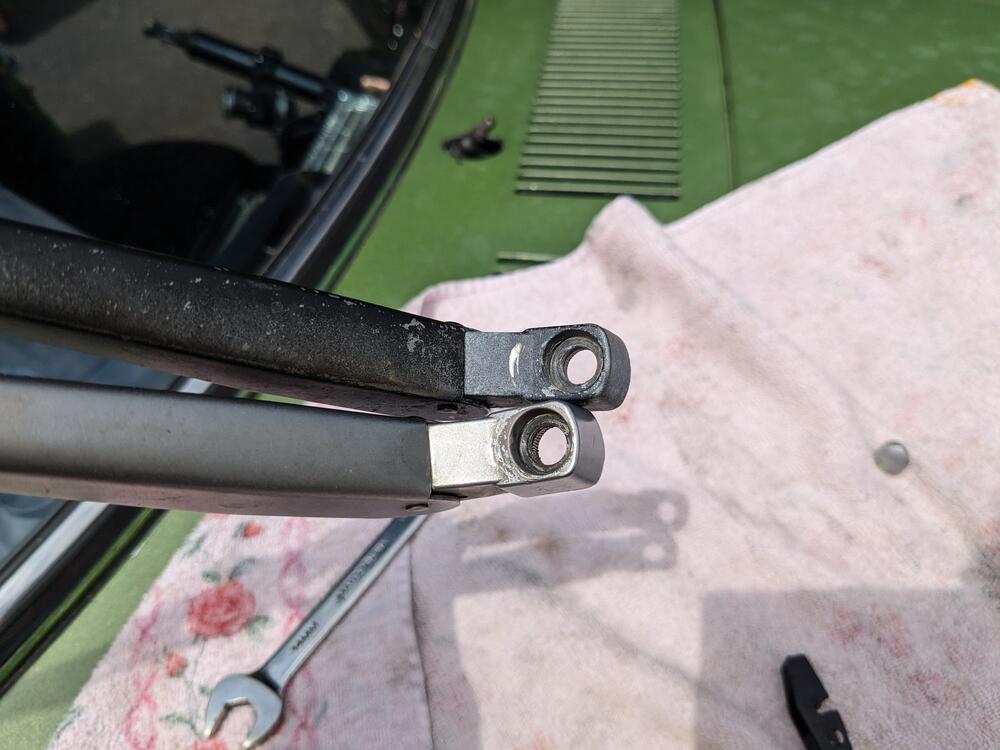
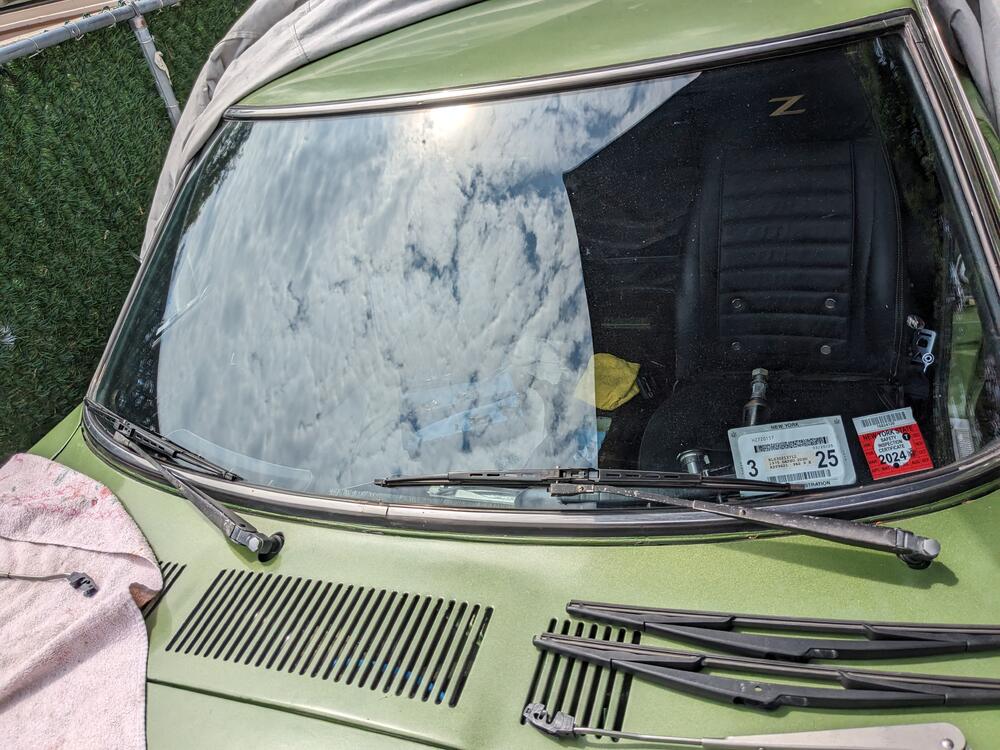
Now that I have the dash out & easier access to all the fuse/relay panel wiring, I'm going to revisit the interval relay. The other thing I disliked about the wipers is how high the arms & blades sit - when I'm driving the blades/arms interfere with seeing the nose of the car. So, I tried doglegging the stock arms to drop them - that did work to some extent, but not ideal. I also tried doglegging the arms off of a Volvo 240, that was better. Then a friend found arms intended for a 240 that are made in Japan (Trico, like the OEM), so the base mount is identical to the Datsun arm, however the blade attaches to an offset pin instead of to the arm directly. That allows the arms & blades to sit lower than the other options I've messed with. Much happier now Factory, doglegged, 18" blades (Bosch) 240 arm, doglegged (Trico) 240 arm (left) base comparison Just have to refinish them view of hood


-
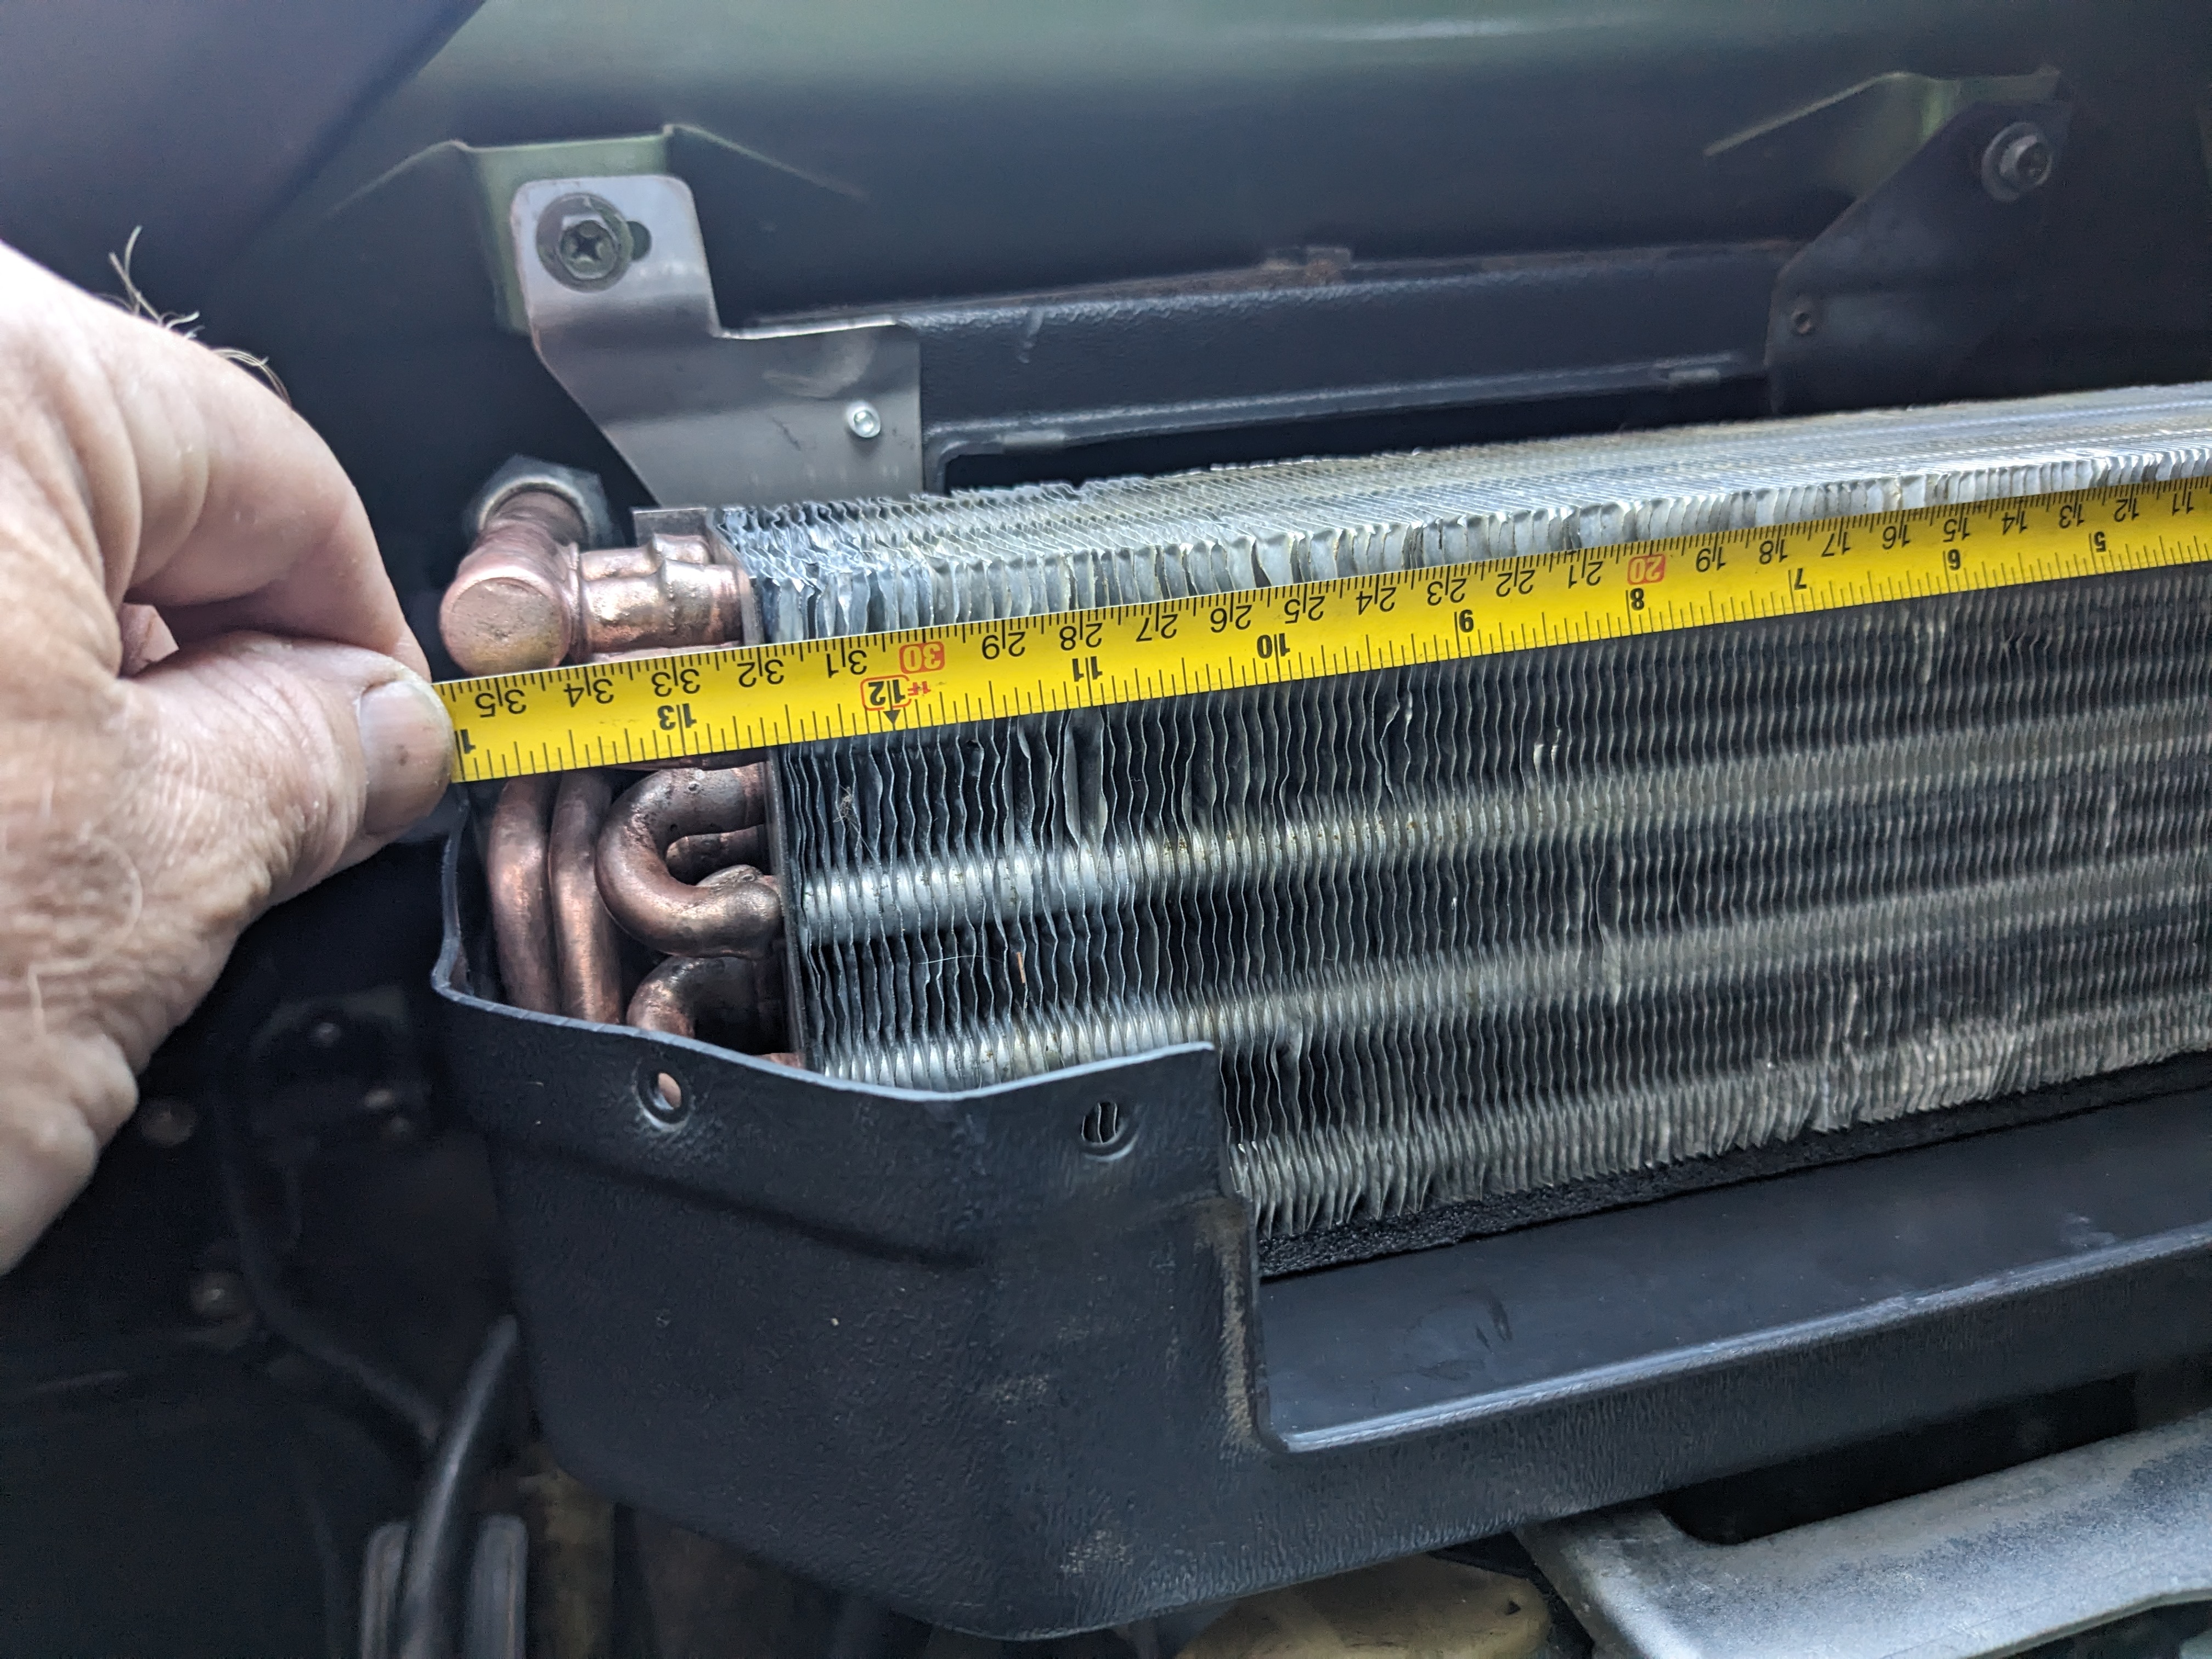
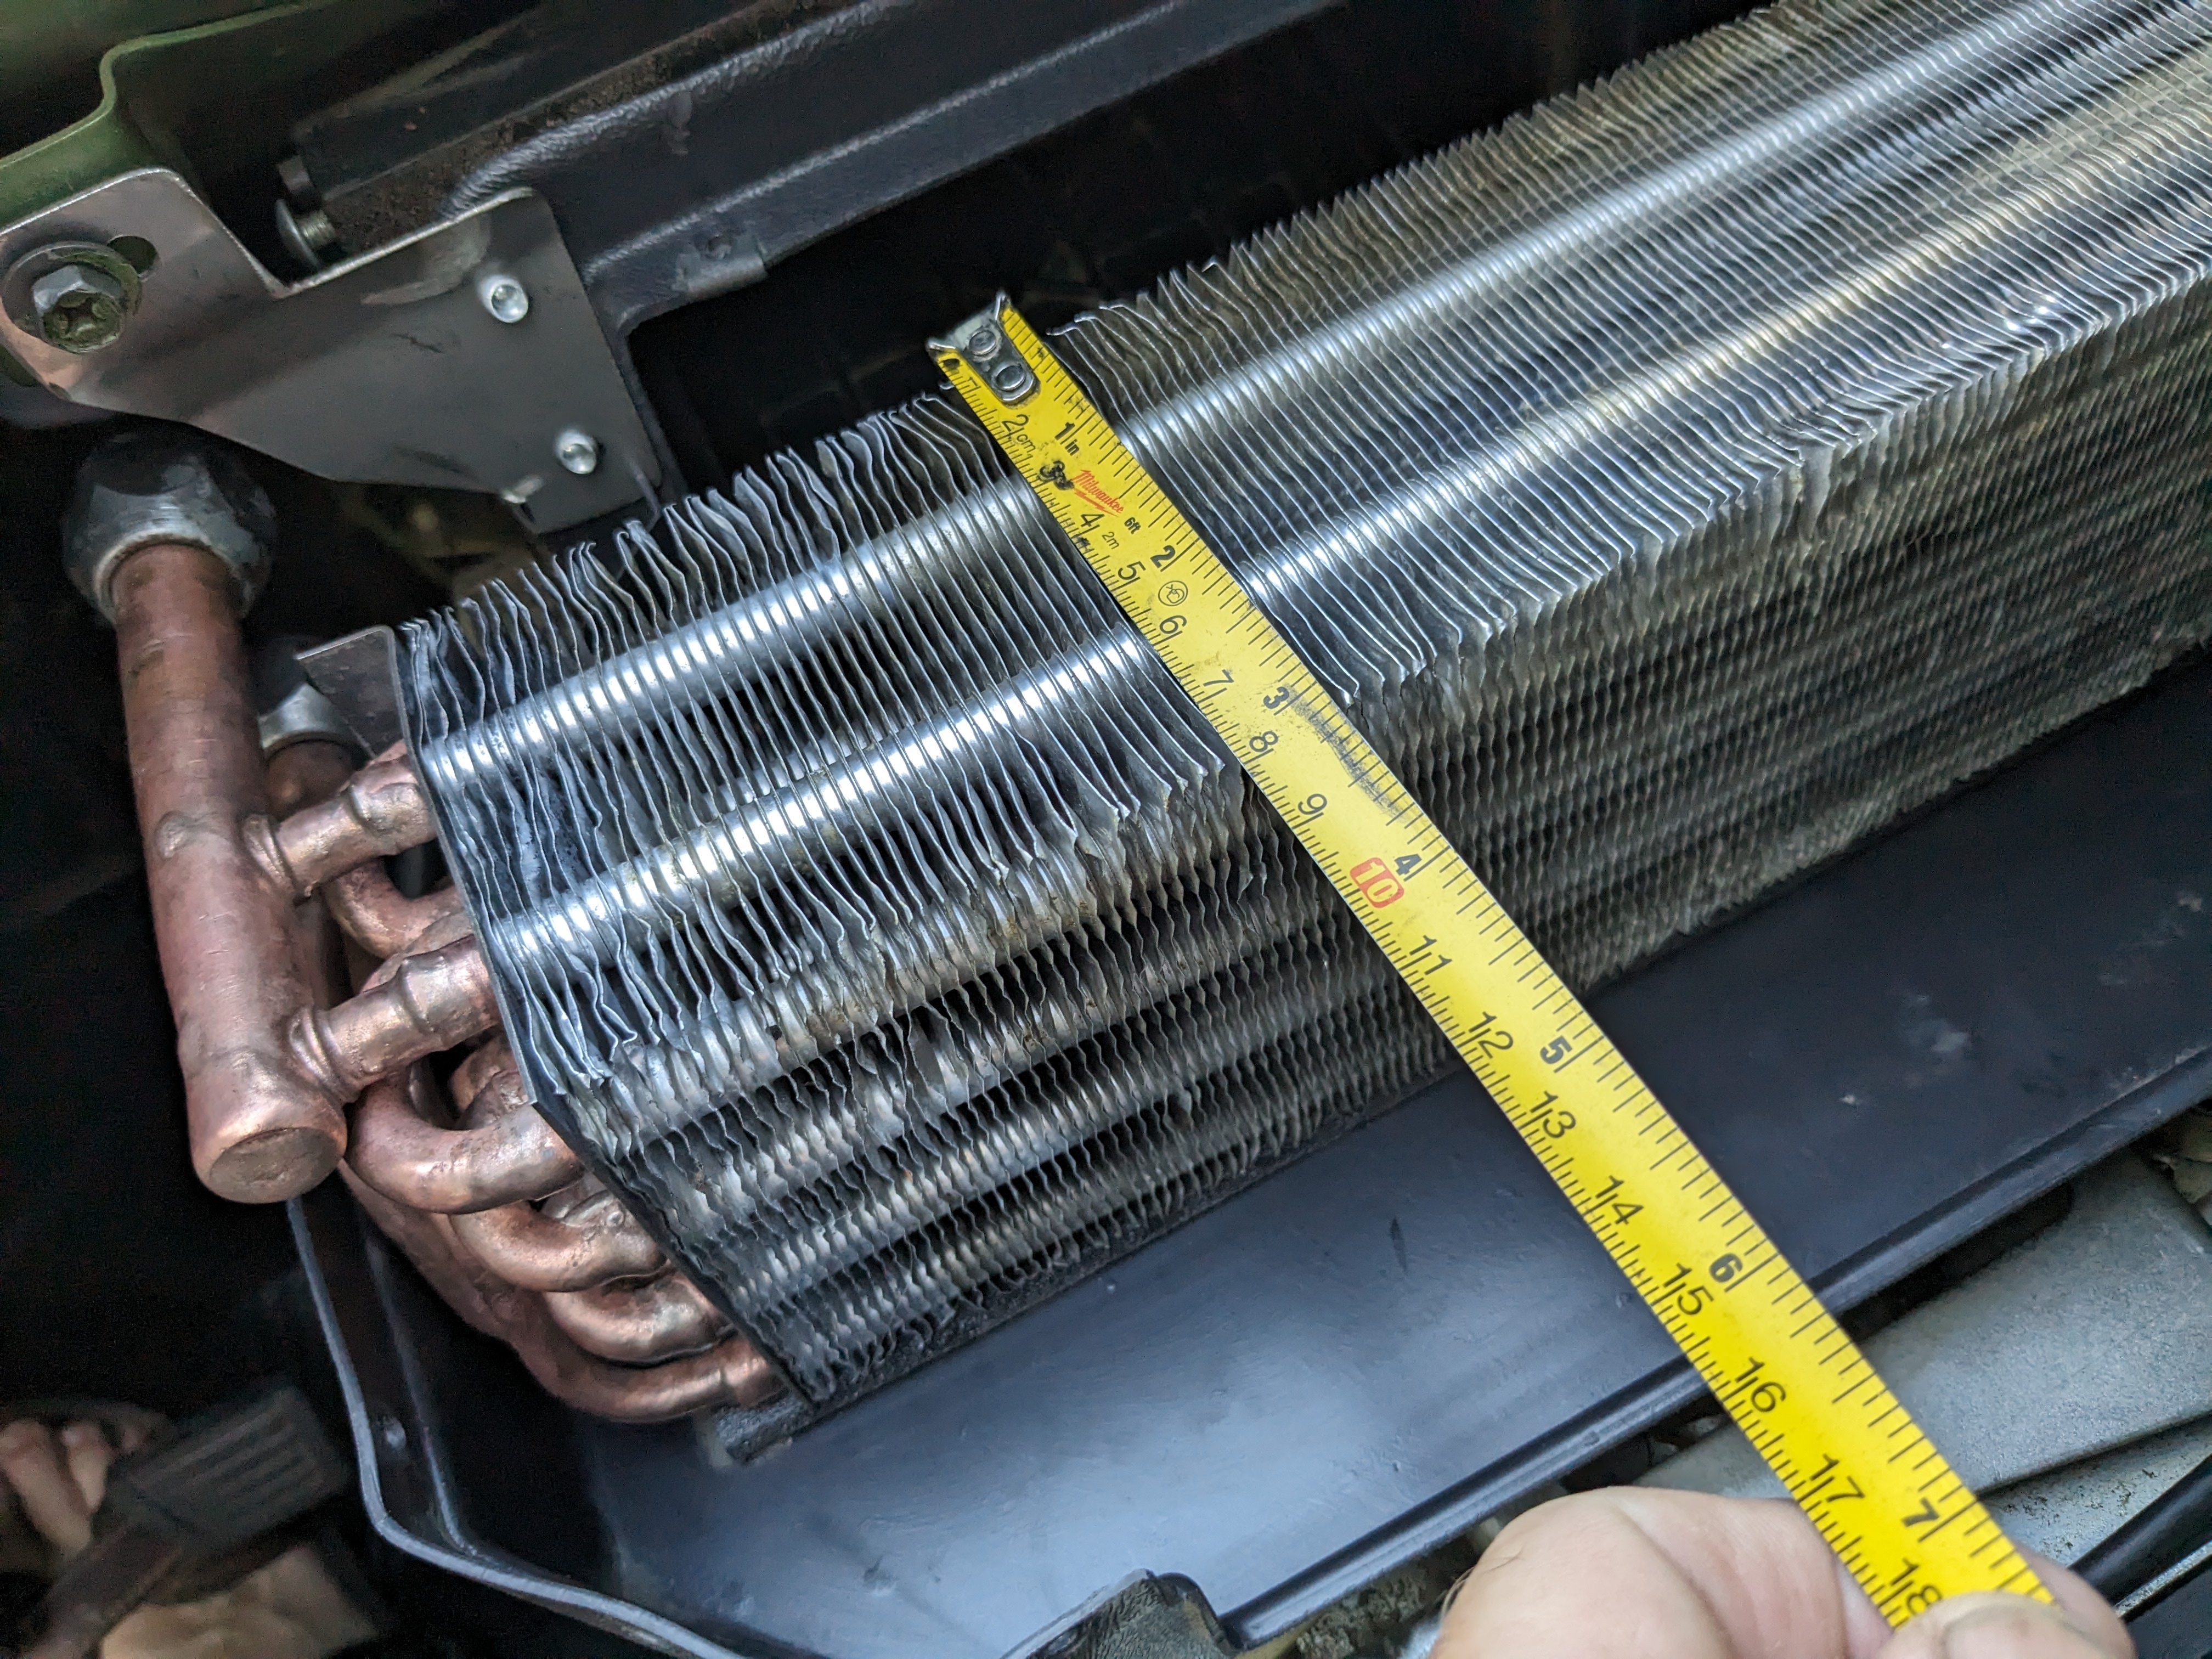
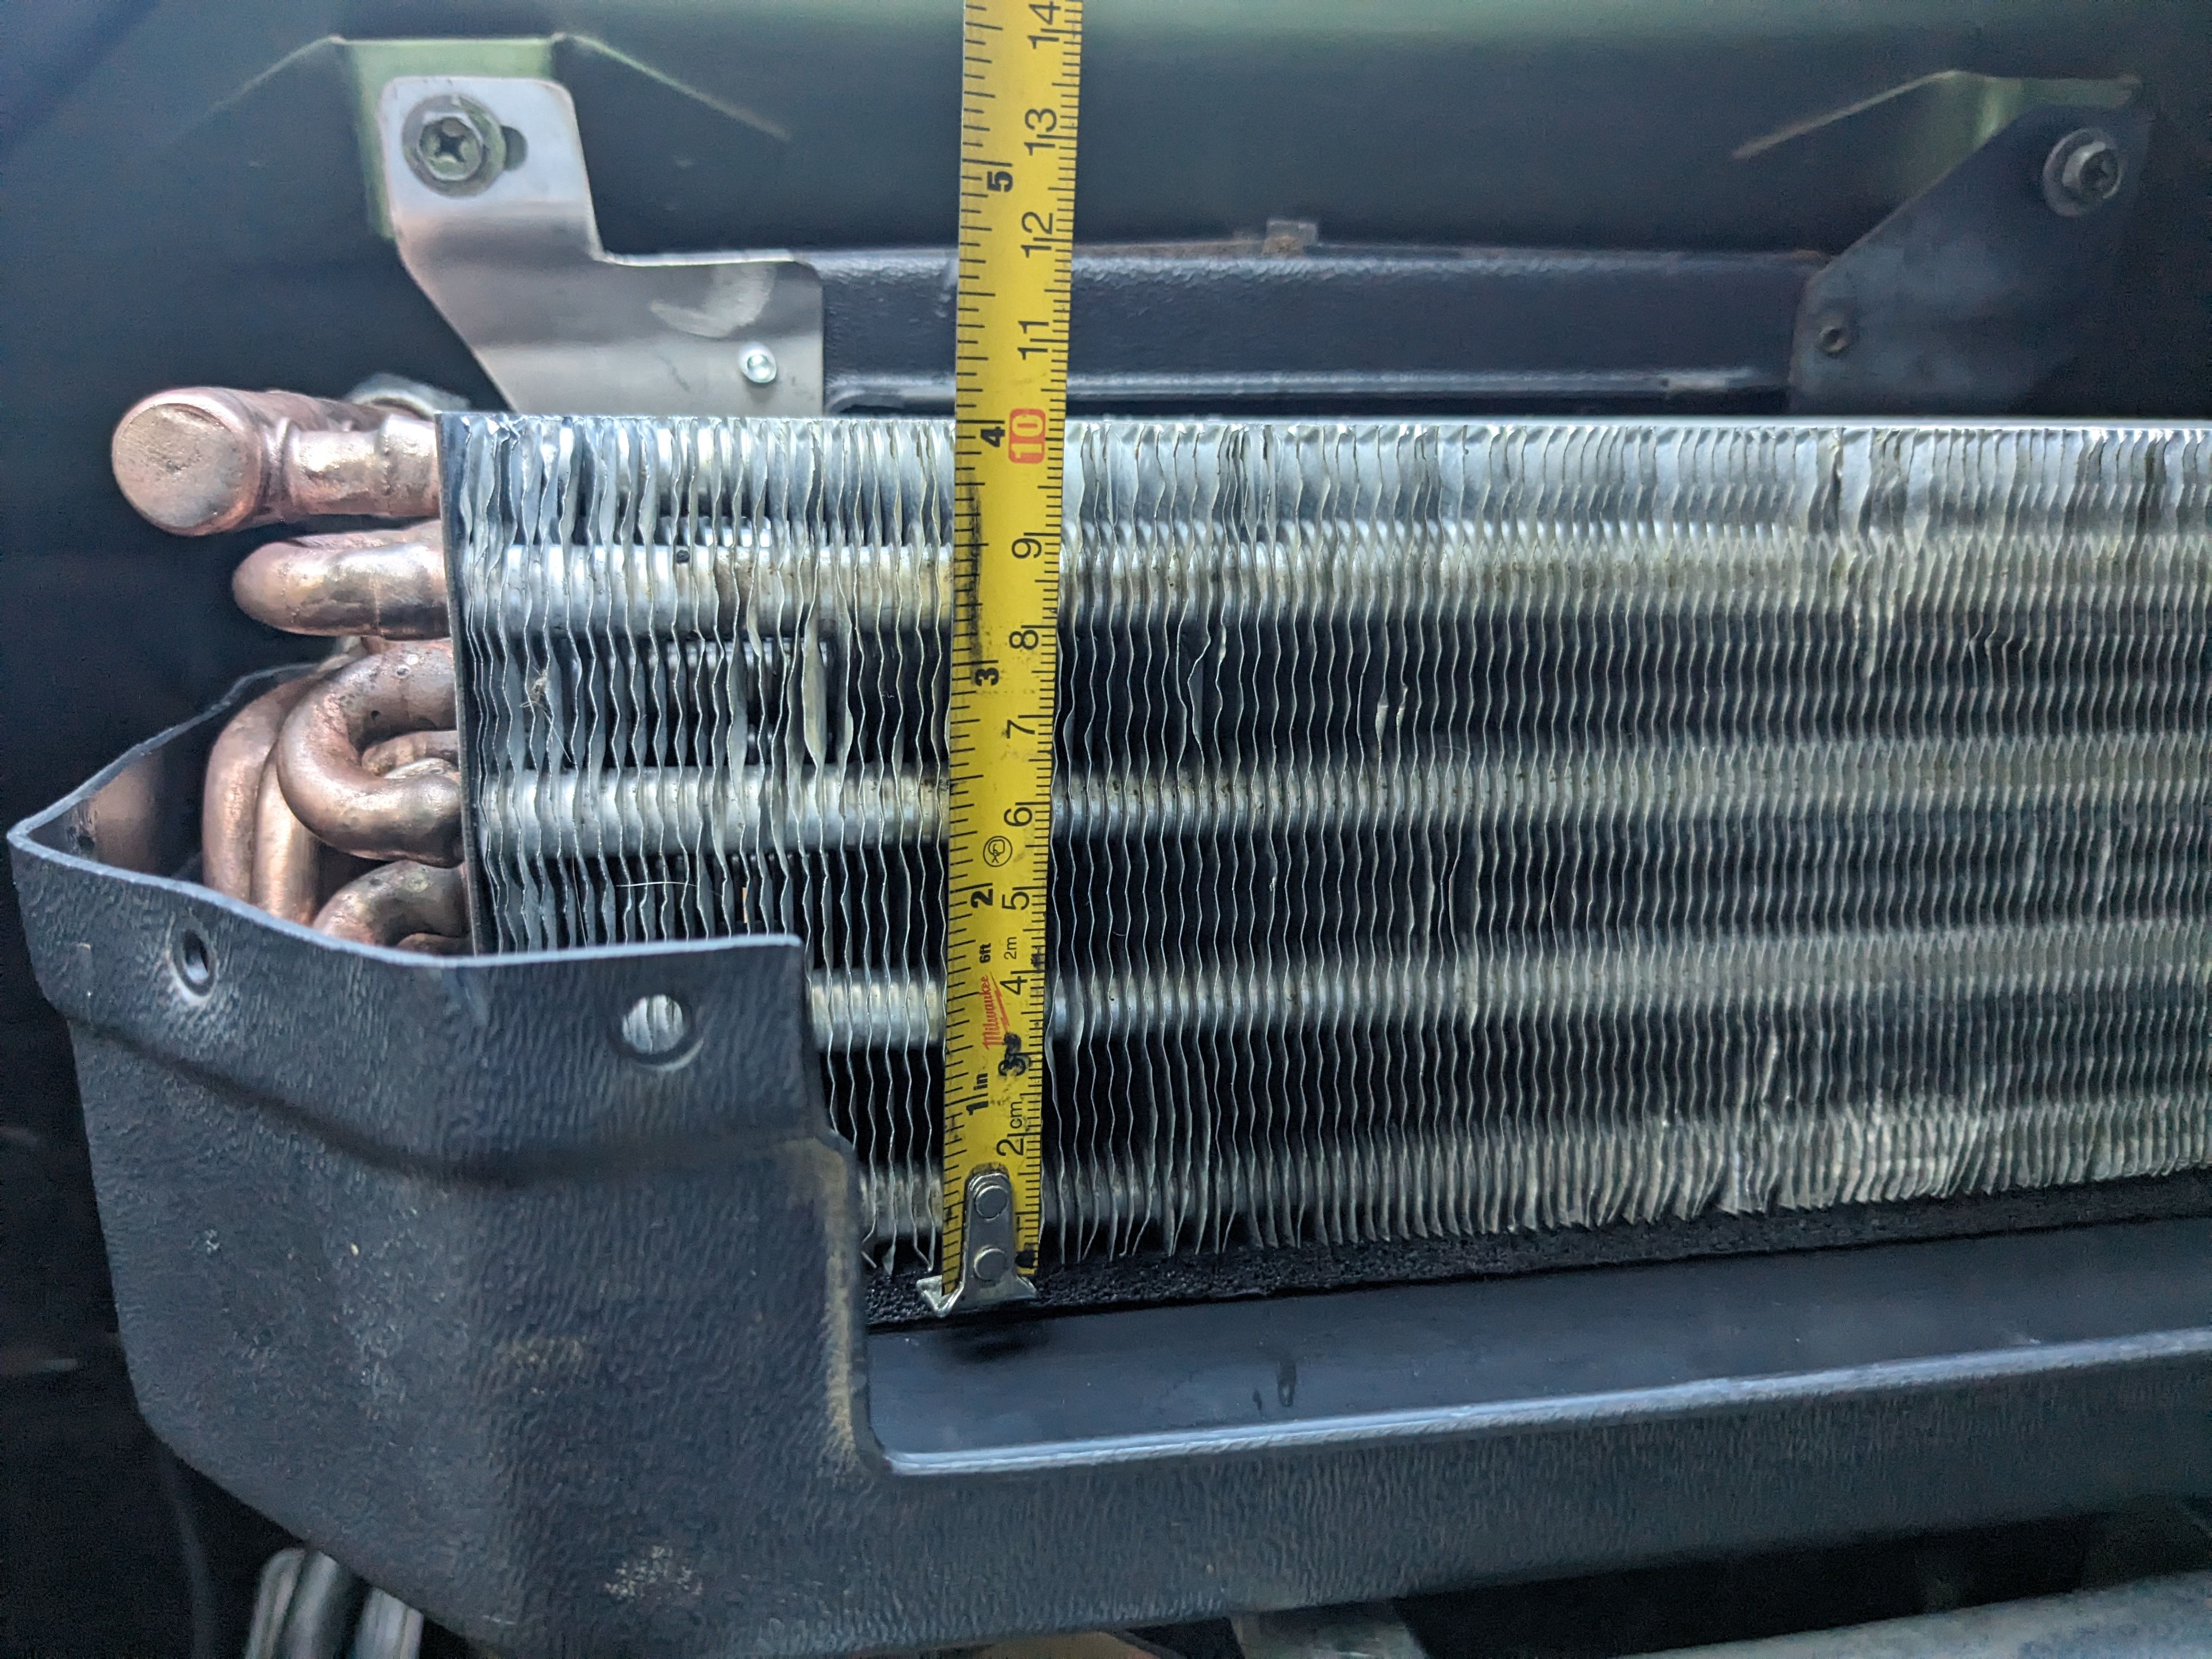
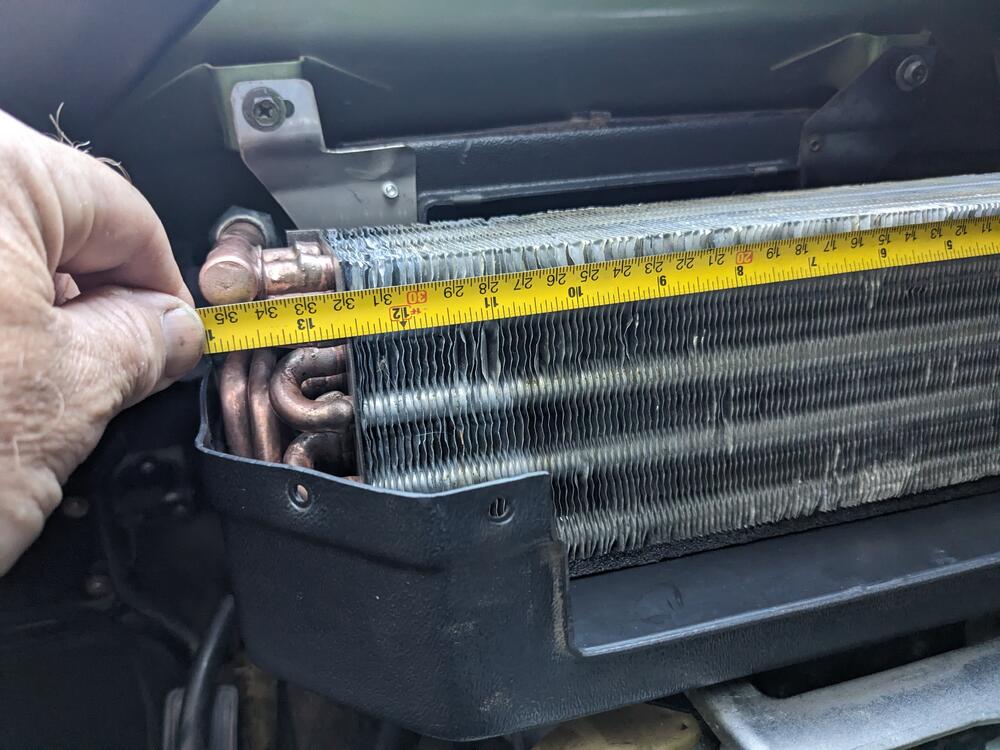
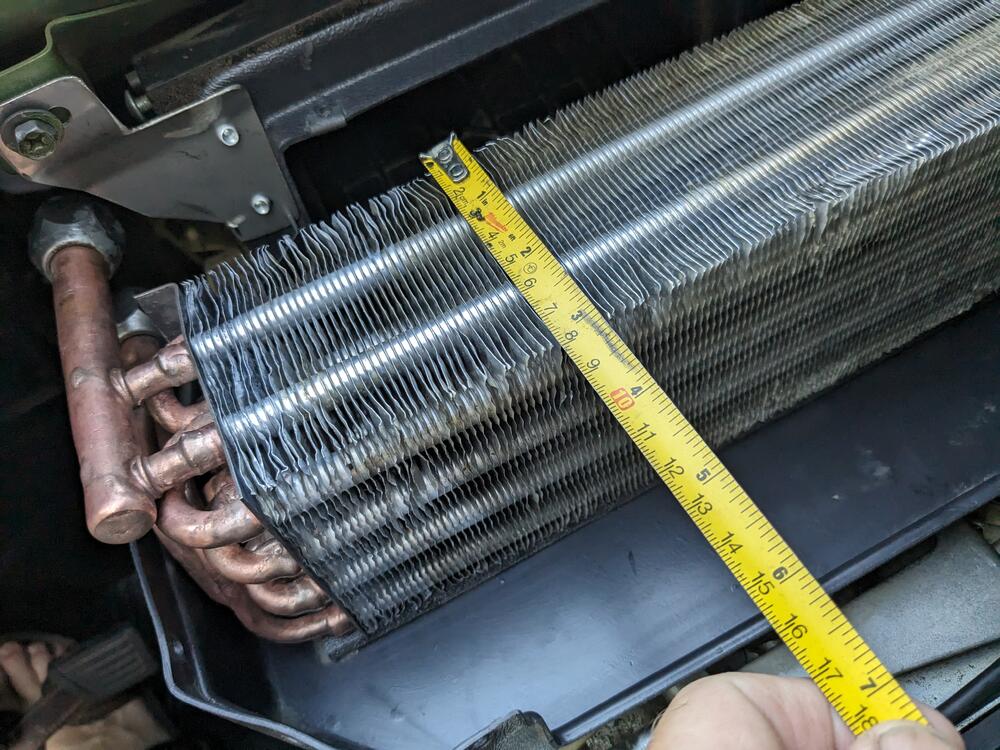
I was wondering how it compared to factory. It's 14"x3"x4" -so 168 cu. In.

-
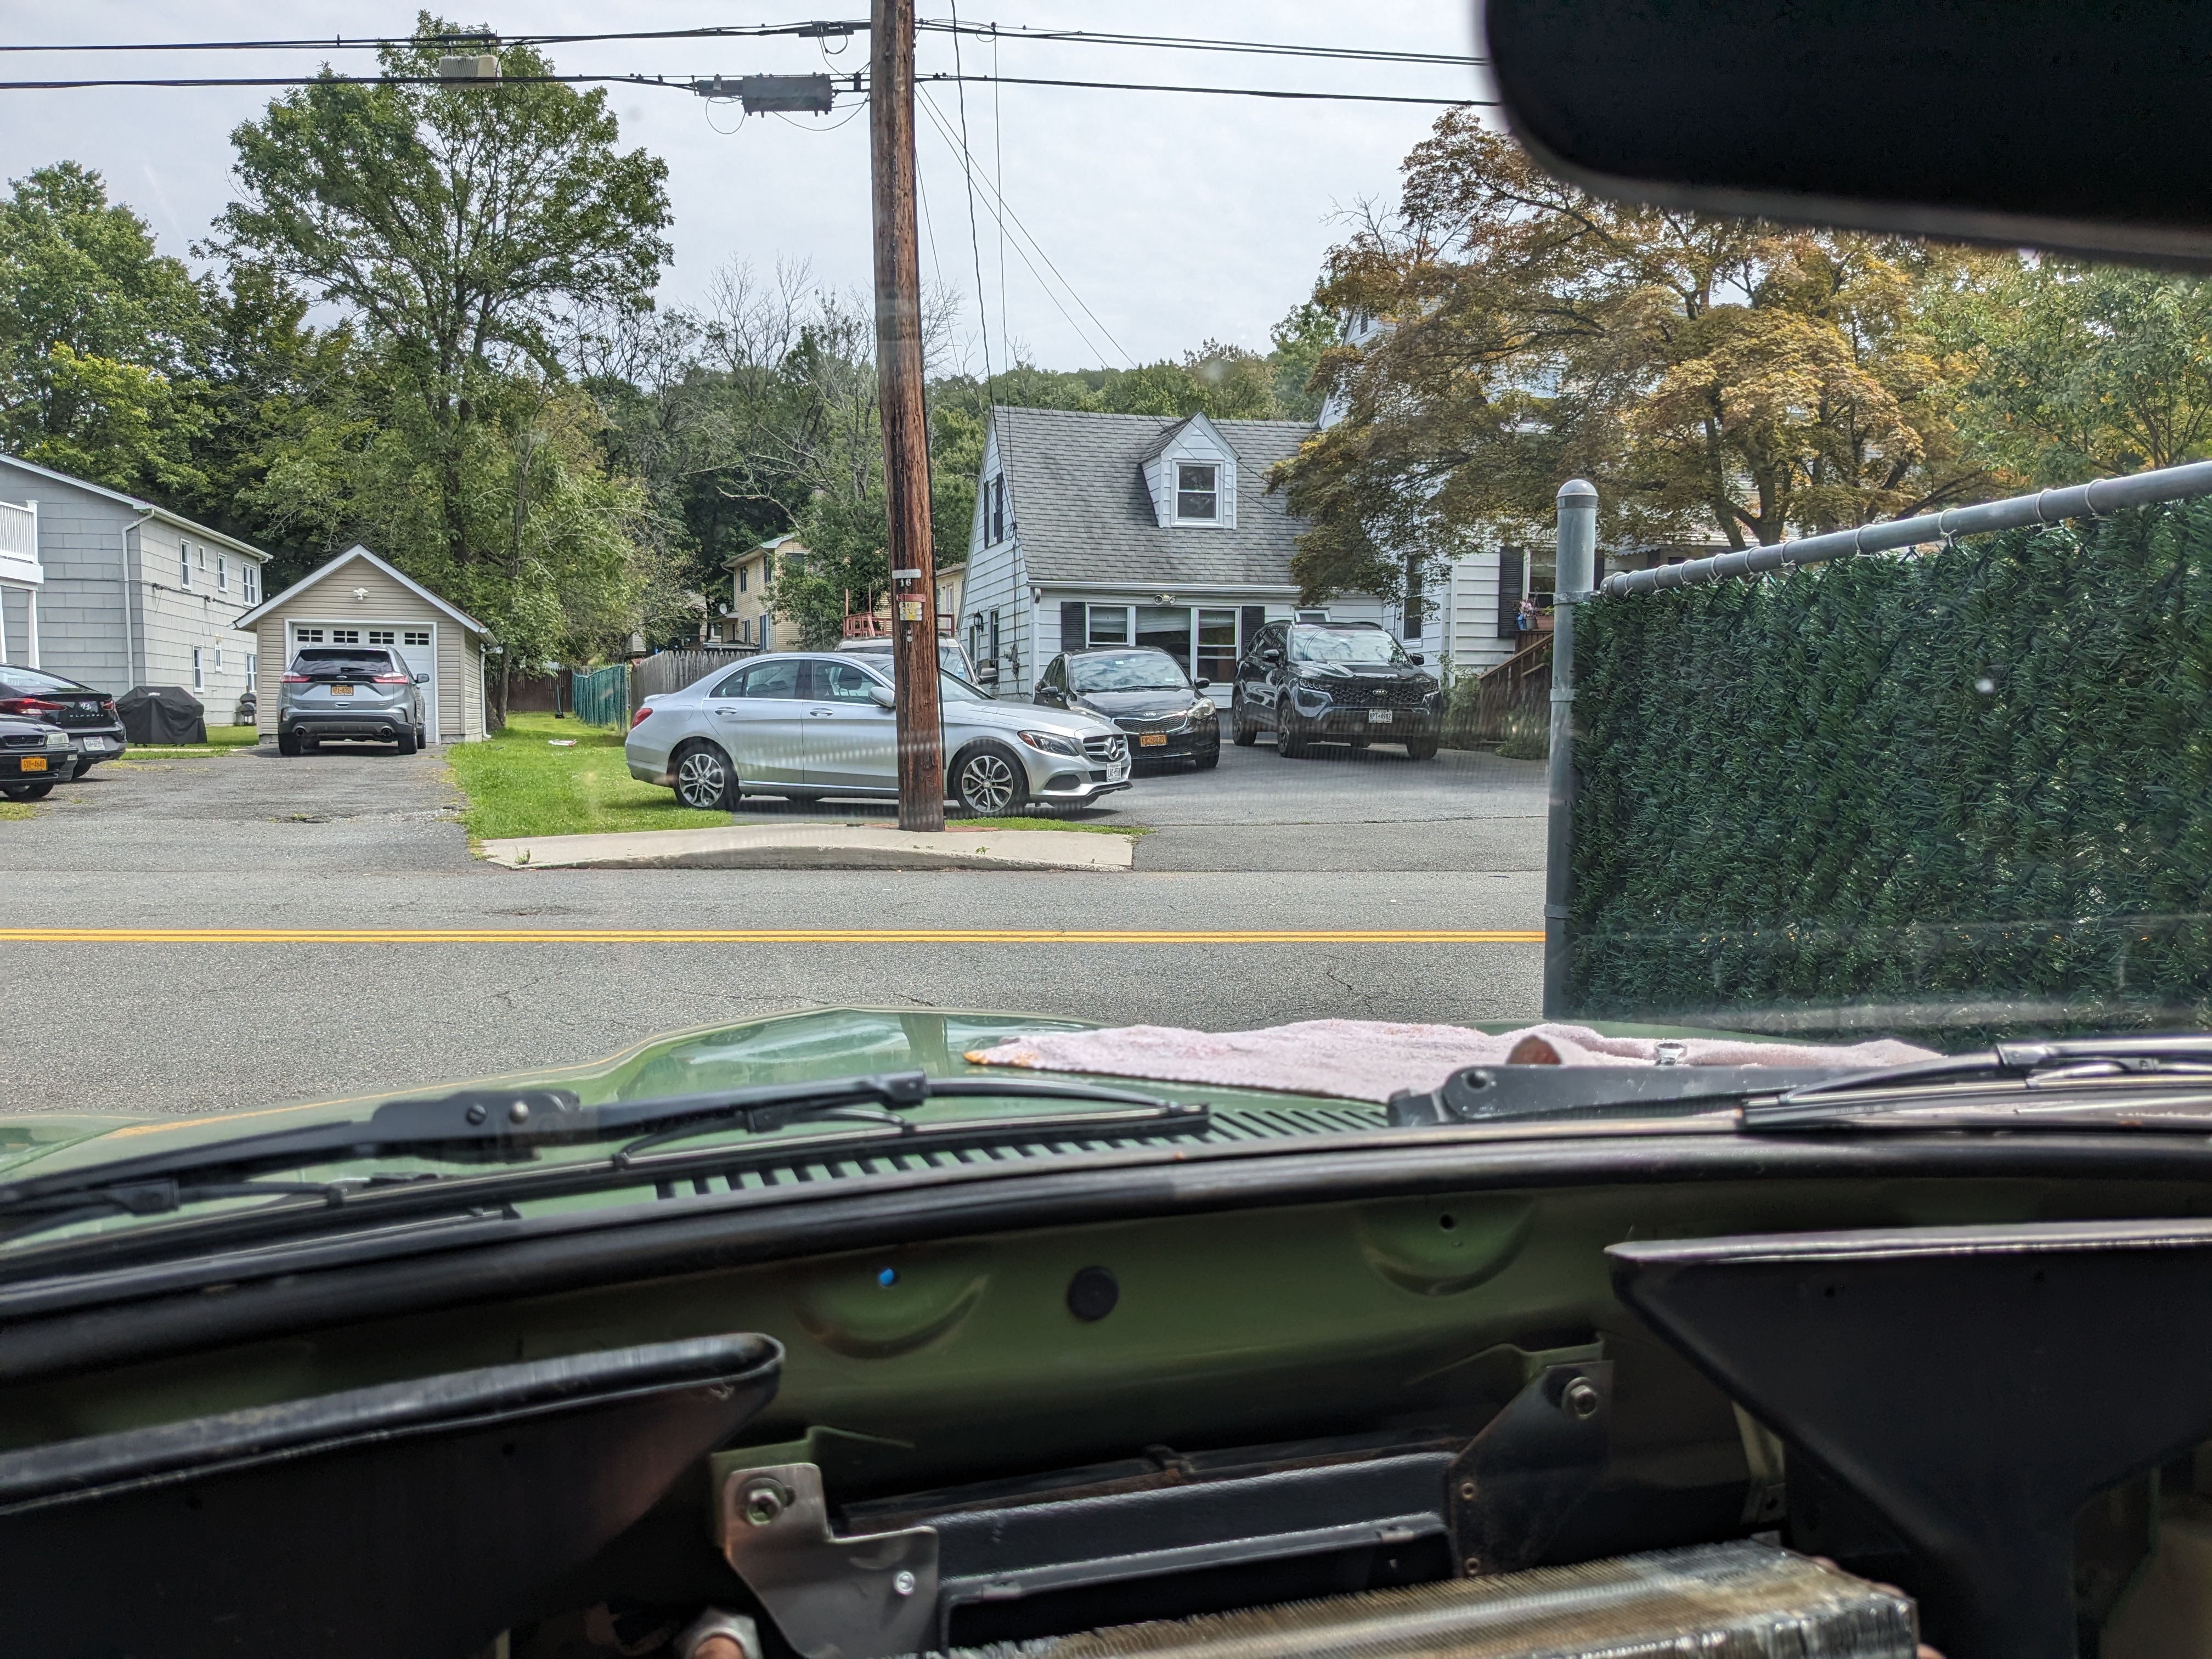
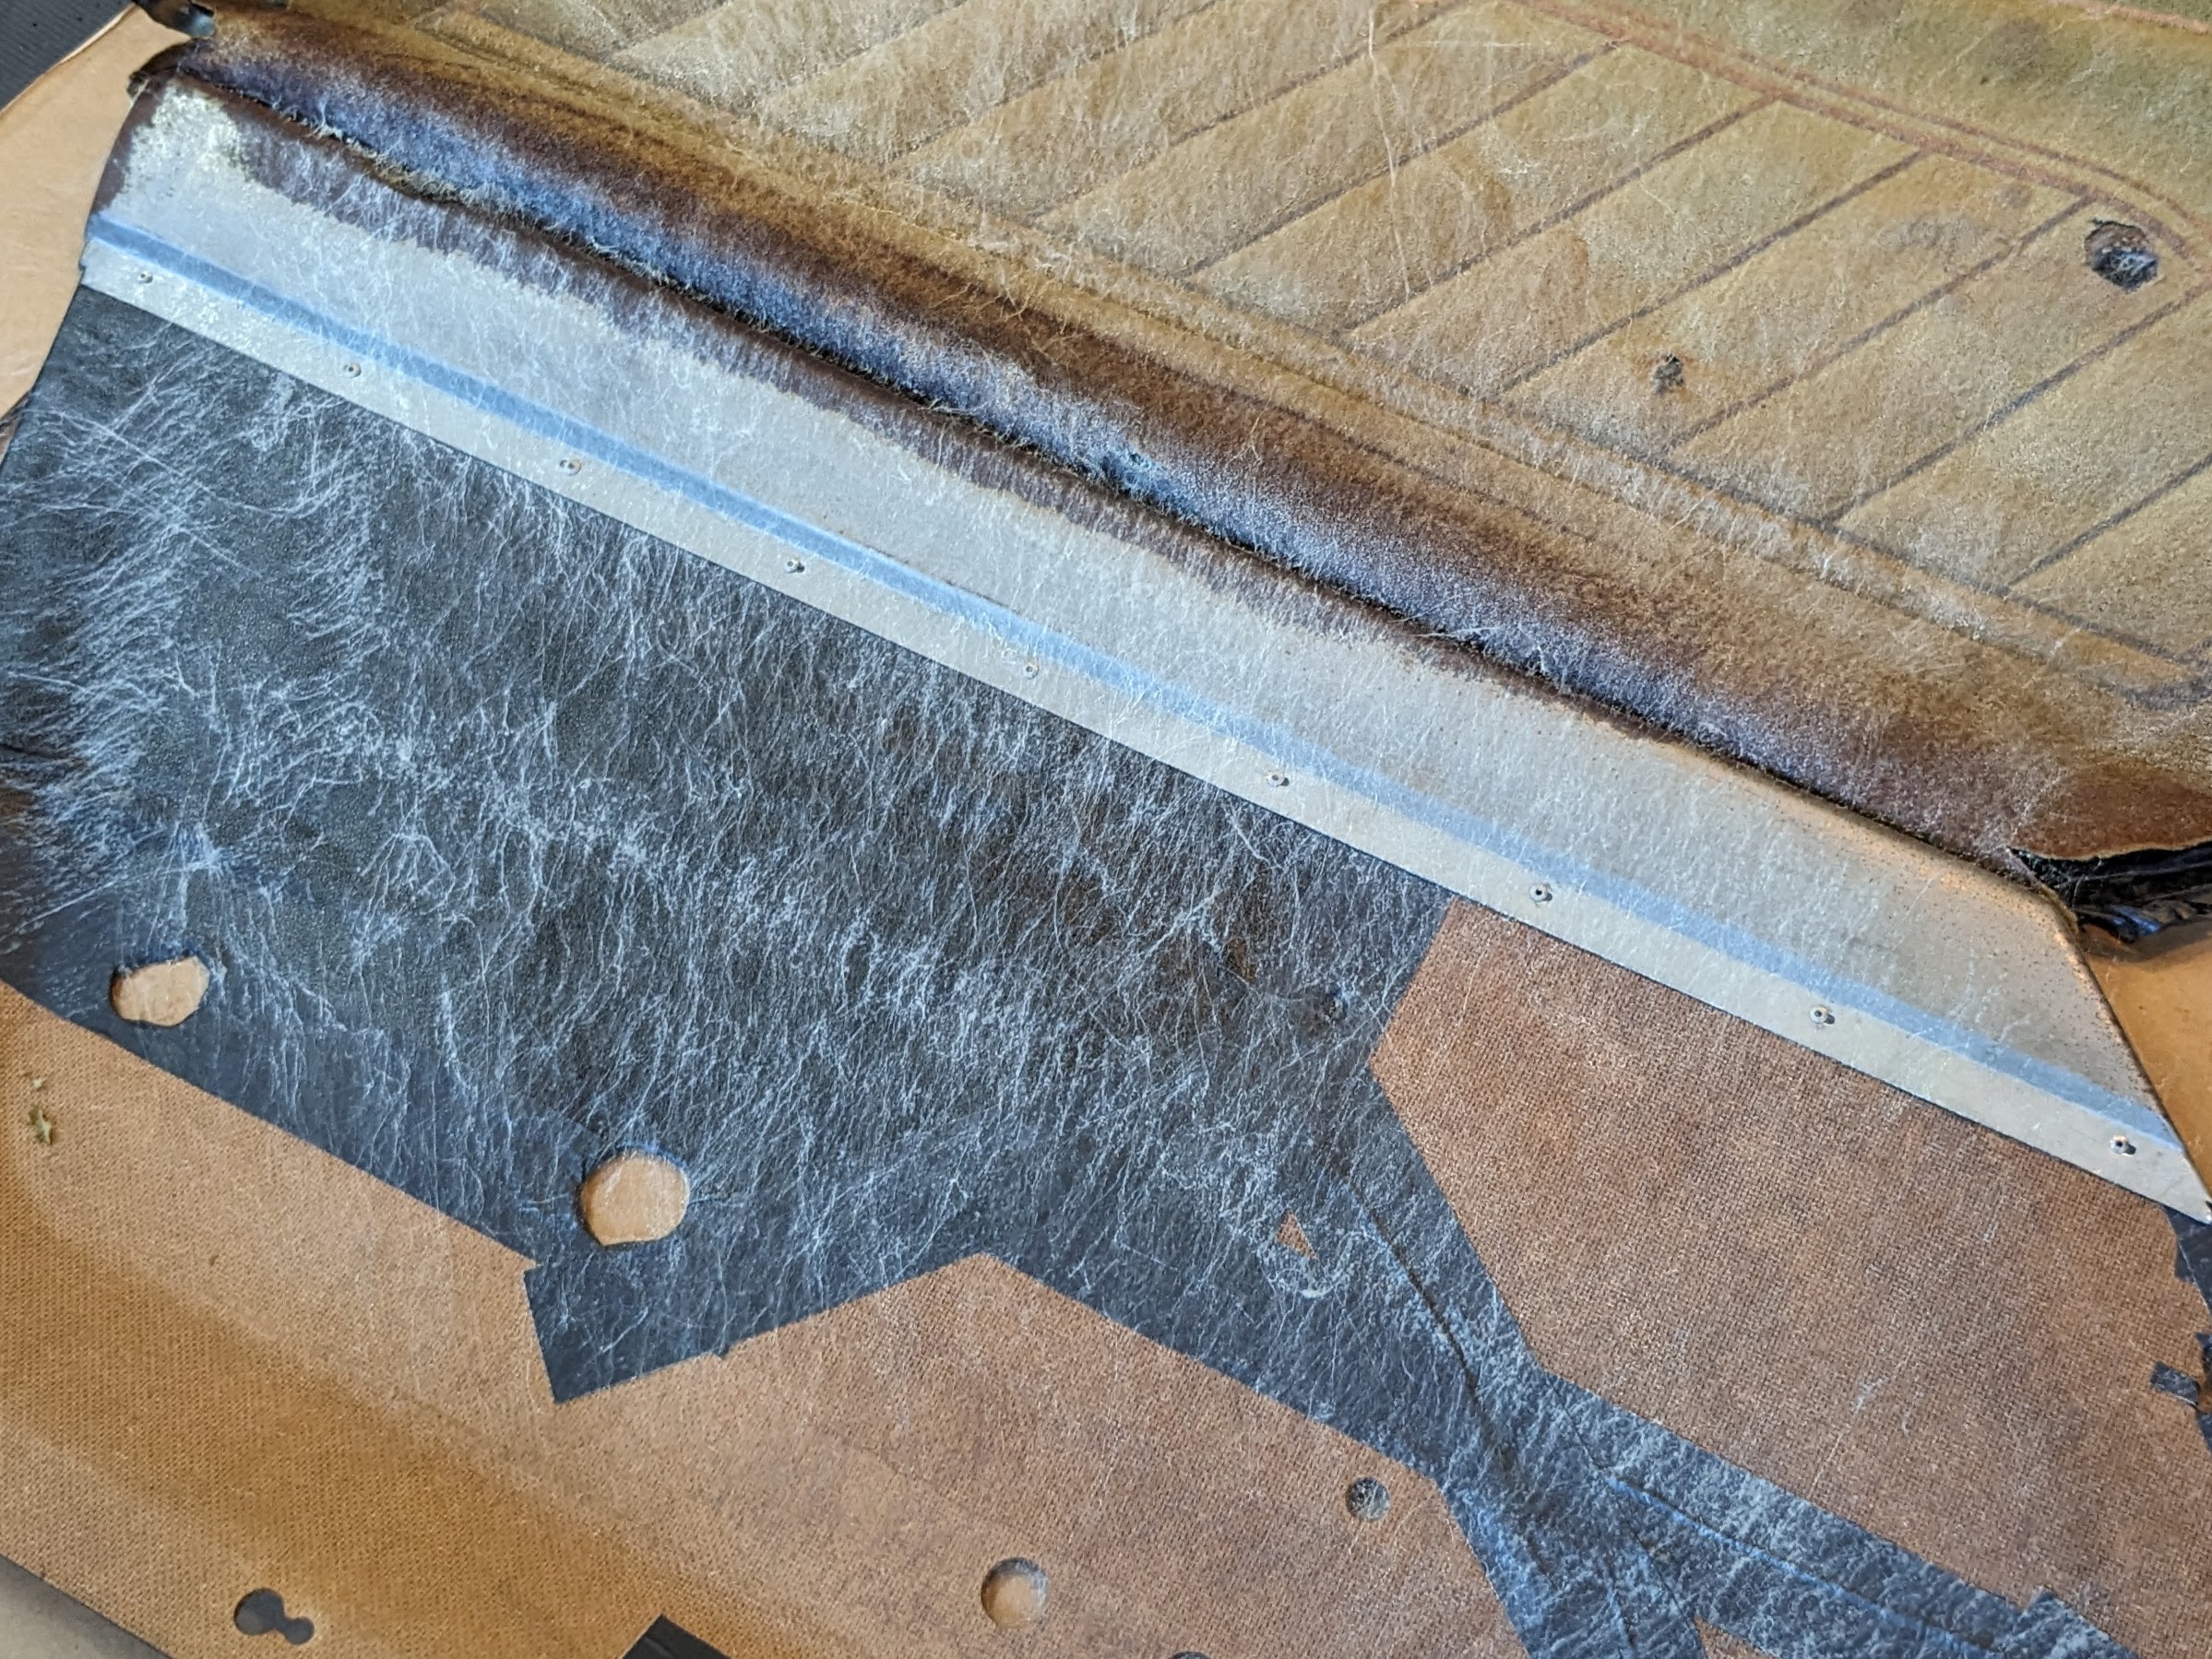
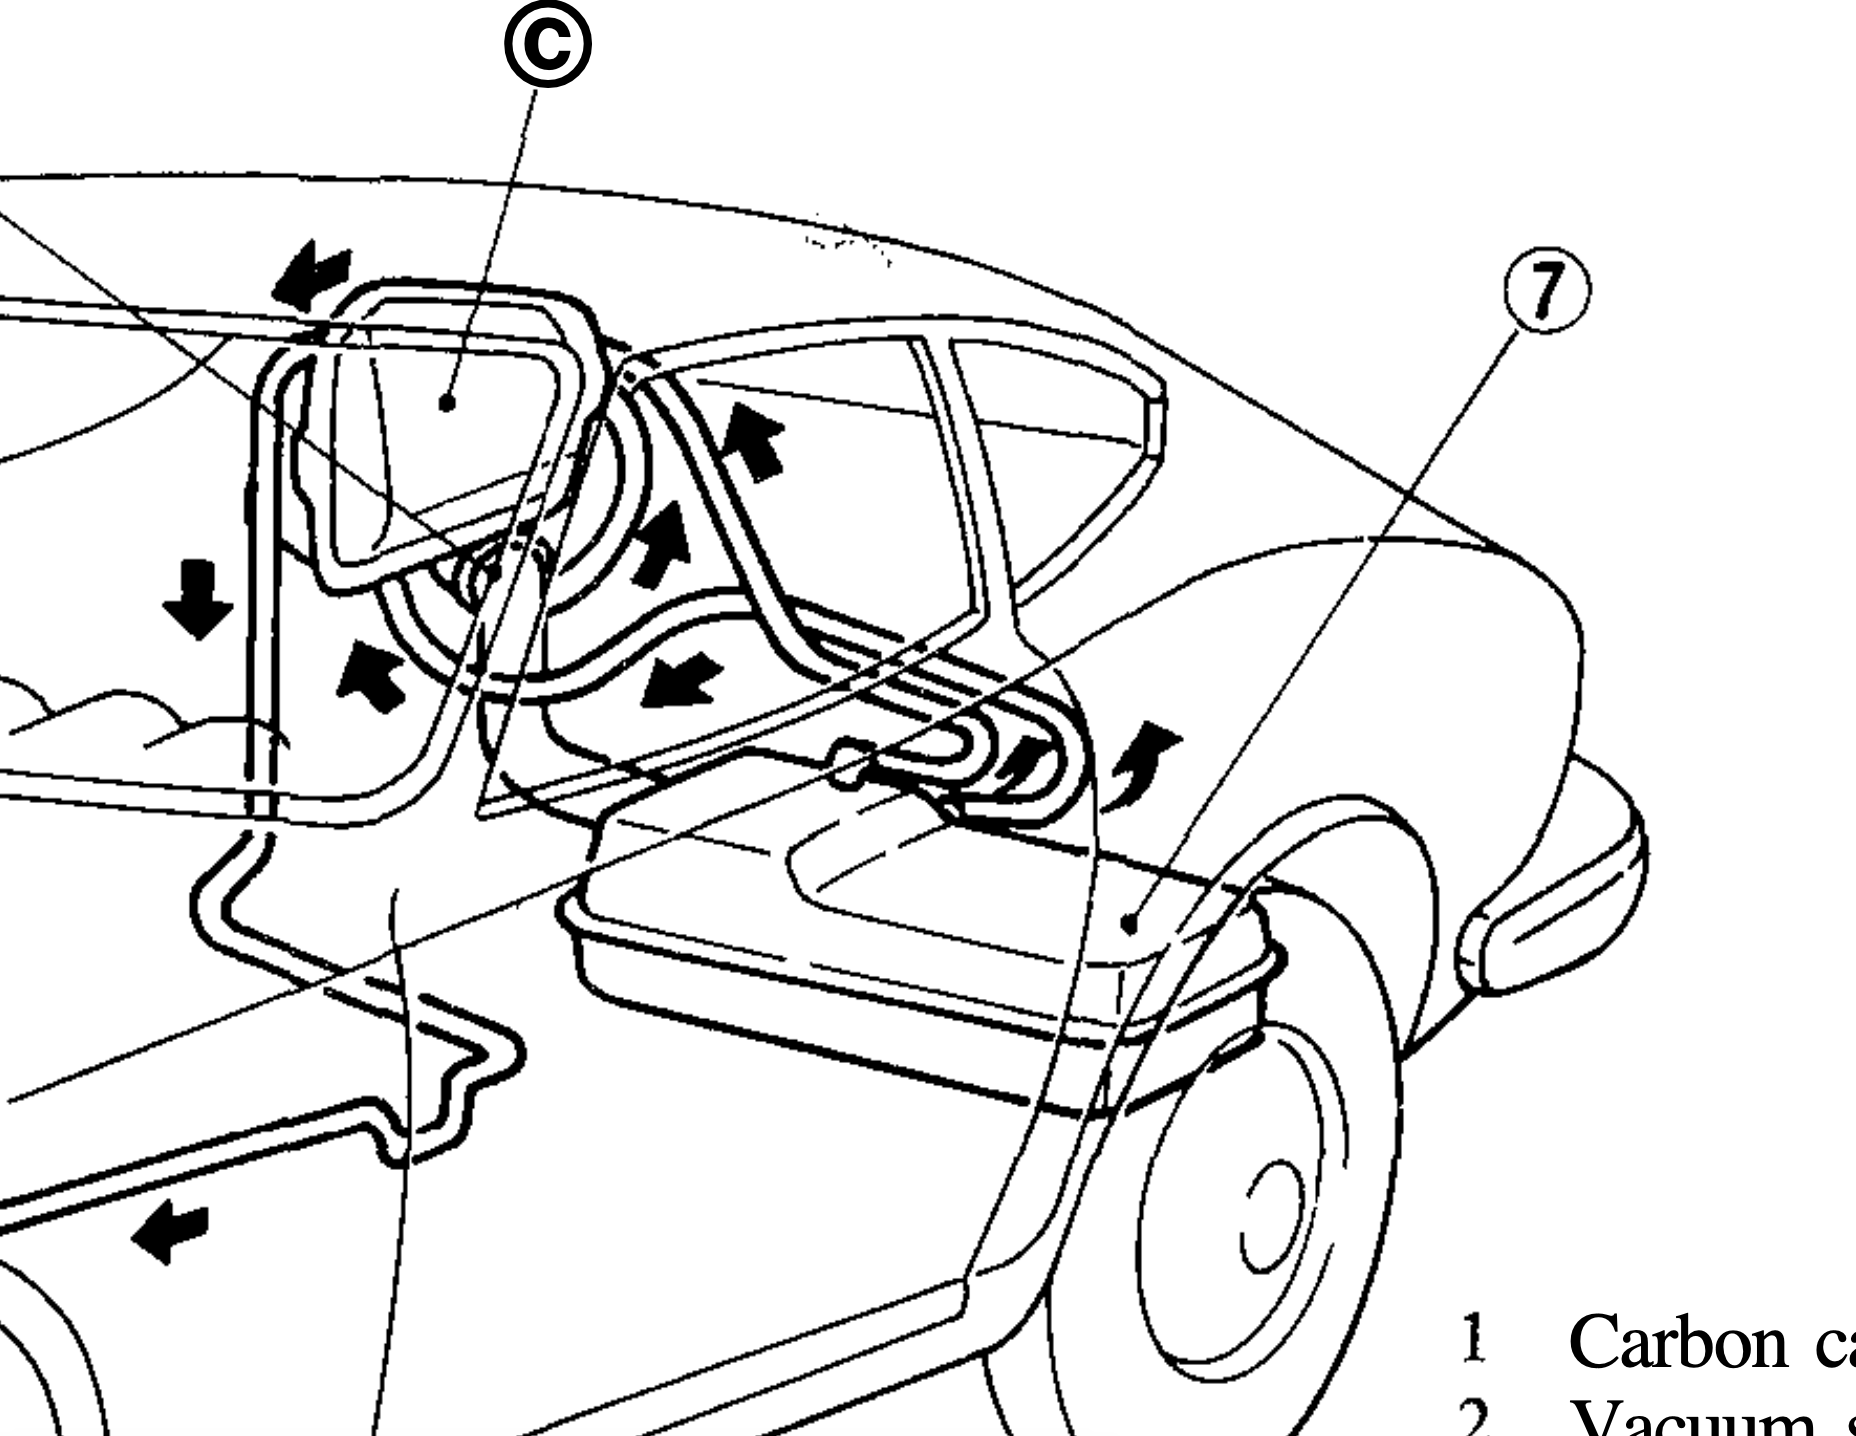
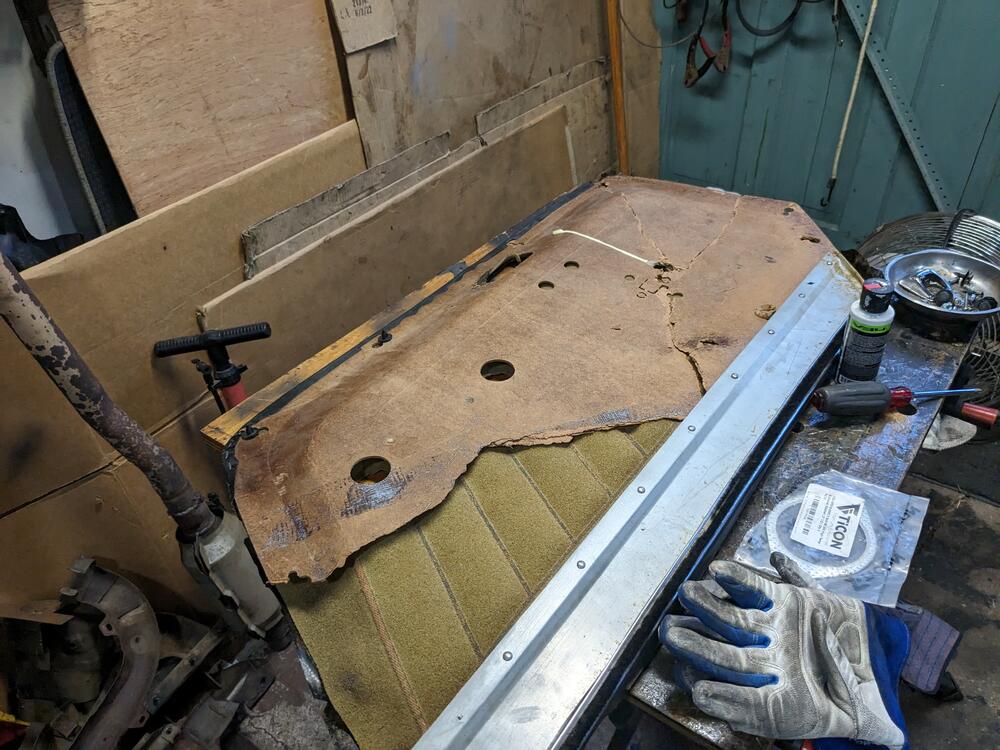
Took the dash out today, to deal with the aftermarket AC work Yuk - 48 years of dust & dirt Dash is actually easy to remove - entire harness unplugs on the pass side, and then just a few connections on the left side of dash. I found it to be very heavy though! I also flushed all the ductwork and tubing, however I'm going to put new tubing in. No way to get all the kaka out of the old ones, and I don't want to be blowing all that crud into the cabin. New dash will go in after all this After several go arounds with sponge, soap & water more yuk made a left side support bracket for the housing plate - the whole thing was hanging off the right ear Evaporator has flare fittings. I've order a #8 & #10 straight flare, and a #8 to #6 step barb Tried fitting the existing hoses to see if I can cut them down - they only need to go to the bulkhead, but the #10 has a 90º elbow, so the routing is very untidy, and the #6 goes to the (now hollowed out) expansion valve, but it's still unwieldy so I'll just make new ones with cleaner routing I found these were mounted under the hVAC control panel - added to control the aftermarket AC thermostat & fan(?) The left one responds to fan position, the right responds to temp setting . I don't have a wiring diagram, so I'm not sure why they added them, honestly.
-
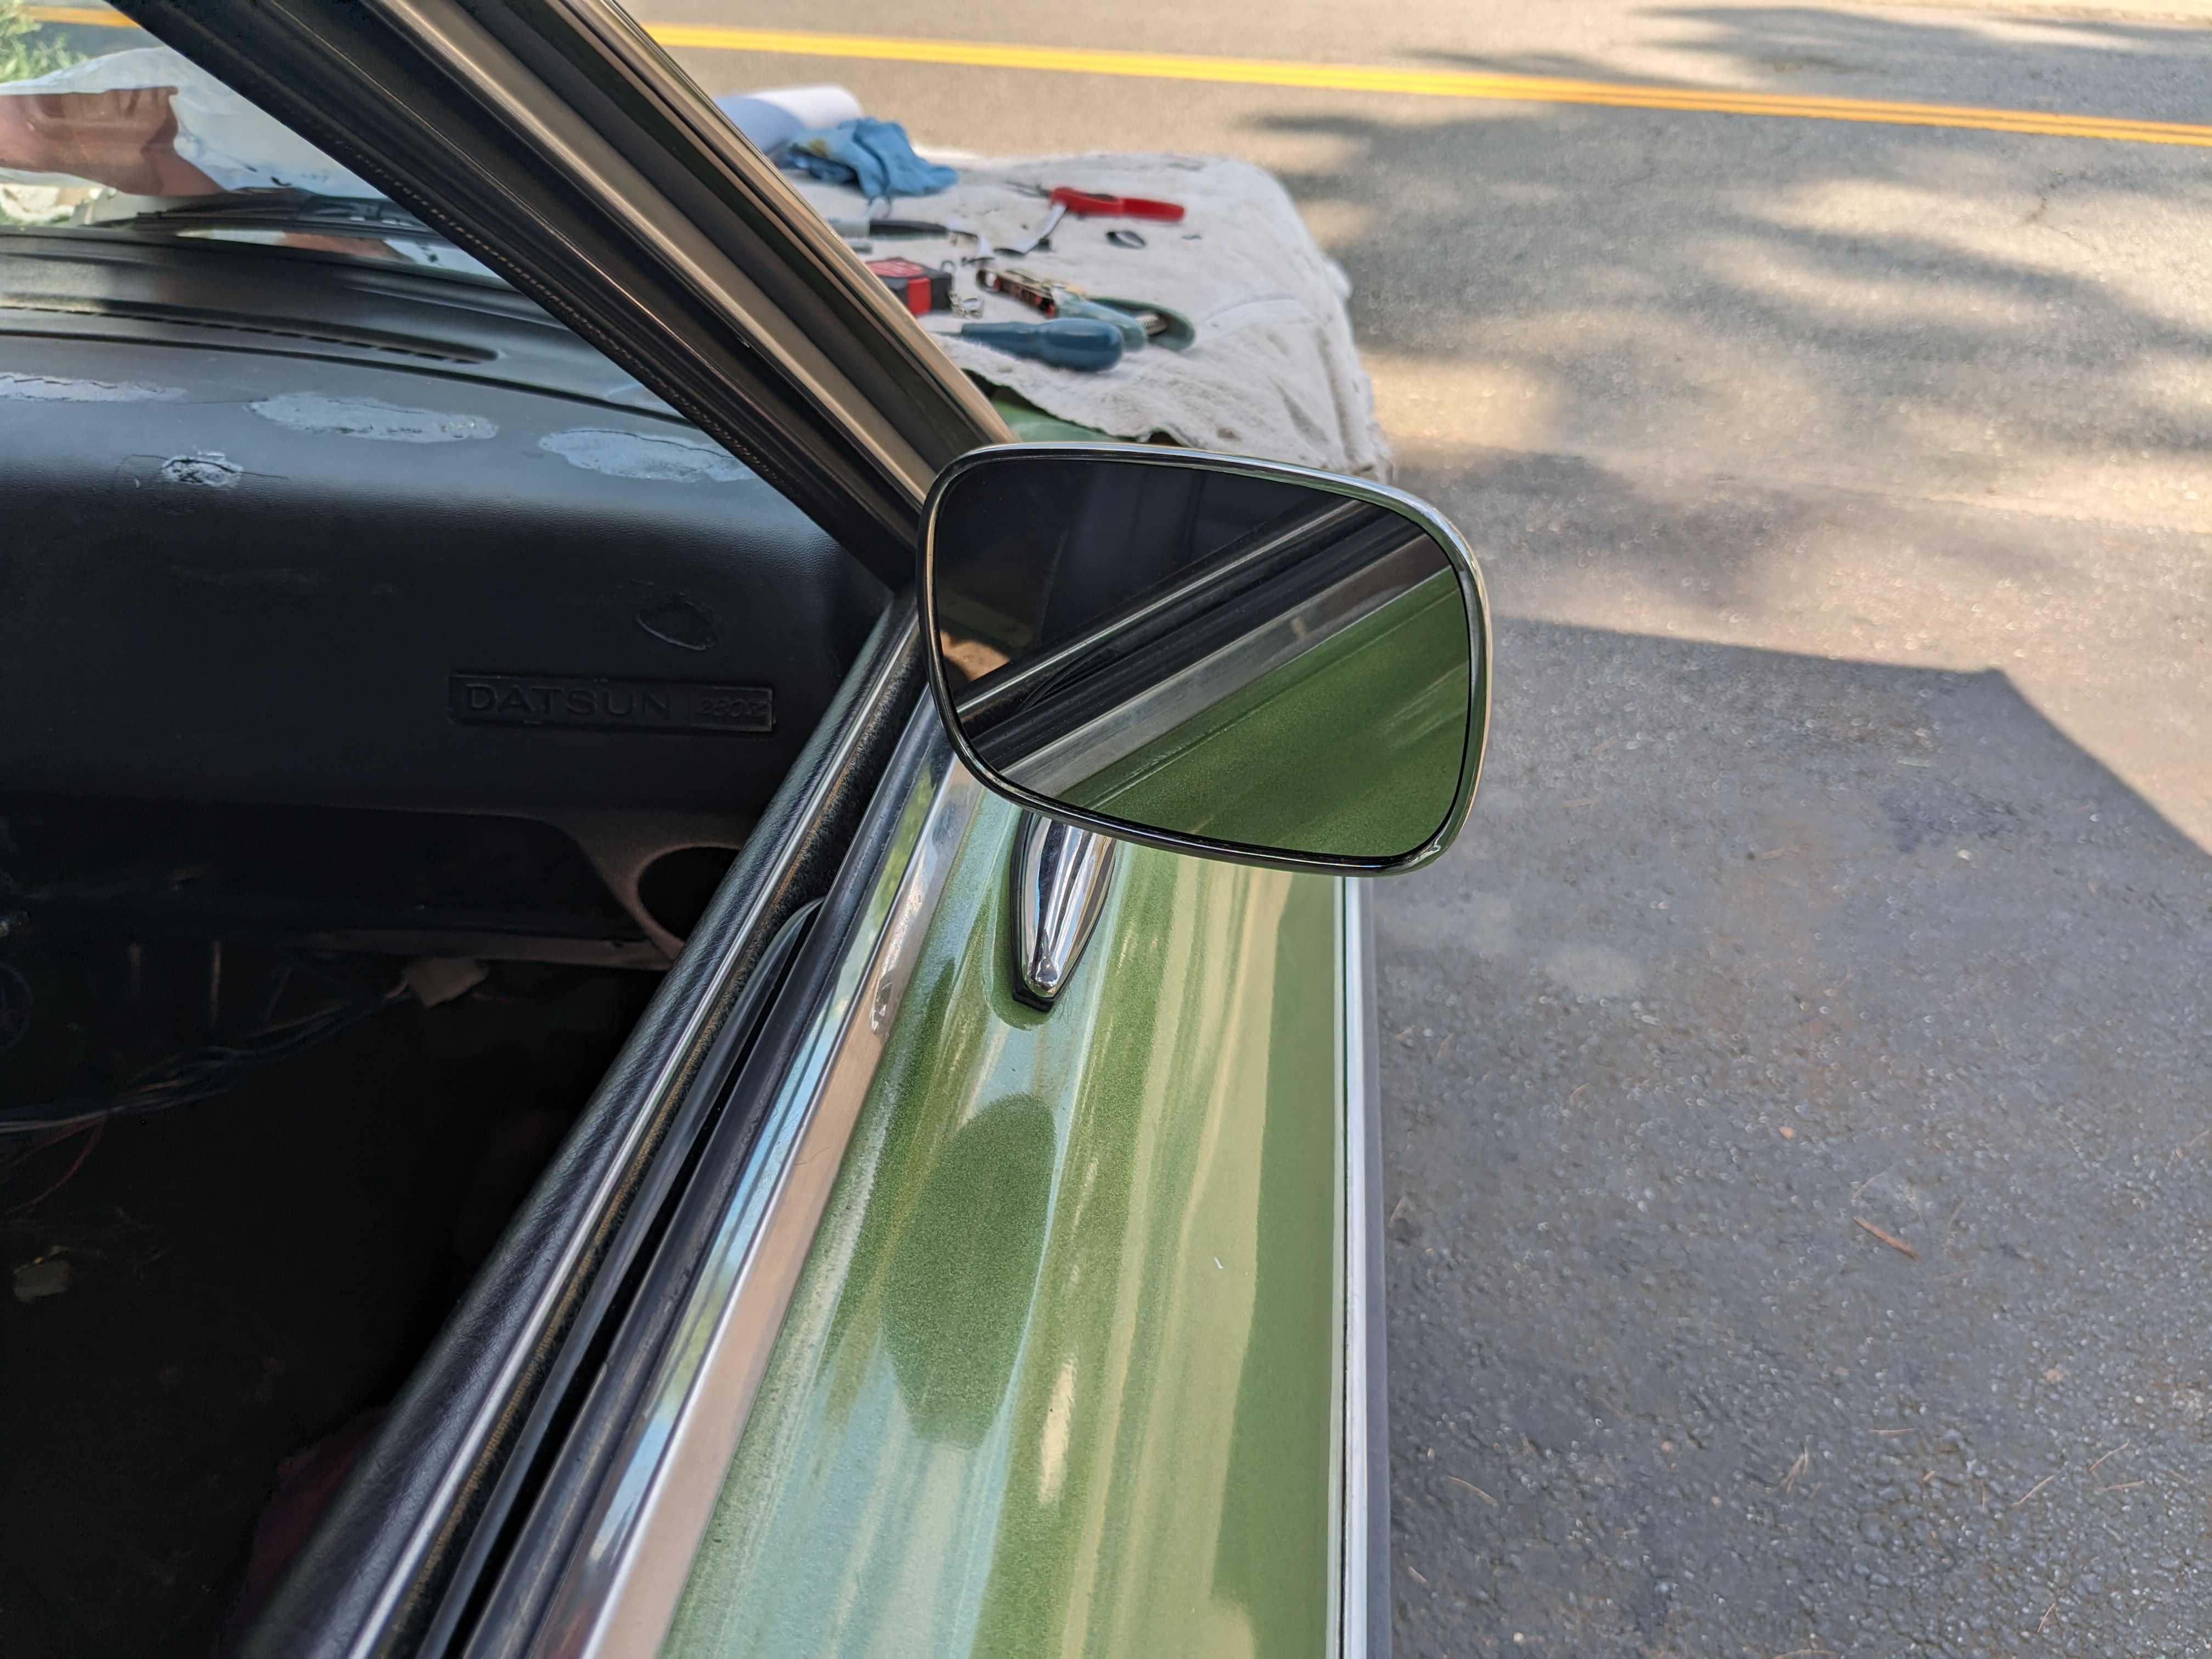
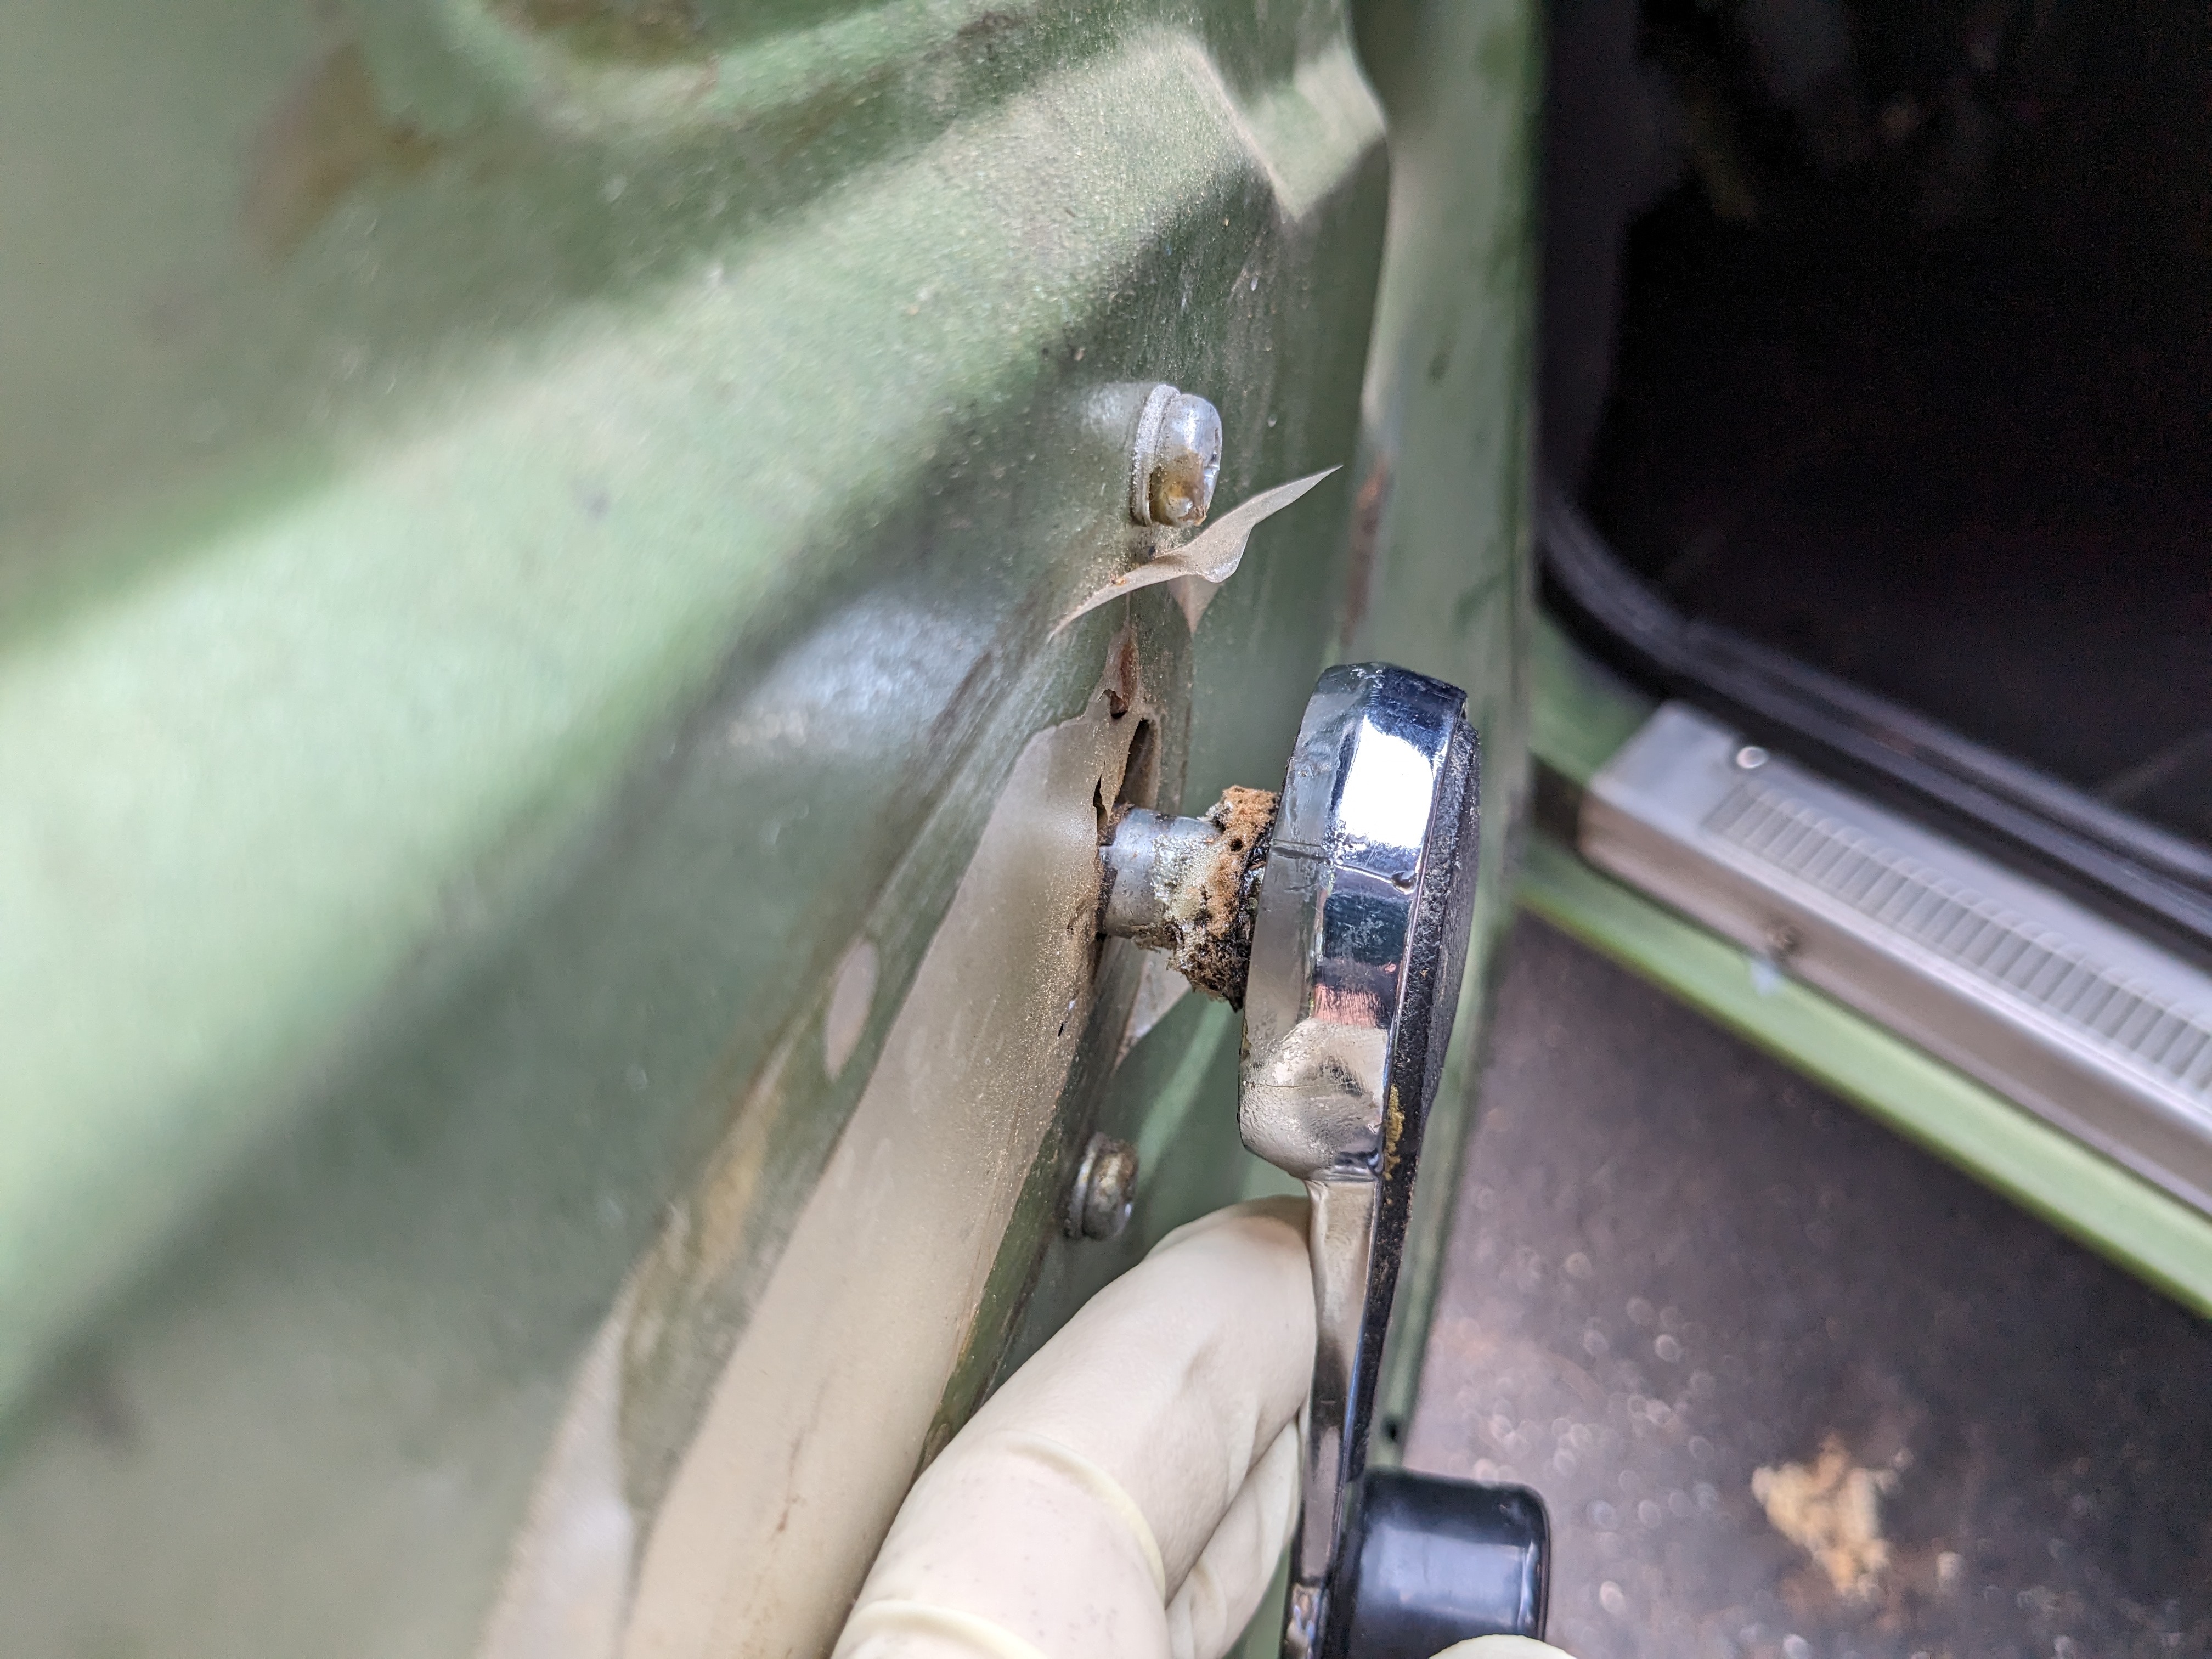
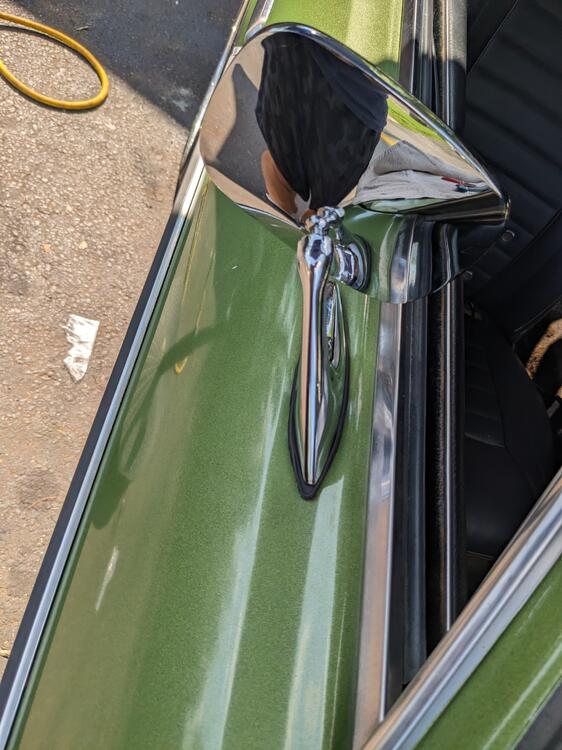
Installed the passenger mirror today Installed M5 rivnuts after this mount plate installed, M5 machine screws Much better!


-
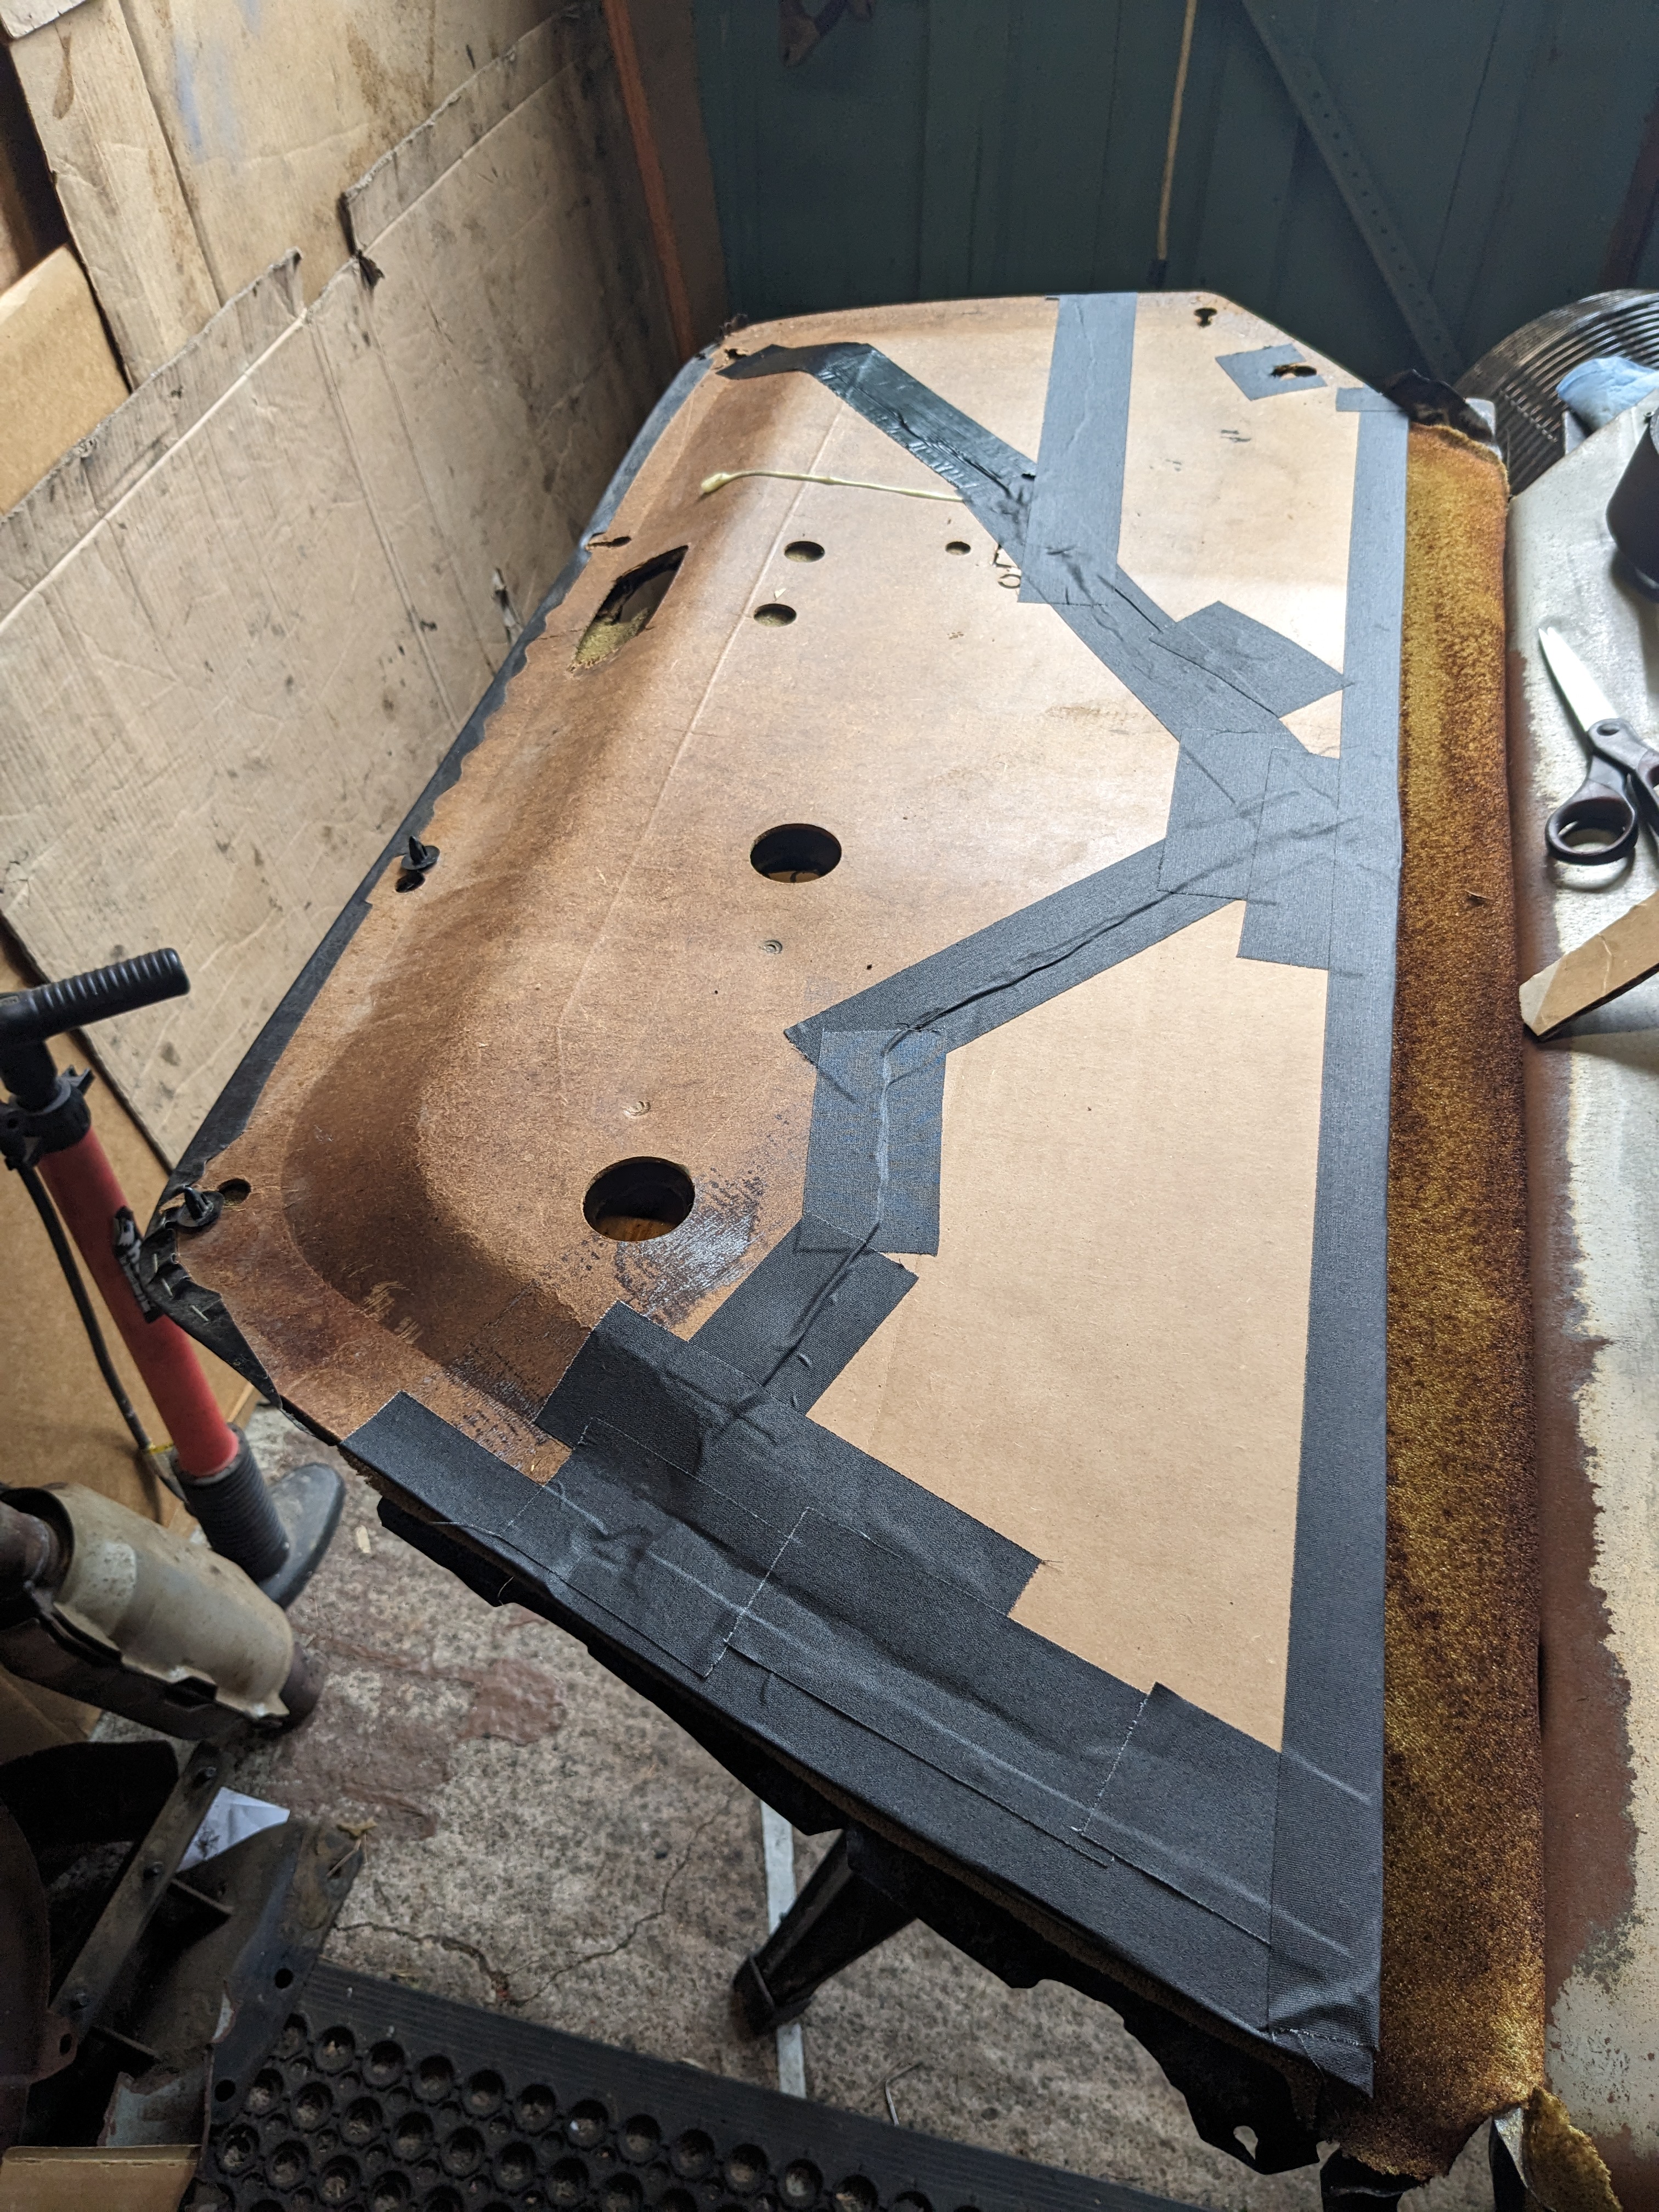
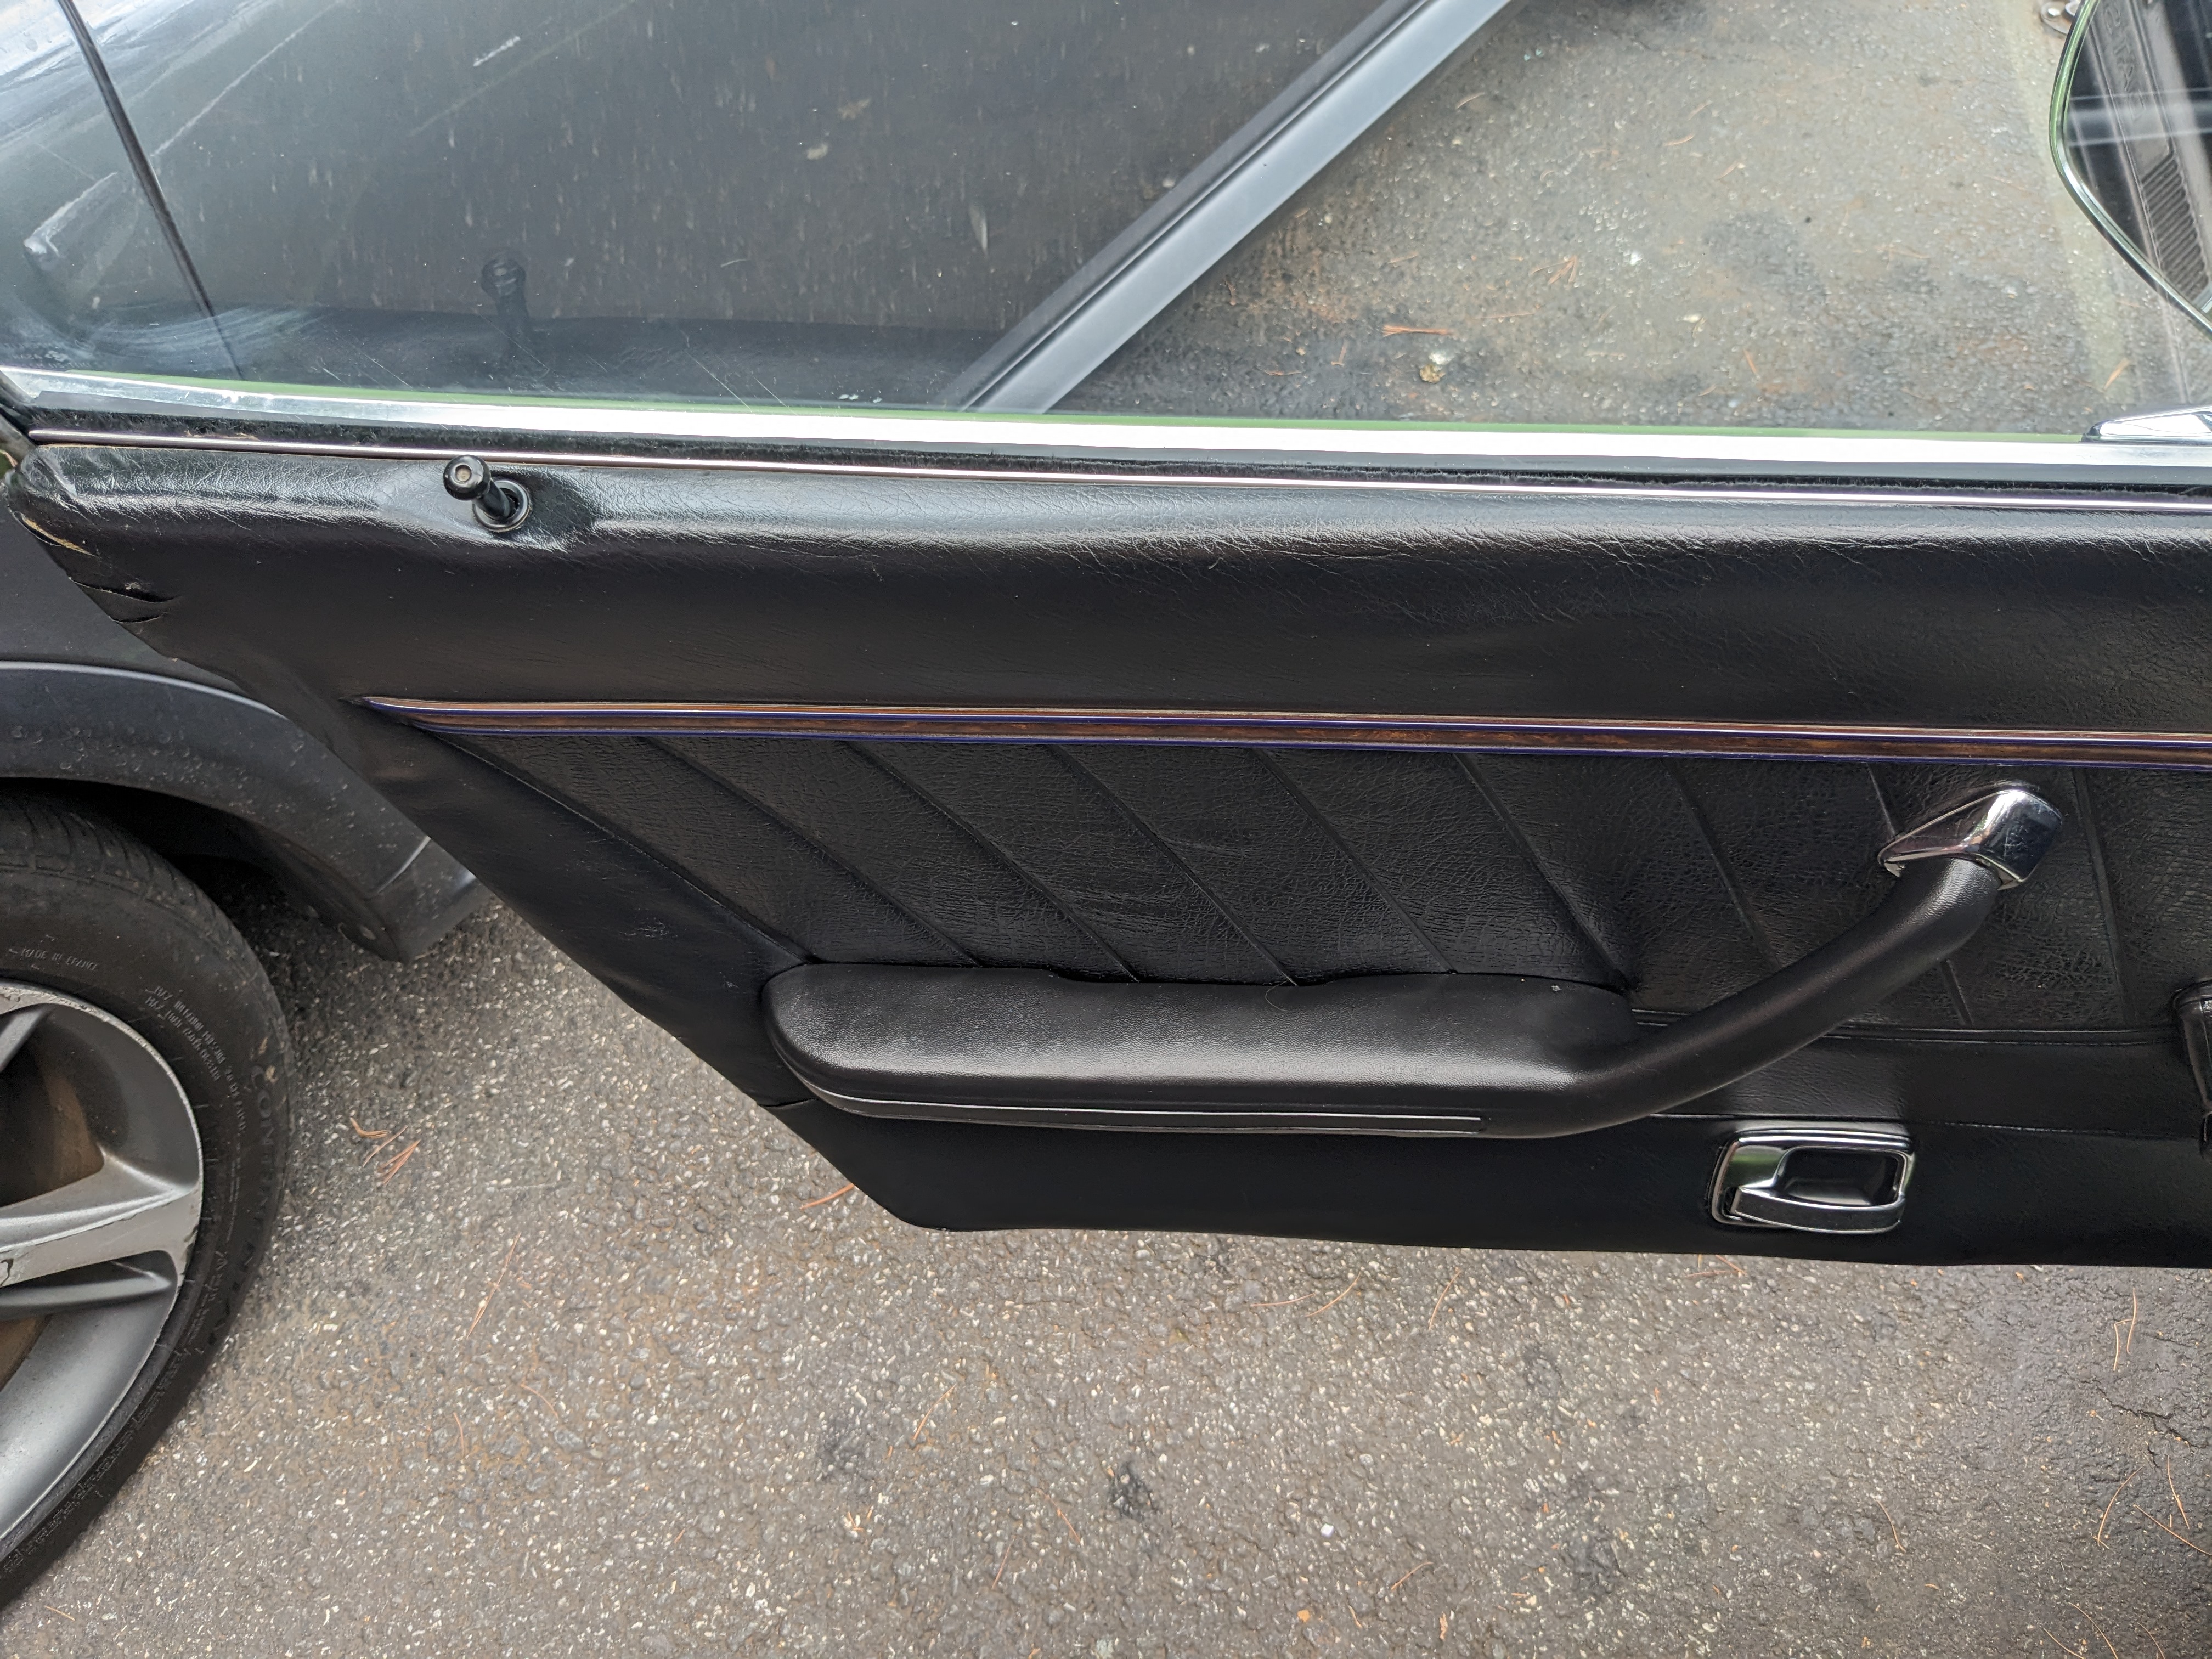
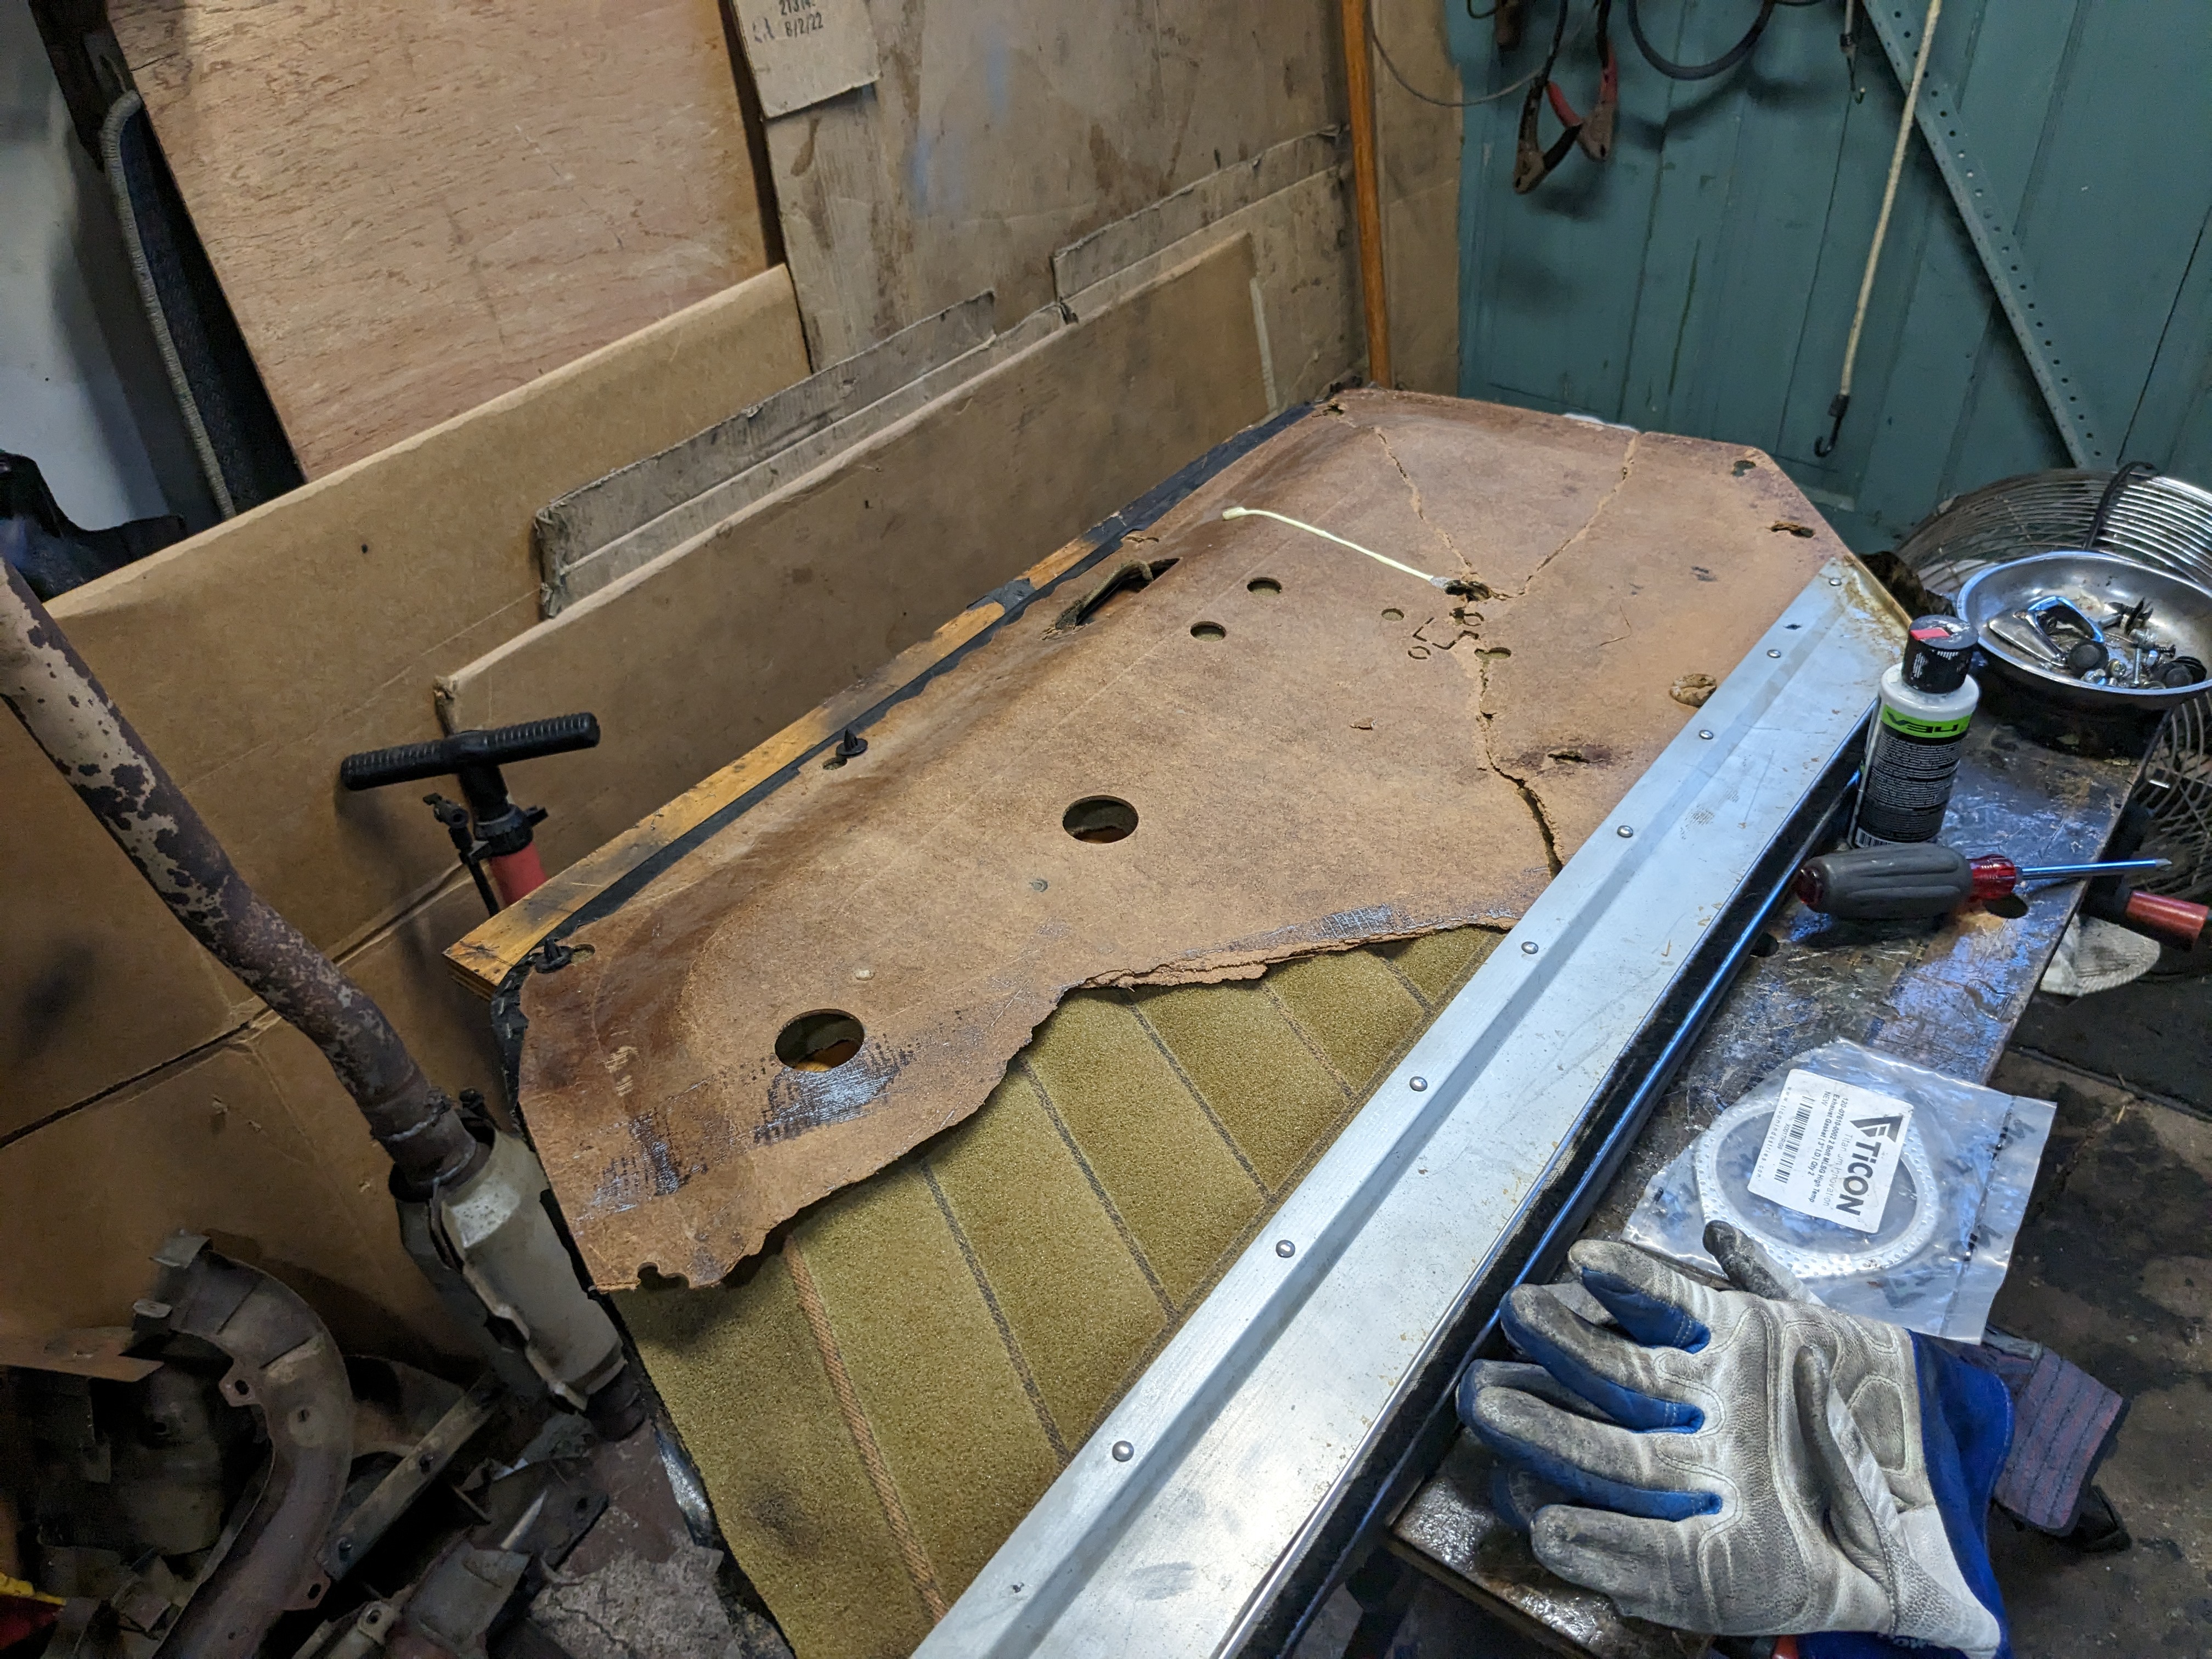
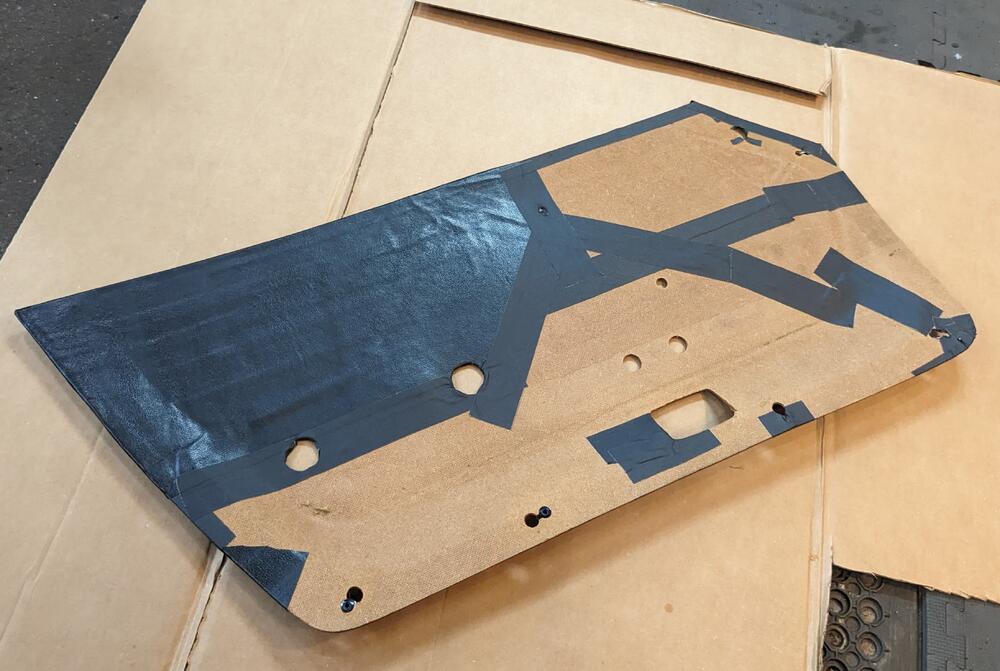
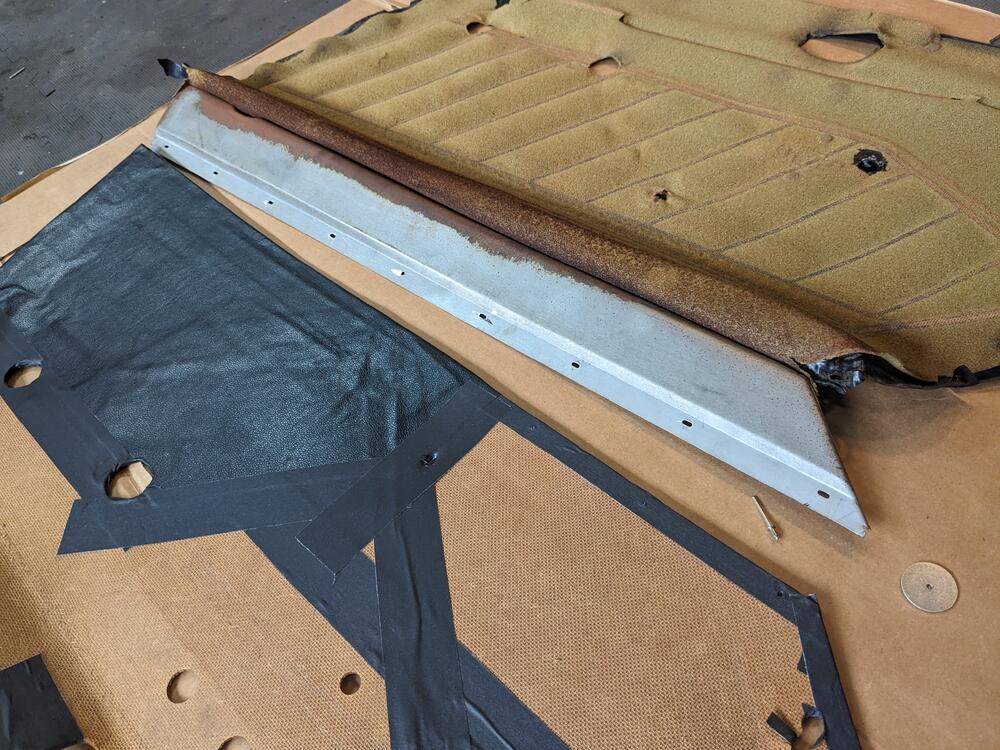
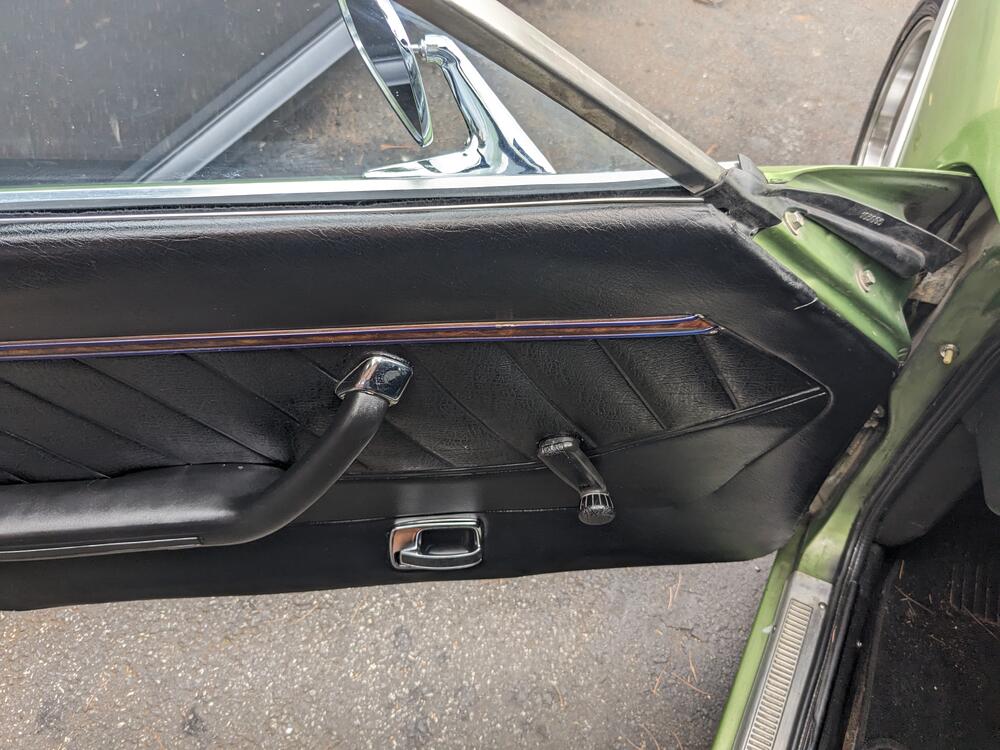
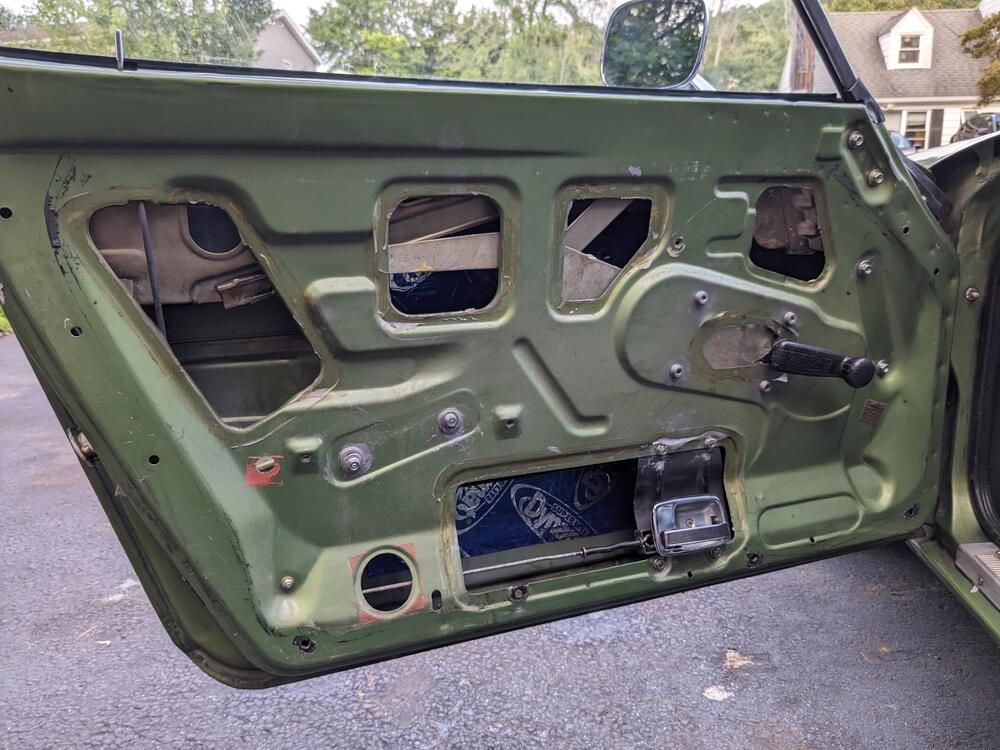
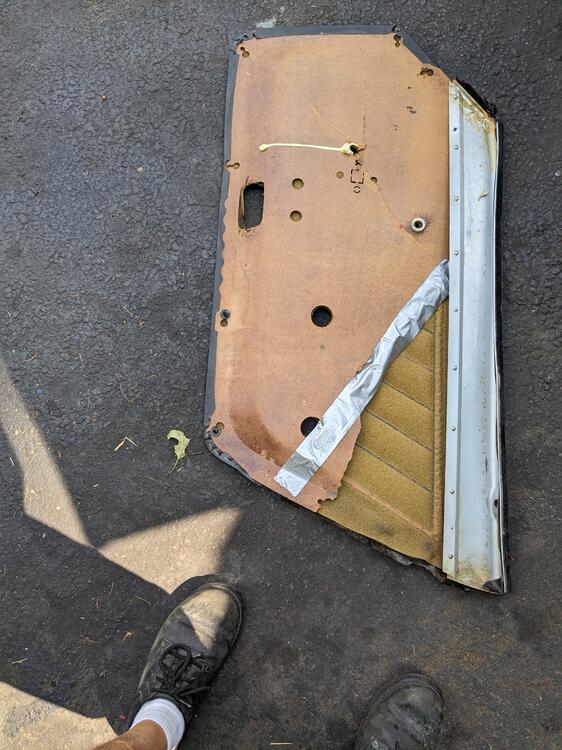
Thunderstorms on & off today, so not much time outside. I worked on repairing the door card as best possible for the time being. Going to get new door cards when they become available. cardboard & gaffer's tape removed the original rivets riveted in place, 3M super trim adhesive to re-bond the foam to the card edges done last. Back in the car. Armrest is a brown one I painted, the original was f'kd. Hard to photograph the damaged rear corner, the vinyl is all torn up here. They had duct taped the panel to the door skin 😞 Lol - I should have looked at the thread before I put the panel back on


-
It is - but there is no obvious way to attach it, and since mine are gone I have no frame of reference
-
Yeah - I assume the monkeys that did the "repairs" to the mechanisms must have literally ripped it off the door.
-
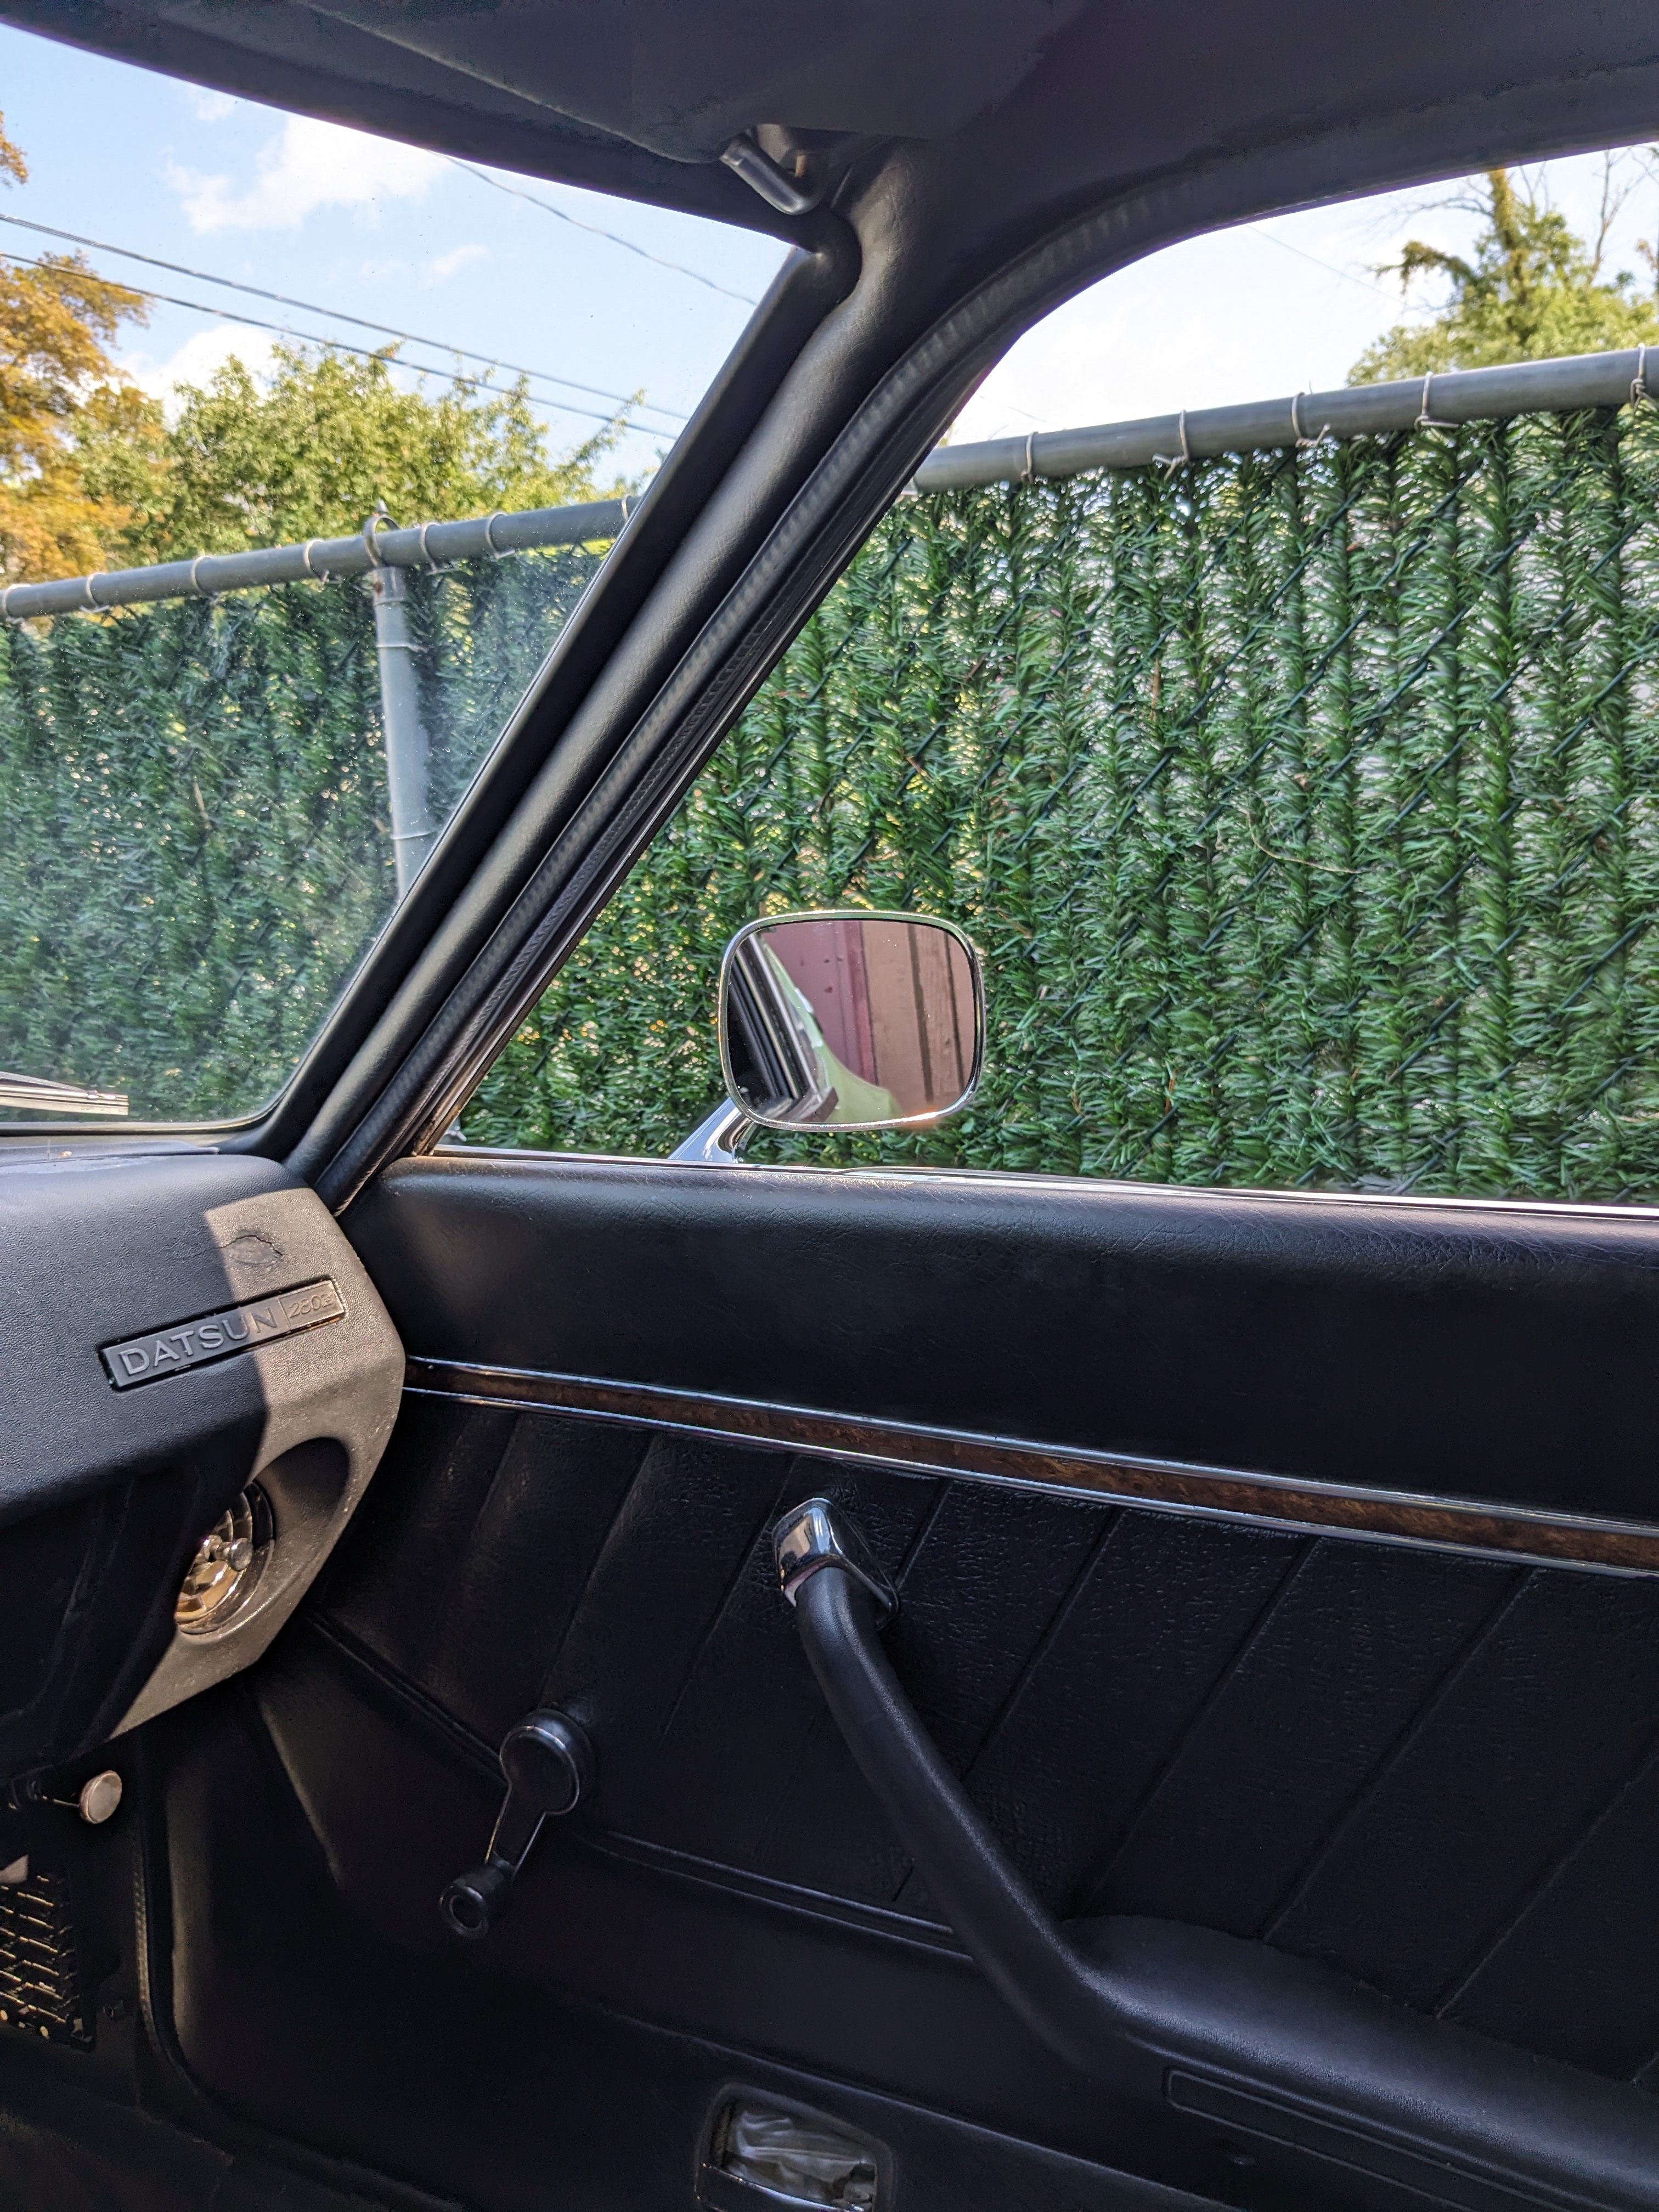
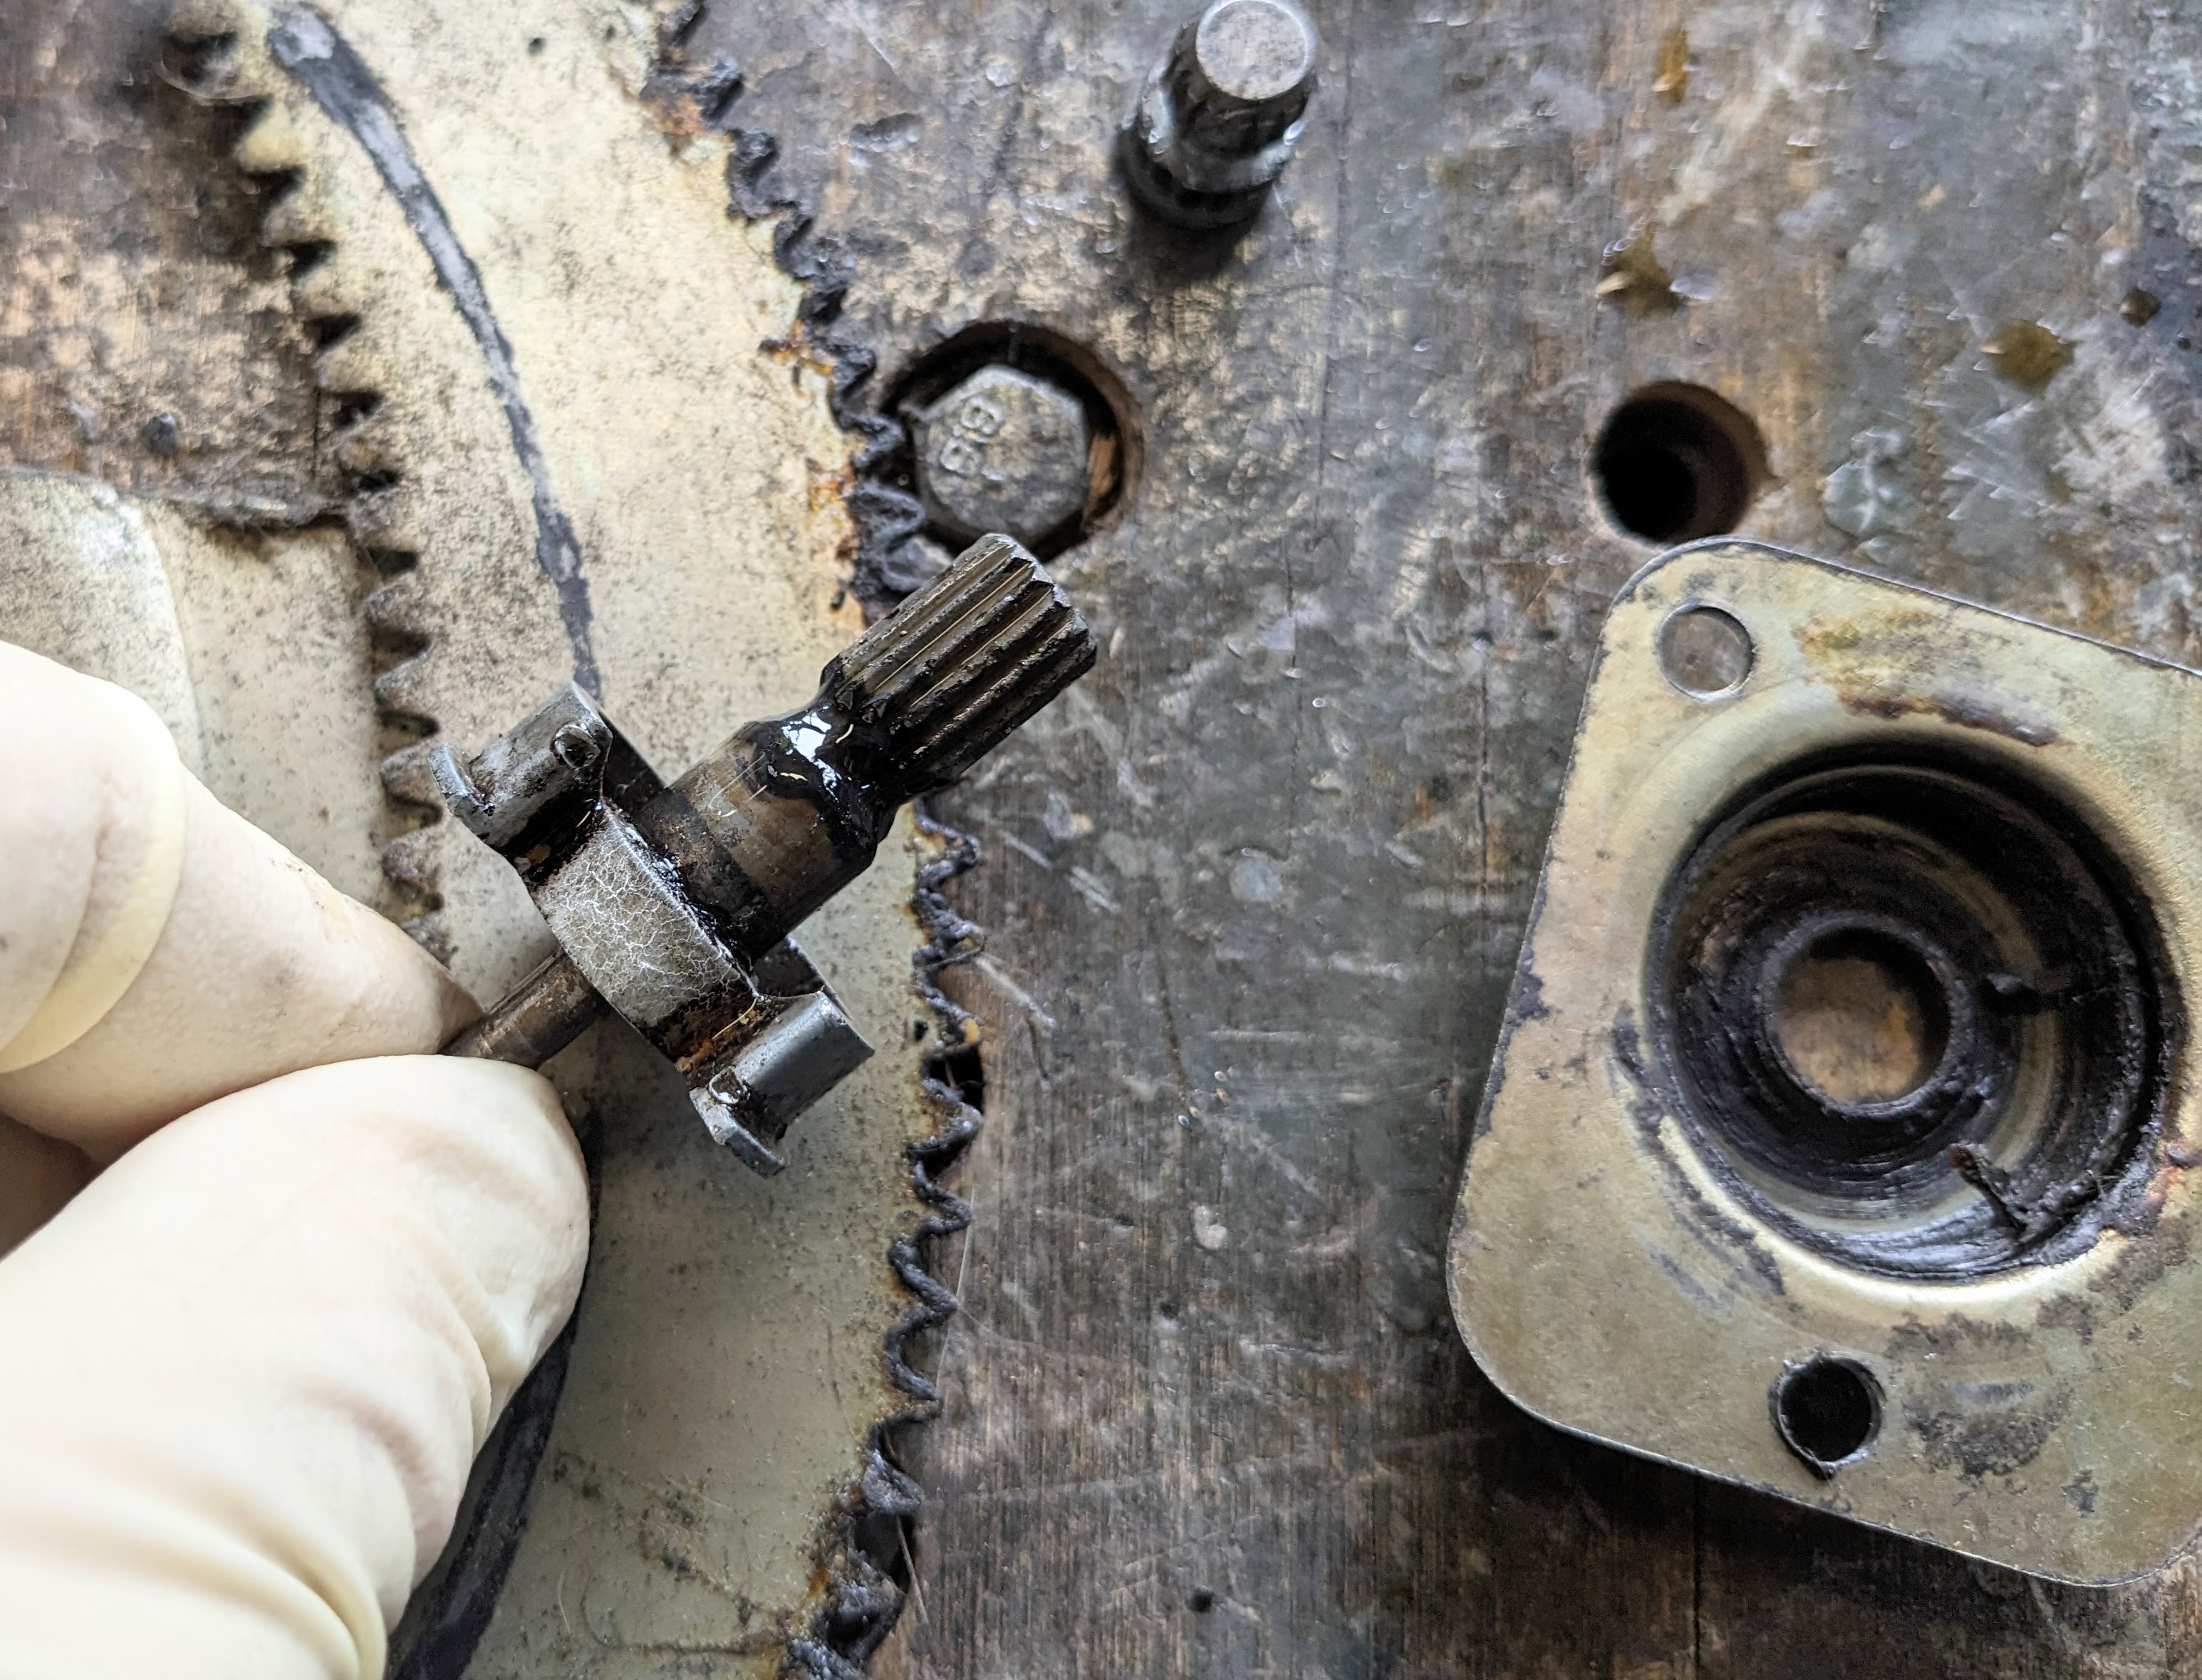
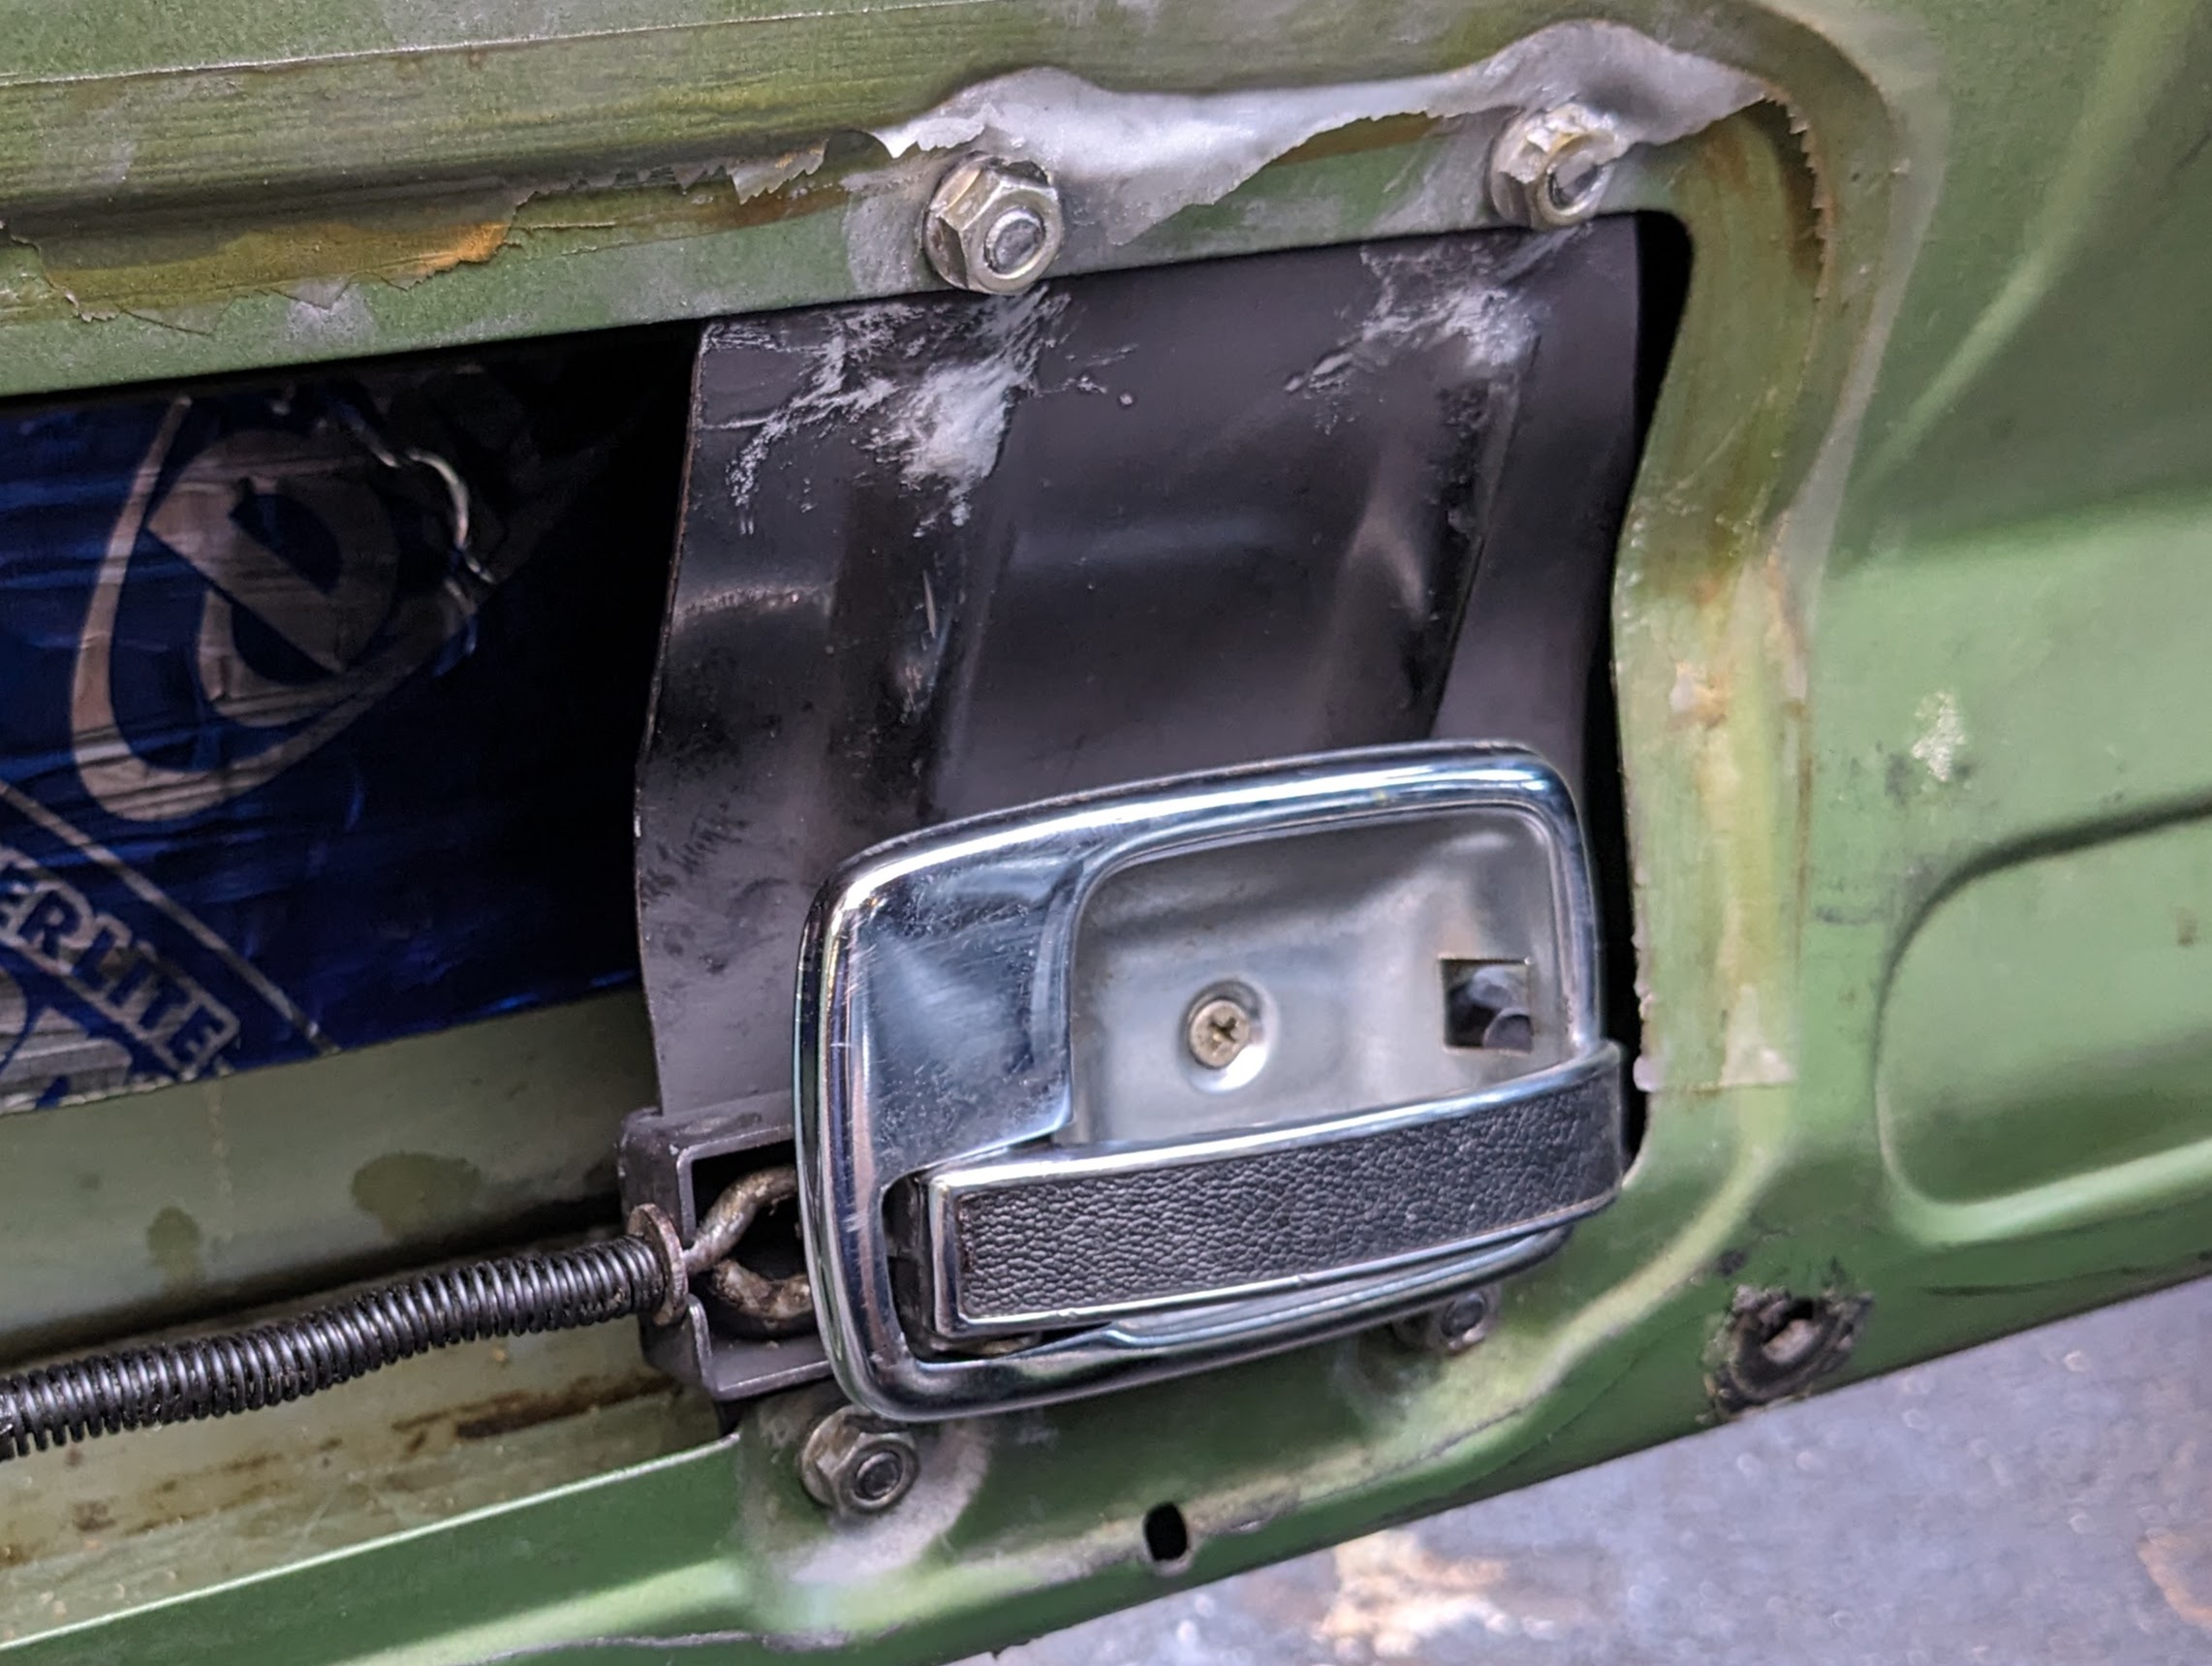
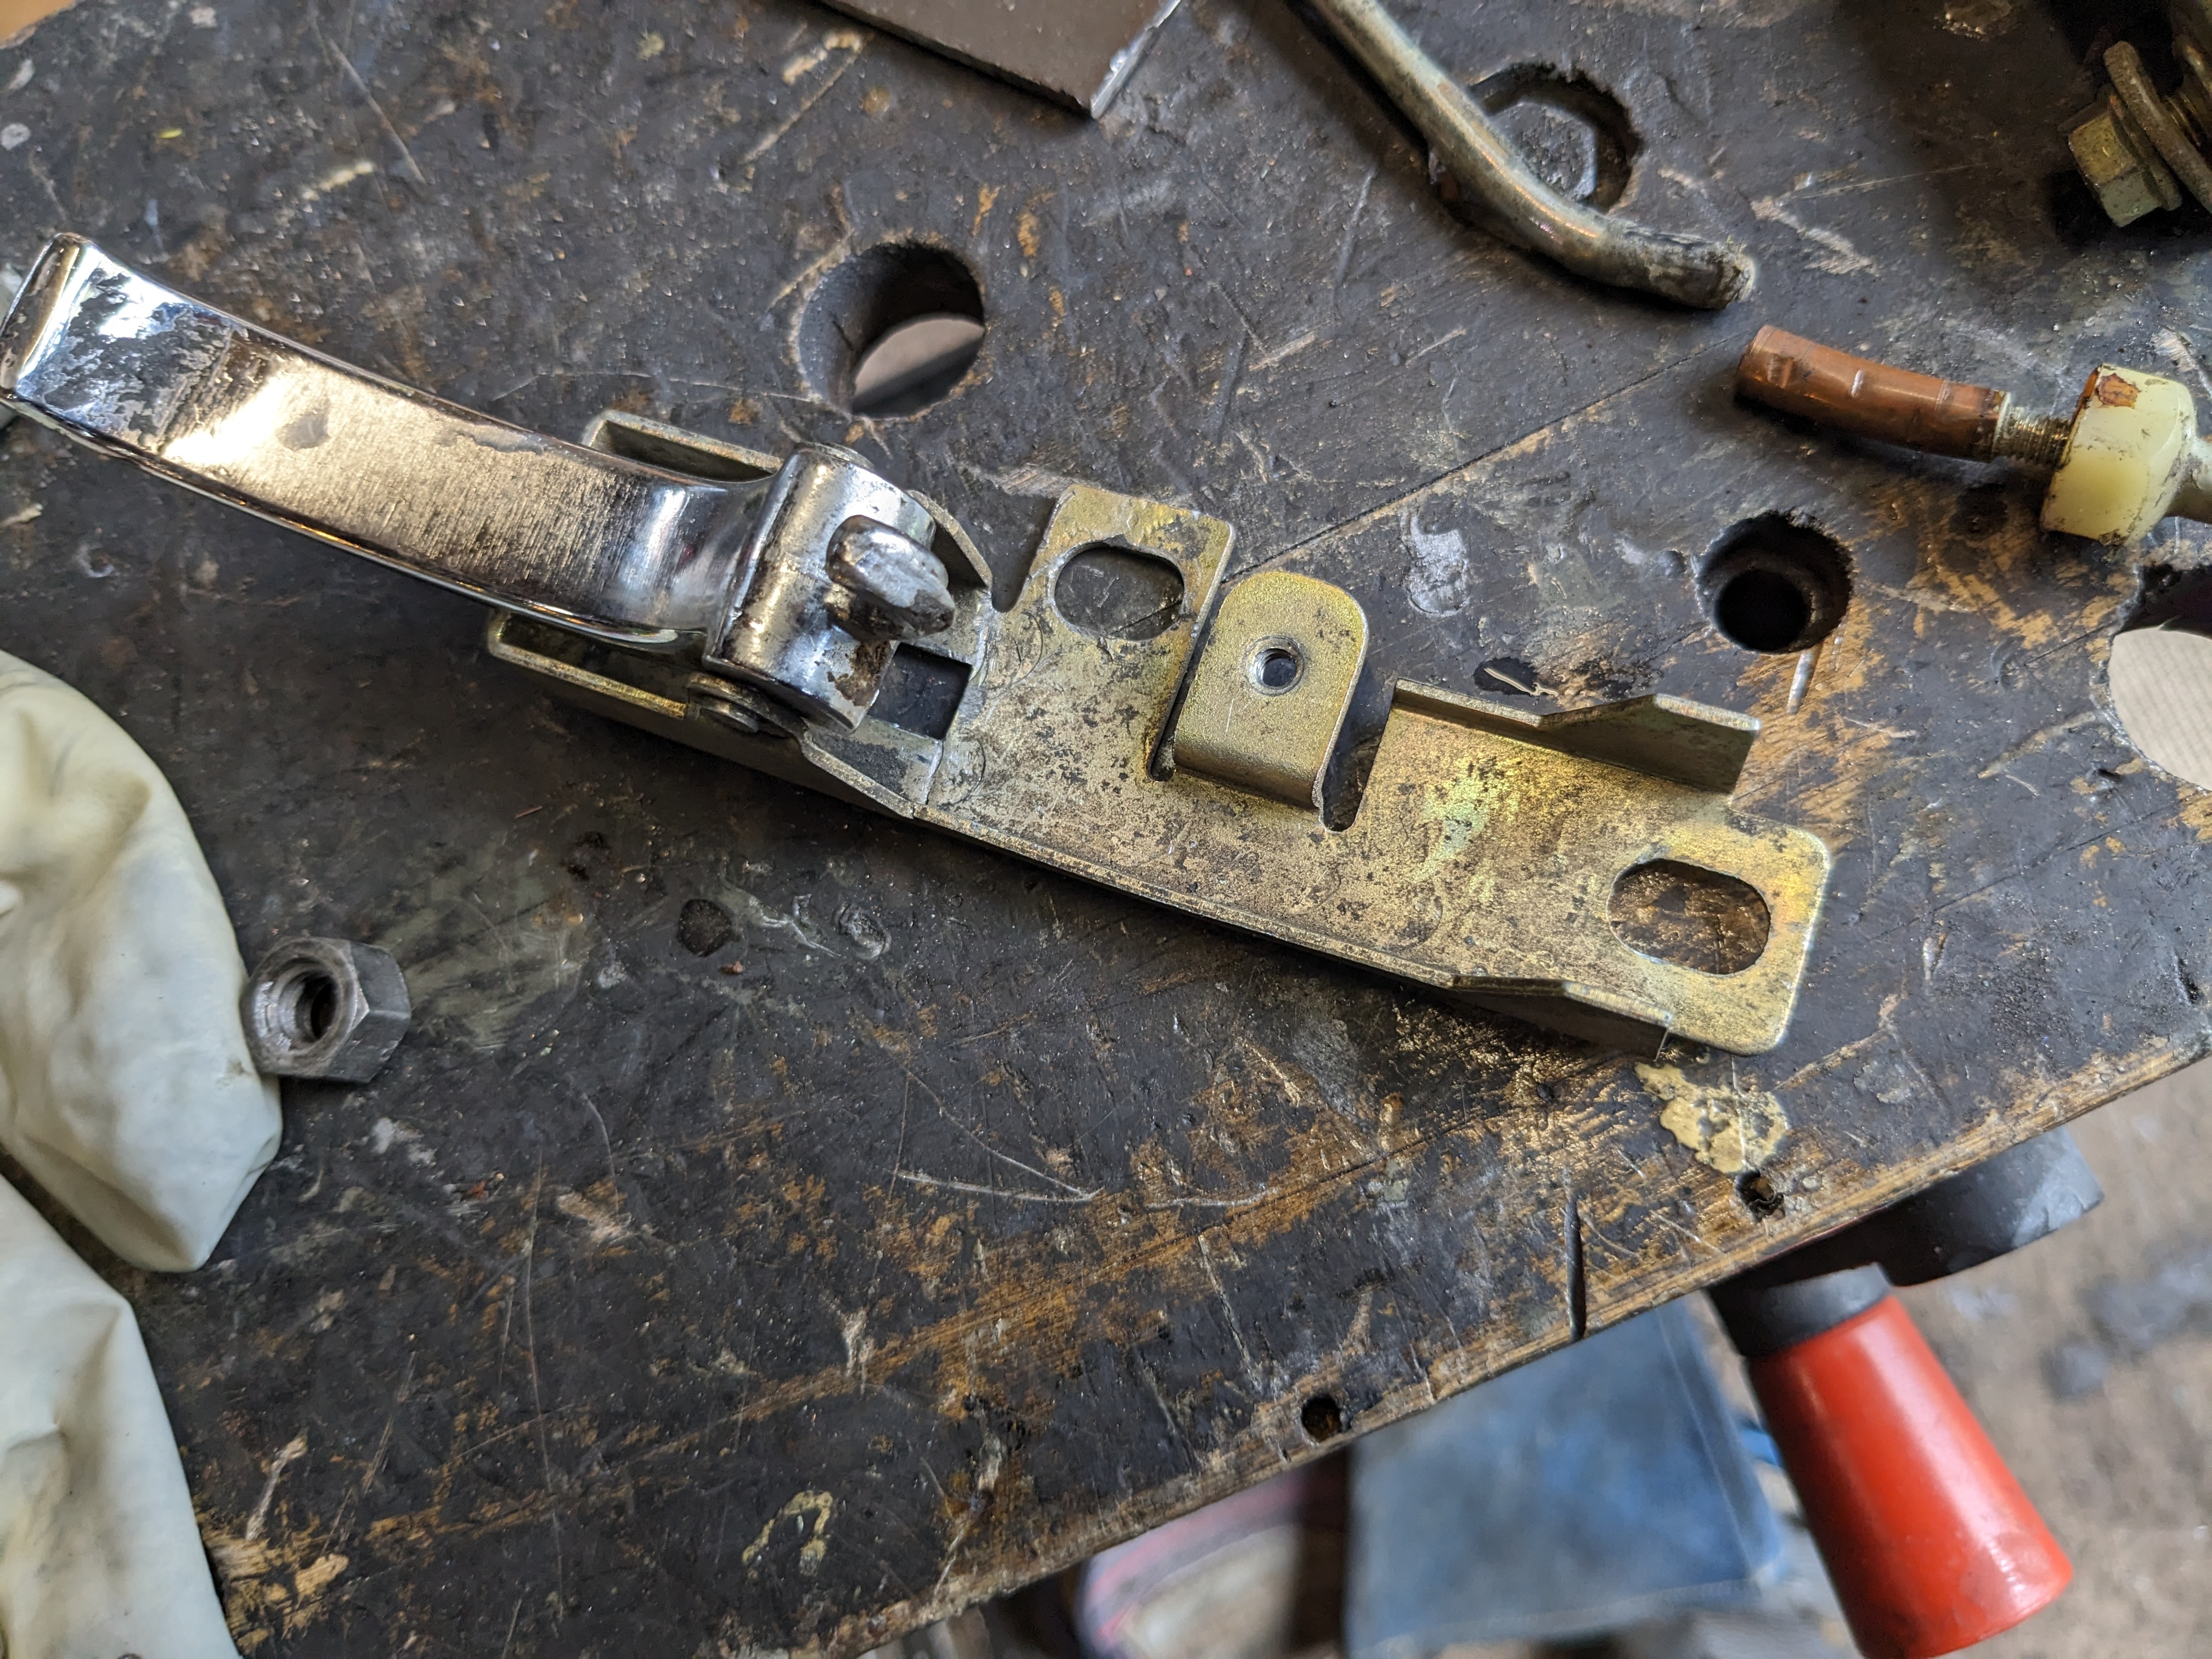
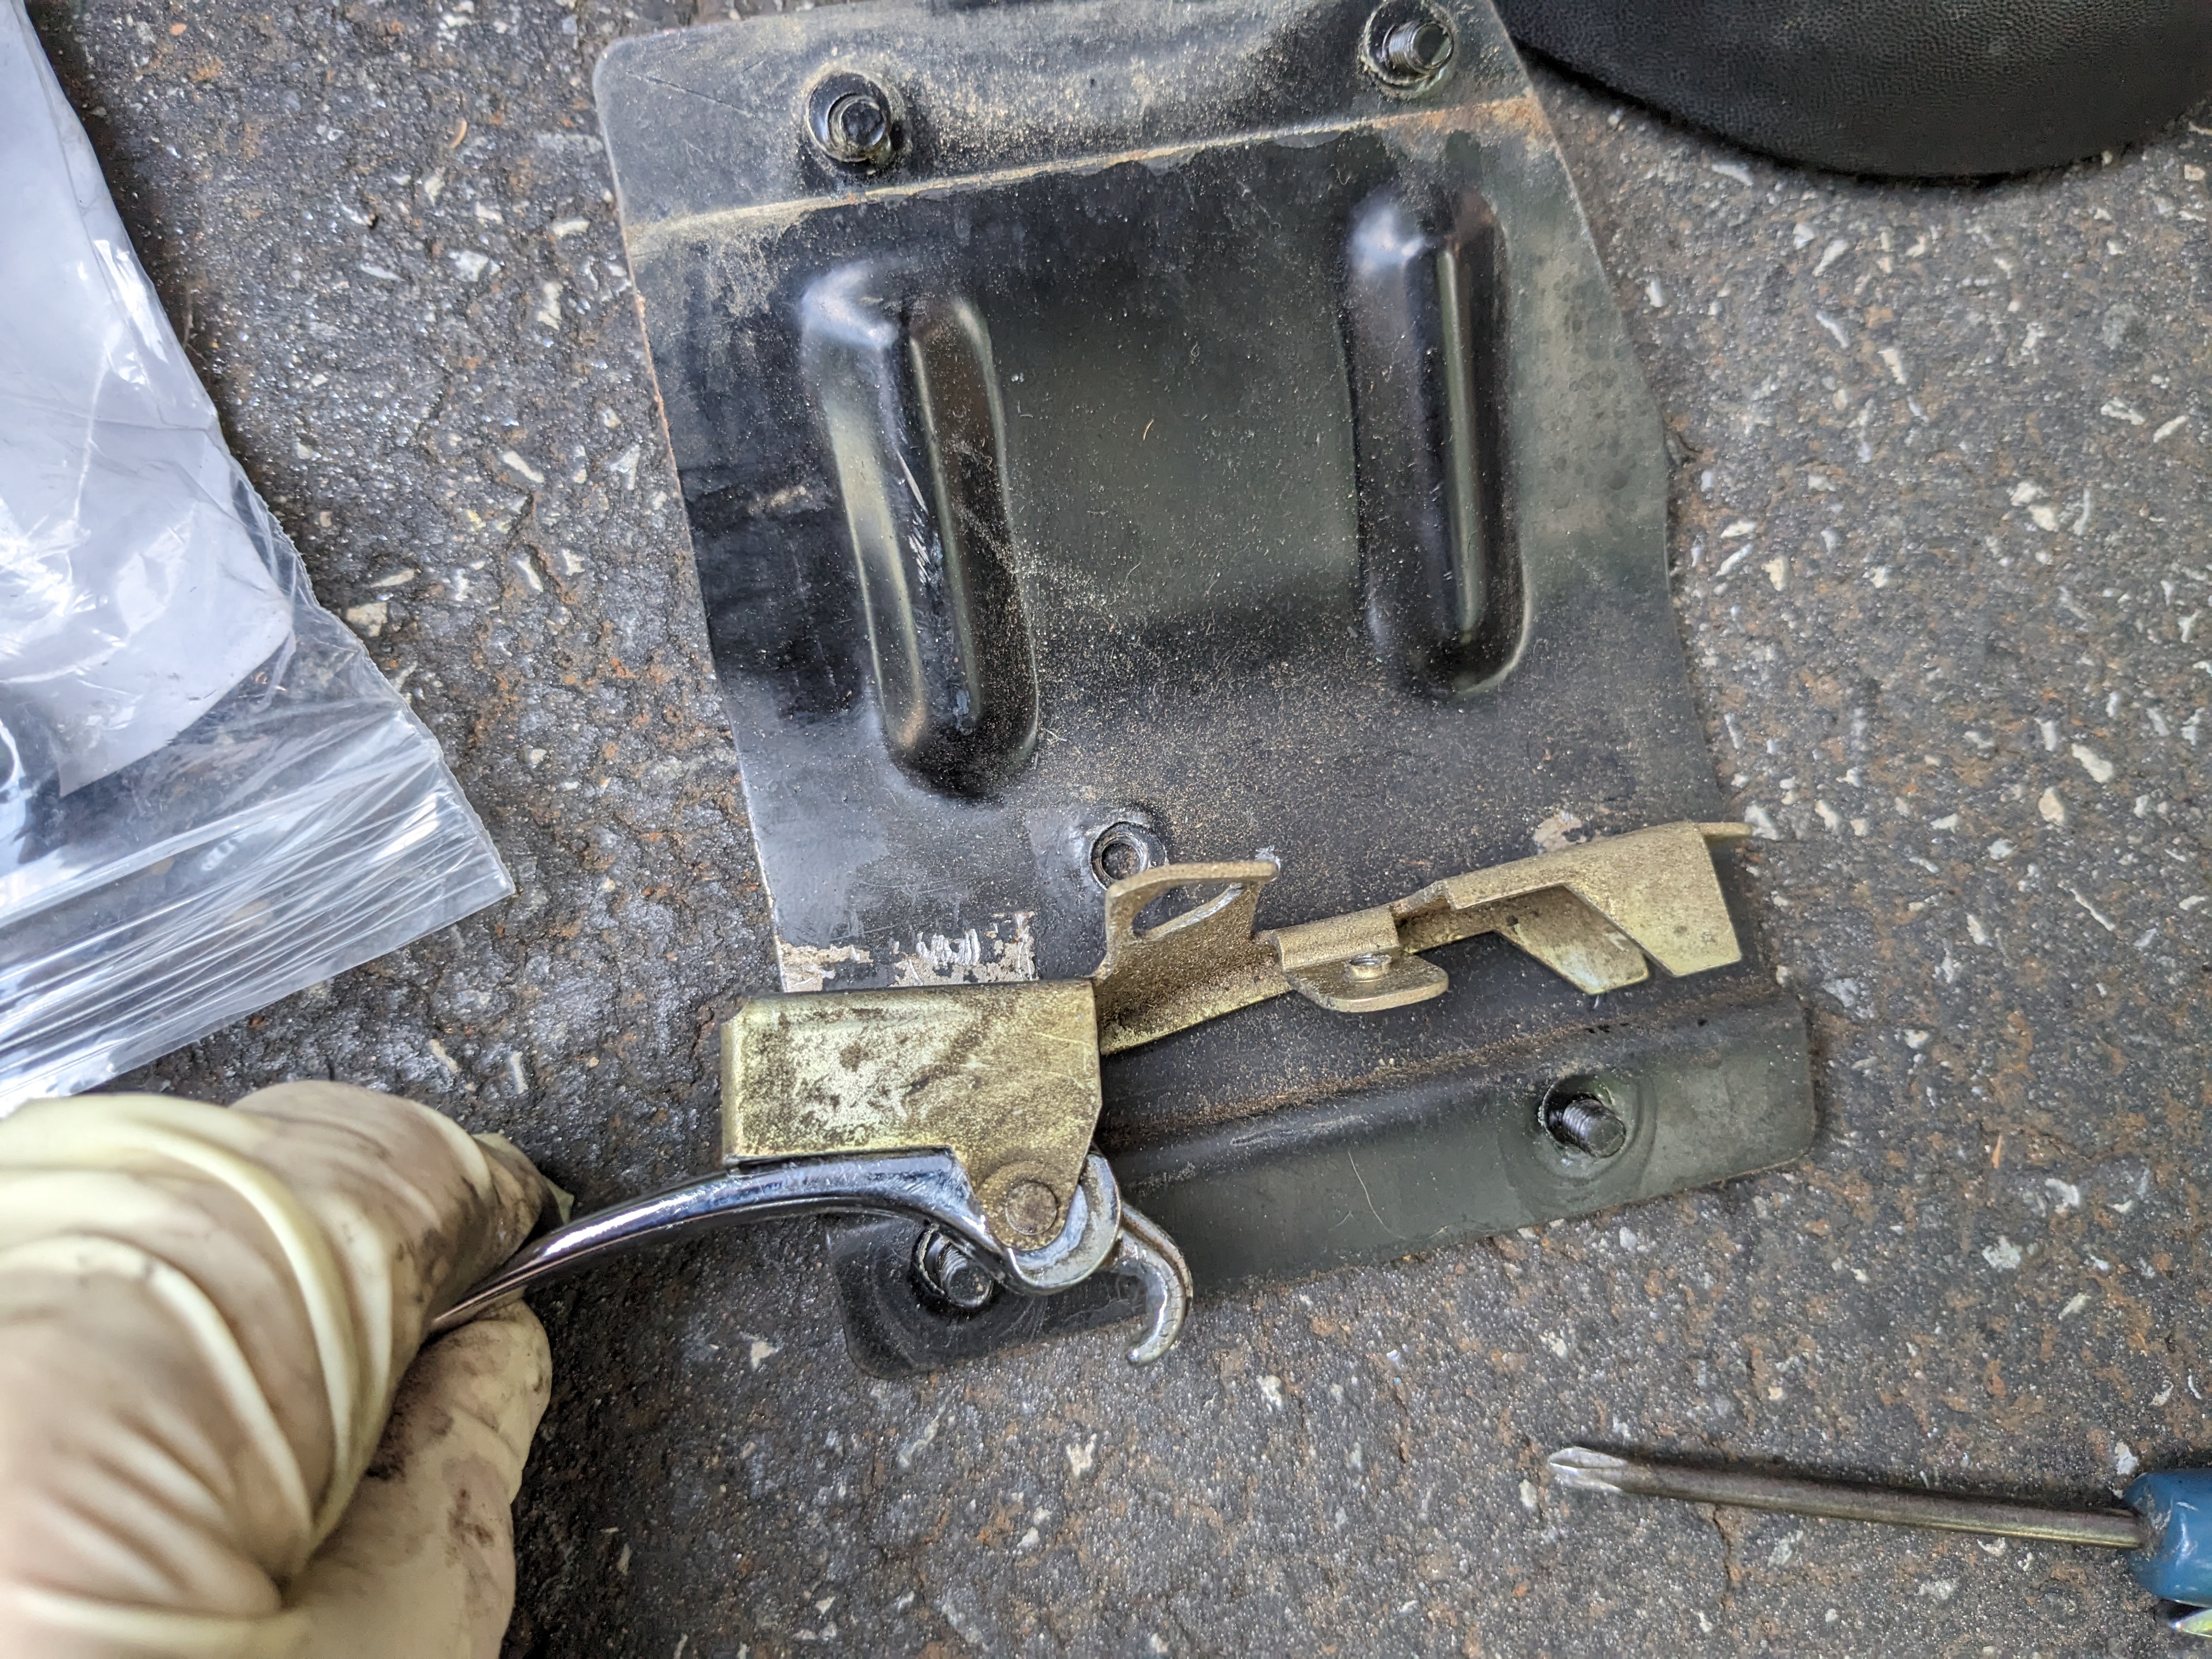
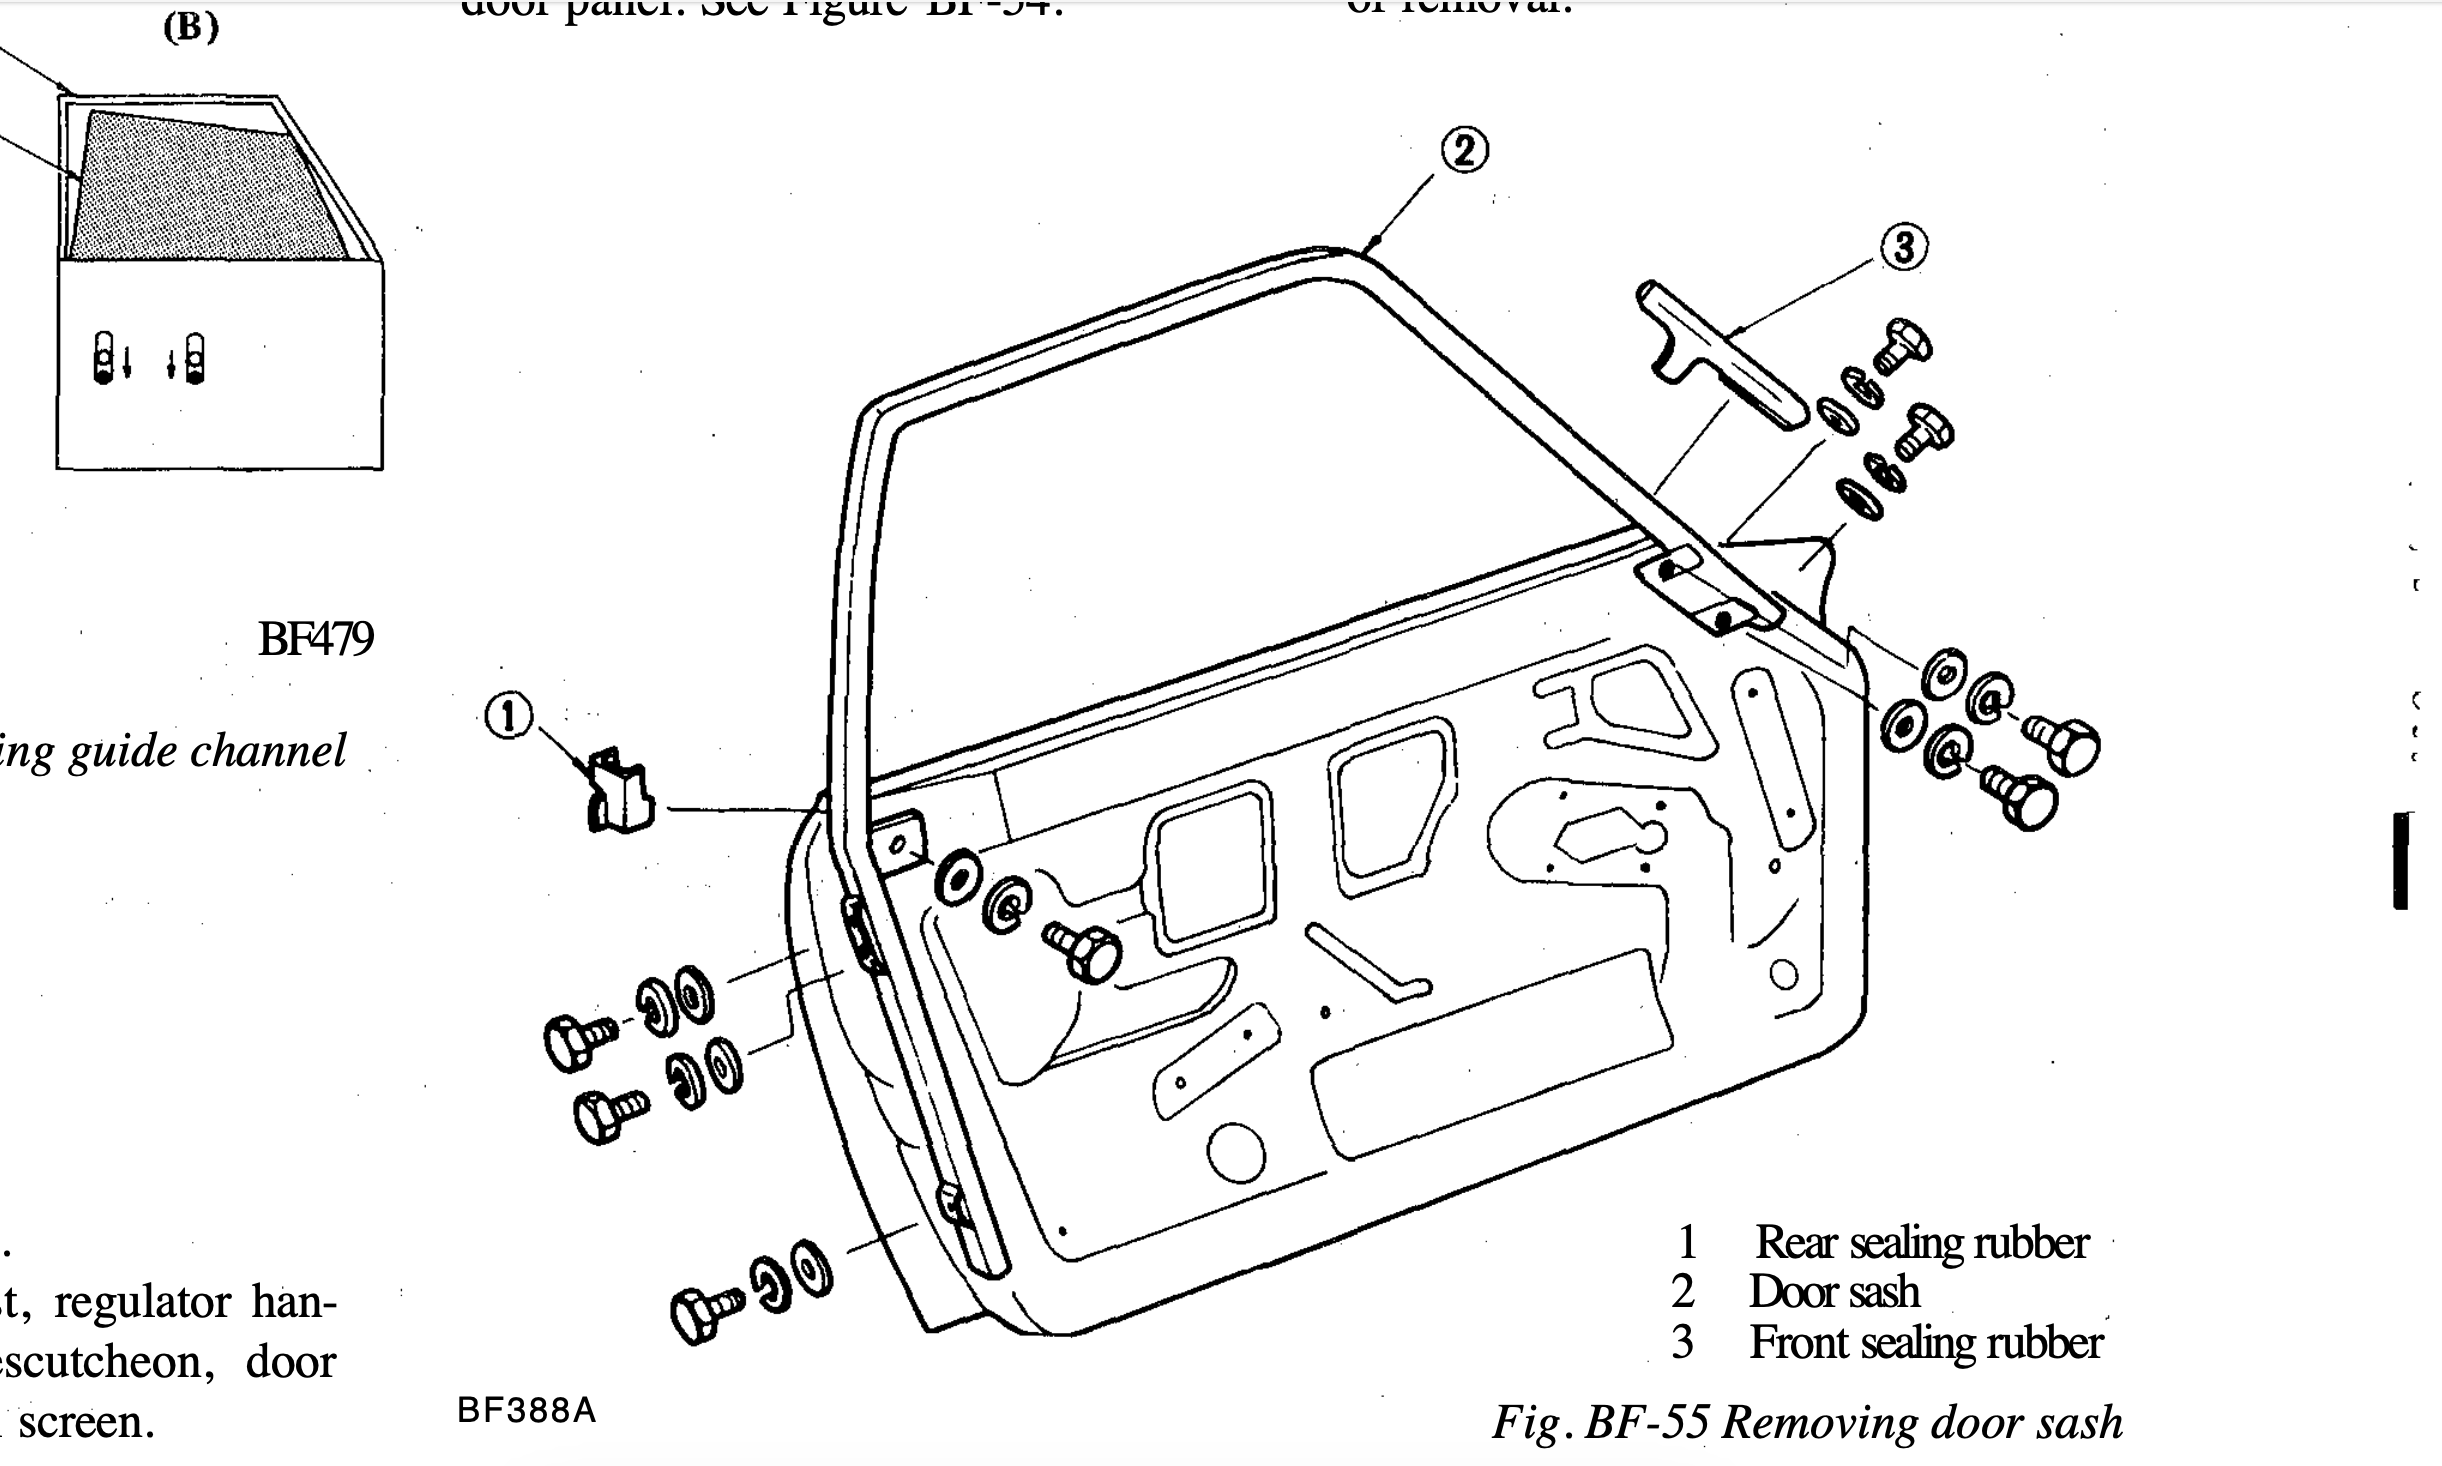
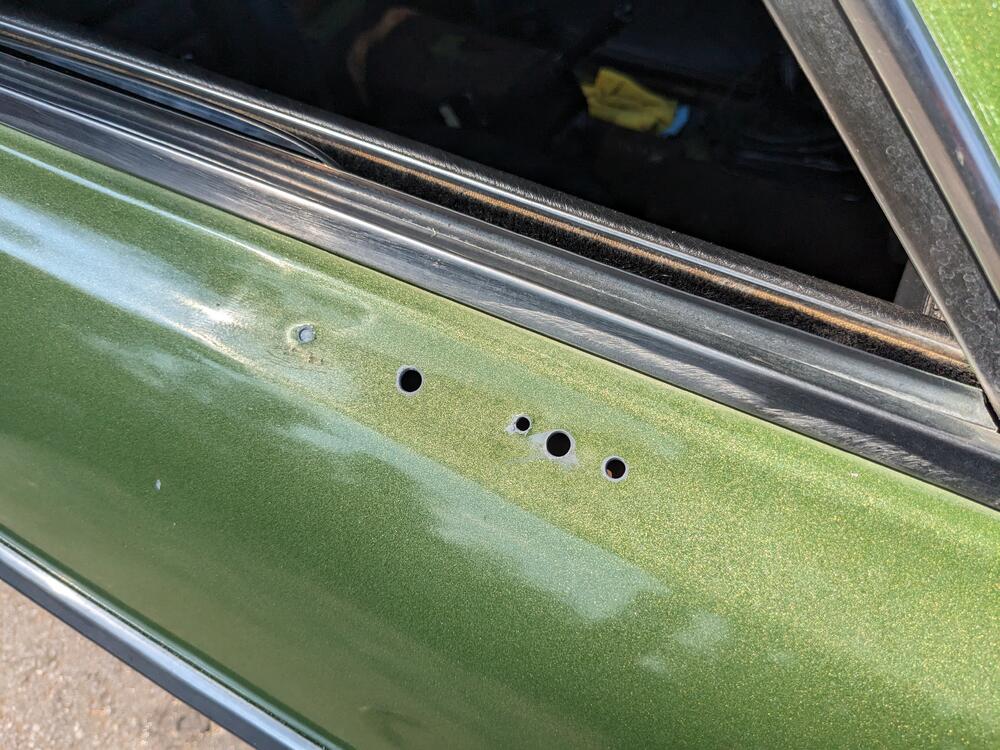
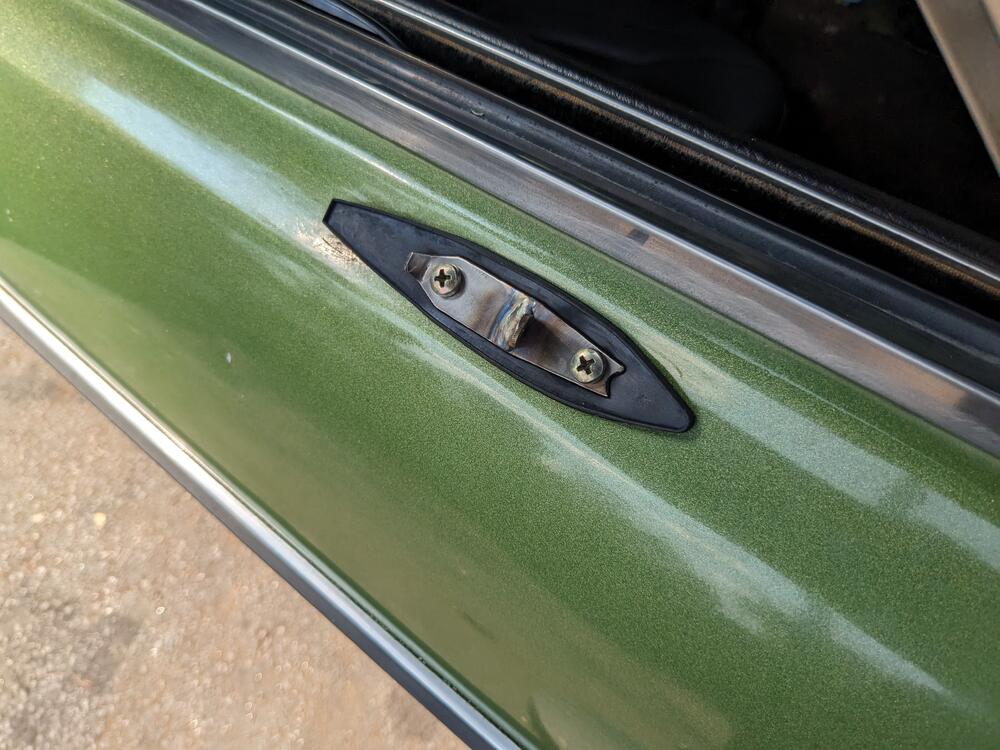
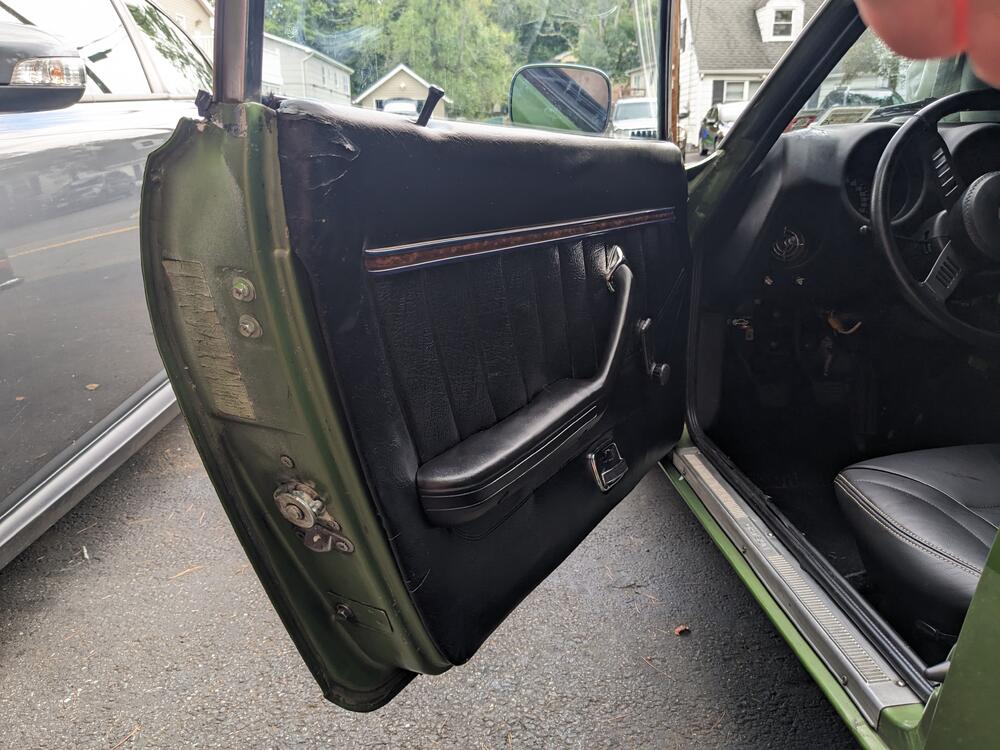
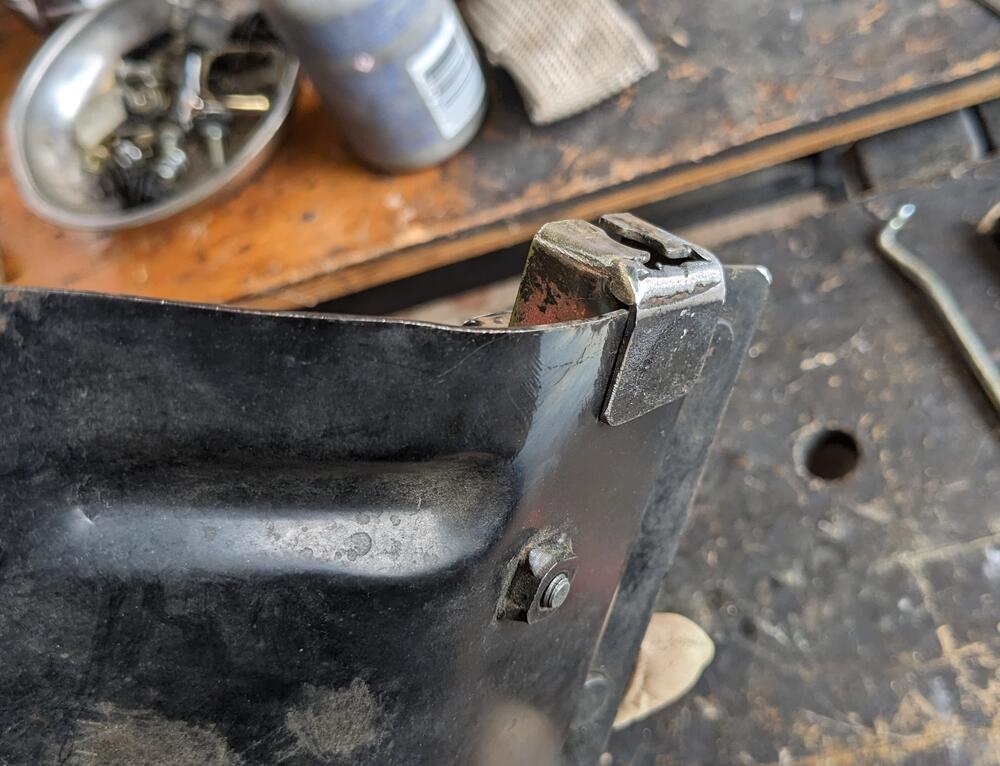
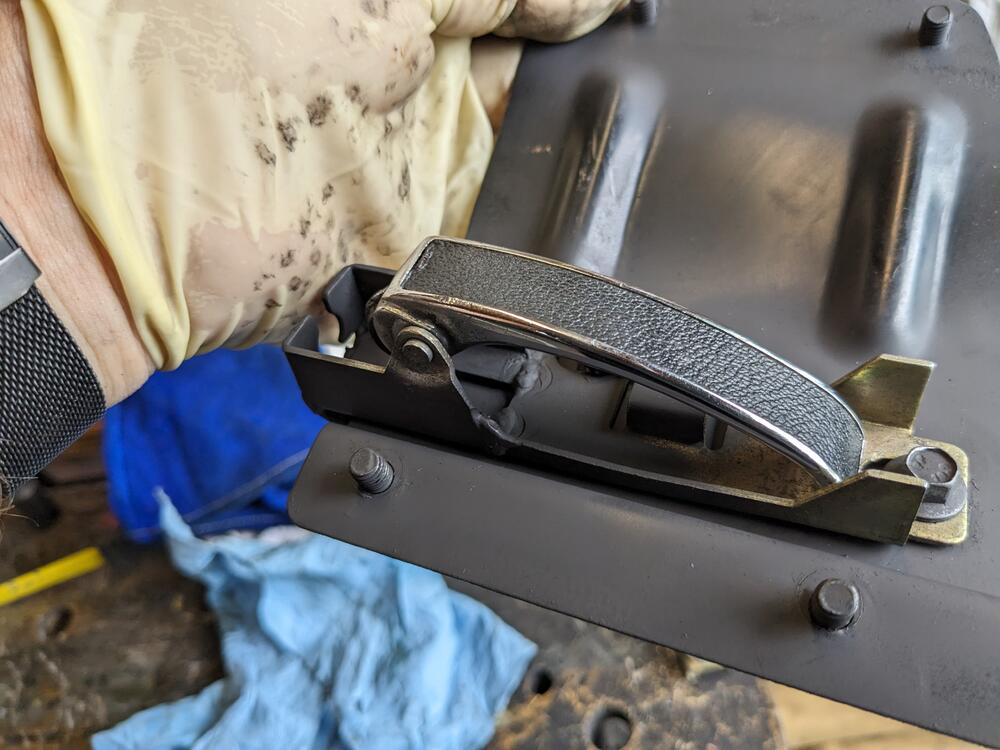
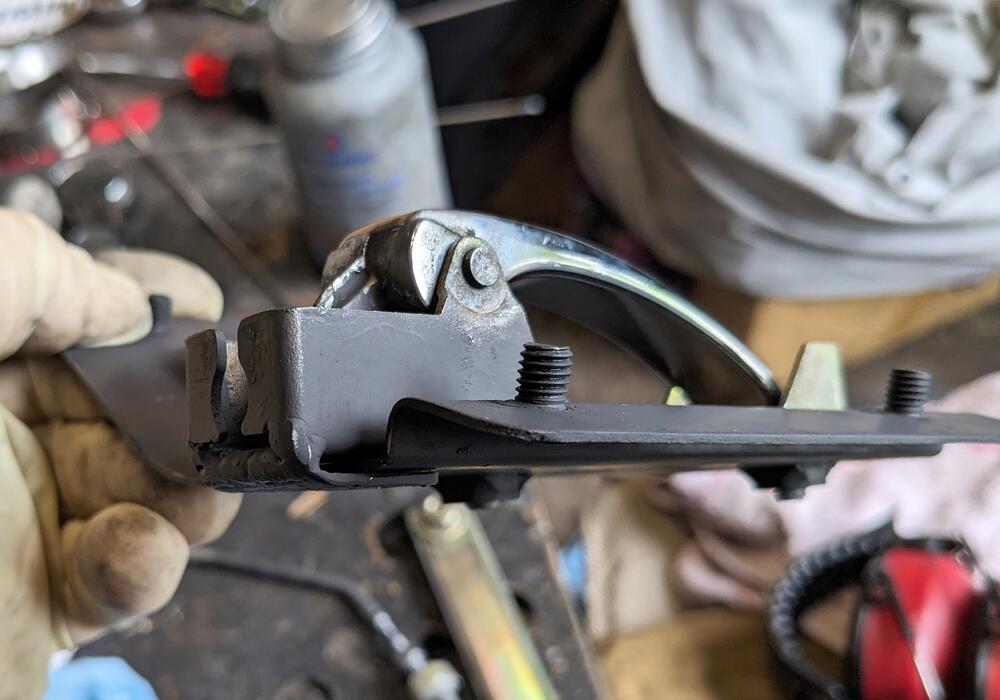
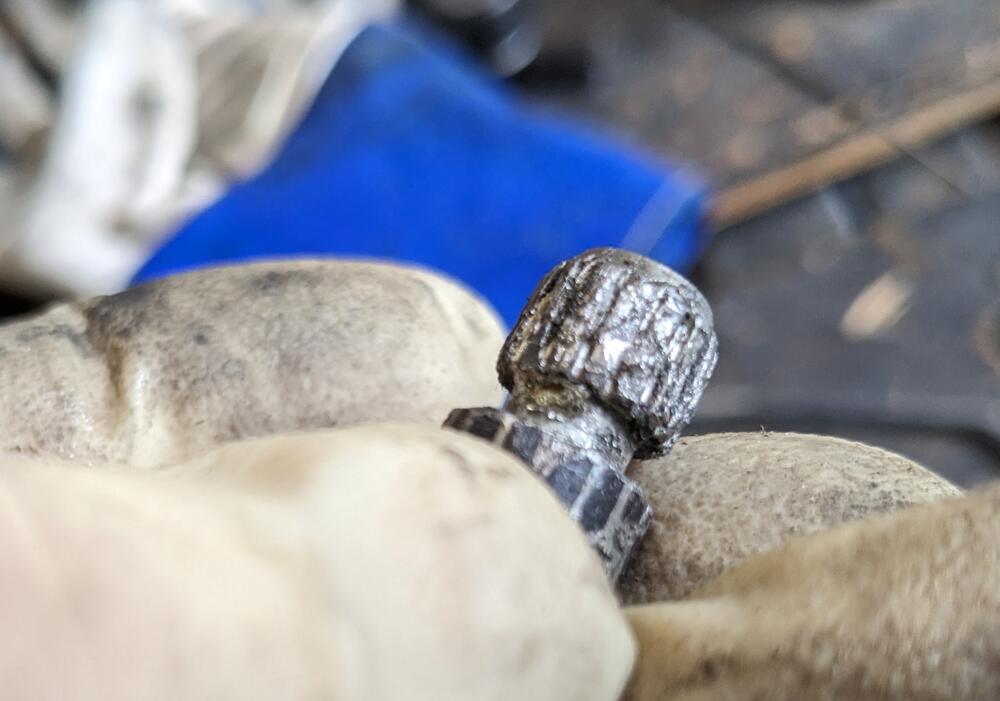
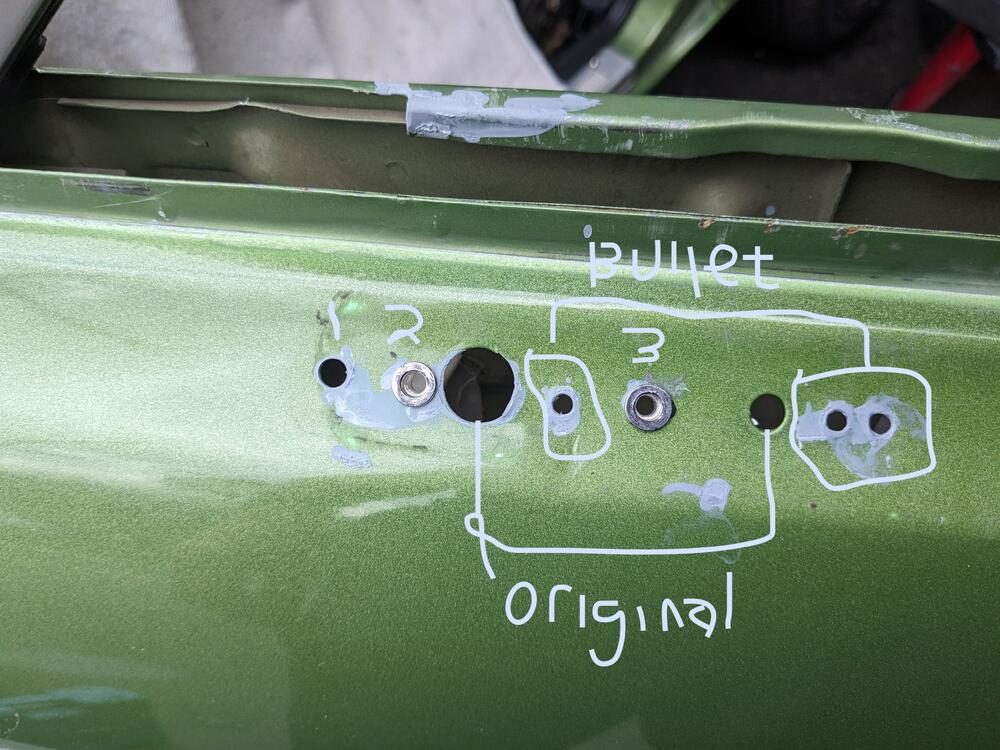
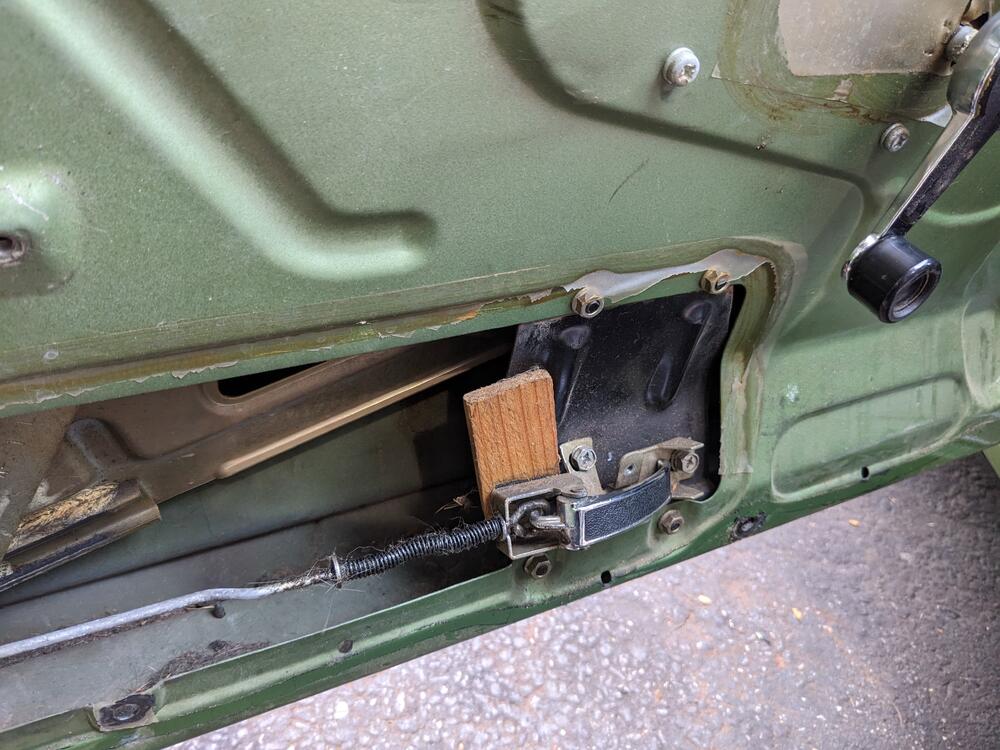
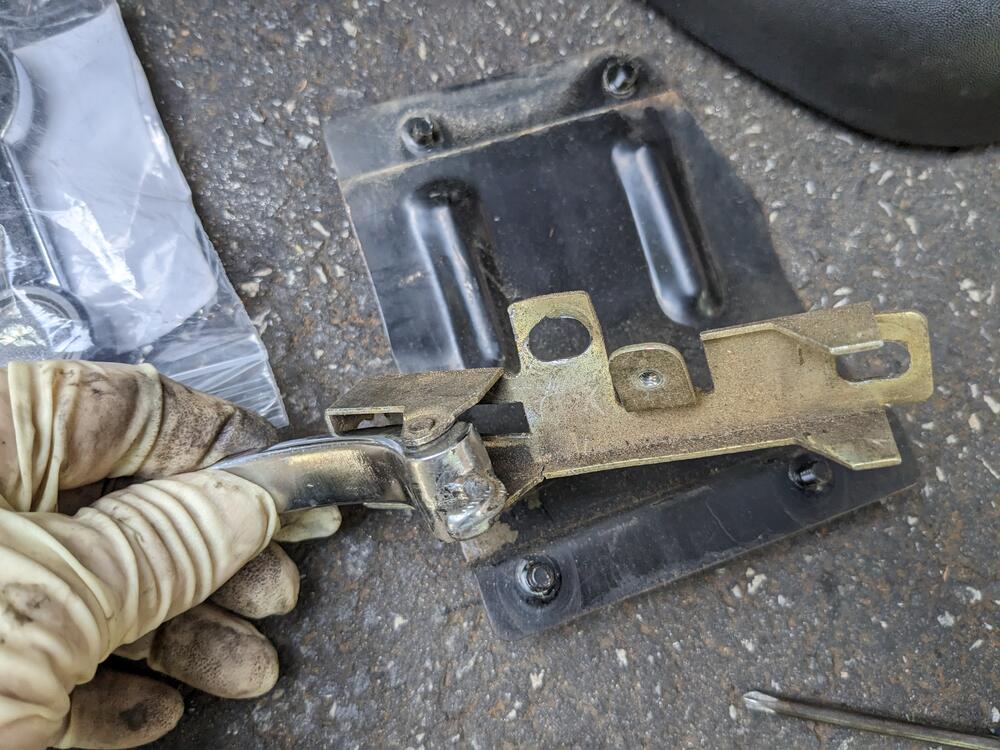
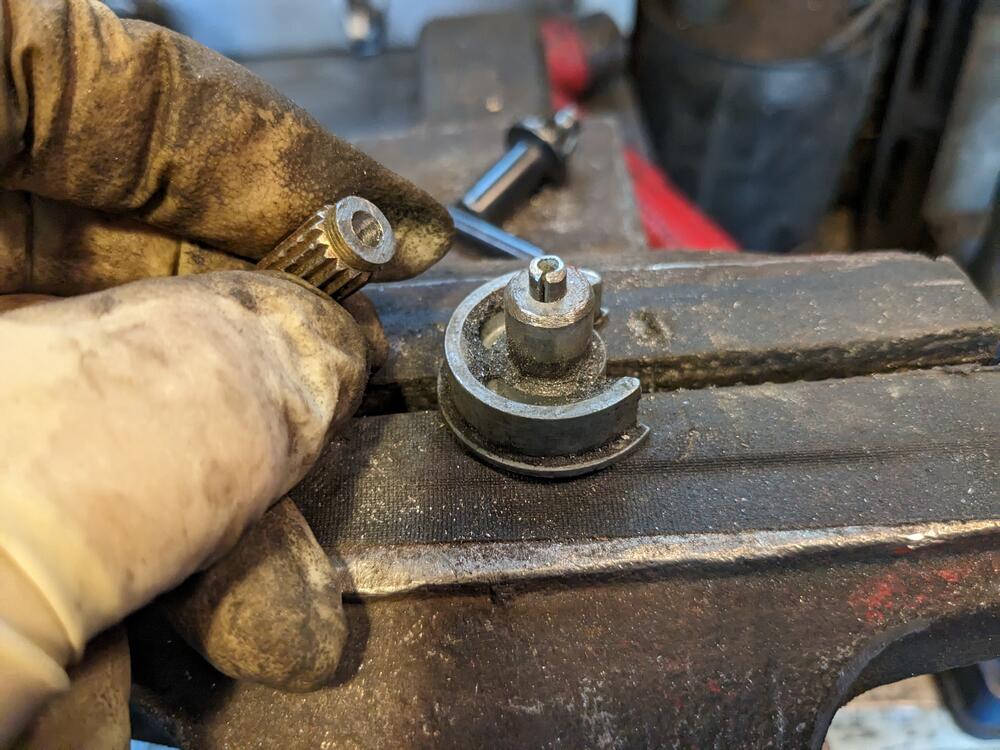
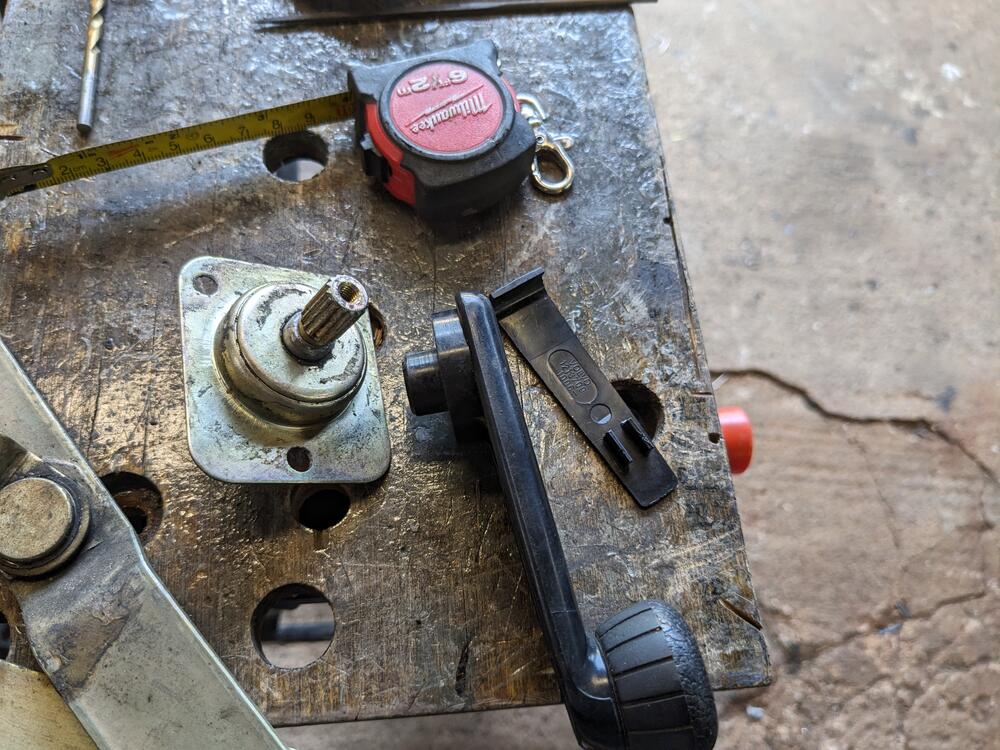
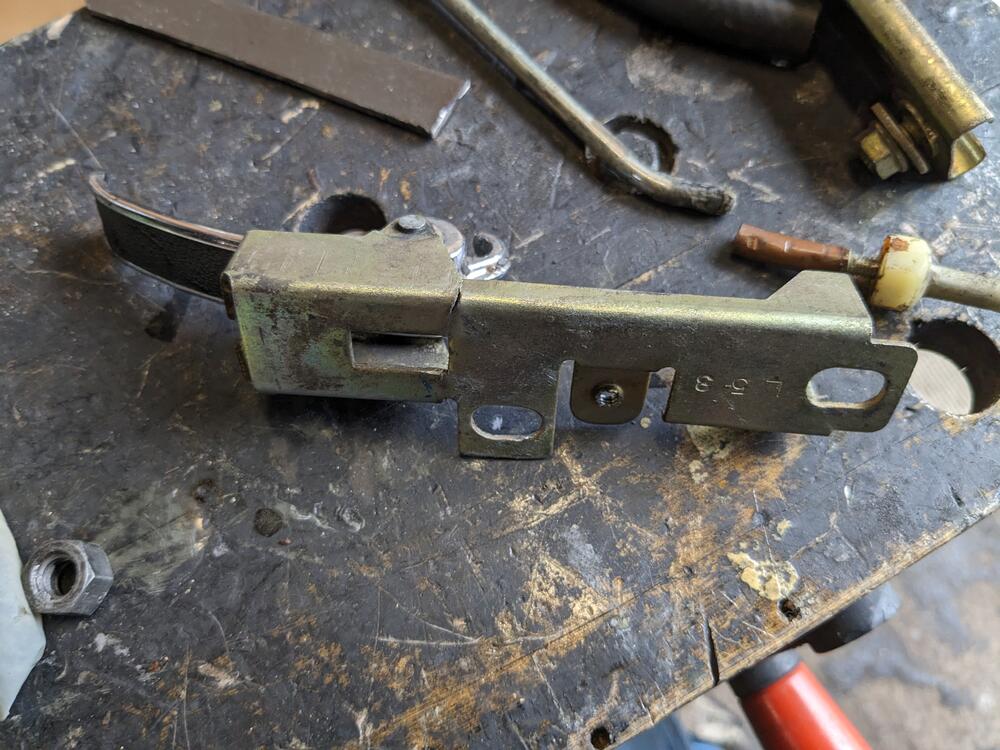
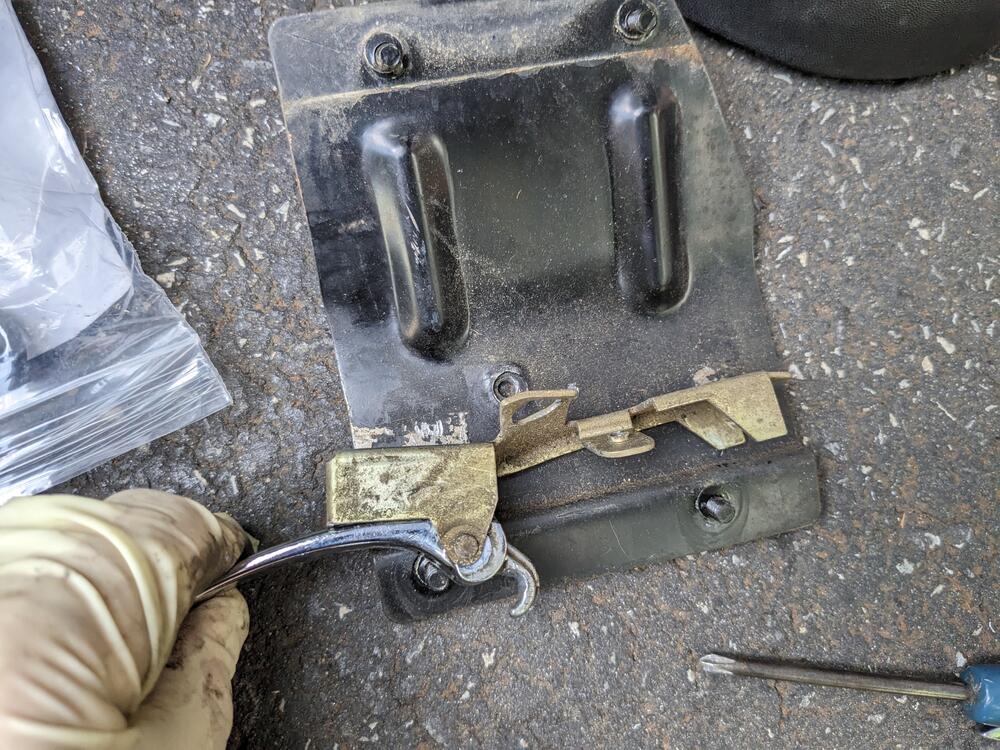
OK. Got the outer handle release rod welded. I looked at using other rod as the threads were damaged at one end, but it's an odd ball size - seems to be 4.5mm .75 pitch. So, I flipped it & welded the damaged end to the main rod. Forgot to take a pic. Welded the winder spline to the shaft & put the crank back together, applied new grease to the mechanism. original splines Welded the inner release plate, and added a tongue that hooks over the back of the retaining plate, so the leverage load is not unsupported welded the cracks in the plate Before I put the door innards back in, I drilled the 3 new holes fore the all-metal chrome mirror I got from Zcardepot. I moved it as far forward as possible while still covering the existing holes. I considering welding them up, but that will have to be another day. Thunderstorms were coming in. I used M5 riv-nuts to score the mirror base, I hate sheet metal screws after that I reinstalled the glass, winder & release for the life of me, I can't figure out where these seals are supposed to go on the outer edge of the door frame. Anyone have a pic of one installed? Still have to figure out if I can repair the door panel


-
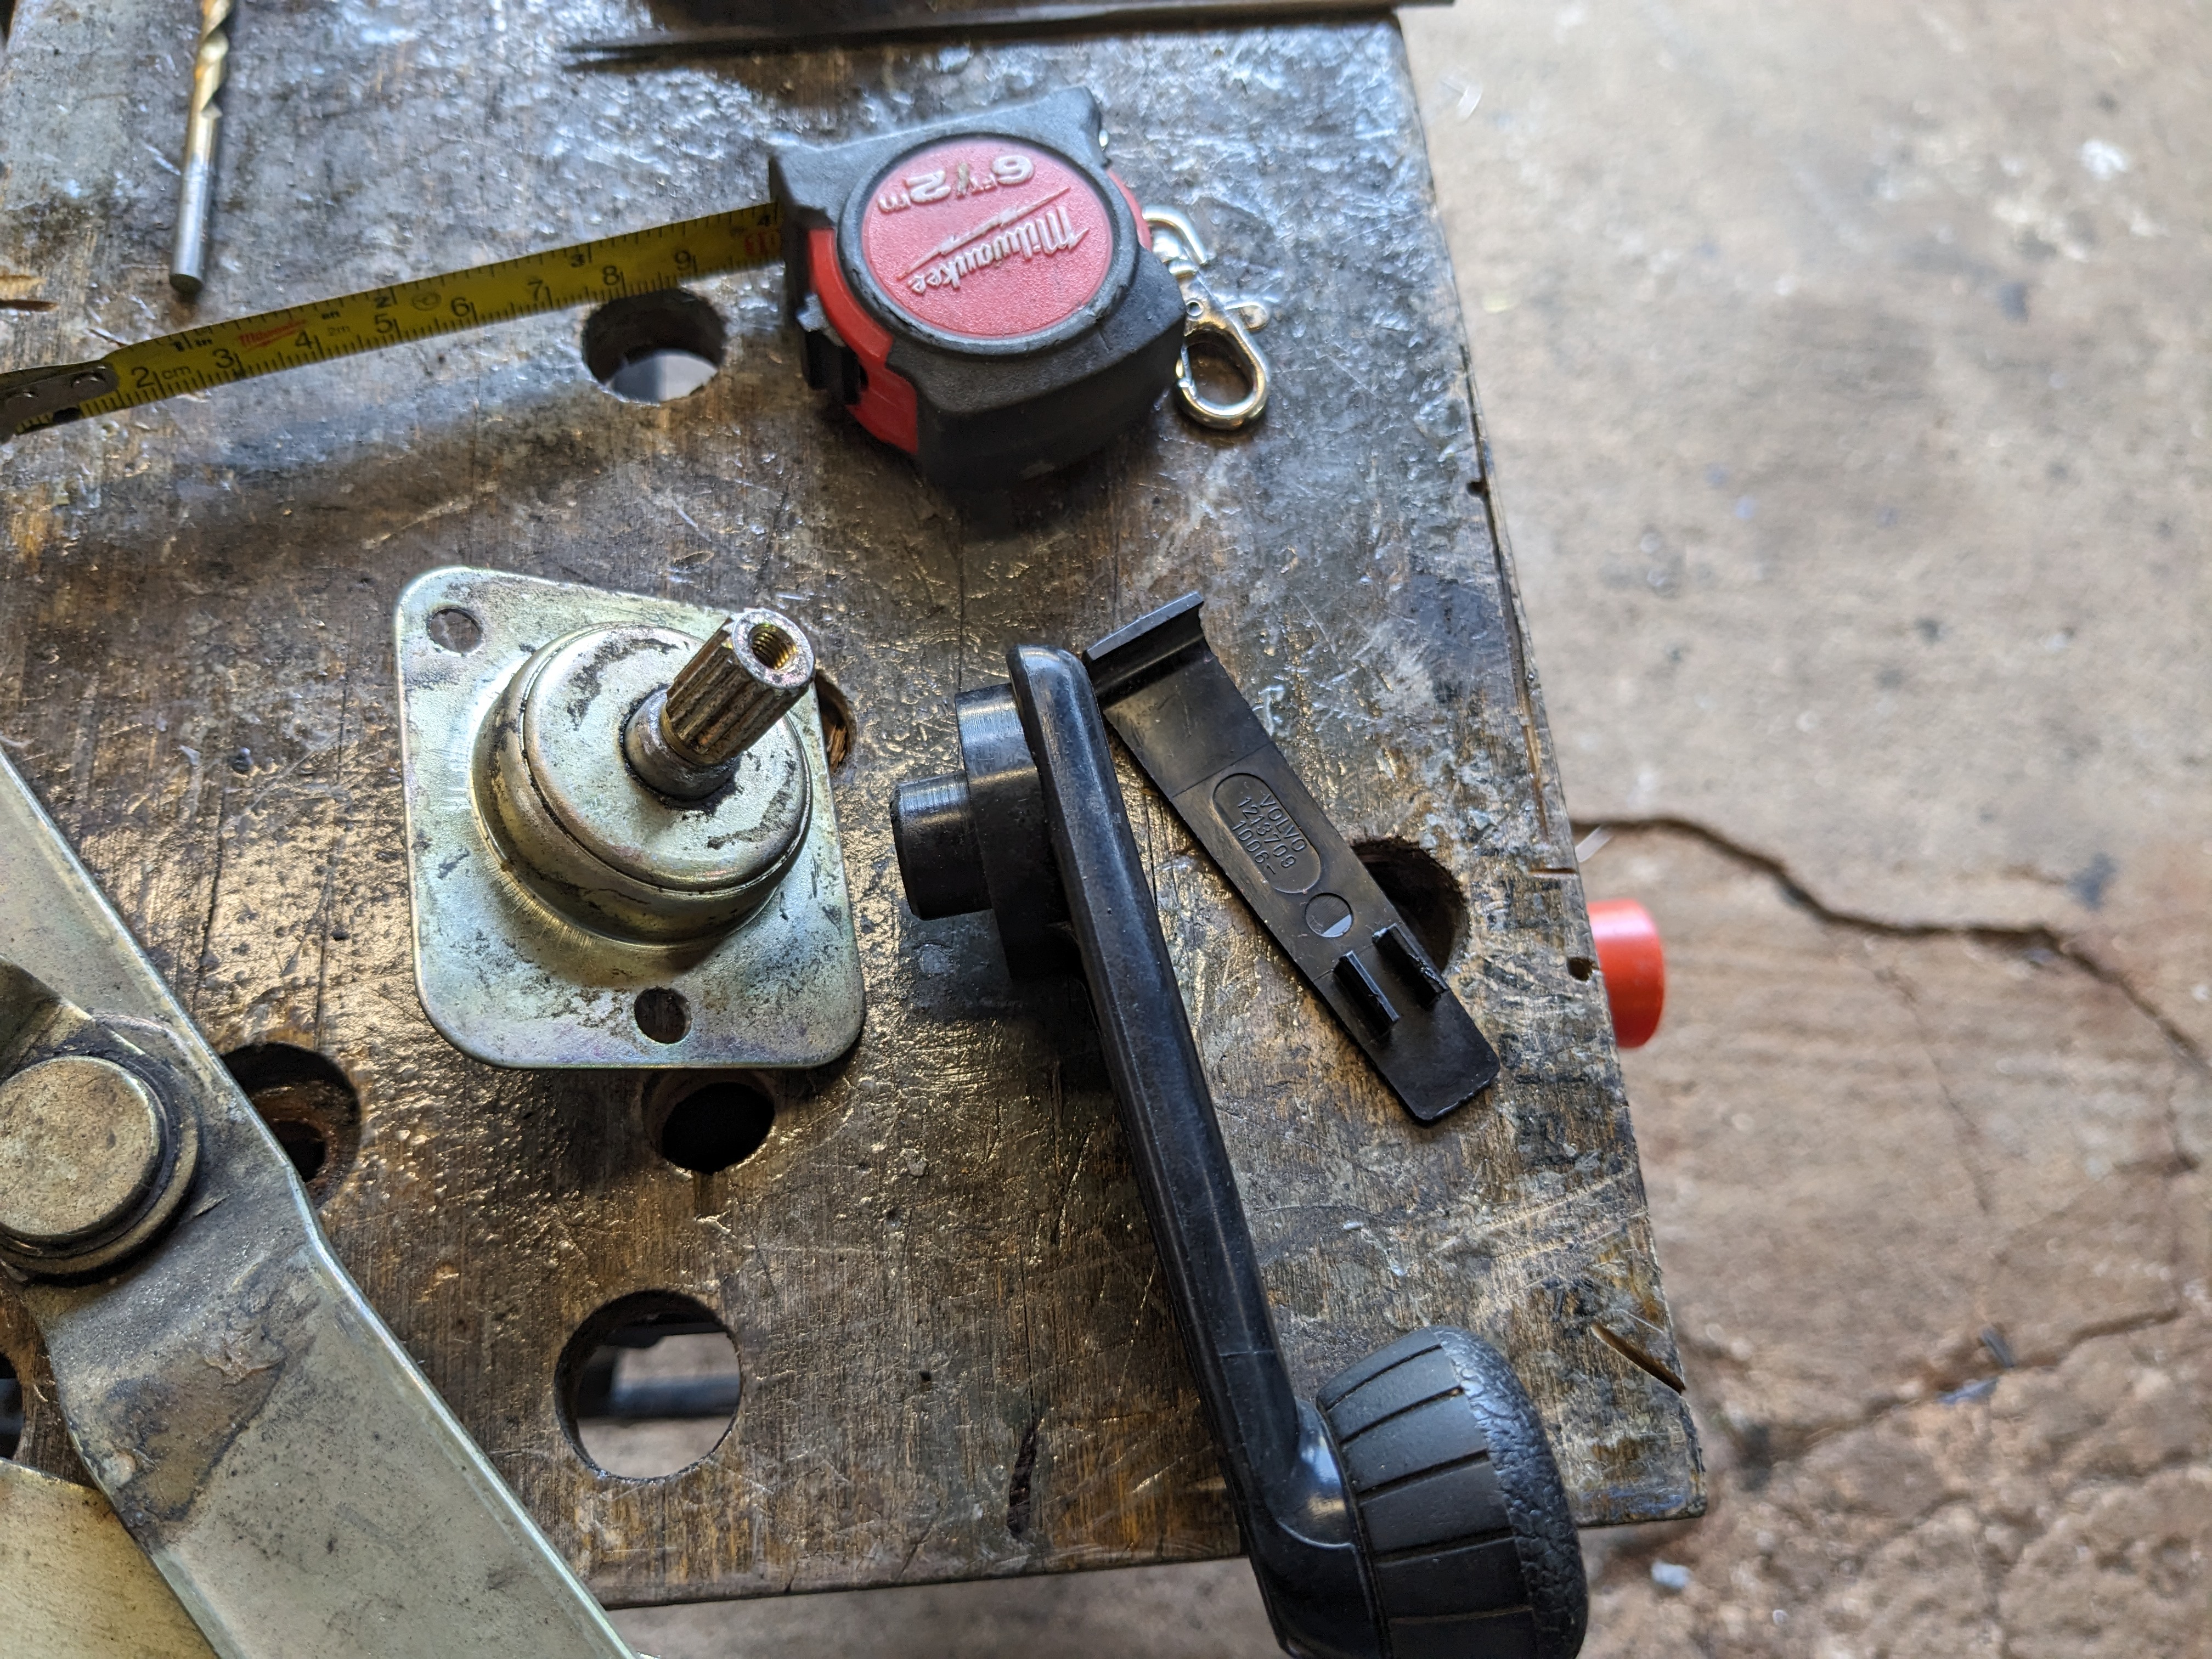
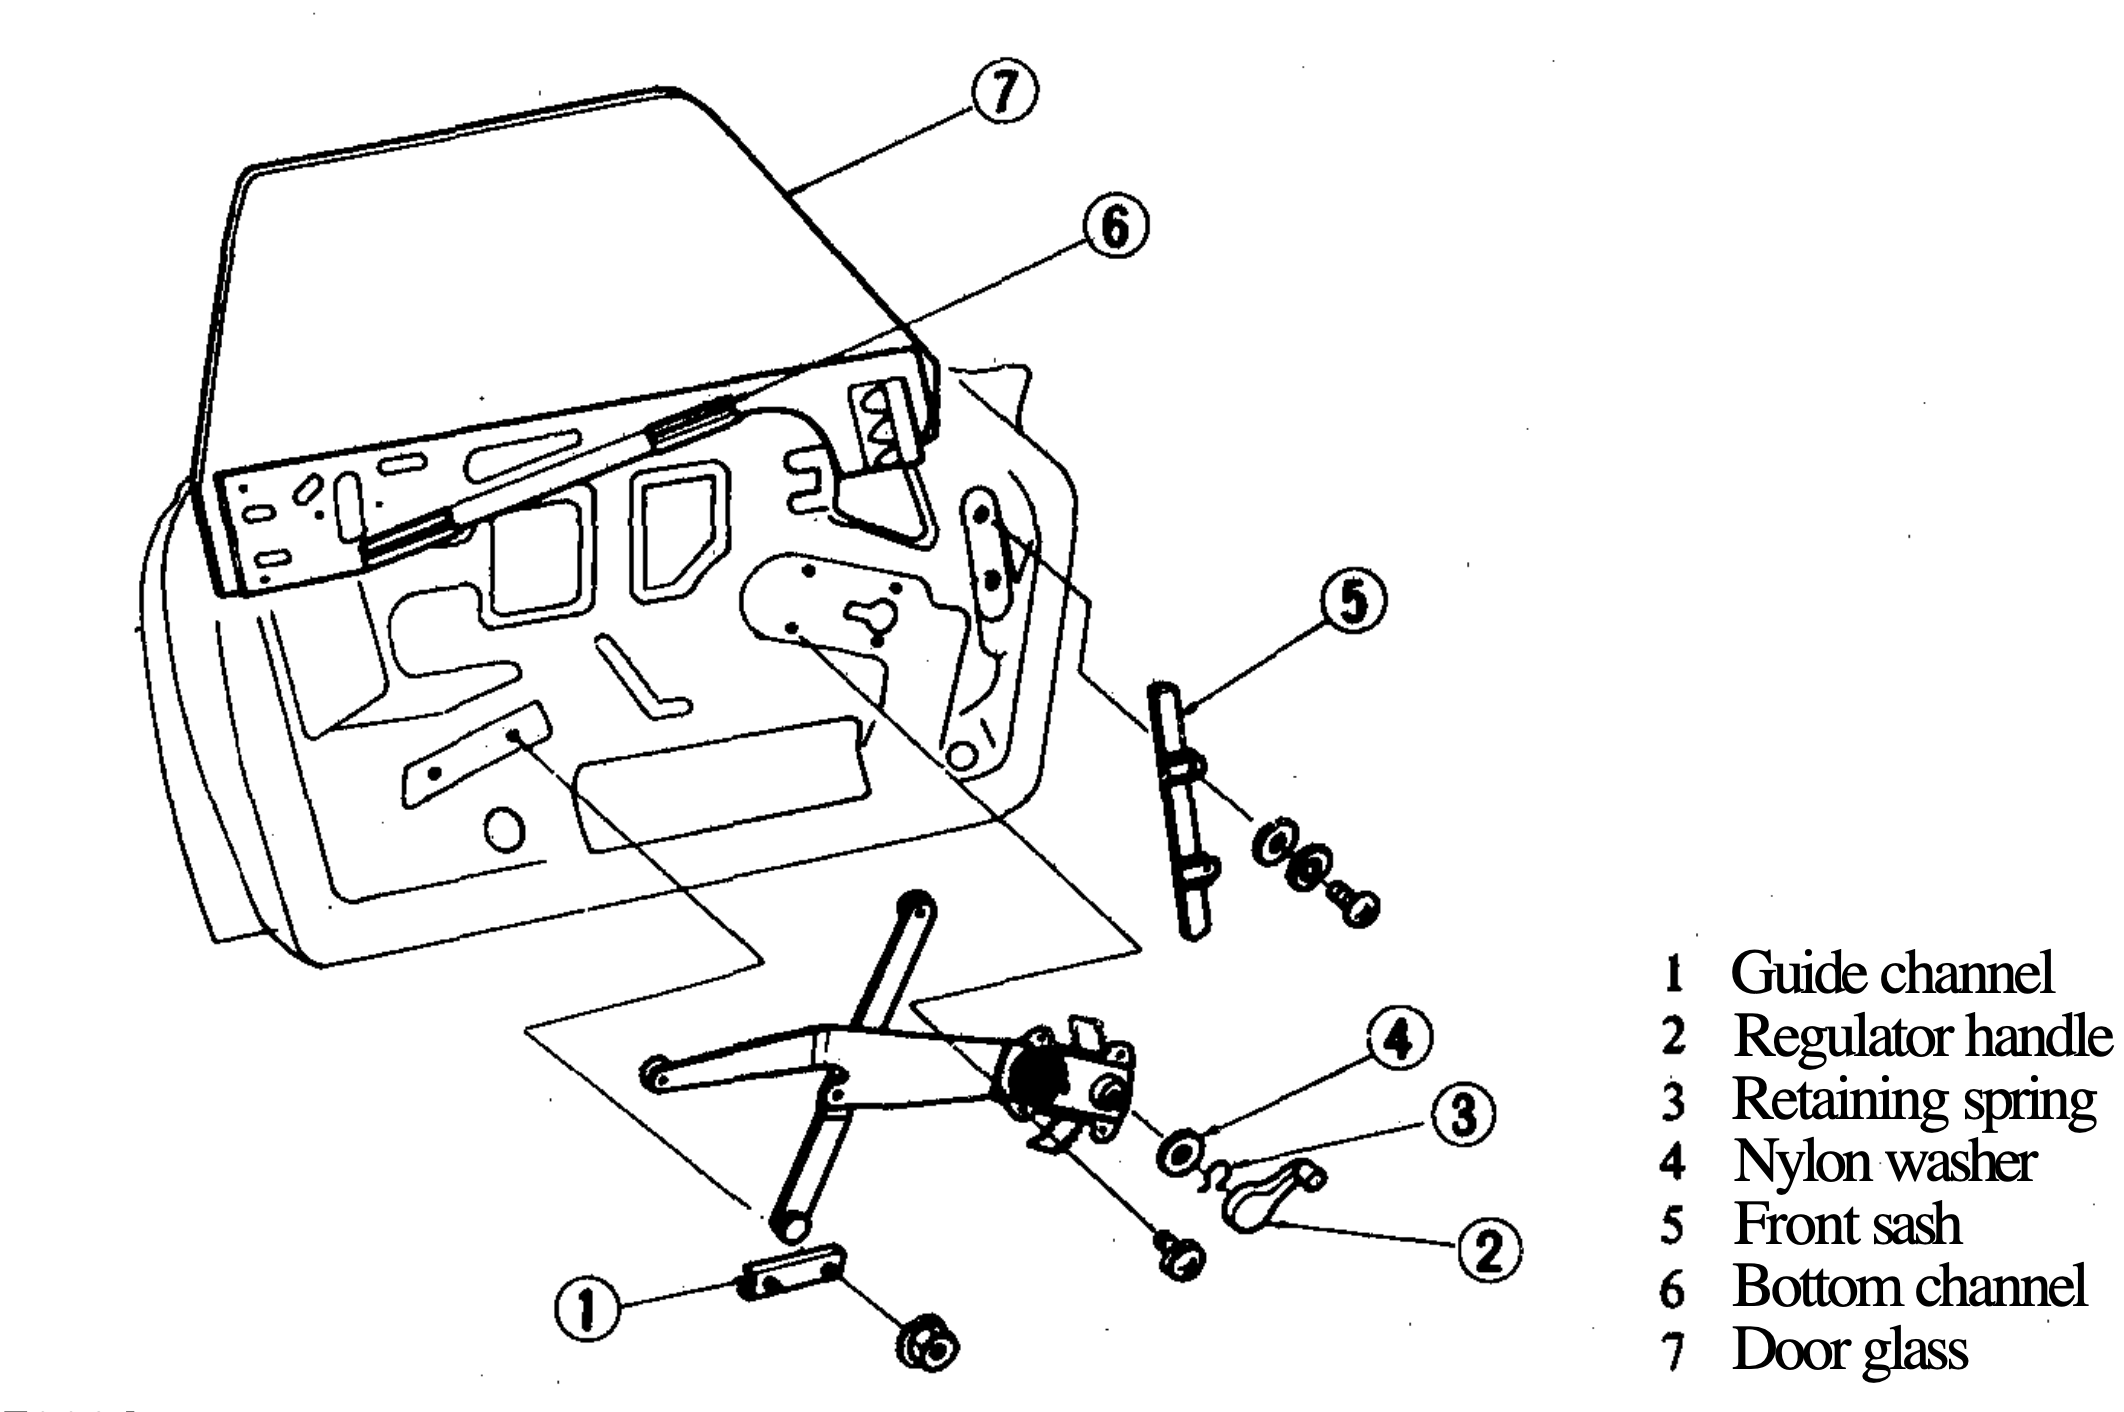
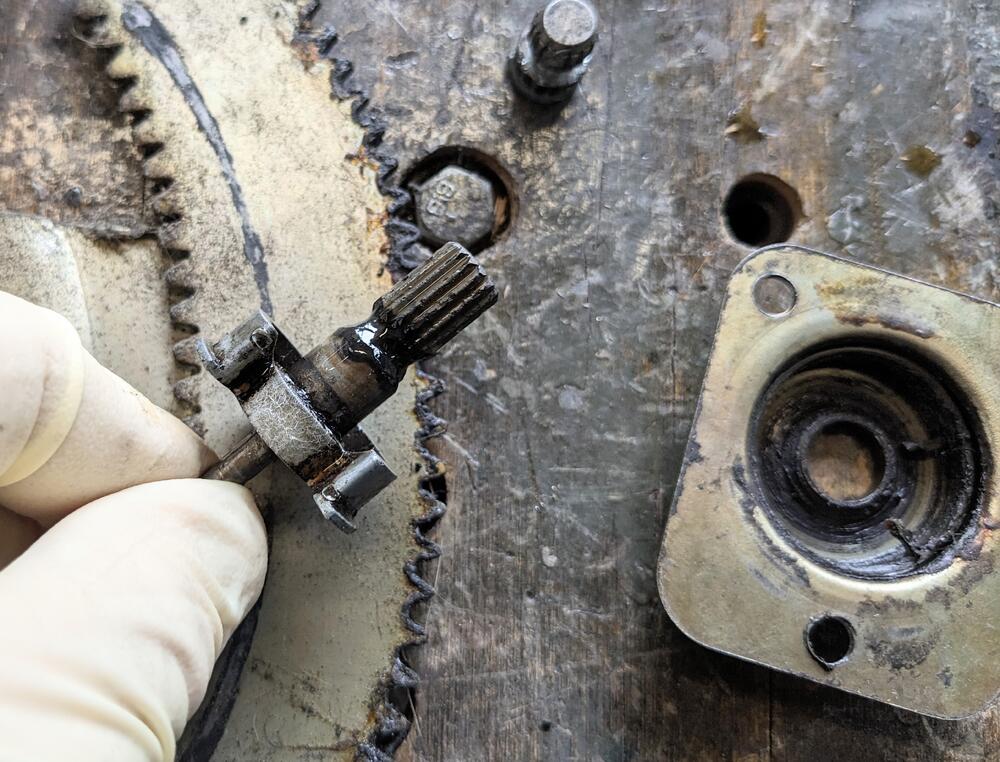
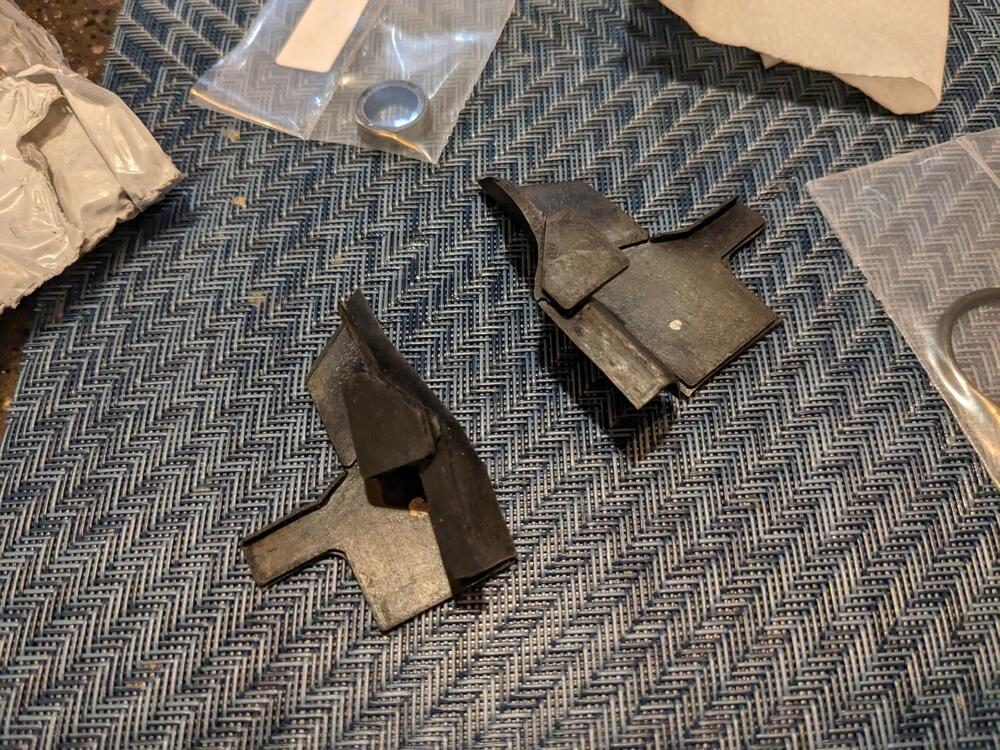
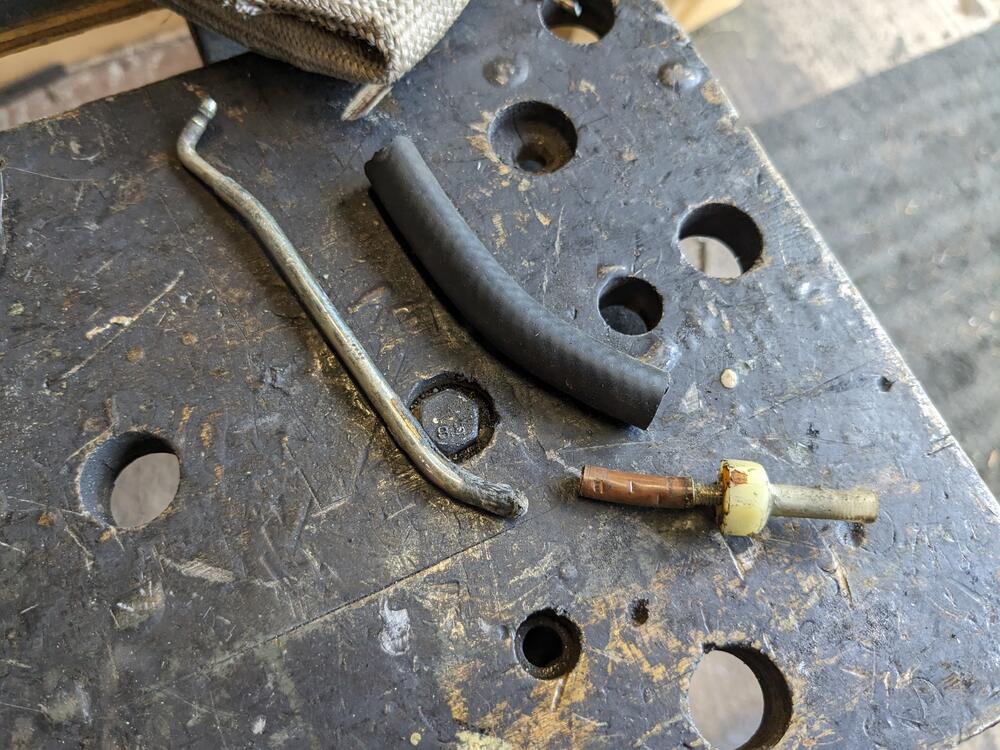
Took the driver's door apart today to change the door glass channel. I already knew the door panel was a problem, and that something funky was up with the inner release handle. As far a I can see, the only rubber in the door is the glass guide & the rear molded seal, (front outer seal I've already done) which I have coming tomorrow. First problem was that the window crank was epoxied to the winder Botch repairs here Release plate is cracked & distorted. release rod for outer handle is also a problem. I'll weld the rod. release plate straightened out - have to weld the stress crack & reinforce the plate The spline section of the winder crank was buggered, so I cut it off & prepped a replacement spline section from a 240 (Volvo) window winder drilled both pieces & used a roll pin to join the pieces before welding, which I will do tomorrow. Volvo crank is screwed in place once attached, no more spring clip to worry about. Crank winder plate rivets were drilled out to remove winder.


-
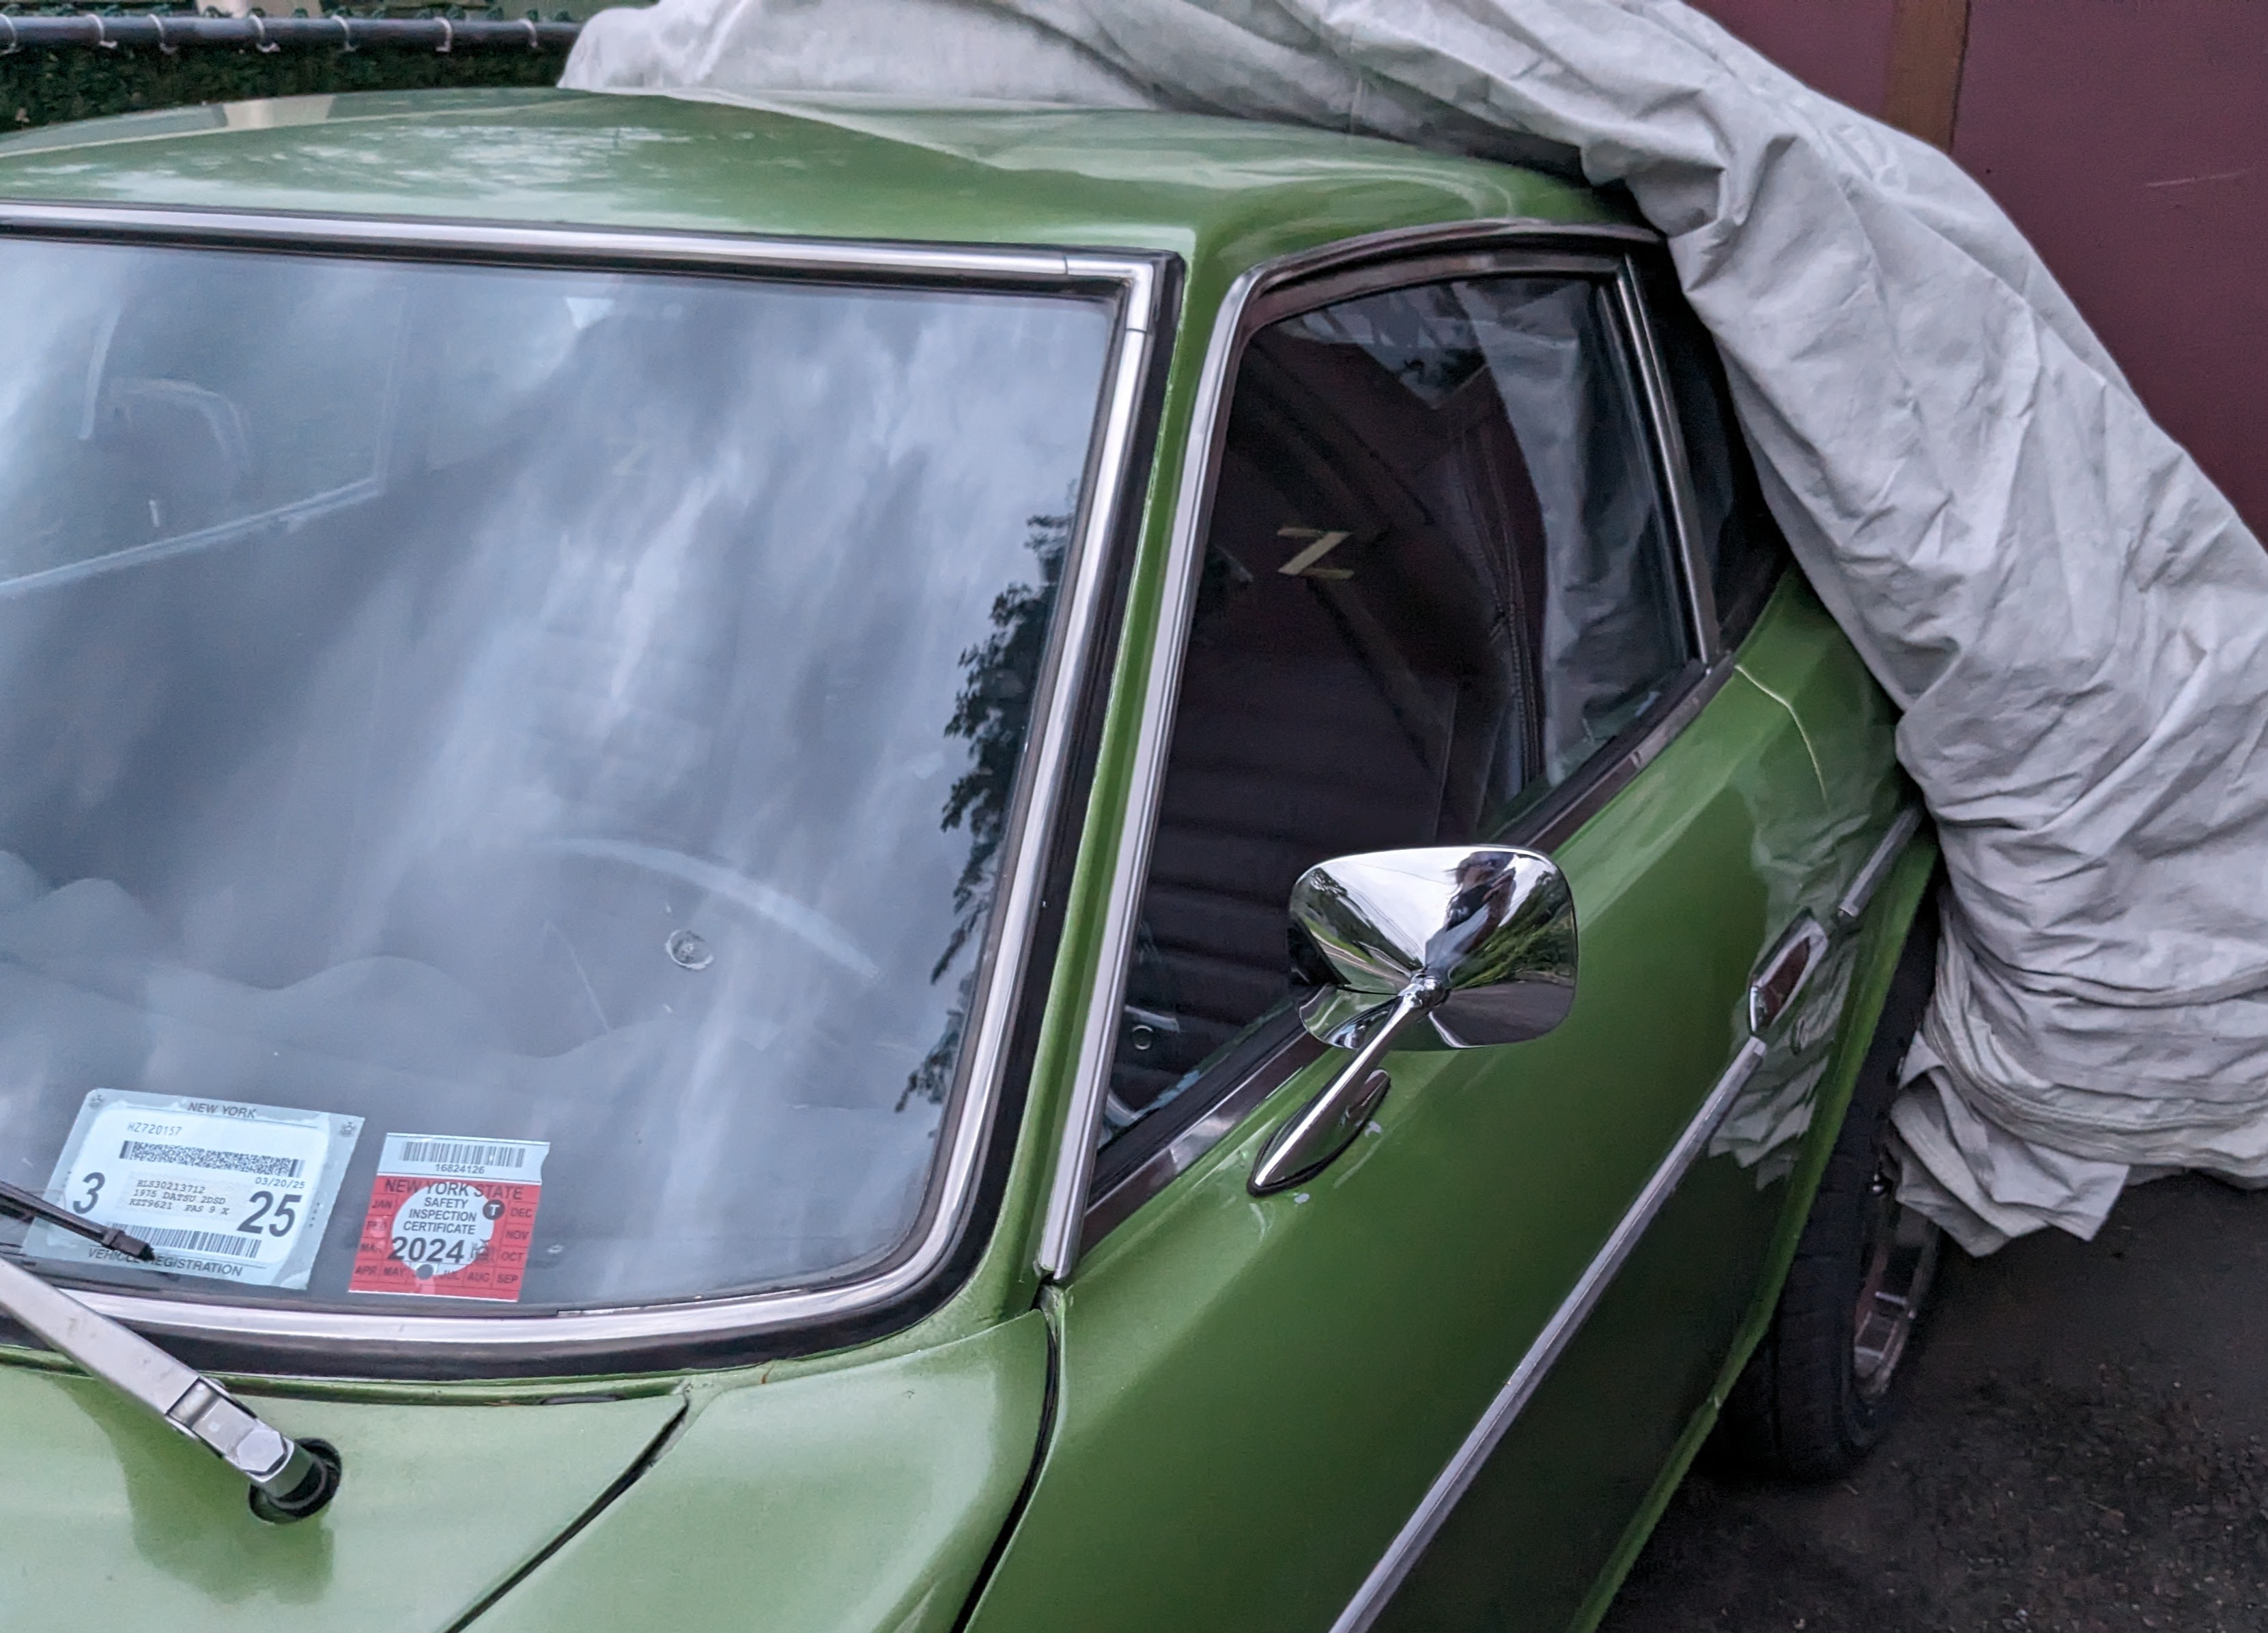
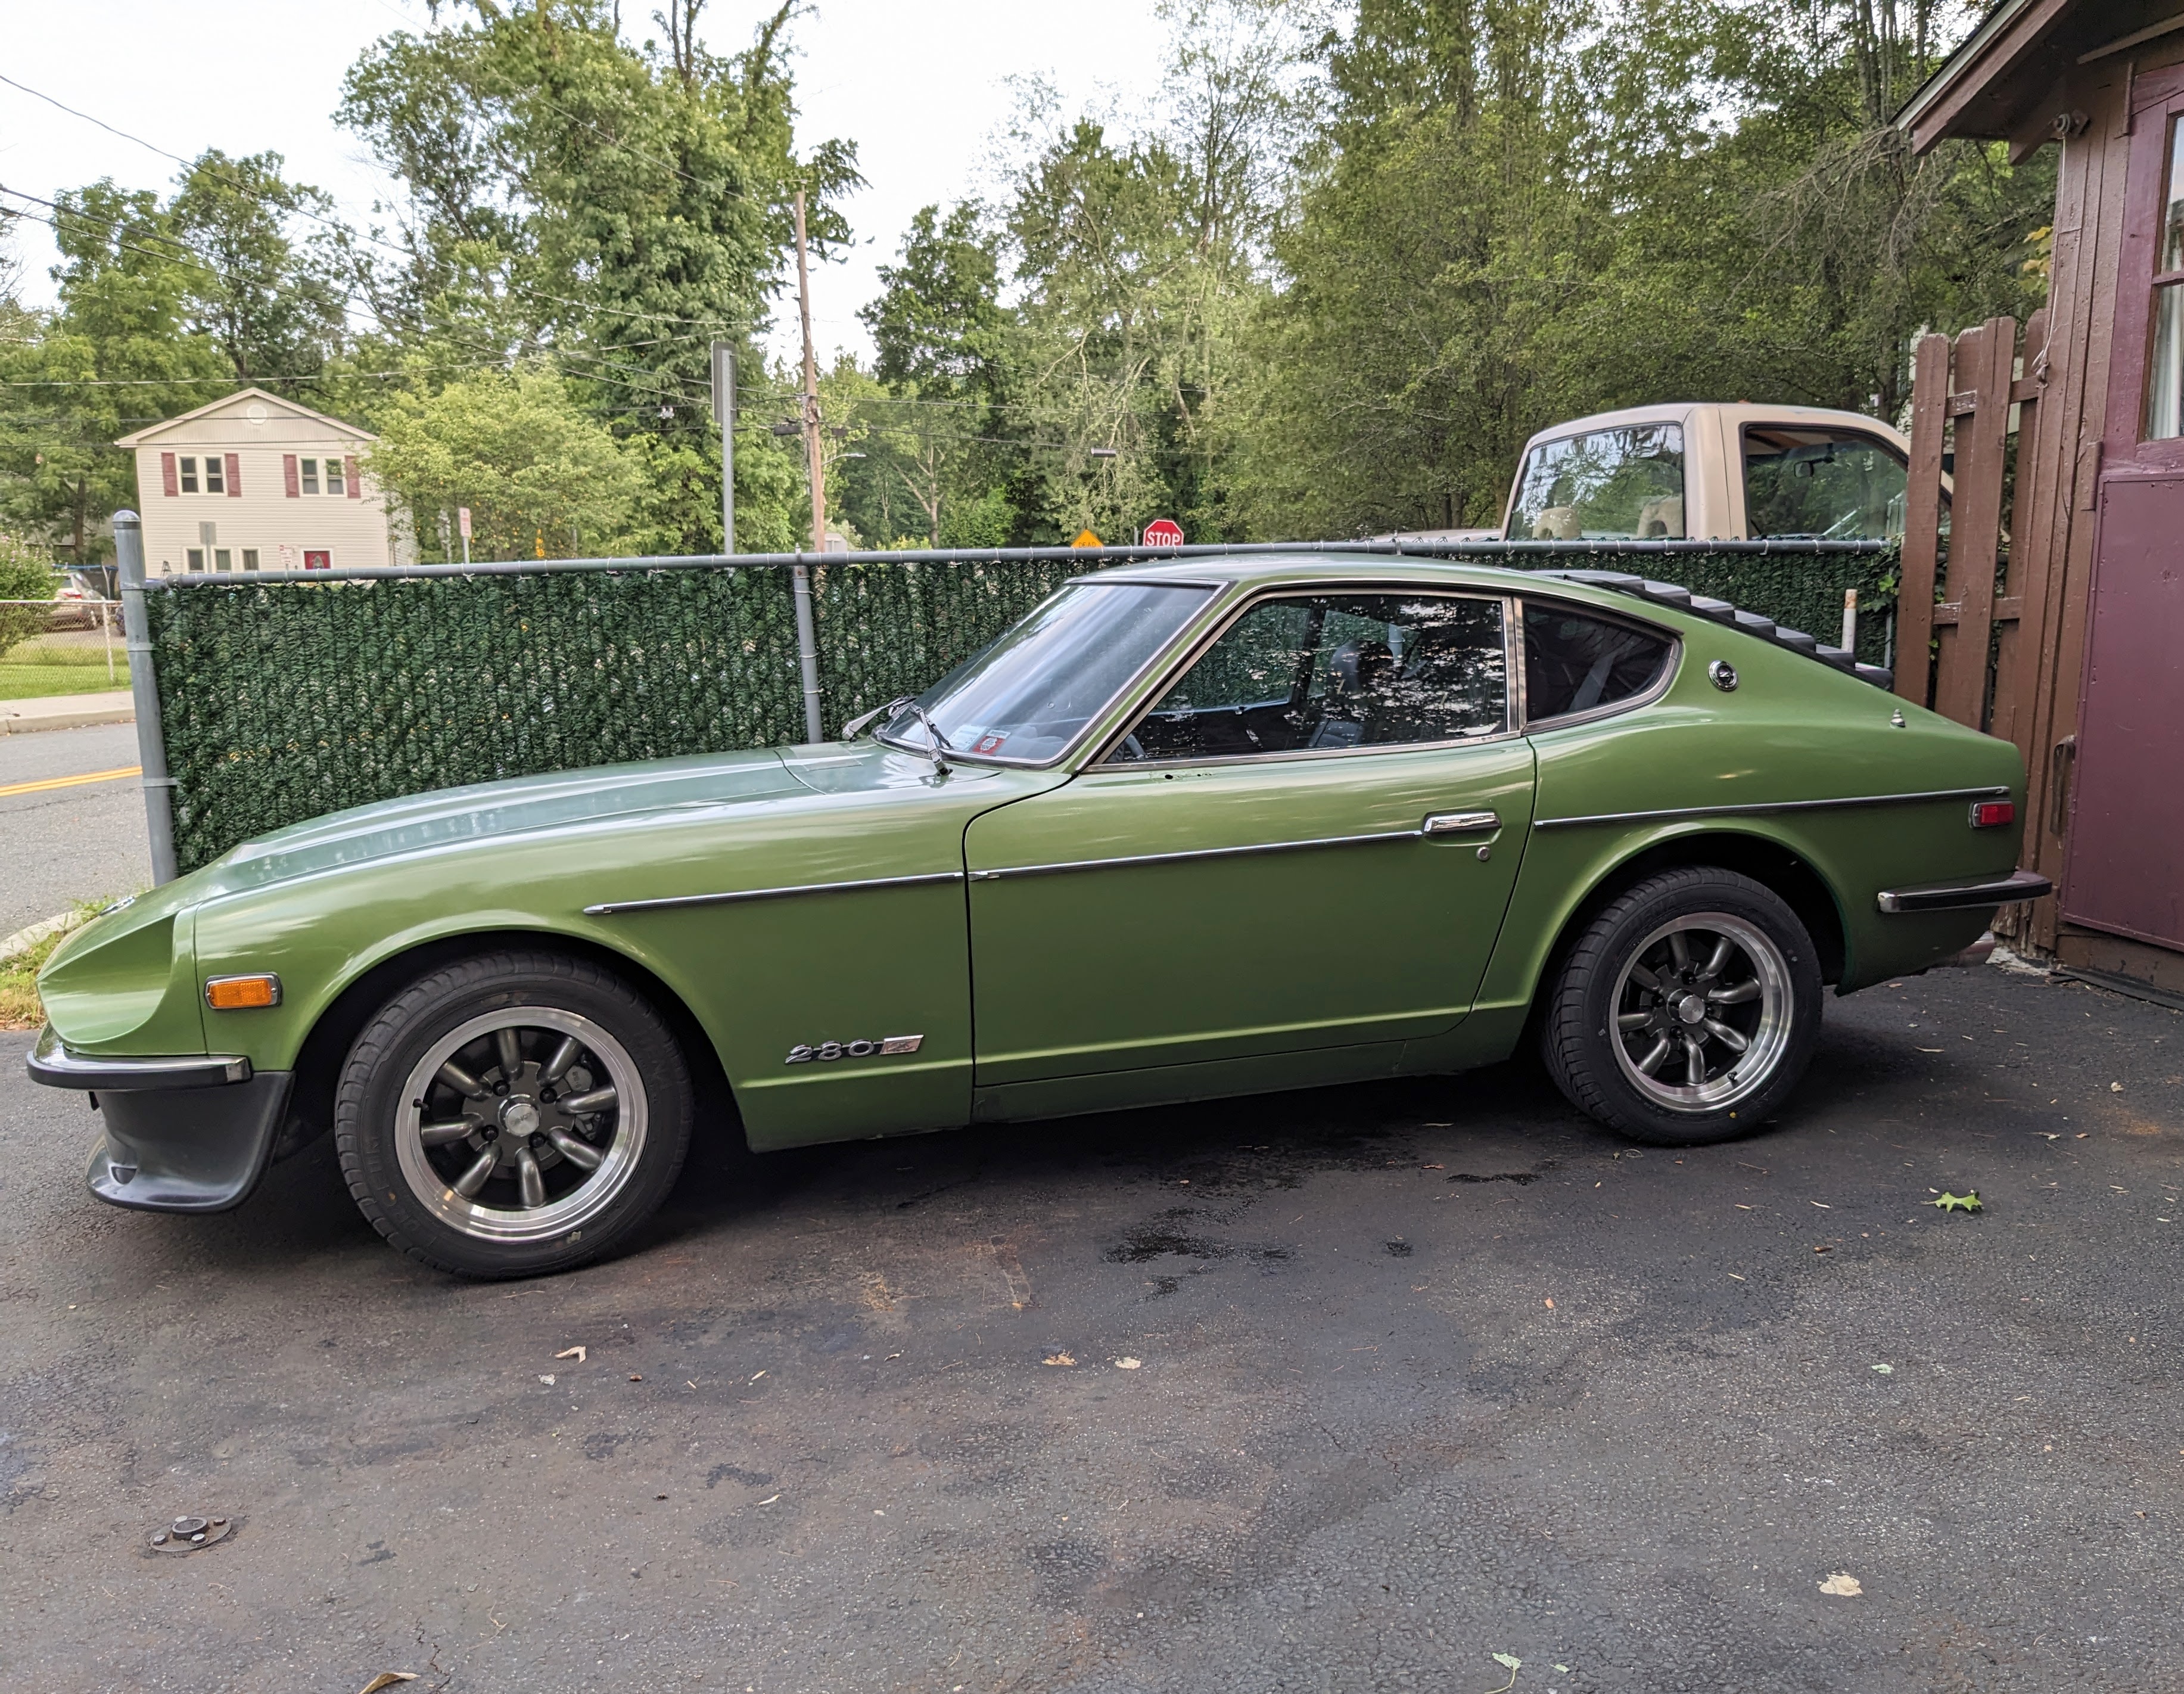
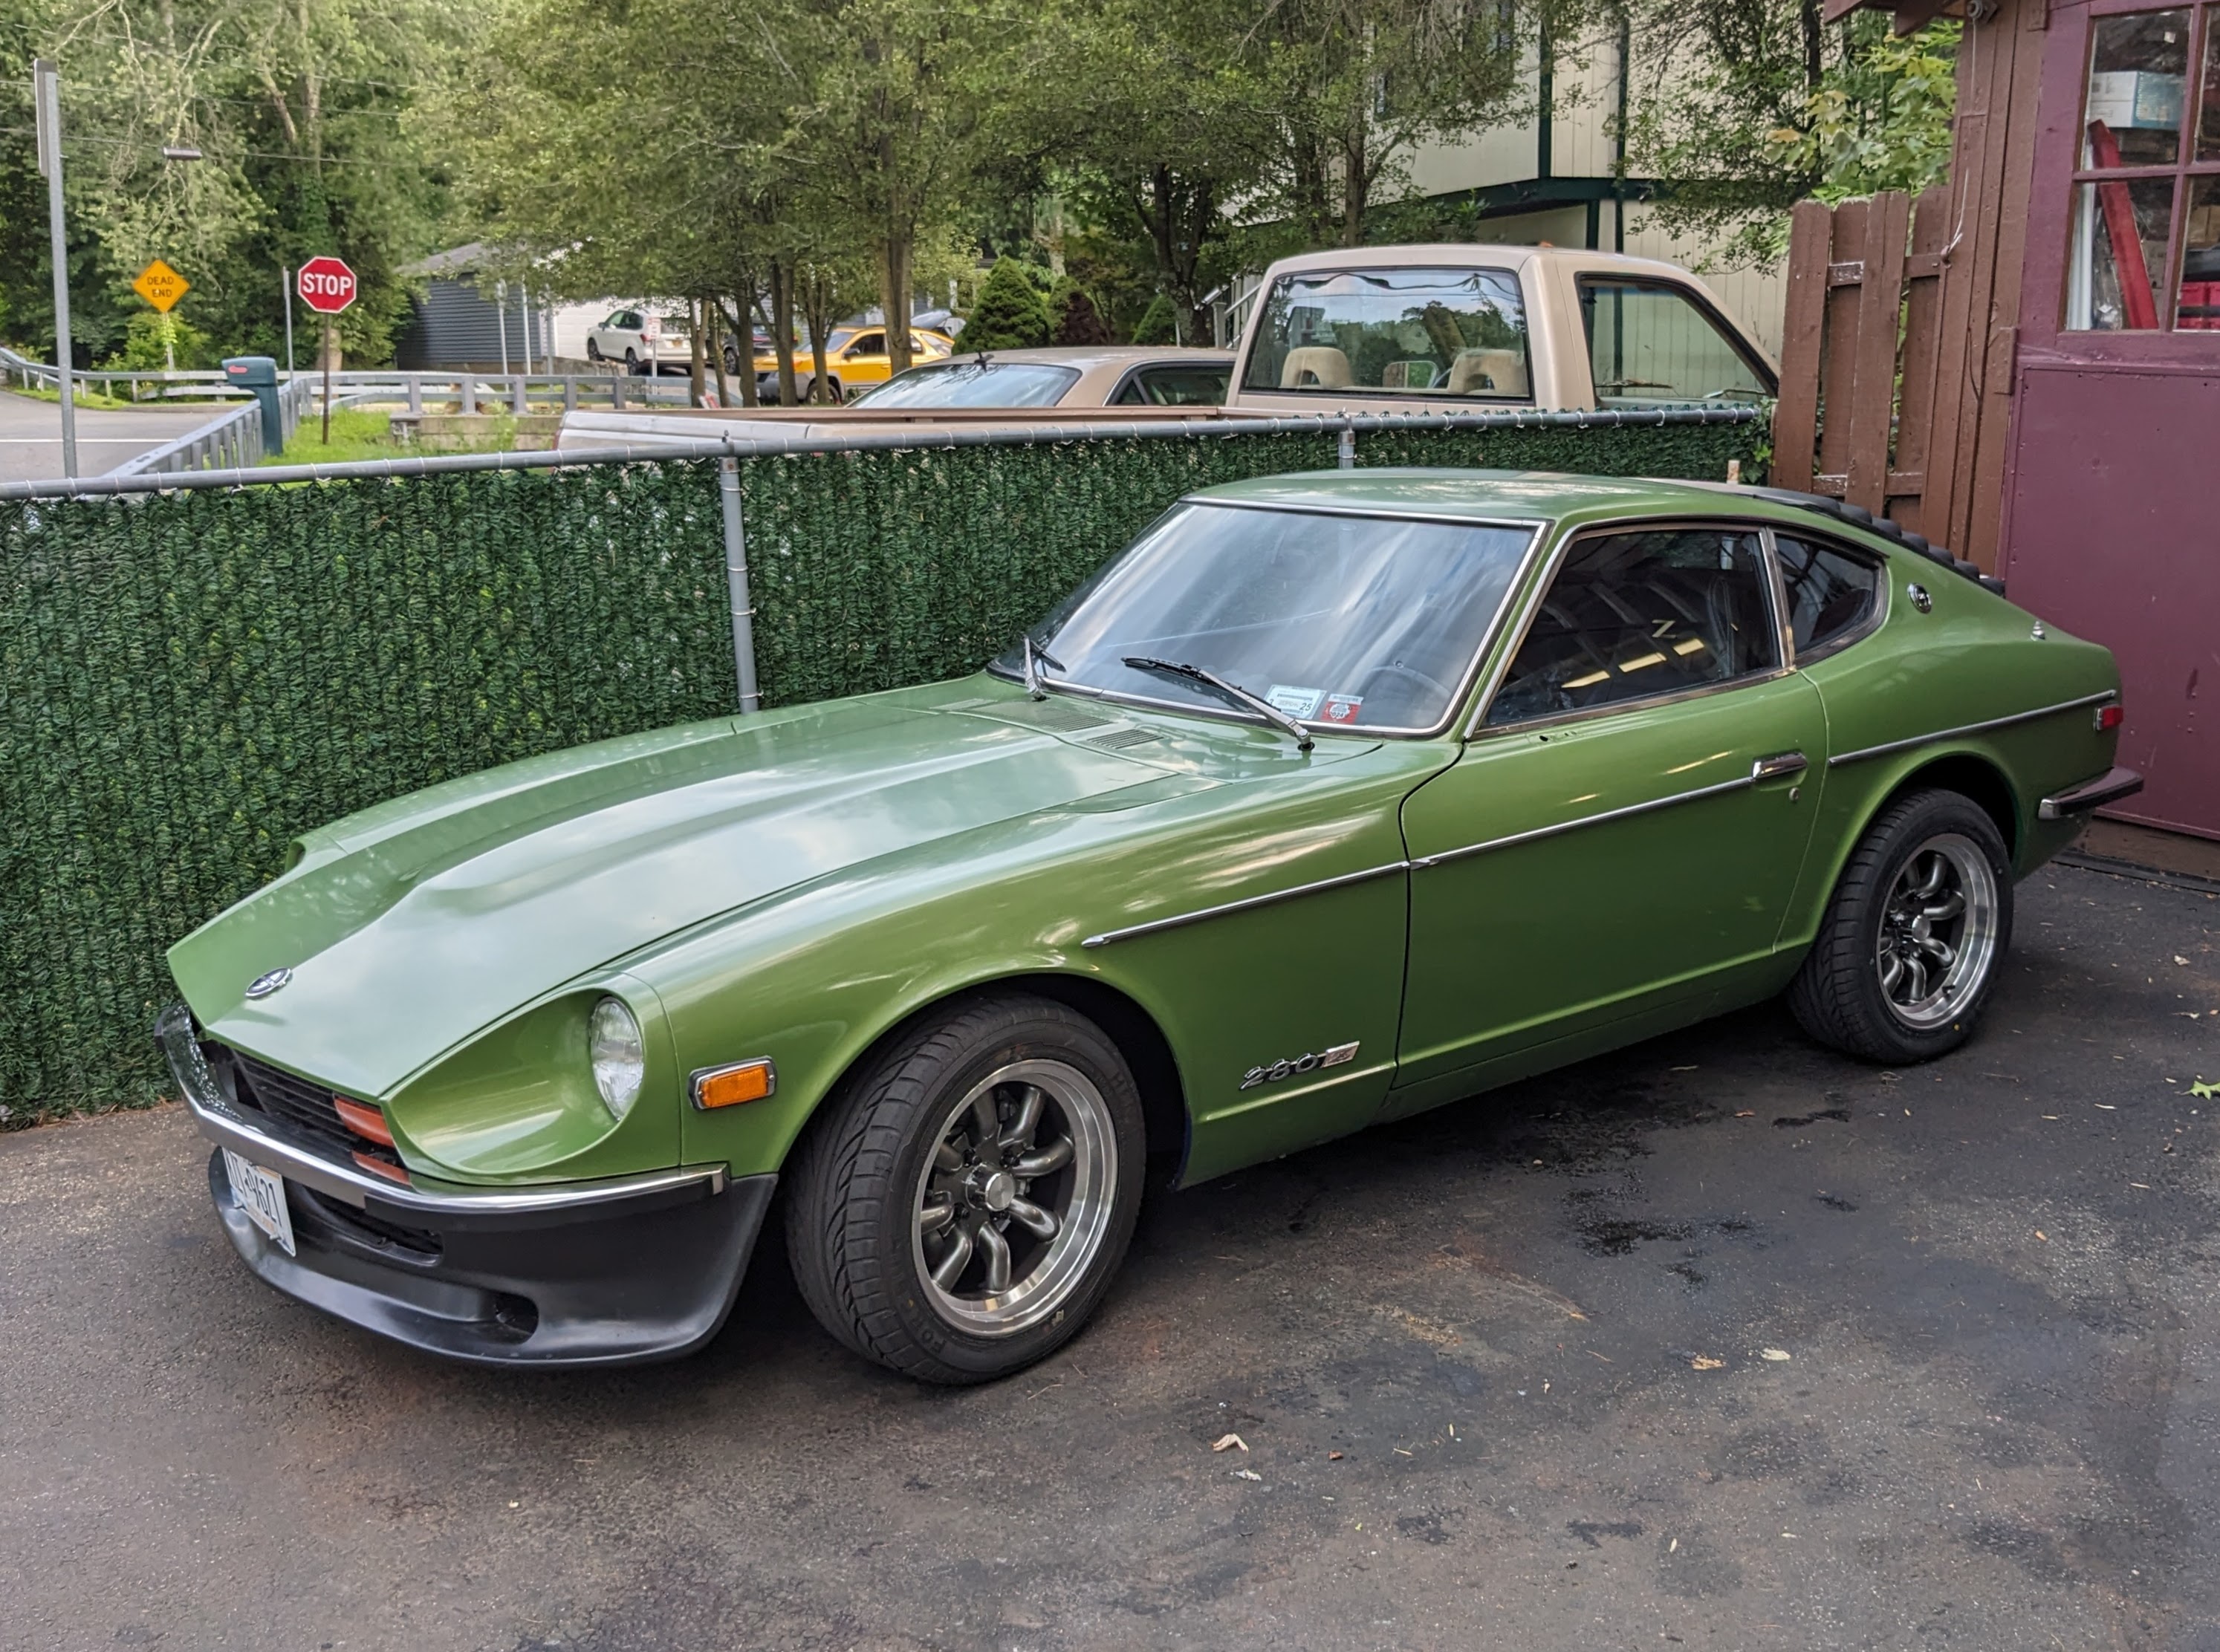
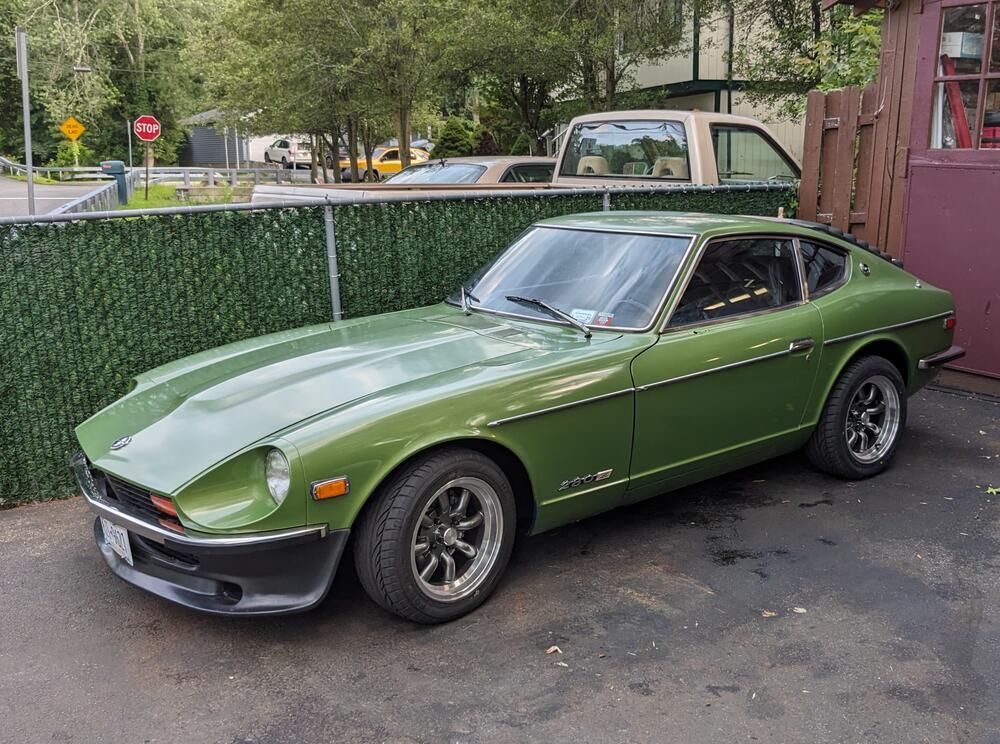
1975 280Z, CA car. So today is the first time I have put gas in the car. Drove it around to check the exhaust note after redoing the exhaust. I filled it - took about 13 gallons. Within seconds fuel started pouring down the back right side of the tank from above the seam. As an aside, getting my wife to like being in the car is getting more & more difficult 😞 In any event, looking in the manuals there are two EVAP lines on the top of the tank. So, I'm assuming the leak is either an aged hose (#28 or 29) that has ruptured, and/or one of the necks is leaking at the tank. I don't know if that's a thing with these though, so I'm hoping it's just the hoses. Looking online, dropping the tank doesn't appear to be a major deal. Any pointers or catches I should be aware of?

-
All Volvos from 2000-on use it in the driveshaft tunnel & under the rear cargo/trunk floor above the rear muffler. I saved the sections from an 2004 S40T5 AWD when I stripped it for converting my C30T5 to AWD
-
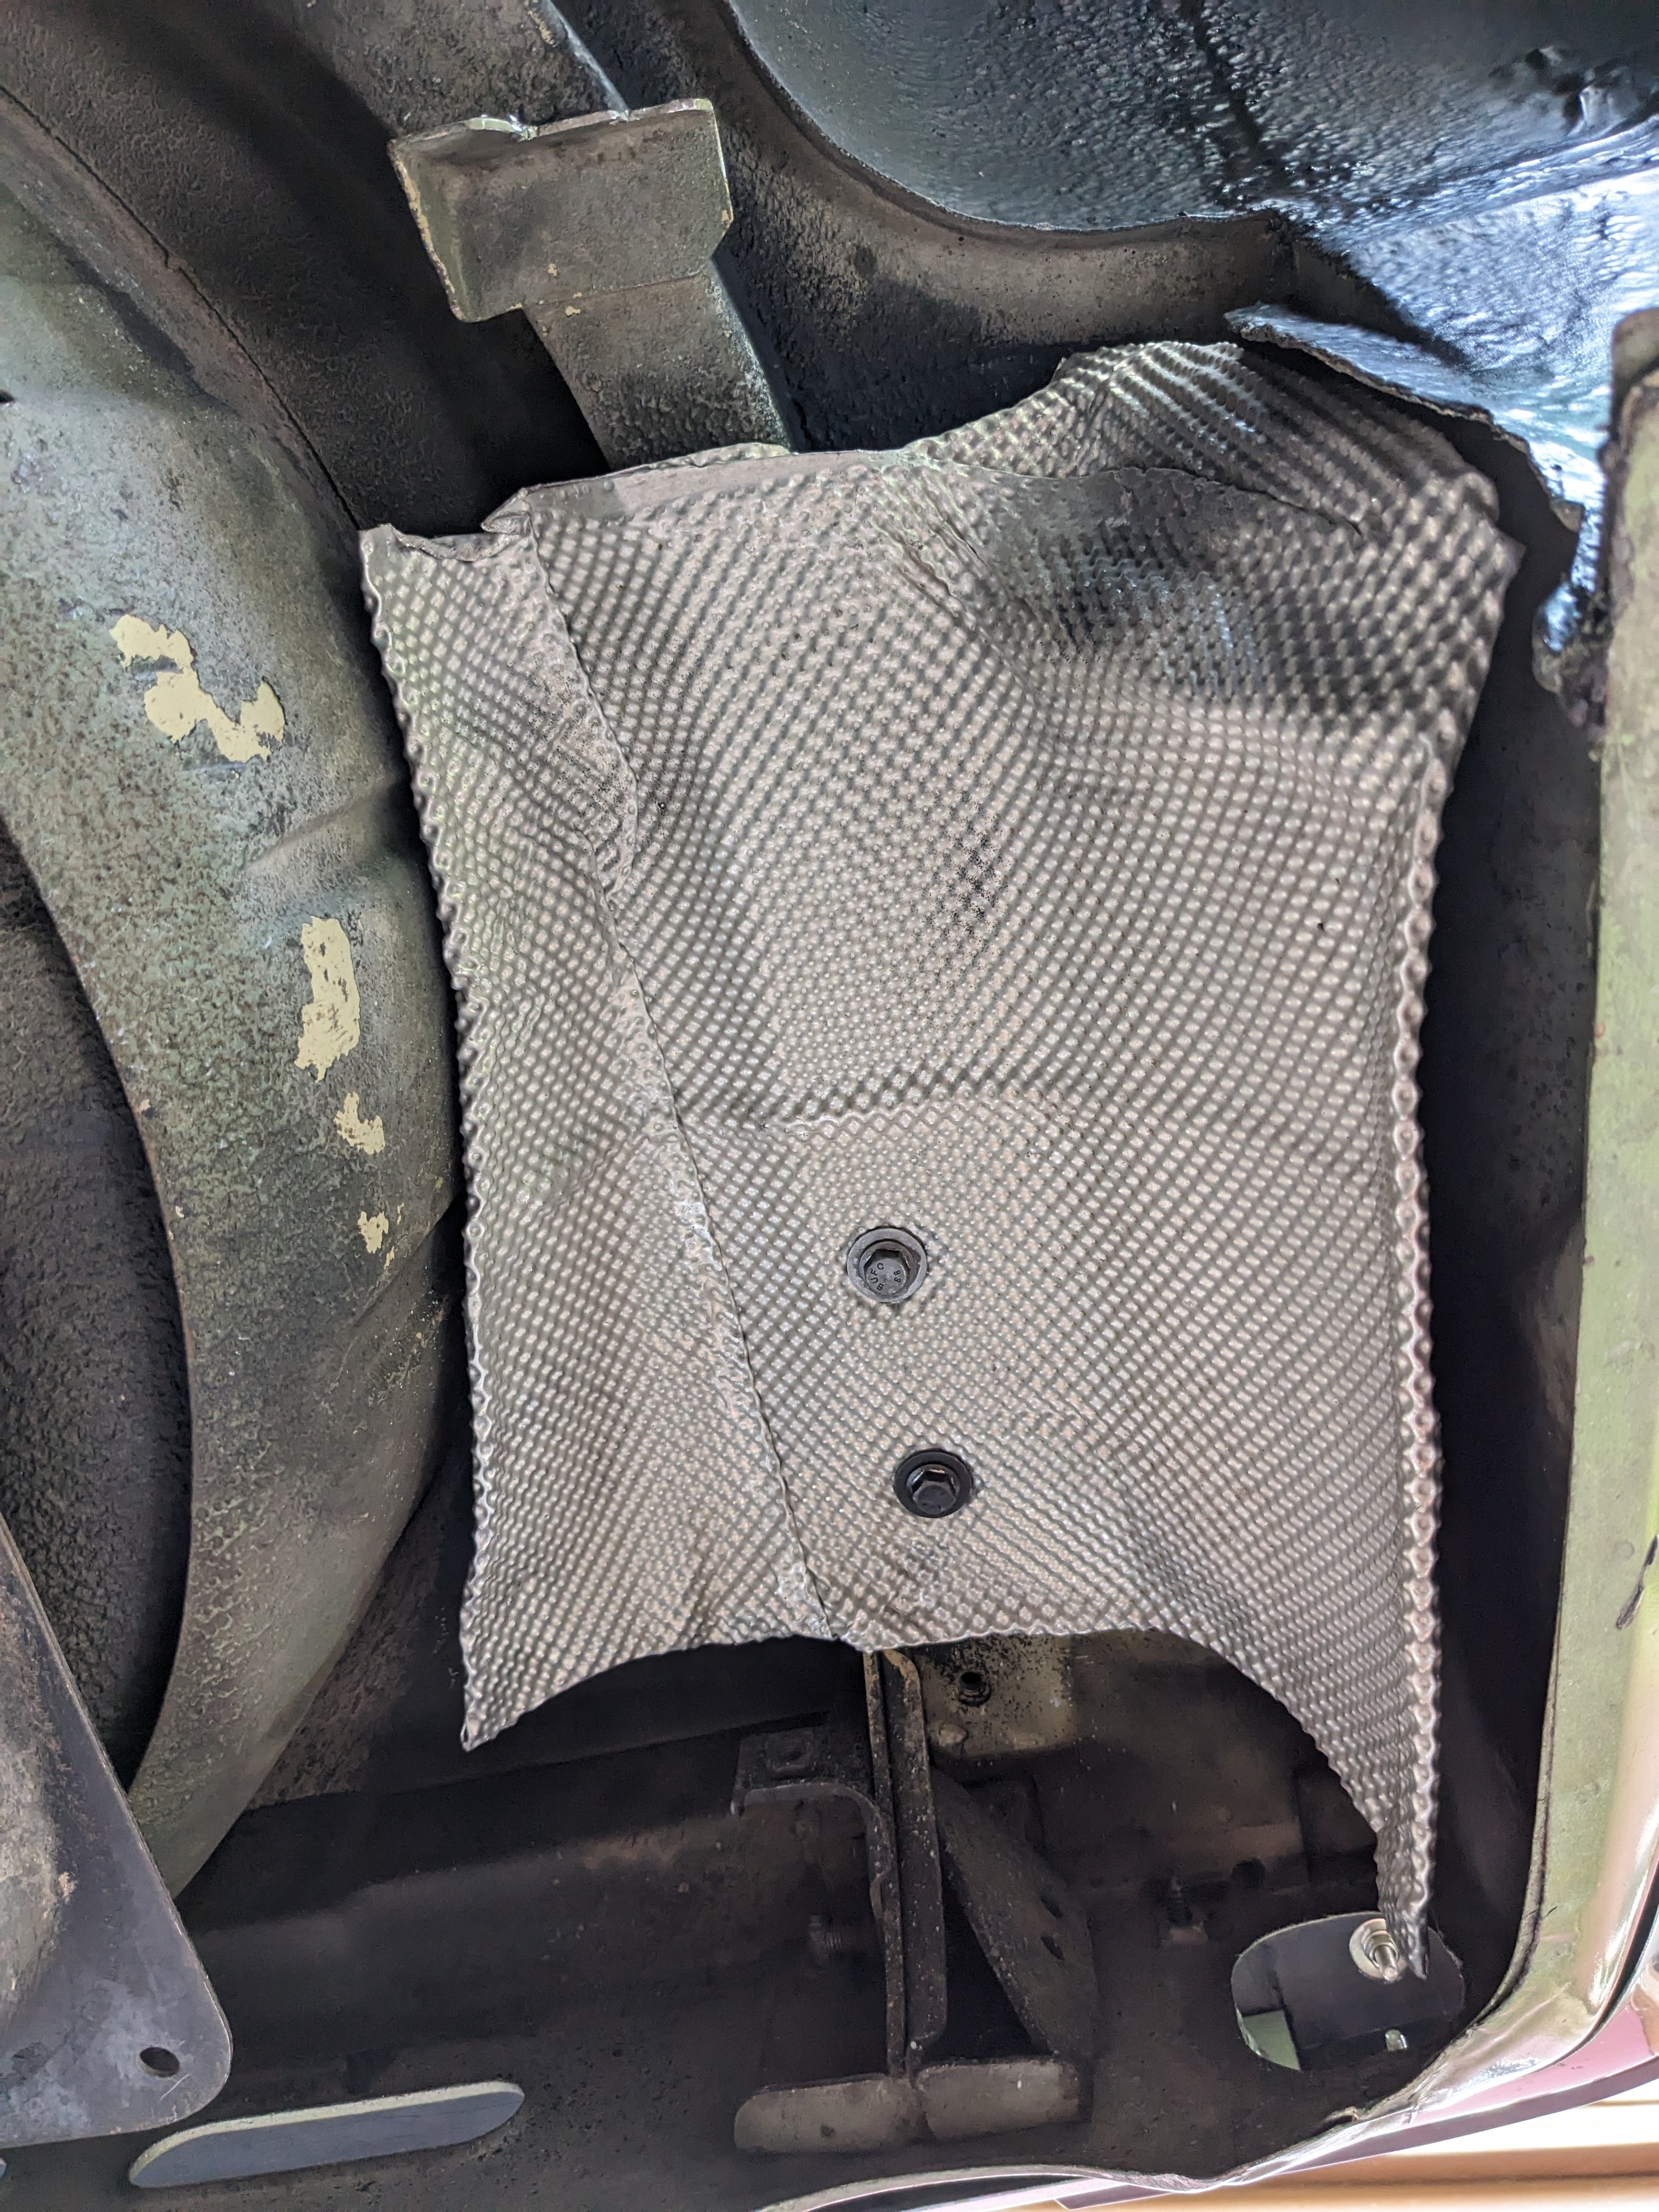
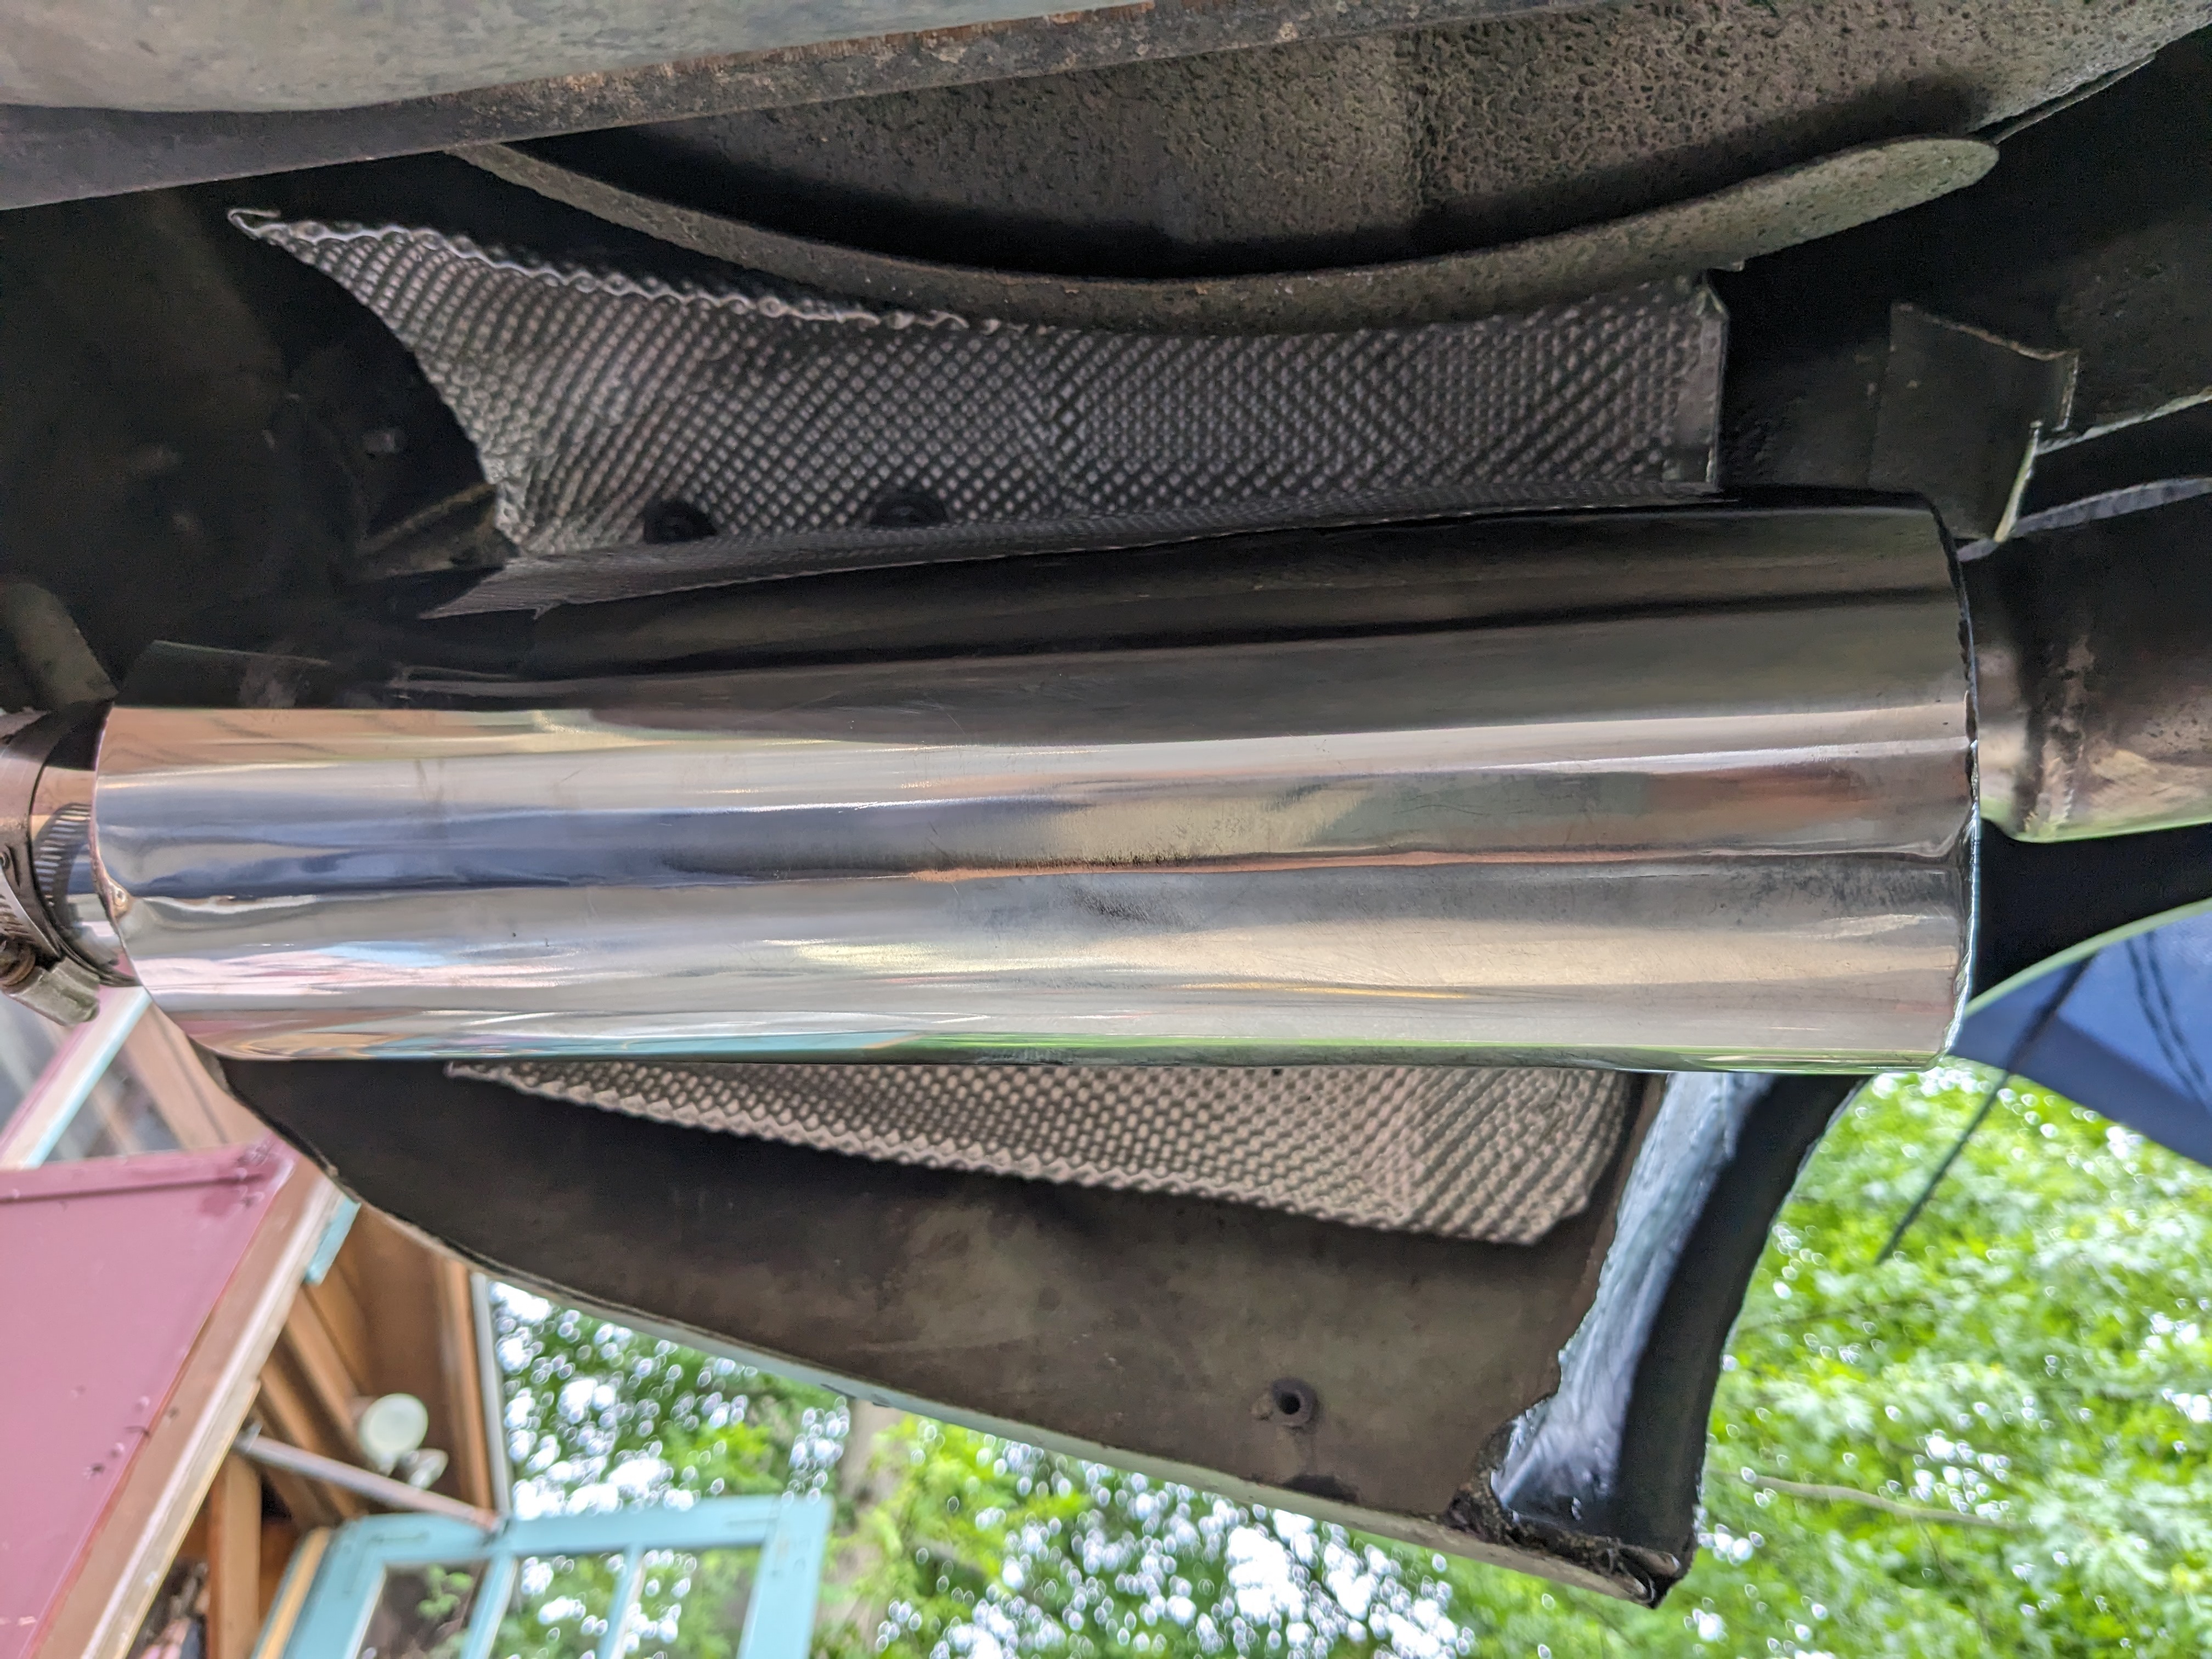
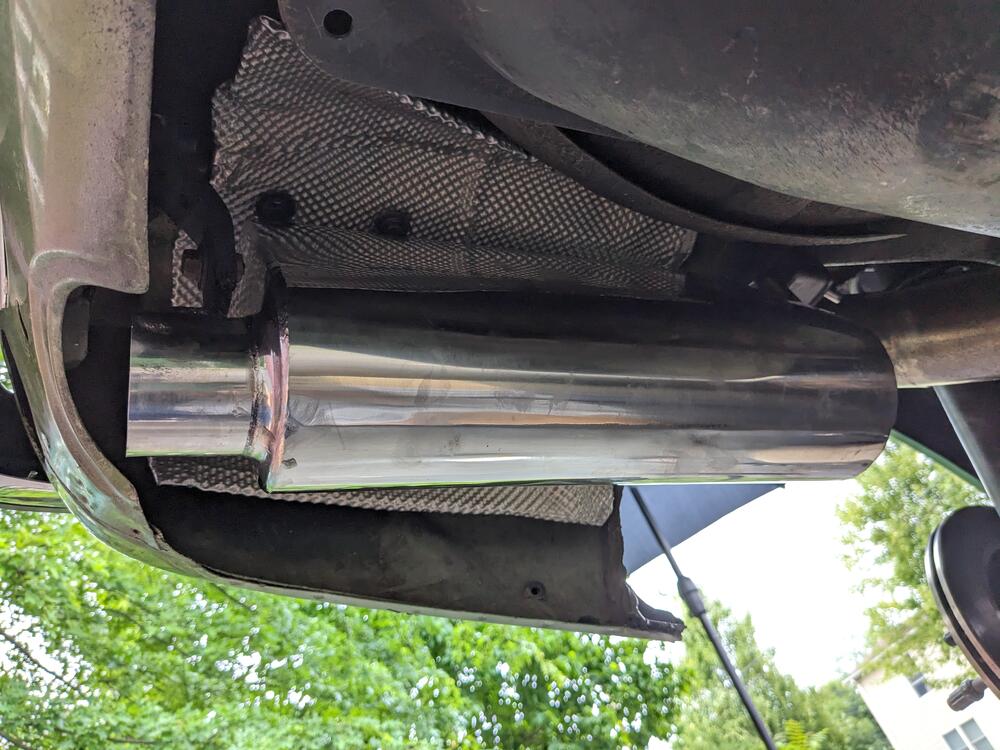
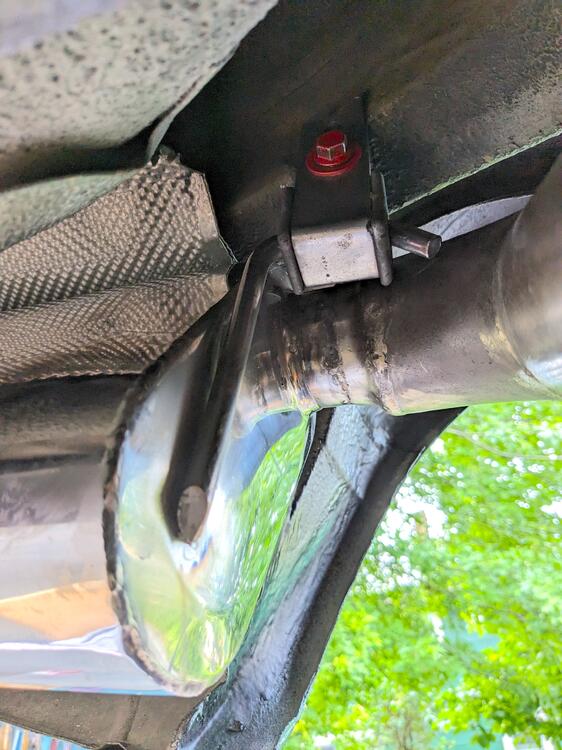
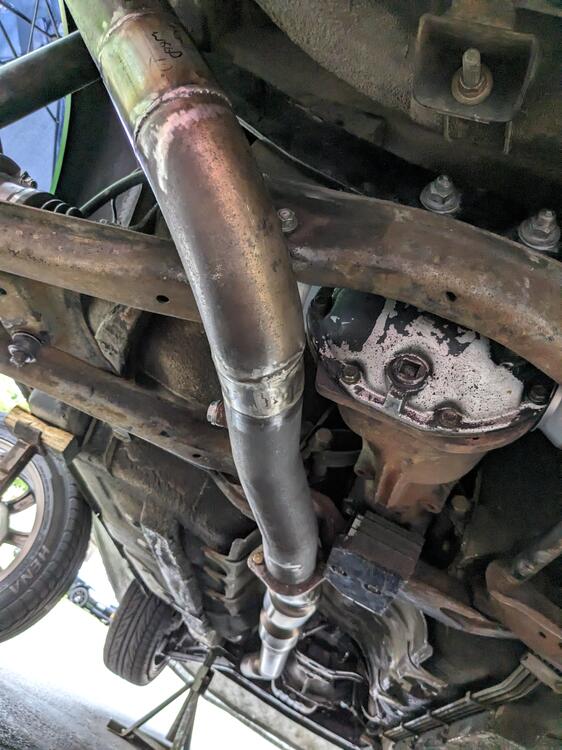
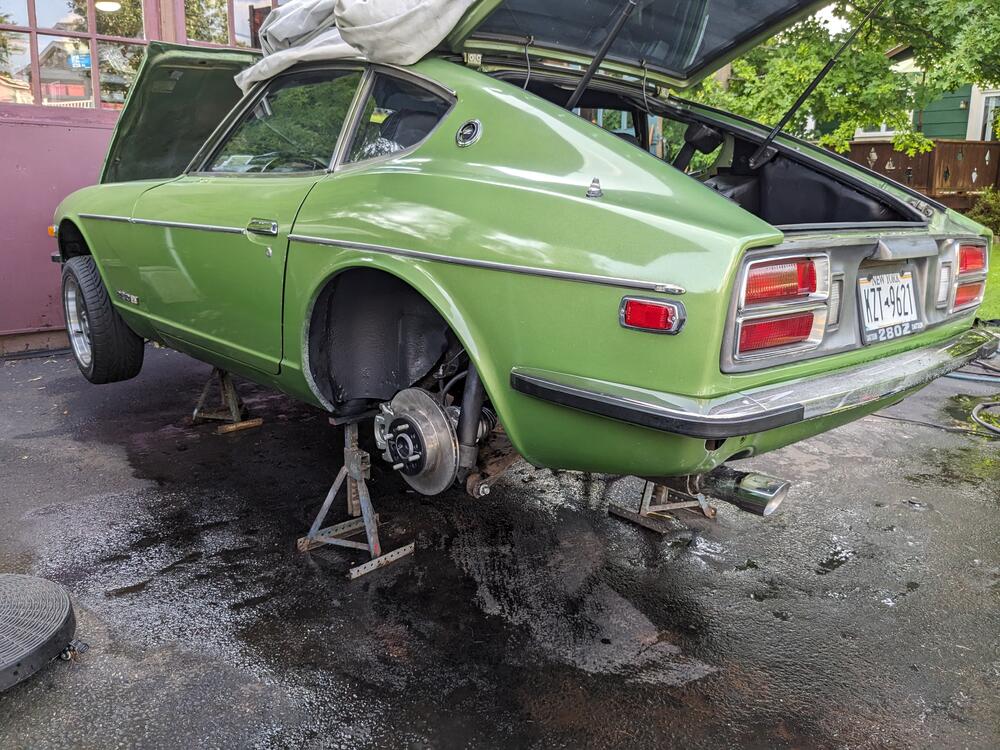
Made a heat shield to go above & around the muffler, since it is now set so close to the frame/floor. Bolted in place where the original bumper shock shield was attached forward muffler hanger gaps/clearance off the subframe is still good Just have to deal with the tailpipe now

-
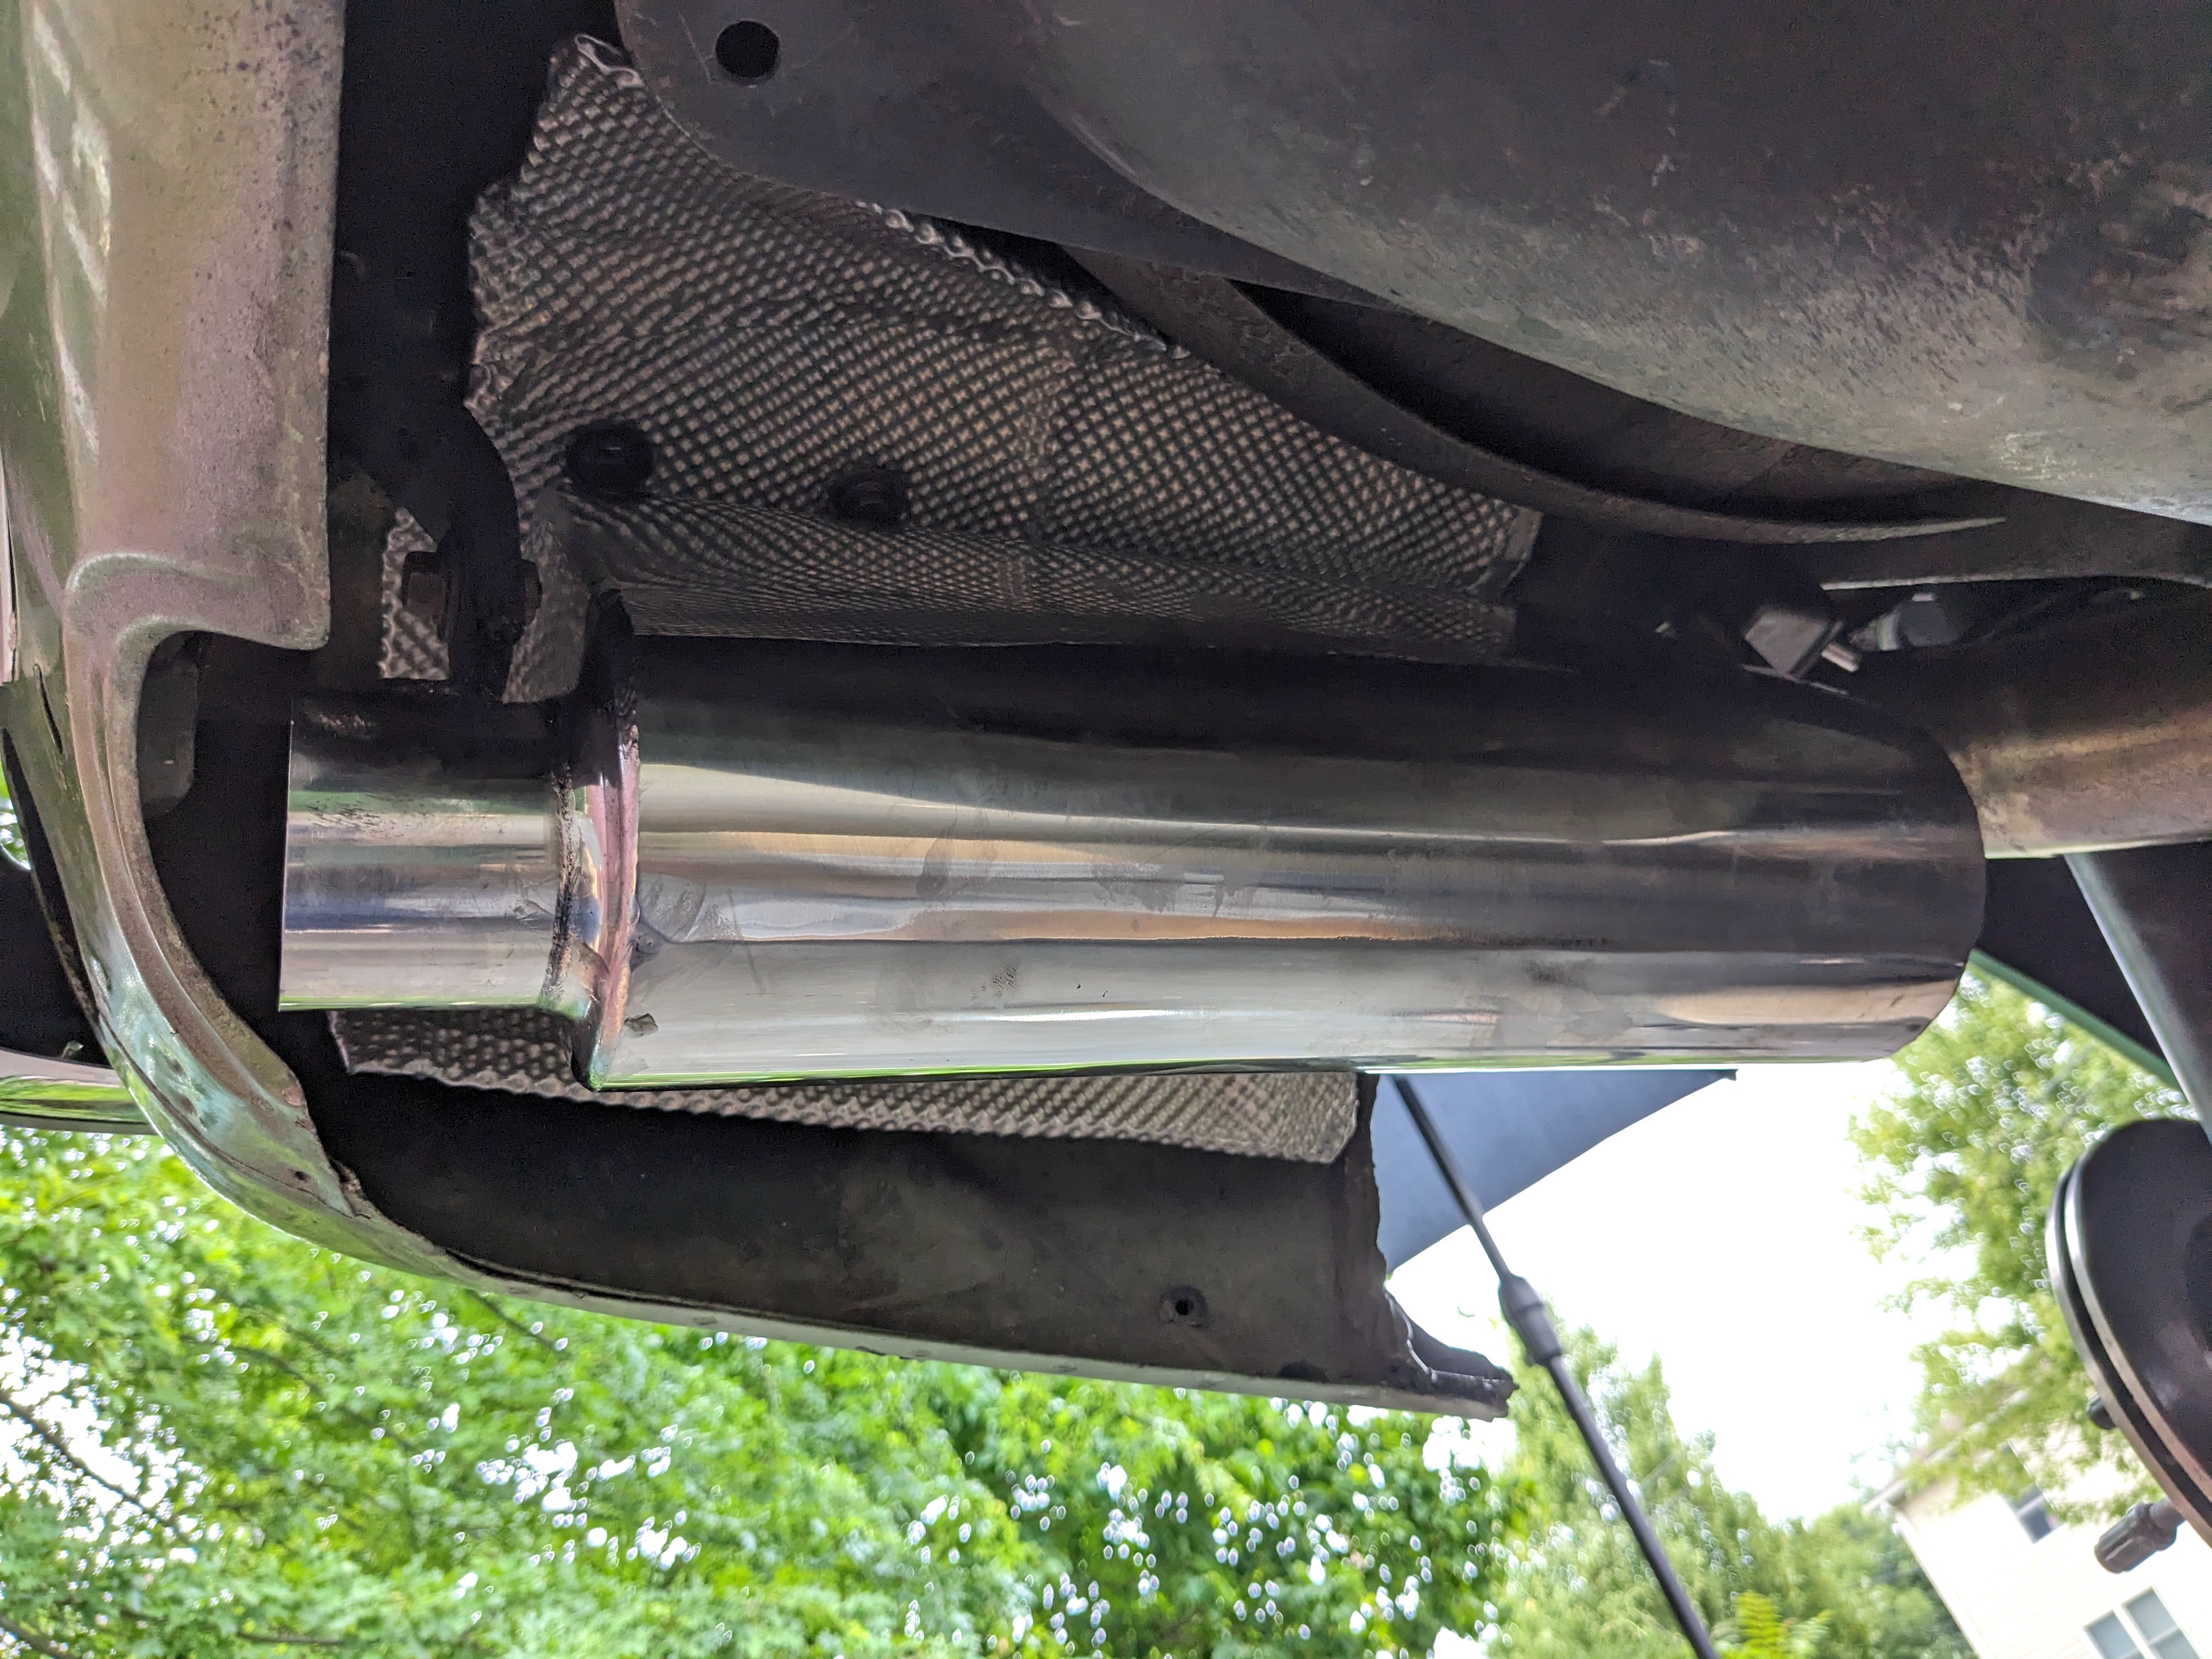
Yeah, happier with the overall fit on this one. I was thinking about the upper clearance. With a hanger on the front of the muffler, the whole rear pipe/ muffler will get pushed very slightly outward & down a smidge. That will center the tailpipe a little better also. Still close though, so I may put some Volvo/FoMoCo heat shielding up above it.
-
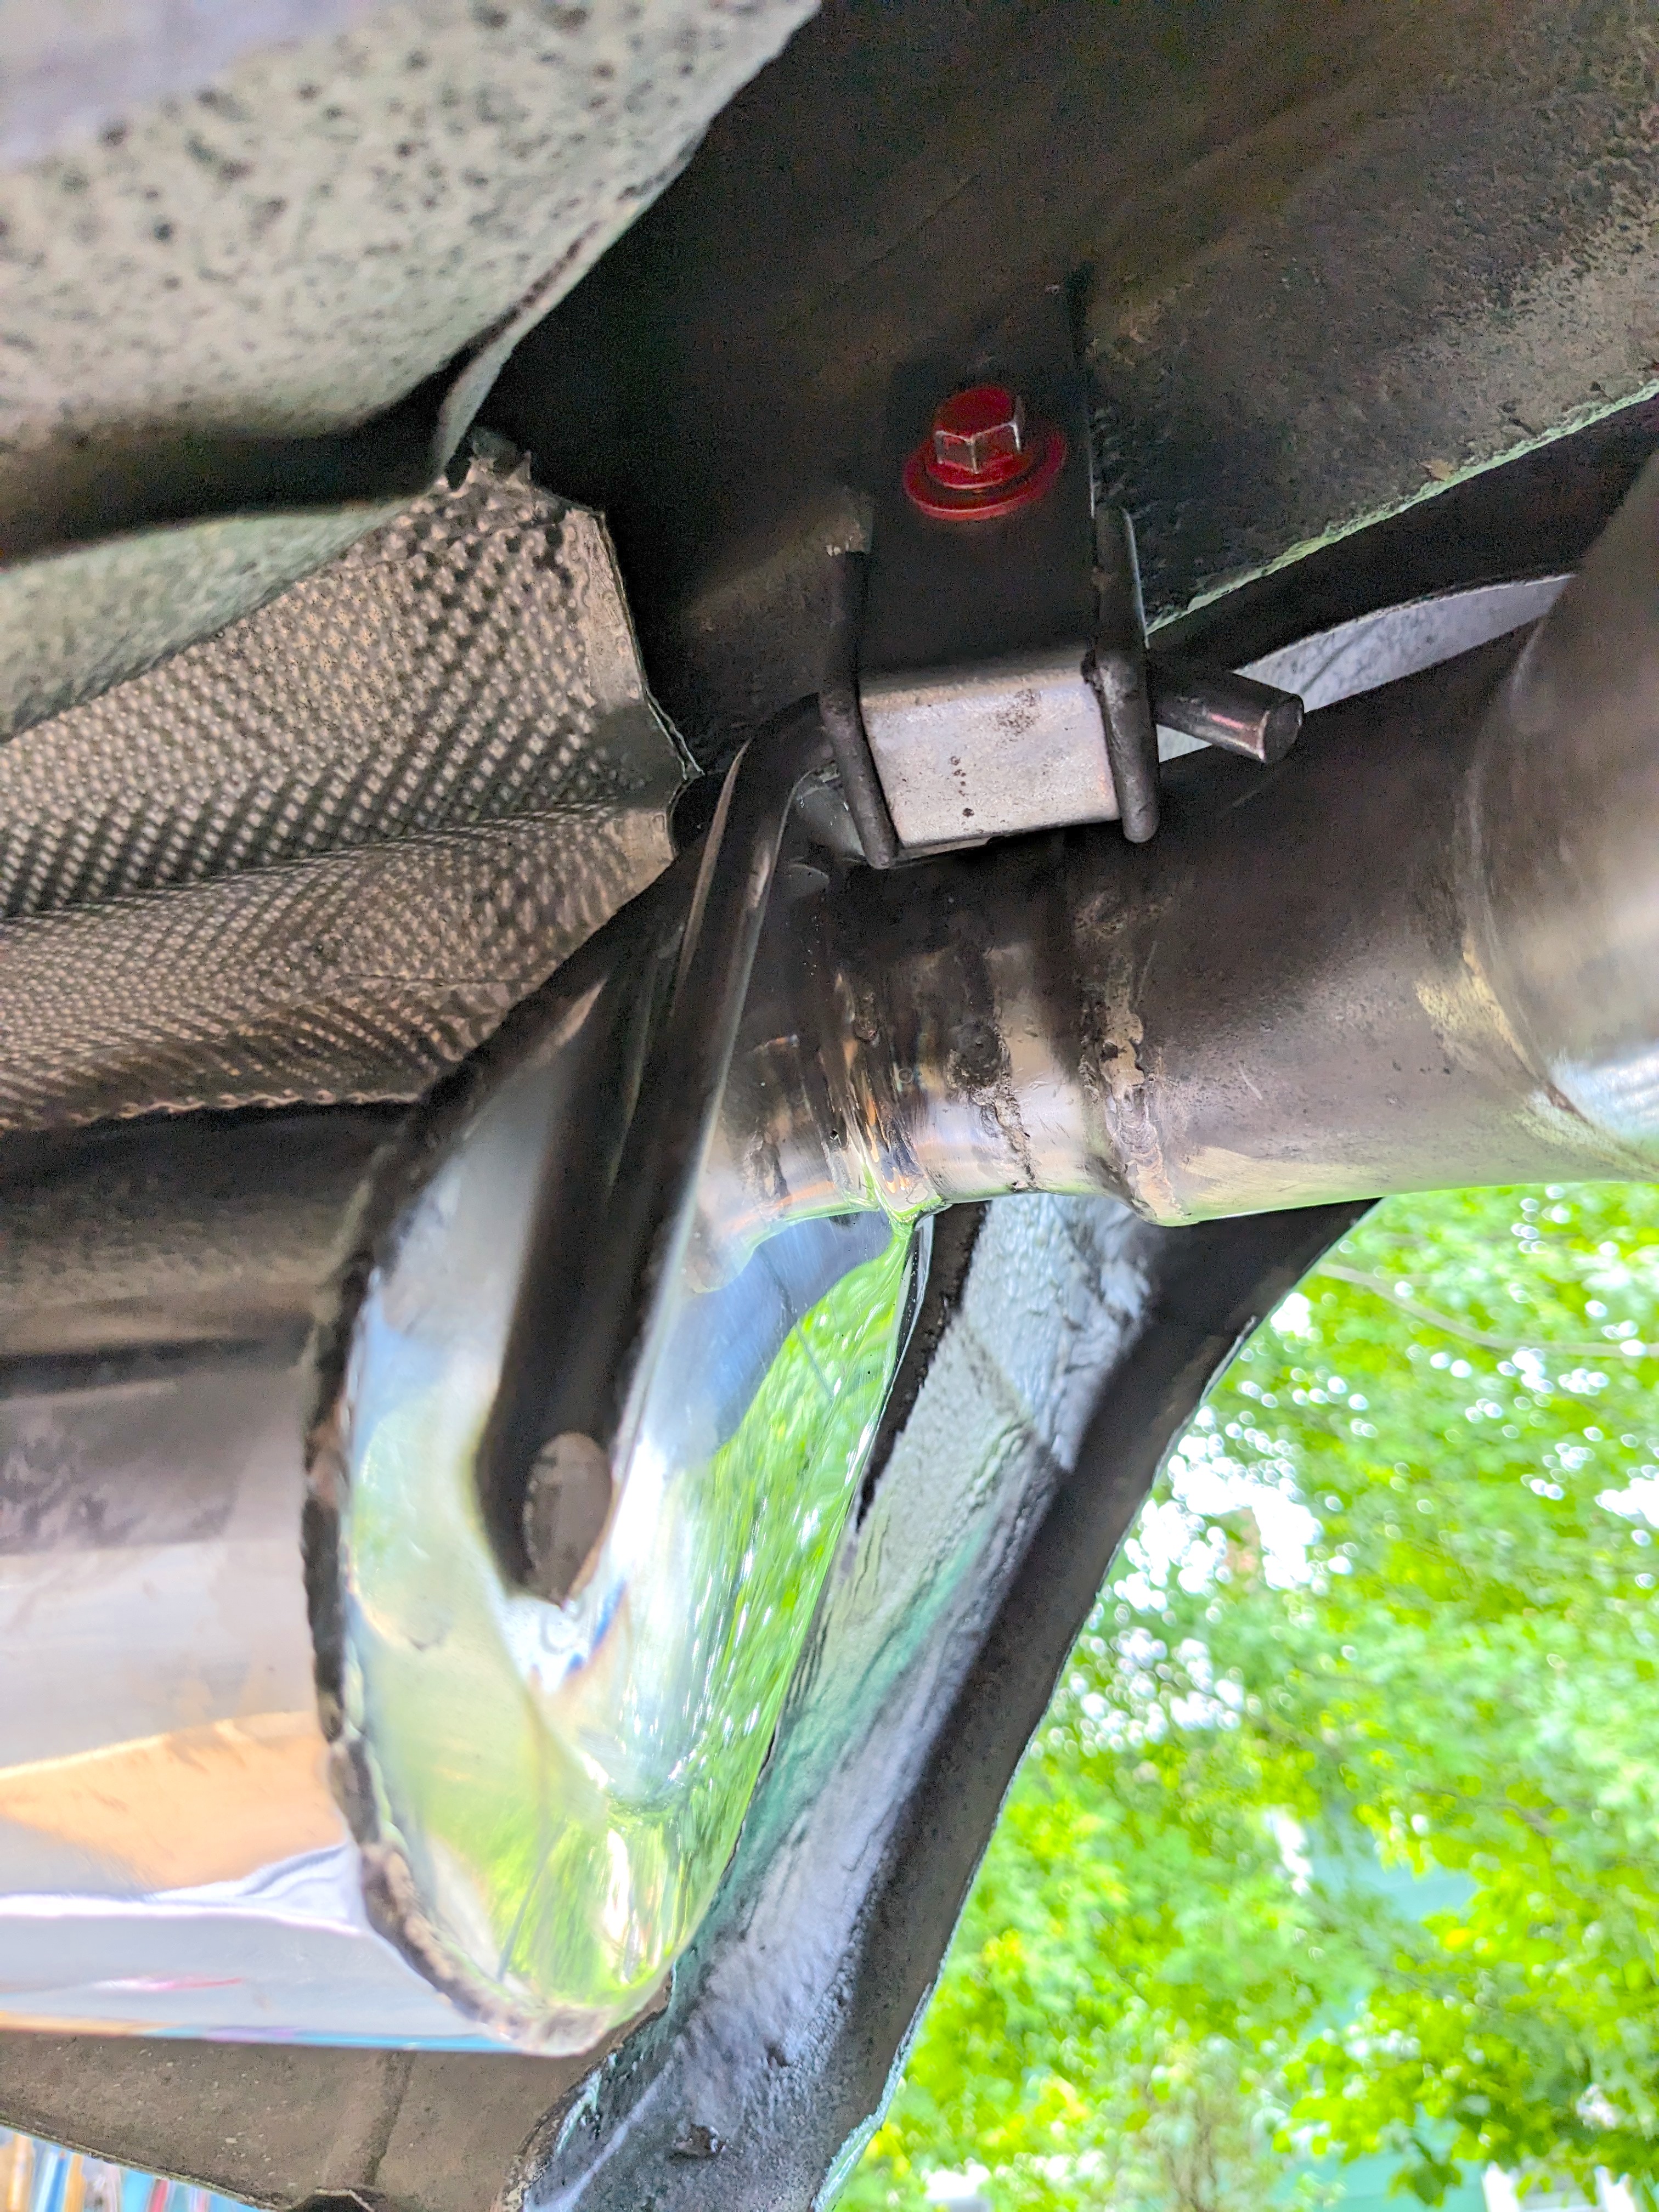
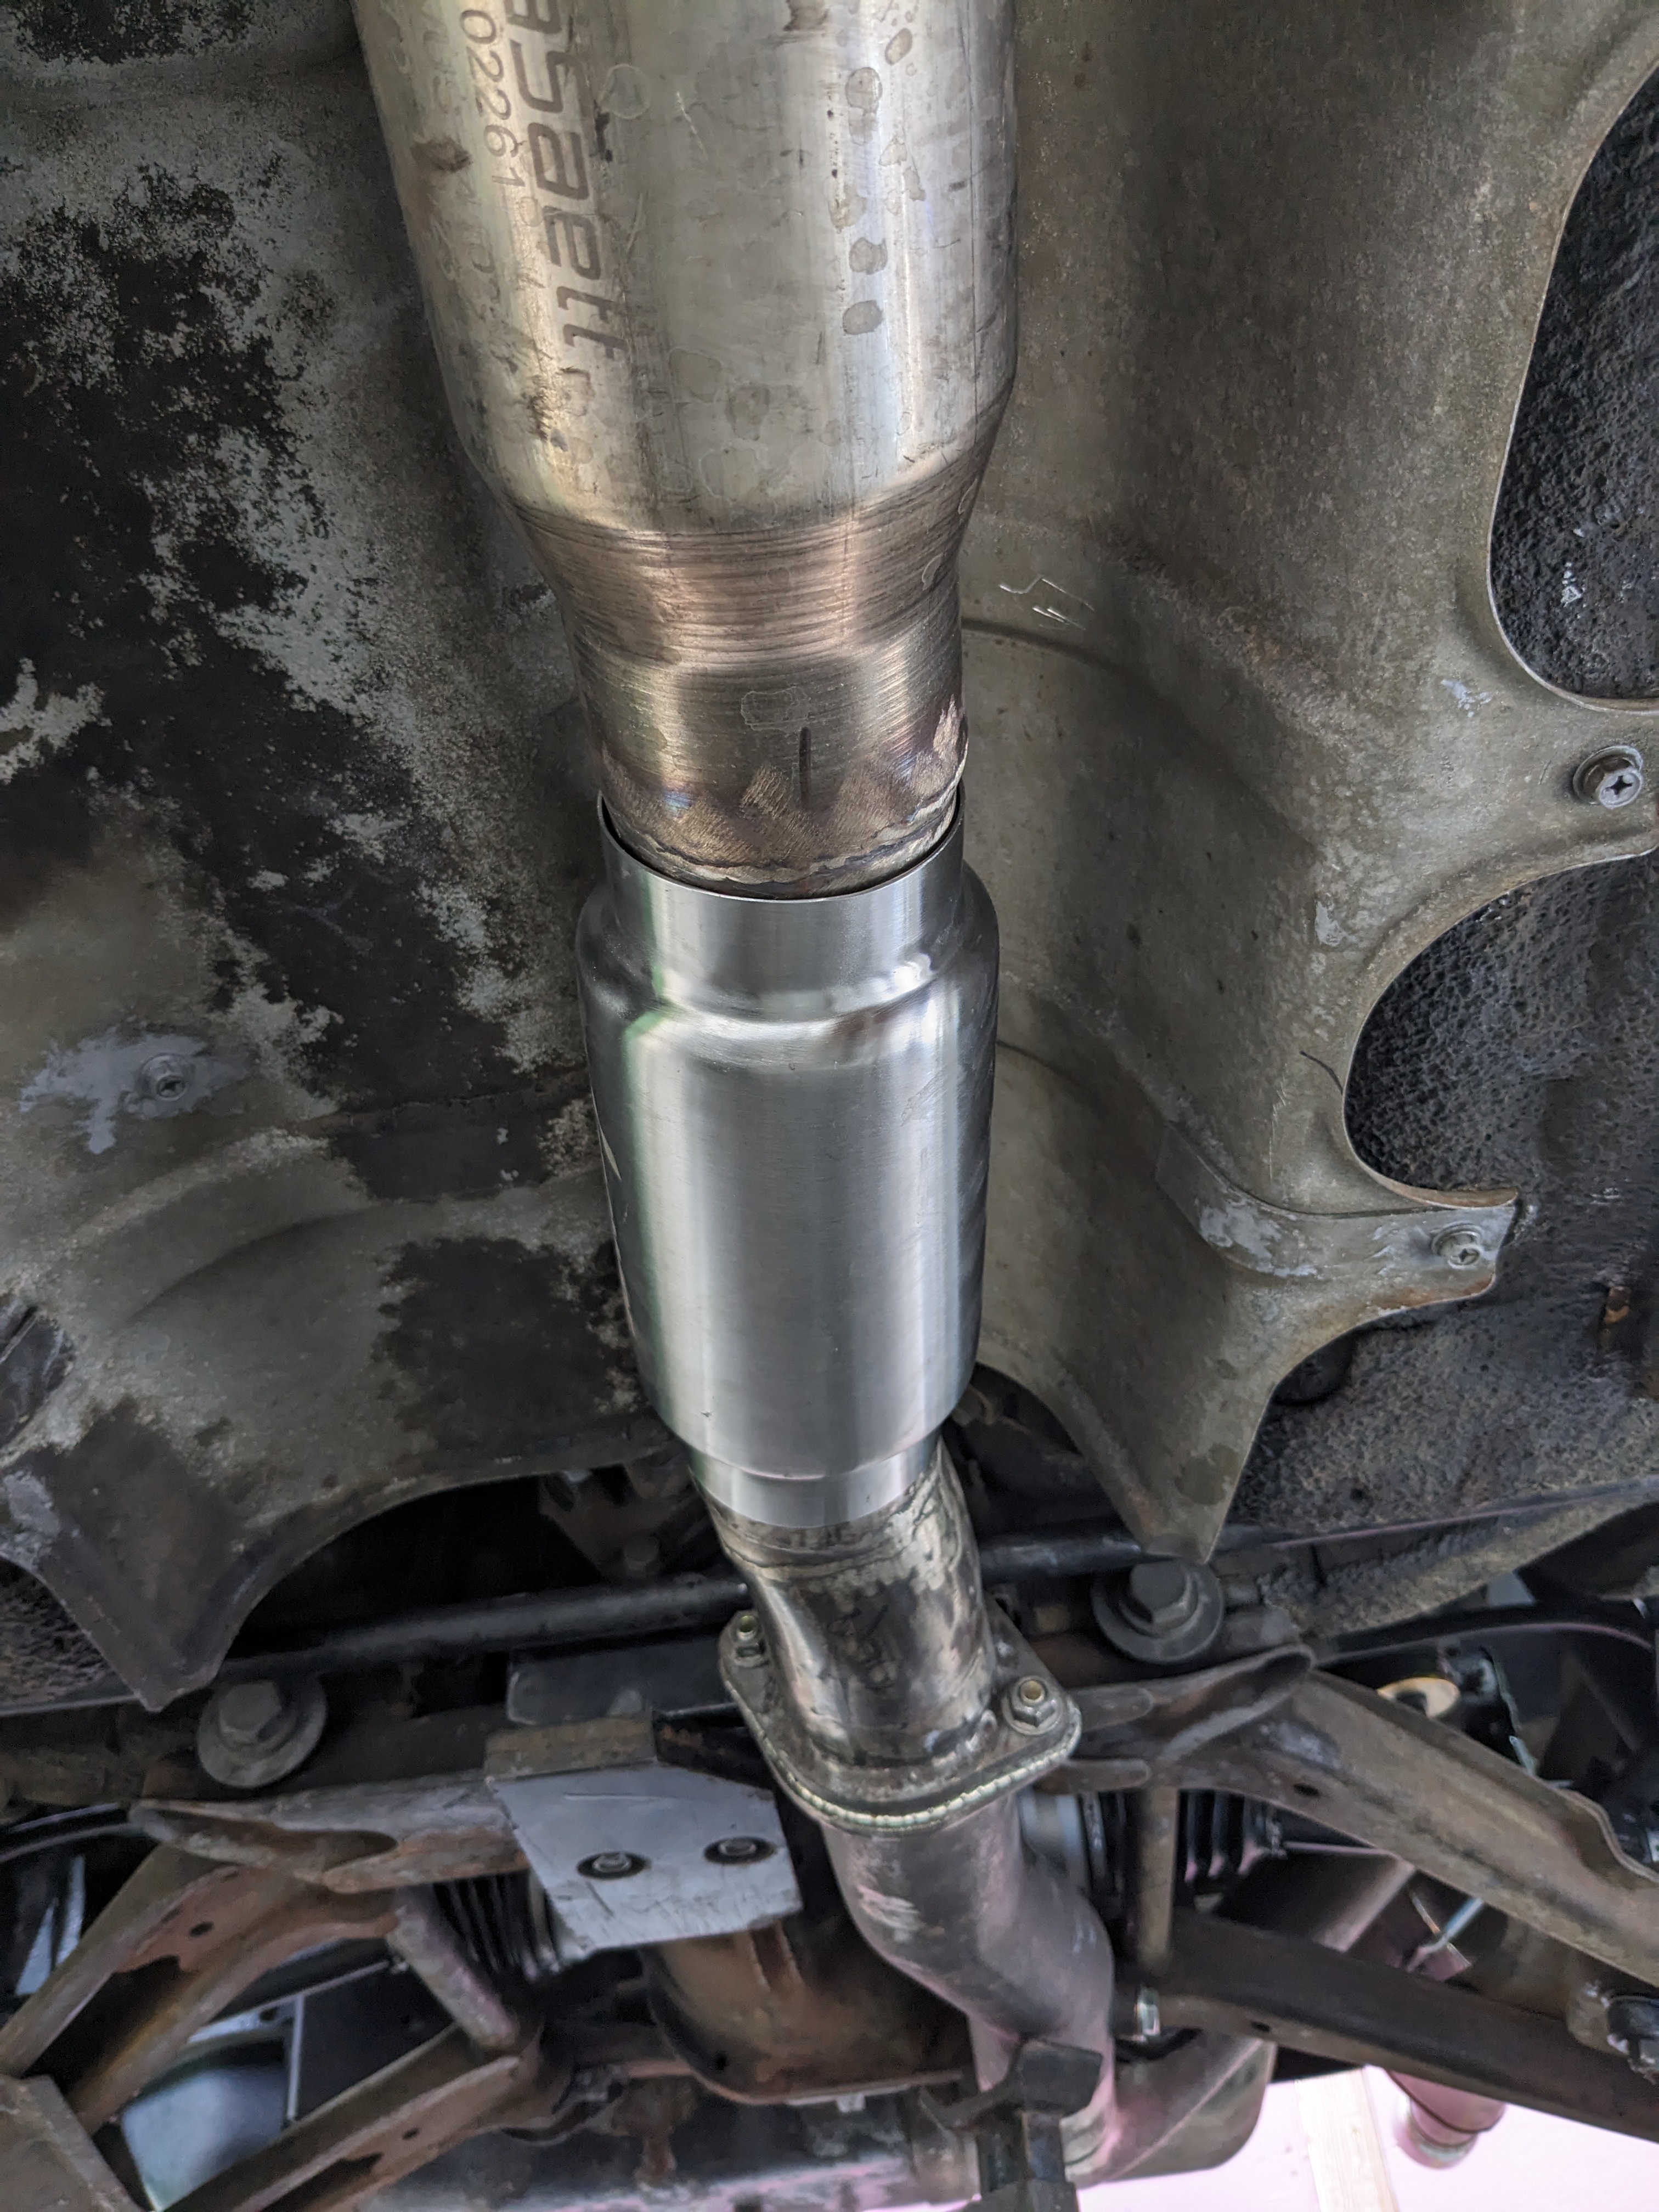
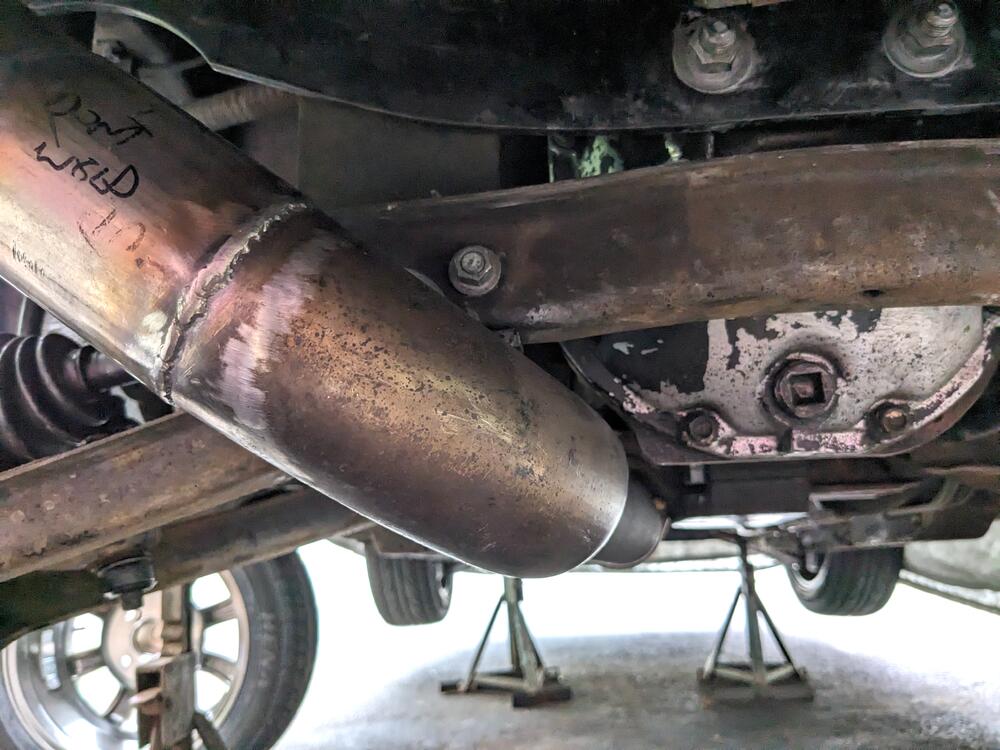
Reworked the rear section to incorporate the Solo Perf. muffler. Dimensions are a little different - a little more rectangular in cross section than oval , so I had to cut & move the feed pipe and remove the stock exhaust hanger bracket to make it fit Have to weld the rear hanger to the muffler outlet, then add a short section for the exhaust tip to clear the valance Got the whole thing set closer to the rail, but with better clearance off the spare well Left the innermost part of the bracket, so I have something to hang a support off of. got it all tacked, now I have to weld it all & make a new hanger
-
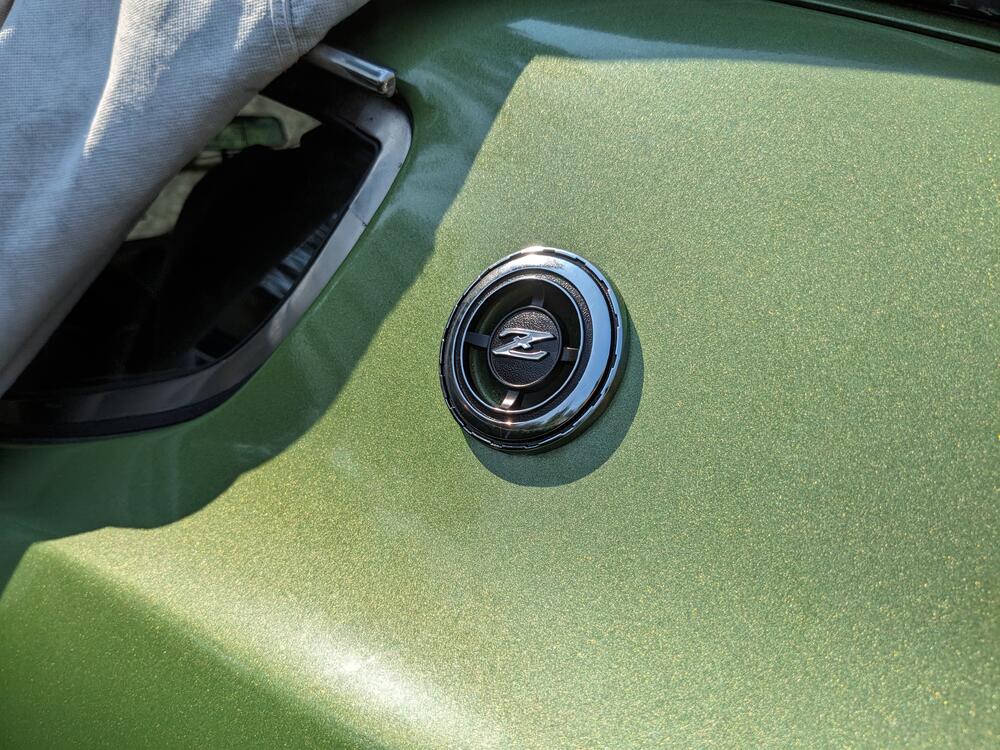
After I got the nice new seals done, I realized I really couldn't stand looking at the 47 year old side emblems - so I got the 2 sides & the hood emblems from Resurrected Classics - by way of the Etsy site, the shipping was less that way for some reason The fit & finish is spectacular


-
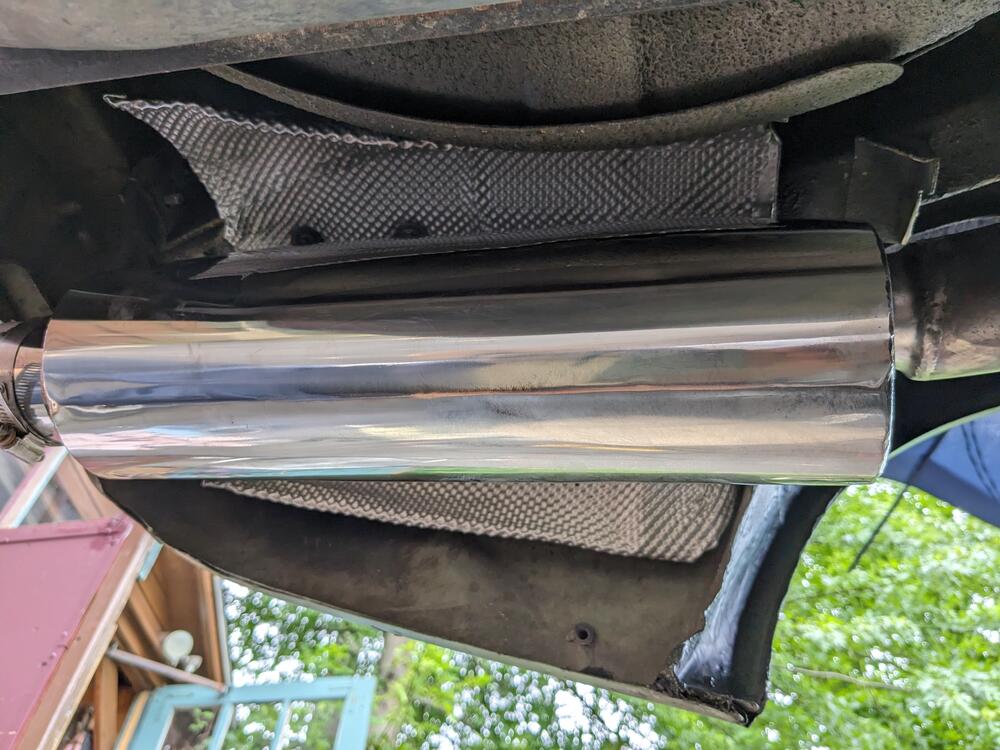
Put the resonator in today. Helped with the drone, but still need a quieter muffler. I have a new Solo Performance Stealth 25 from my X1/9 K24 build, so I'm going to swap that out next

-
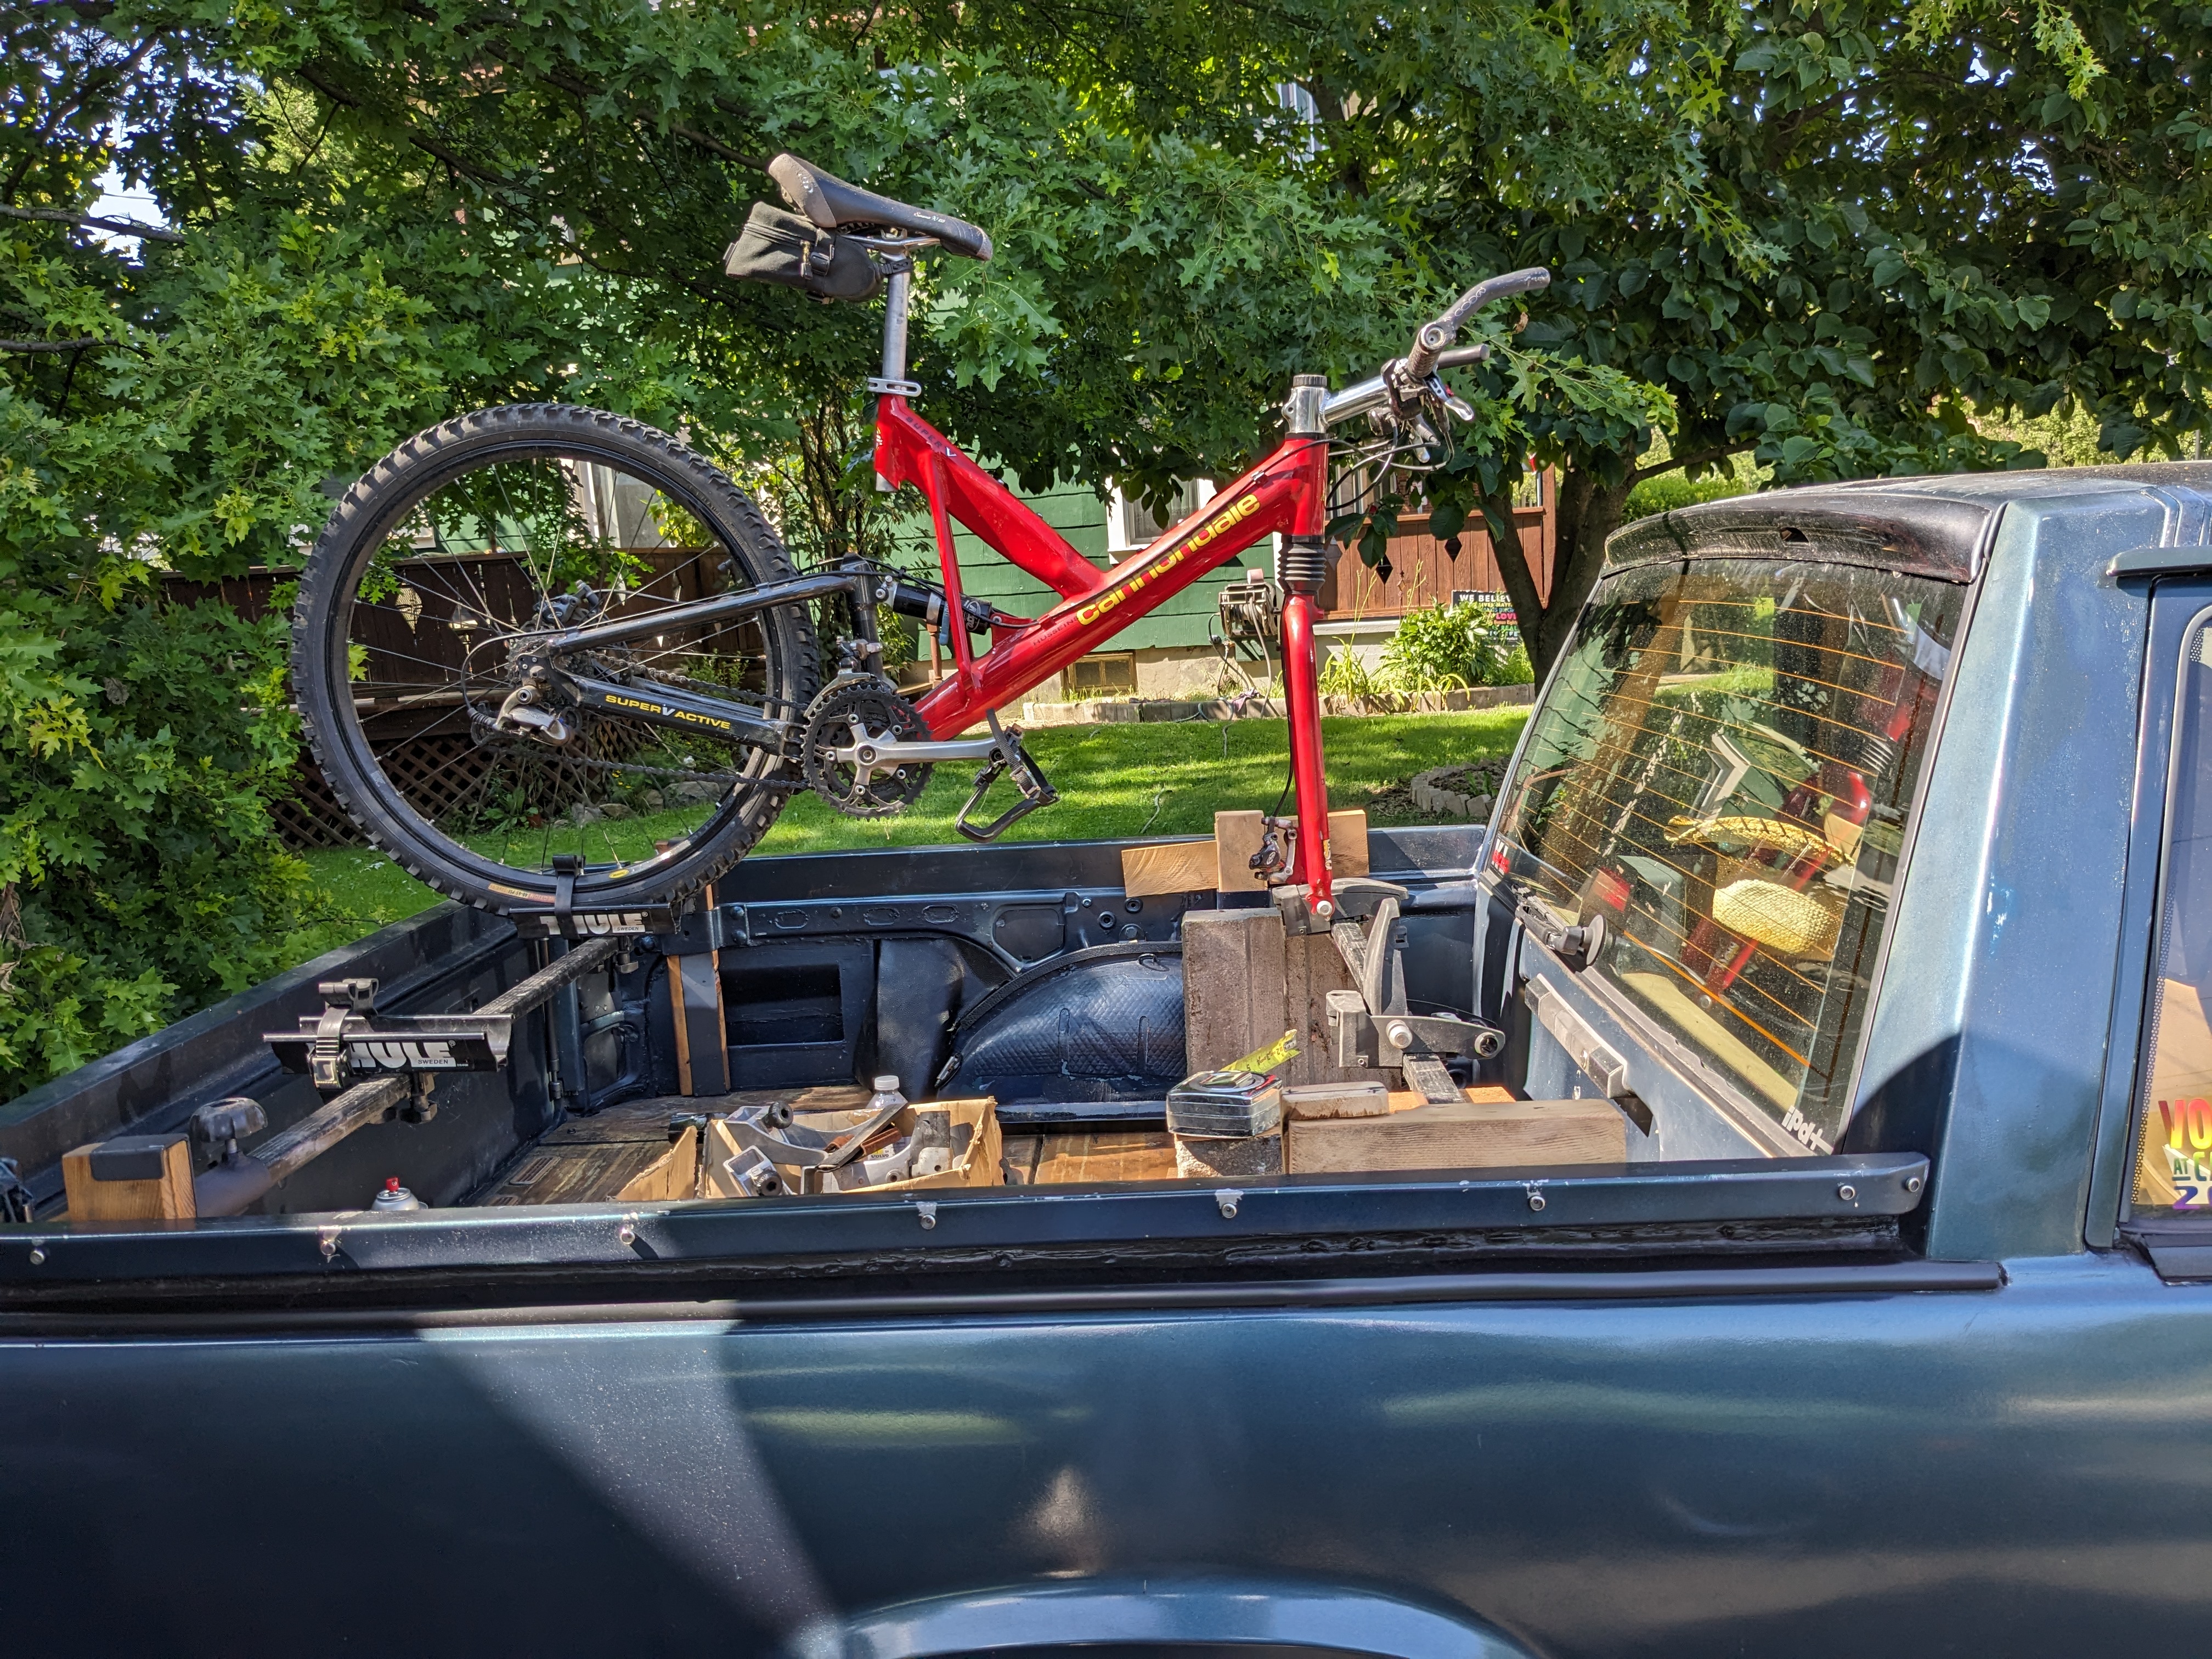
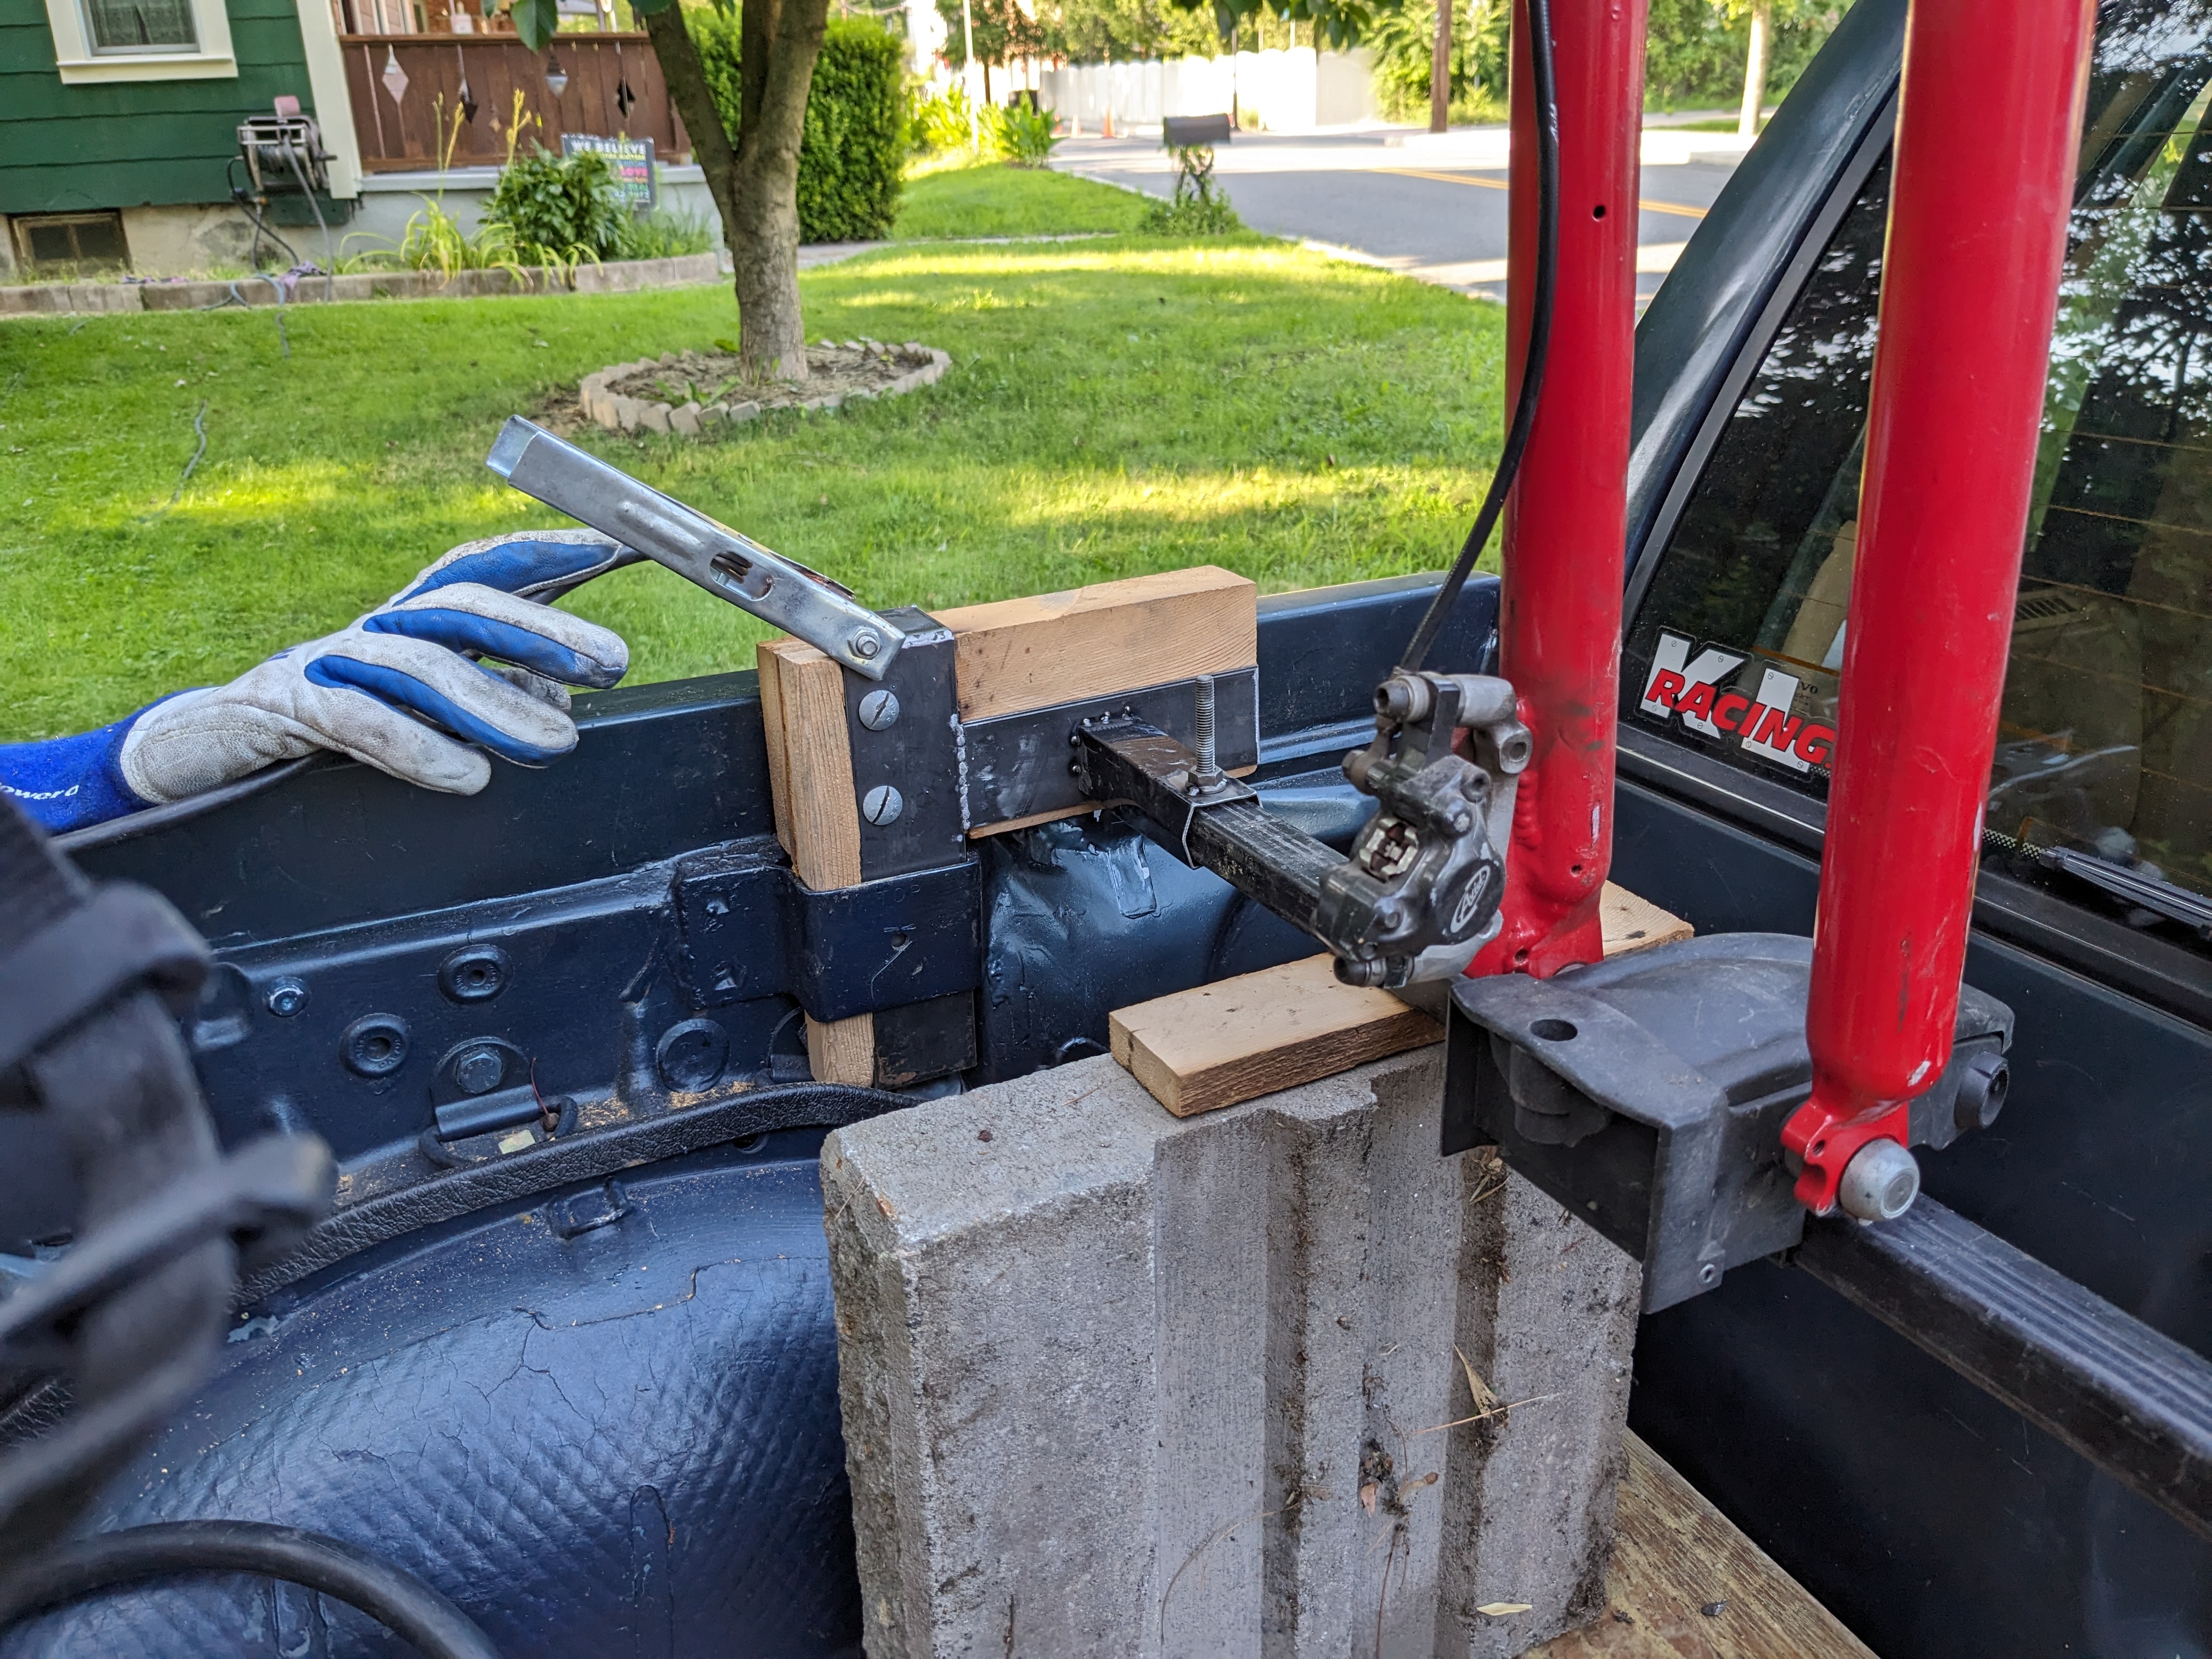
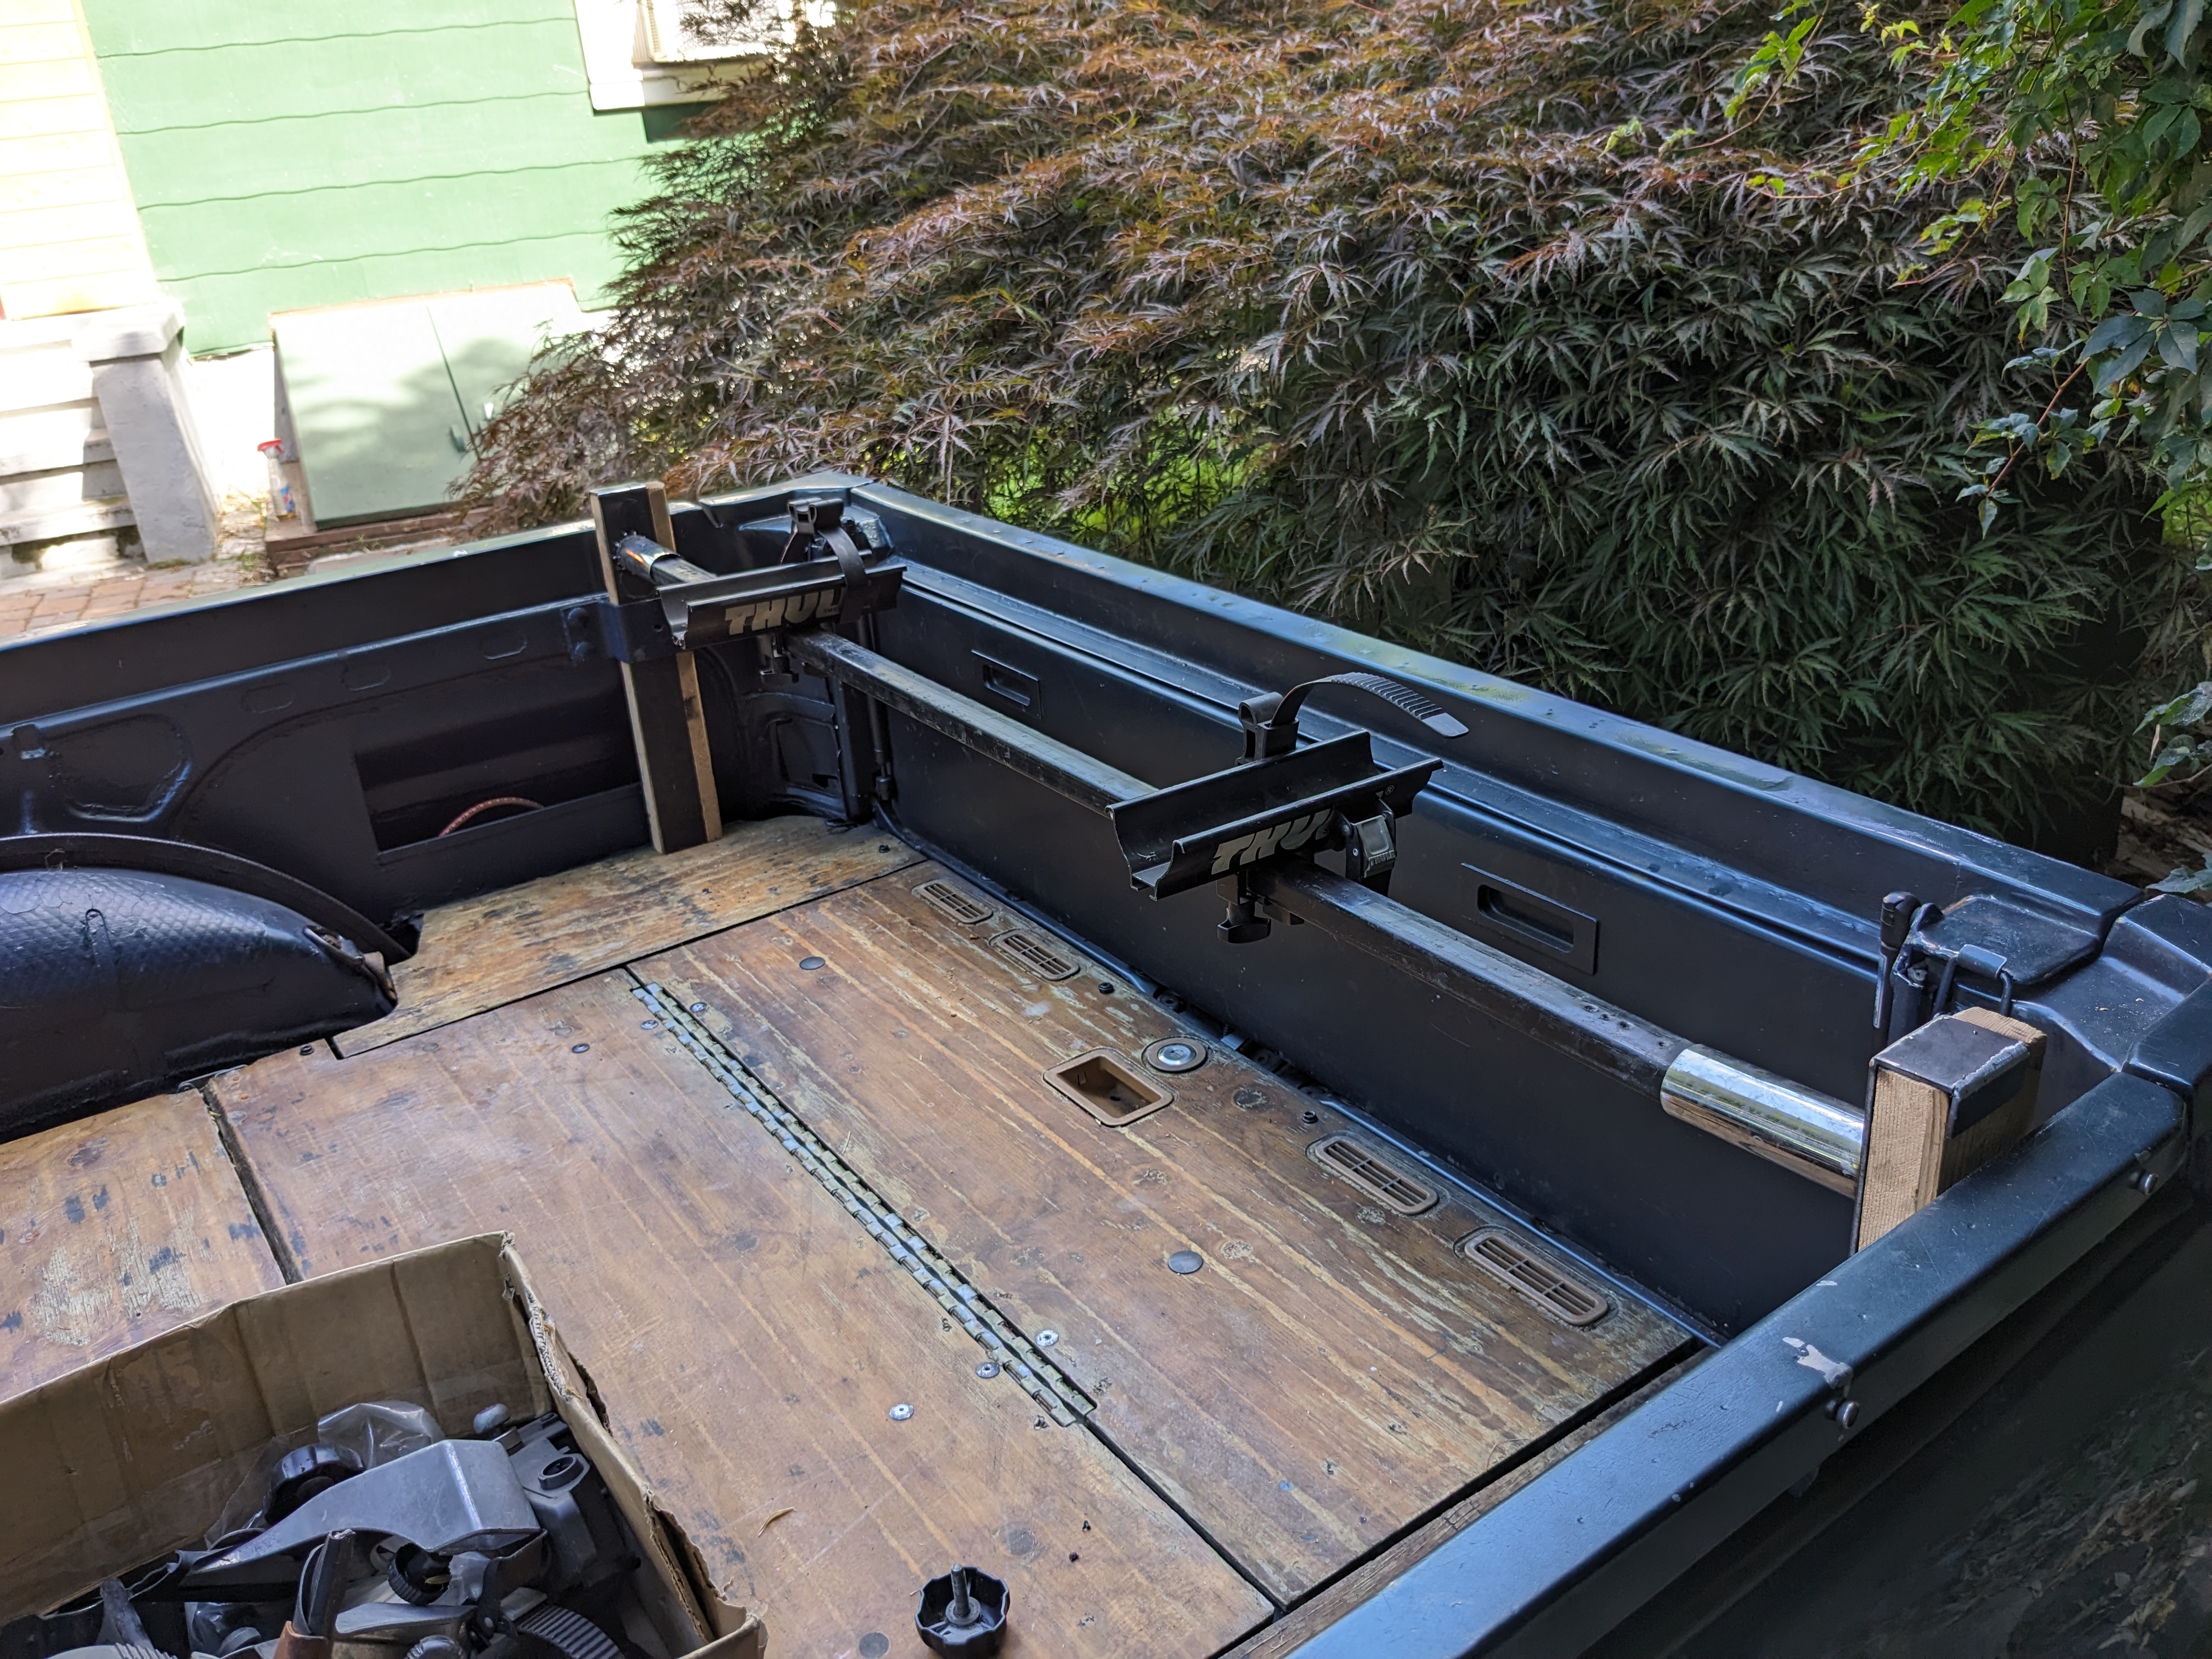
3" OD, 9" long resonator came today, so I'll hopefully get that in tomorrow. In the middle of making bike carrier adapters to hold the Volvo/Thule load bars & bike carriers I have had since the early 90's. I added stake holders to the bed sides when I made the truck. When my kids were young, we would typically fit 4 bikes on the roof of whatever Volvo wagon I had at the time. Wife & I are going to go upstate NY & CT in a couple weeks to do some hiking & rail trail biking. my bike is almost as old as my pickup.


-
3" Exhaust thread (prep) My Z with the organ donor Considering the Apex Engineered Front crossmember, so the basic drivetrain geometry will be established up front.
-
So, now that I'm driving it again, the exhaust is WAAAAYYYY to loud & drones terribly between 2-3K rpm. I will have to look at a different muffler, and perhaps a resonator that is smaller than the 3" Magnaflow I have, that was too long to fit after the cat in the straight section, which is only about 10".
-
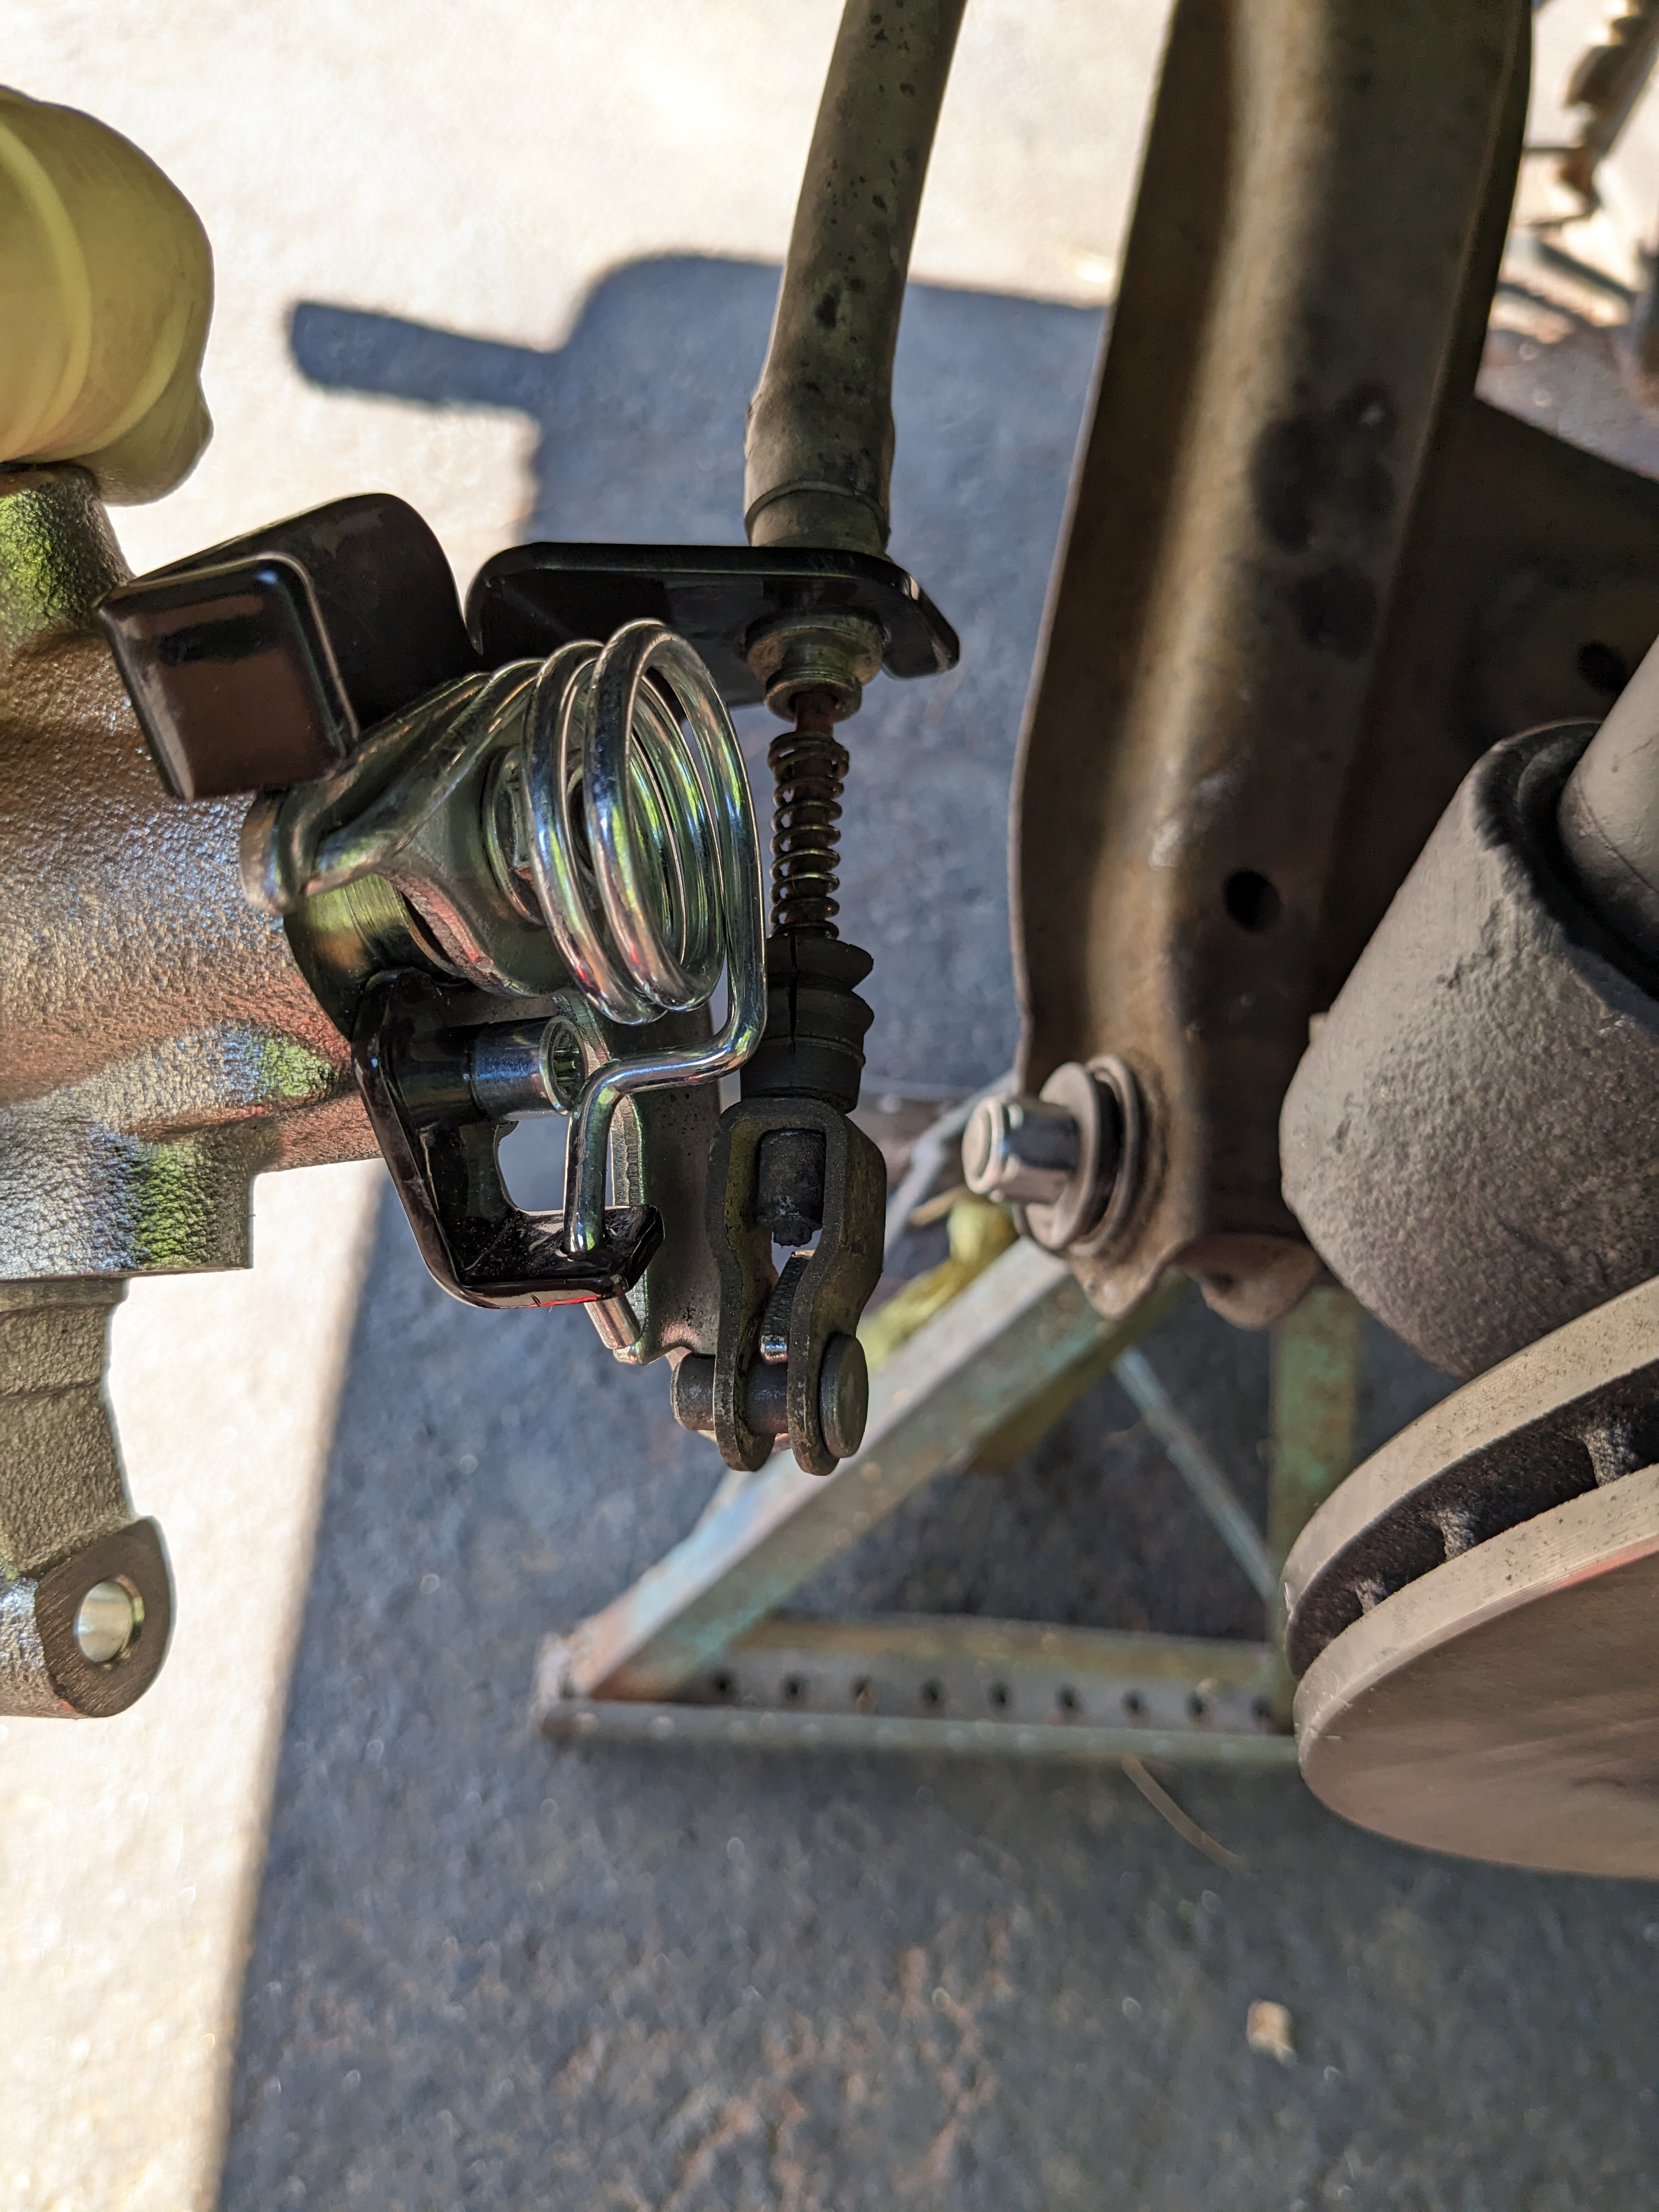
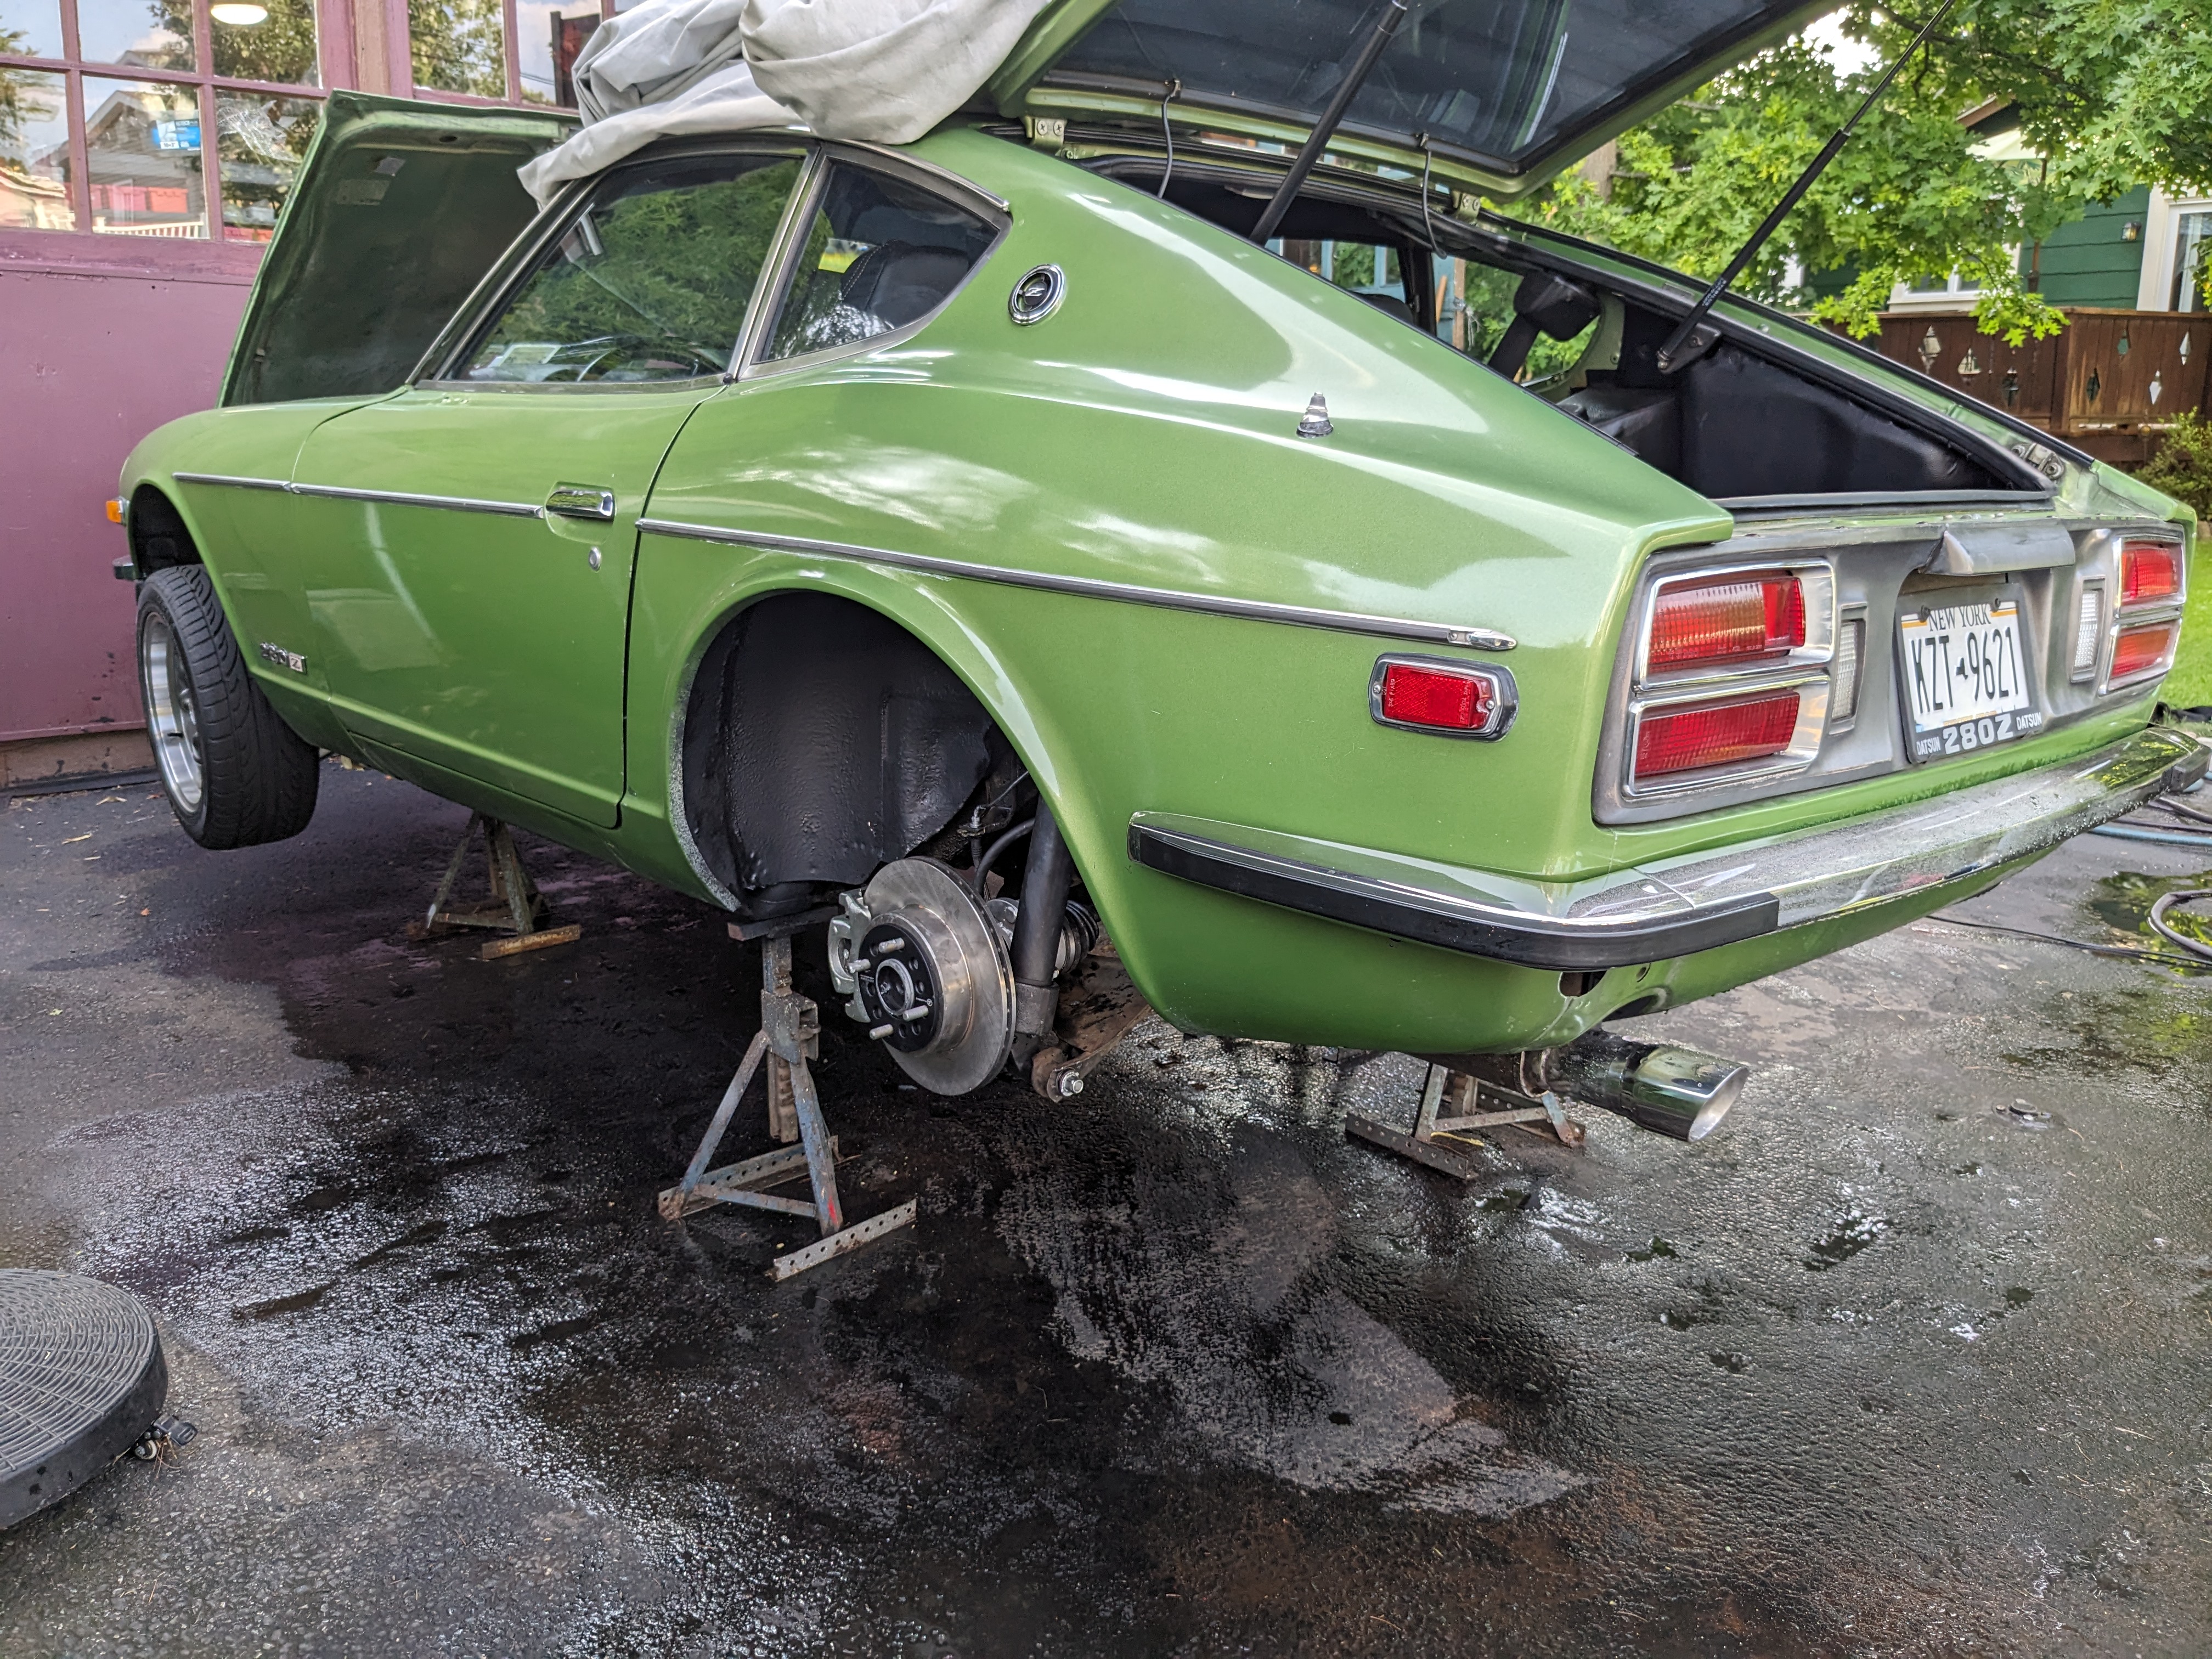
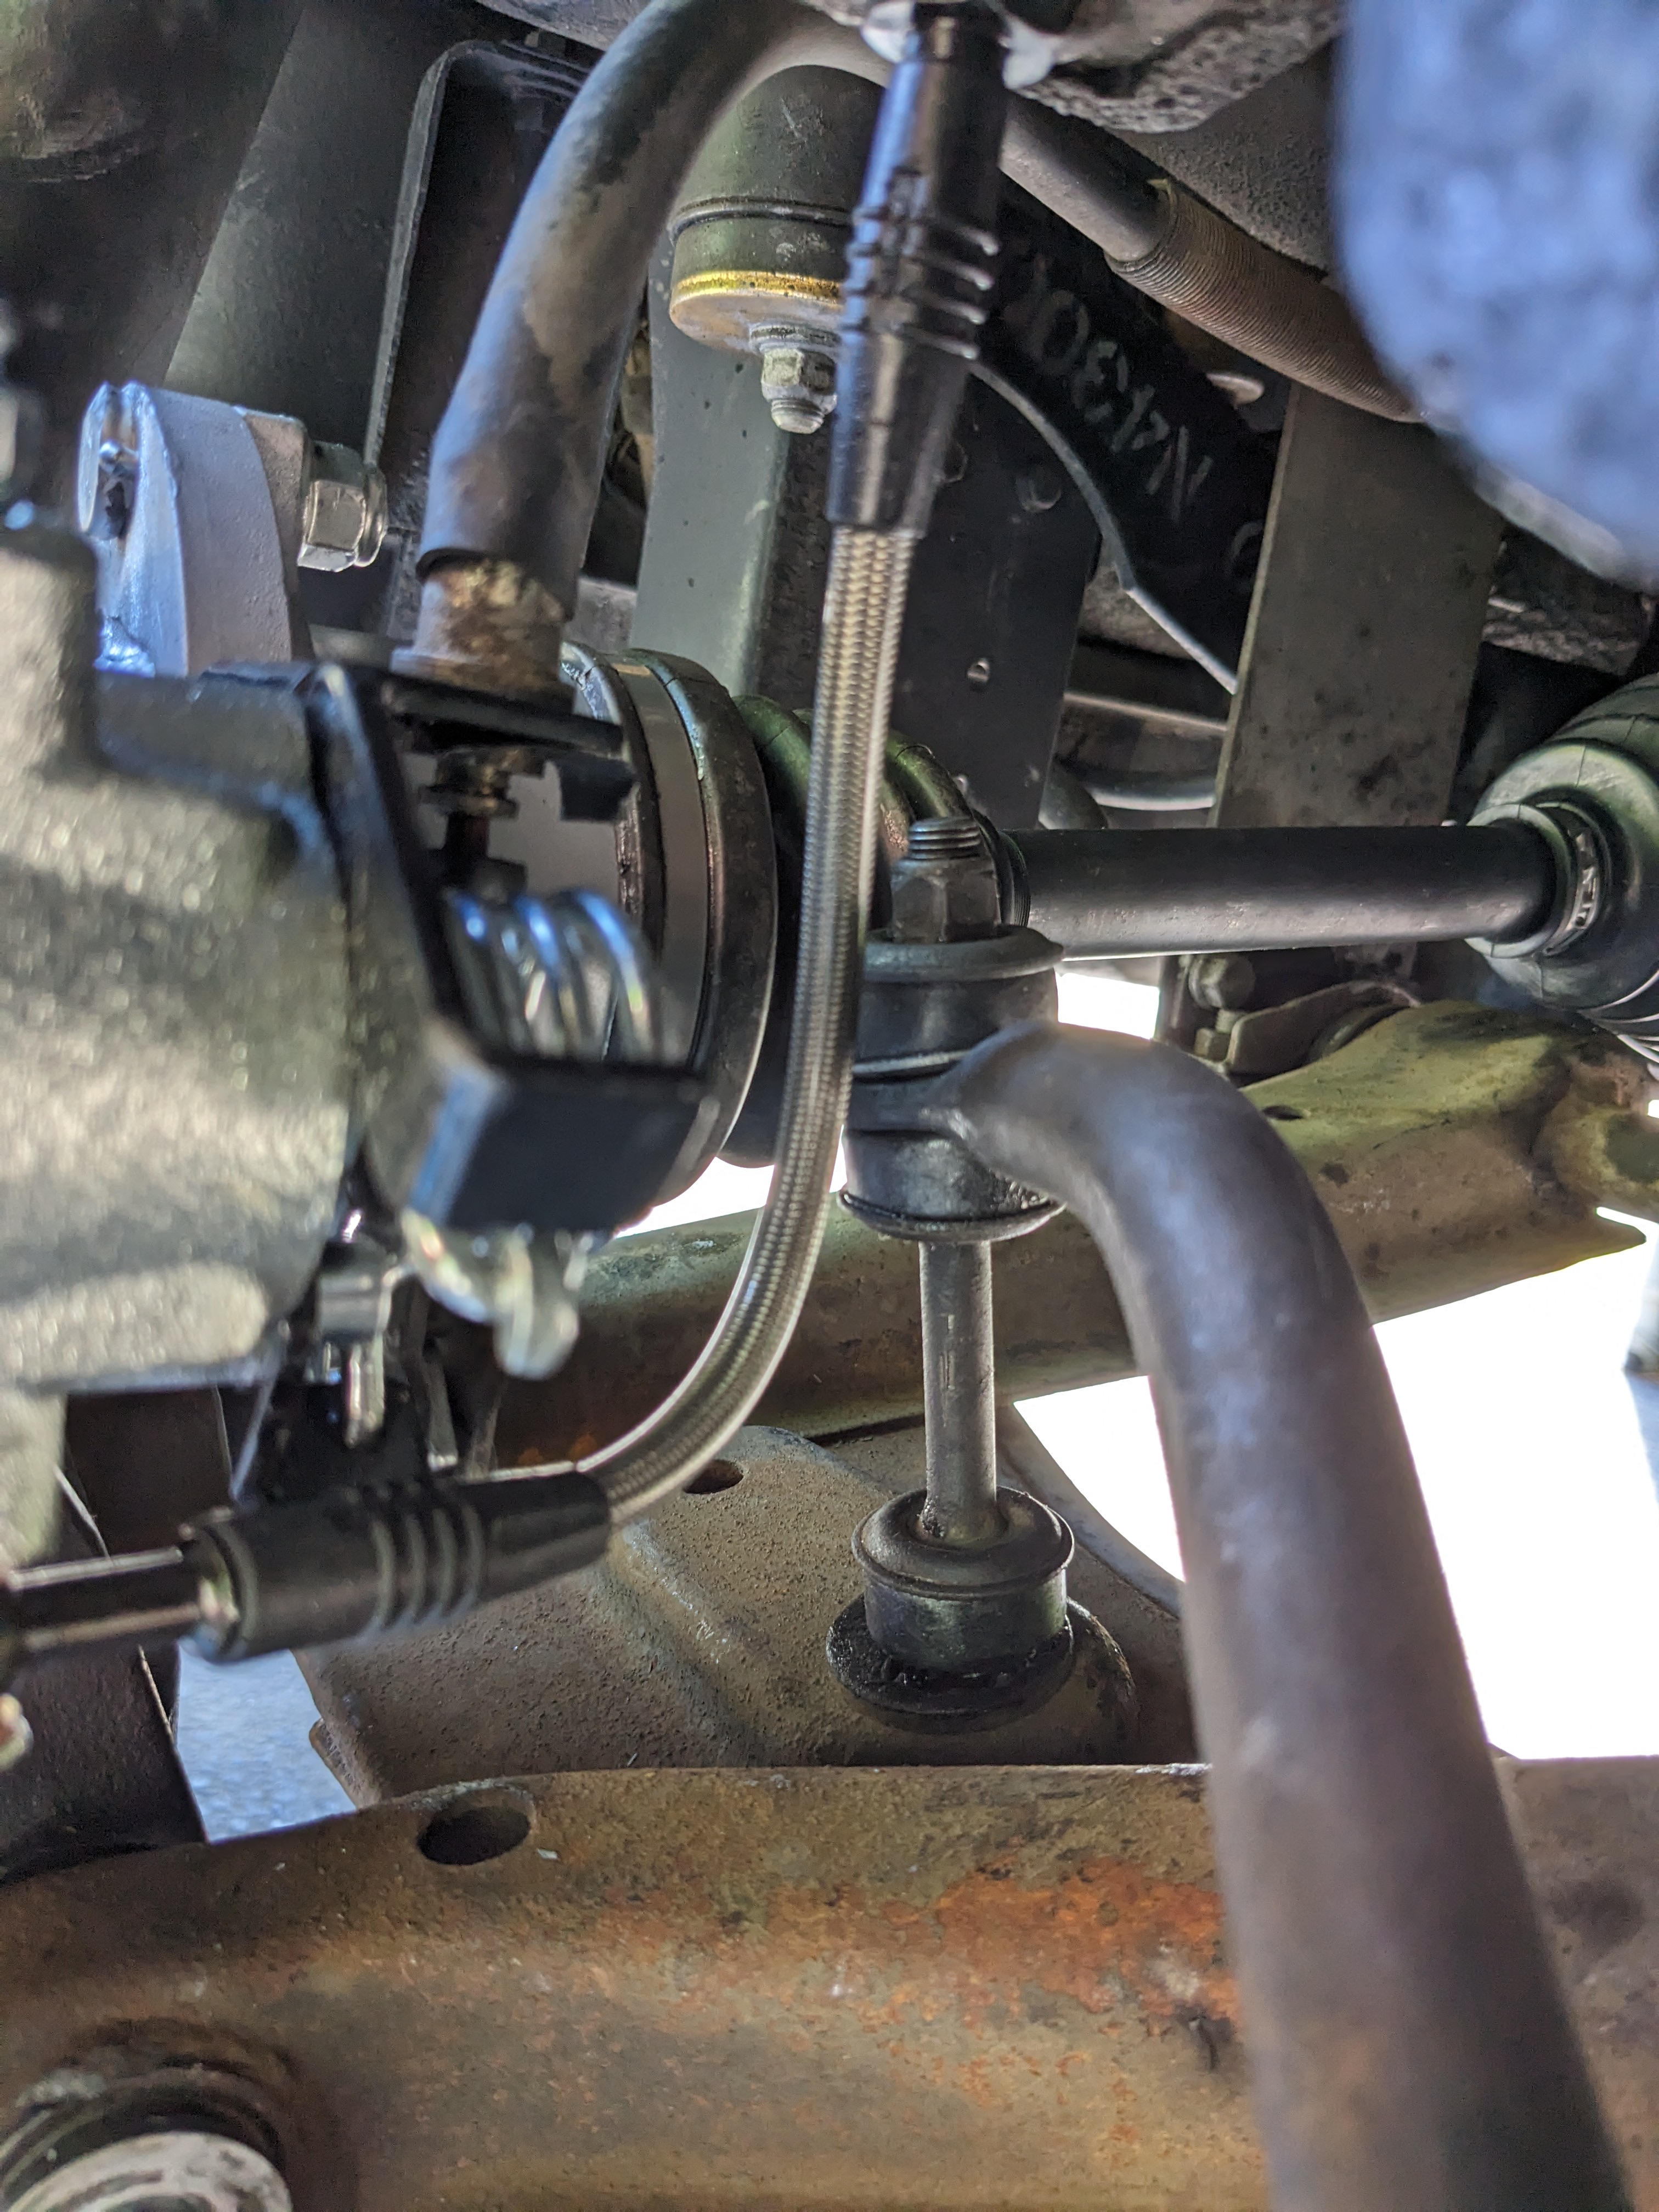
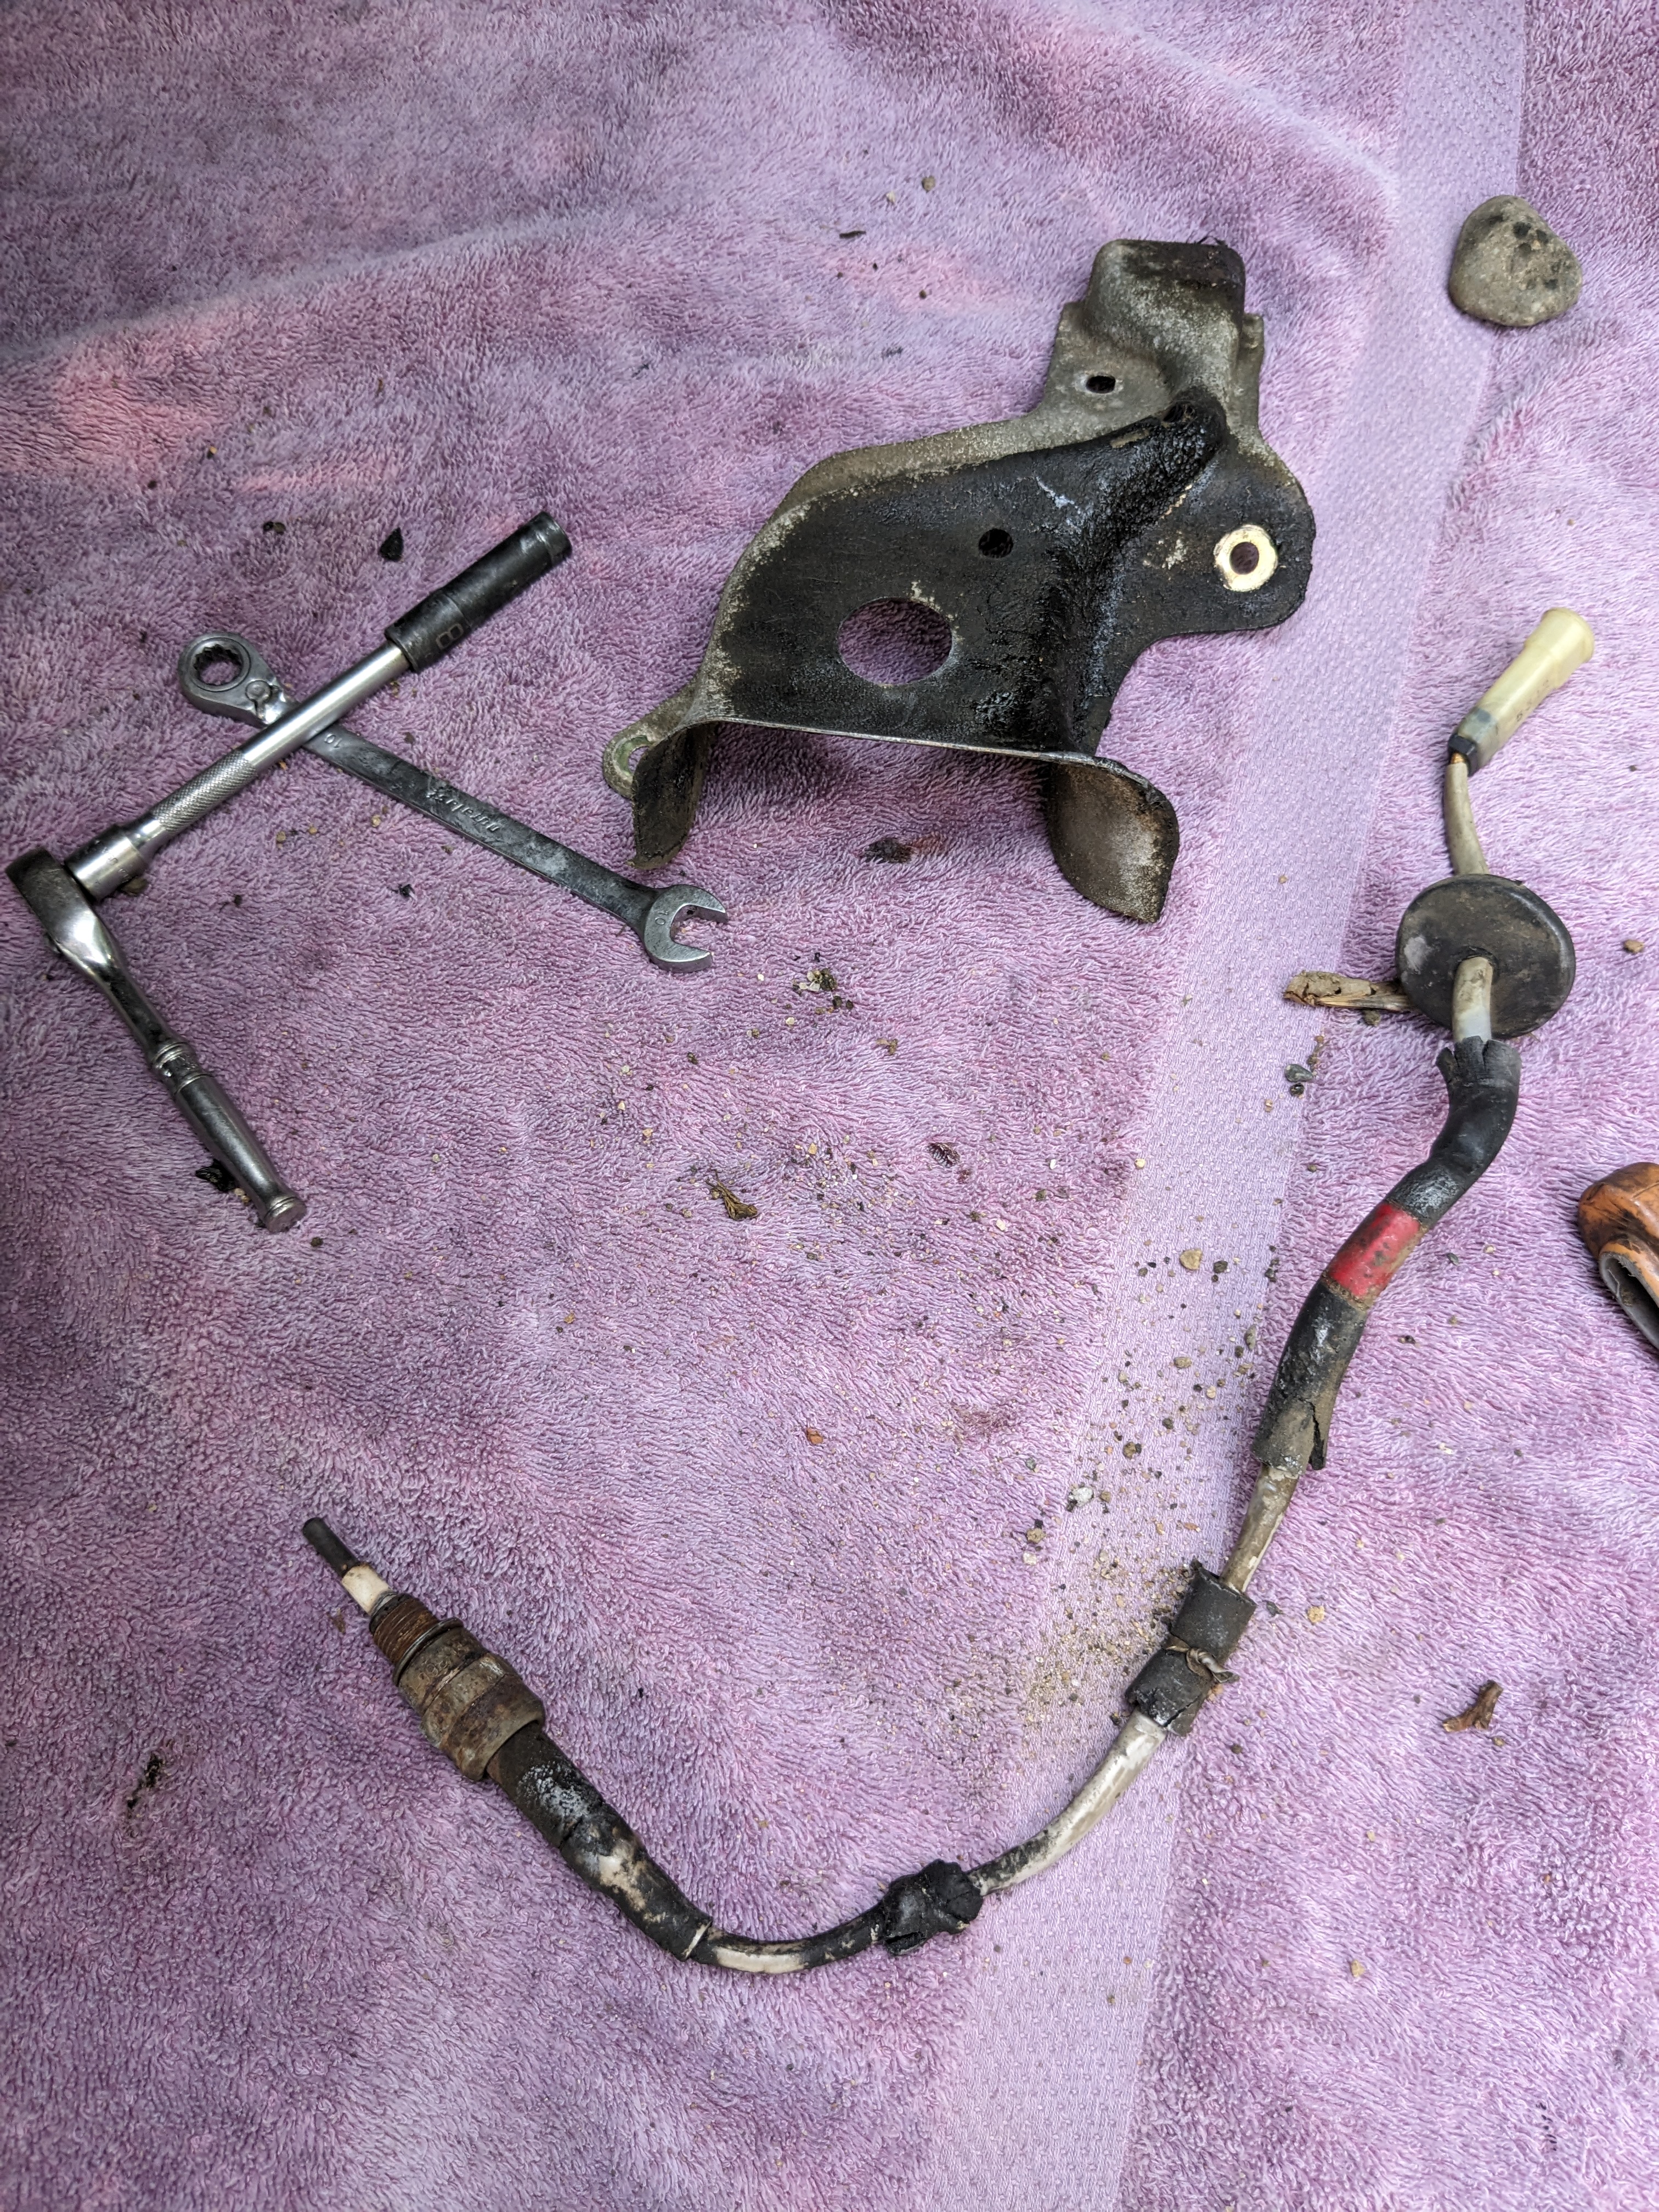
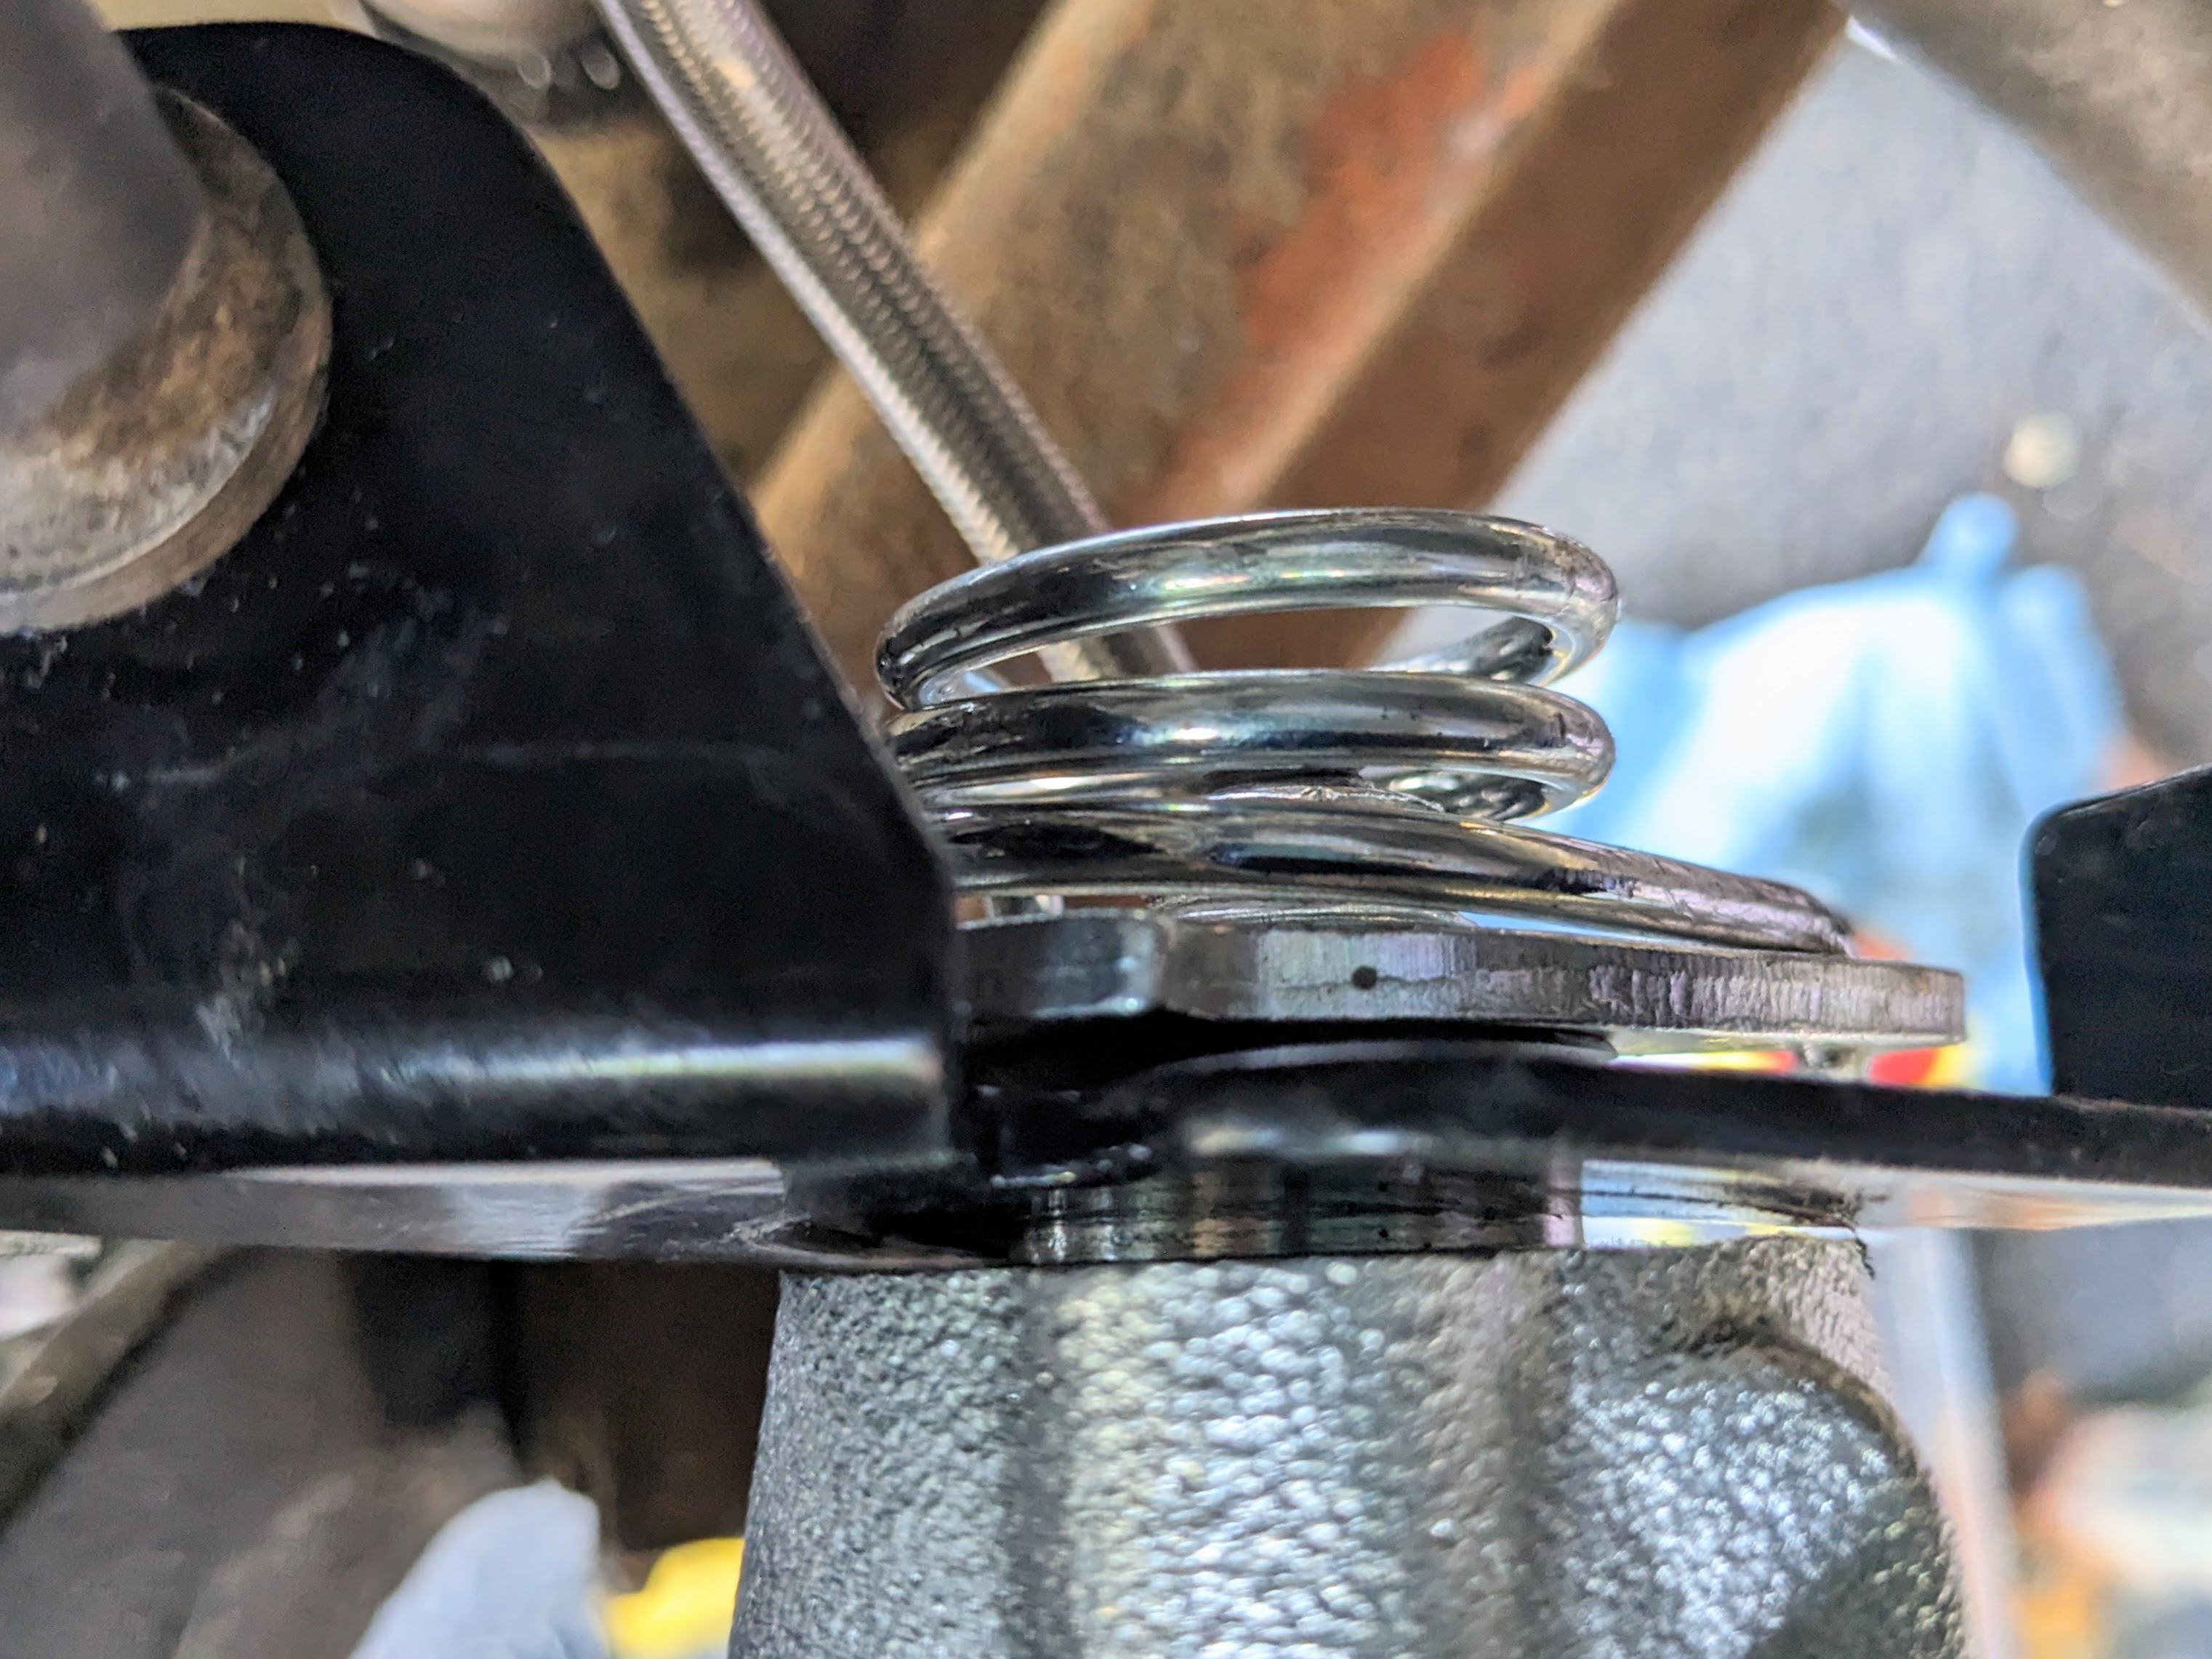
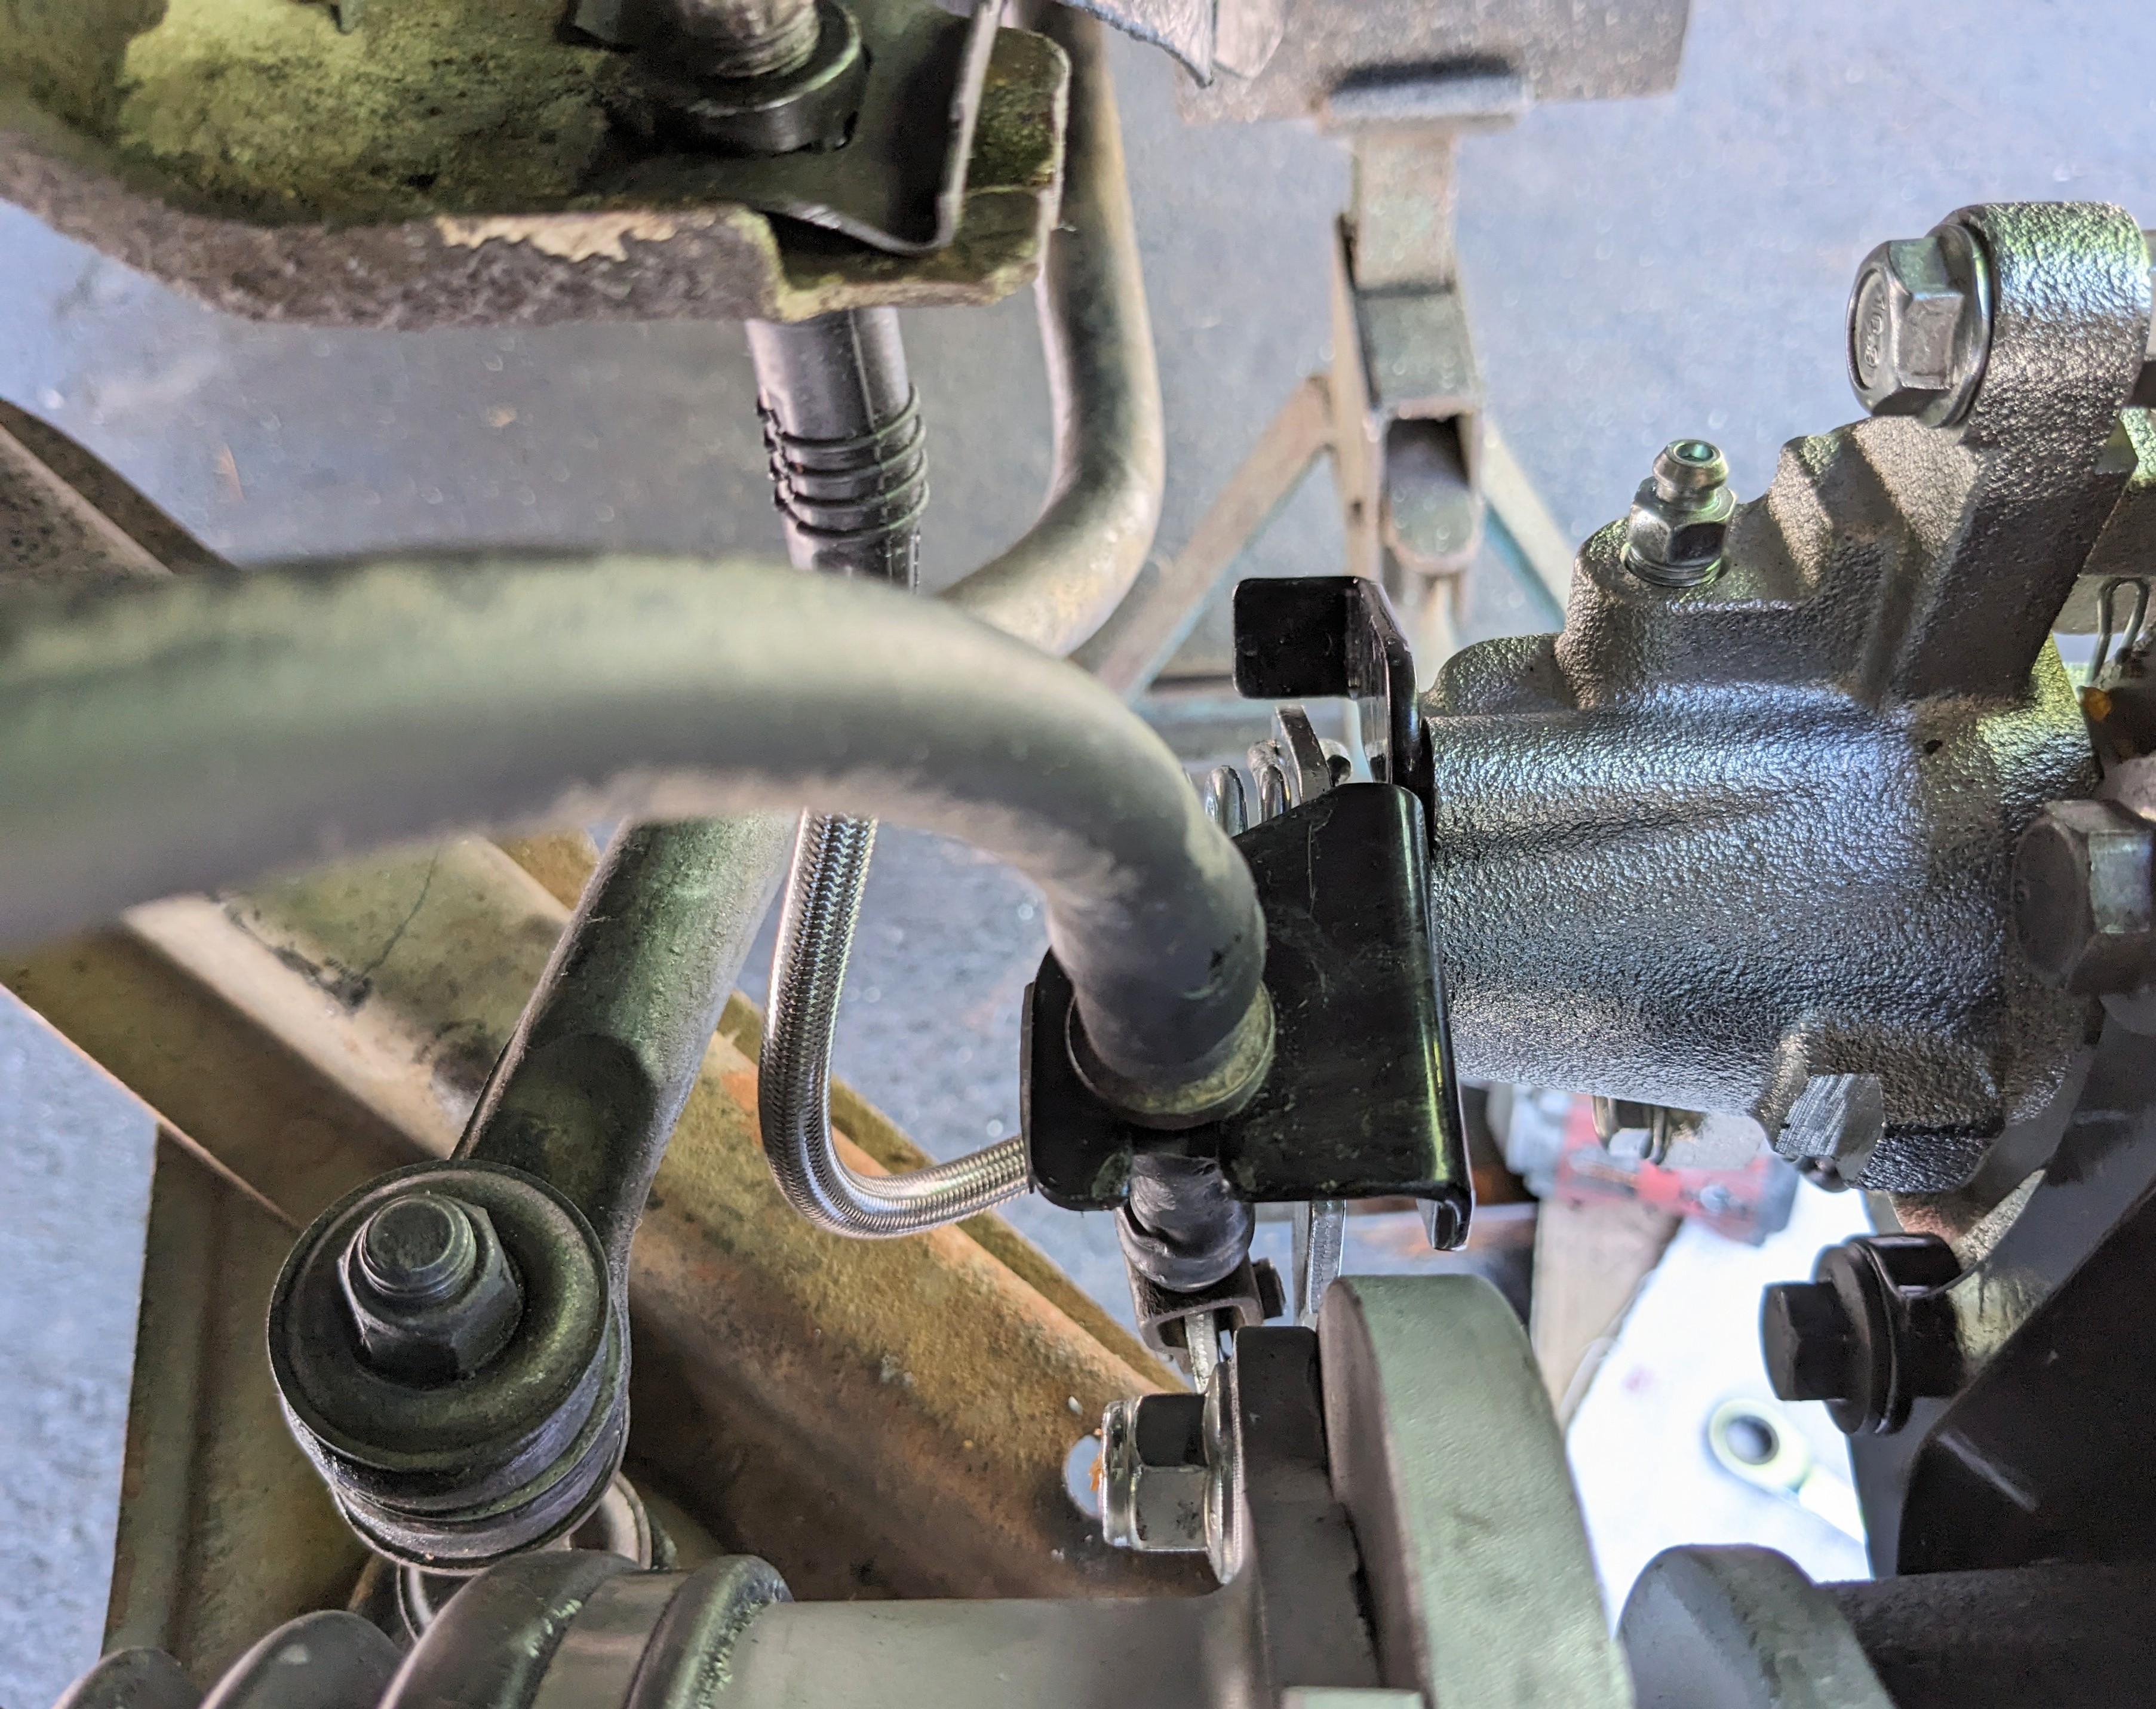
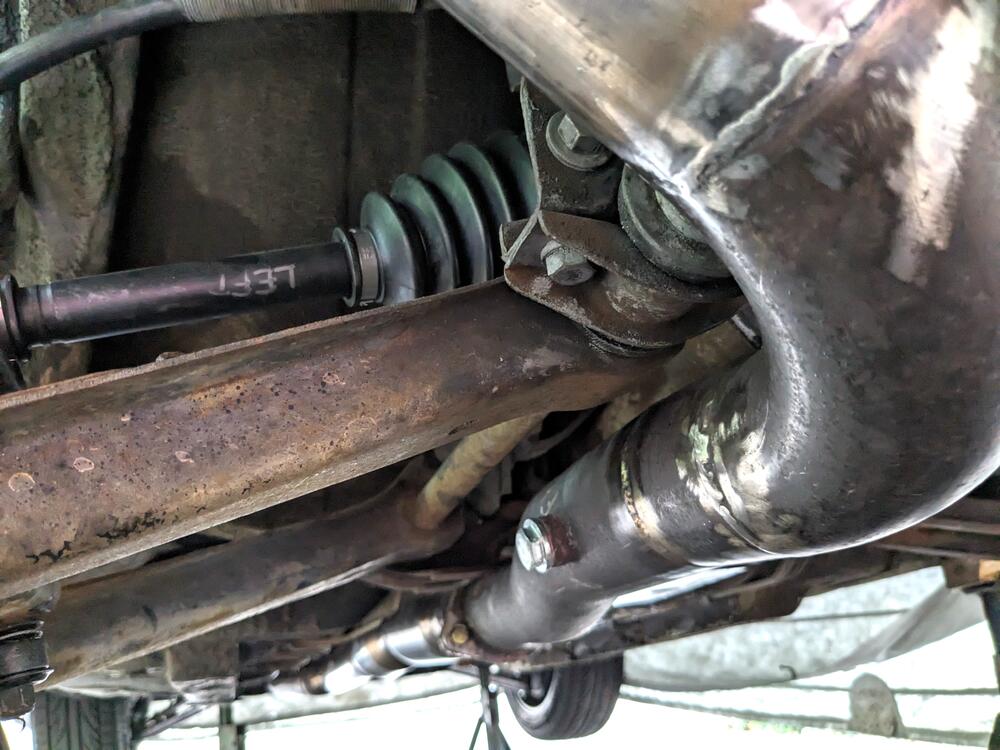
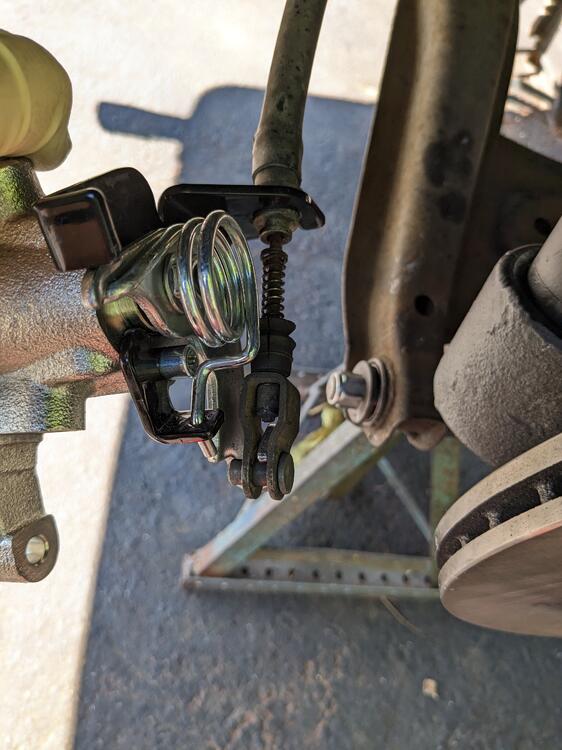
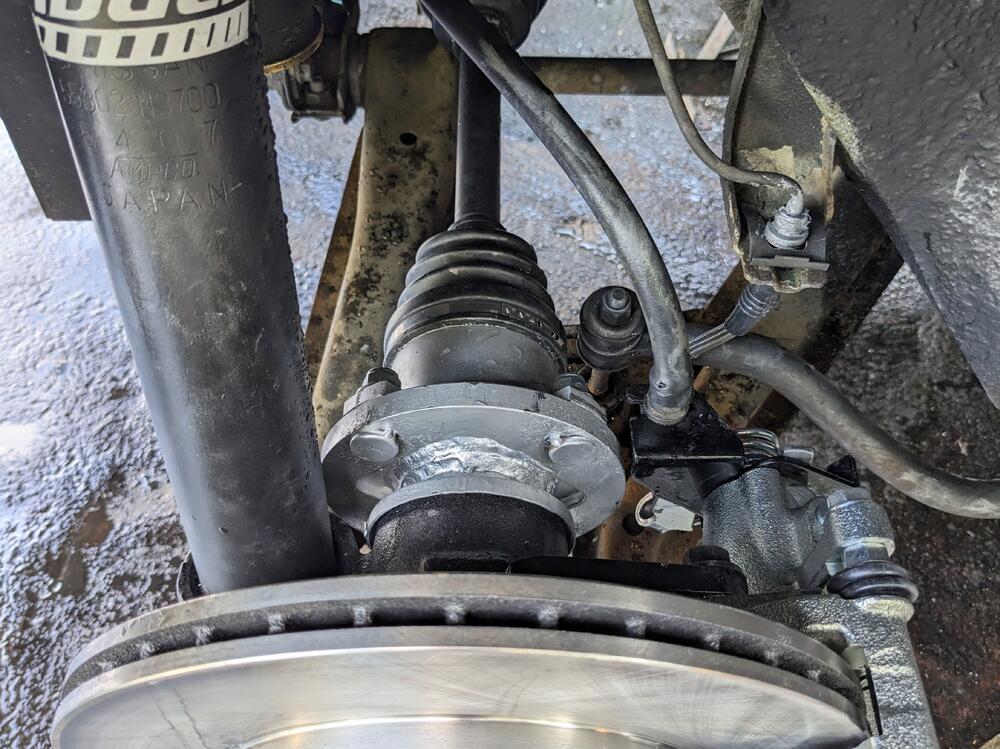
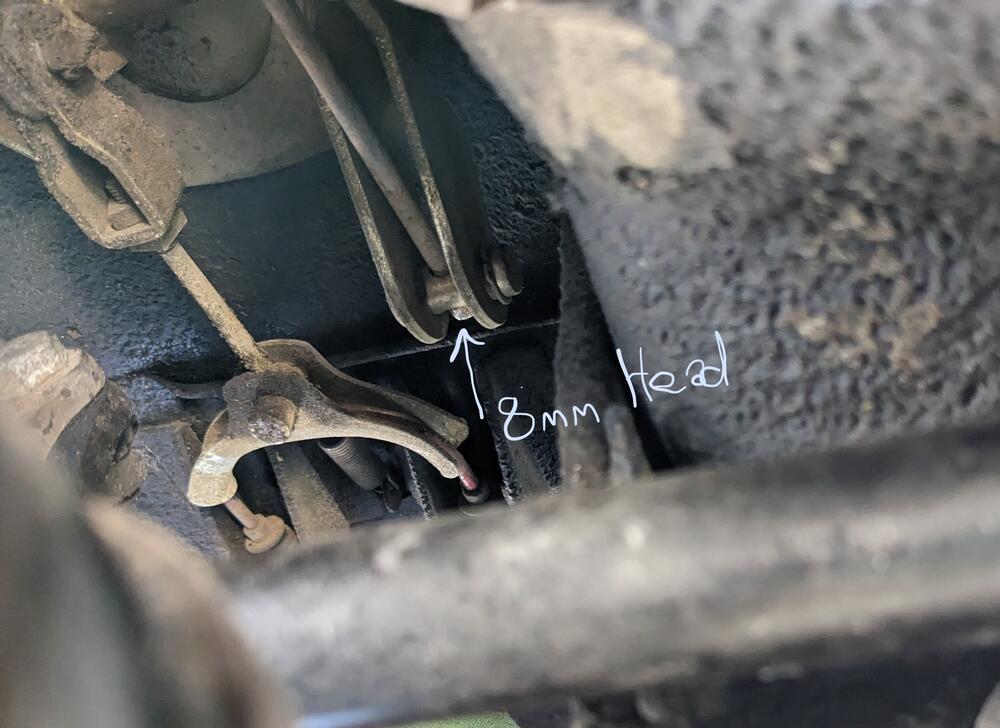
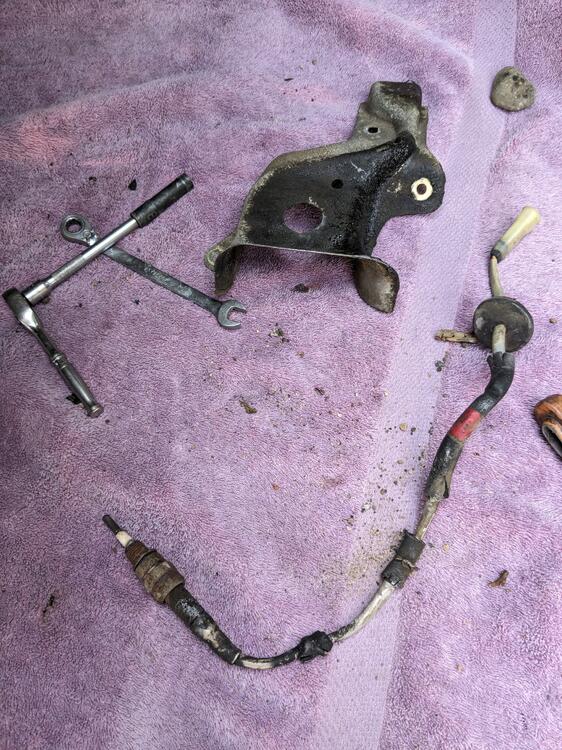
Cable attaches as I thought after looking at the pics I took Getting all the cables / hoses routed nicely. Used a vacuum- bleeder after this to get the rears bled (Dot 3). adjusted the cable to get enough slack. Looking online, there are ppl using pliers to turn the rod - I realized that the rod end is 8mm, just have to turn it had dropped the heat shield to get better access - so I removed the Cat heat sensor & shield while I was in there Volvo grommets to fill that & another hole problem with MilkFab cable bracket - it flexes significantly when cable is operated. I've emailed MilkFab about it car in the air, did some more power washing before putting wheels back on wheels on, after driving to settle the suspension - when I first took it off the stands, it looked like monster-truck arch clearance. Still would like it lower, but roads around here are not great & the town had speed bumps all over. Feels so much better on the road now, it was horrible with all the worn parts.


-
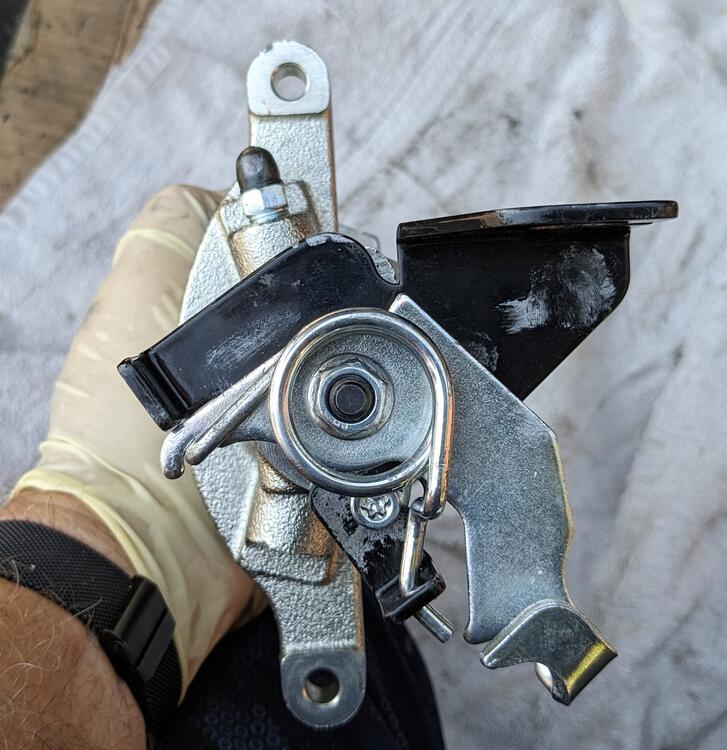
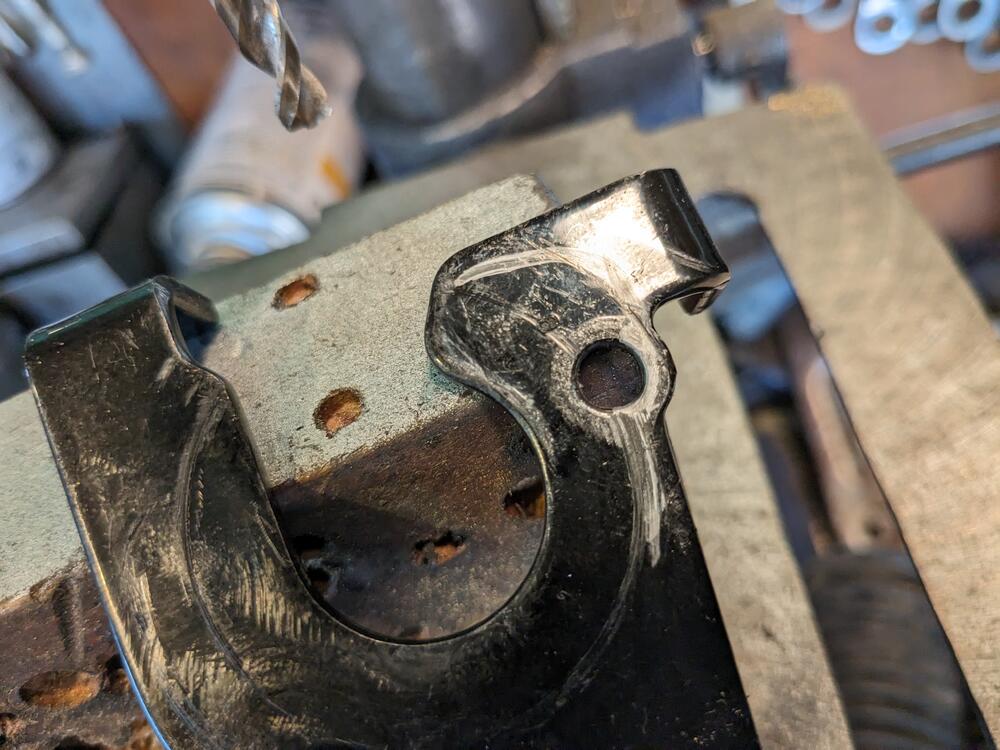
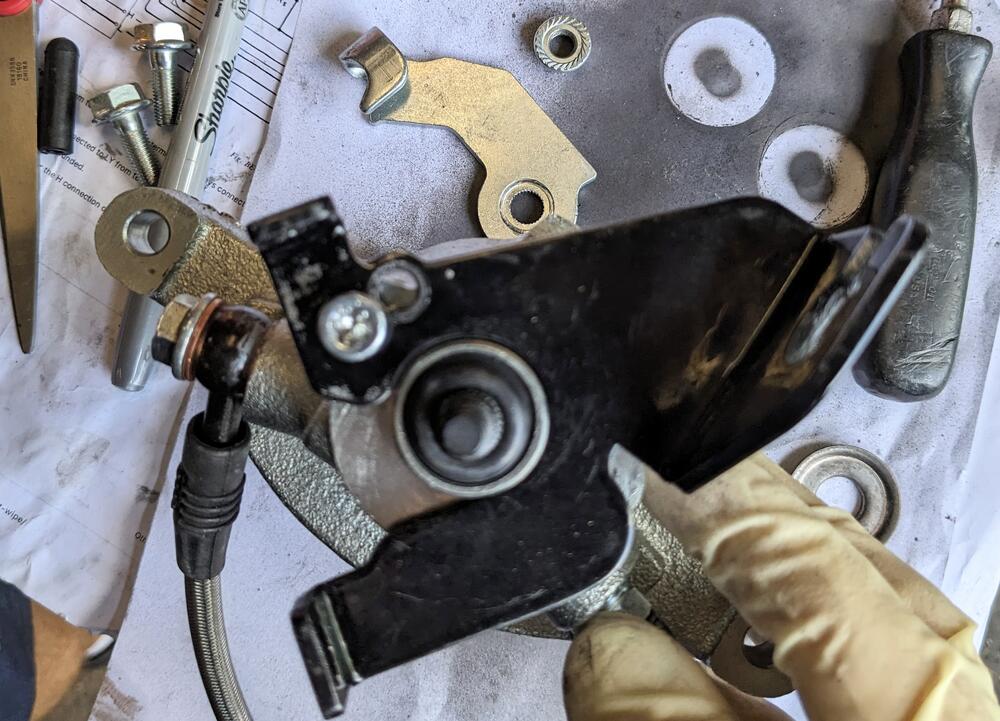
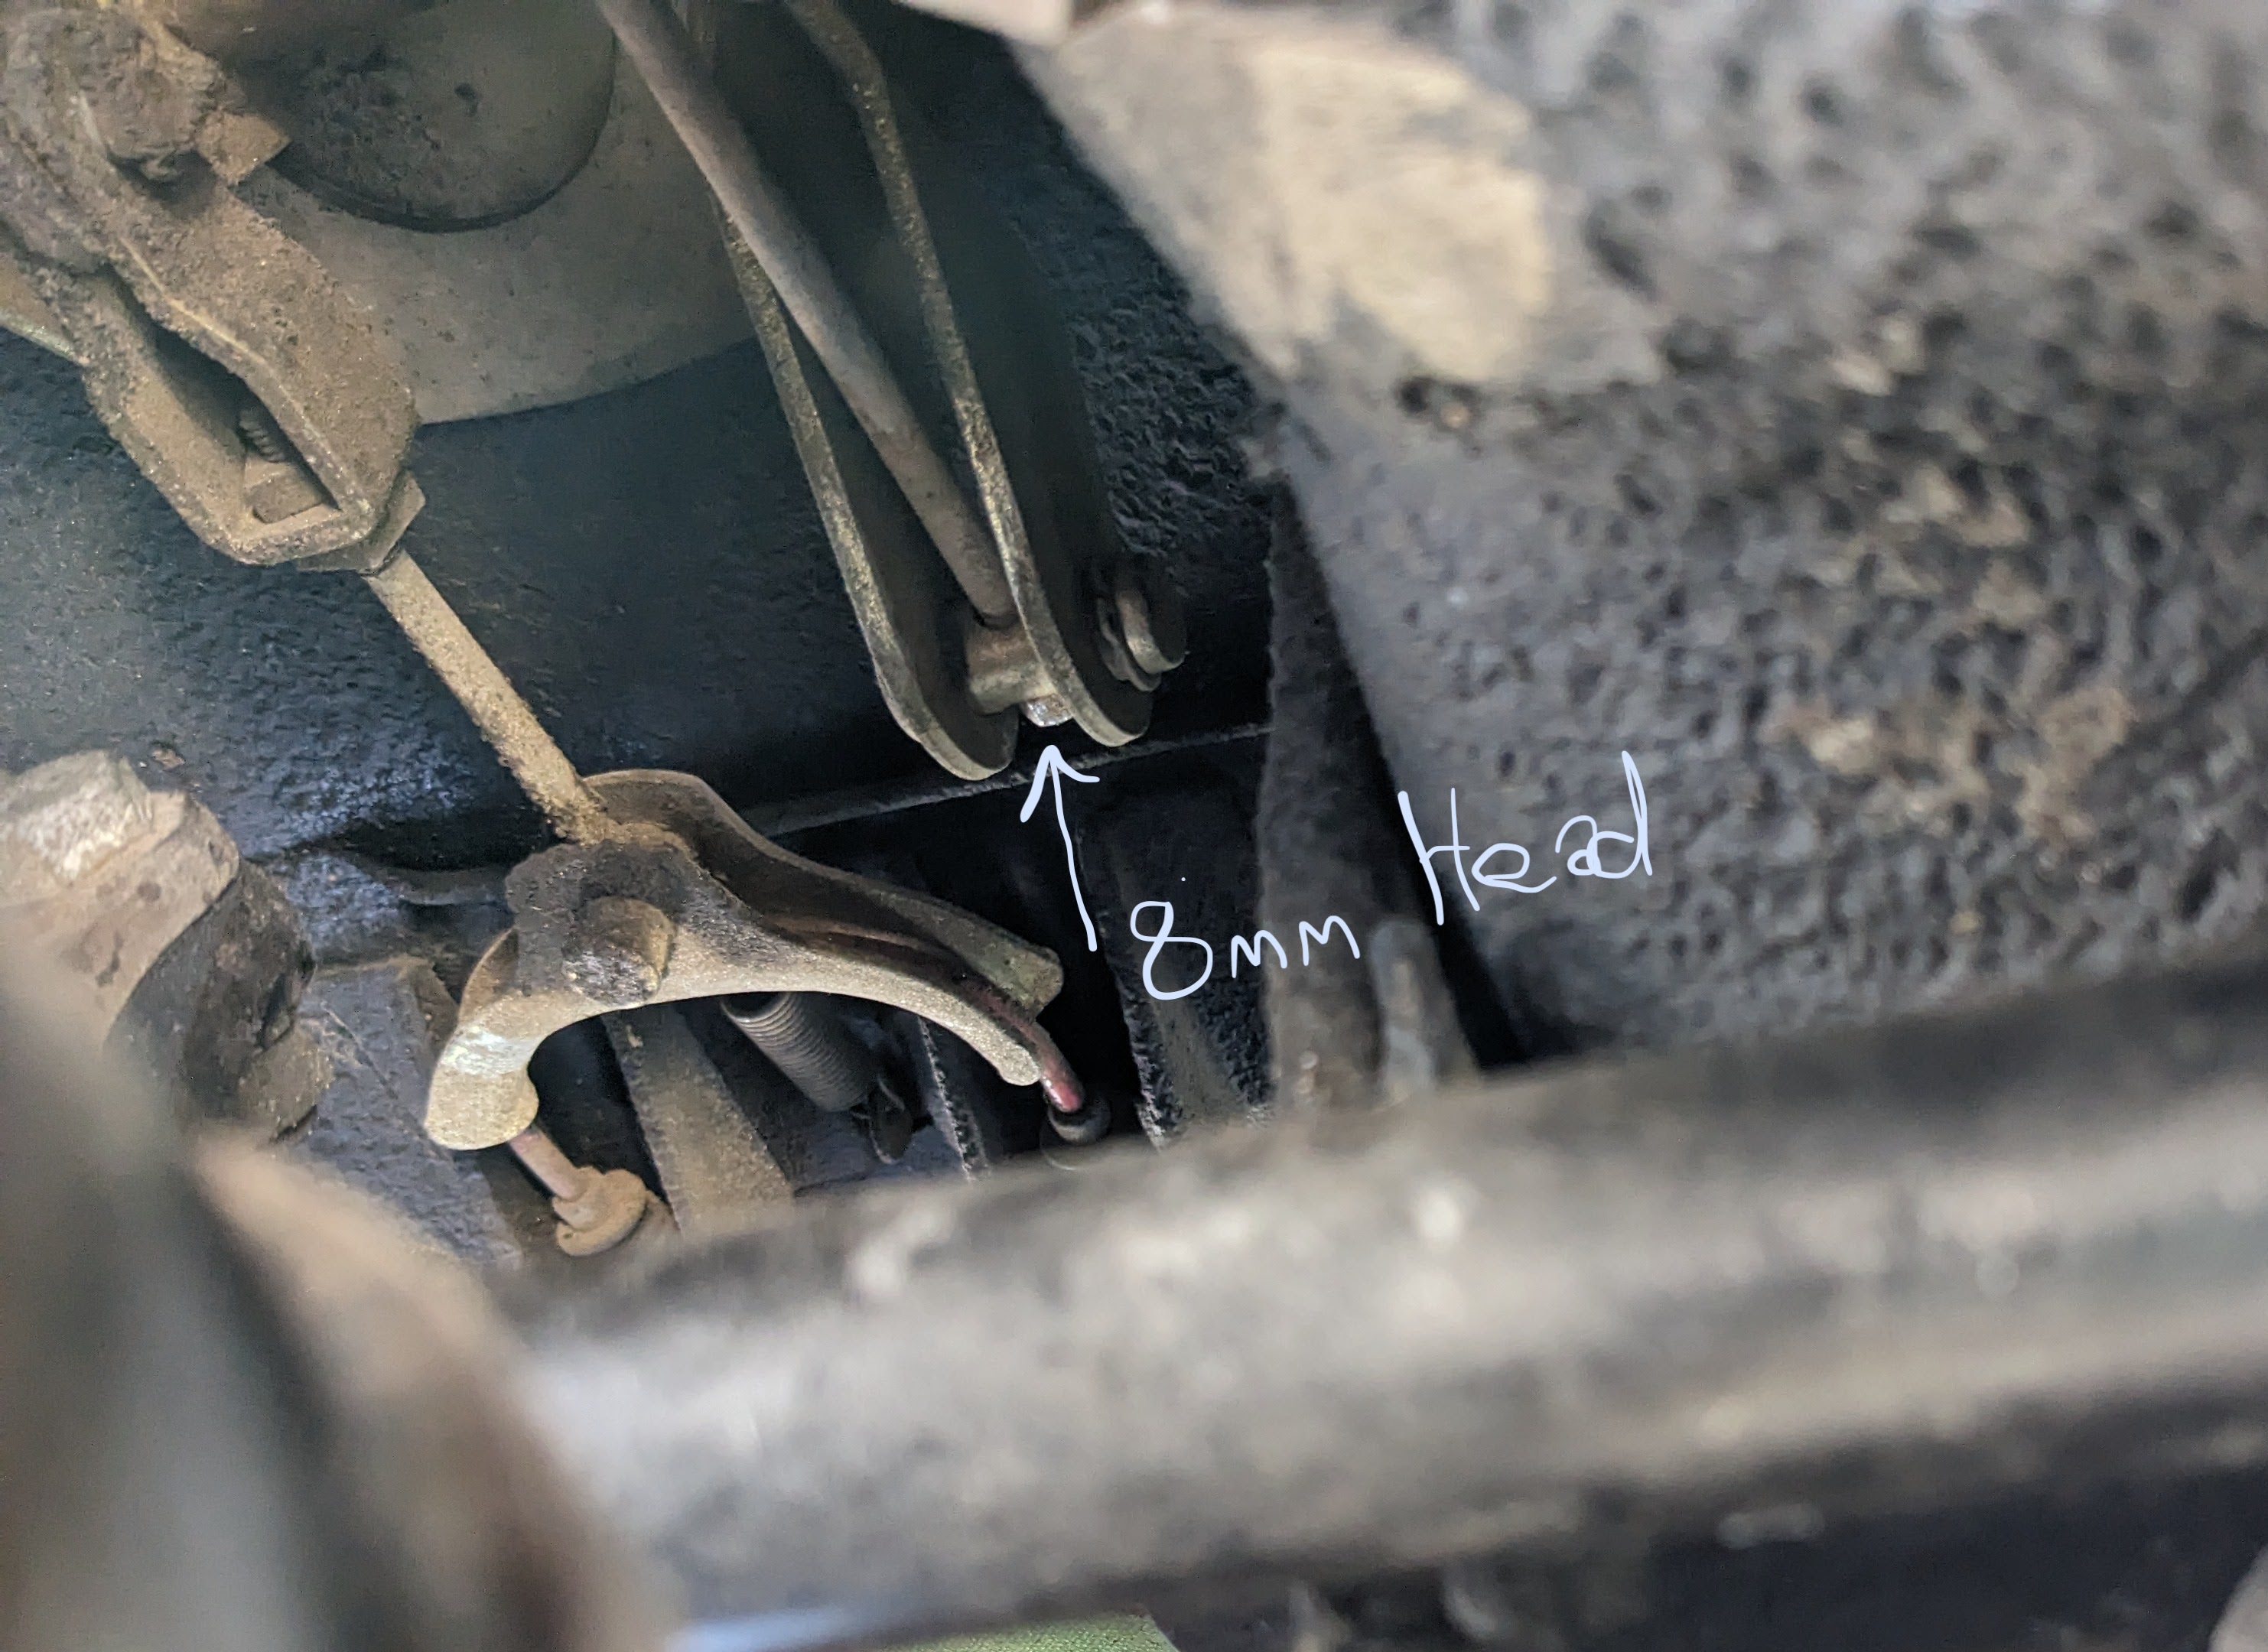
Resolved the eBrake lever issue. Figured out I could just redrill the axis point, and gain the necessary clearance off the flange Rotated the flange on the back of the caliper to mark the centerline, drilled a new 1/4" hole just outside the existing Reassembled after confirming offset clearance