HusseinHolland
Free Member
-
Joined
-
Last visited
Everything posted by HusseinHolland
-
 I bought a stock gasket, and it was already seeping oil mostly just sitting for the past couple months. The silicone one came from MilkFab
 -
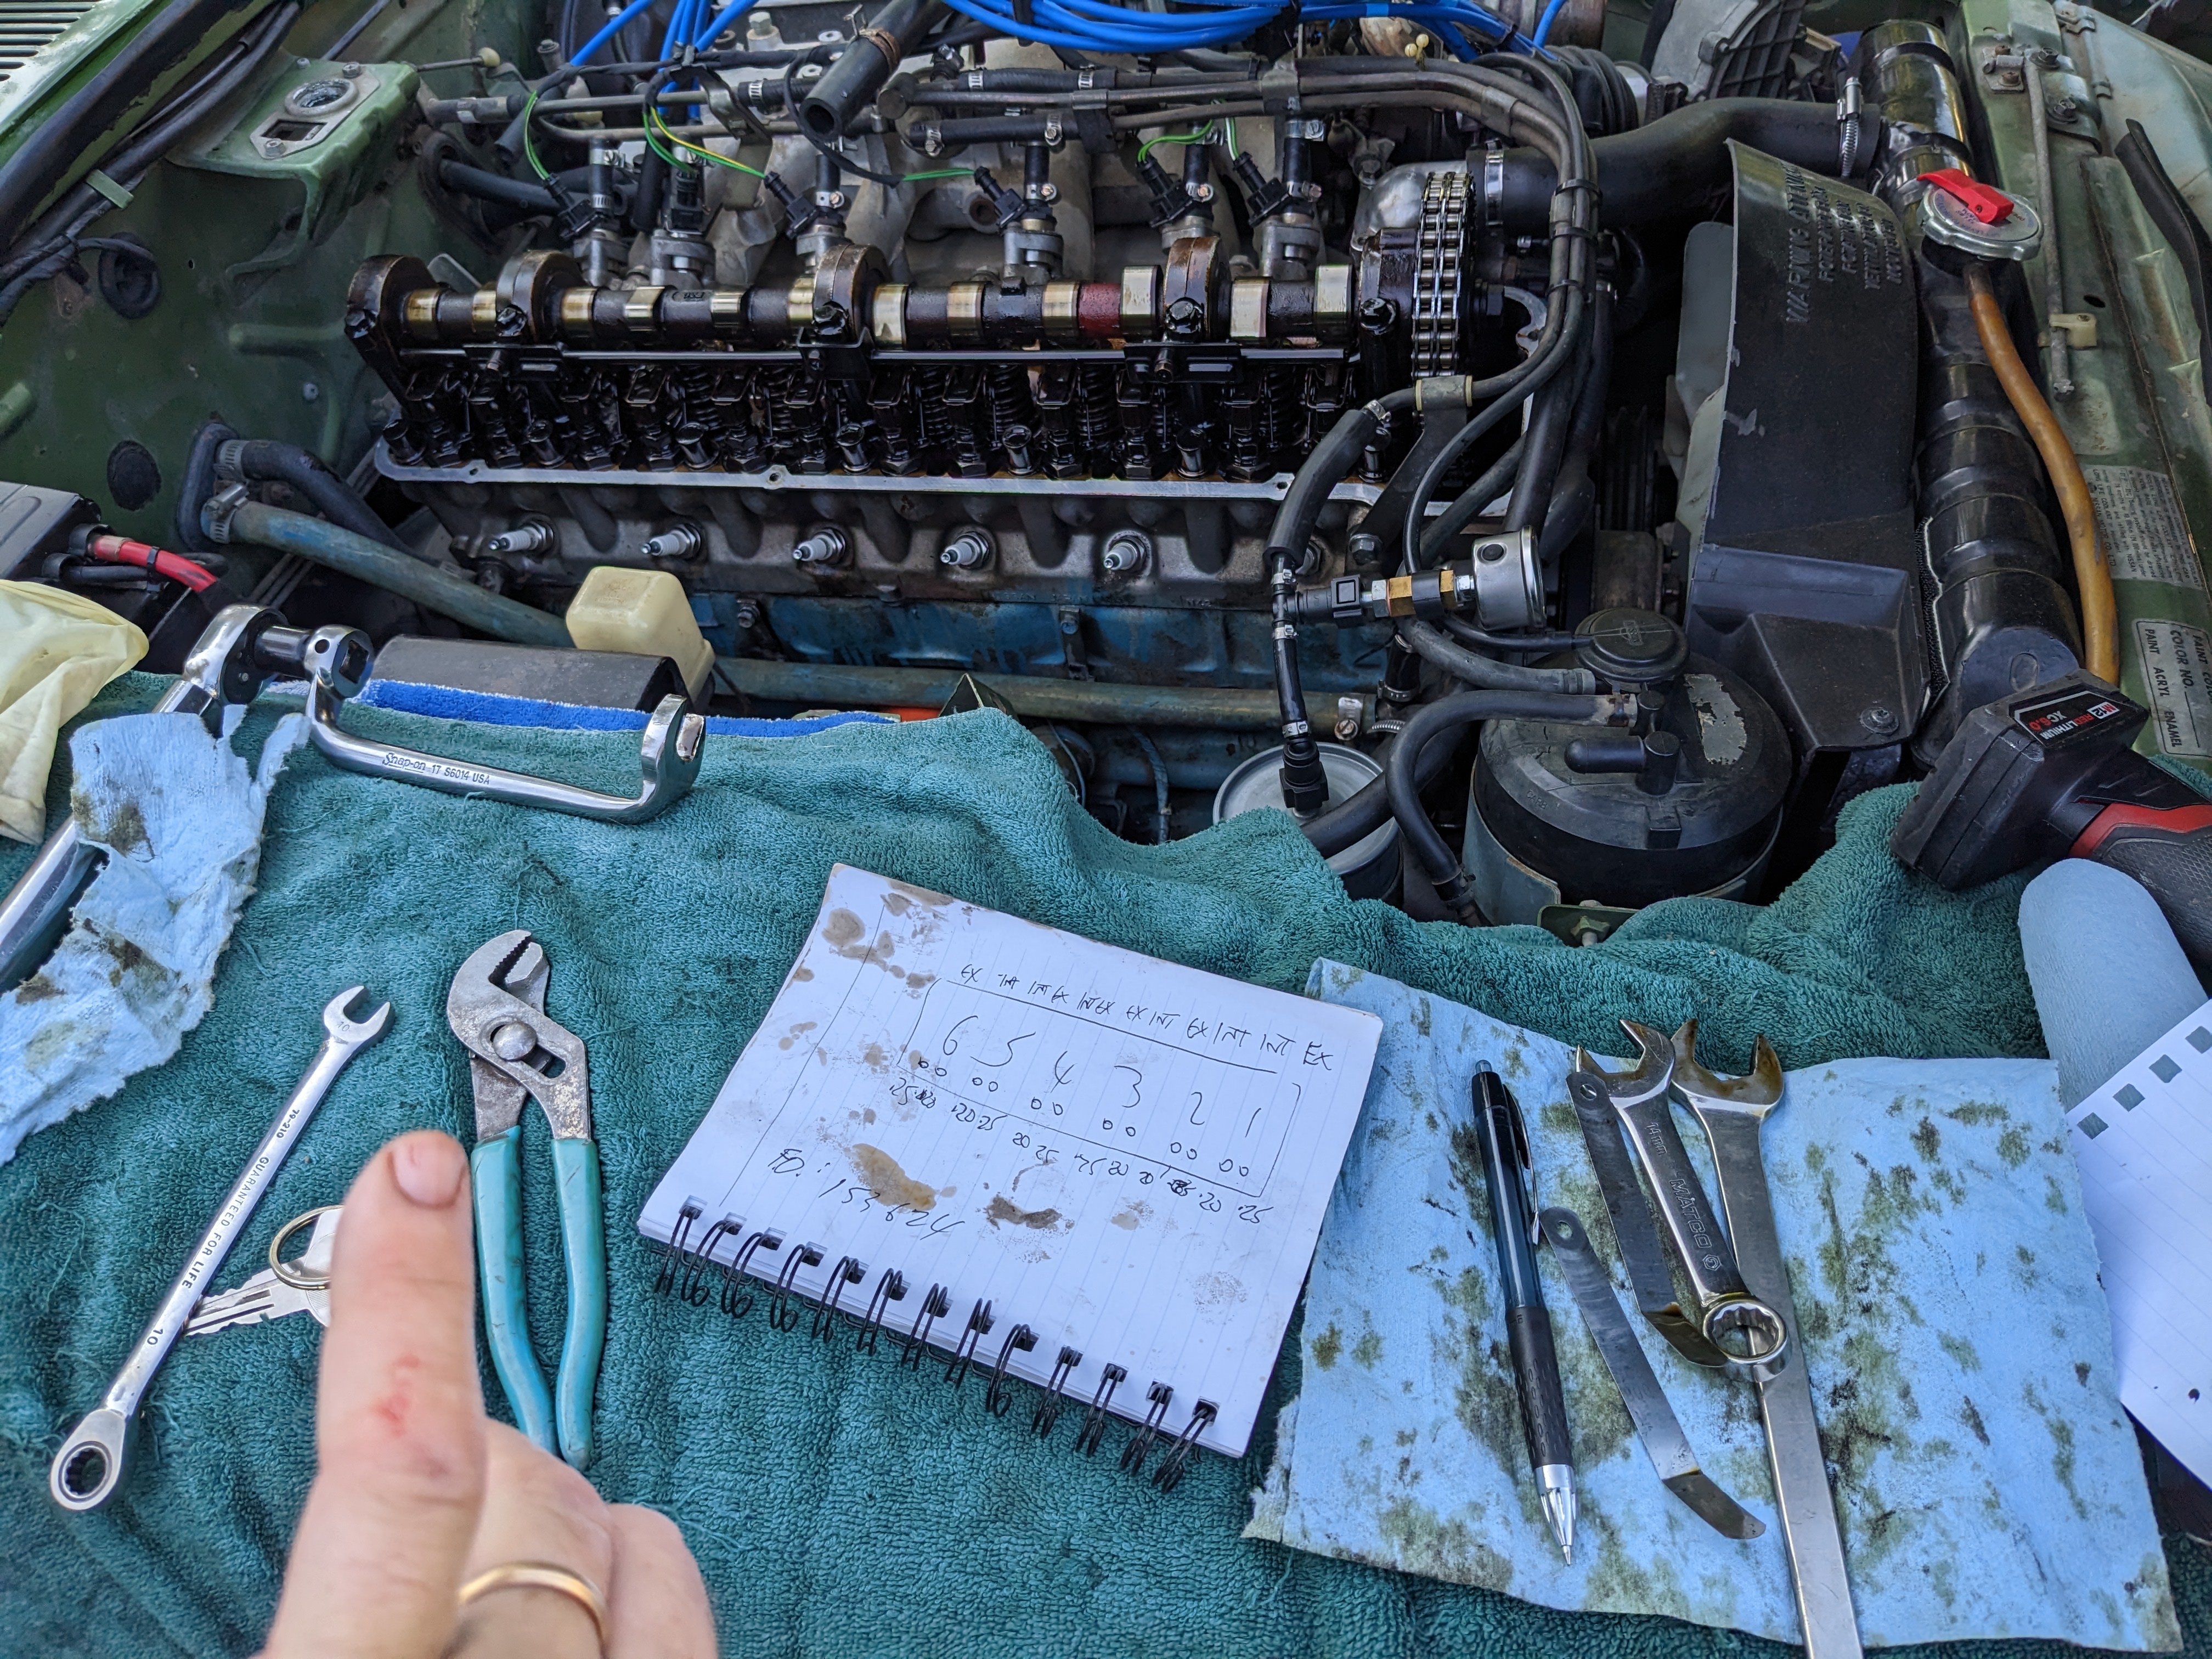
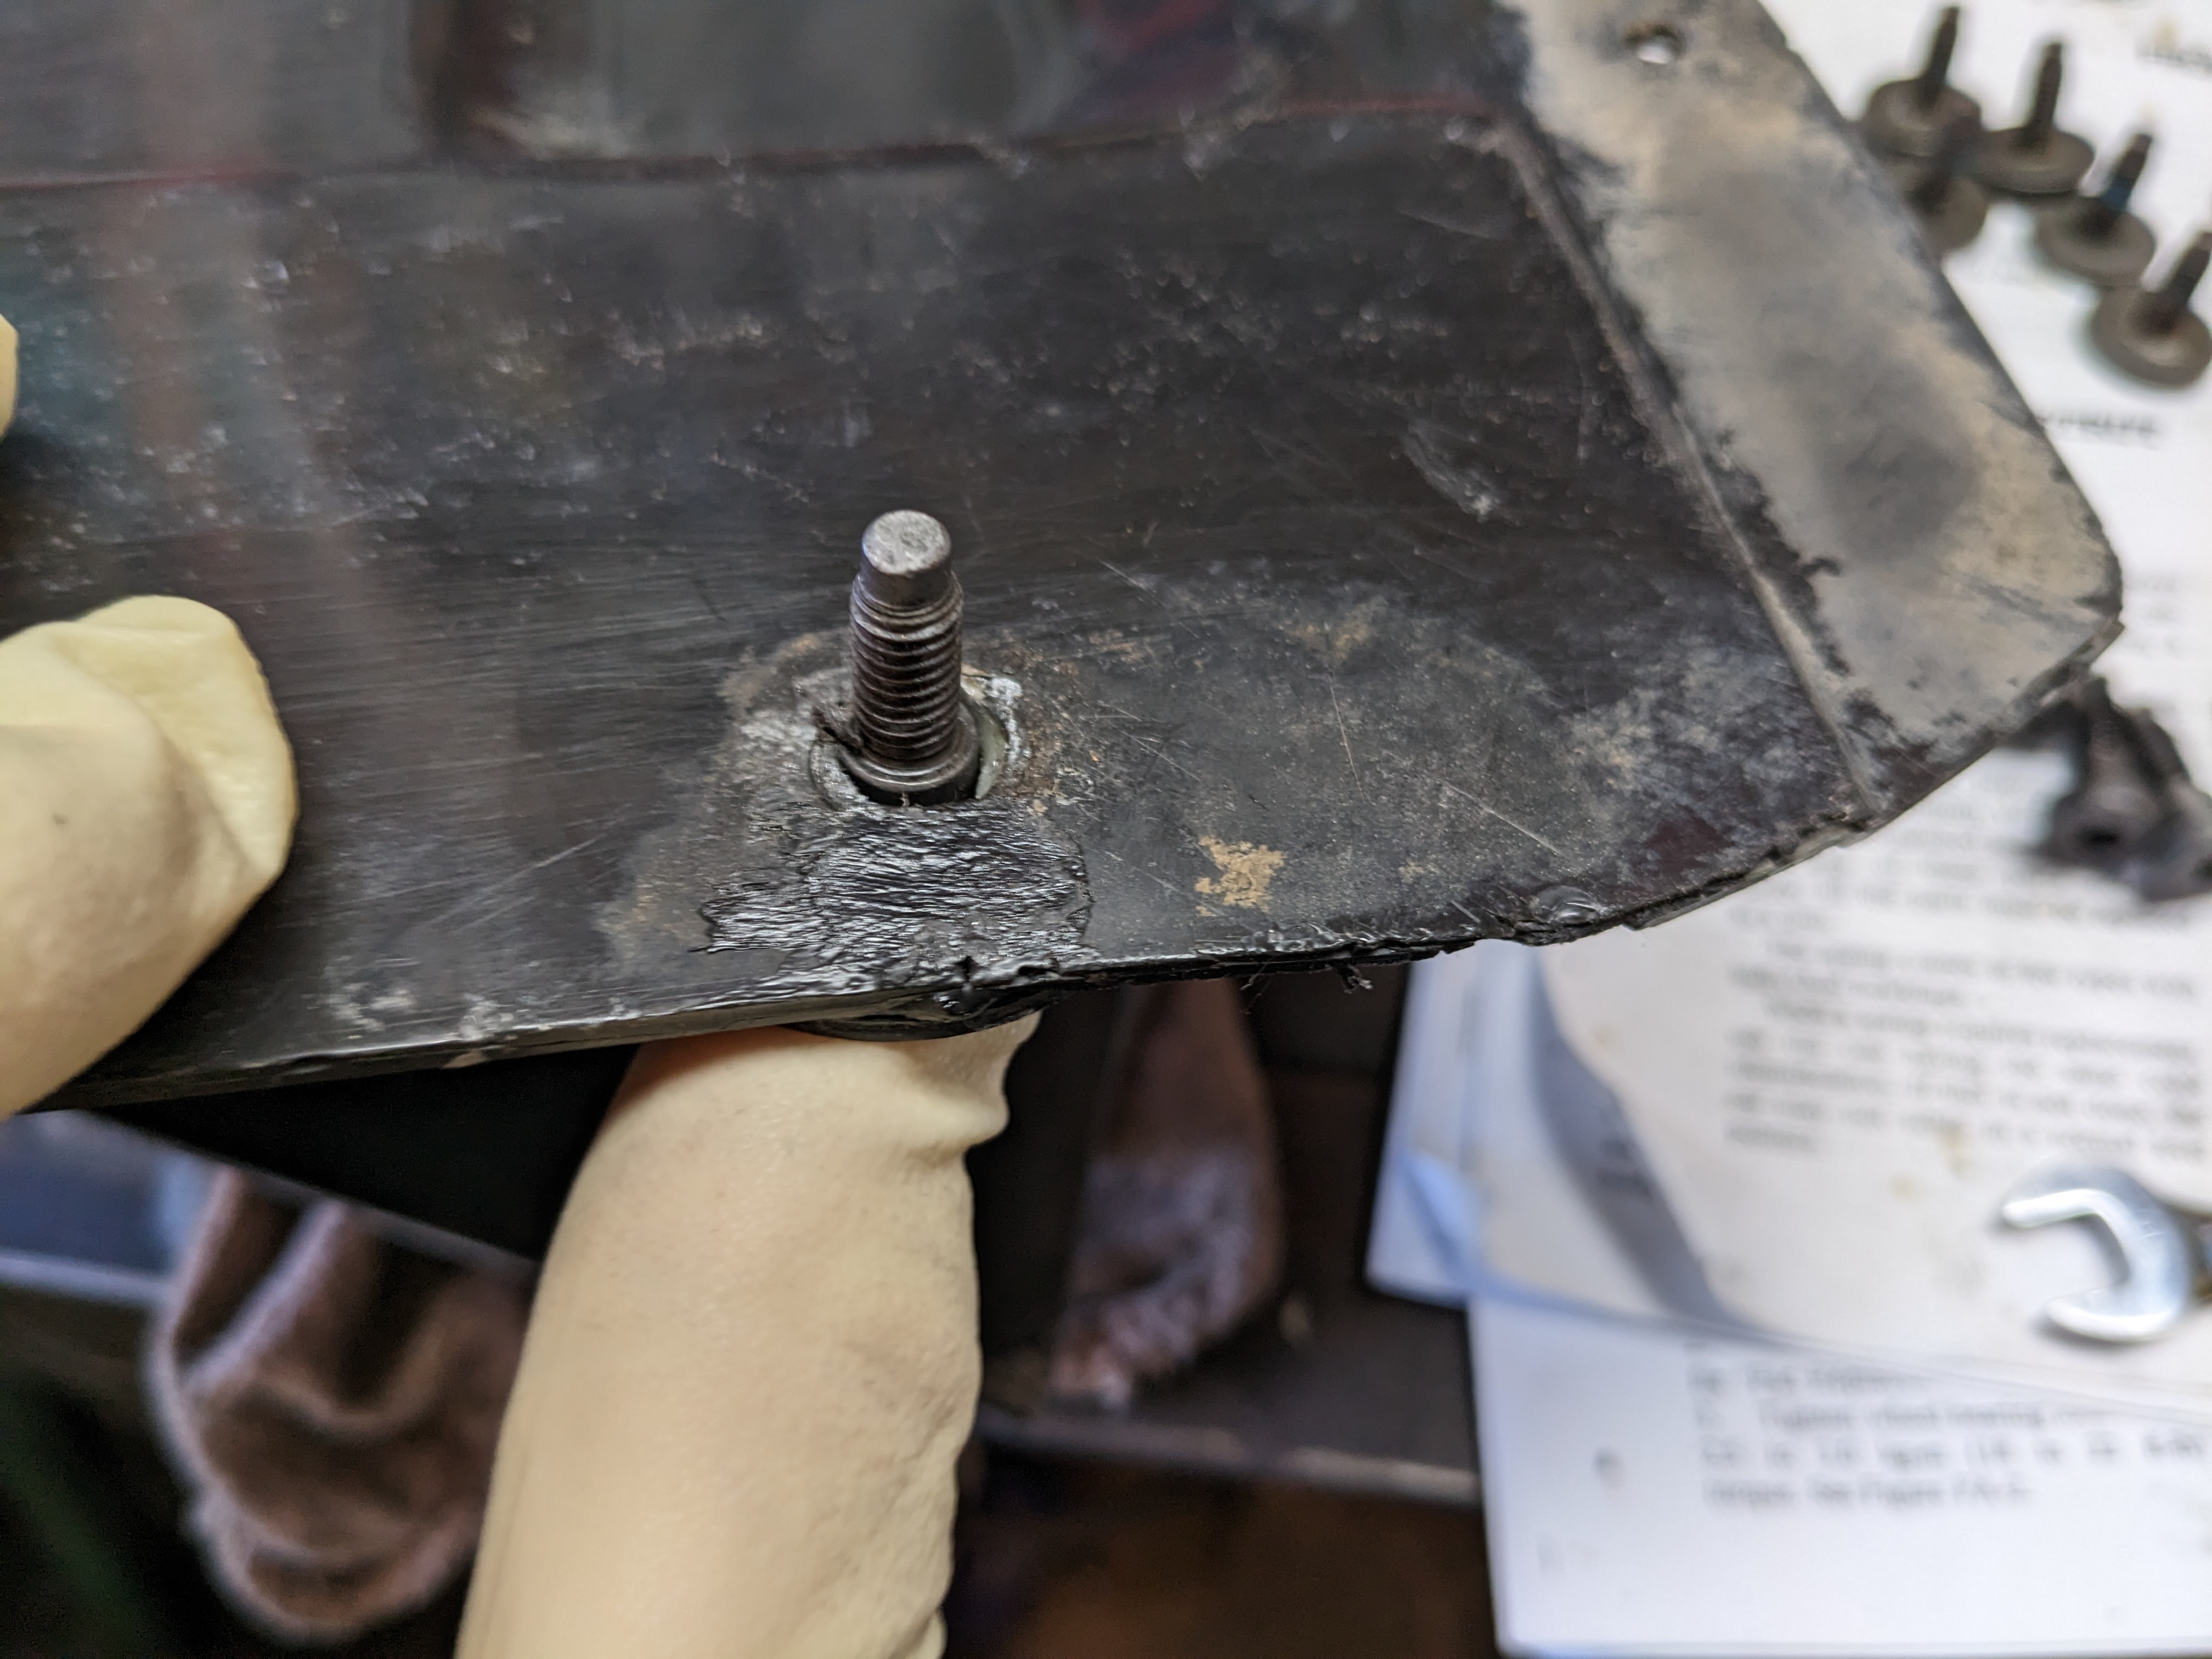
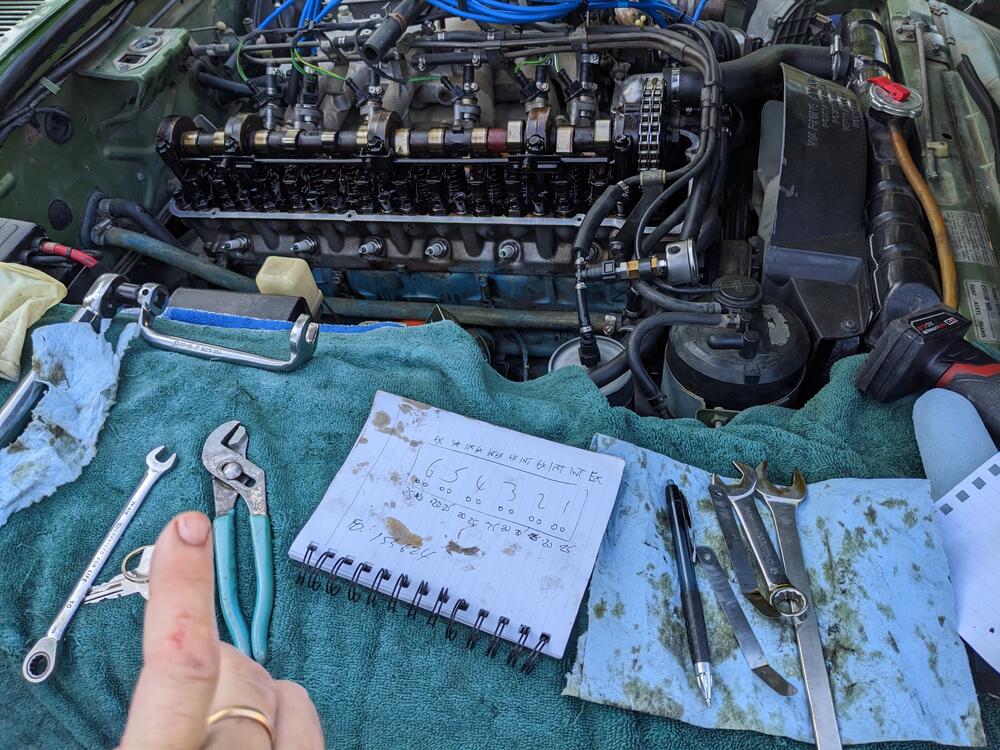
Finally got back to the valve adjustment, now the car is back on all 4 wheels. I just bump the motor with it in 4th gear. the car is so light I can push it forward with one hand on a tire - went 1, 5, 3, 6, 2, 4. I also bought the silicone VC gasket, but didn't read the install directions until I was ready to put it all back together. I found that it has to be "glued" to the cover with RTV. SO, It's not going to be finished until tomorrow One of the locknuts was so tight I took a chunk of skin off my finger on the metal cover next to the battery. Most of the rest were barely tight. No valves were within cold spec, all too tight. couldn't even get the .008" in the exhaust rockers. They were all at least 1/2 a flat too tight. I set all intake @ a snug .008" and exhaust @ .010". I did torque the lock nuts to 36ft/lb, based on the range given in the FSM. Definitely fiddly, as I found it very easy to end up with the valve too tight again, when snugging the lock nut.
-
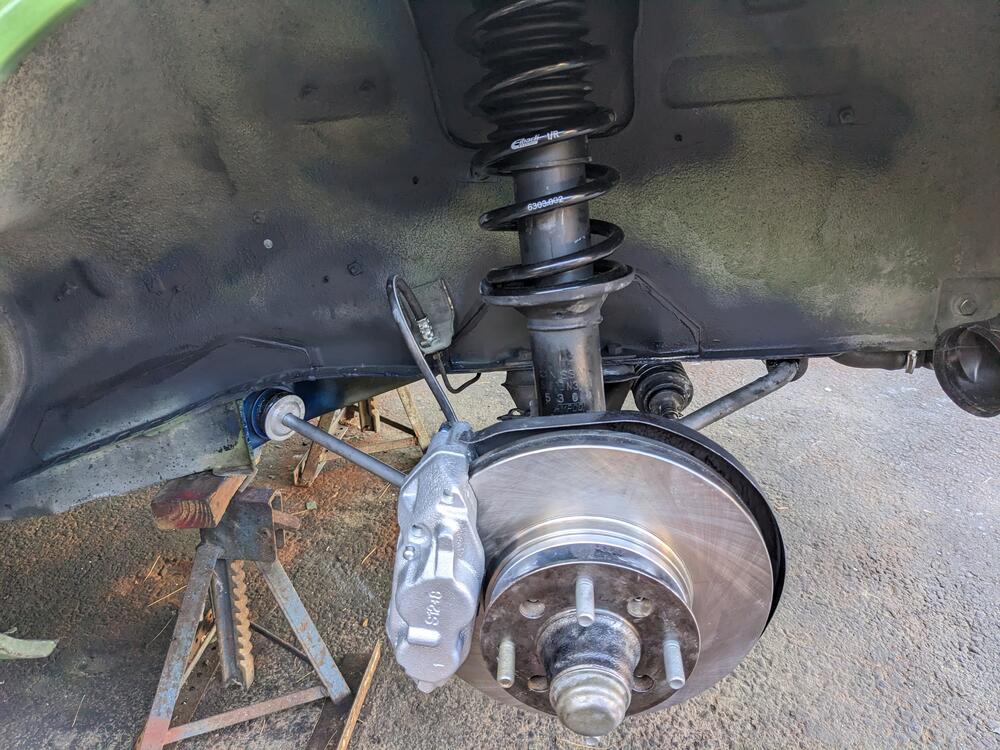
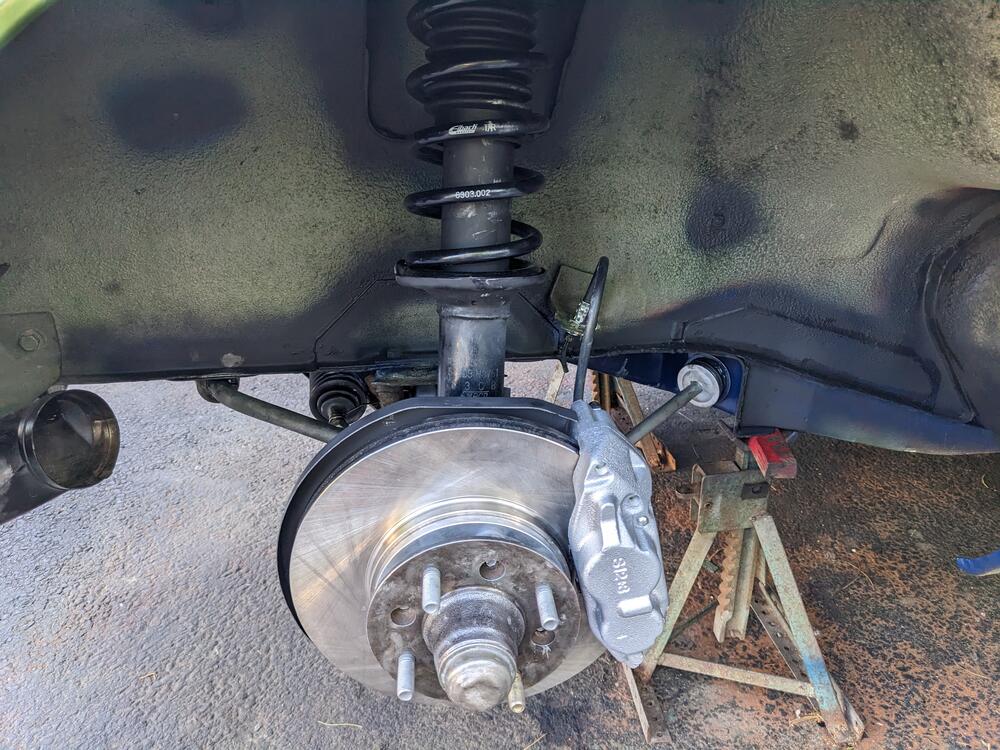
Thanks Zed Head - with my Mum it's only going to get more involved moving forward. I'm retiring from teaching at the end of the upcoming school year (2023-2024), so I'll be able to give her more time. She has a long to to list for stuff on her house & yard that I really don't have time to address as things stand. I had looked at that and a couple other posts before I decided on the rear brake kit. I went with the MilkFab kit, in part because they include specific directions, which can also be downloaded off their website . The other main reason is that it uses much newer & readily available Mustang (Girling?) calipers - they are very similar to versions used on various Volvos, so I'm comfortable with that.
-
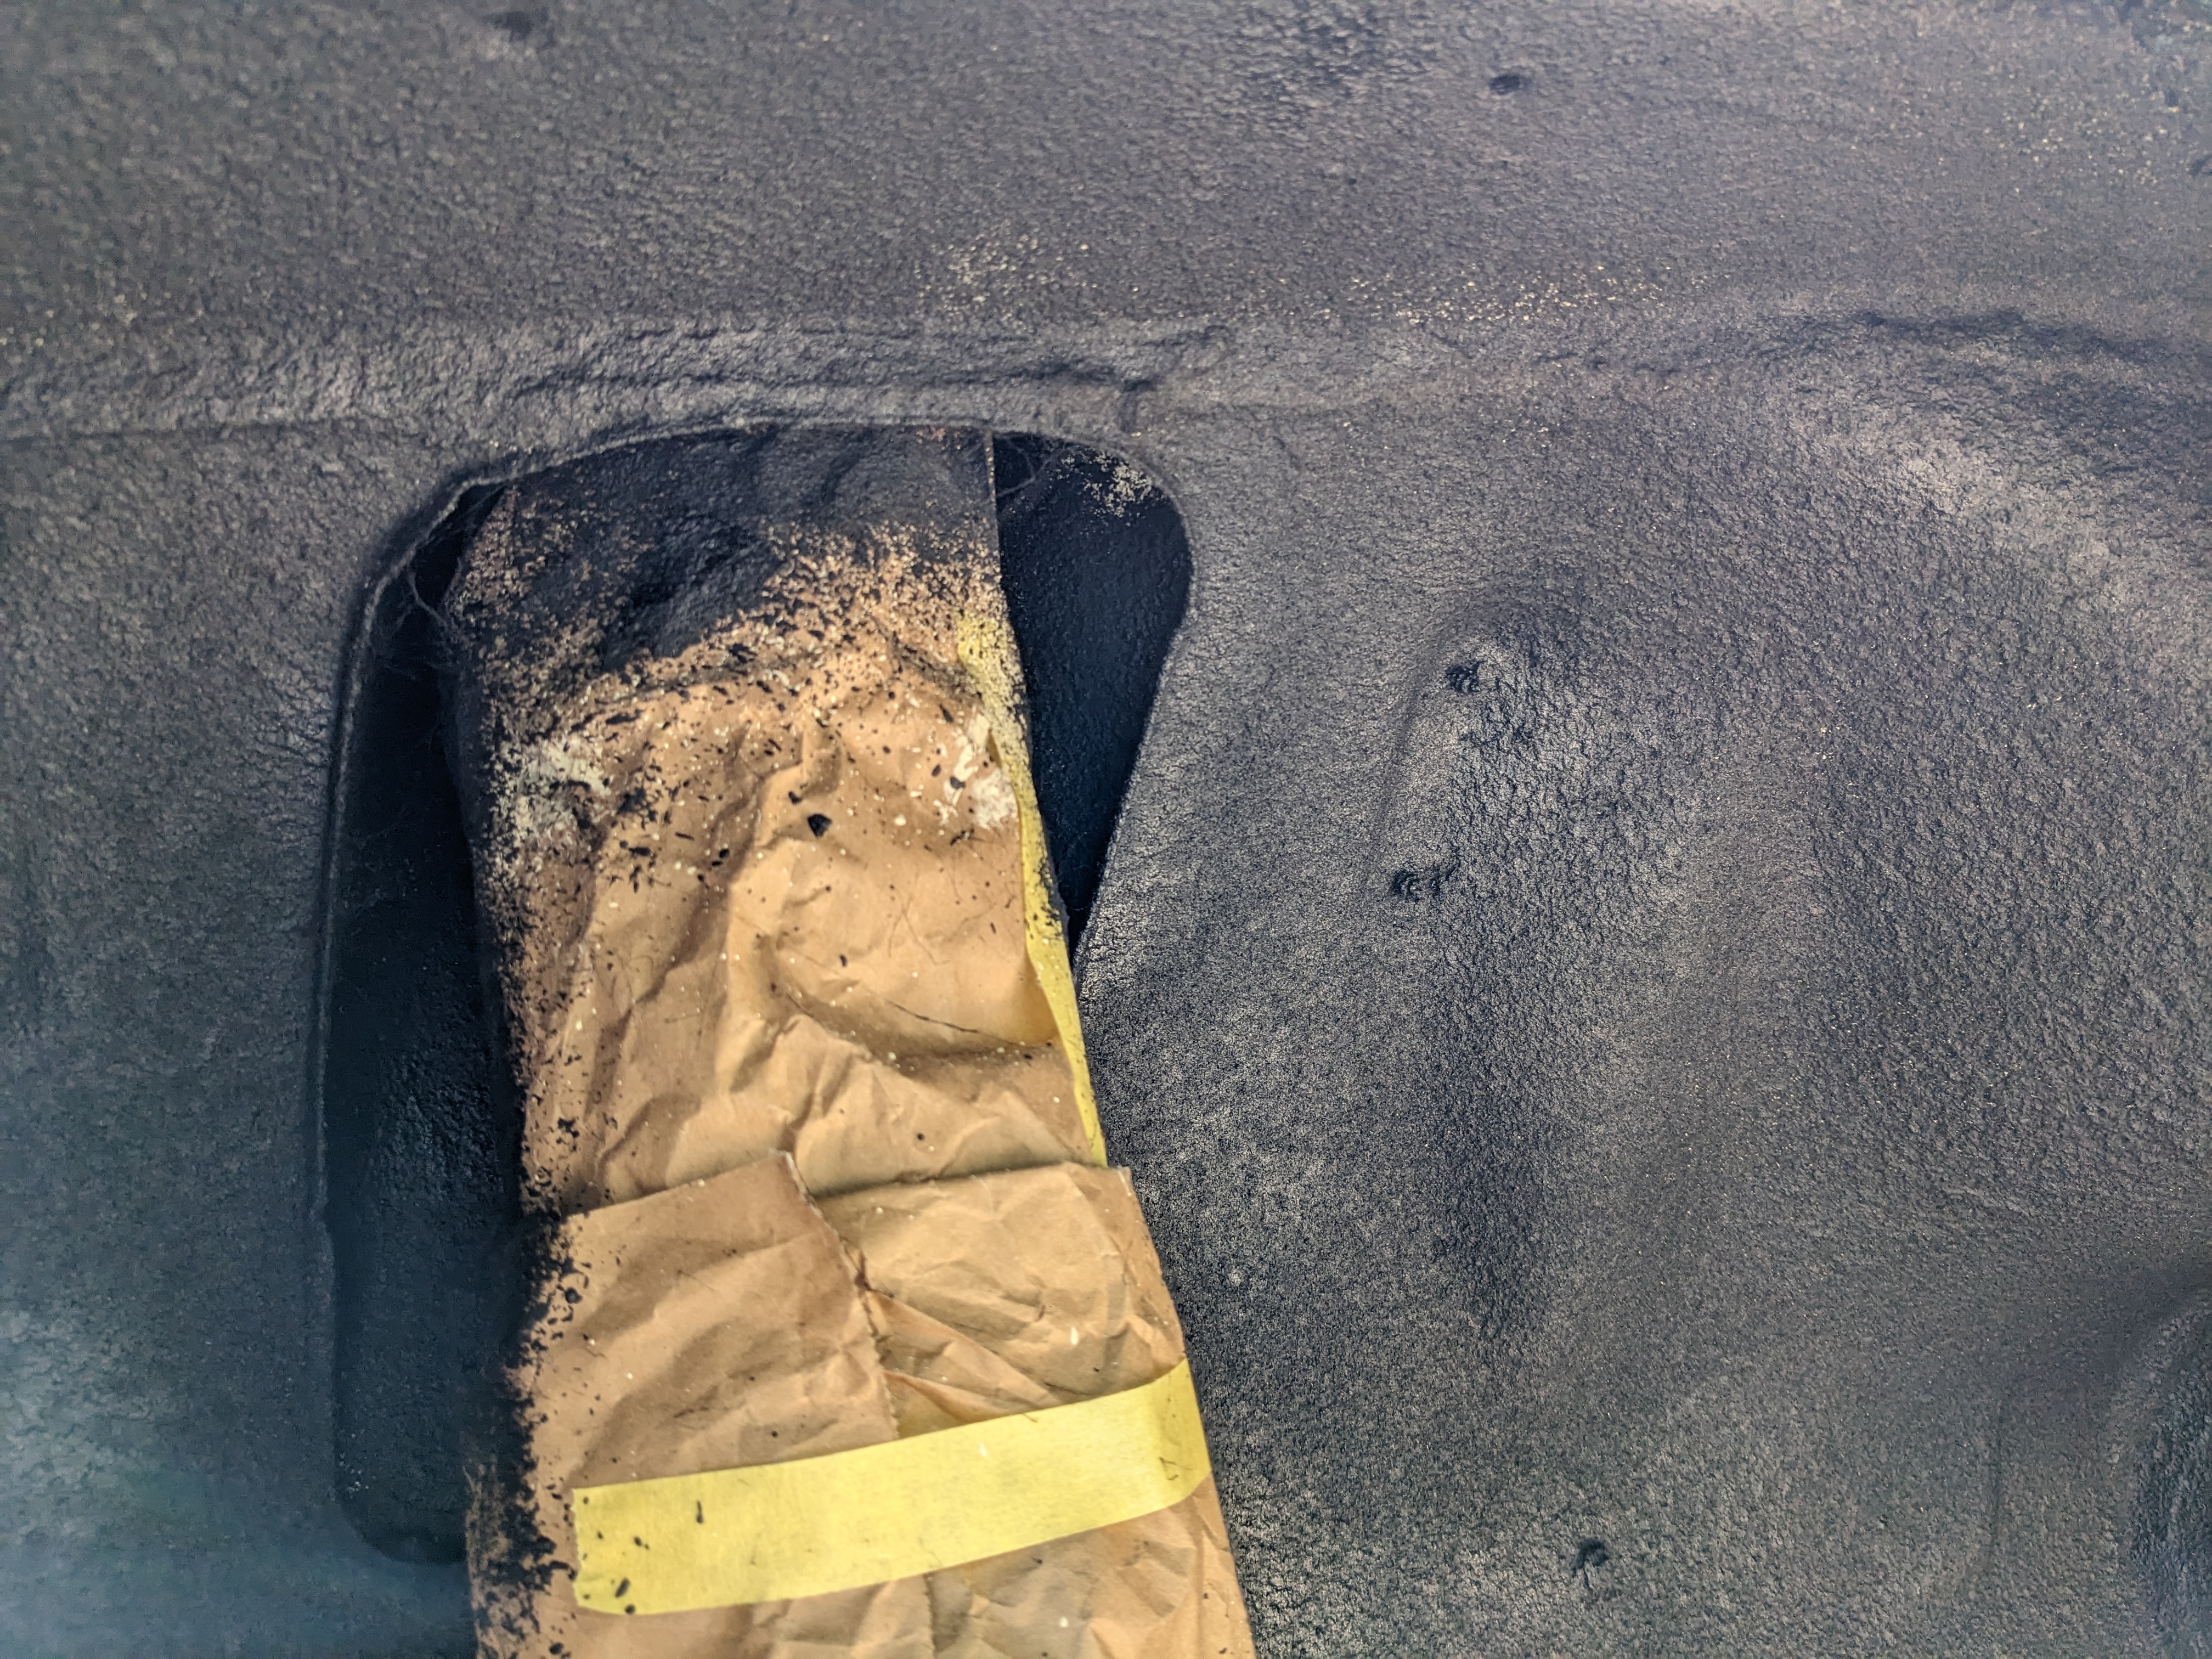
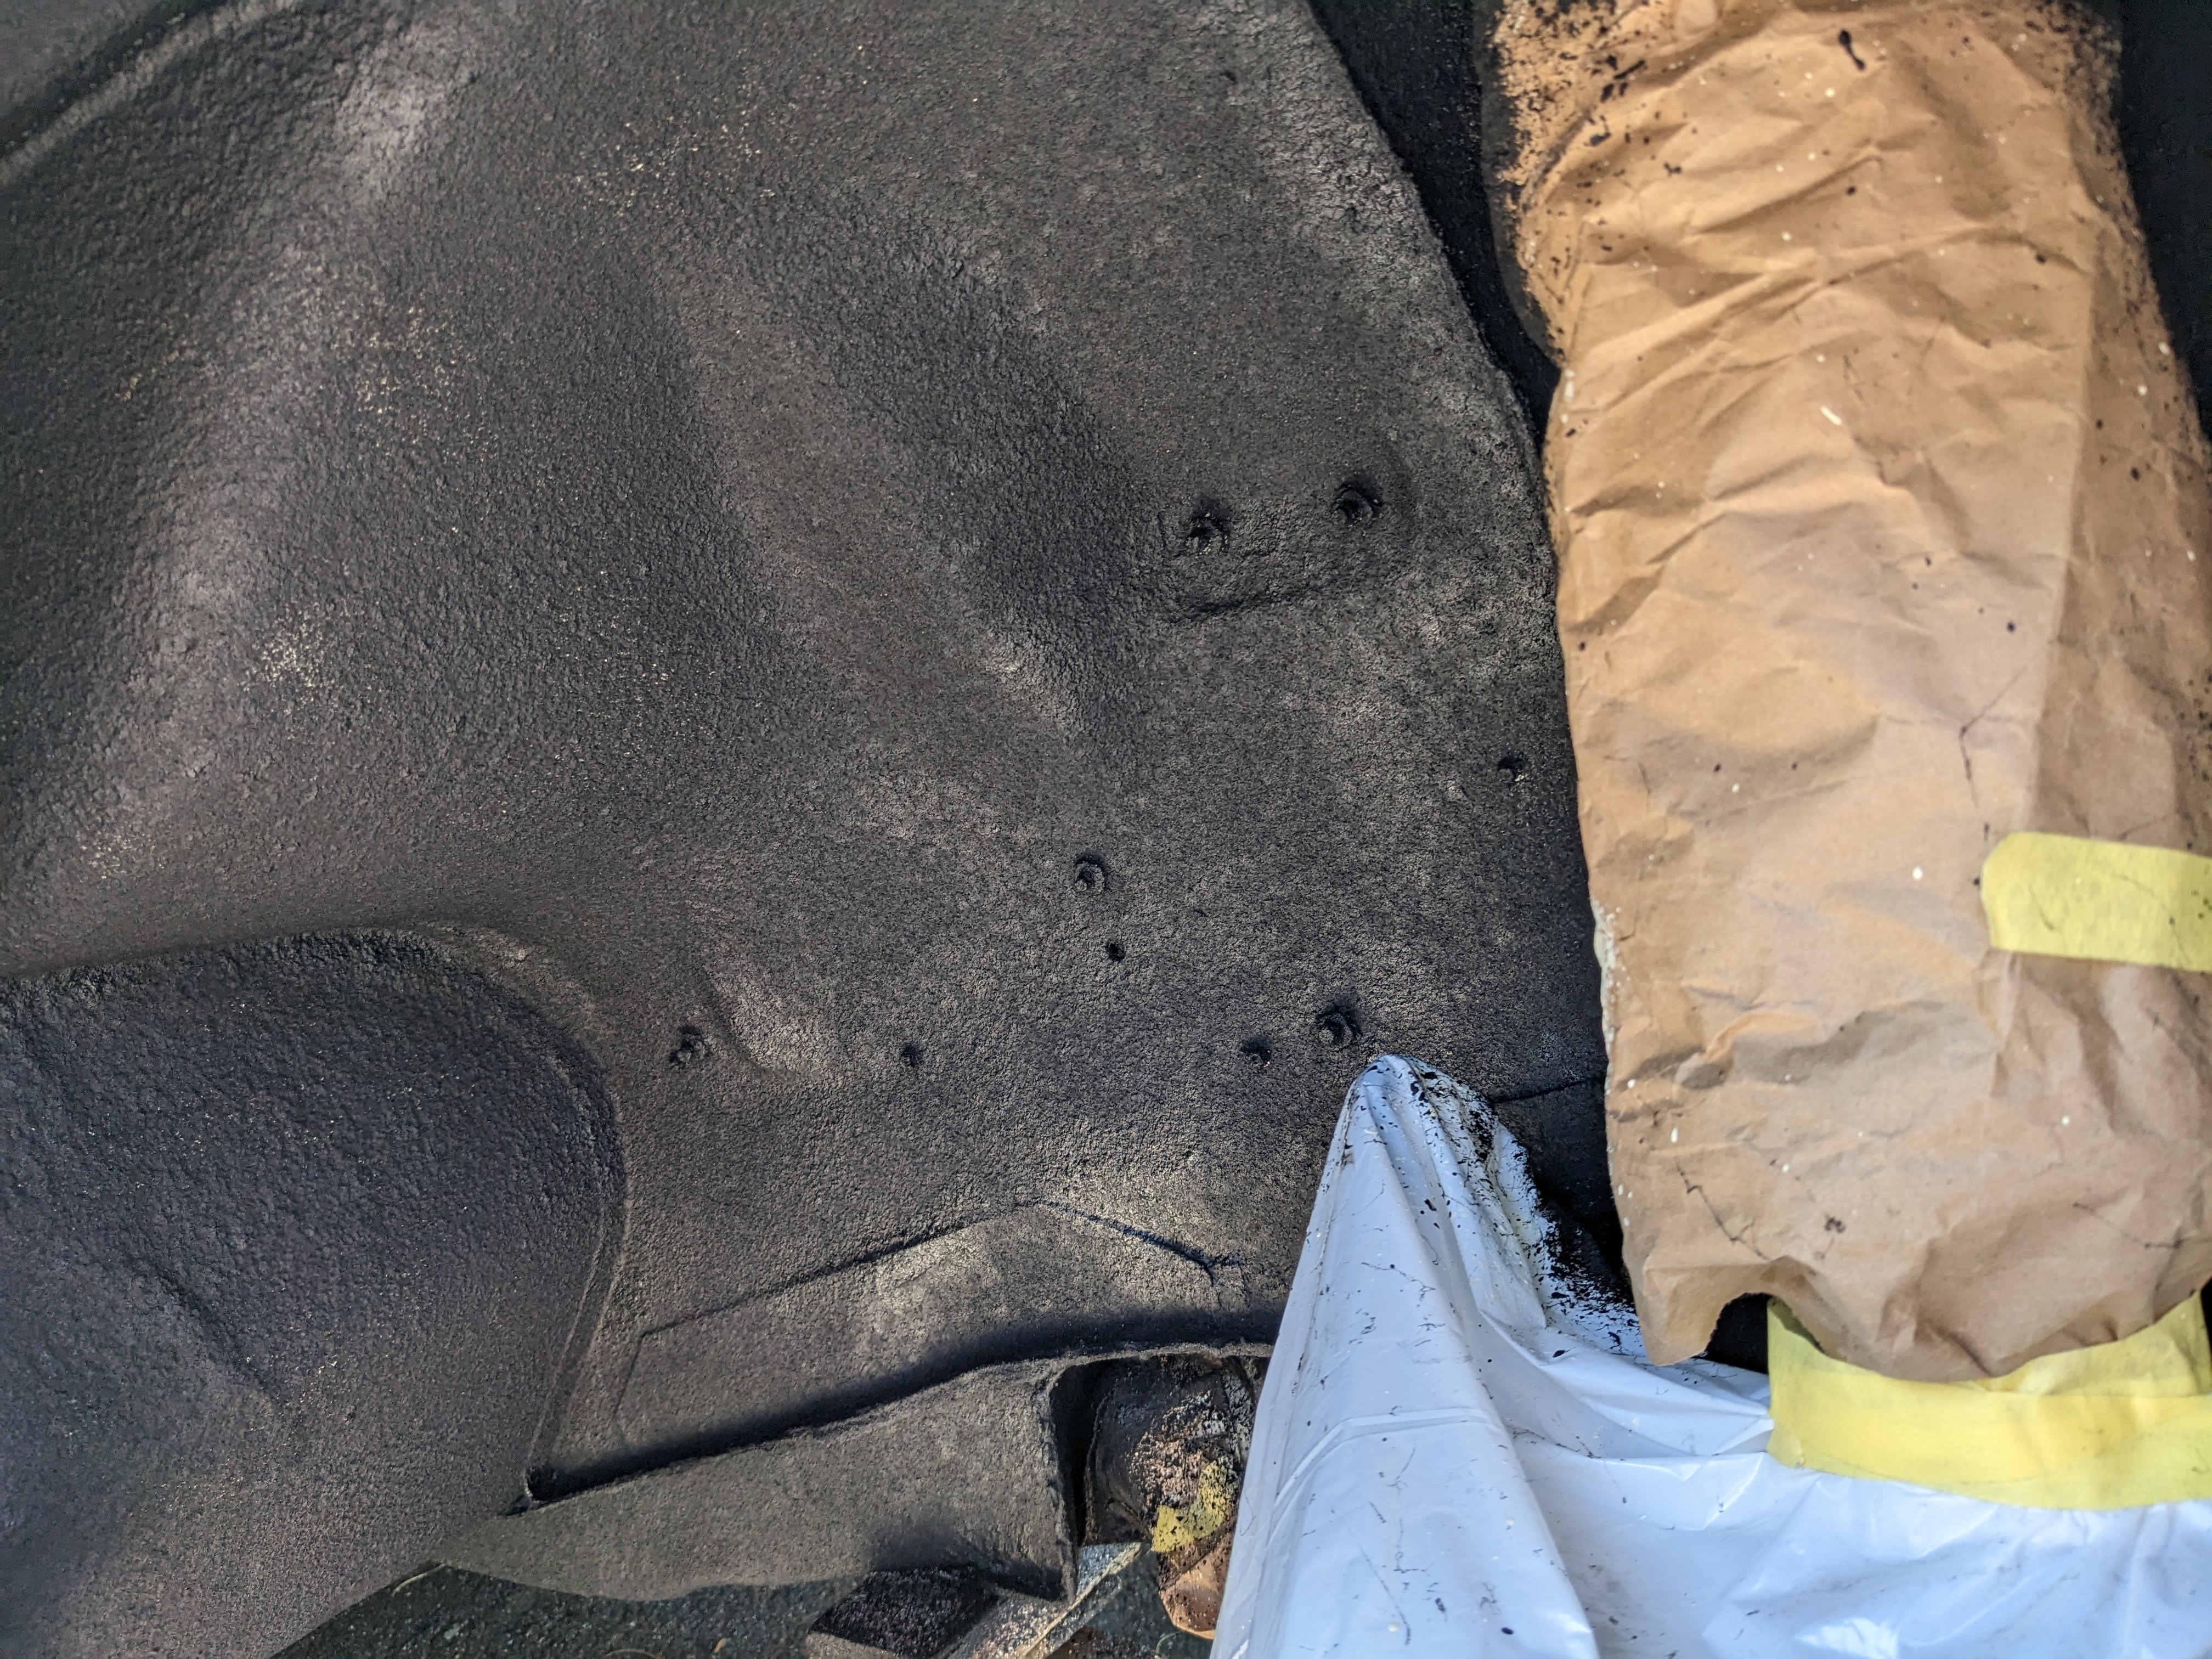
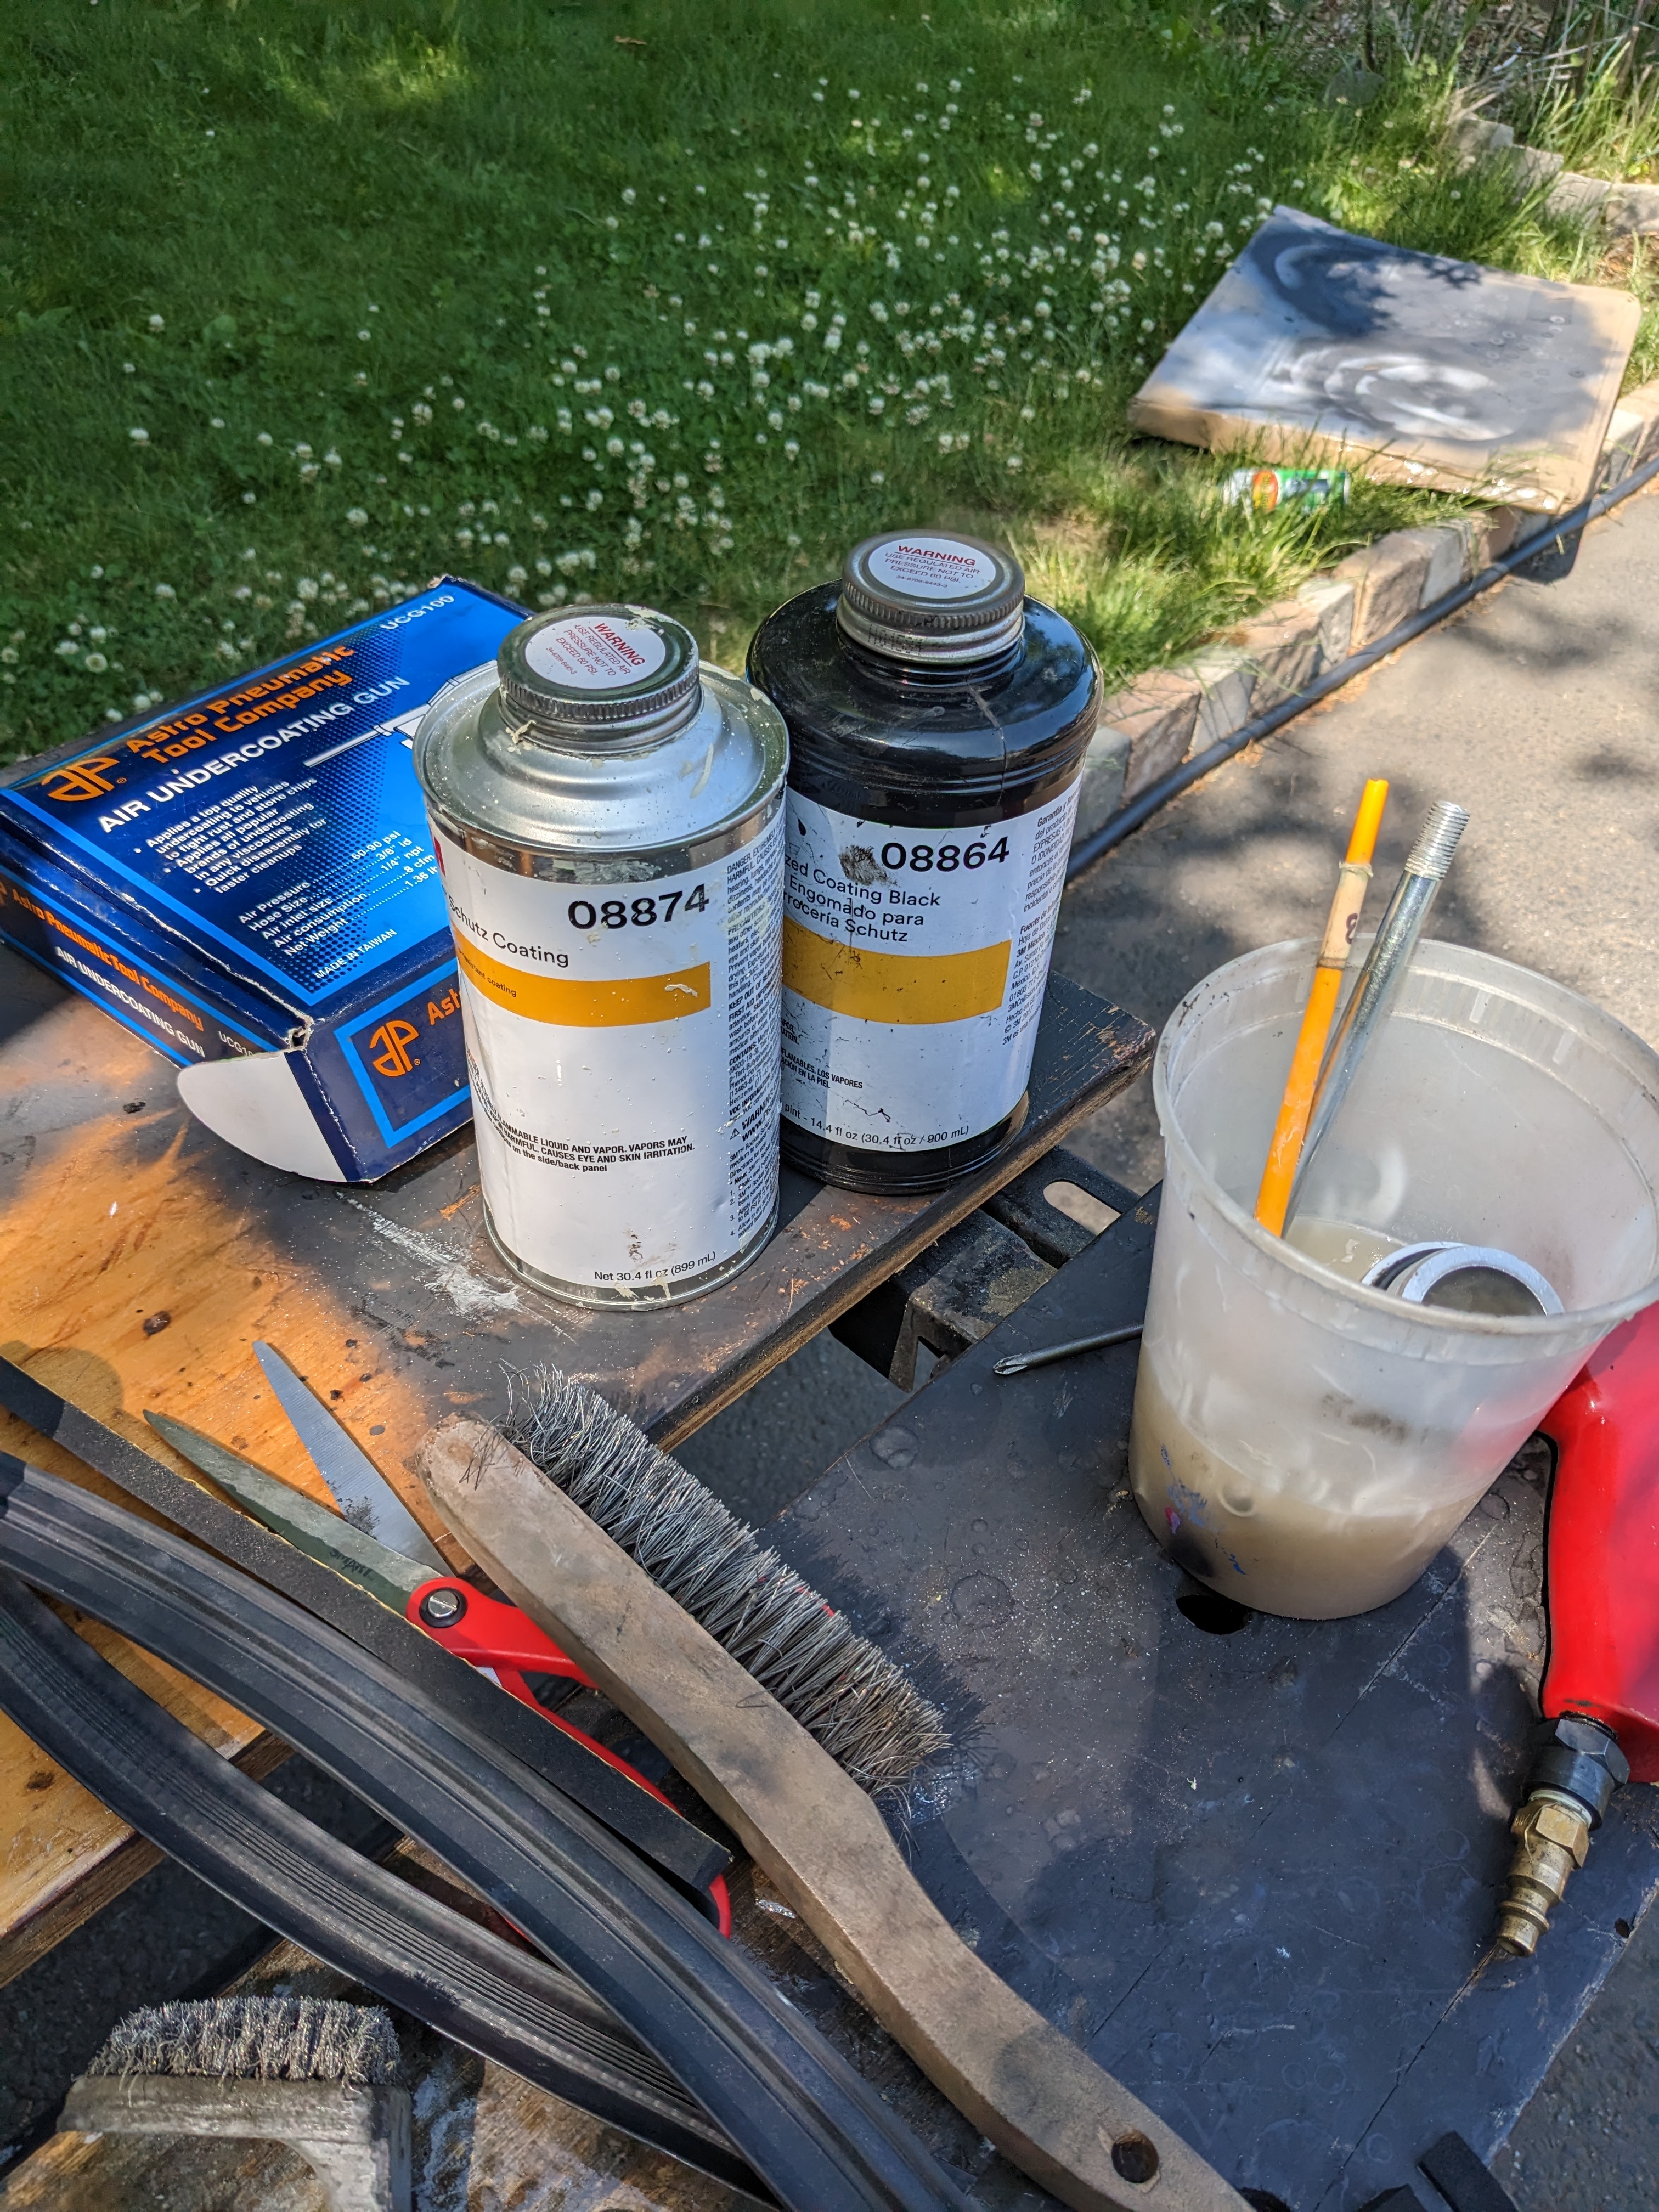
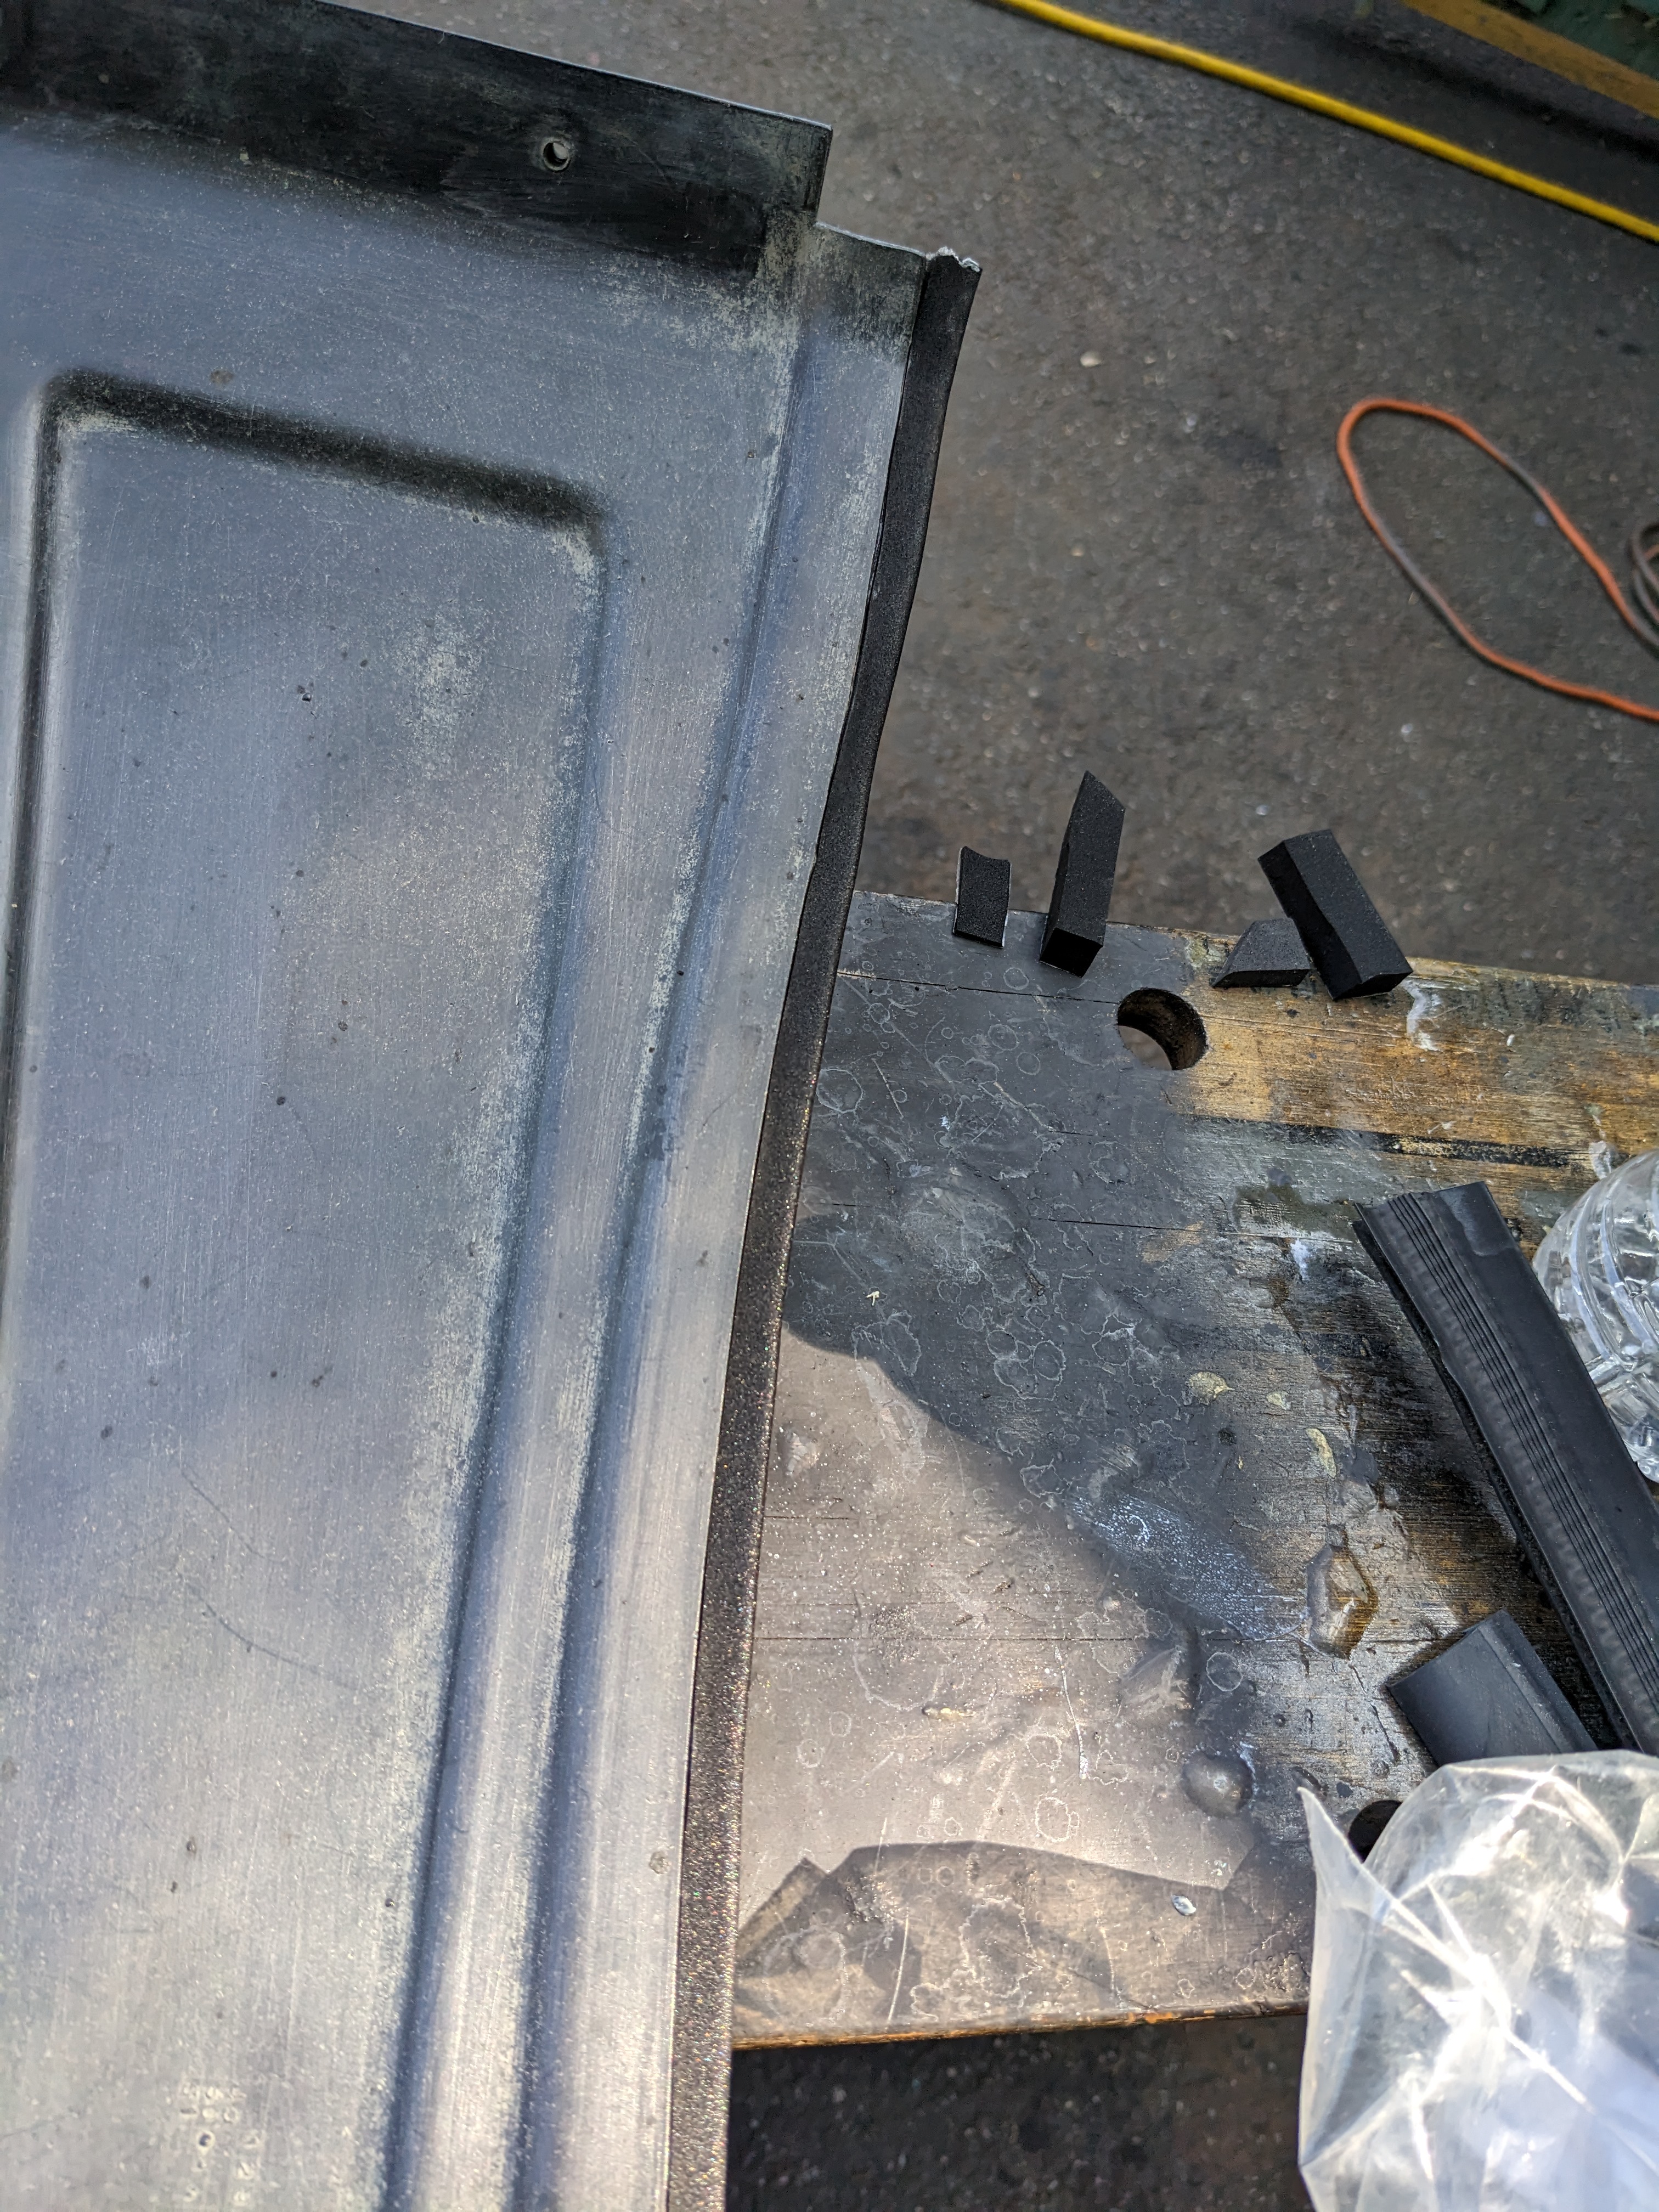
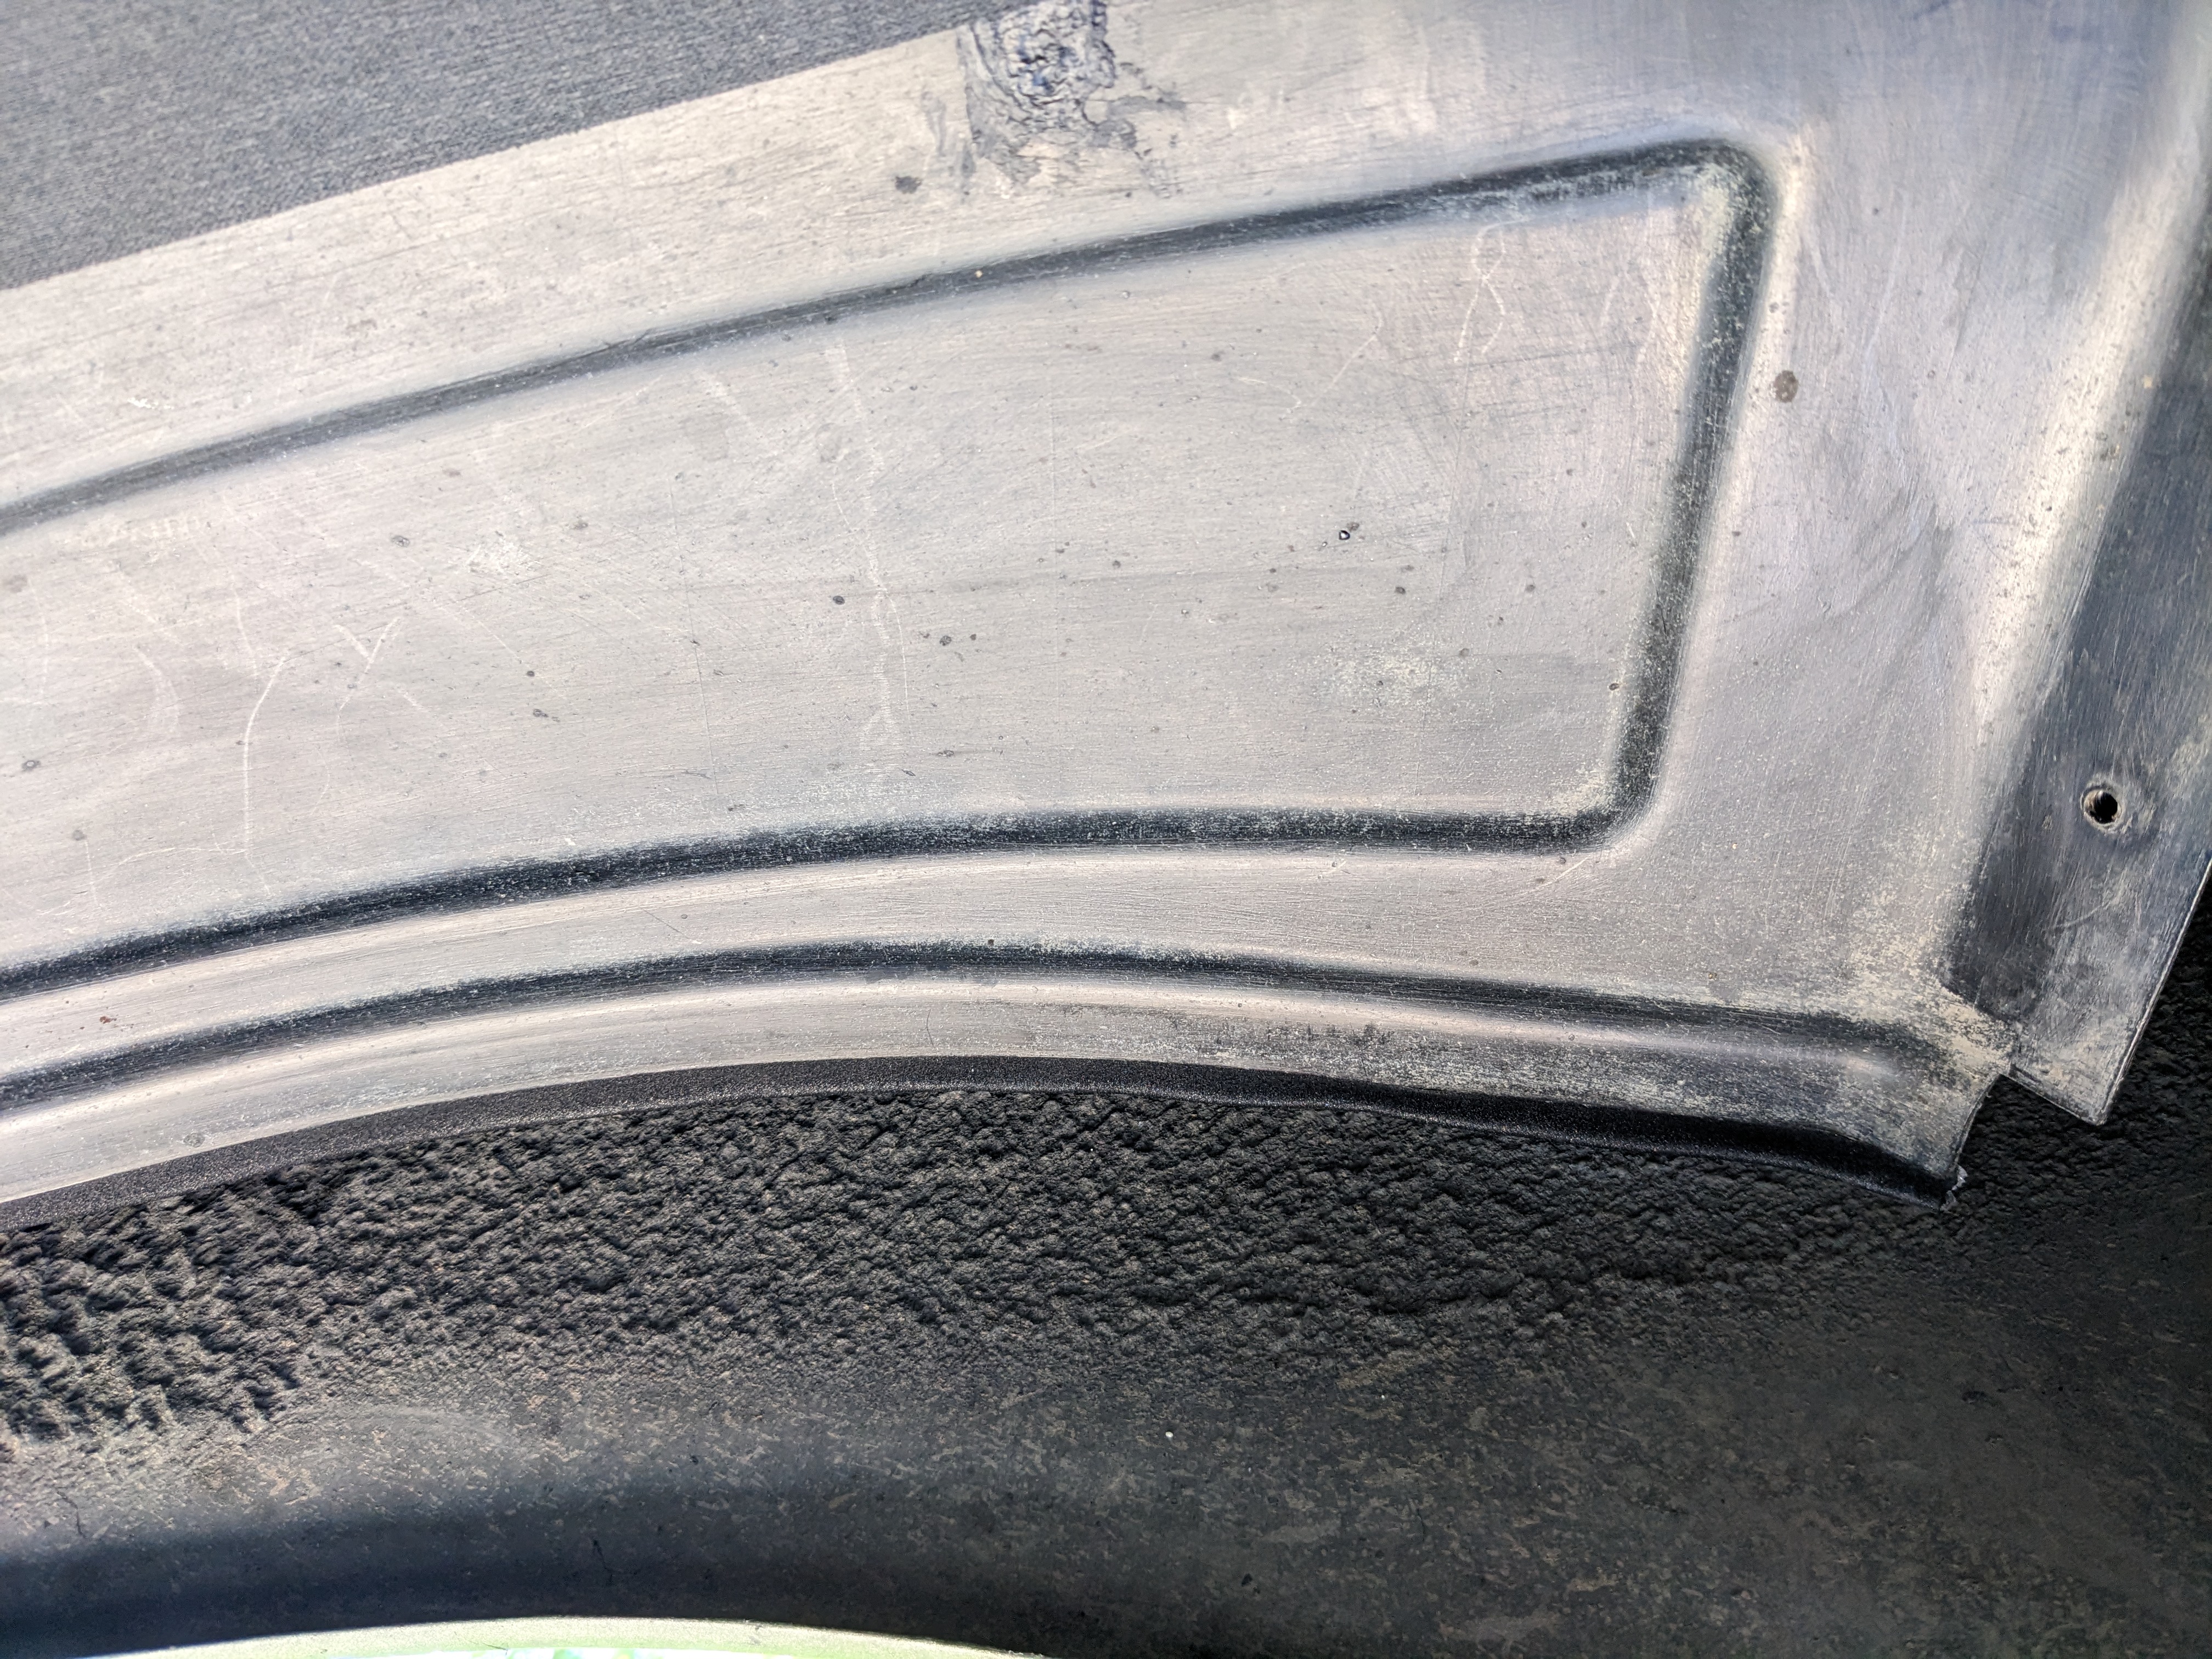
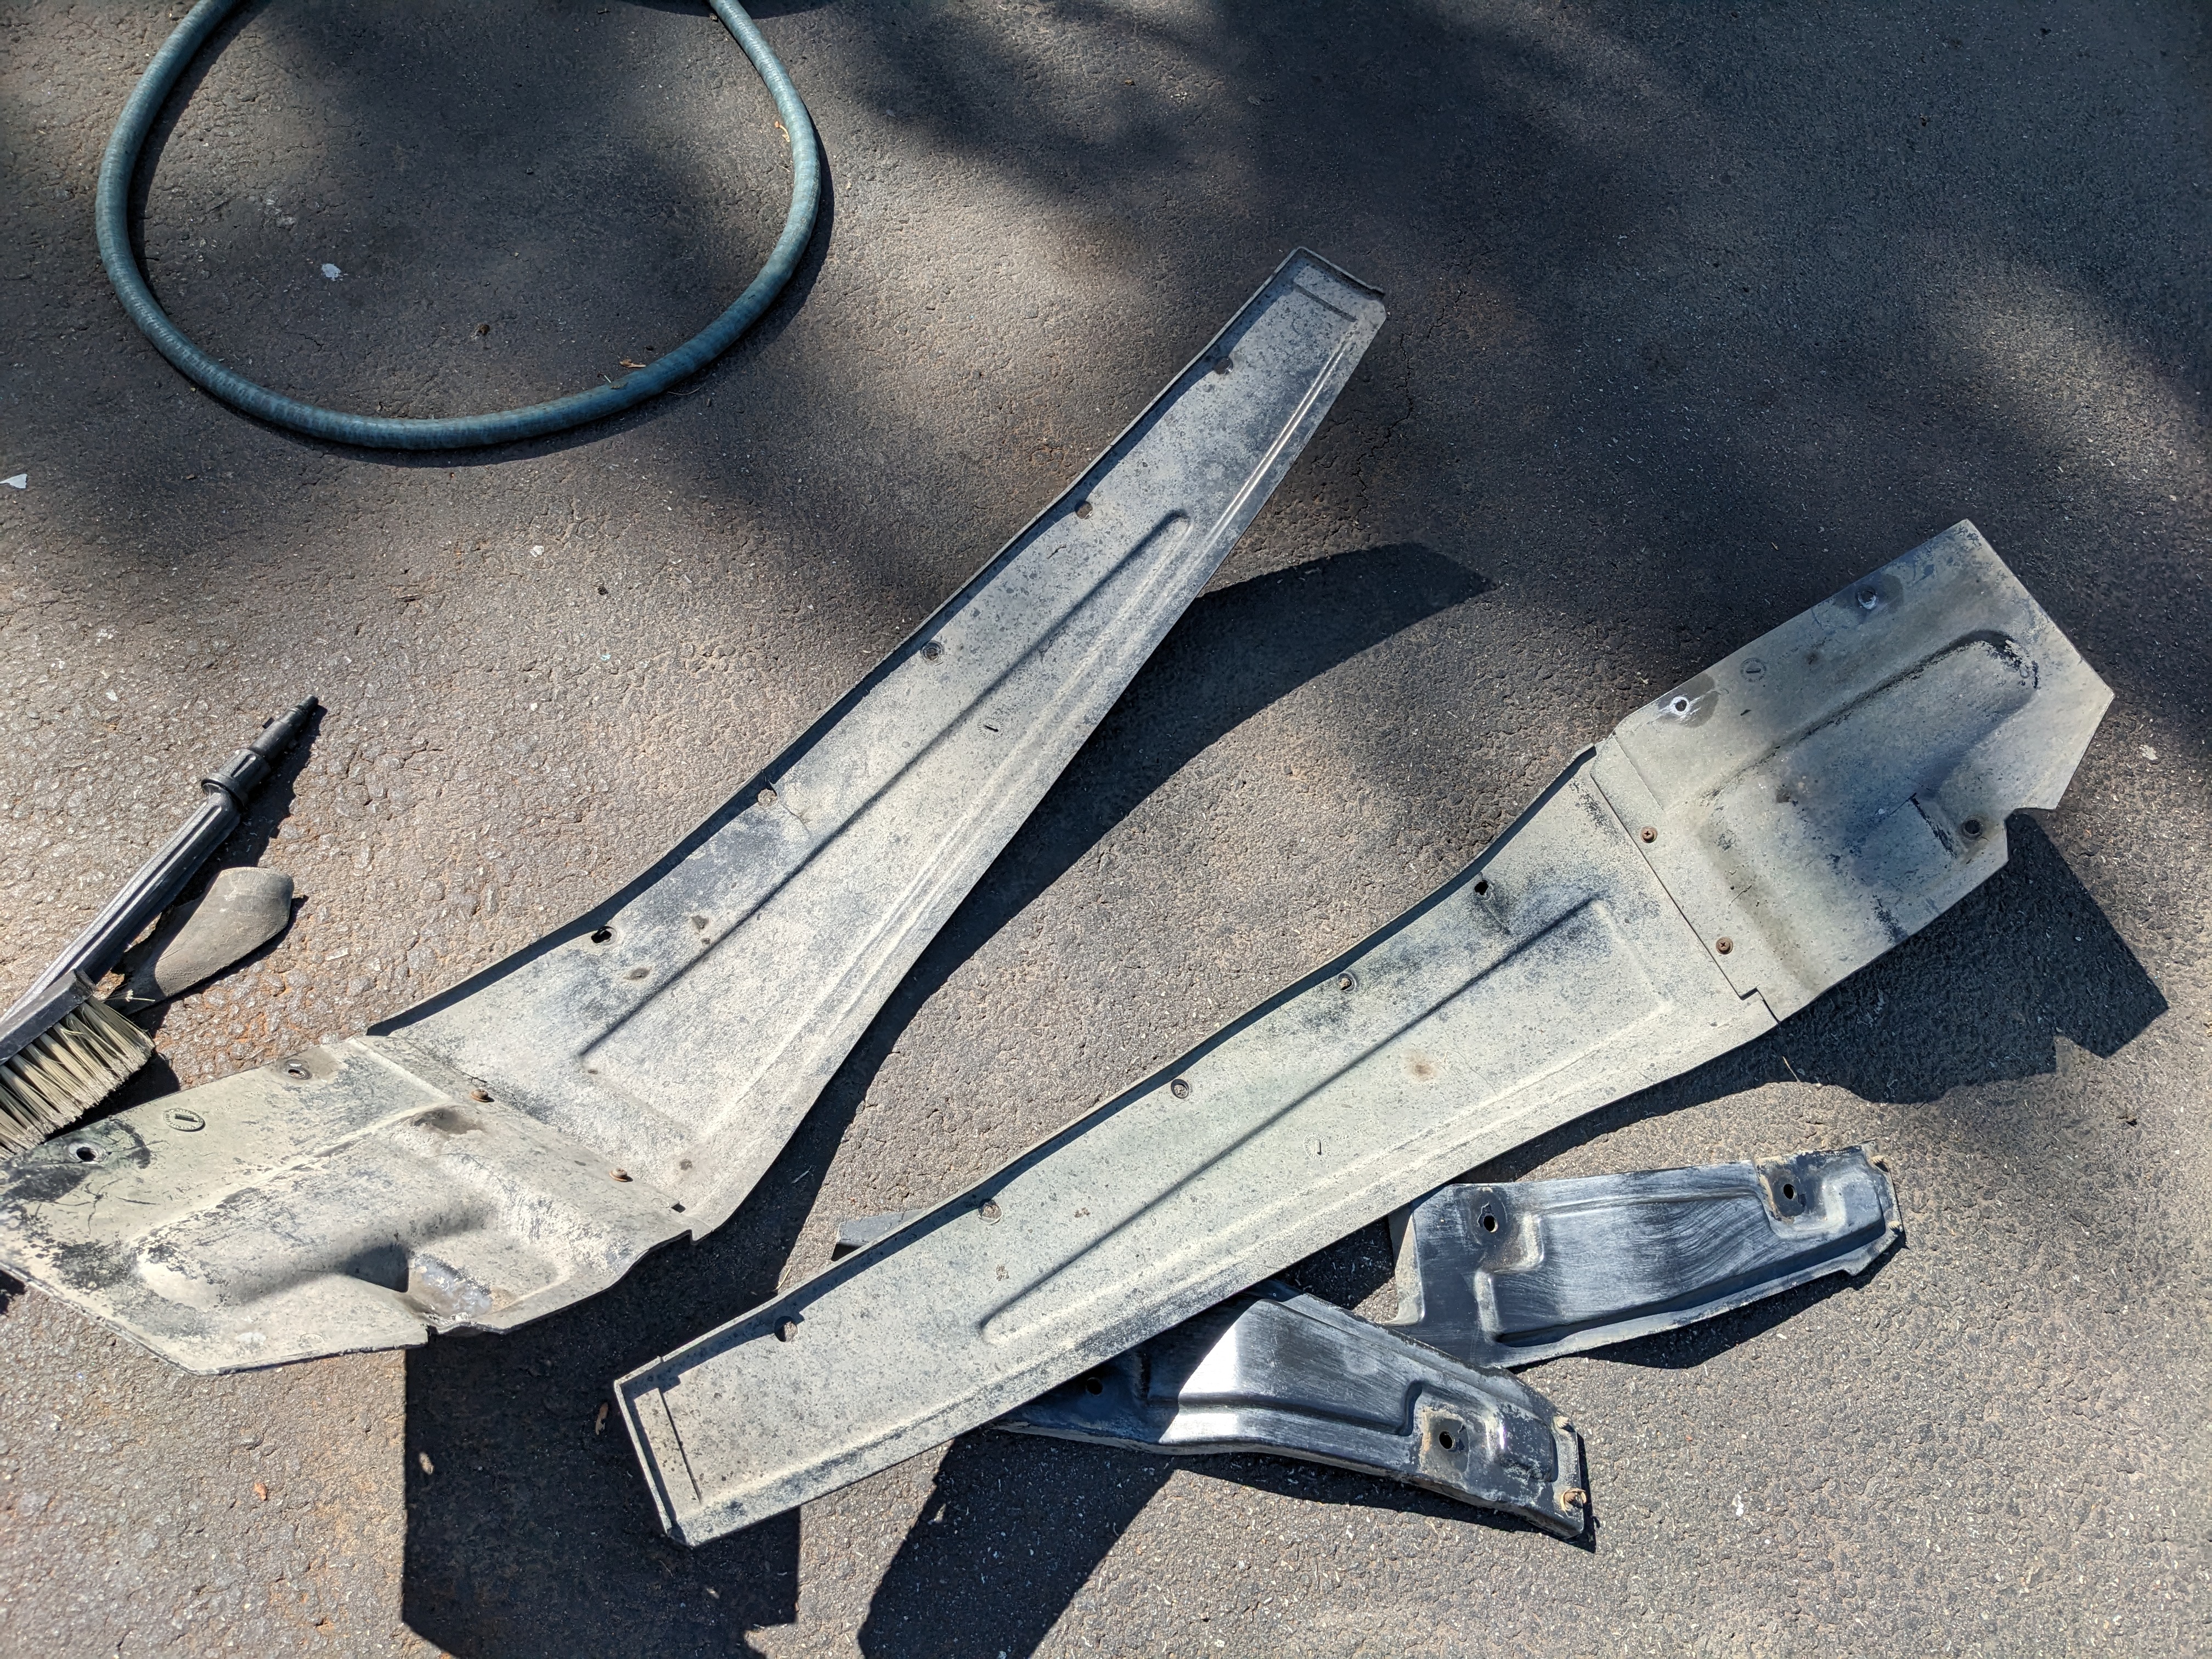
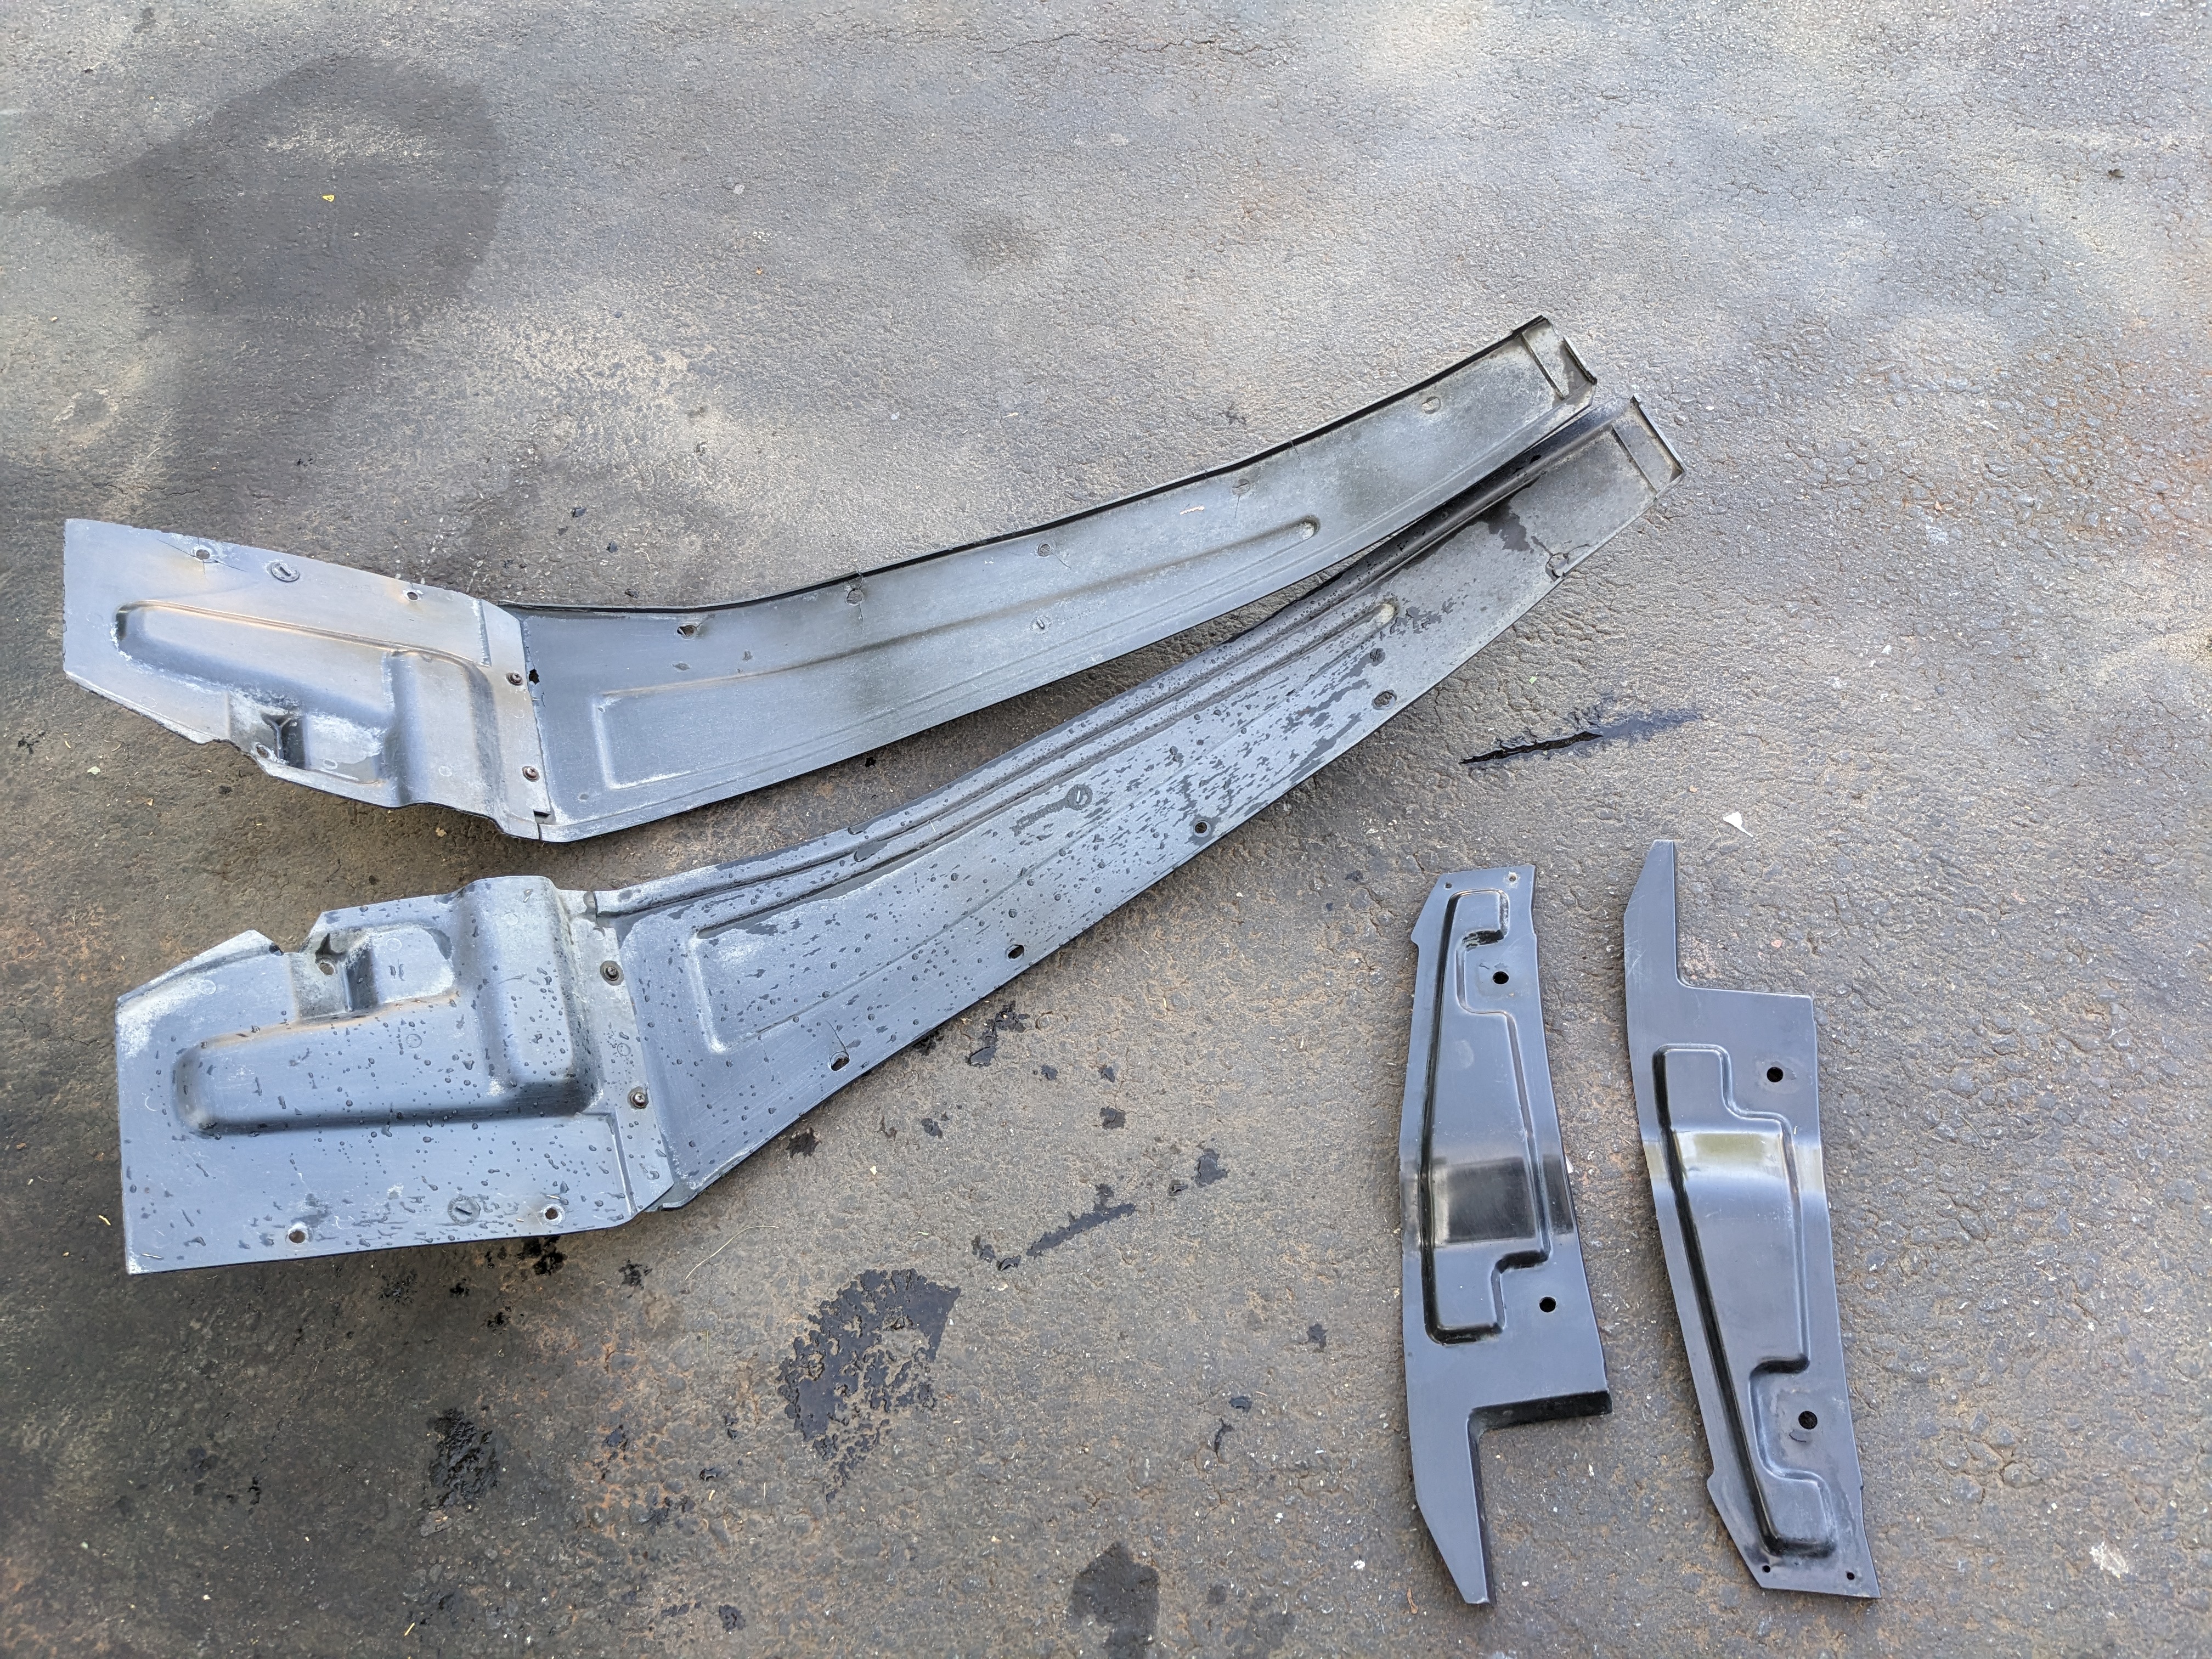
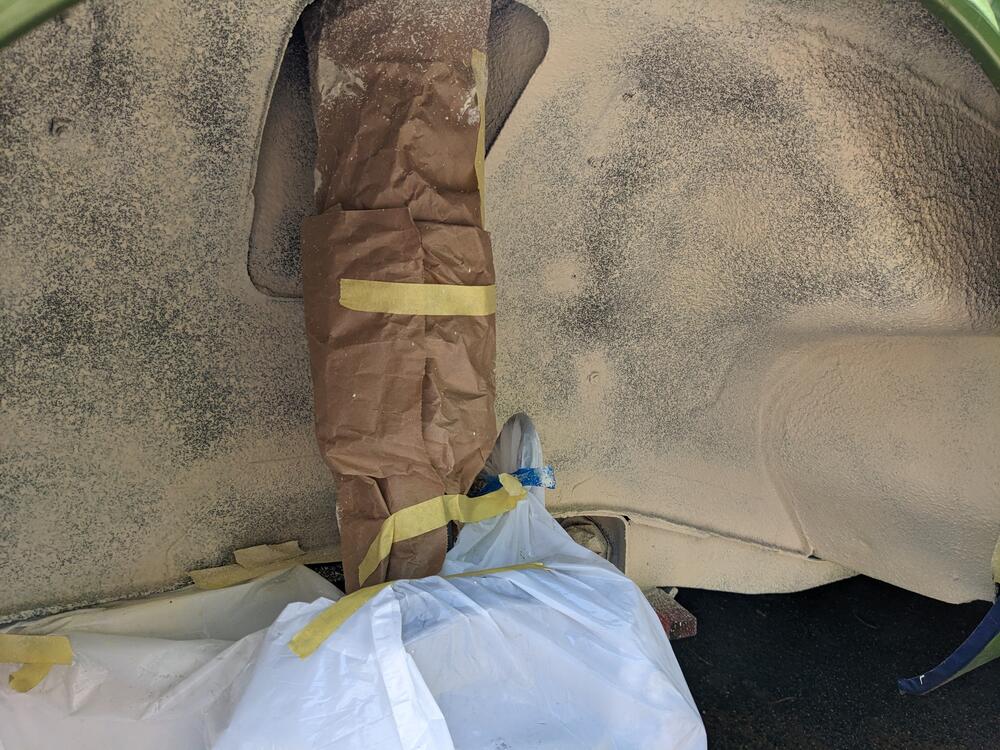
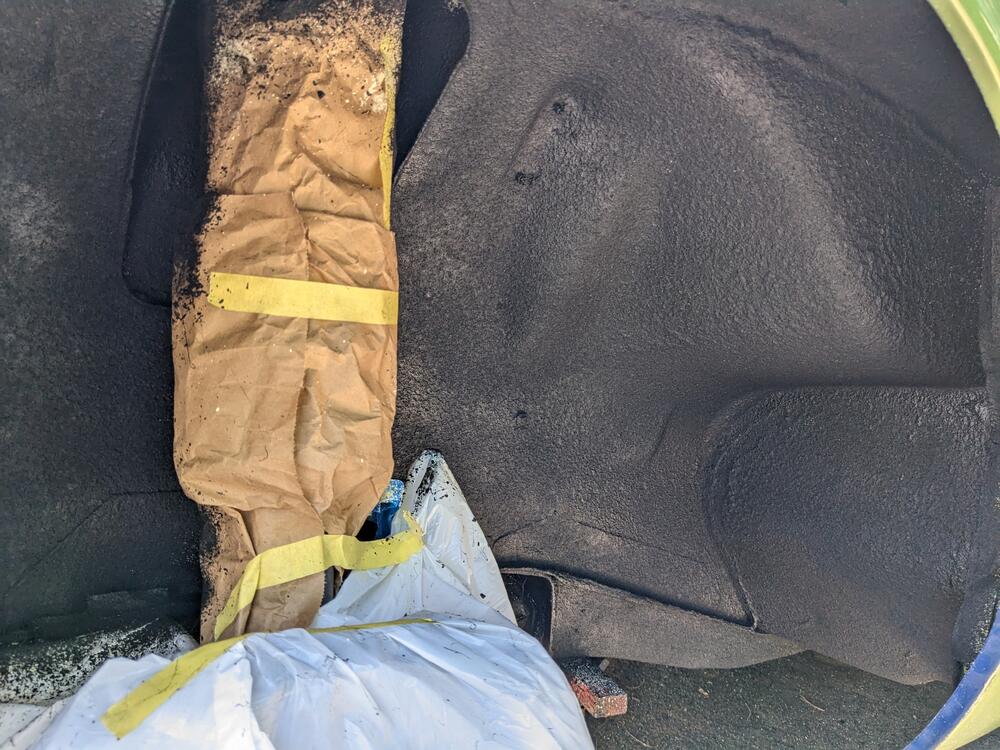
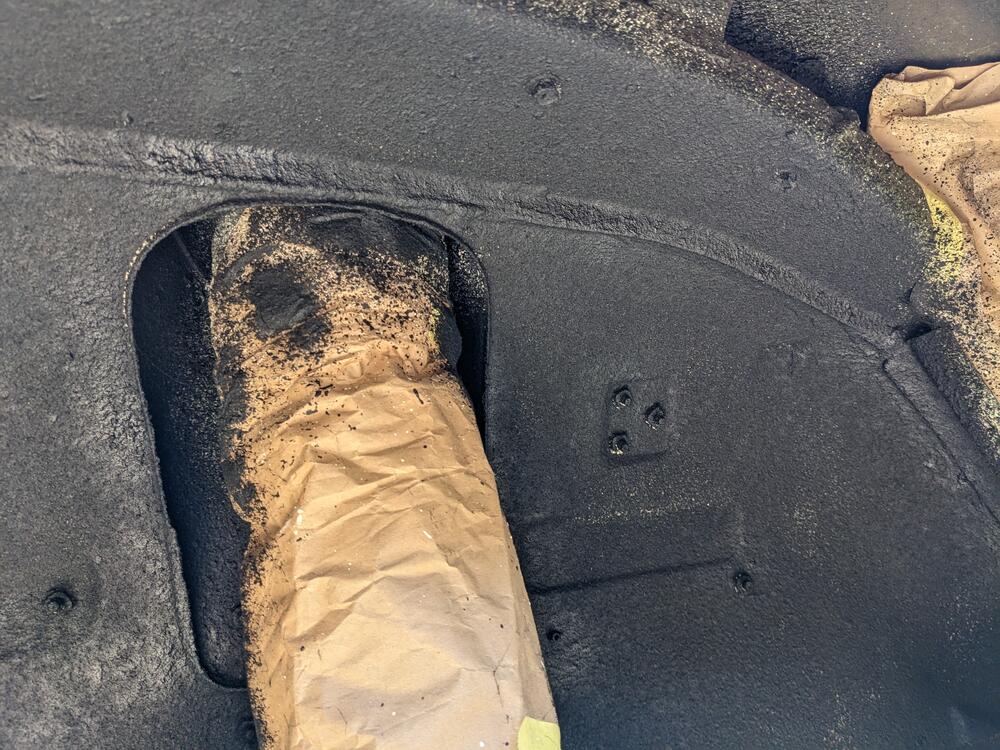
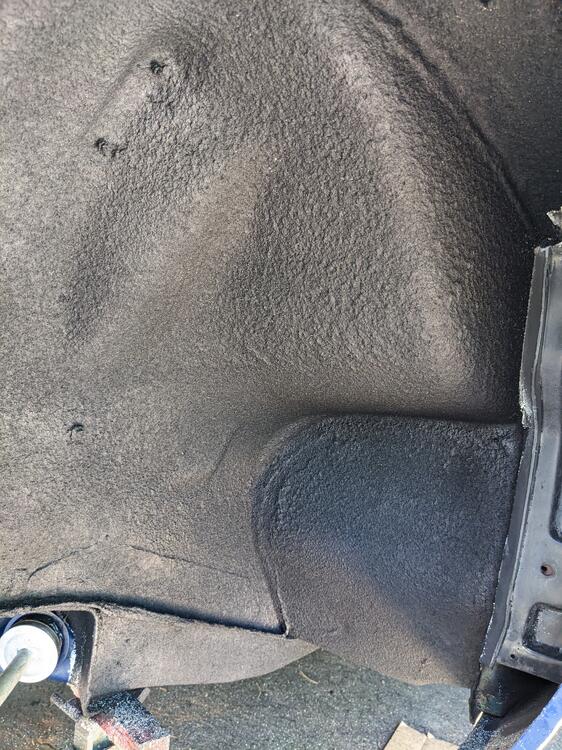
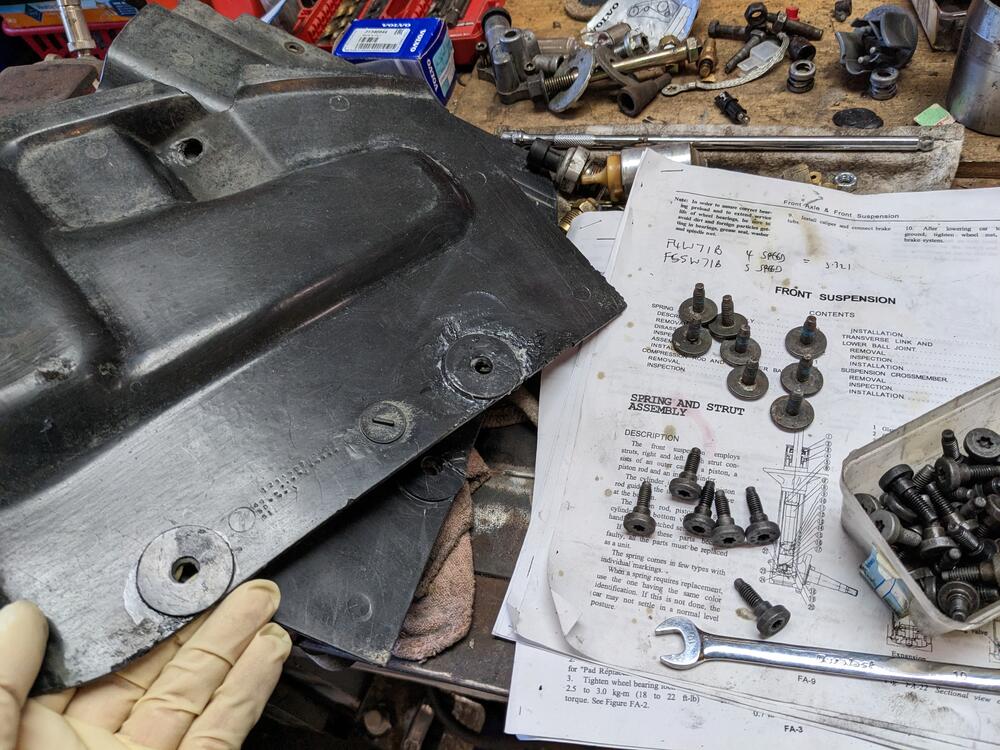
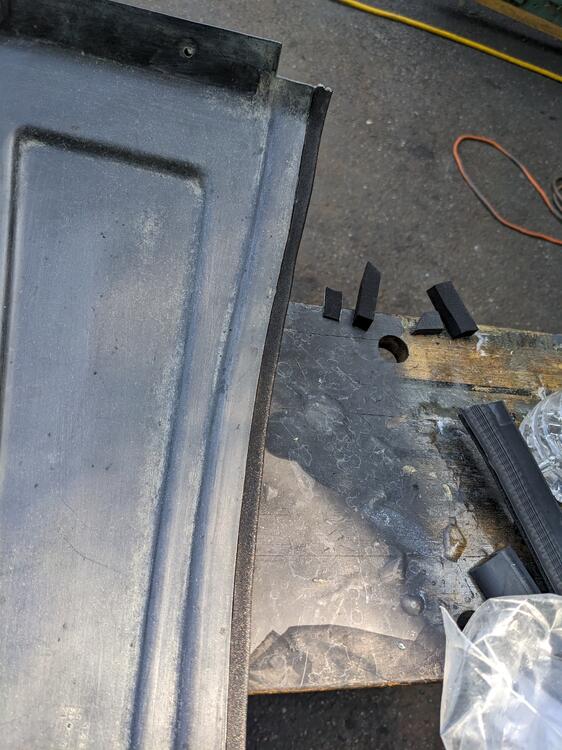
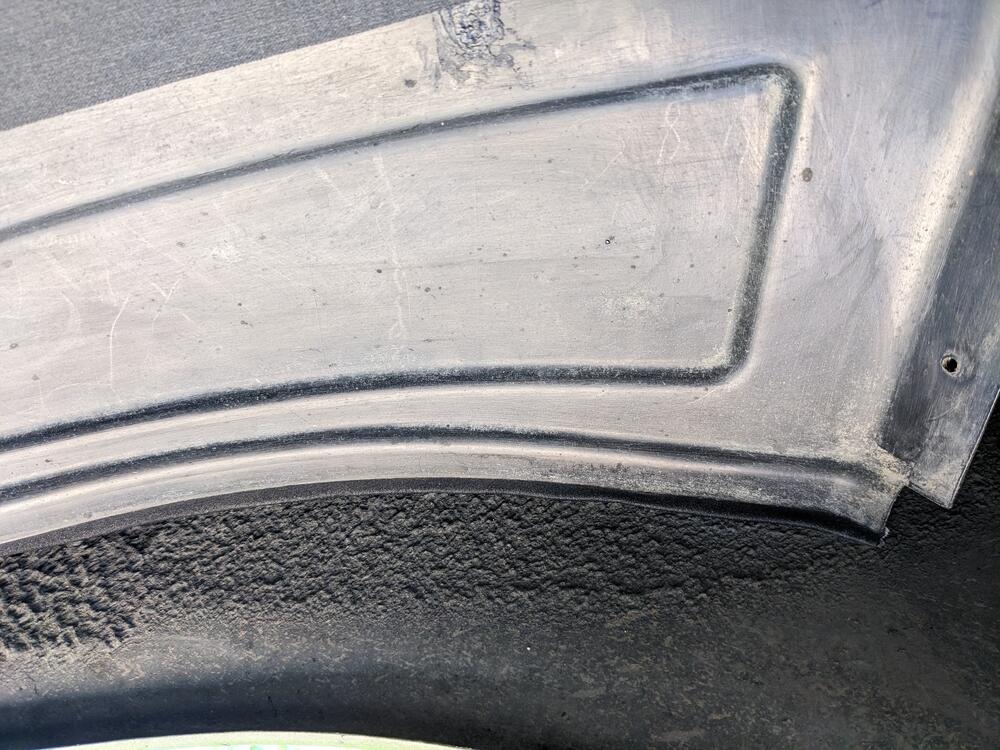
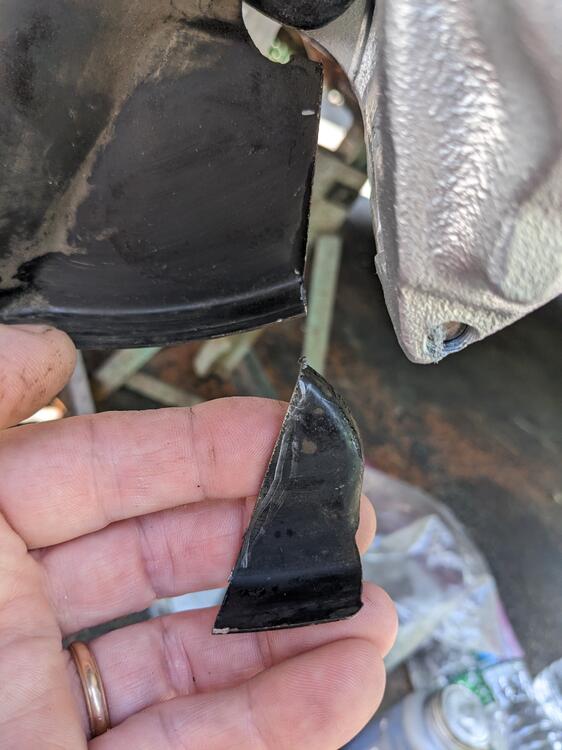
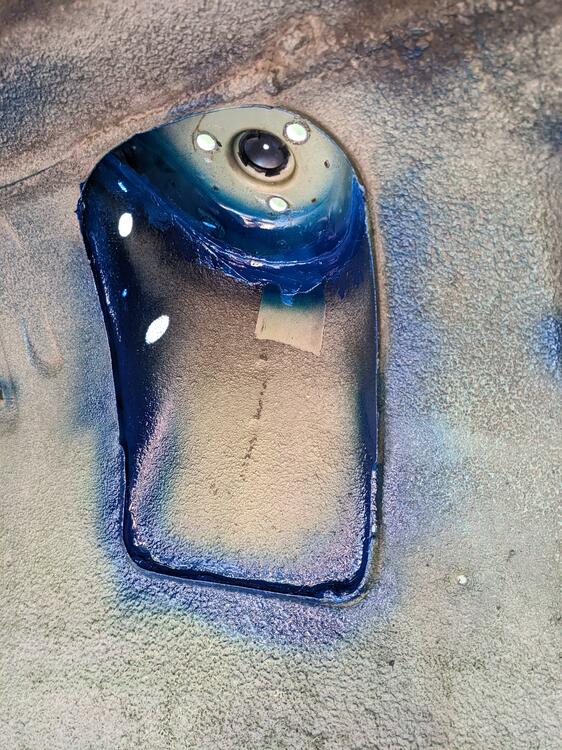
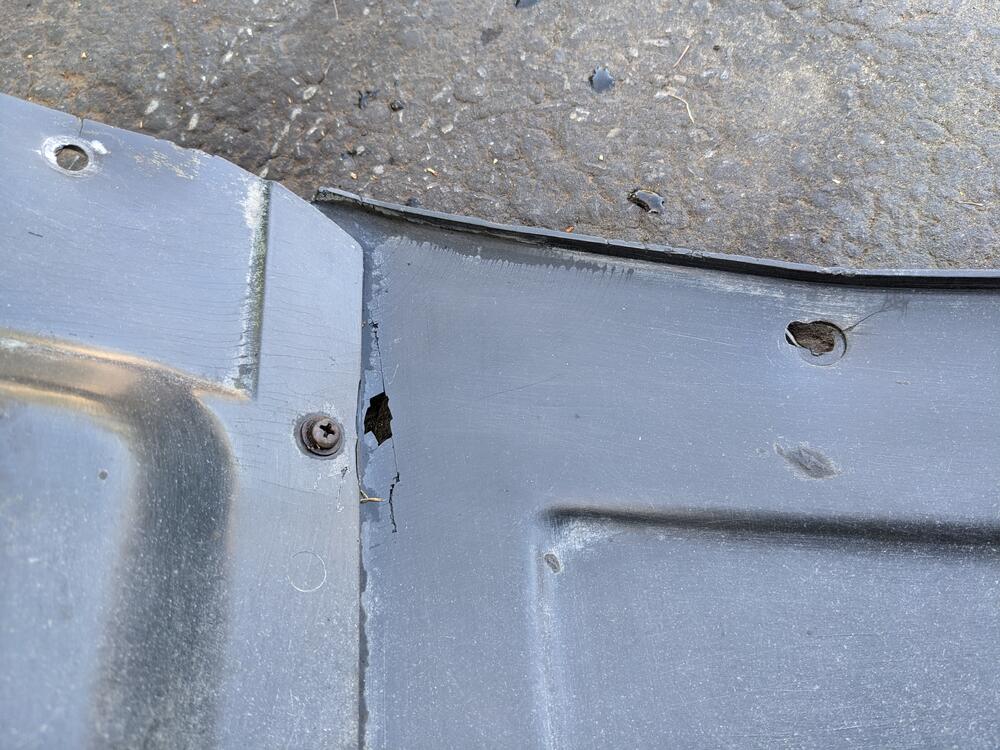
Got the brakes bled, then worked on the fender liners & the wheel well coating. Did some plastic weld repairs to the cracks around the mount points Added closed cell foam to the inner rear panels, they are not exactly a snug fit by any means added a foam lip for the main panels, they also don't seal against the fender as supplied. I looked for an EPDM lip, but the ones I have are too bulky. I've since found one online, so I'll revisit that when I remove the fenders in the future reinforced the forward sections with plastic washers. Also using Volvo M6 hardware with large heads, to spread the load Shouldered hardware - prevents crushing the liner Scrubbed the wheel arches with a wire brush, then prepped the undercoat with lacquer thinners to help the Rocker Shutz adhere wait 45 mins then apply undercoat Put the Konig on to find that the backside of the hub doesn't clear the Toyota S12 calipers. Had to add a 1/8" spacer to each side


-
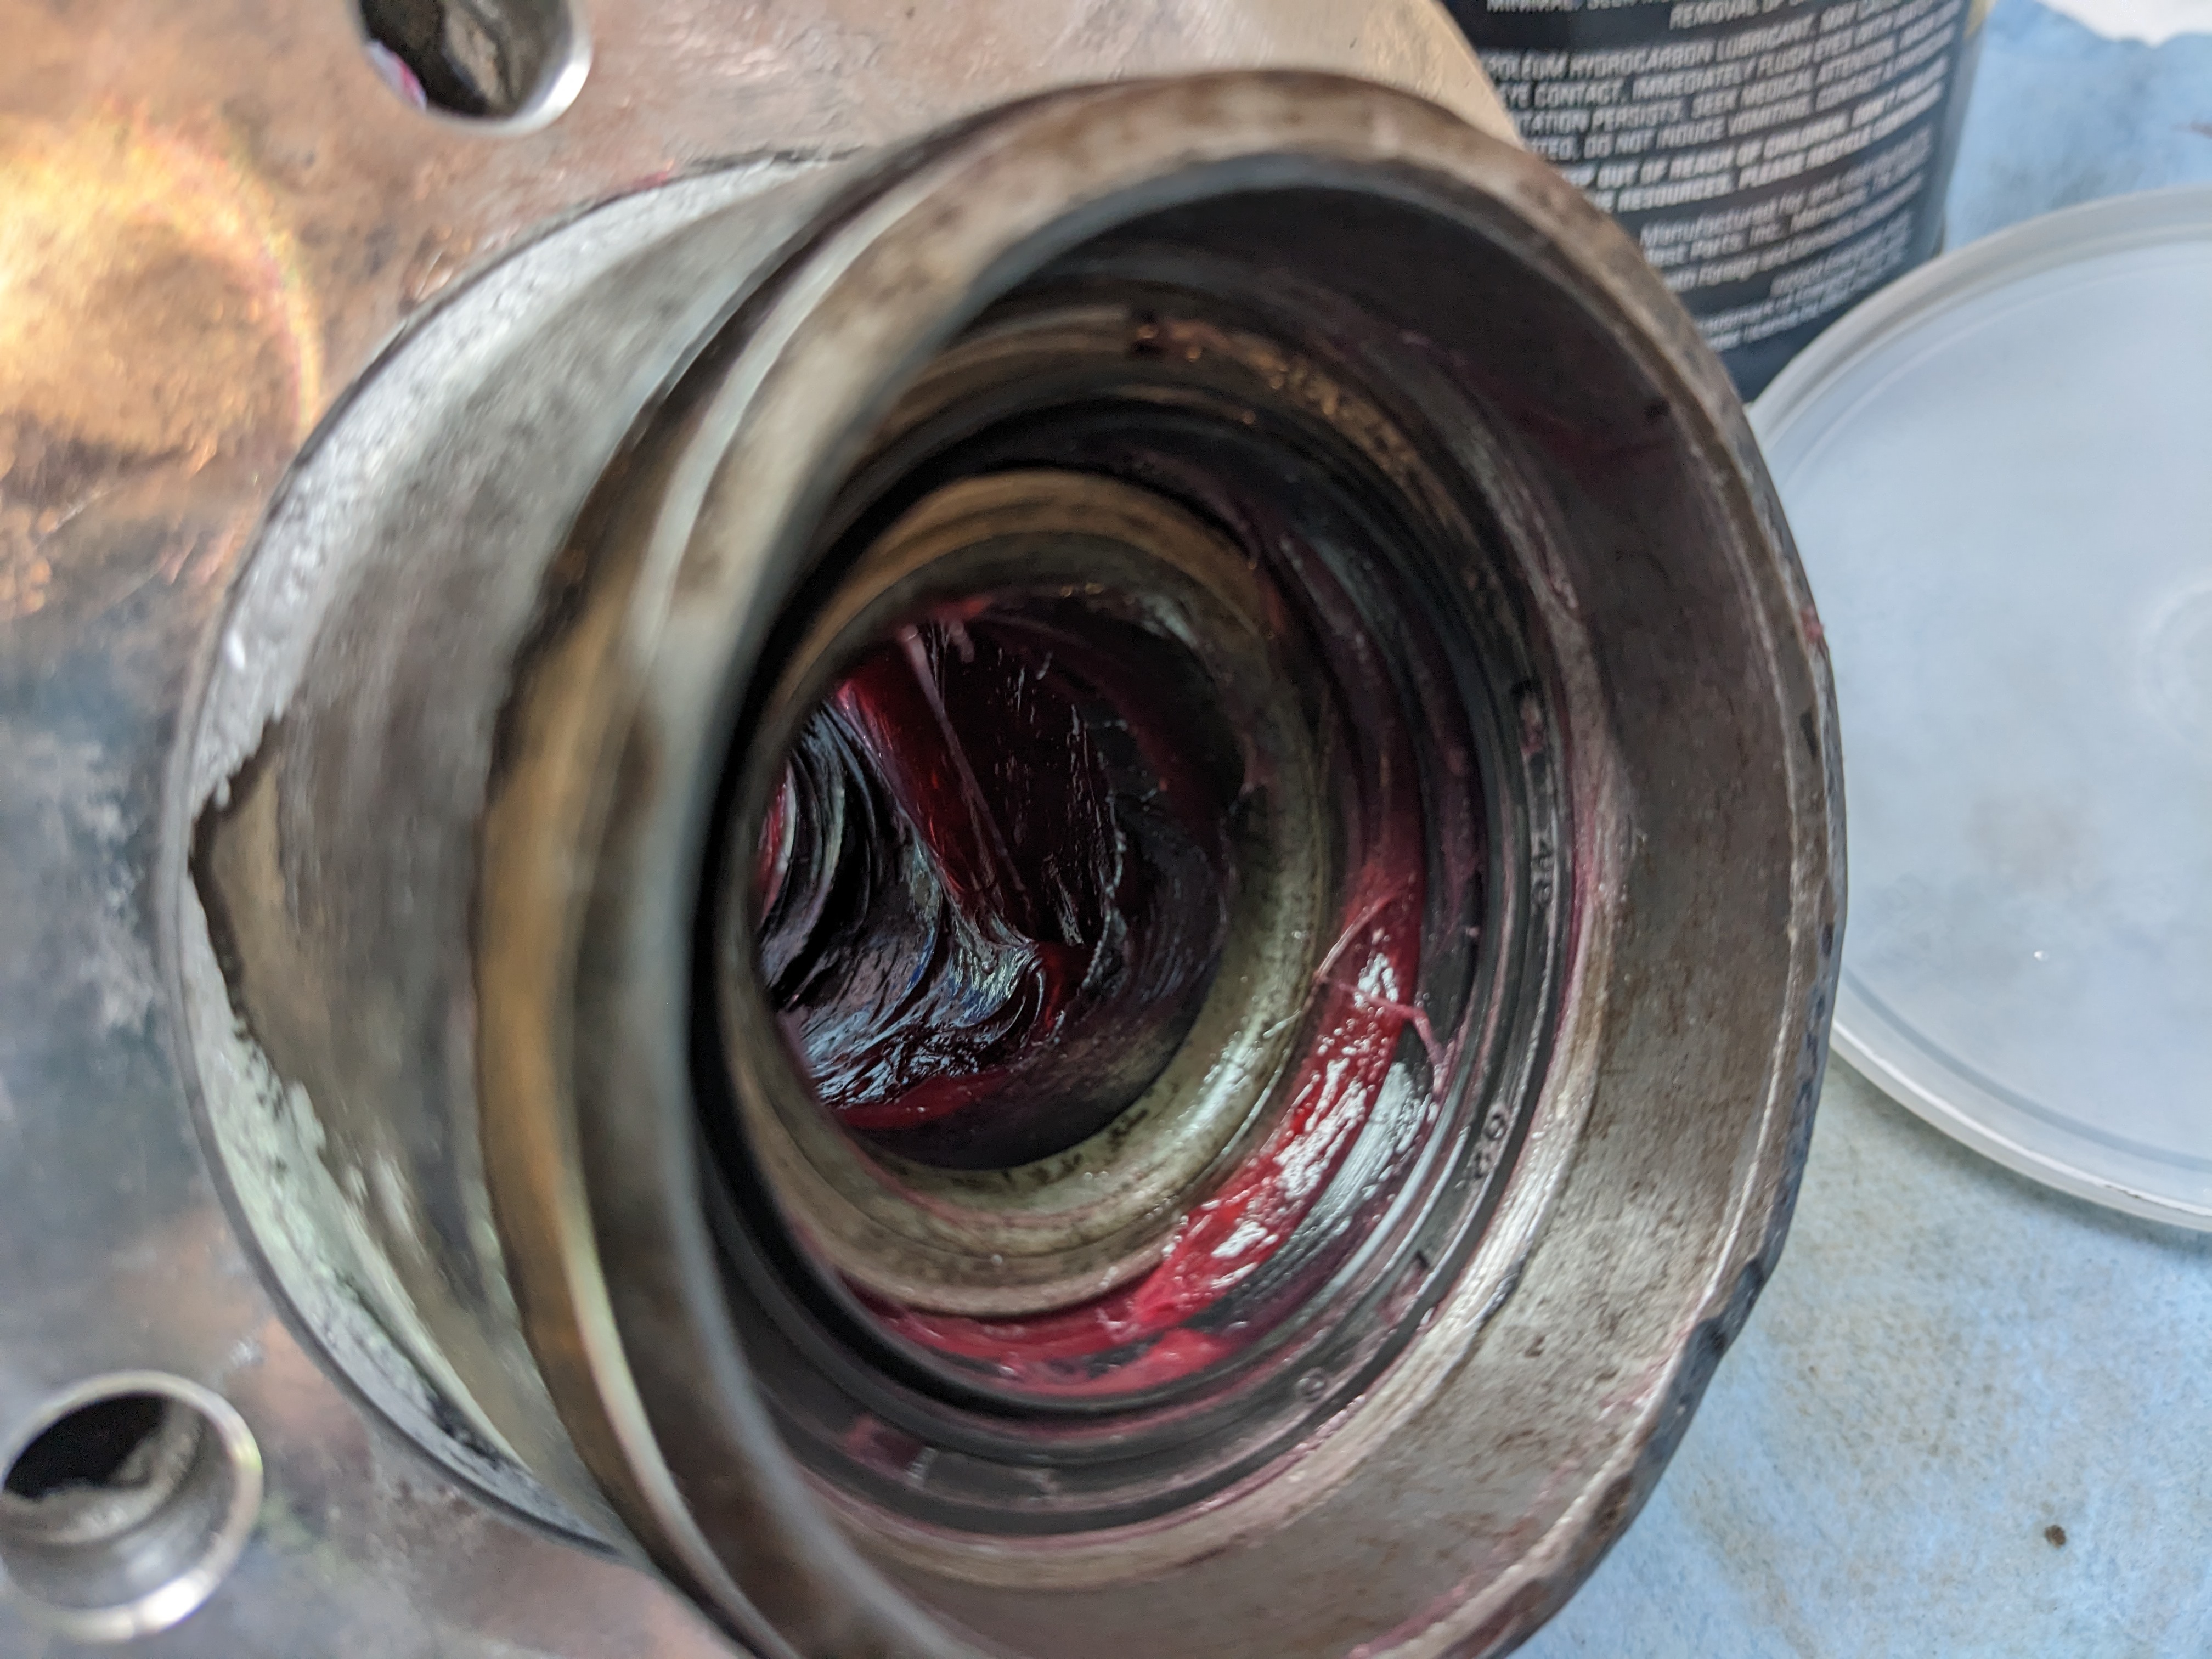
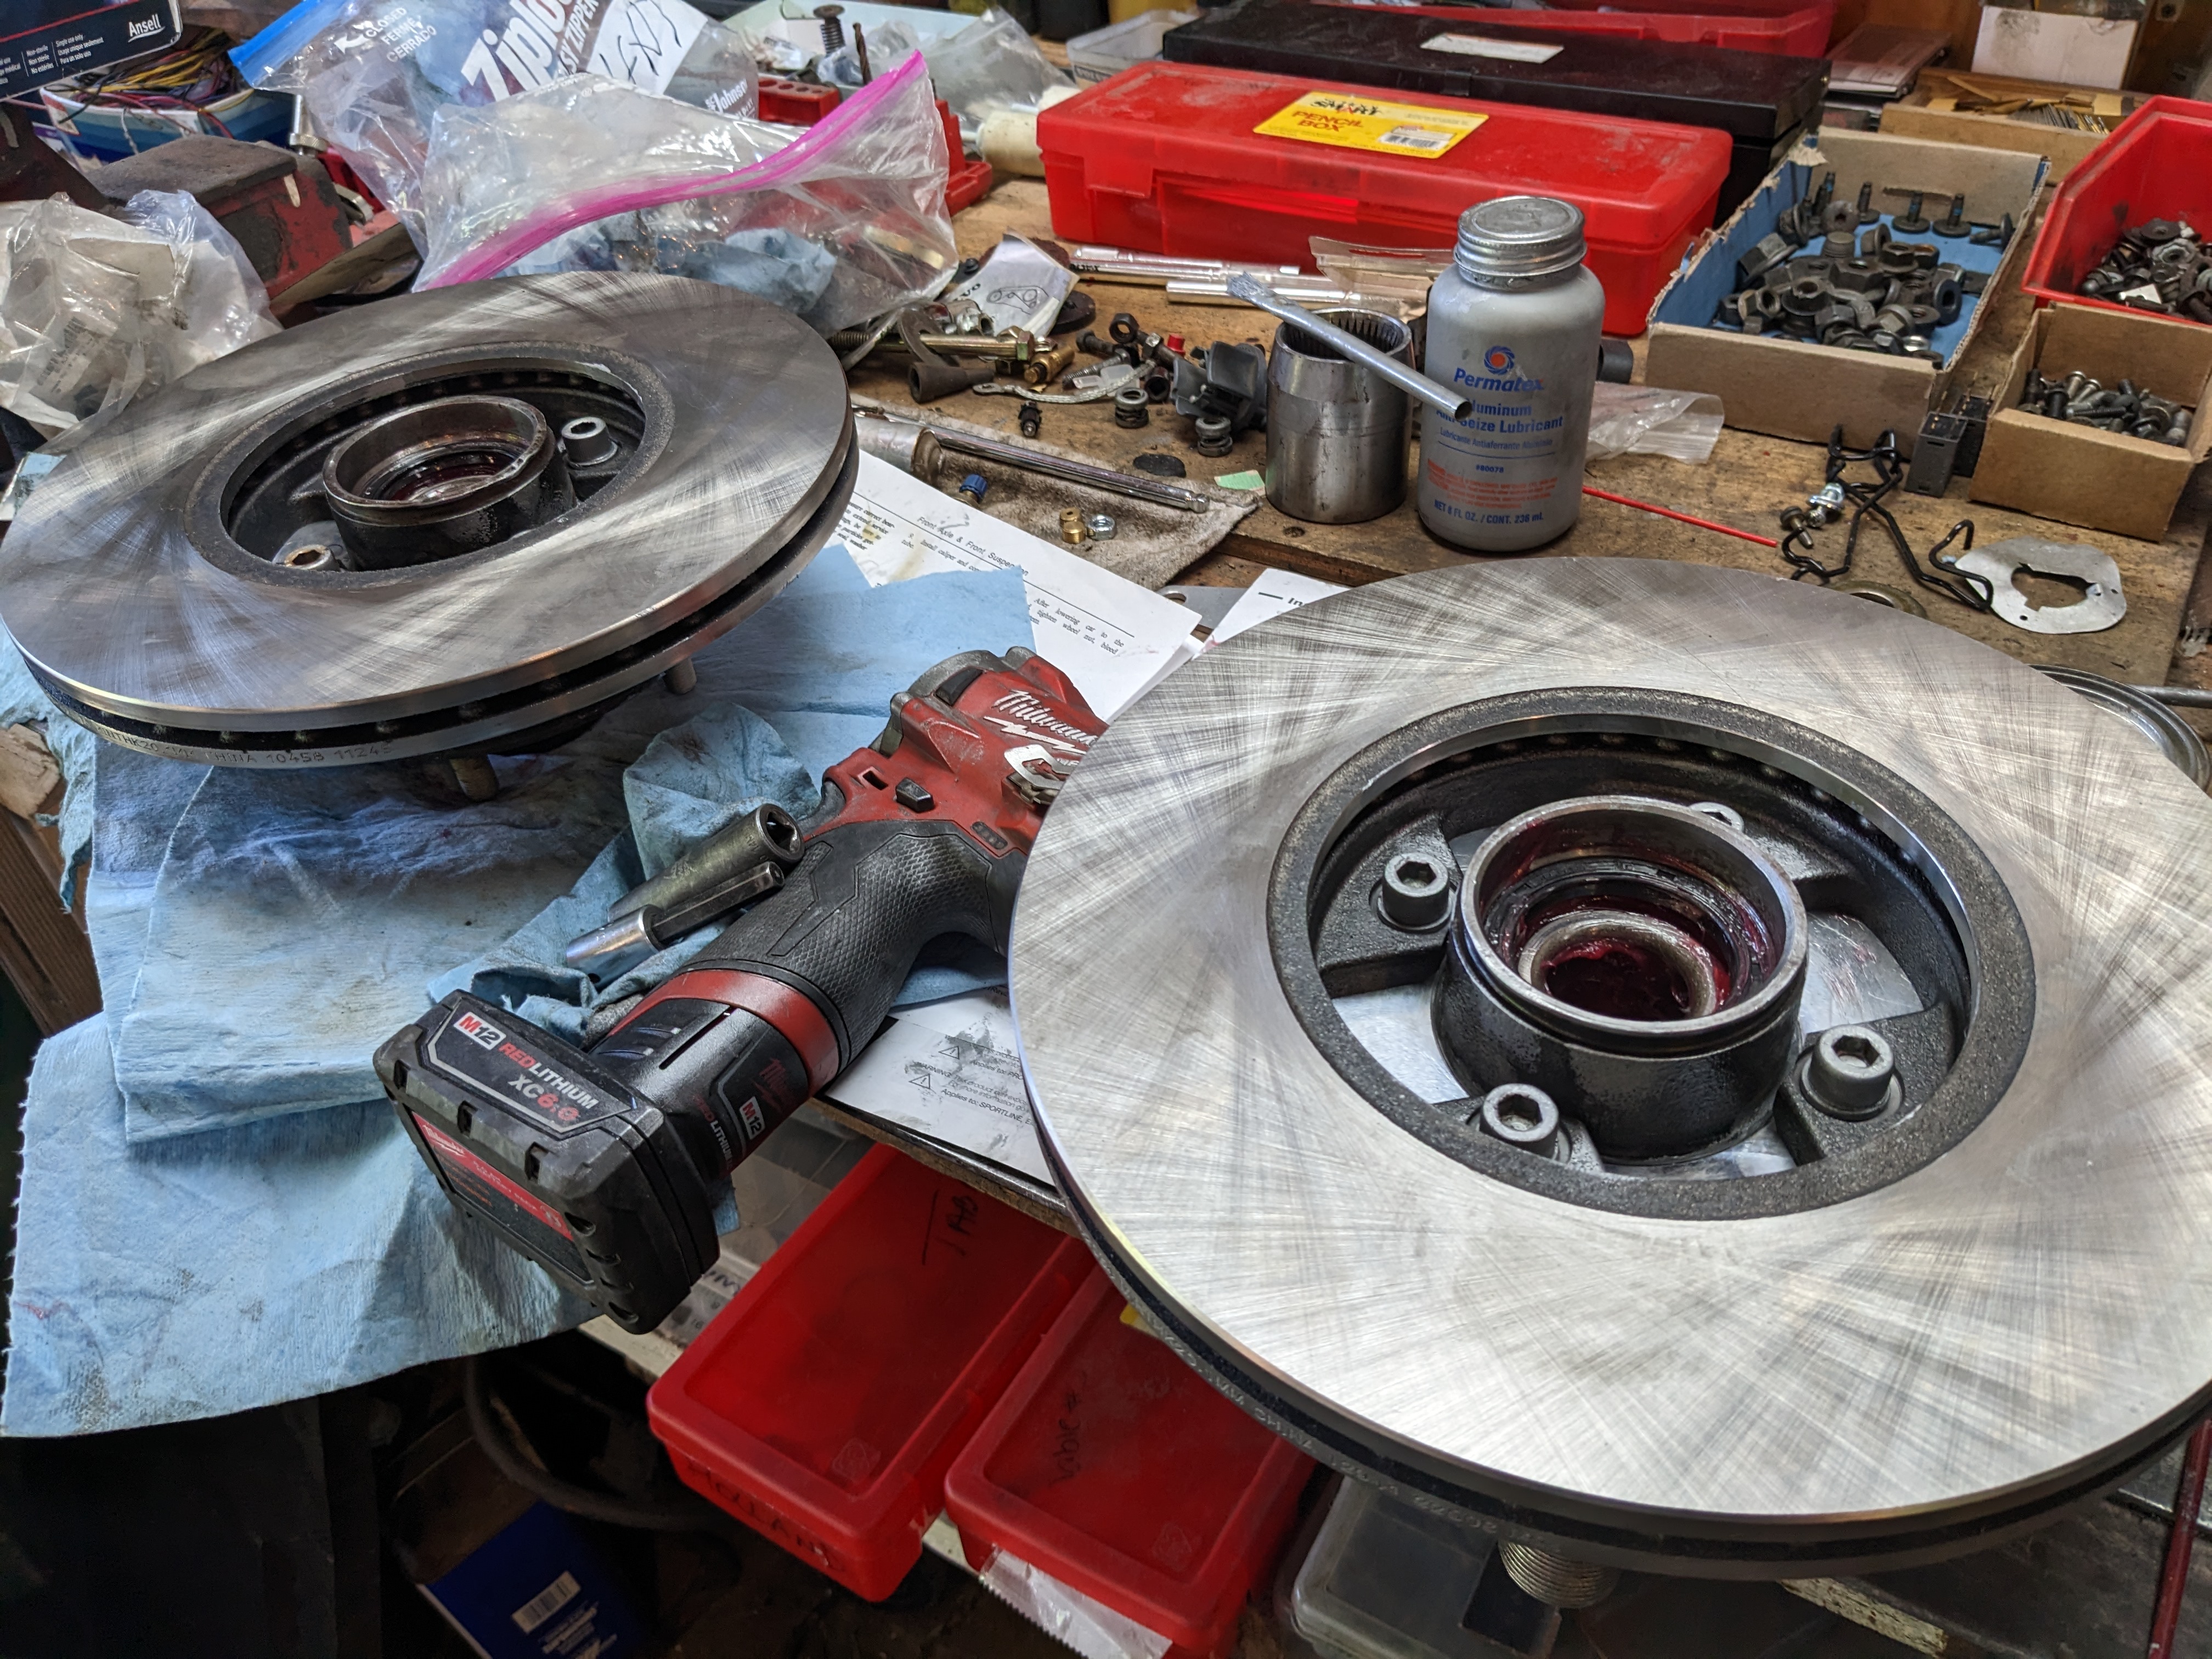
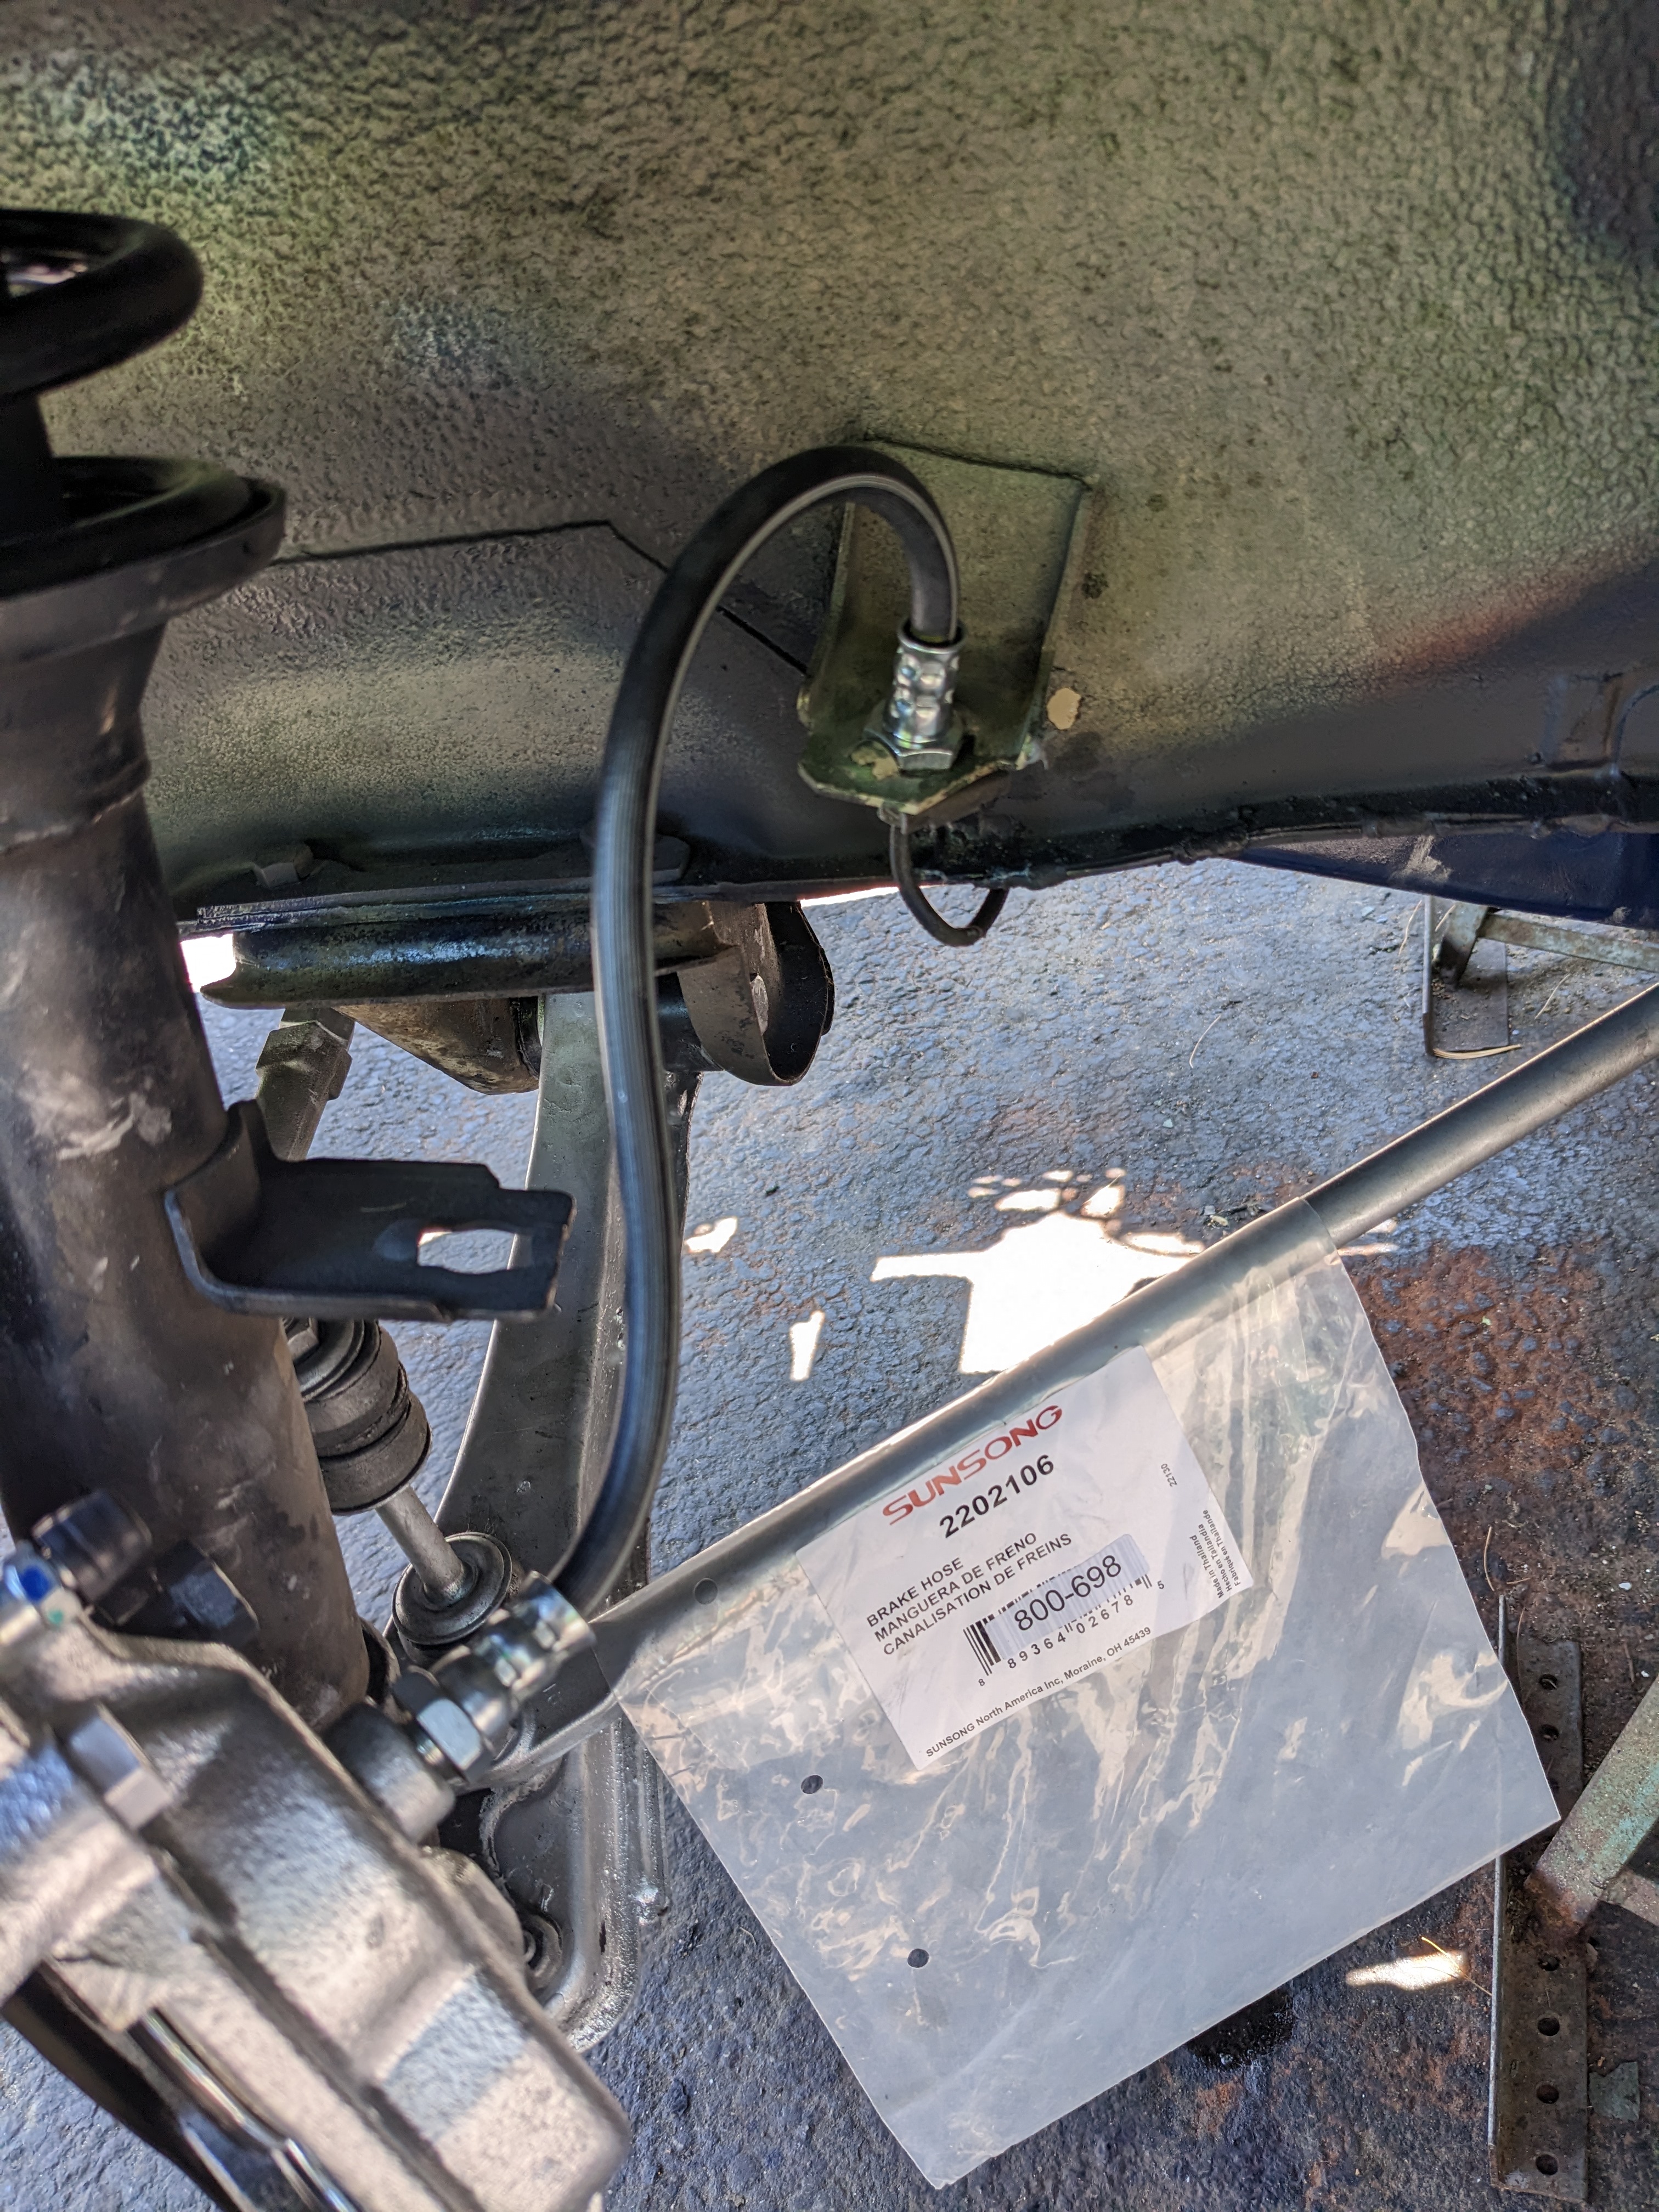
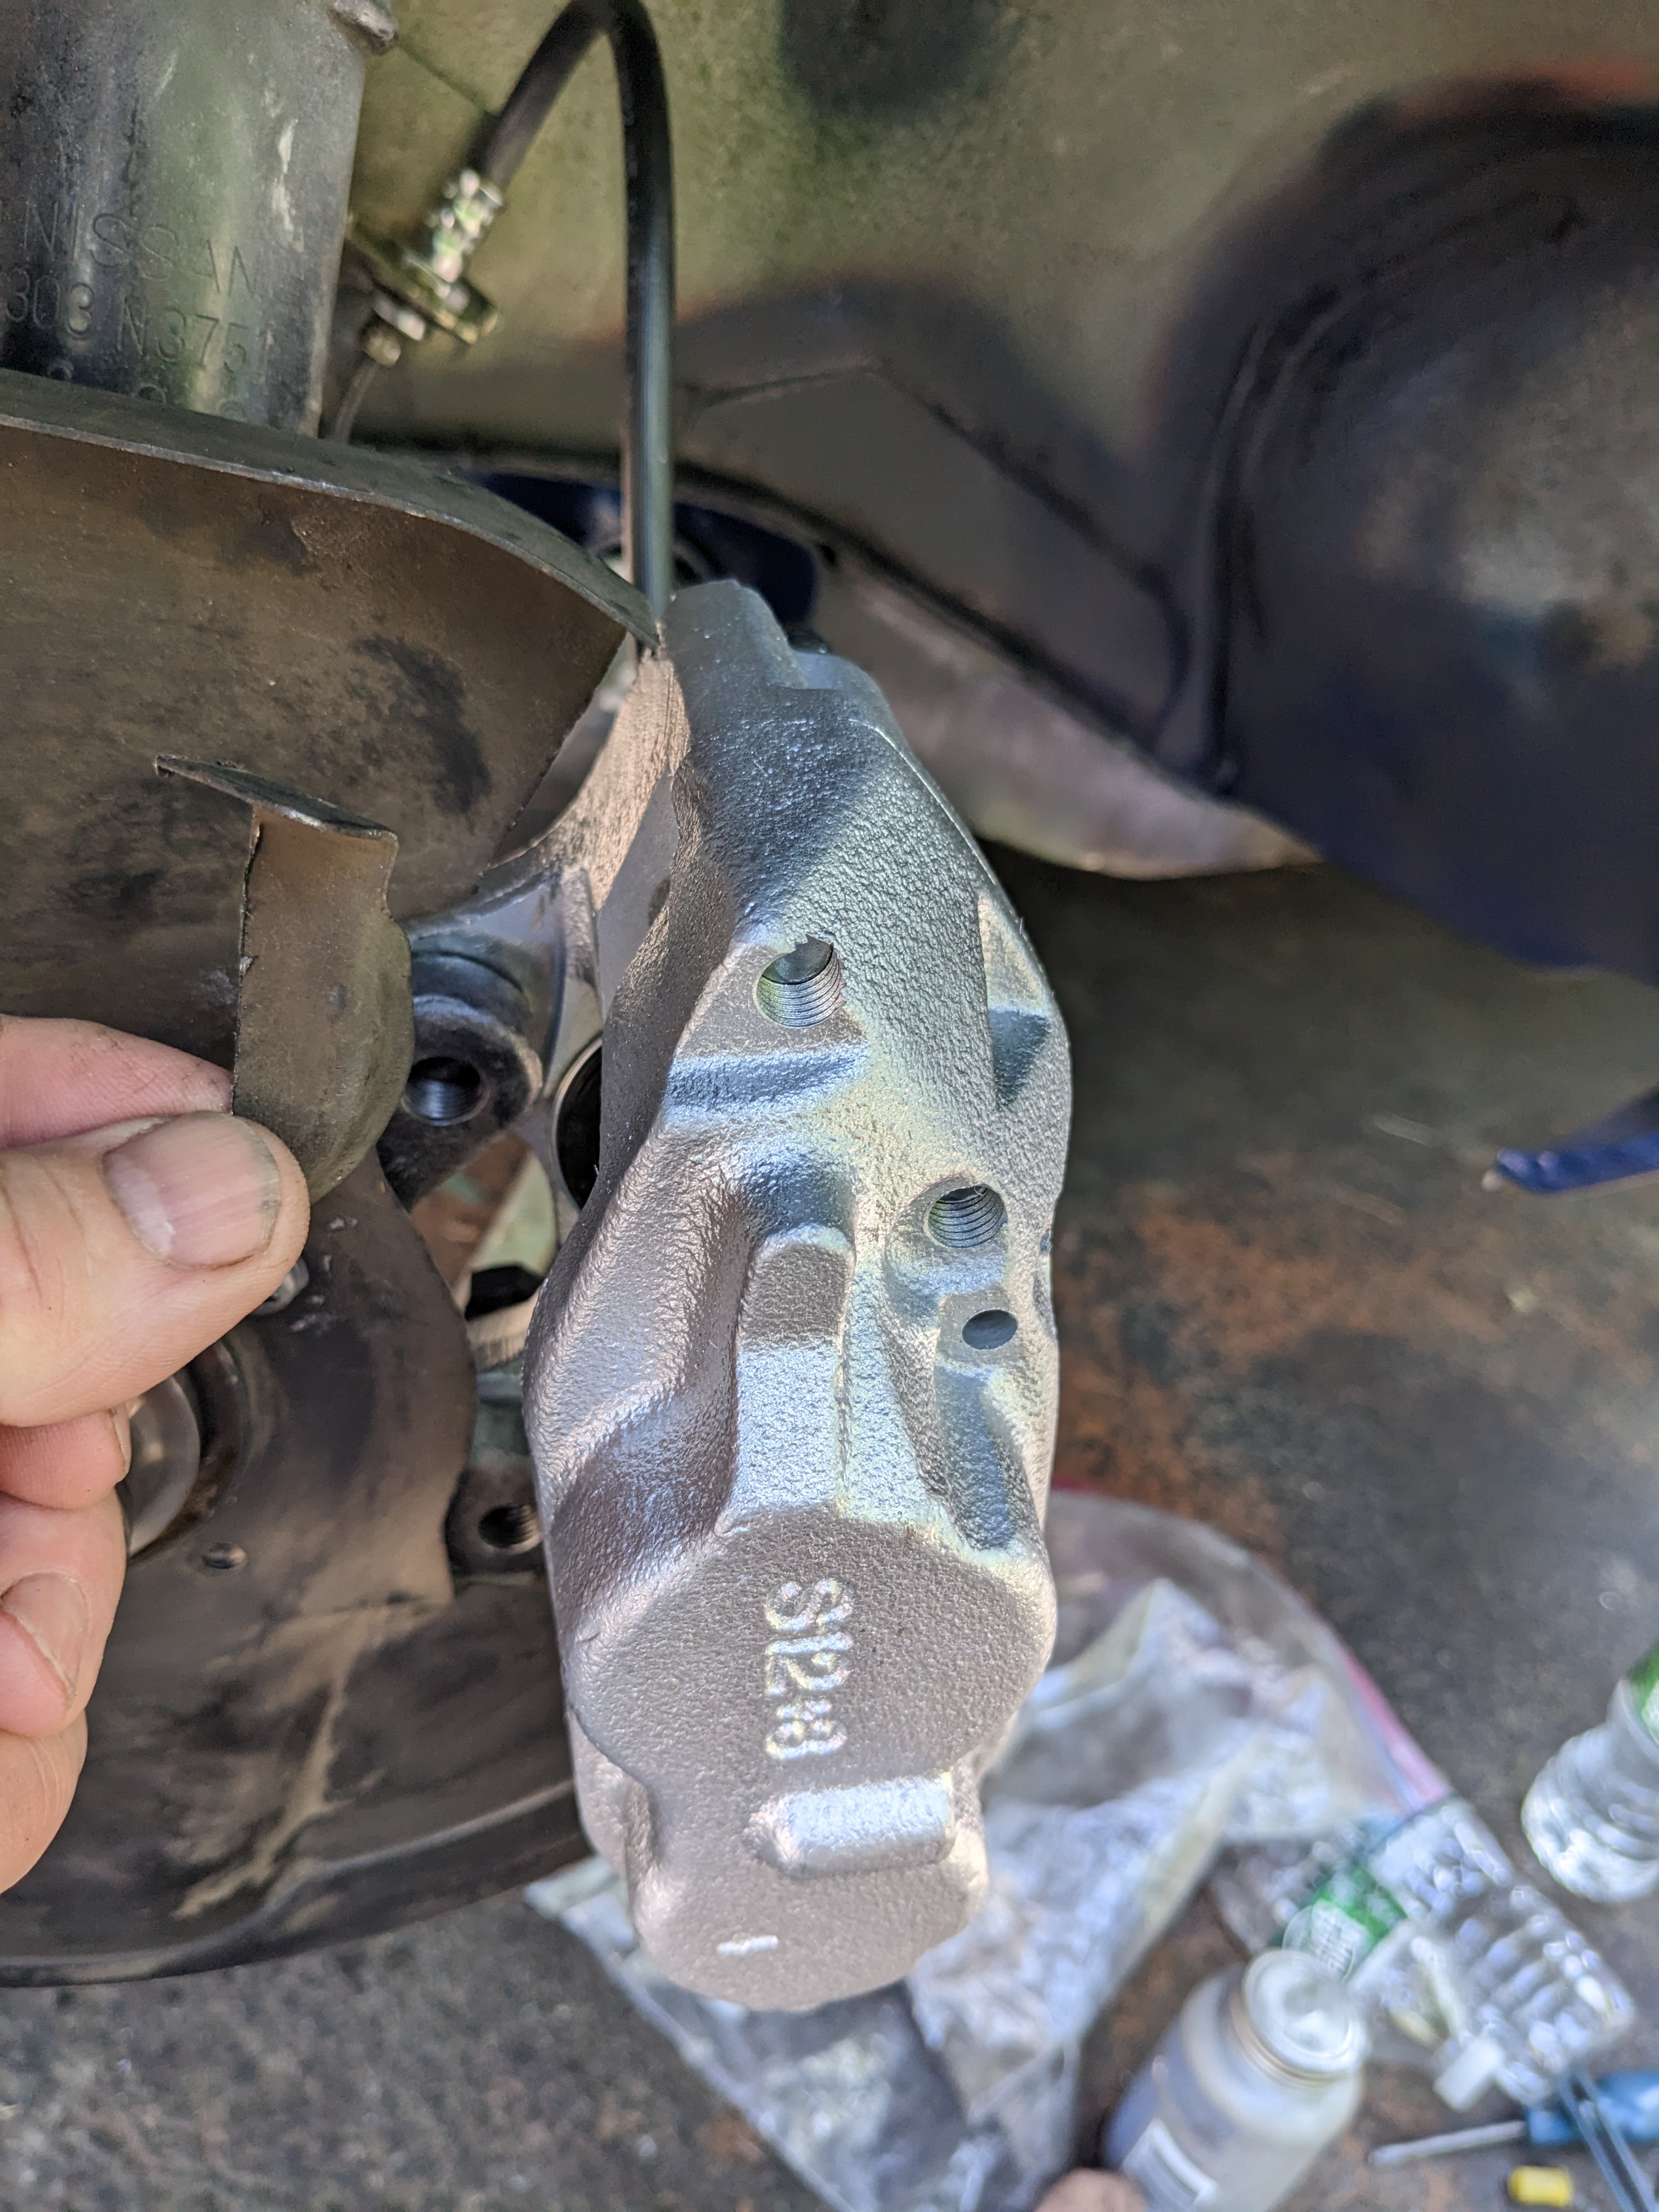
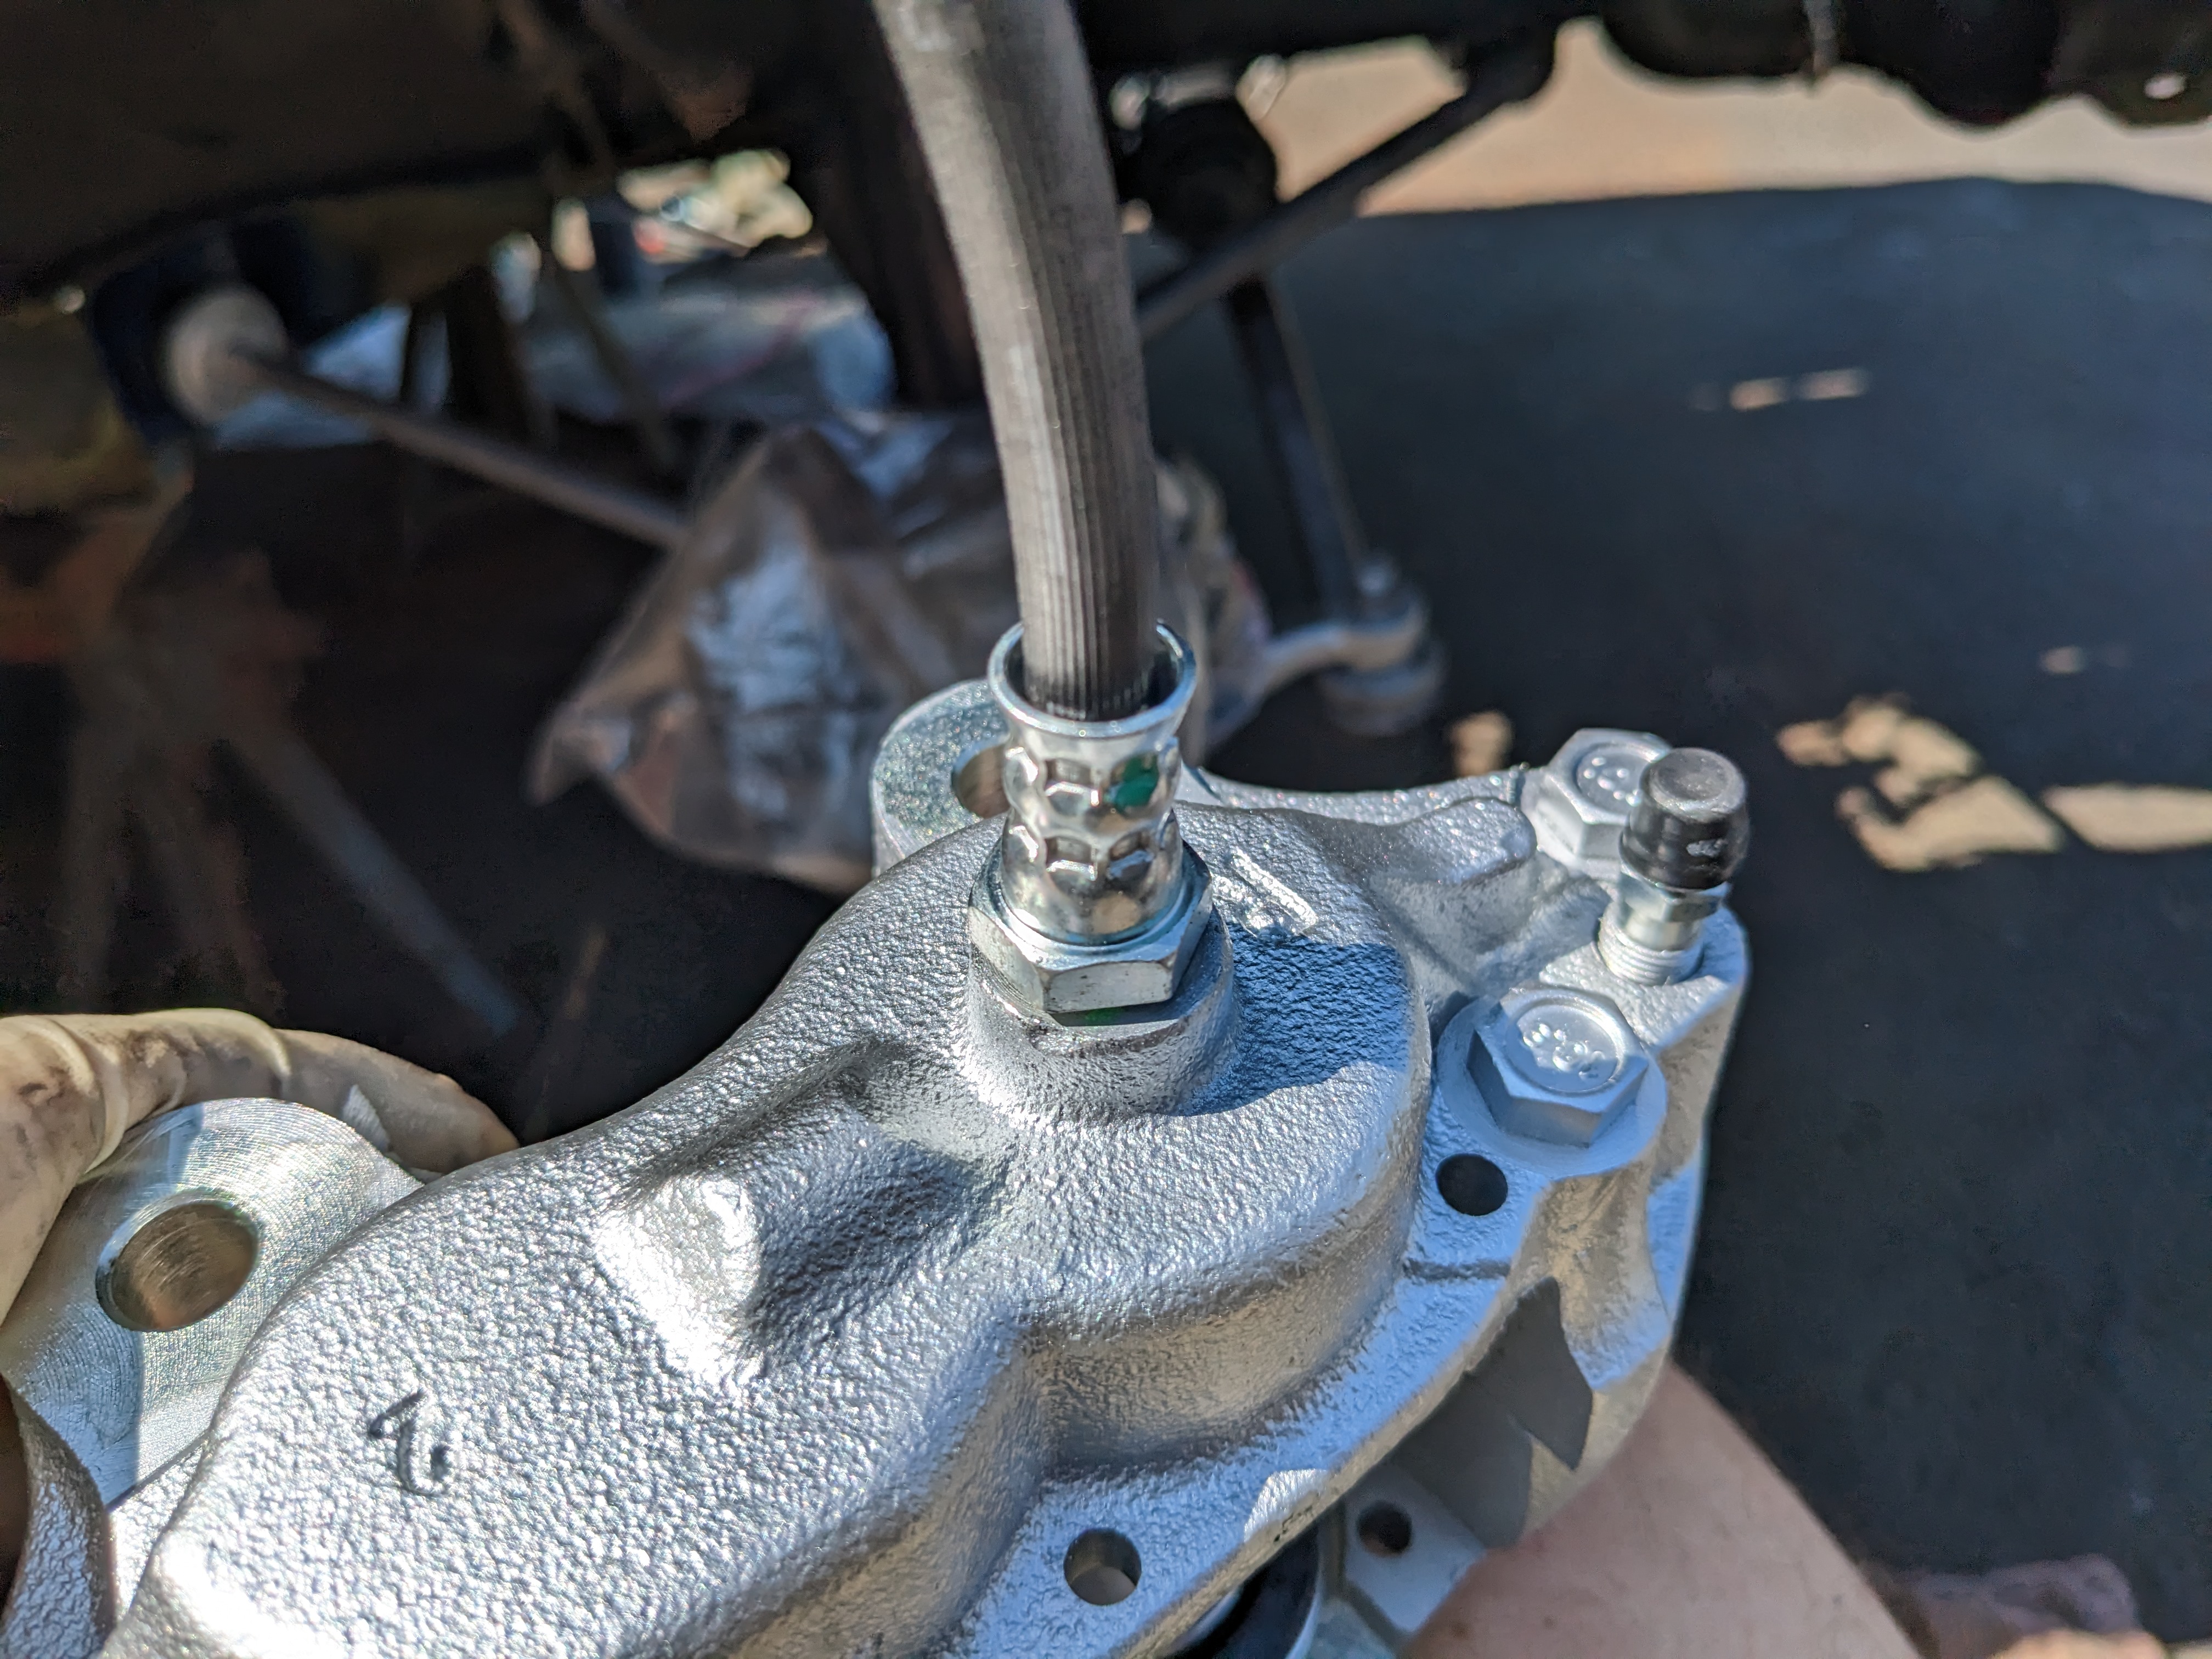
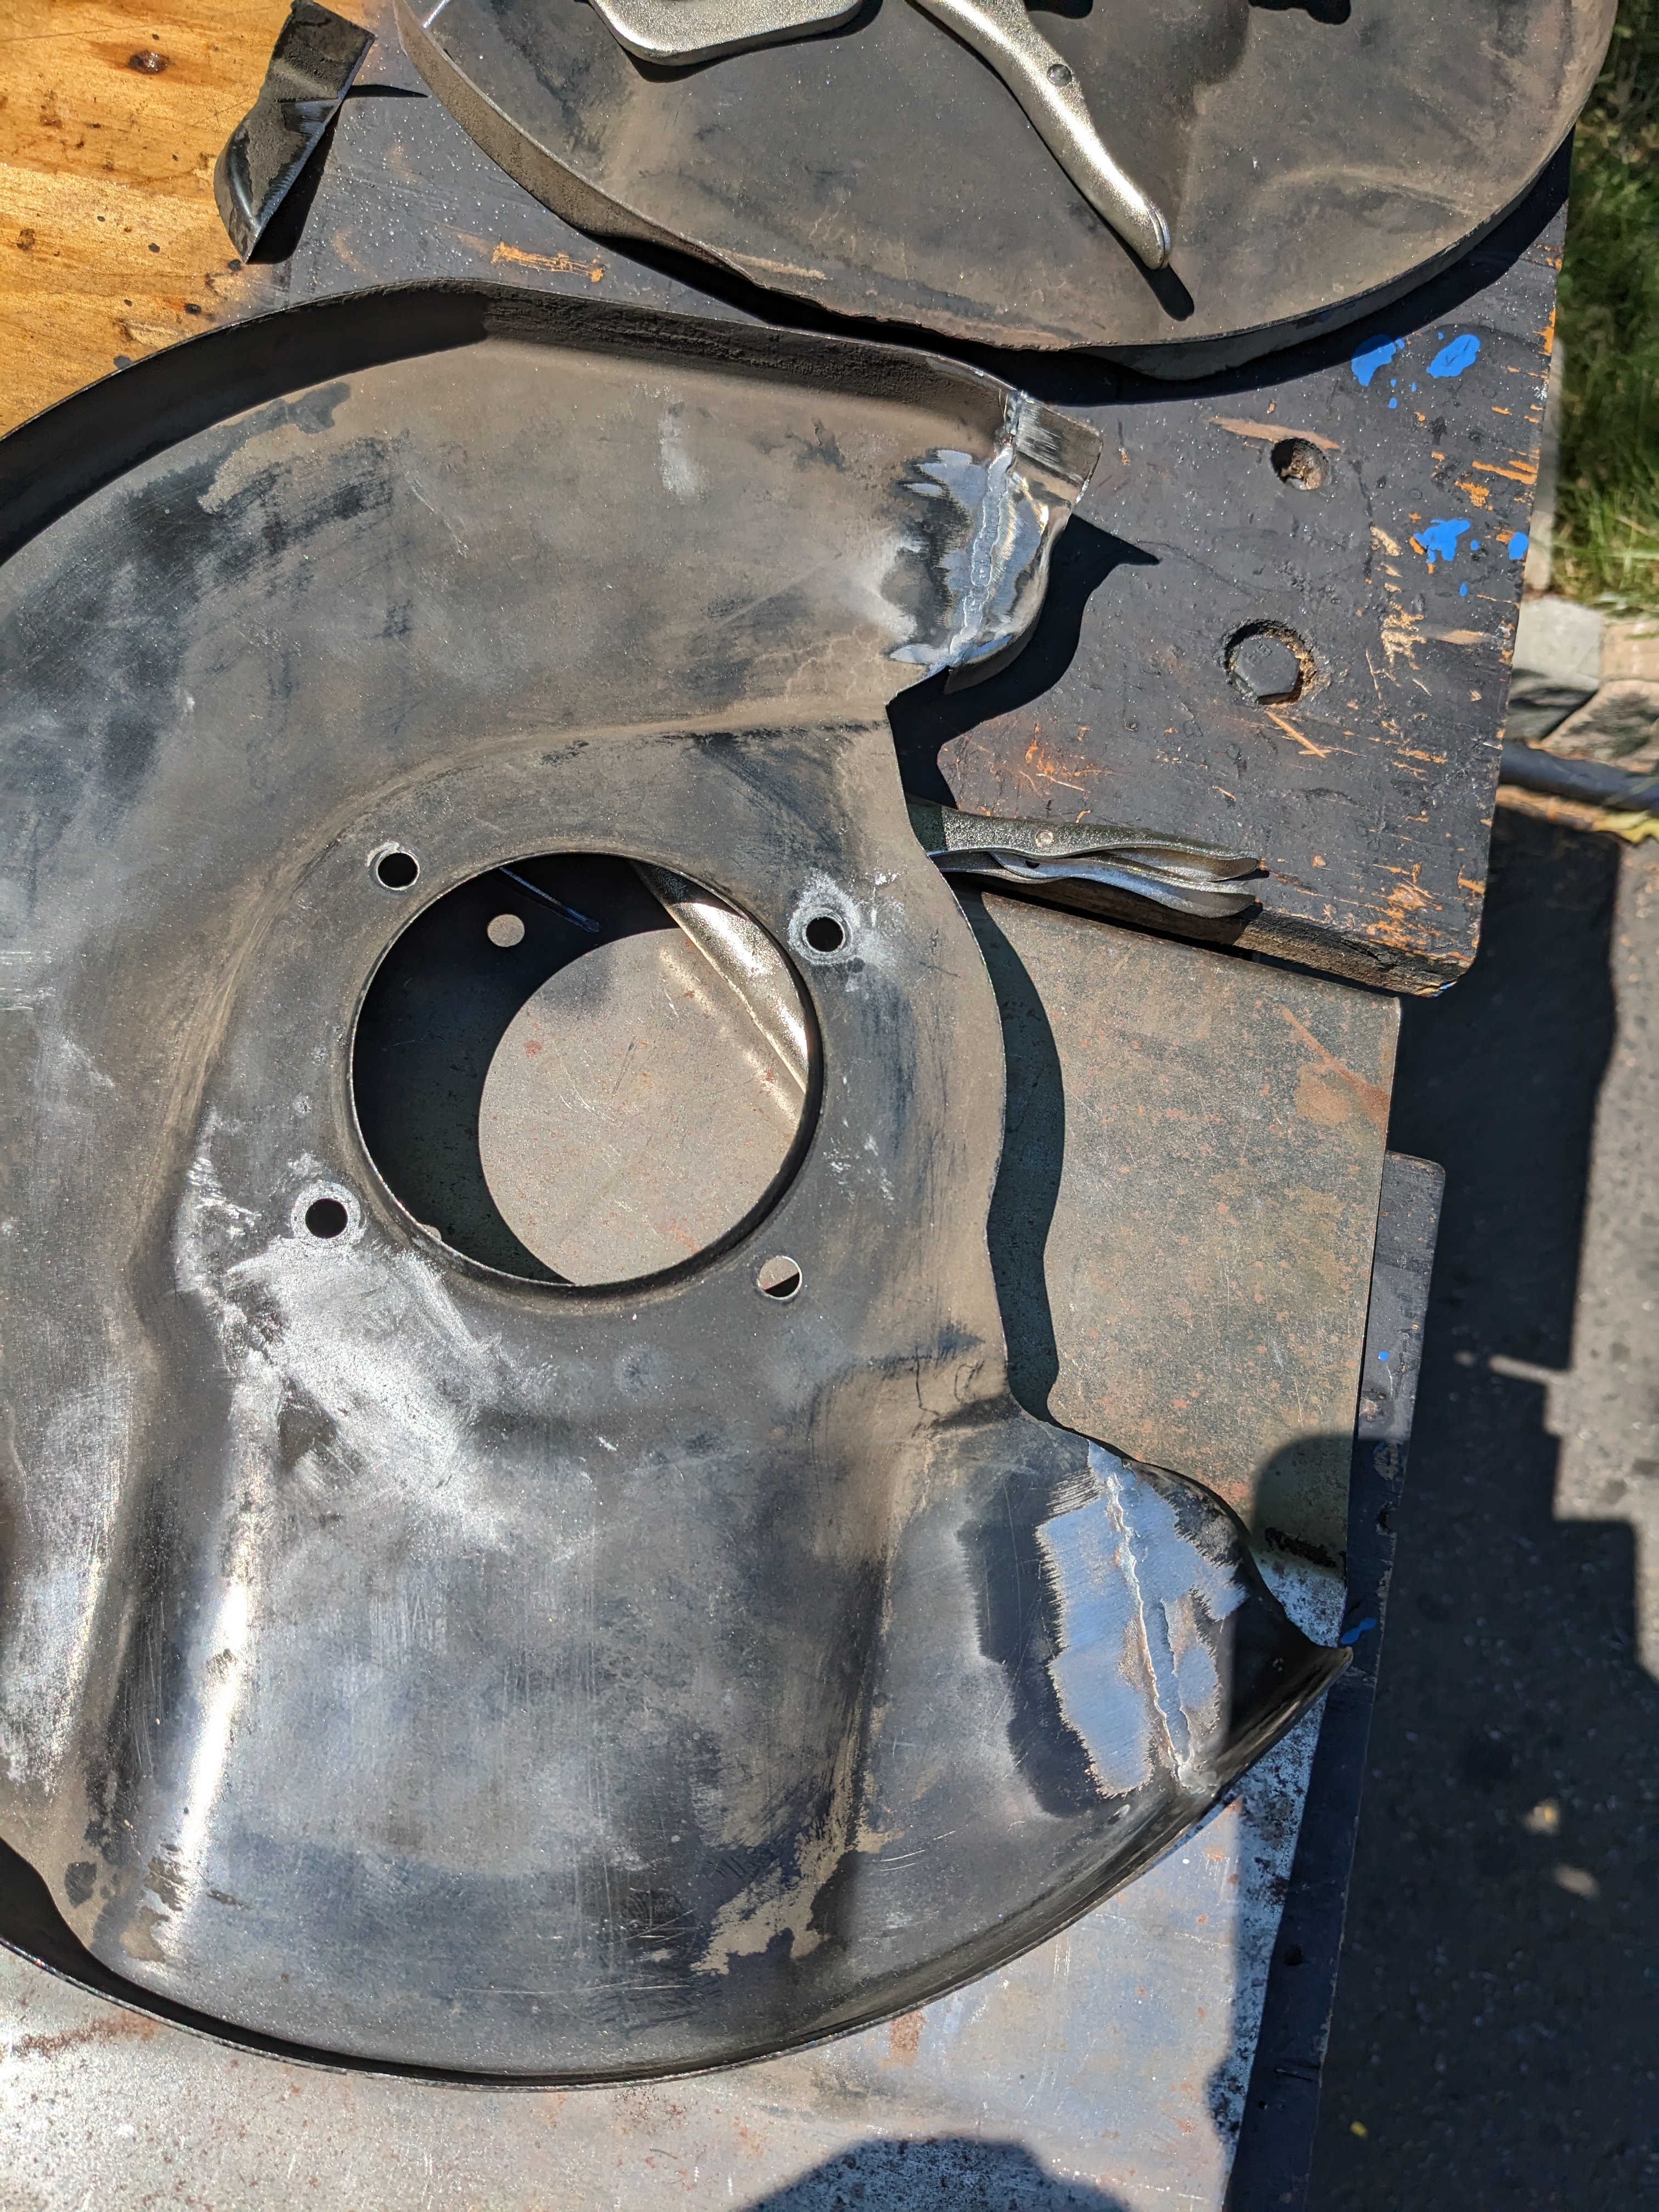
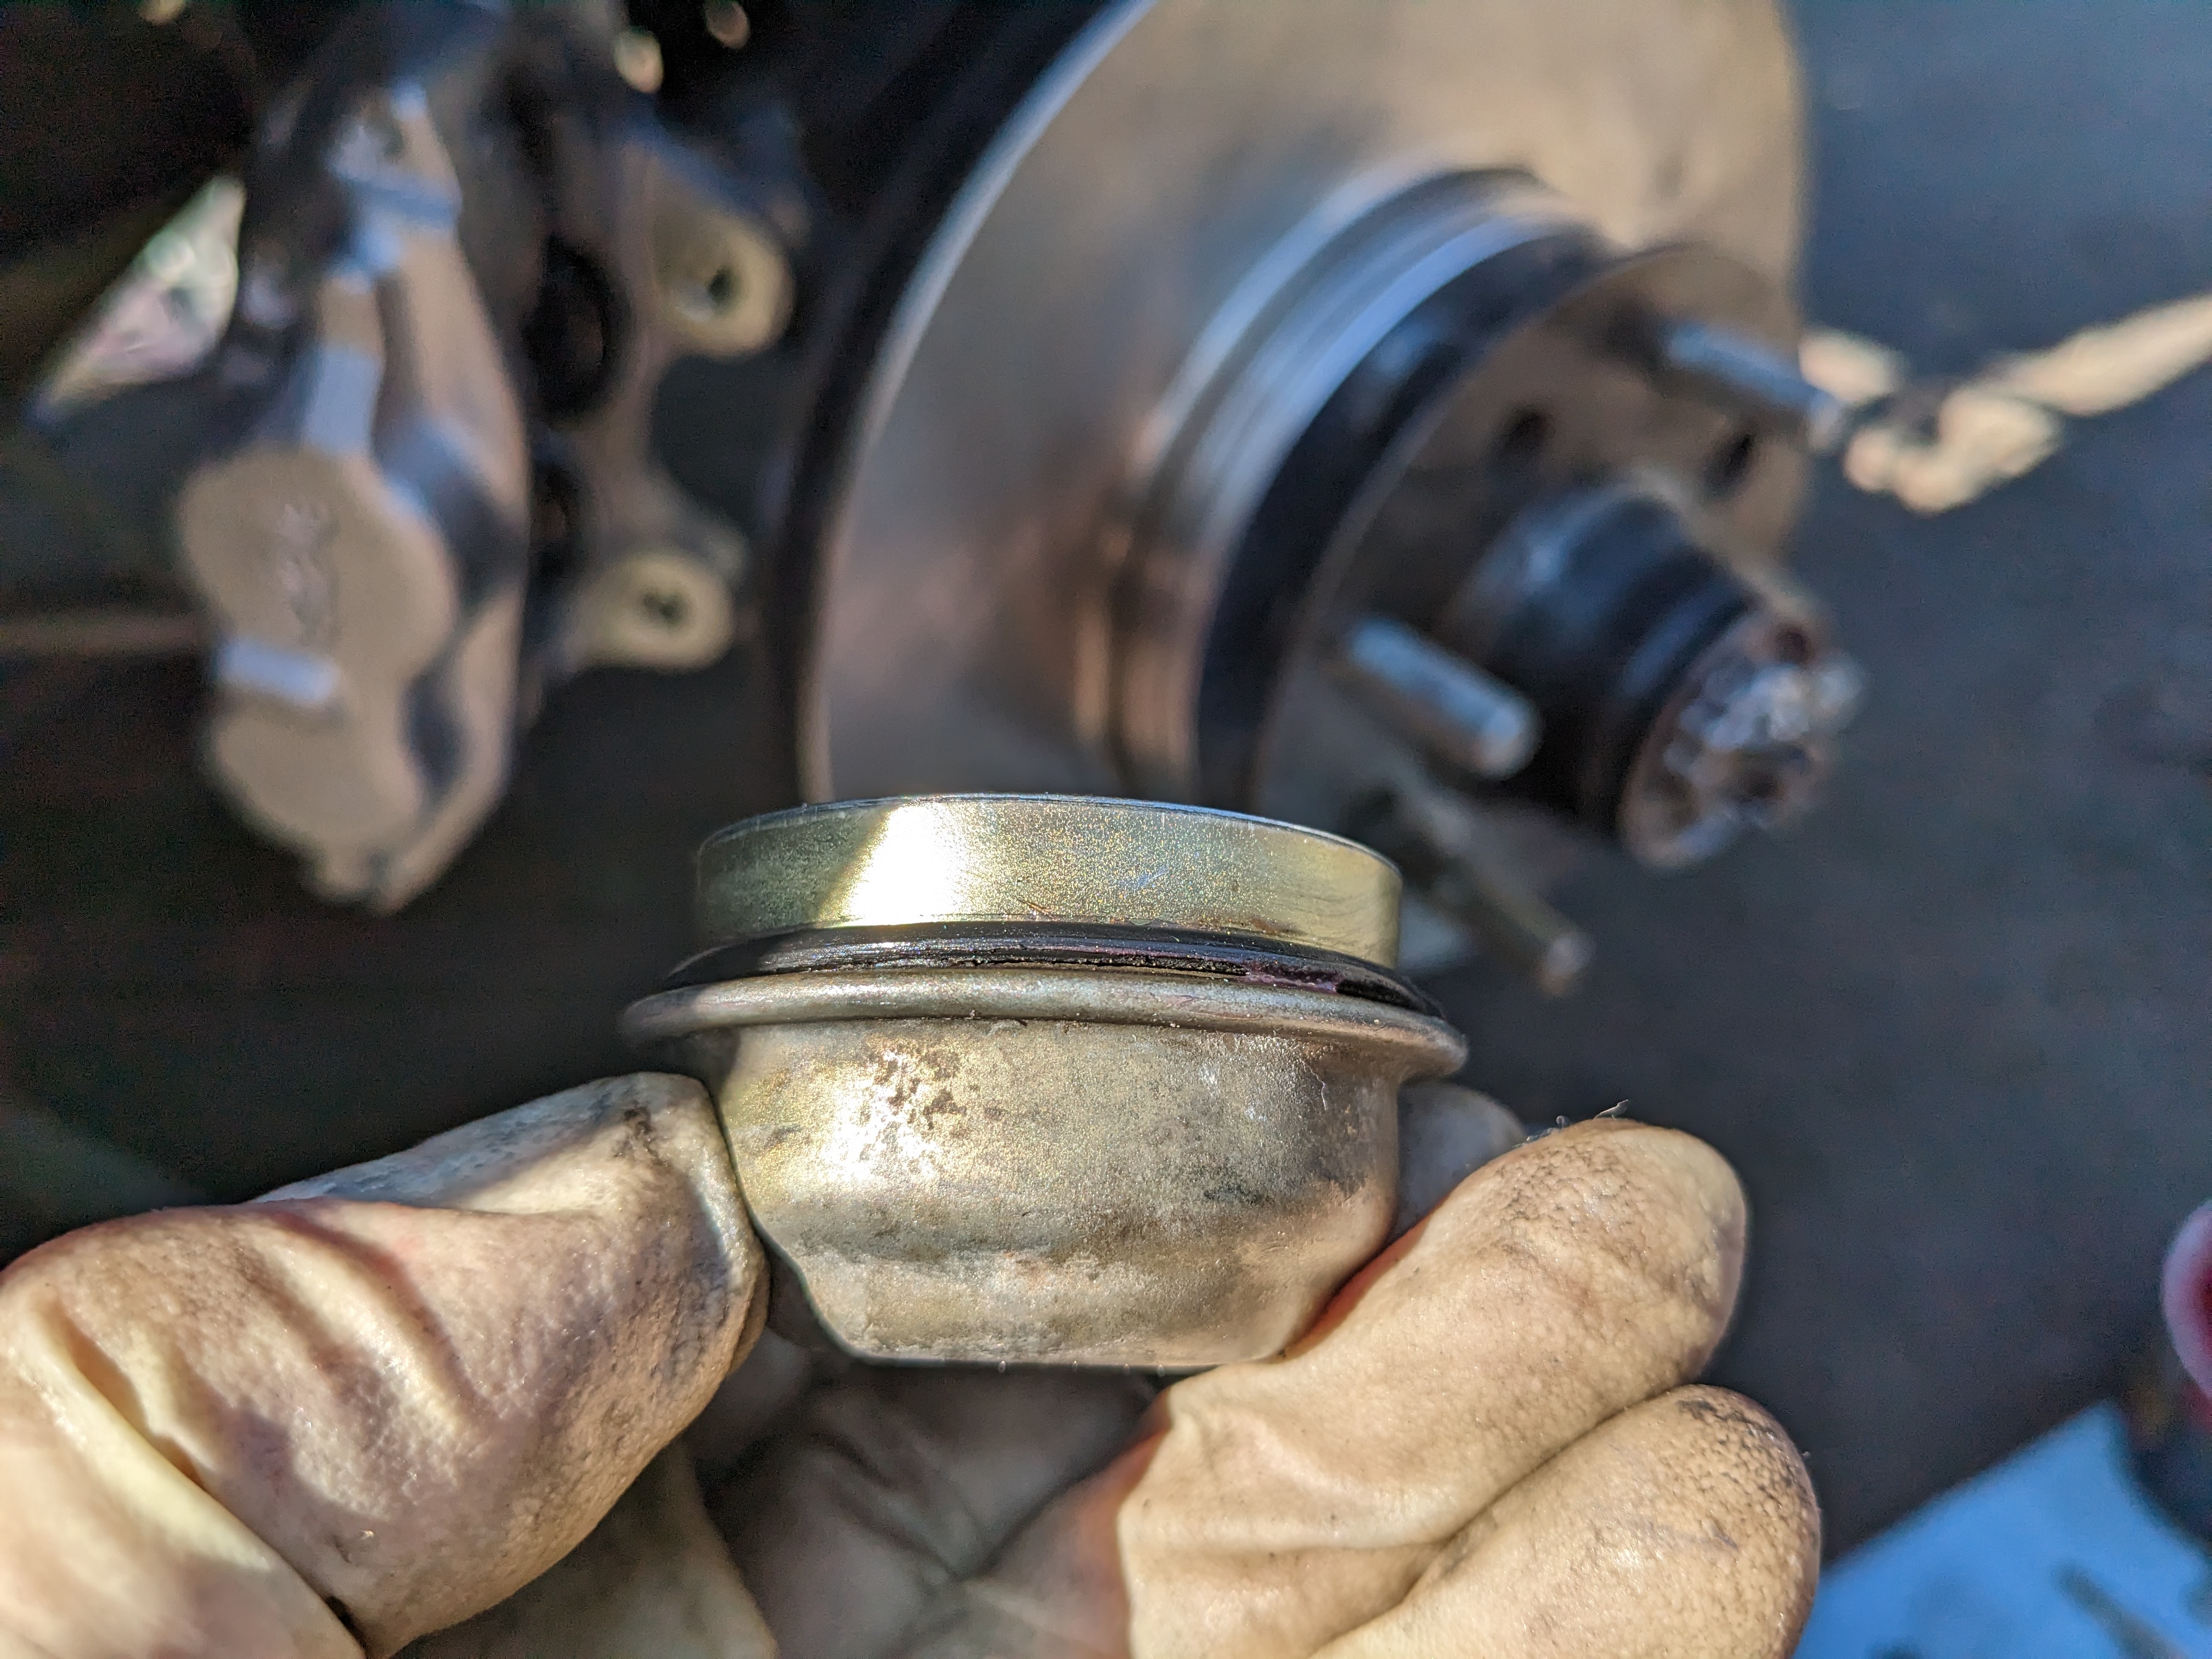
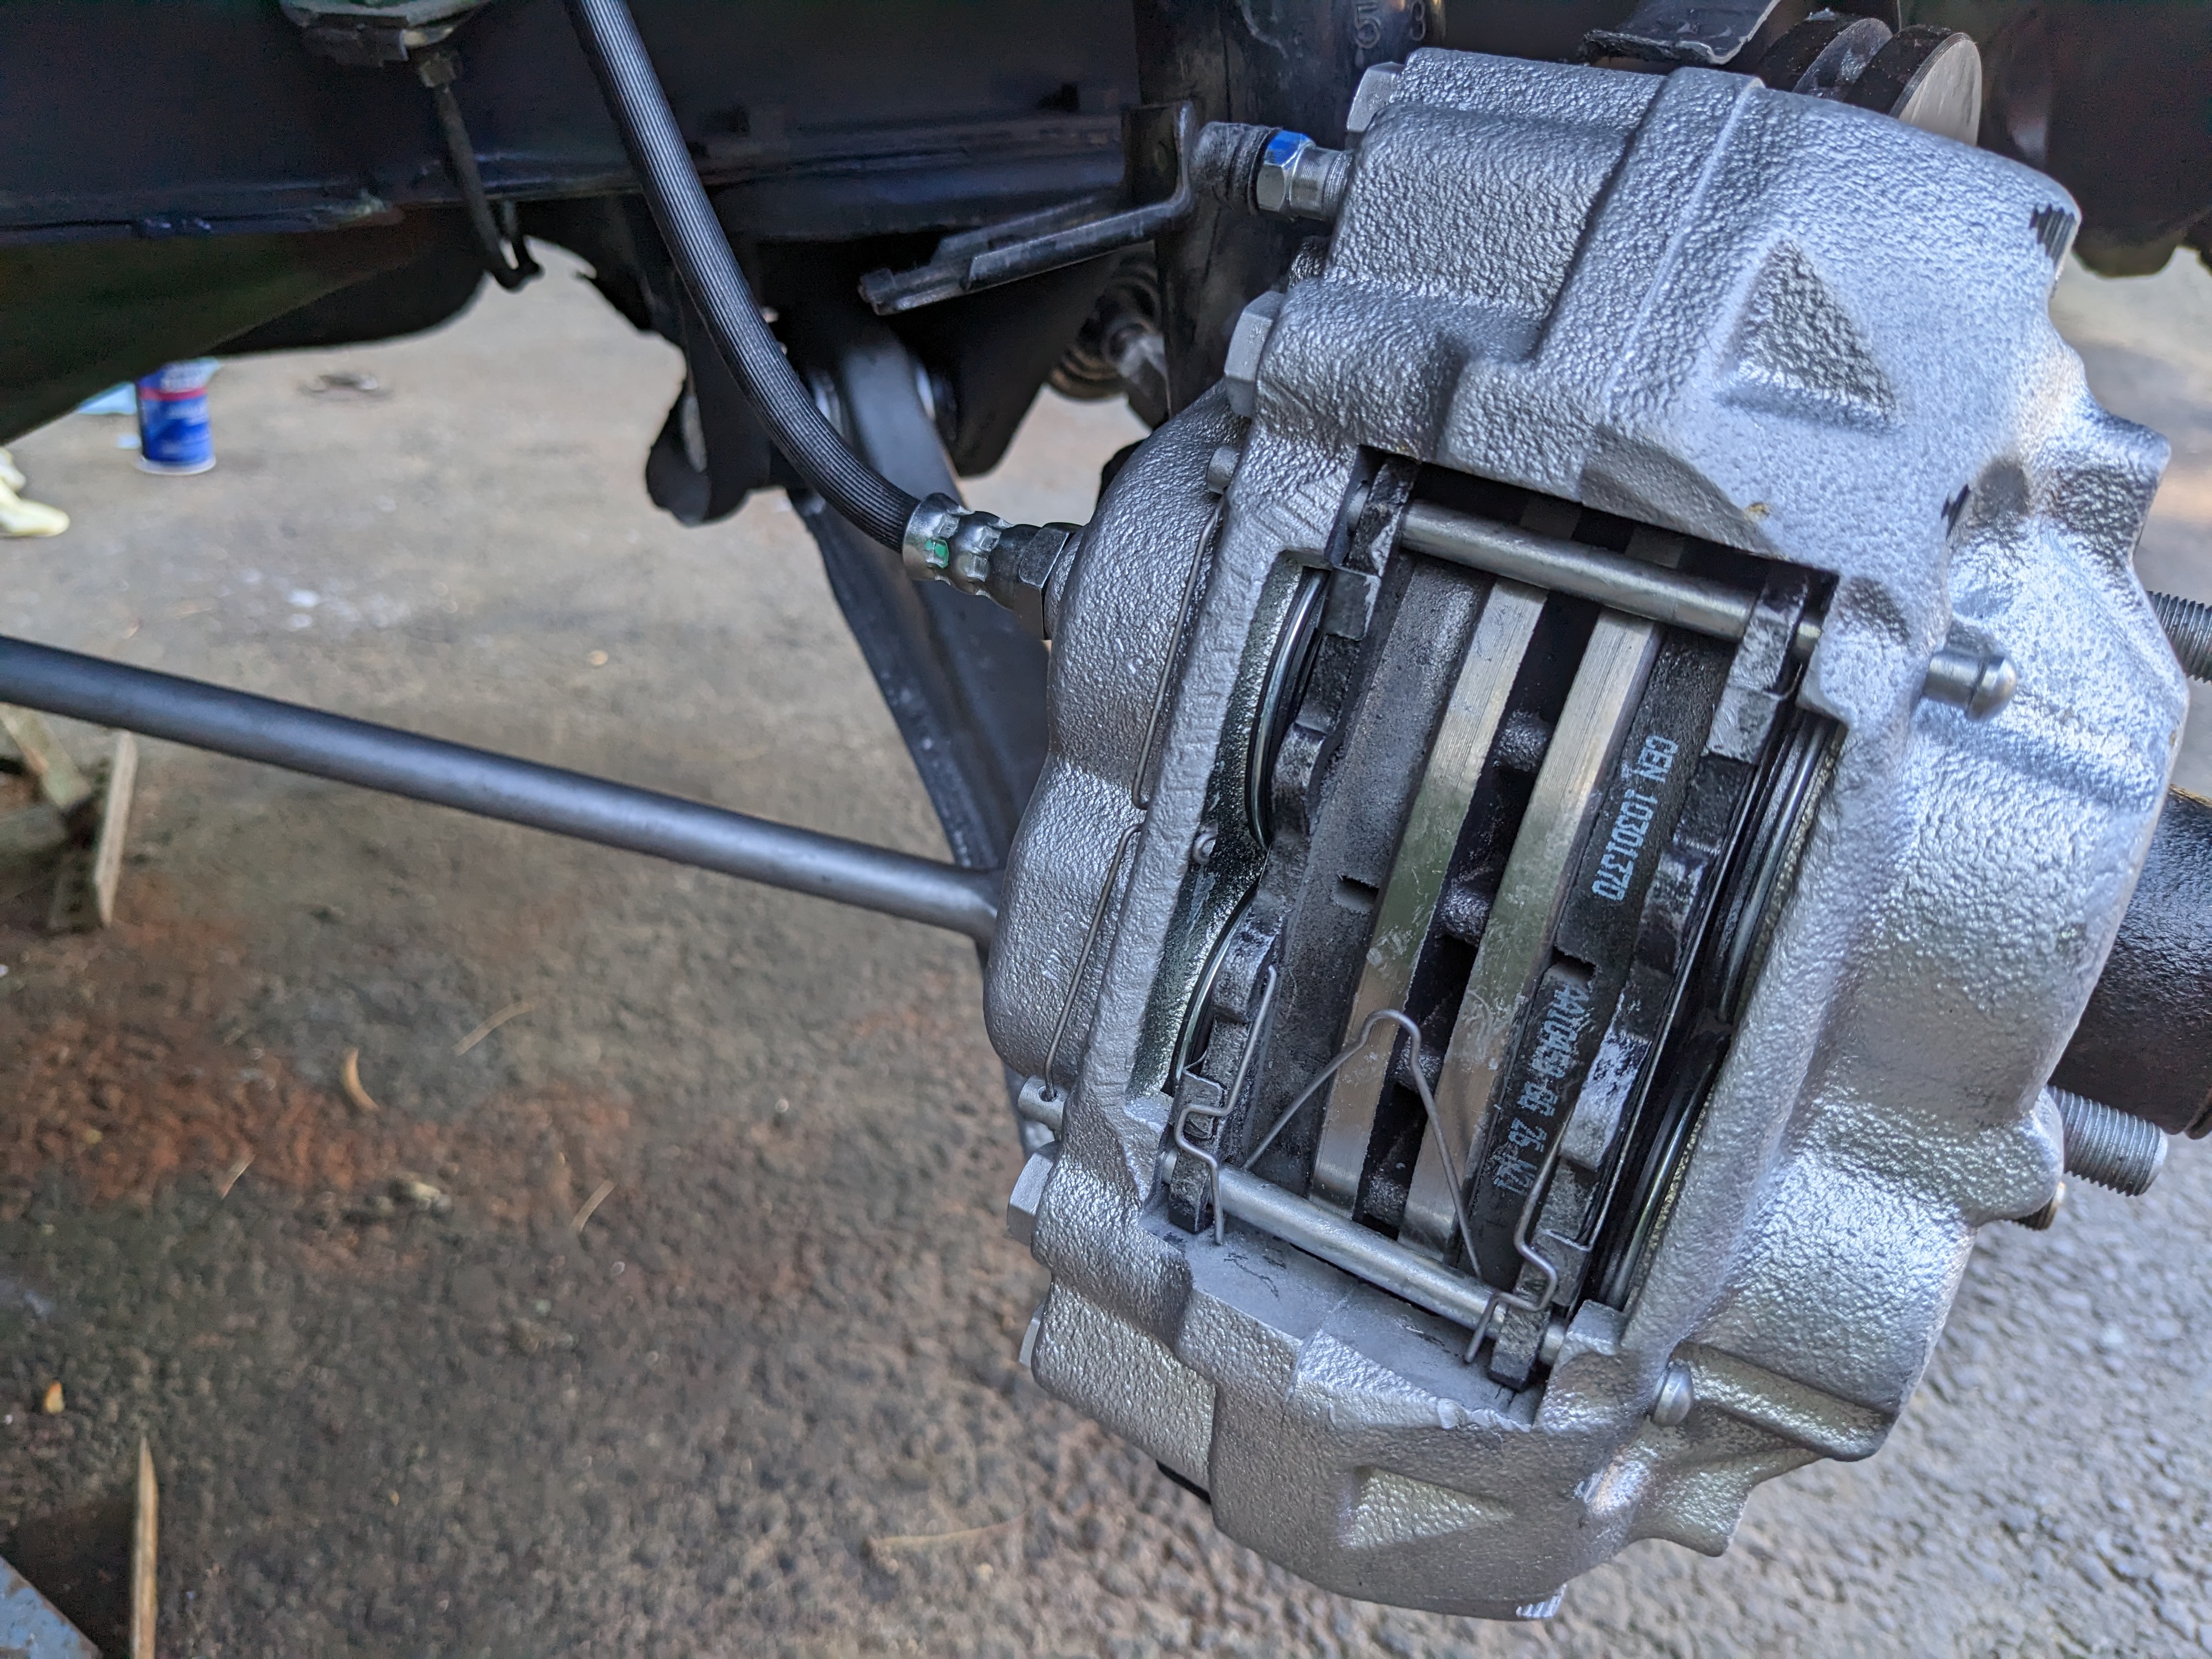
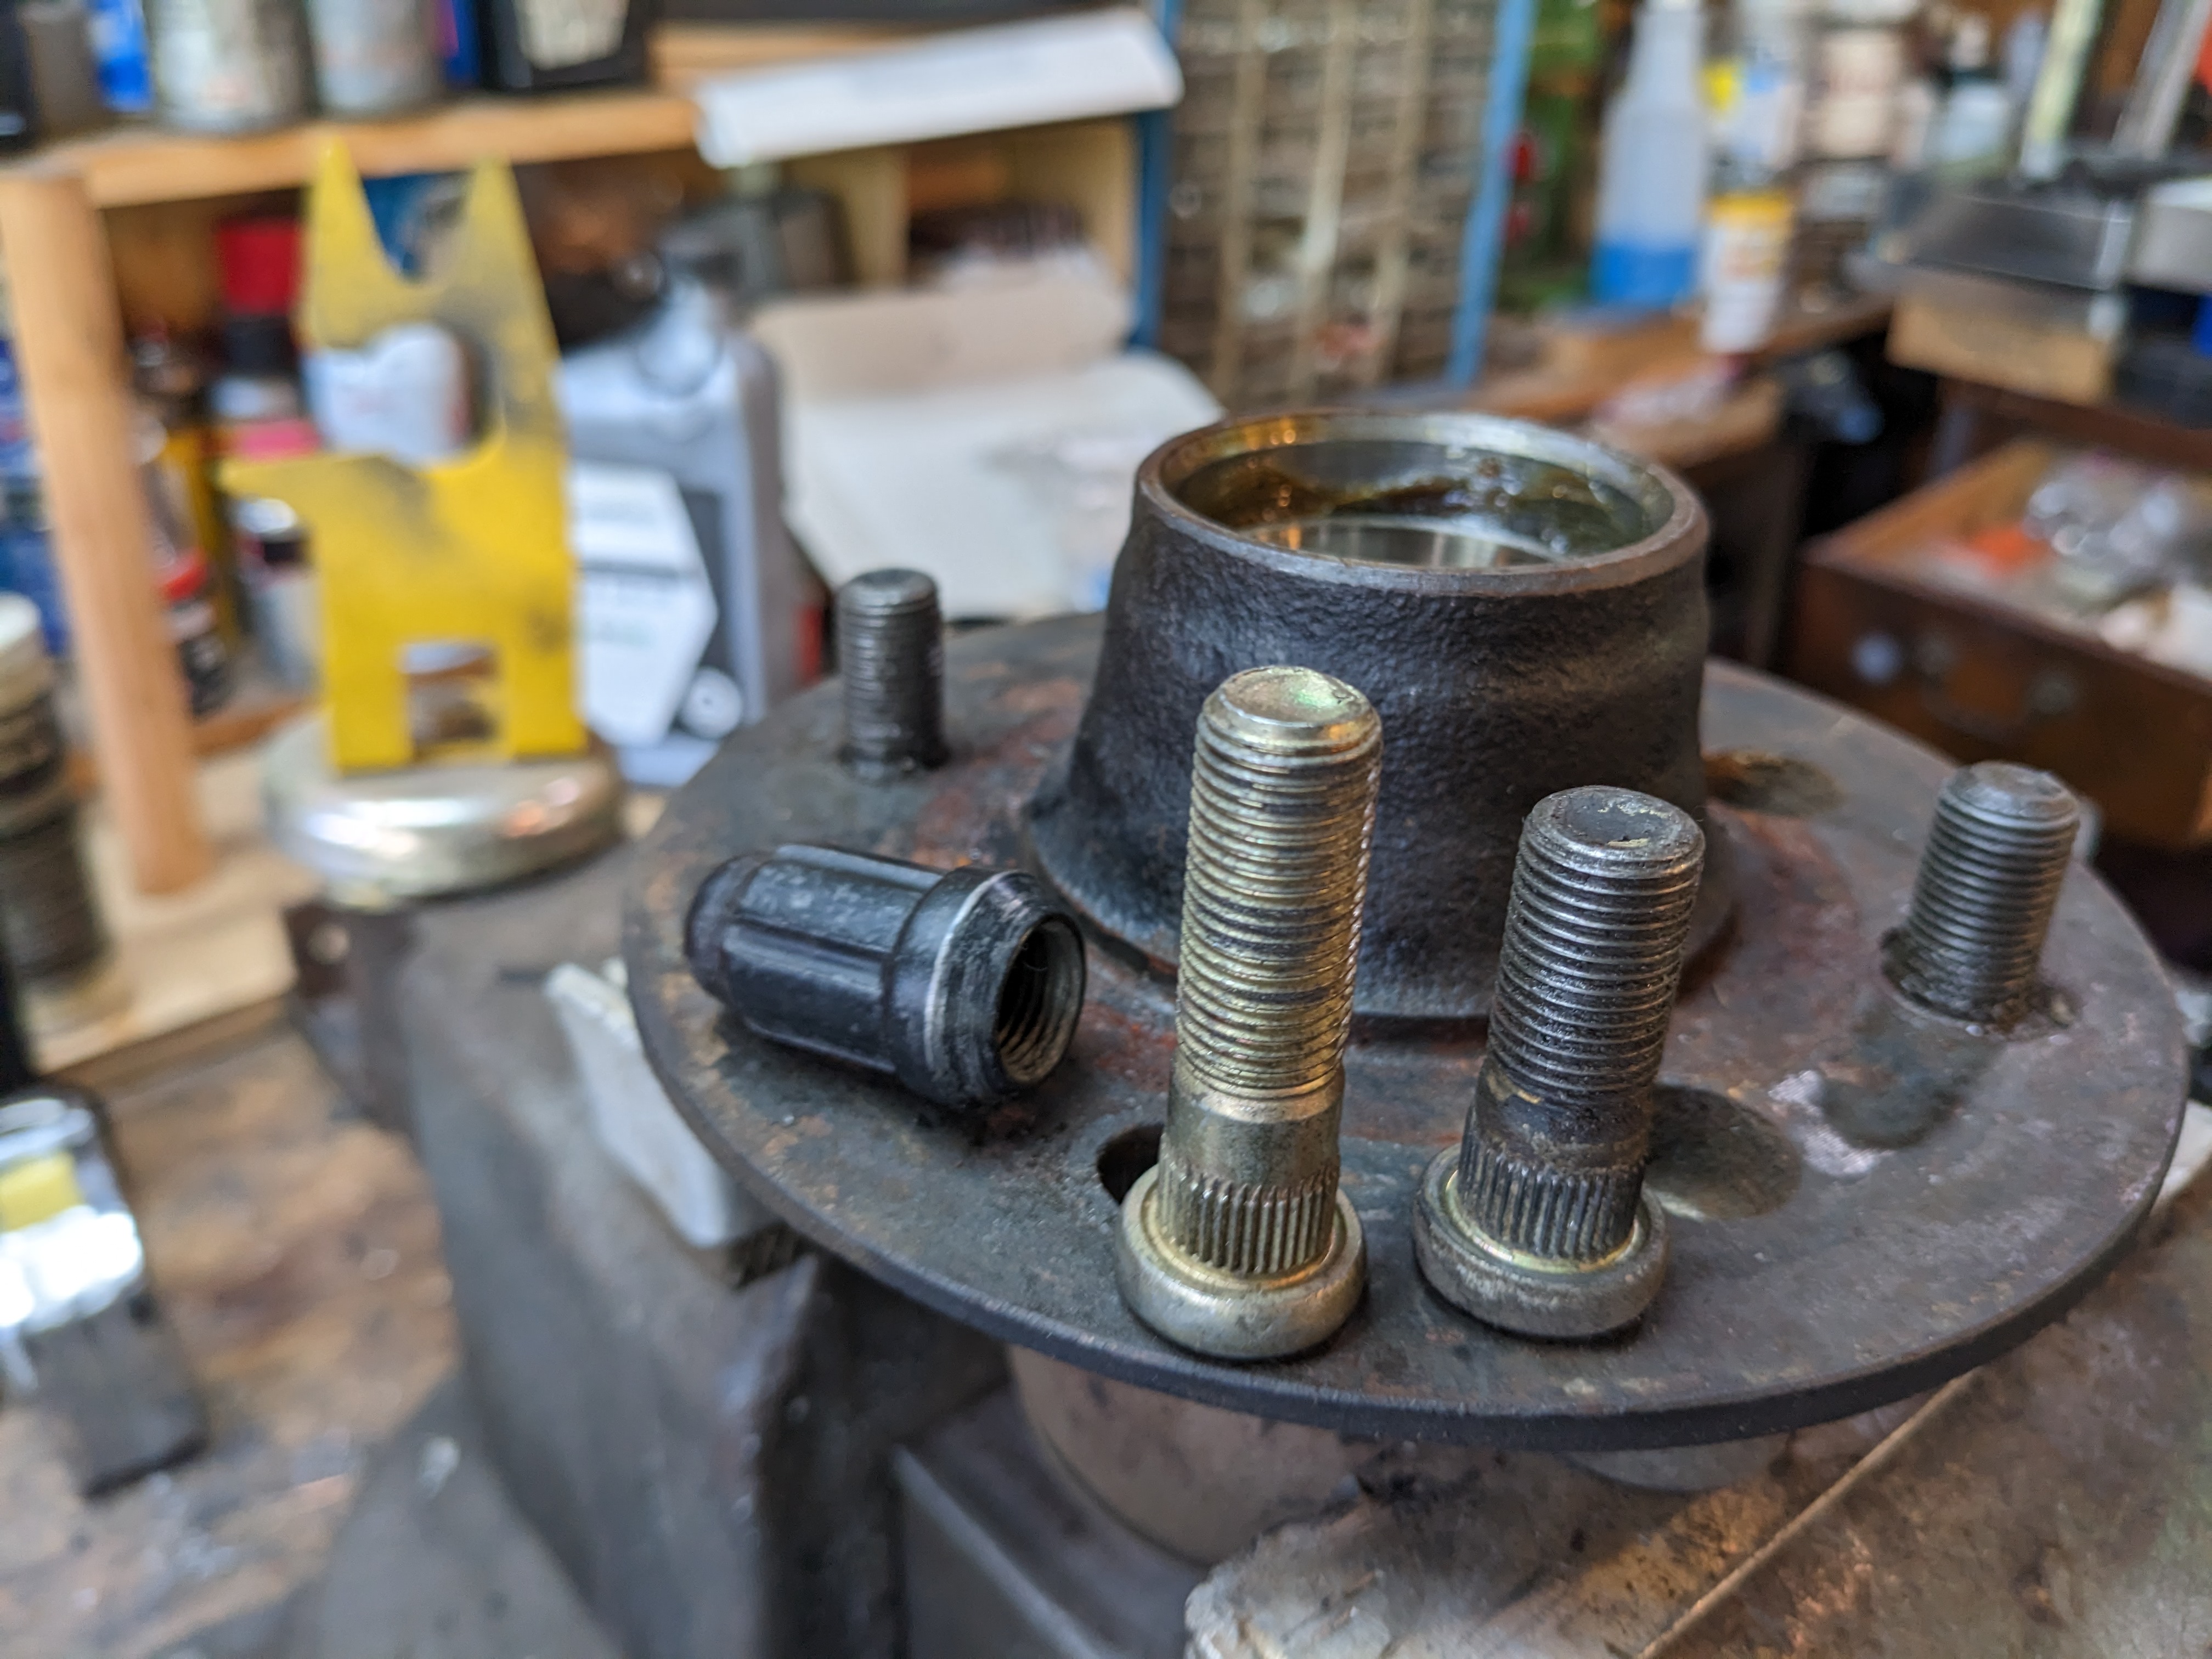
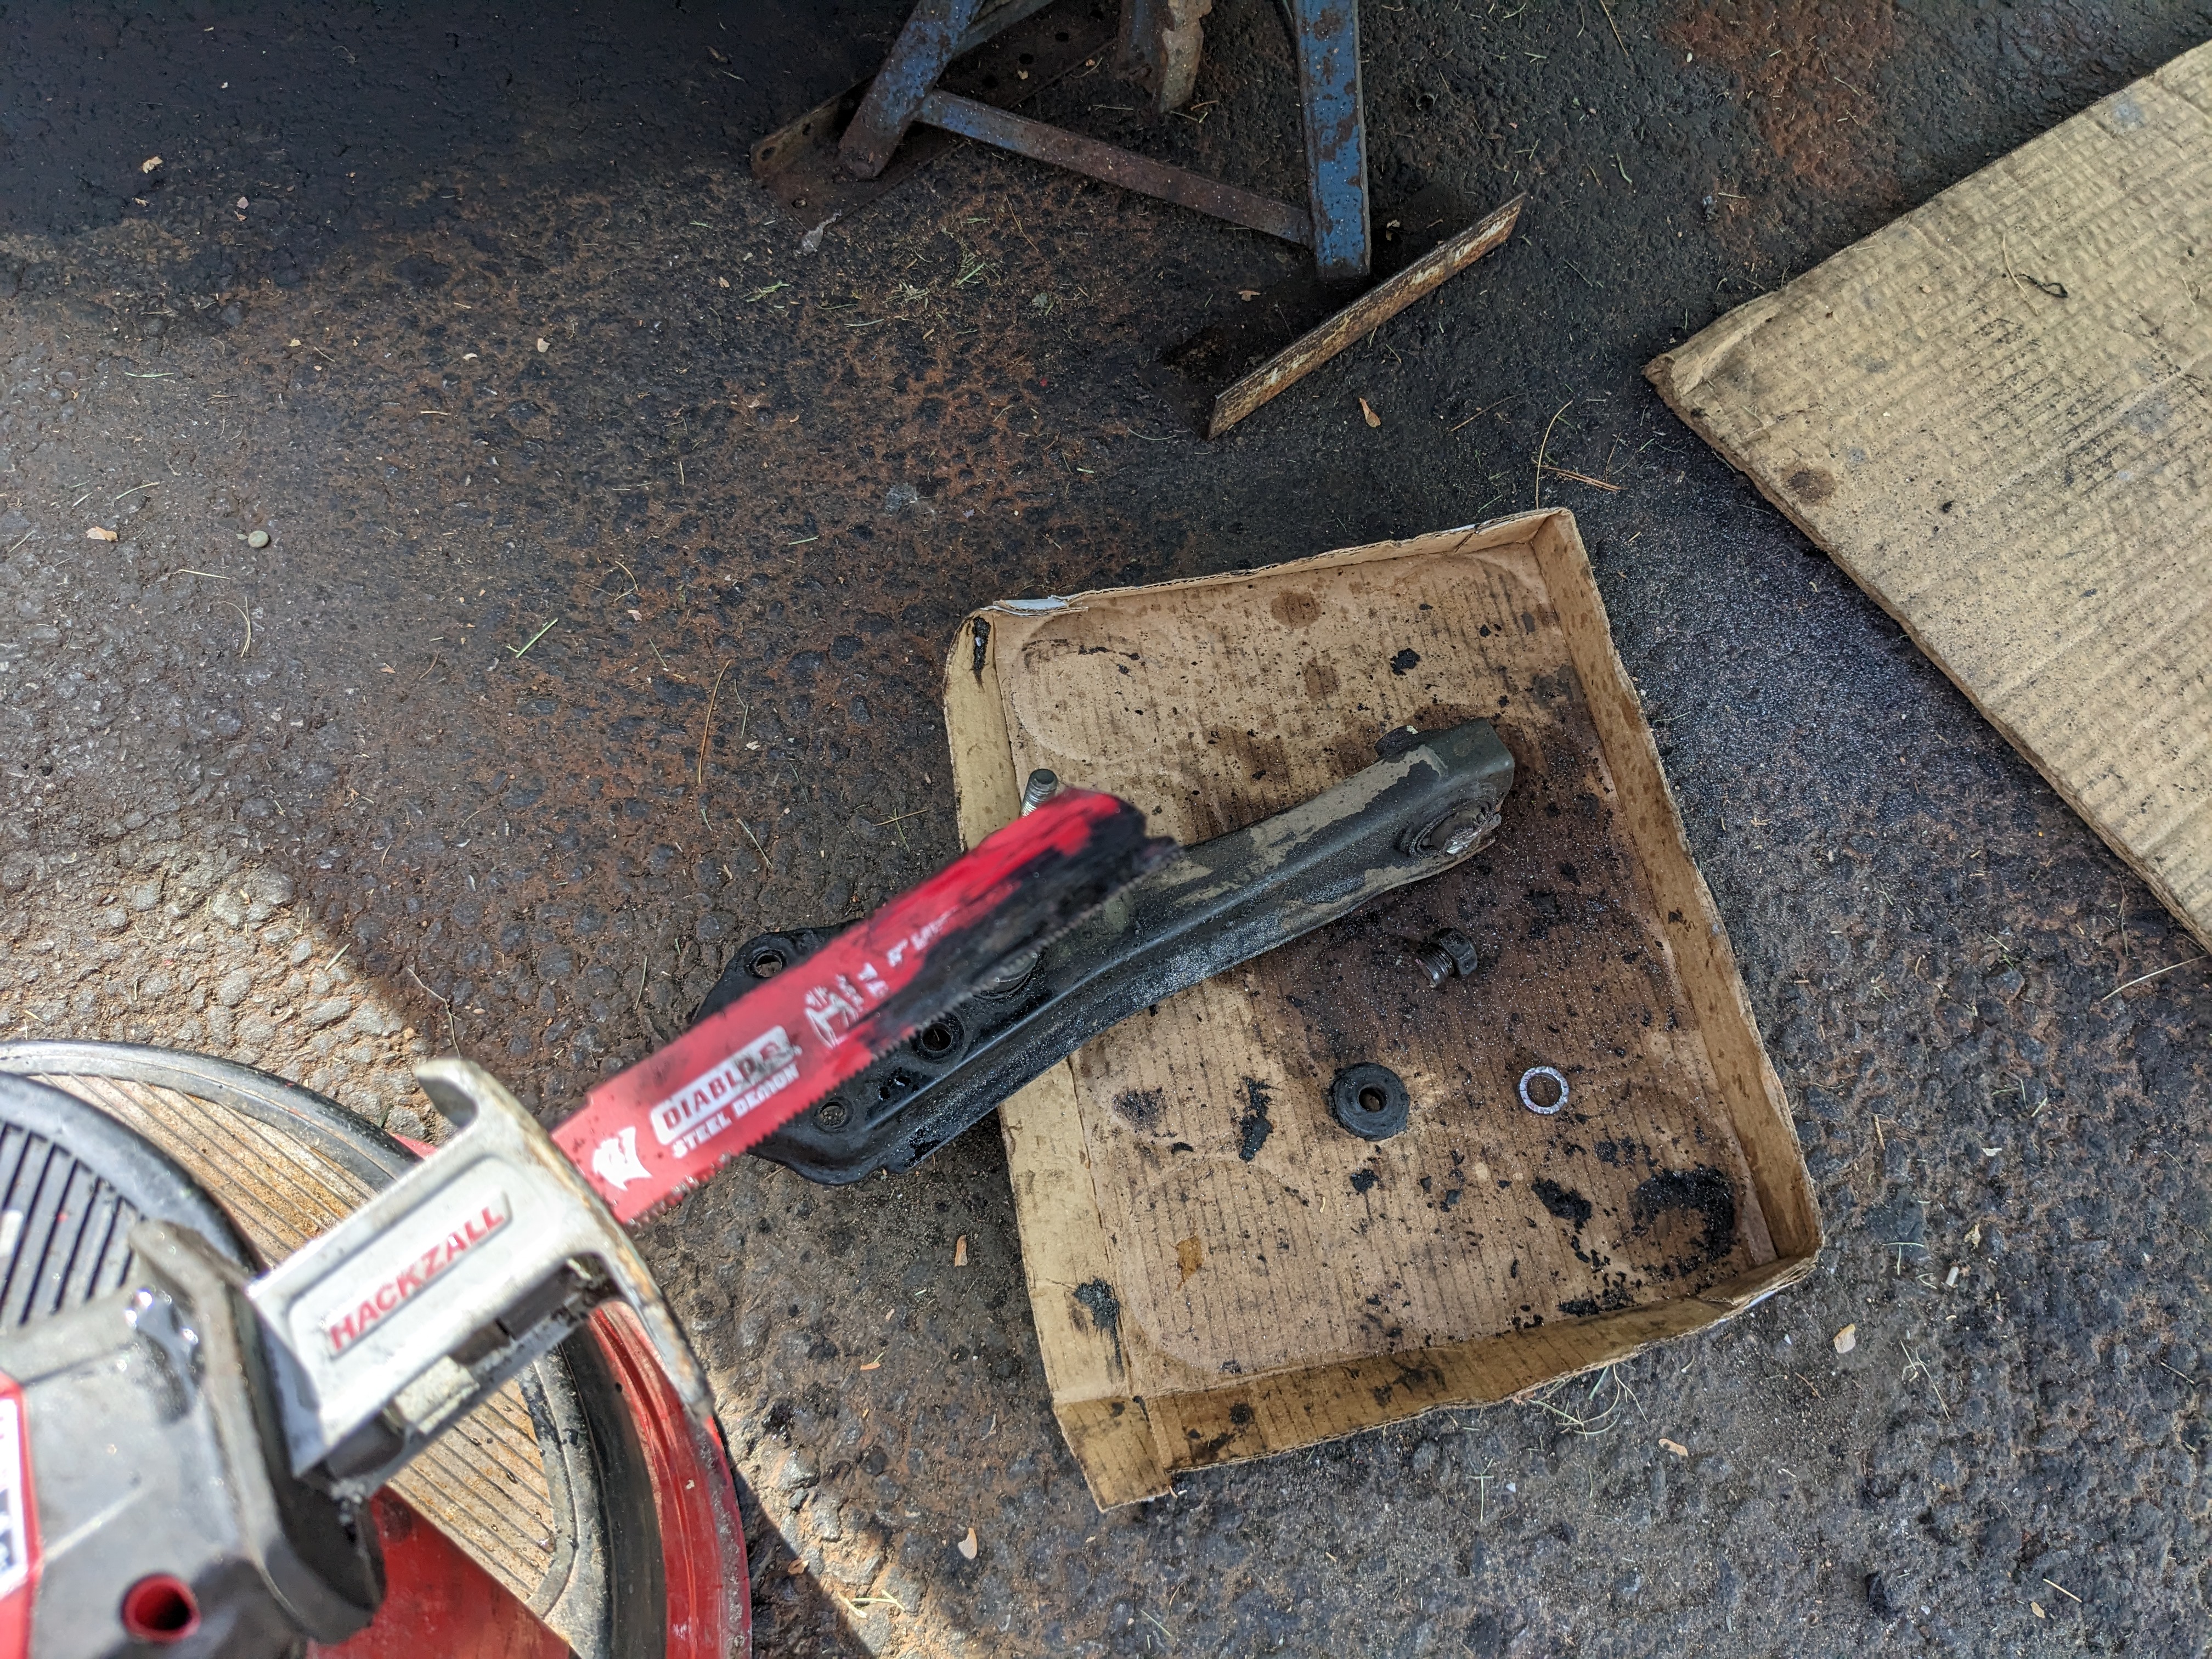
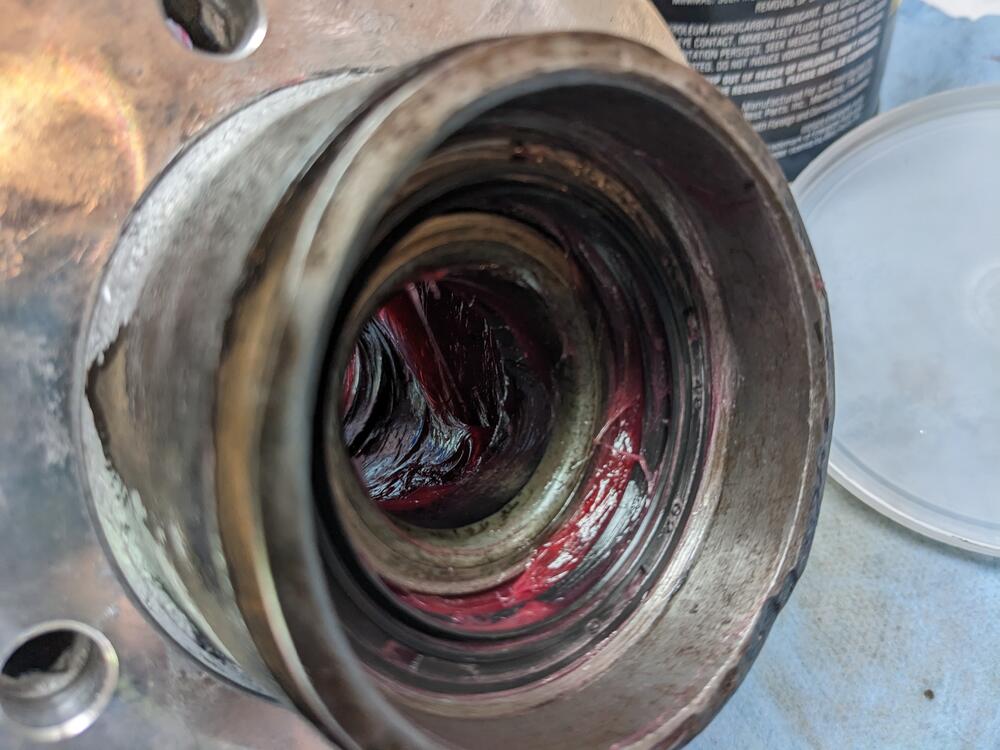
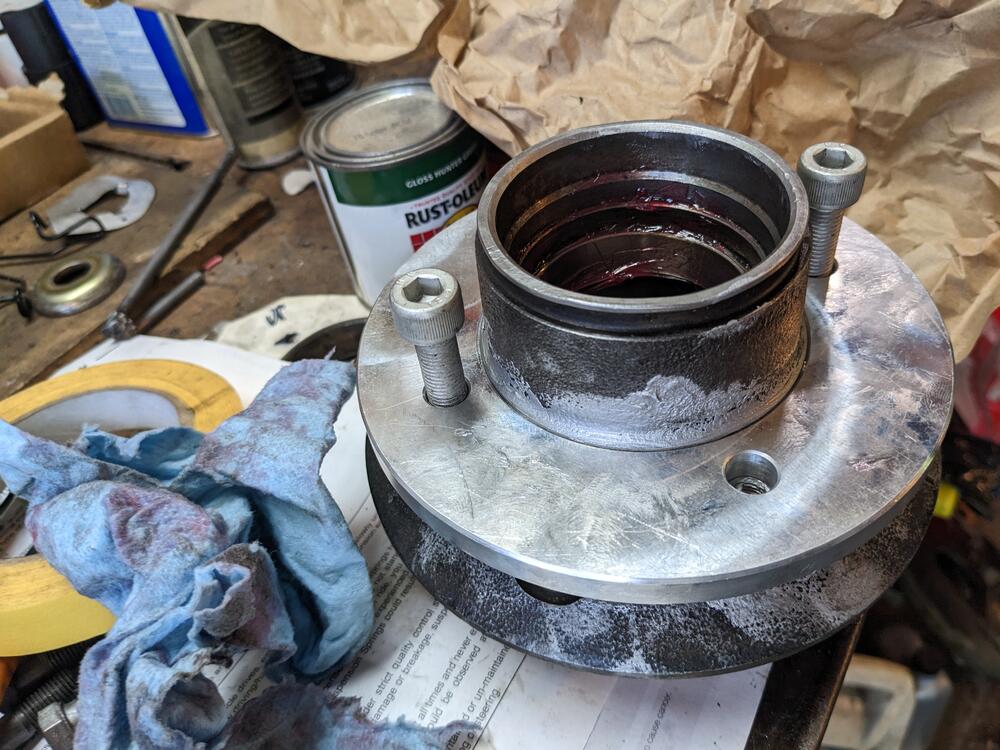
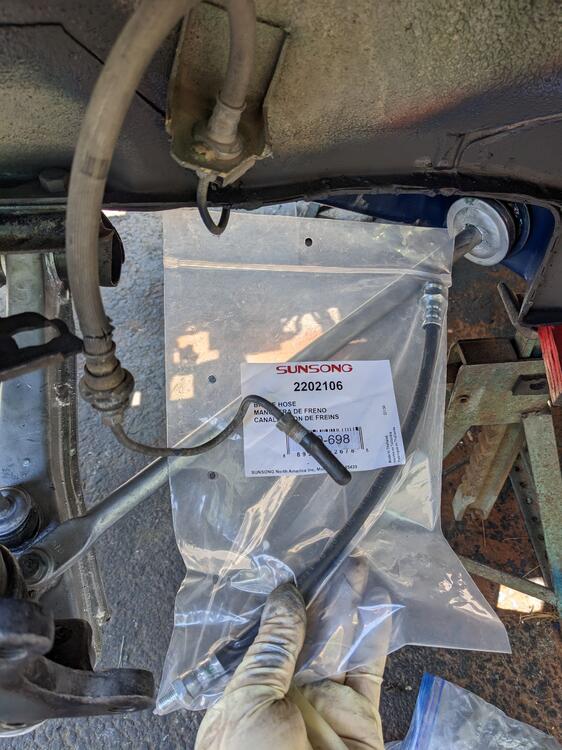
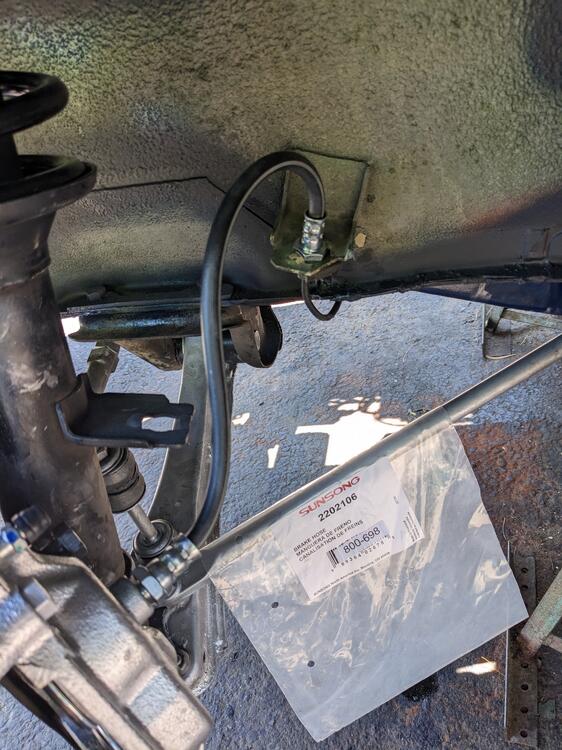
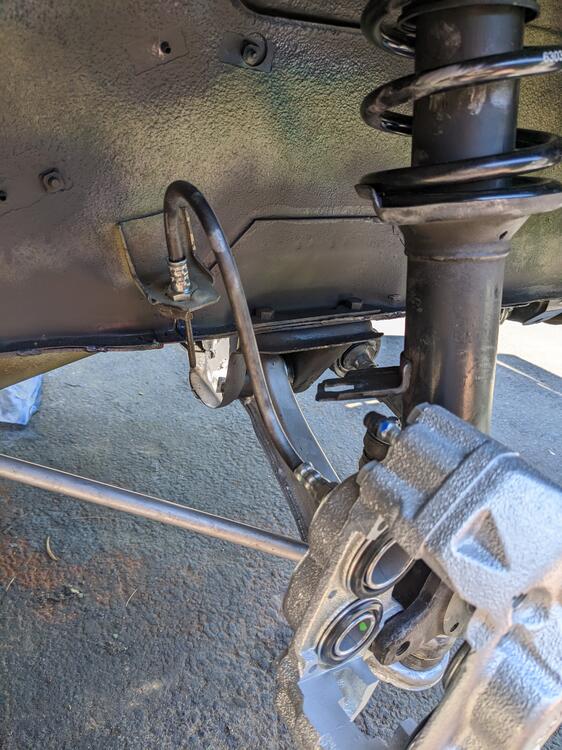
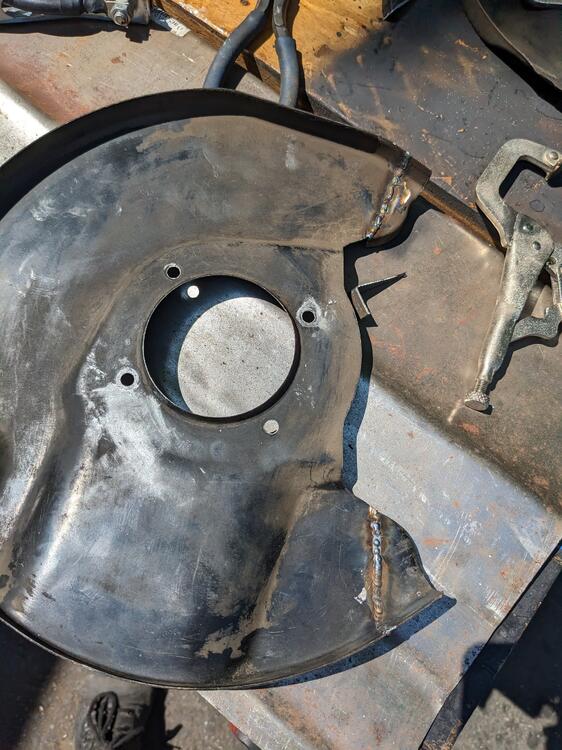
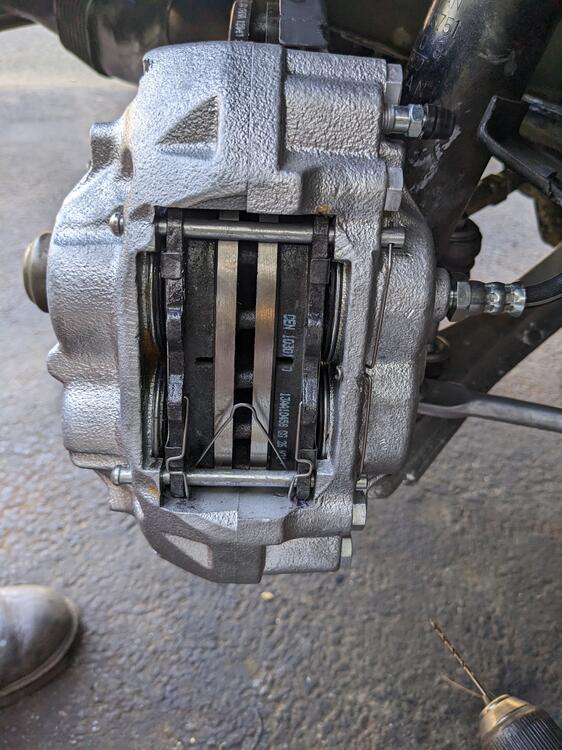
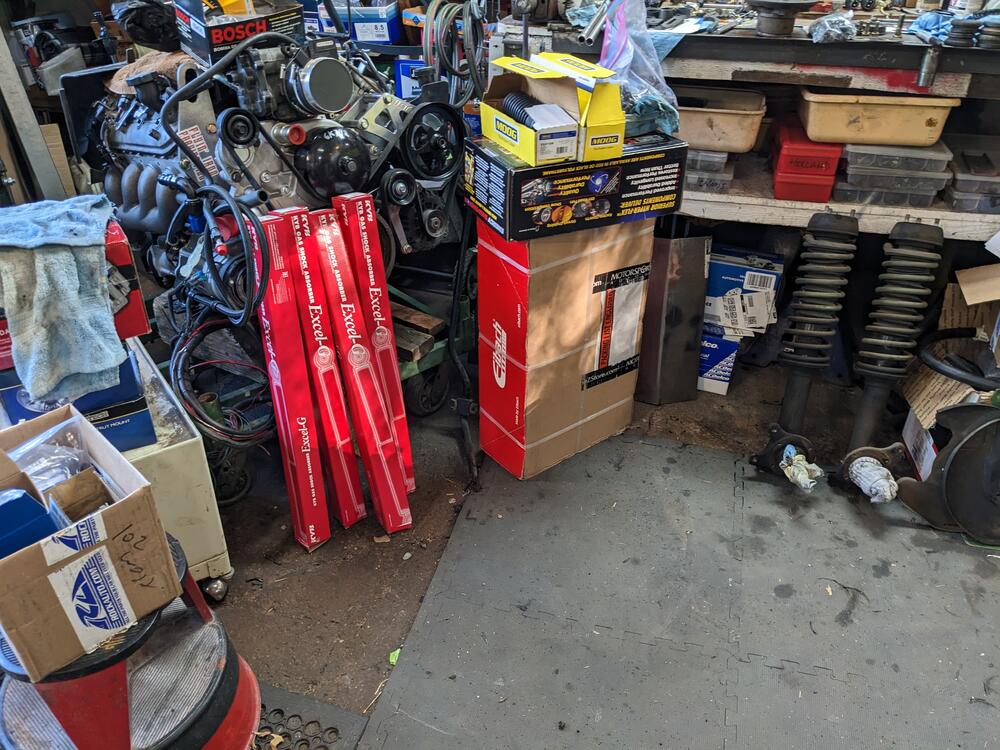
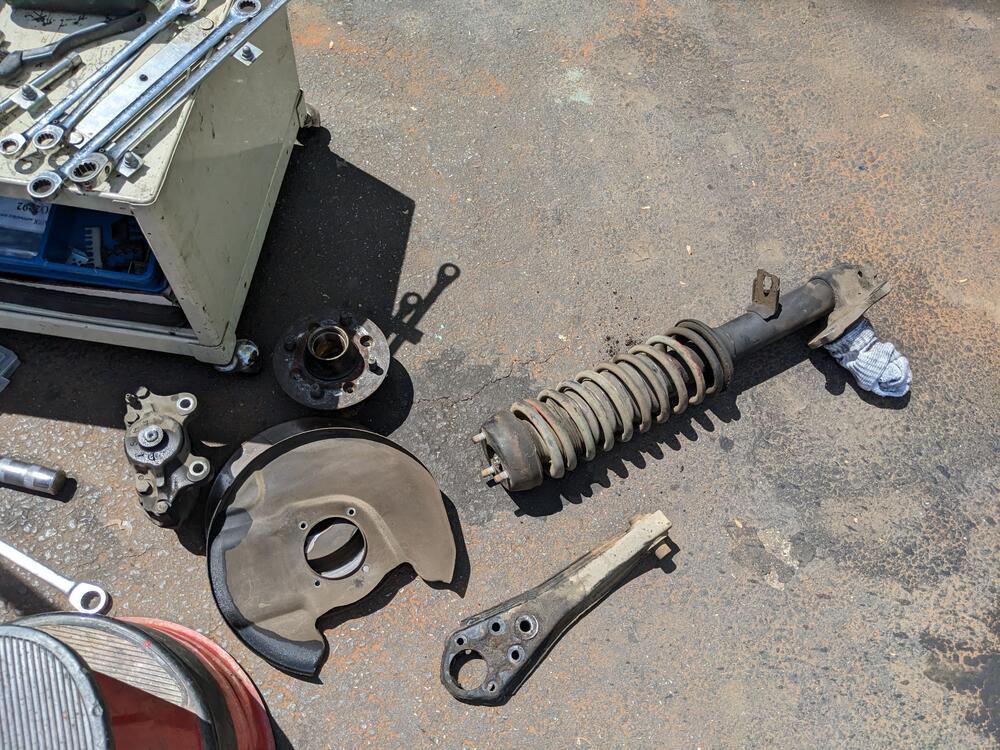
Finally got back to the brakes. I bought the ZcarDepot kit, which comes with no directions. I didn't realize that the supplied hose is intended to replace both flex & rigid lines, it didn't appear long enough. Besides that, the back plates have to be modified to clear the larger Toyota S12 caliper. I had cleaned out the old grease from the hubs, and repacked the wheel bearings in preparation for reassembly. So, I filled the hubs with new bearing grease as per the FSM, and installed the inner bearings & grease seals. I also found I never received the 8 longer bolts with the brake kit. Thankfully I had extra bolts from a CEIKA brake kit. Rotor spacer in place. CEIKA bolts. Vented rotors bolted to hubs. Single hose to replace original hoses Hose installed into caliper first, to prevent twisting or binding the hose Modifying the back plate. Sections removed I didn't want to leave cut edges on the back plate, so I reduced & welded the folded edges back on Cleaned up, primed, painted & installed Hubs & rotors installed, bearings adjusted. Longer studs installed for the Konig wheels Nice touch on the grease caps, oring seal Pads & hardware installed. The outer pad didn't have the hole for the damper spring, had to drill it out Just need to bleed the brakes


-
Put the struts, torsion rods & swaybar/links back on today. That was fun. The poly kit doesn't come with the front sway bar bushings (WTF?), so I put the old ones back, and put rubber instead of poly for the links. I've ordered the poly for the 18mm sway bar pivot. The torsion rods I have heard that the poly can damage the rods, since it cannot flex & pivot through the suspension travel arc. So, I put new rubber ones in. Hopefully get the brakes on in the AM.
-
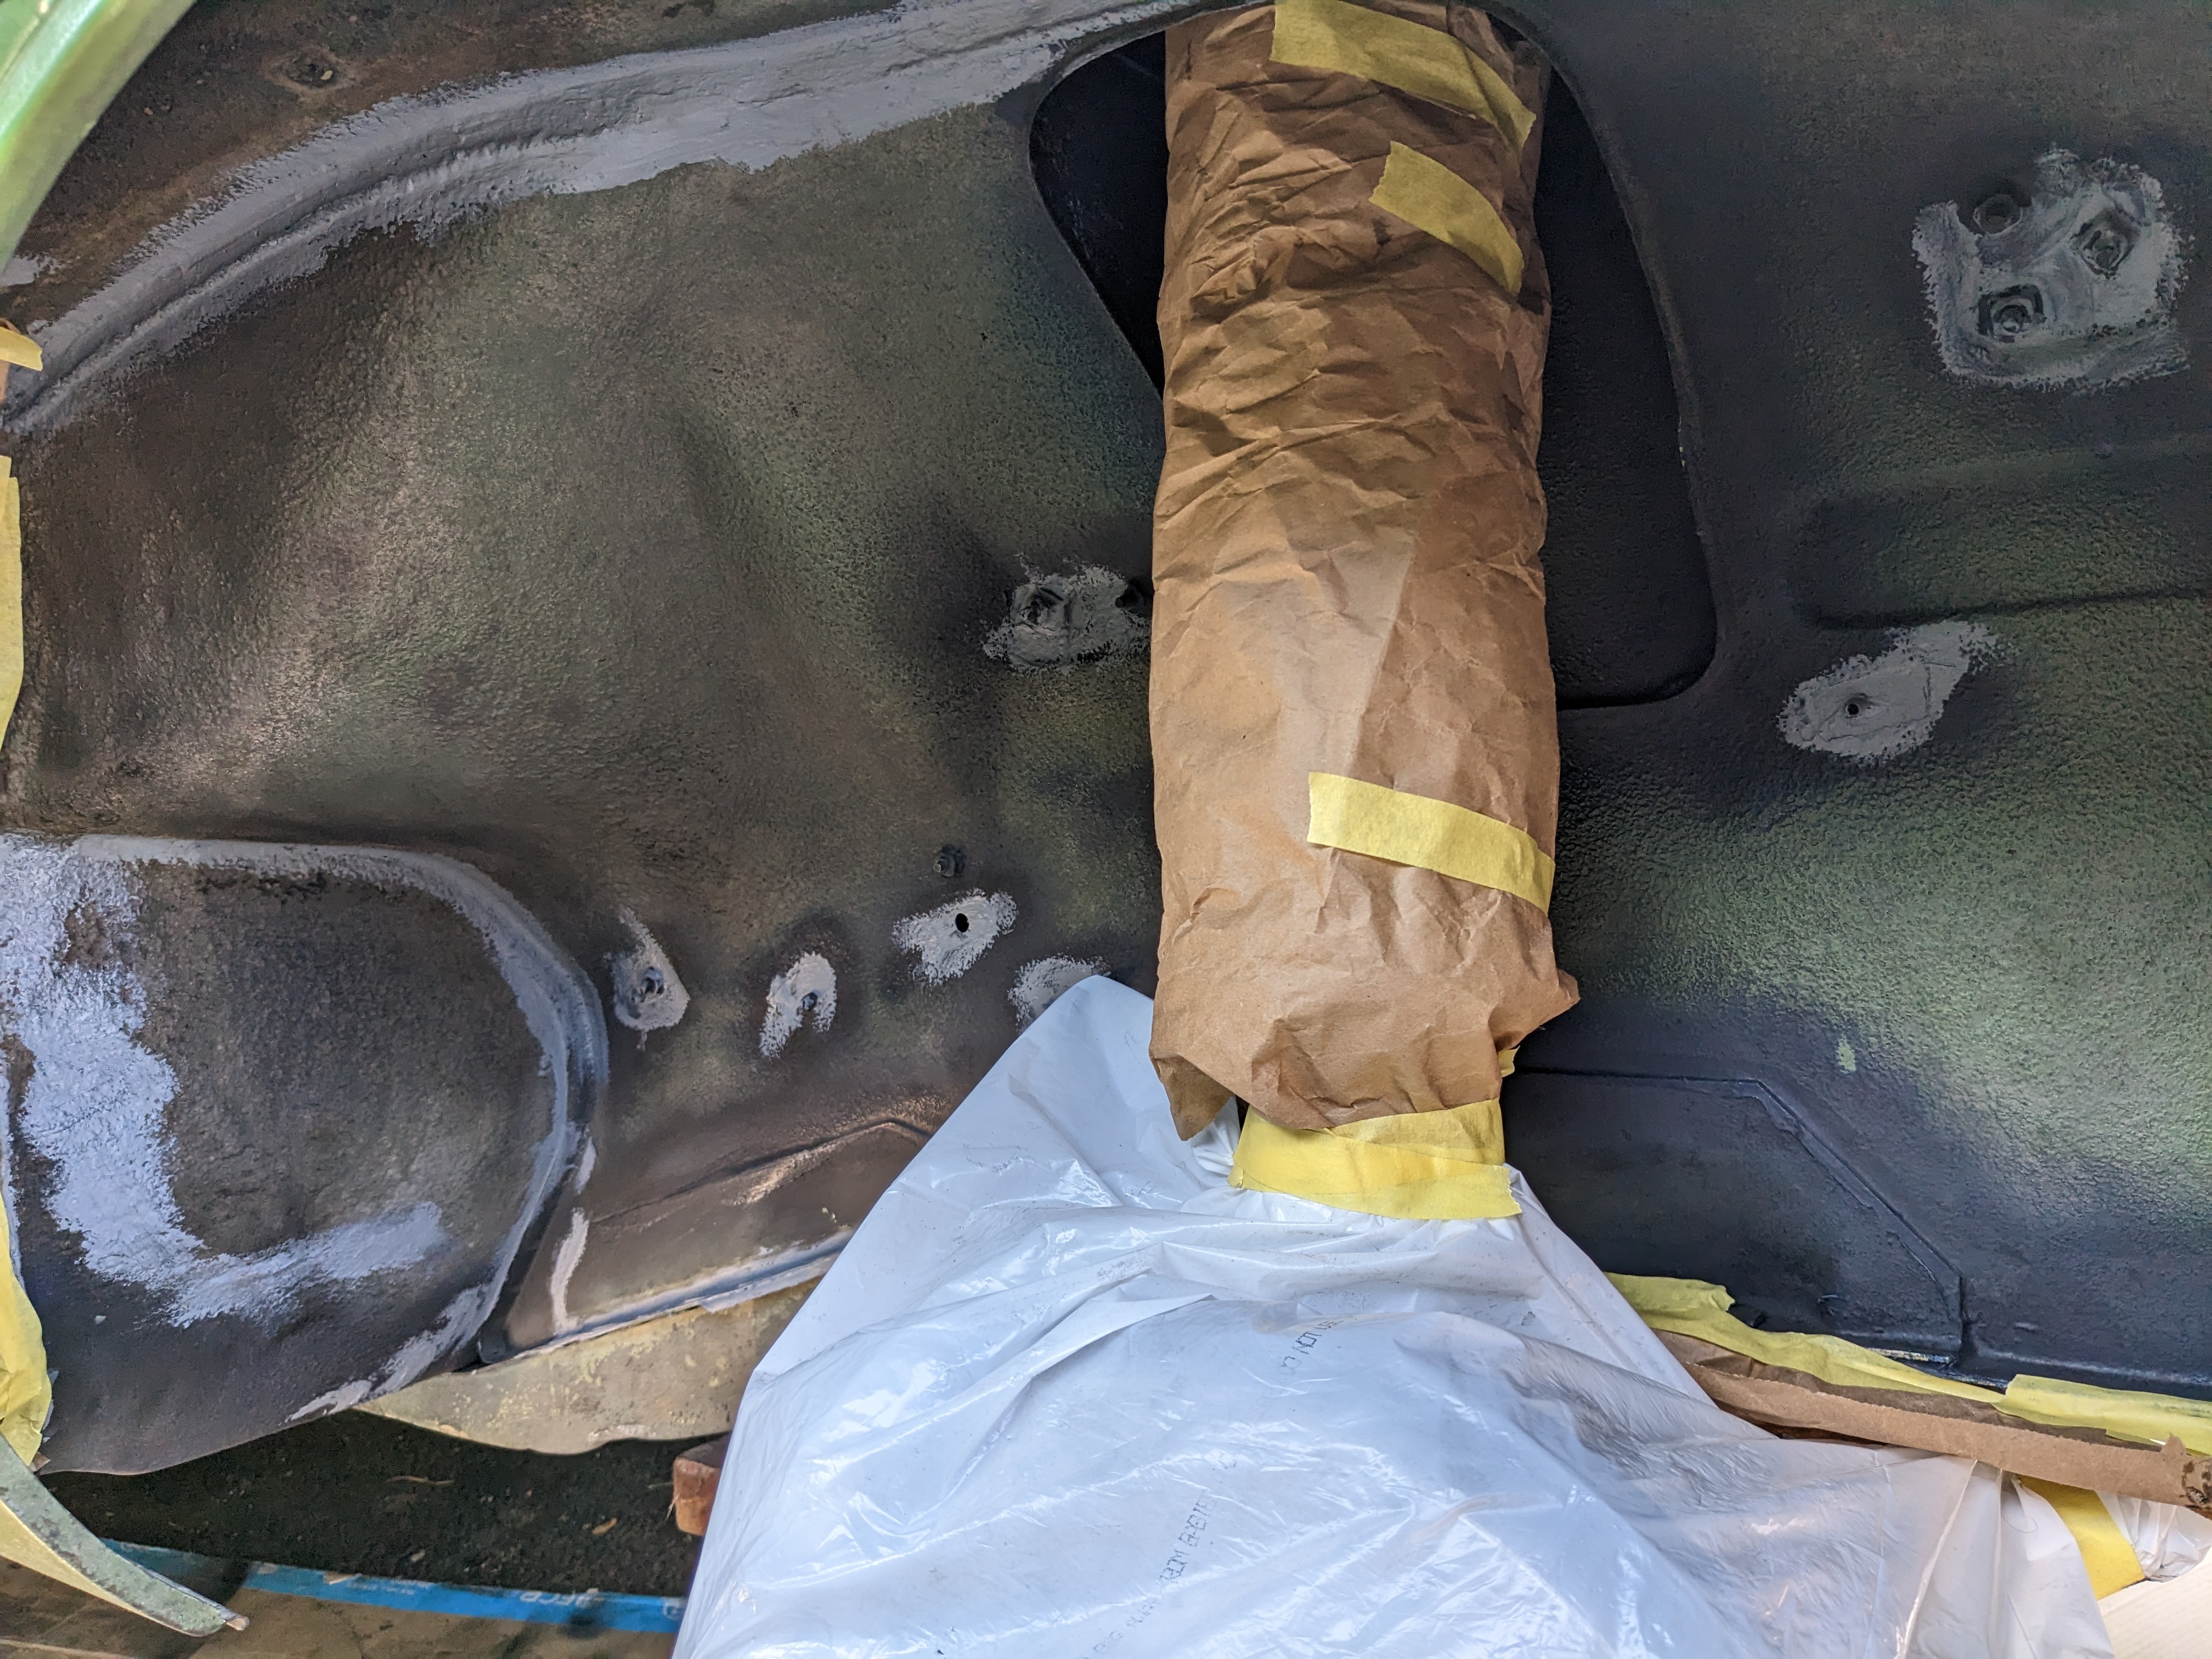
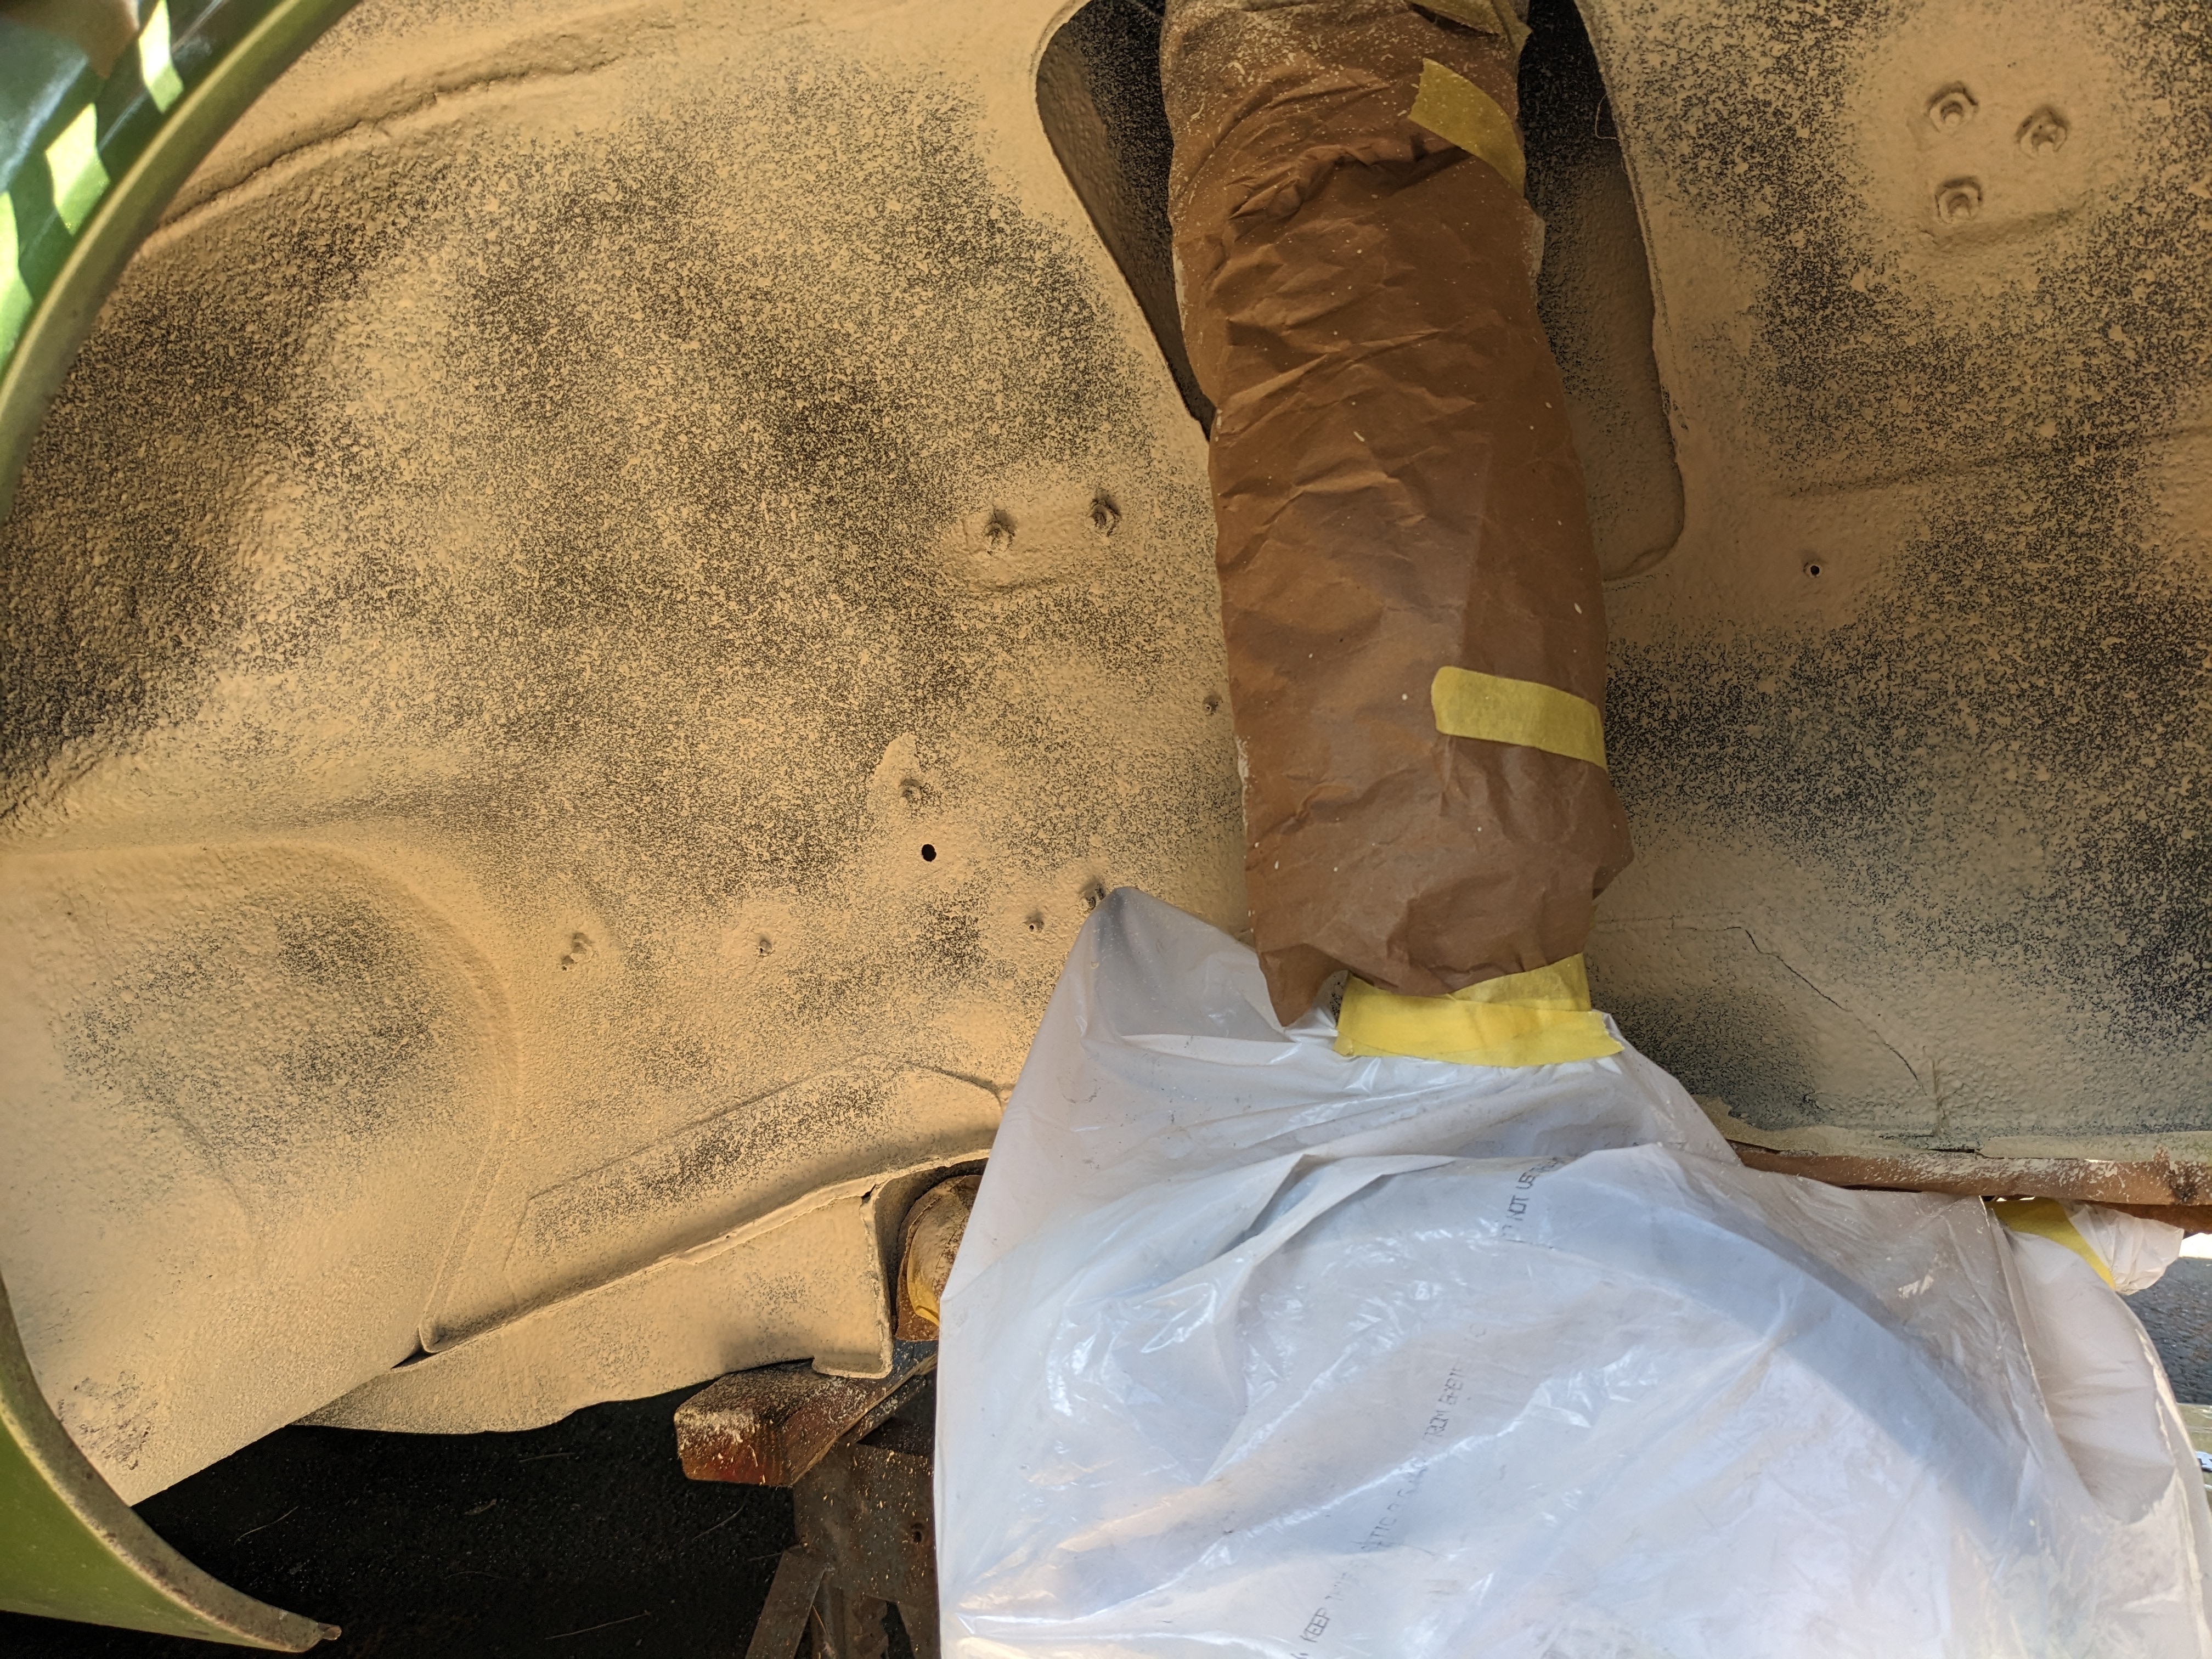
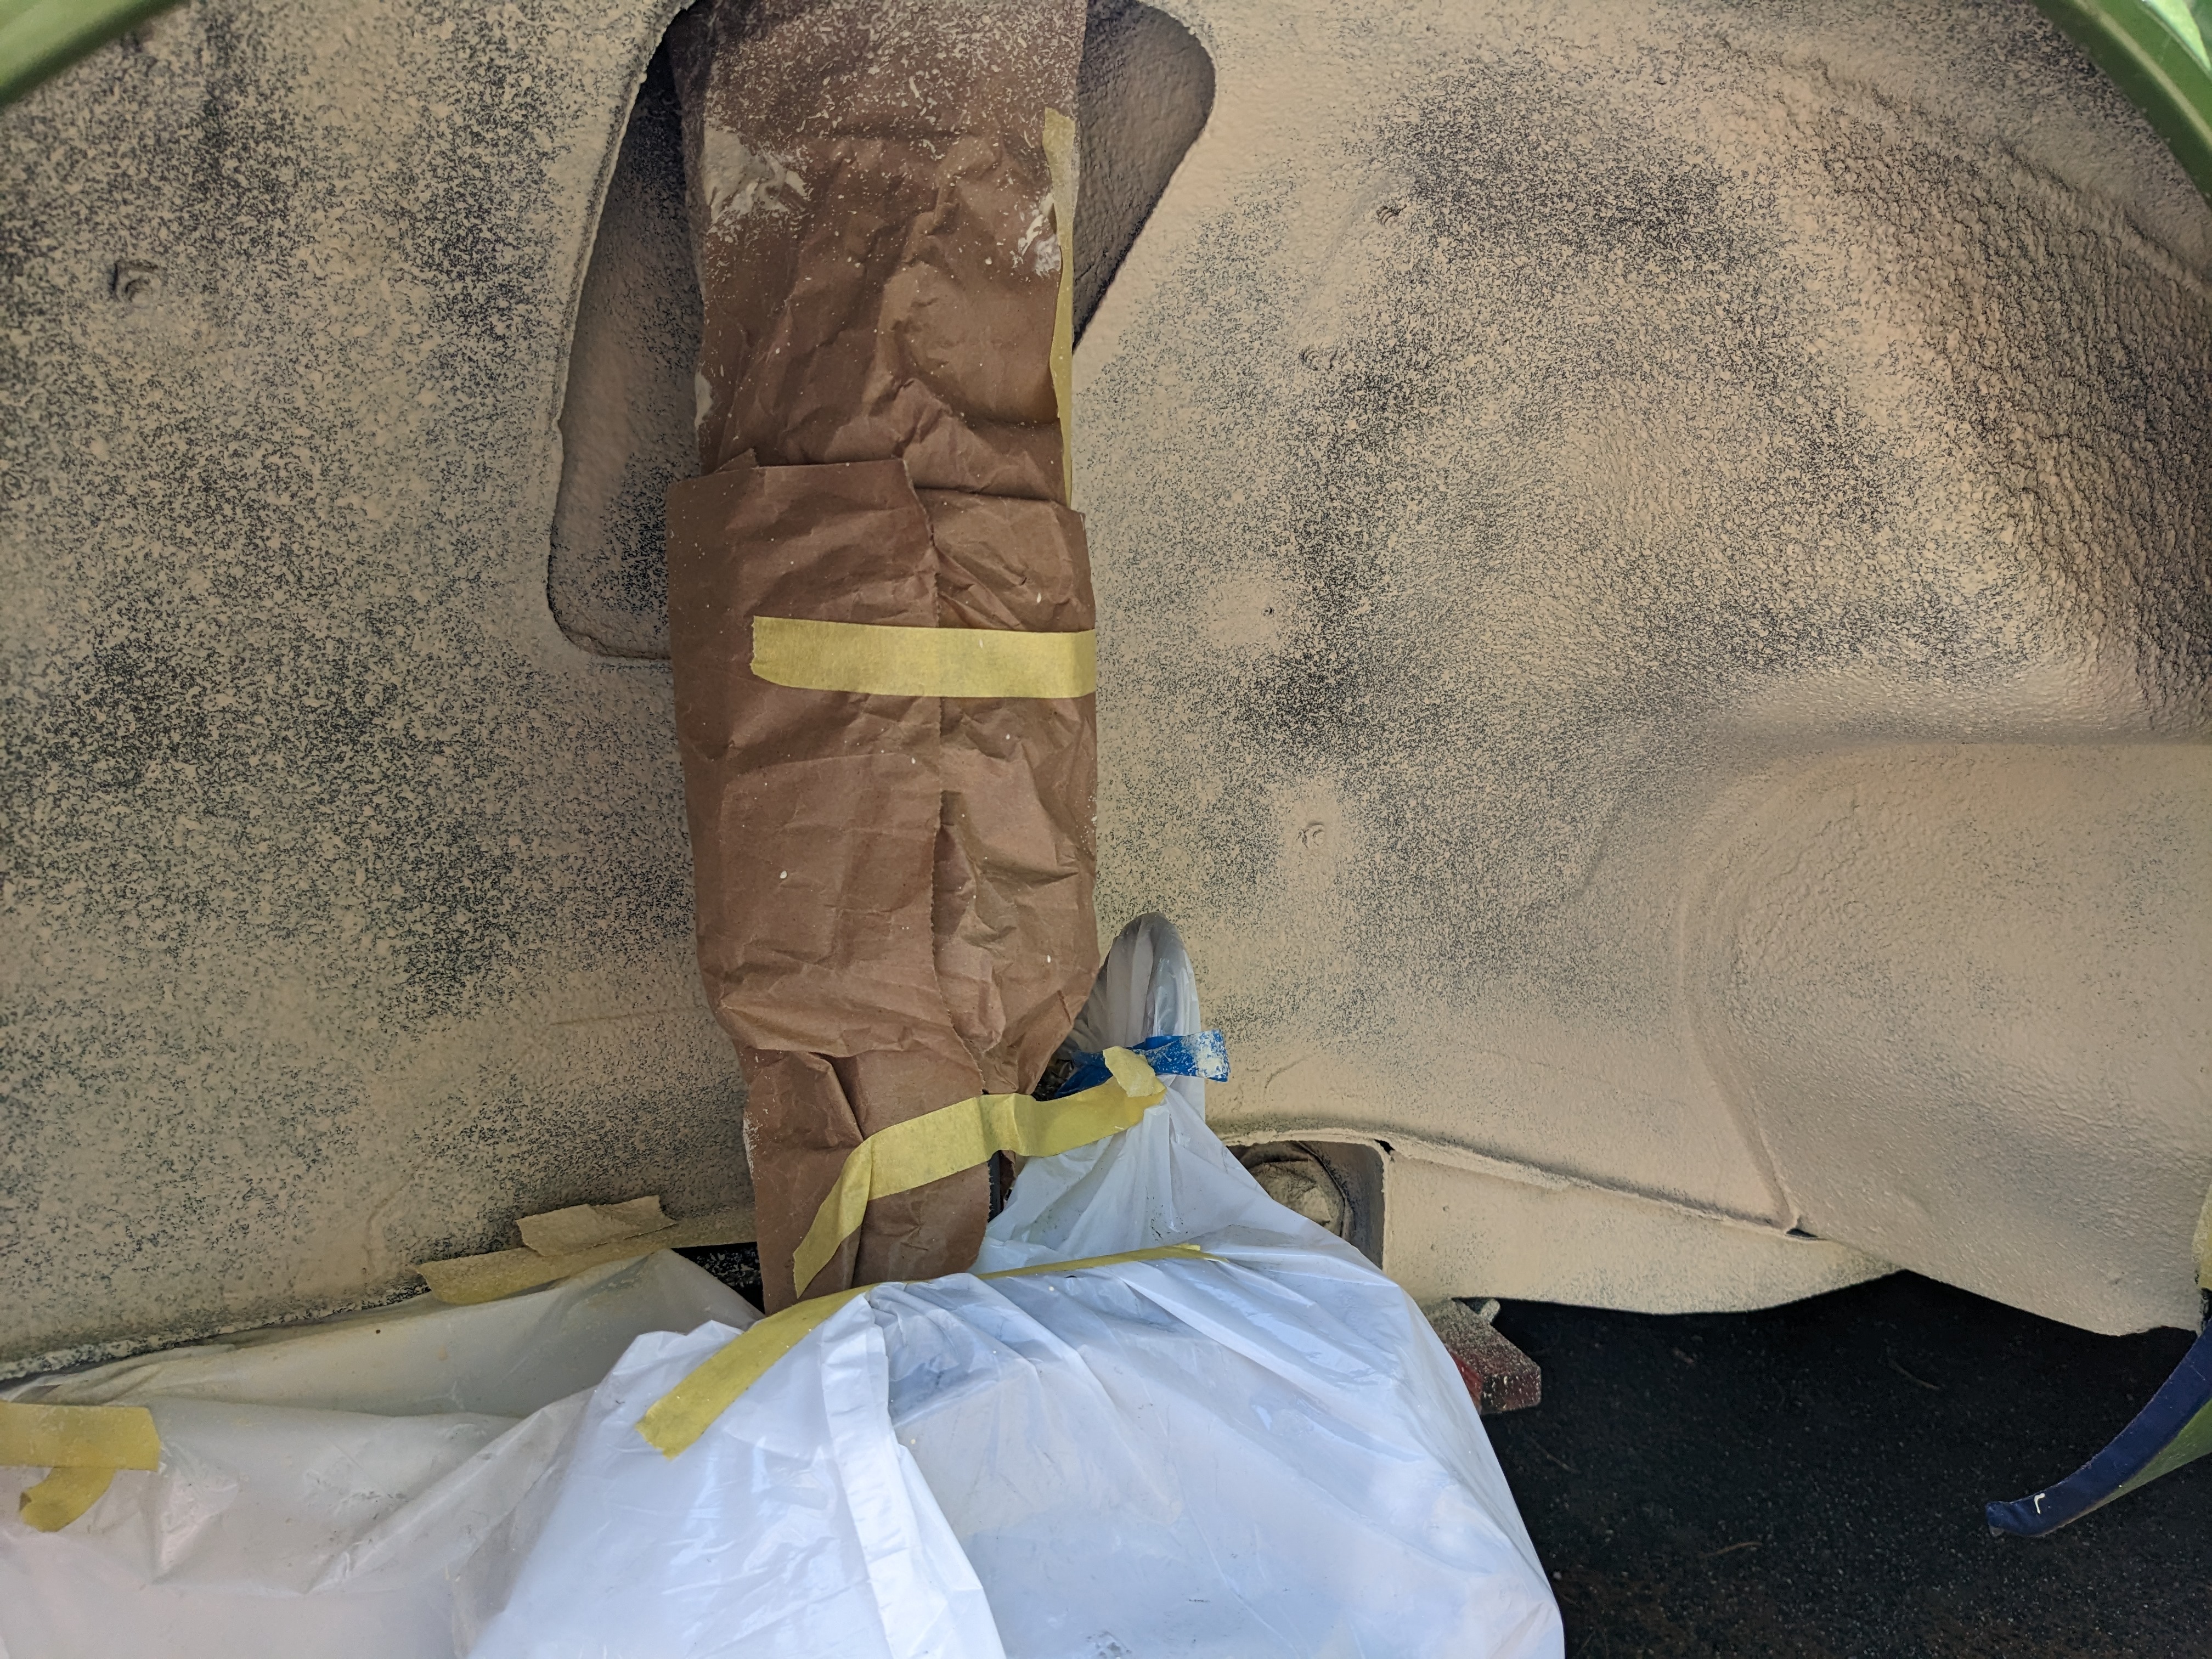
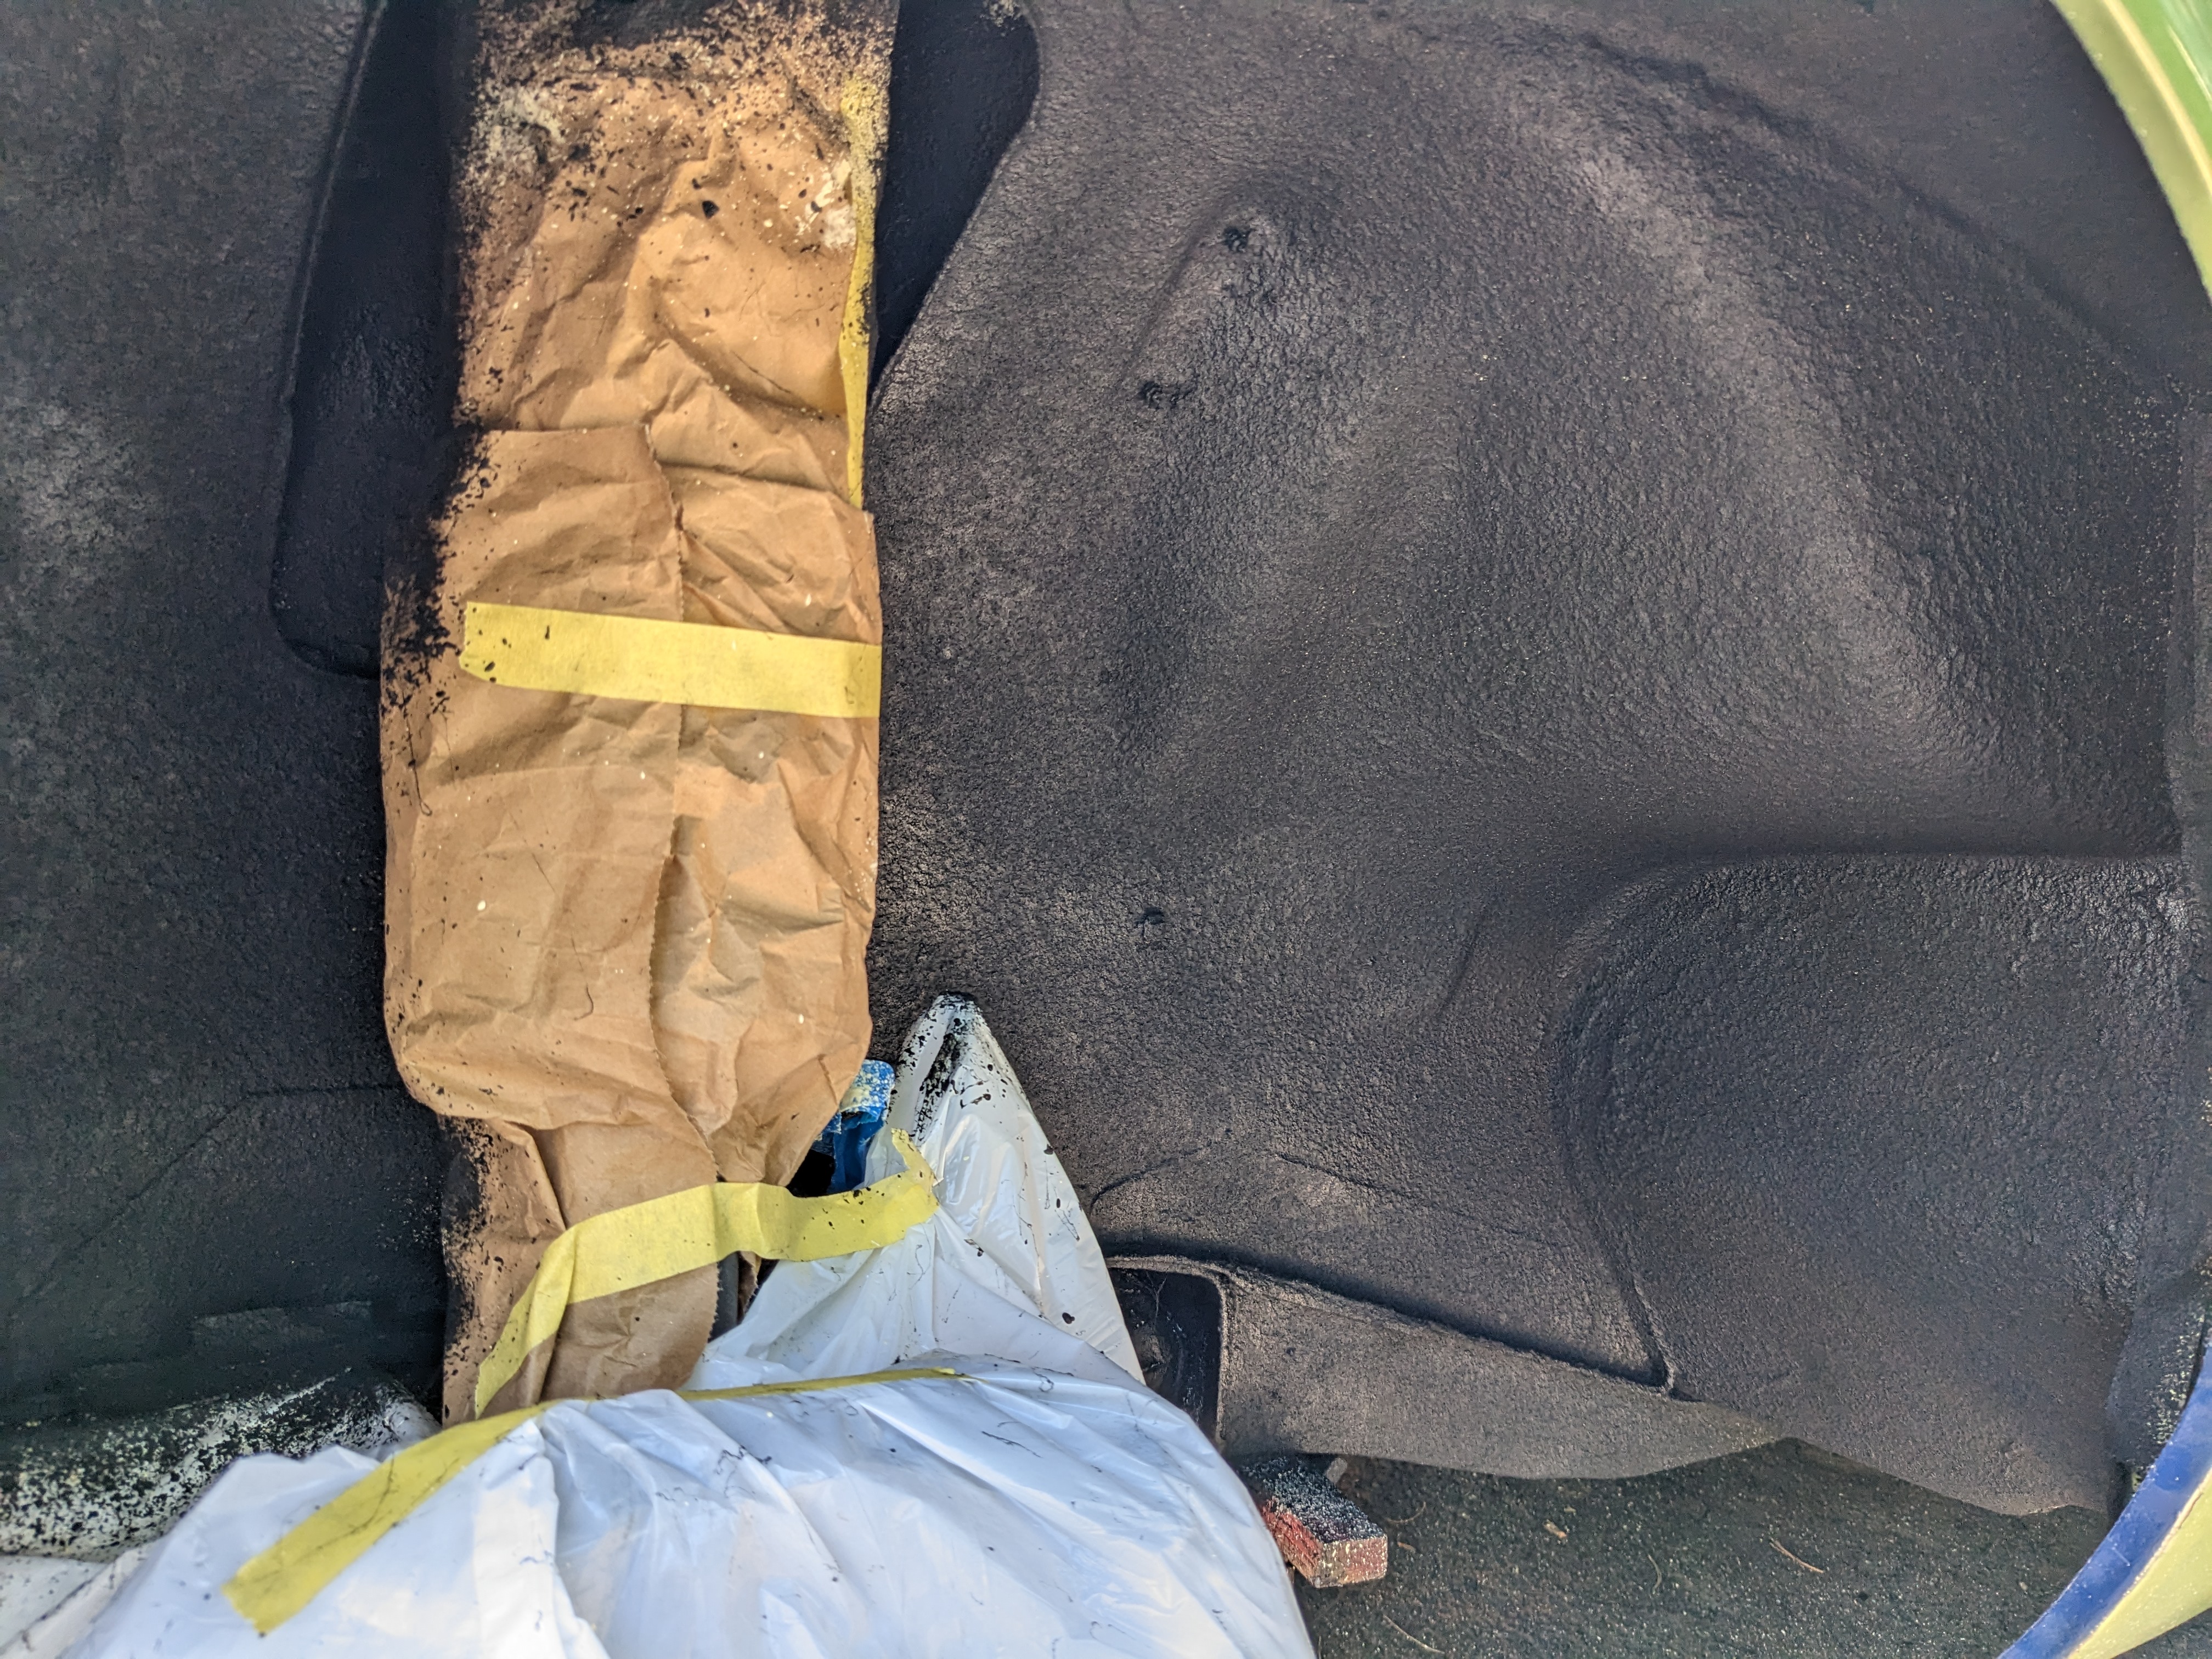
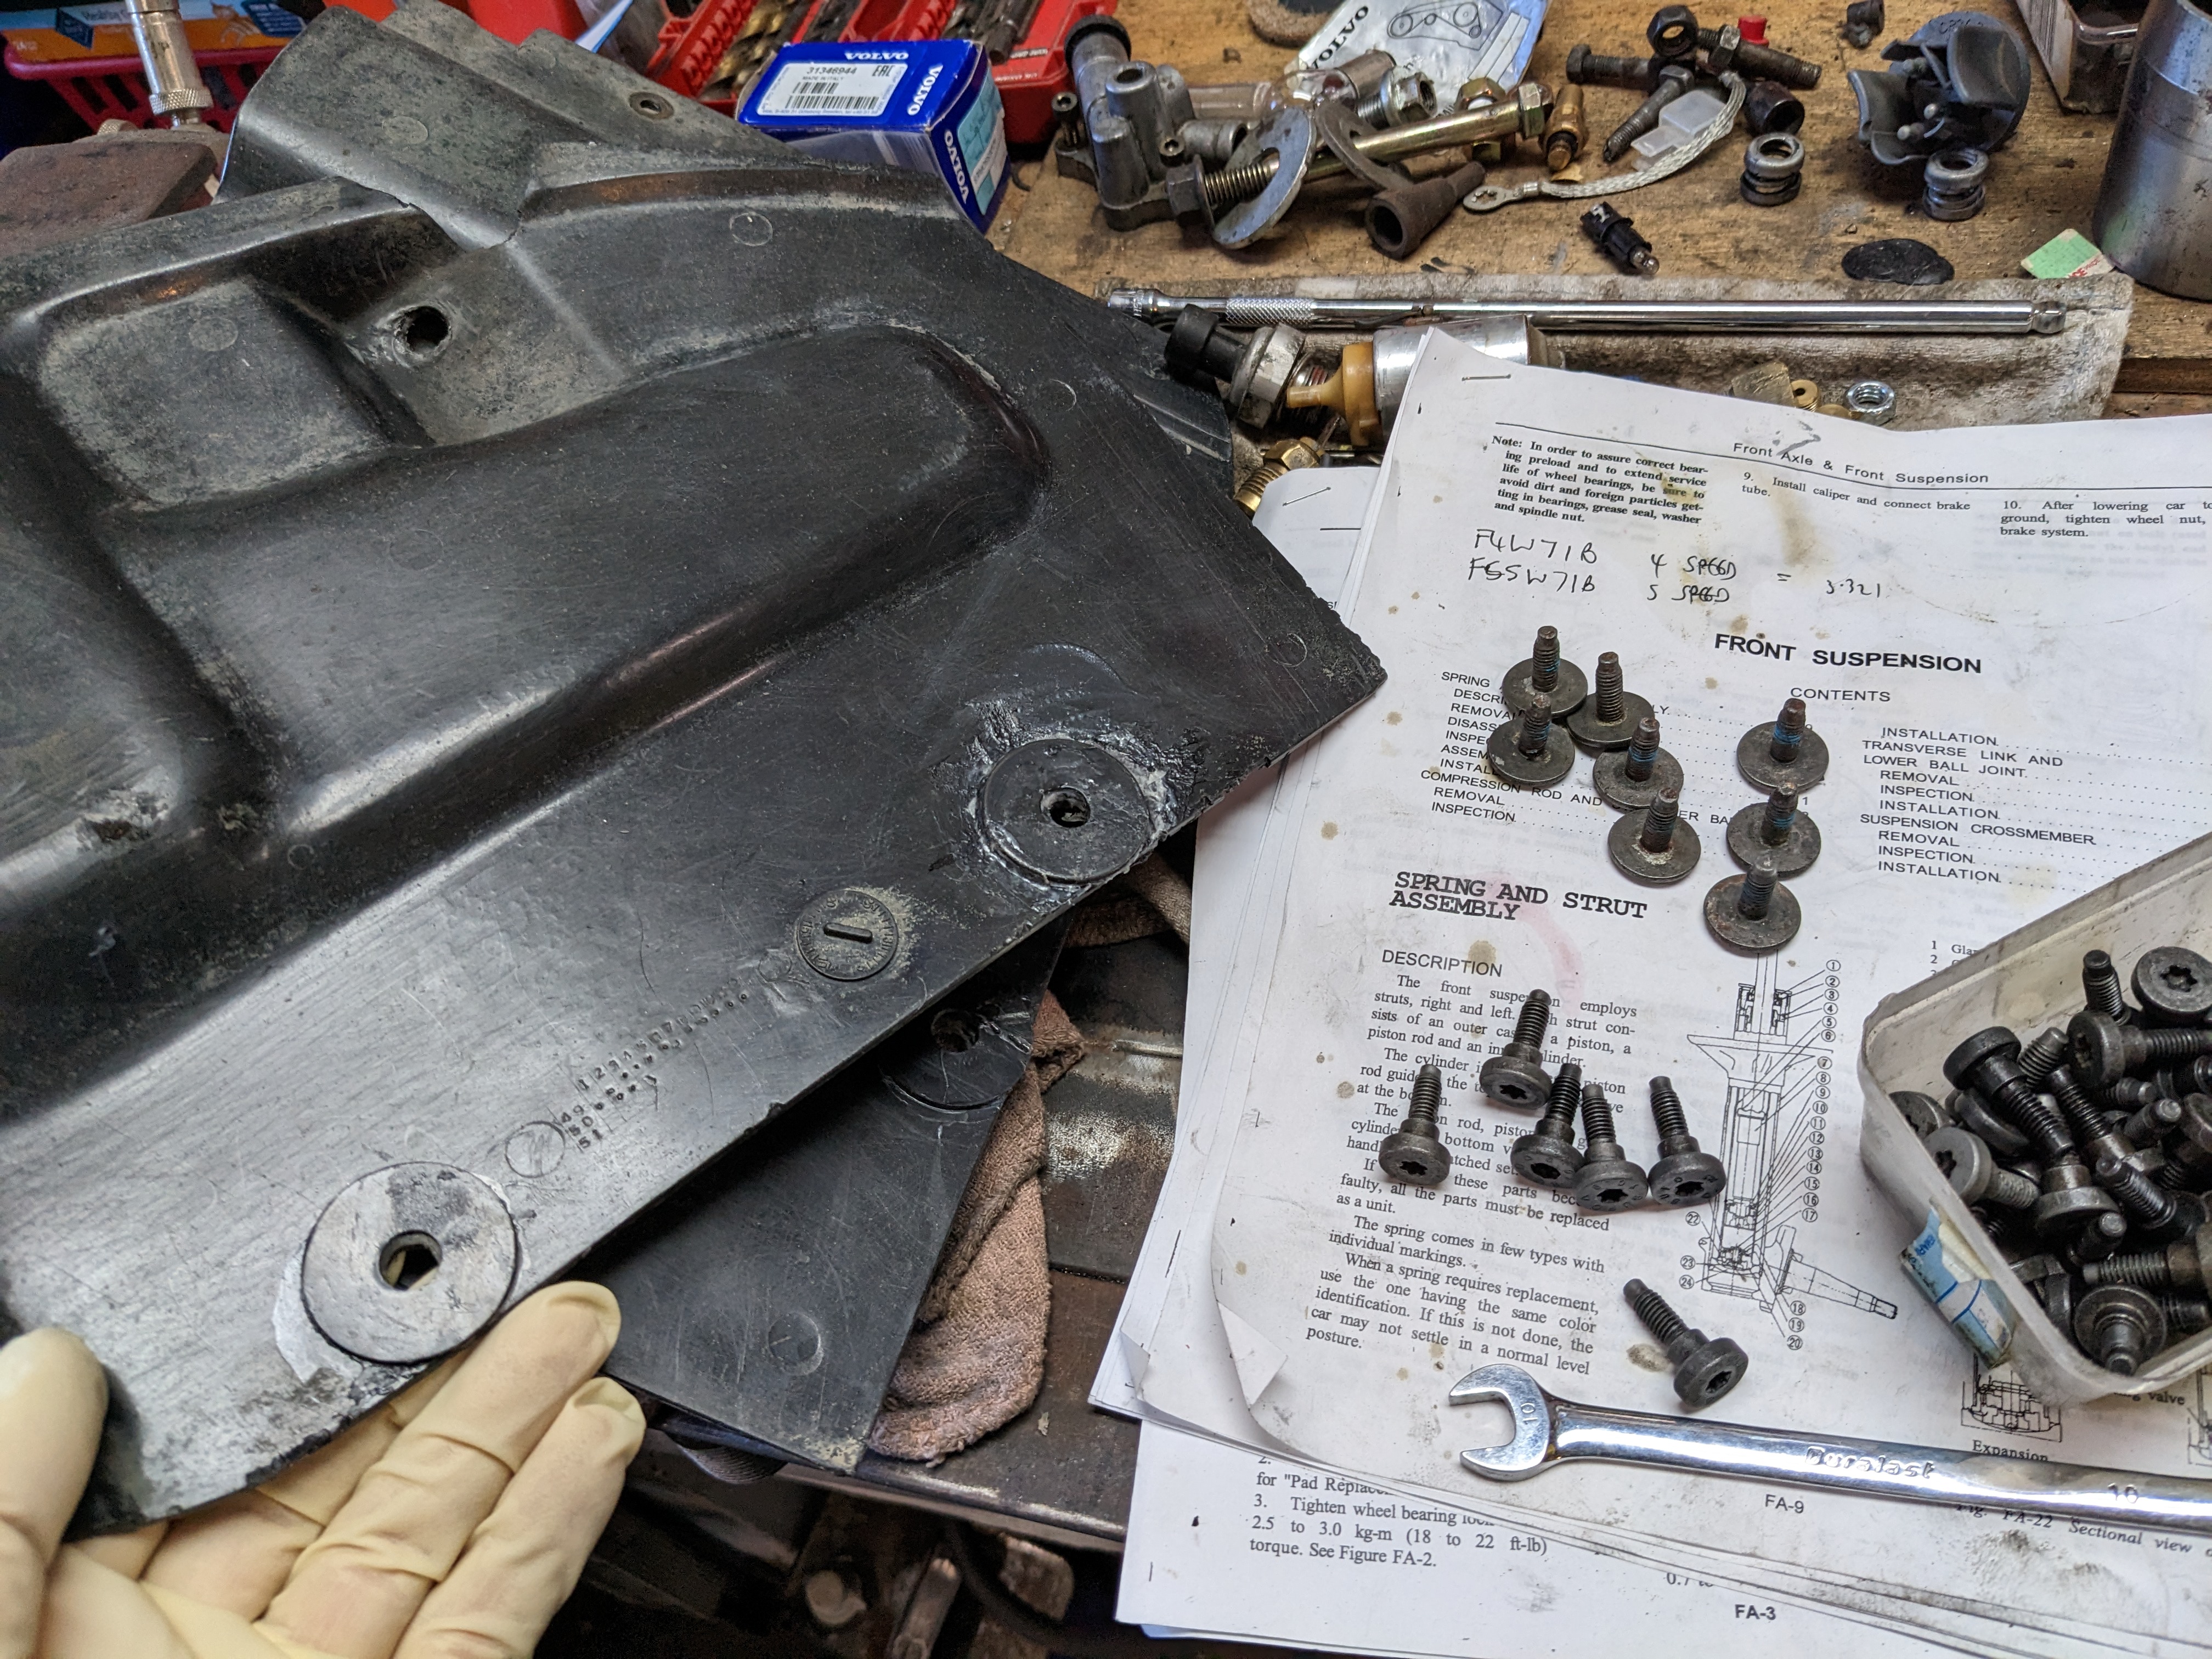
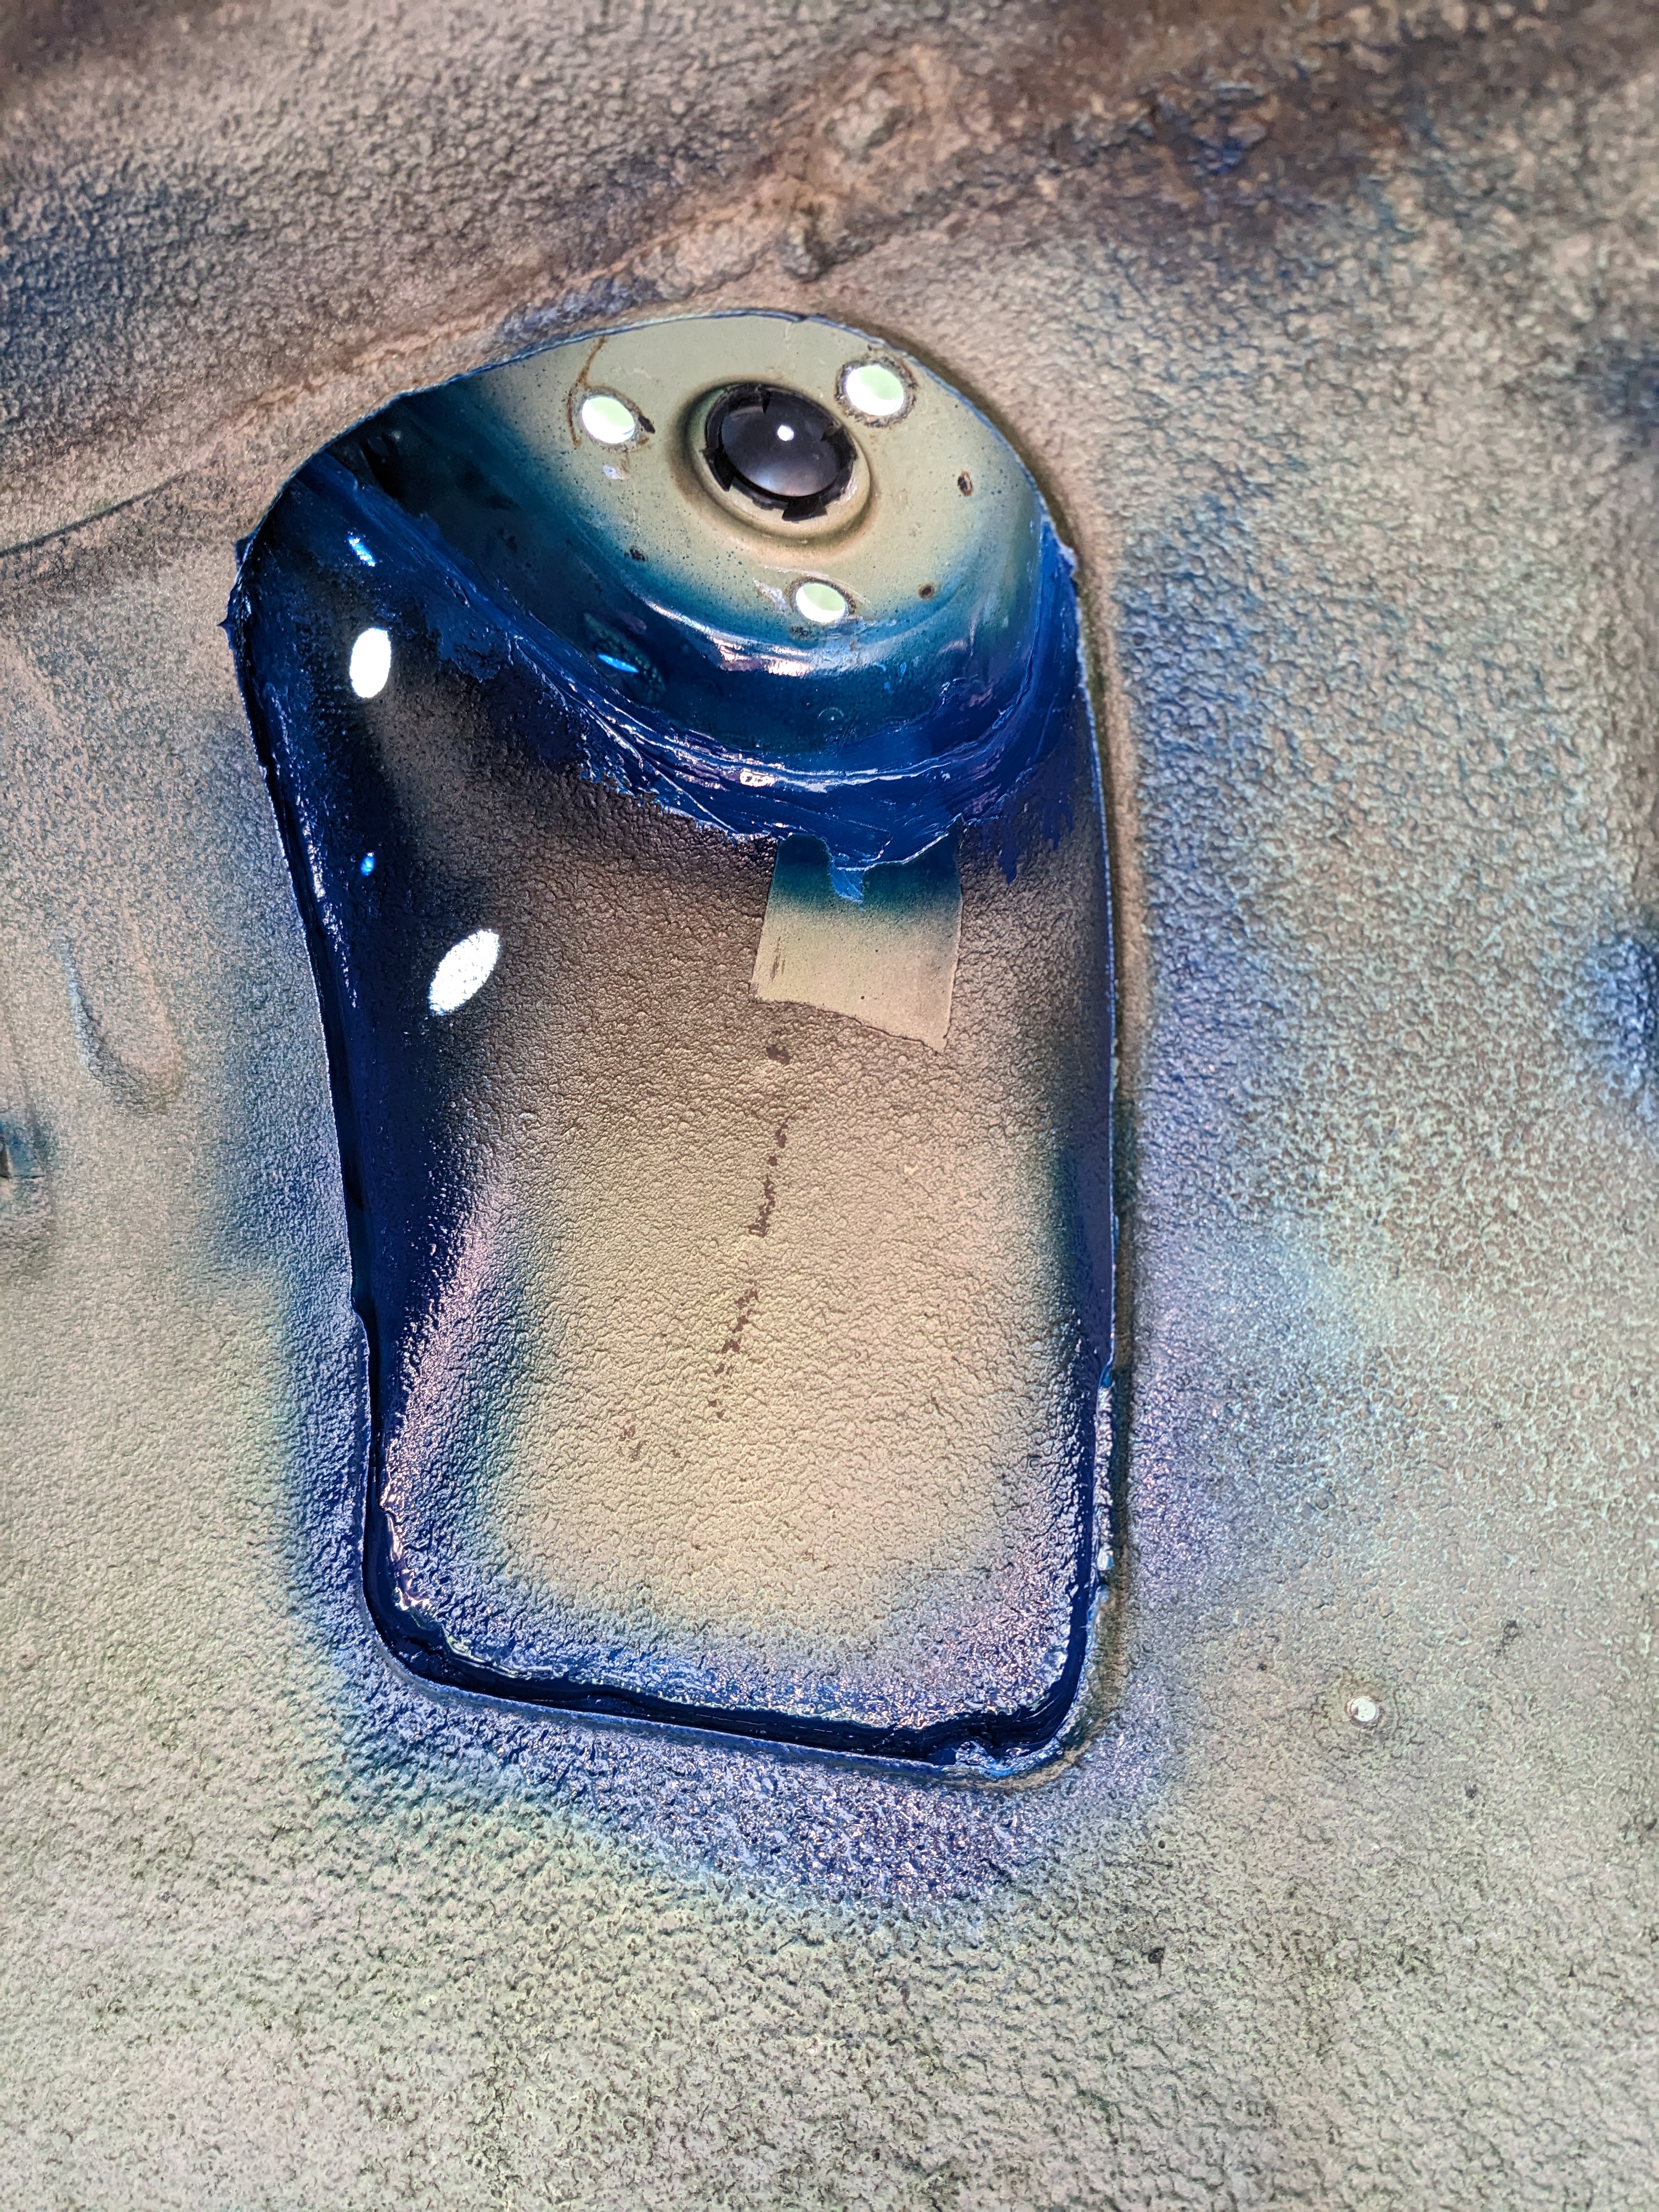
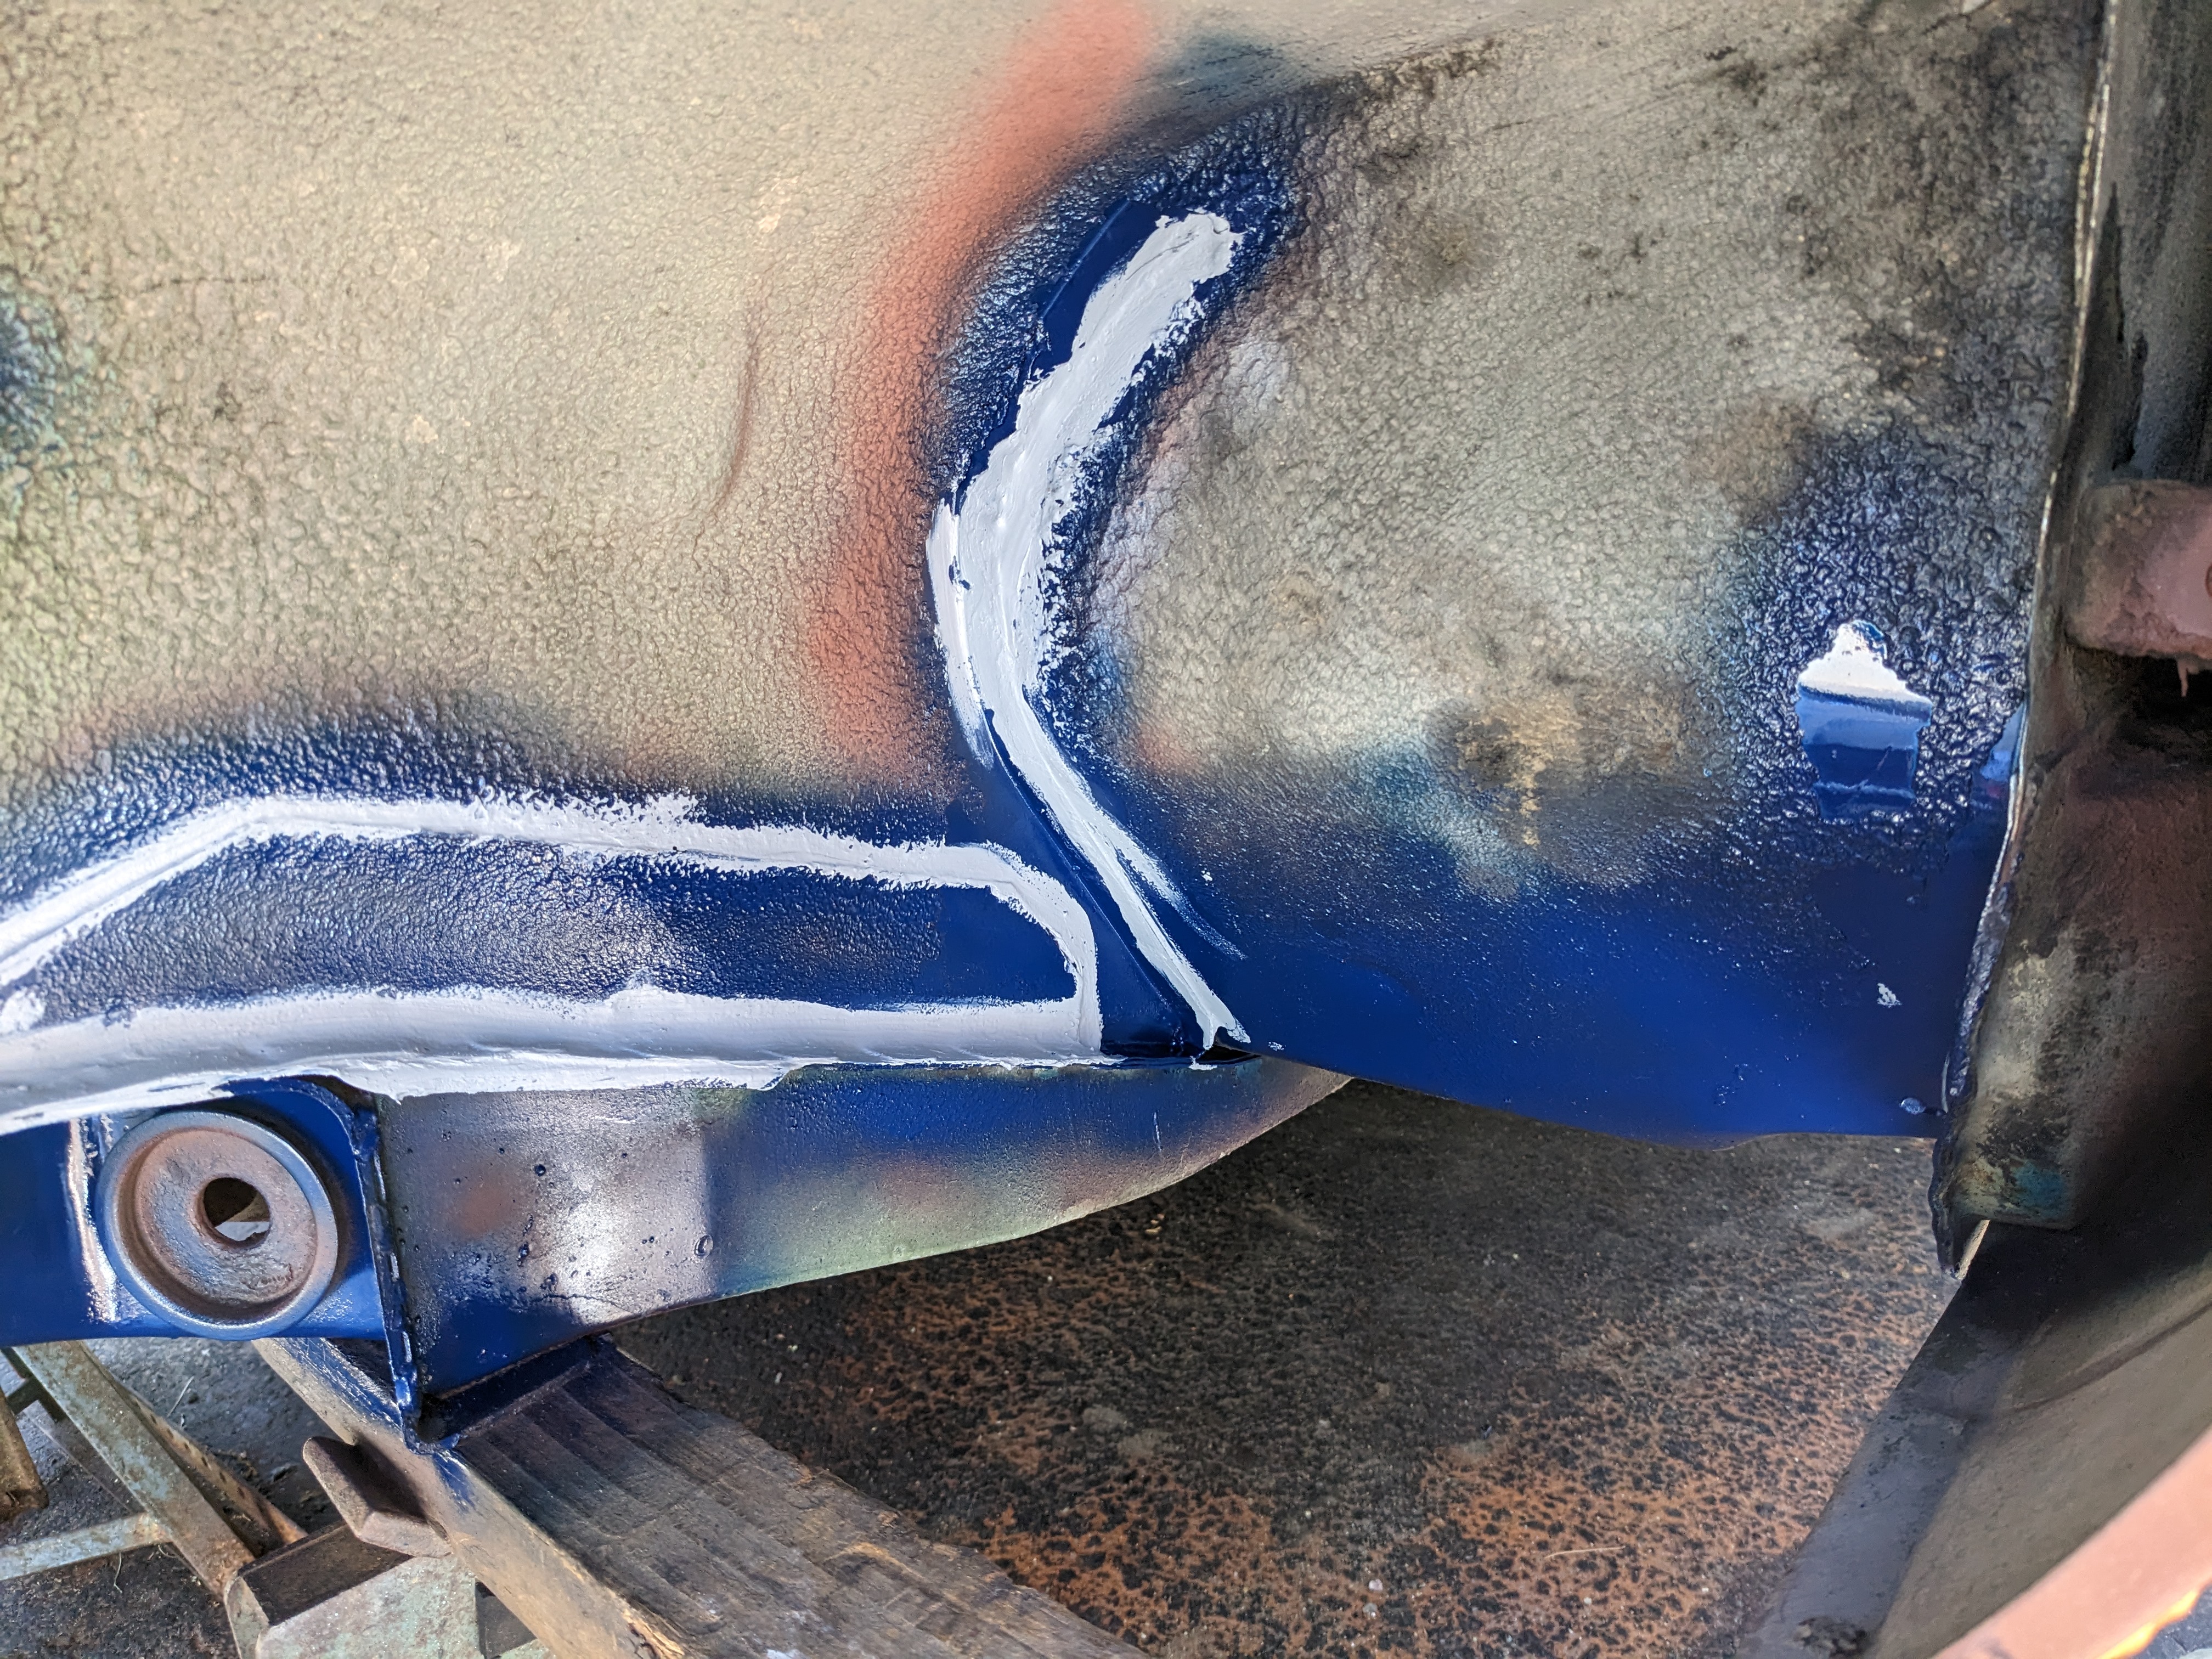
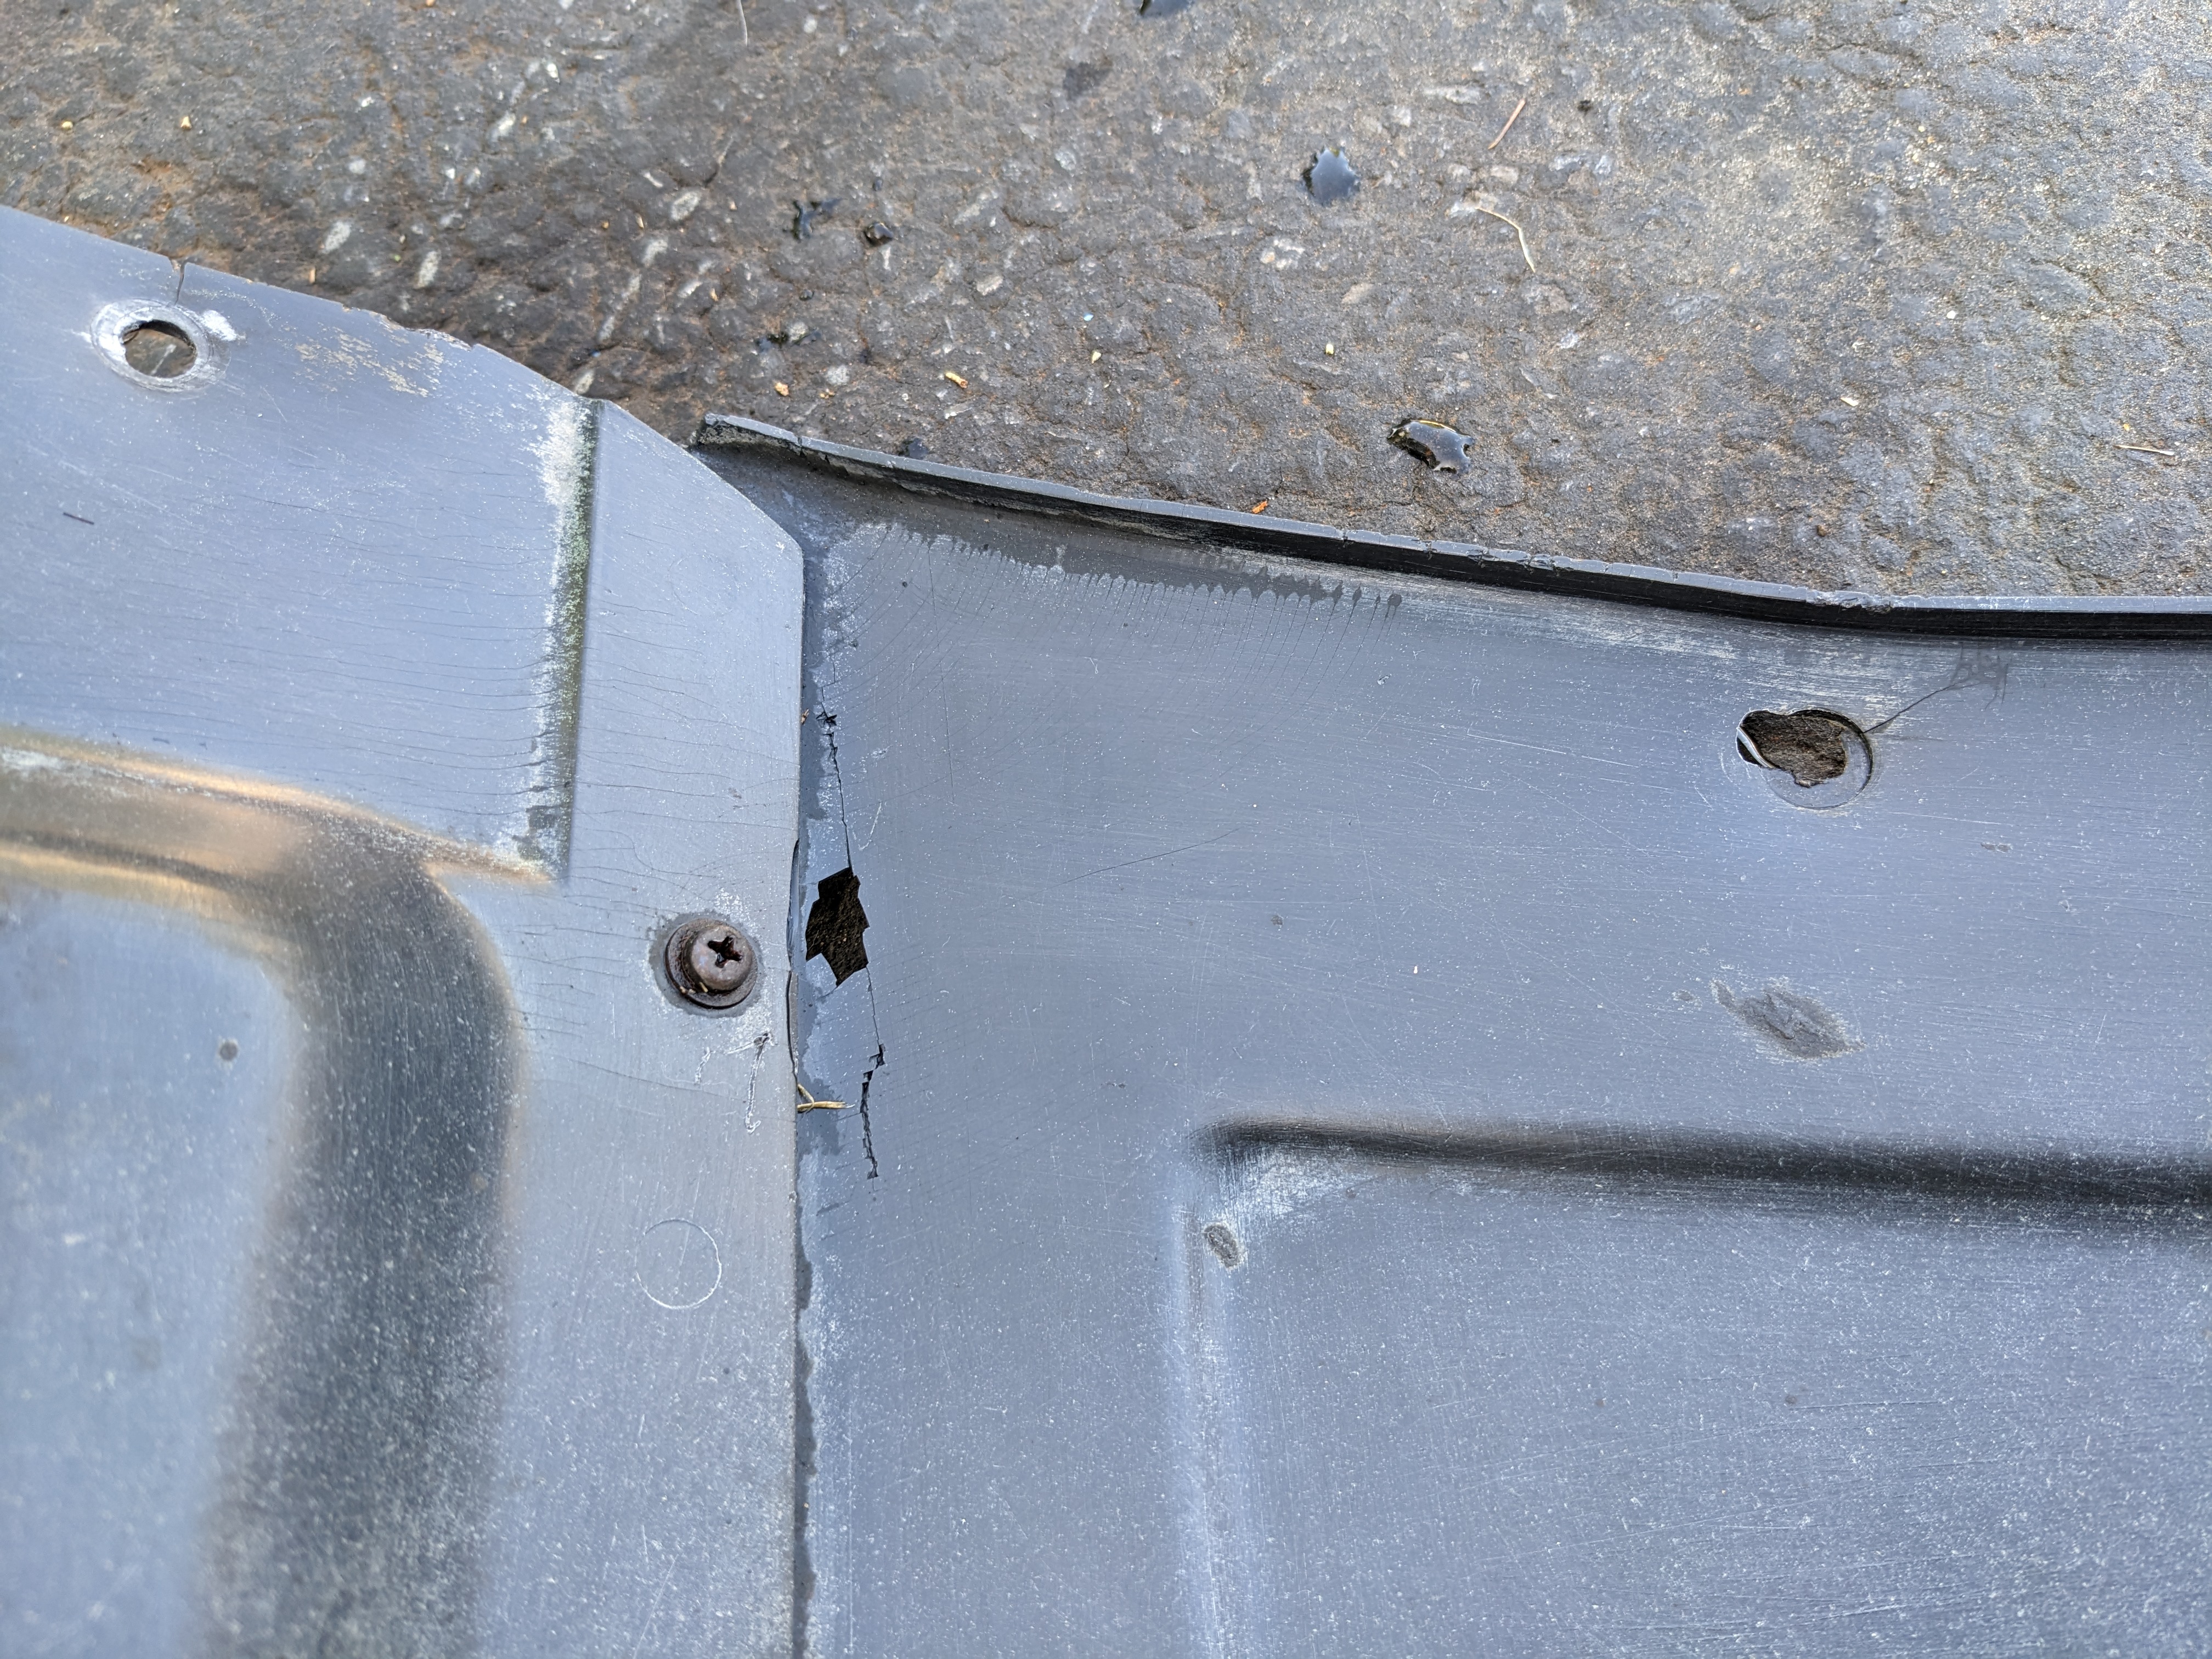
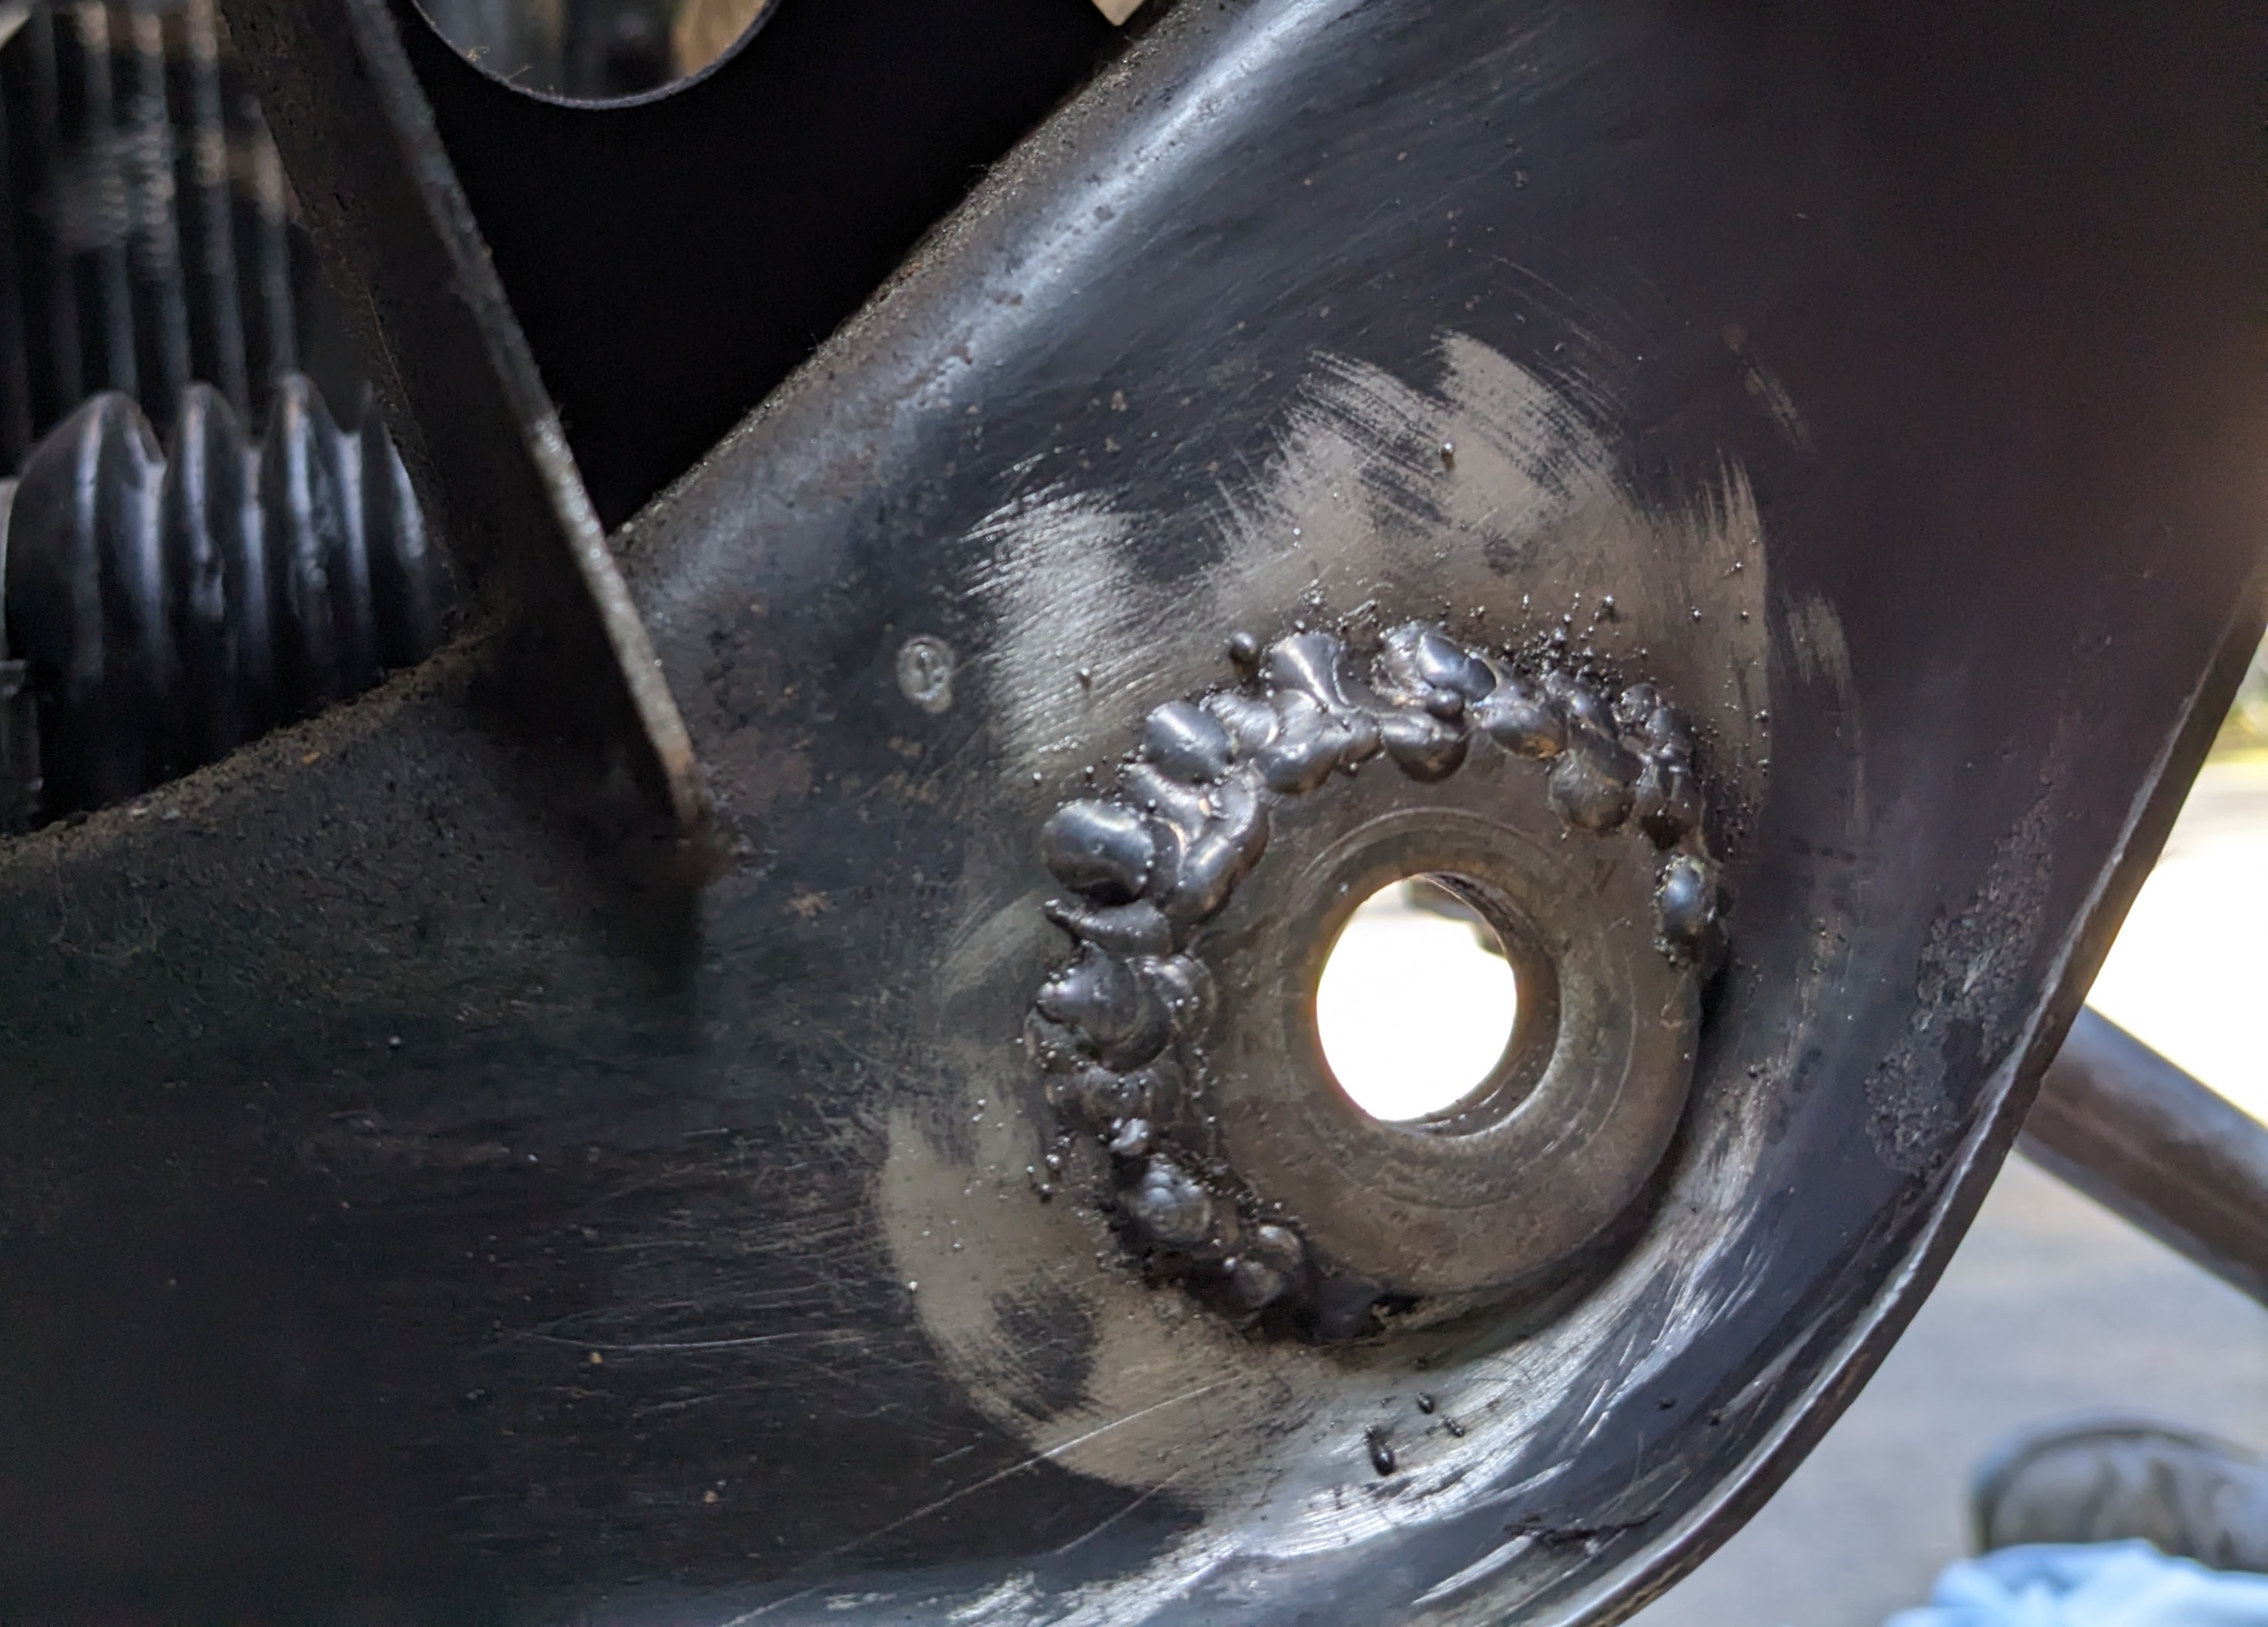
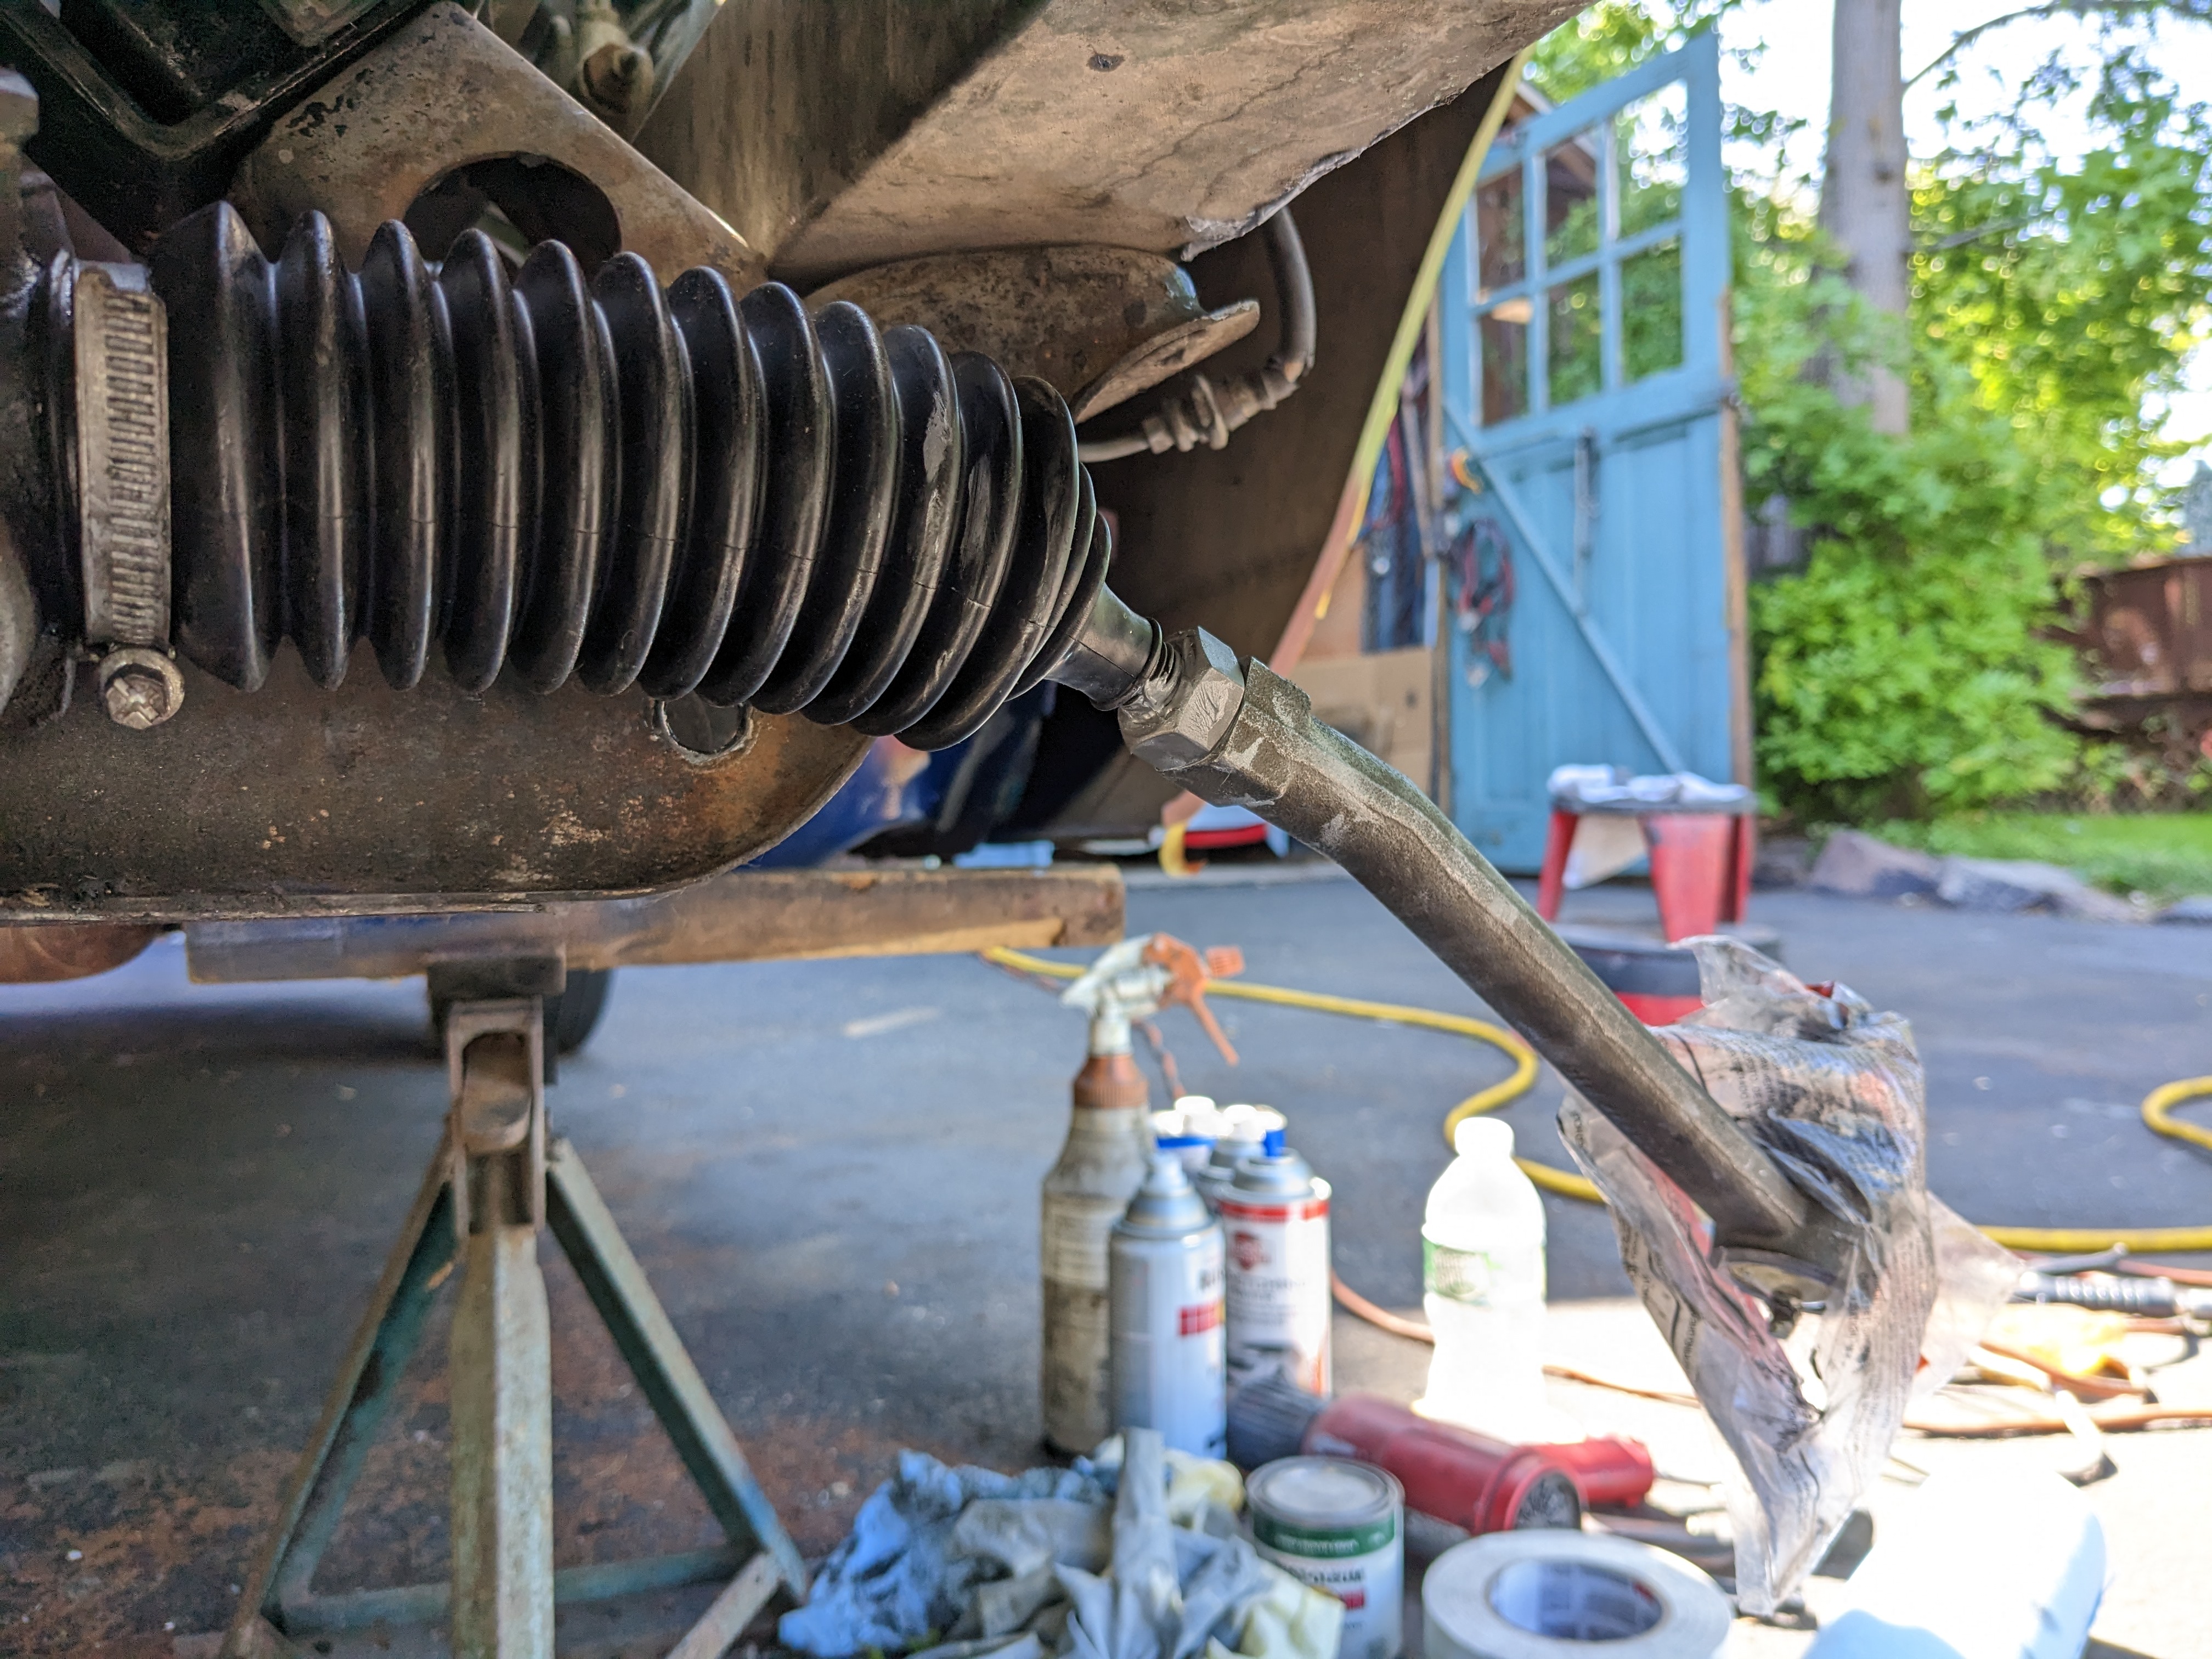
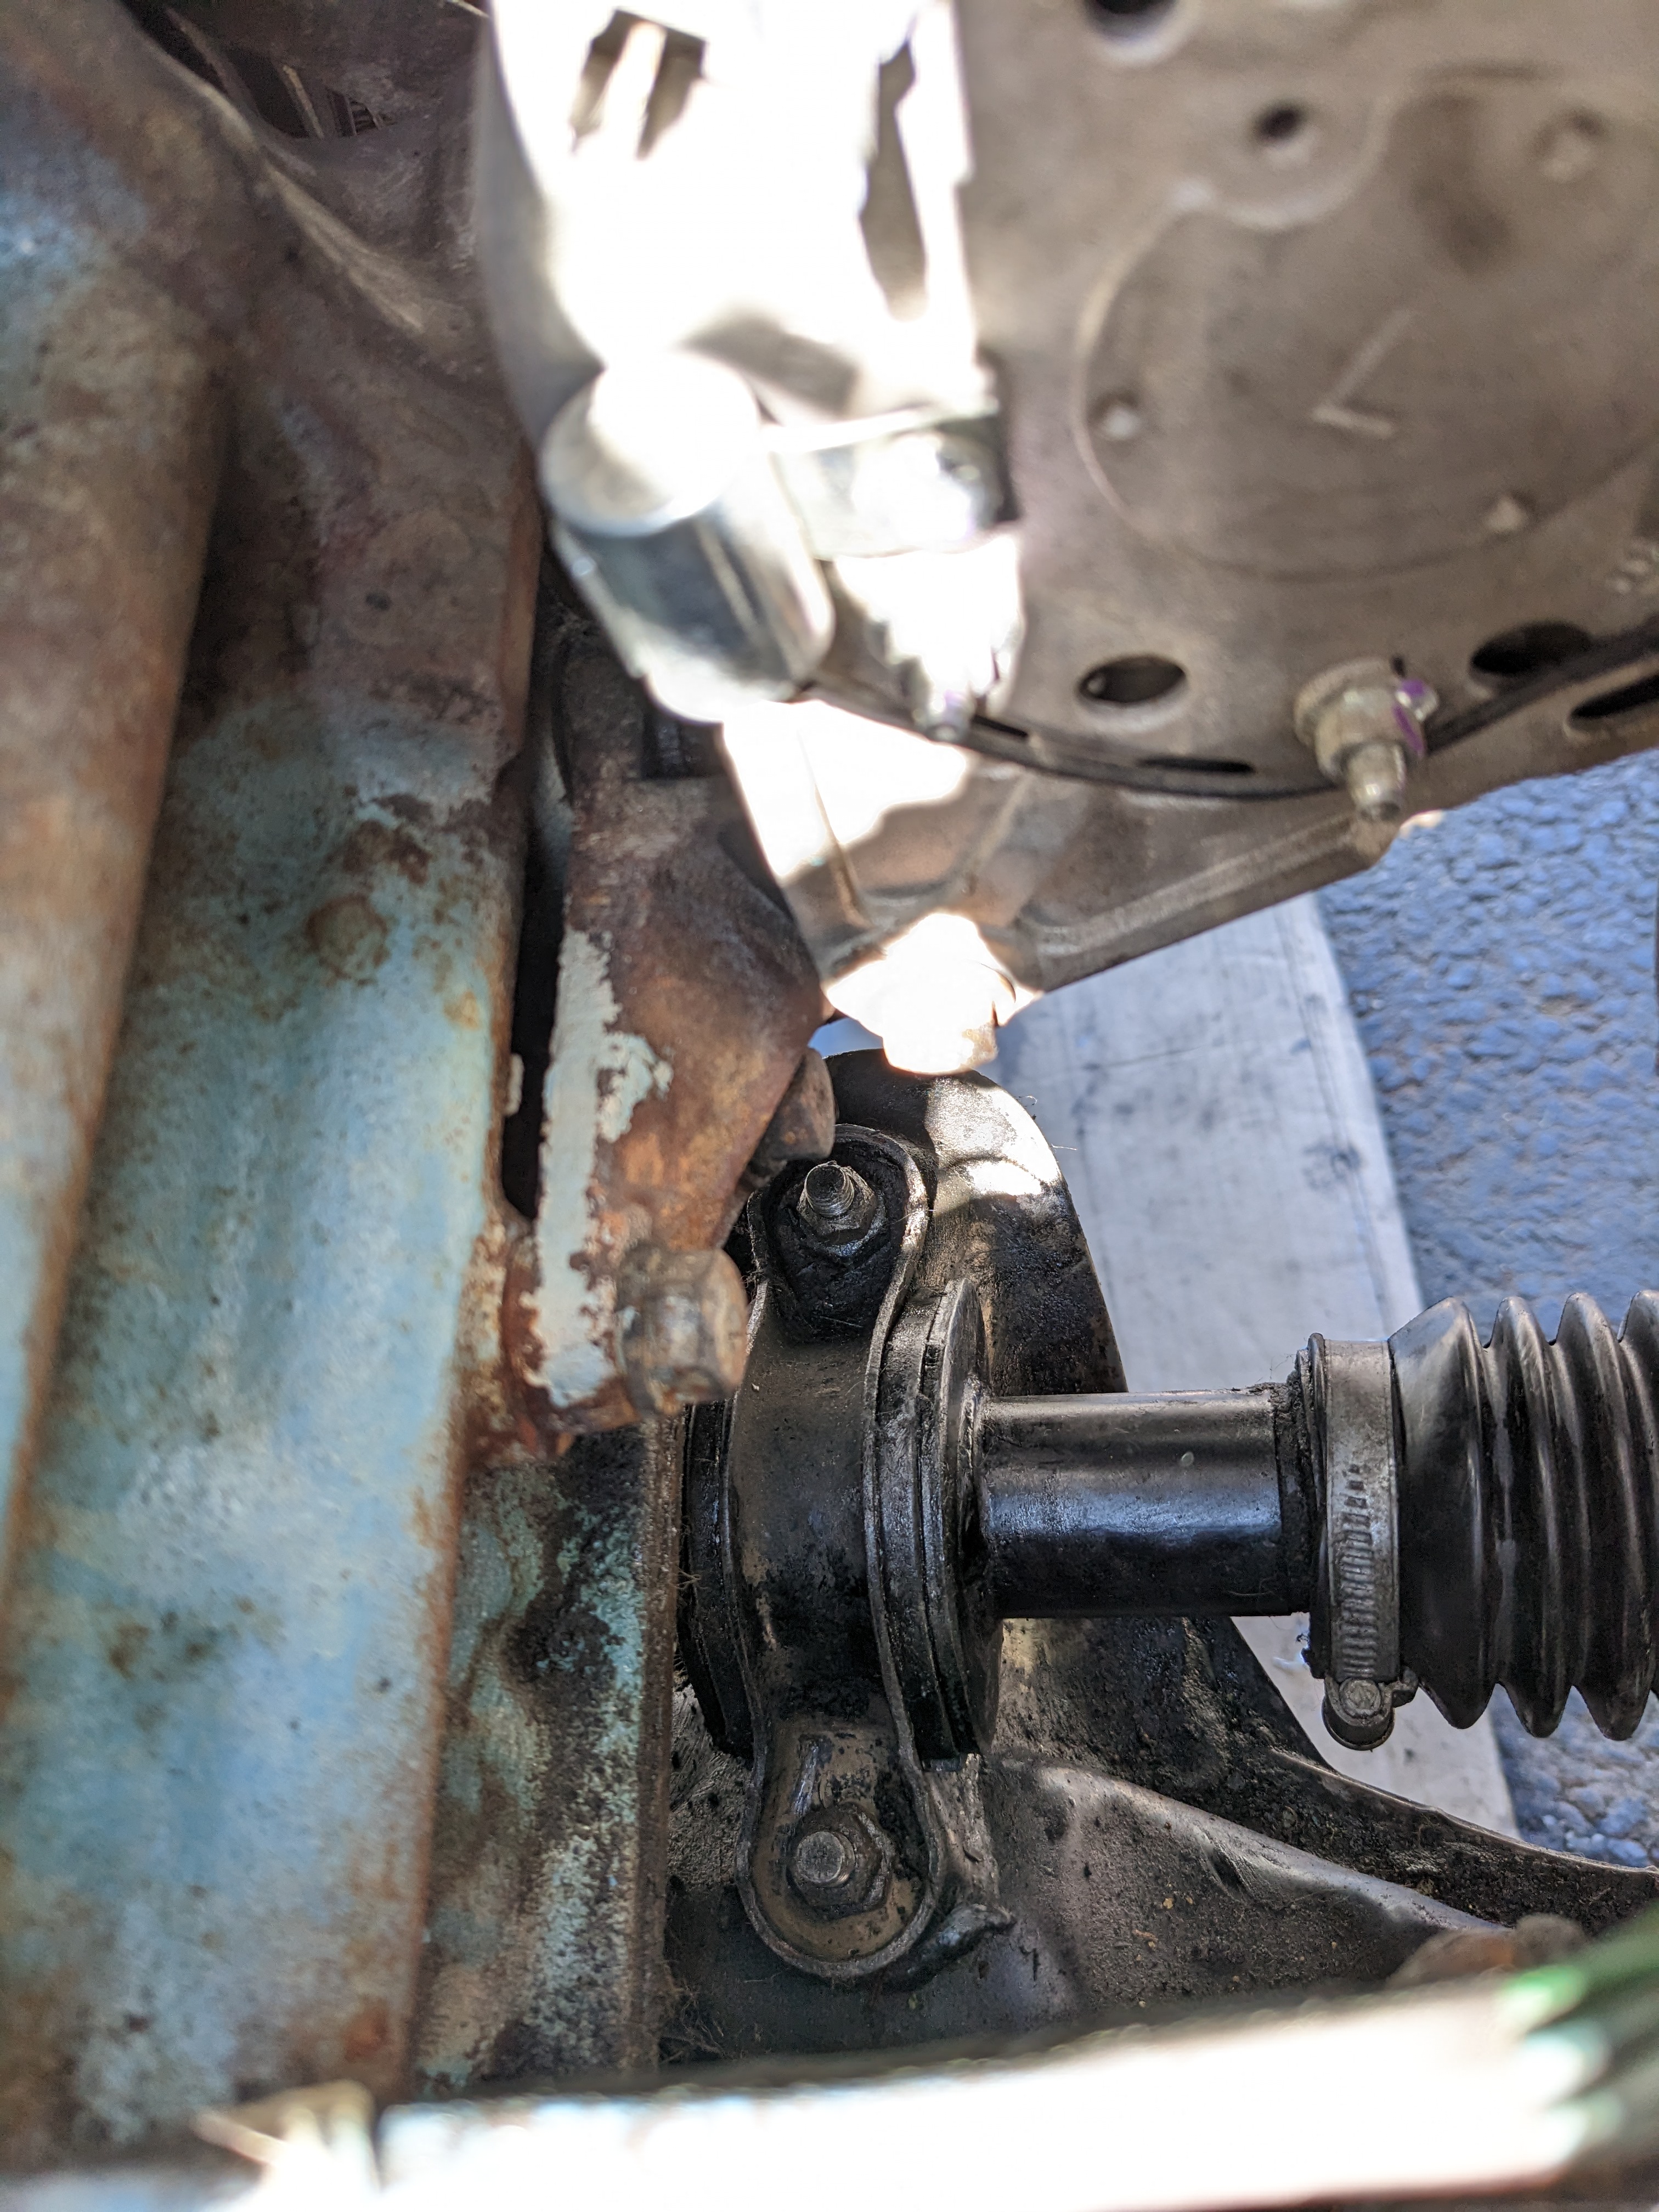
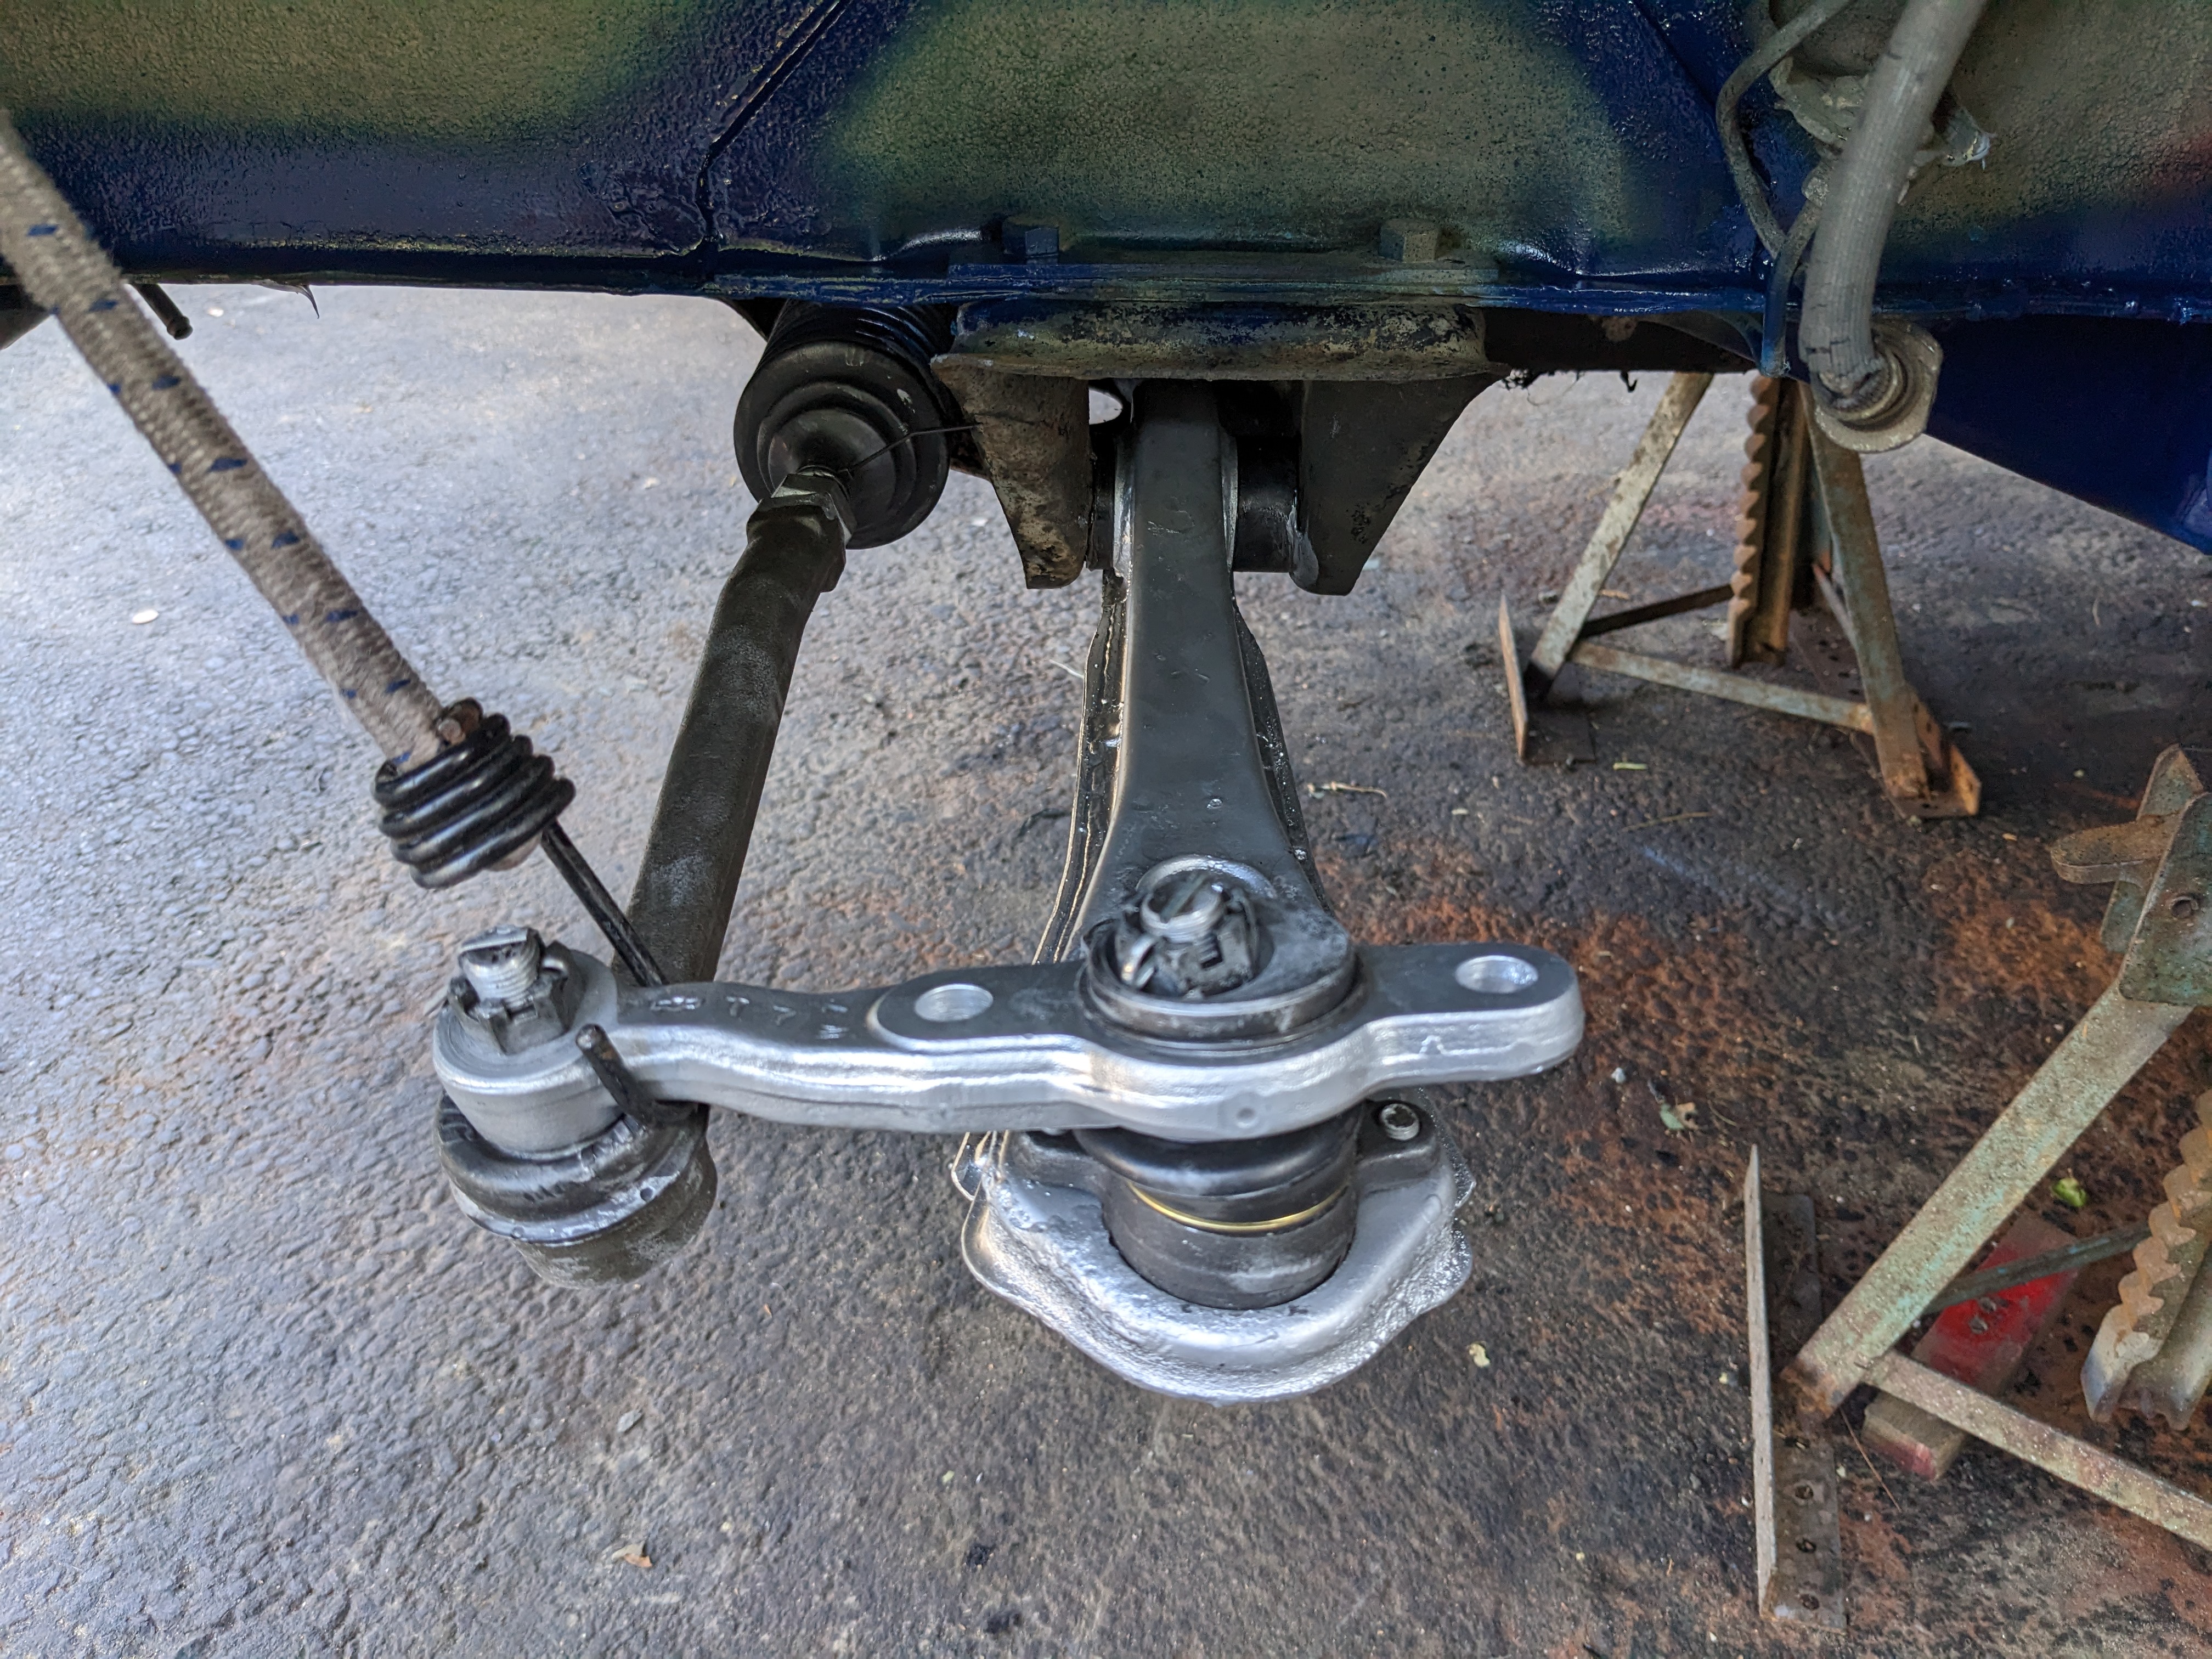
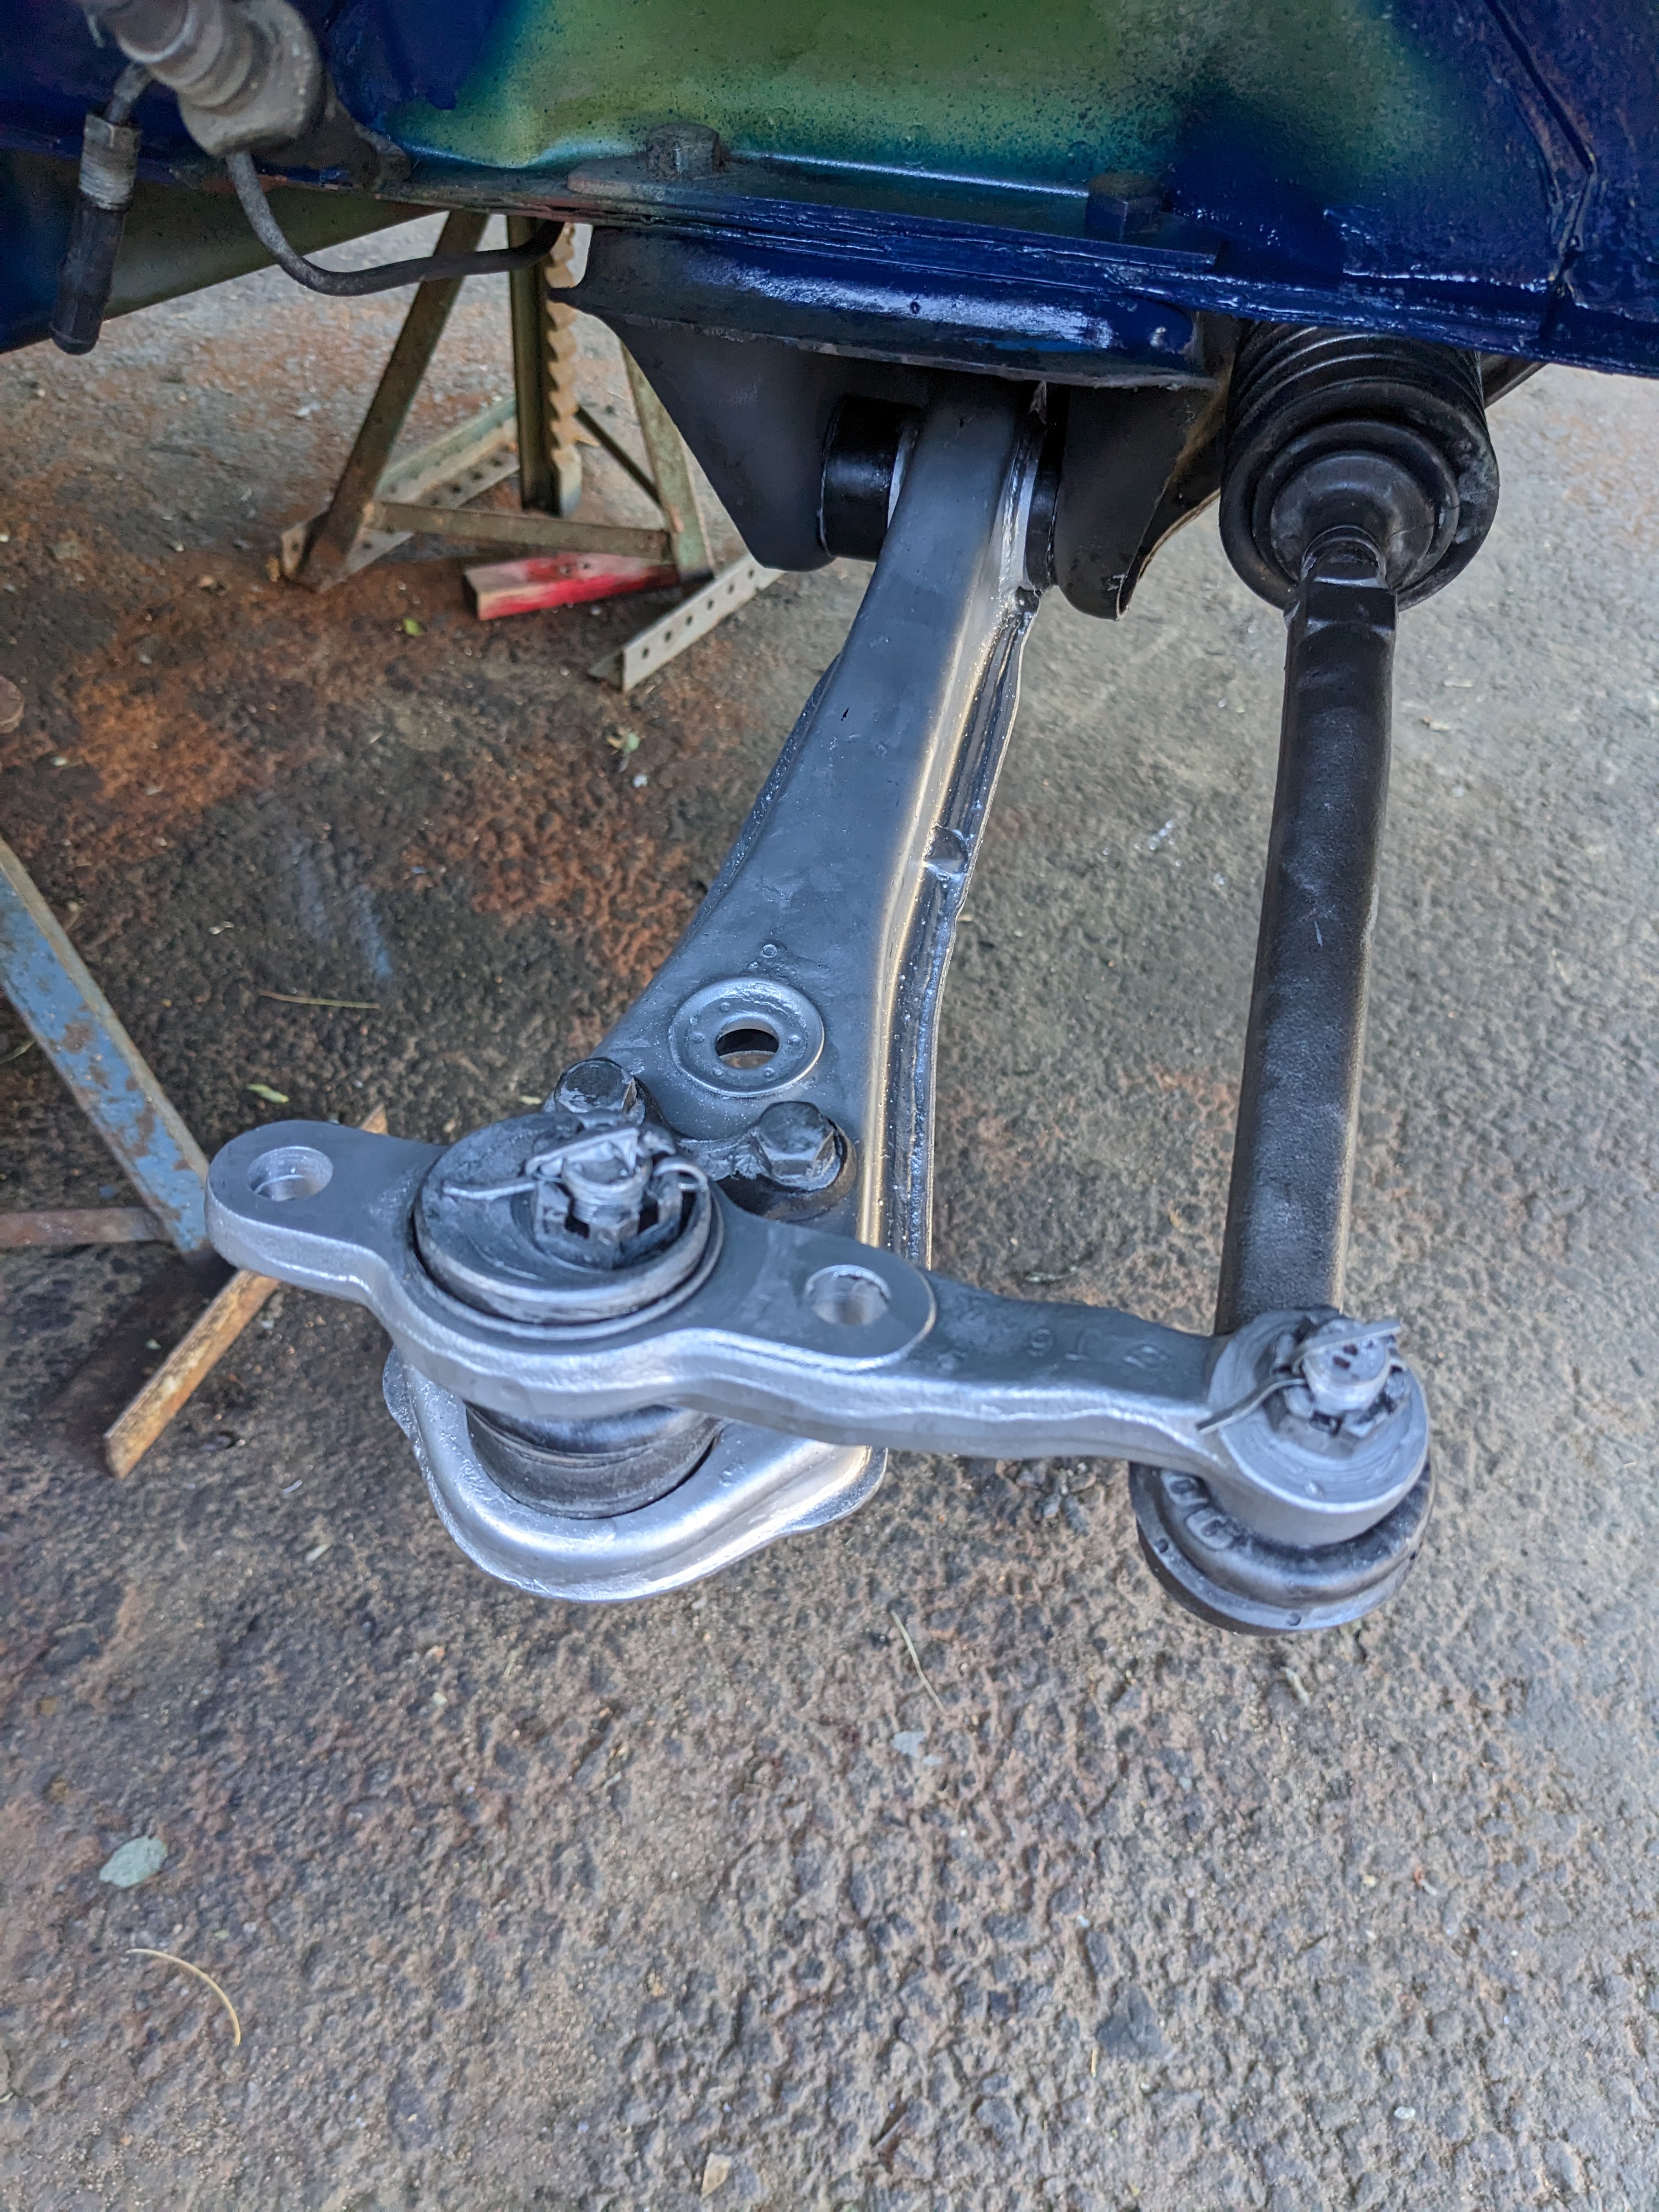
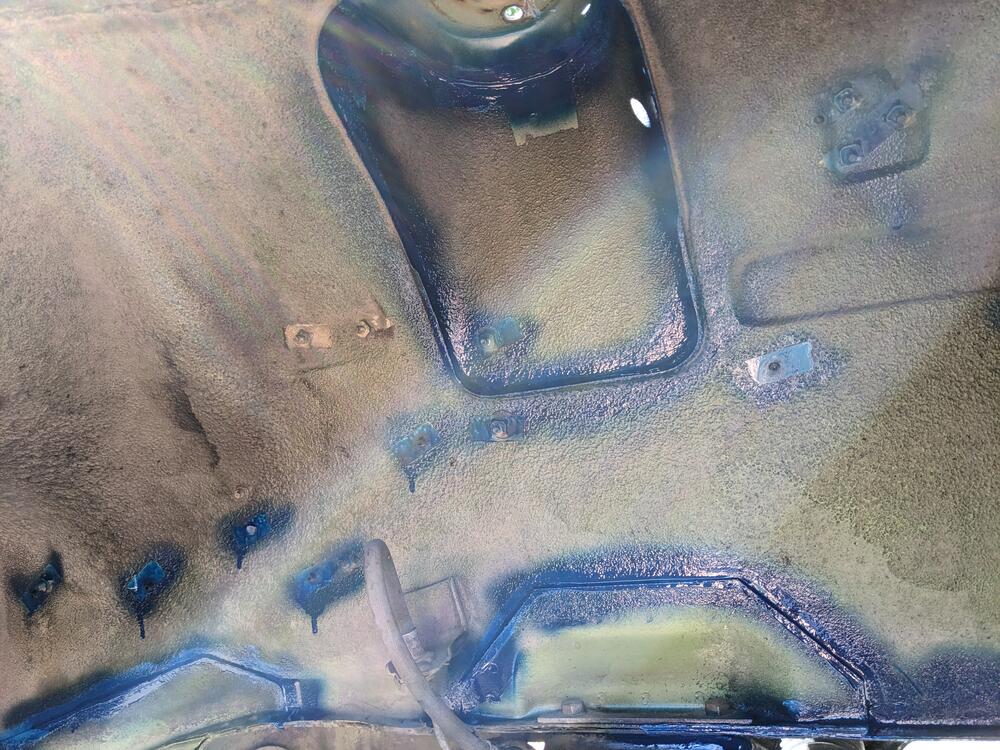
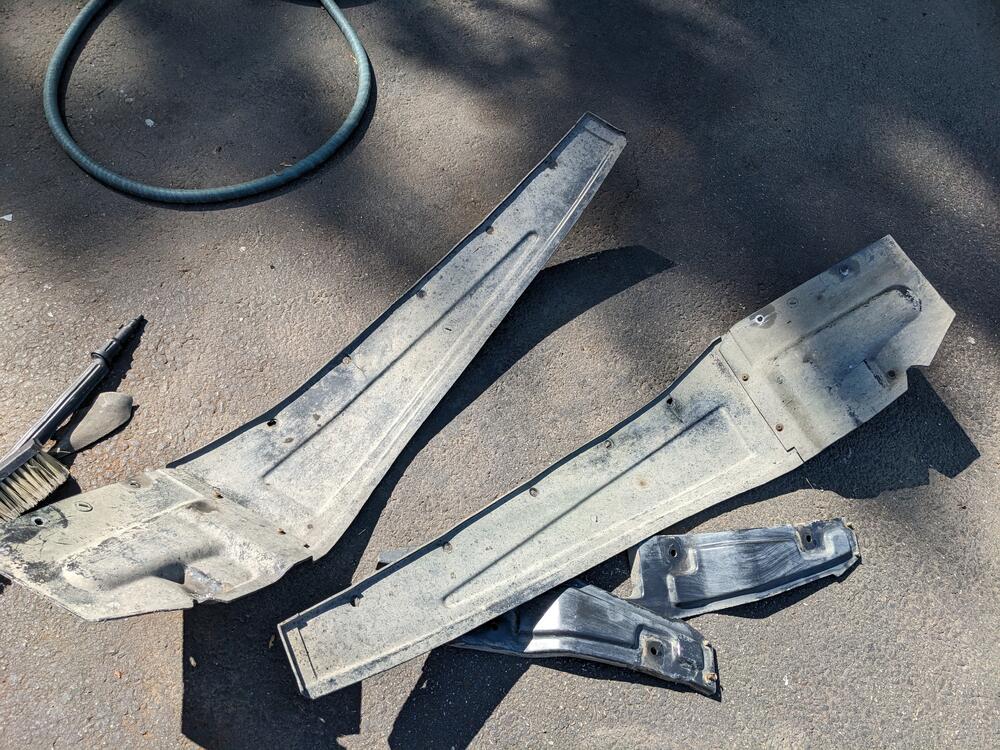
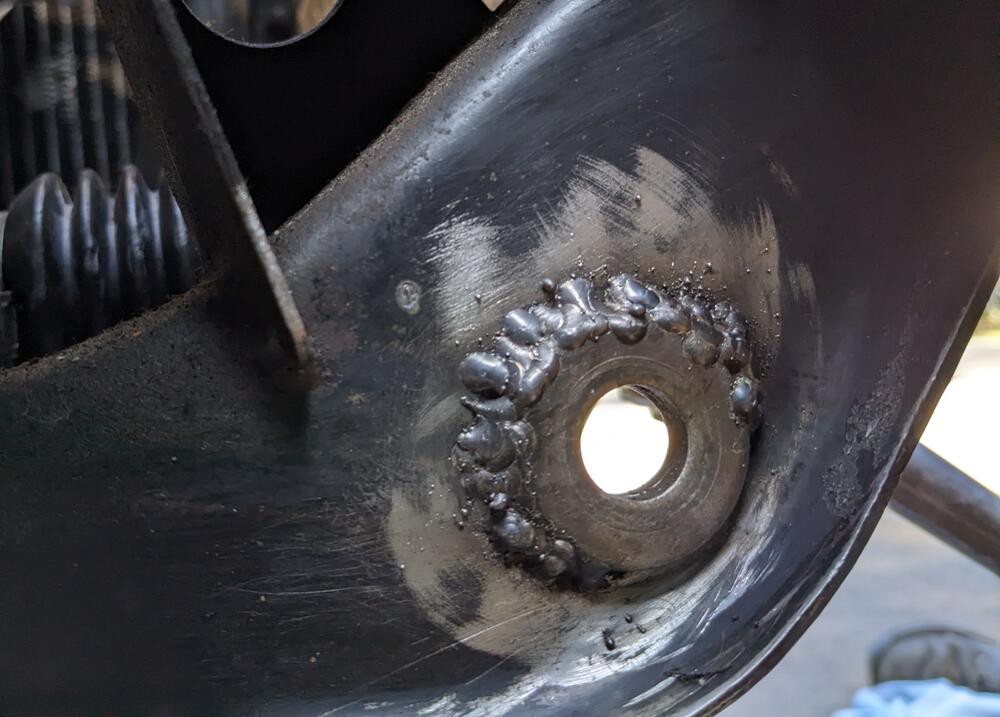
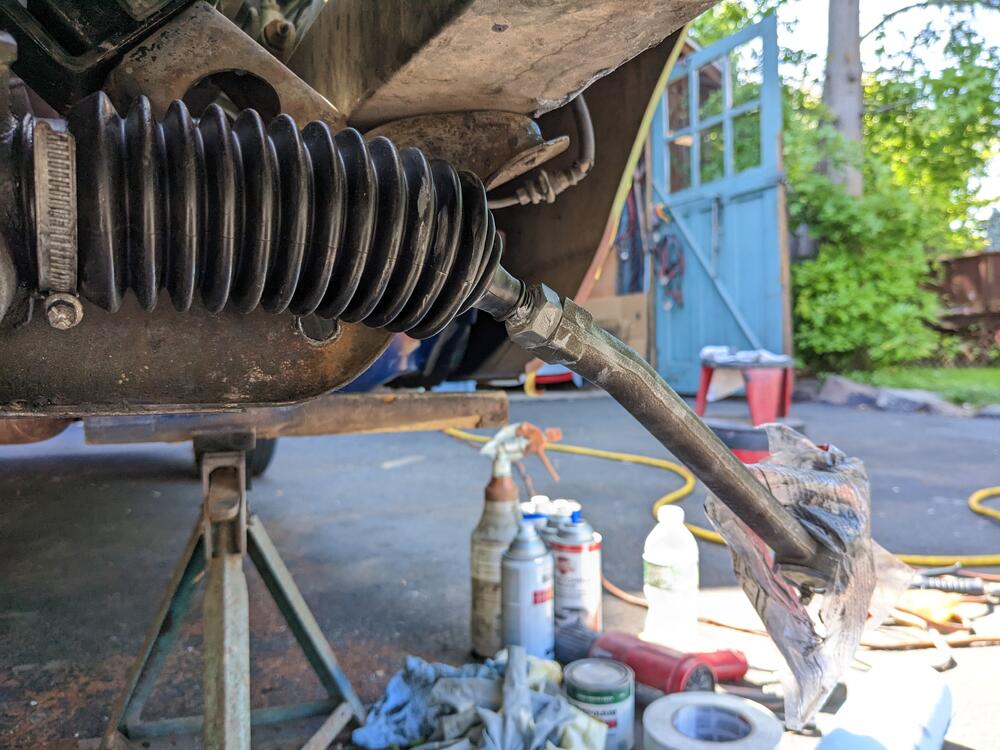
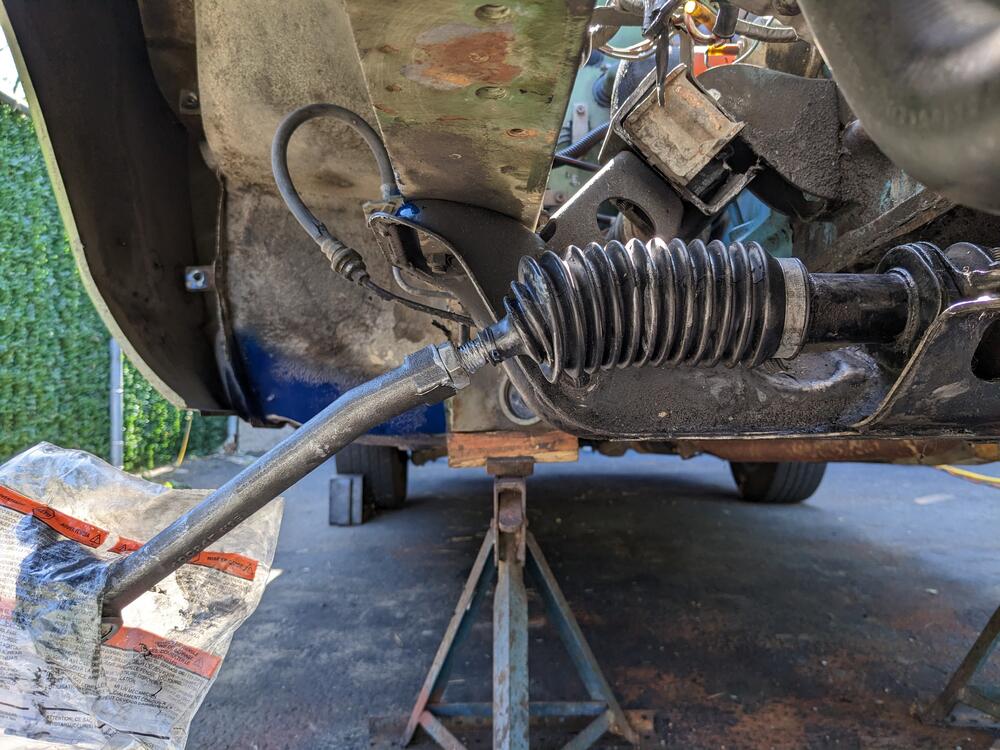
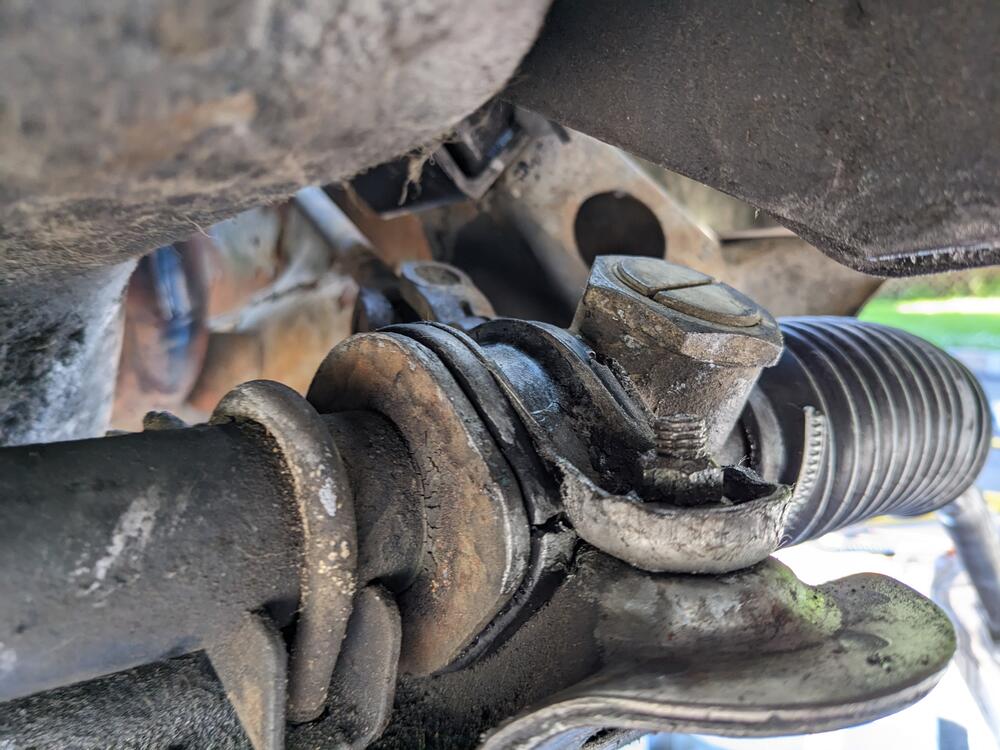
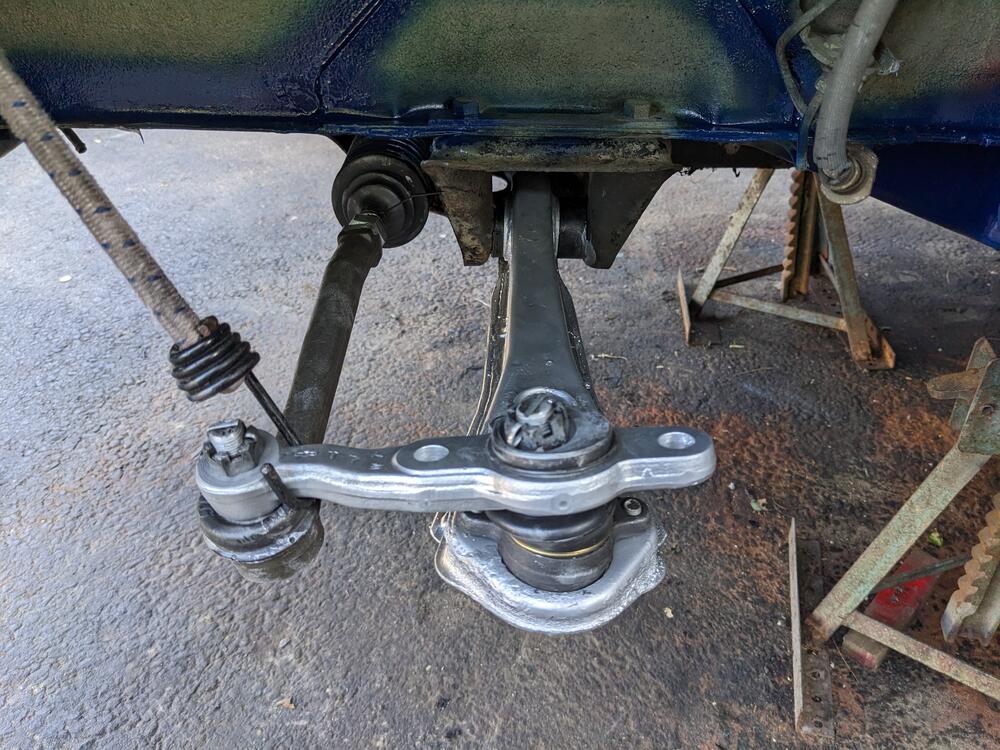
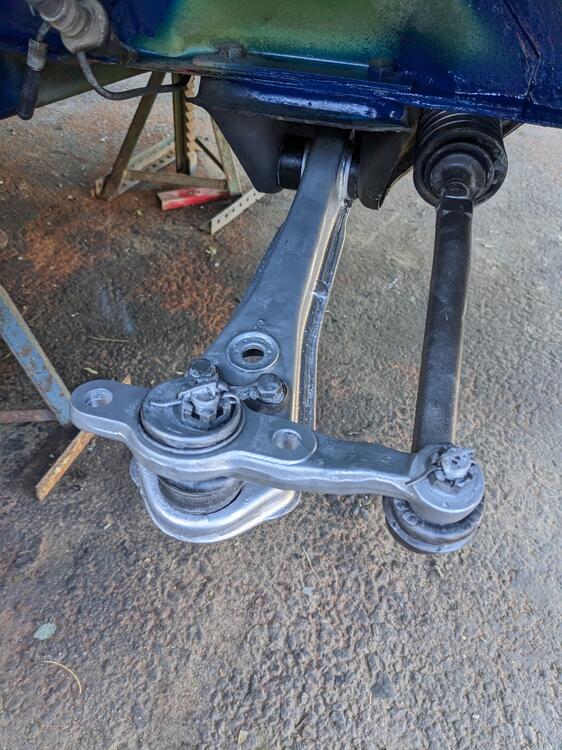
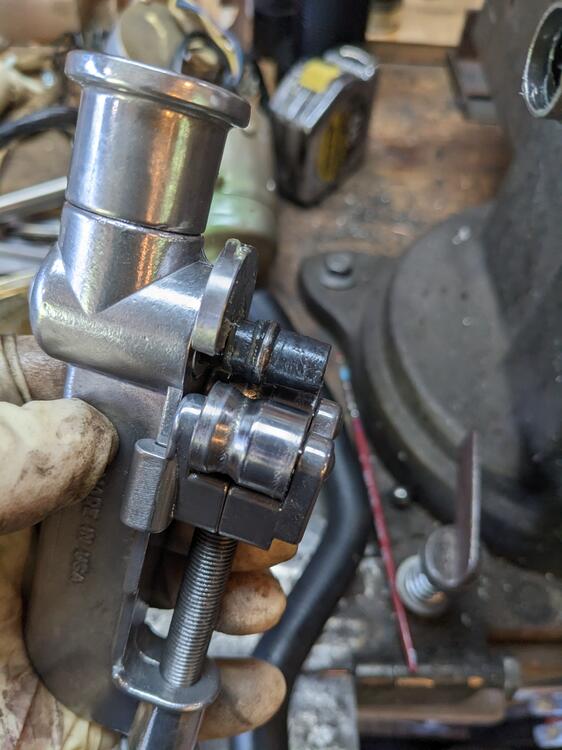
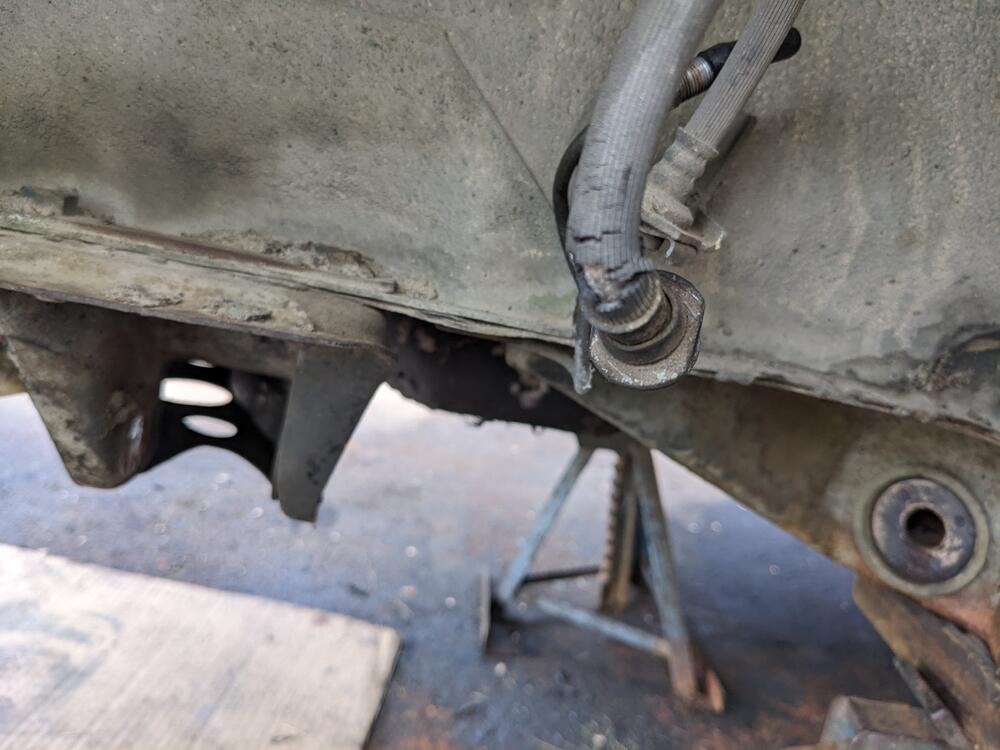
Had time today to work on the front end. I spent a fair amount of time cleaning, scrubbing, degreasing & prepping the inner fenders & strut tower, frame reinforcements, so I could get some seam sealer in there followed by primer & paint. Not that the car will ever see winter driving, but any moisture getting into those areas will happily rot the metal I'm sure. The larger undercoated areas will get further cleaning, then I'll go back with some fresh stone chip & then undercoat. DTR, I'll remove the fenders & redo the seams back there he inner fender liners need some work, and the lower right mudflap was gone. Much silt wedged between the fender & inner panel, not good for NY cleaned up somewhat, need to address the cracks cleaned up the right control arm mount hole & welded a heavy washer in place to remove the slop from the ovaled holes Din't bother welding all the way around, it's not going anywhere Steering rack mounts, new boots & tie rod ends in New control arm poly bushes & sleeves in place


-
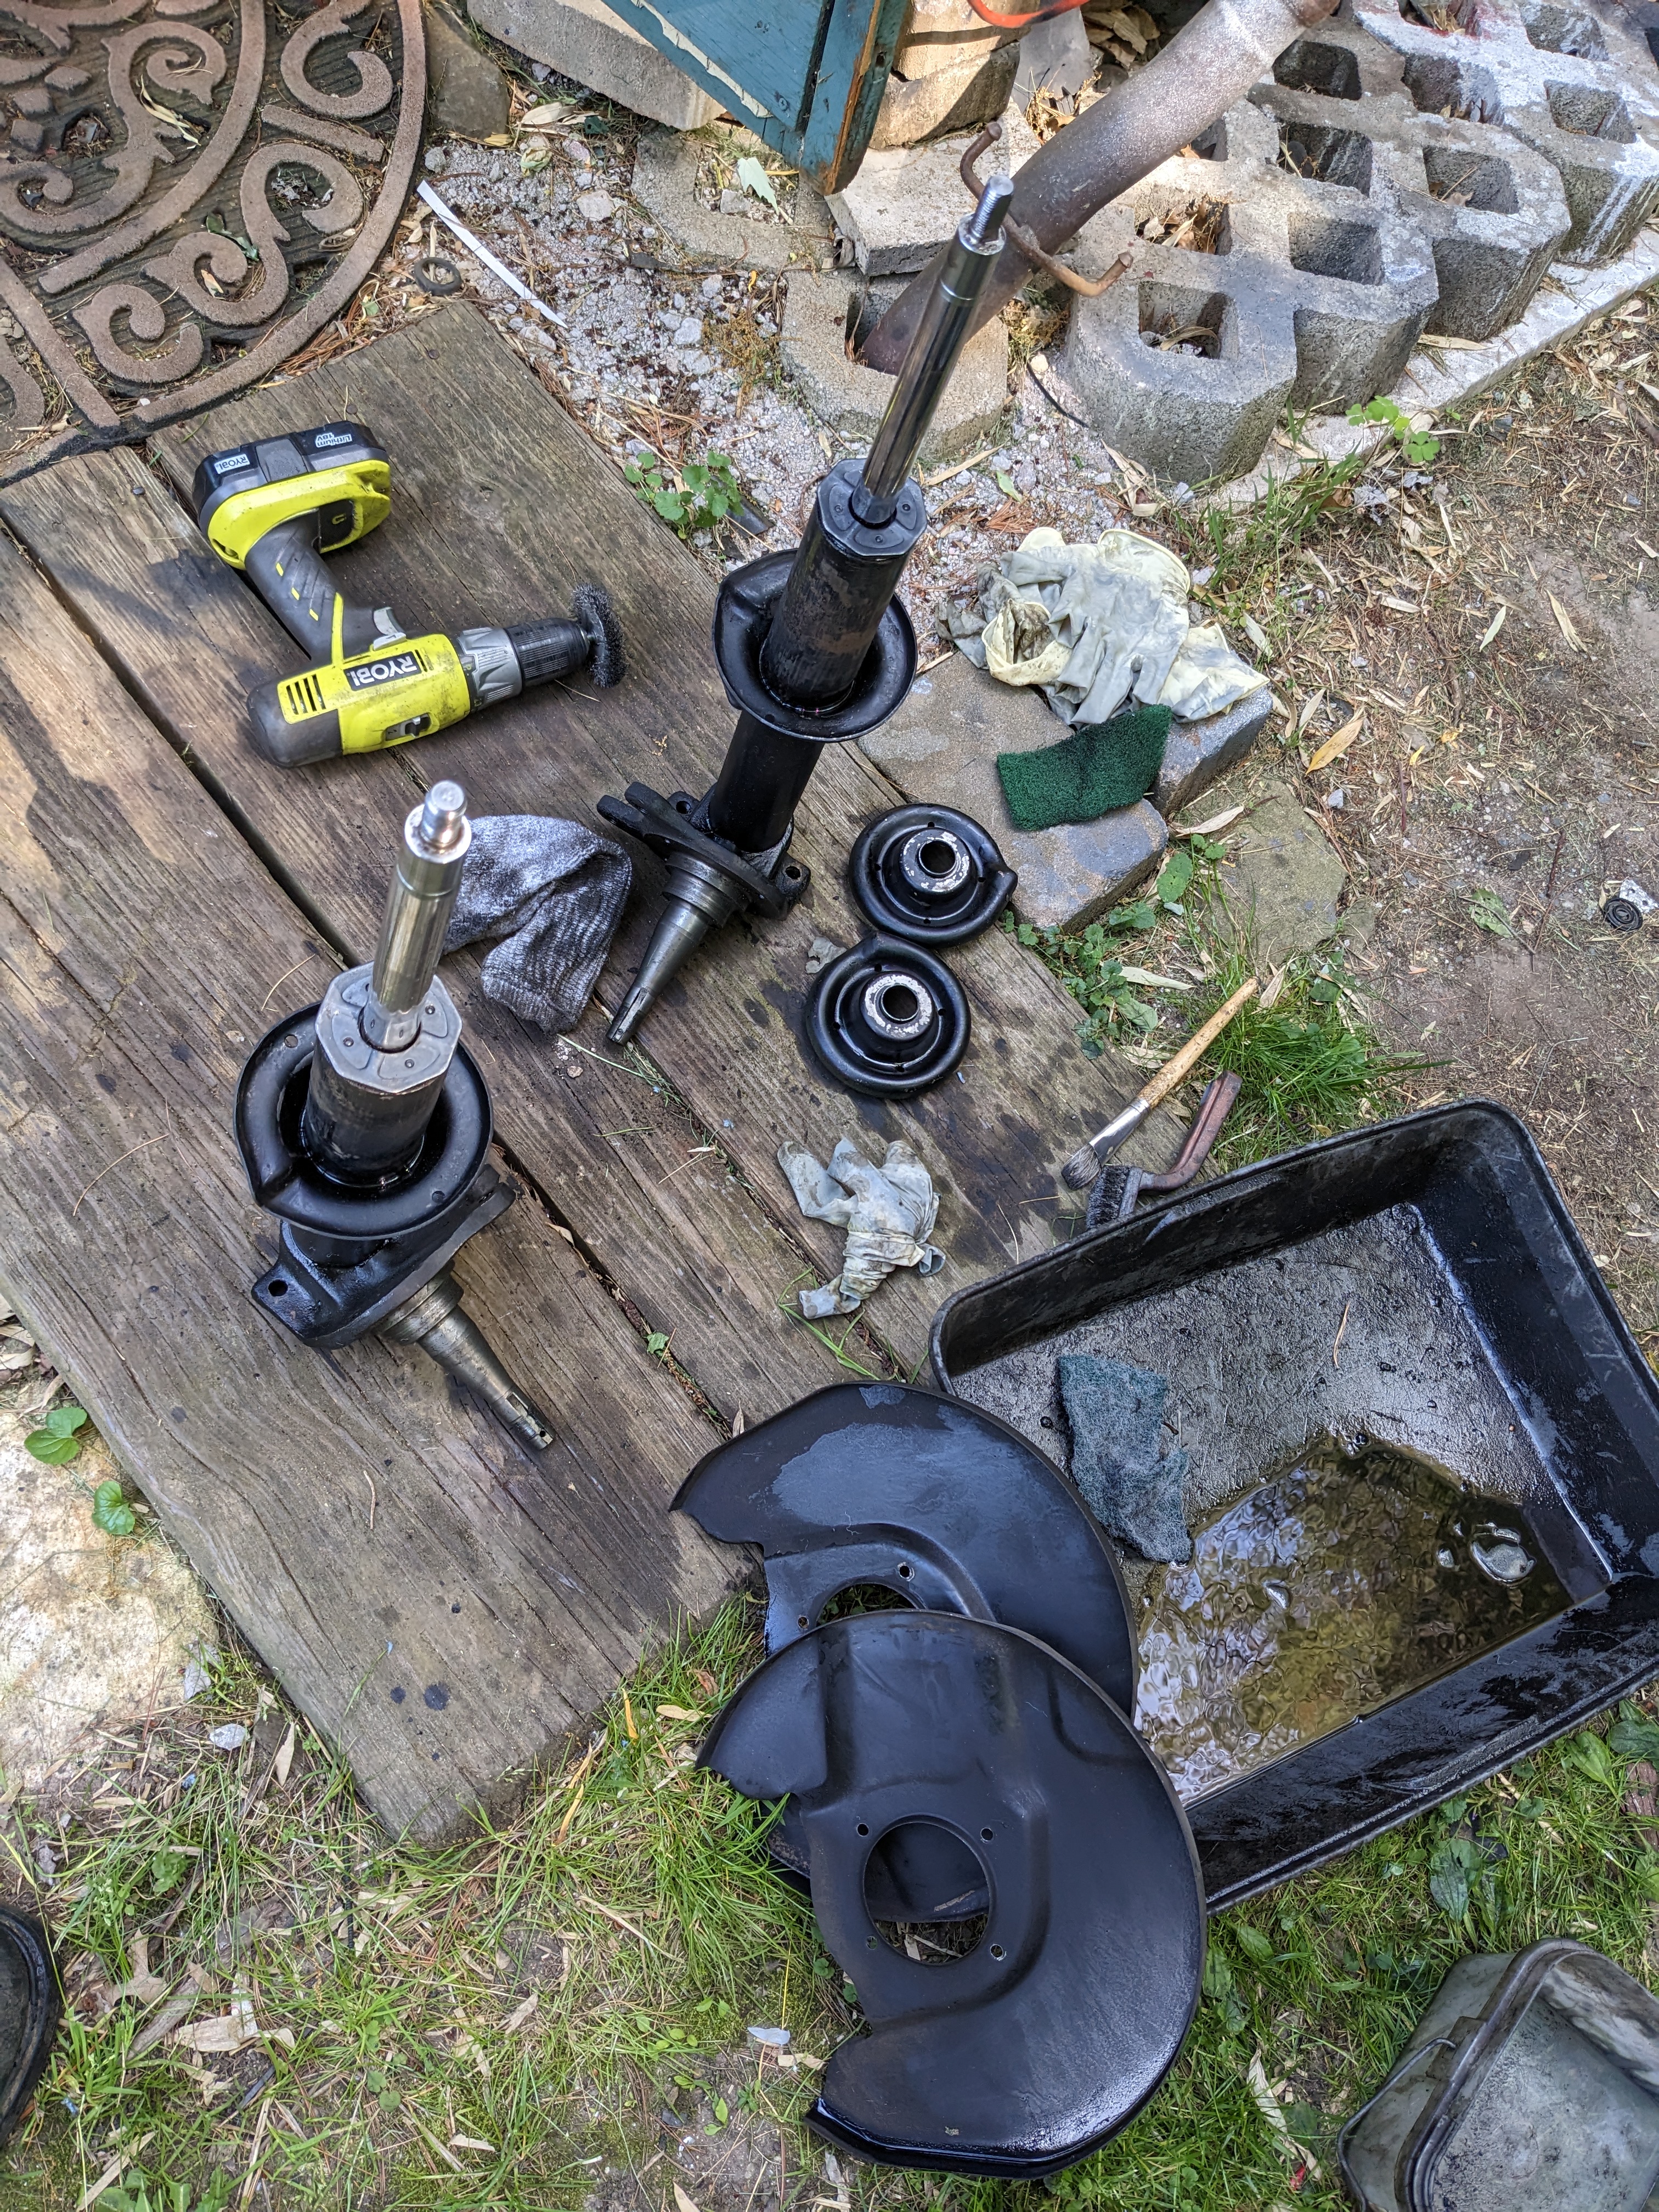
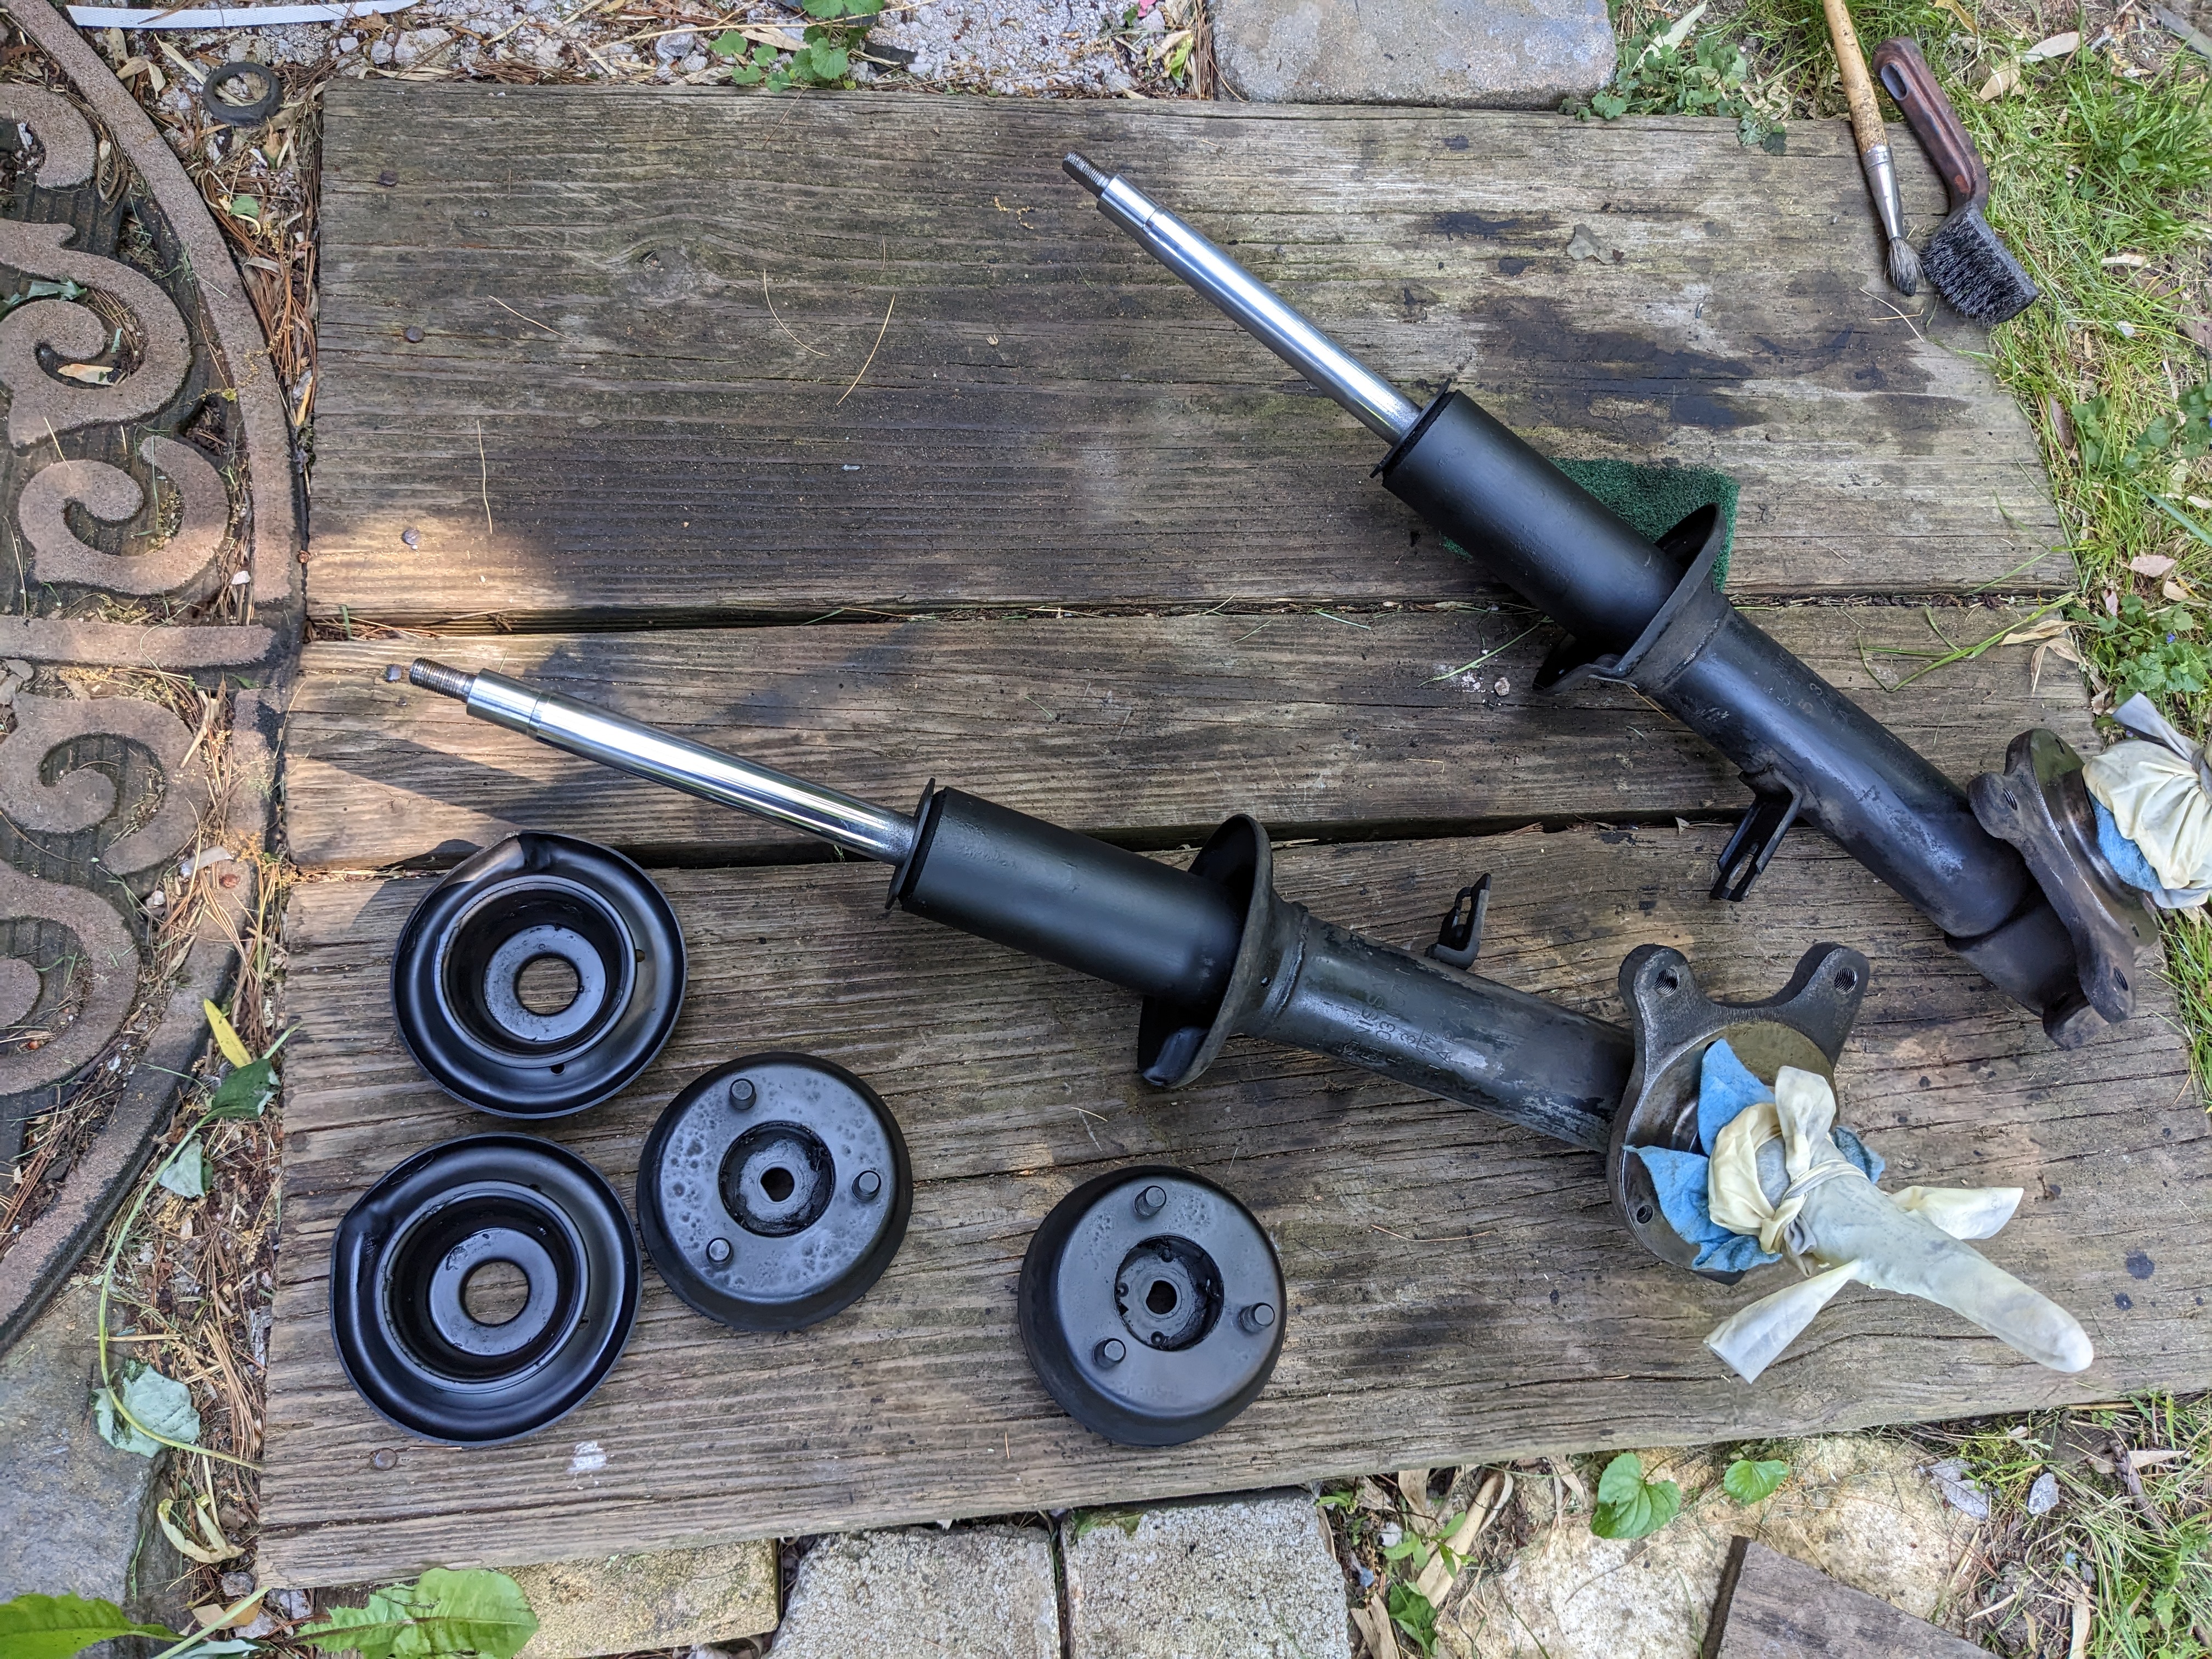
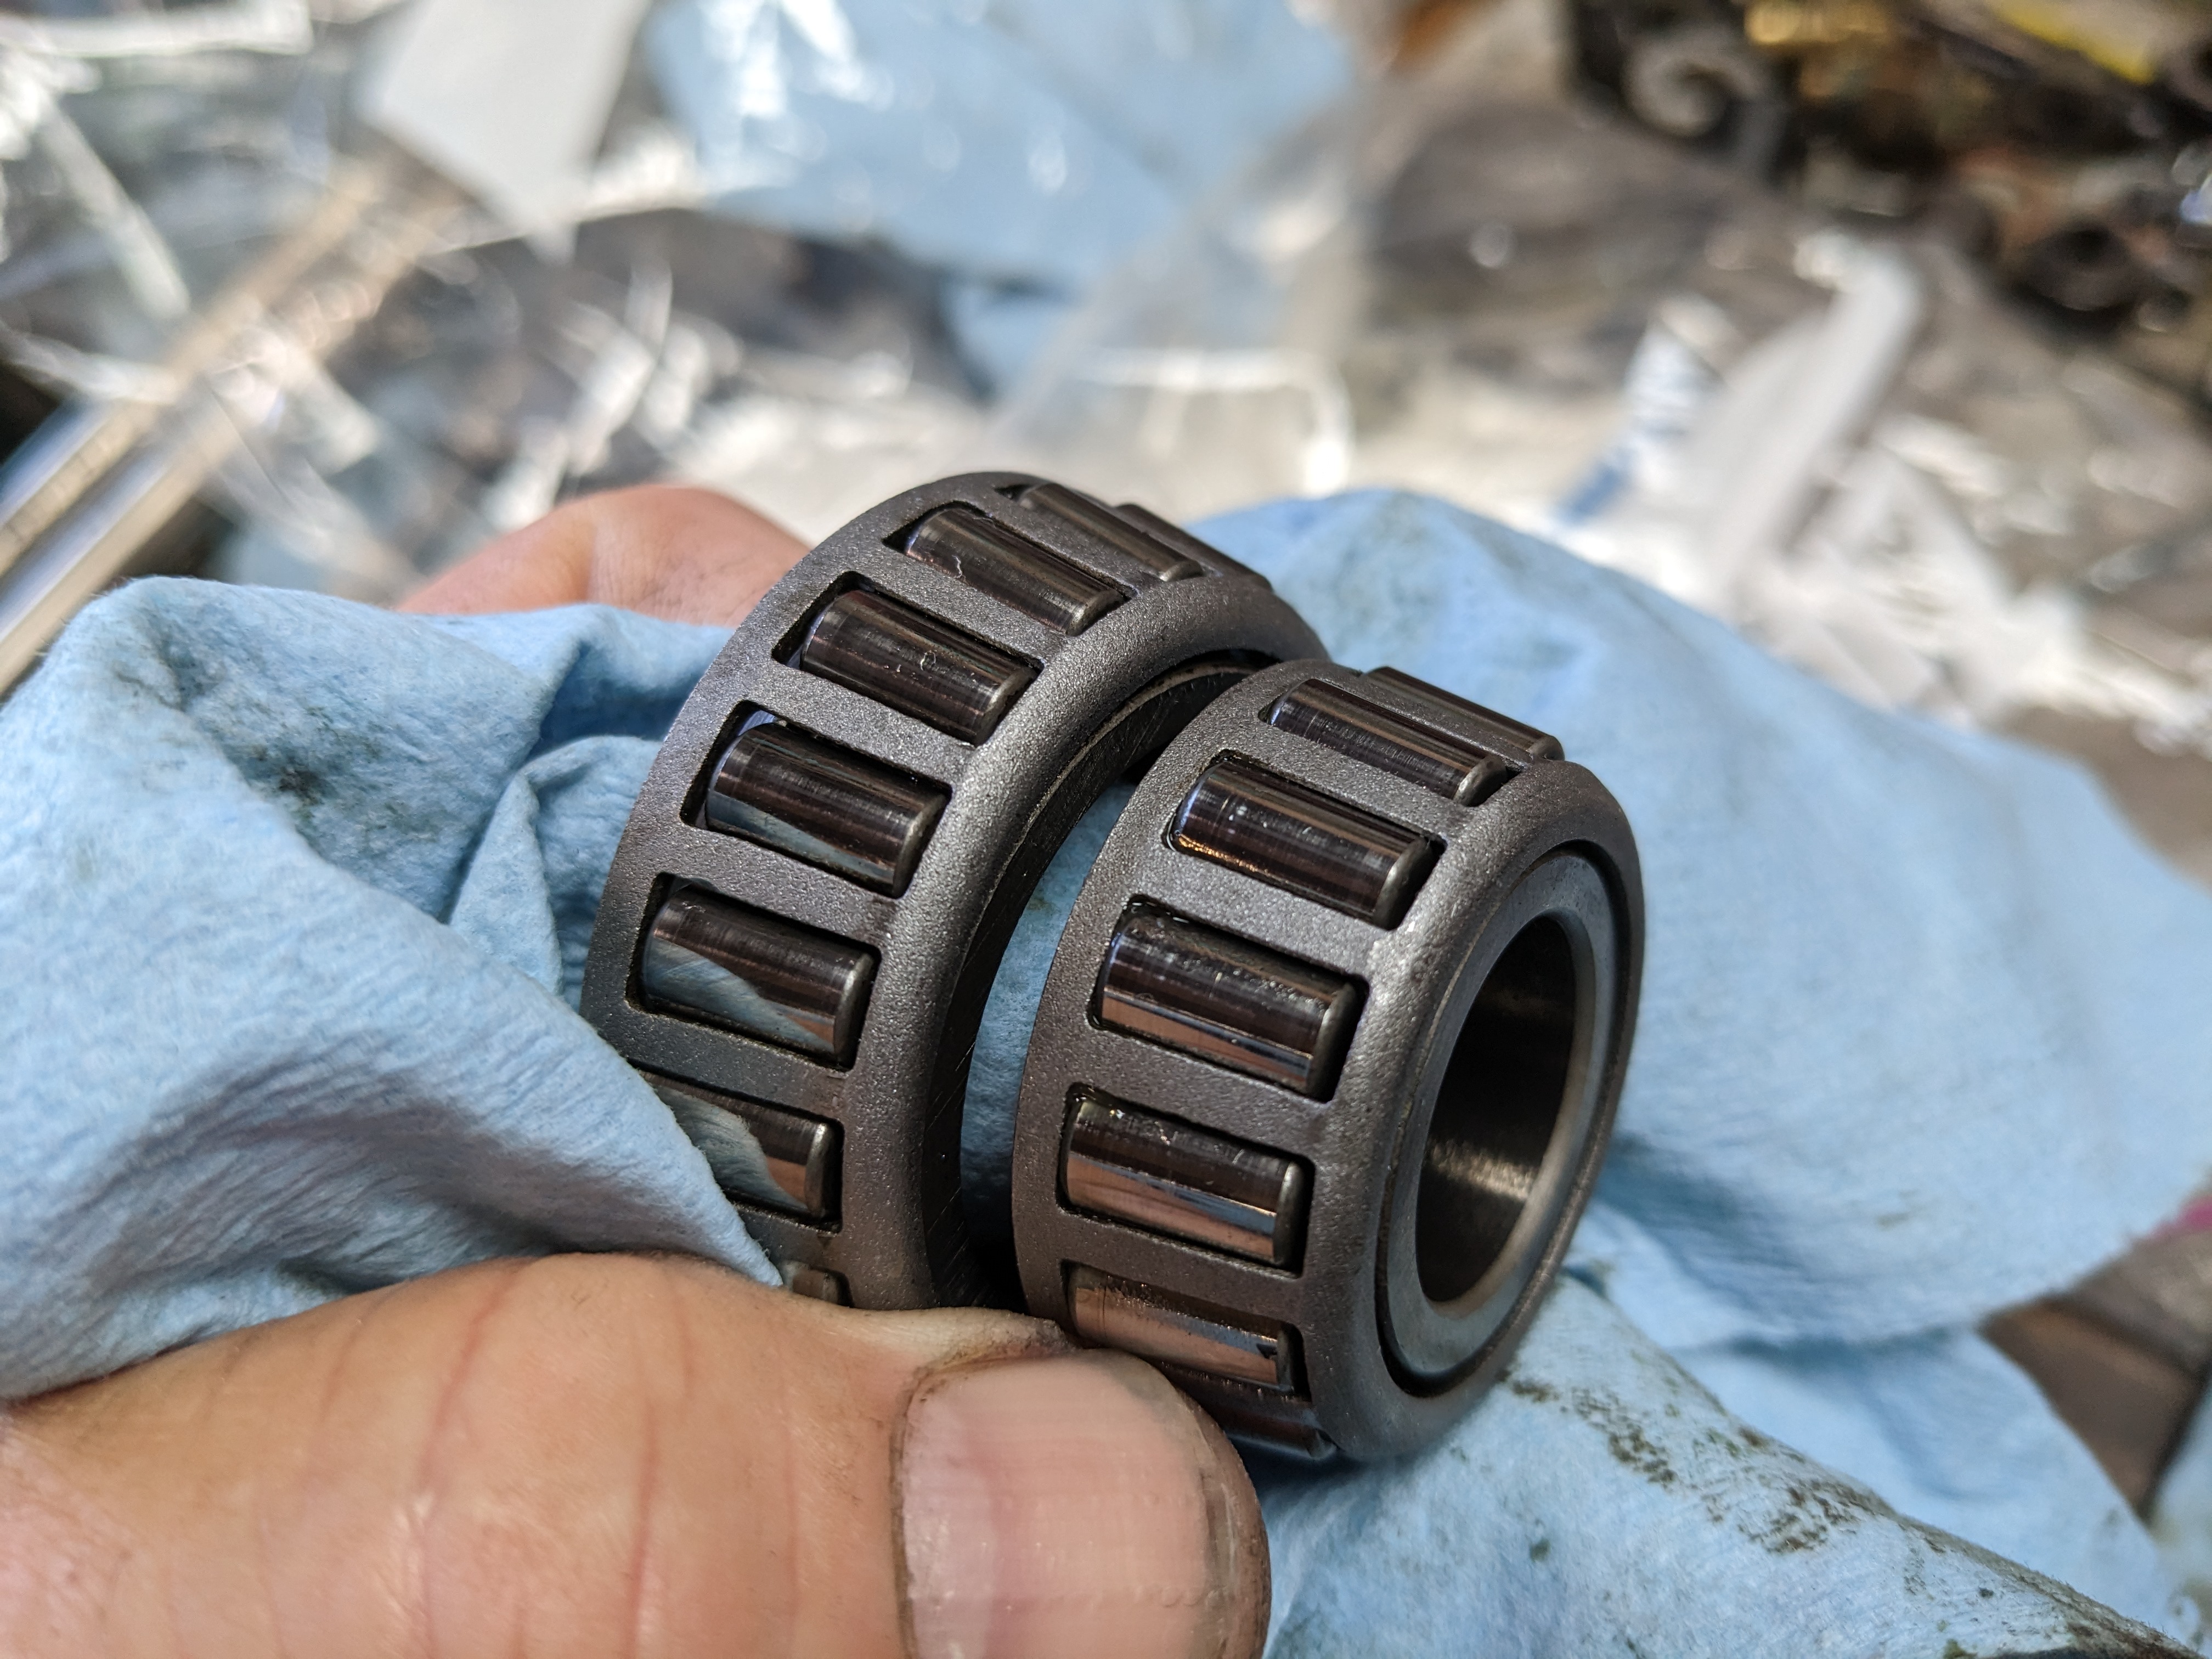
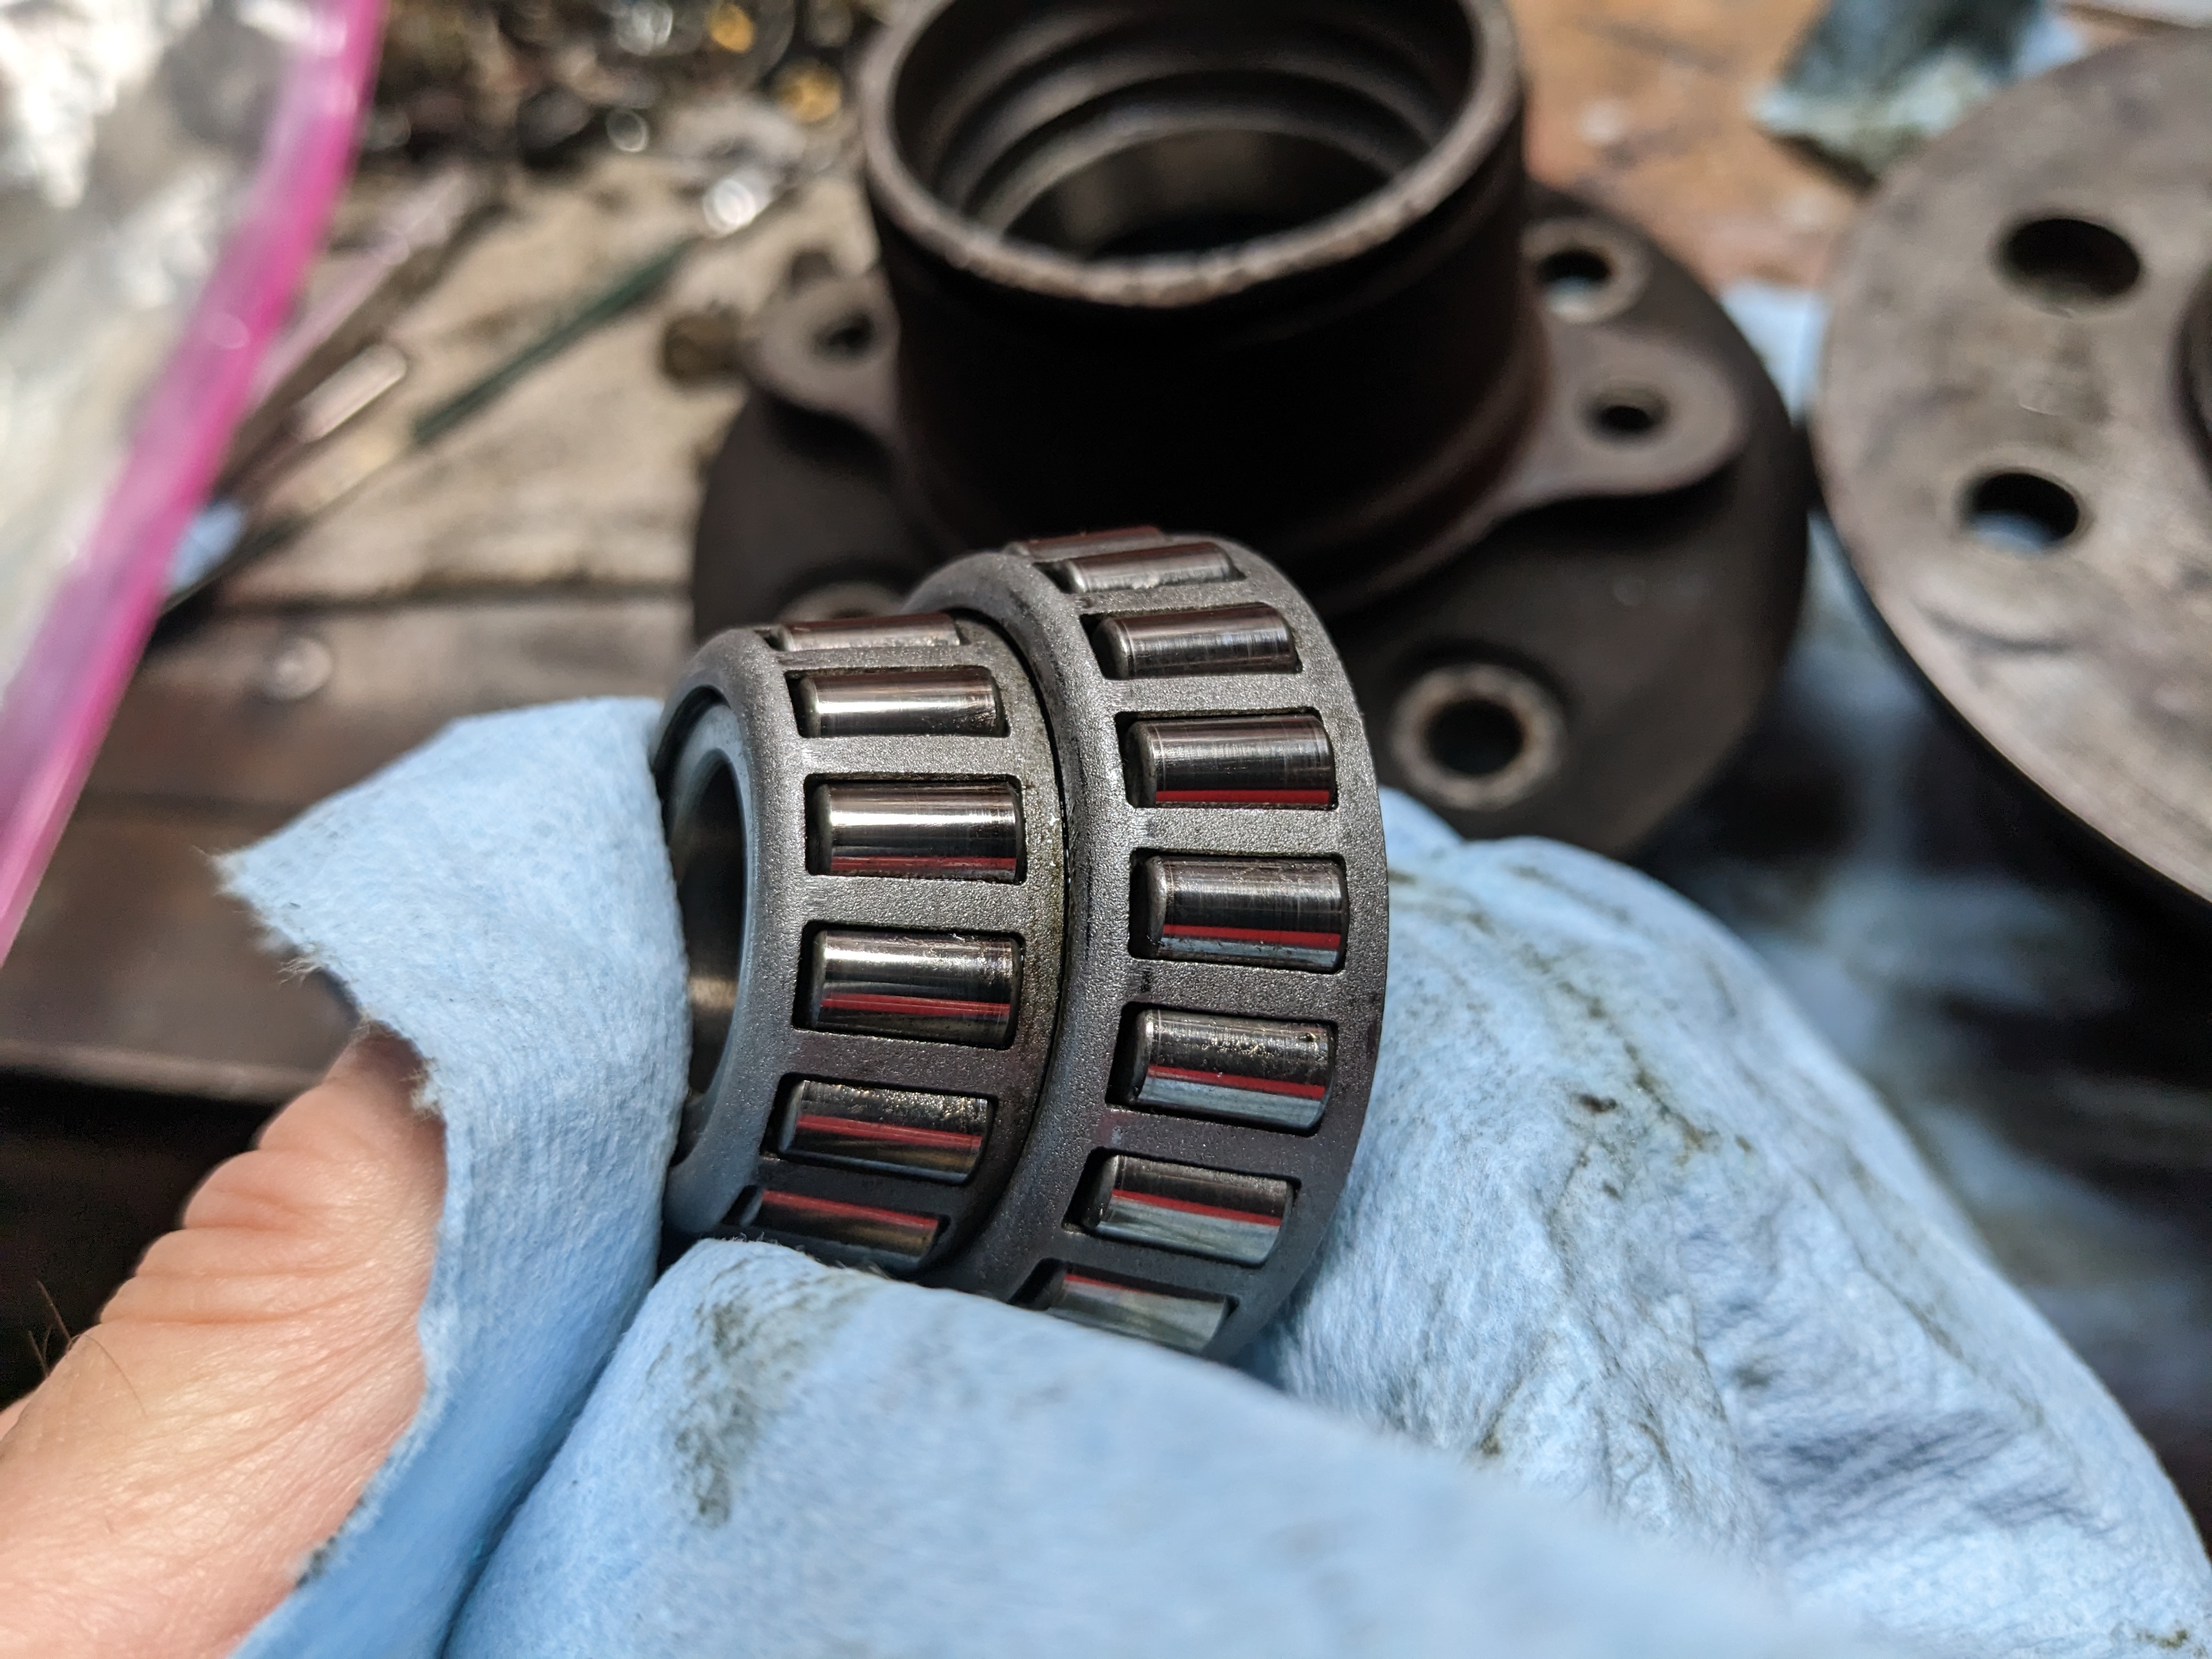
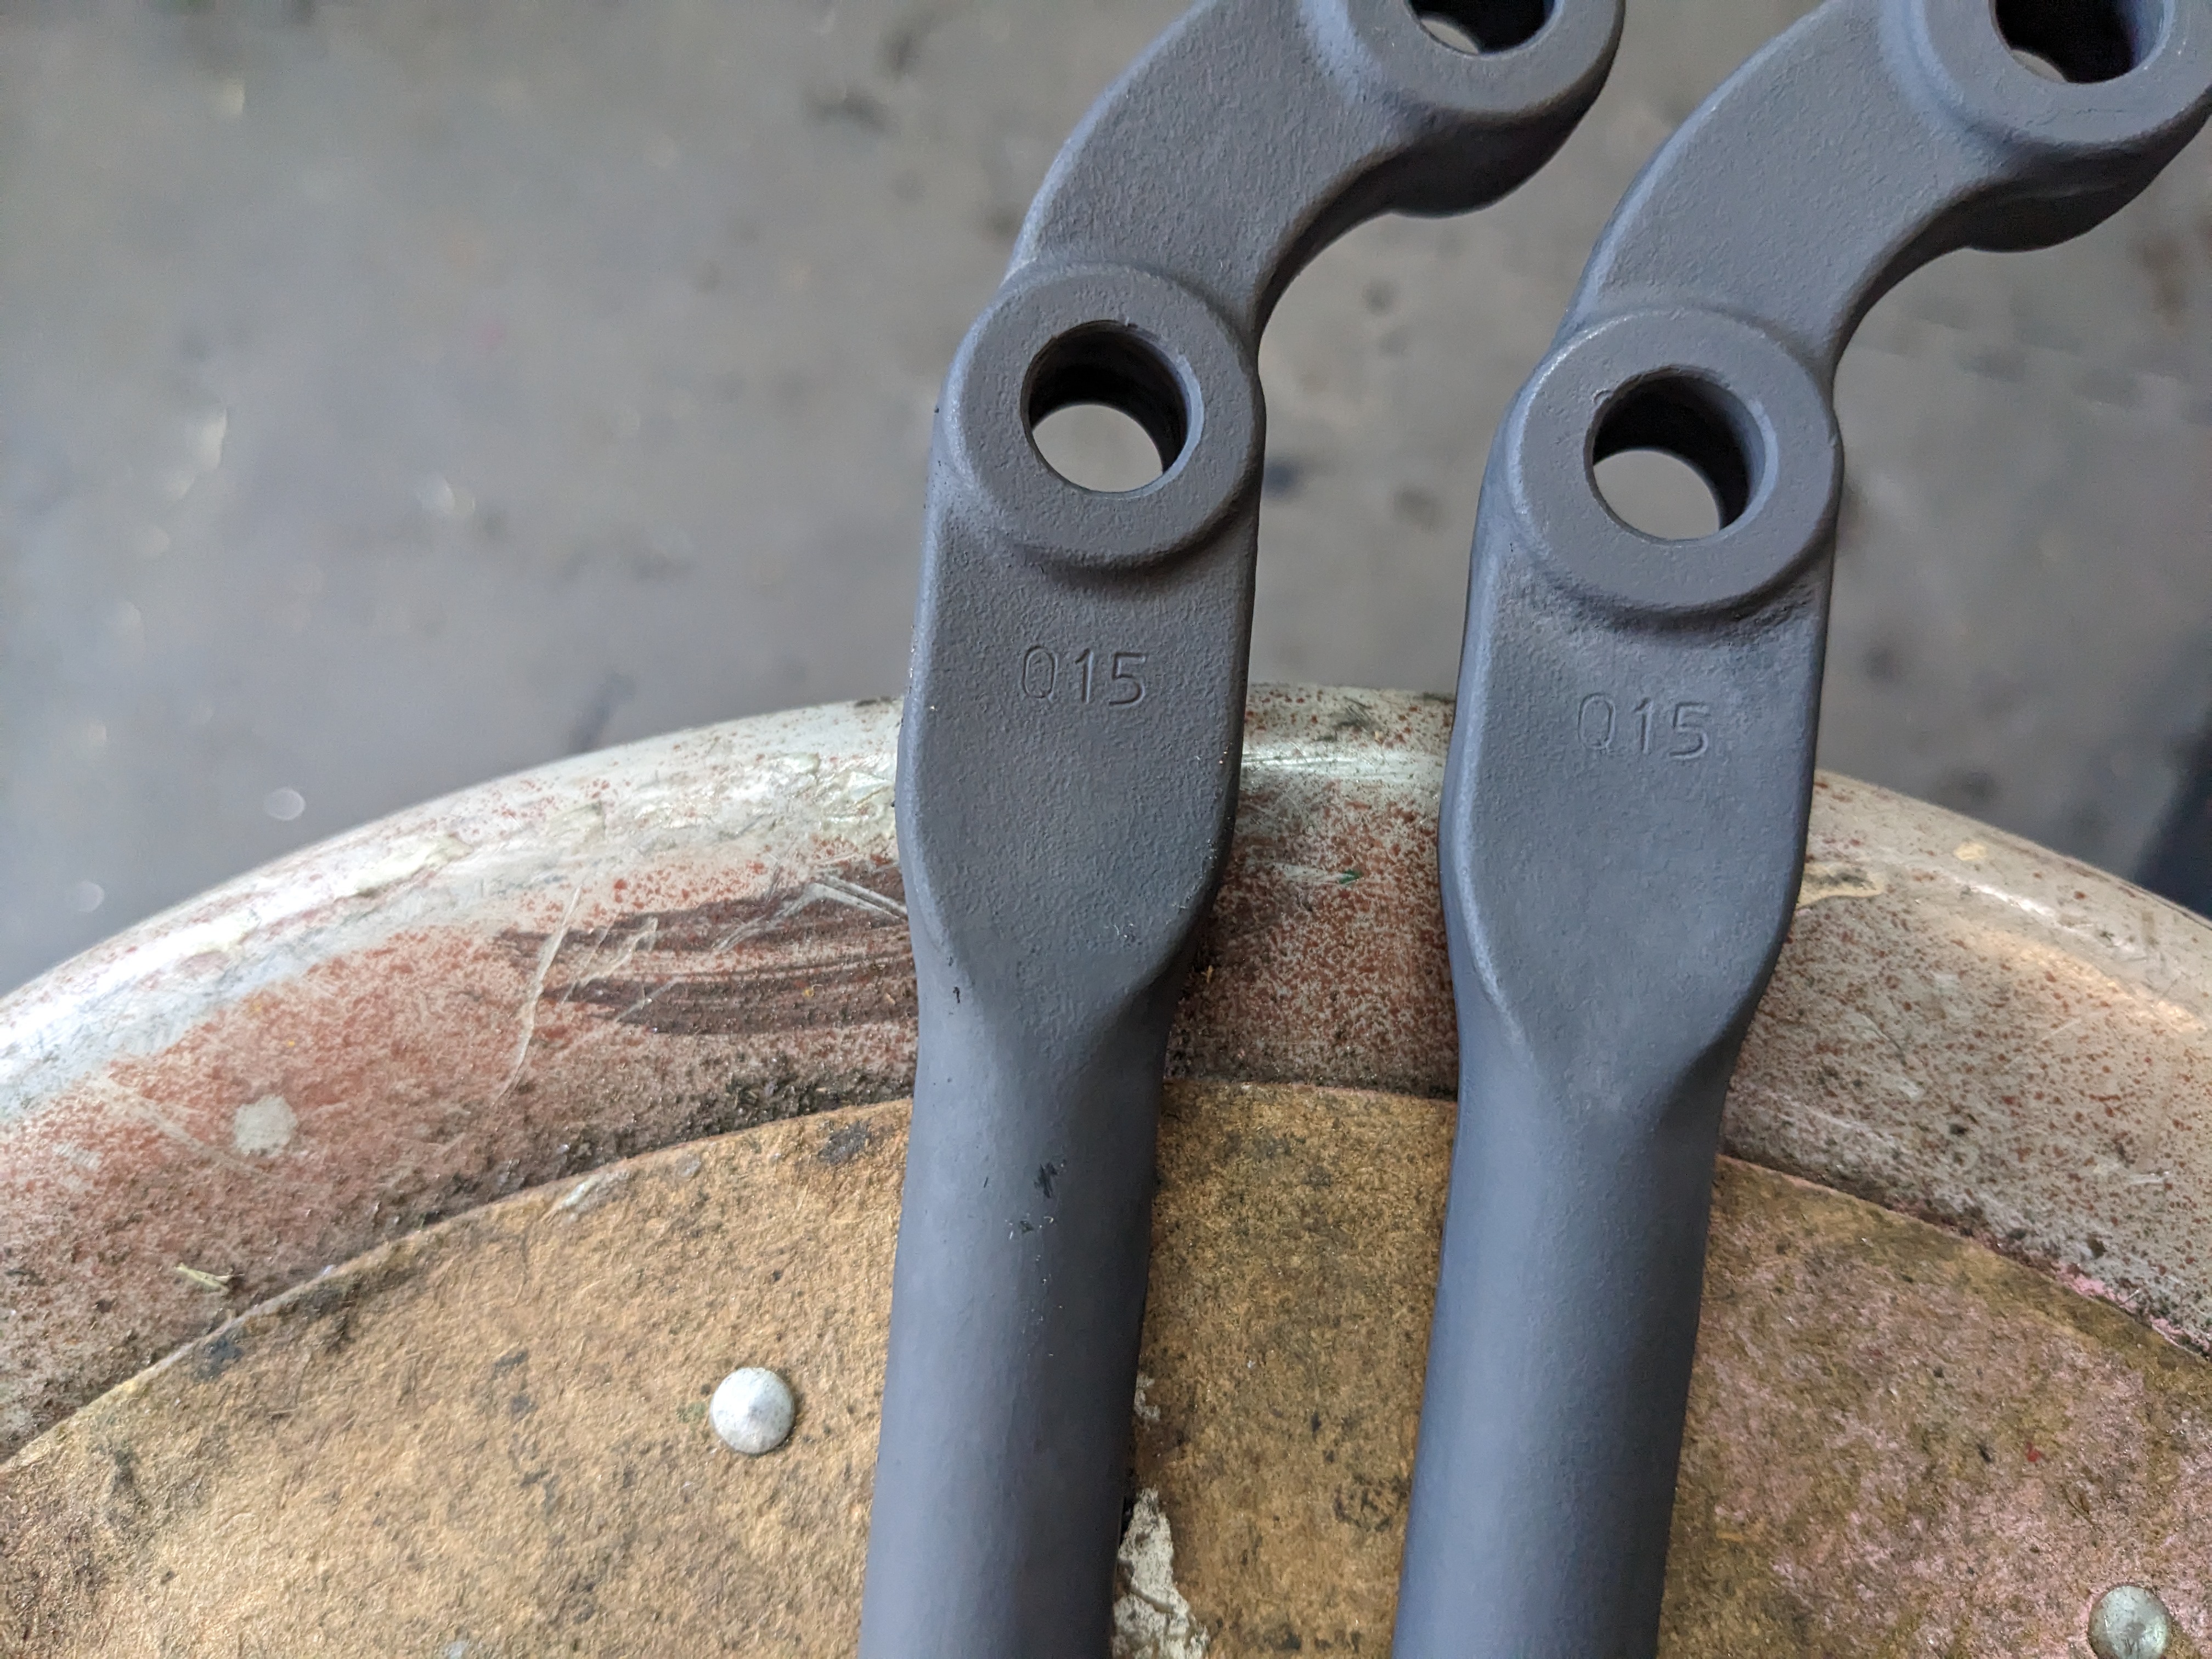
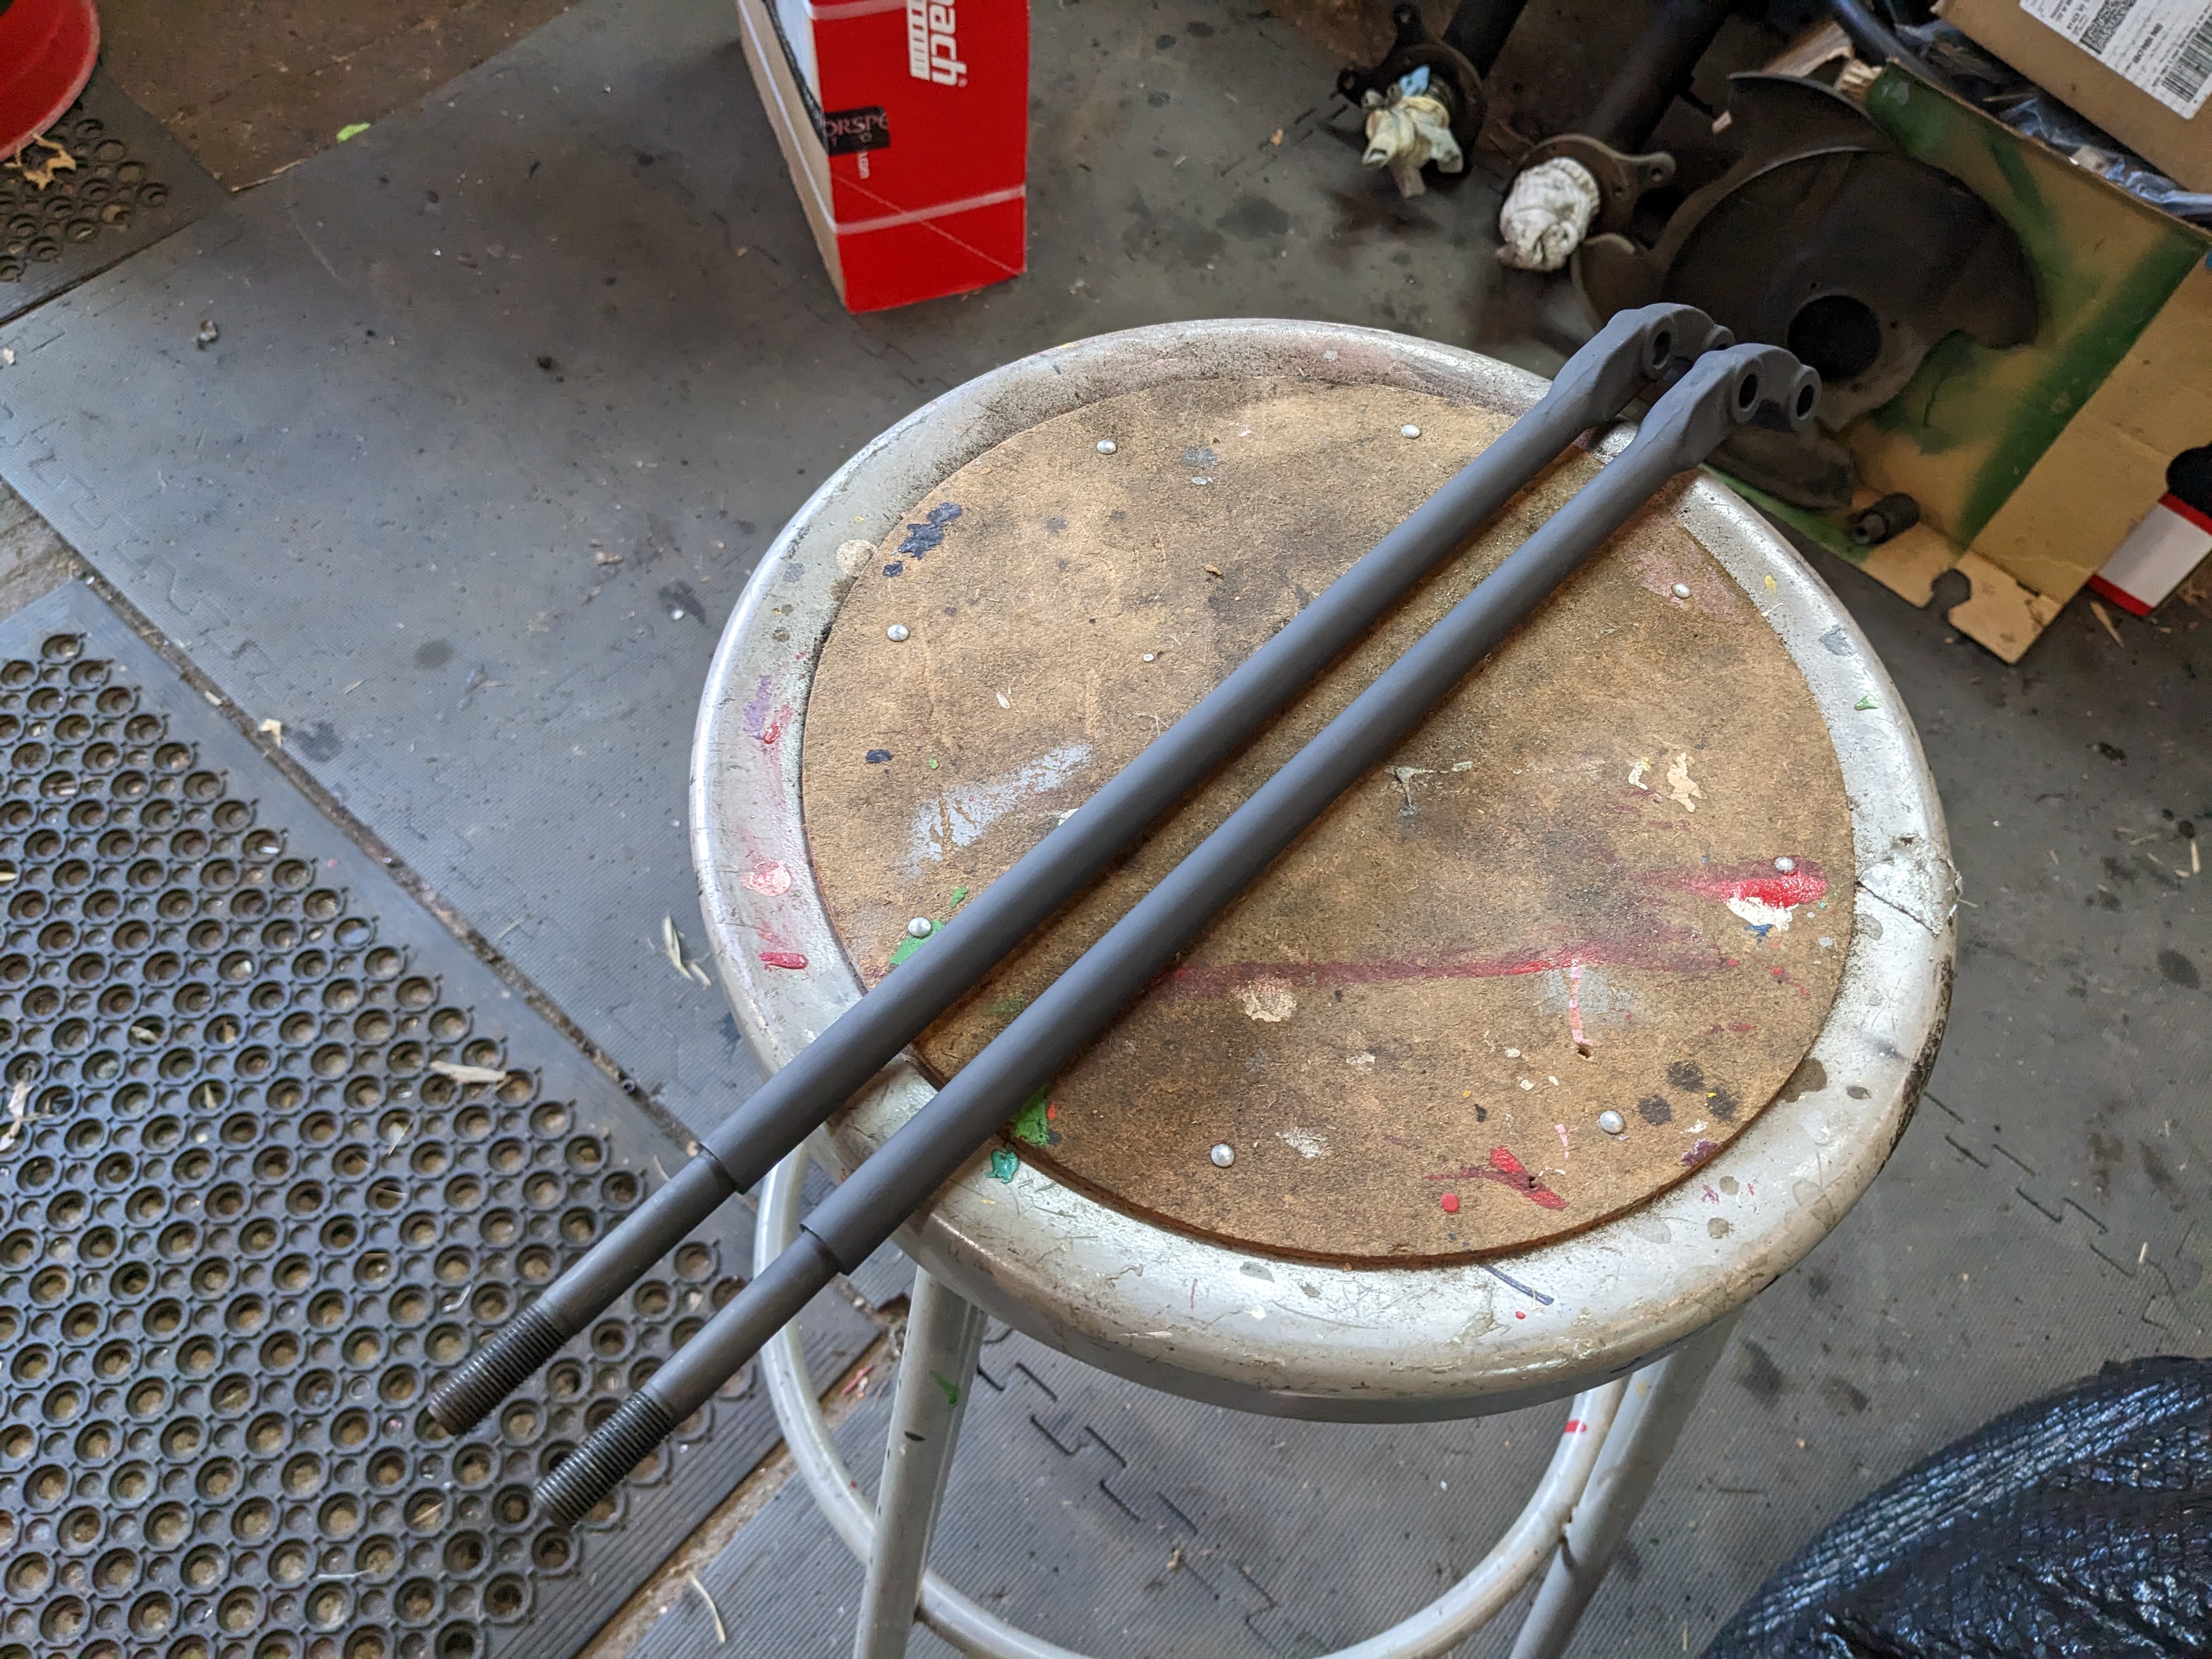
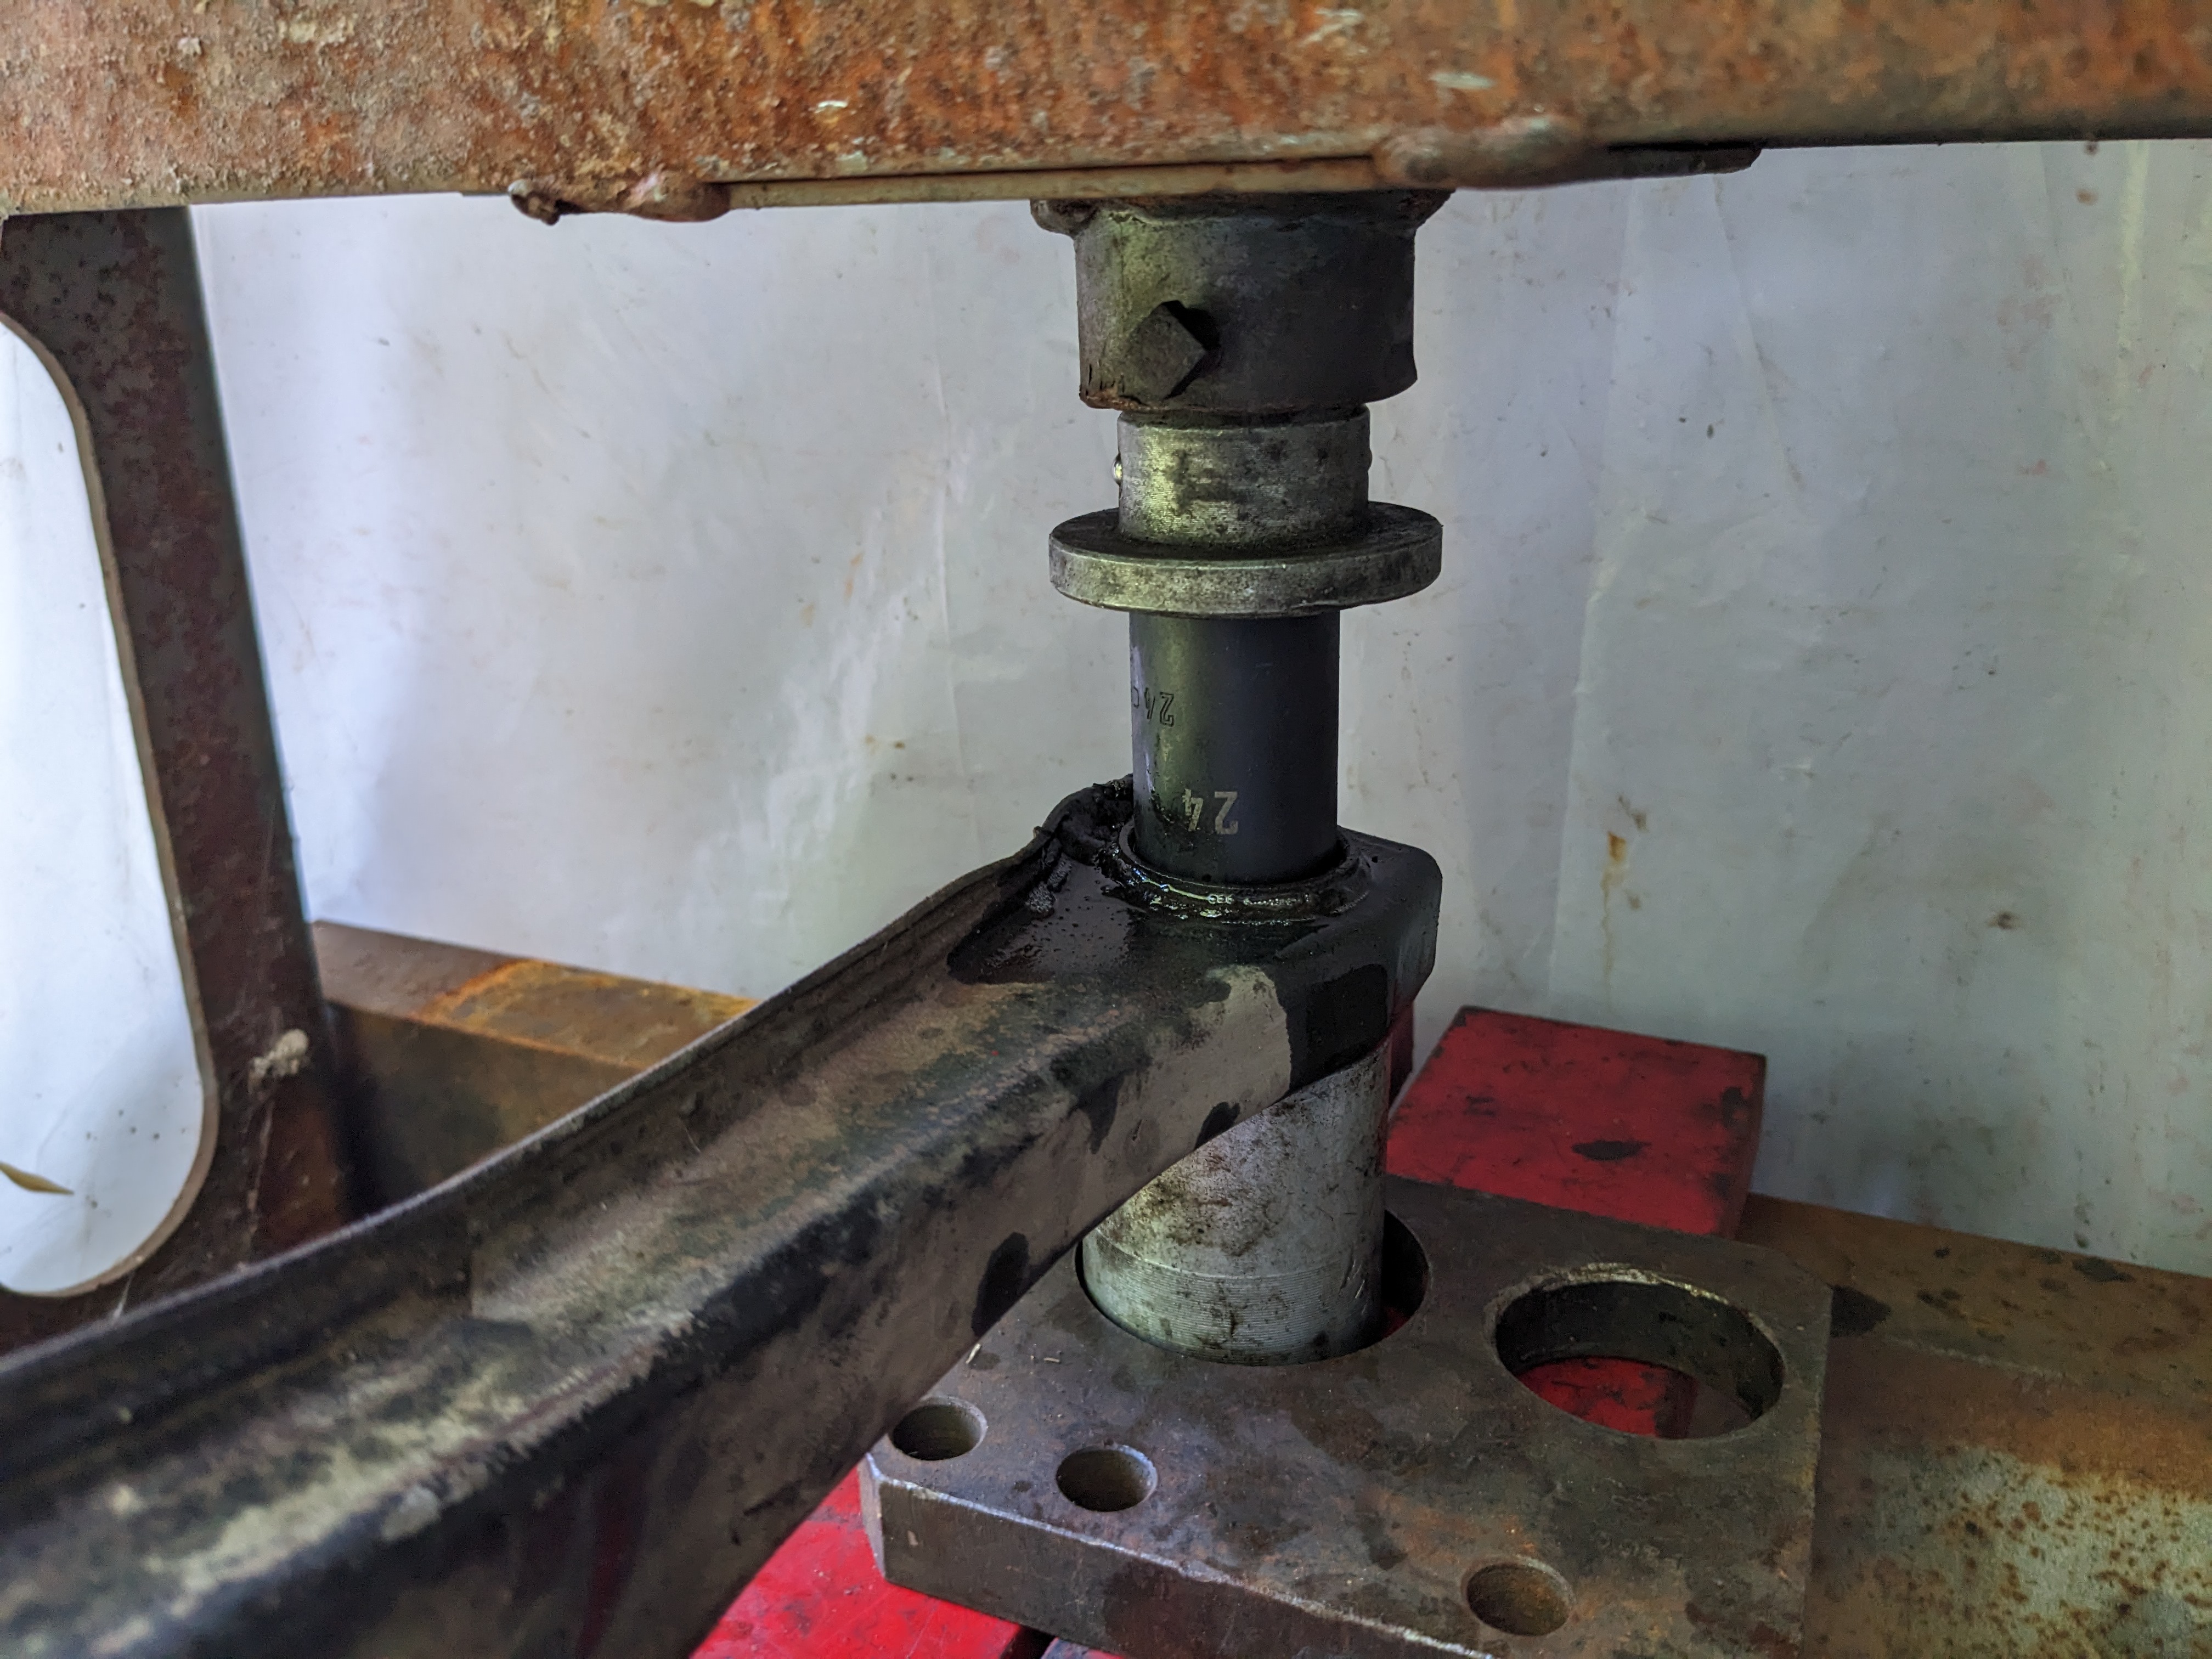
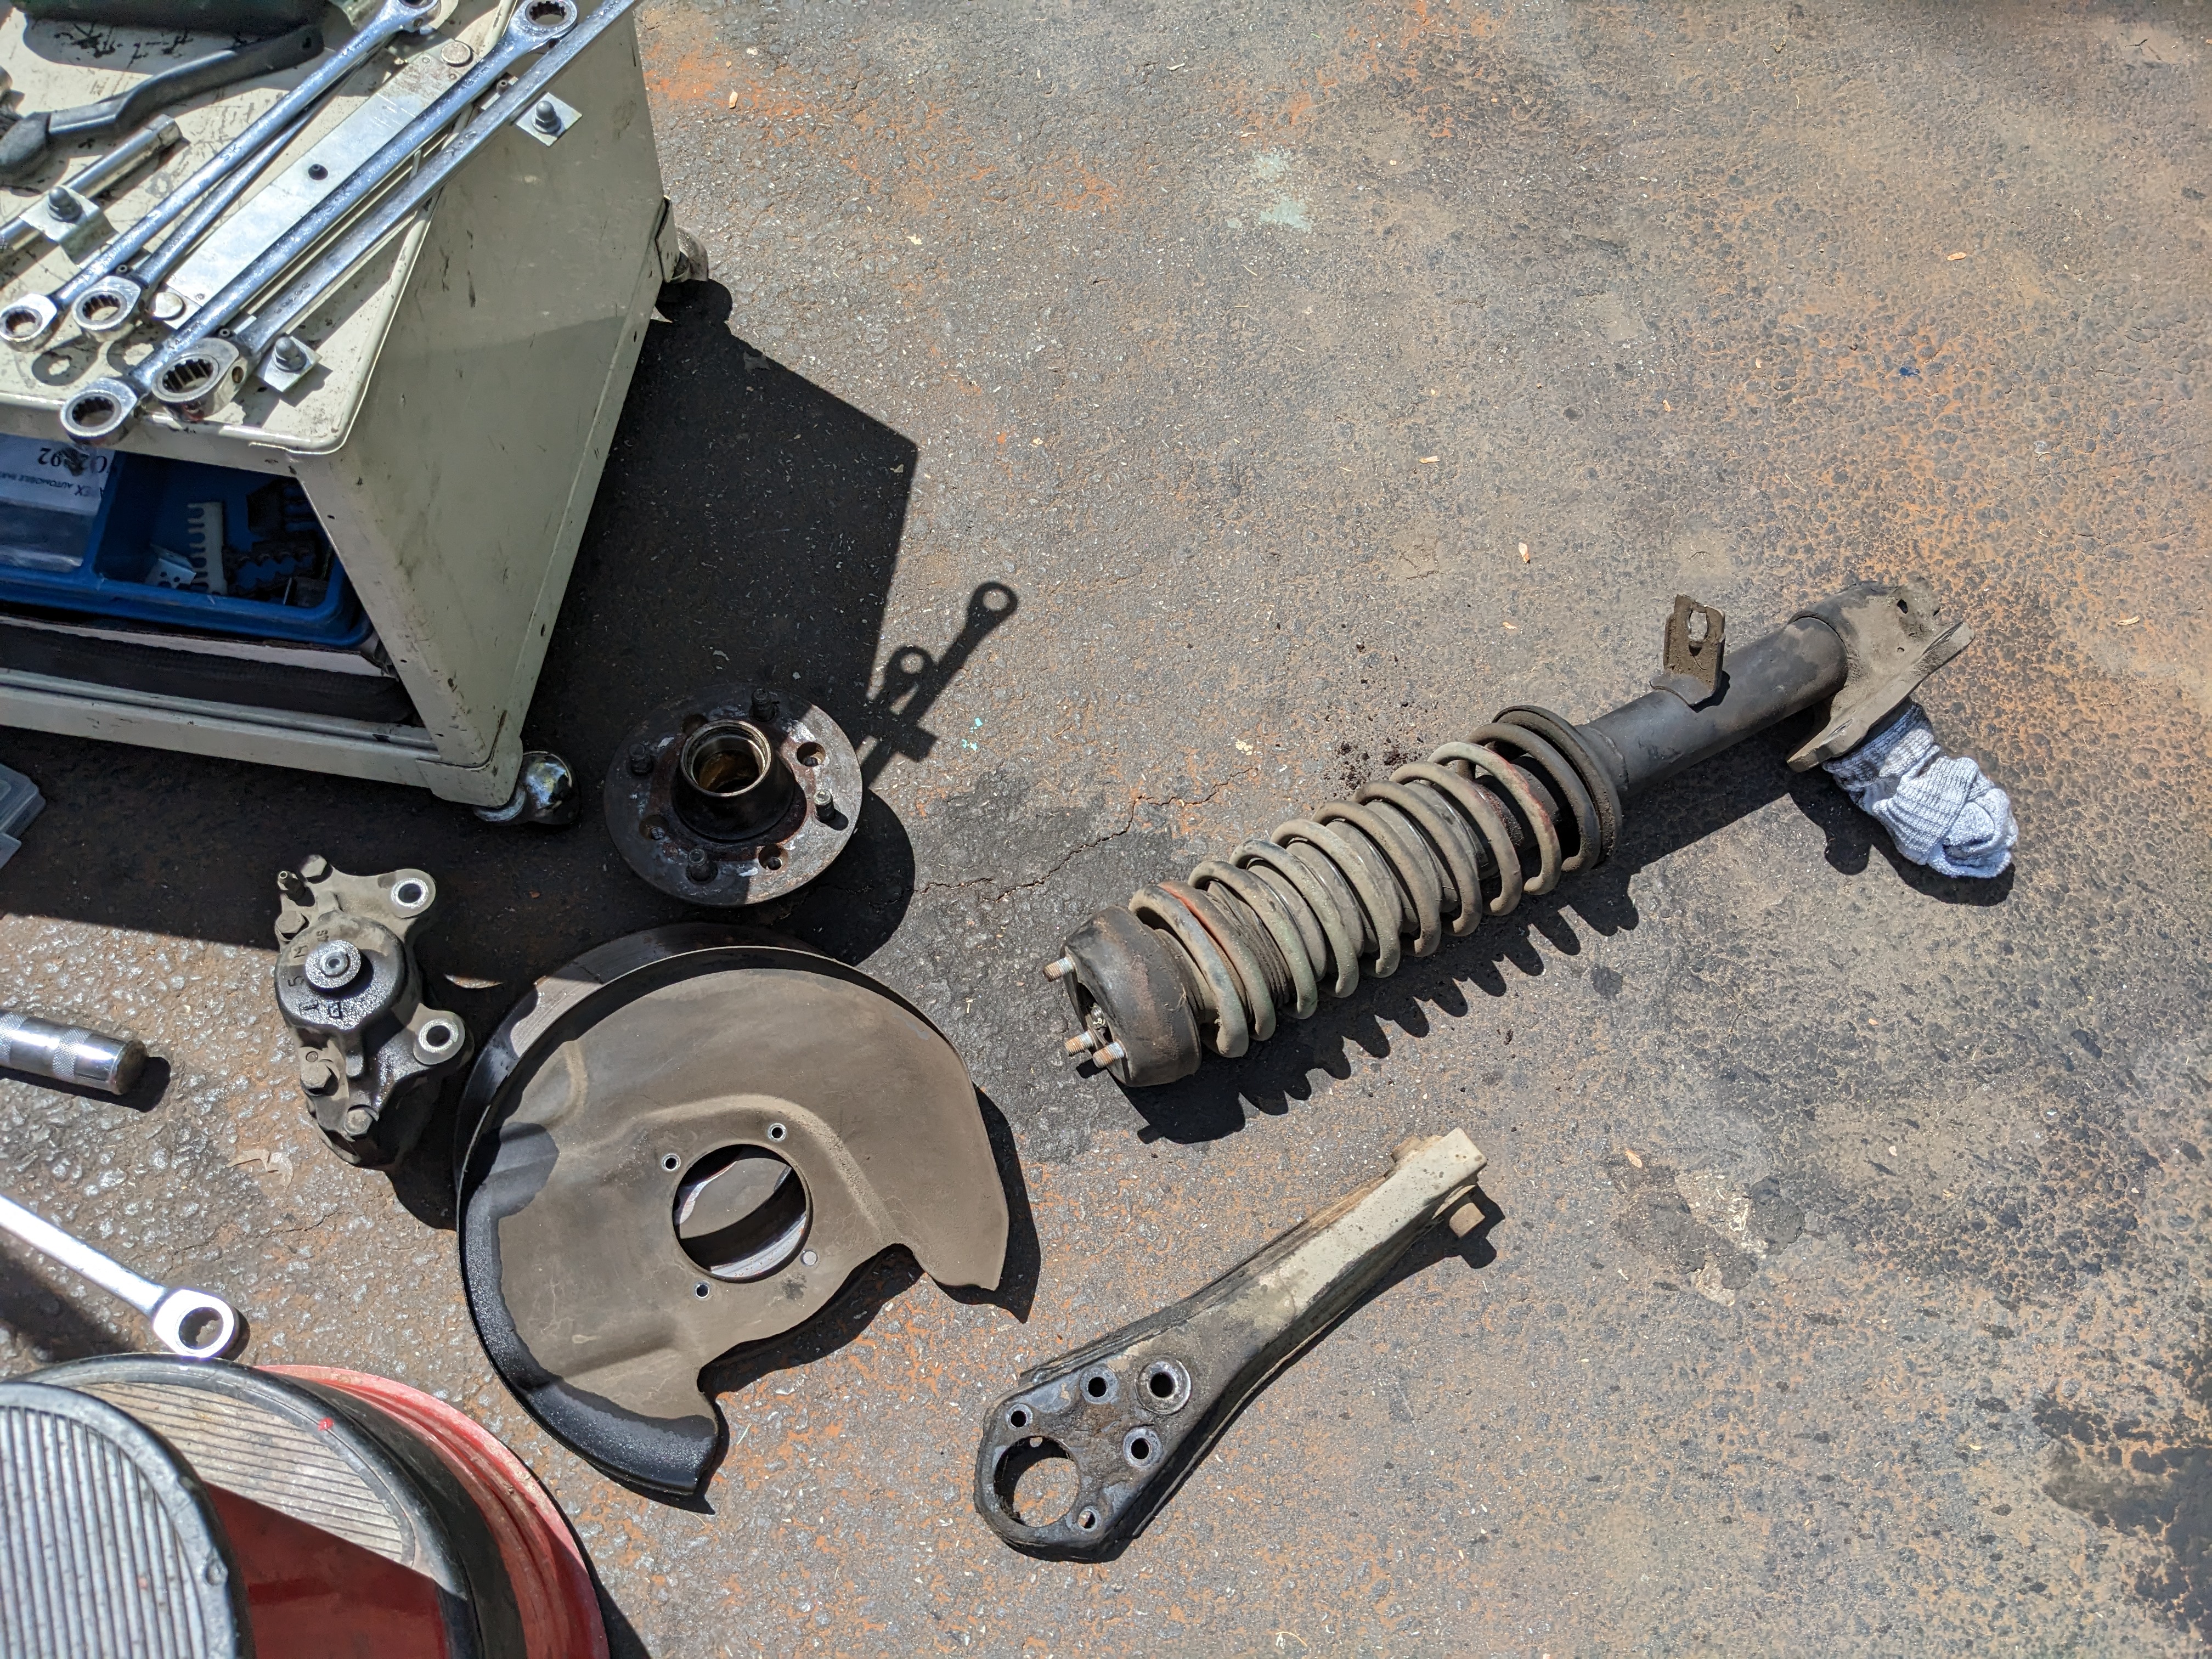
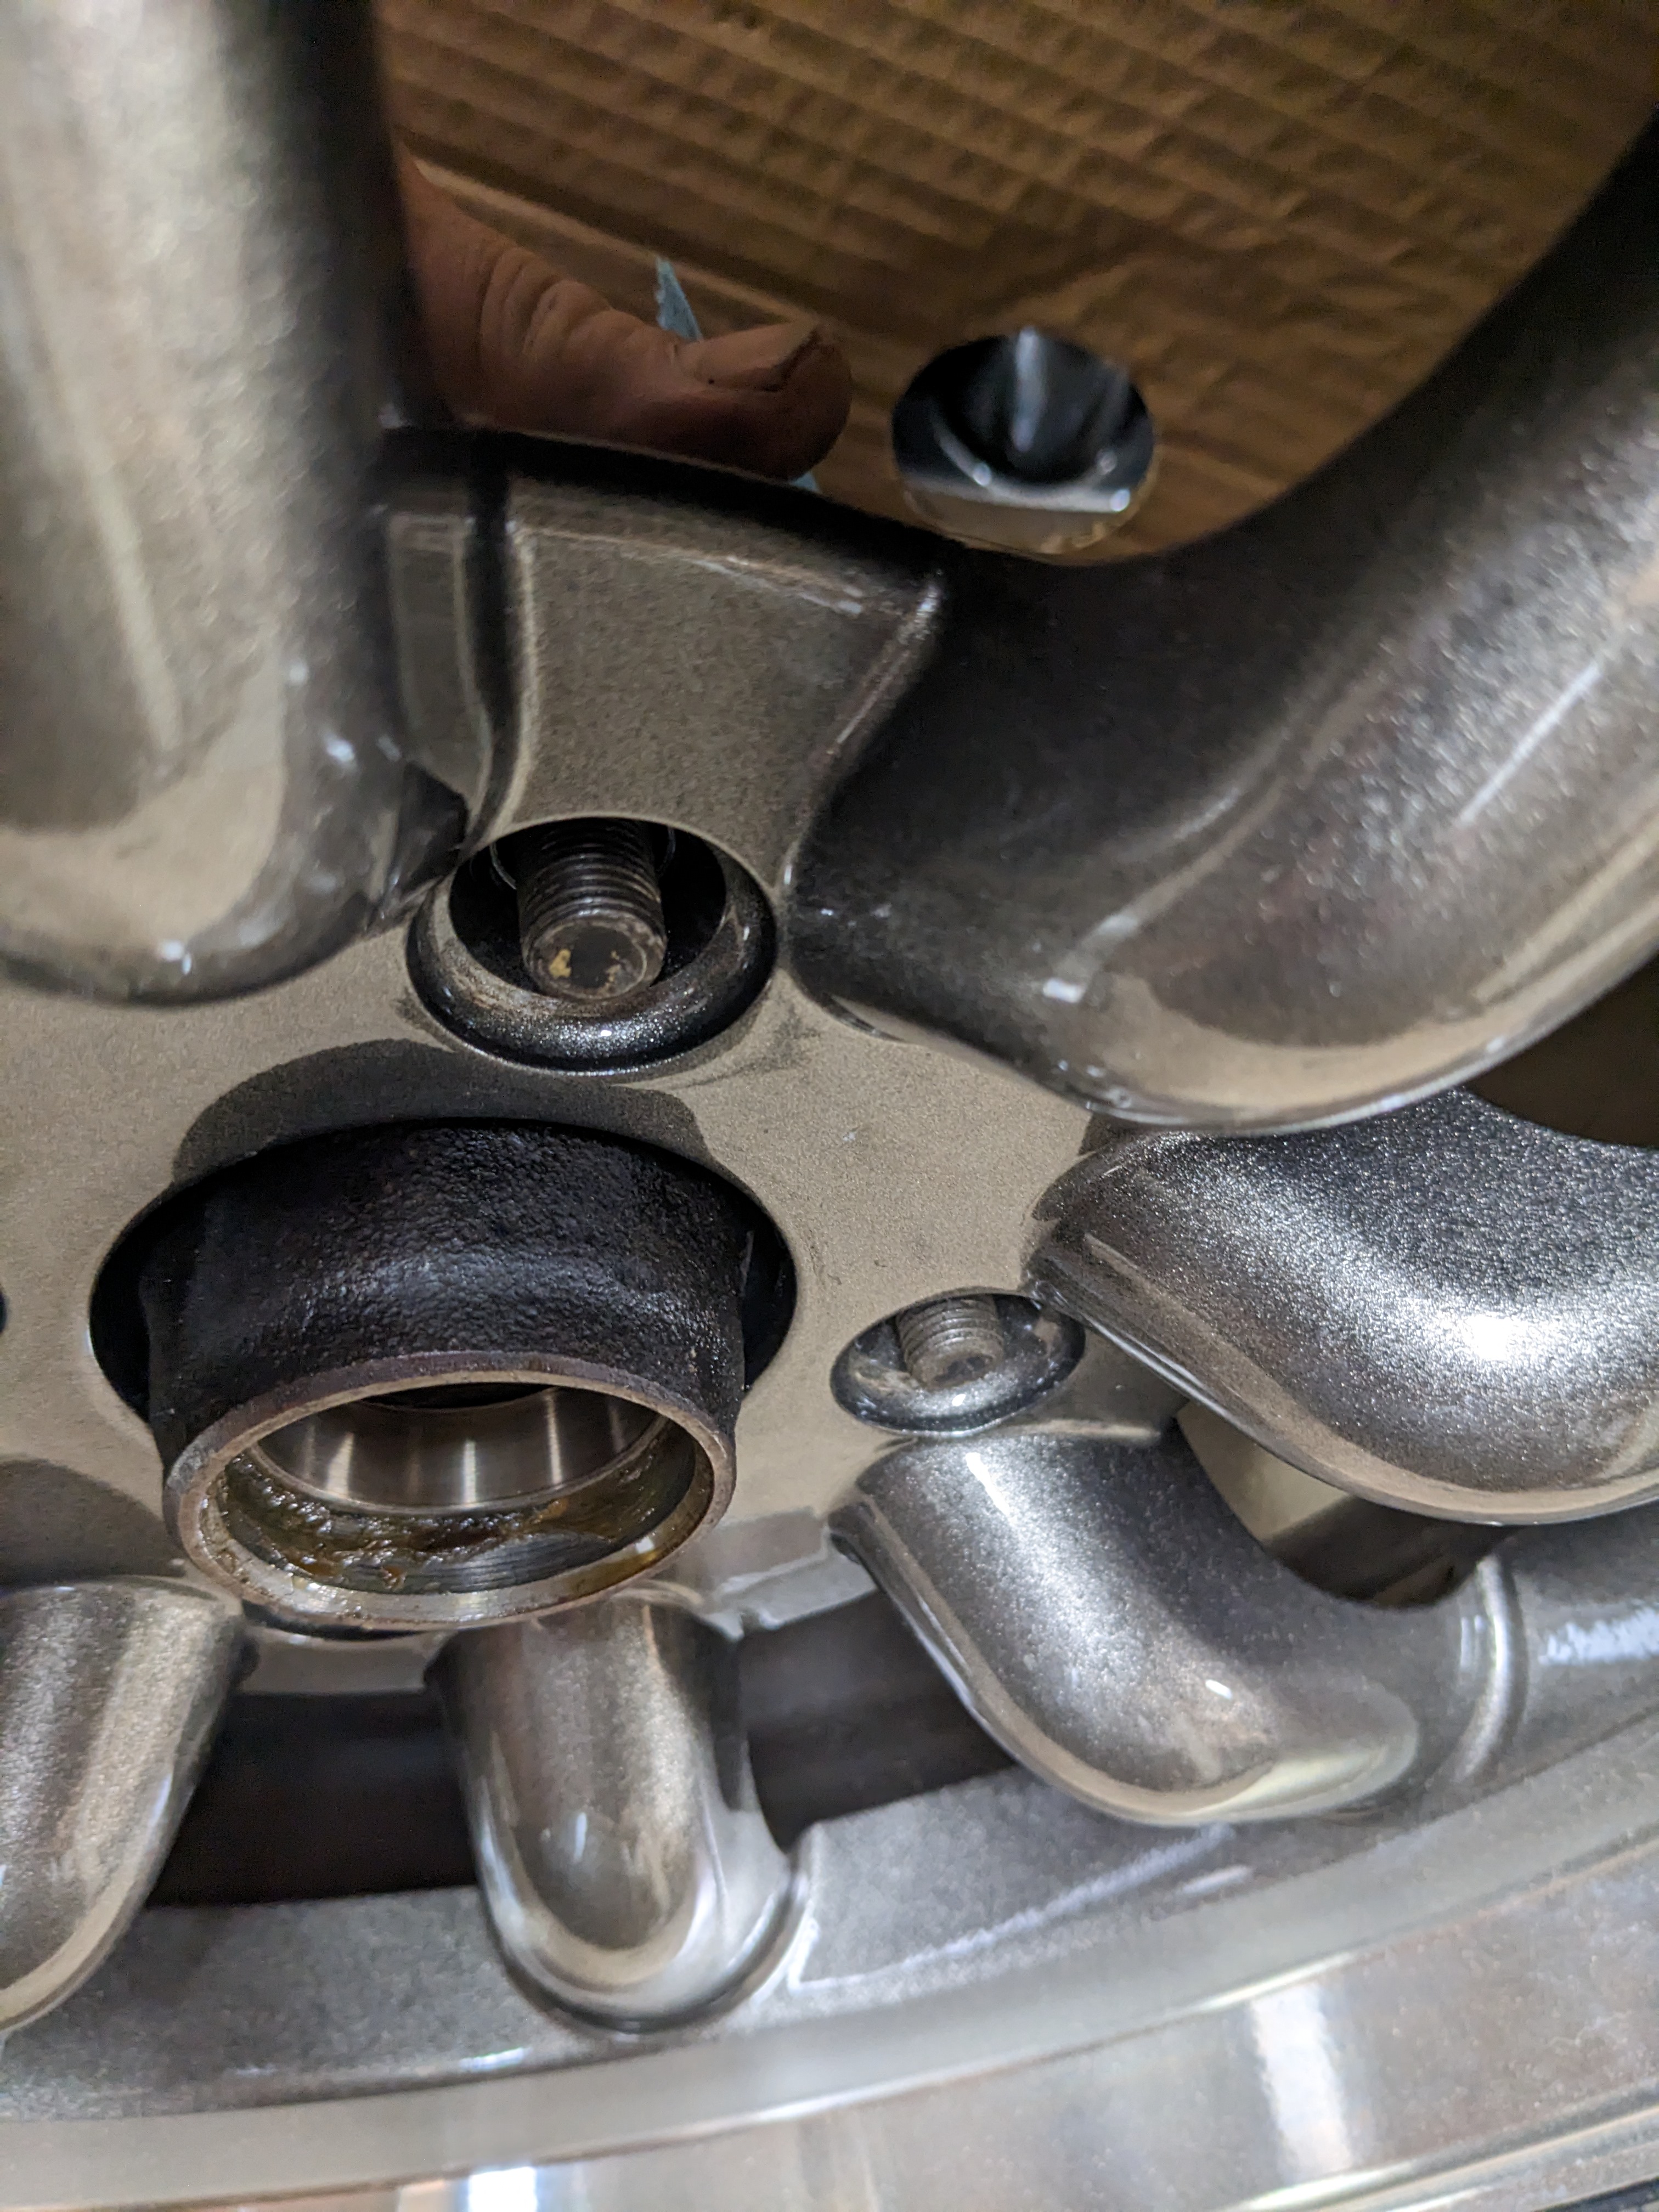
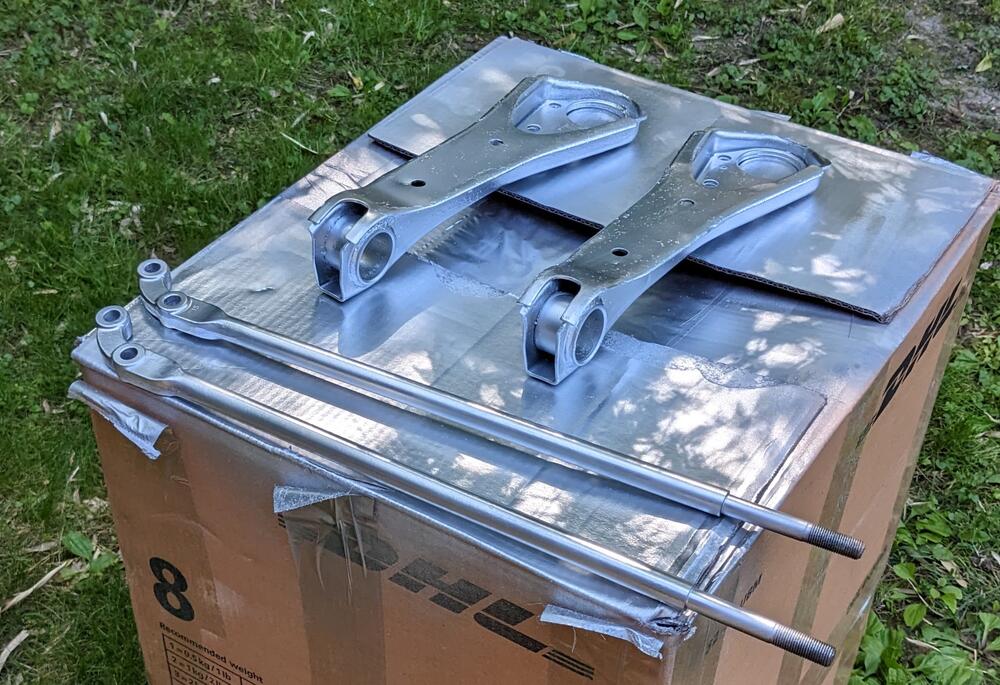
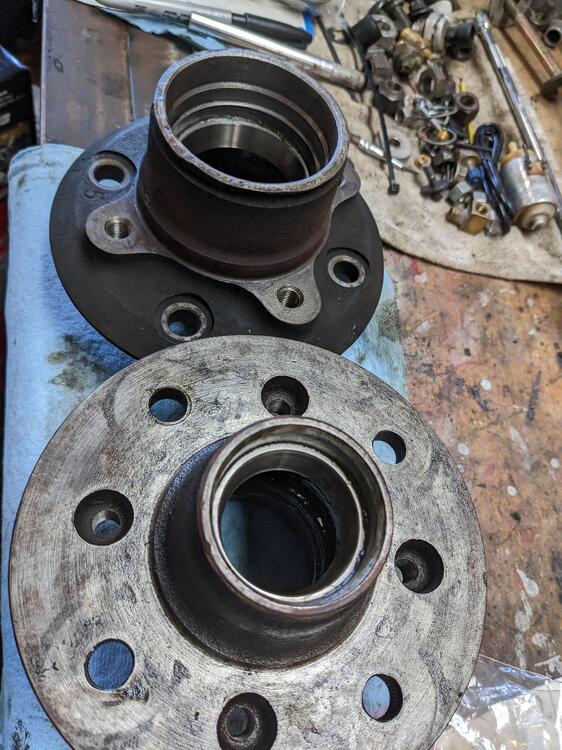
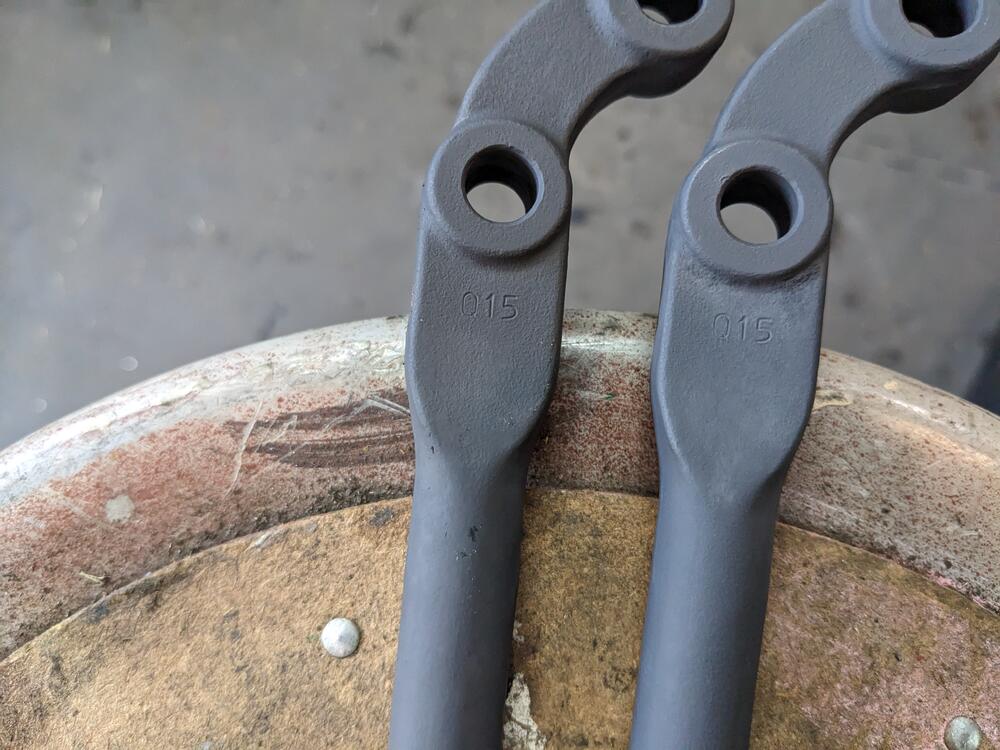
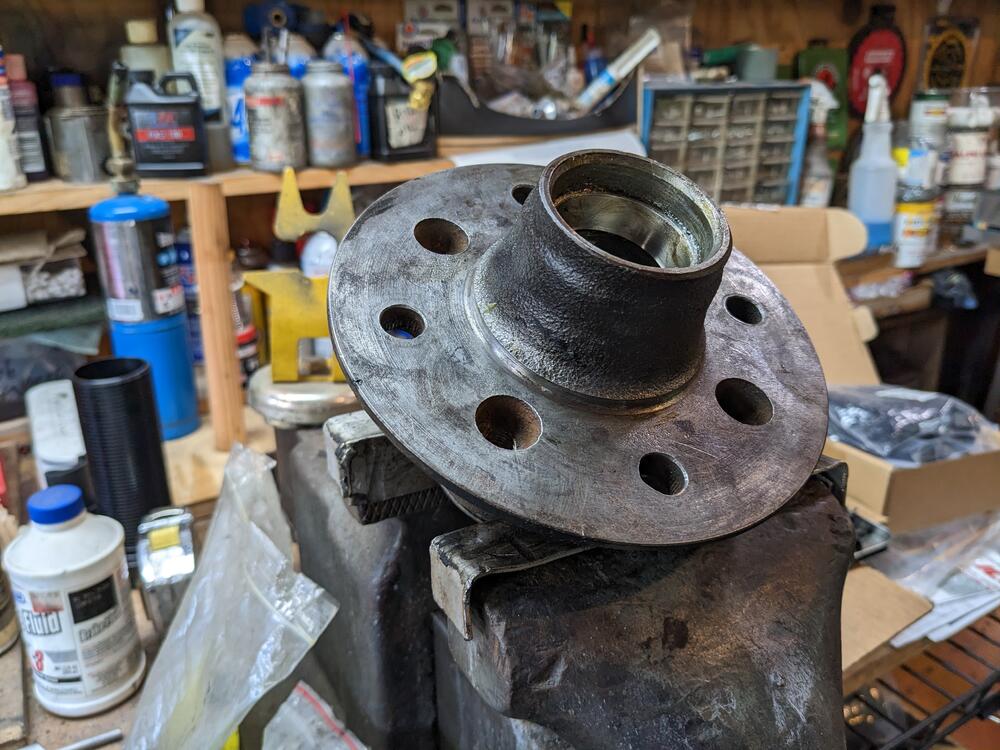
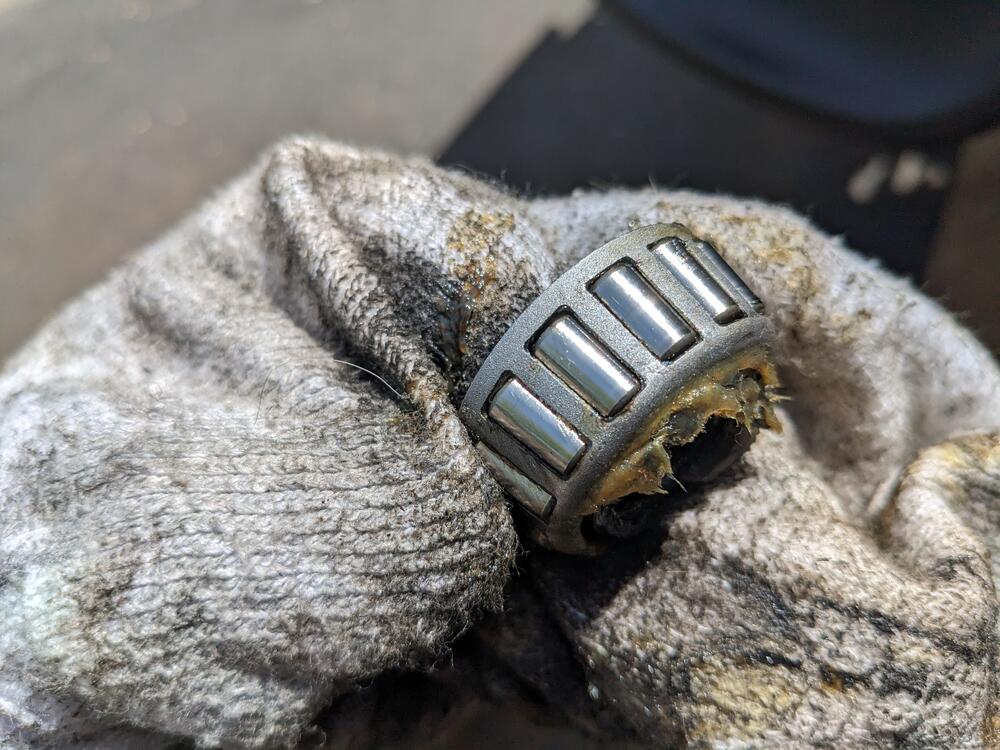
Some siblings are in town visits with my Mum, so I had a bit of time to work on the front end stuff. Never marked which tension rod was which, but they have the same marking, so I'm assuming L & R are equal. Volvo offered several lengths when they had a similar design. used a silver enamel on these, easier to see leaks against the lighter color, but I'm not sure I can deal with it if the suspension components stand out looking at the car. Probably going to repaint them black I had acid dipped & cleaned all the hardware, so I primed & primed the sway bar & tension rod bushing plates stripped the struts. everything that I'm keeping is in good shape, just had to strip the strut tubes of the crust around the upper tube top bushings and spring seats cleaned up wheel bearings all flushed of old grease. The races and bearing really look good, so I'm just going to re-grease them & pack the hub this time around. I didn't hear any bearing whine or grumble in the front end when driving. hubs need to be cleaned up


-
He sent pics to me of what he does - he recreates the original covering, but you have to send him your panels, so the backing card has to be usable.
-
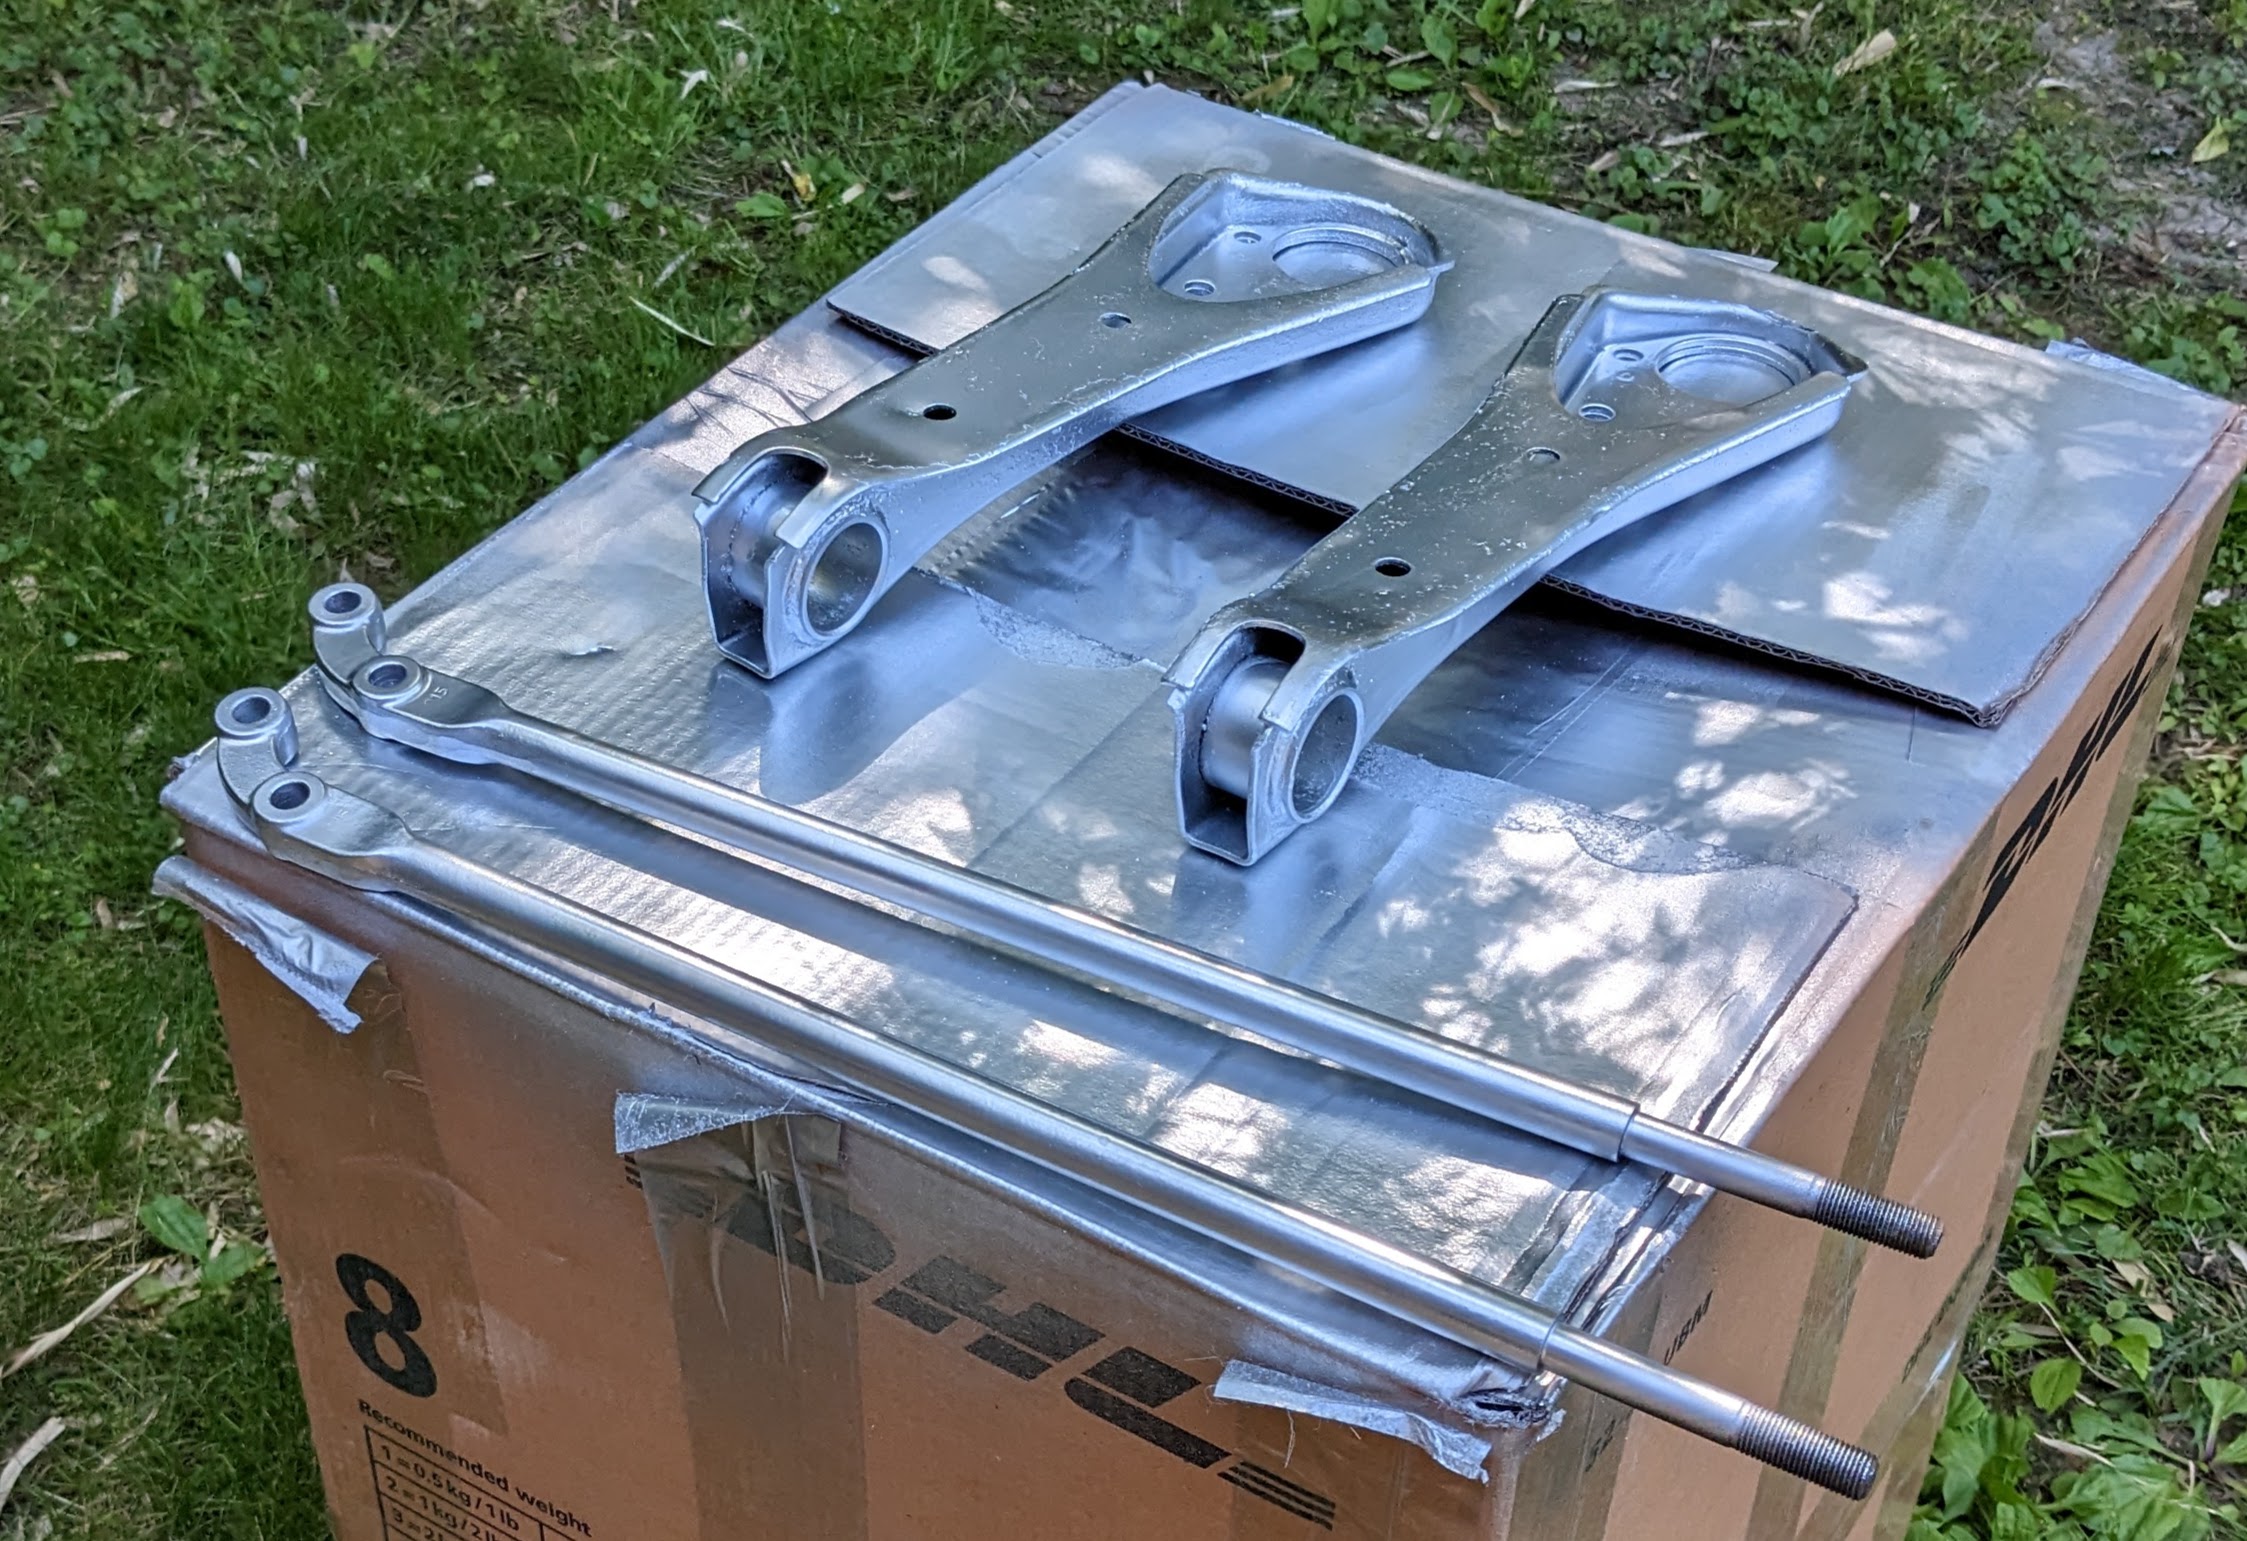
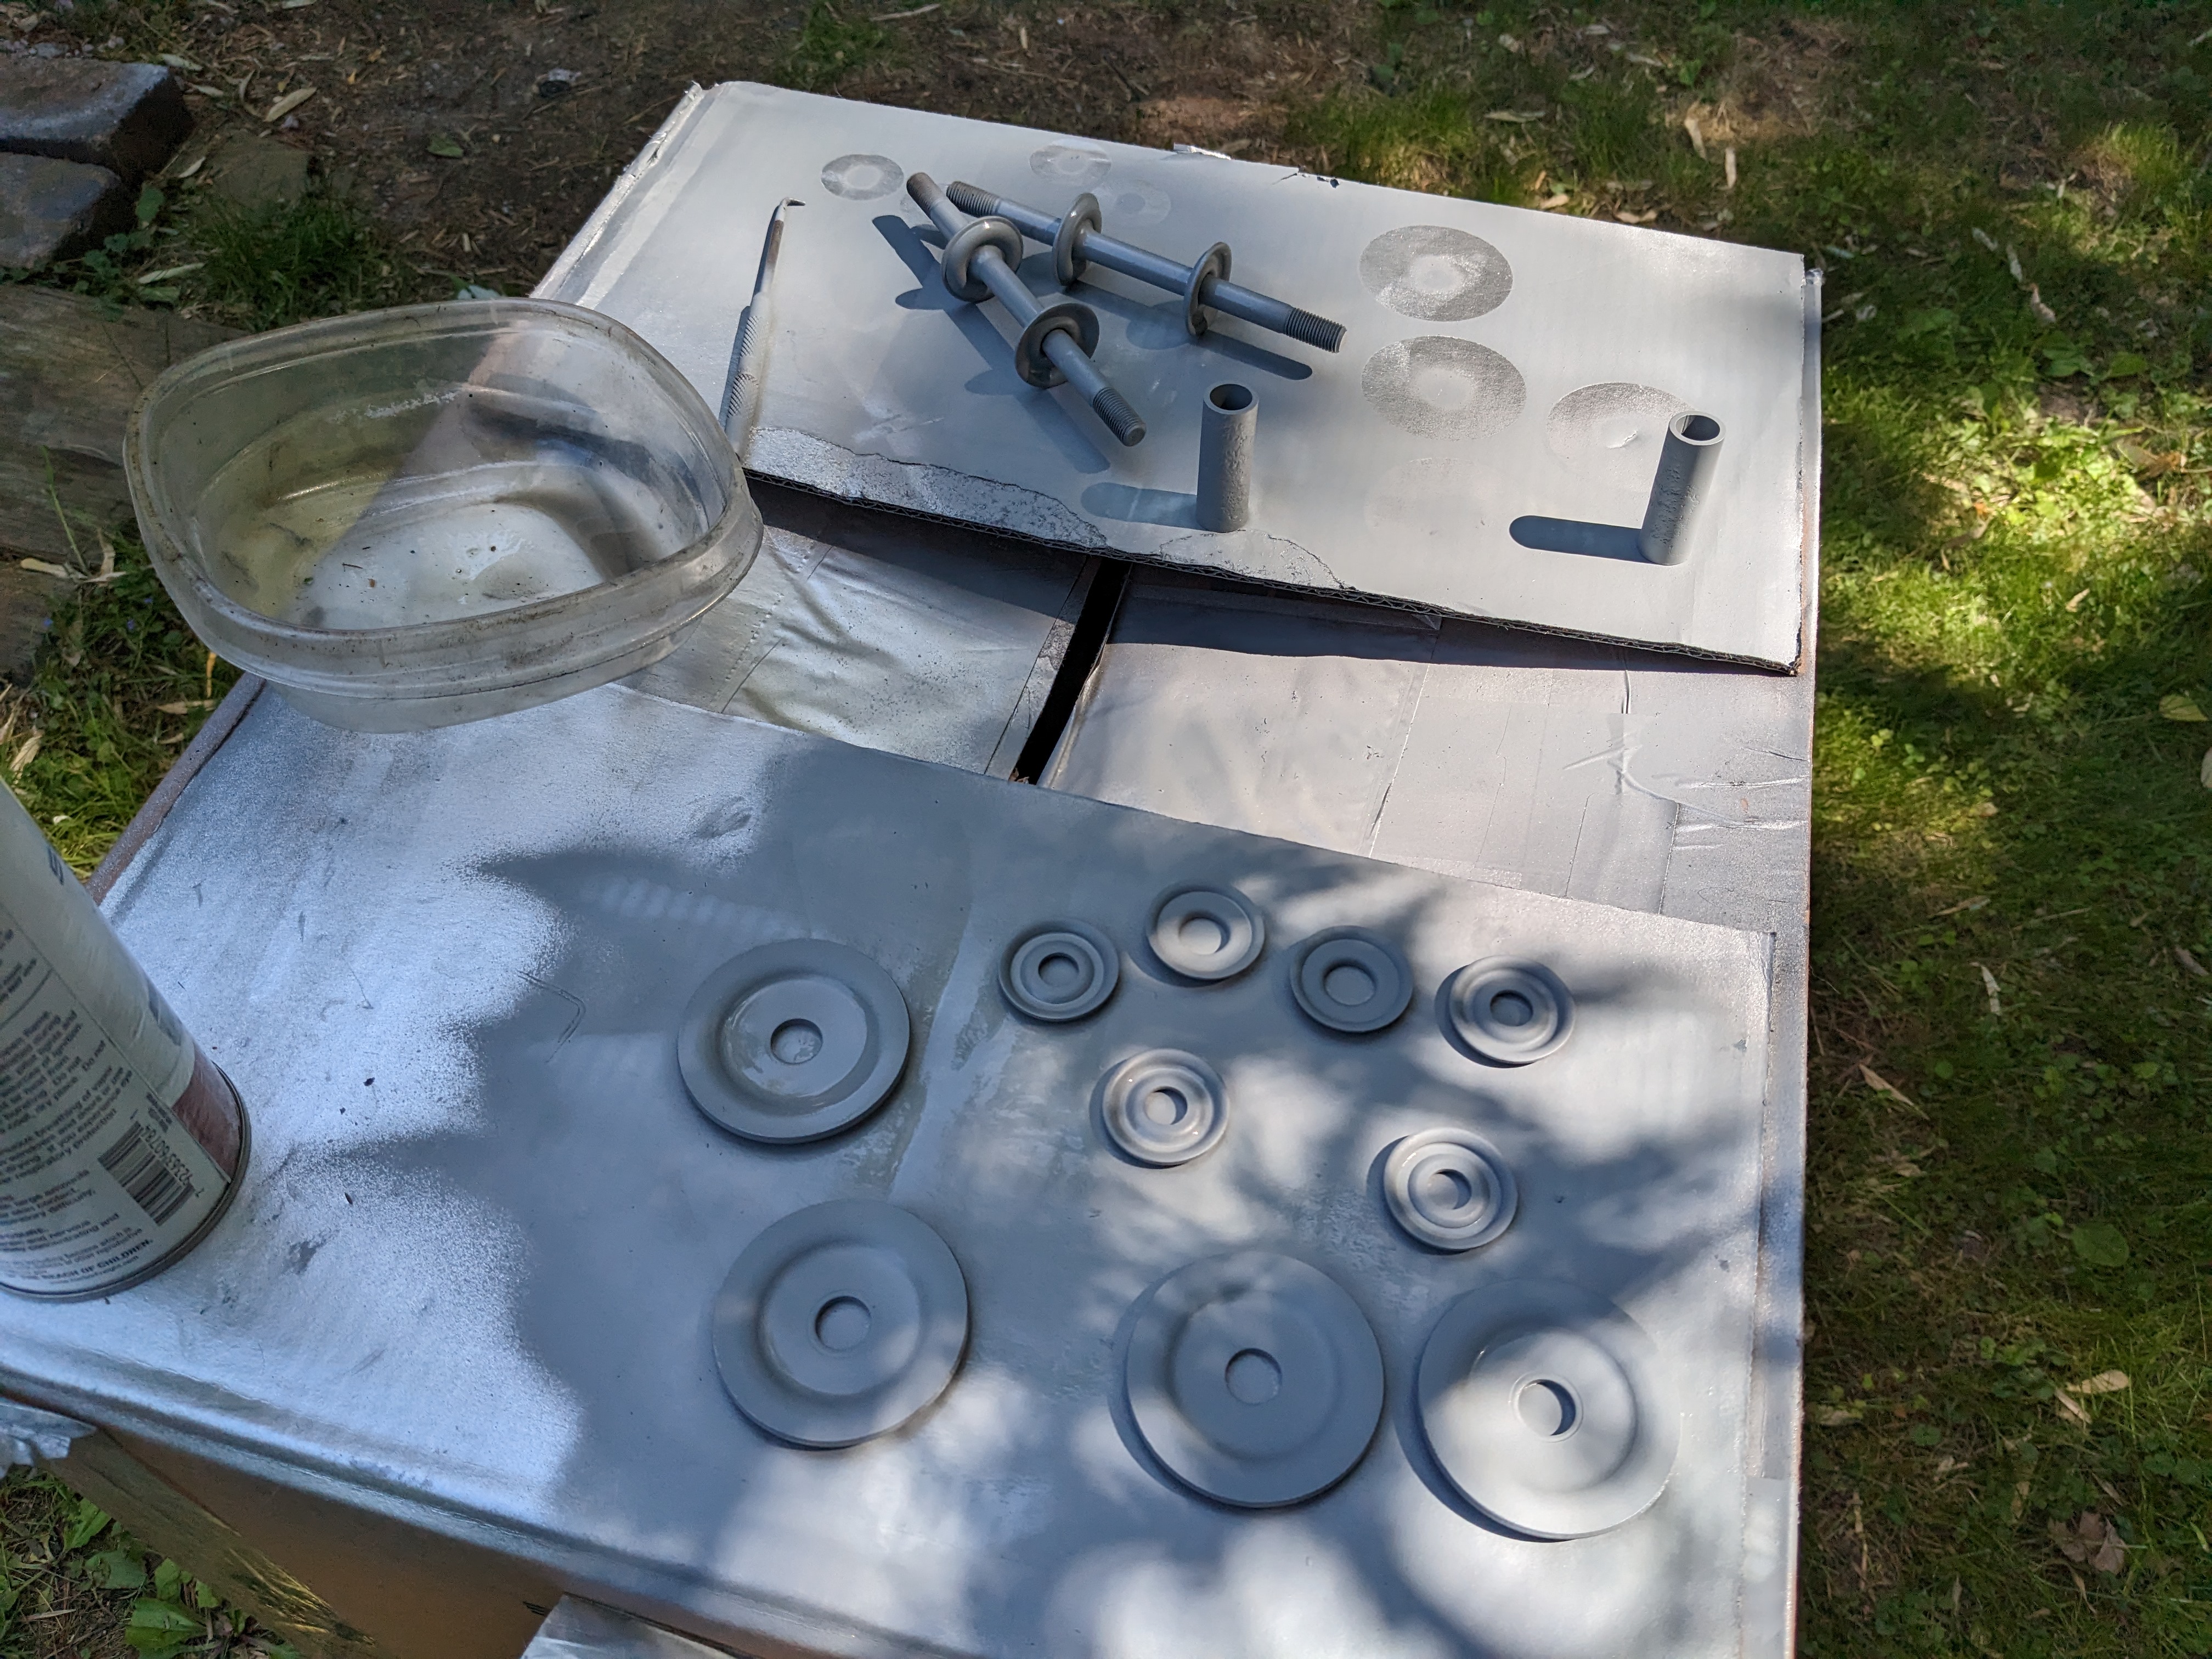
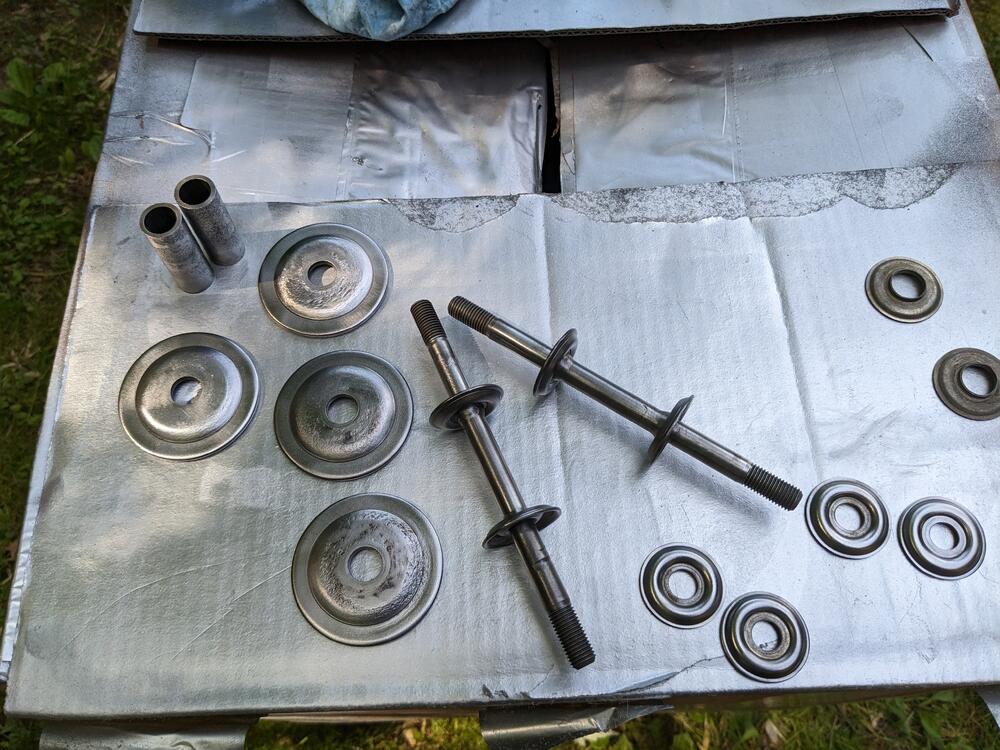
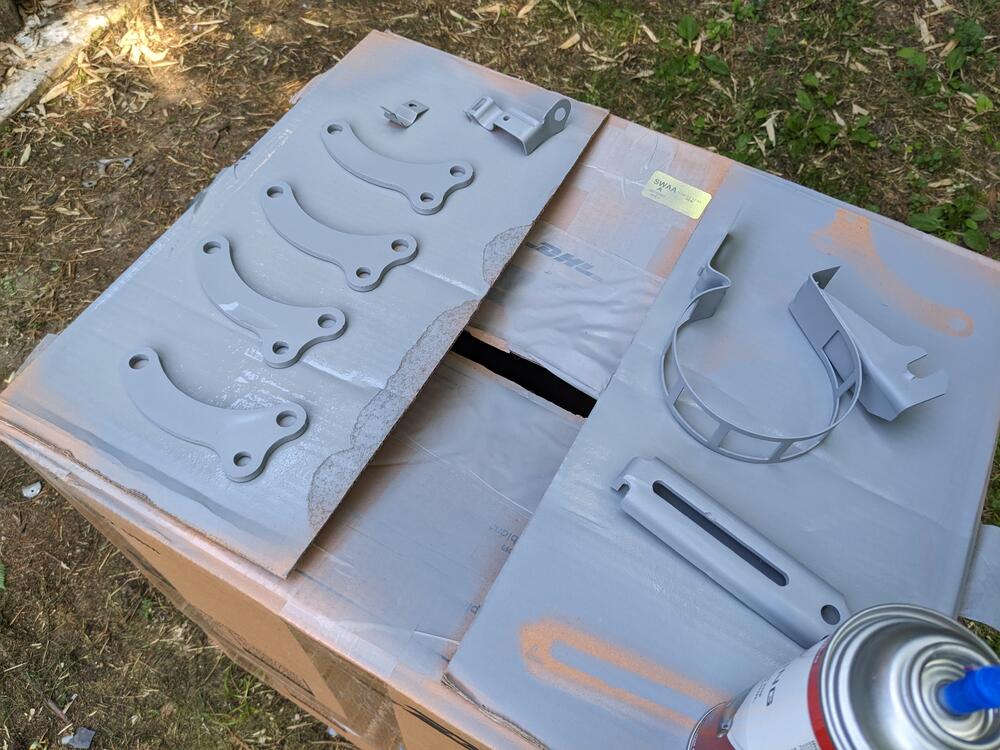
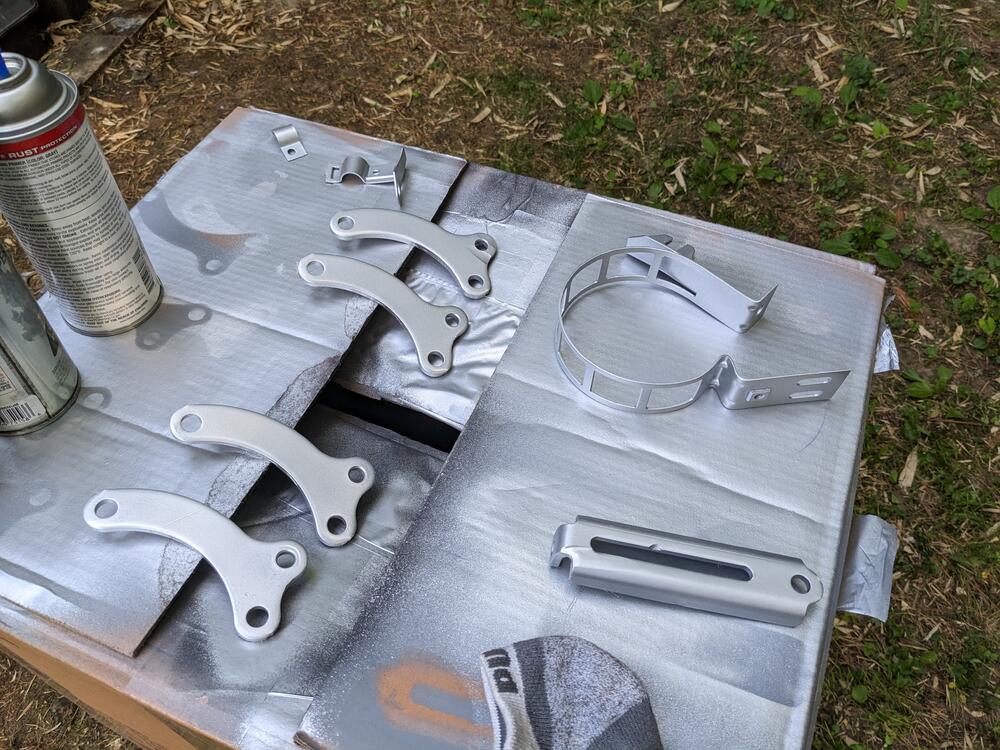
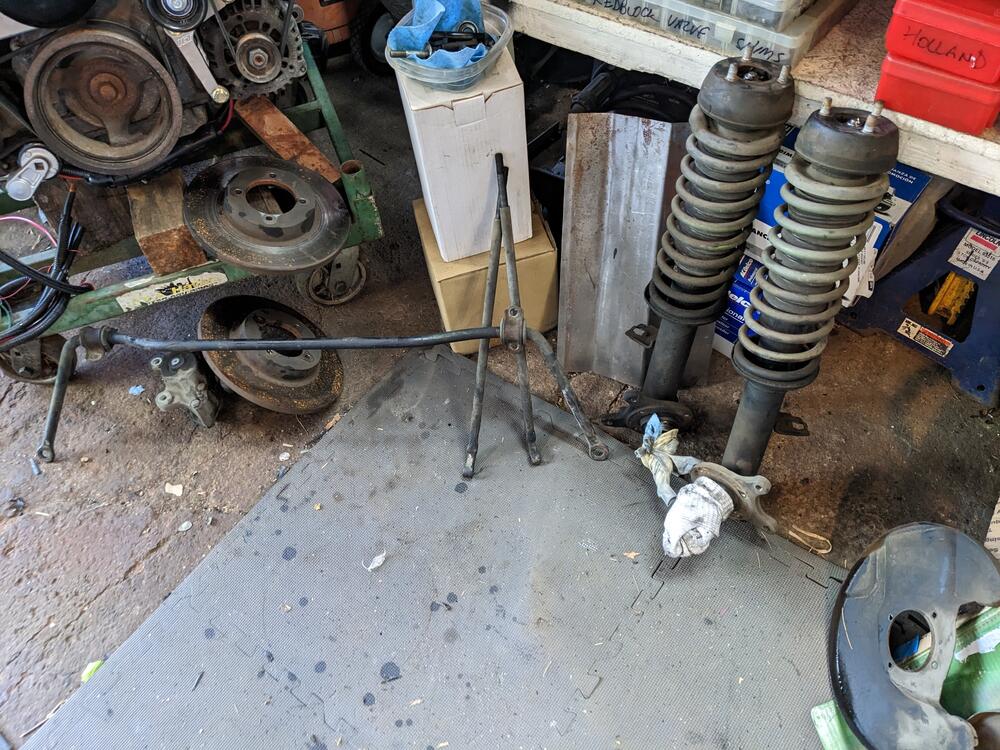
Still focused on getting things set up for my mother's change in health, so not much time for the car right now. I got about an hour to futz, so I started cleaning up the front hubs and tension rods, and acid-dipped, cleaned, primed & painted the AC compressor mount brackets (for the Volvo conversion) An array of suspension & brake parts

-
Nice find! I messaged him on FB, to ask if he has 280Z templates. ZcarDepot has an Asian vendor, but they have no stock or ETA on 75 280Z pattern
-
Nice work! Always good to rebuild when possible. It's better to problem-solve & find a solution vs. just replace If you have a selection of AC orings, for example, the thick wall variety would probably seal, since it's just the seat, not the sliding seal. I doubt that square cut is an imperative, if one cannot be readily sourced.
-
-
I haven't, but my question would be how you are going to replicate the factory stitching / door panel design. IMO, flat stretched vinyl without the design/detail element is going to look pretty tacky, especially considering the labor intensive nature of the job. Another consideration would be the state of the door card itself. Unless it's really pristine & all mount points have no water damage, that will be another detractor when it comes to assembling the vinyl to the card. Do you have any experience sewing/ working with vinyl & patterns? It's no small undertaking.
-
-
Graham Tool Co - Medium Tube Beading Tool Not cheap by any stretch, however I'll need to do a fair amount of tube bead rolling on the V8-into-Volvo-Pickup that I have underway
-
I tested the bead roller yesterday. I wish I had room for a lathe, there is certainly many an item I could use one for. In any event, this tool works very nicely

-
Hmm... that diagram shows is in the center of the dash, isn't it in the relay block. Bloody hell they like to confuse you.
-
Thanks for that, Steve. Dang. Why the heck would they label the same item as two components and number them differently? Just to fk with ppl???
-
Thanks Steve Intermittent Amp above - 7 wires Interval relay, 10 wires Locations of the 2 relays
-
Ok many thanks for all the responses. Sounds to me like all rubber or poly on the front side is the way to go. I don't want to damage the rod by making the outer length unable to pivot through the travel range. On older Volvos that use caster rods, they have a large bushing on the body side to allow for rotational flex over suspension travel, and the resistance bushings are set into an ear in the control arm. X1/9's are setup like the Z, with a rigid mount at the control arm and the resistance bushings at the frame, just forward of the control arm instead of aft. Those wear the bushings rapidly, in the scheme of things
-
I'm confused as the diagrams indicate two components with different pin outs for the intermittent amplifier and interval or intermittent relay in the diagrams I posted above.
-
Quick question - I know I read this in someone's post, but now it's not coming in a search. Do I want the more compliant rubber on the leading or trailing side of the frame mount? TIA
-
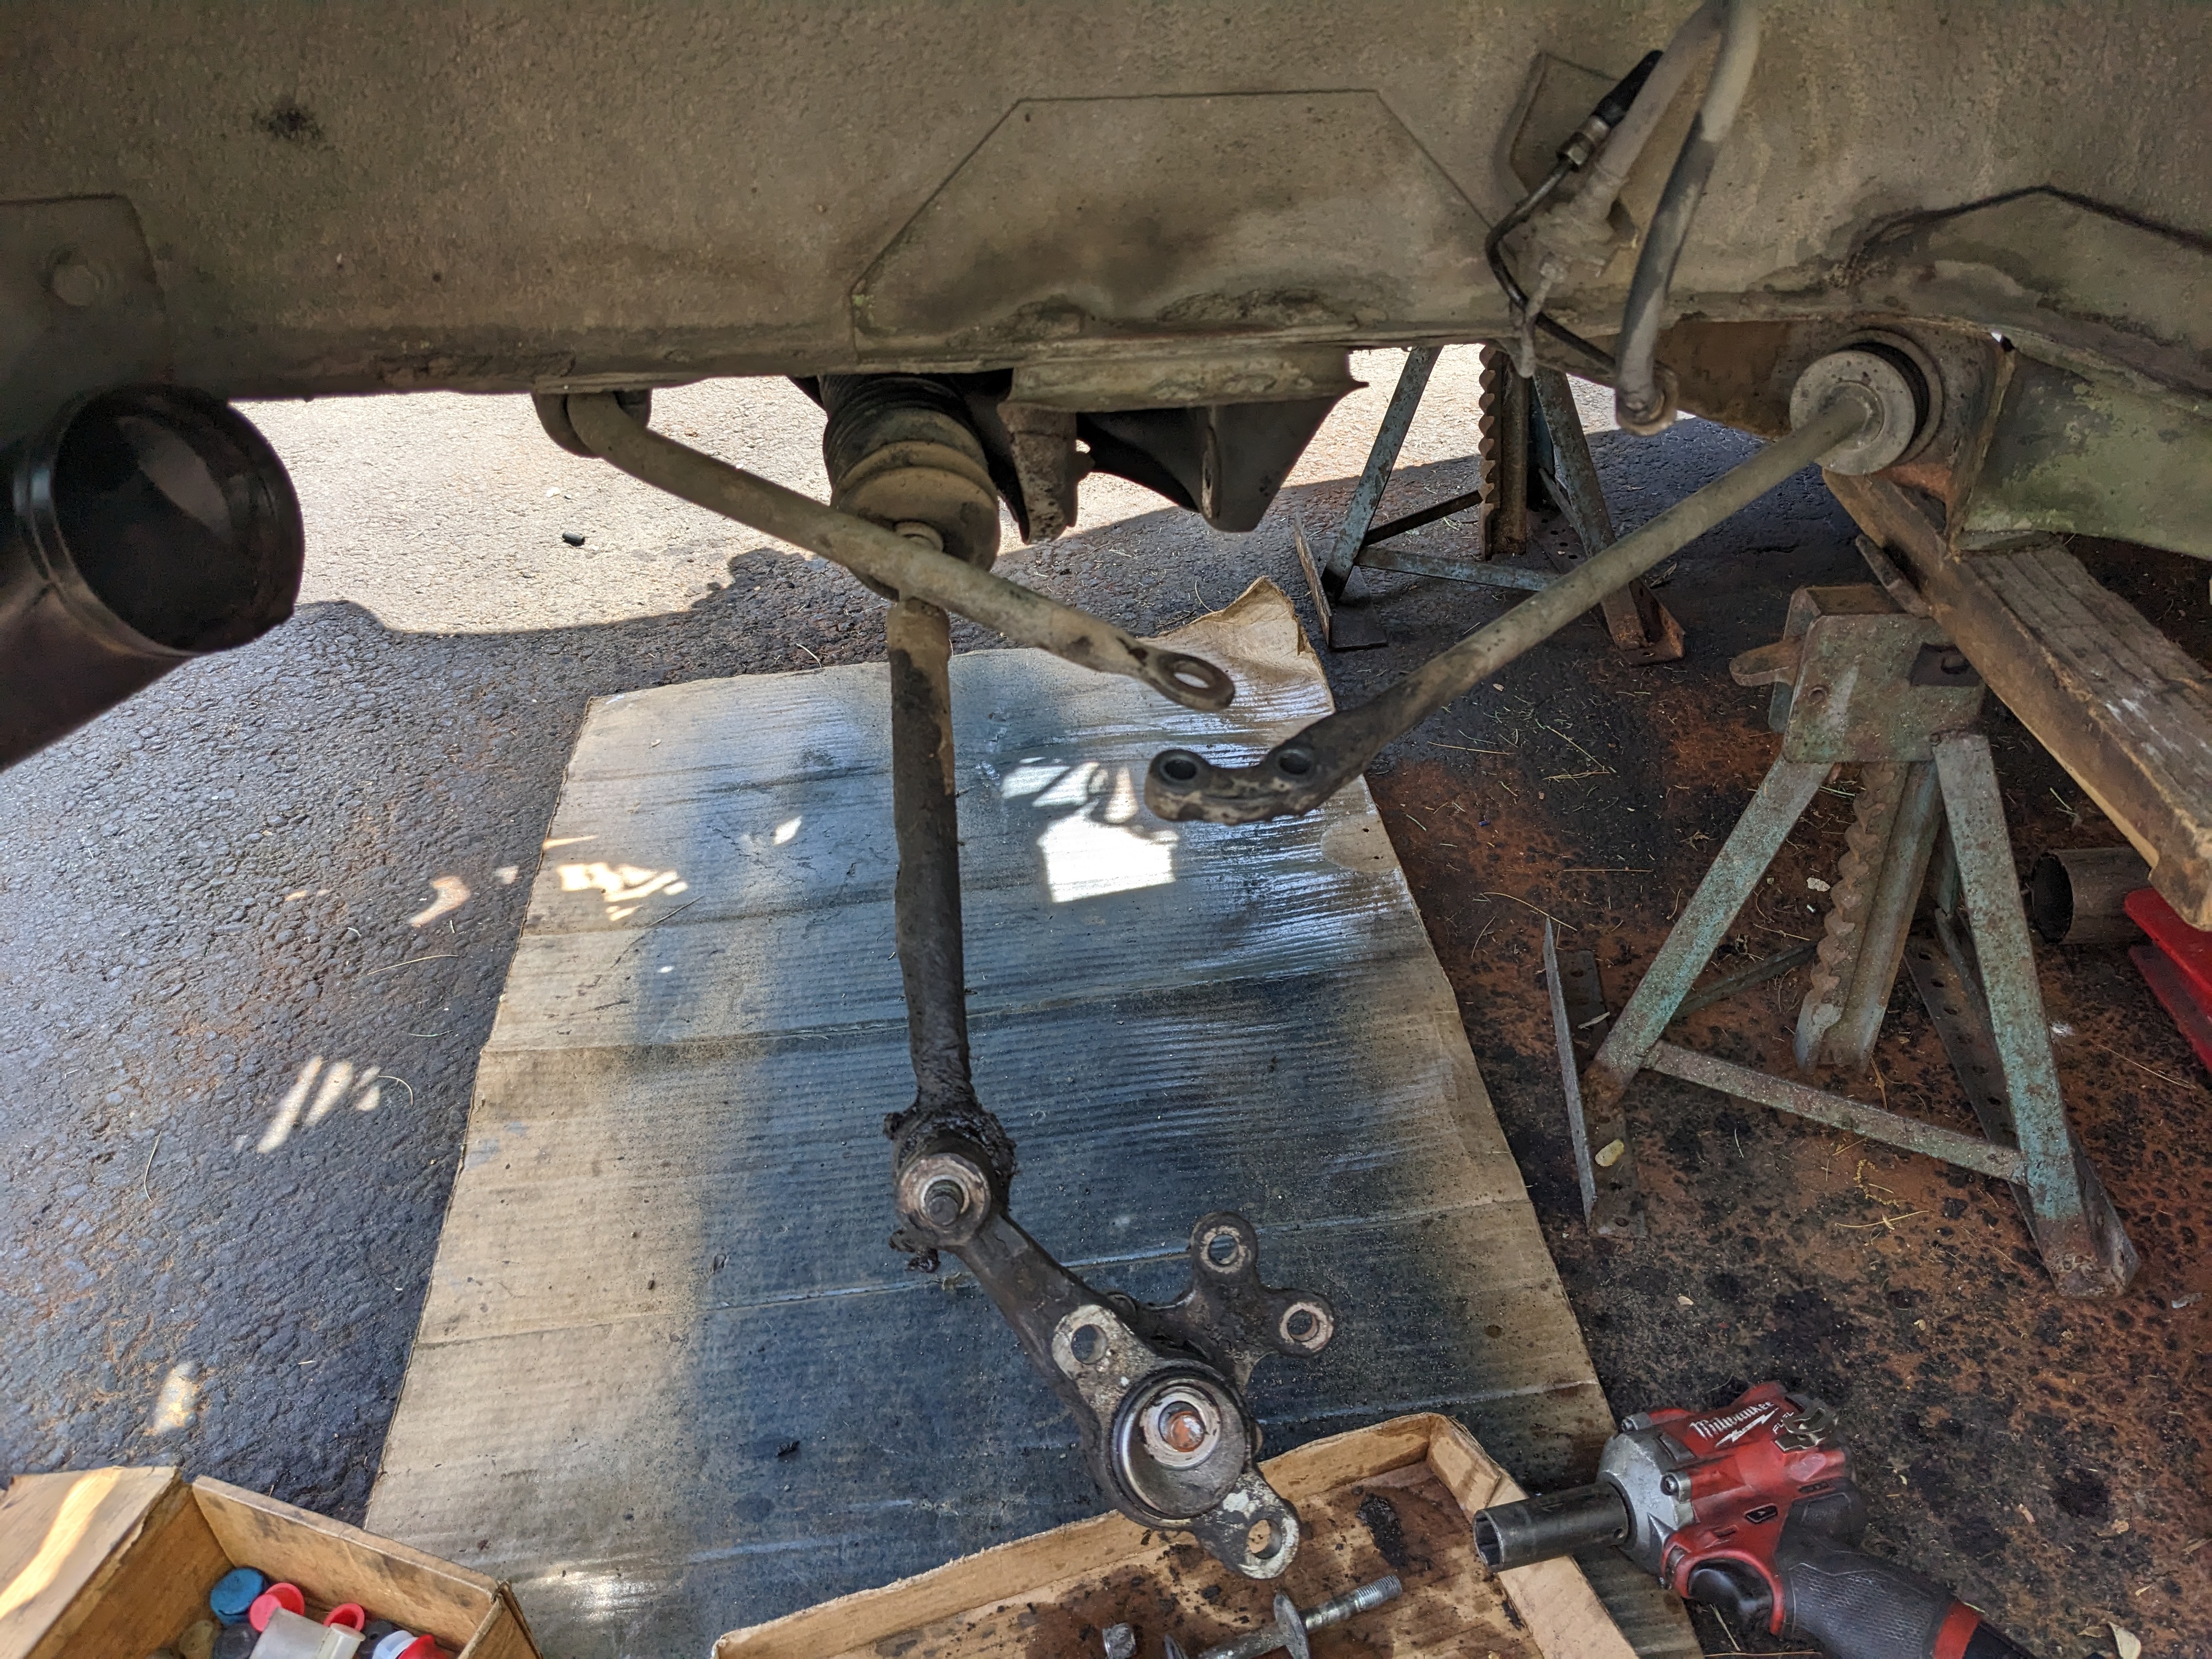
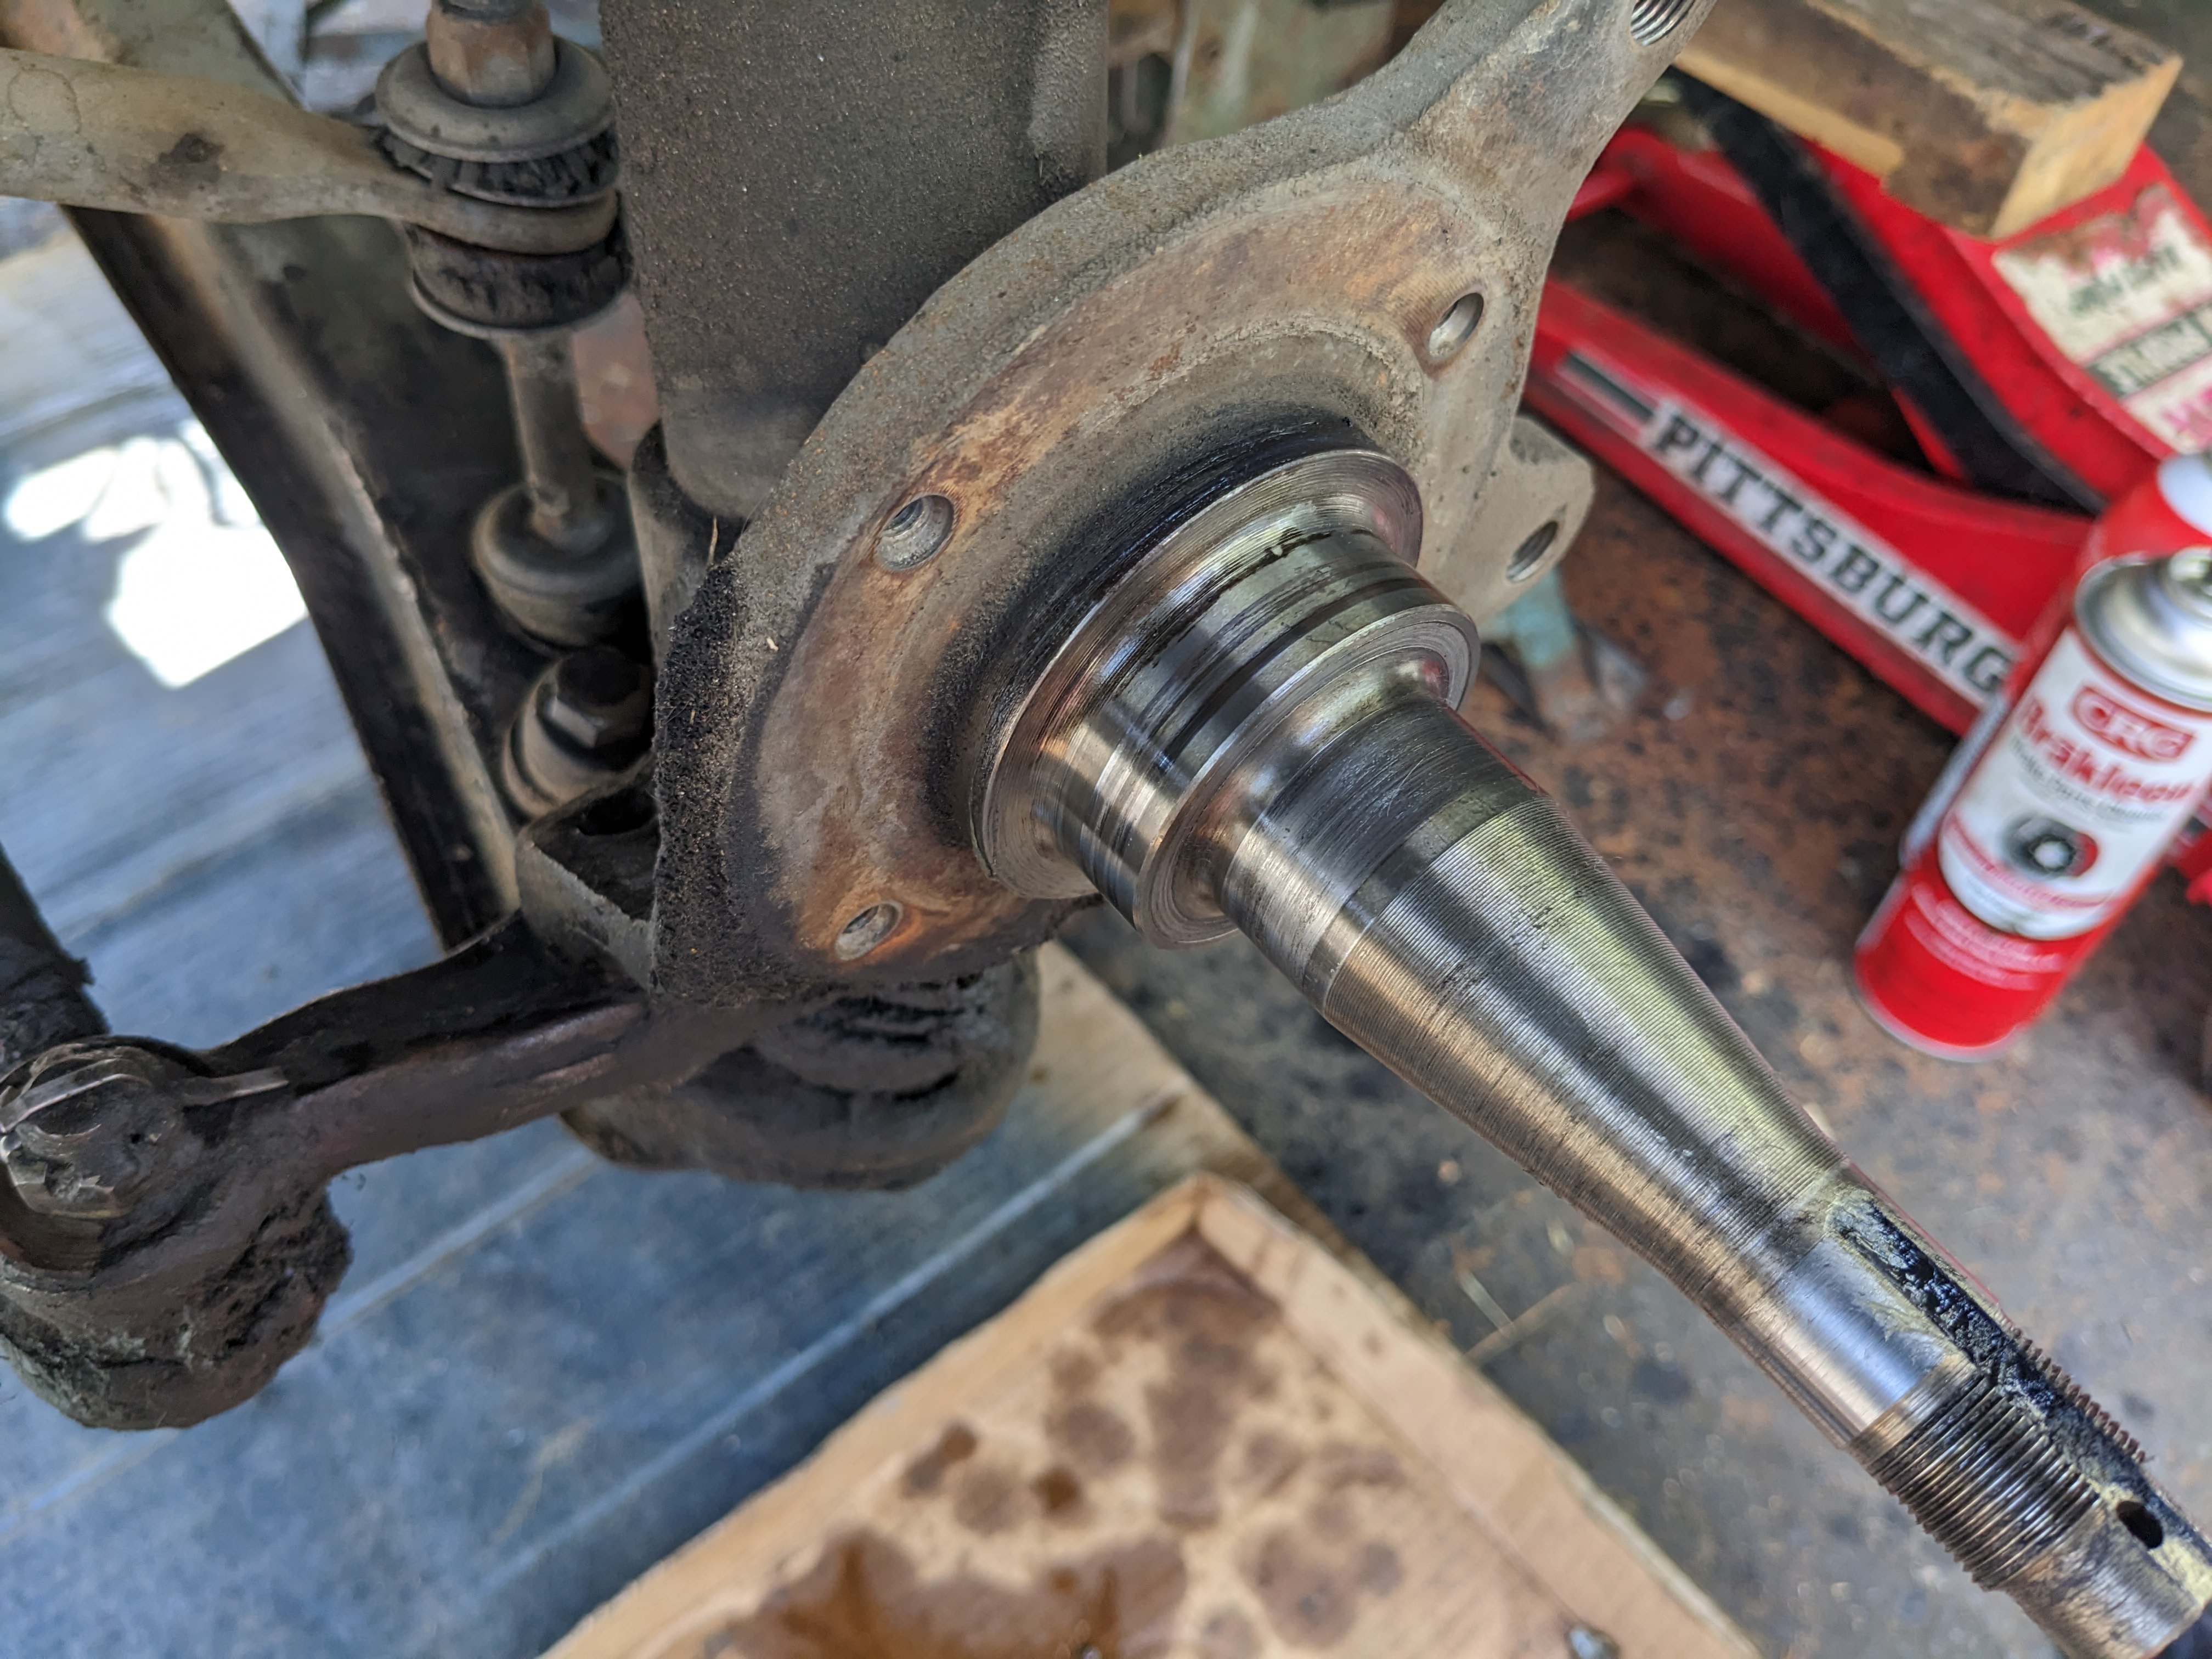
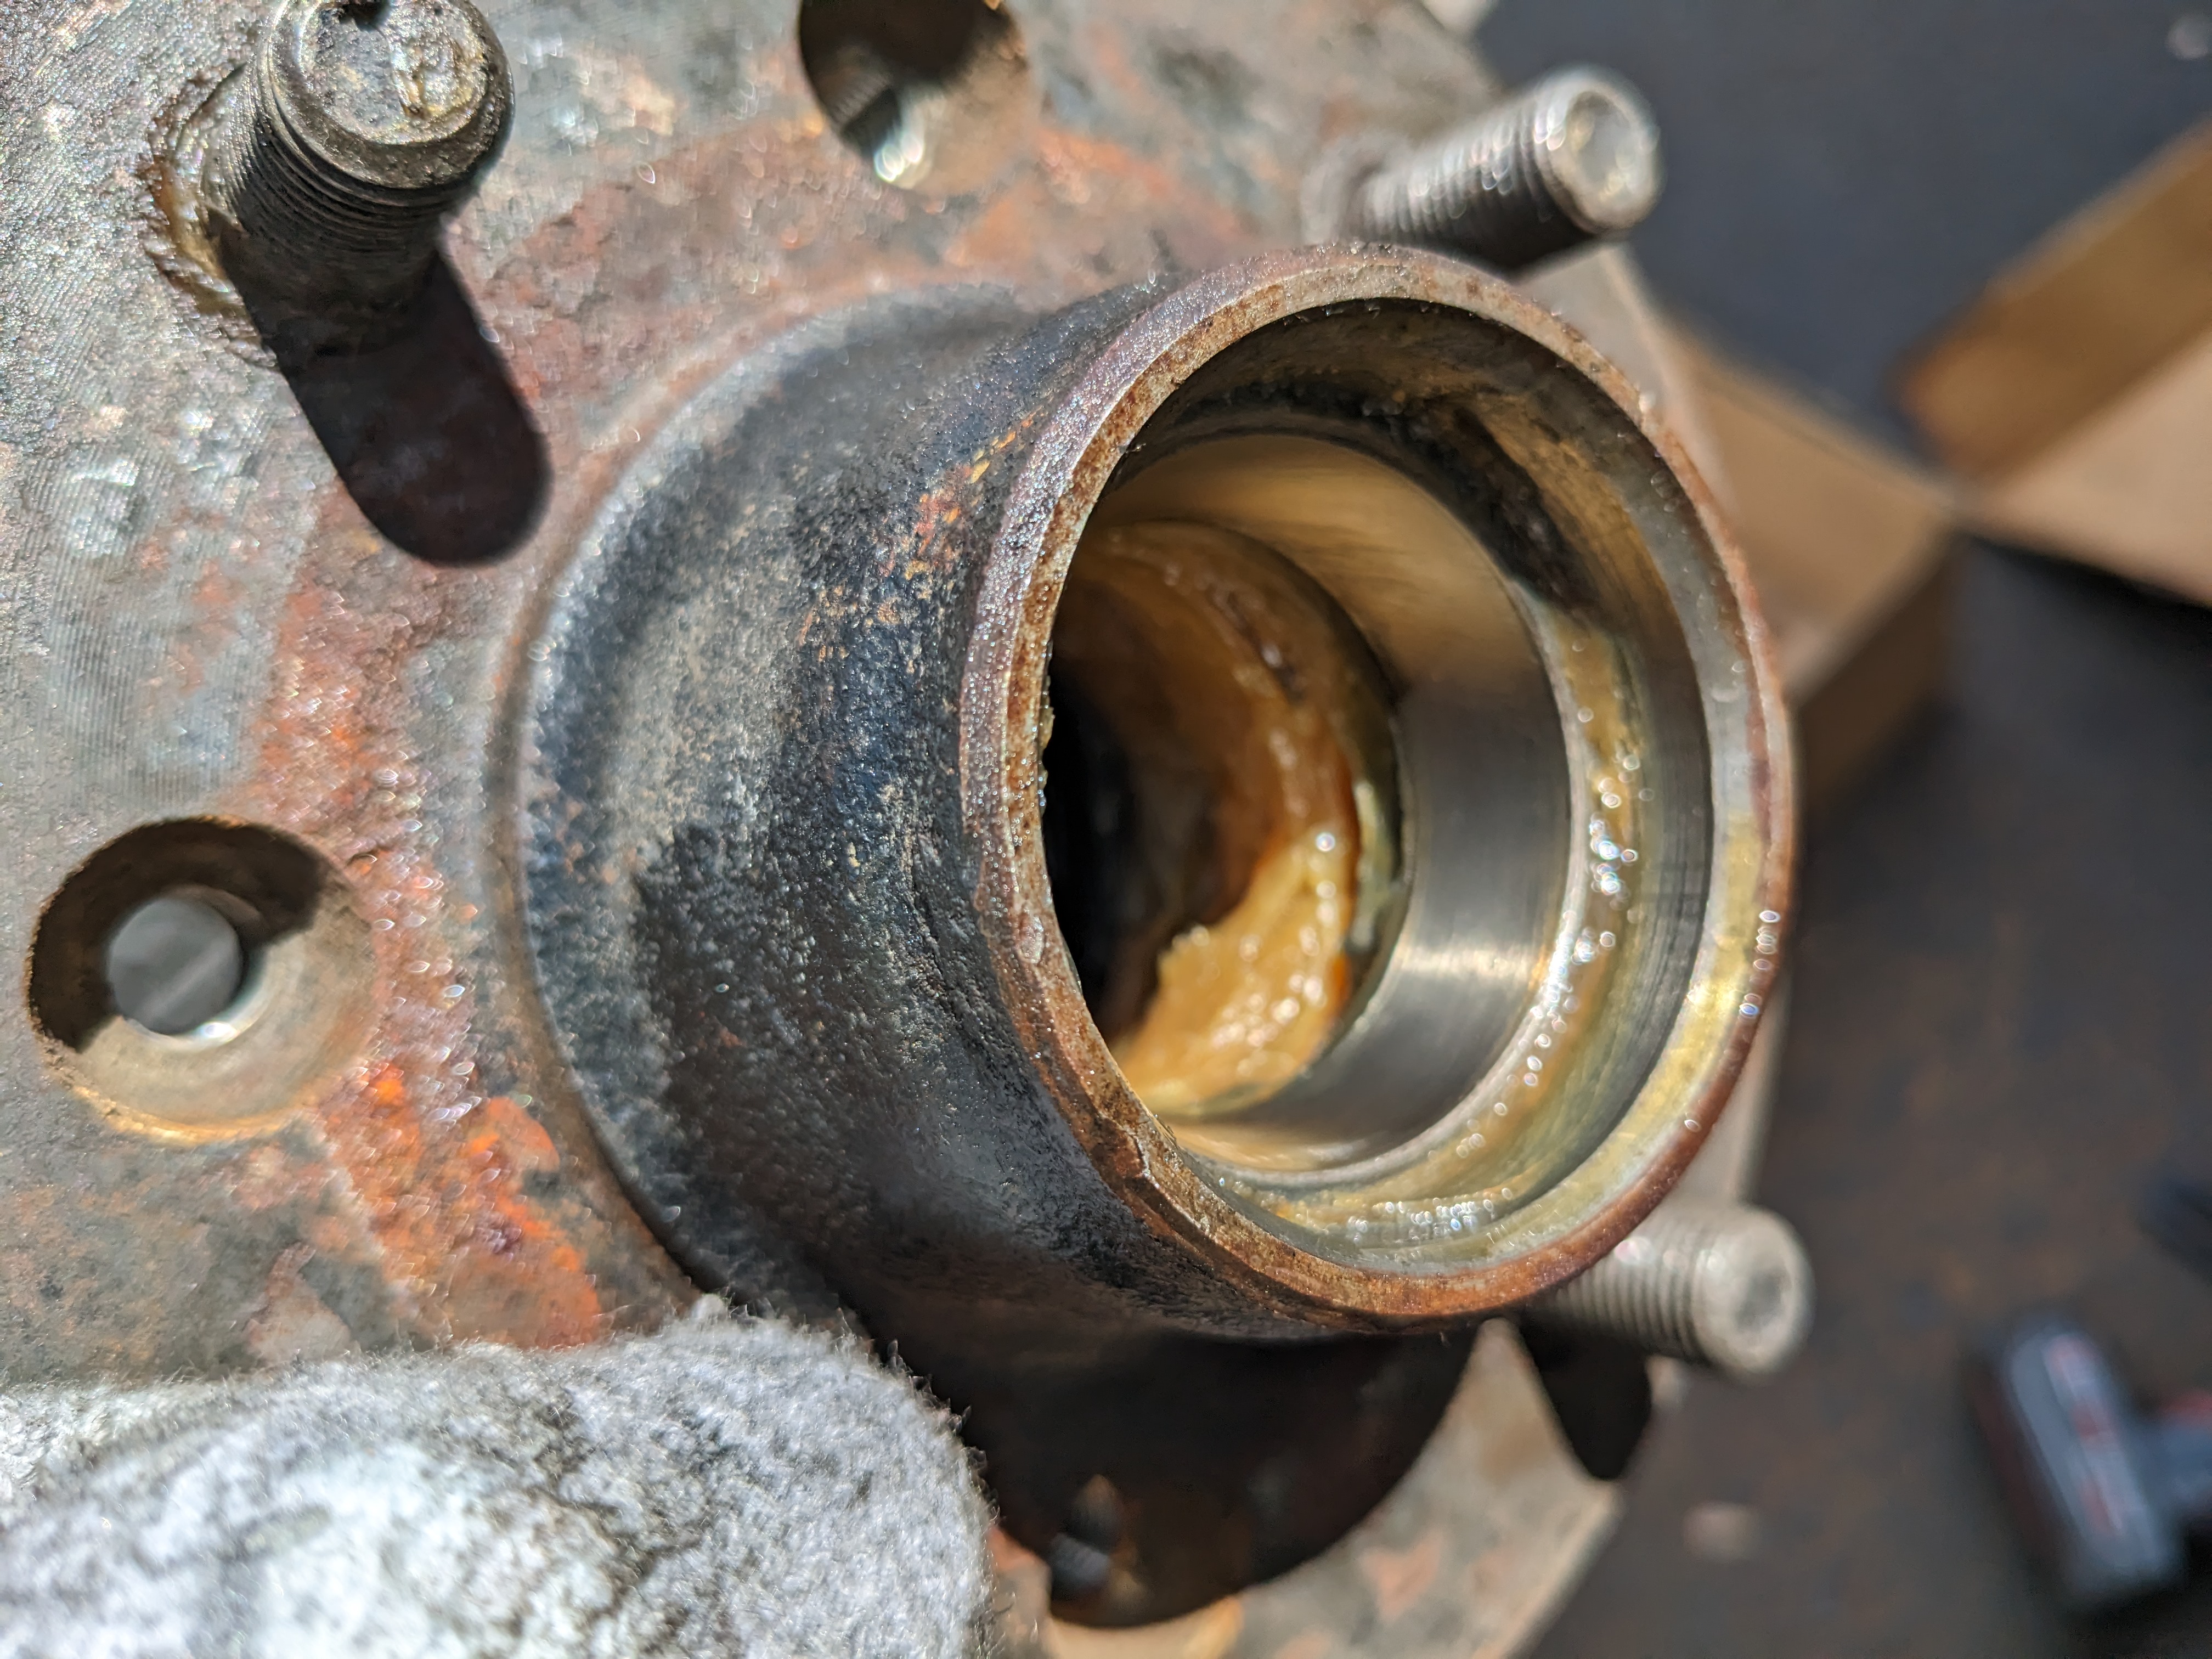
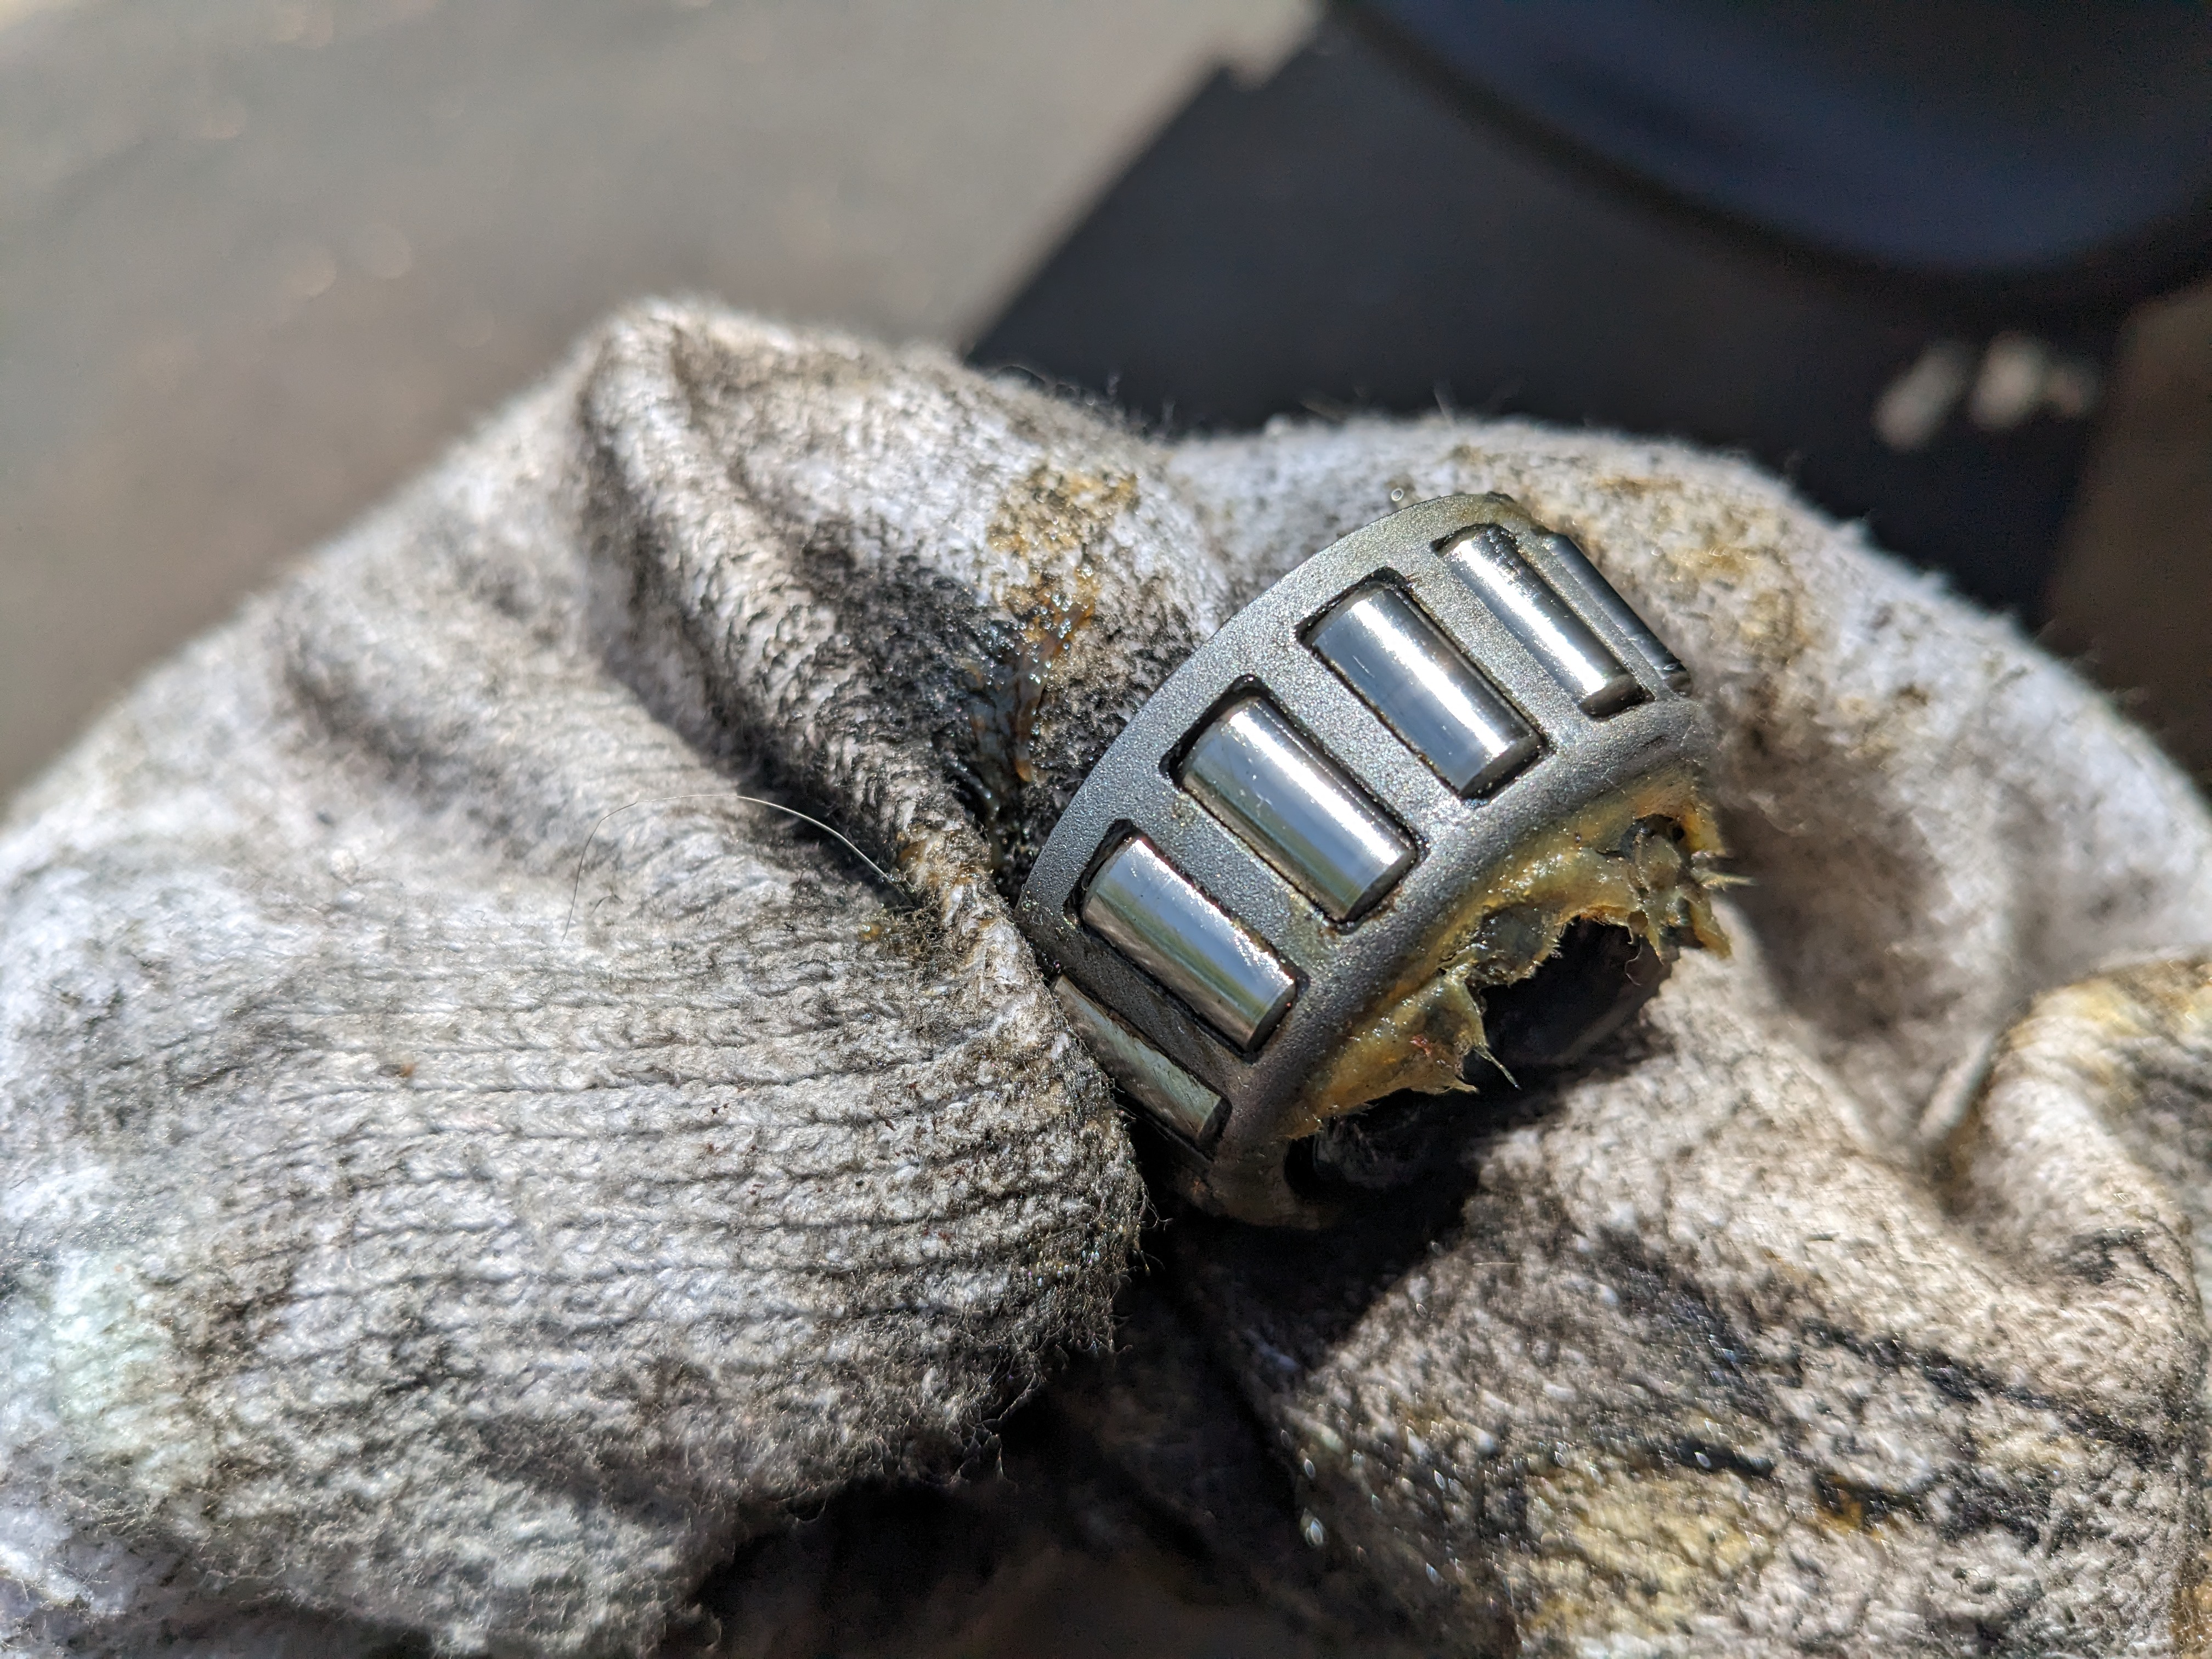
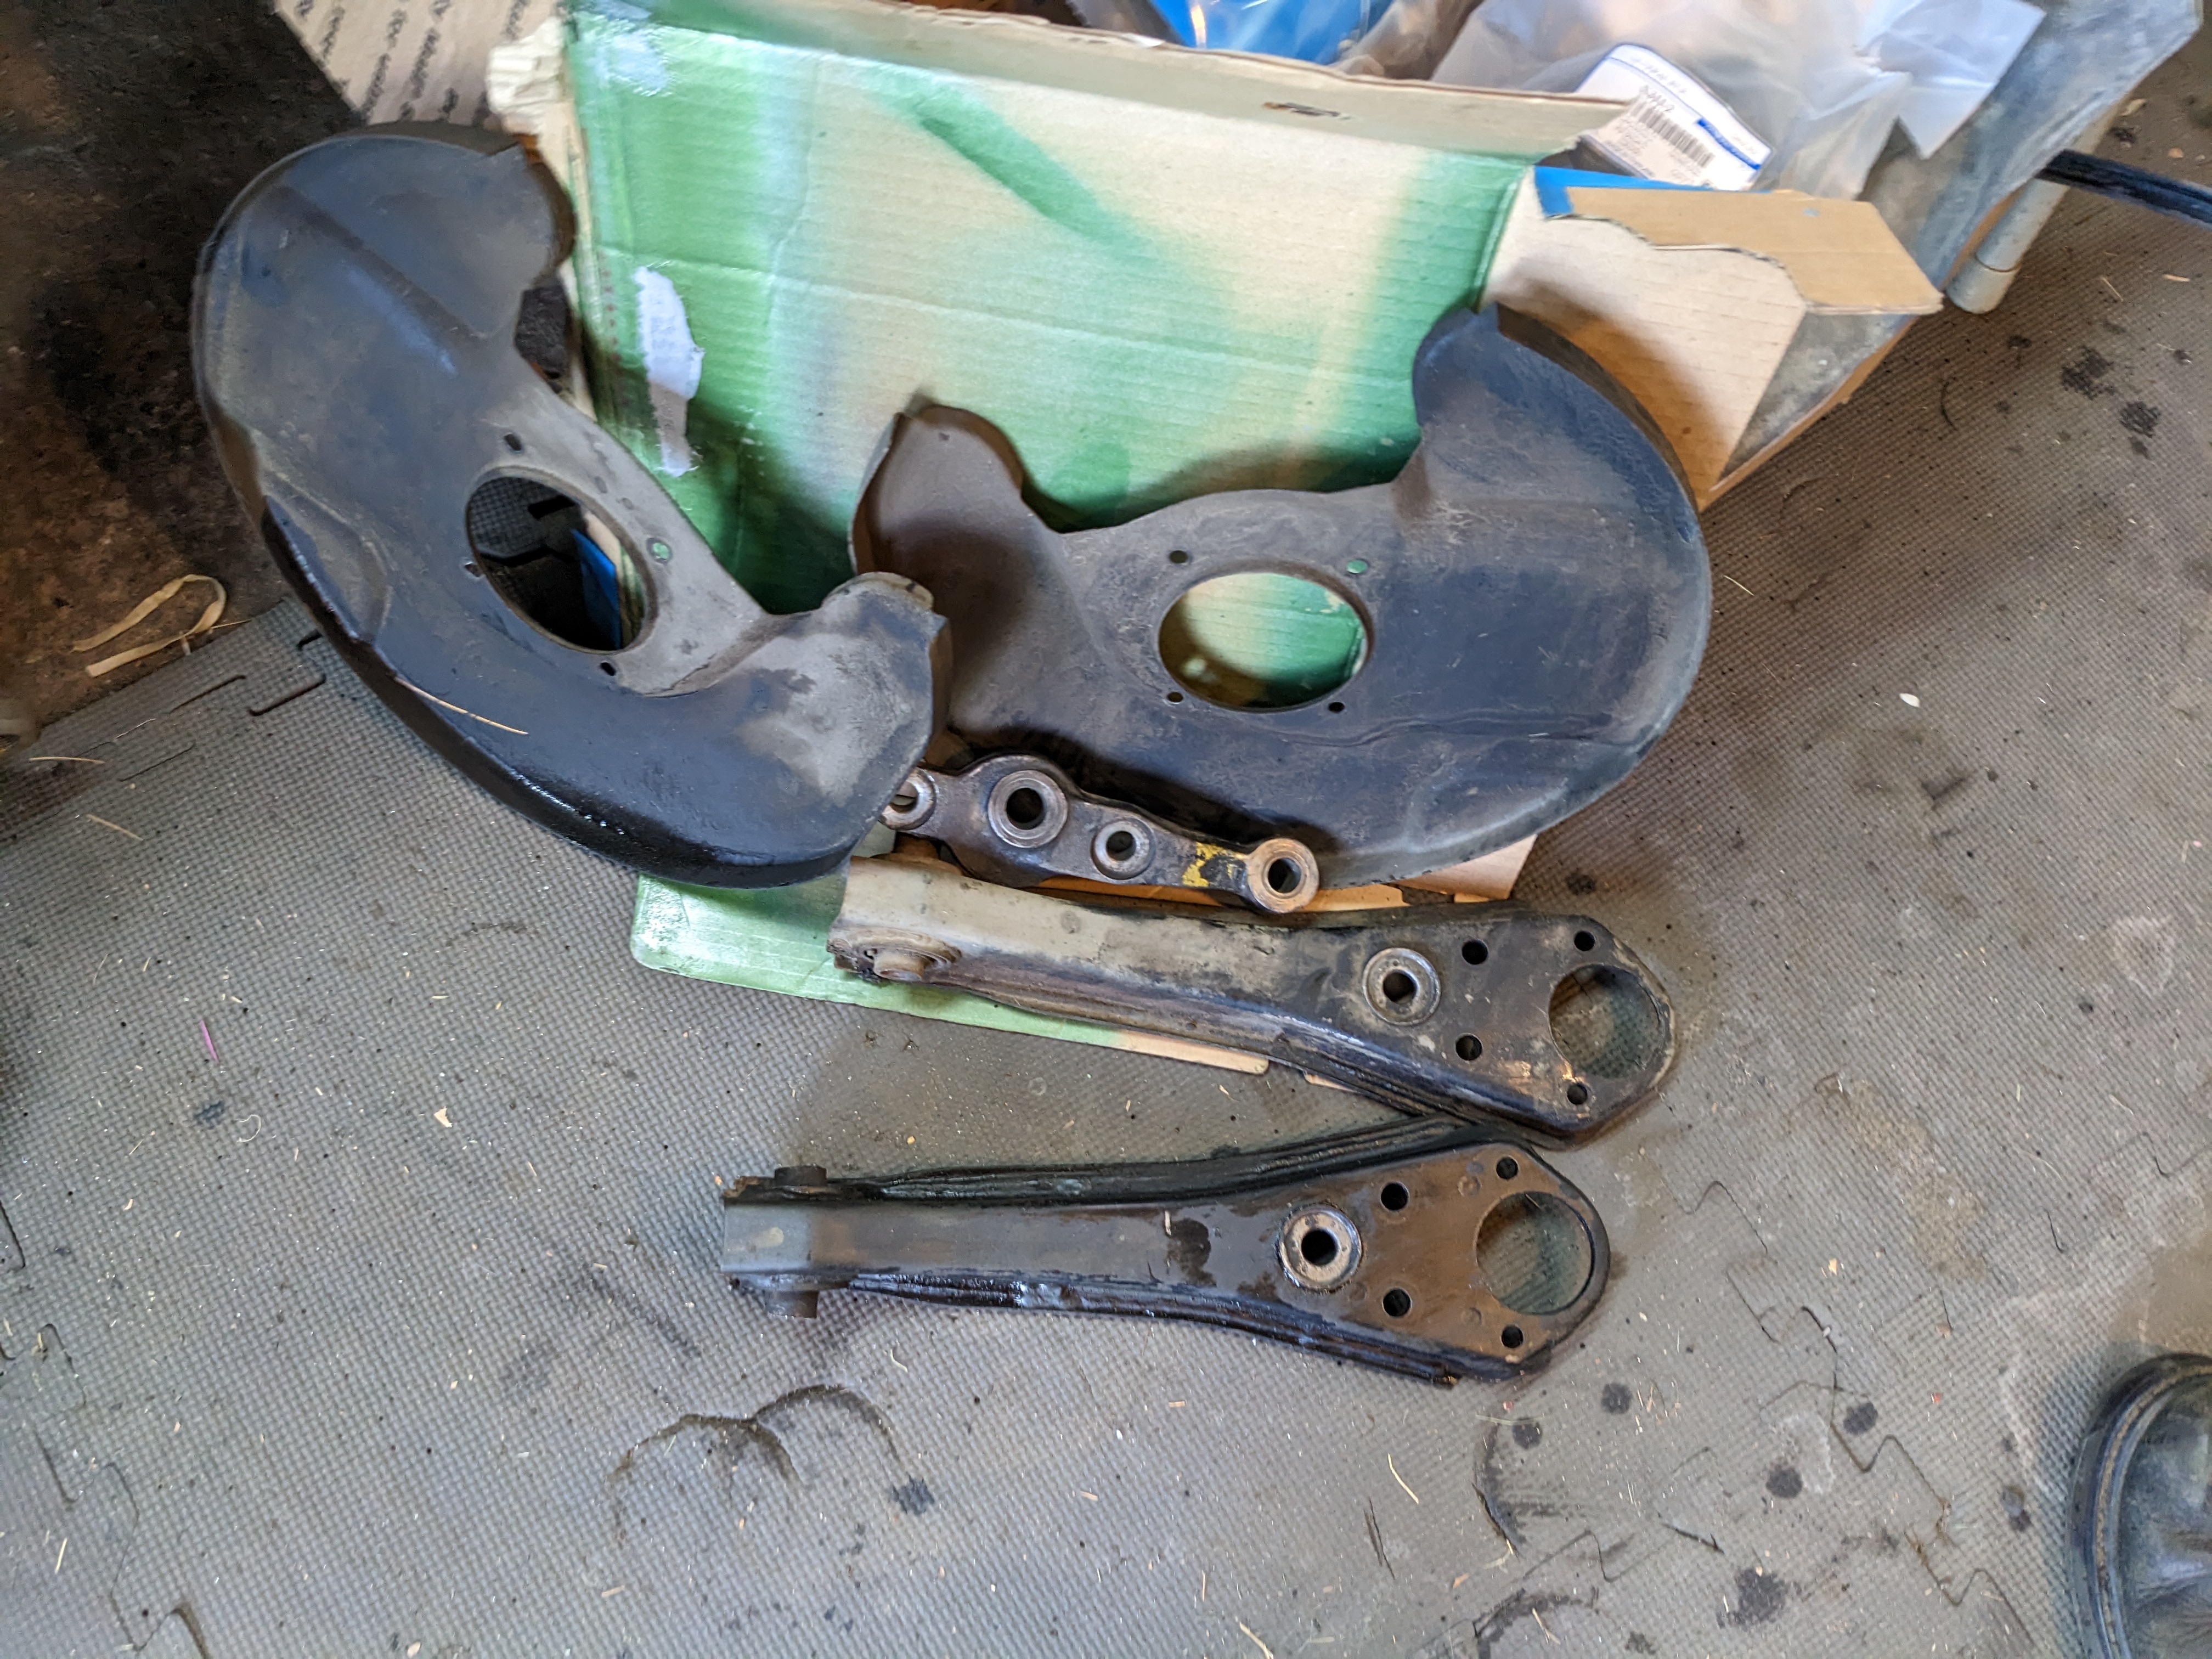
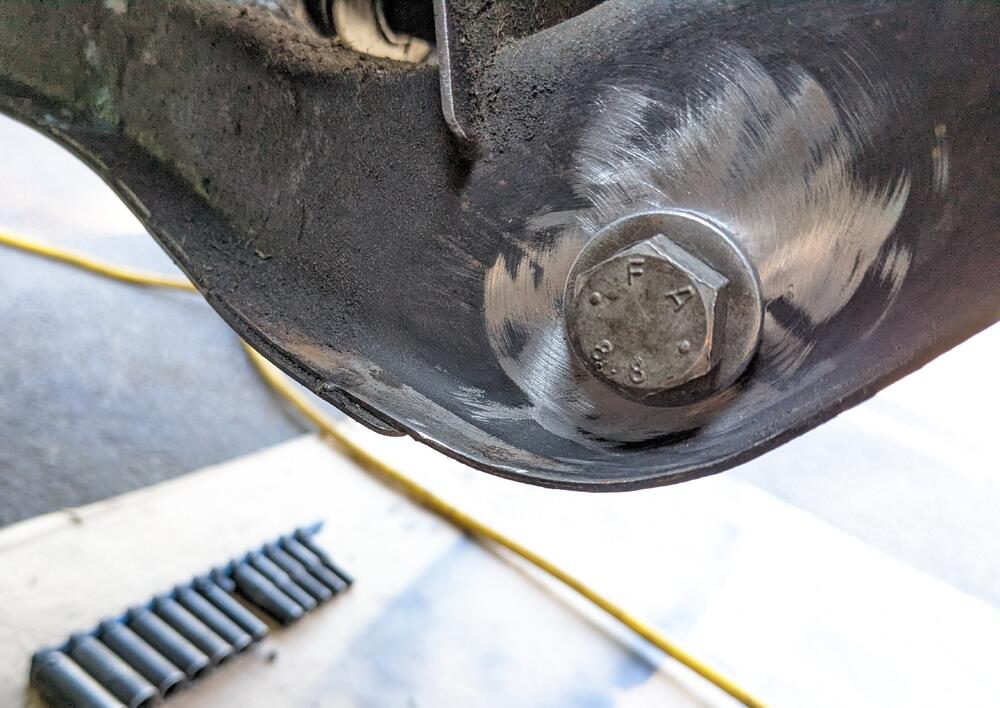
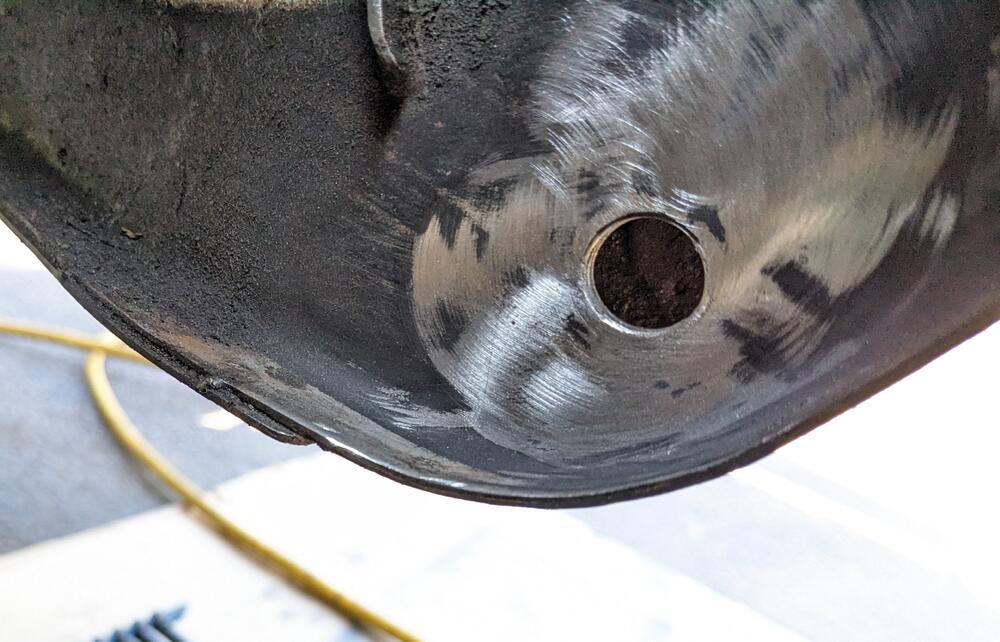
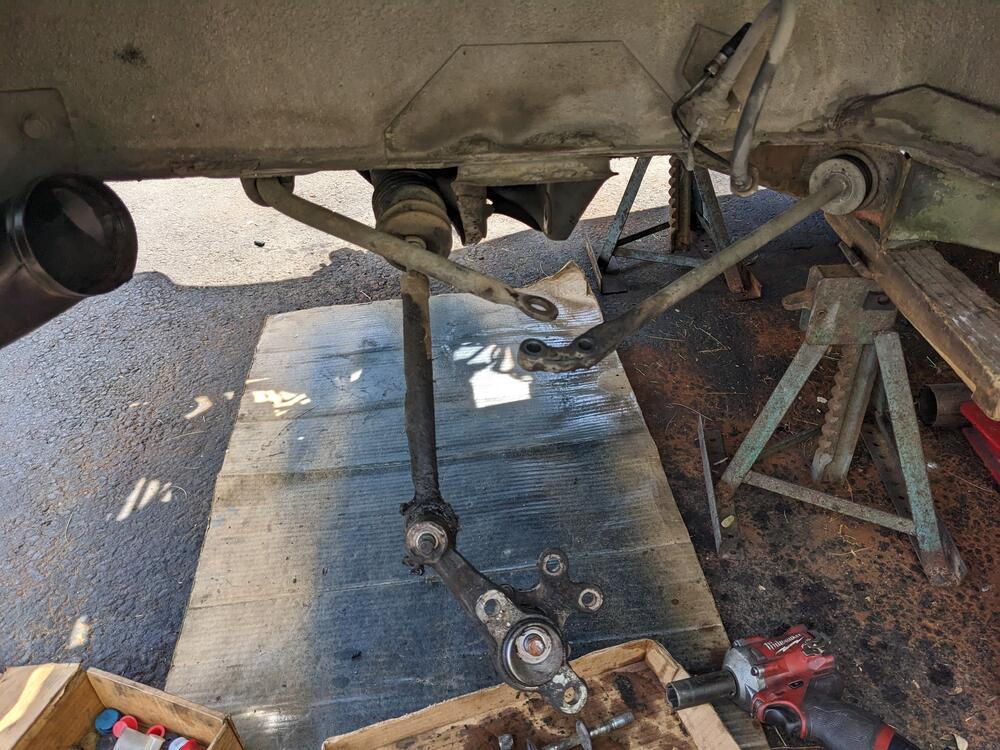
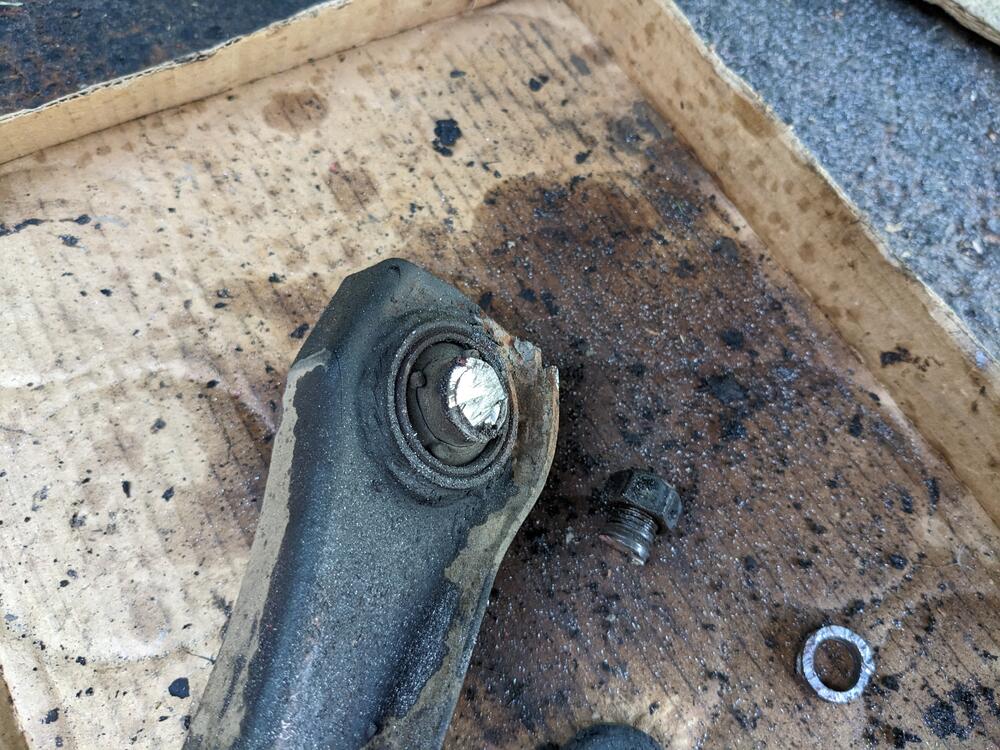
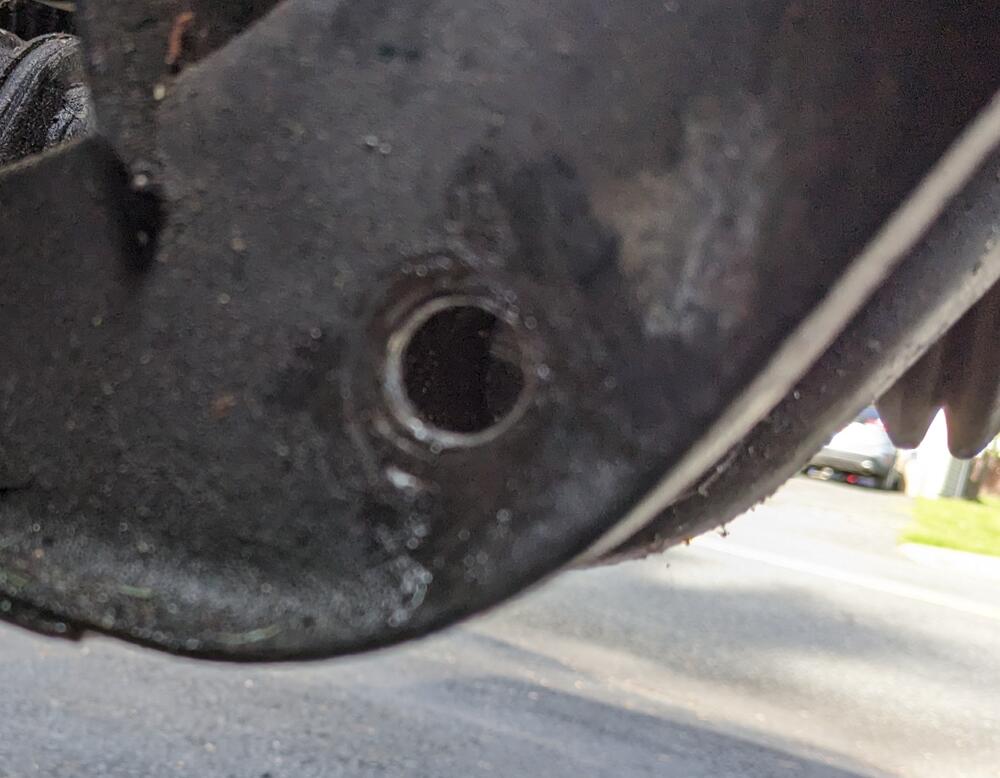
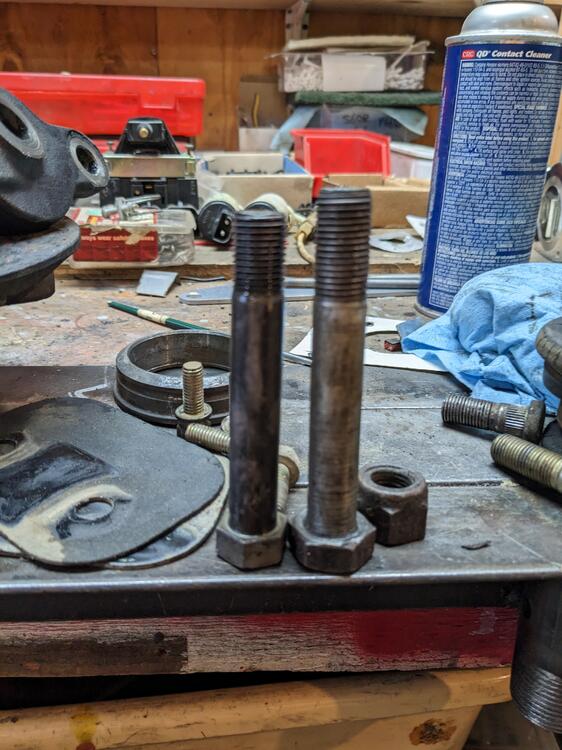
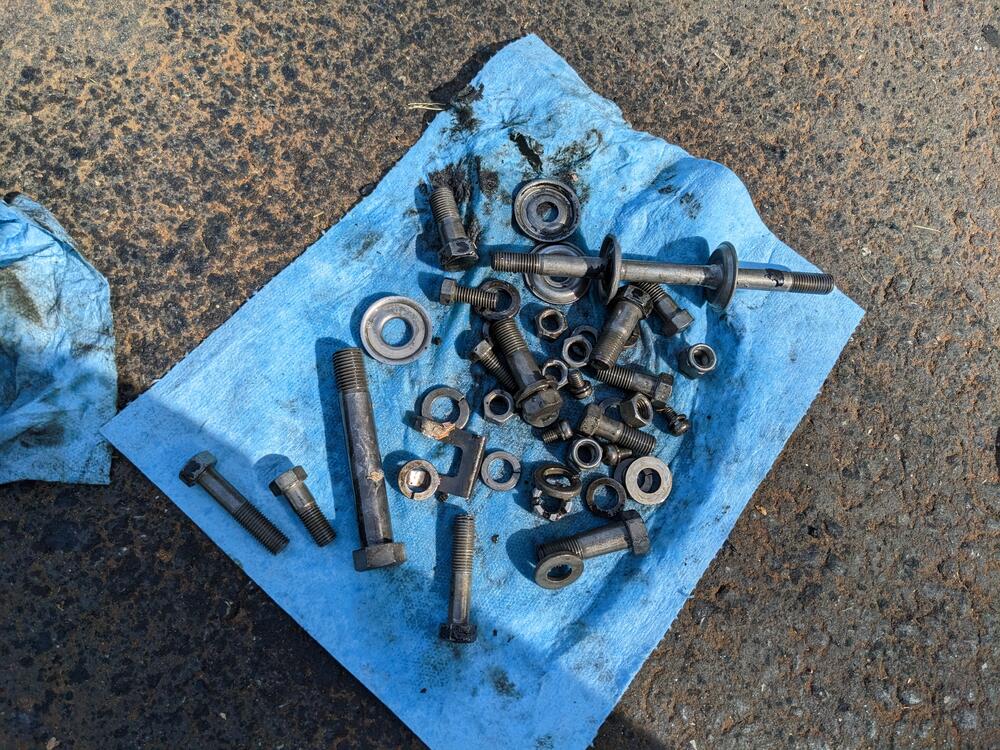
So, I finally got around to stripping the front end. Balljoints fkd, tie rod ends, fkd. Every bushing, fkd. Left side pivot bolt came out clean , no damage to subframe Left side hardware all cleaned up left side spindle. Hub was loose - I was able to turn the nut almost a full flat. The bearings look OK though. So this time around I think I'll just clean & repack them Right side was a bitch. I had to cut the control arm pivot bolt off, it was seized inside the bushing sleeve, and has elongated the holes in the subframe I have a longer M14 bolt (probably off the X1/9, which will work if I have to weld reinforcement washers to the subframe So, the wheels - they will not fit the stock short studs, since they use cone seat nuts that do not recess as deeply as the shoulder lug nuts I removed. Technically, that may be just within safe thread depth for an M12 nut, but I'm not risking that. I didn't see any mention of a stud or lug nut concern when I was searching wheel options. I found the rear studs are longer - so I'll use the 25mm thread depth rears on the front hubs, and get 2" length for the rears Brake hoses are also shot Caster rod seats are good made a start degreasing the back plates, control arms & link arms. Everything was covered in copious amounts of grease from the (lack of) boots of the tie rod & balljoints I'll have to dismantle the struts next. Ho[pefully no nasty surprises with the tubes


-
Thanks Steve The amplifier relay or the interval relay? #9 or #1 in the relay panel schematic?