HusseinHolland
Free Member
-
Joined
-
Last visited
Everything posted by HusseinHolland
-
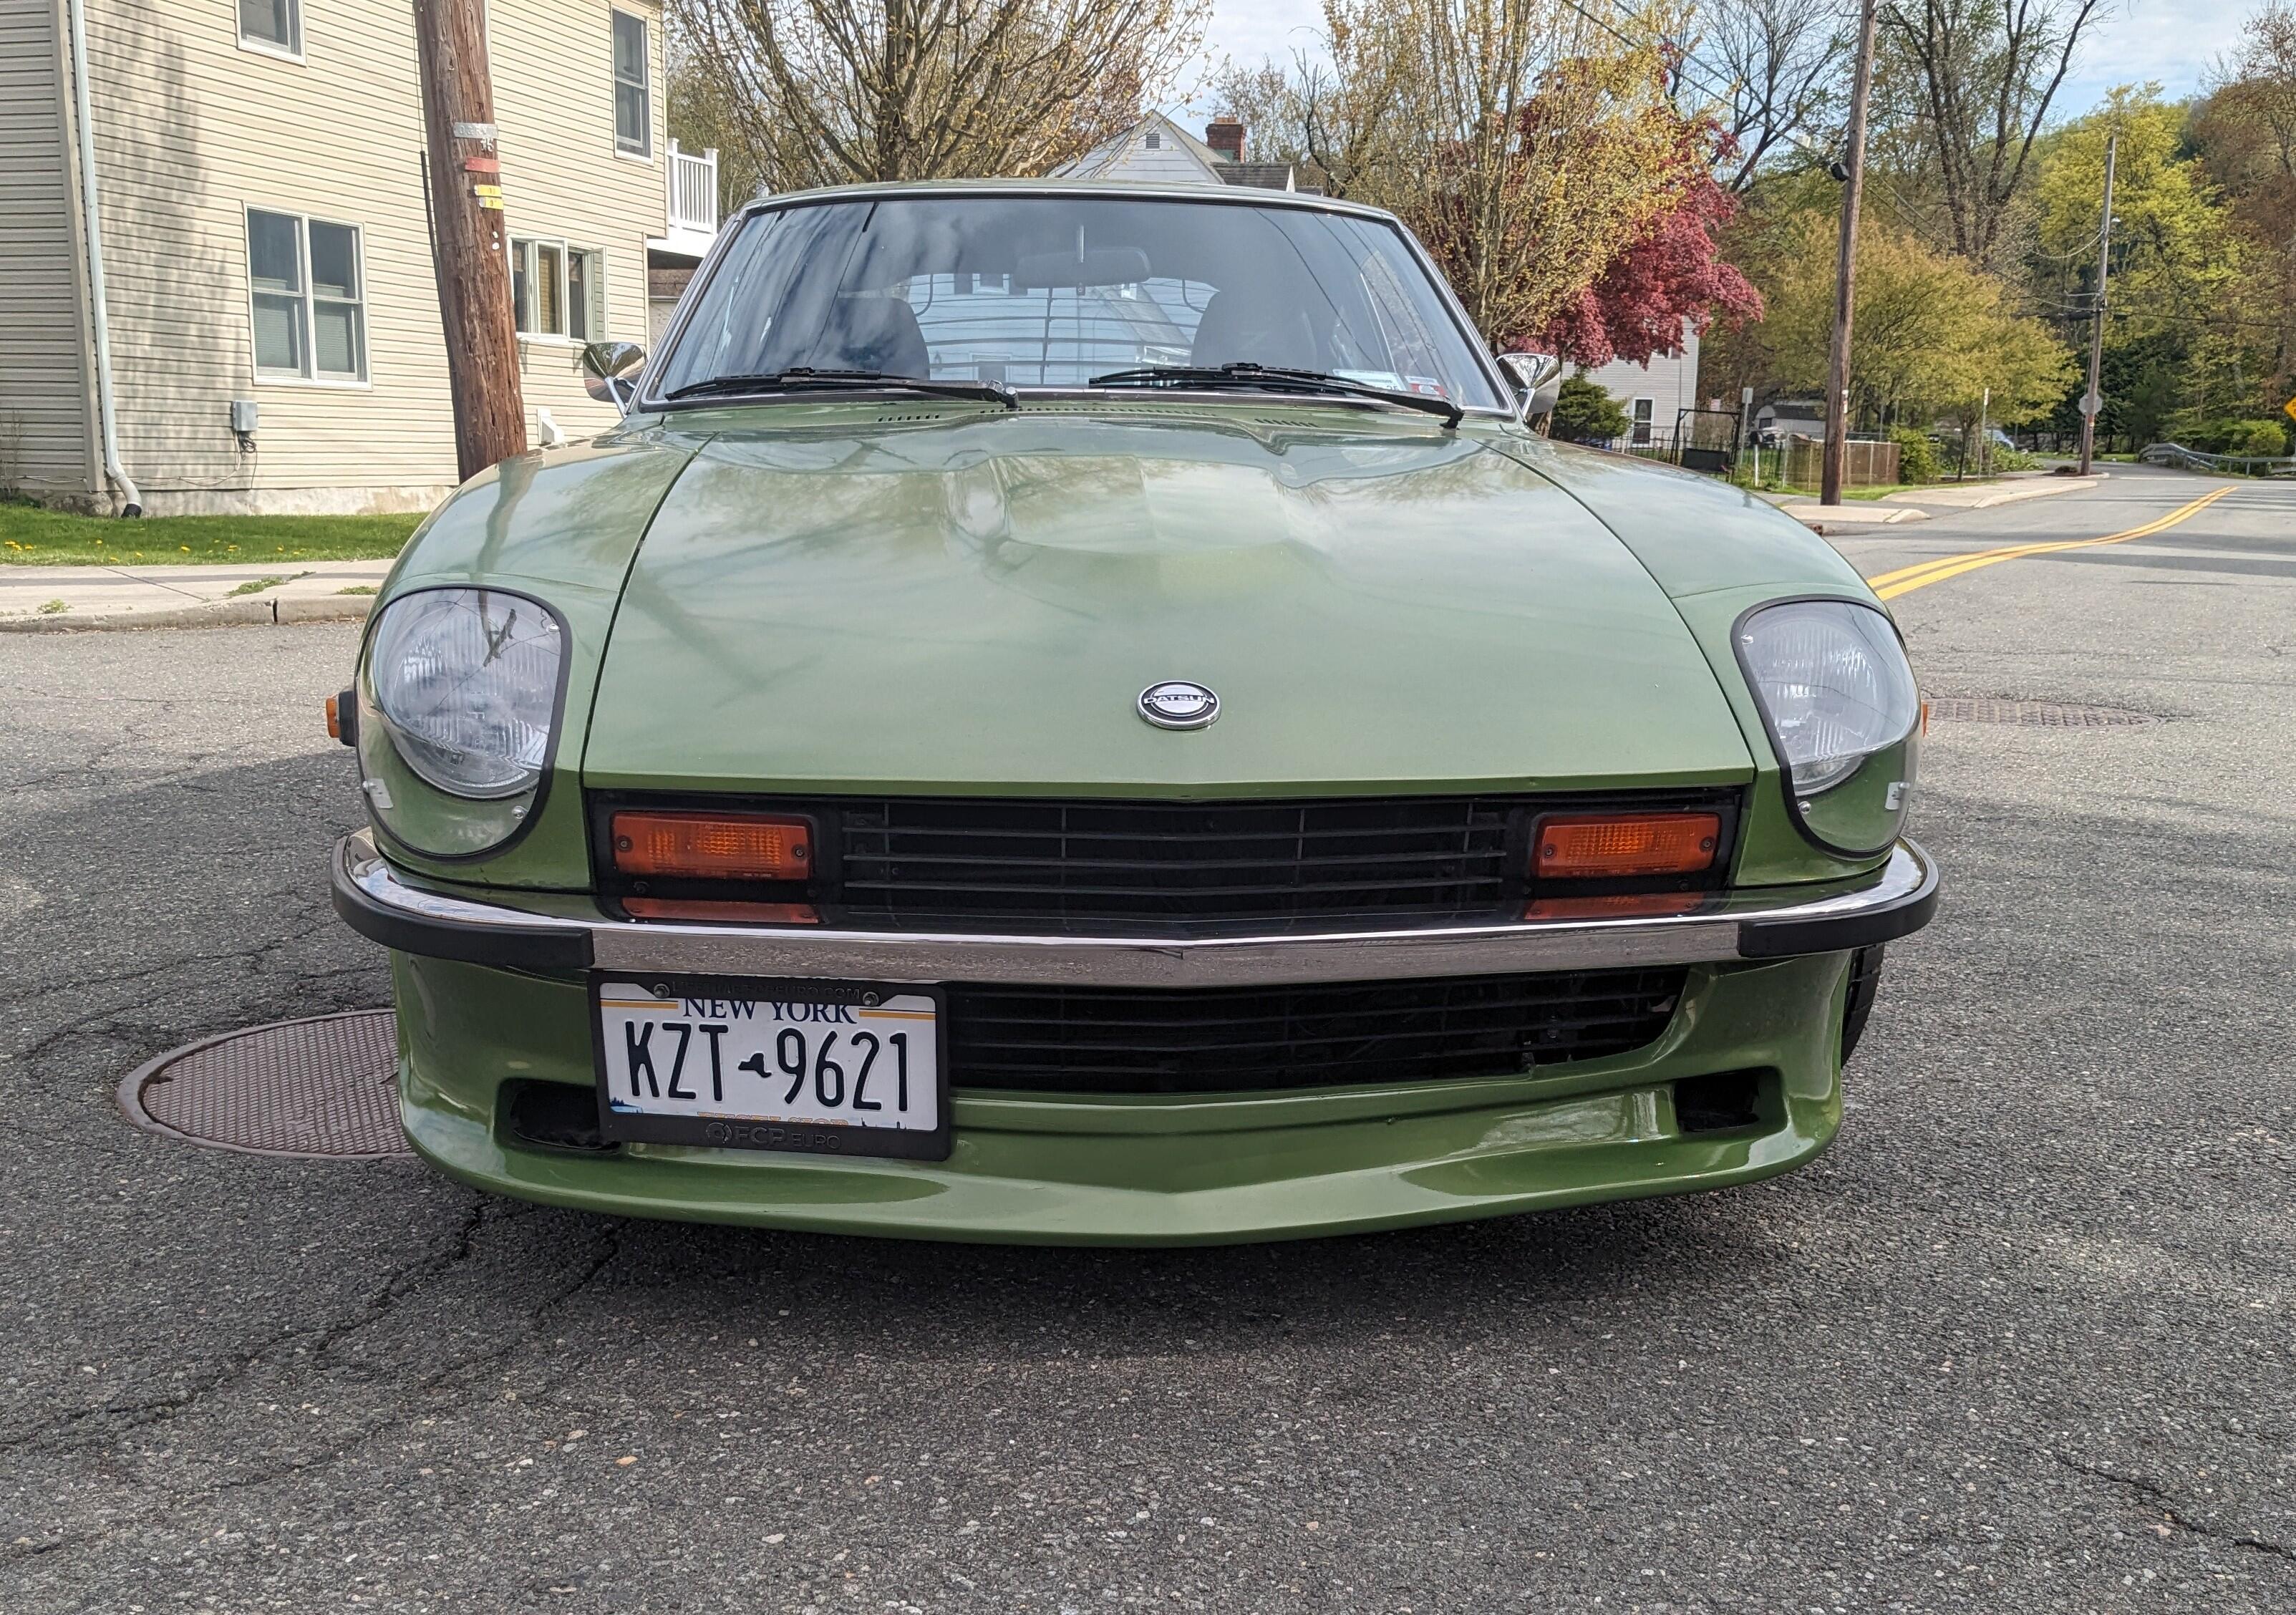
 Back in 2016 I went to the Tail of The Dragon with 30 other C30's from across the country - the car handles really well in this type driving
 -
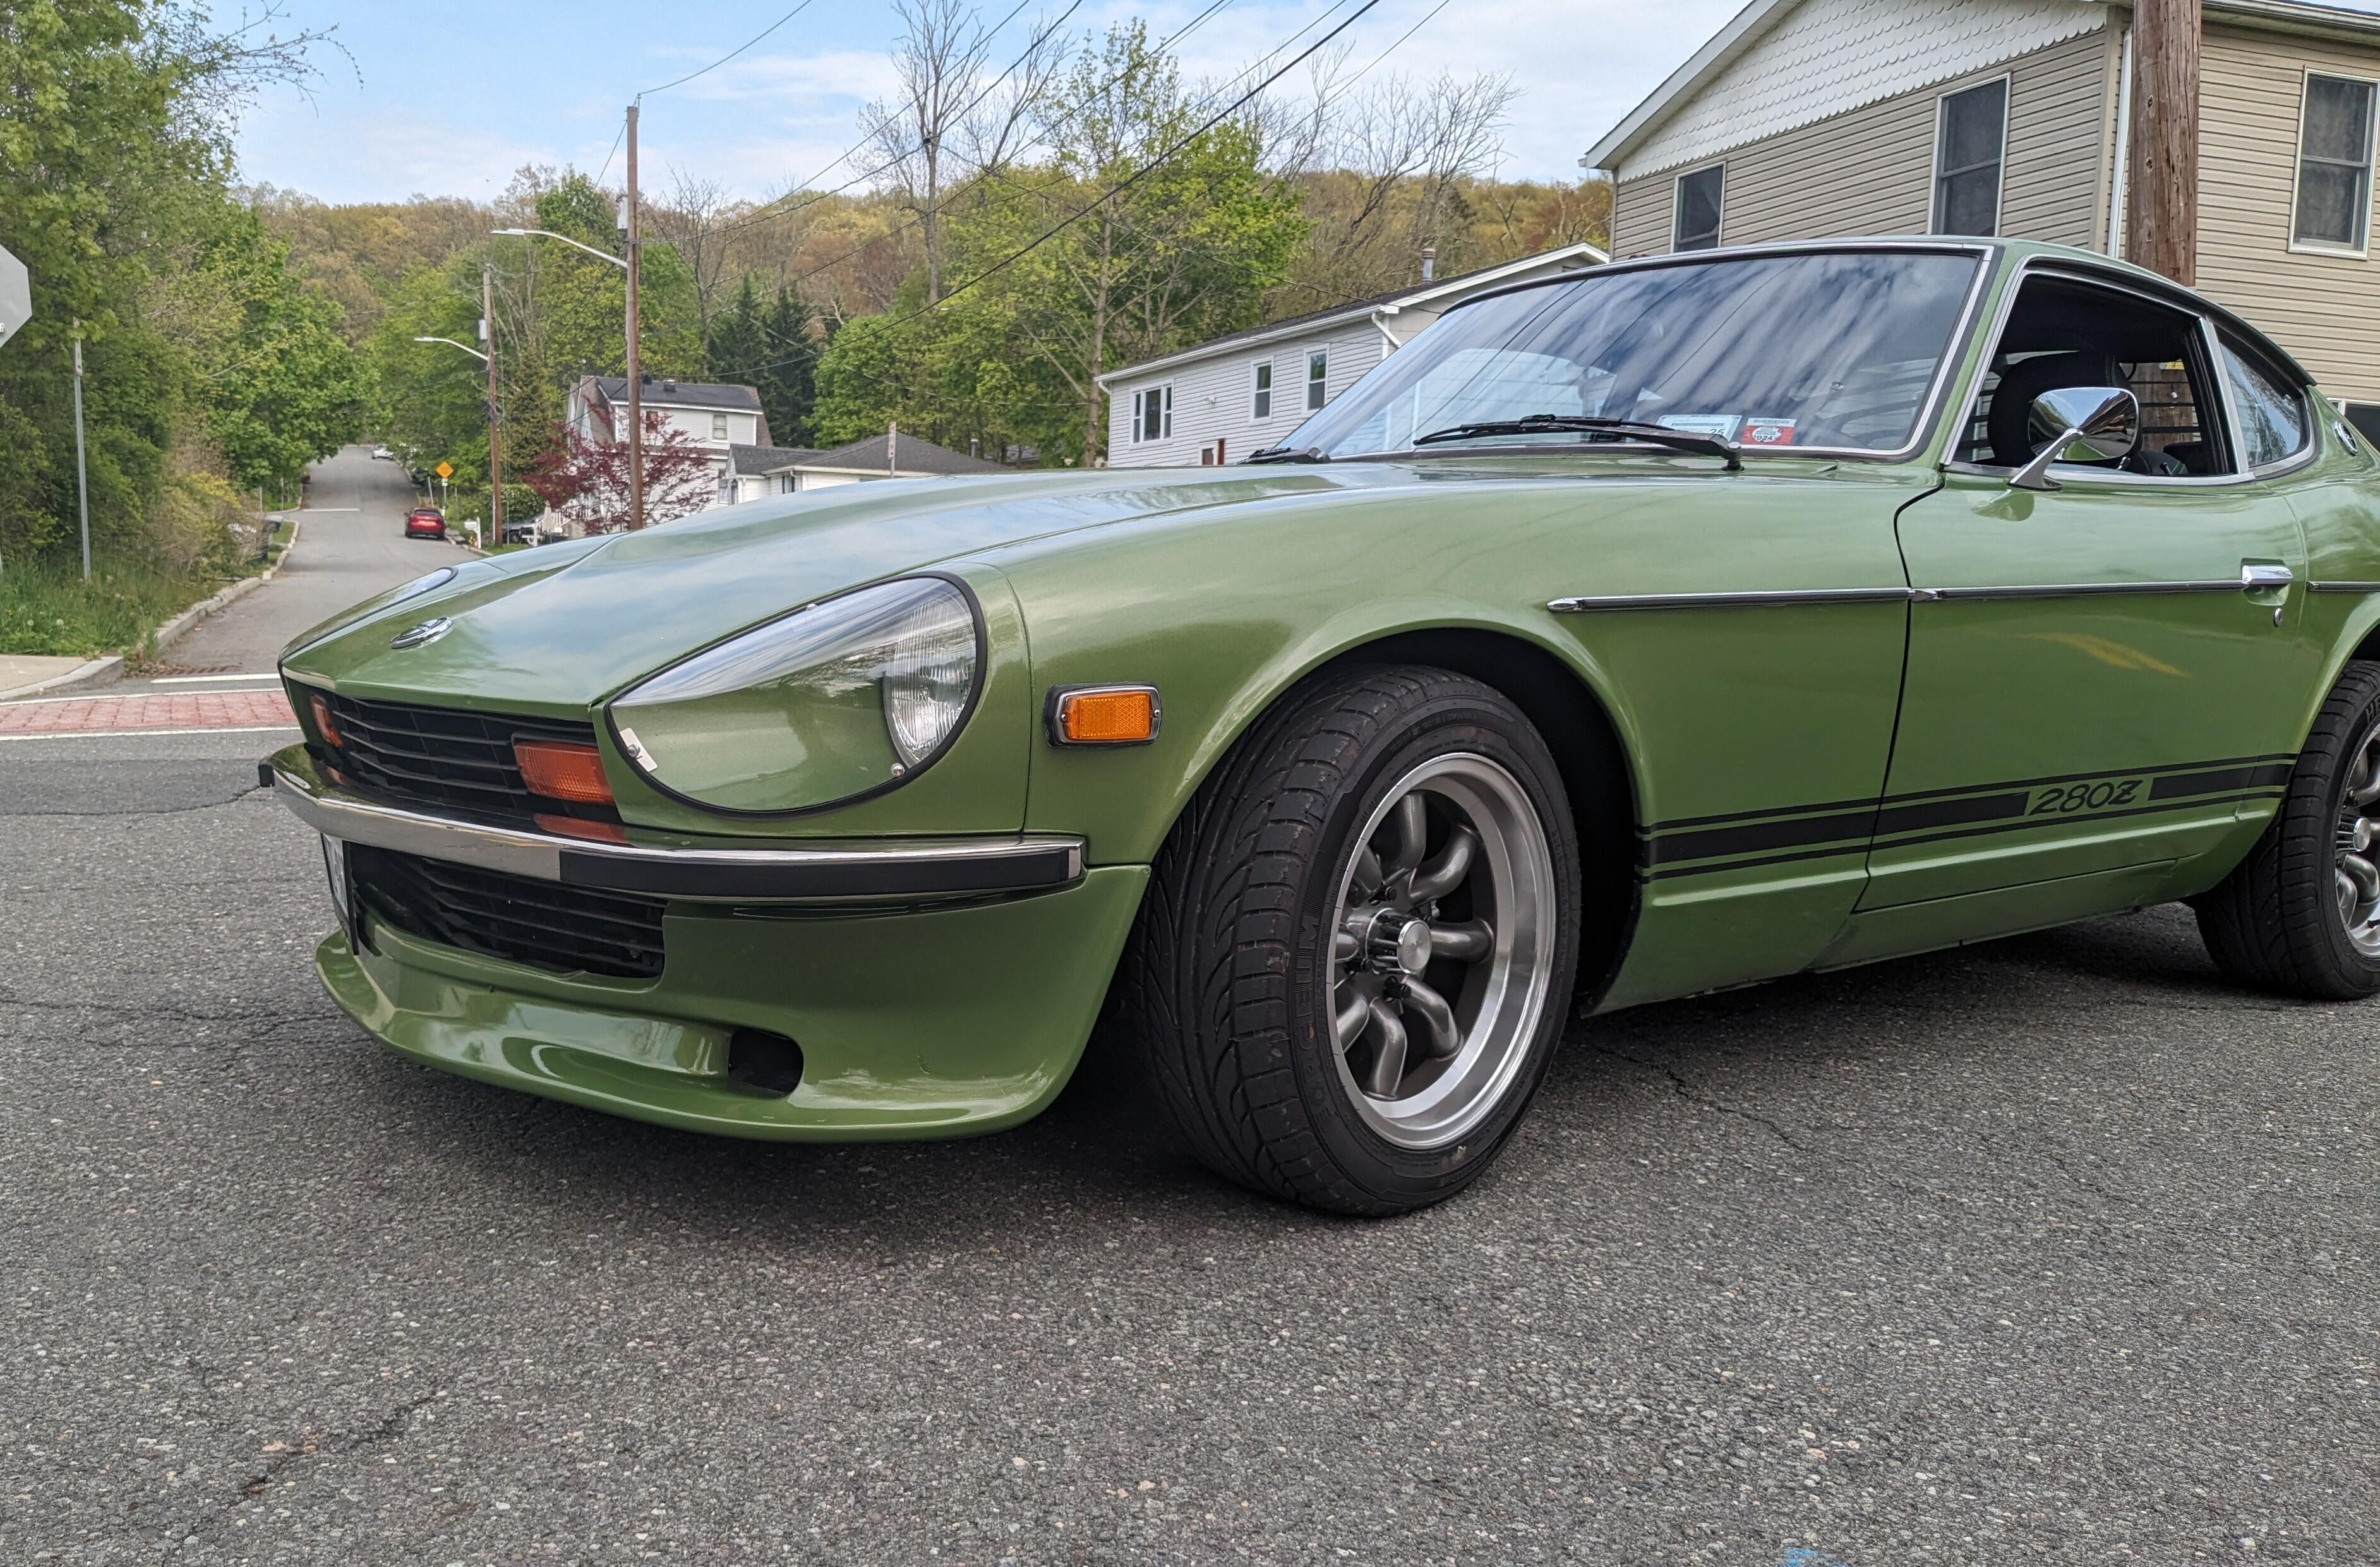
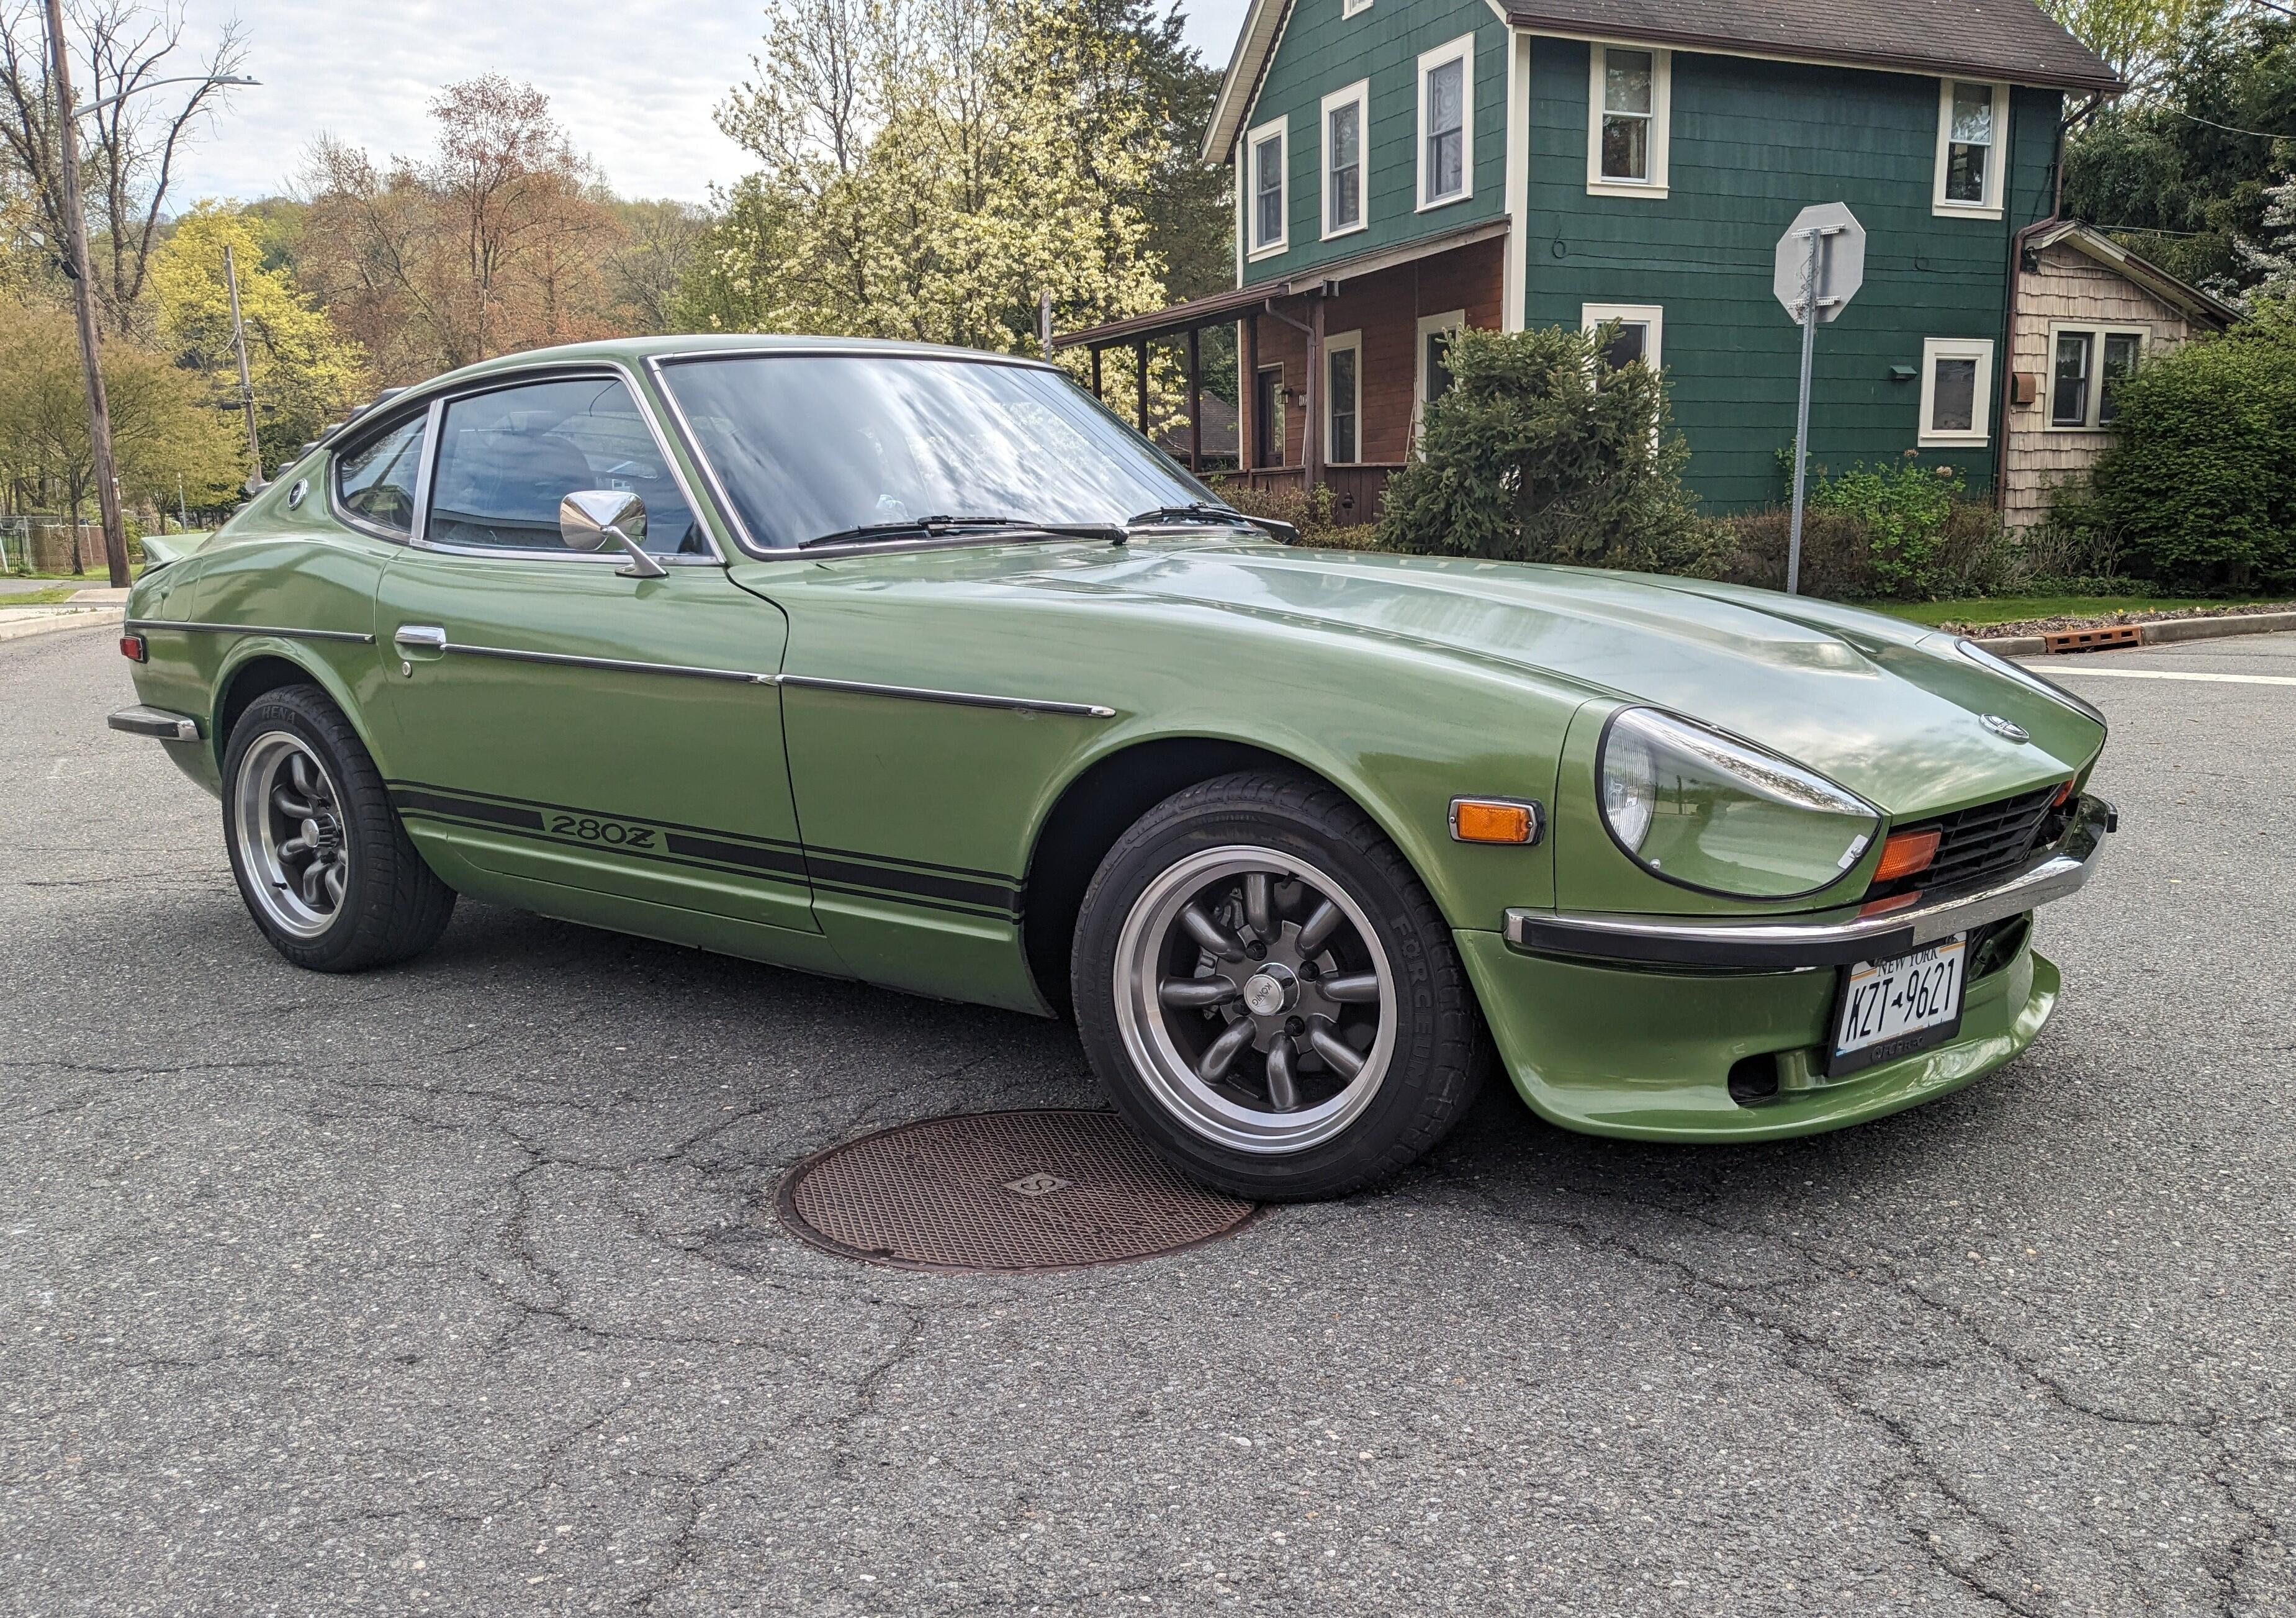
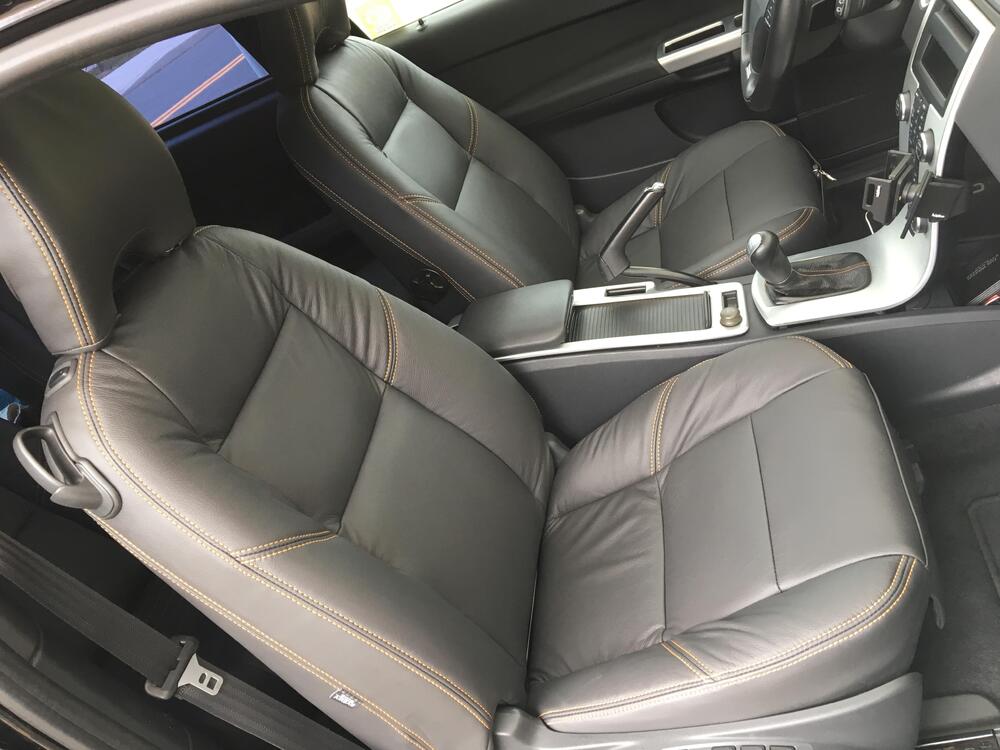
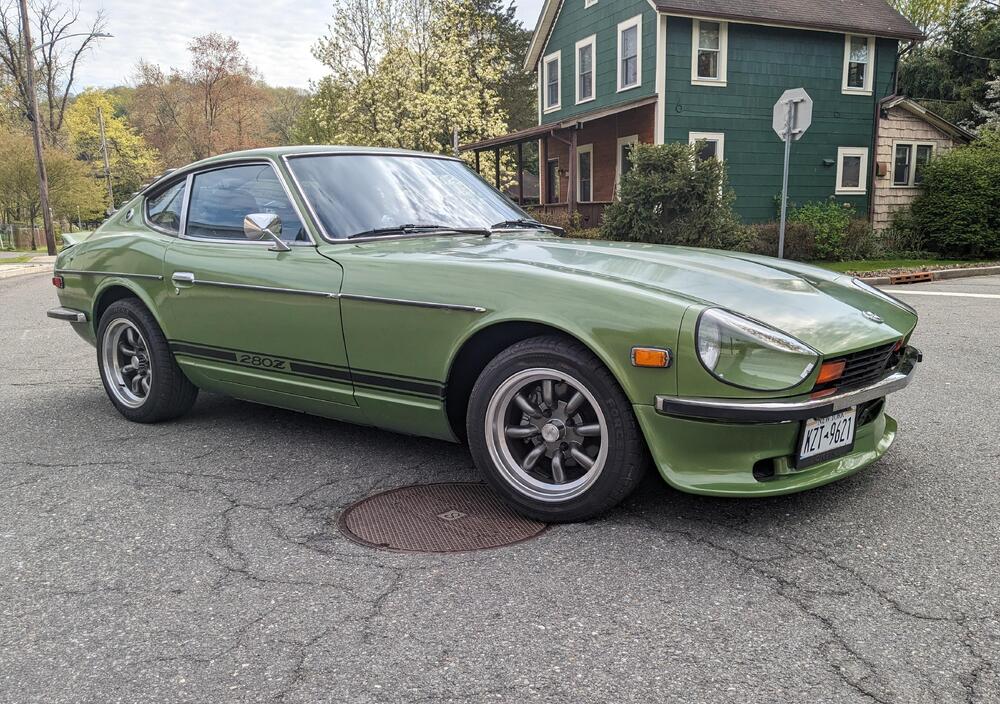
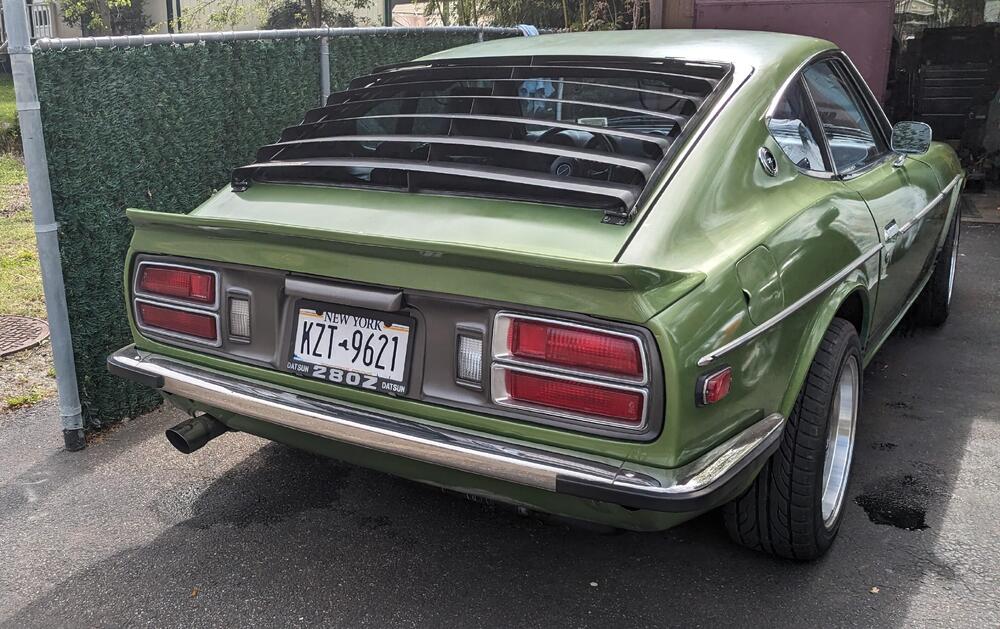
It's a great car - interior is quite unremarkable (Ford era Volvo), however for my size it is extremely comfortable & pedal position, etc., is perfect. I don't have any interior pics besides a couple from when I replaced the upholstery with leather. It is 6 speed manual. I converted it to AWD after putting a larger turbo/tune in it, as FWD just gave too much wheelspin . Plenty of exterior pics, it's a good looking form 😁

-
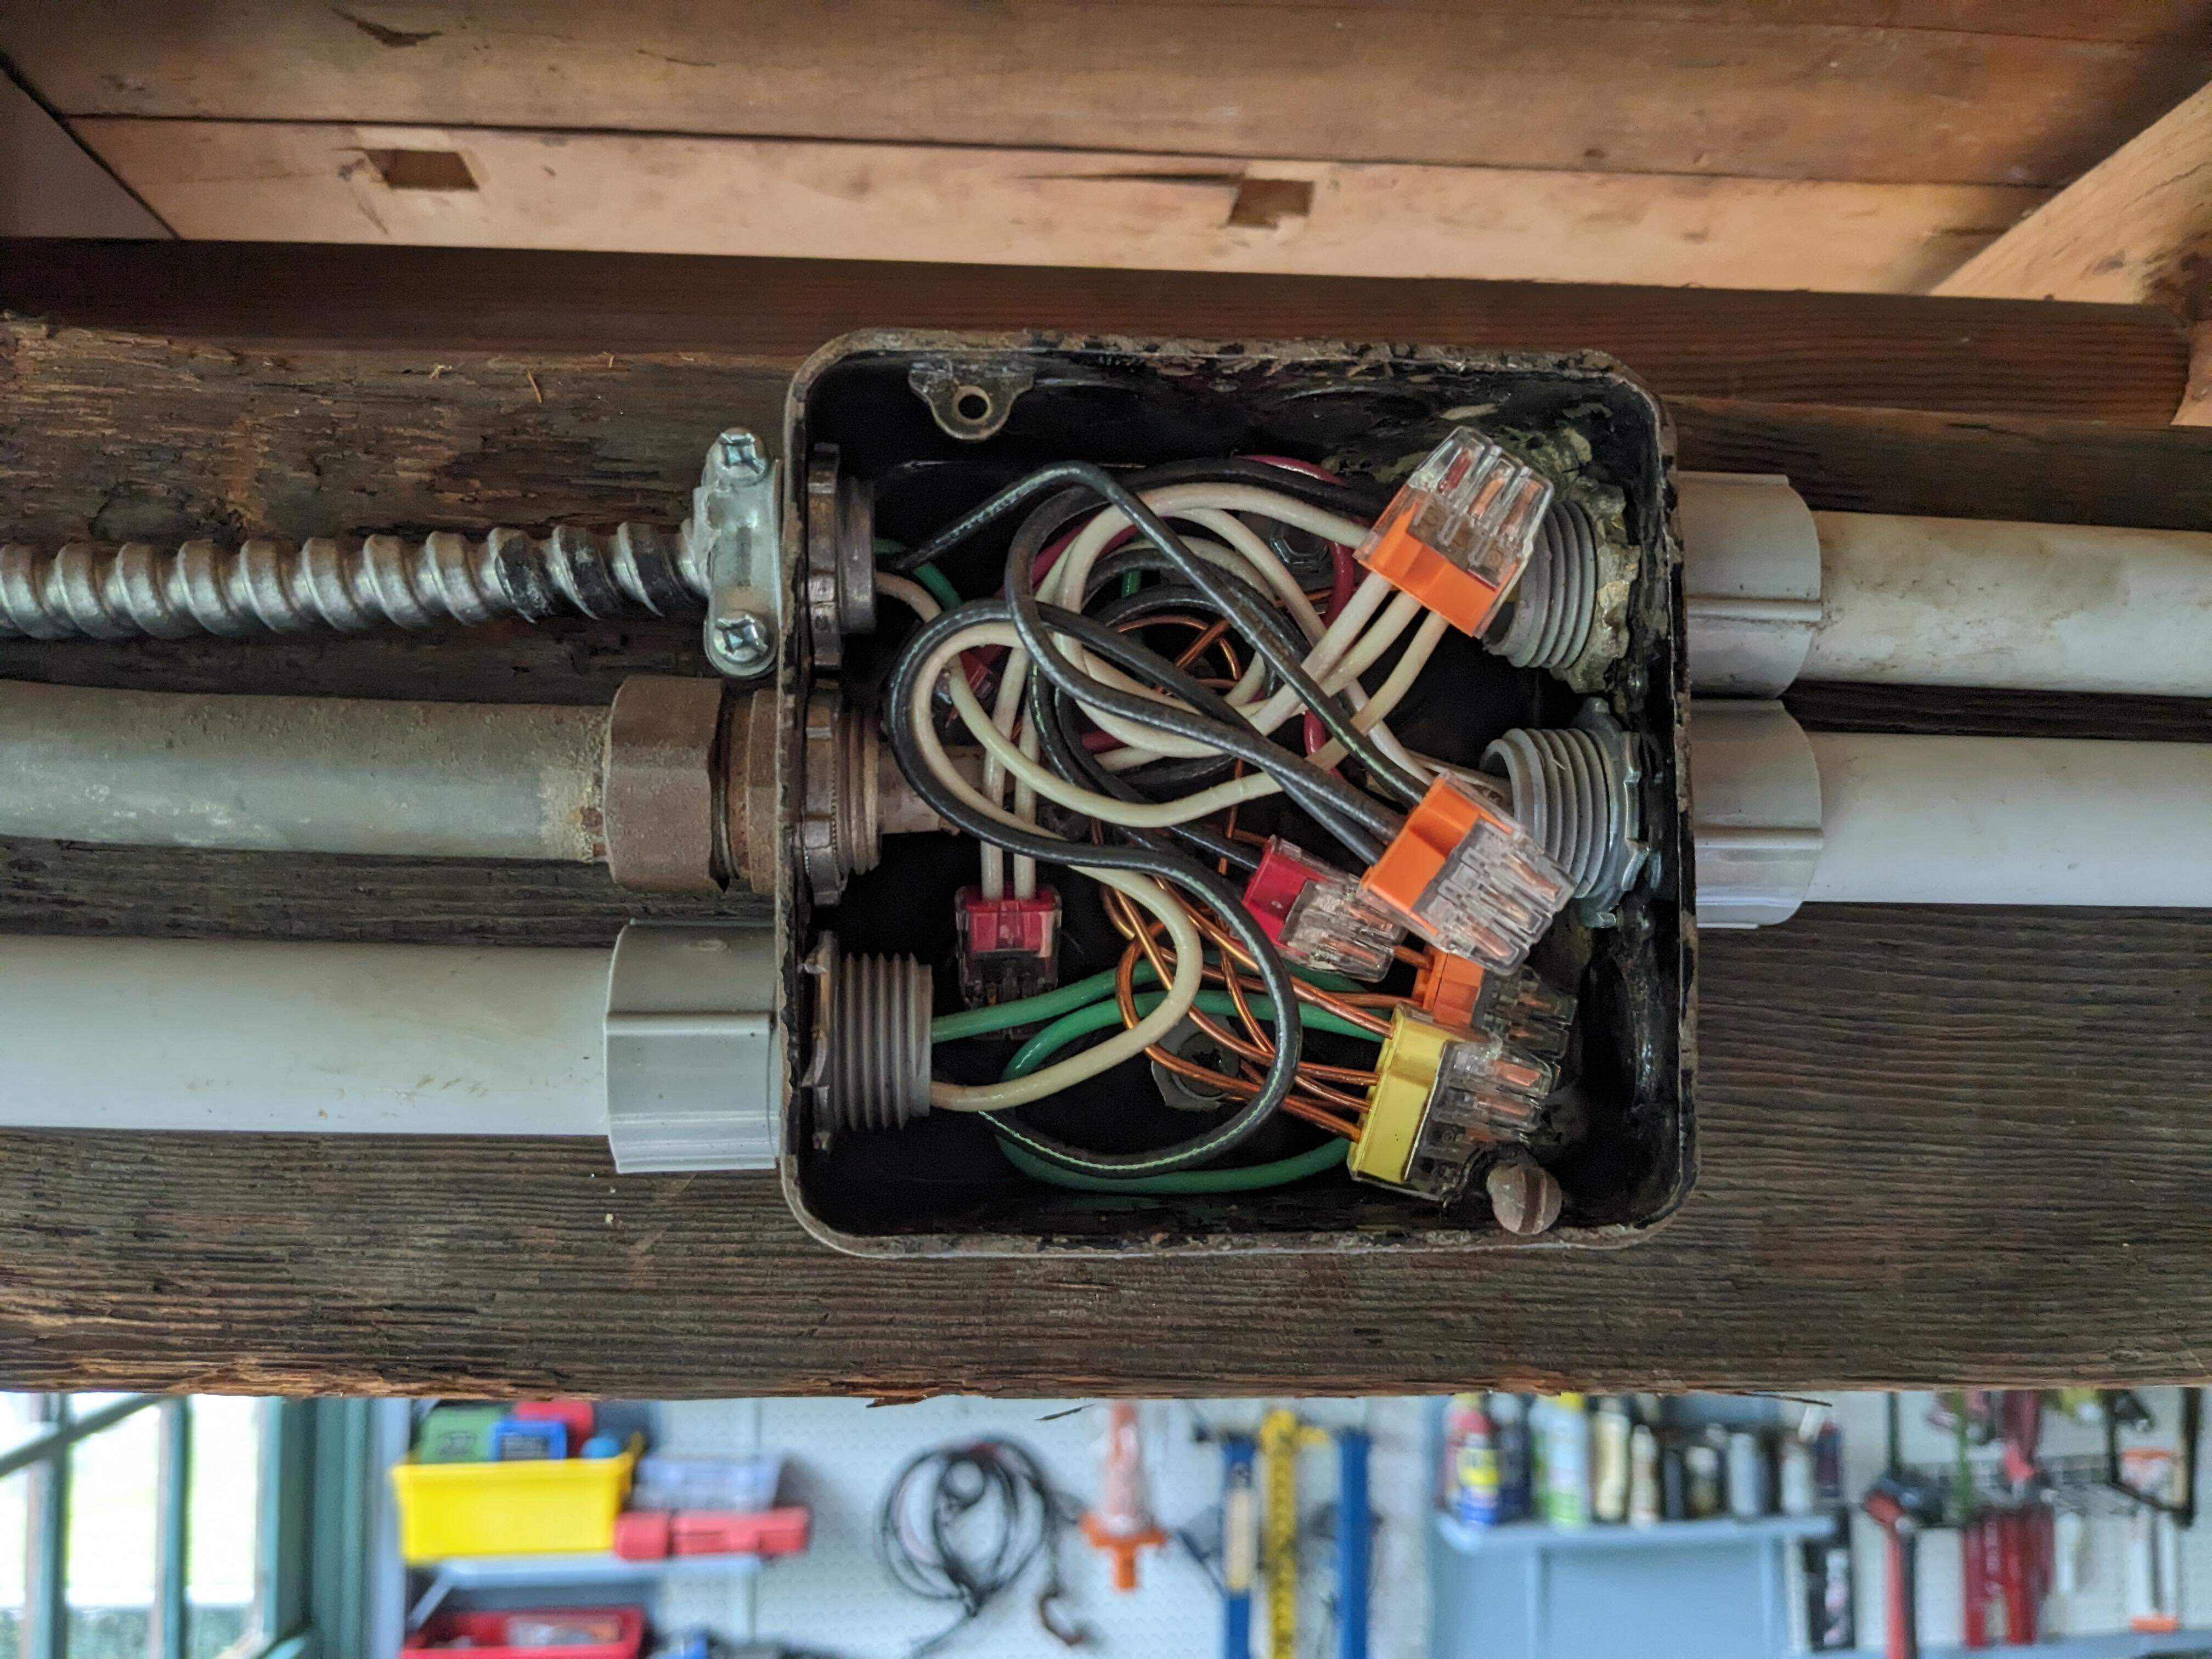
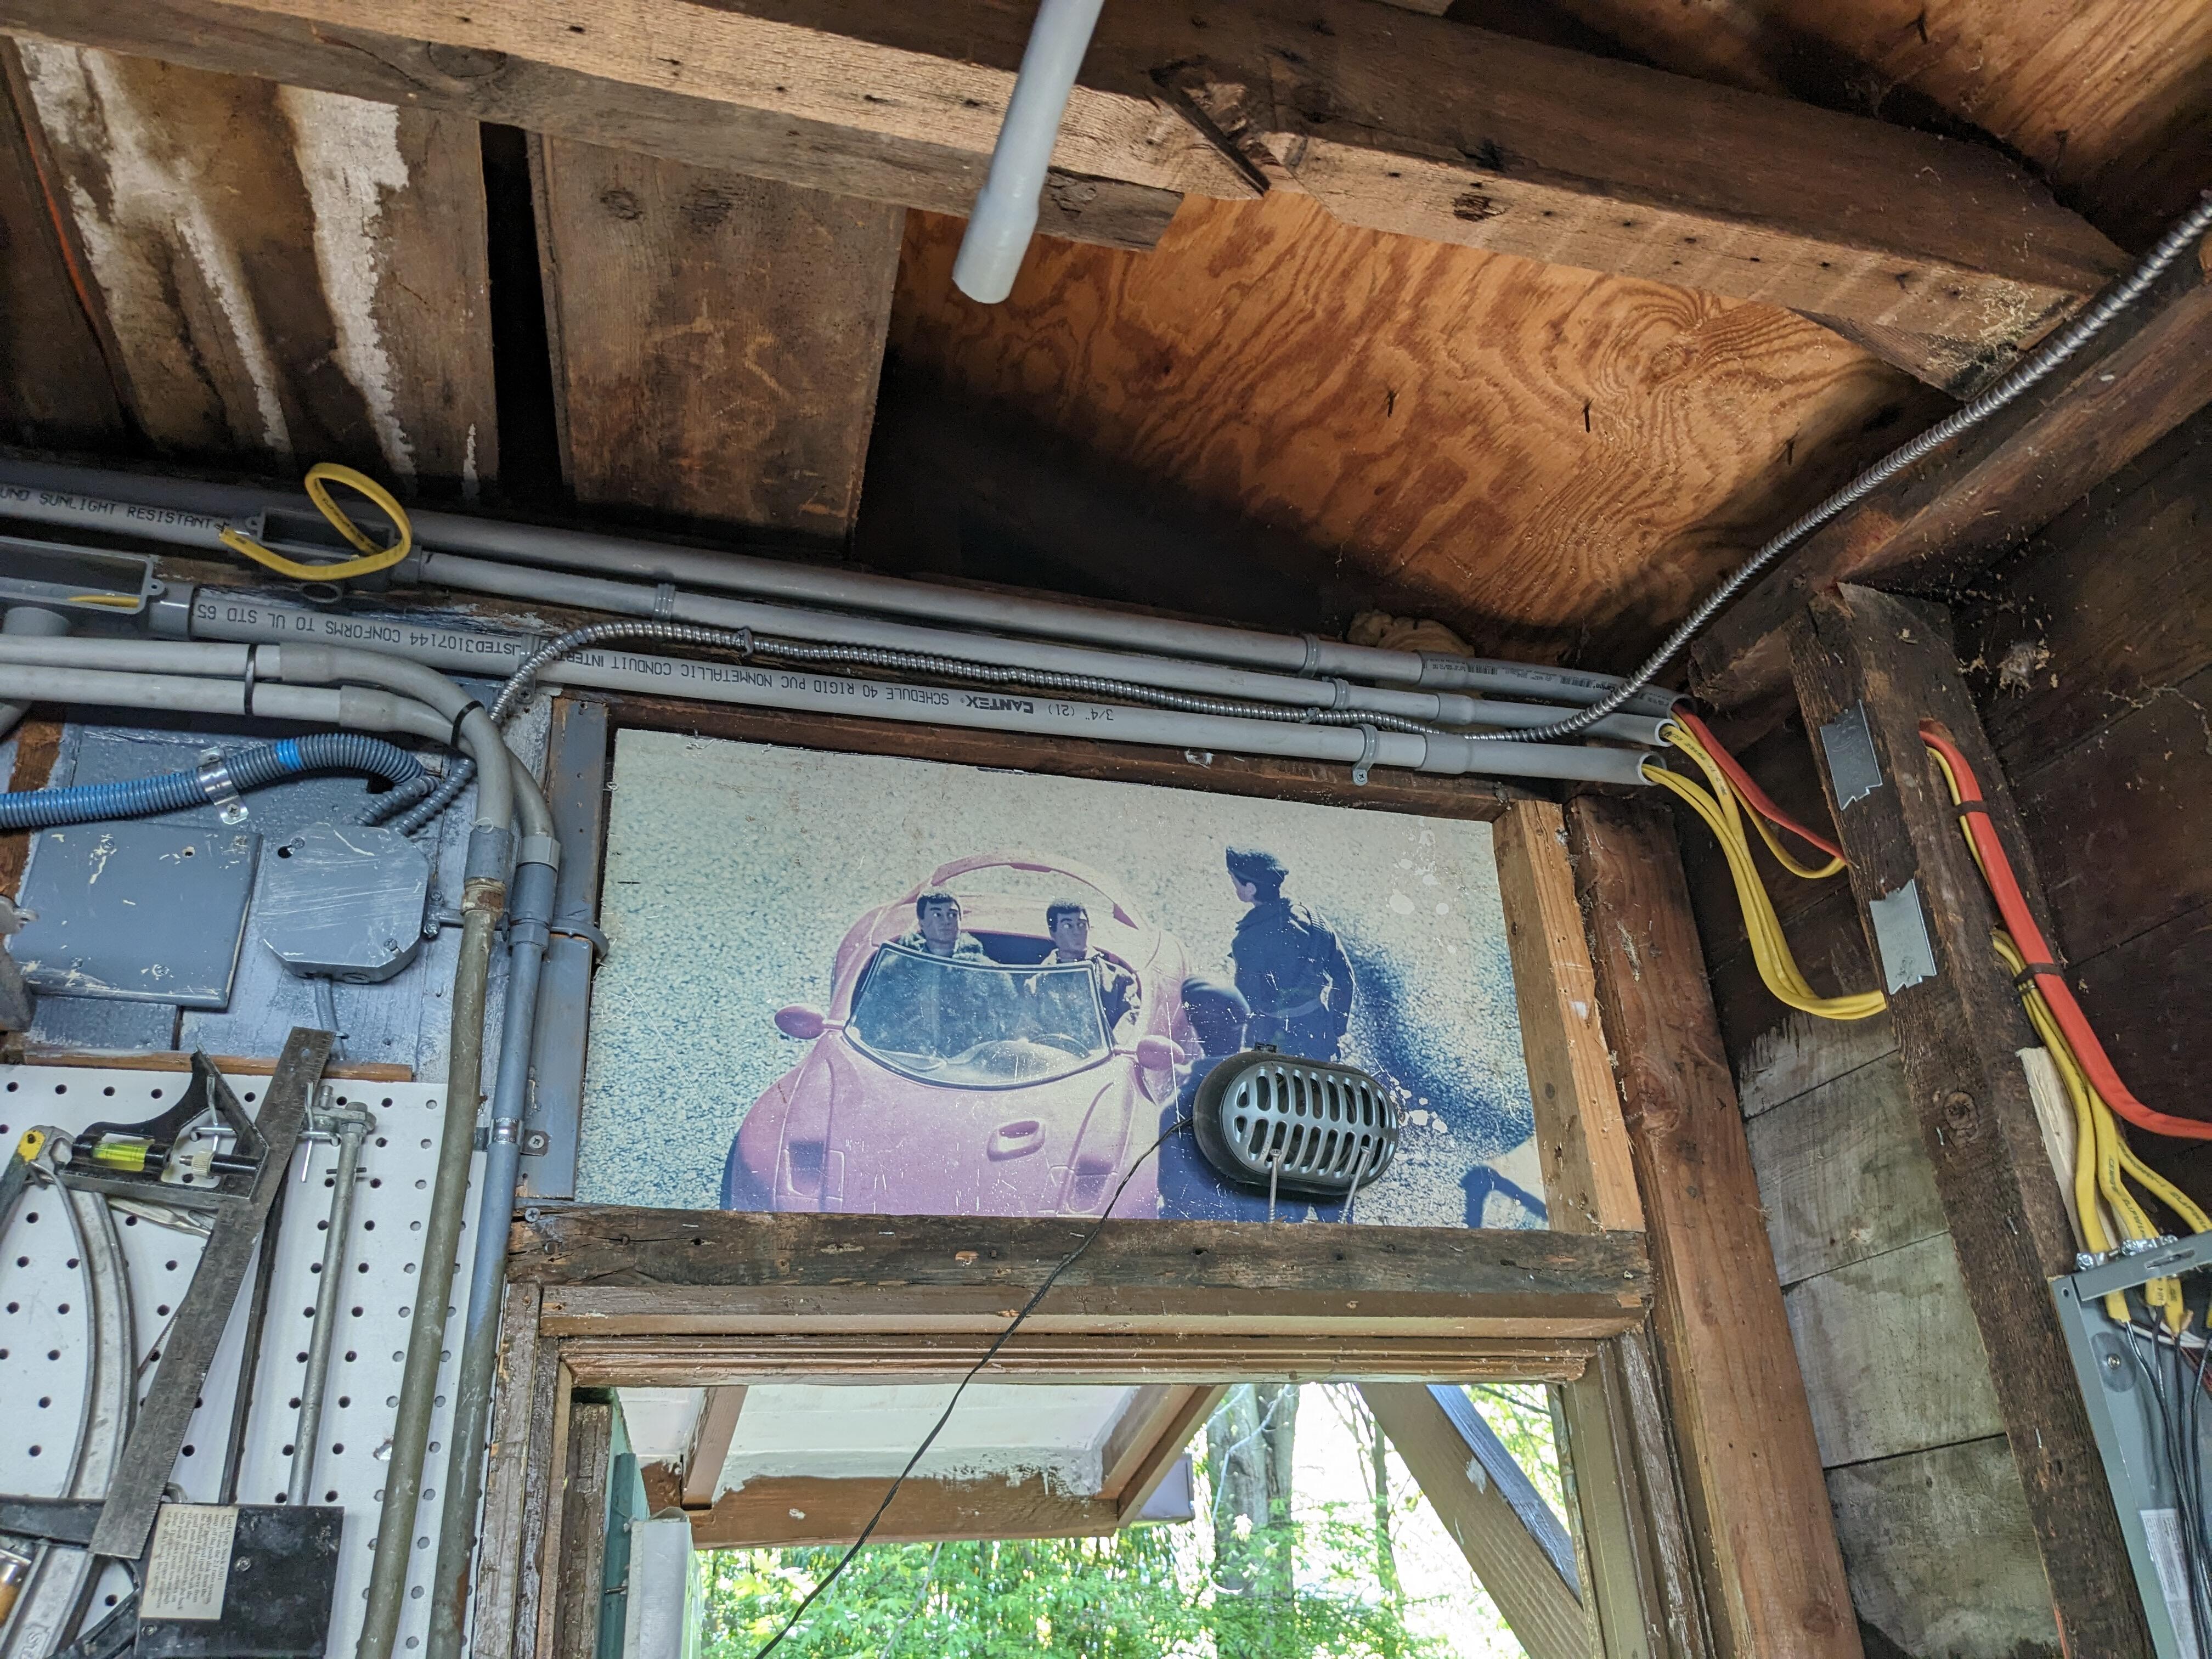
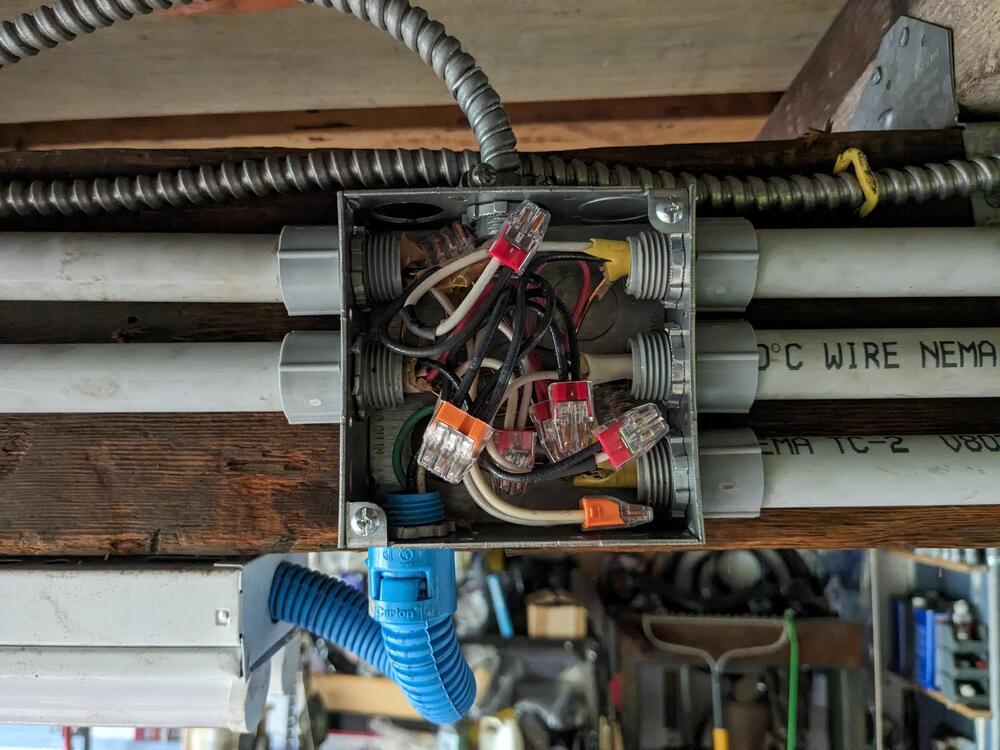
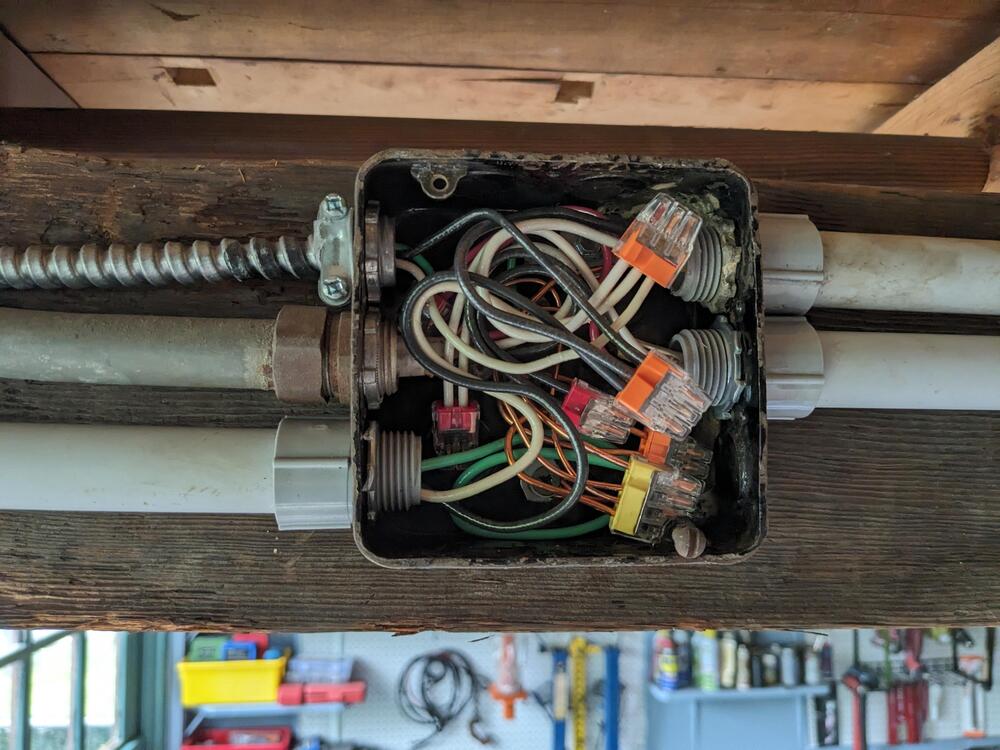
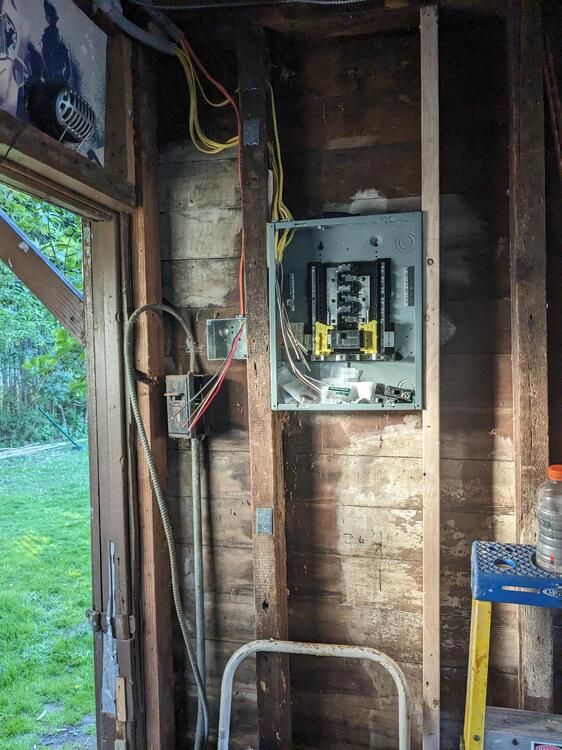
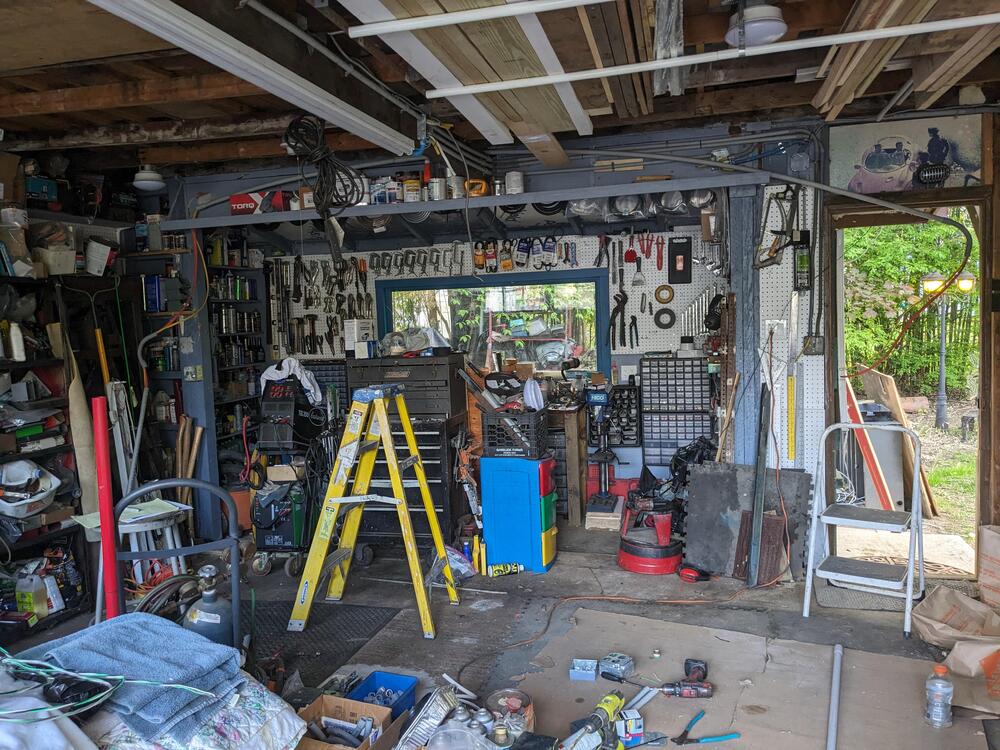
Small amount of work accomplished today, between chores & visit from a good family friend who had moved upstate. Go the junctions on the center beam connected for the attic lighting branch, the overhead lighting, and the outlet on the me main door post. Also ran the 3/4 conduit from that box up & over to the south wall, where it will ultimately connect to the feeder branch coming down the south west corner post. Separated all the 12/2 and 14/3 wiring into their own conduit. I worked in layers starting with the grounds, then neutrals, then travellers, switch outputs and finally the hot feeds Had to make schematics for each junction, to make sure I didn't mis-connect anything, having a 3way switched circuit for one branch of the lighting makes me check 3 times at least. Hopefully get more done than this tomorrow.

-
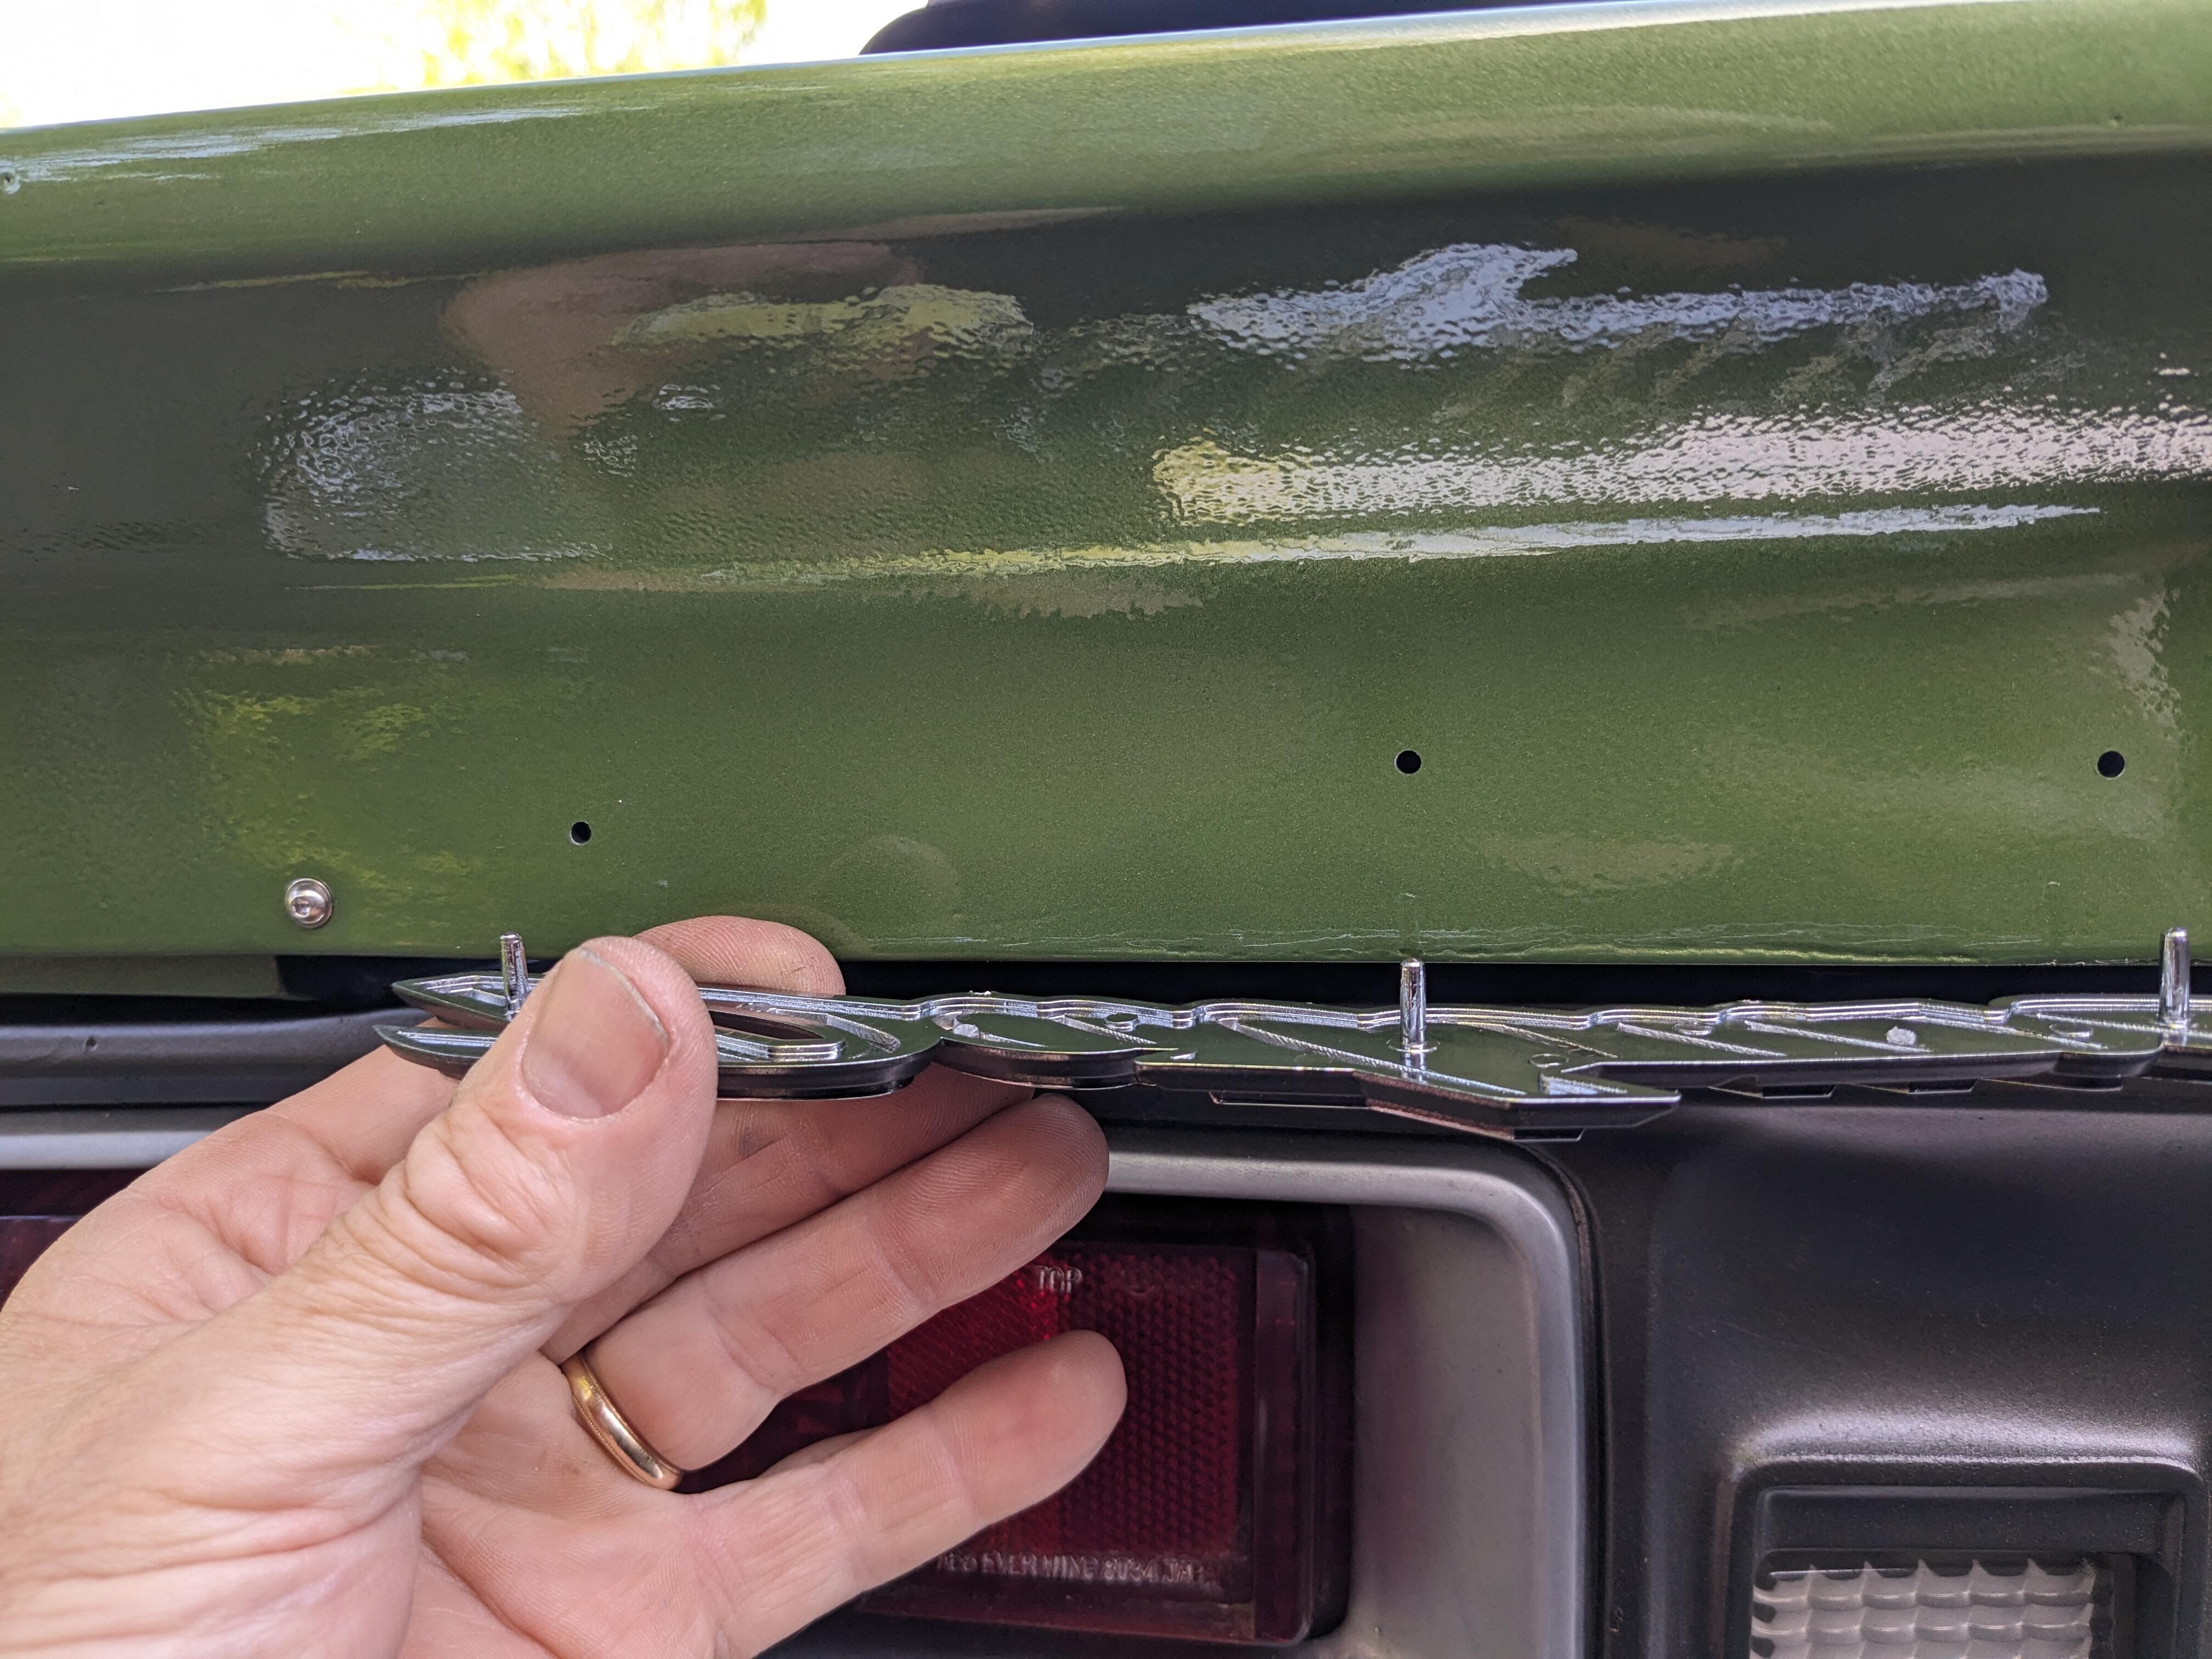
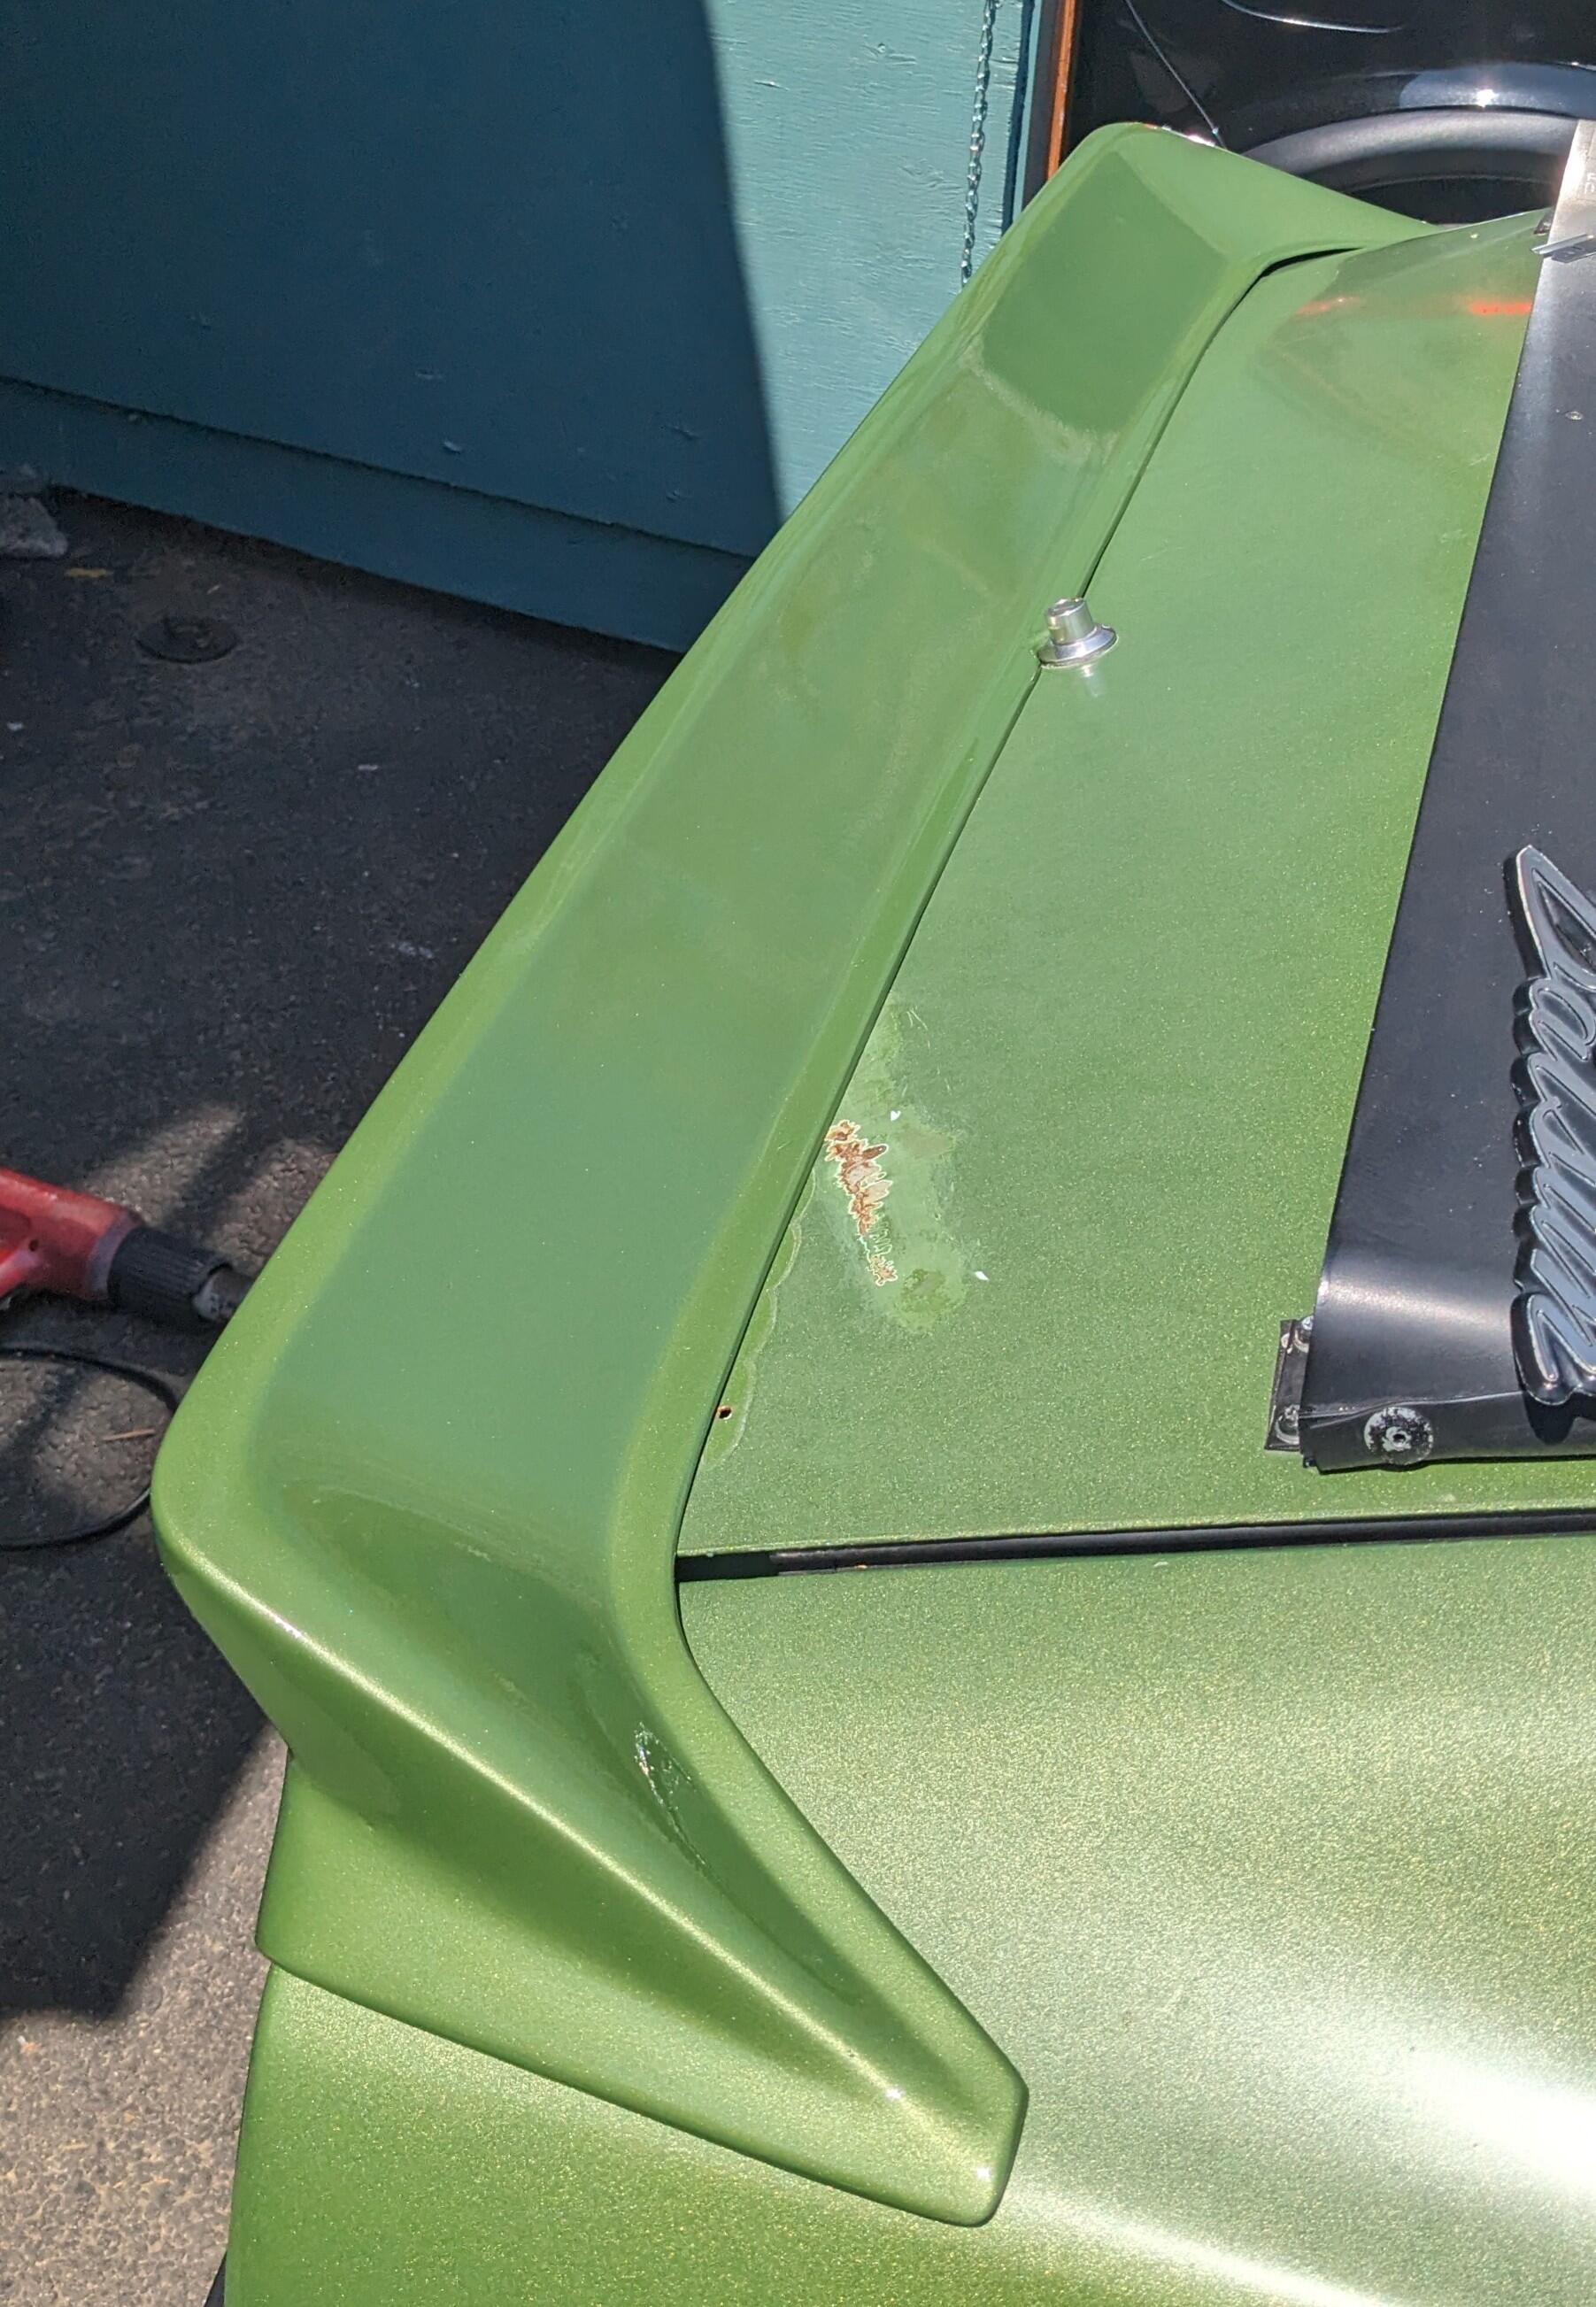
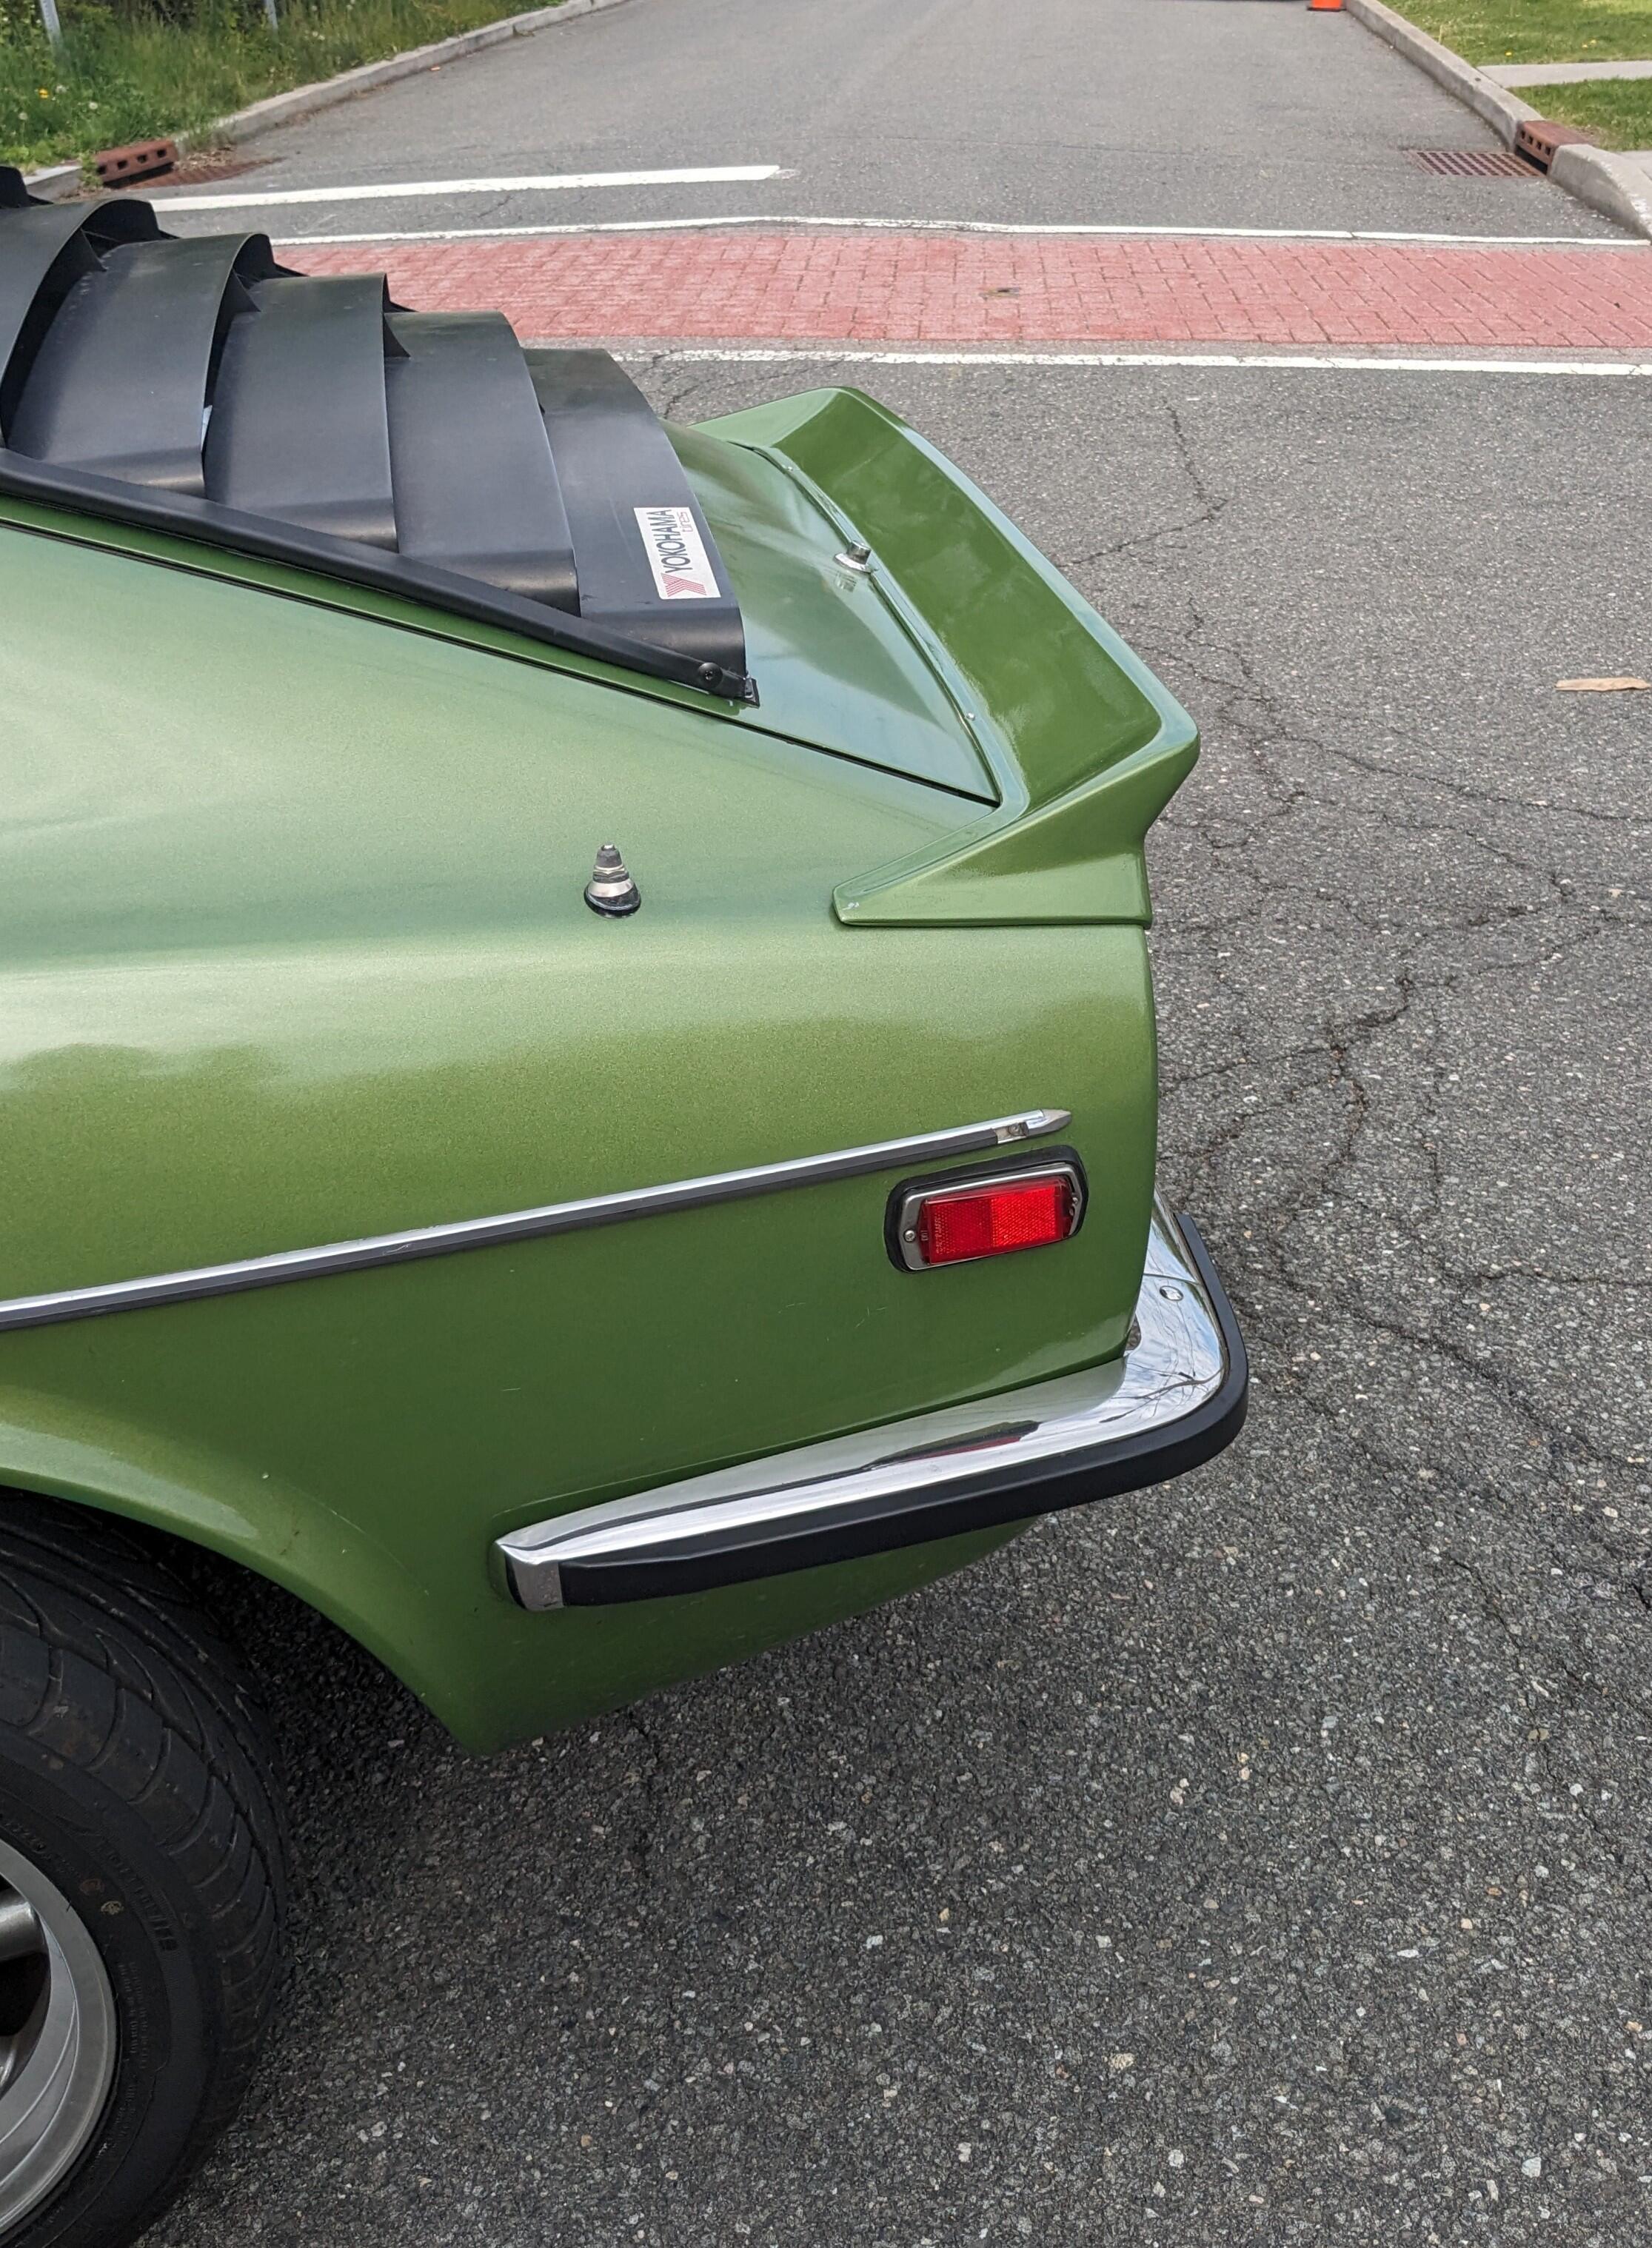
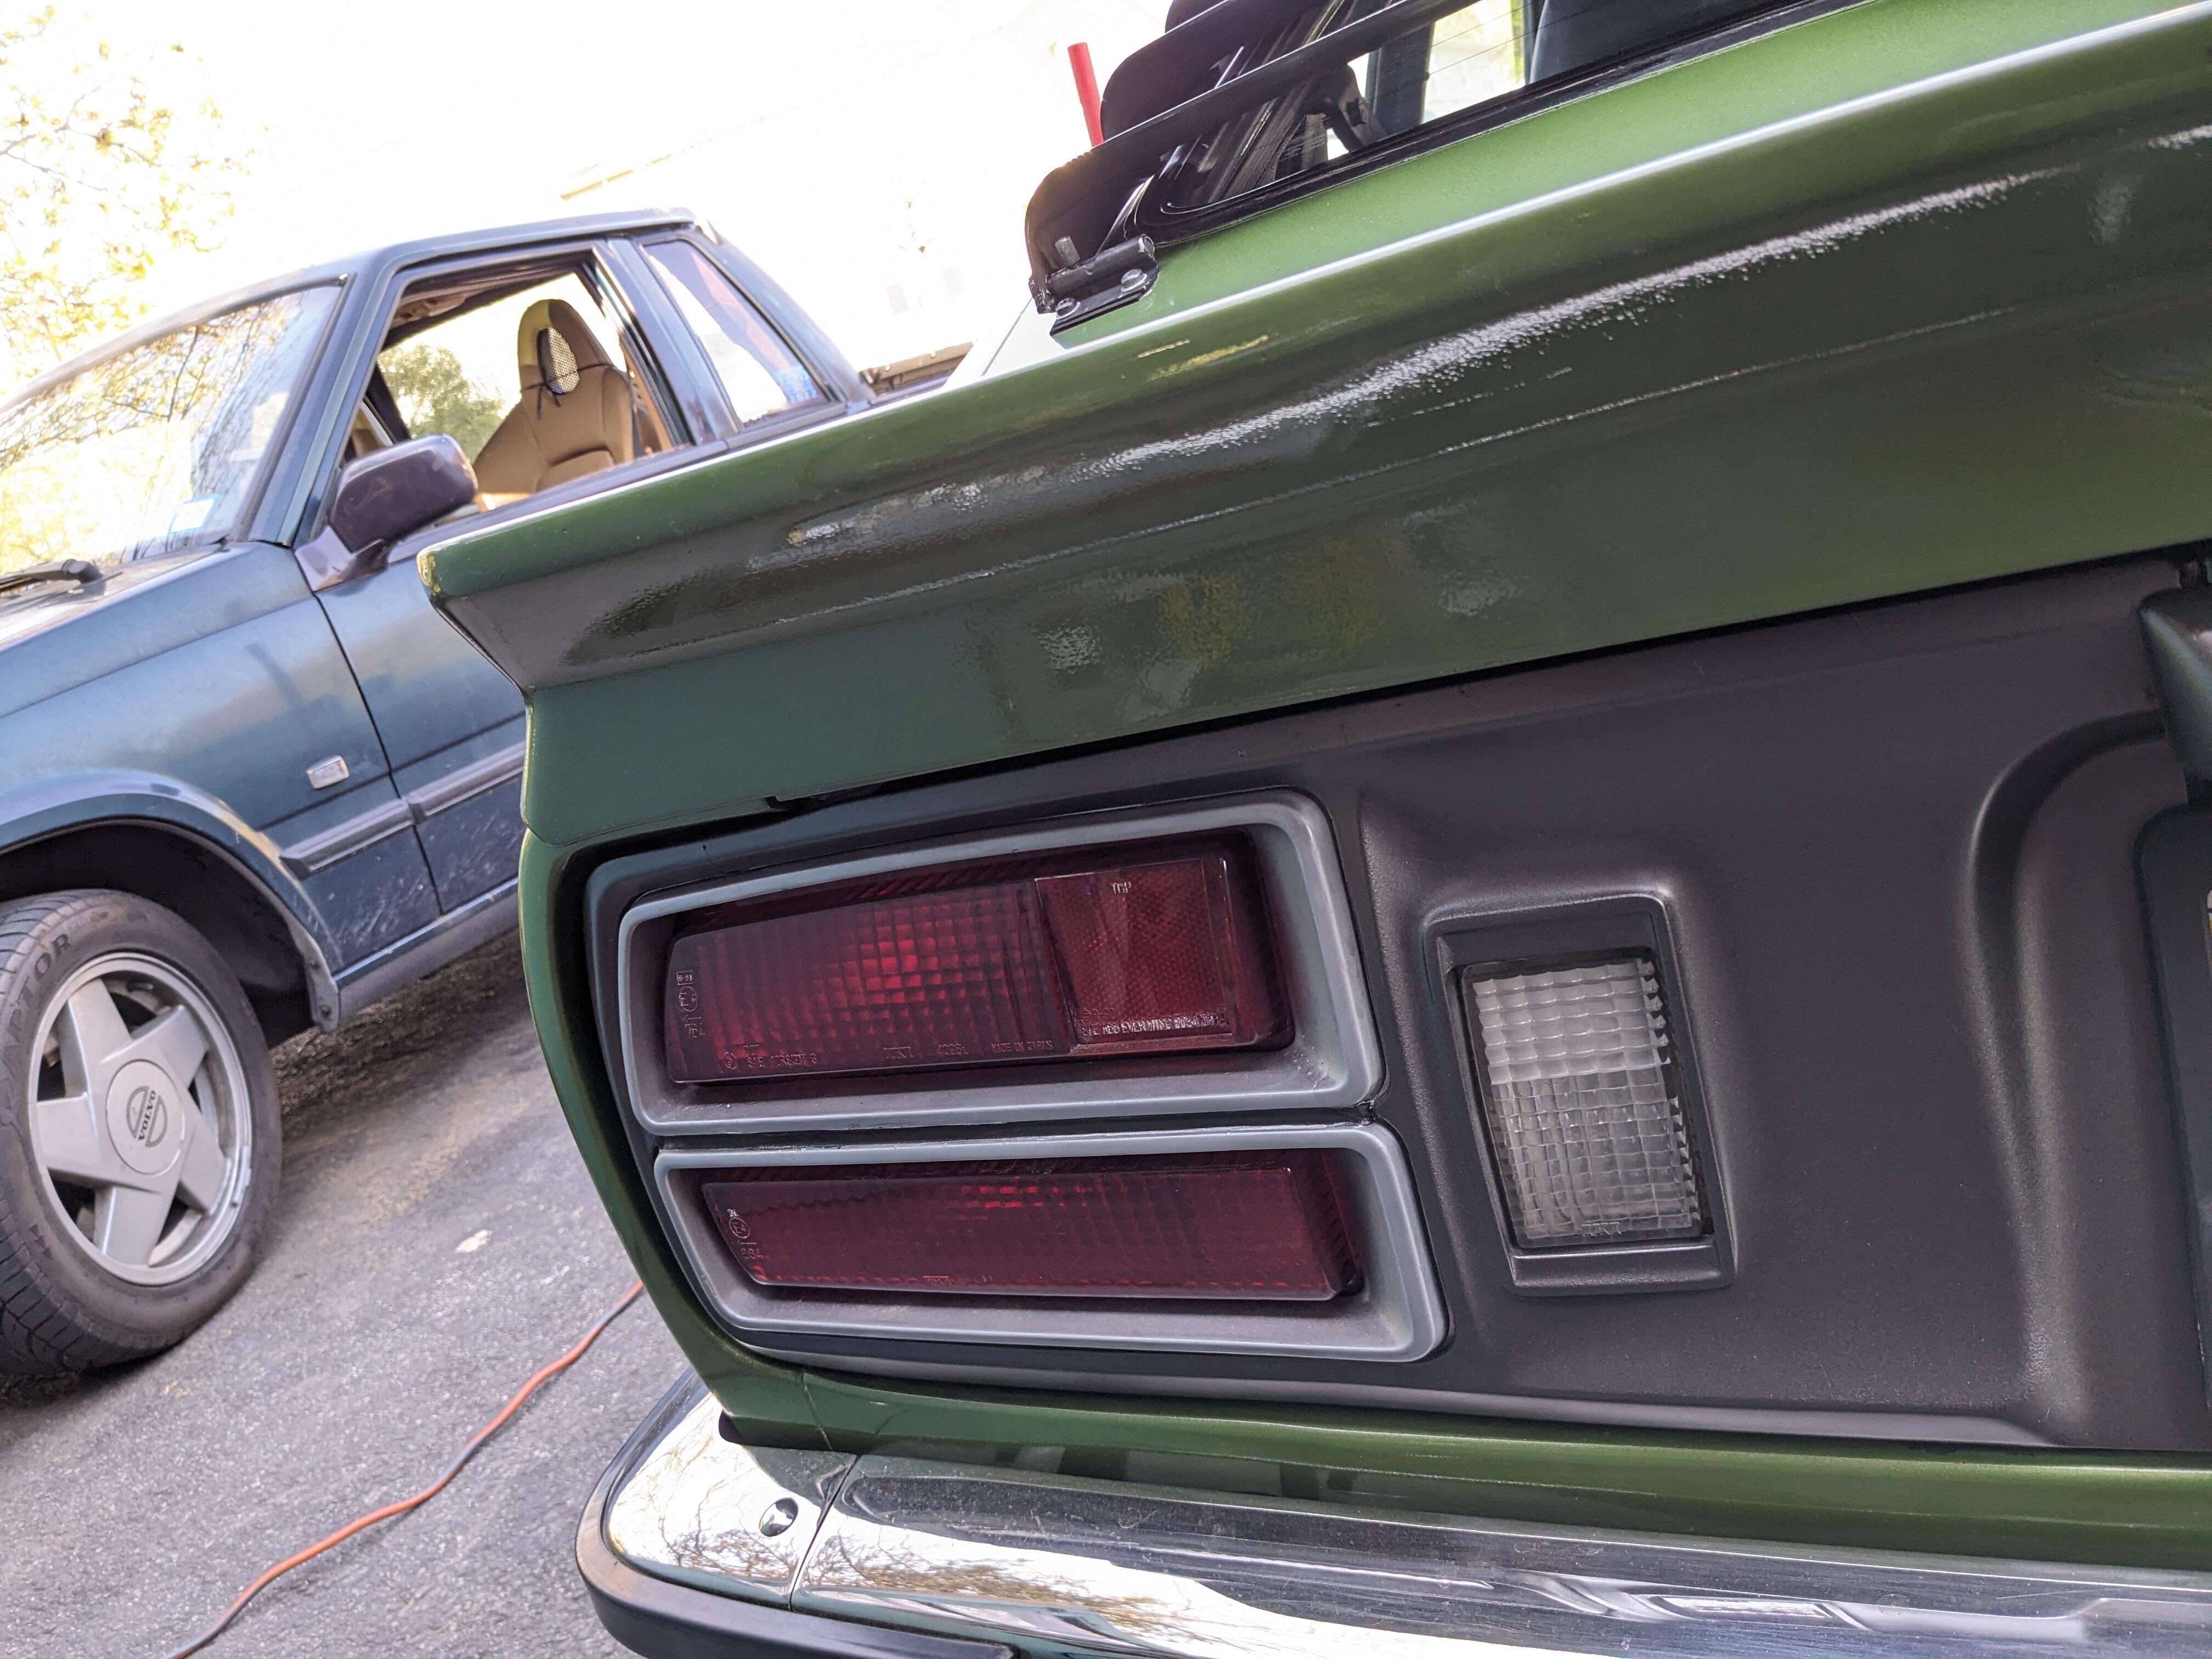
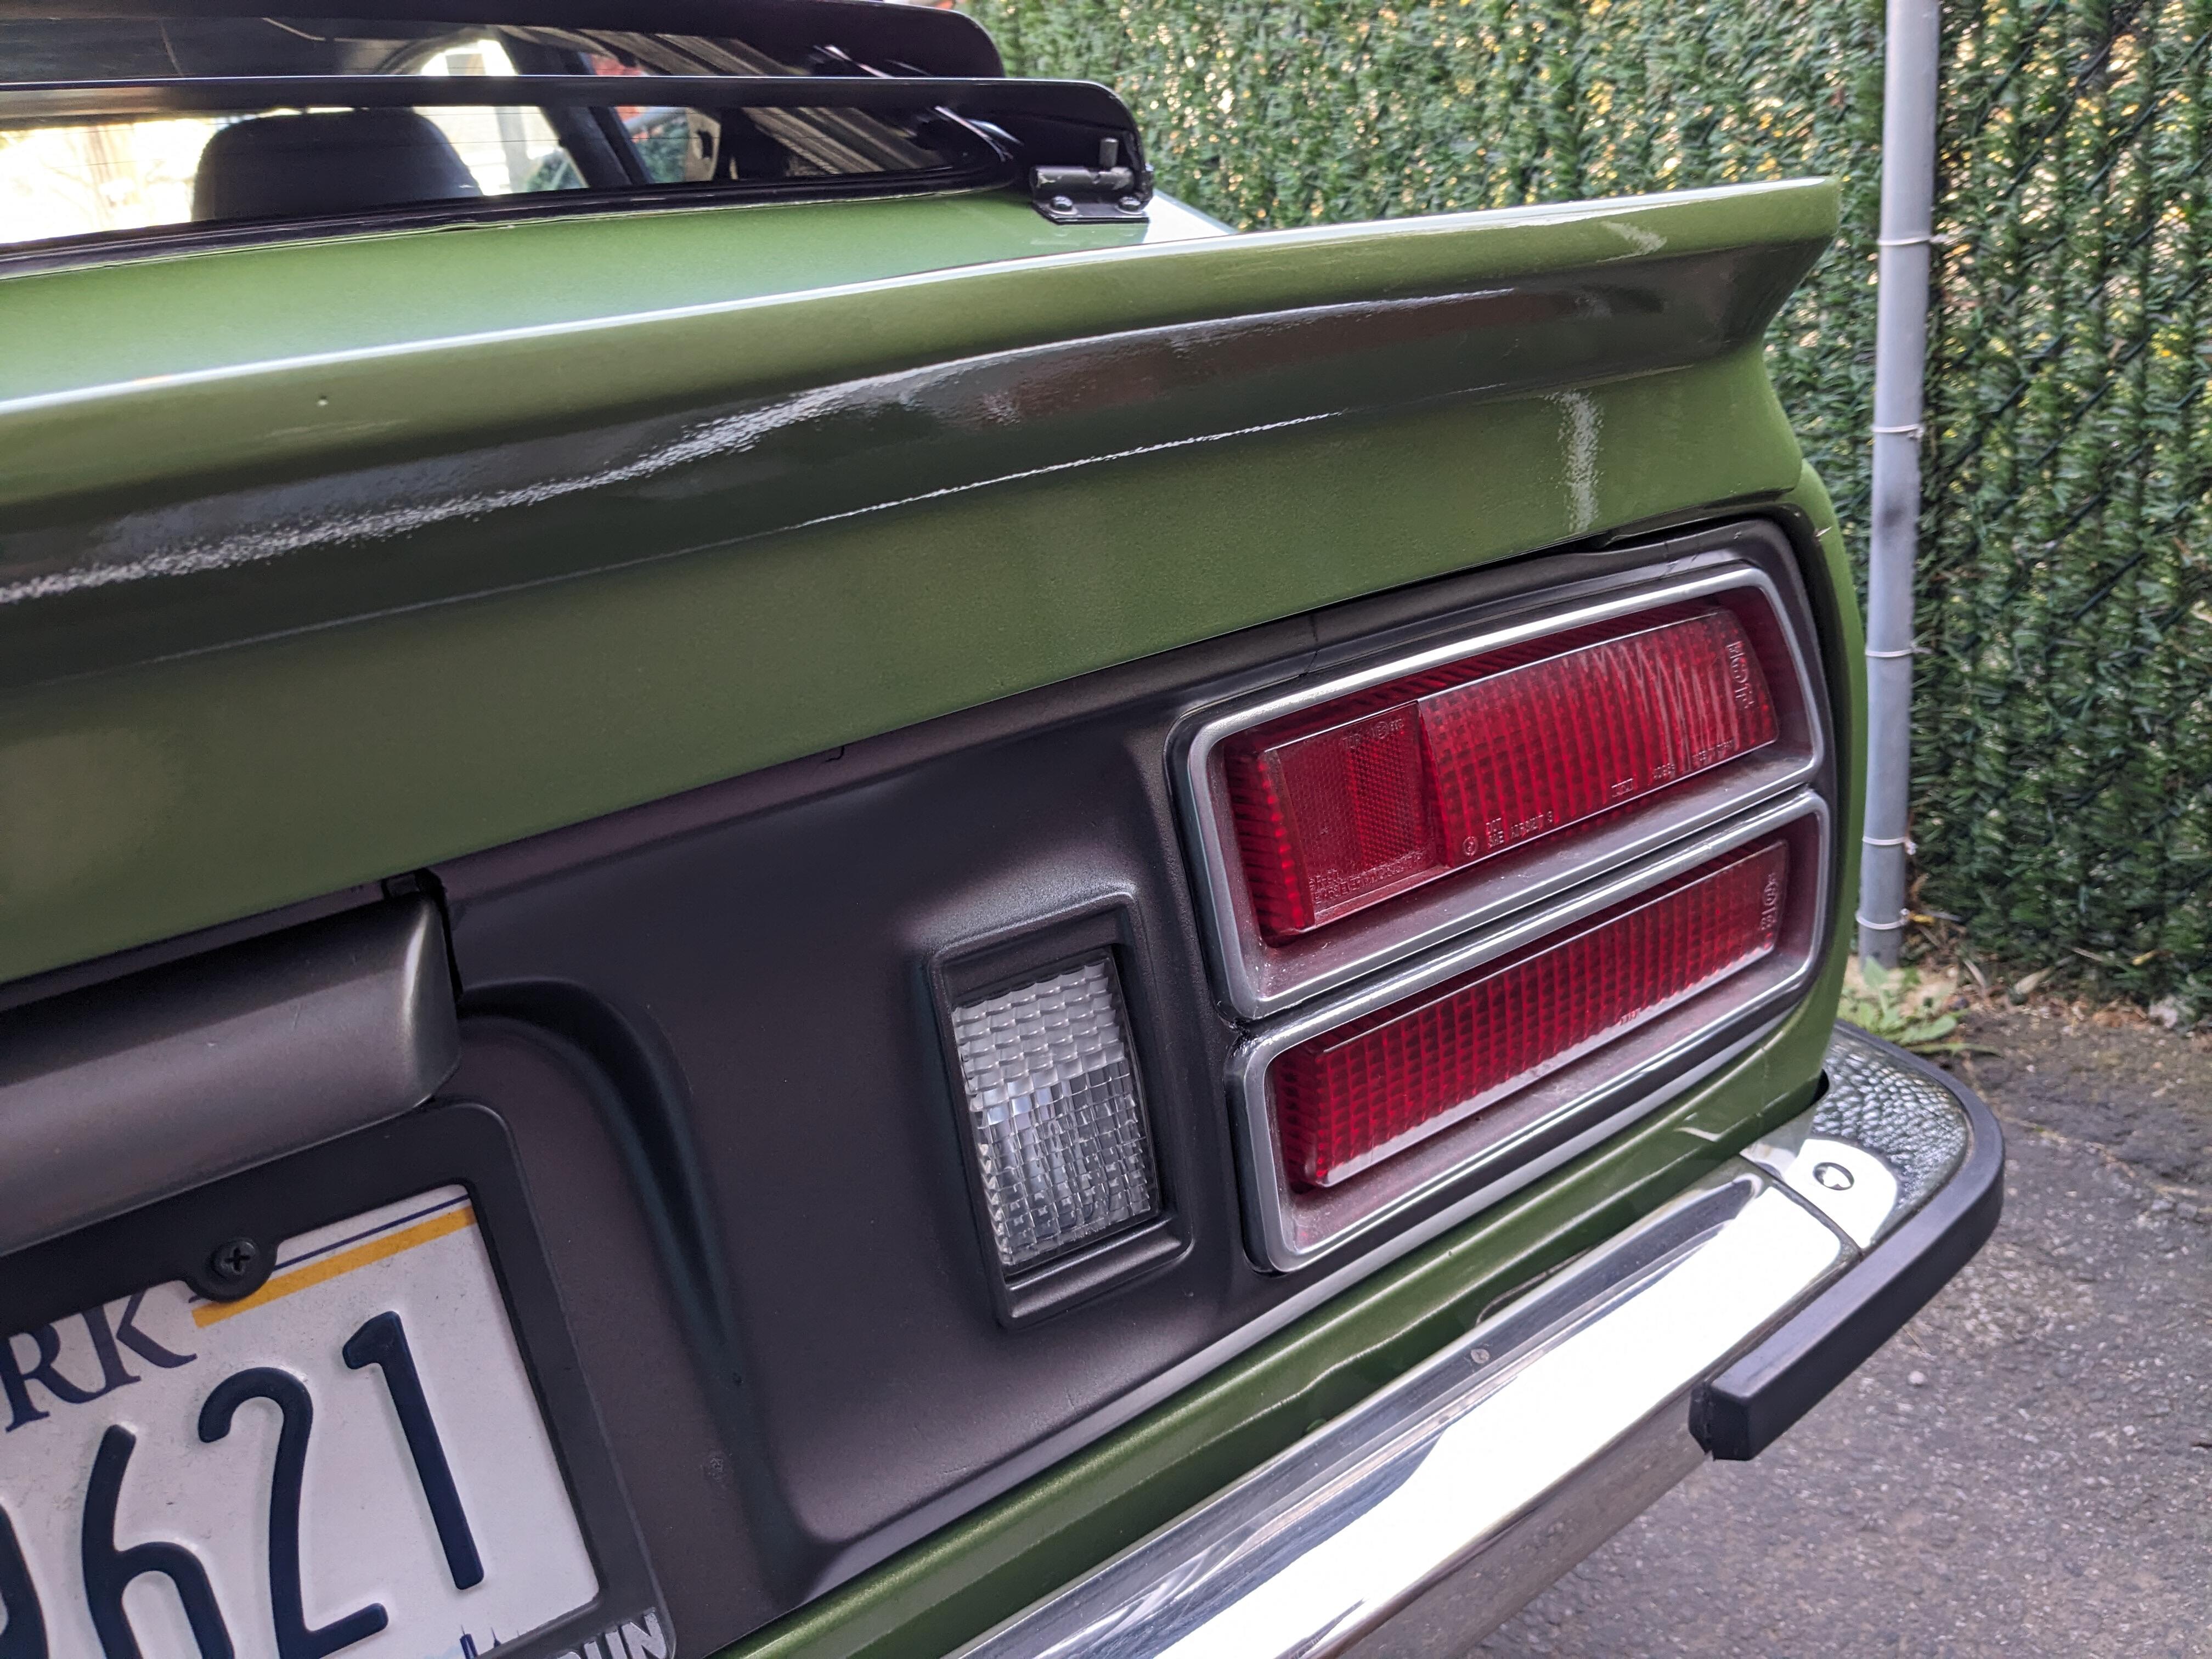
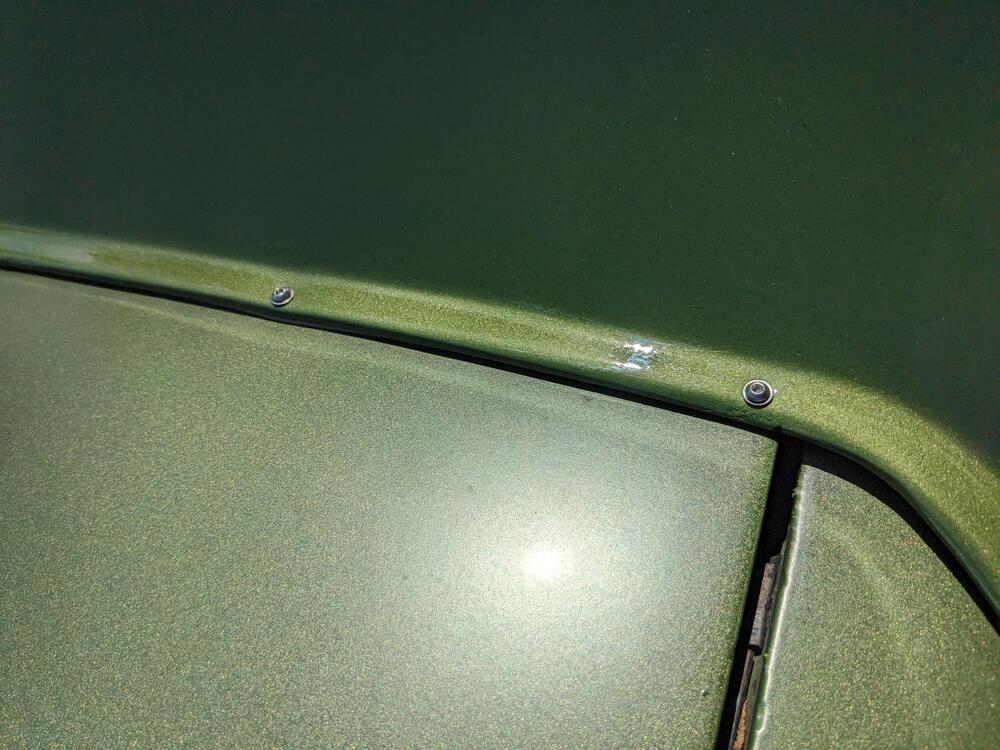
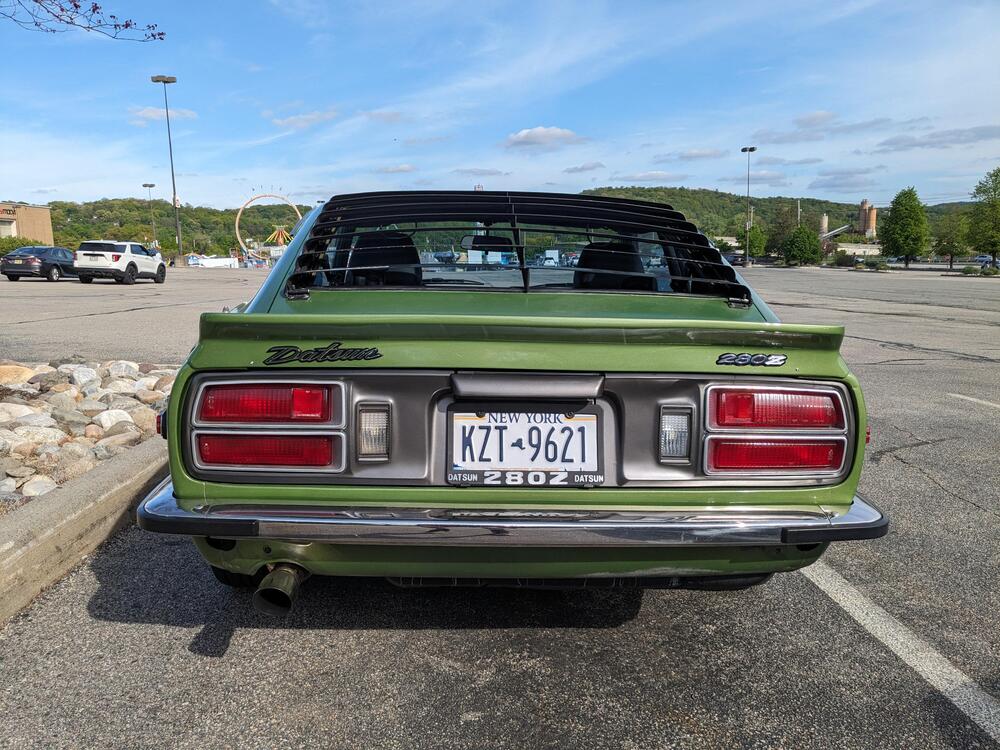
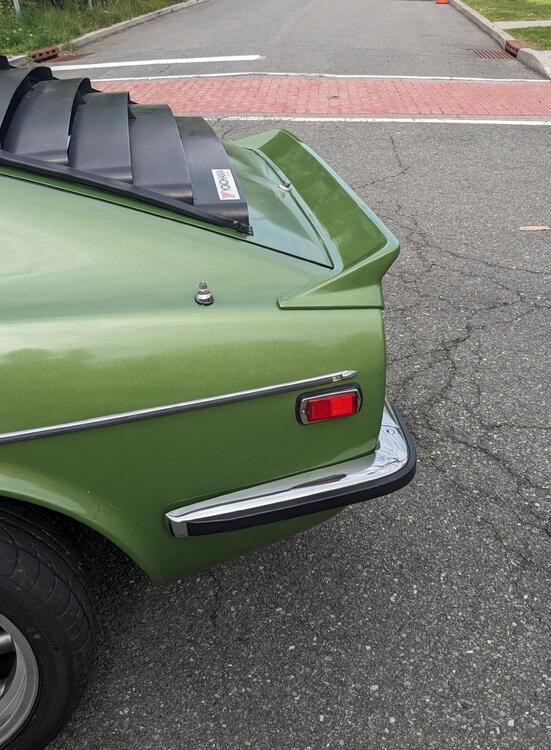
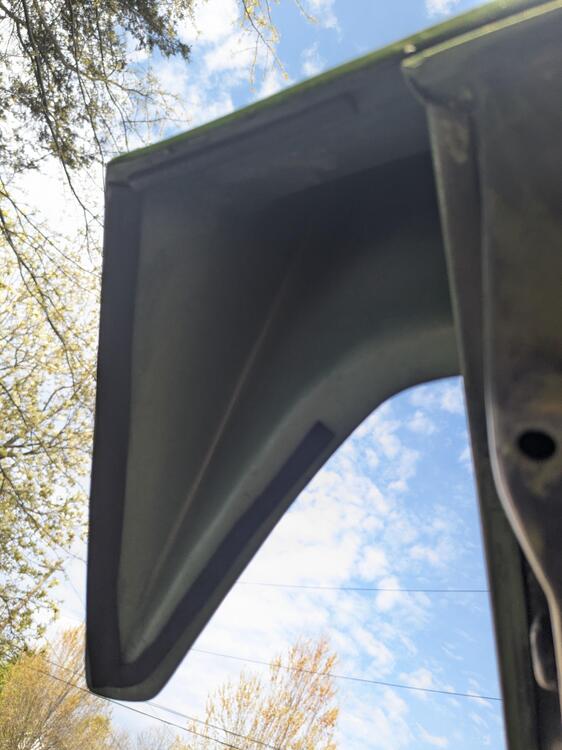
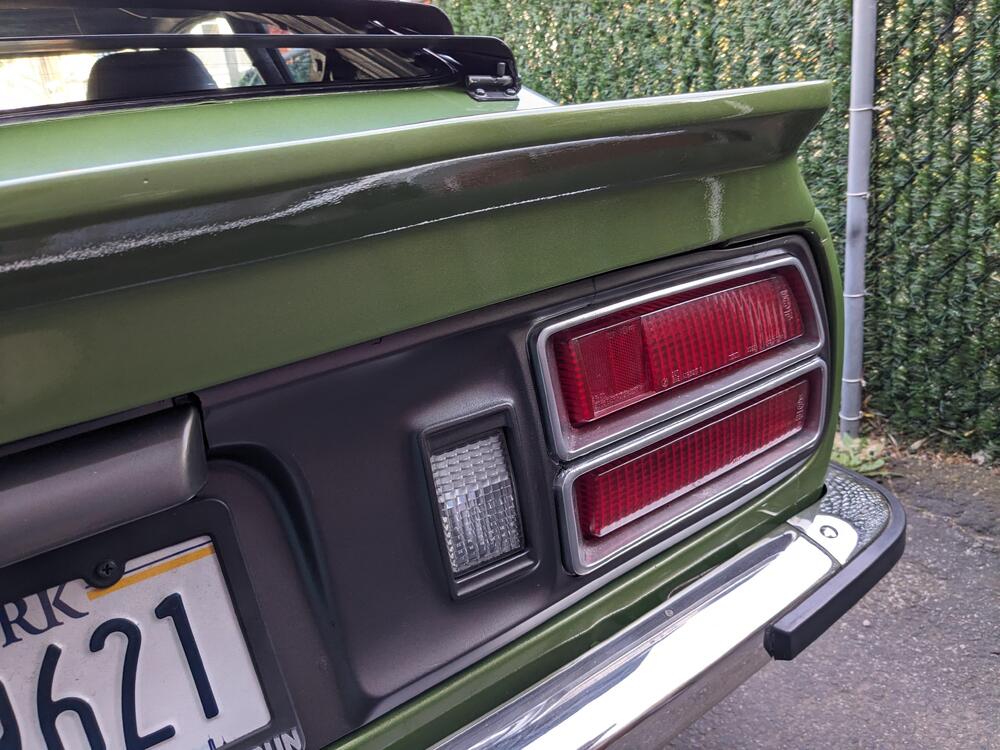
Details on the Xenon rear spoiler install. The way it's designed, the end caps press against the rear quarters. The issue there is that the pressure causes the spoiler to pull away from the hatch along the top, and on the back edge. To counter that, I added two more M3 SS machine screws to the outer edge of the hatch, and to the vertical outer edge. screw heads are visible from the outside, however I'm OK with that.


-
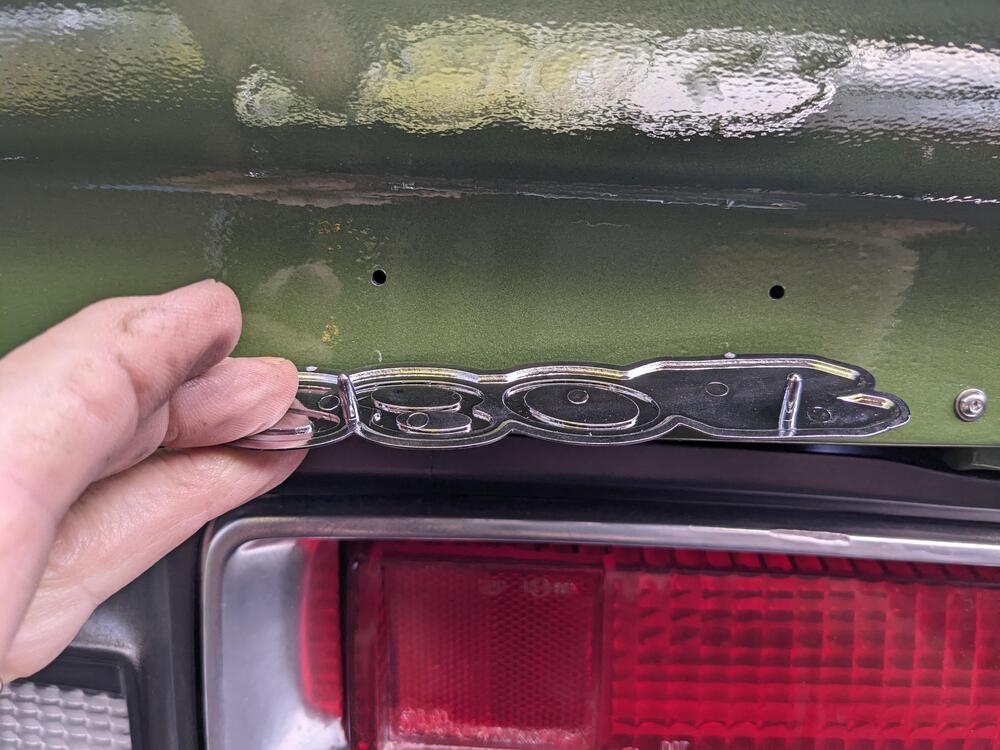
Hello Steve - I have them - they come with the new emblems - the spoiler is thicker than sheet metal, so I don't k now if the clips will lock into place. I didn't want to risk drilling what would then be an oversize hole in the spoiler & have the clip not work as intended.
-
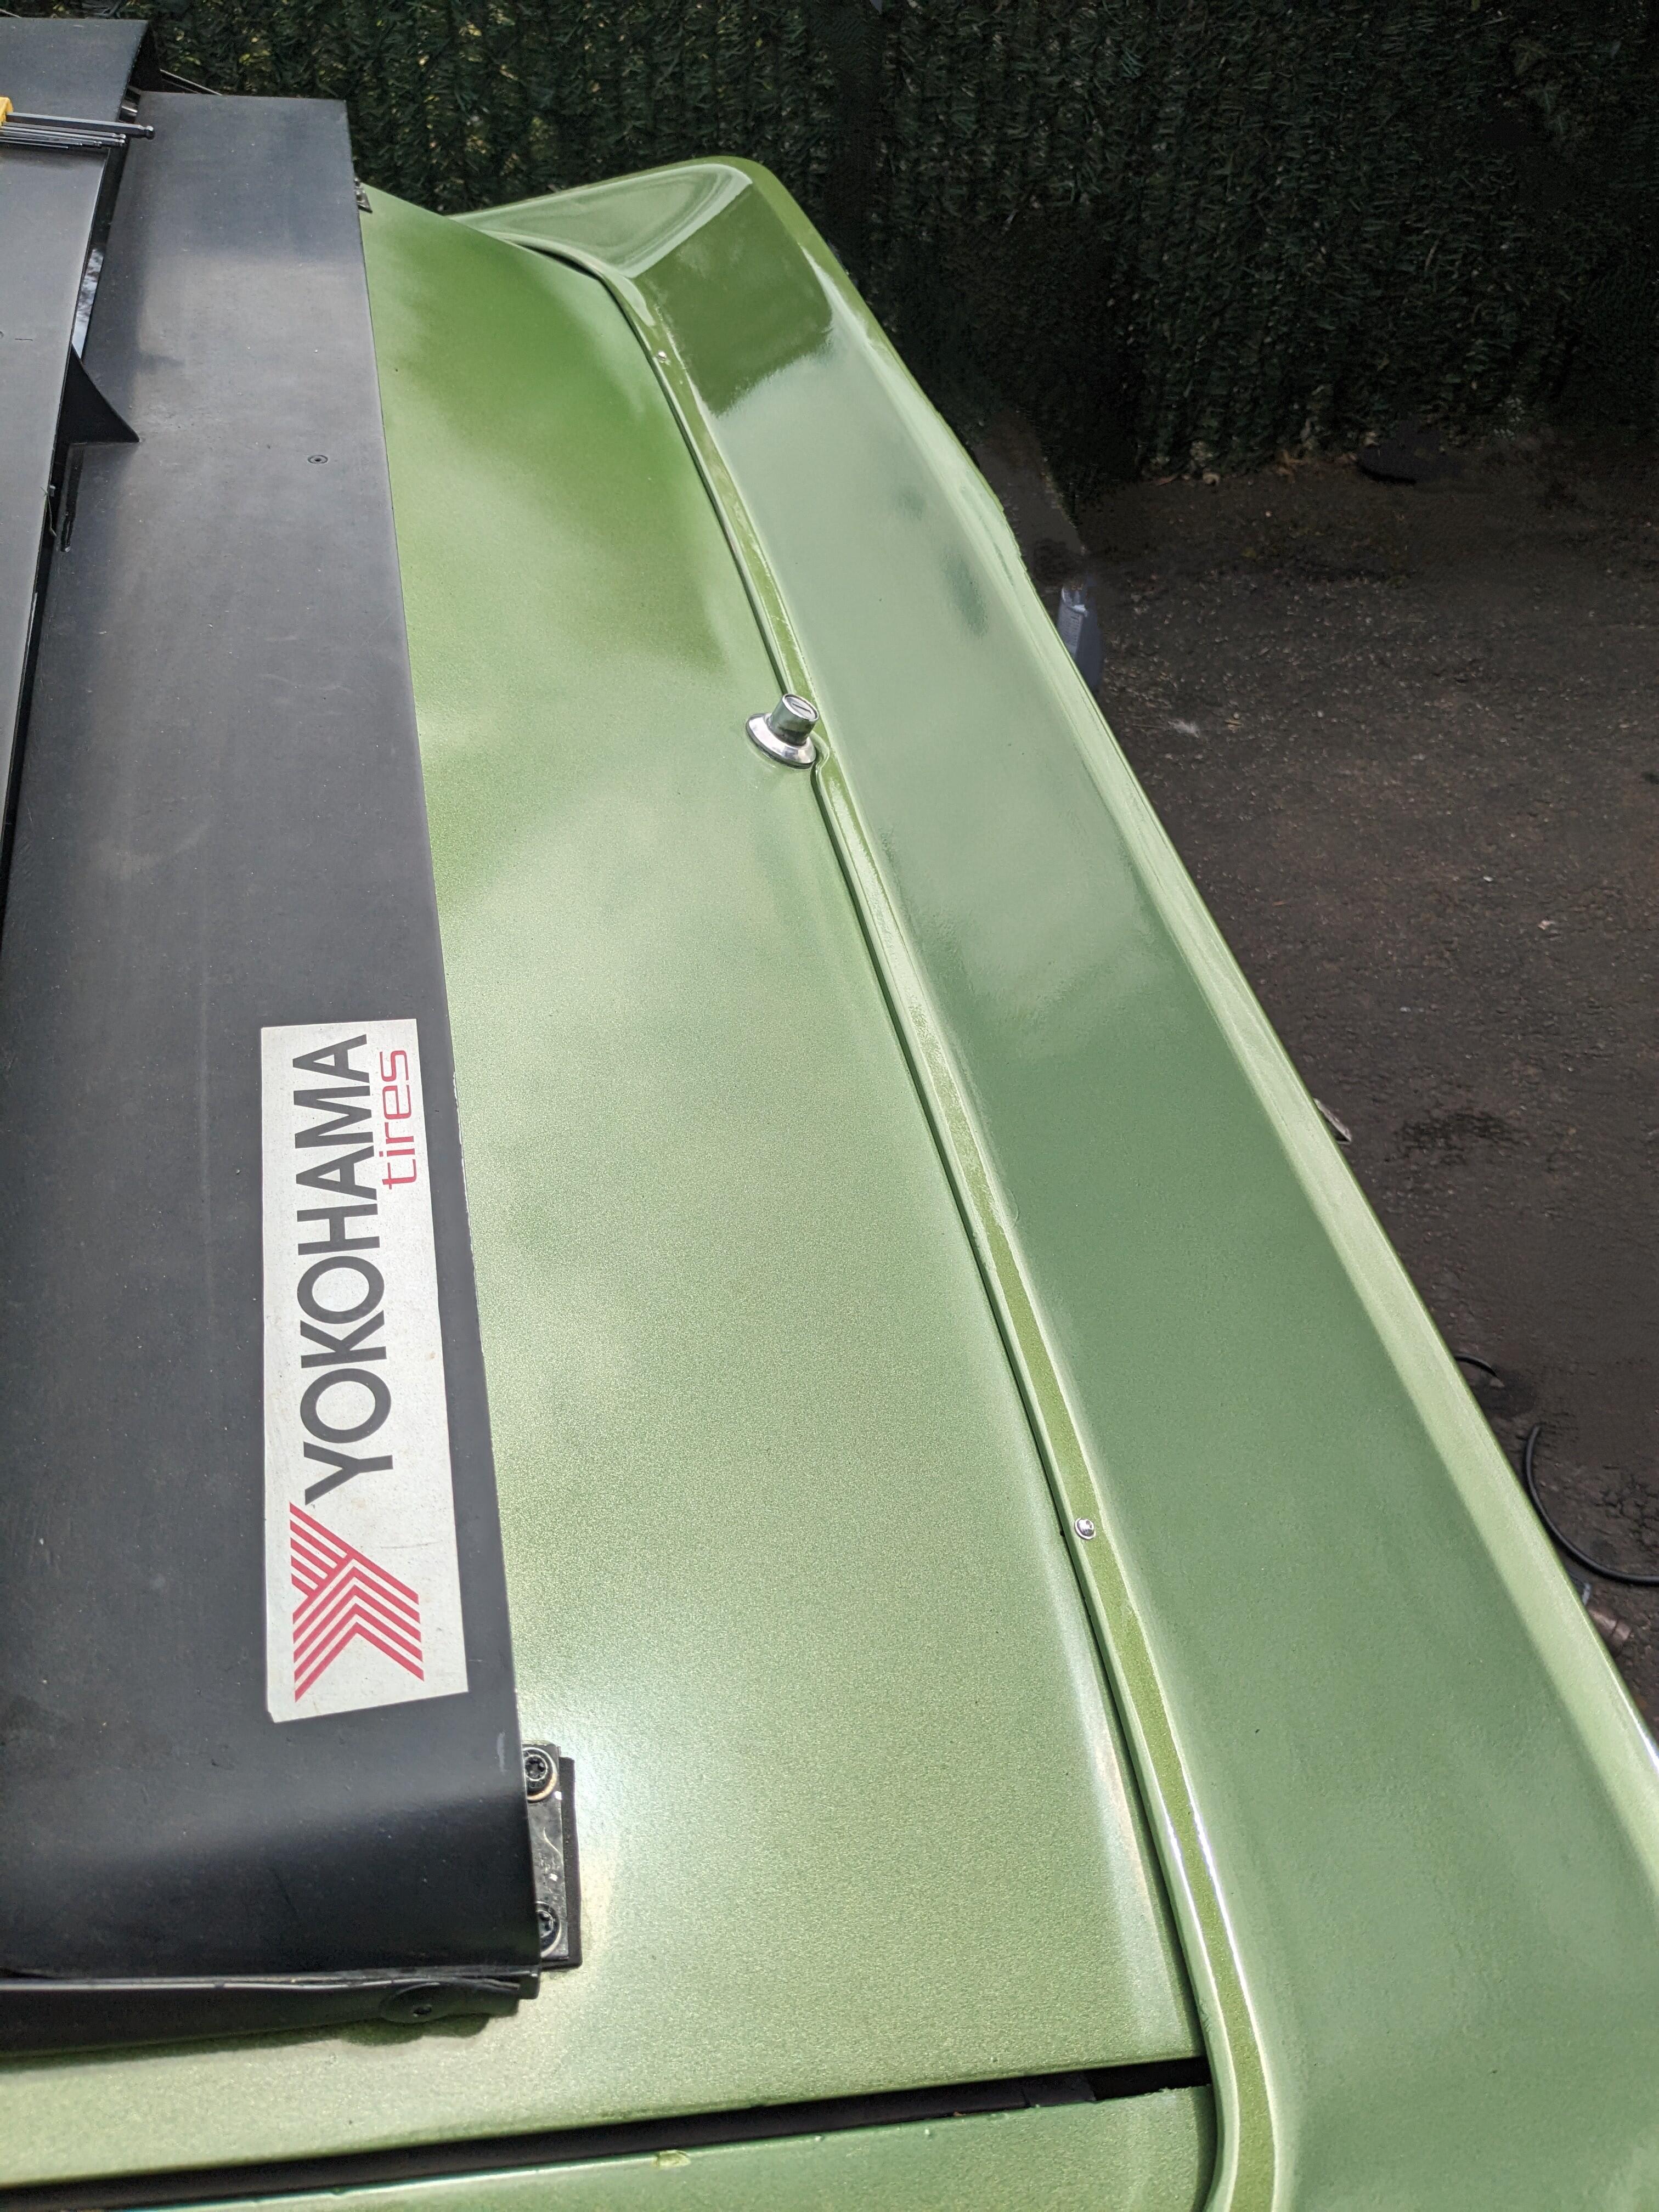
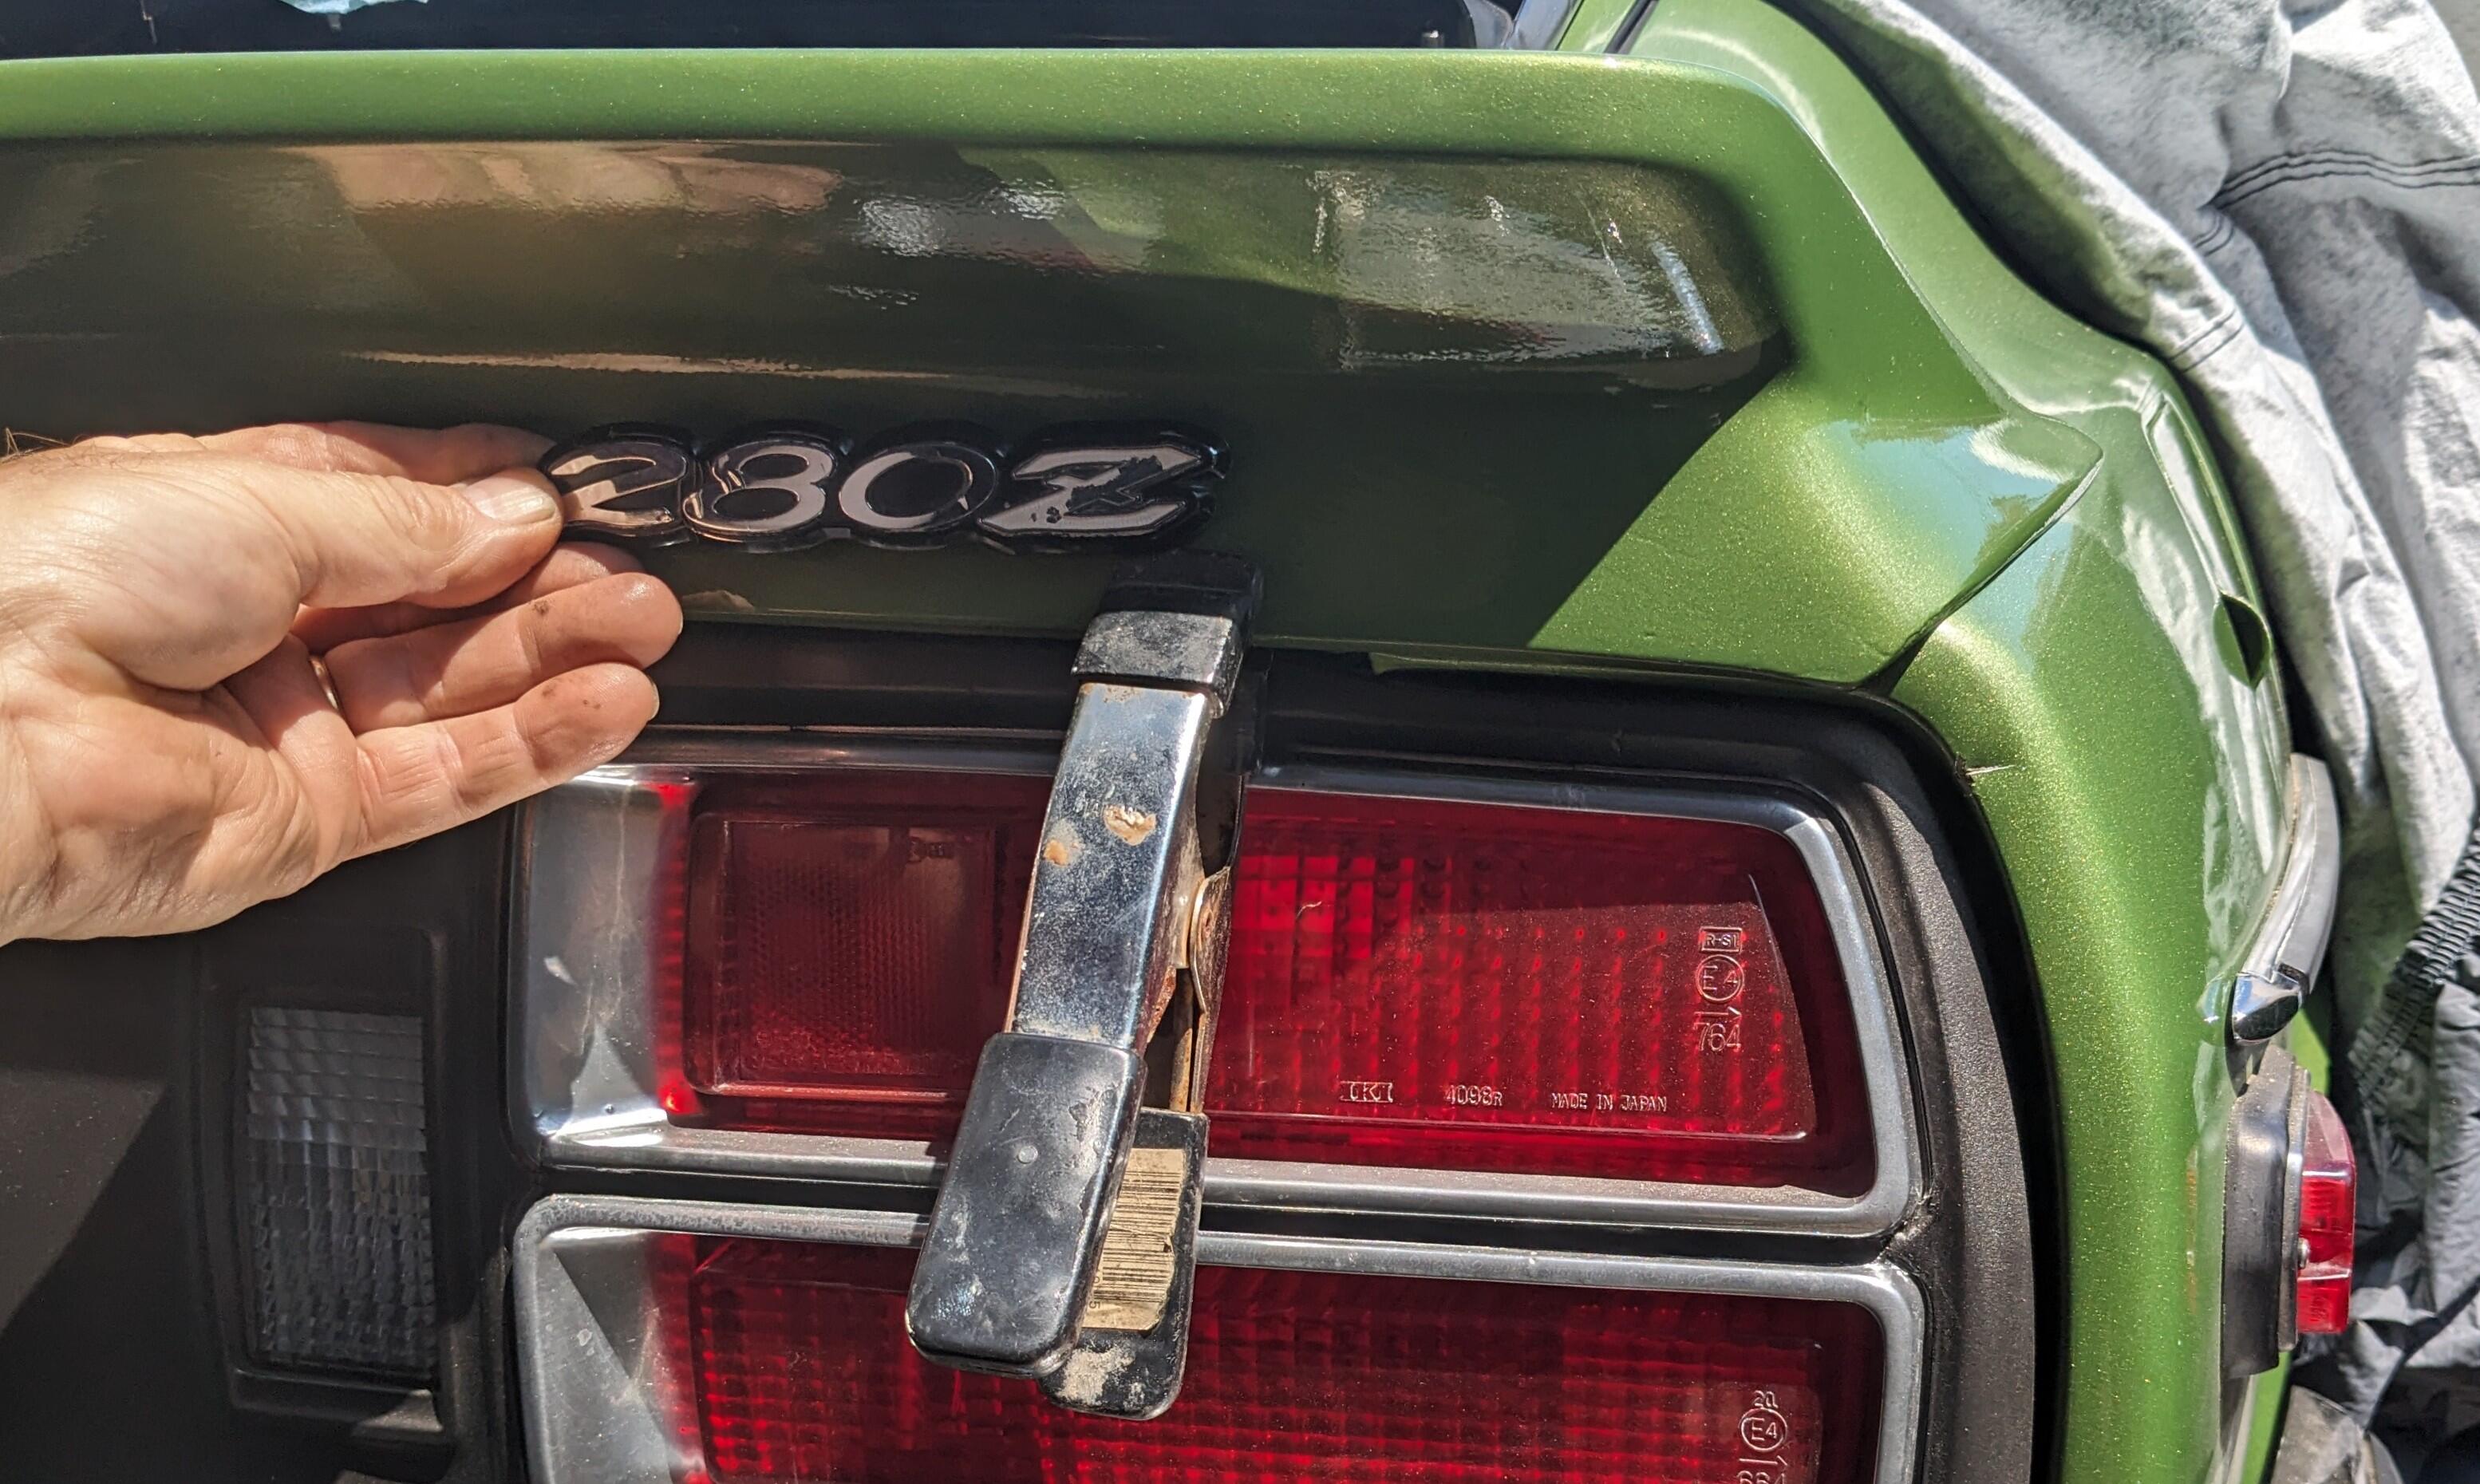
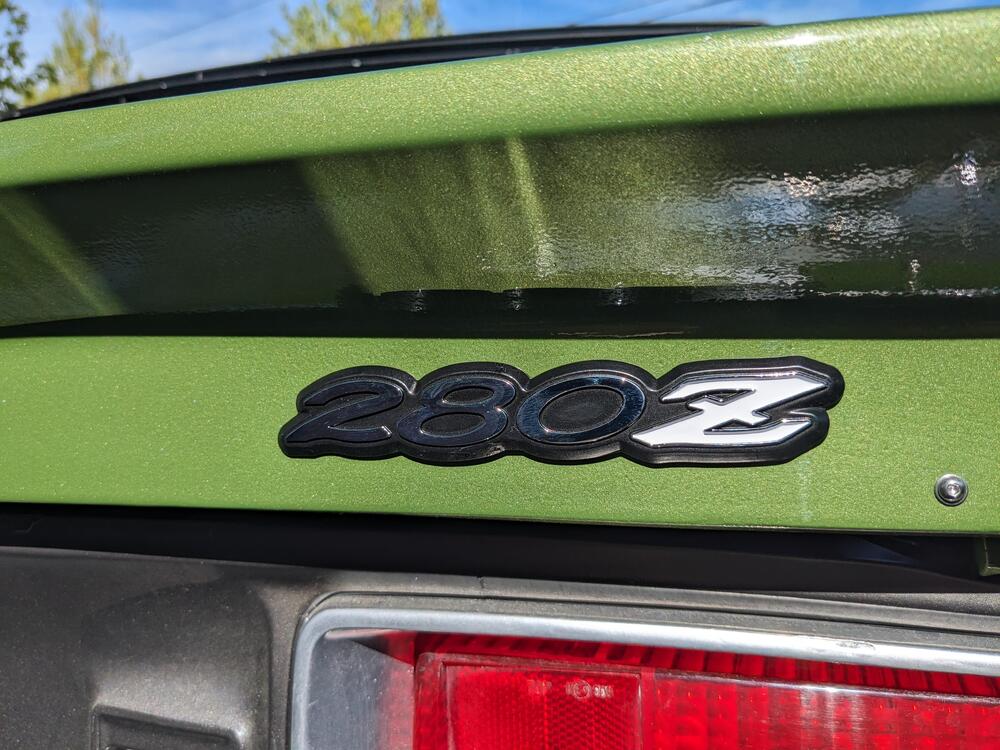
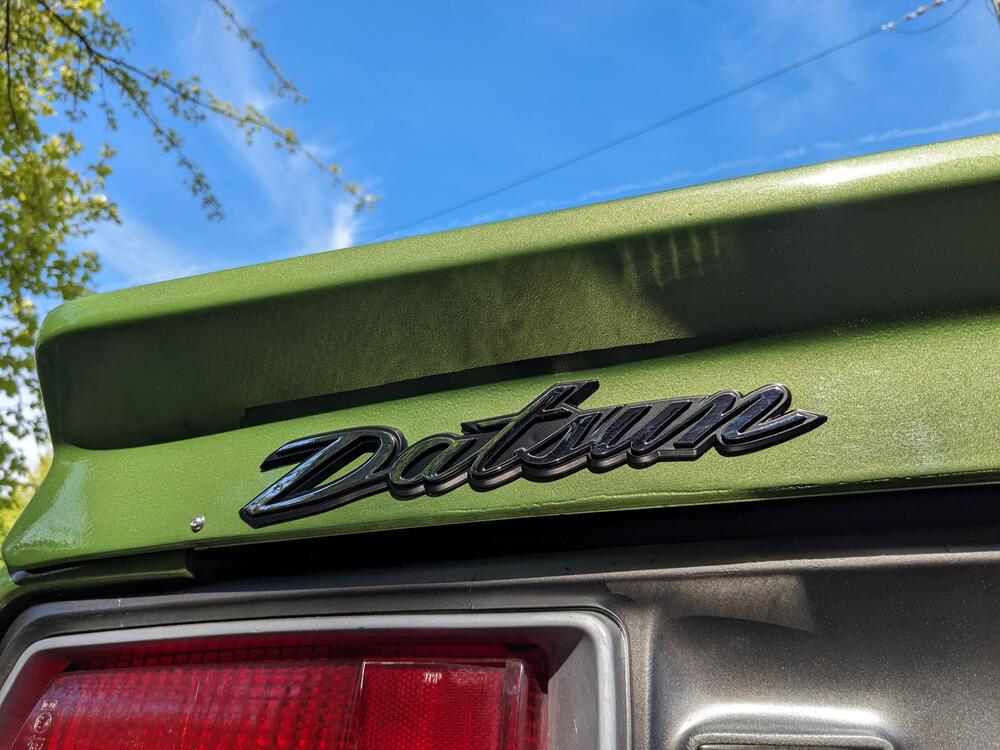
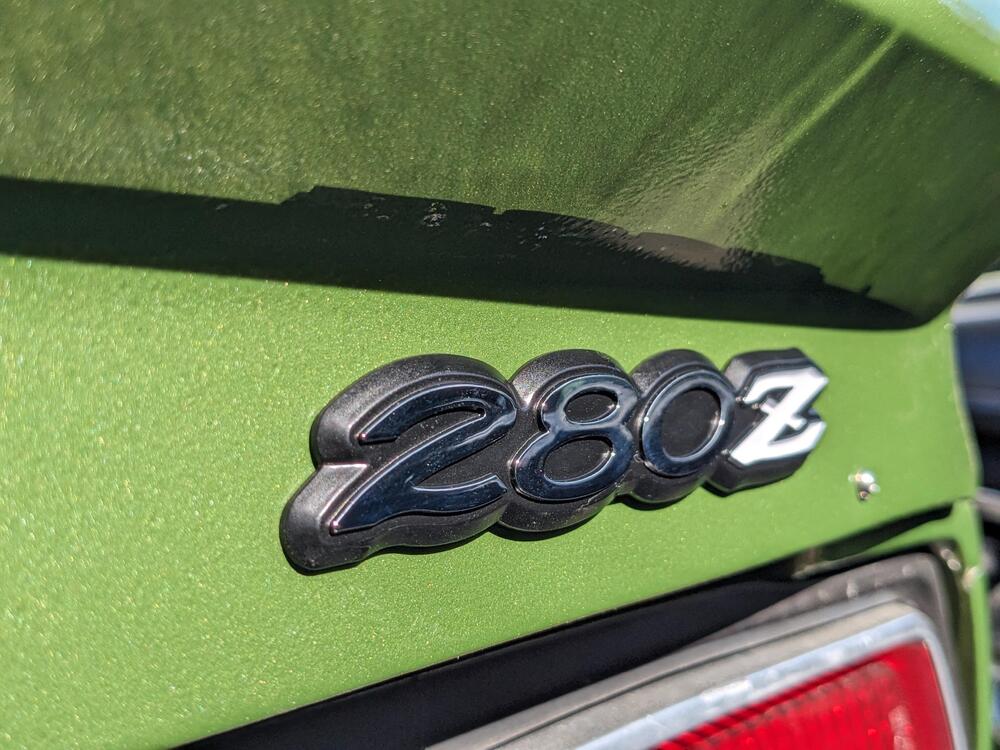
Got the new Datsun & 280Z emblems today (from resurrected classics). I contemplate the location of the Datsun emblem a bit, since on the hatch, it is set on a diagonal - it's obviously not really intended to be set in a horizontal spot. I ended up angling it very slightly to mimic the hatch fitting 280Z set horizontally, 15mm up from bottom edge I just drilled the spoiler slightly under the pin size, so it's a press fit


-
Yes - I got that - you can see the shoulder placement in my second pic - when reversed, it is stretched on the area between #1 & the cam chain
-
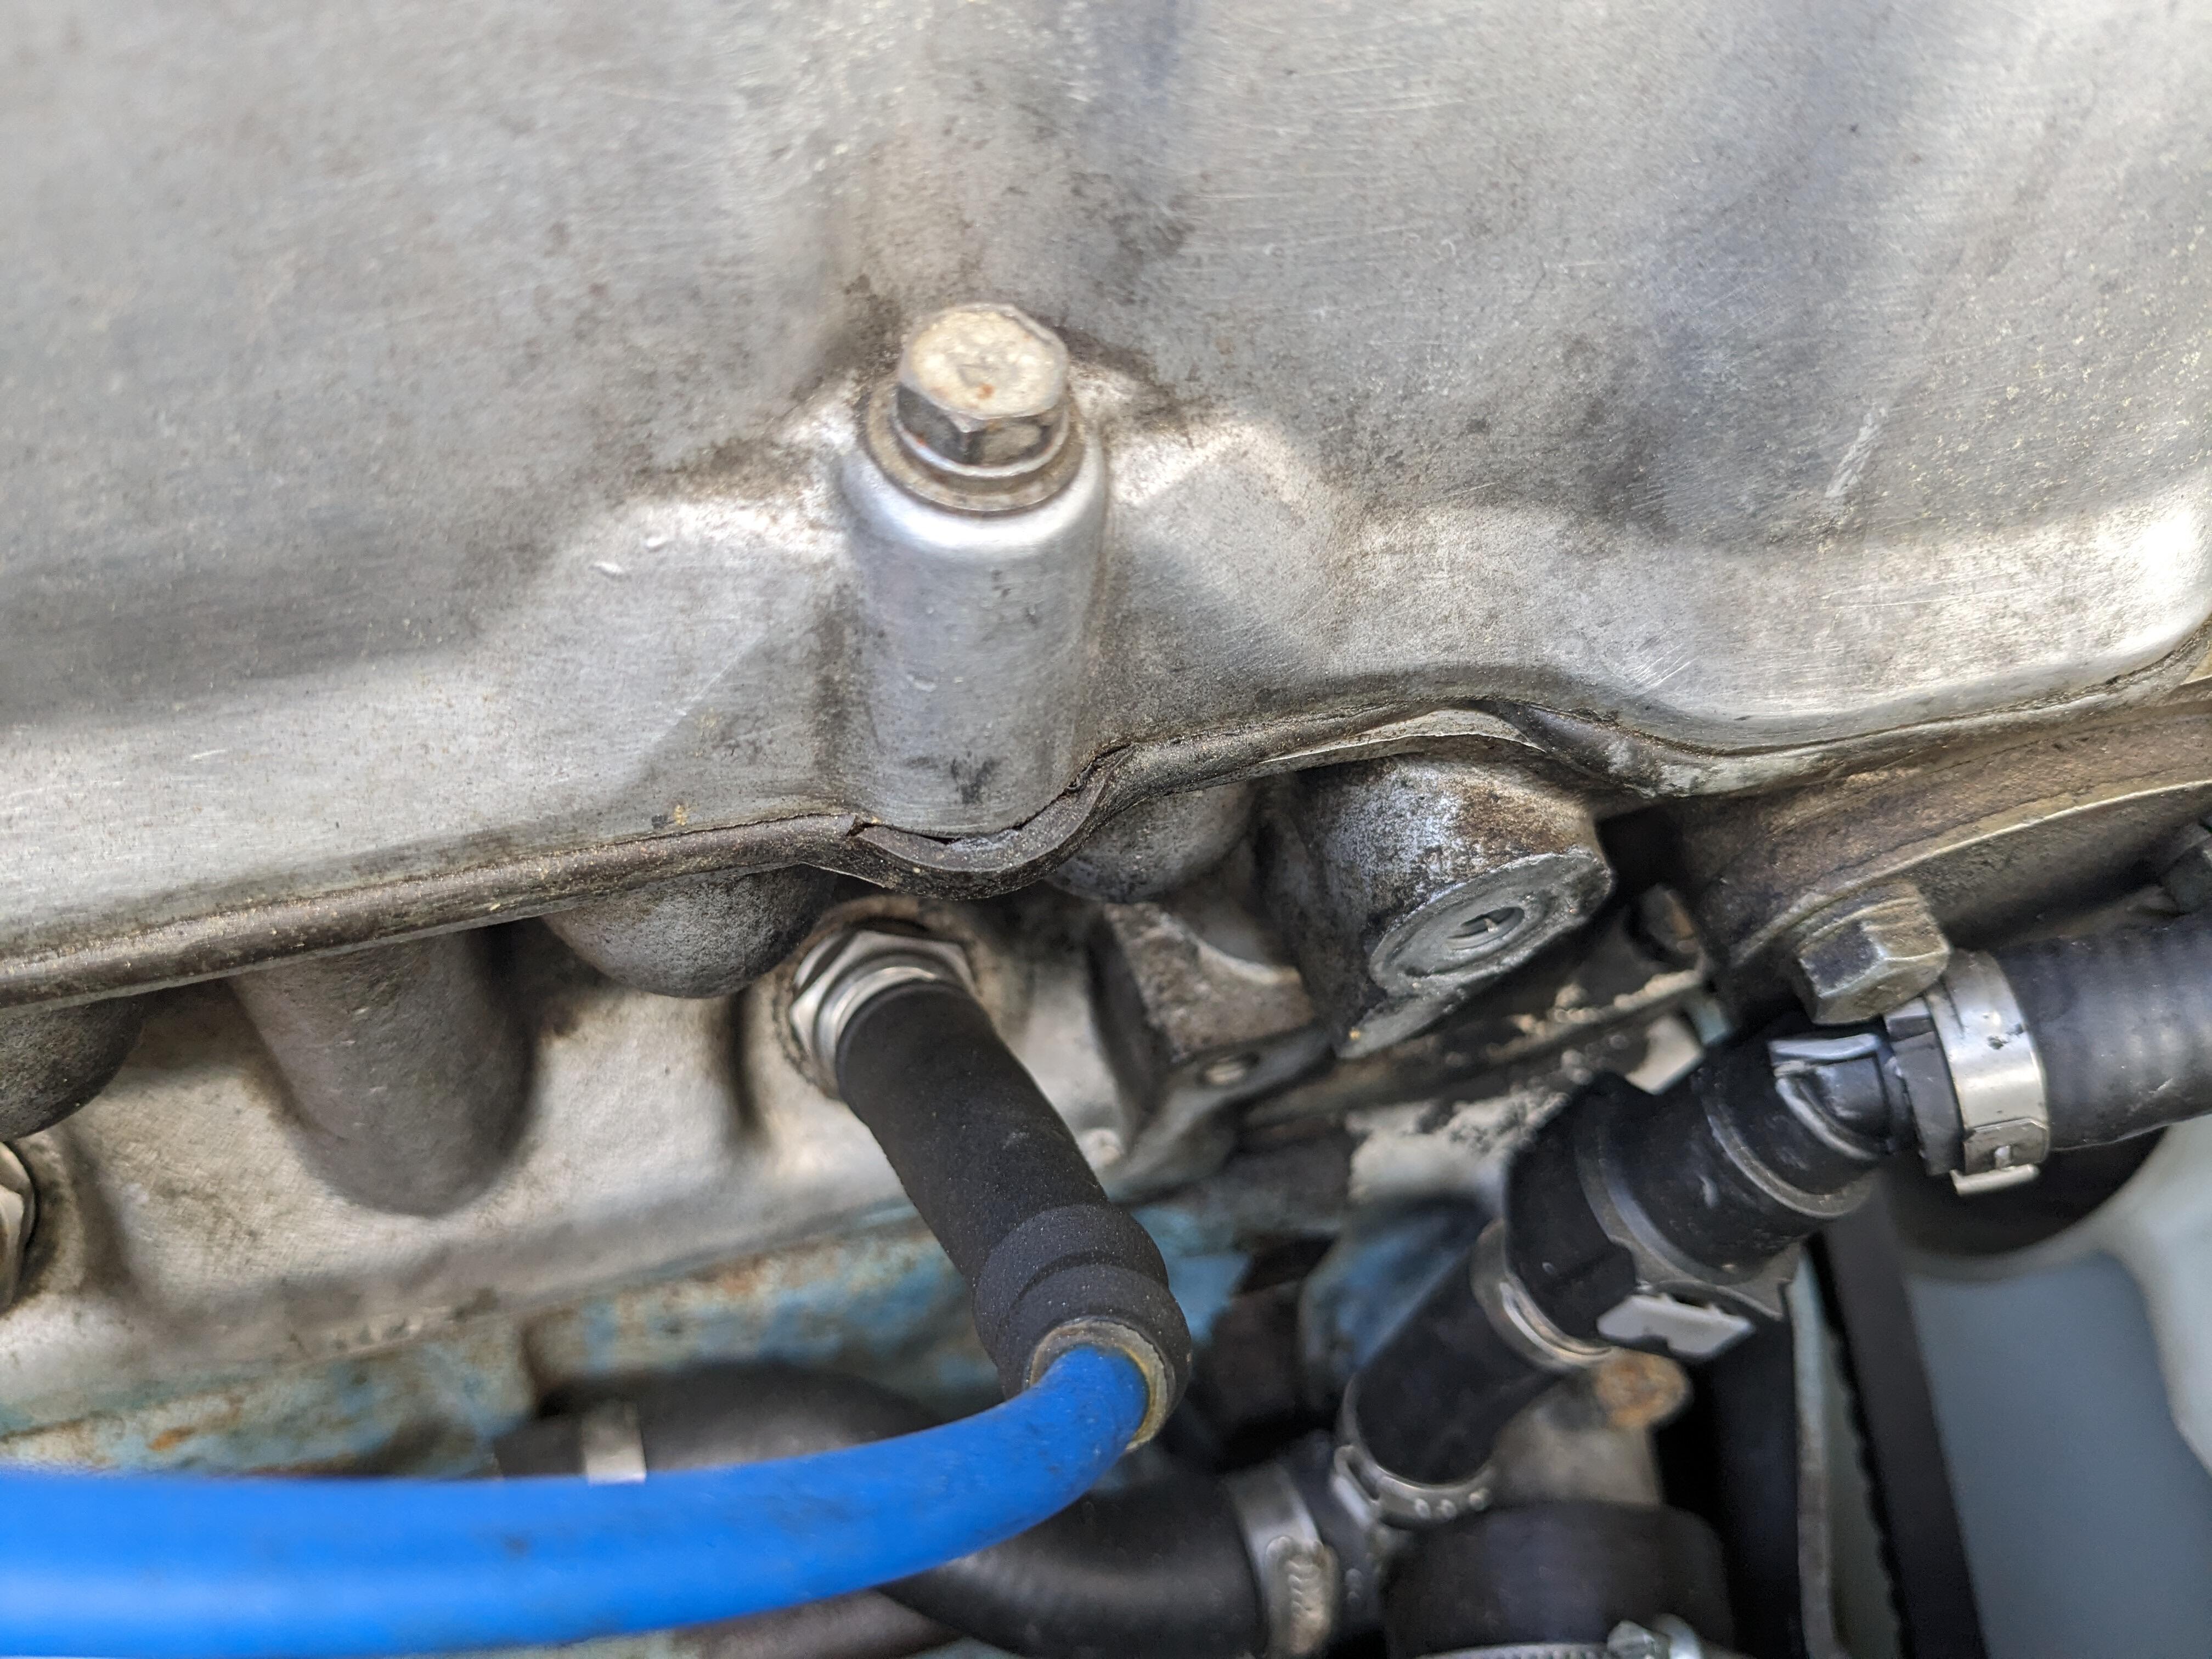
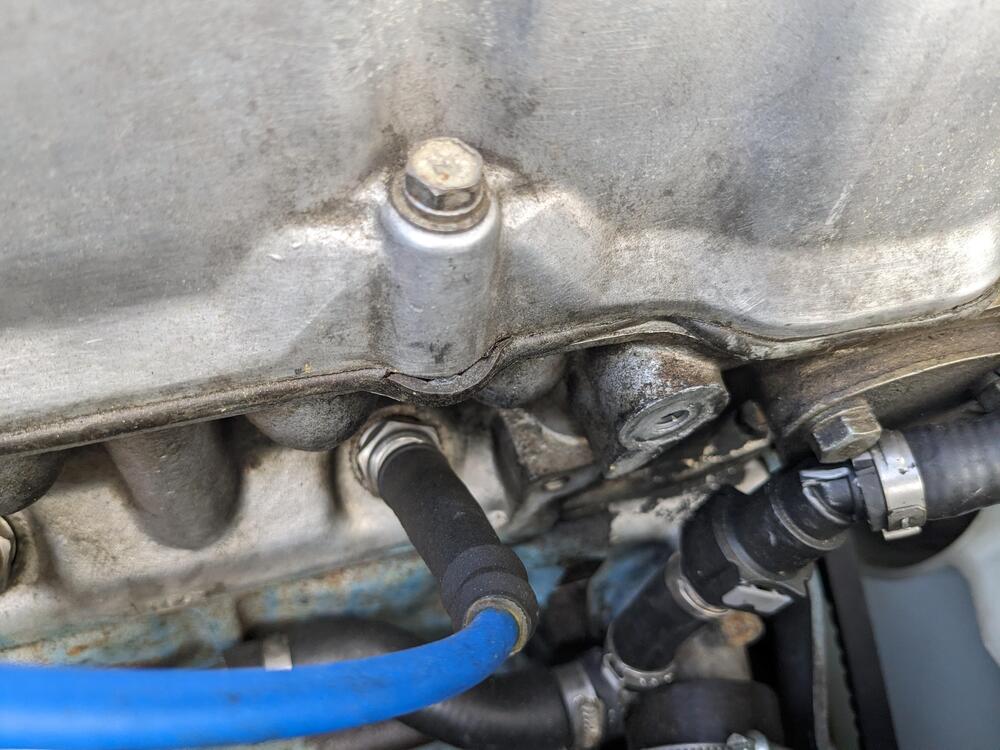
Not good - this gasket is coming apart - just noticed this spread. Driving about 500 miles round trip next weekend to the Carlisle Import Show - so I've ordered a Mahle cork/rubber version to tide me over. I've emailed MilkFab.
-
Good to hear - I bought one of these to replace the crap Delco rebuild (massive current draw when hot cranking) from RockAuto - still haven't installed it though, I just re-installed the reman the PO had installed while I was waiting for the WAN unit
-
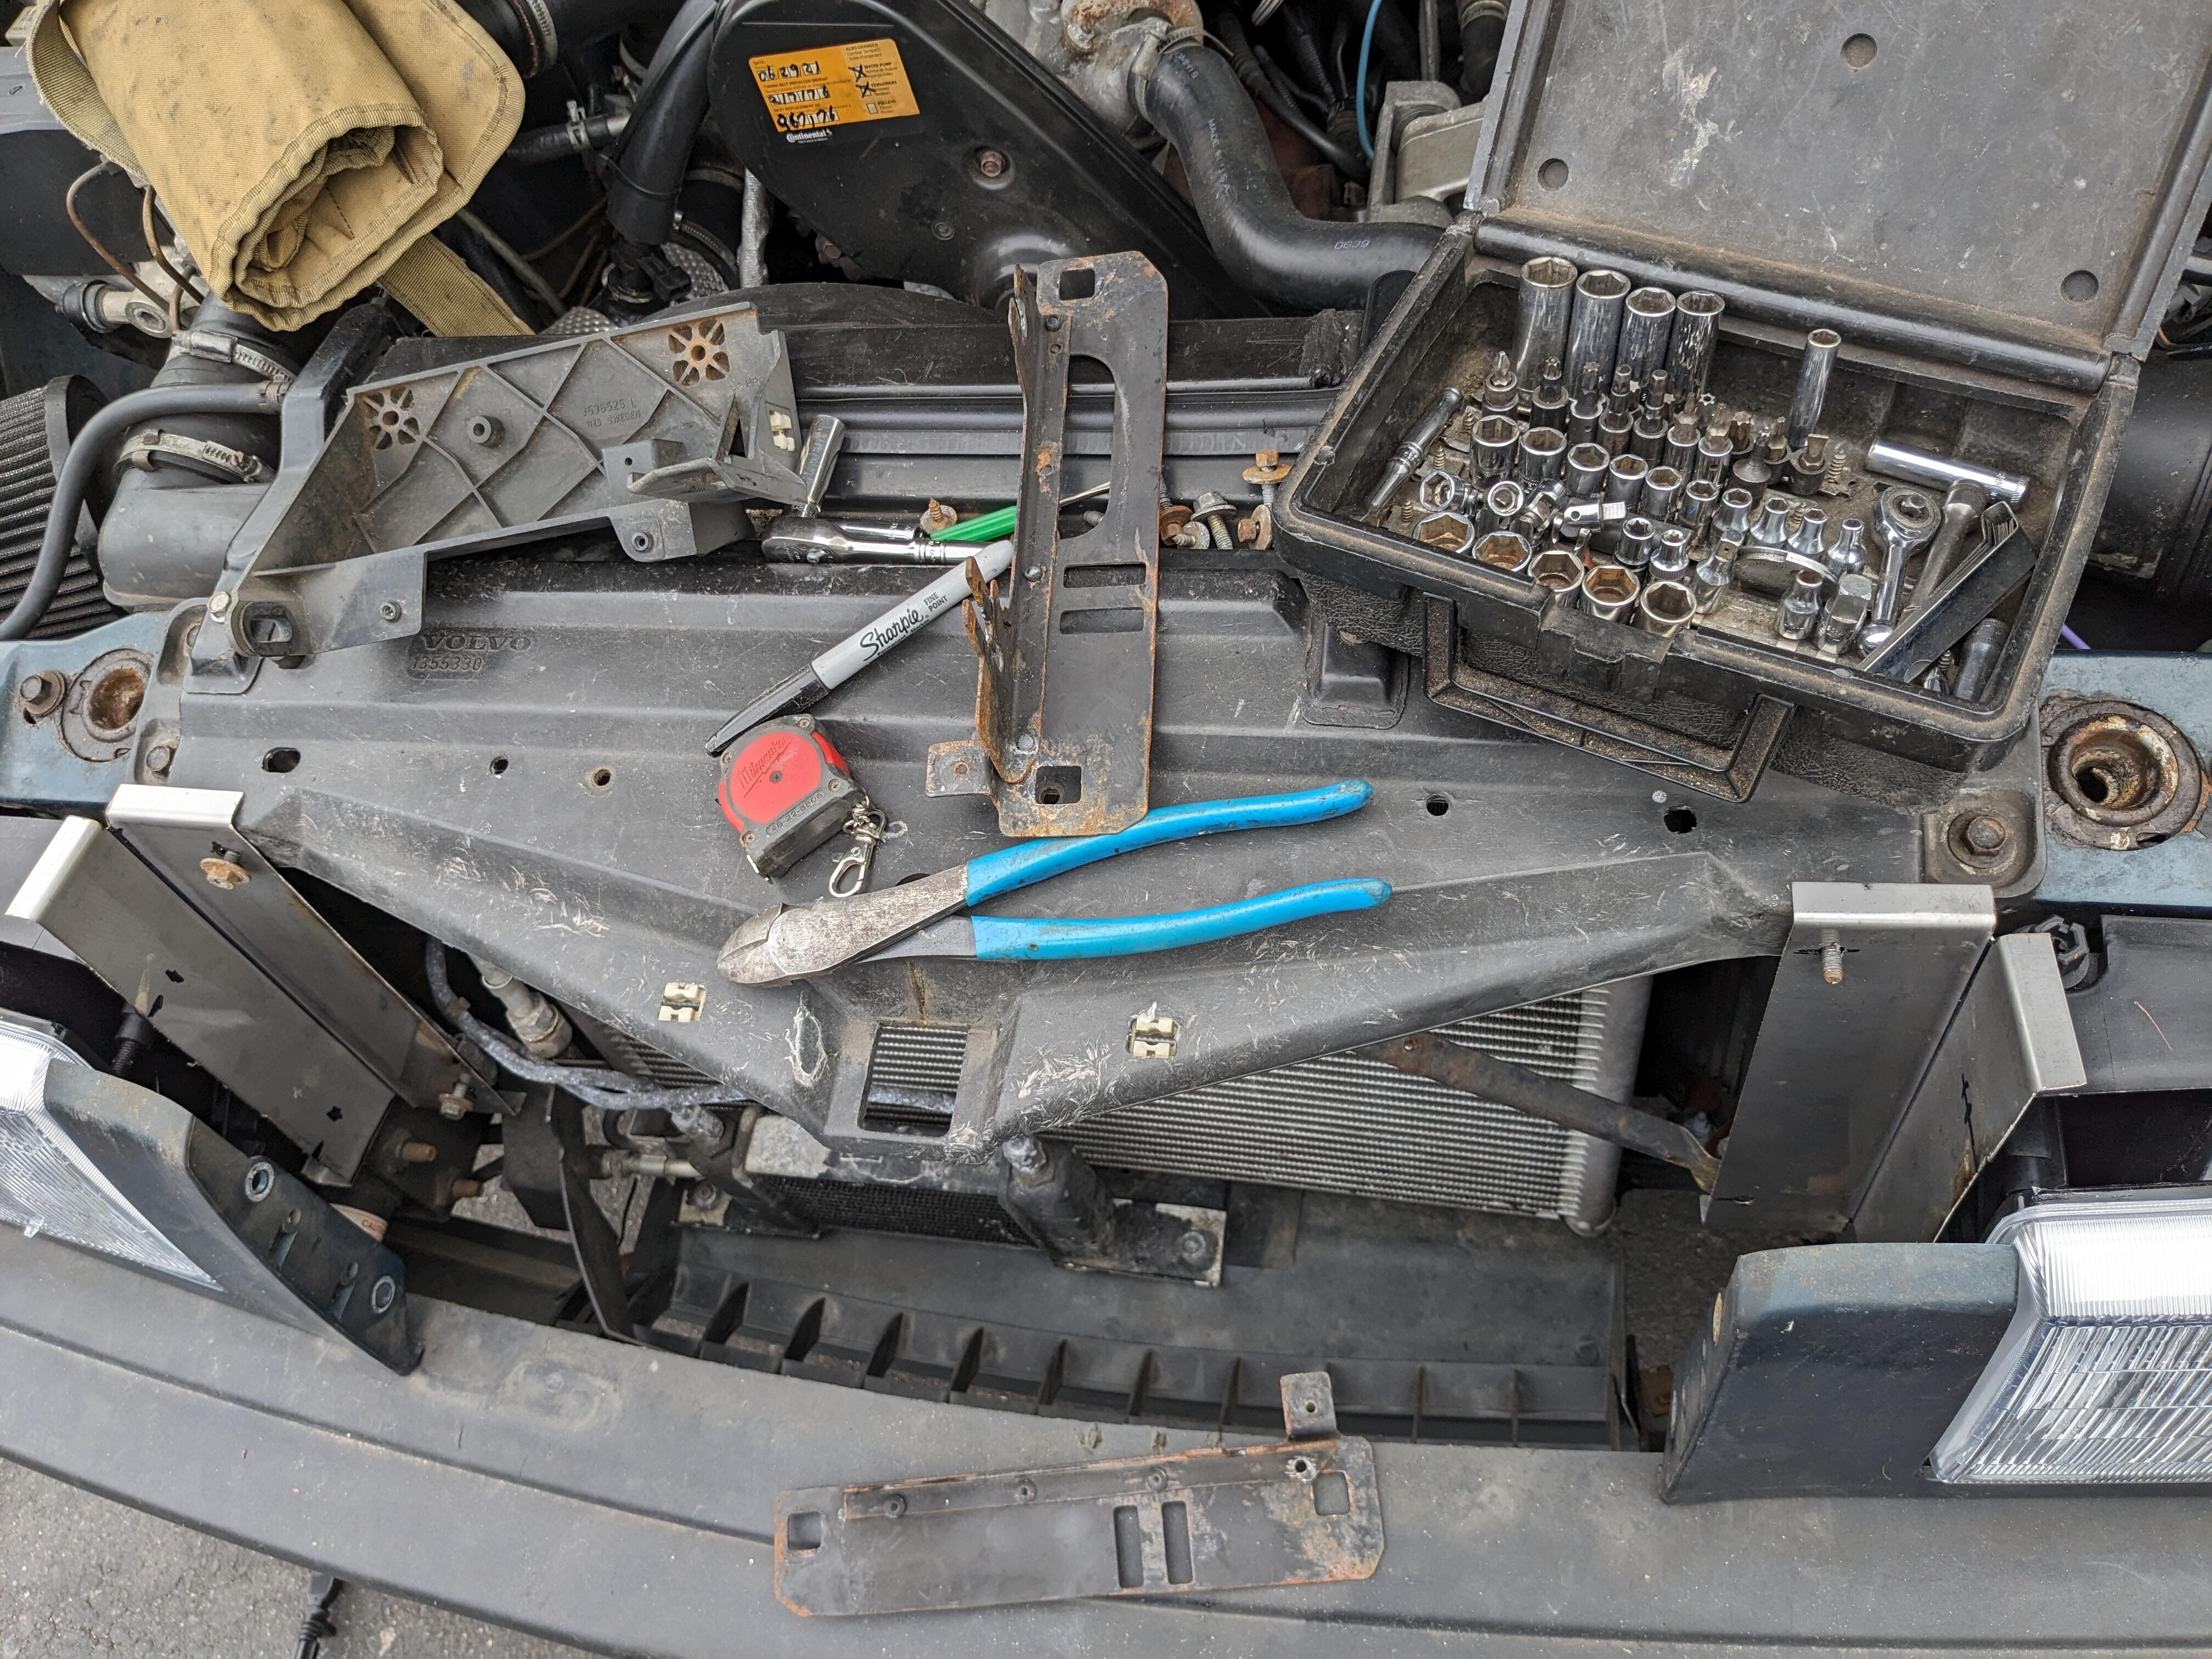
I have noticed that the front end gets flighty when I'm up around 80 +, depending somewhat on the roadway, but definitely a touch hair-raising. Original air guides/ valance are present behind Xenon spoiler. I have new Eibach lowering springs, all new struts, all new suspension bushings (all poly except the rear caster rod bushings),, etc., front and rear. Wheels are 15" W/ Hena Forceum tires (forgot profile, I'll edit later) Anyone have similar experience?
-
I did not touch the steering column for dash removal on my 75
-
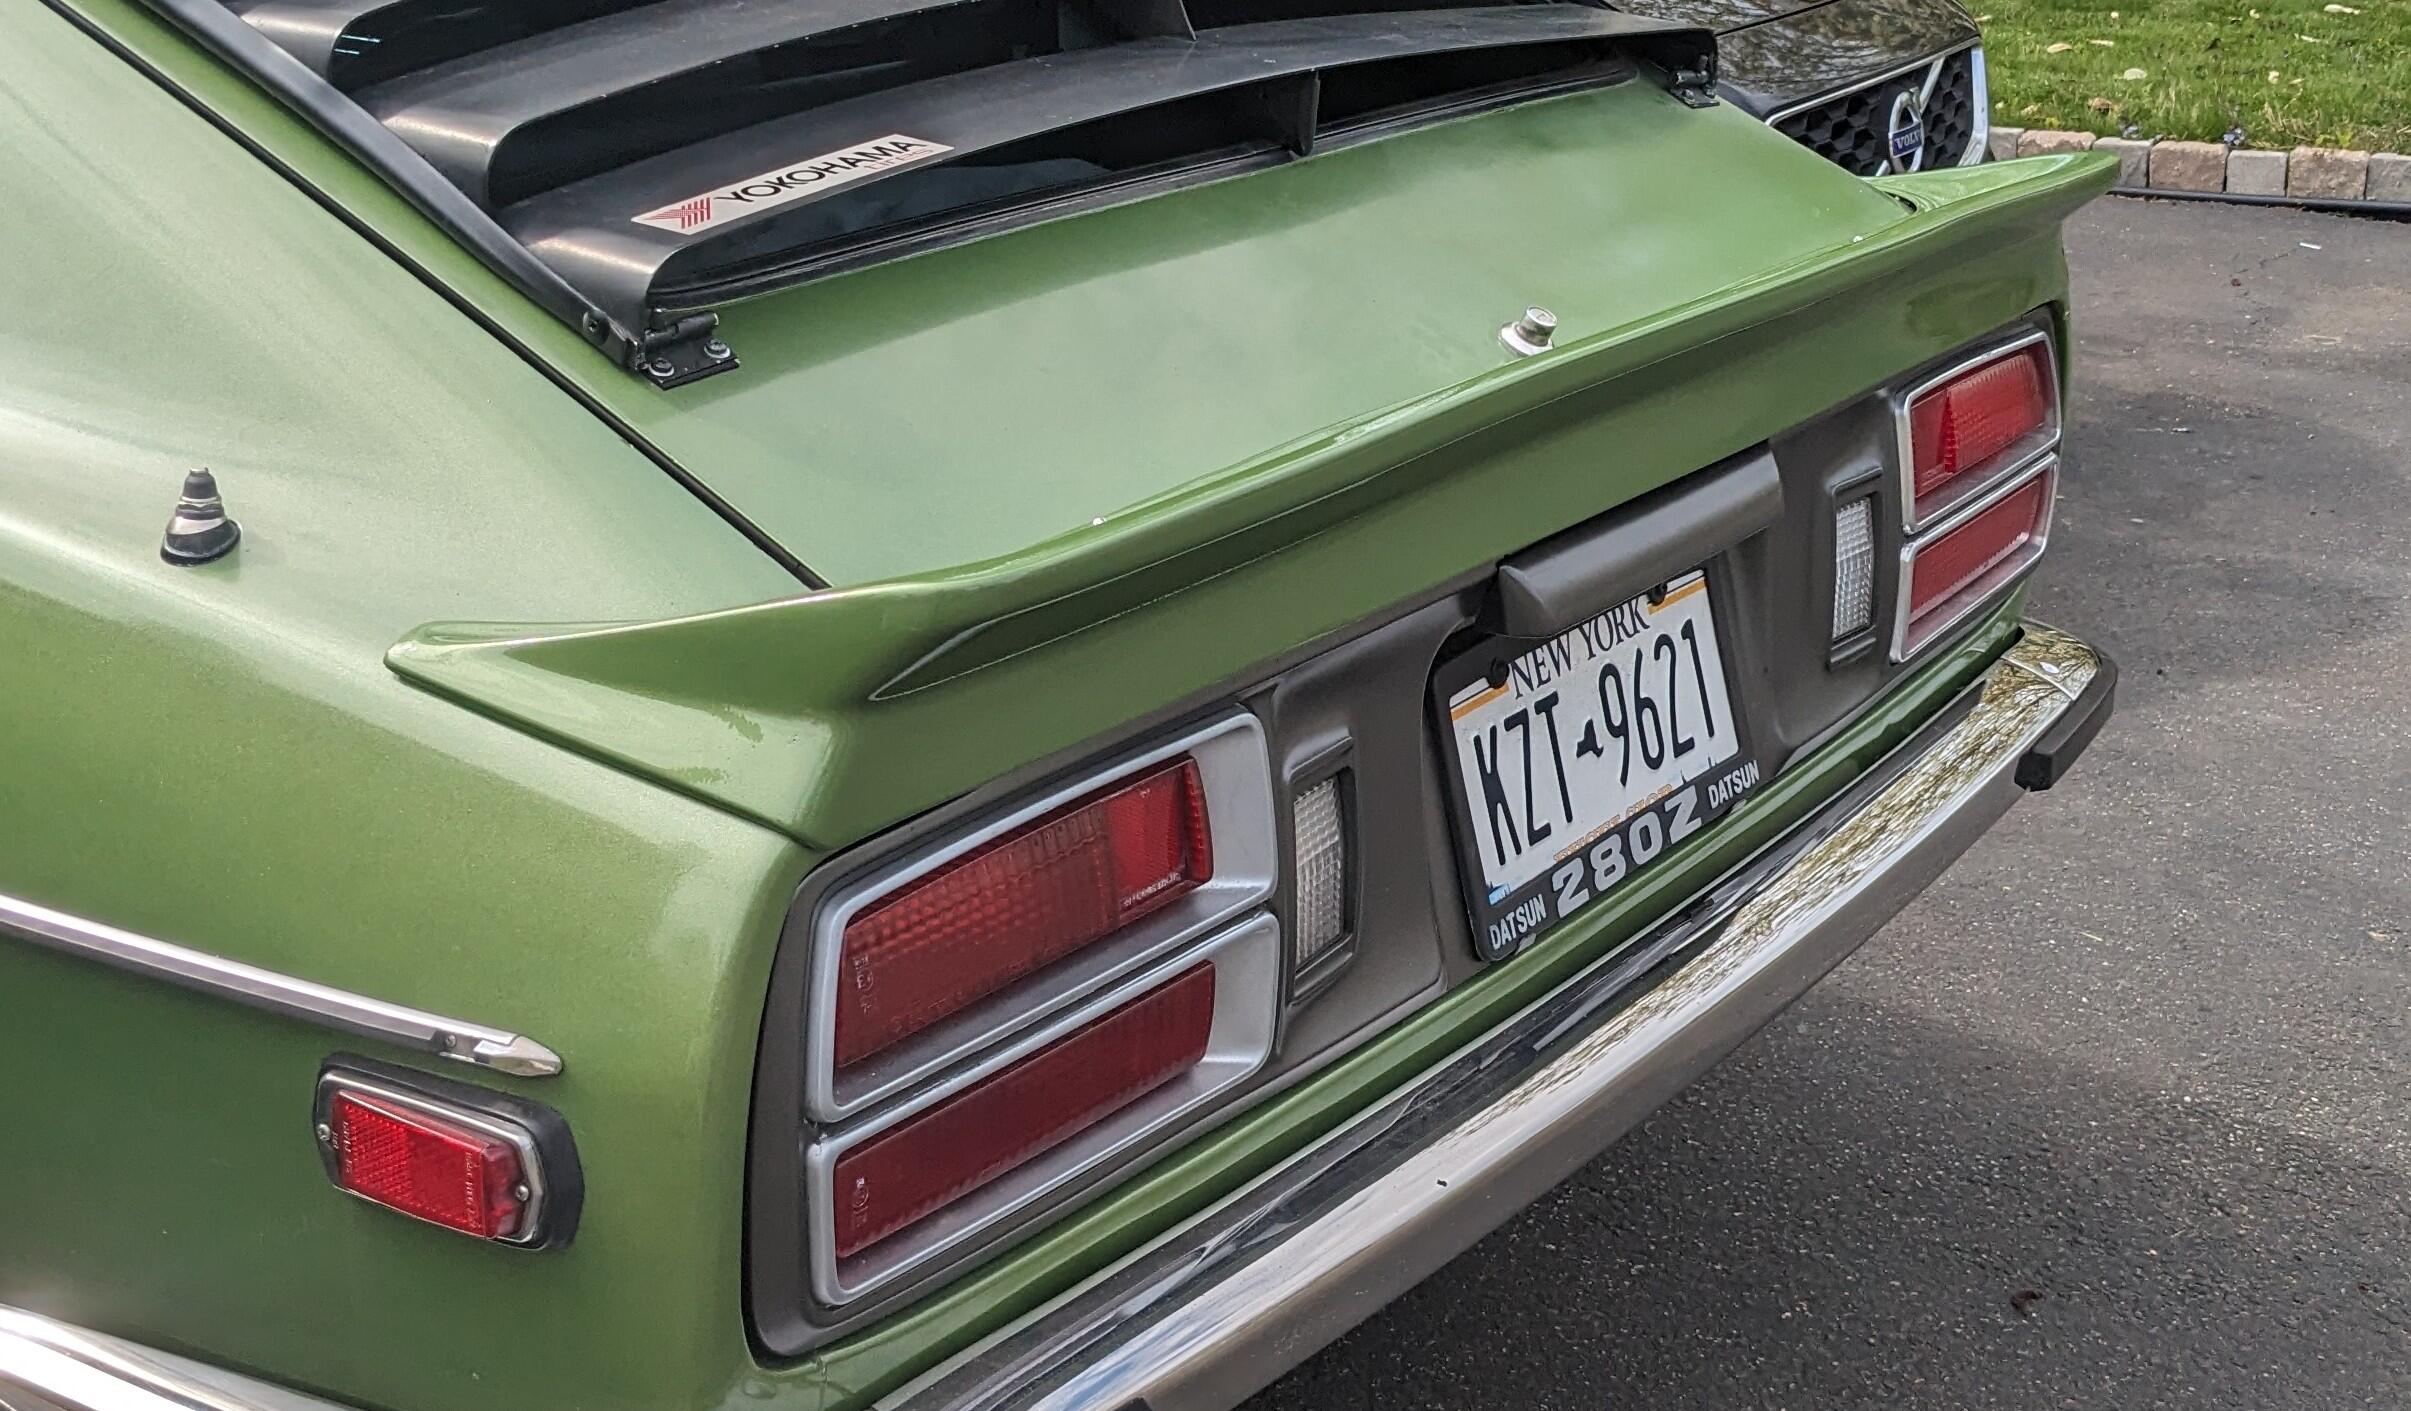
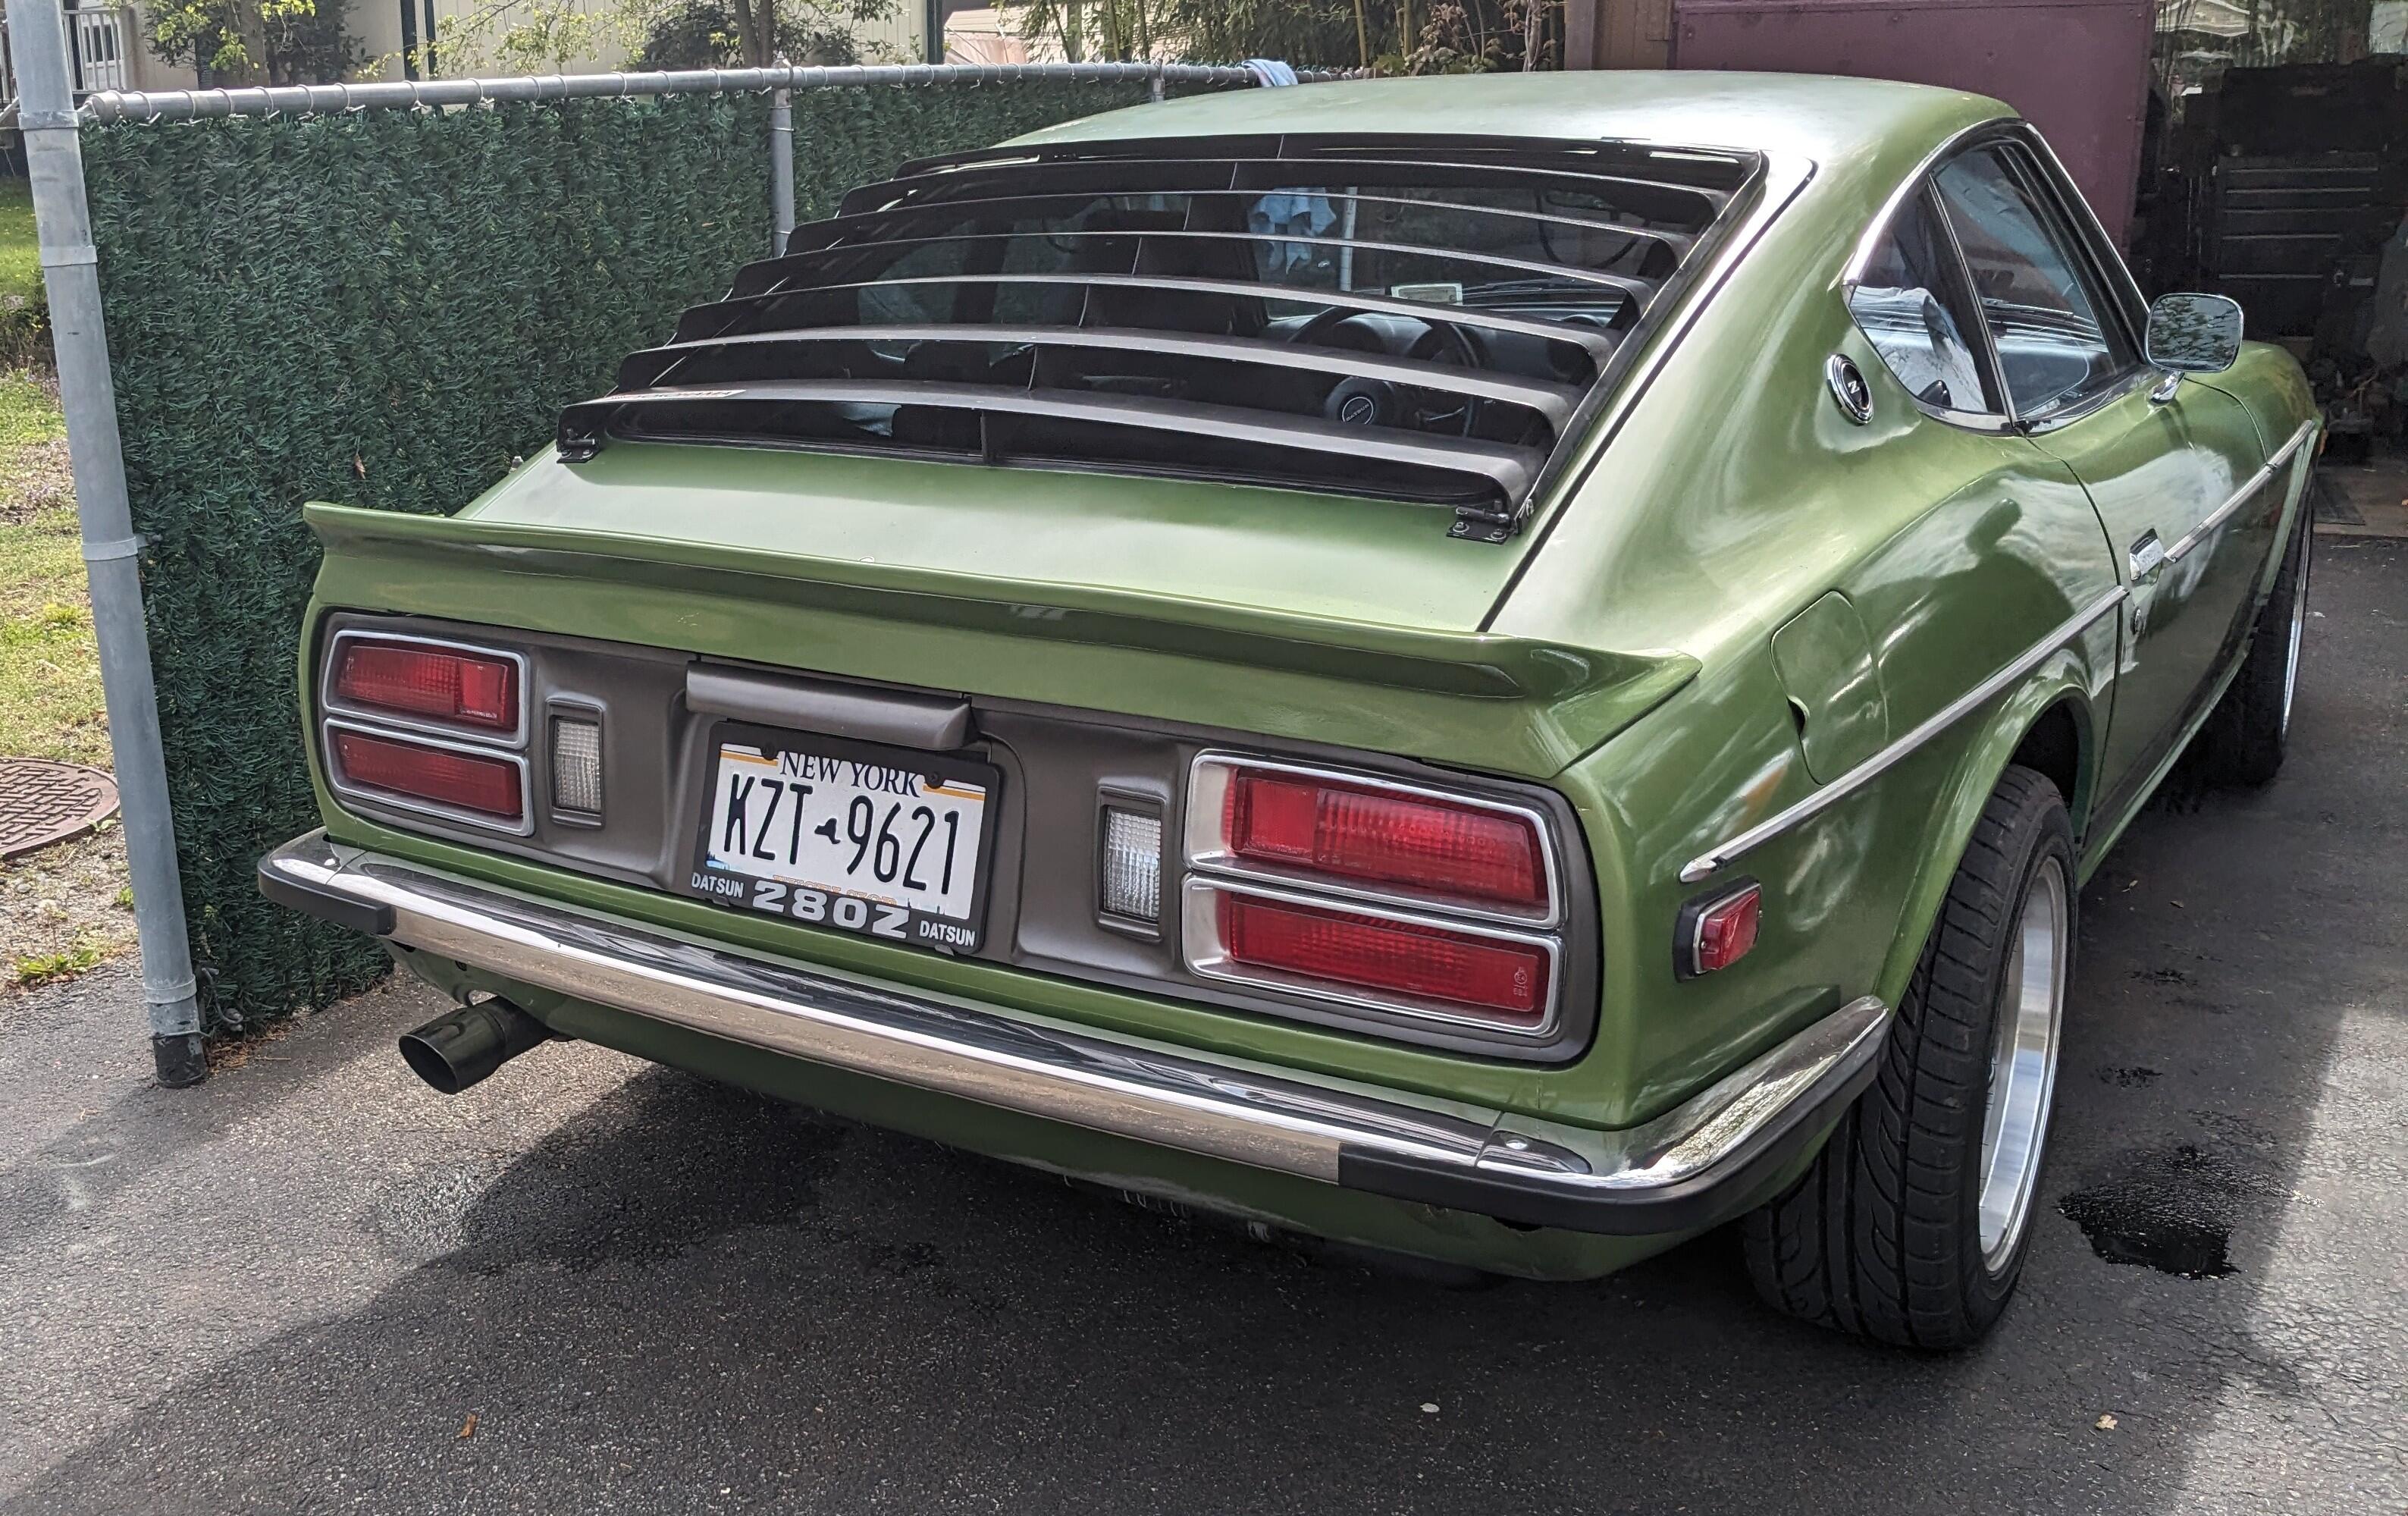
Final pics of the Xenon spoiler install, painted


-
Had an hour after work before Pilates class with the Mrs, so I started tidying up the branches at the panel & end wall, and began wiring the branch grounds and then the neutrals


-
Got it - I am going to either remove the 14/3 currently run with the 12/2 from the 1/2" conduit visible in the above pics & run it in a separate 1/2" conduit, or replace that section with 3/4" conduit. I will also remove one of the three 12/2's from the short 3/4" conduit run, and put that in a separate 1/2" conduit.
-
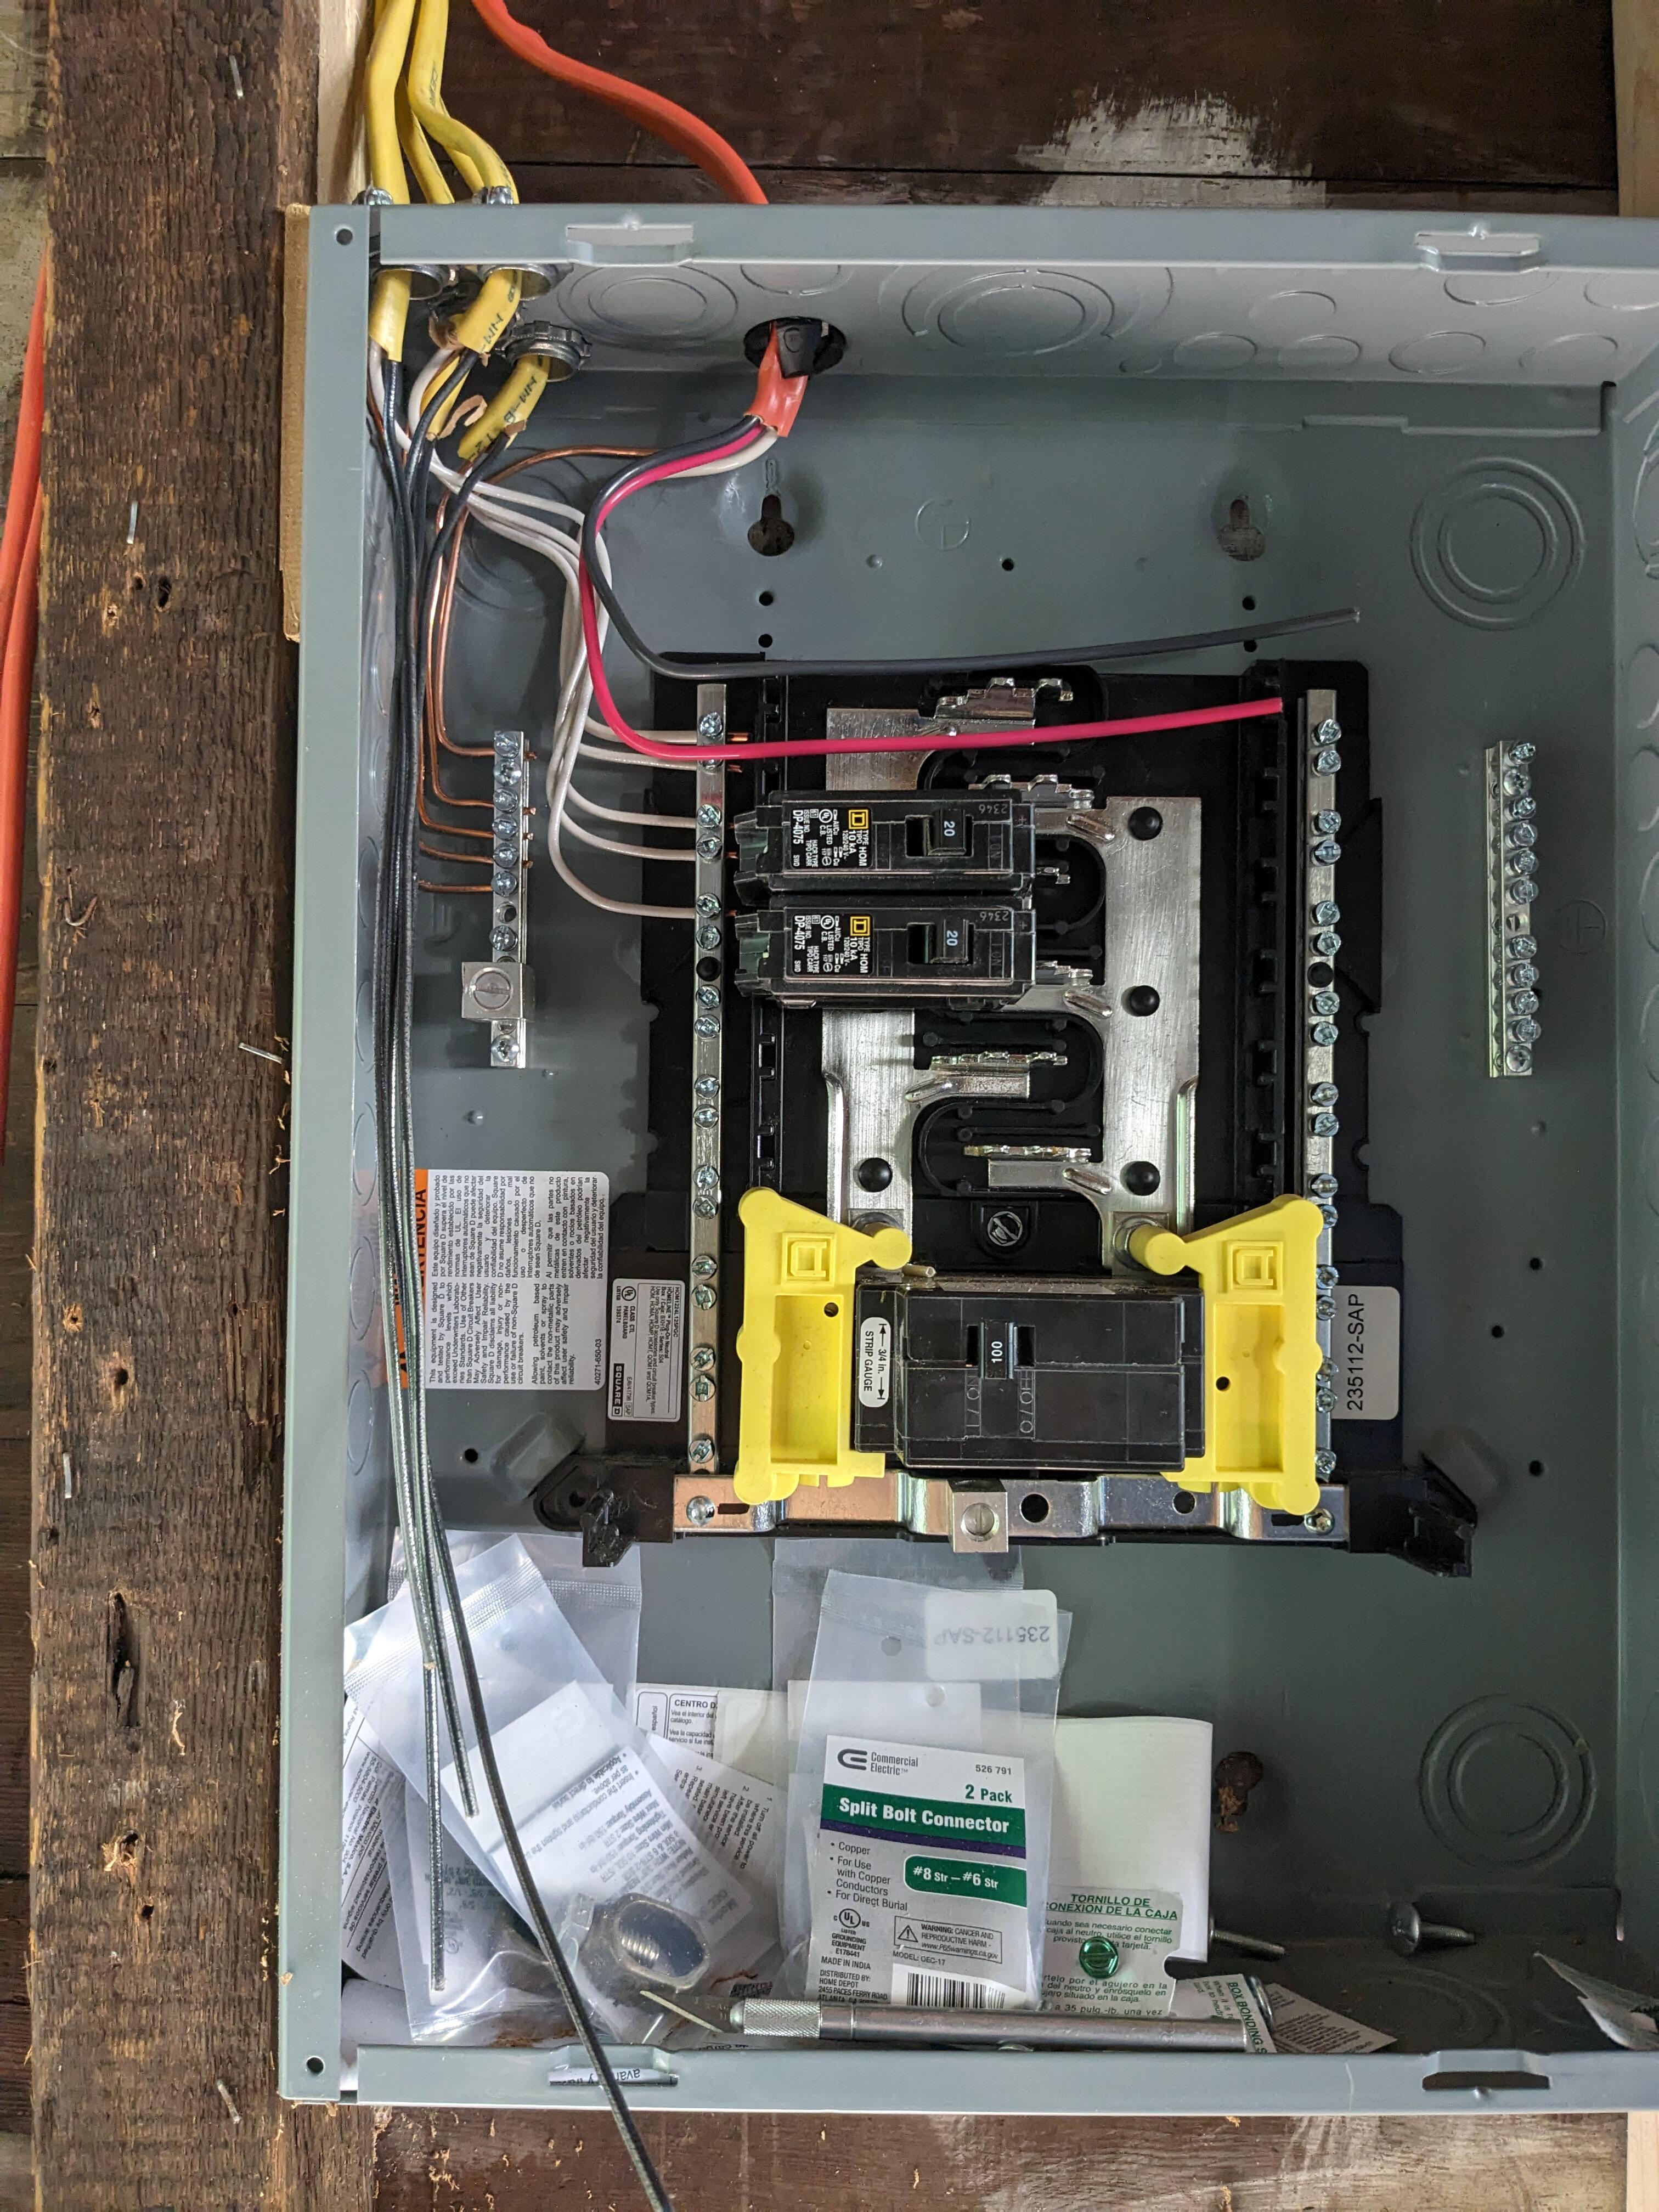
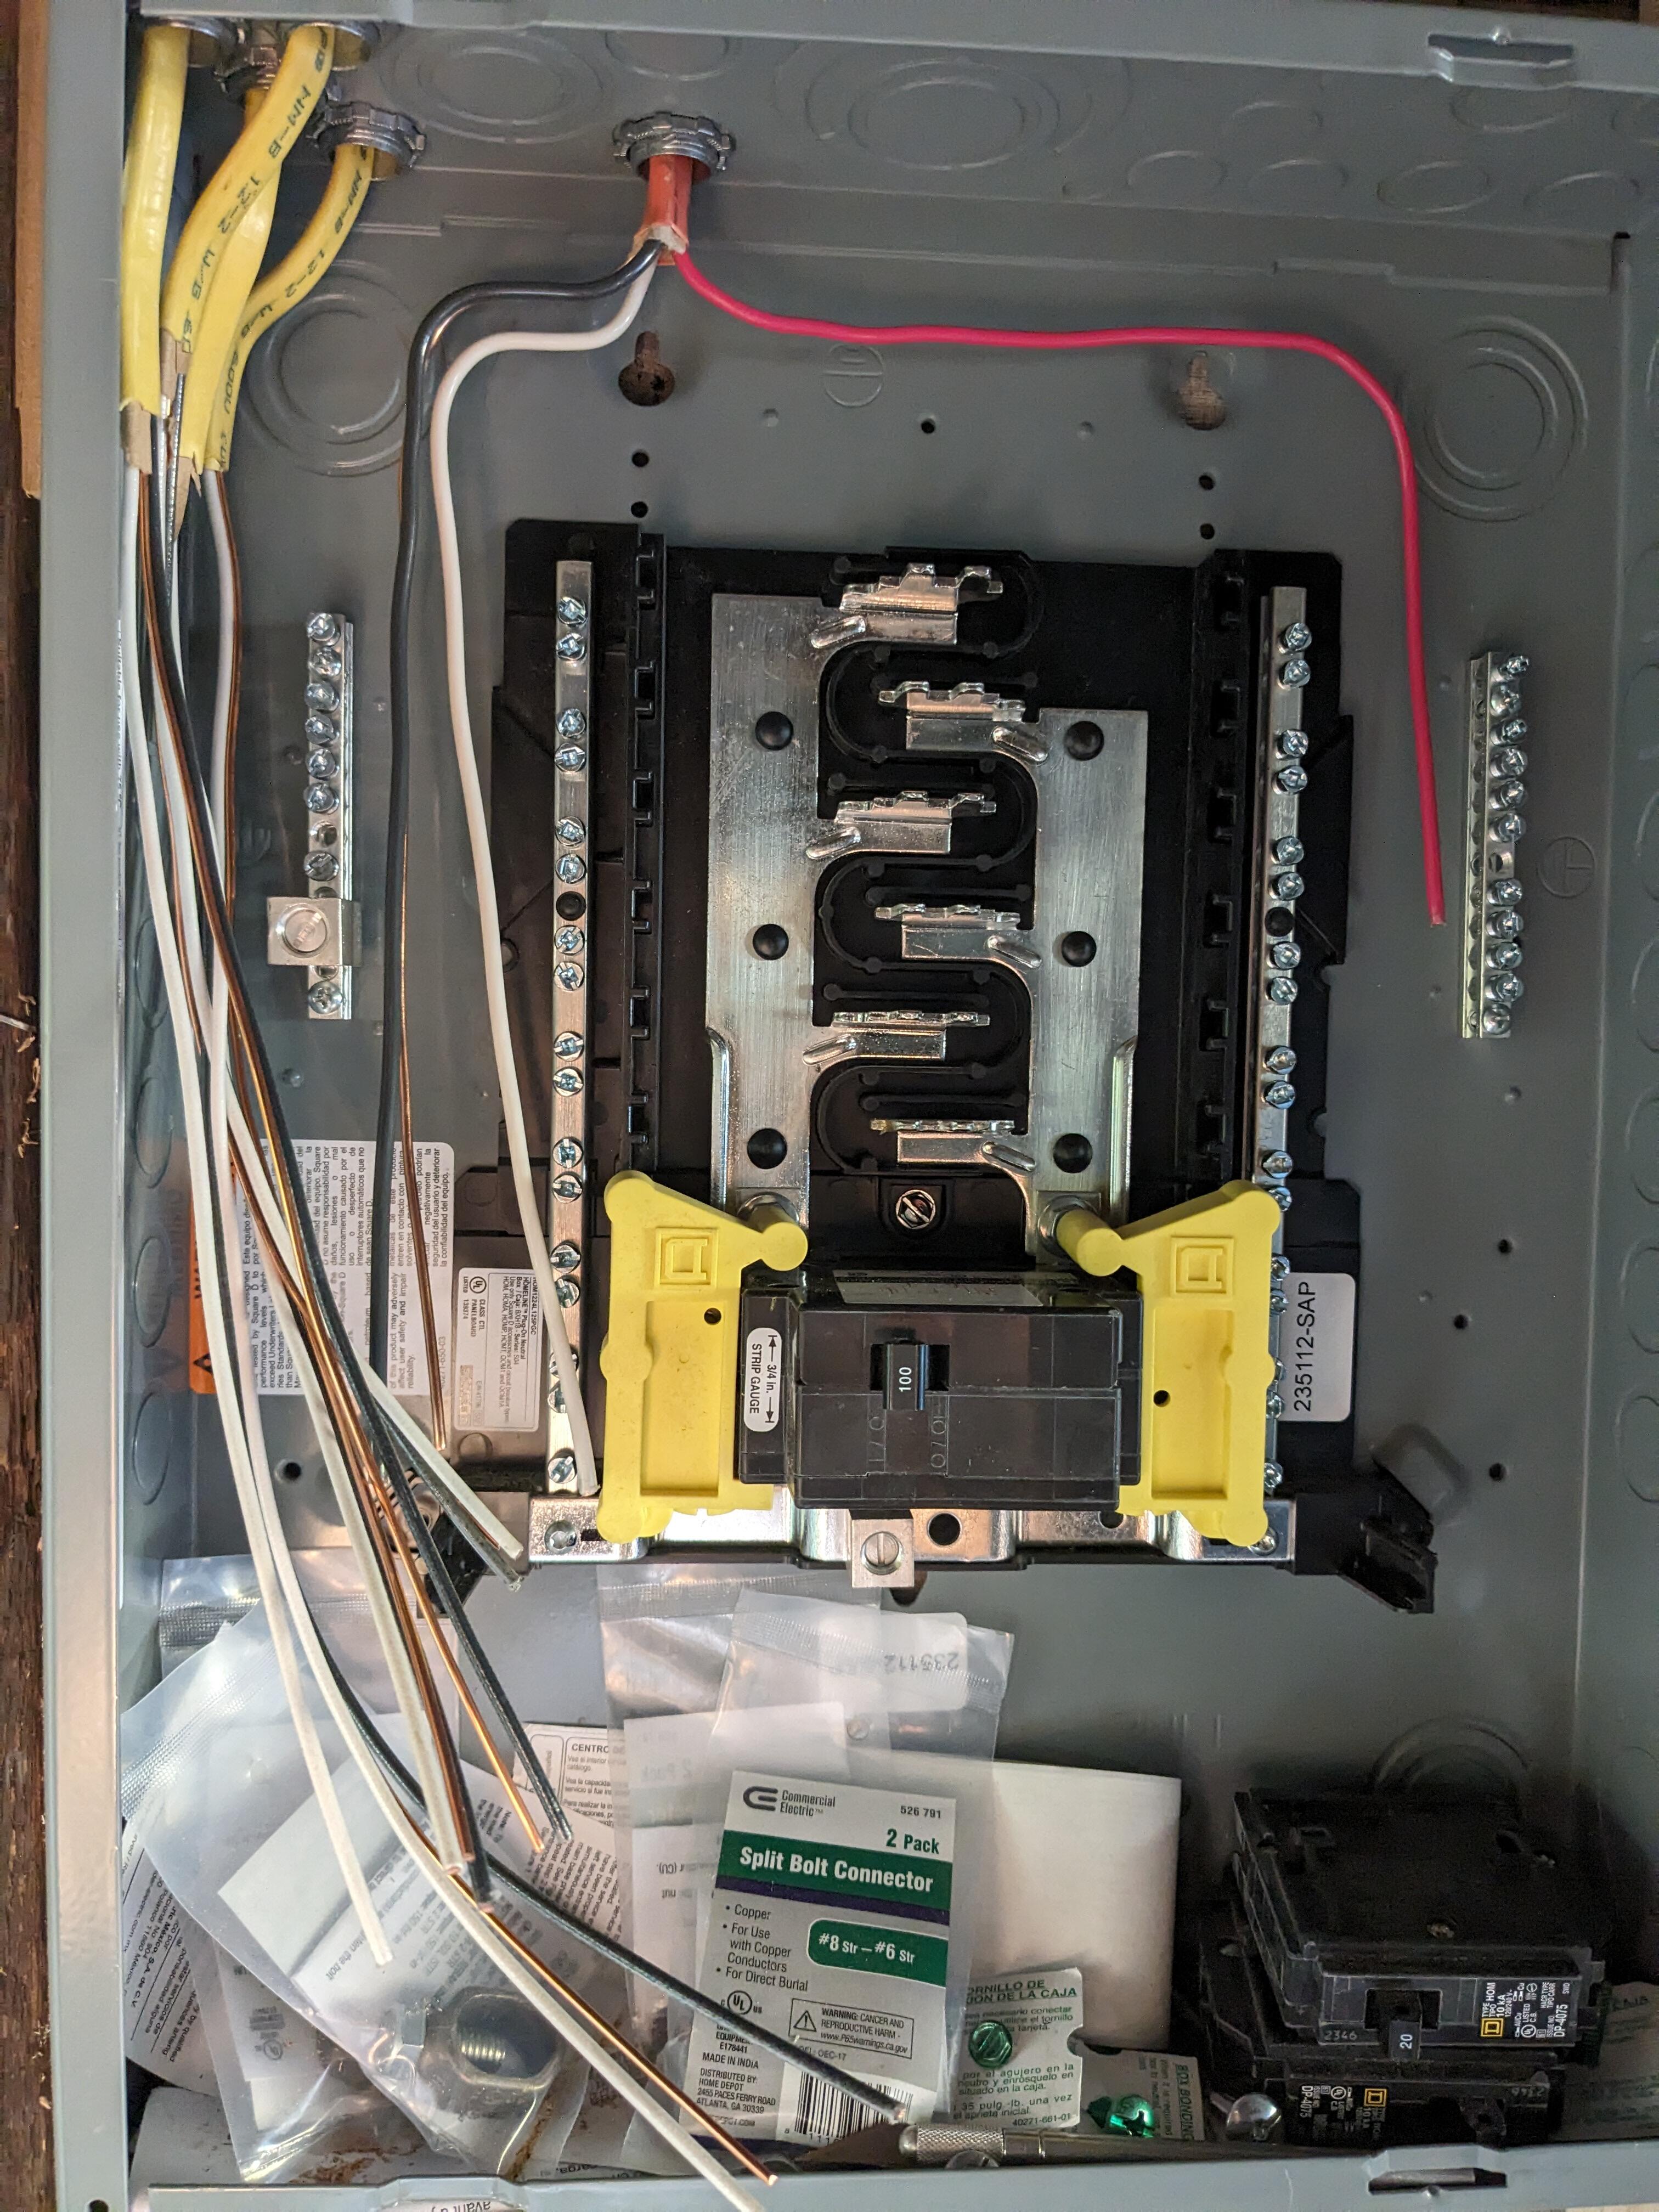
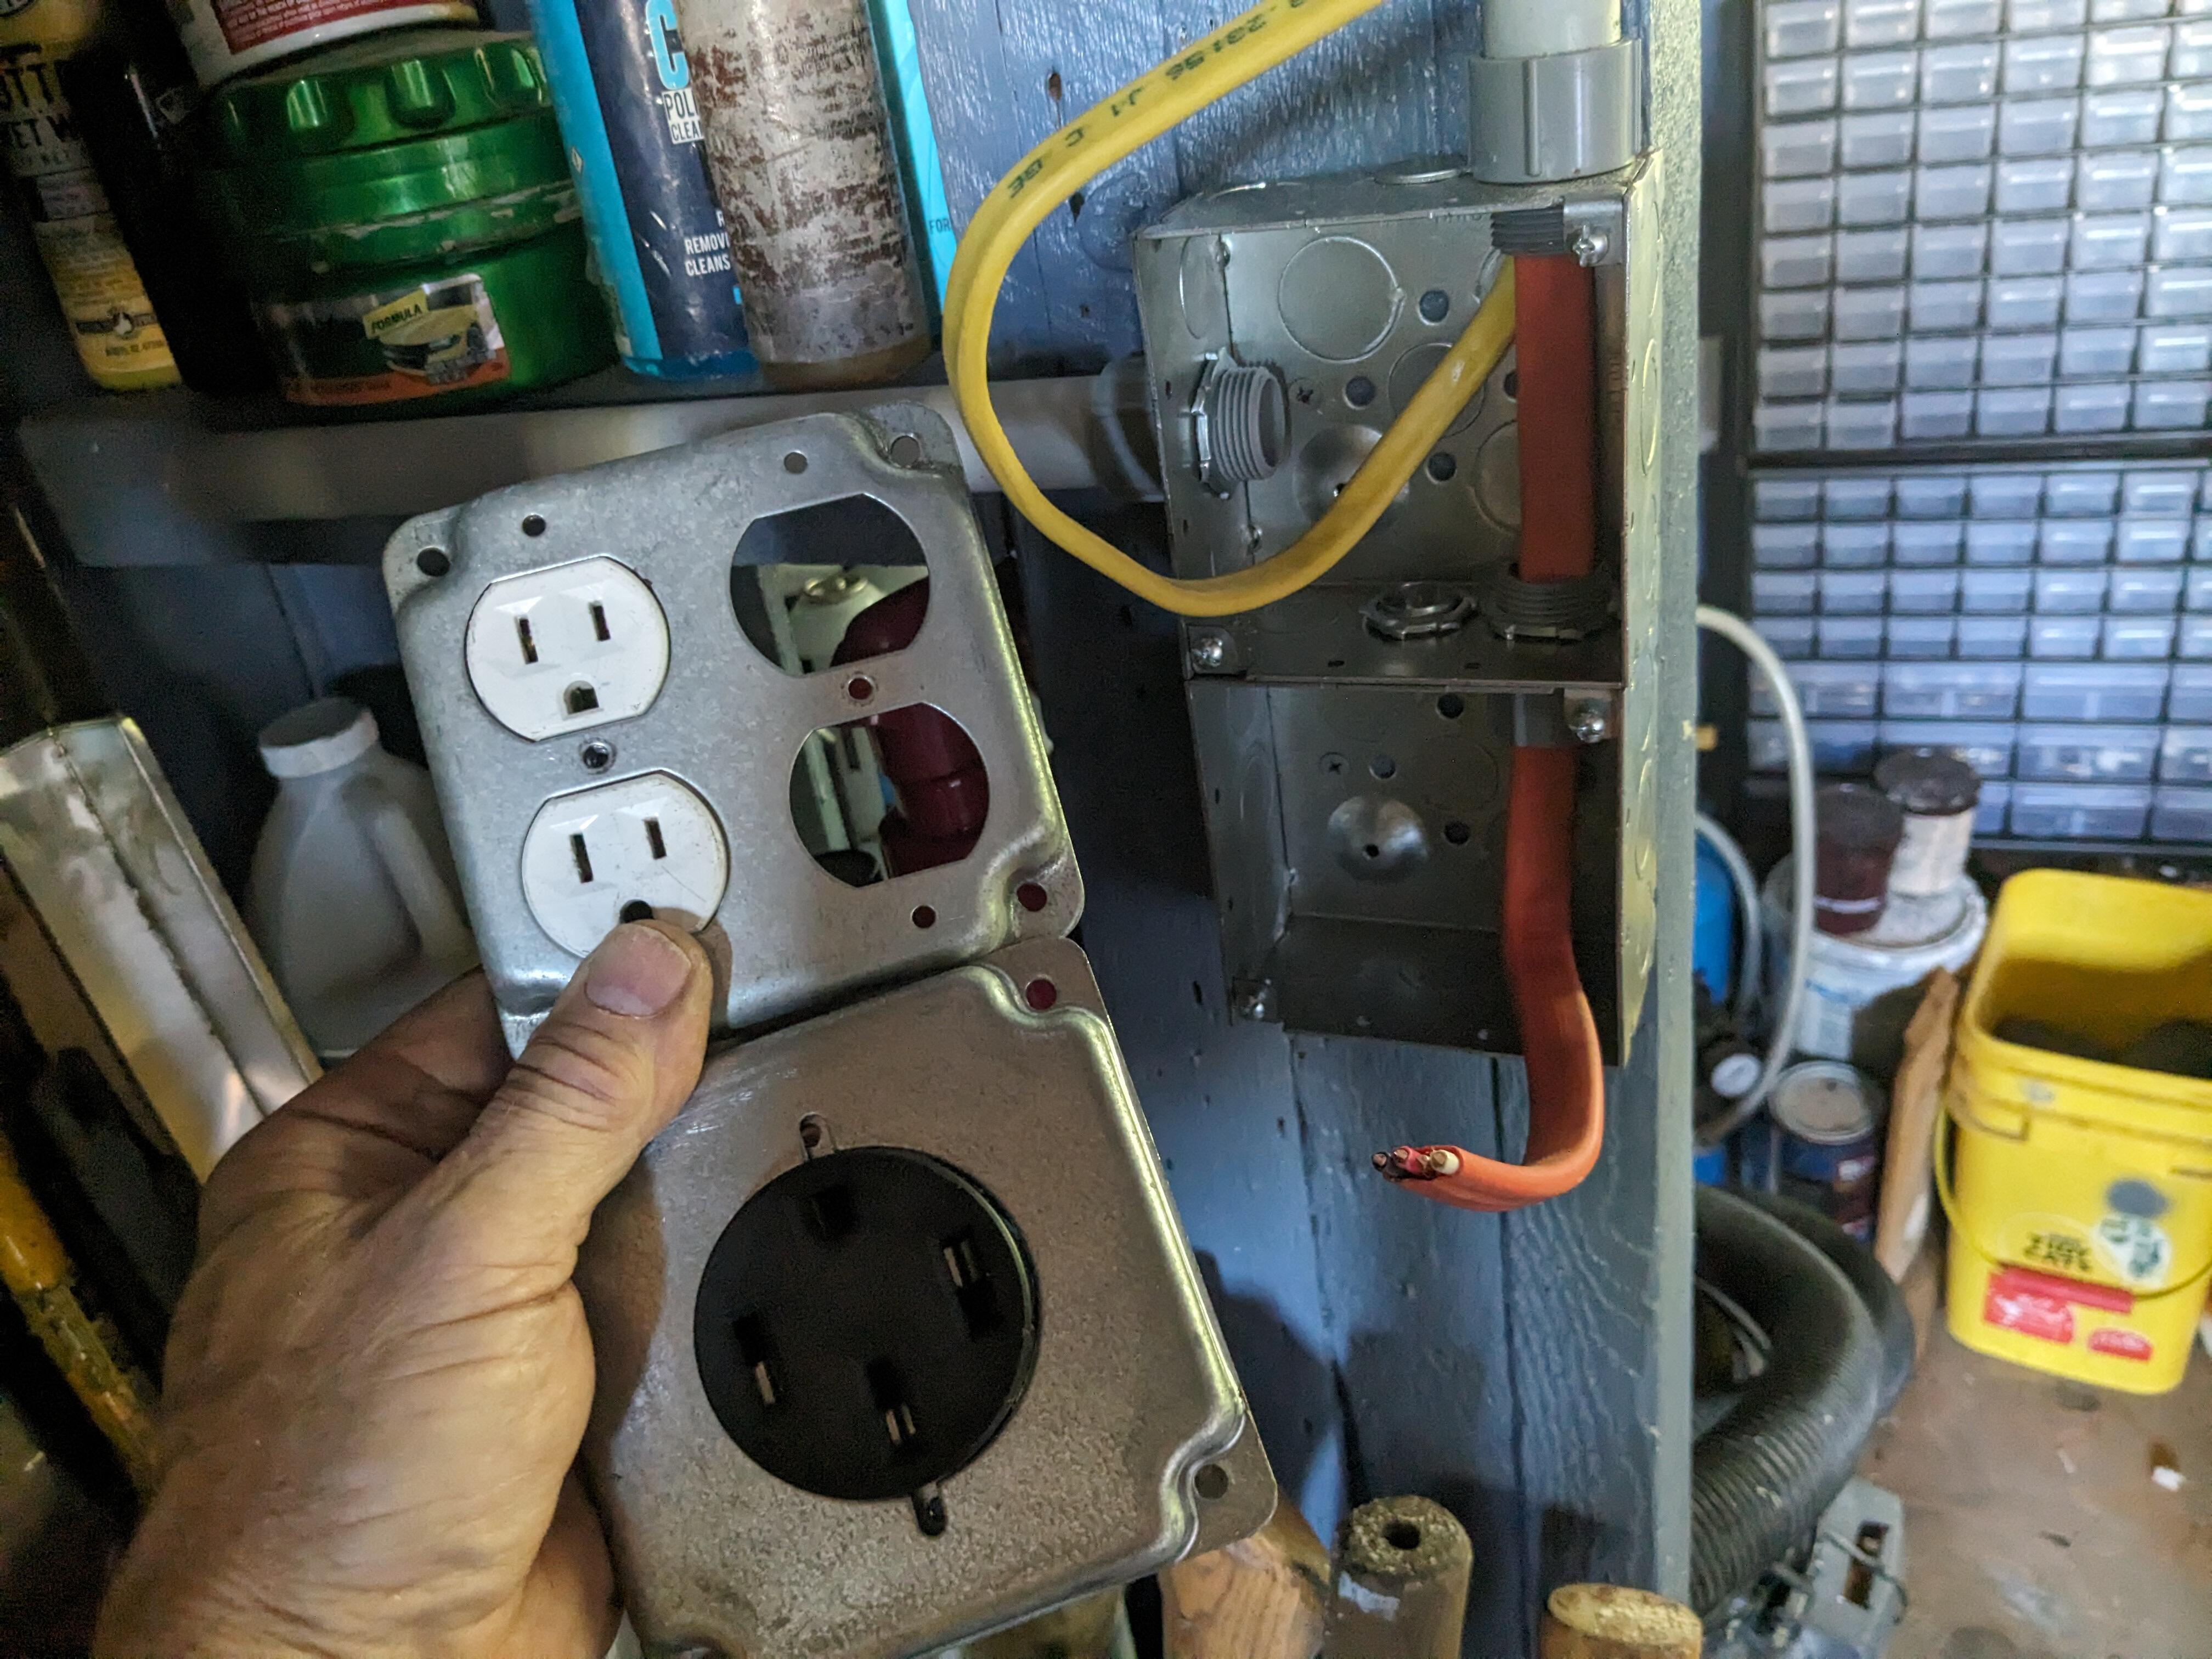
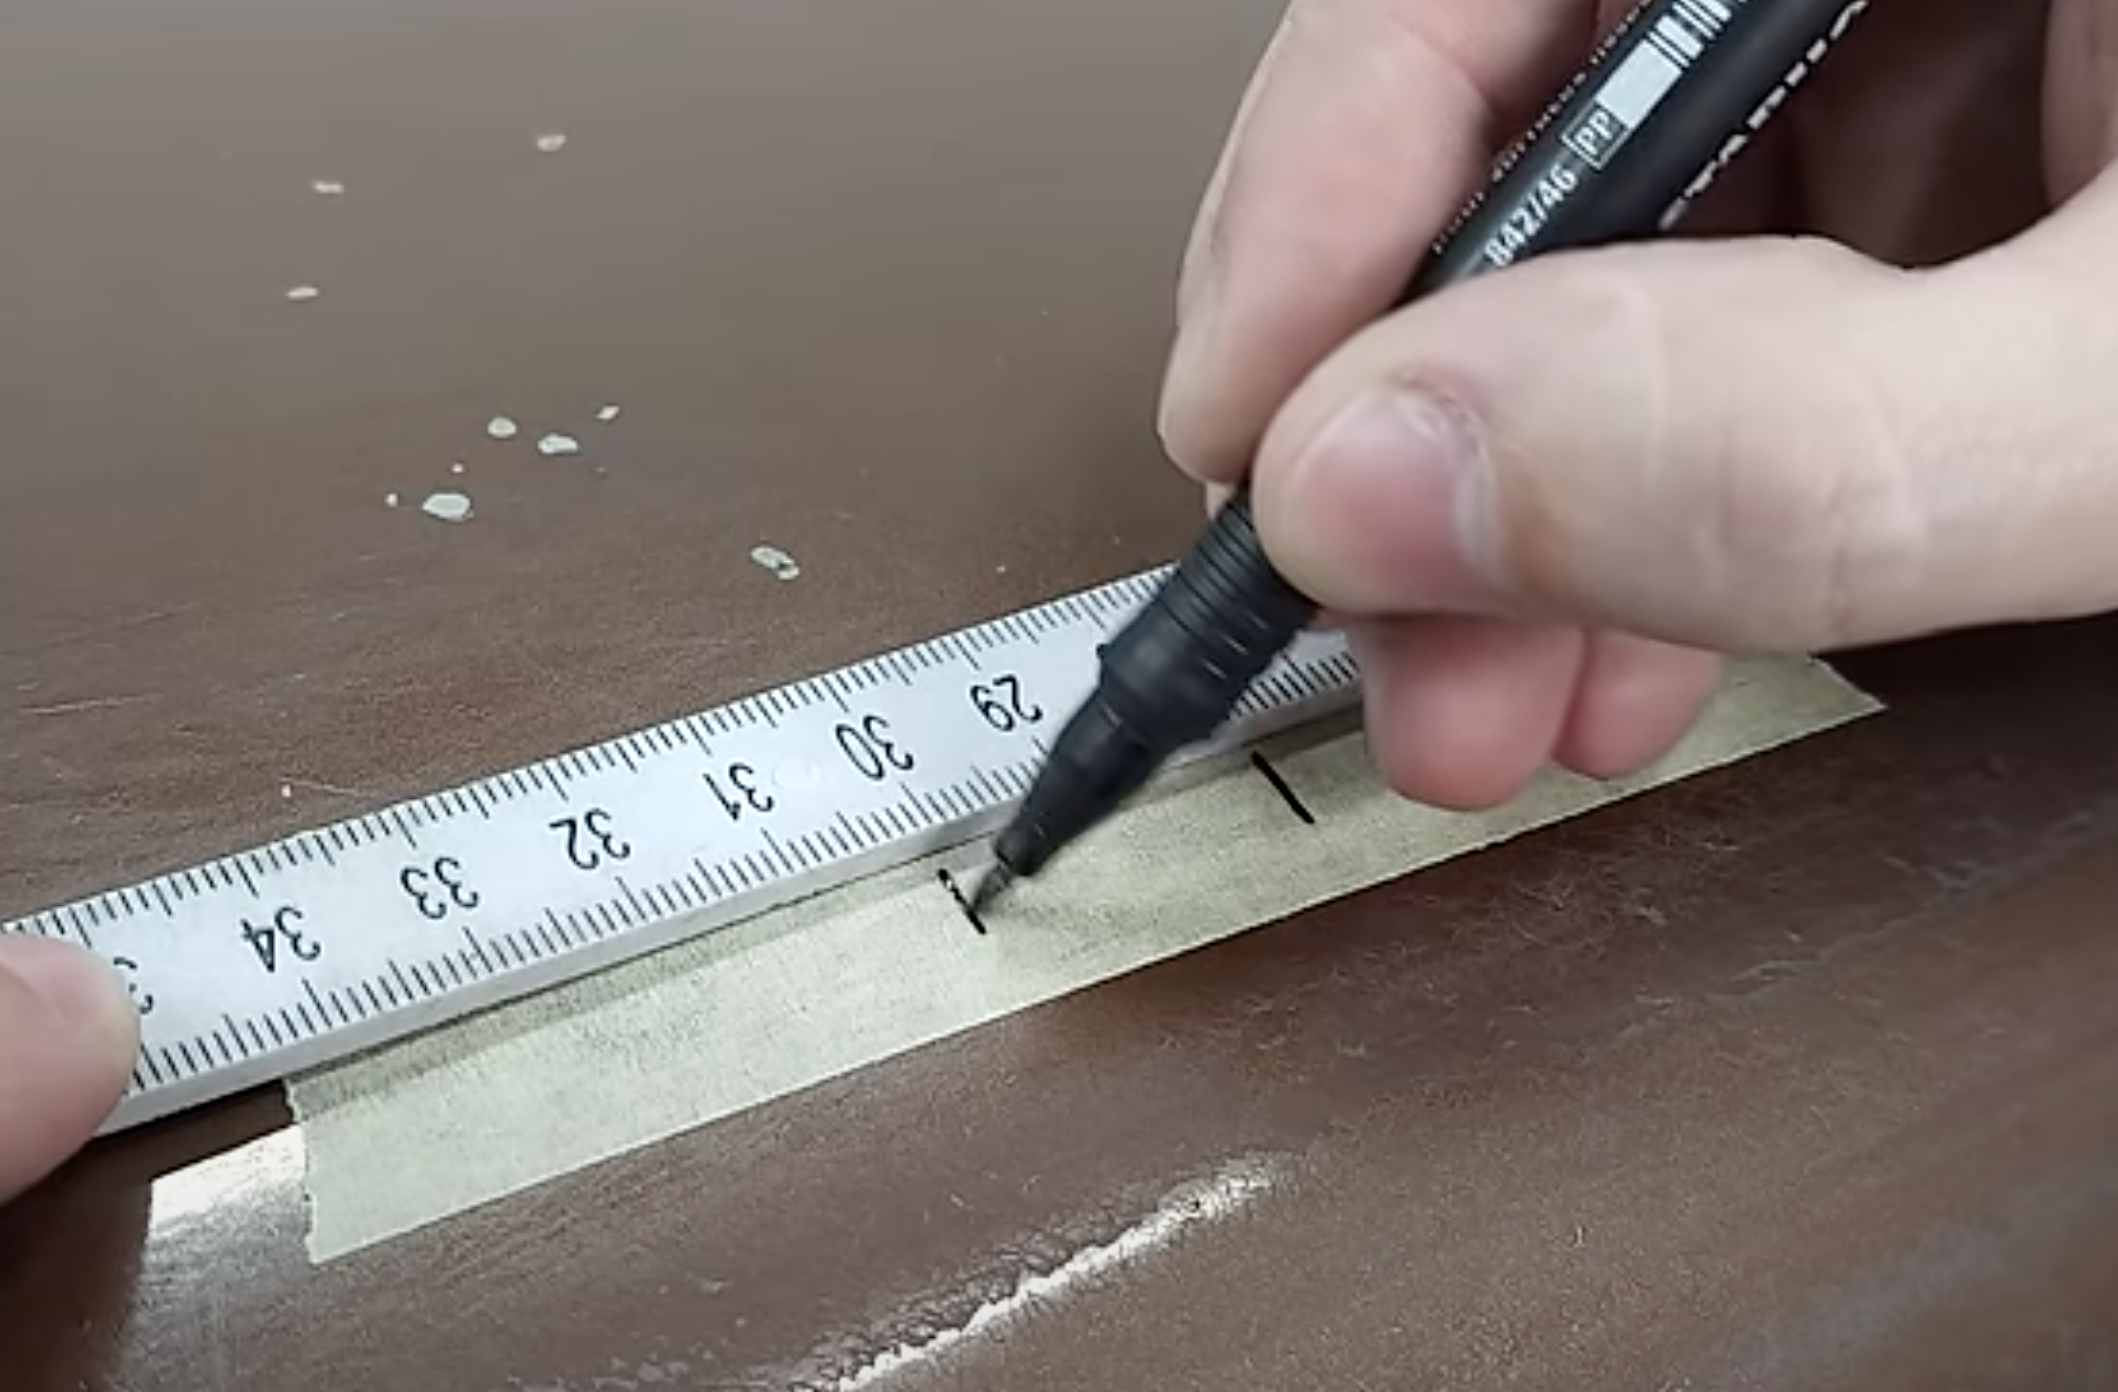
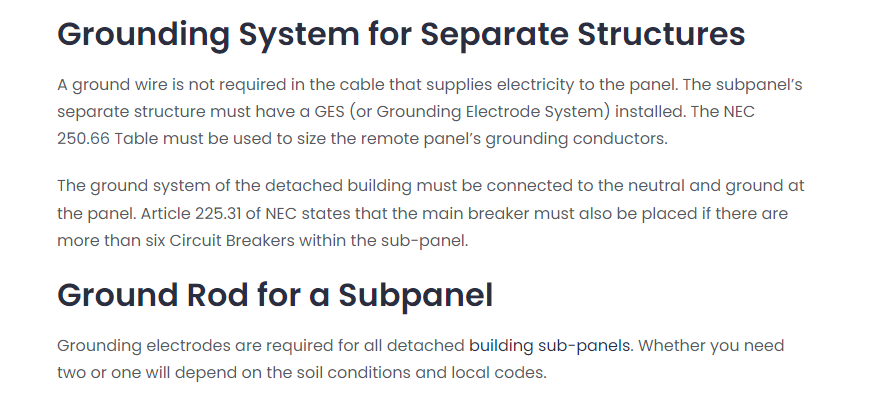
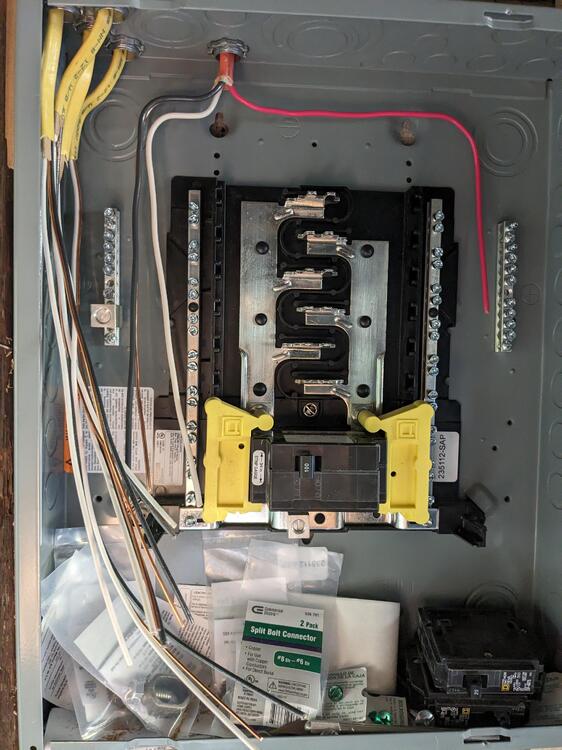
Thanks - when you say overfilled - you mean using 1.25" conduit for the 6/3 feed? I don't want to risk it not passing, since the building inspector will see it when they look at the addition work I am proposing. It does look like more than 40% fill, if you count the width of the cable as the circumference for fill. I will need to find out what AWG to use if I have to also run a ground back to the Mains ground at the house. I was looking at this article - but it's from 2022, and another Fiat guy said the new NEC calls for ground at sub panel to run back to mains
-
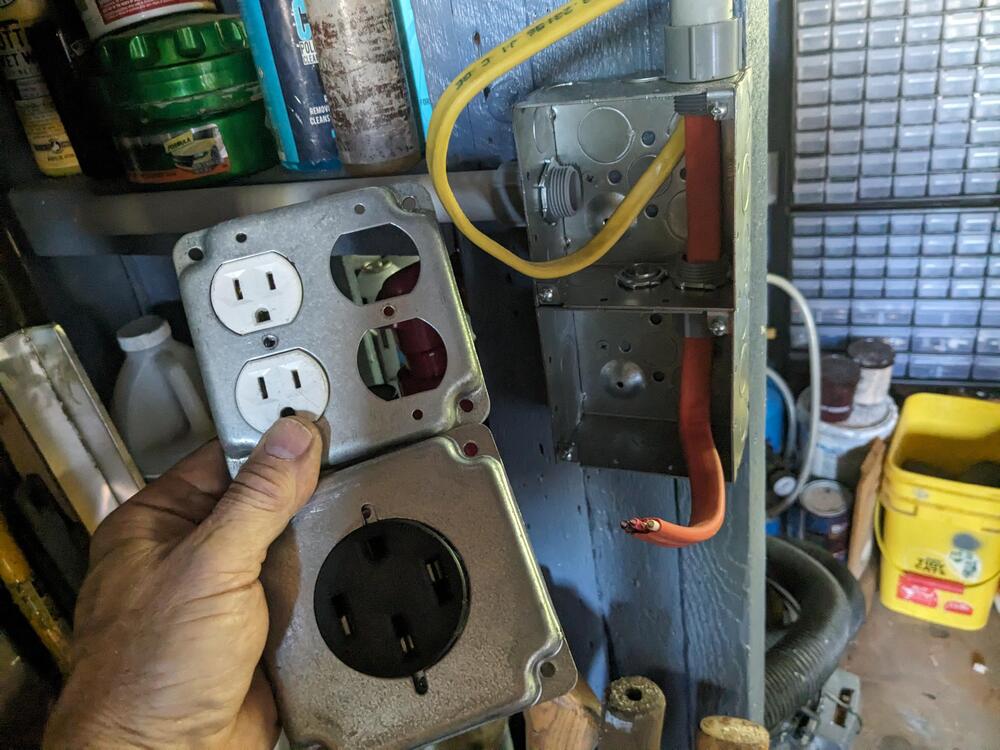
Thank you for your input Patcon (Dave?) The 6/3 I bought has a ground wire - did you mean an additional ground to run along with? Or are you referring to the grounding for the sub panel? The sub panel is a 12 circuit, and I added the mains breaker to kill the entire garage. Do I still need an external junction with something like the split bolts to connect the buried line to the line that would then pass inside & connect to the breaker? Since it is a sub panel, the ground requirements may be less than the 2 8' rods? It's still a separate structure, which is why I assumed the 2 grounding rods Running the 10/3 and 12/2 cables For those circuits, what I'm intending are joined boxes , with one carrying the 10/3, and the upper the 12/2 and 120v receptacles. I would only have 3 240v in total on the side, the 120v I would add more. Vertical placement on the post here, horizontal when it runs along the south wall at approx 4' off the floor EDIT - ordered 10AWG solid copper THHN in red, black & white to run in the 3/4" conduit with the 12/2

-
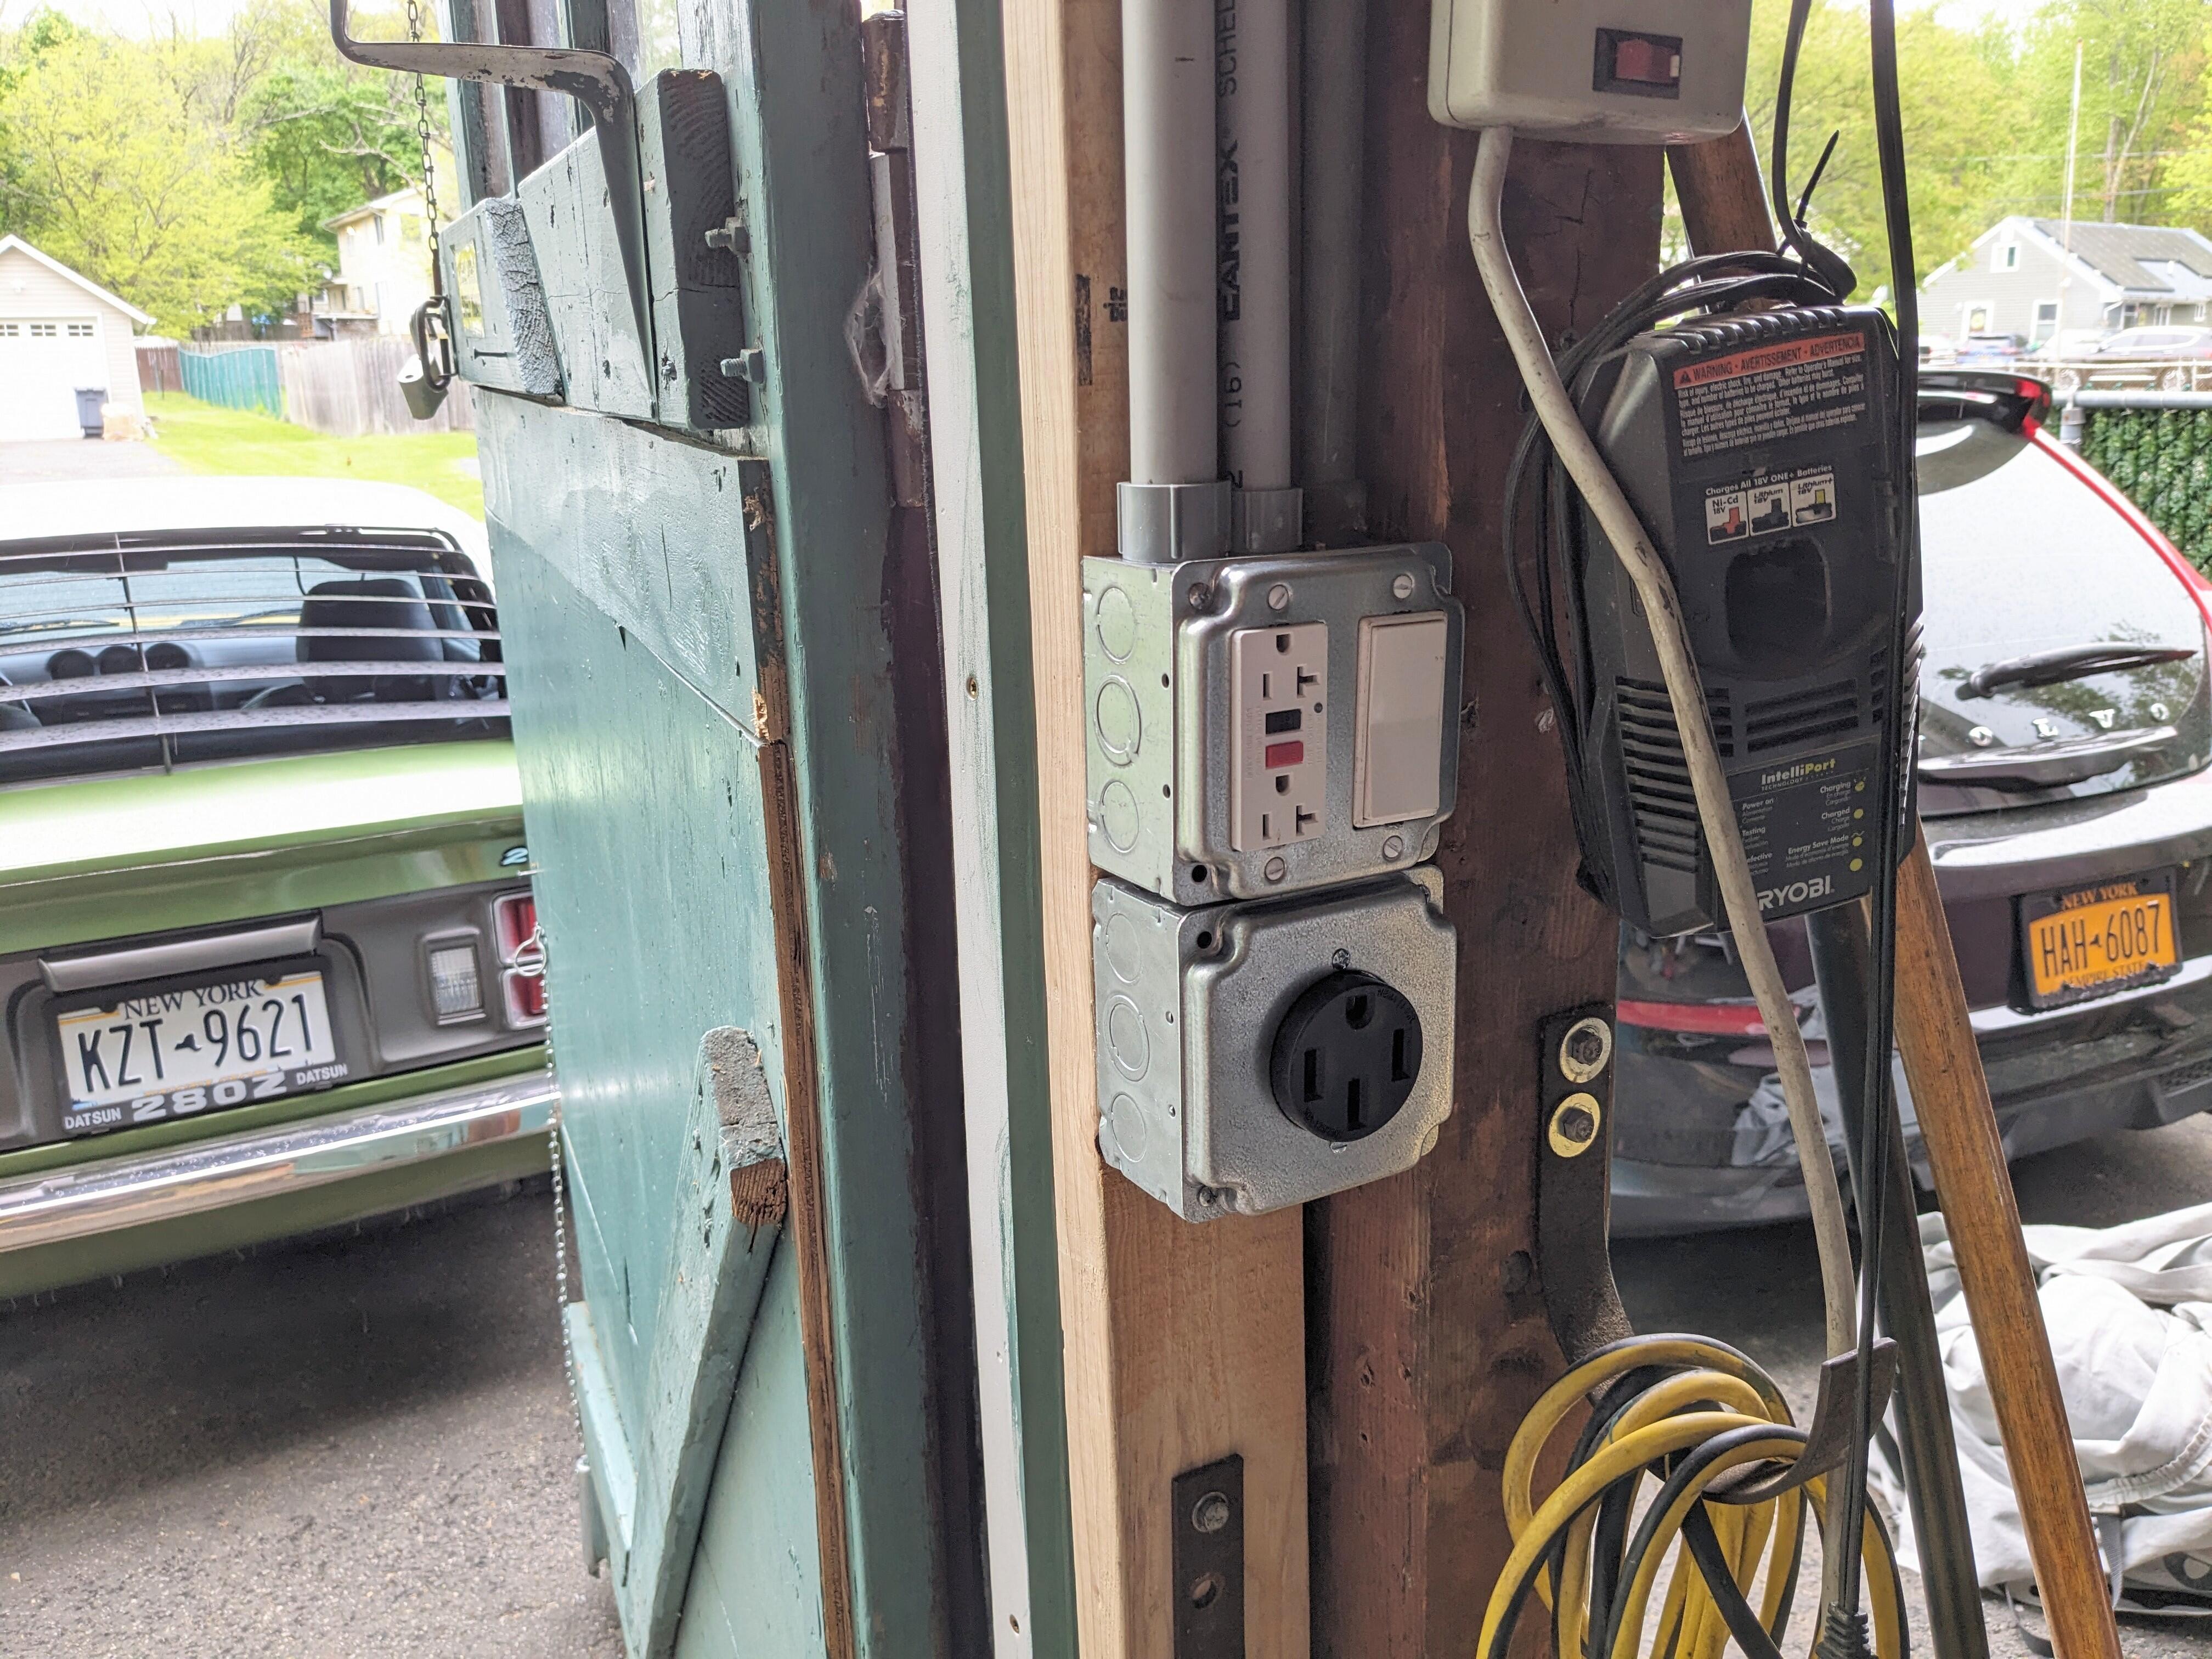
Been going around in circles (feels like endlessly) with the garage wiring. Initially, I just wanted to replace the existing old wiring with new, keeping the basic circuit as it was, then adding new circuits for the outlets and lighting I want to expand with. However, it's going to be better to run all the circuits now, so I know the conduit will fit where it needs to go, even if I don't have the new mains supply in place. My normal car-related method of some planning & some winging it really isn't going to work with the garage. I need to write this all down, as it's just going round & round in my head. 1) I can't find online what the code is for placement of the underground rated 6/3 UF-B I bought (to allow for 240v outlets), in terms of termination at the supply (house) and at the garage. From what I can ascertain, where the wire enters the structure, it needs to be joined in a junction box (code for specific height off the ground?, don't know), rather than feed continuously through the structure wall. I'm going with 2' burial depth based on online info, then where it needs to come up & enter the basement and garage, I can fit it in 1 1/4" PVC sched 40 conduit. Can't be smaller as the 6/3 cable is too rigid to roll or squeeze to reduce width. I don't think conduit is required by code, however it will be where the cable comes above ground, so it seems to make more sense just to have conduit from start to finish. reference for appropriate receptacle wiring YT video - they don't use conduit in the "raceway" (?) - they poured concrete though. I think I'll just get conduit. Edit found this regarding connections at either end (link😞 So, I could just run the 6/3 all the way to the main panel, where I will have a mains breaker to disconnect the entire garage. Or, if joining outside, use split lugs in the appropriate 6AWG would seem to be OK for this junction, either sealed versions or wrapped. It looks like I need 2 x 8' grounding rods at the garage. can't figure out if there is a code for how the grounding cable is supposed to exit the garage & attach to the closer rod. 2) For inside, I bought NM-B wiring; 10/3 for (30a) 240v outlets, 12/2 for (20a) 120v outlets, 14/2 for lighting circuits, 14/3 for the one 3 way circuit that governs all the existing lighting. I'm using online guides for load rating. As far as I can determine online, NM-B does not need to be in conduit placed over 7'6" - up in the rafters & top plates, basically, which was one reson for buying it. However, since this is the garage & not a basement, I want to make sure all the wiring is protected from potential harm, and I can't figure out if there is a local code requirement at play - that info is not made public, I don't know why - besides the fact that they only want electricians doing all the new wiring. In any event, I really want to make sure I'm meeting potential code requirements, even though I don't know what they are I started running 1/2" PVC sched. 40 conduit to replace the old (MC?) cable, routing it along the existing path, but adding some junctions to allow for some flexibility. Separating the new outlets & light into a new circuit. For the south wall receptacles, I am running 3/4" PVC conduit (to make sure there is not a fill issue) for the 10/3 and 12/2 combined - from the north wall, over the west wall, to the south wall. I'm going to have the outlets approx 4' off the floor, in conduit going to exposed boxes. The single 240V receptacles will be in a 4" square box adjacent to the 4" double duplex 120v receptacles, that way I don't have 2 separate conduit runs along the middle of the south wall, and over the west wall coming from the mains panel on the north wall. New lines replacing the original single circuit switched lighting and (3) duplex outlet boxes. Loose MC cable for attic lights will join the junction box shown. May have made sense to use 3/4" conduit & reduce the number of runs. Shouldn't matter here, as I'm not going to run any additional wiring on the center beam. I don't want to run any wiring over the north wall at this time, as that is where I want to make the 14' bump out. Need 120v outlet and 3 way lighting switch at the garage door (old layout) and I want a (30a) 240v receptacle below it - 10/3 will be added in a conduit & pass though to lower 4" box. I have exposed work 4" metal covers to house the switch & receptacles 14/3 for the 3 way, 14/2 is for the 15a outlet just used for lead lights & battery chargers (edit - probably going to pull the 14/2 & replace with 12/2 so I can use the 20a outlet here) More to follow
-
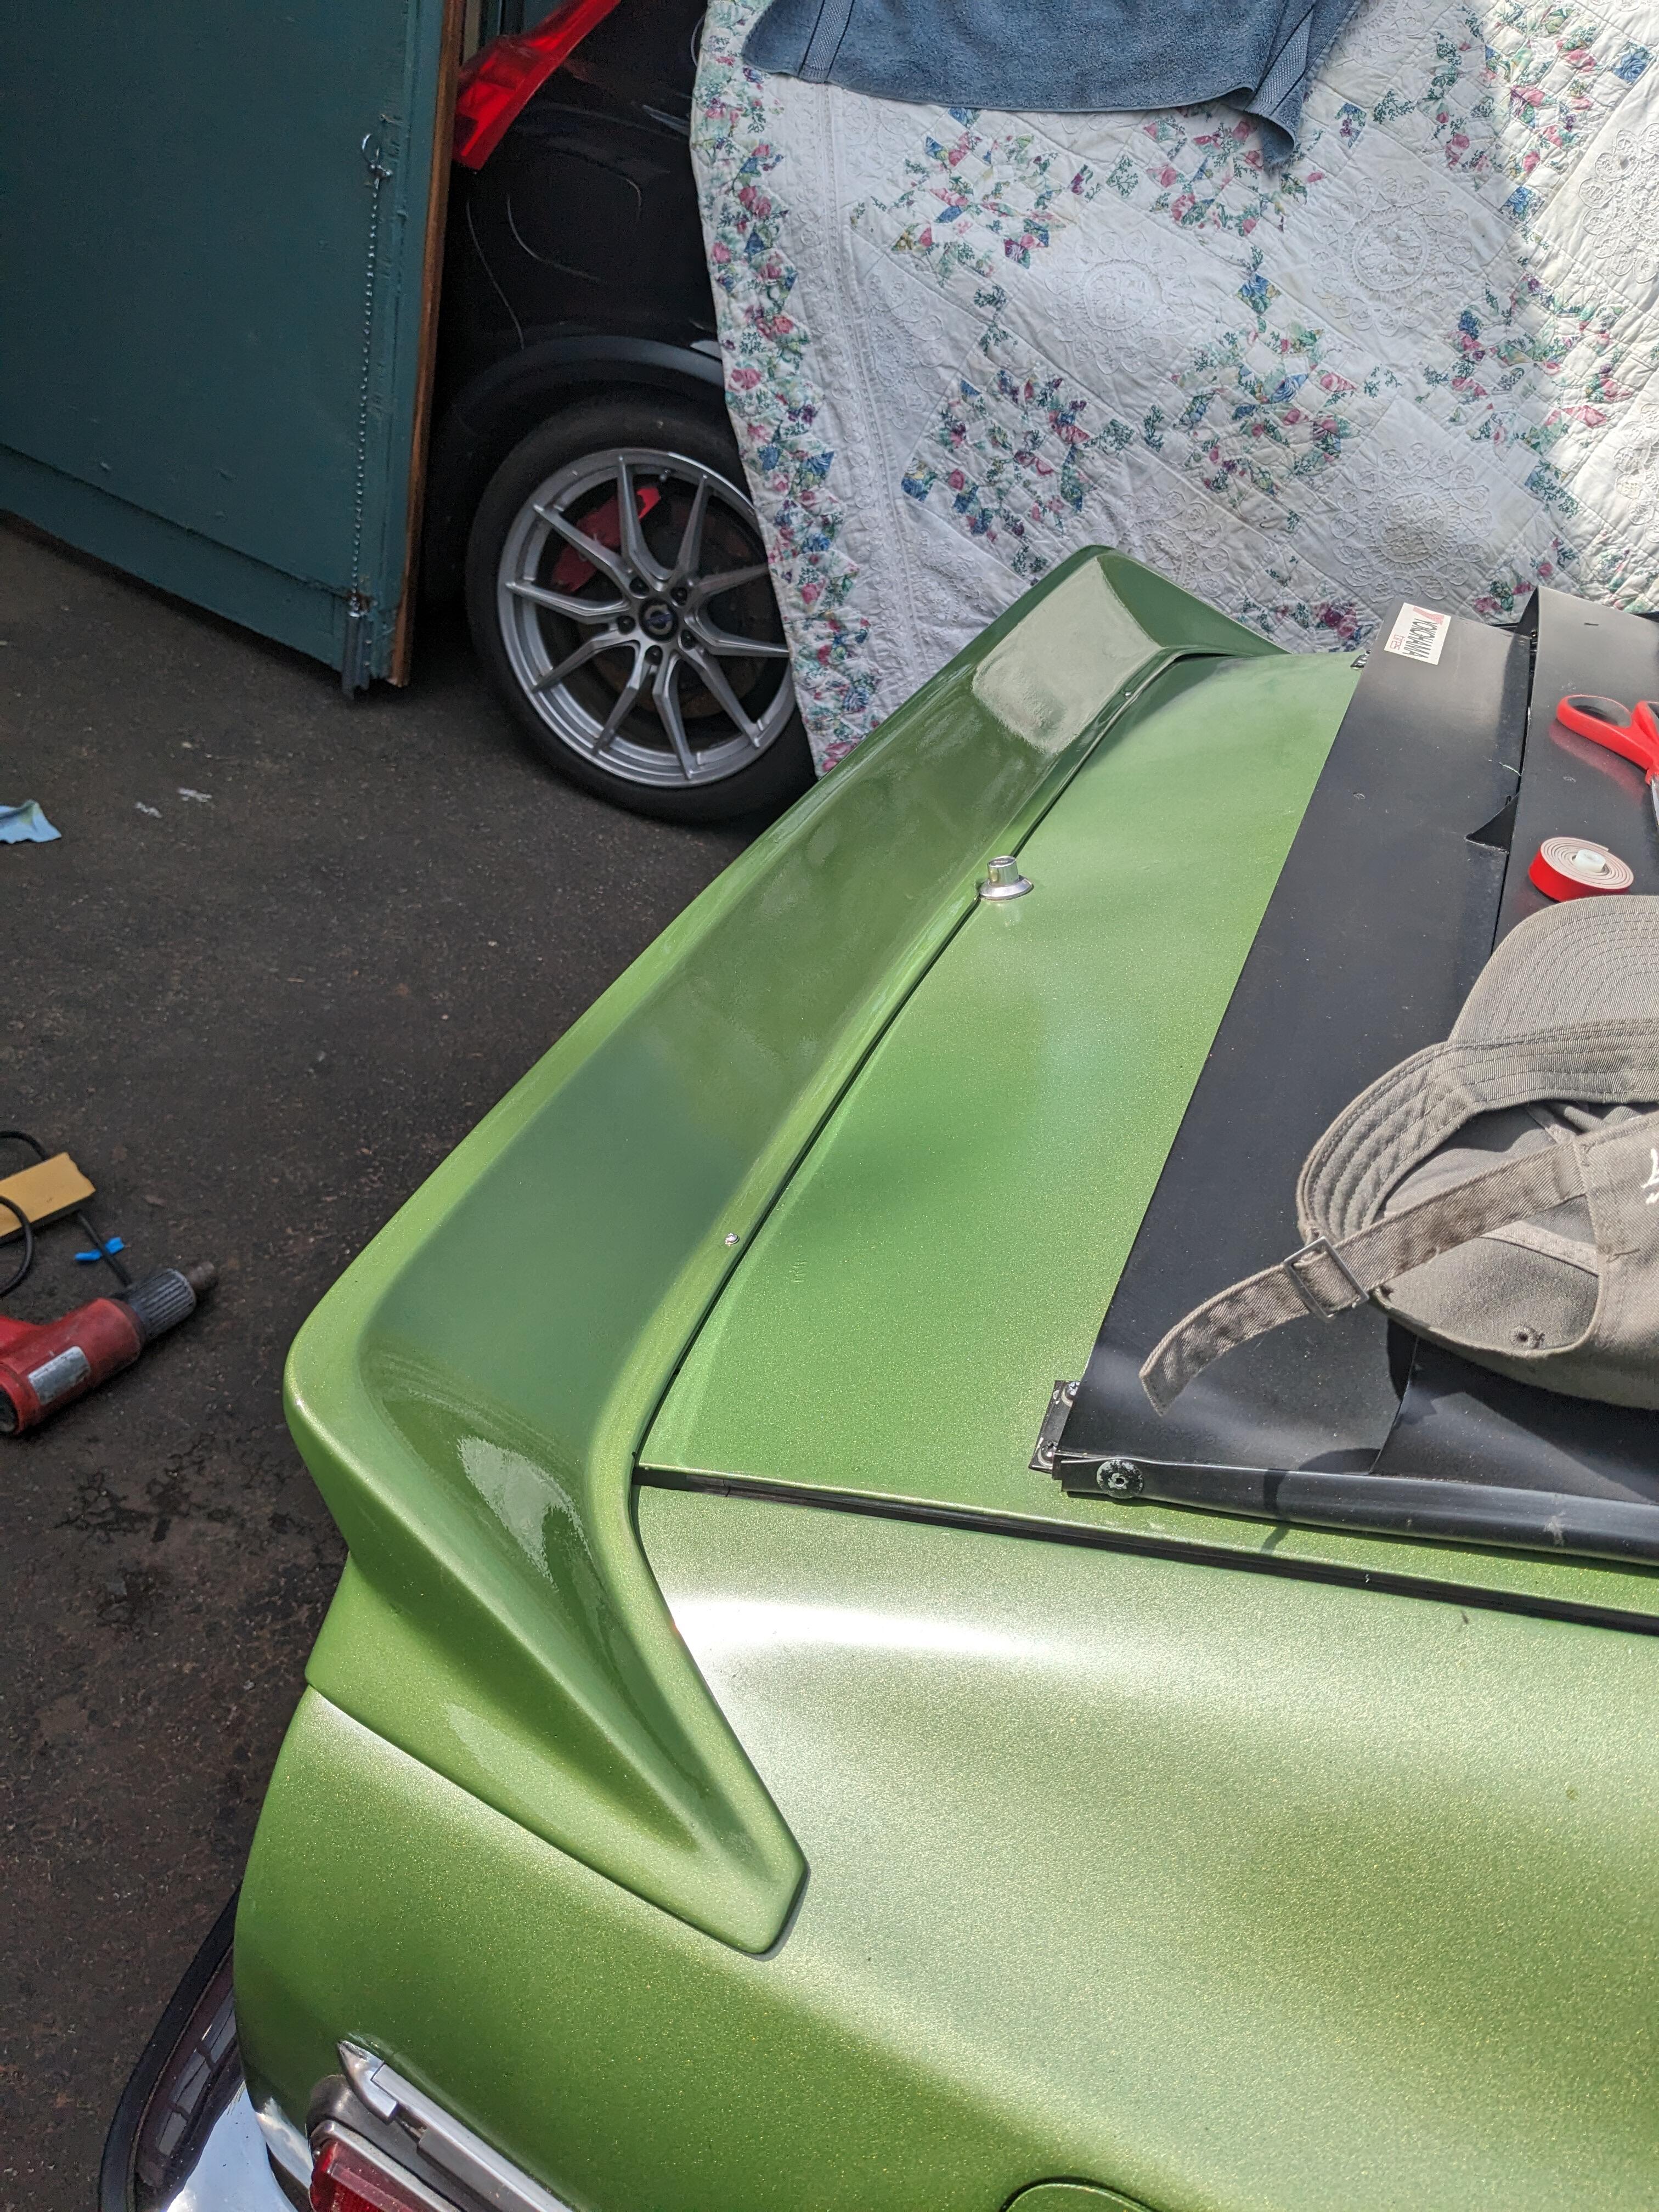
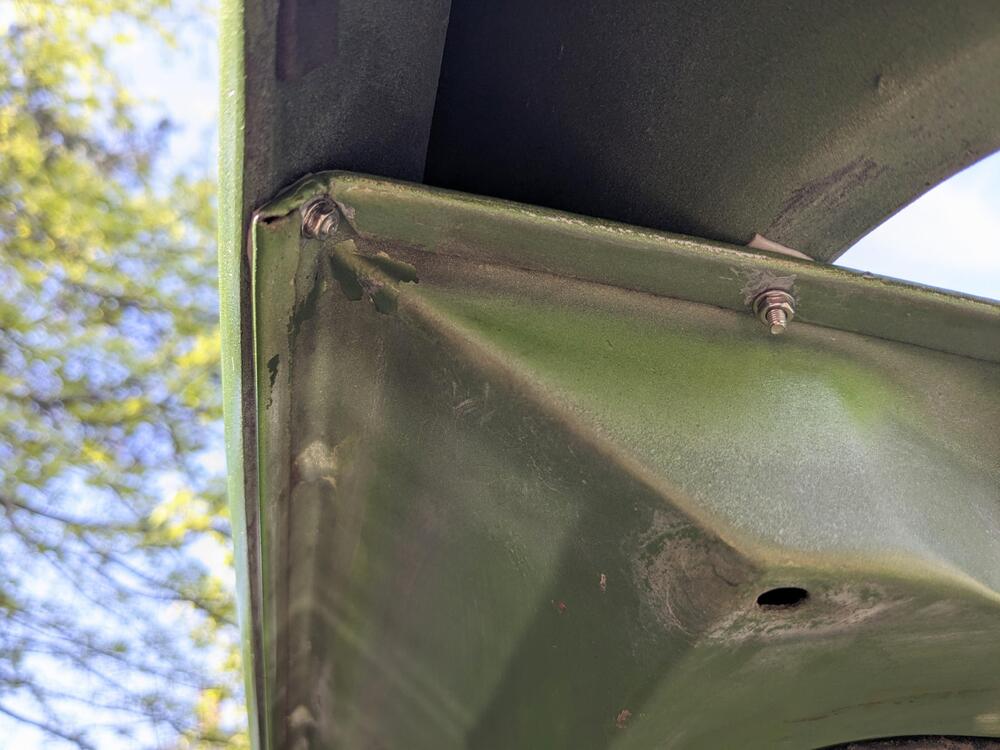
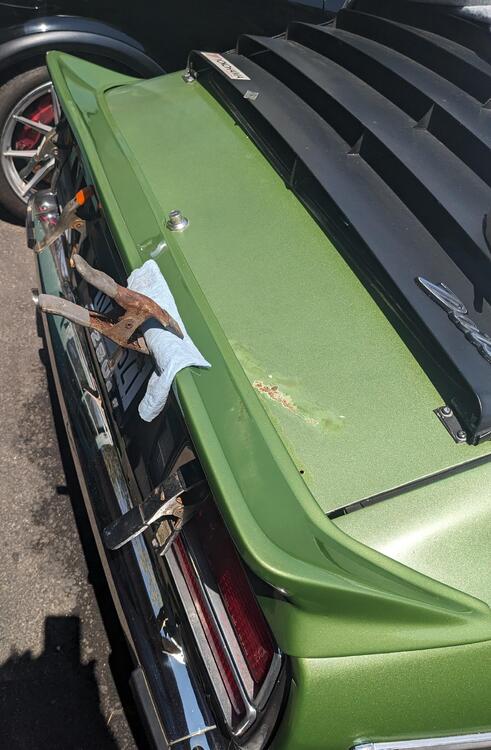
Plenty of sun today, so I clamped the rear spoiler to the hatch along the back edge & let it bake awhile. That actually resolved much of the misshapen issues, added a clamp on top which pushed the wave that was present on the right out. Had to address the paint under the emblem also After paint repair The directions say to drill & use two sheet metal screws in the forward outer region, after the spoiler is taped in olace. I used the existing inner "280Z" emblem mount hole, drilled out for an M4 riv-nut, and did one on the other side to match approx 5" in & 3" up from hatch lip, prior to adhering the spolier. Those helped me align the spoiler and adhere the back edge to the hatch lip knowing that the placement was correct in relation to the lock. I added closed cell foam to the outer fender overhangs as per the instructions (although not provided ) Need to add the 280Z back Also heated & shaped the lower spoiler edge to minimize the wave that was present


-
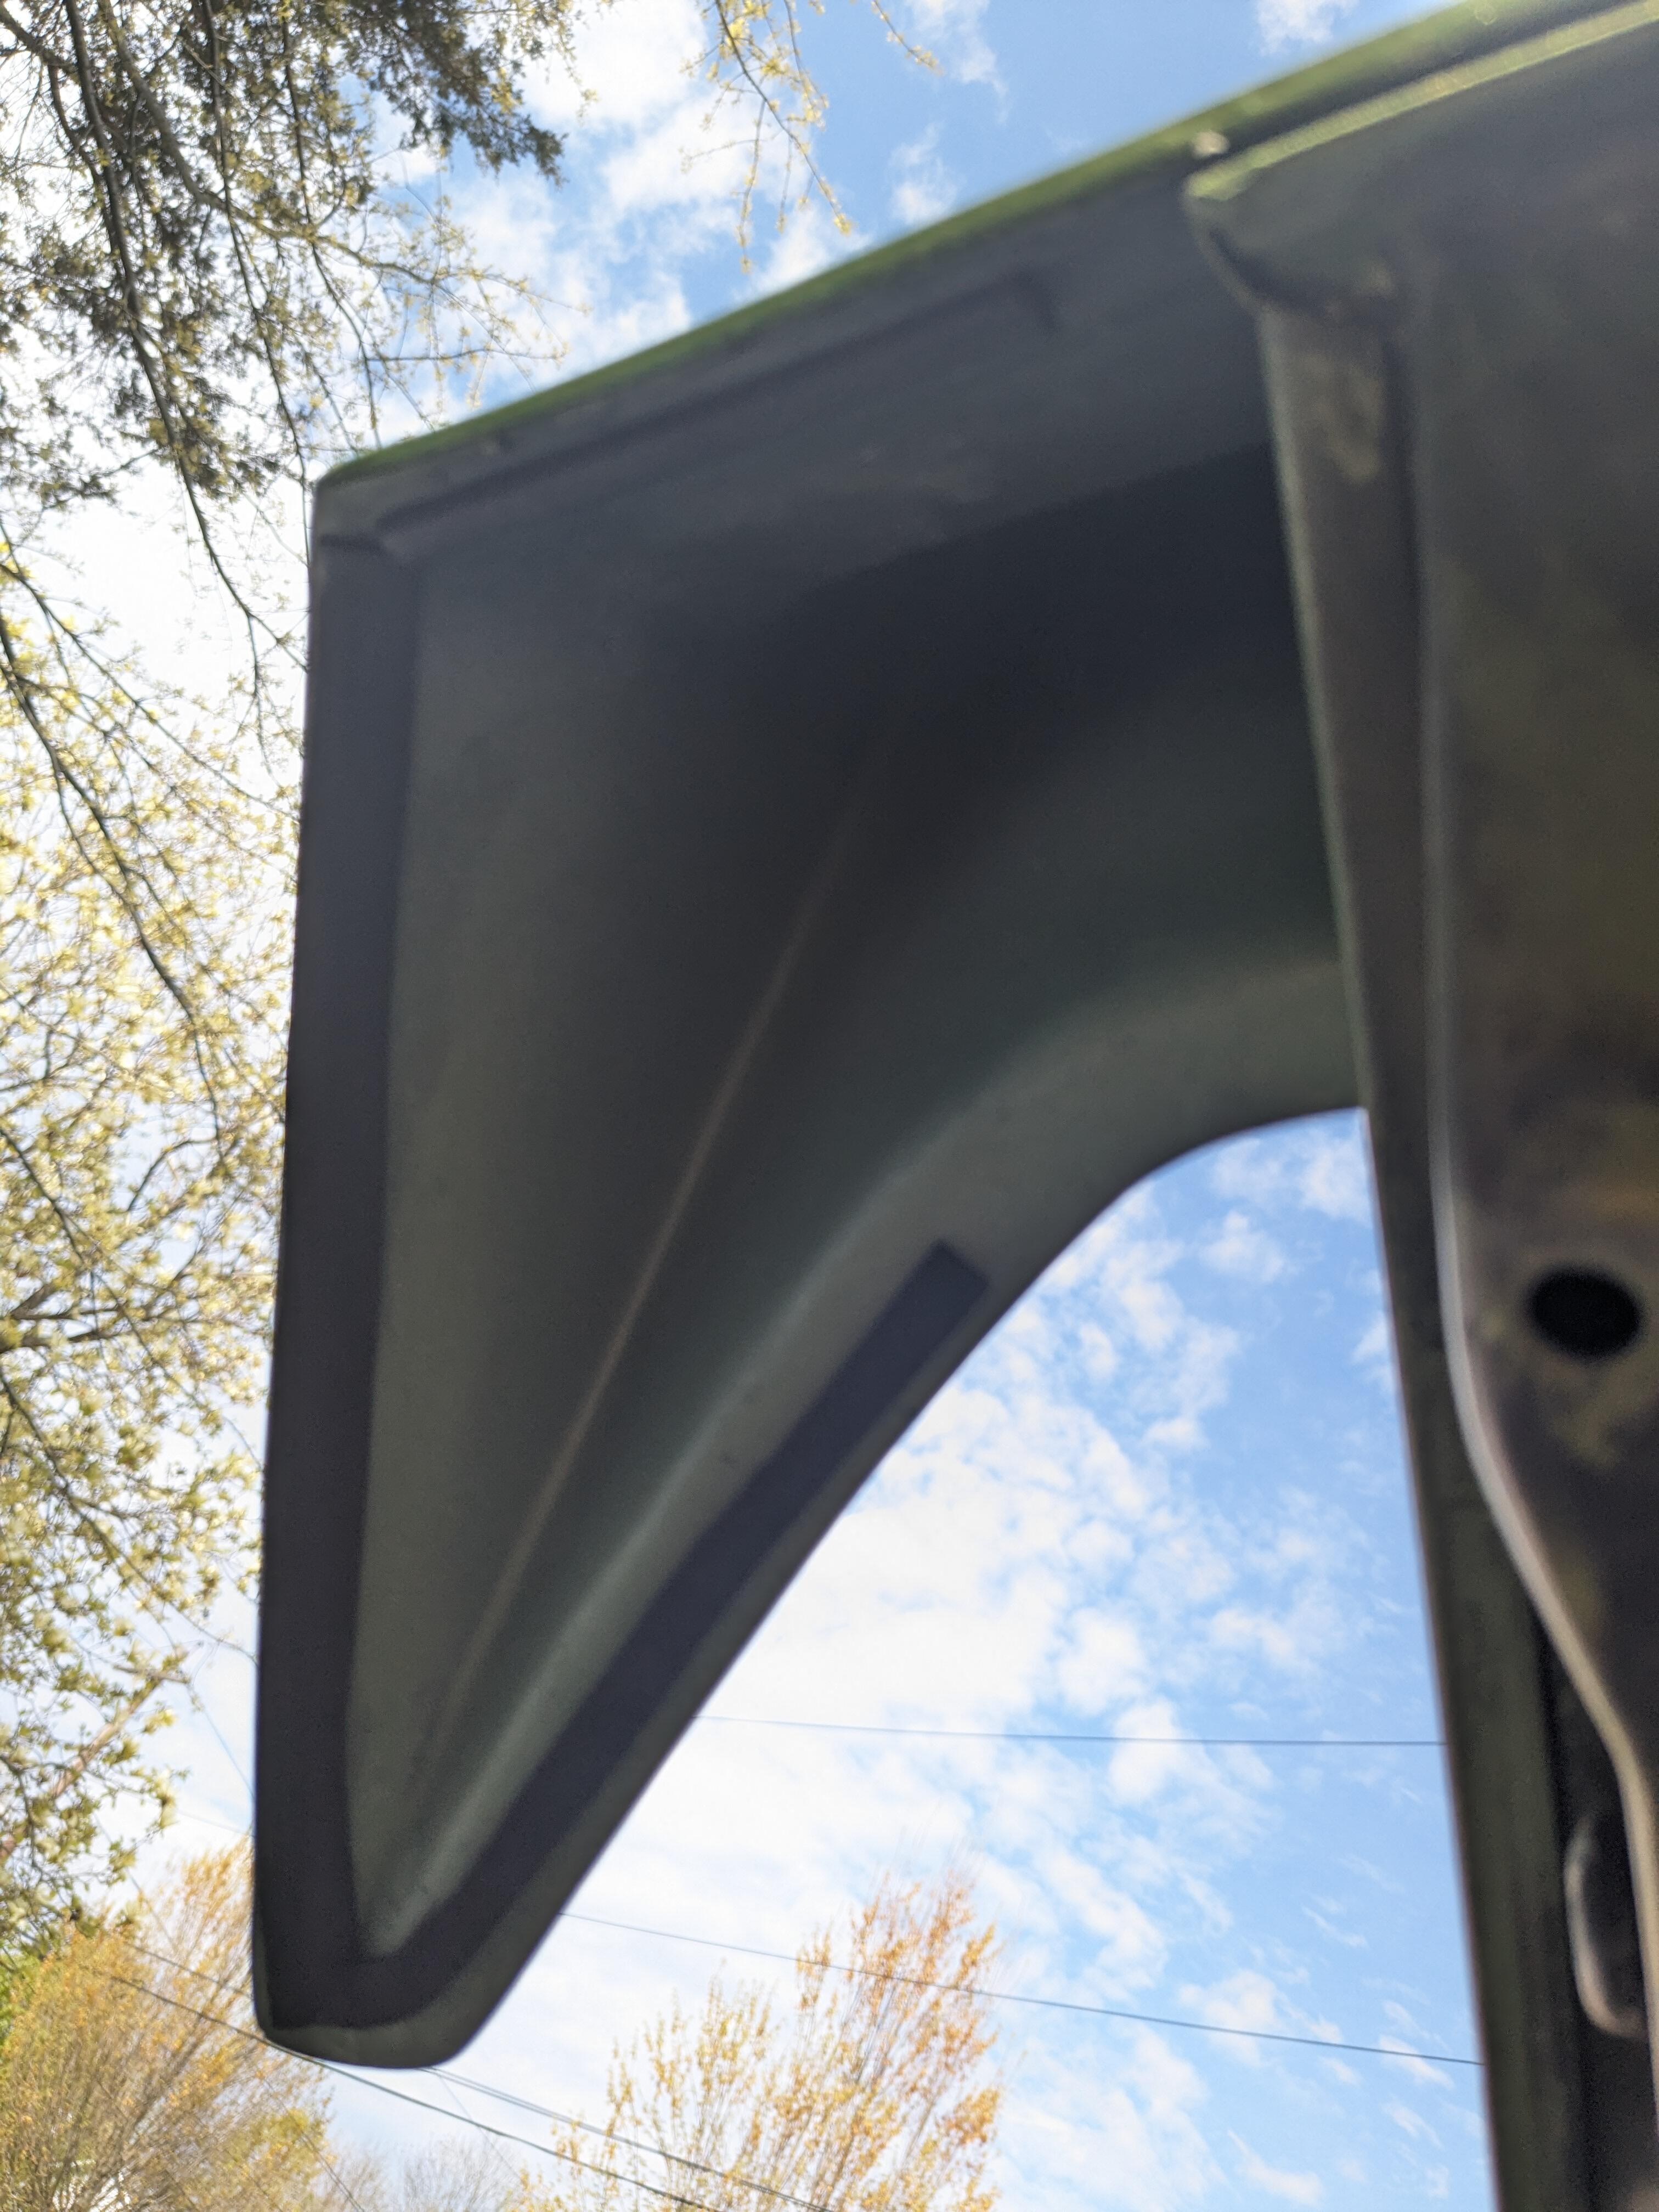
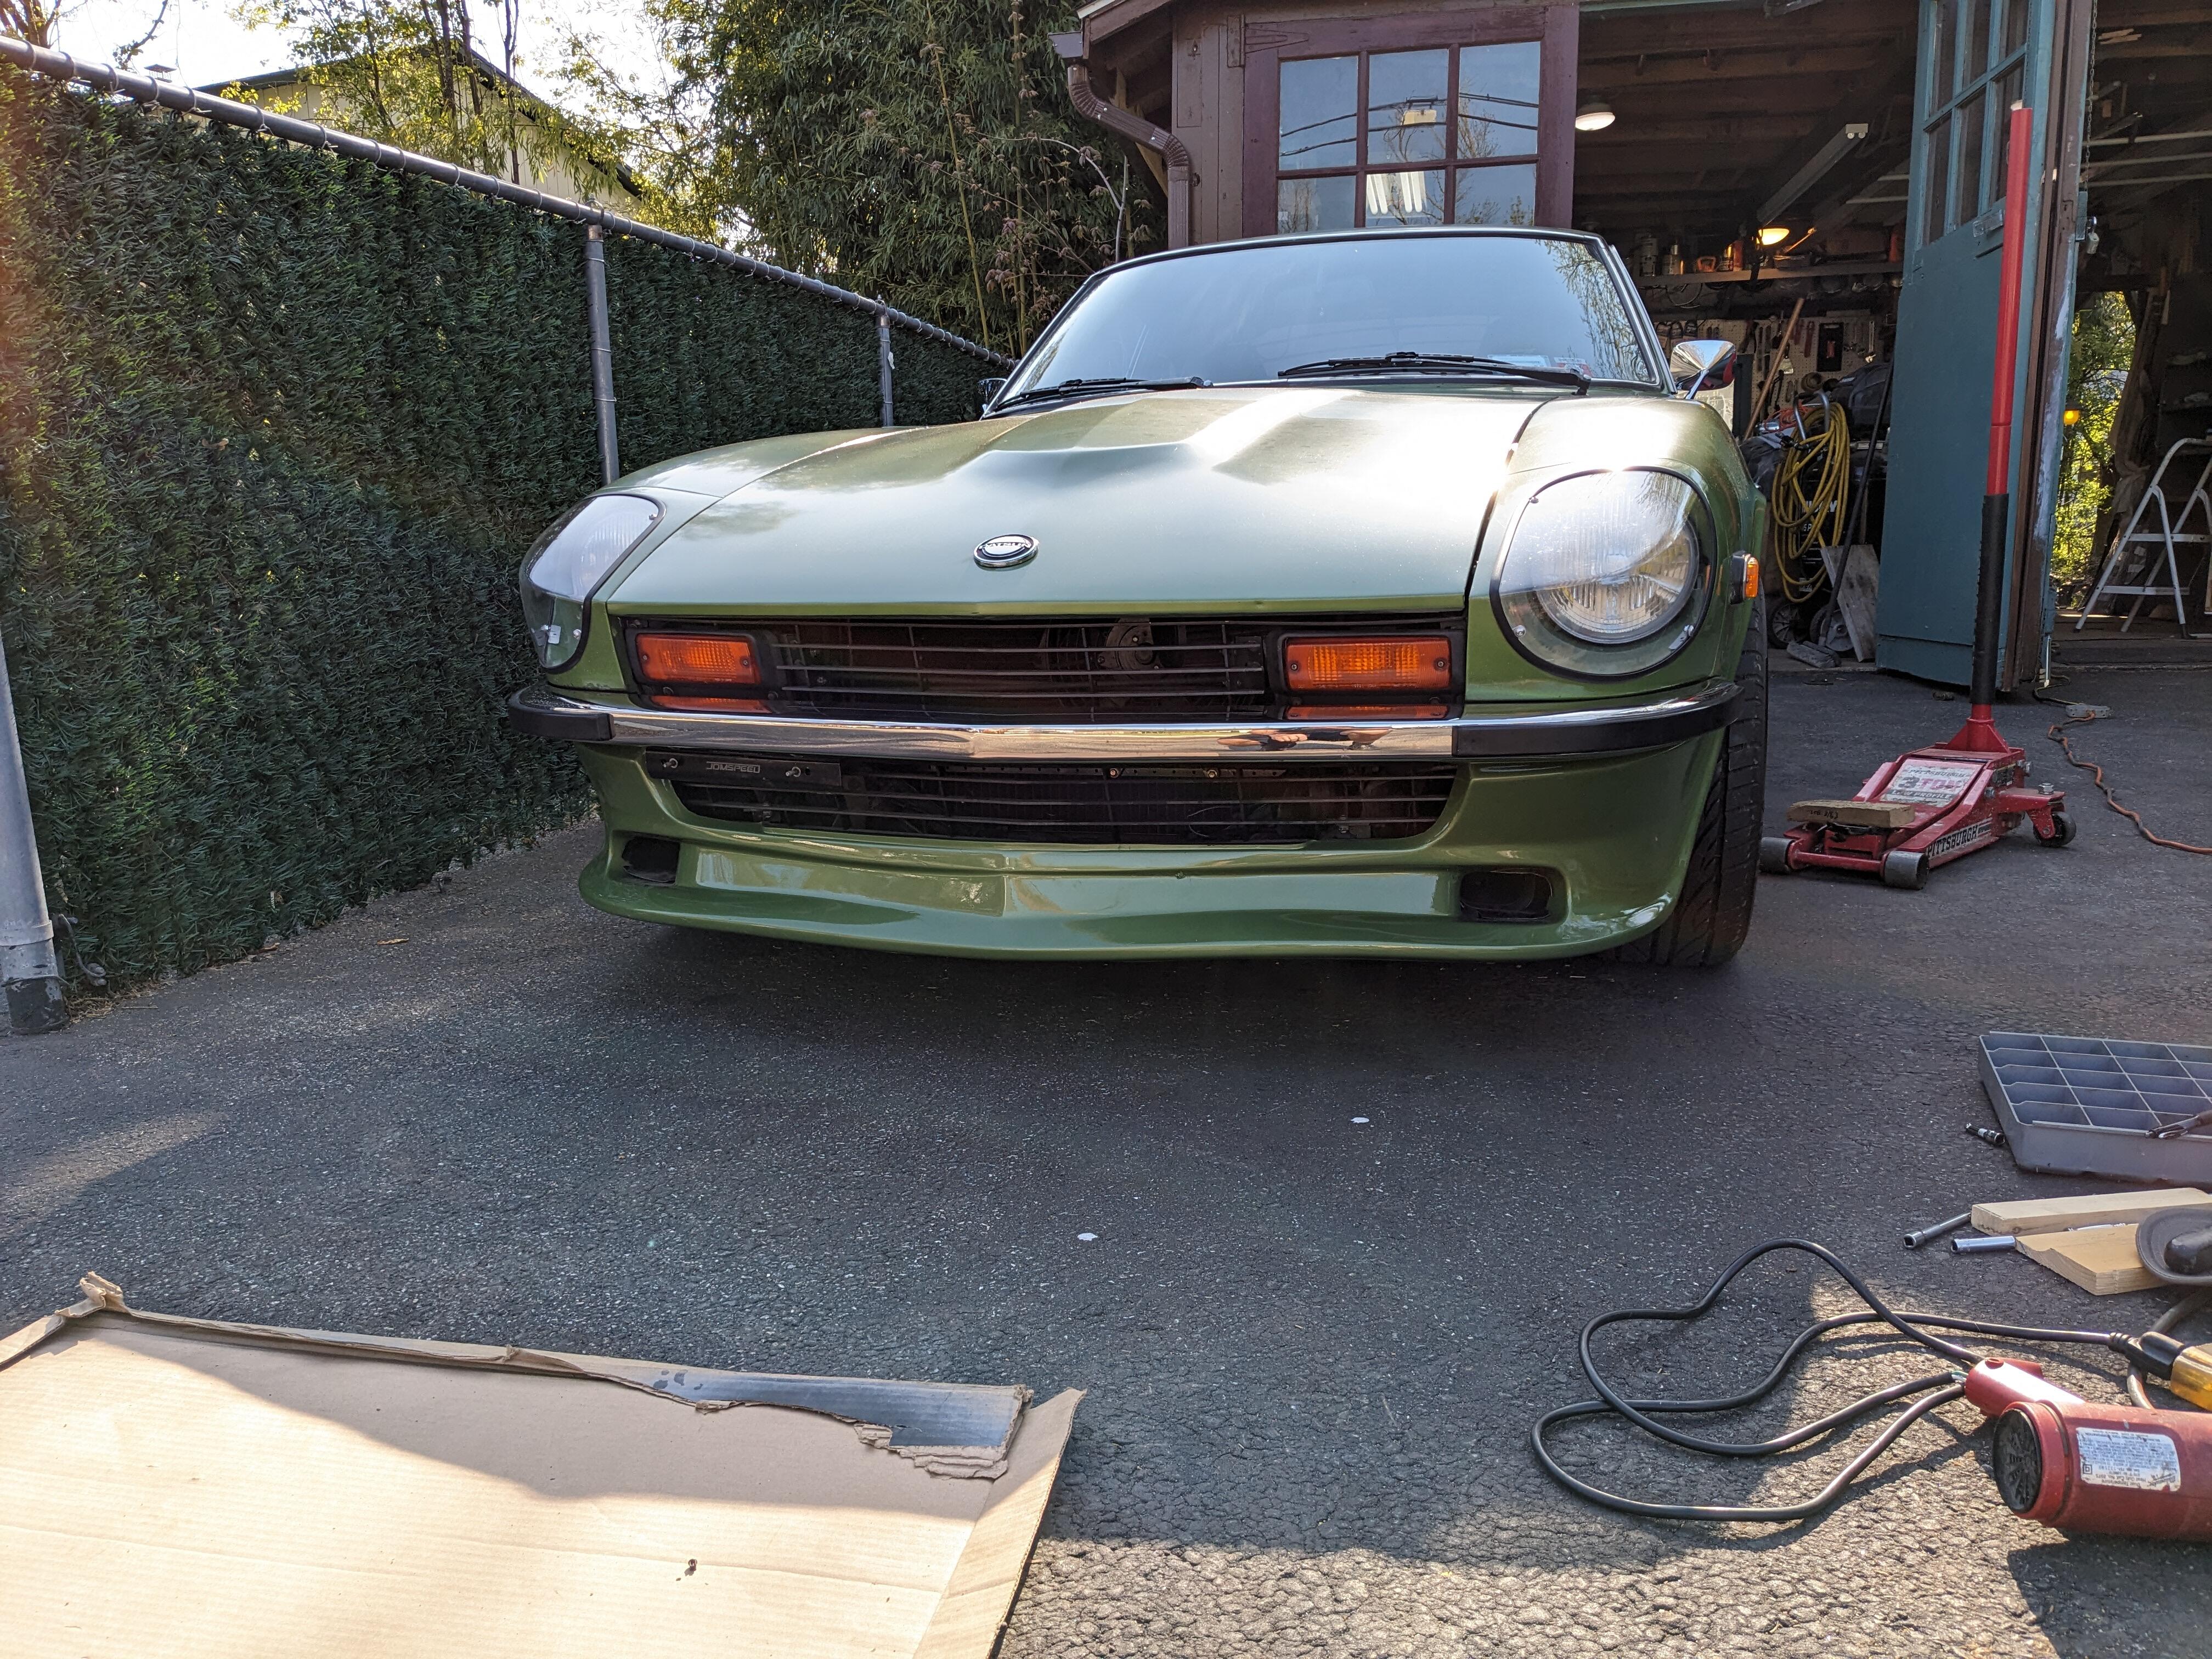
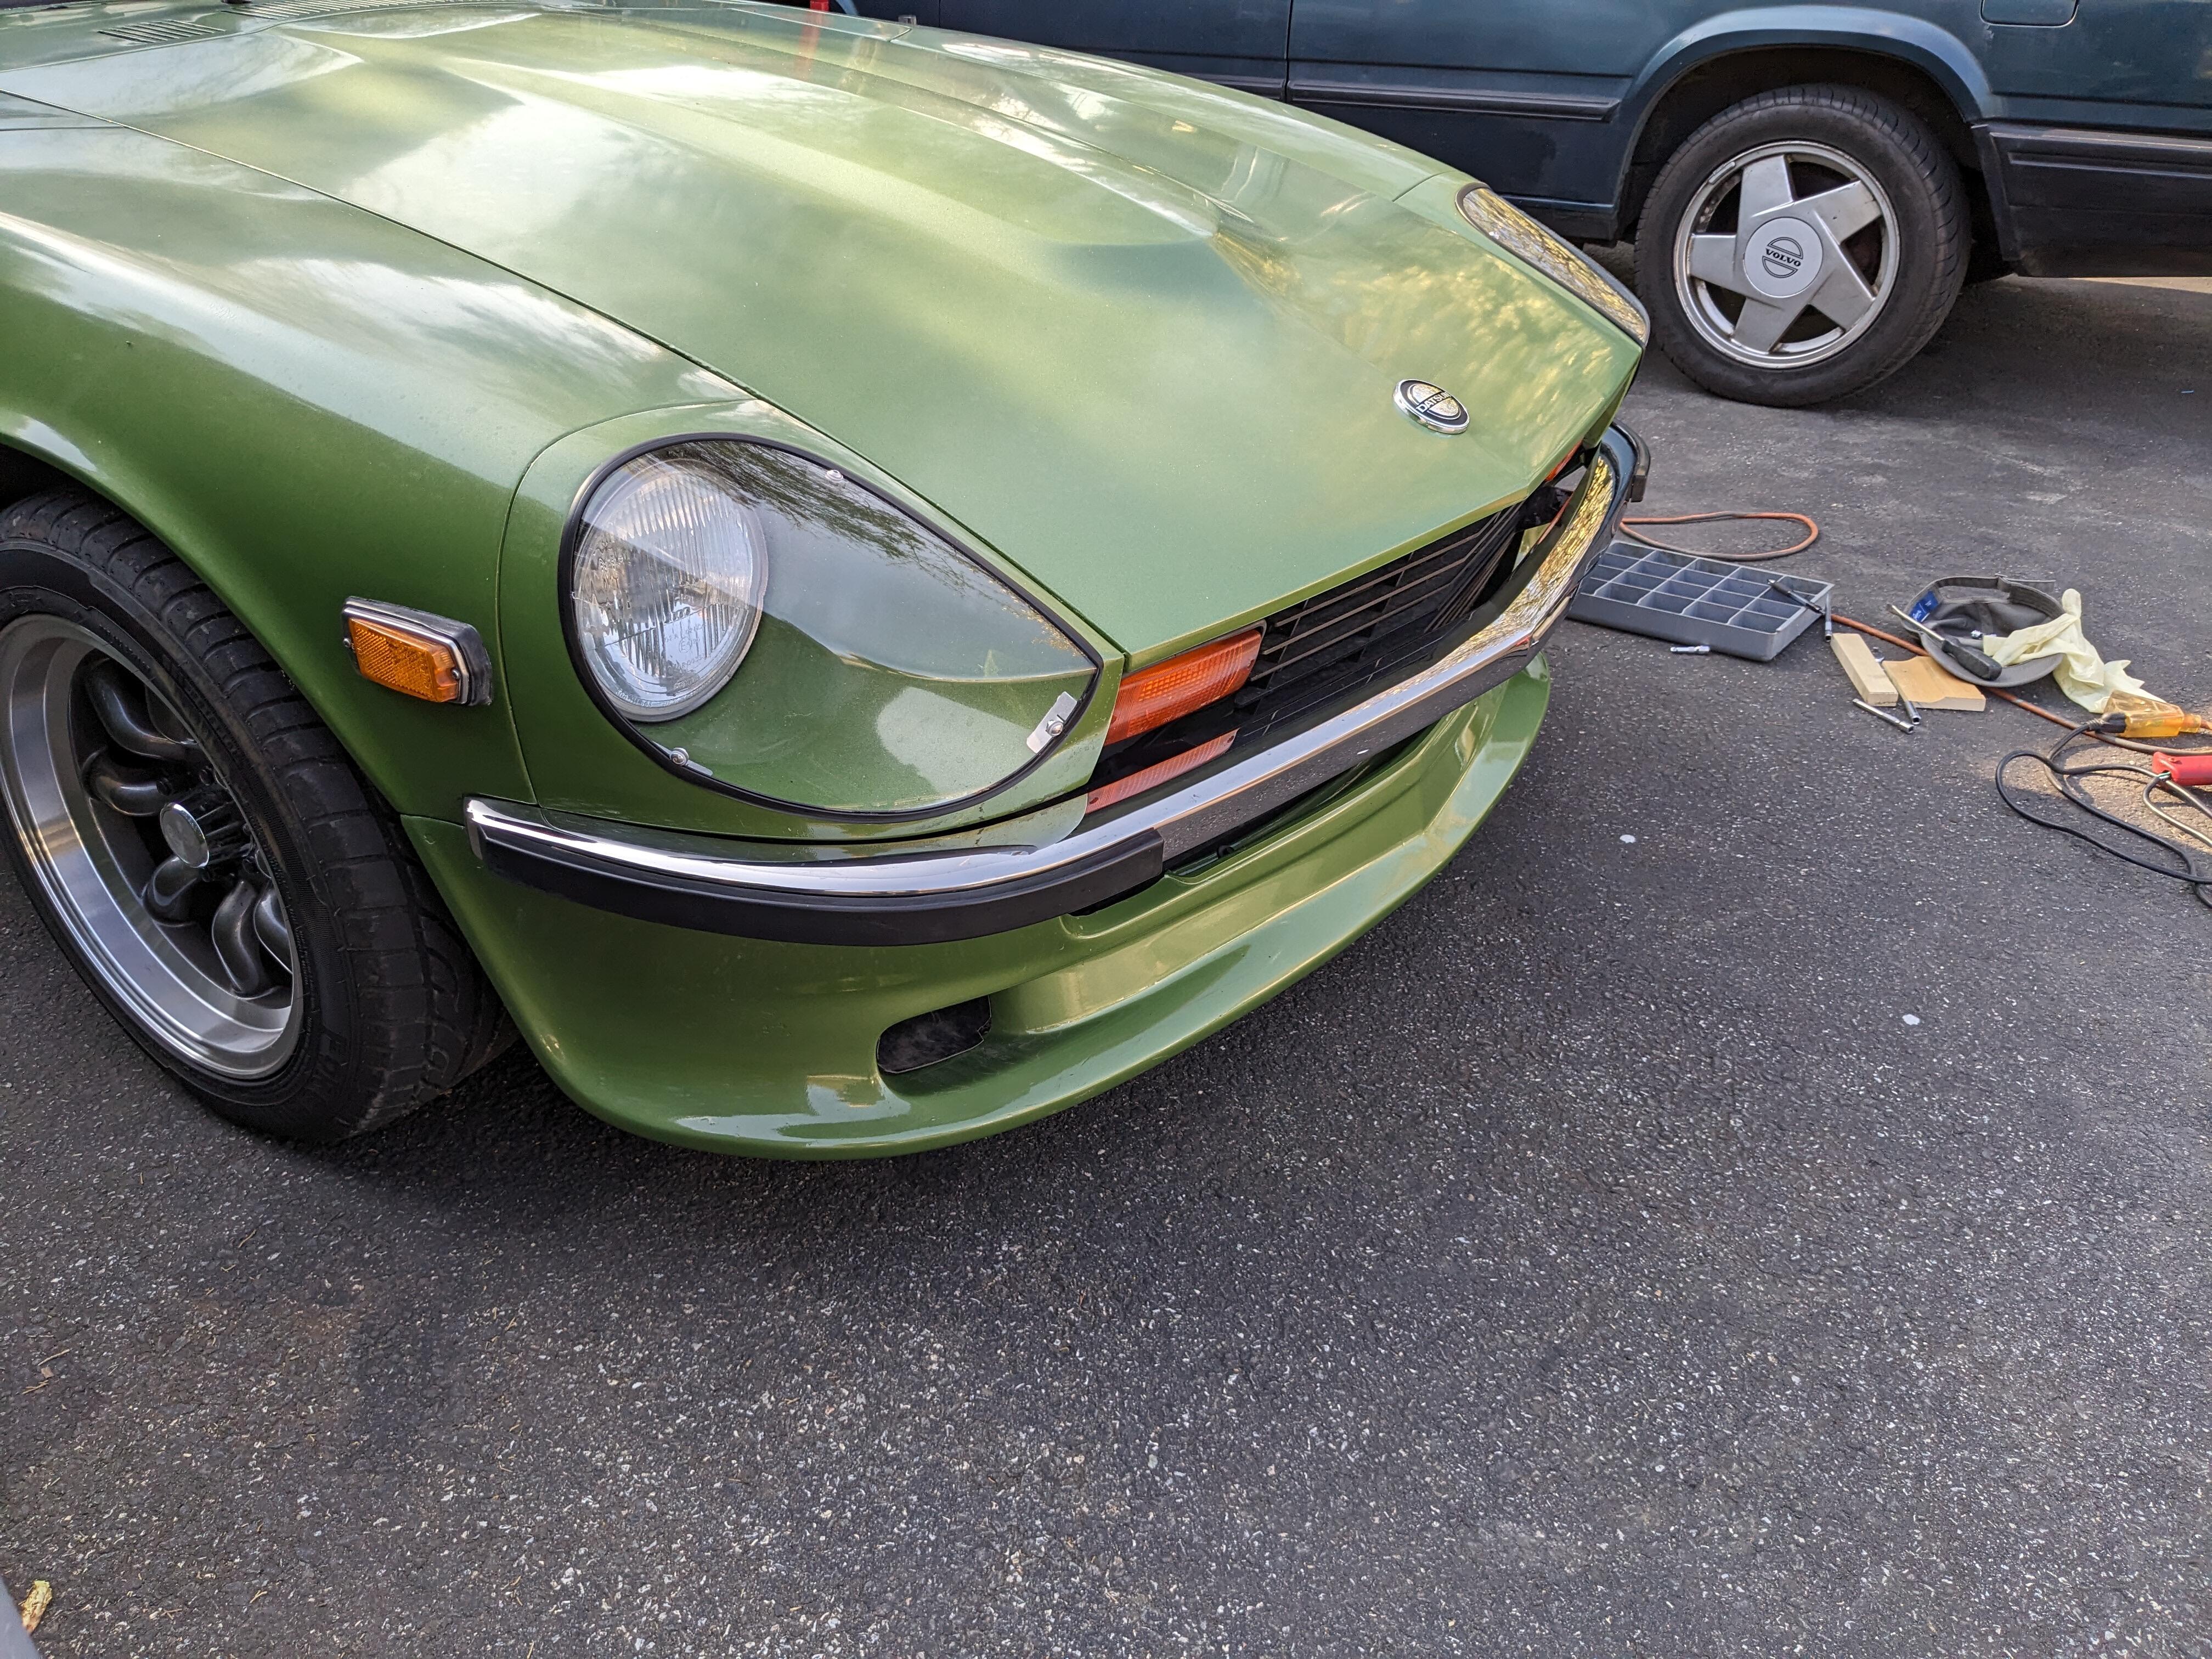
Put the painted Xenon front spoiler back on - that was a pita - either the thing shrunk in paint, or something - I had a hell of a time getting the holes to align. There is a wave in the left lower that wasn't there previously, I'm going to have to heat the crap out of it & see if I can relax that . Happy with the color match at least The rear spoiler is a $^!# show - it's completely deformed, in this picture I'm pressing it in place to get it even close. And the left and right are not the same. It doesn't come with specific fit instructions, that would indicate which surface to align with. As a result I don't know how deep the top is supposed to be? Whether it's supposed to be tucked right under the lock or further back from it no way to tell for sure because nothing aligns. This is problematic as it is supposed to be installed with double-sided tape. That doesn't work very well if you have to maneuver the spoiler at the same time as sticking it in place, in fact it's not going to work. Xenon has no pictures of one installed on their website.


-
OK - I typically replace line clamps with Oetiker clamps for anything that doesn't require routine service.
-
apologies - I didn't see the question - yes, that is what I would do there. EDIT - actually I think you would add a vacuum line. The ports are listed PCV - Carb - Tank, so I think all three would be used. I'd look at a GM schematic for the model it's intended for. When you say belt clamps, you mean the hose clamps?
-
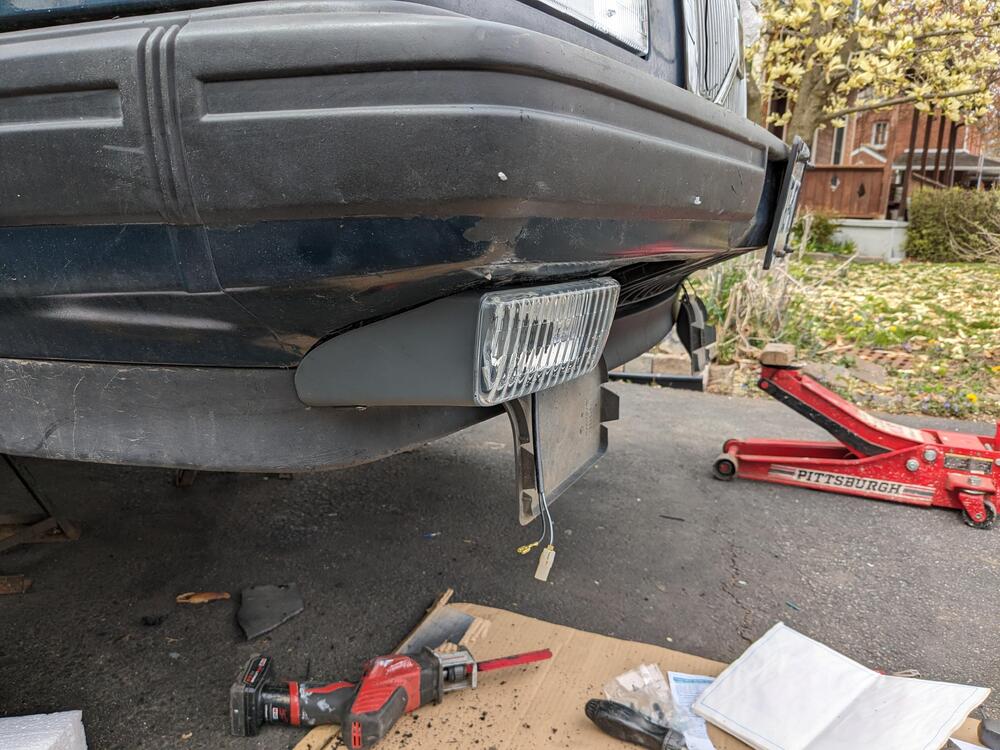
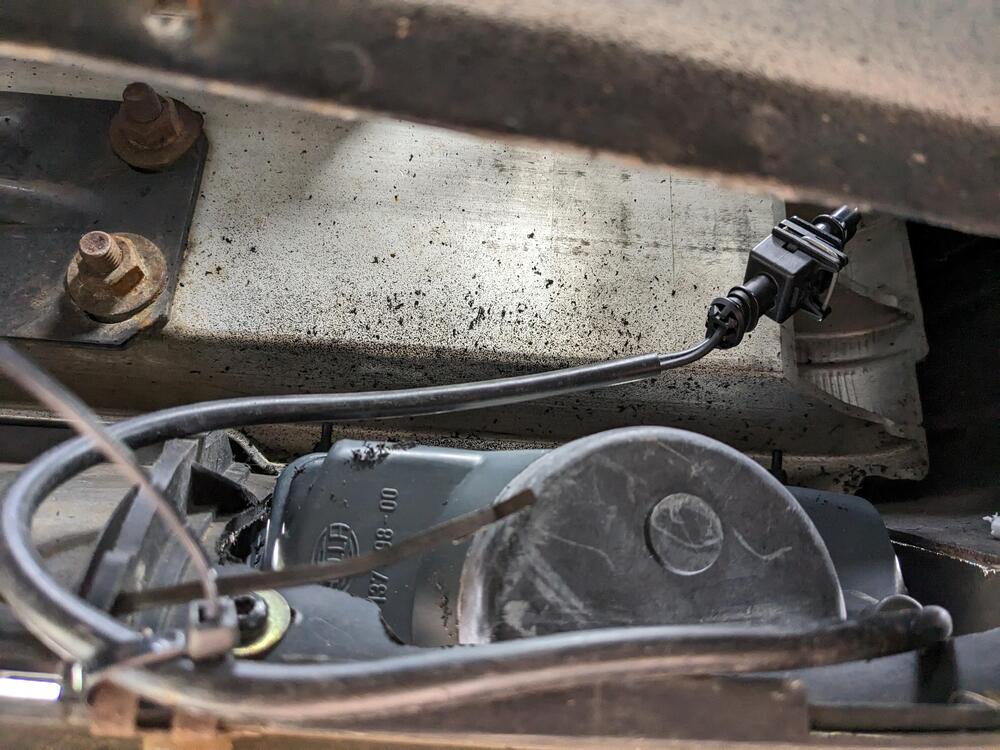
Had to get several things squared away on the truck - it's annual state inspection is due. Main thing was the tail lamp connections - since I drove it for a year with no covers over the back of the tail lights, the sockets had all got crud on them, and sometimes the indicators would come on through the brake light circuit and so forth. All indications of bad grounds. I have several new bulb sockets, so I dug those out and cleaned up the connections on the tail light circuit boards. Besides that it was just odds and ends that they would look at as part of the safety check. I got it inspected this evening, no problems there thankfully. Since I didn't have a lot of time, I focused on making a rack to store the wood that I had outside - the tarp I was using seen better days, and wasn't keeping the water off the wood. So I had to clean and dry them all . Figured it would be safe it to store them indoors. I used pieces of tubing from the canopy I had used to cover the X1/9 when I painted it back in 2018, and set those in the angle iron with six of the longer Fiat head bolts (welded in place)
-
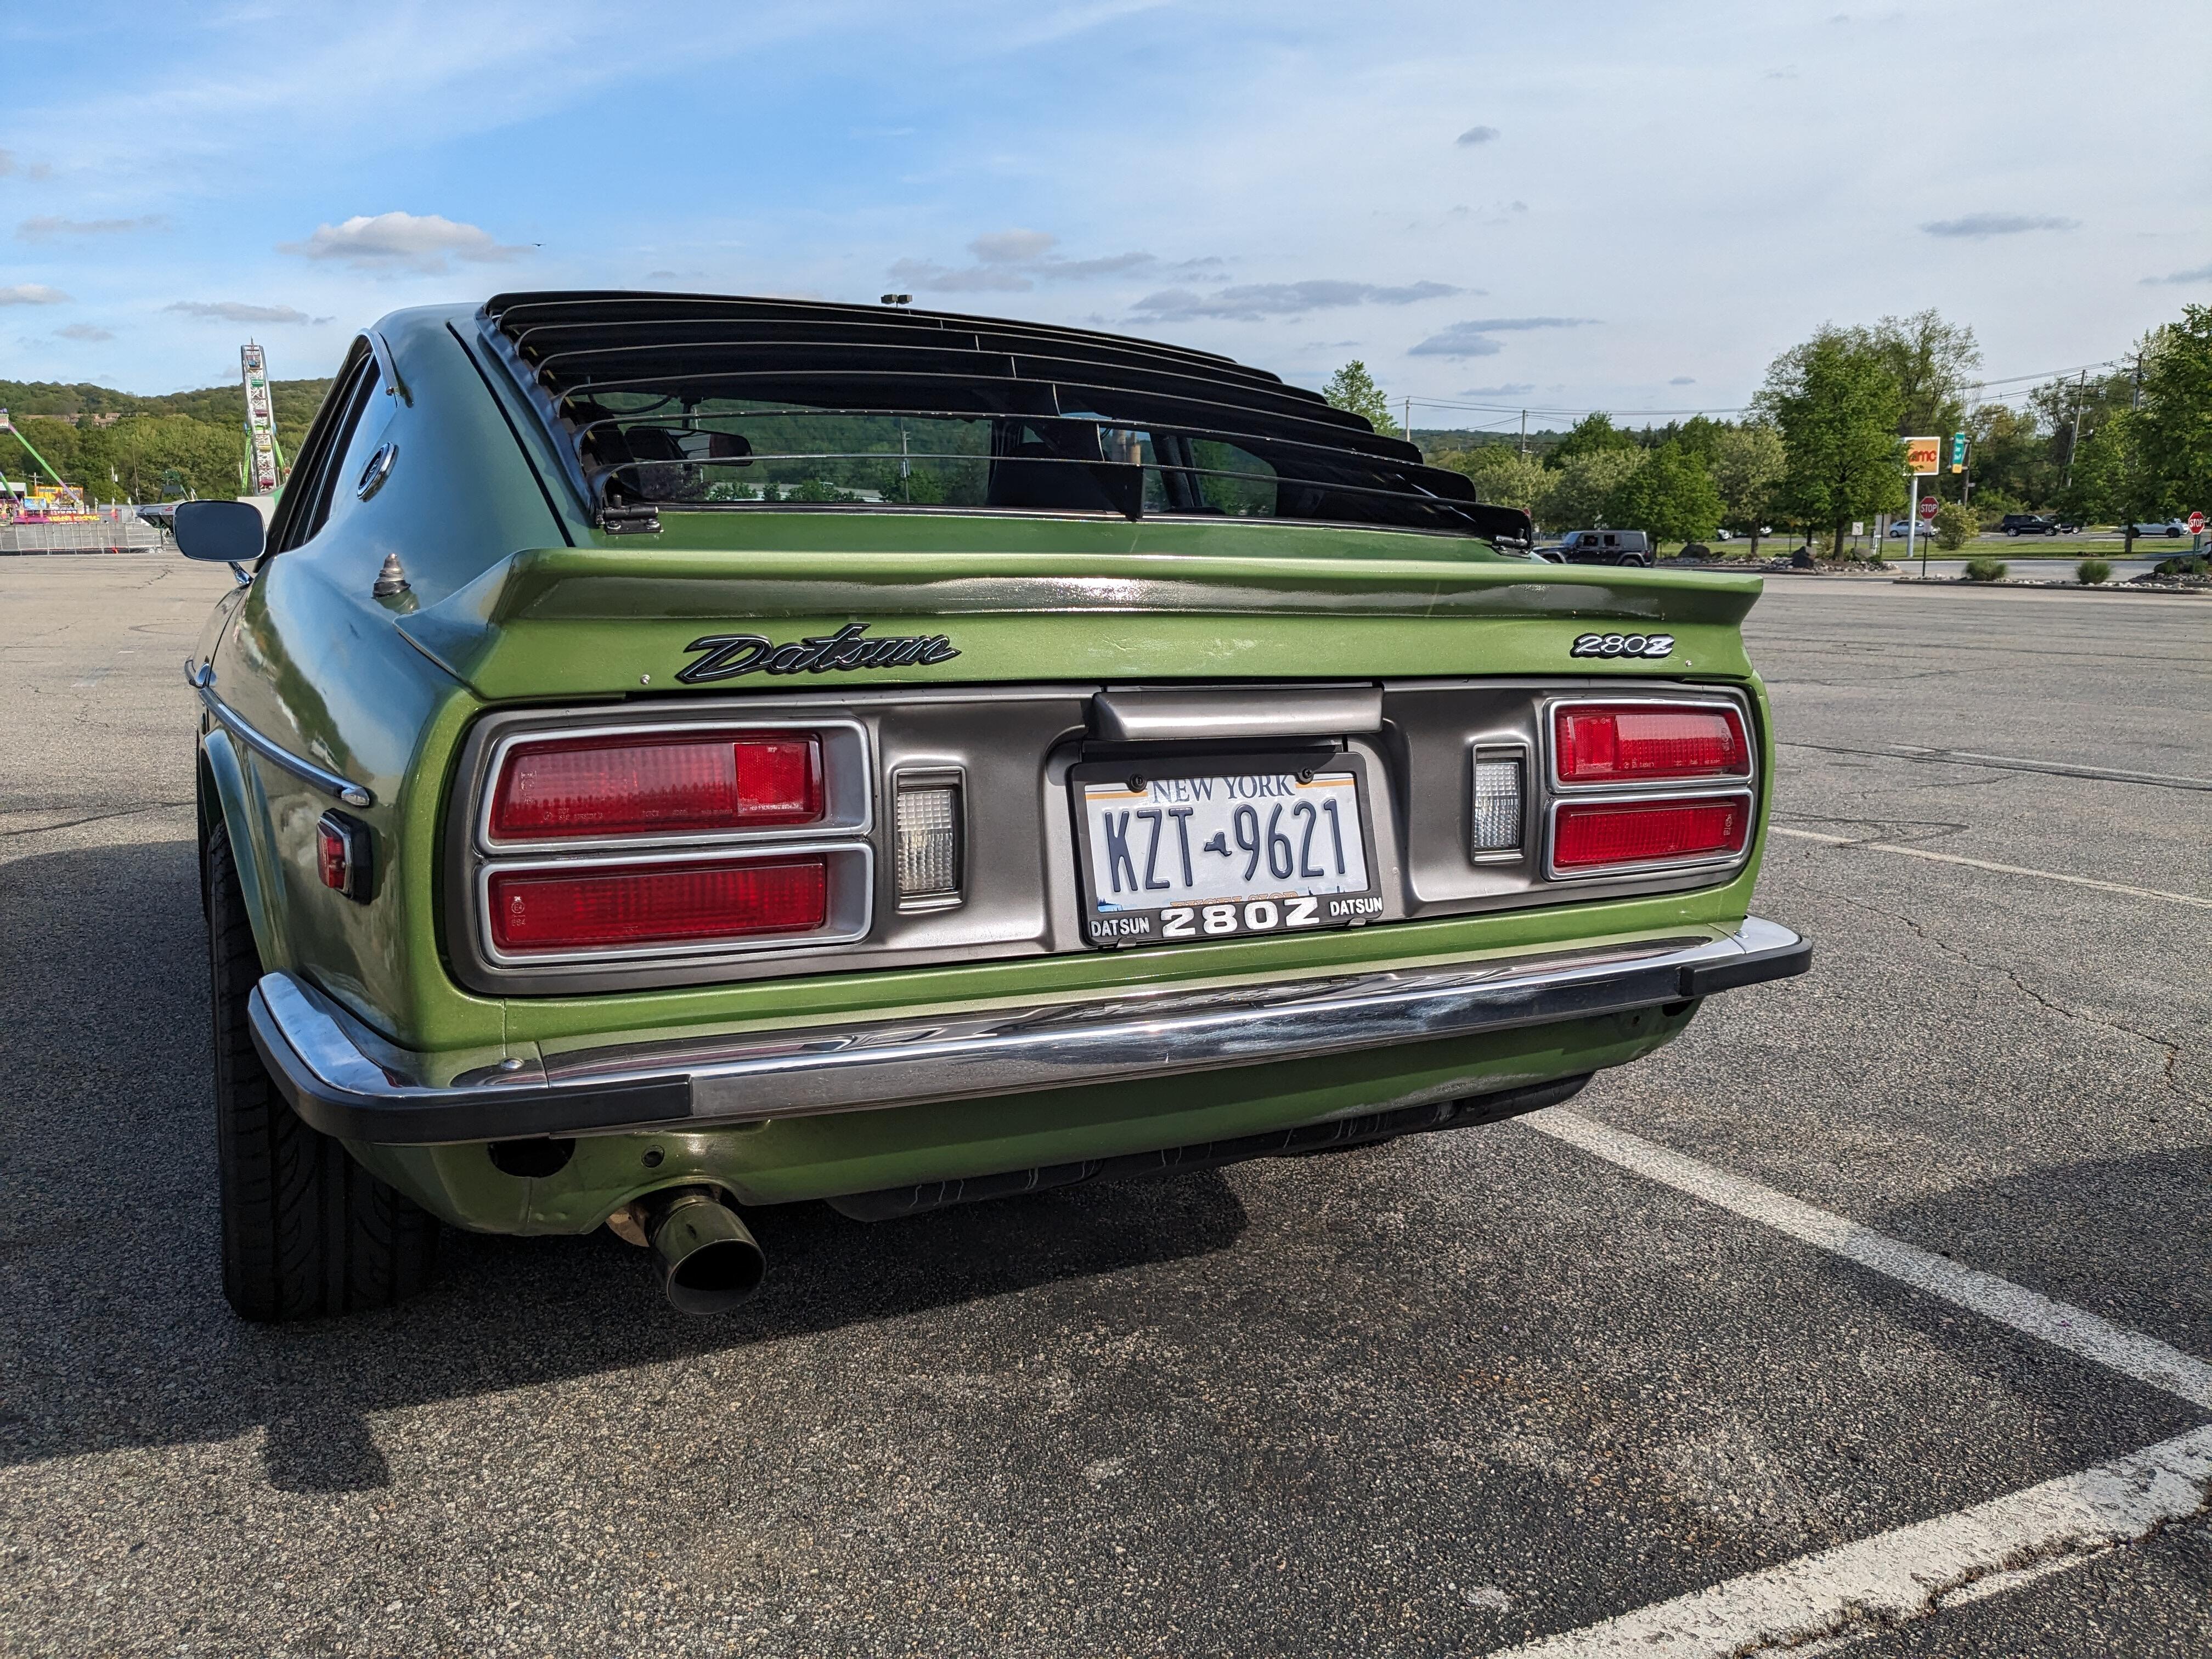
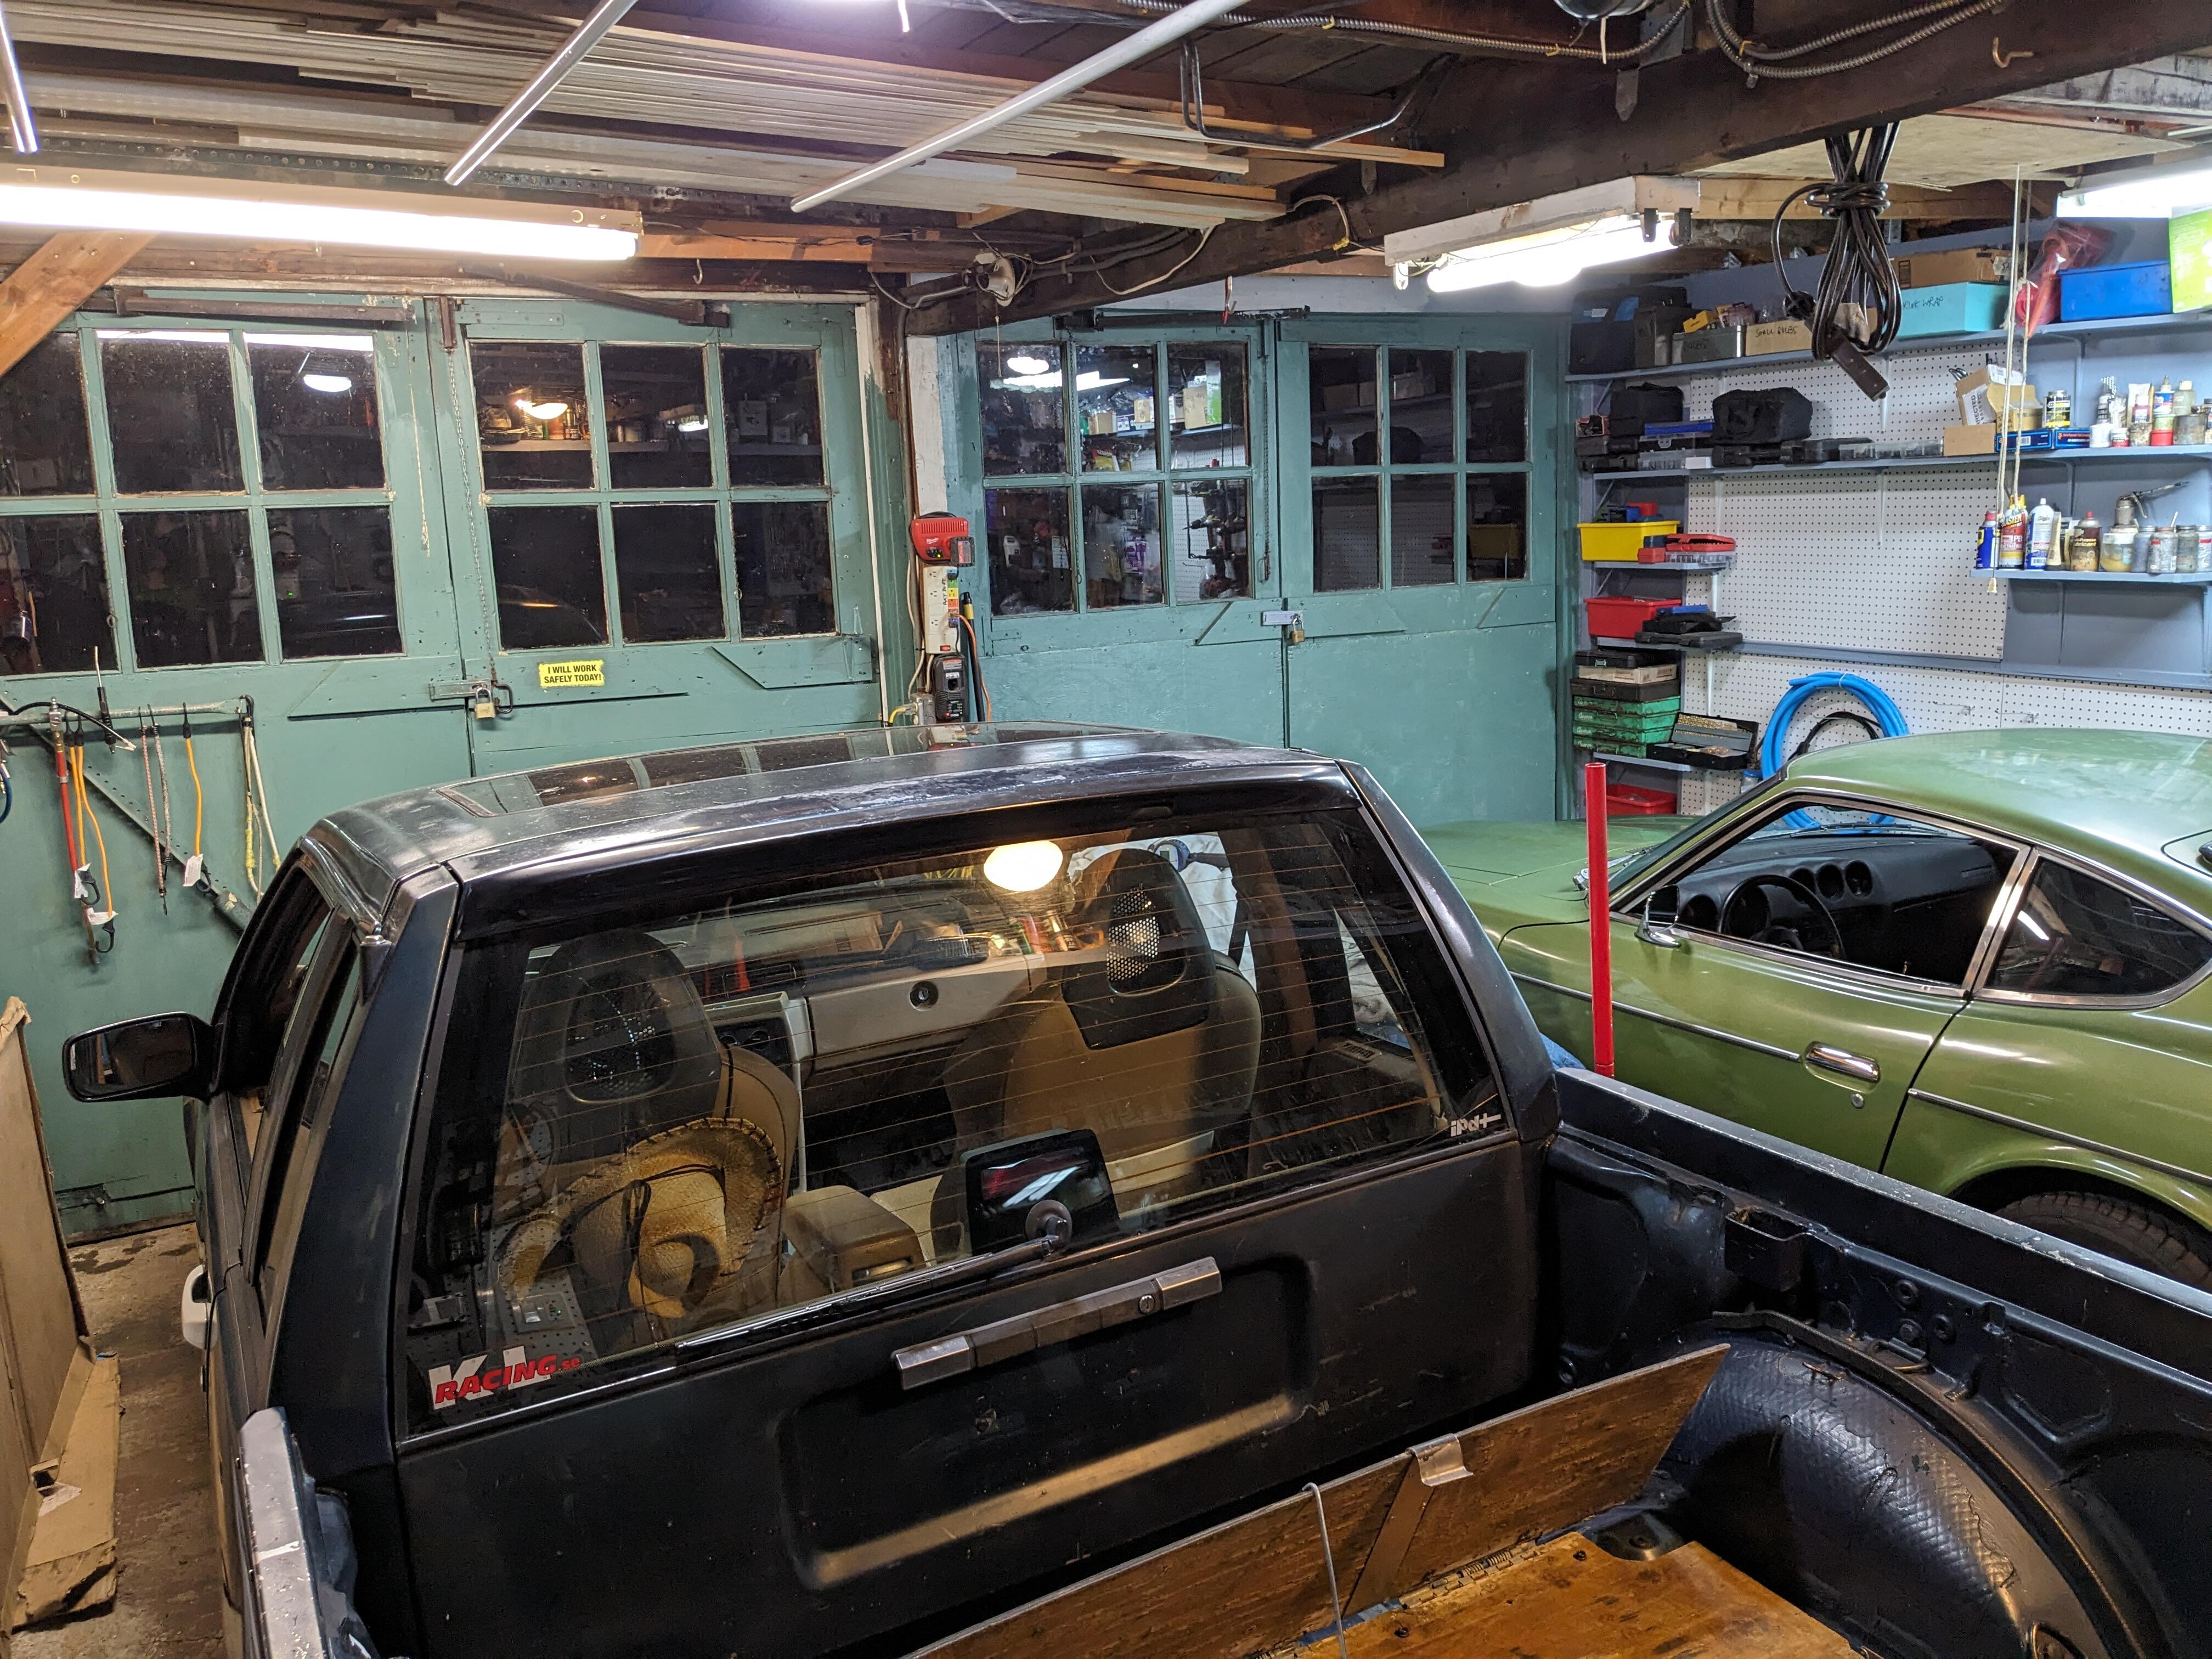
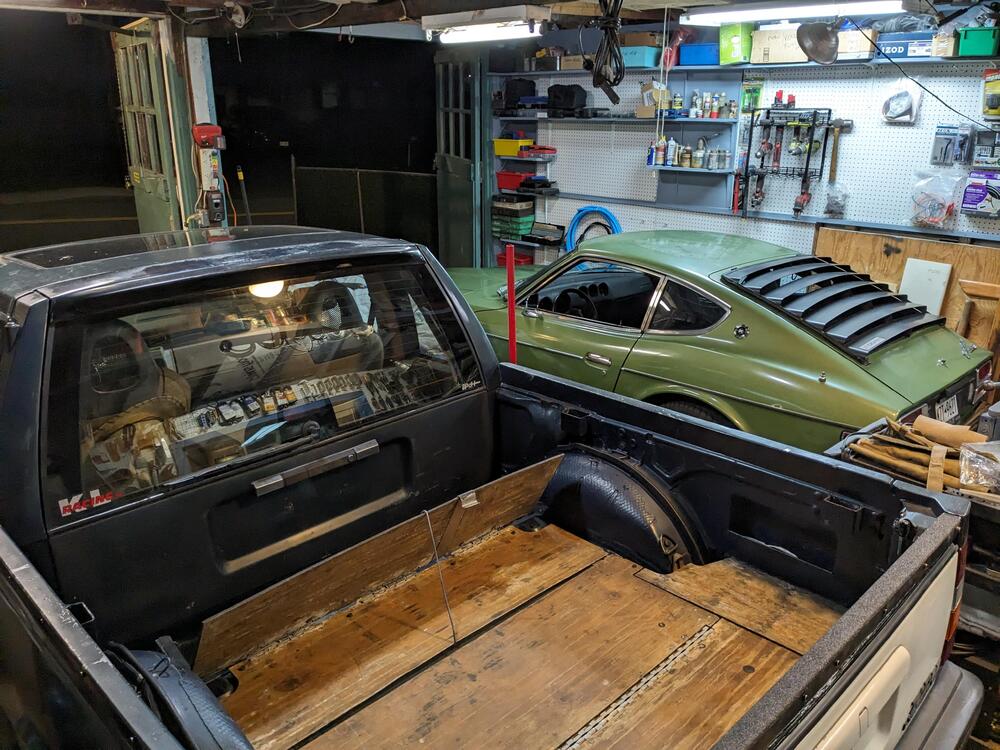
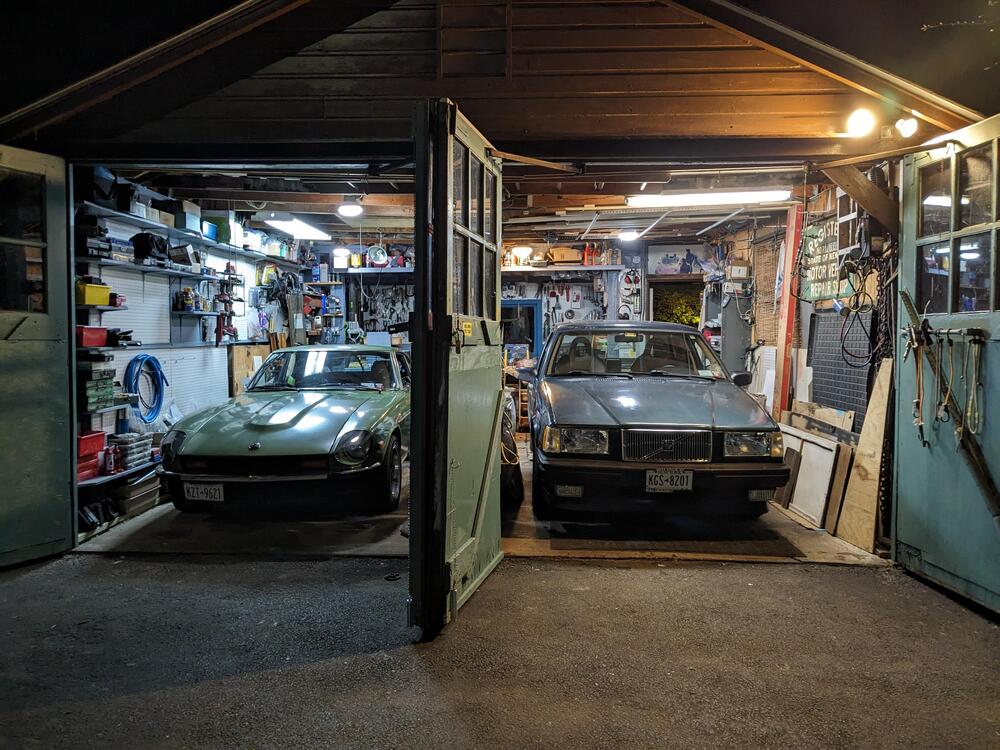
Fiat is now gone, making space for the pickup alongside the Z

-
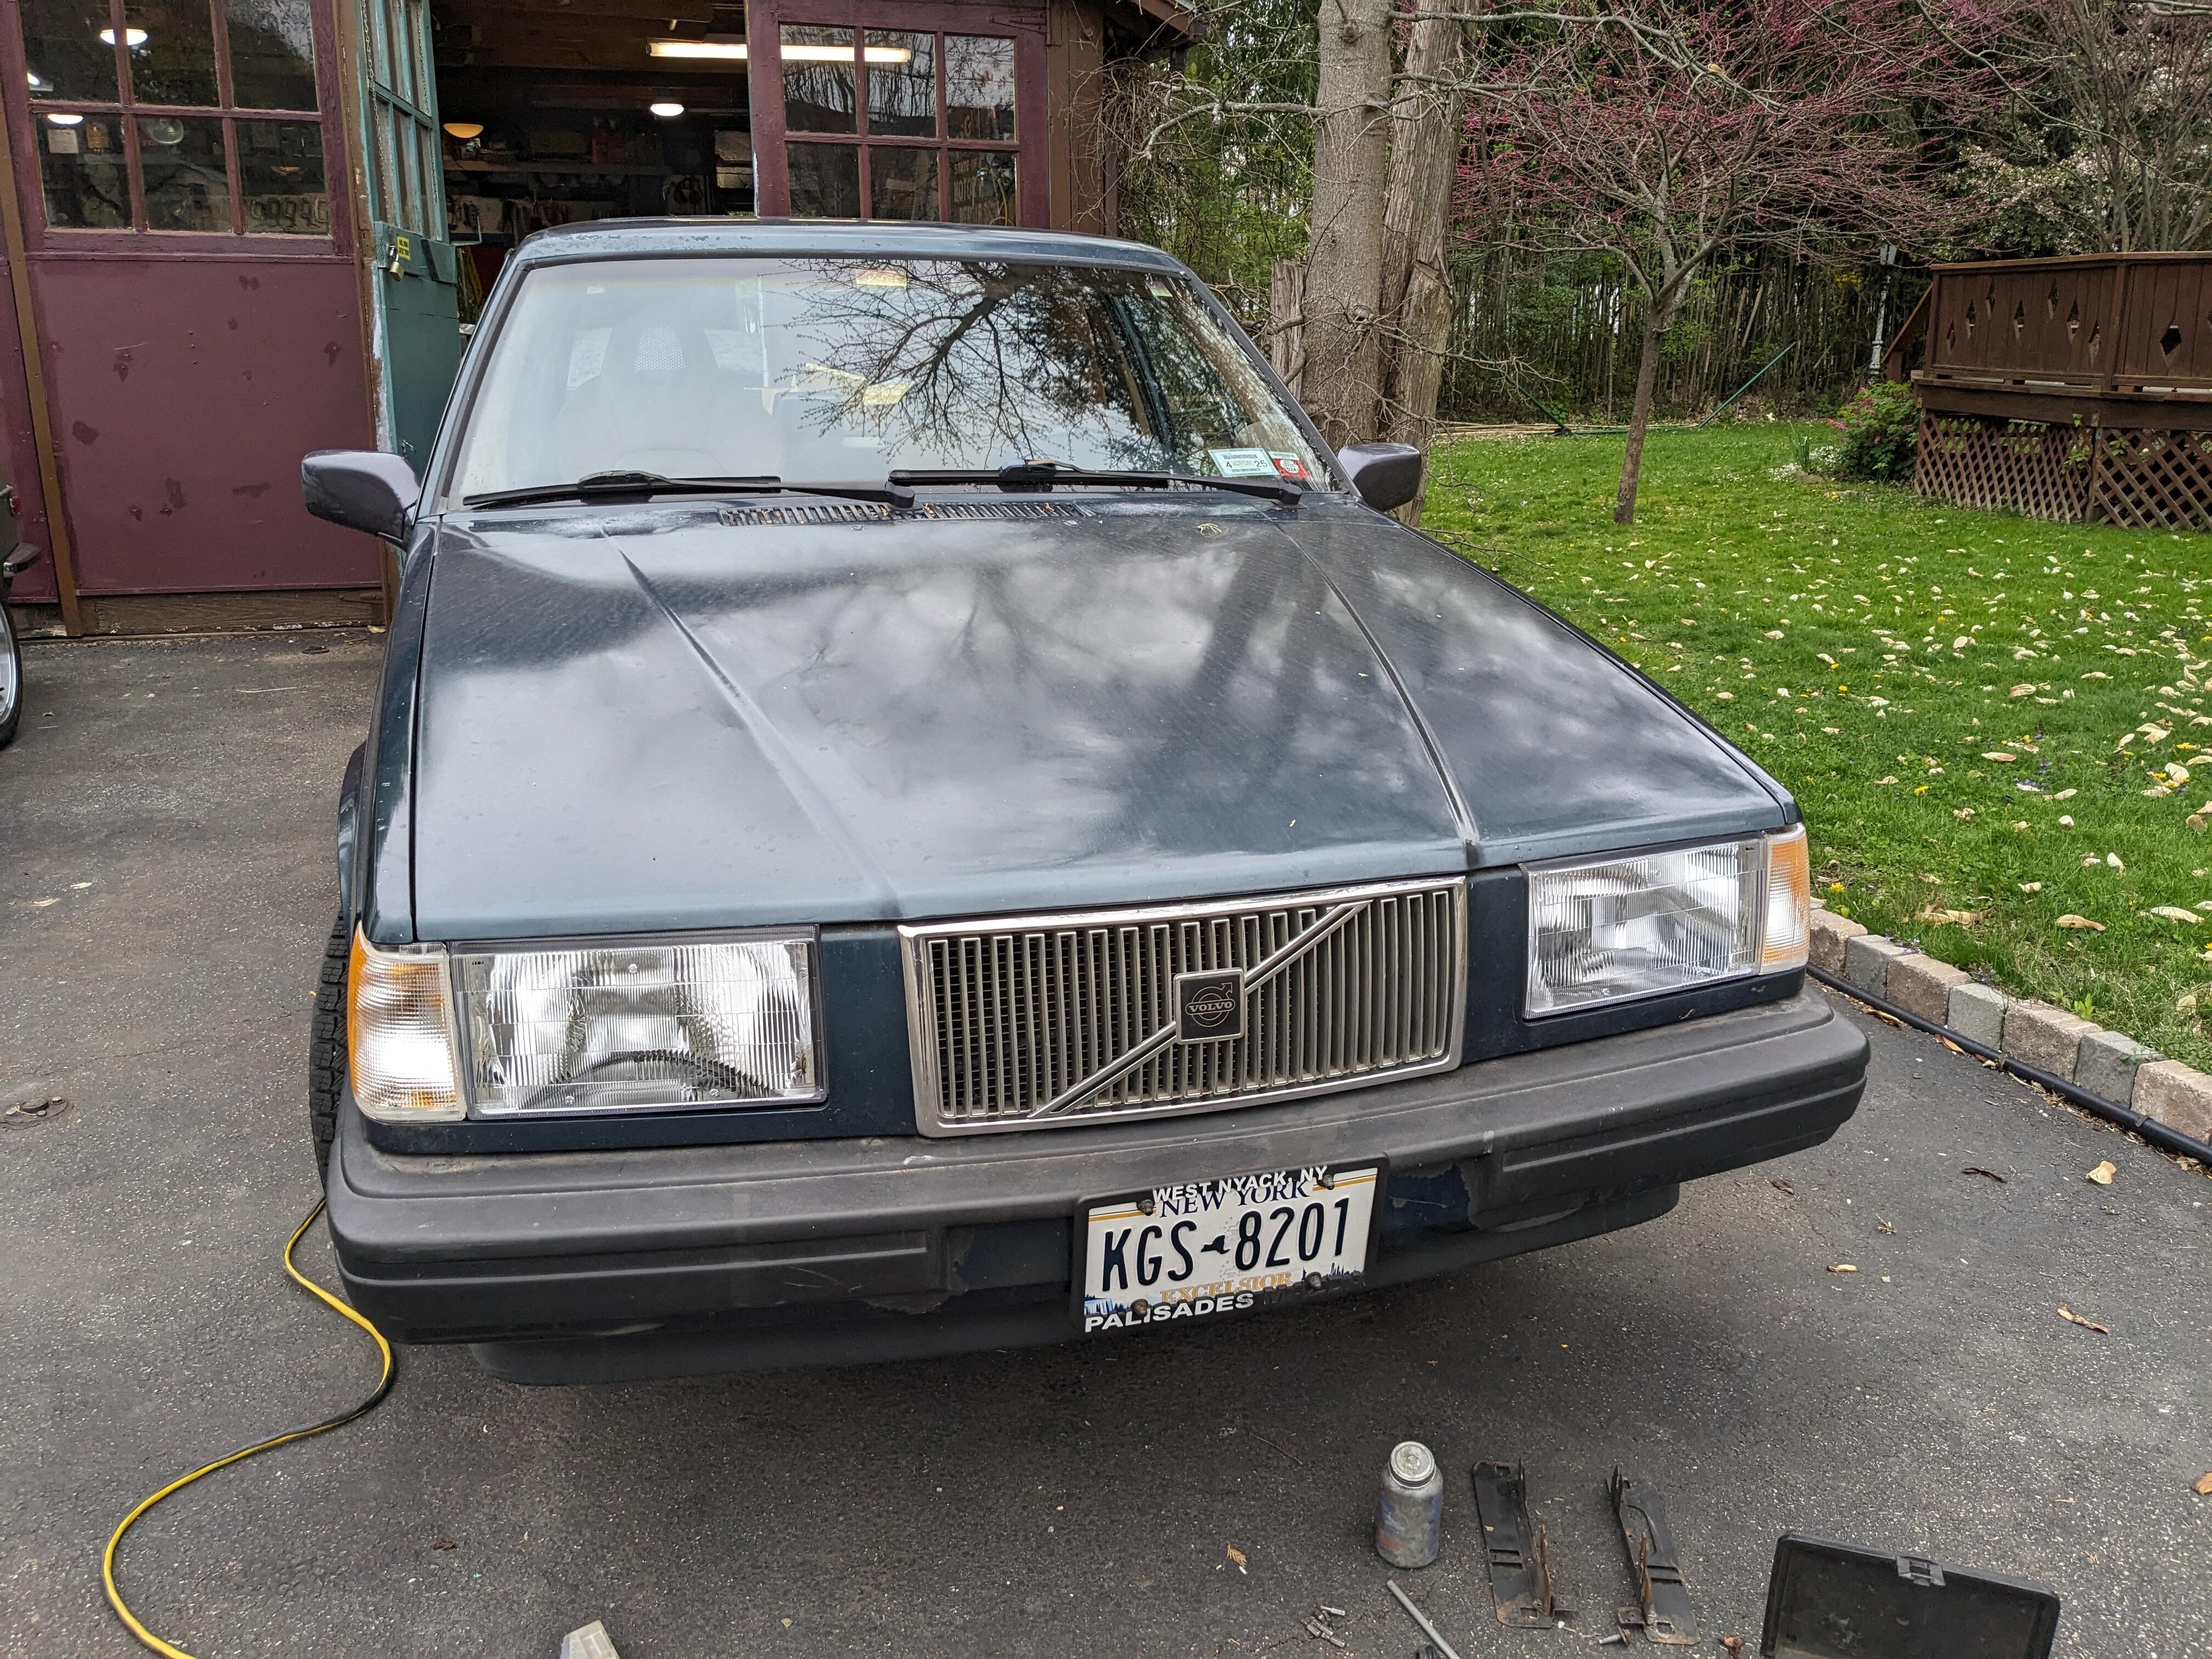
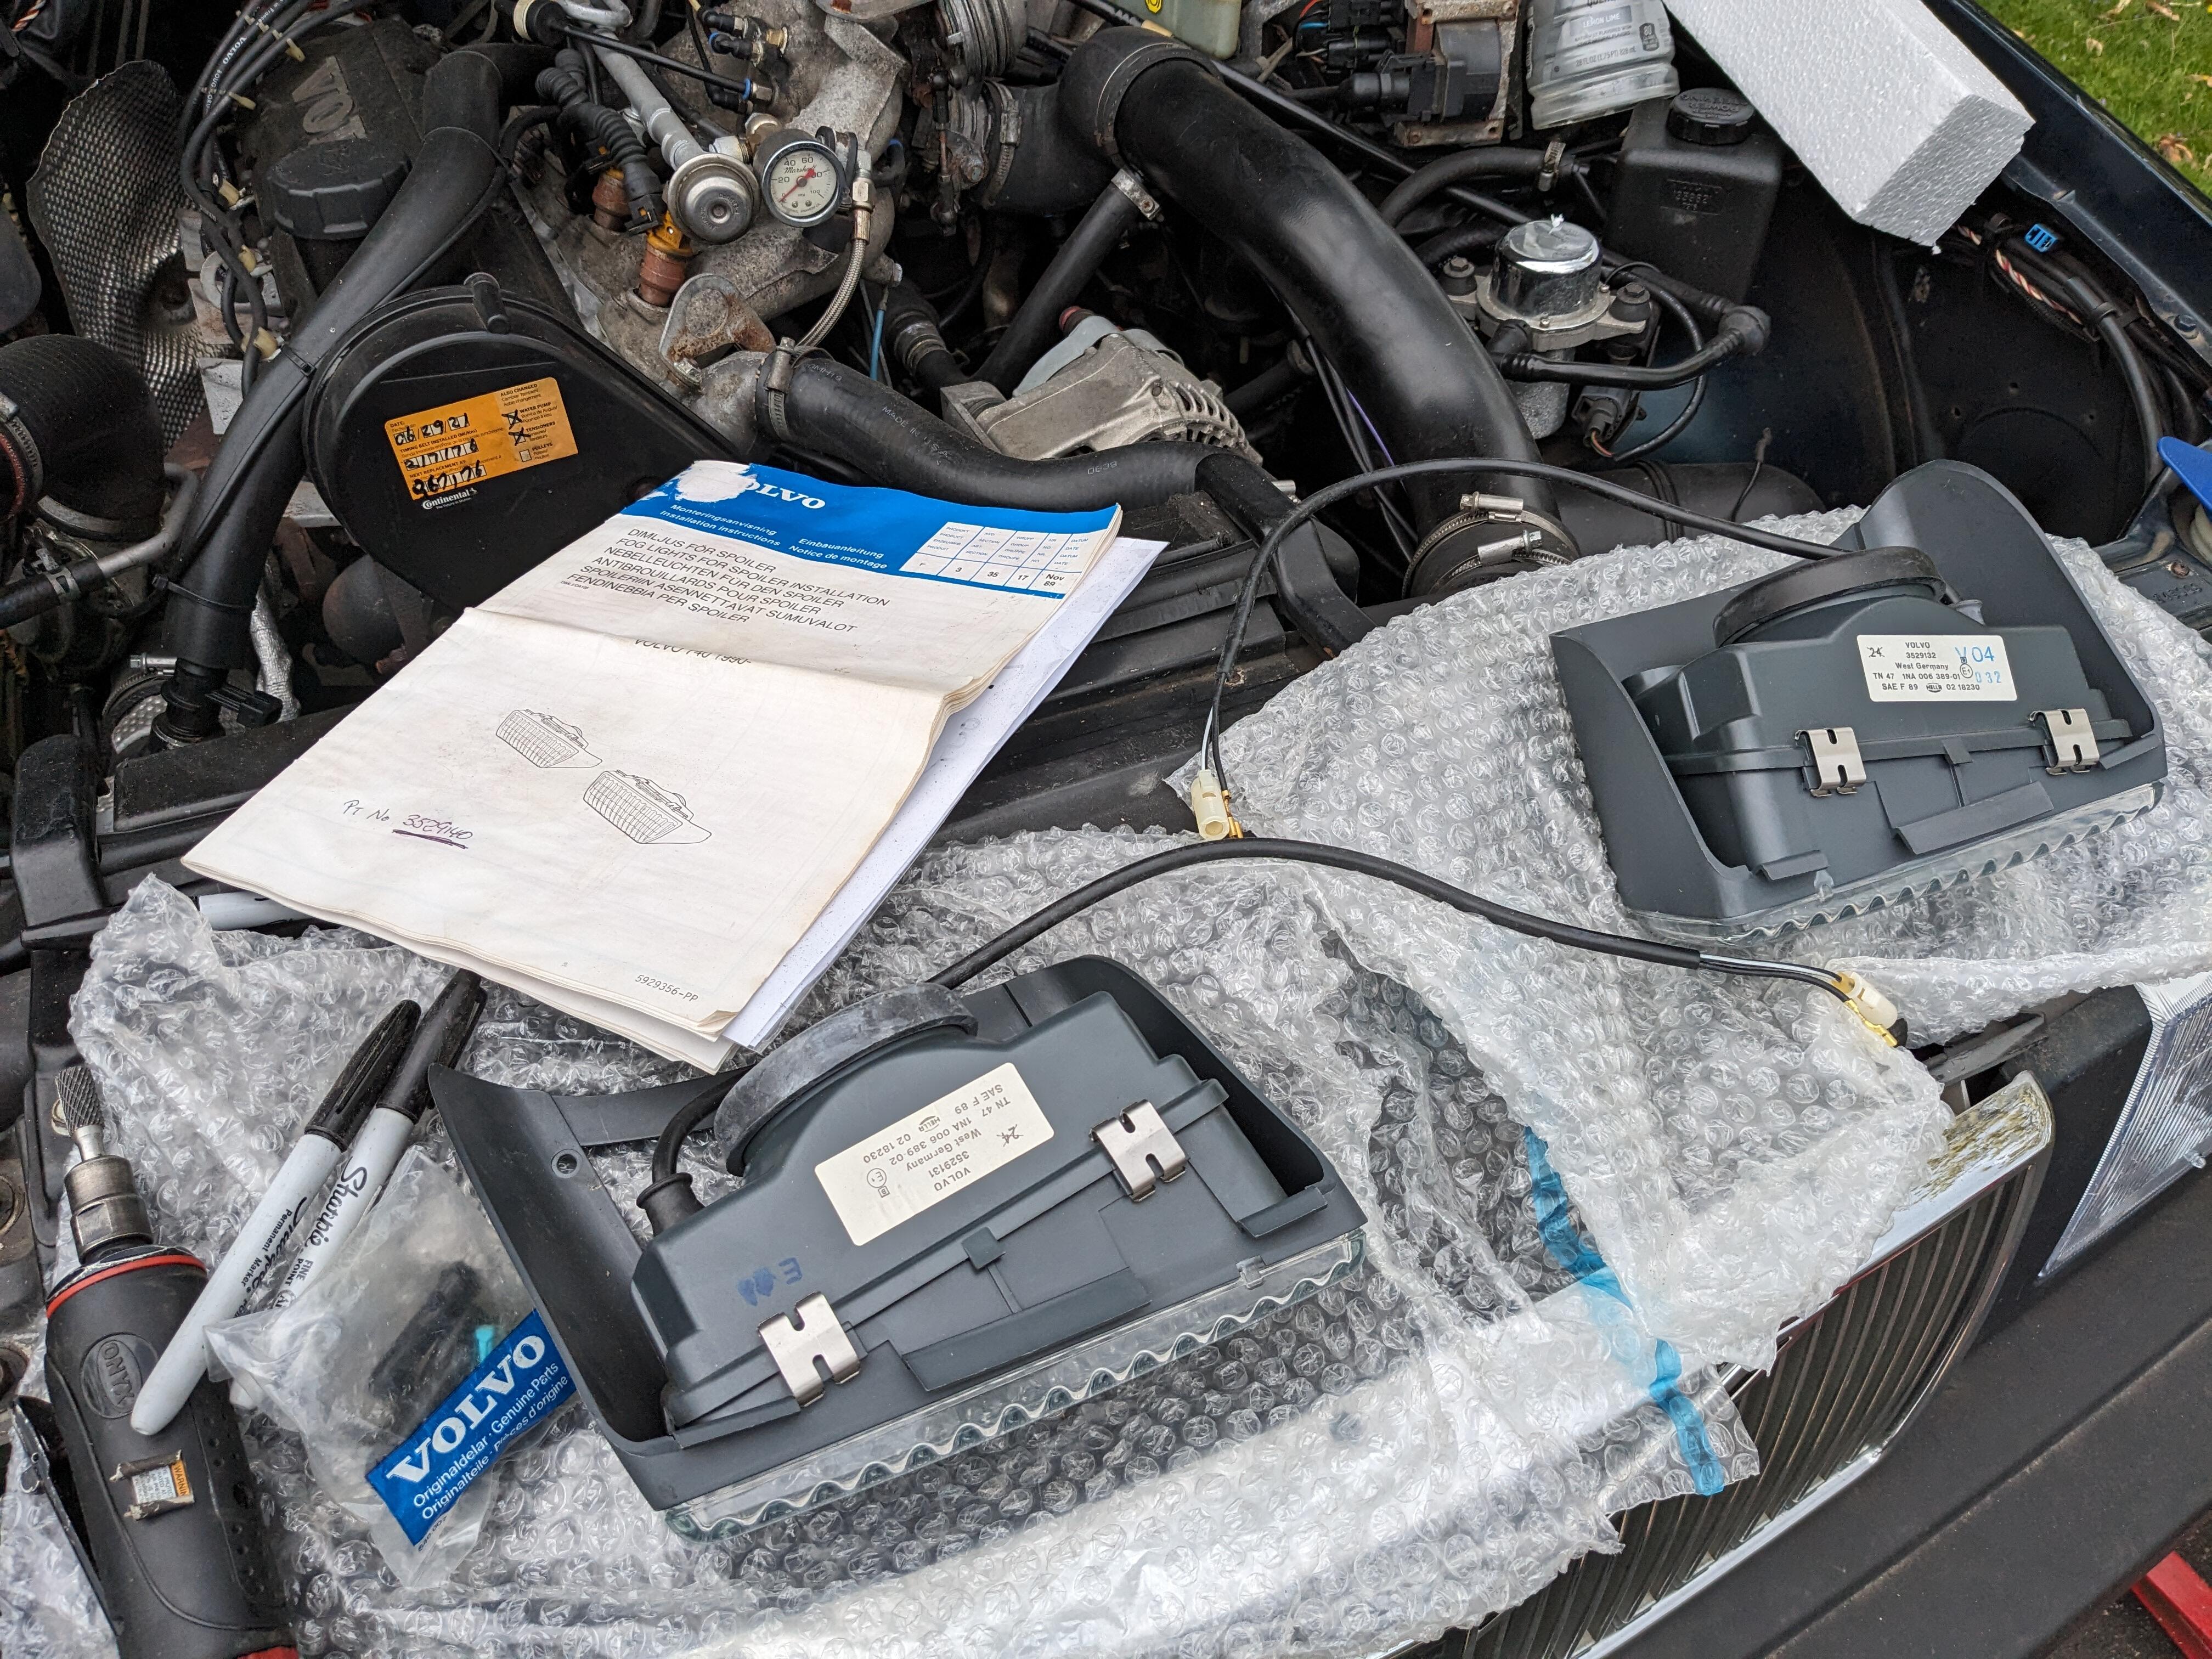
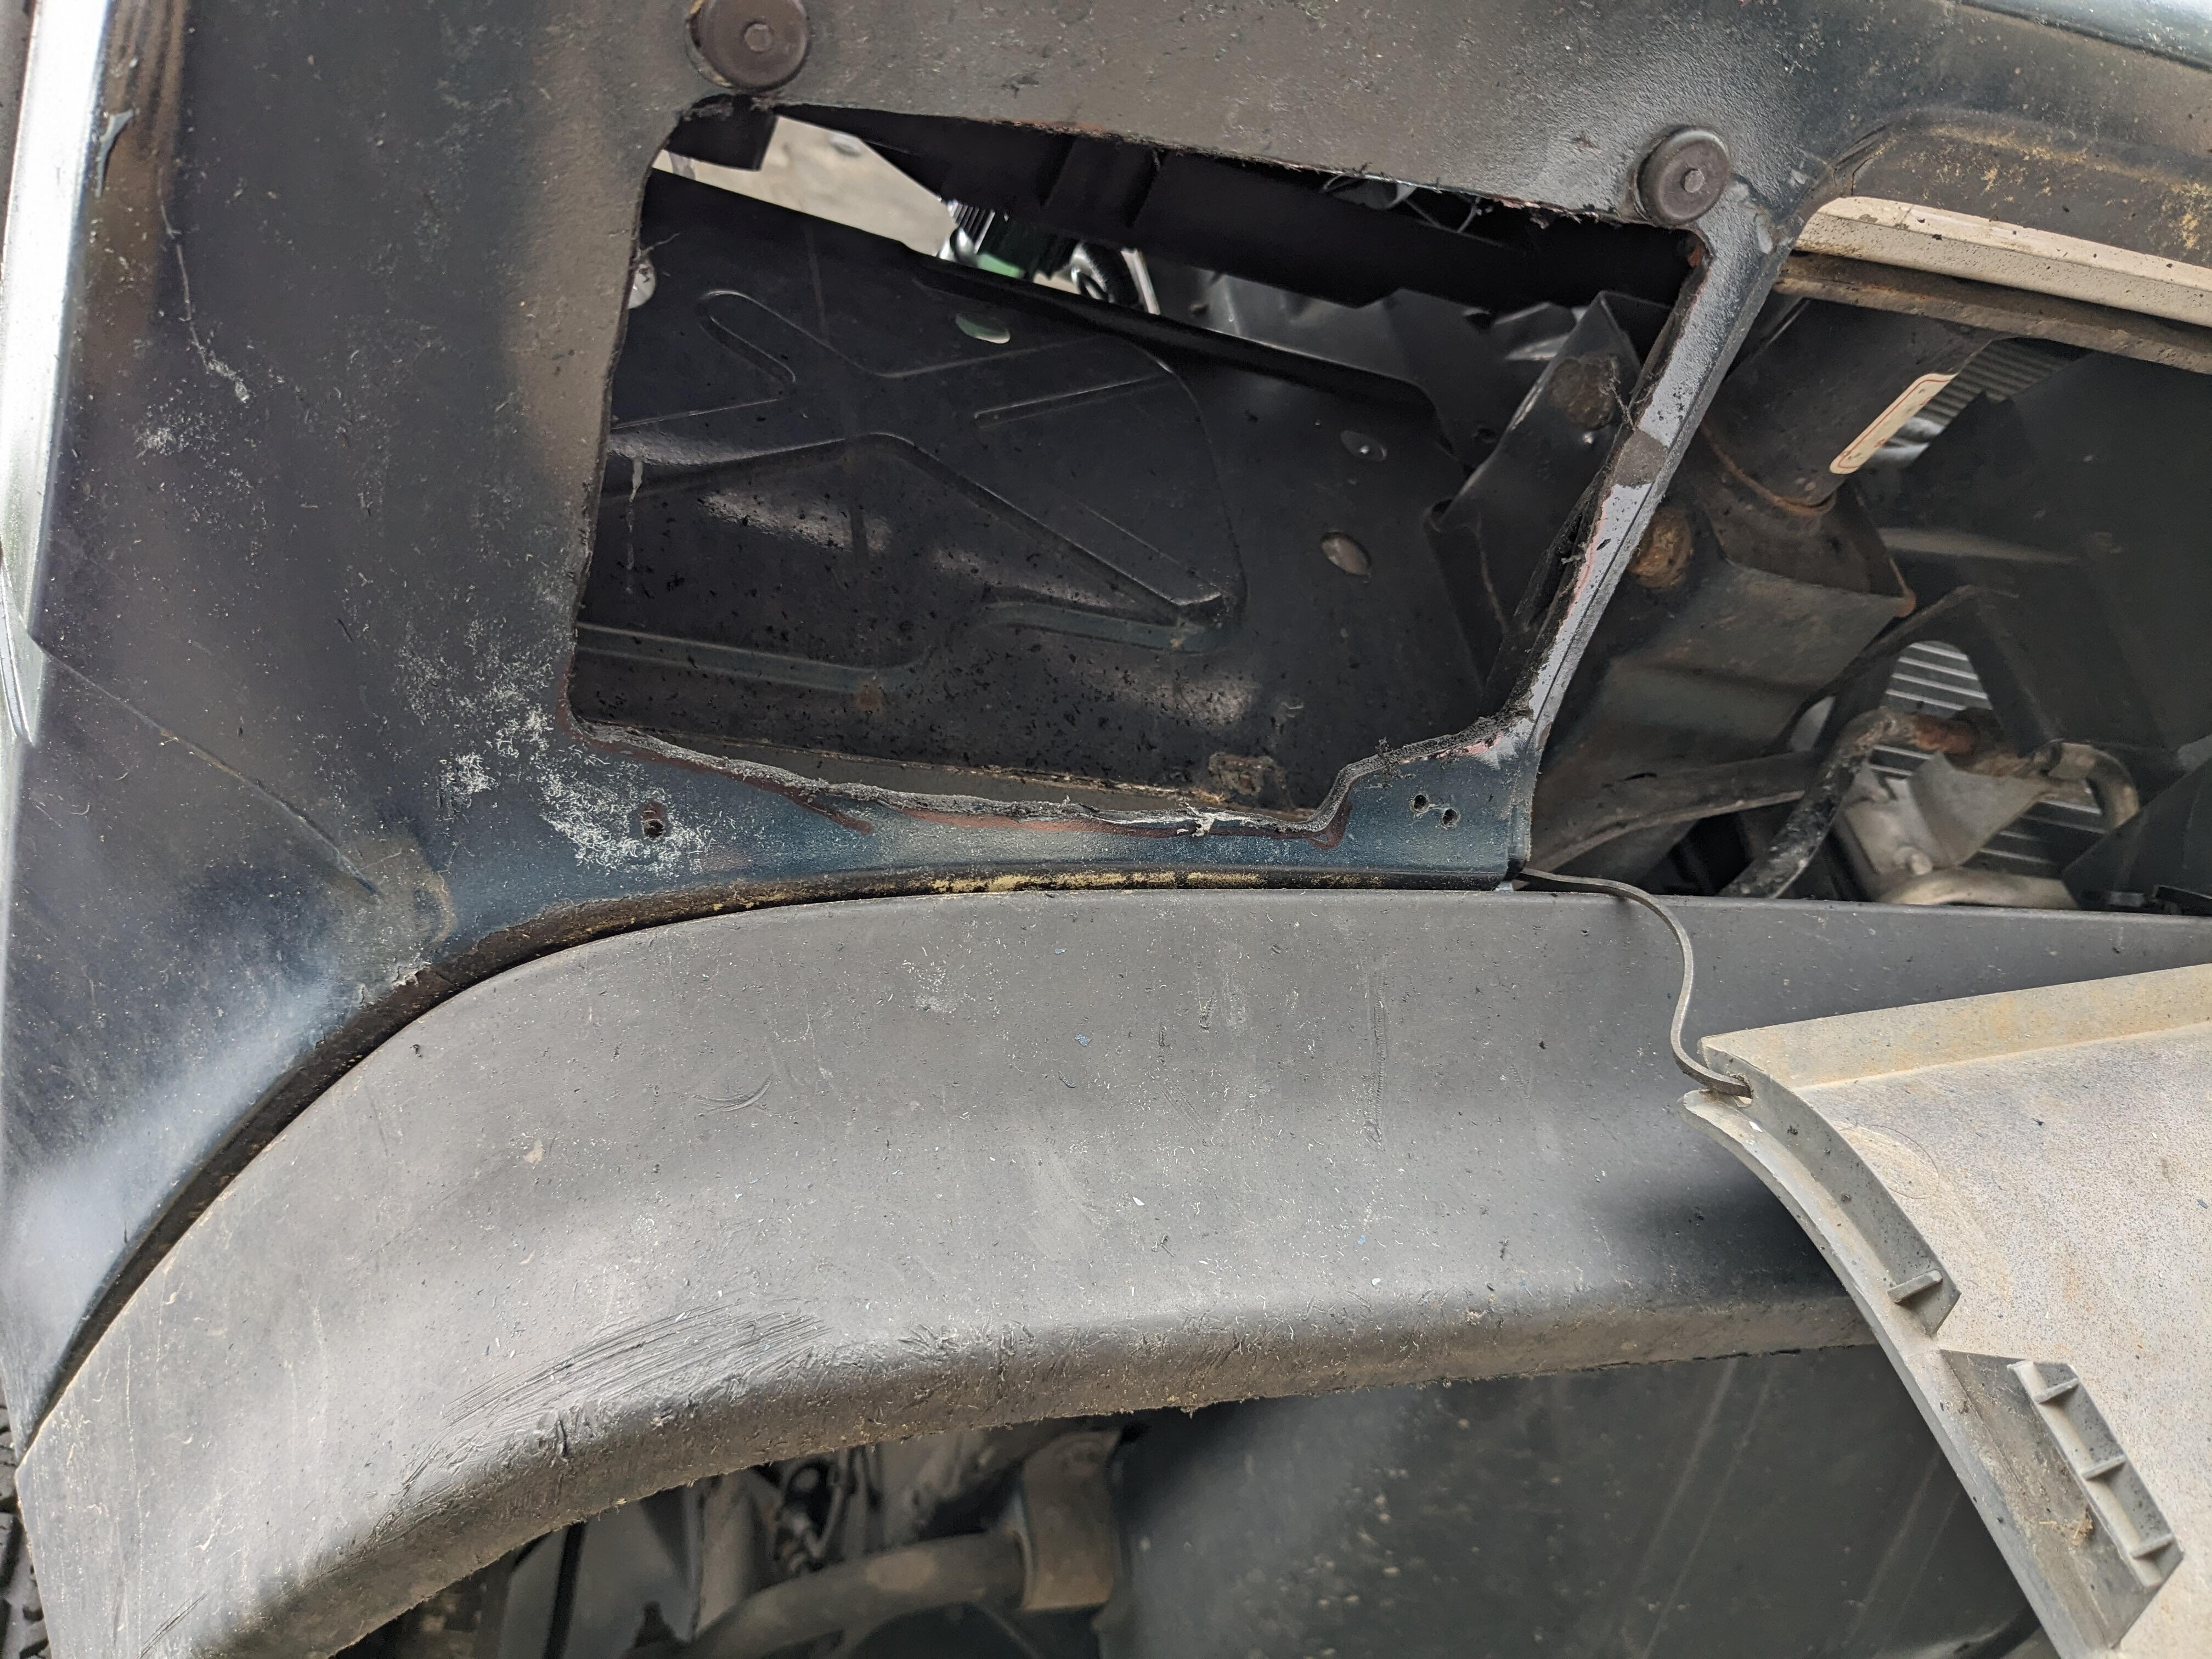
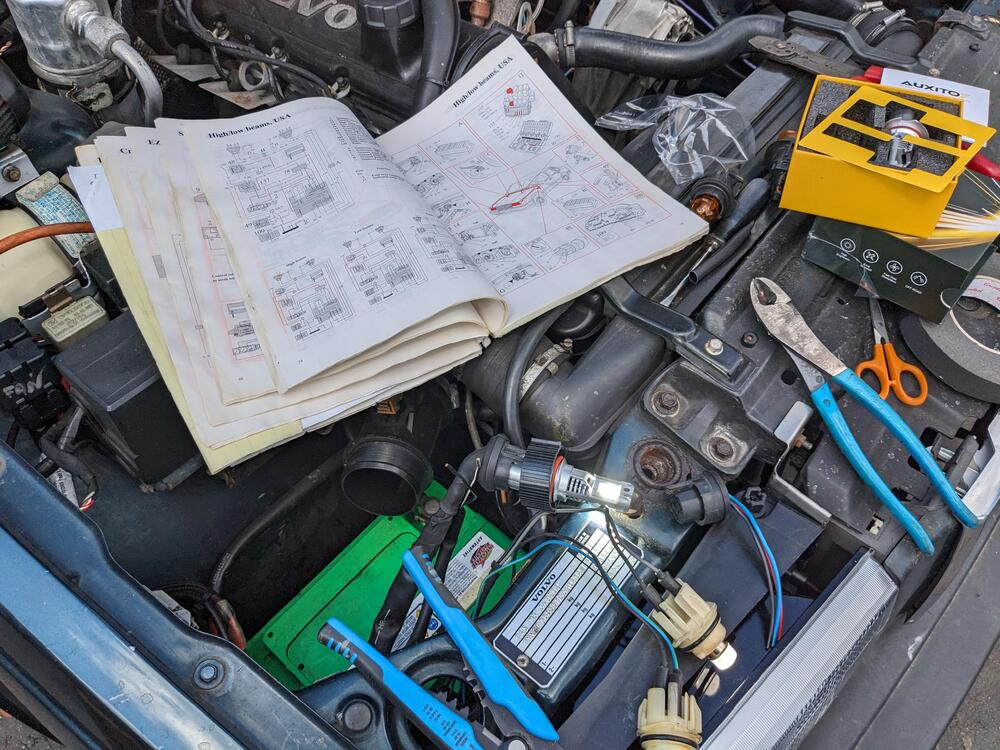
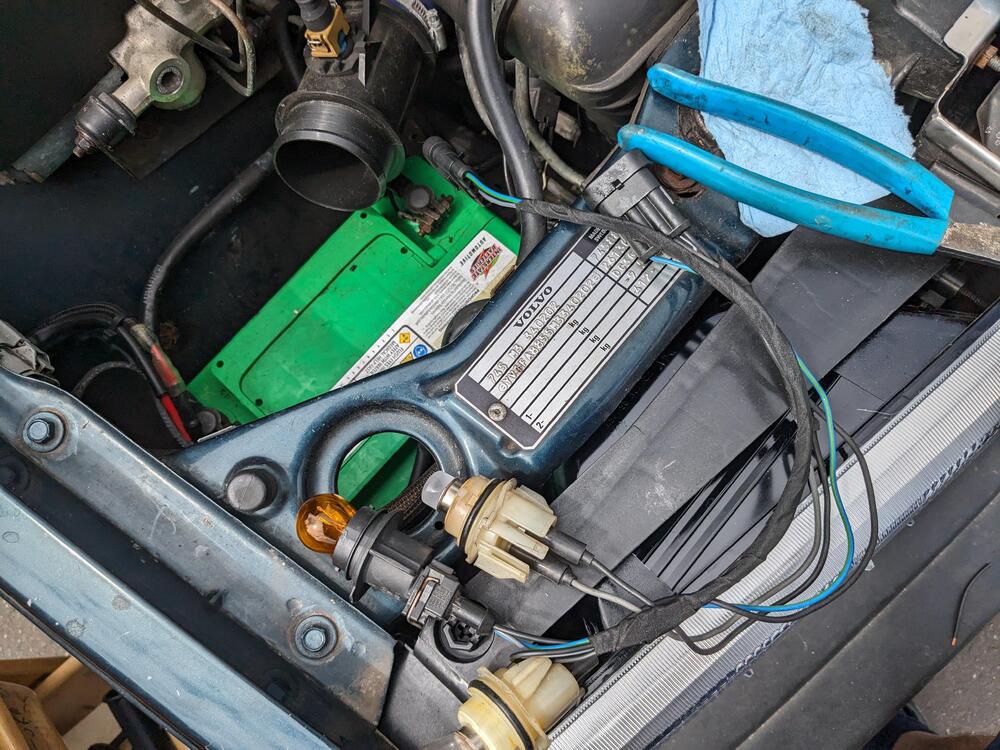
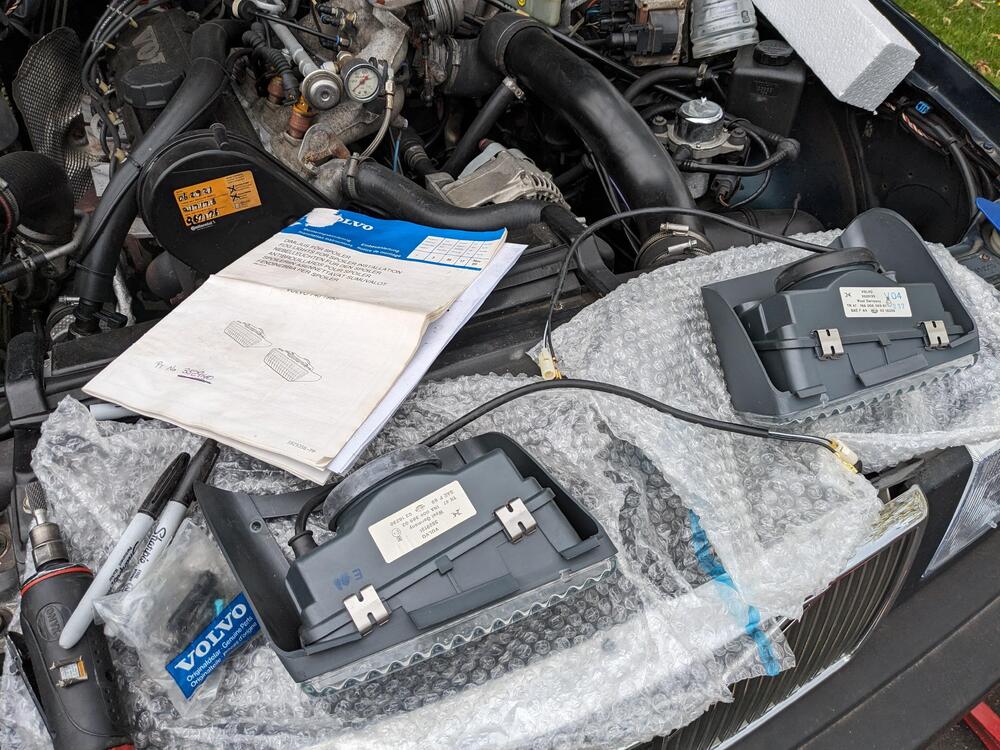
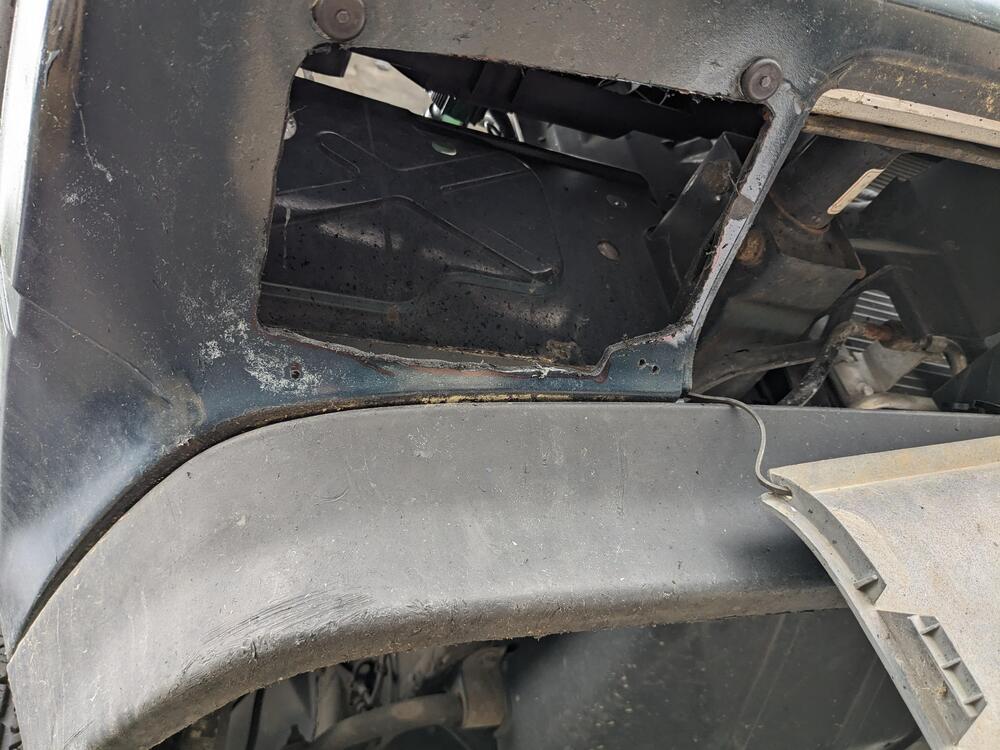
Another side step while I'm waiting for the Z spoilers to get painted. On the 740, I reverted to the original headlamp arrangement - these have plastic lenses vs the glass of the EU version I had installed a couple years ago, however they are much easier to get the beam properly adjusted. Also added the factory fog lamp kit I bought a couple years back. Had to make new support brackets for the lamp units , also used to anchor the grille brackets Test fit alignment Rewiring for the US spec bulbs & sockets NOS foglamp kit Cut opening using provided templates Anchored harness just case bracket gets hit


-
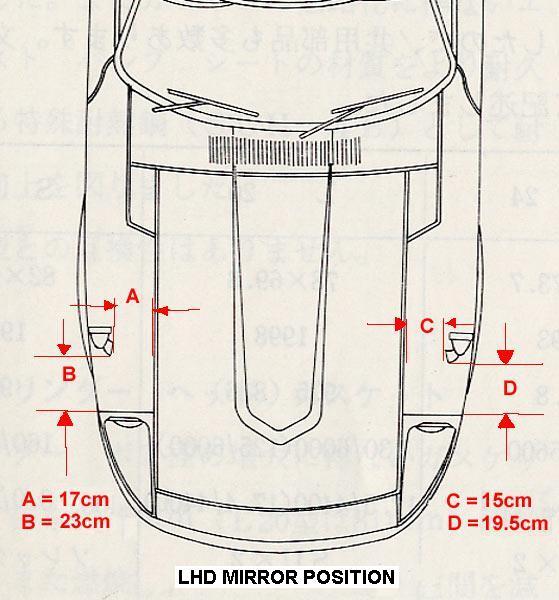
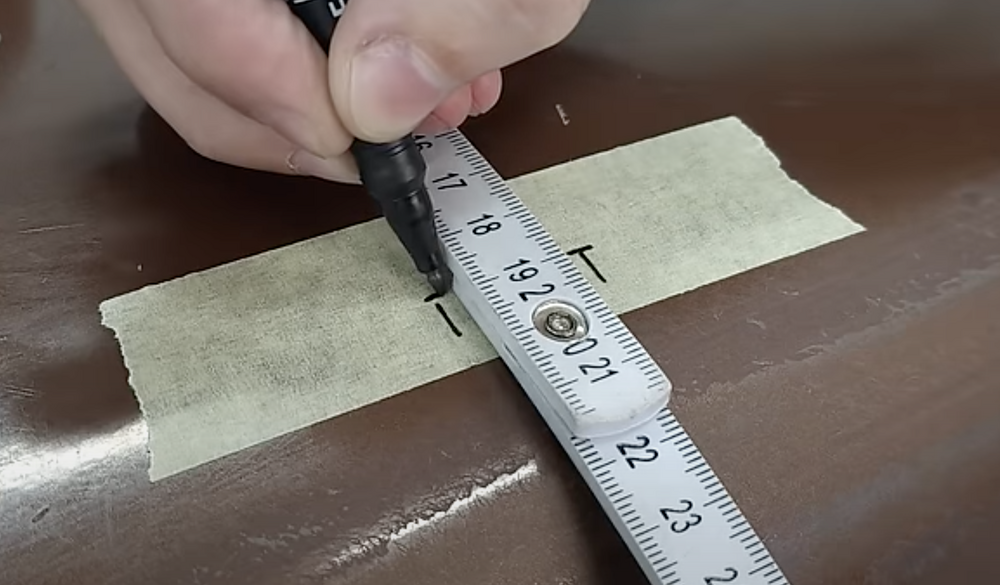
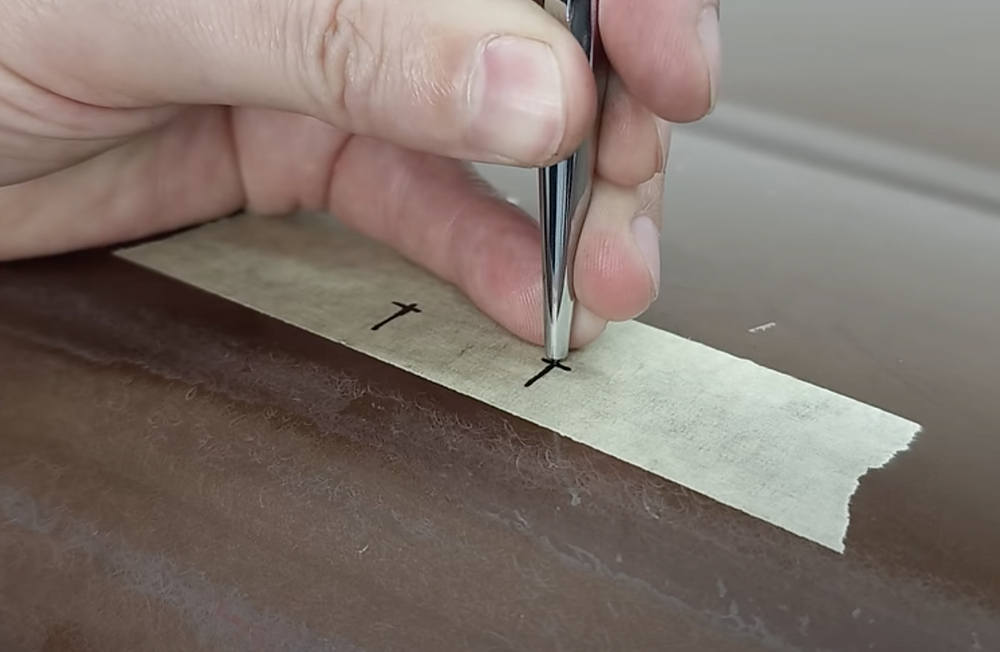
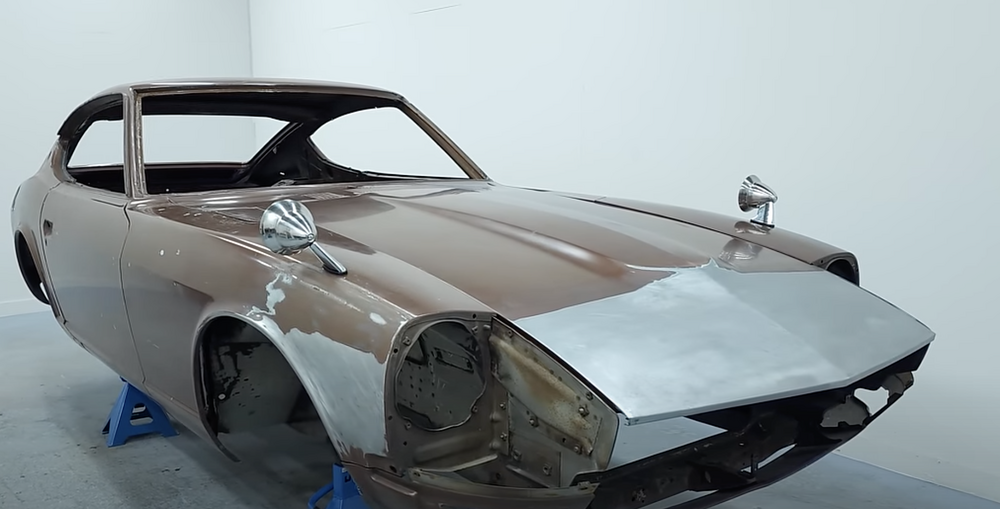
Thank you for the links! I do wish someone had actually photographed their car with the physical hole location when they did it, vs. a diagram of where to place the base gasket. Not one of the threads actually has any install pics besides the diagram. I'll have to add mine when I do them. One guy adjusted it for LHD There is a very meticulous YT Z restoration video ongoing series - I took screen shots from his Pt. 2 video (rightside, LHD chassis)- but he only shows one side & can't tell if he made them asymmetrical - I guess he'll find out if his are not right DTR