HusseinHolland
Member
-
Joined
-
Last visited
Everything posted by HusseinHolland
-
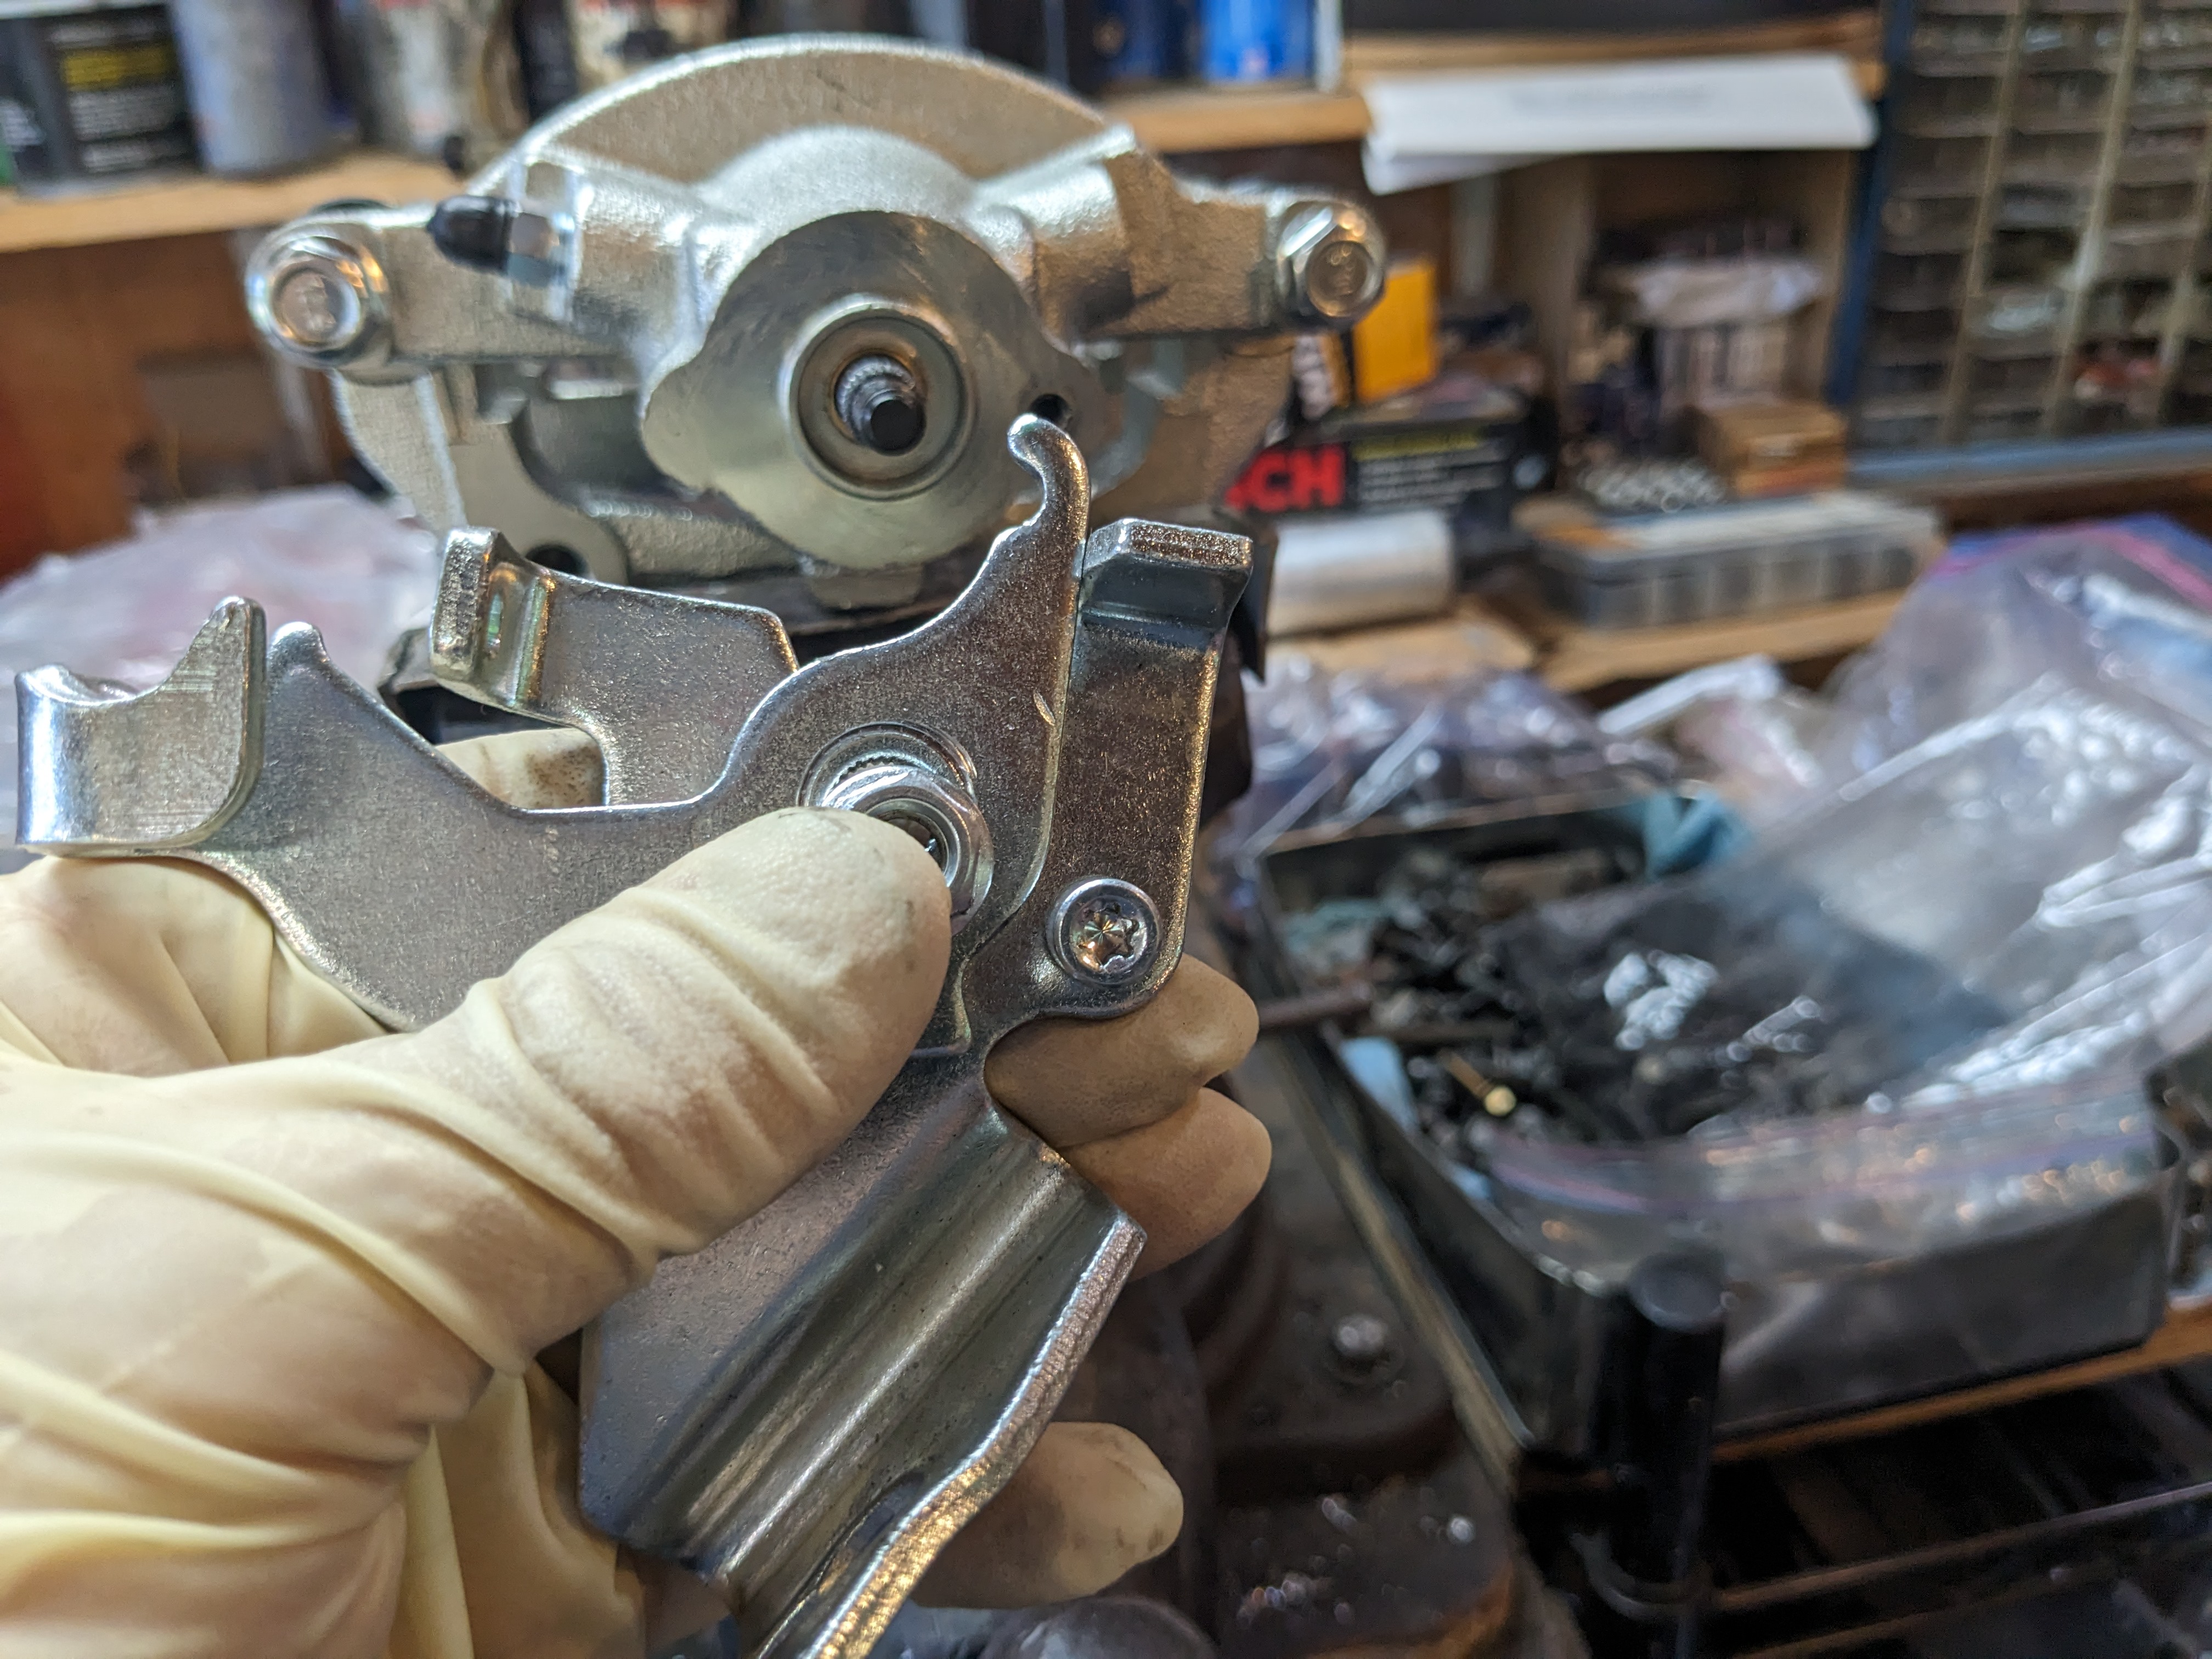
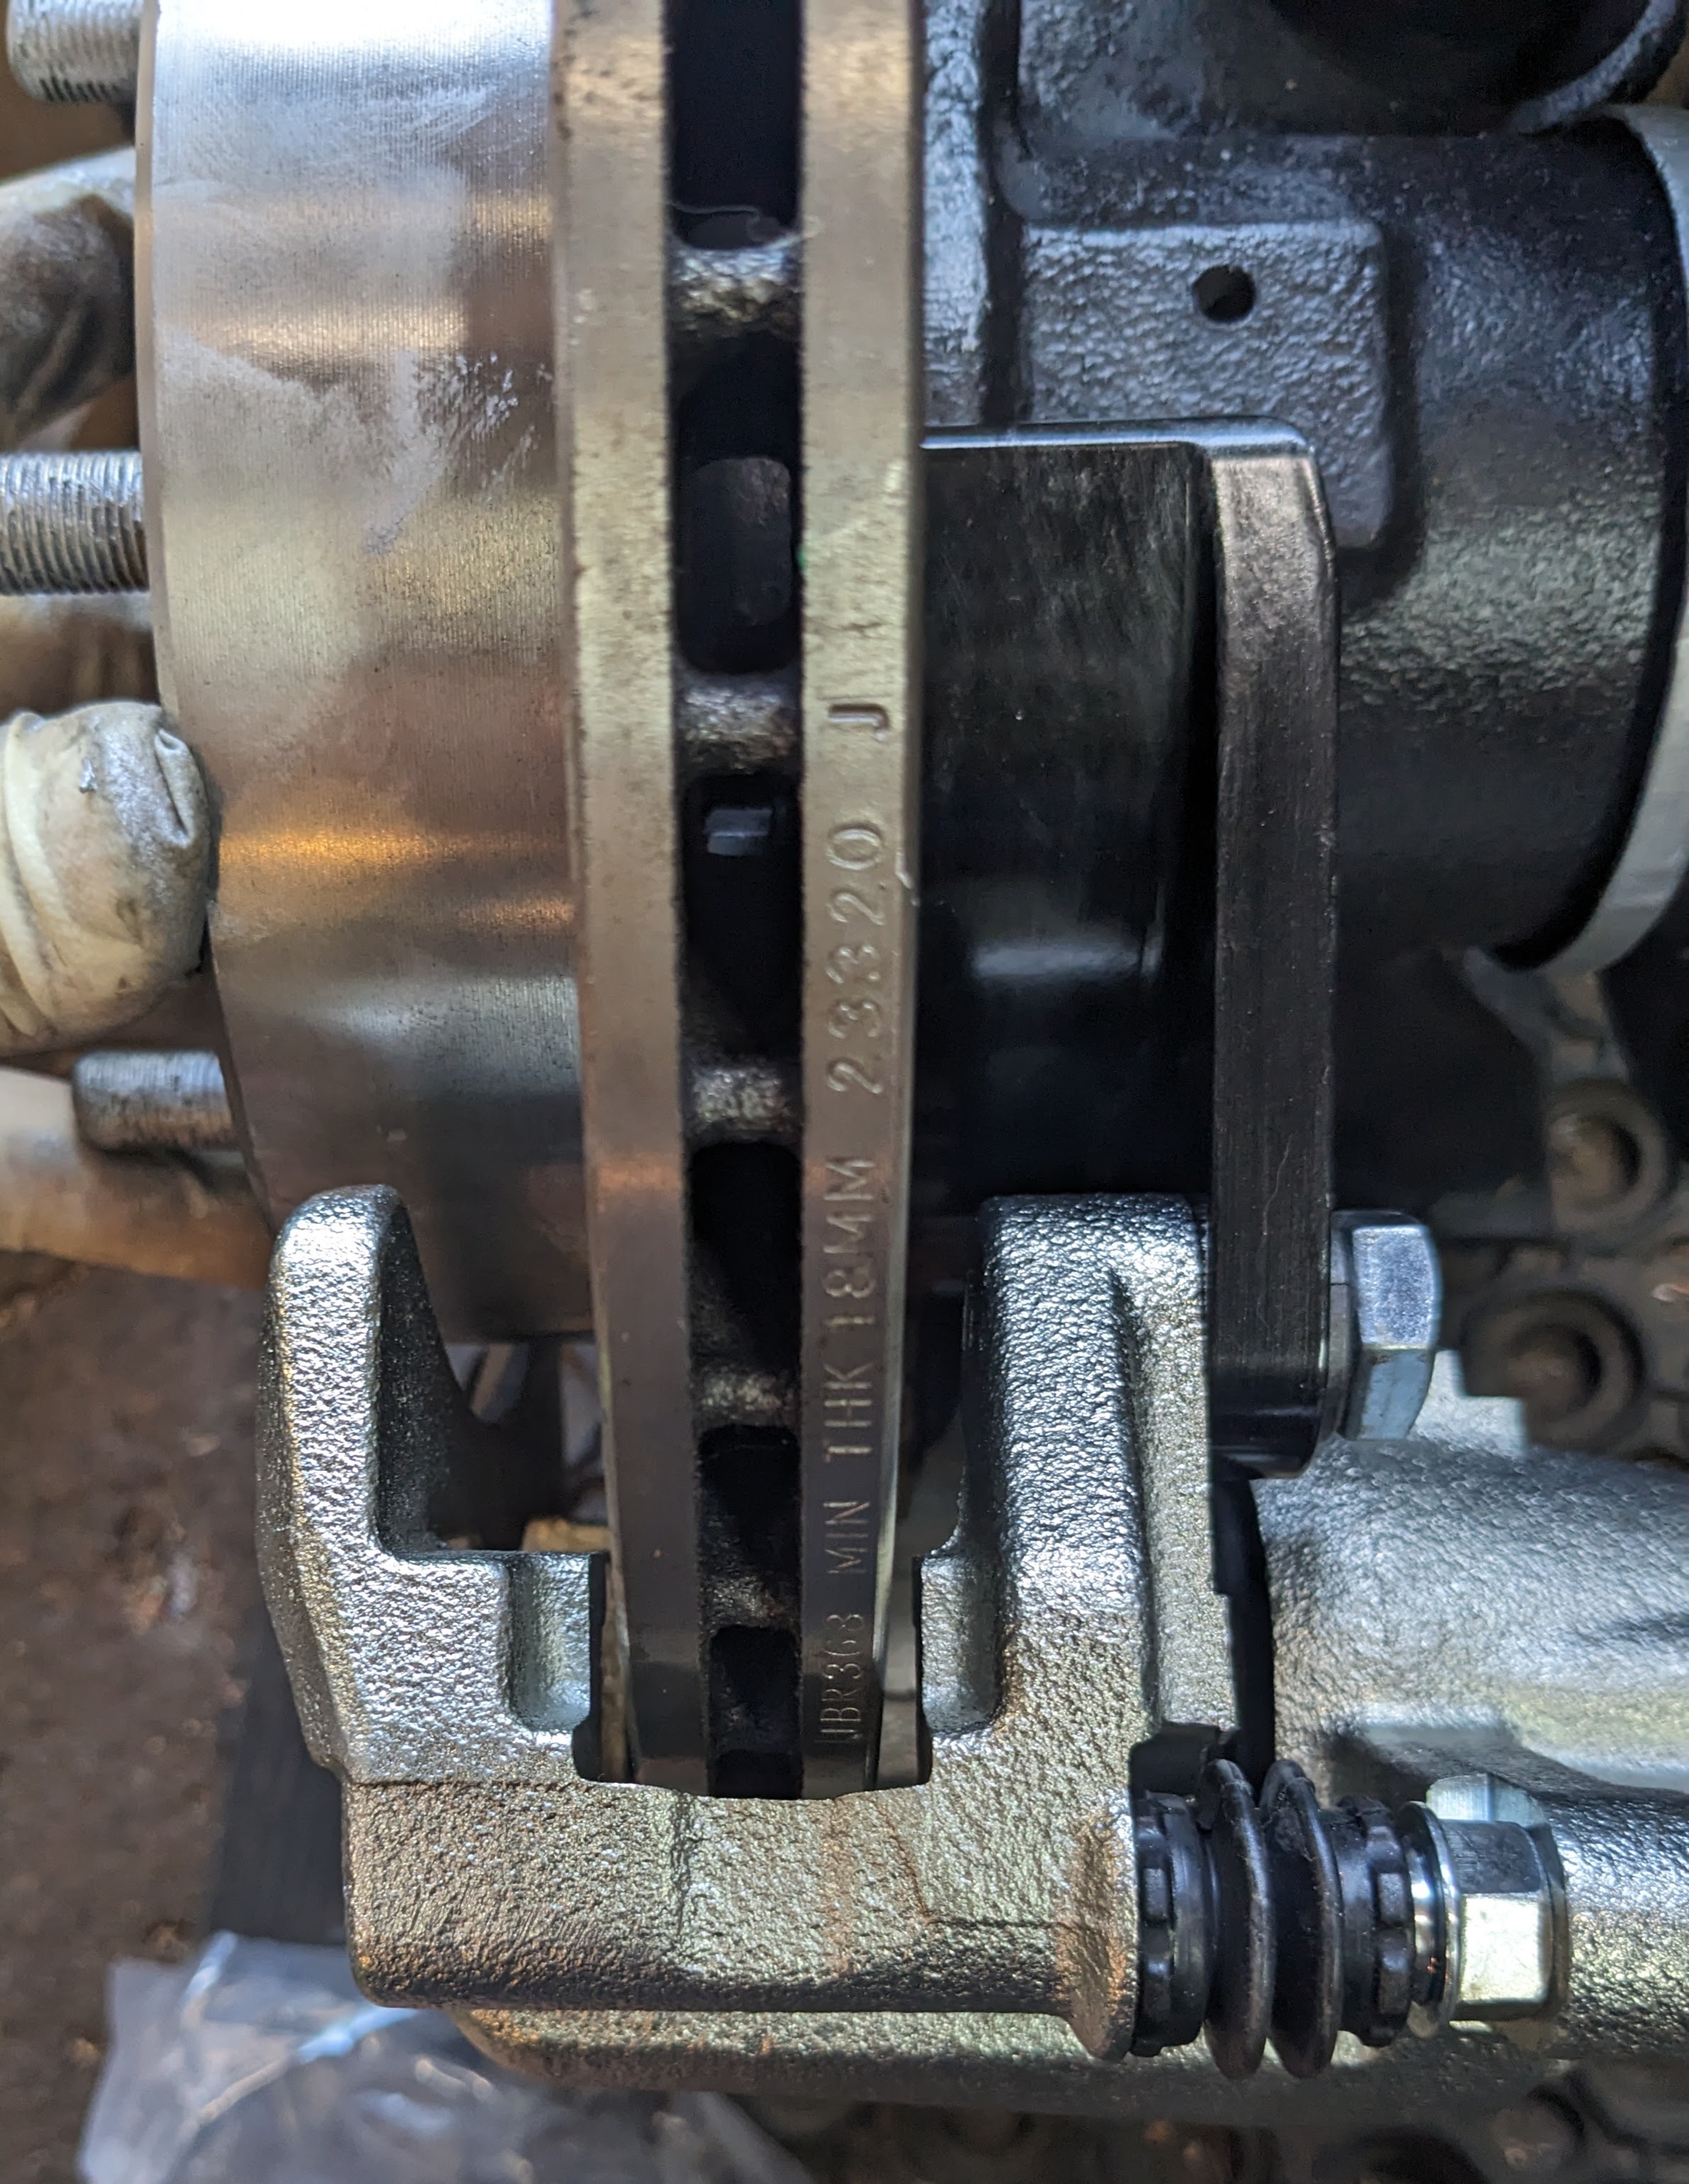
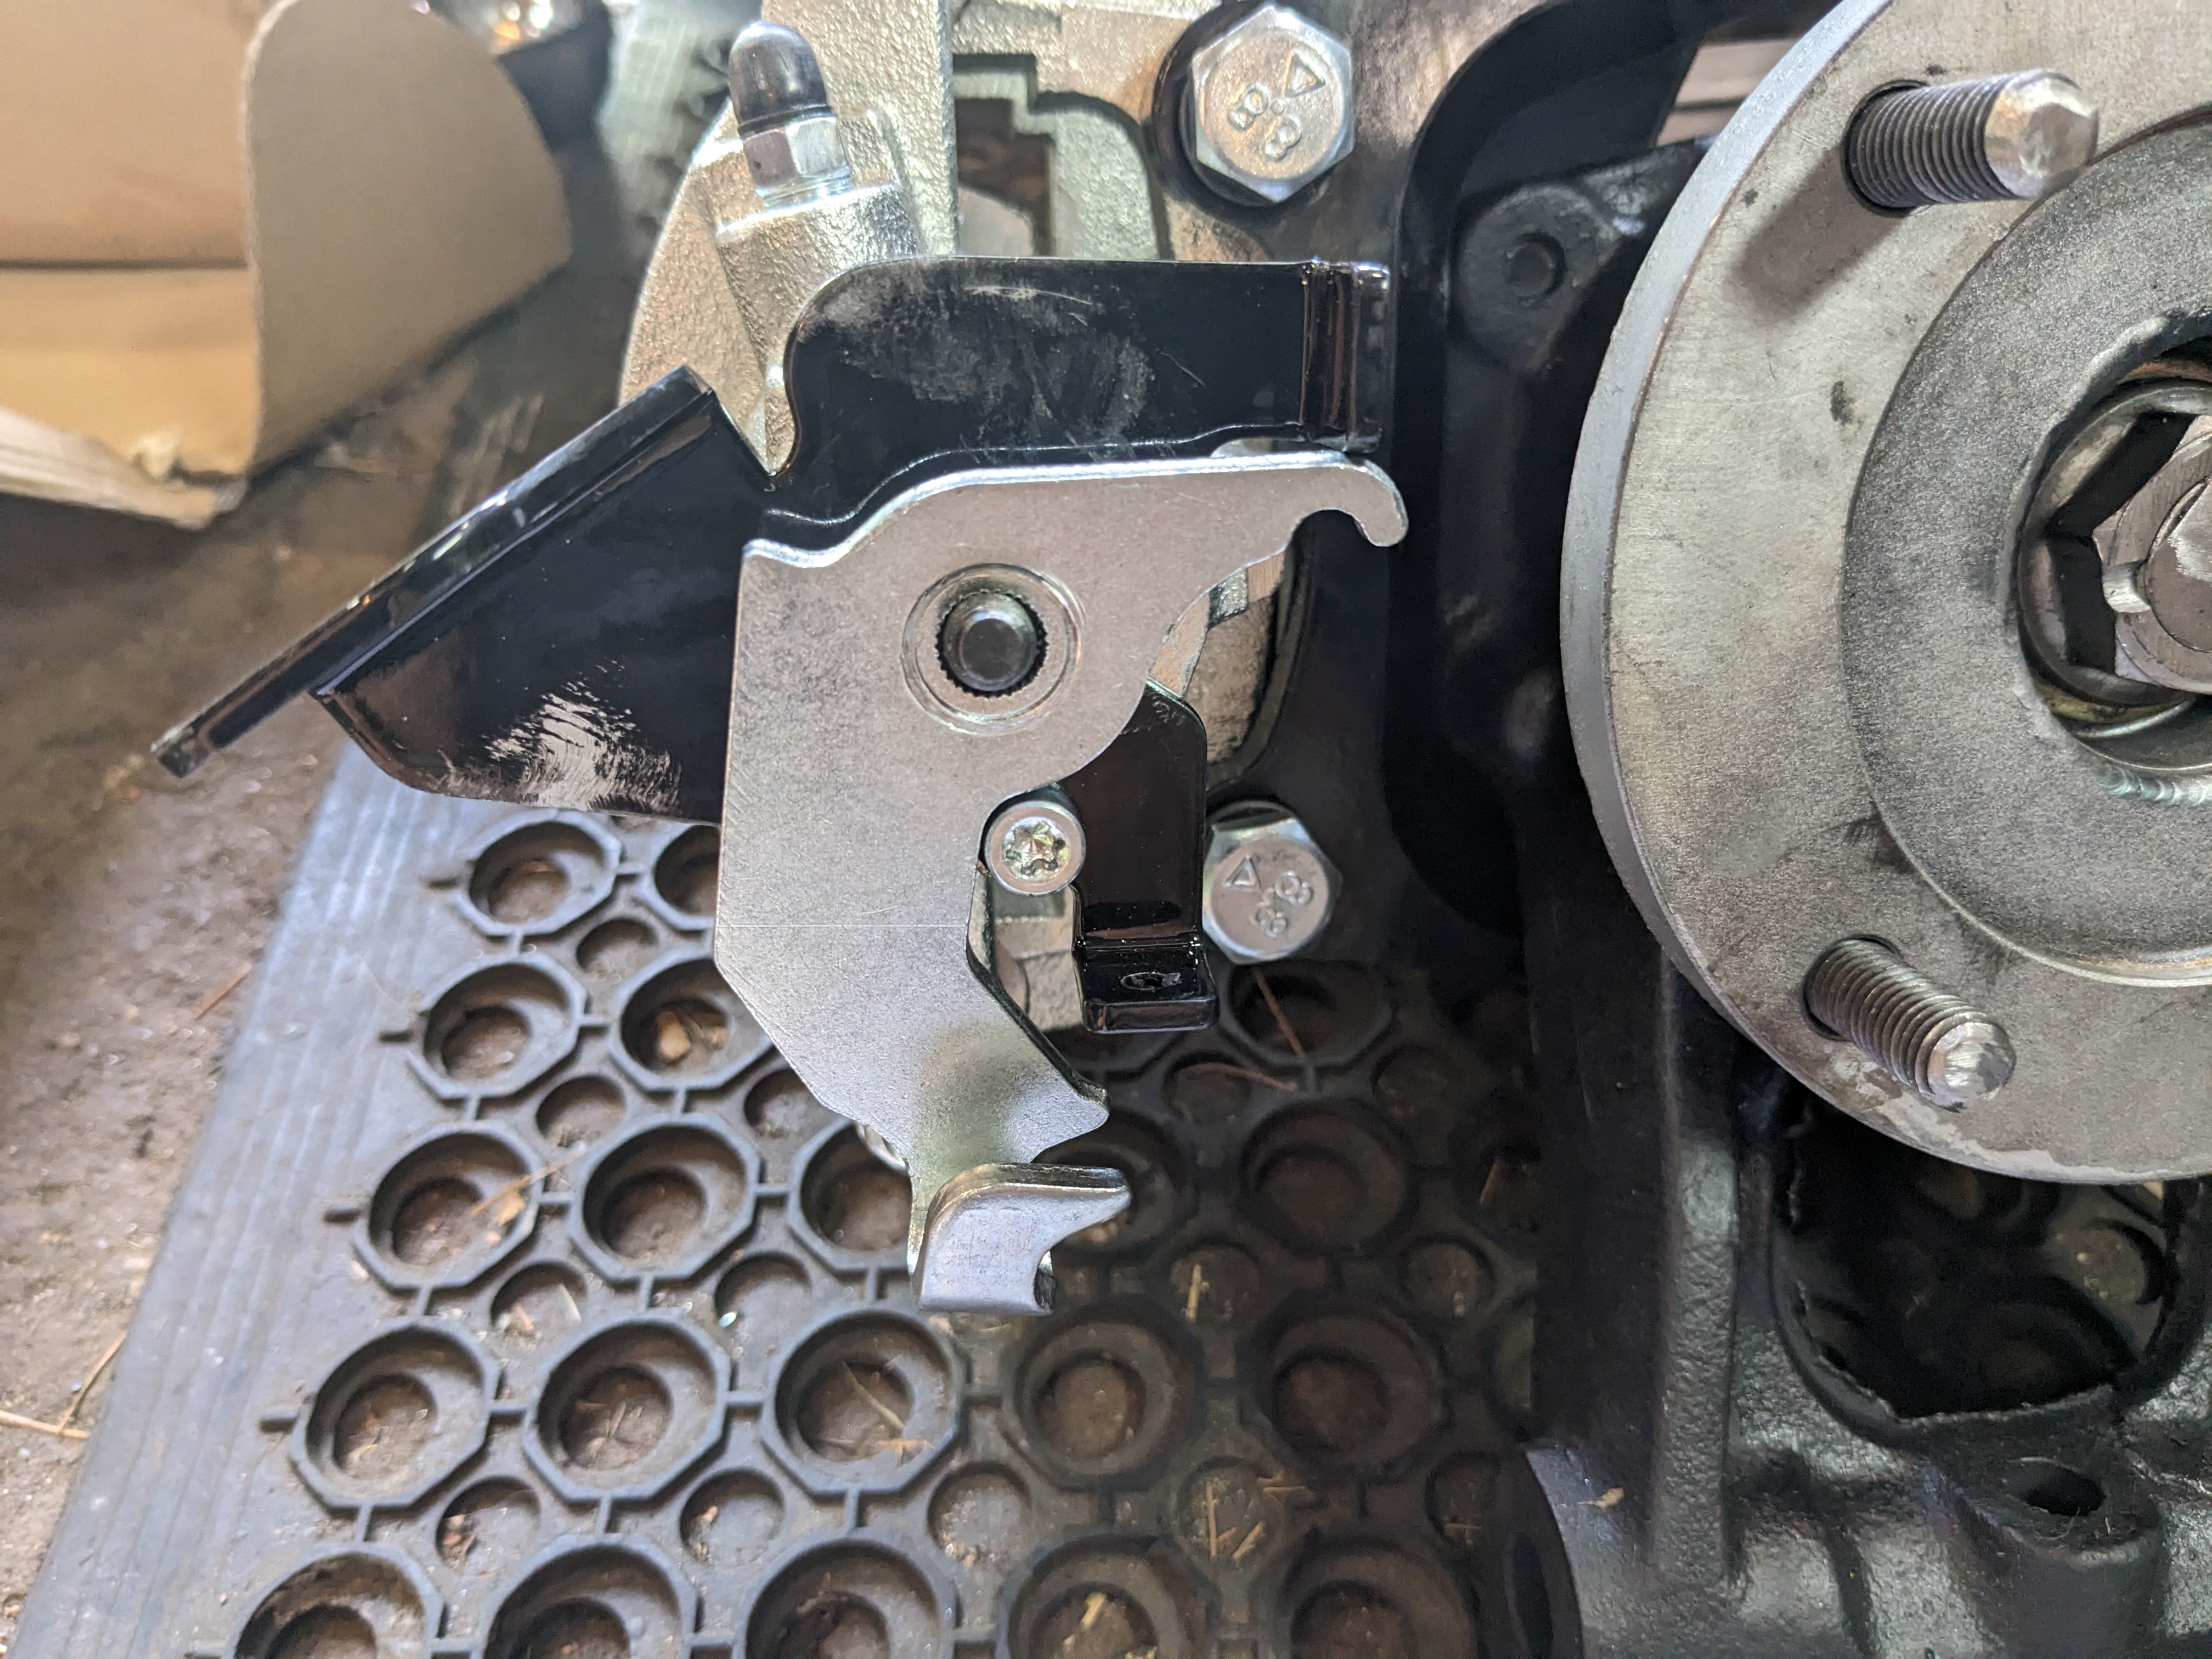
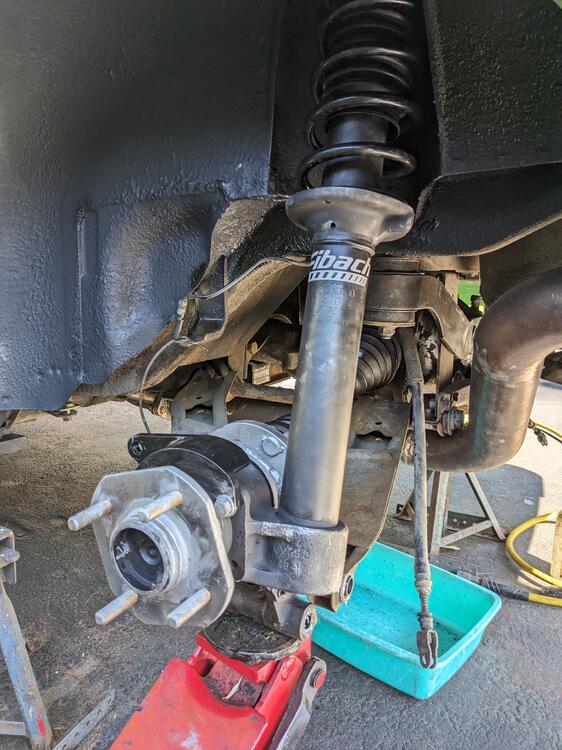
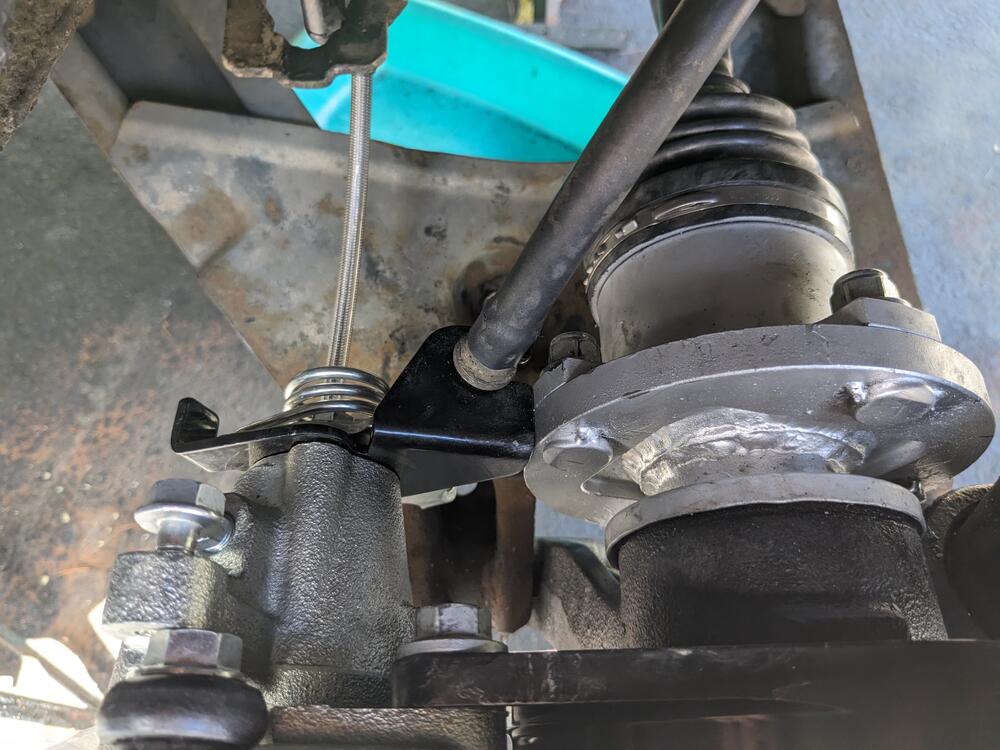
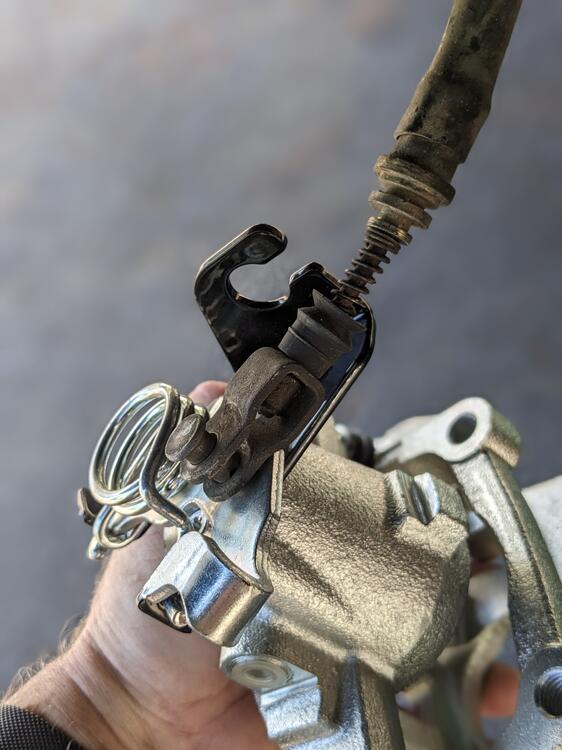
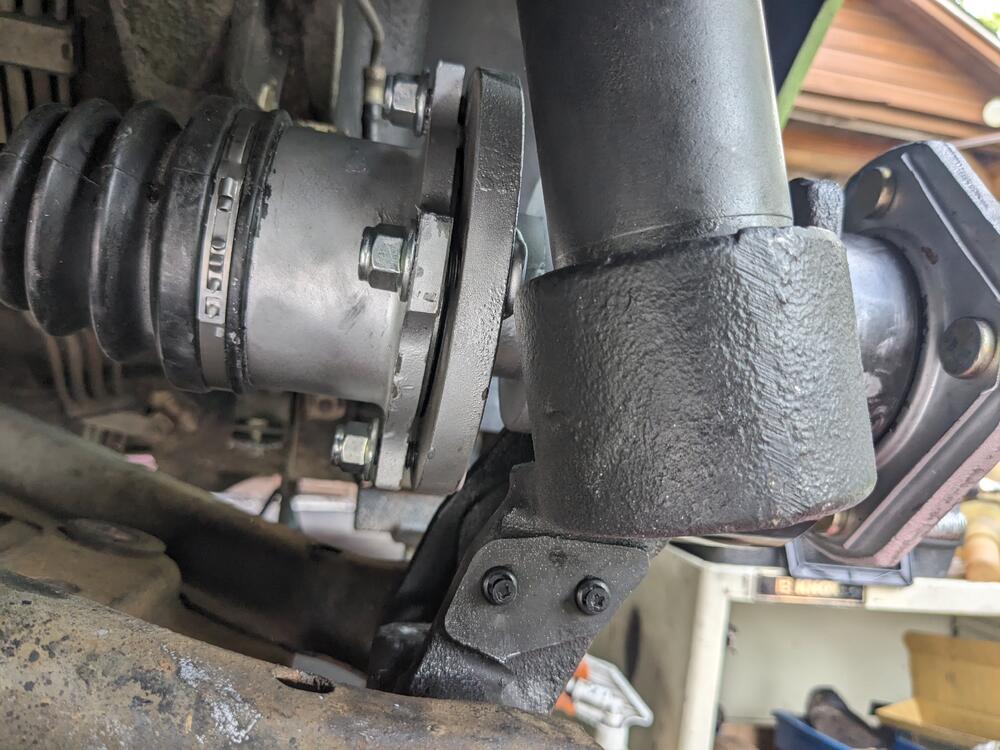
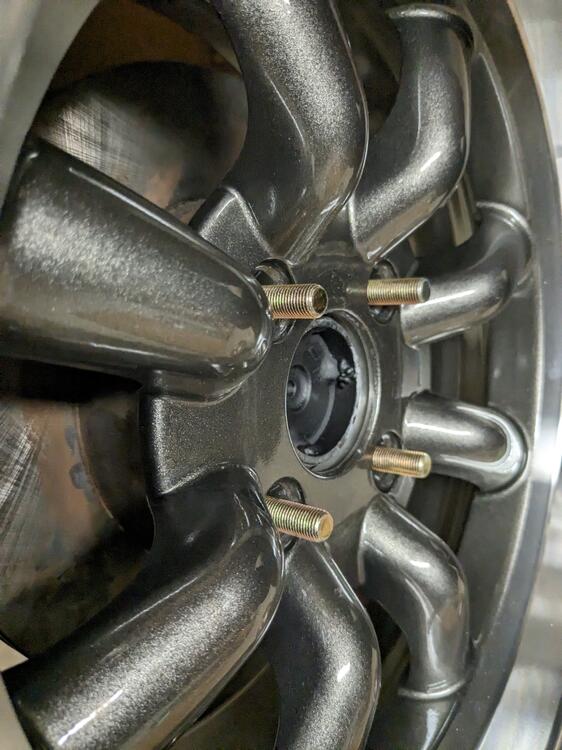
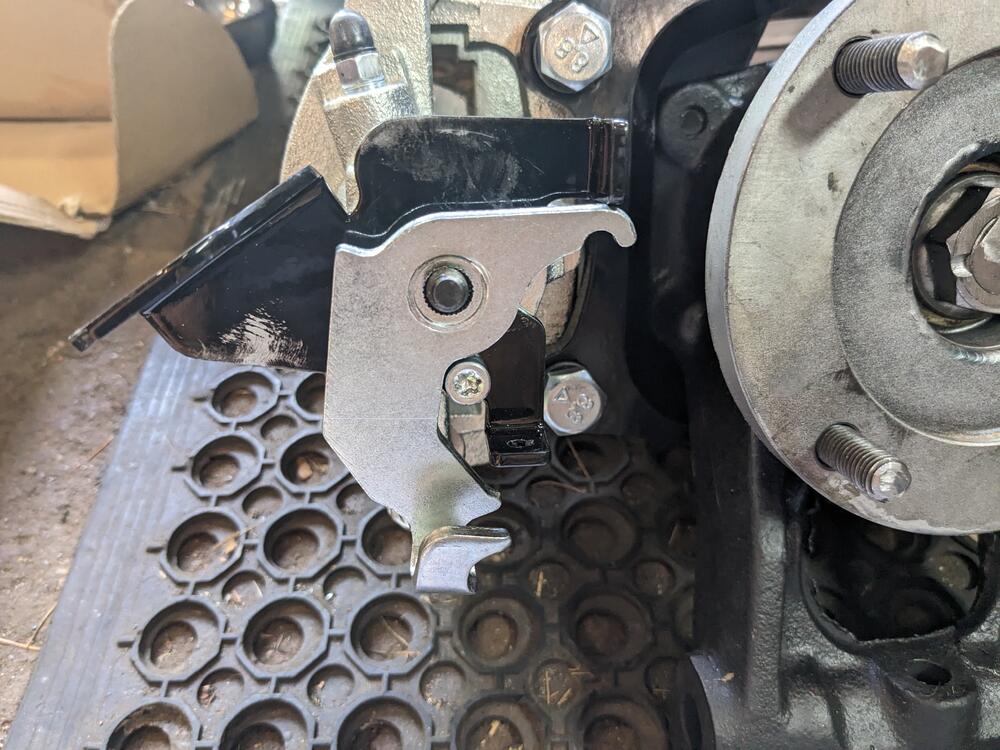
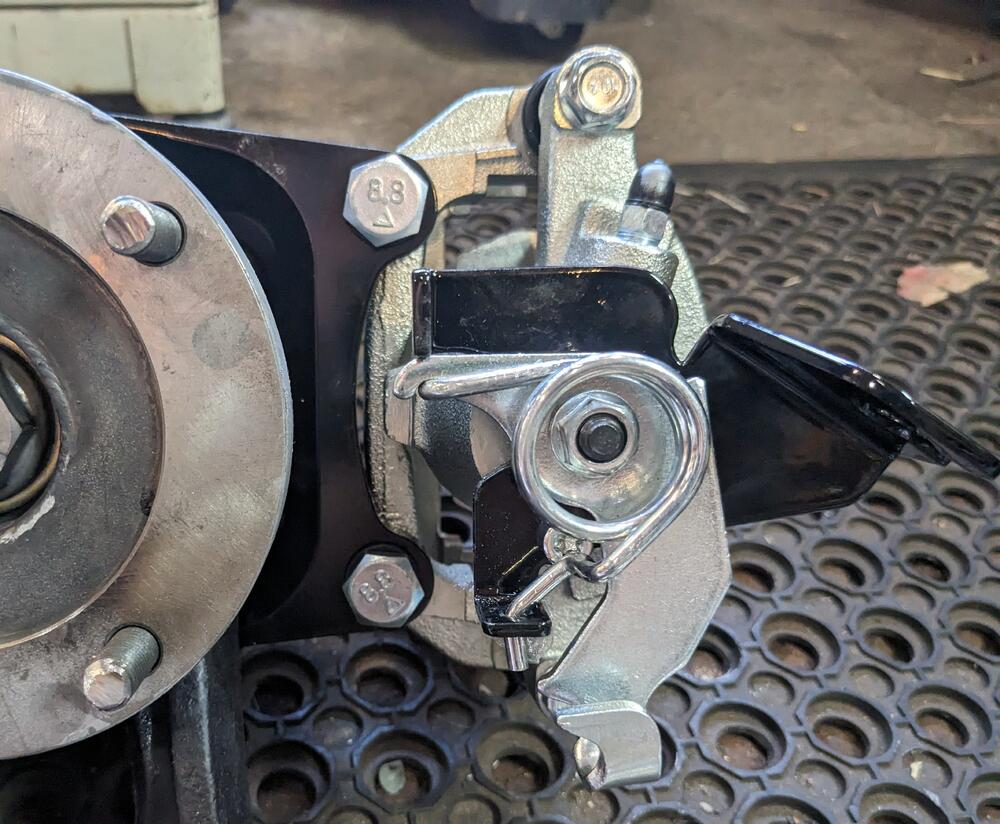
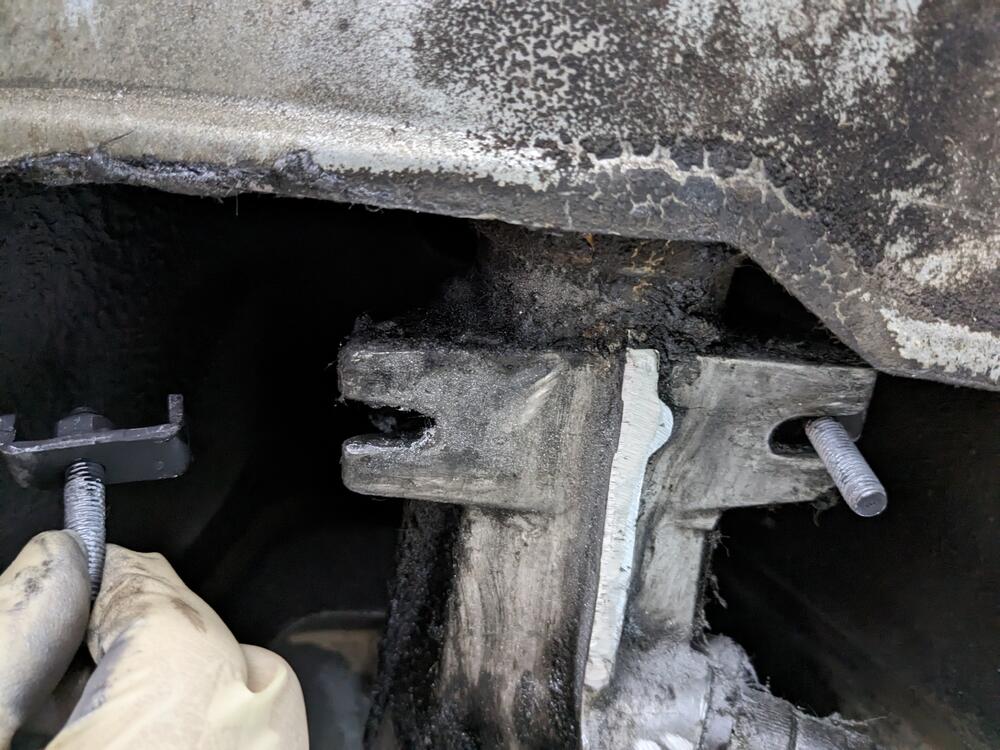
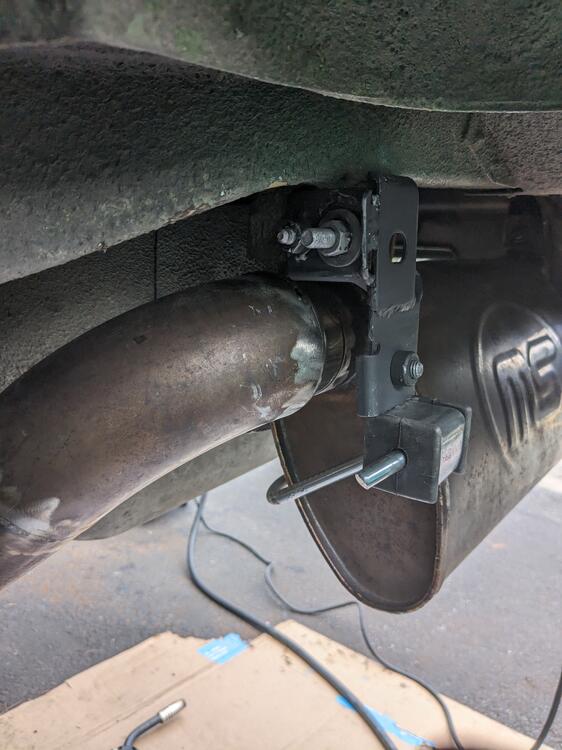
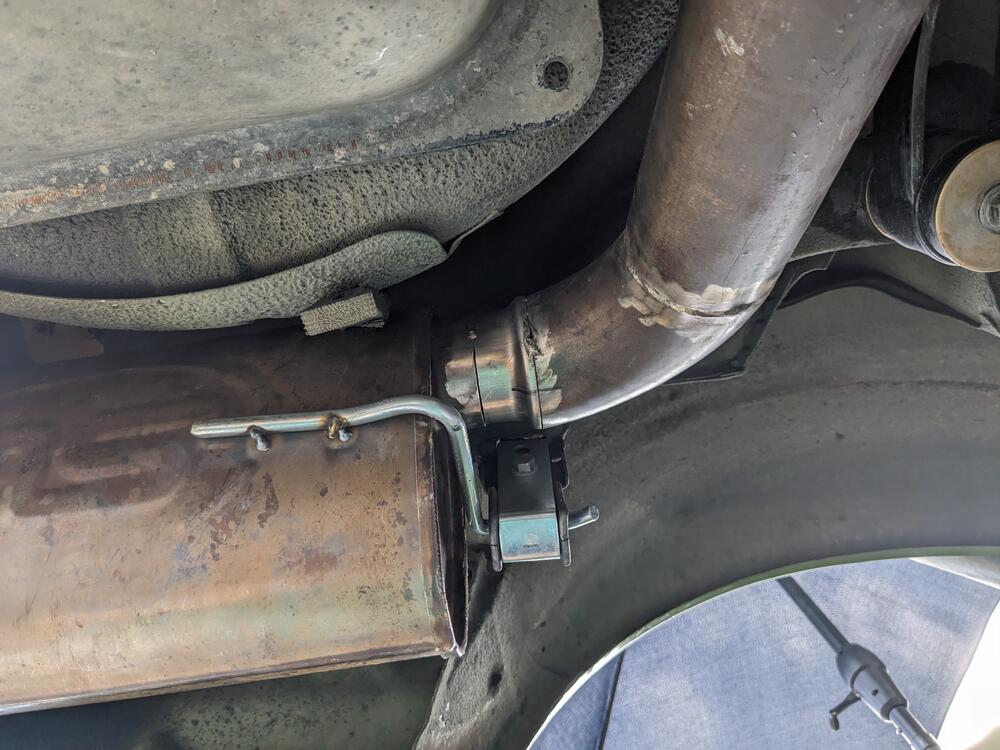
 Yesterday I fitted the left axle ('87 300ZX T, #N18435) & strut assy. I found that the left axle had almost no play in the outer CV at full drop. I can't imagine it would work without binding using one of the flanges as intended, esp. w/ stock springs, since that would drop the hub even further. Left inner stub. They are the same length, just aftermarket has a shorter innermost spline section and deeper outer seal seat shoulder. left axle seal was also not leaking, so I'm just going ahead without replacement installing the strut assy - used my jack to lift the assy. in place, so I could secure the strut top plate in the tower once the top was secured, I could position the spindle hub & insert the spindle/bolt and clevis. Not fun. The elements do not readily align, so the shoulders on the spindle can catch on the bushing sleeve in the control arm. This side took several tries to get it in place. Spindle & axle in place With that done, I started on the brake install. (re-drilled) '88 300ZX T Rotor then (Mustang rear '05-2014) caliper hanger installed, all good so far... Then I found a couple issues. I had never checked the kit listing to see if the kit worked with modded setups - it doesn't mention whether it only works with stock setups & I didn't think to ask at the time. The eBrake bracket will not clear the CV flange. I'd be curious to see a pic of it in relationship to the stock U-Joint shaft flange, as it seems that the cable bracket would still end up pretty close to the rotating flange. Needs to swing inward I'd say at least 3/4" from here to get the upper caliper retaining bolt into the caliper slider pin. I'll have to cut & weld the bracket to make this work. Angle and offset relative to the actuating lever can't change too much or it will bind the cable, and/or just not operate as intended. I've emailed MilkFab to see if they have suggestions. This also seems to be an issue - Milkfab directions just say to attach the stock cable end to the lever. I could not see how the different designs could interface - now looking at the pics, I'm thinking he wants the clevis pin looped over just the outer ear of the lever. There are no comments in the instructions or photo documentation to assist in this, which would have been helpful. I'll work on this today.


-
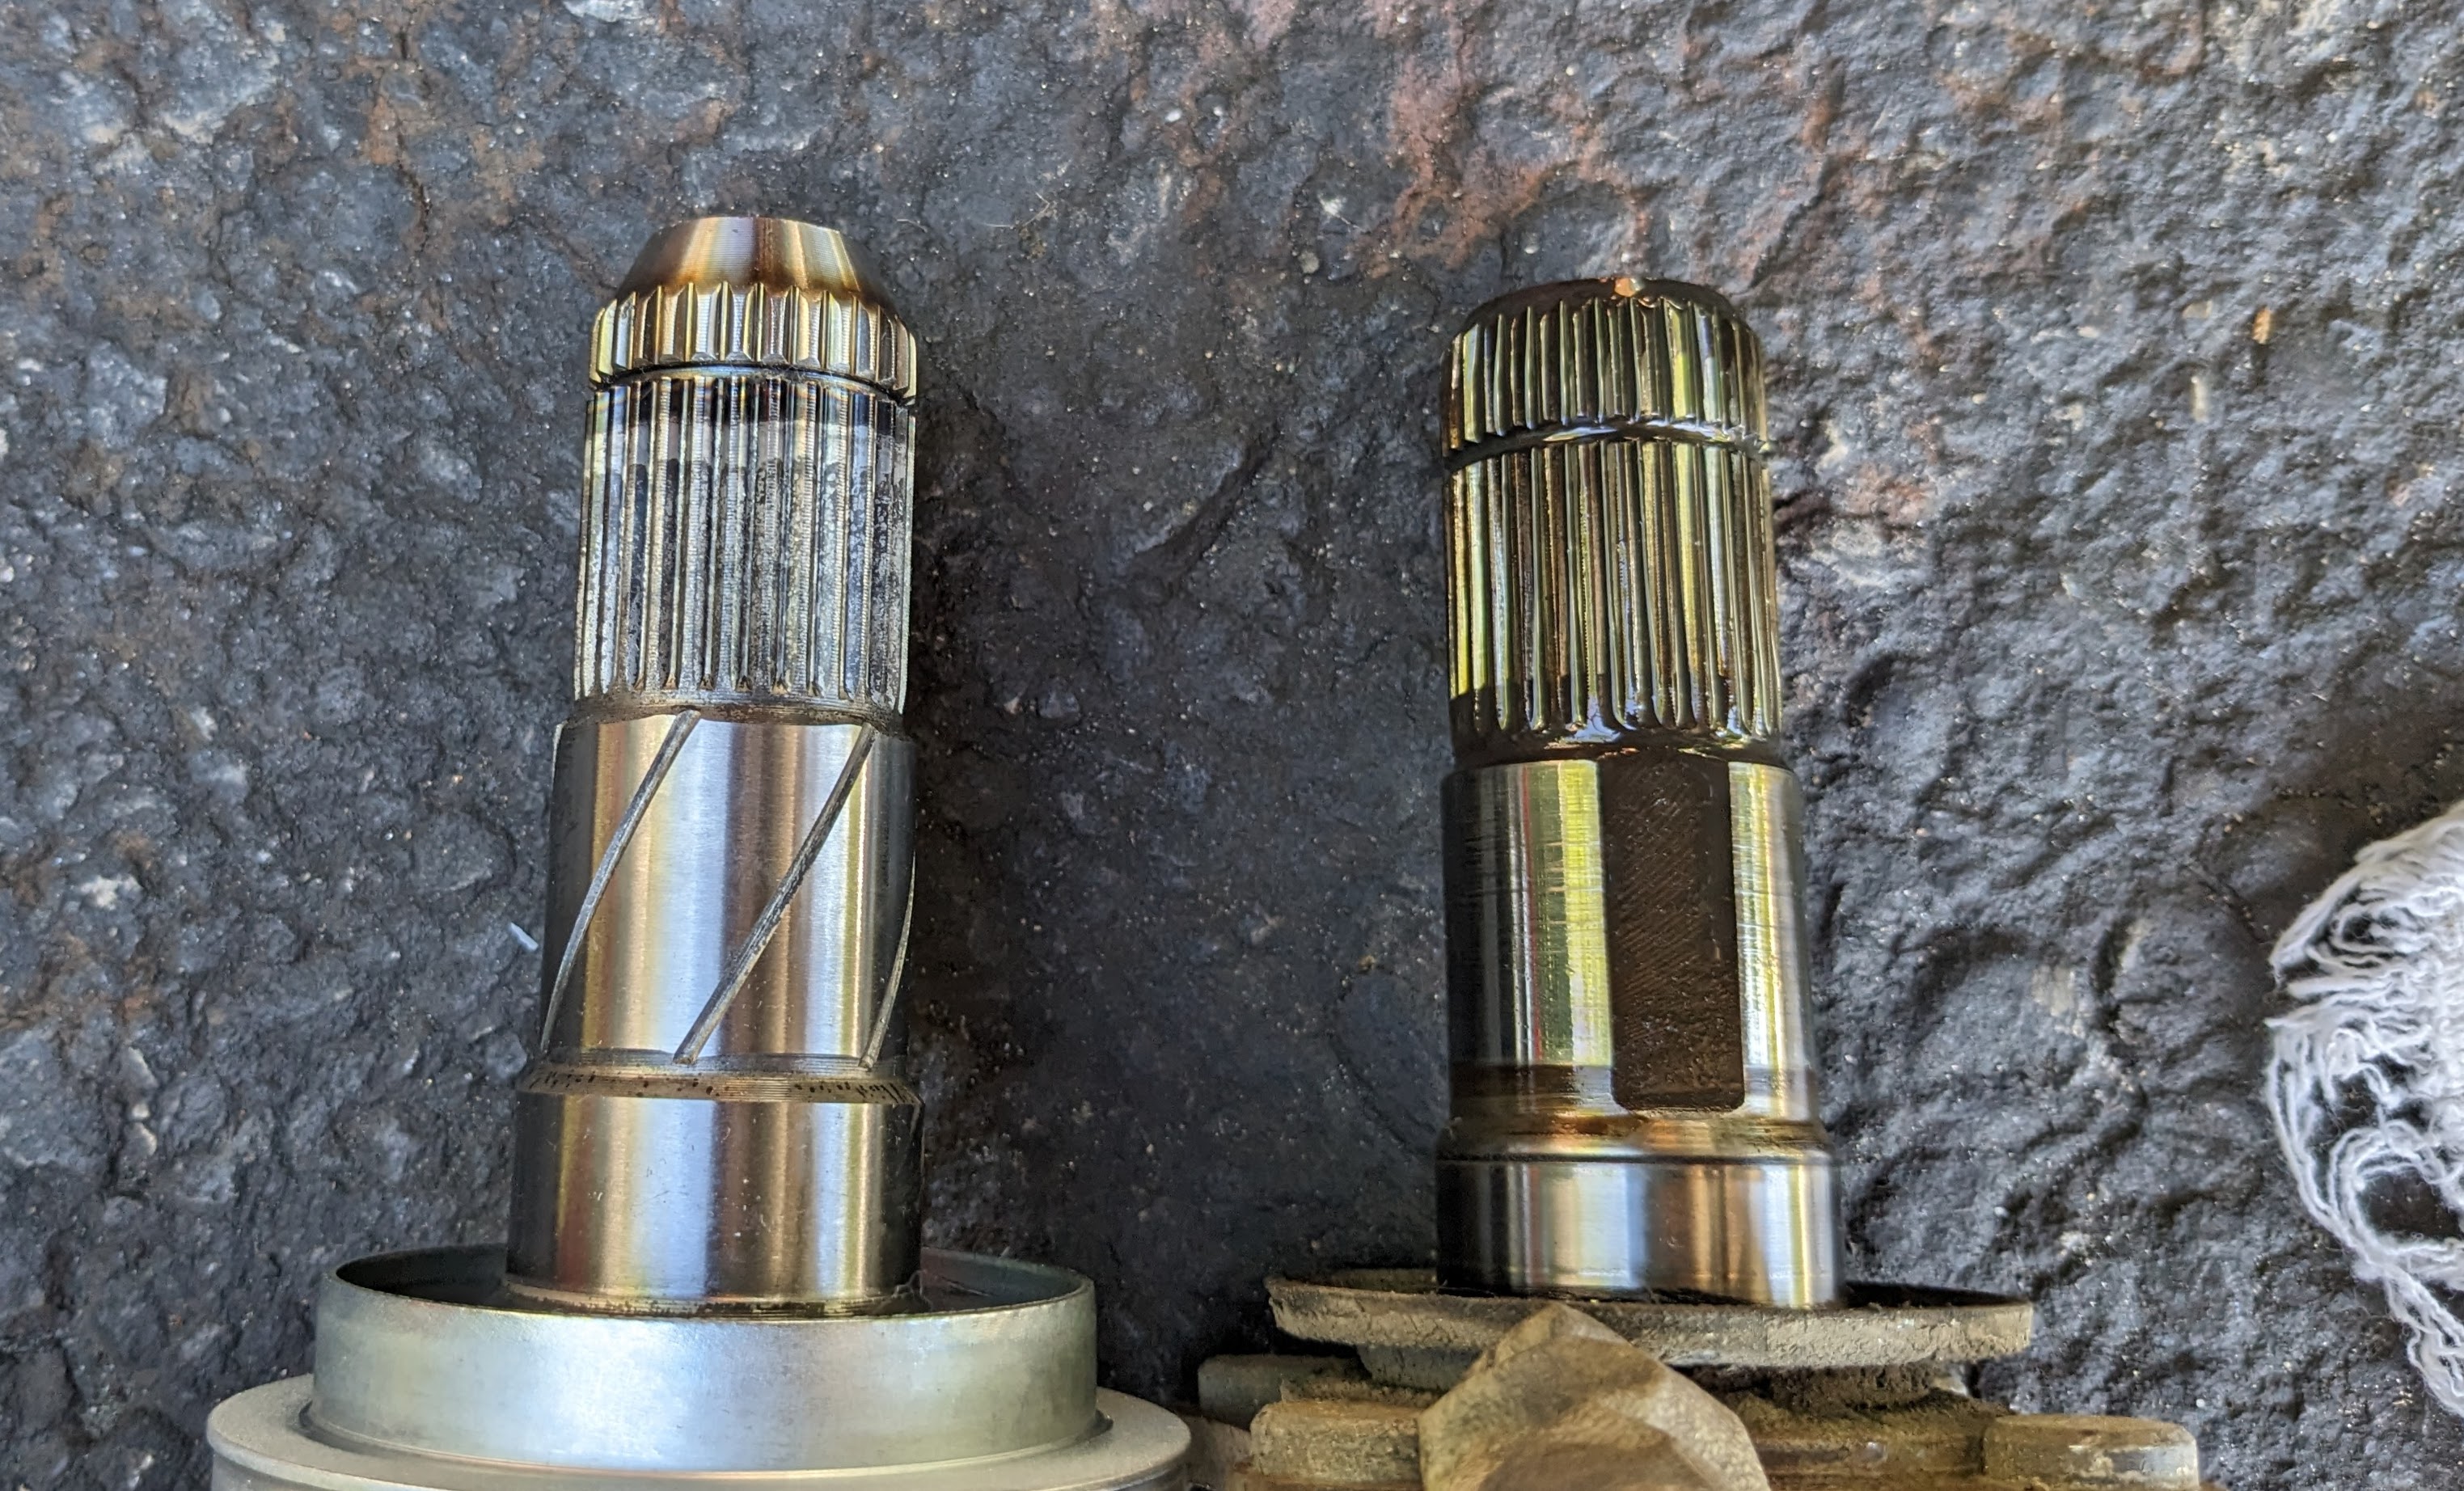
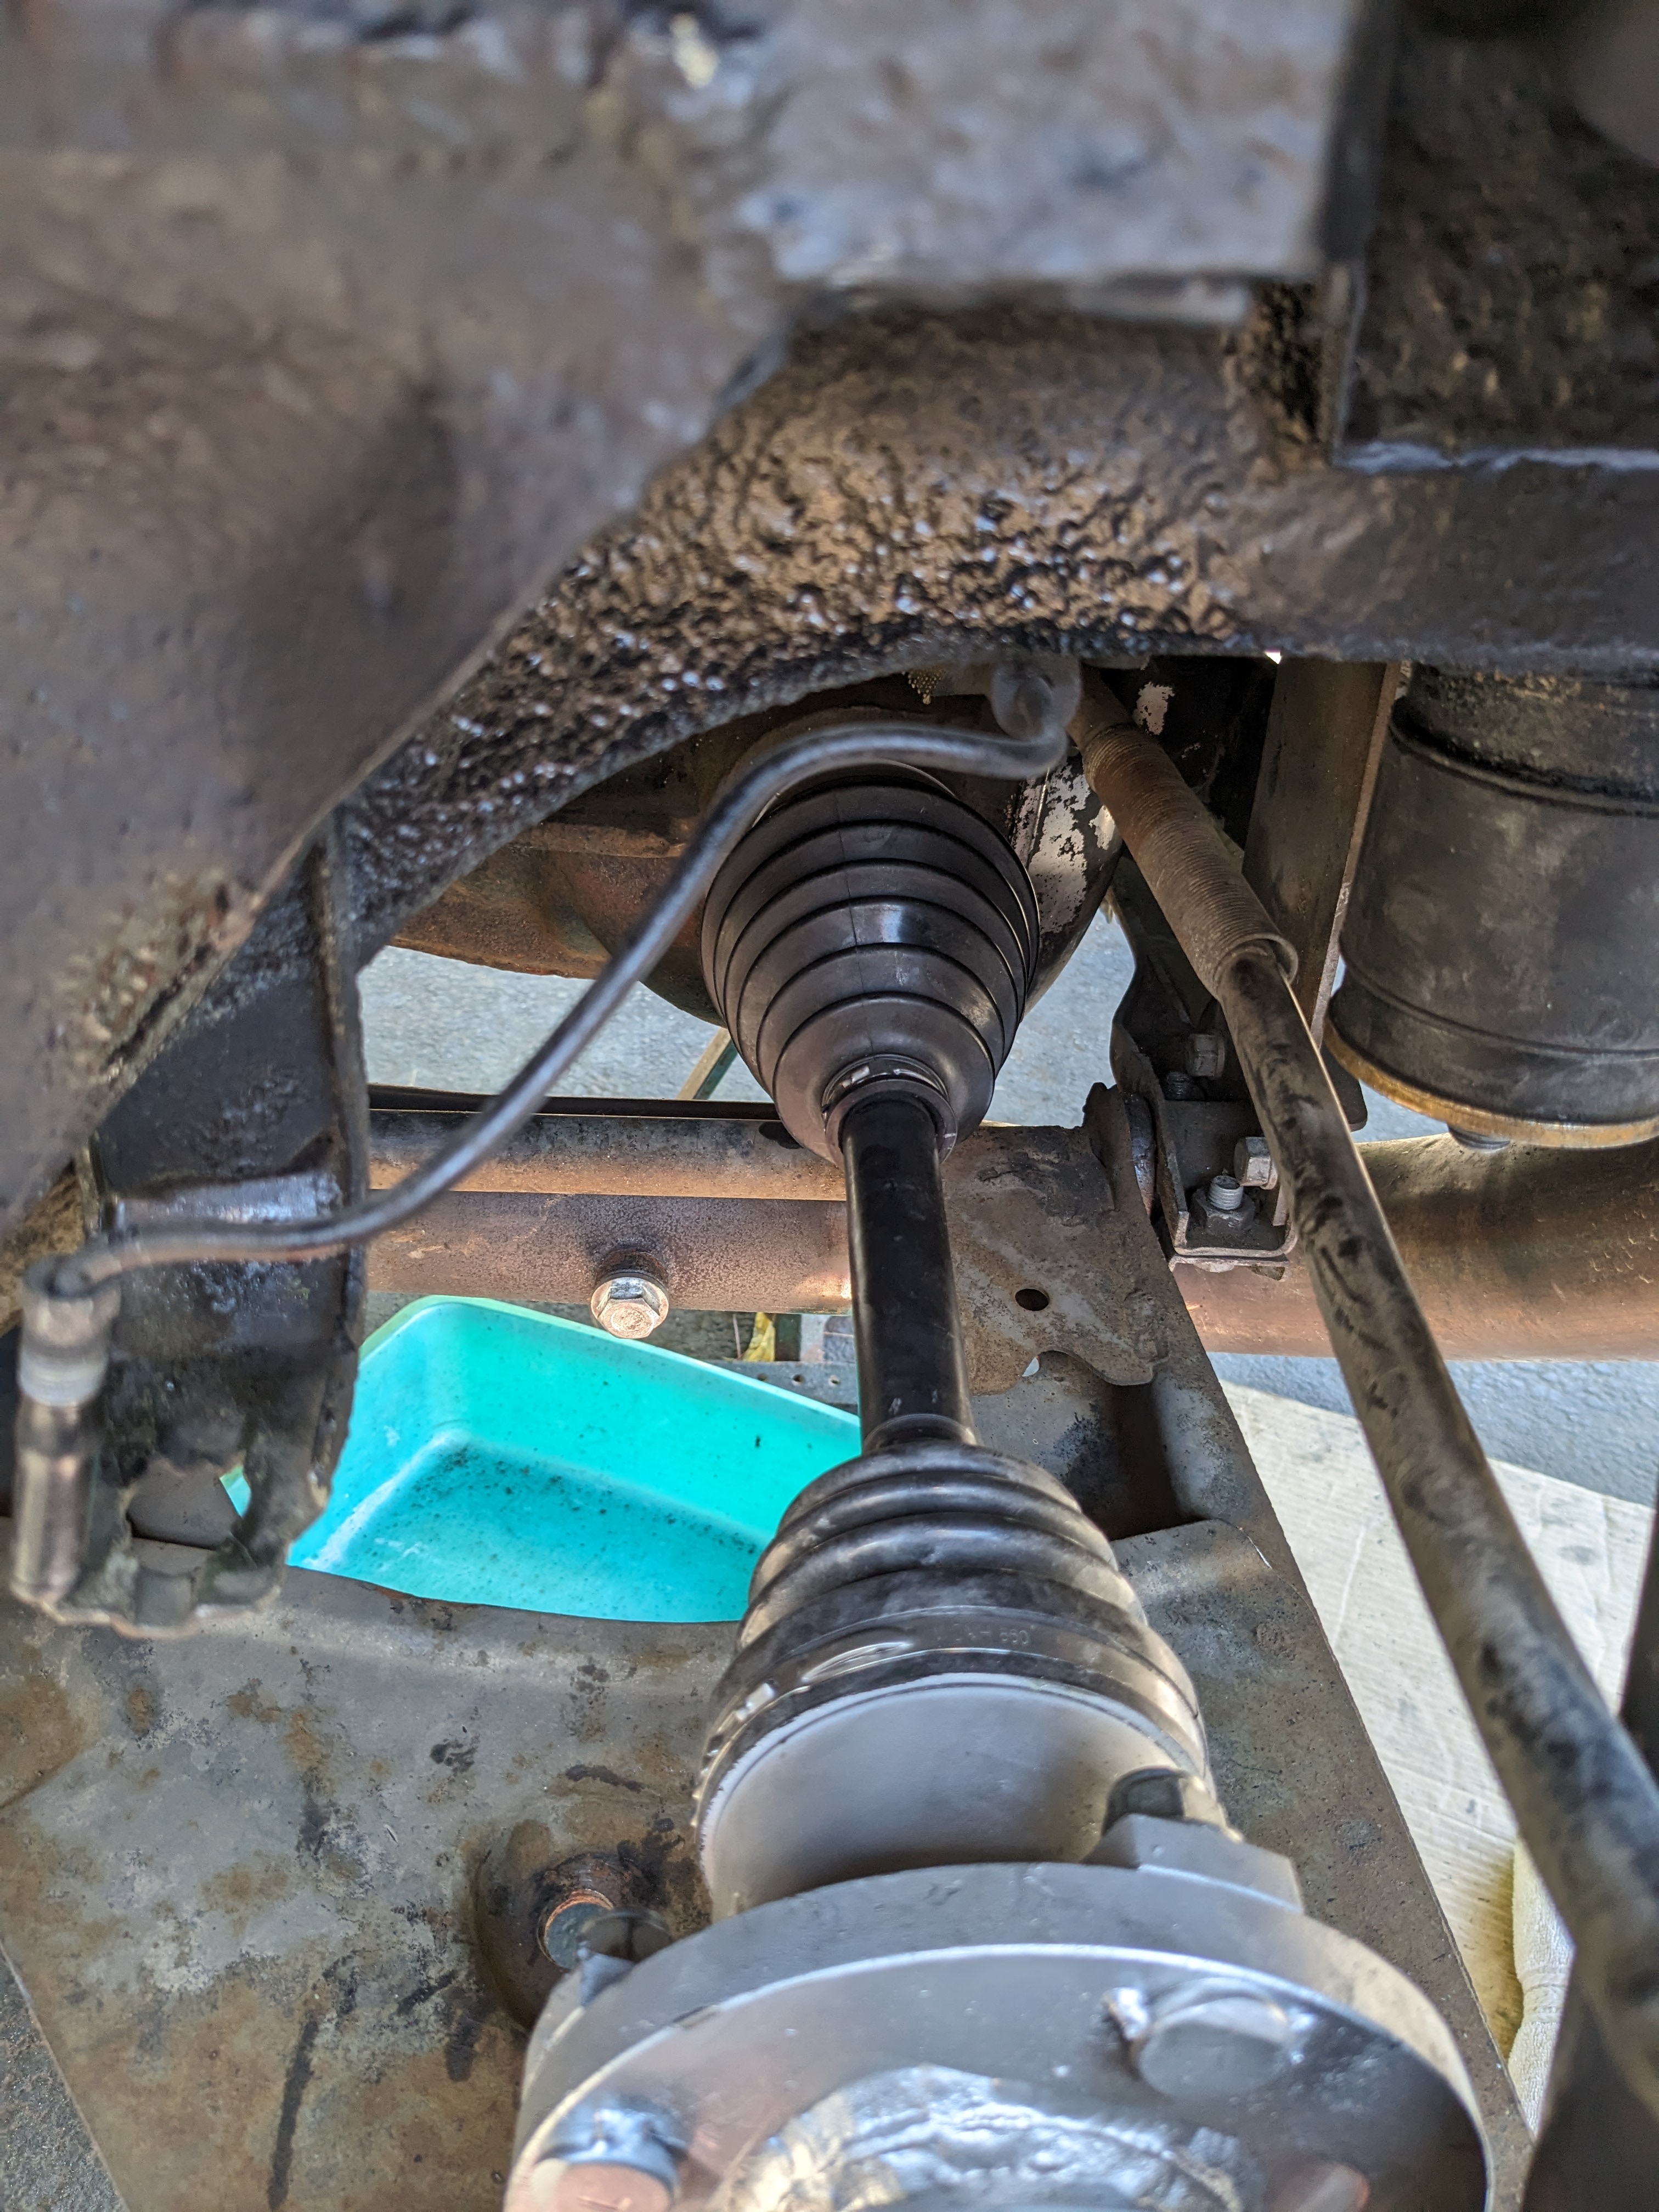
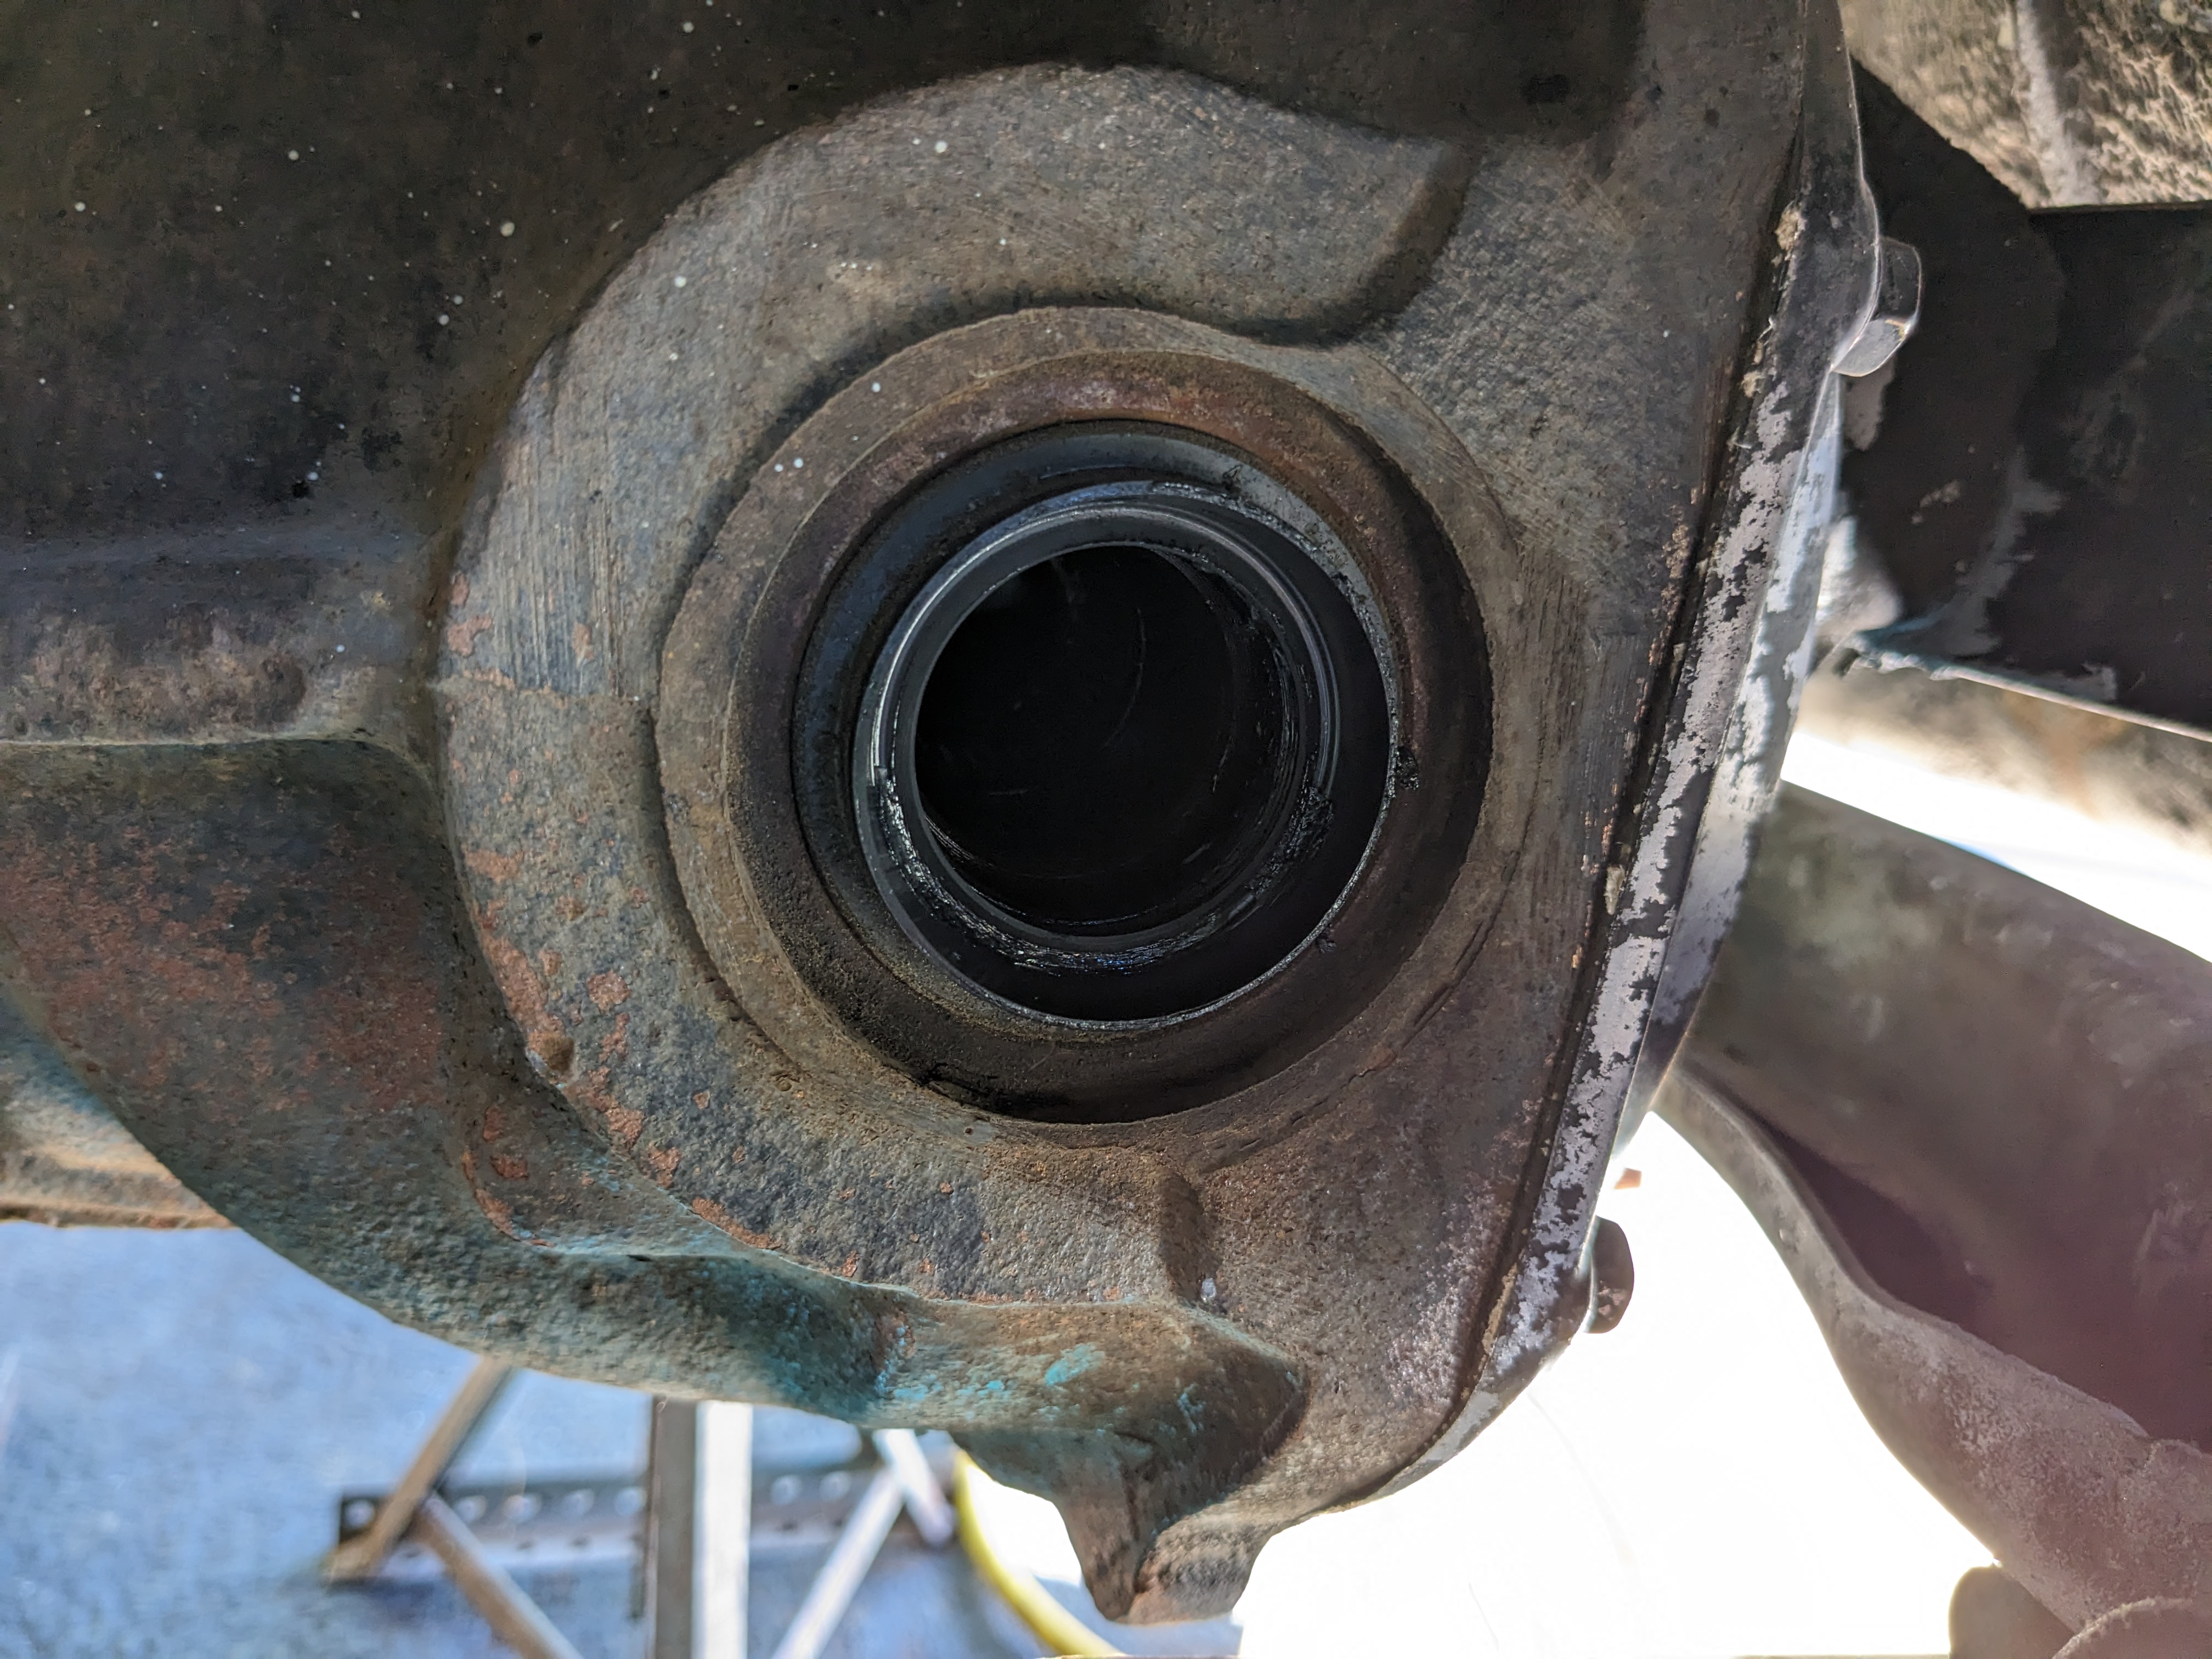
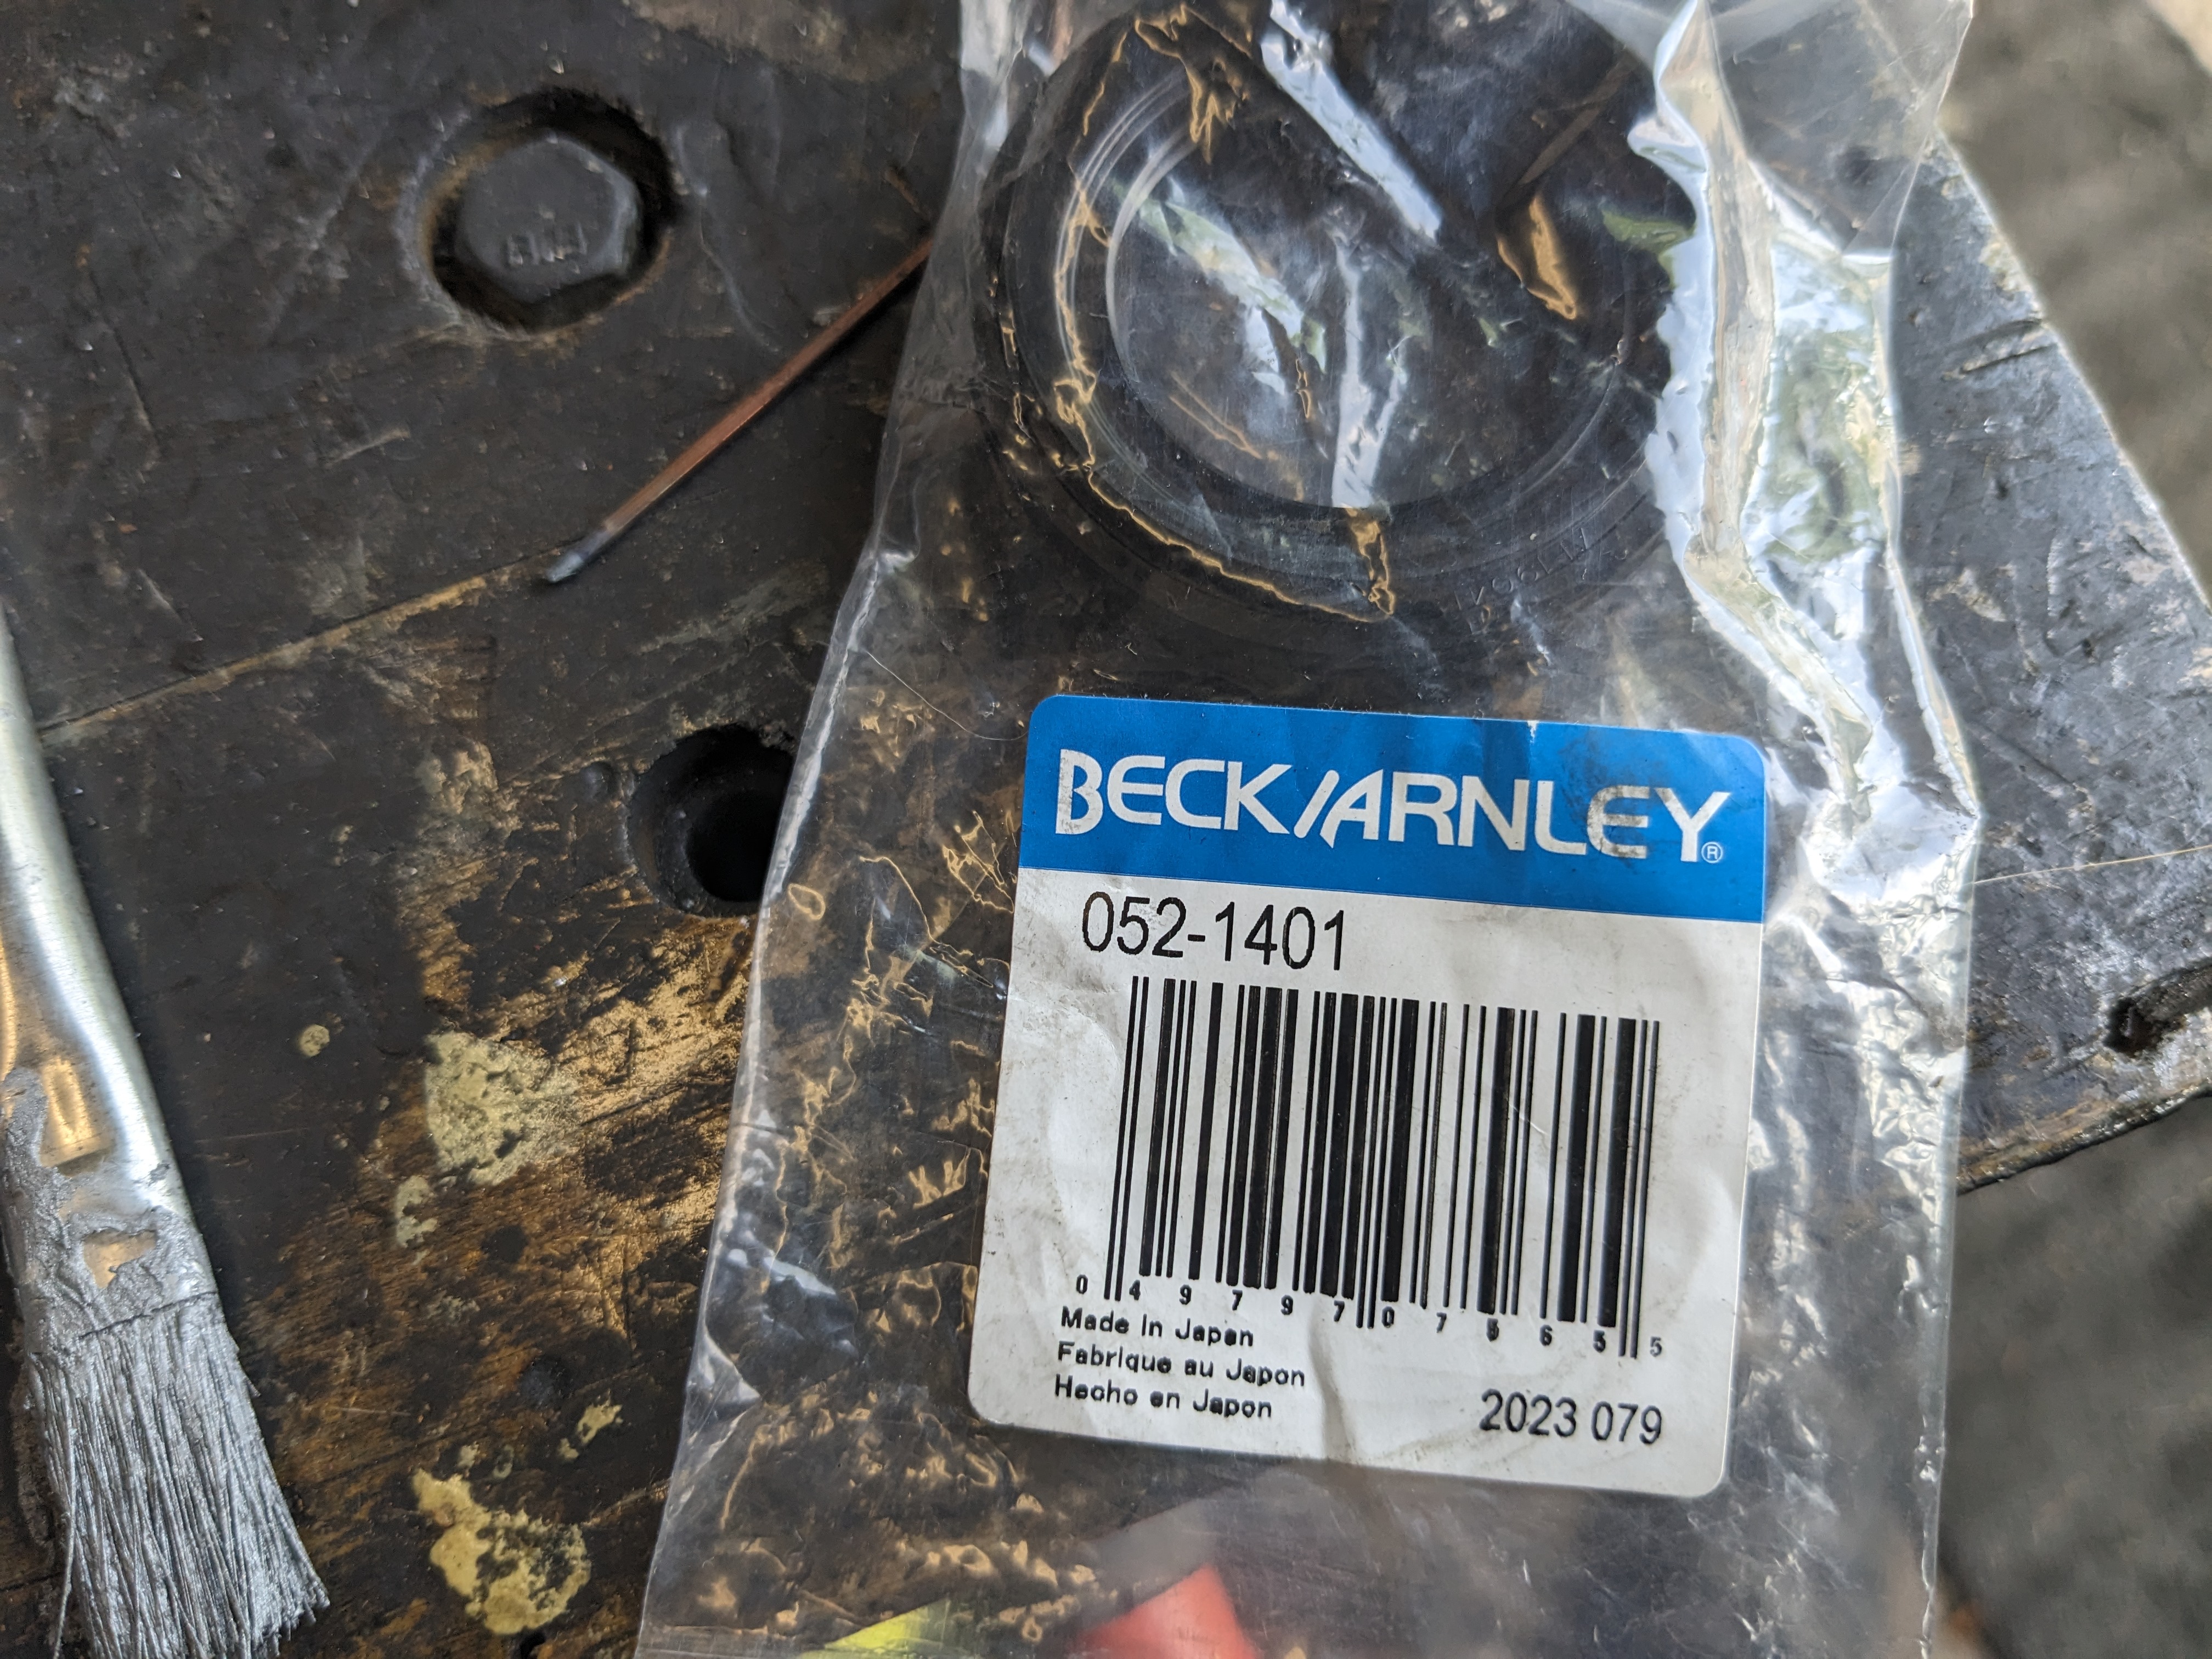
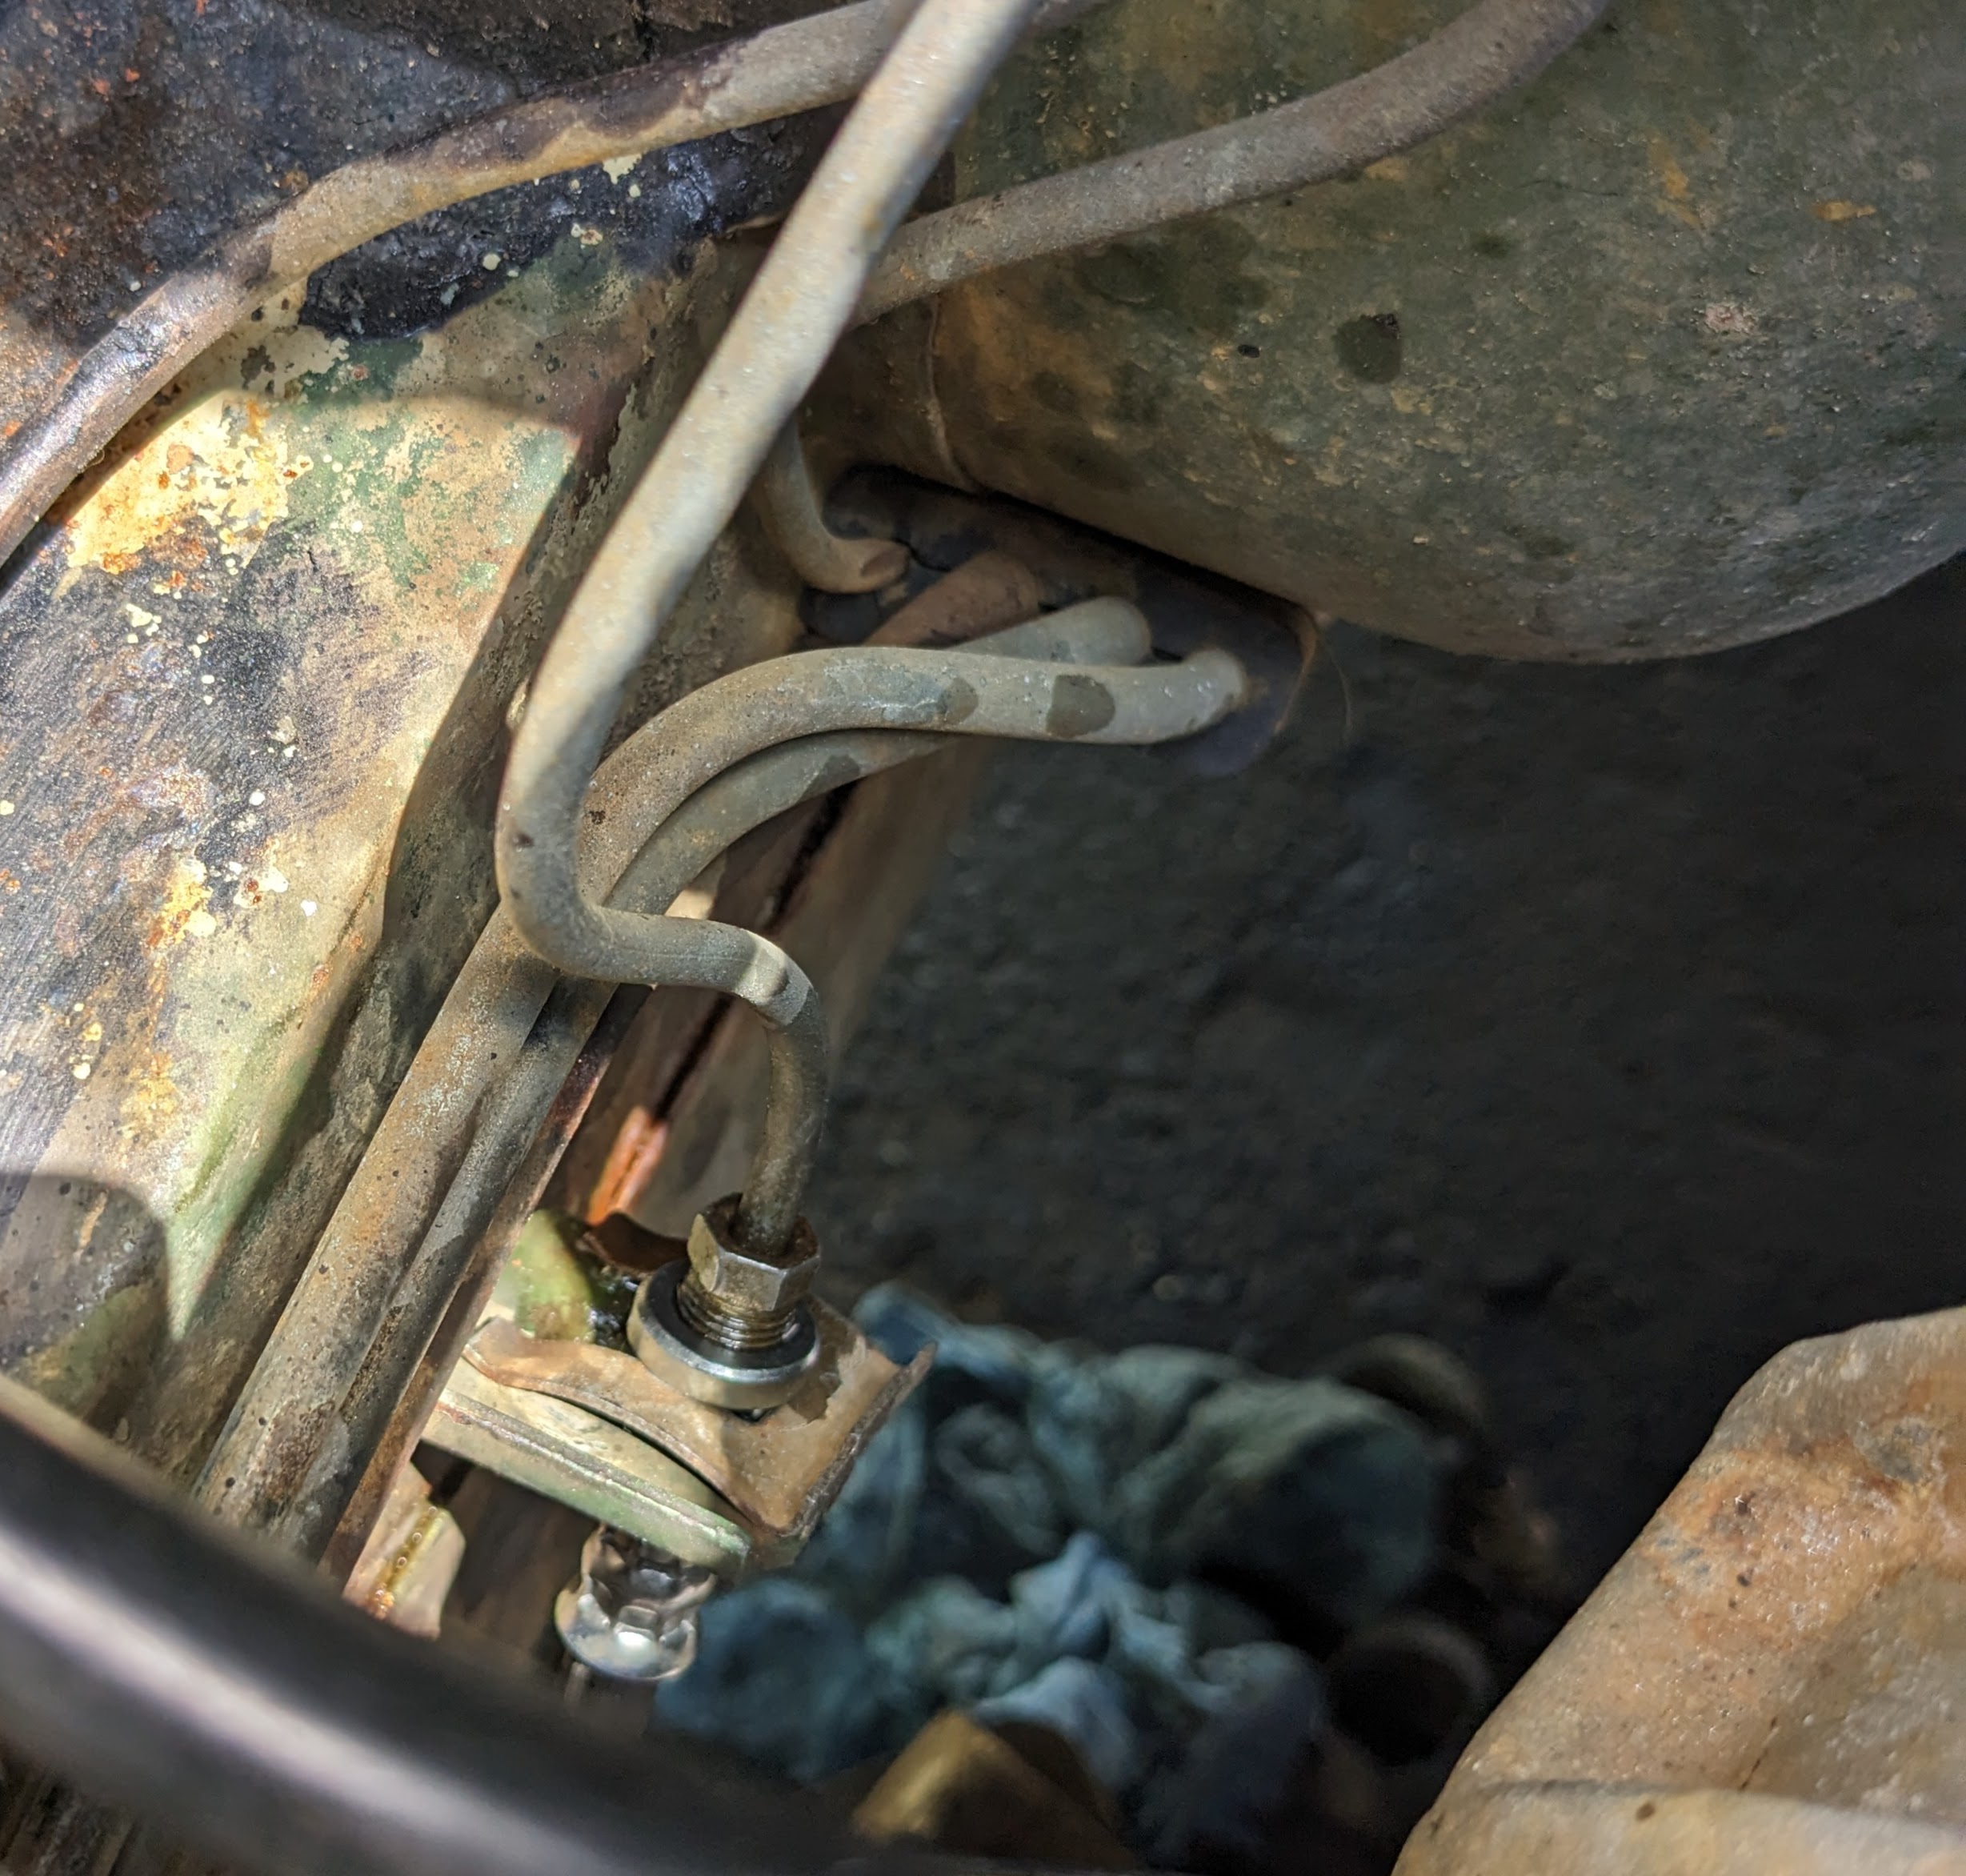
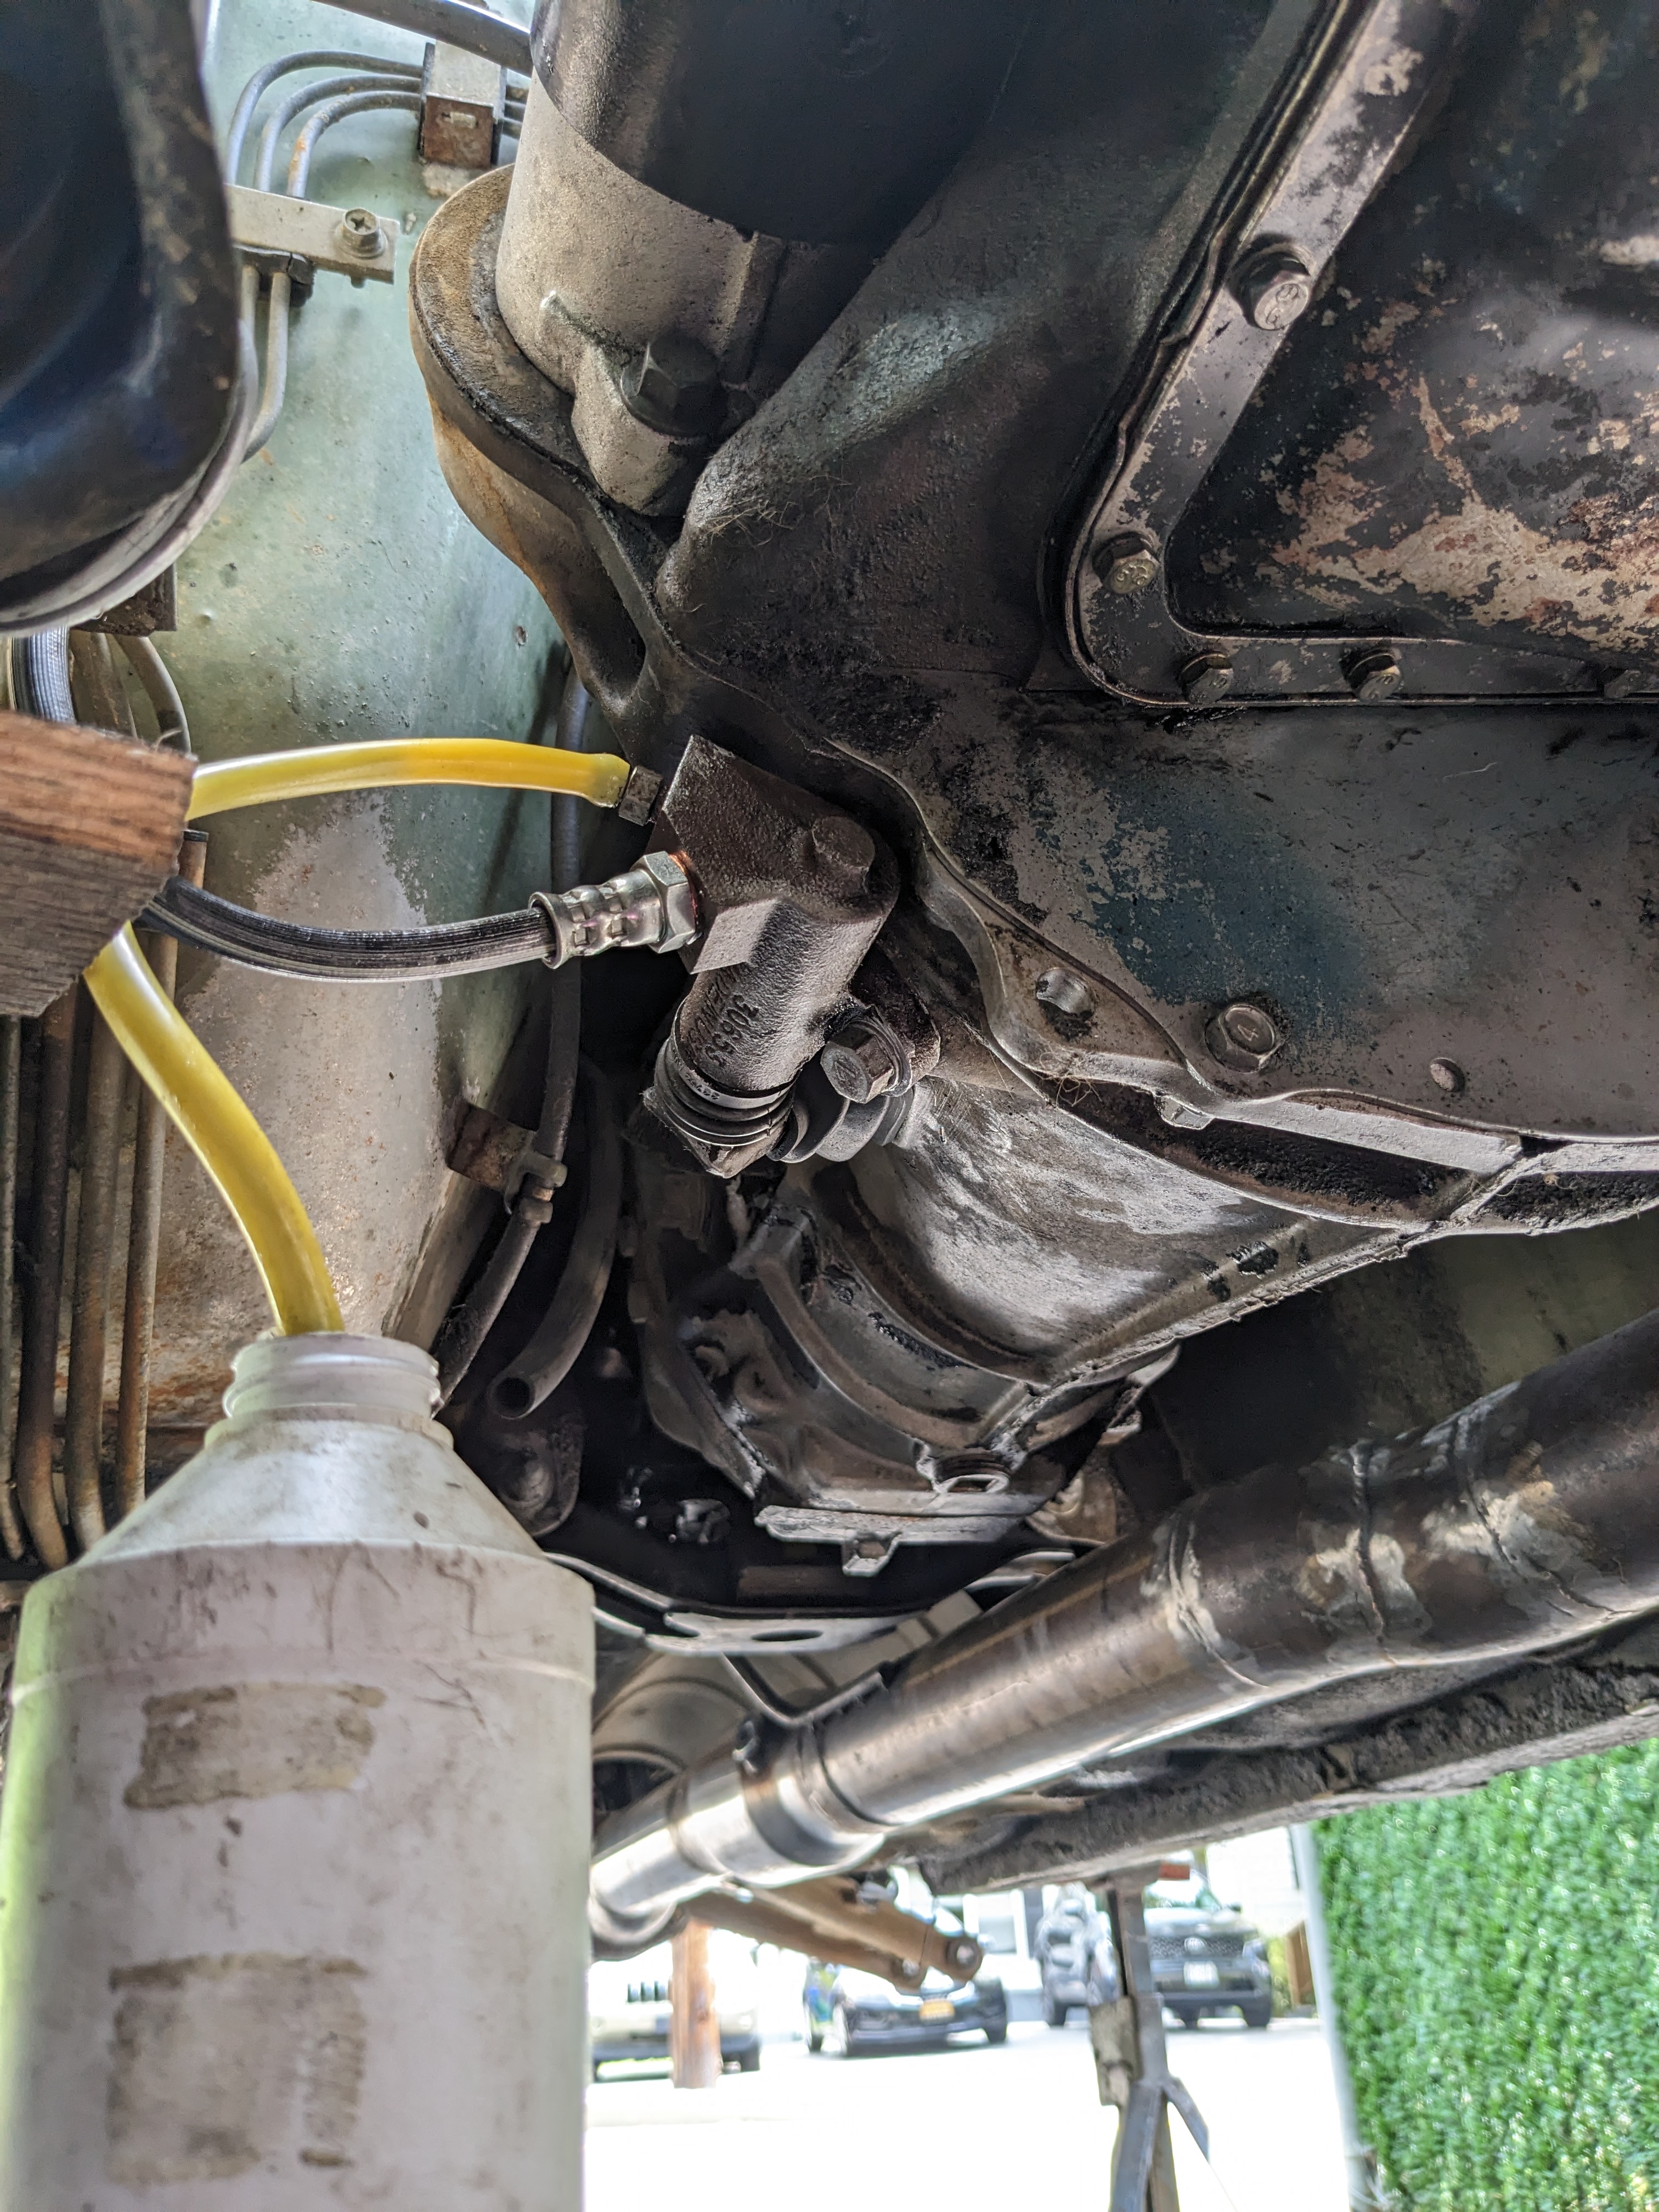
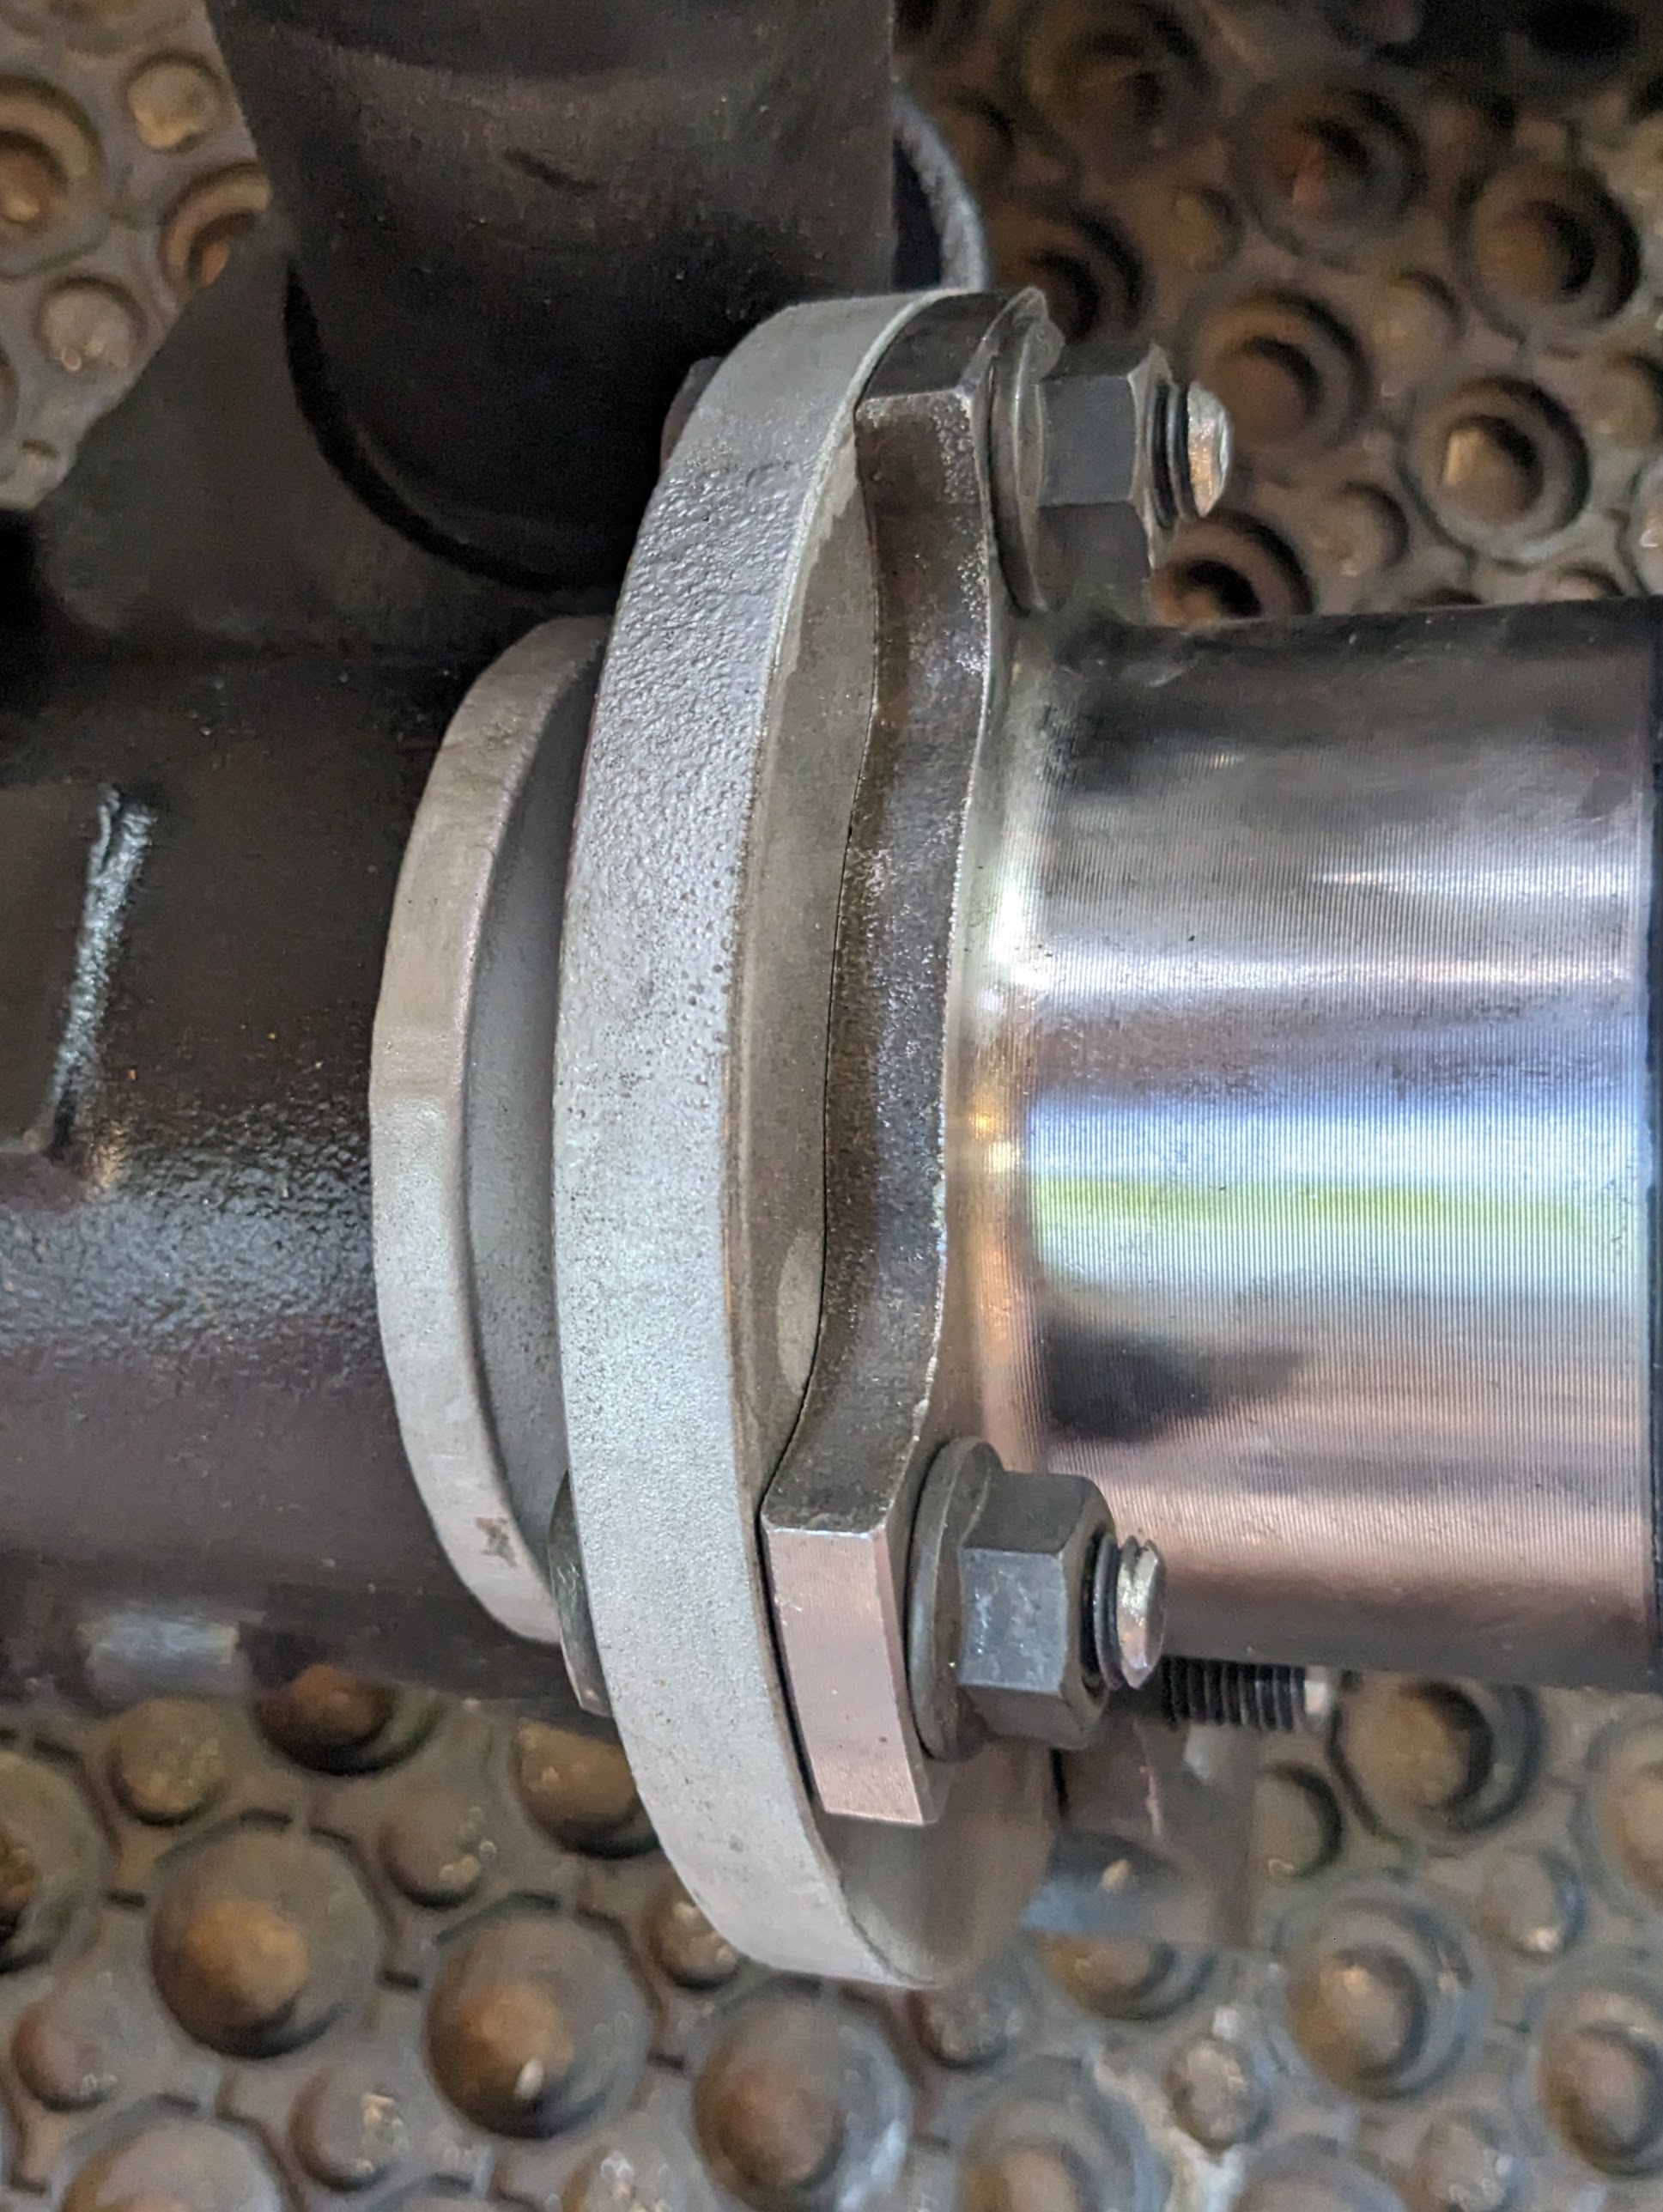
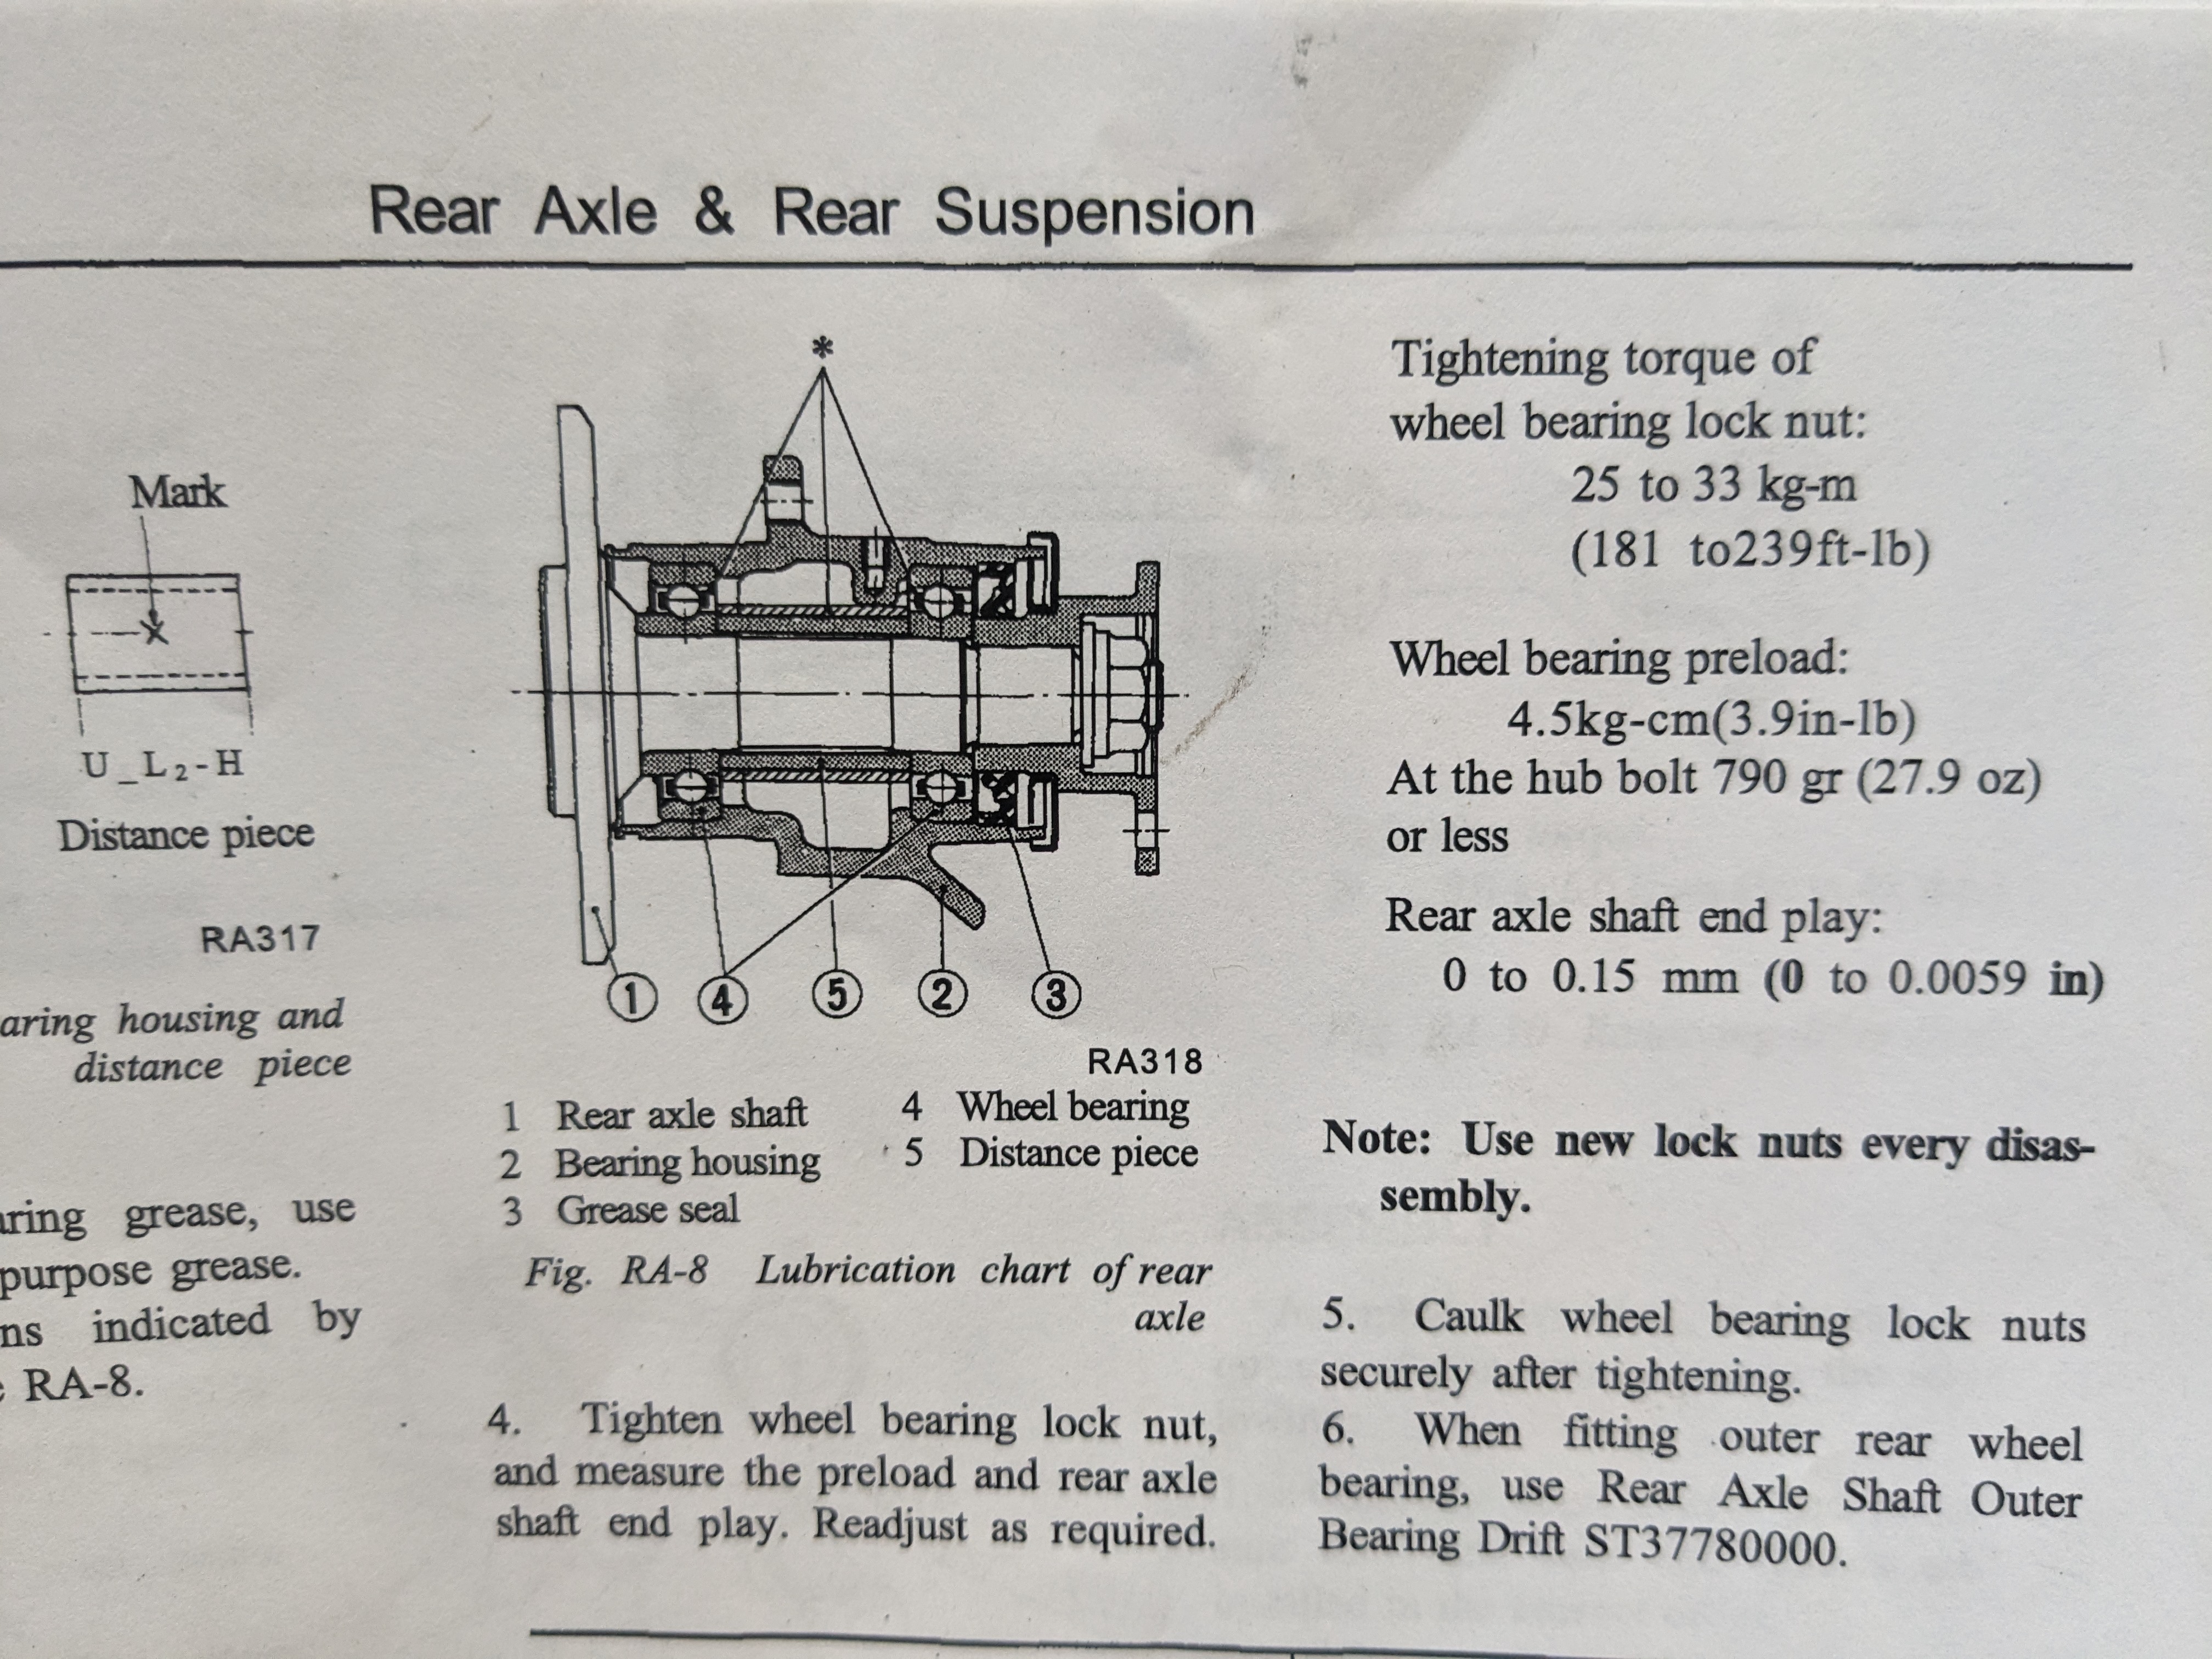
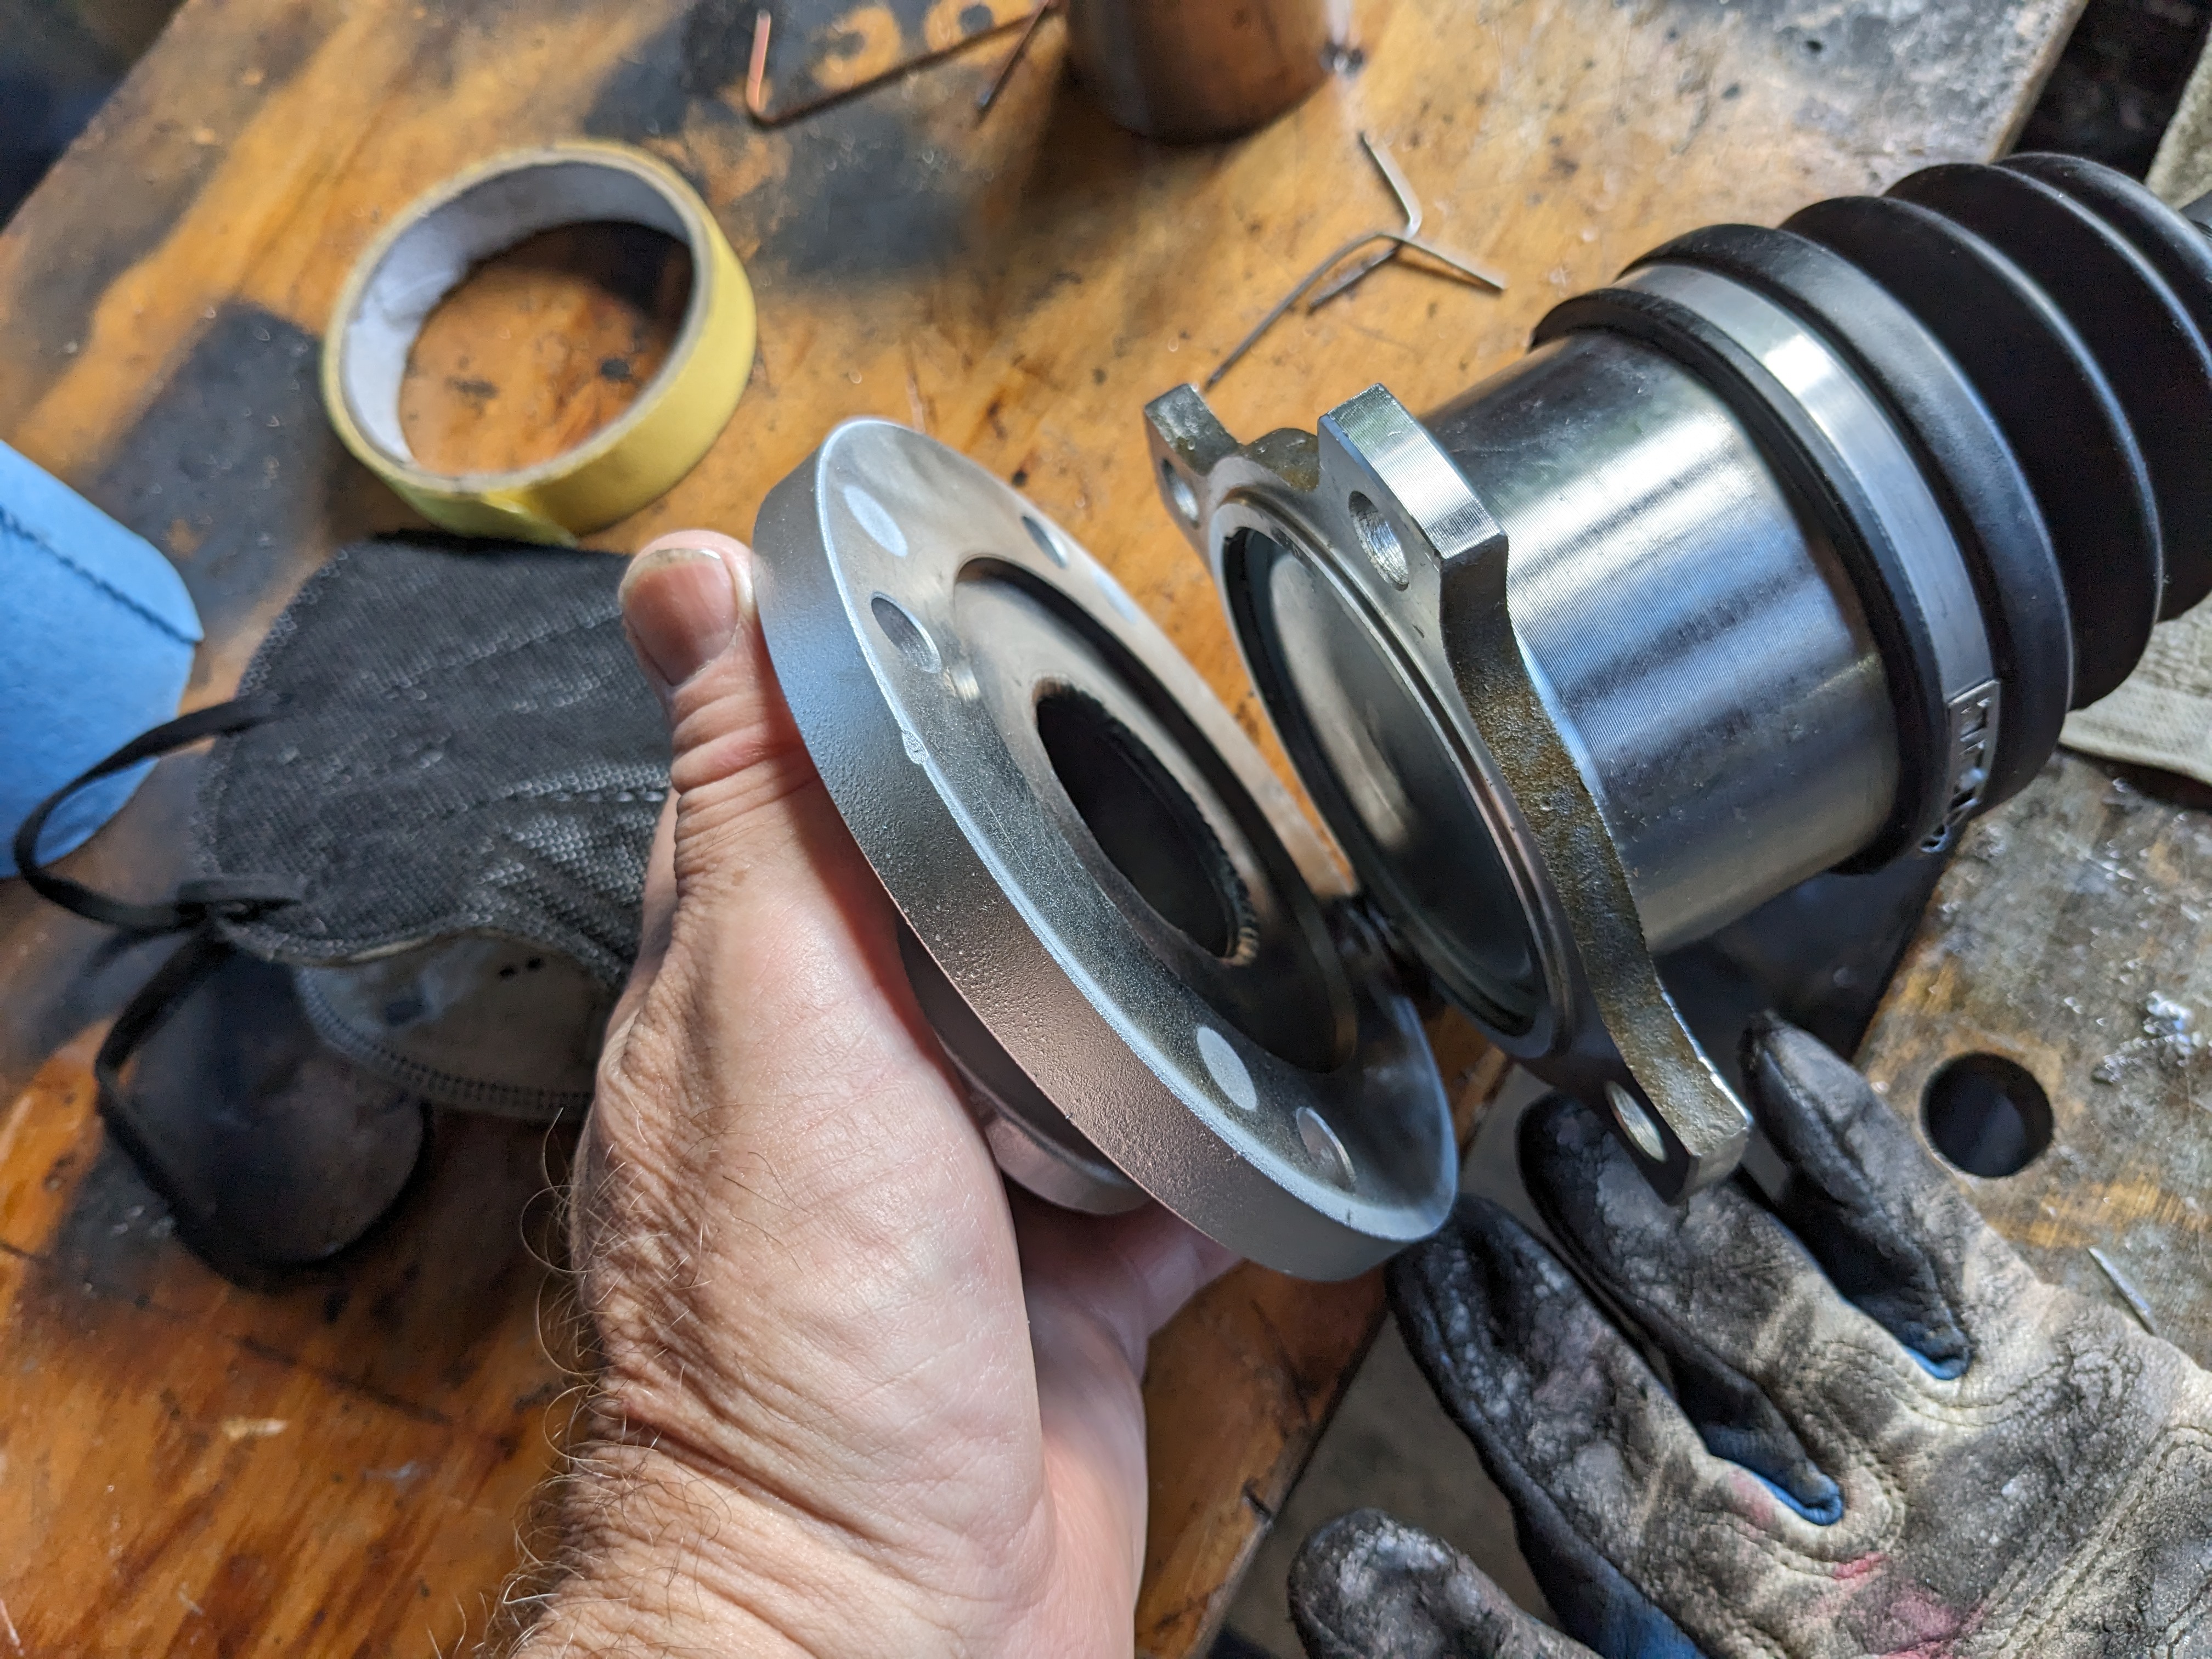
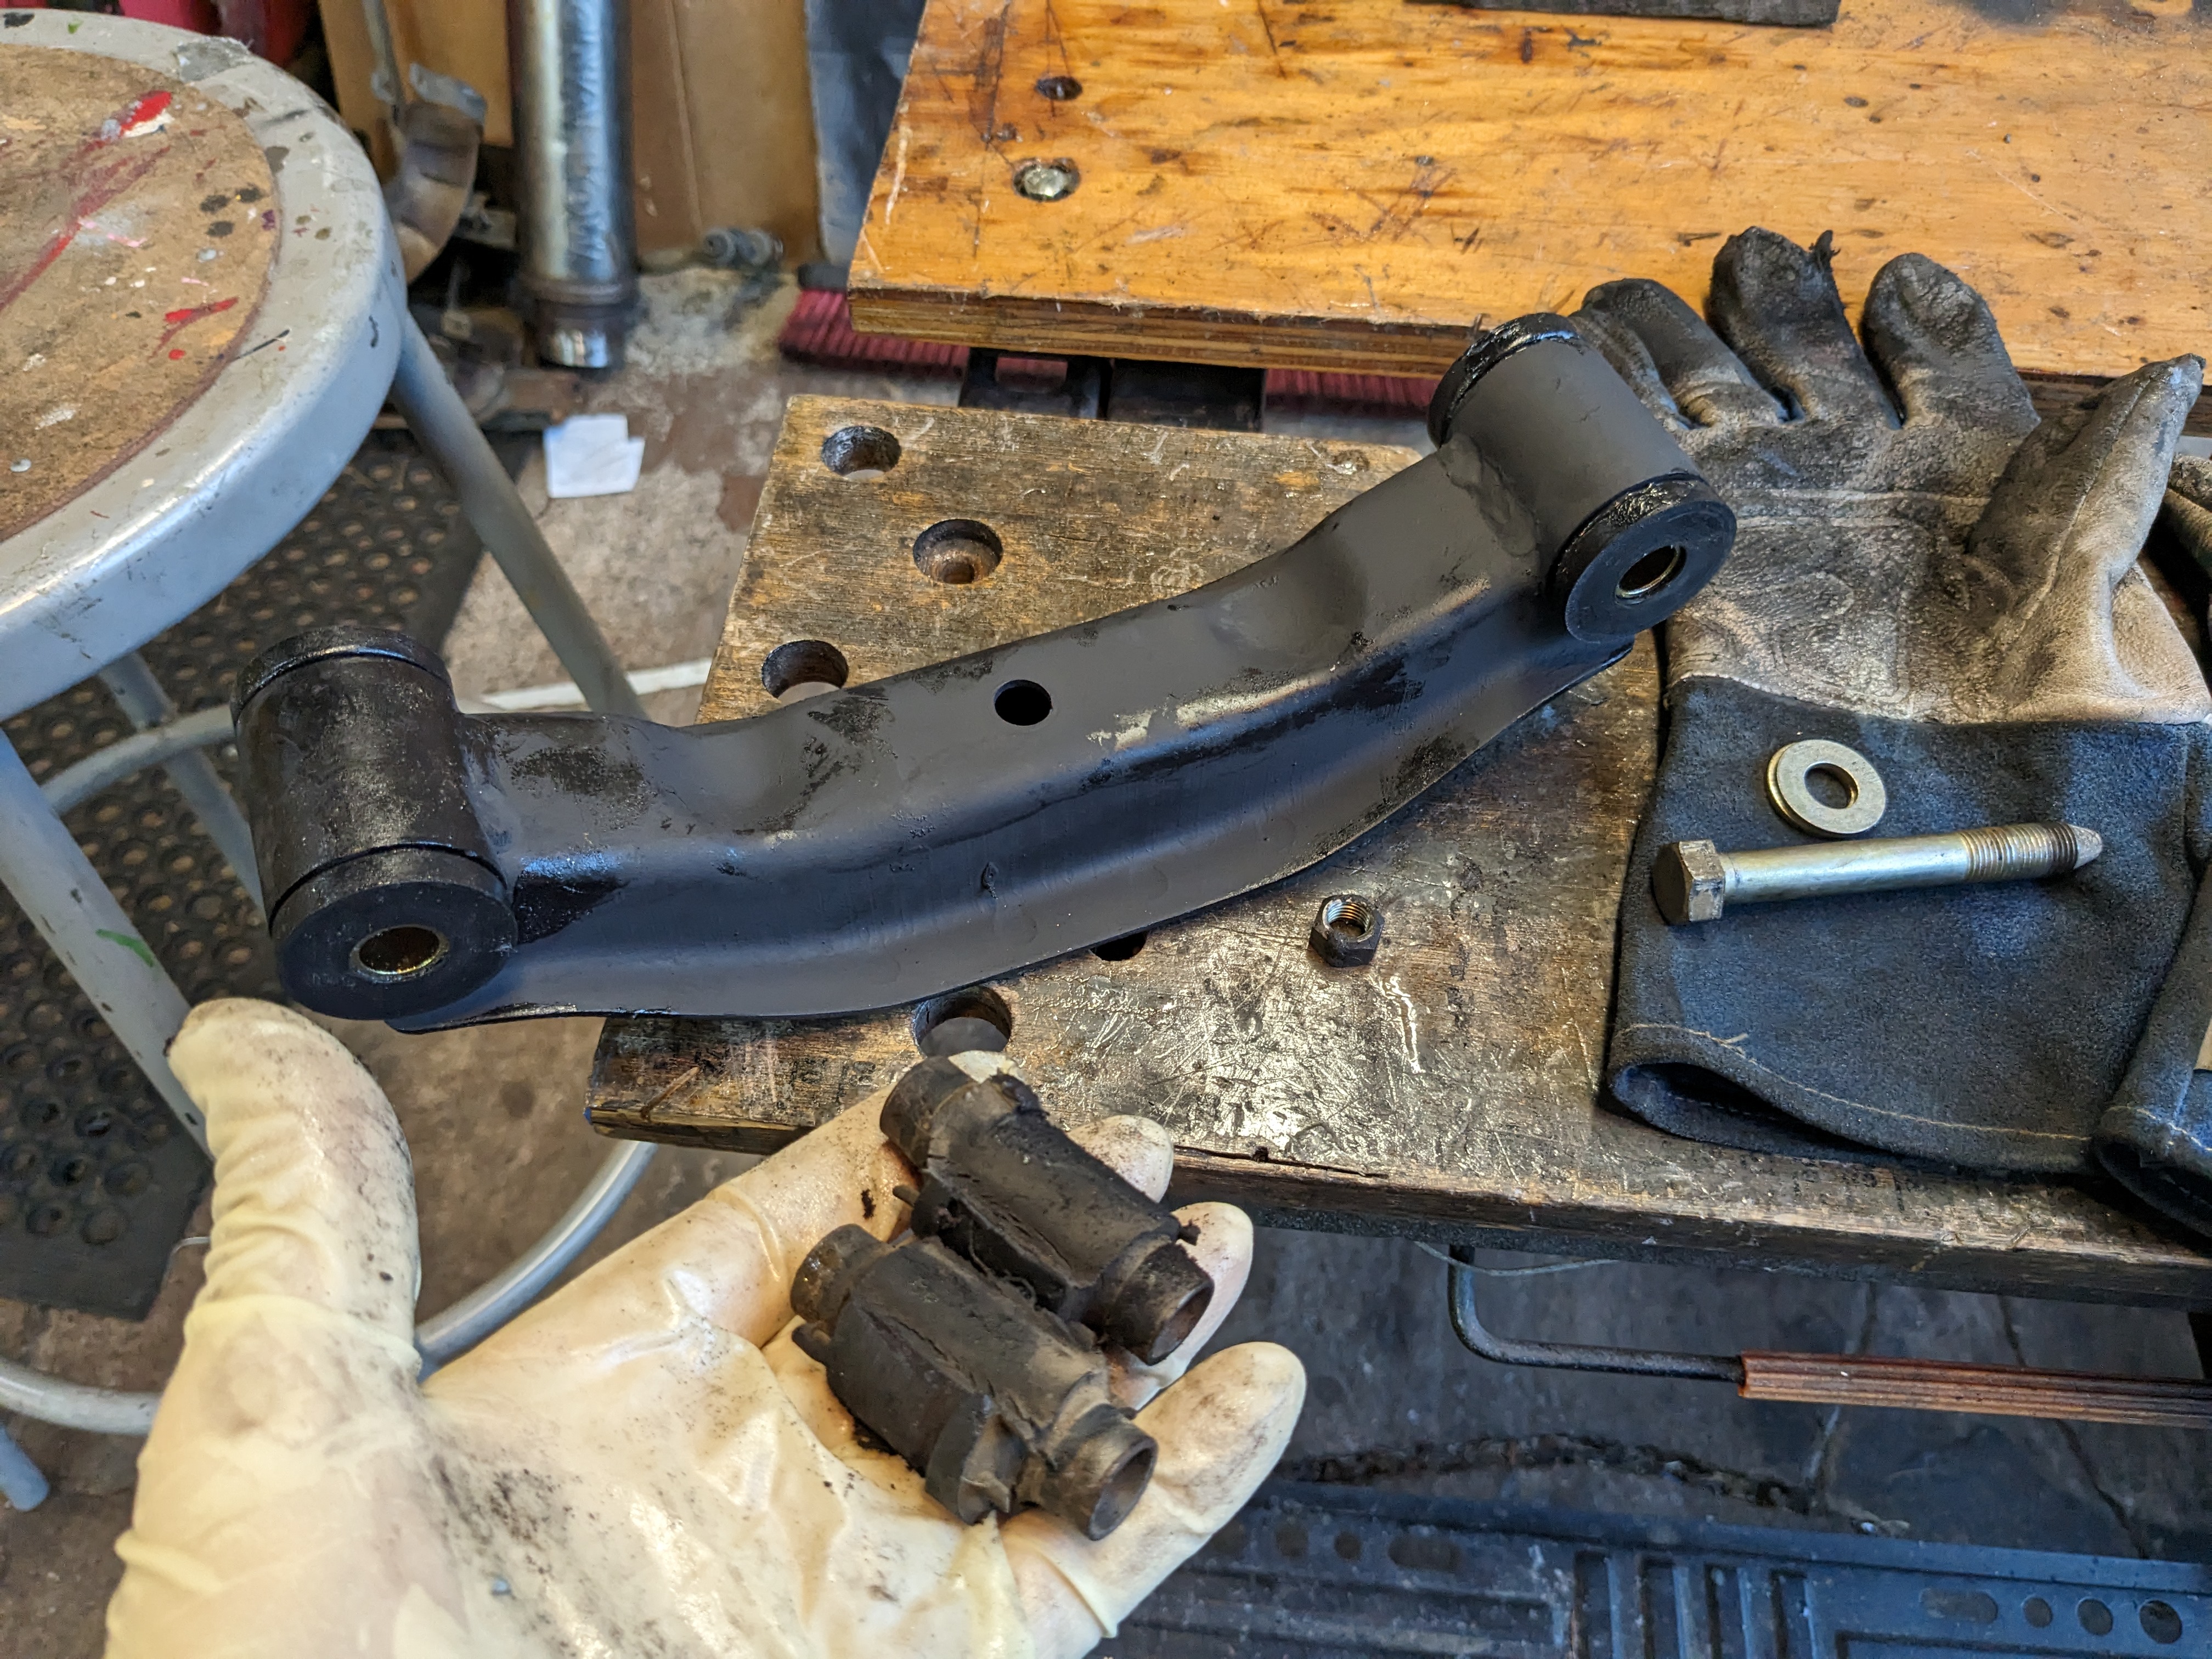
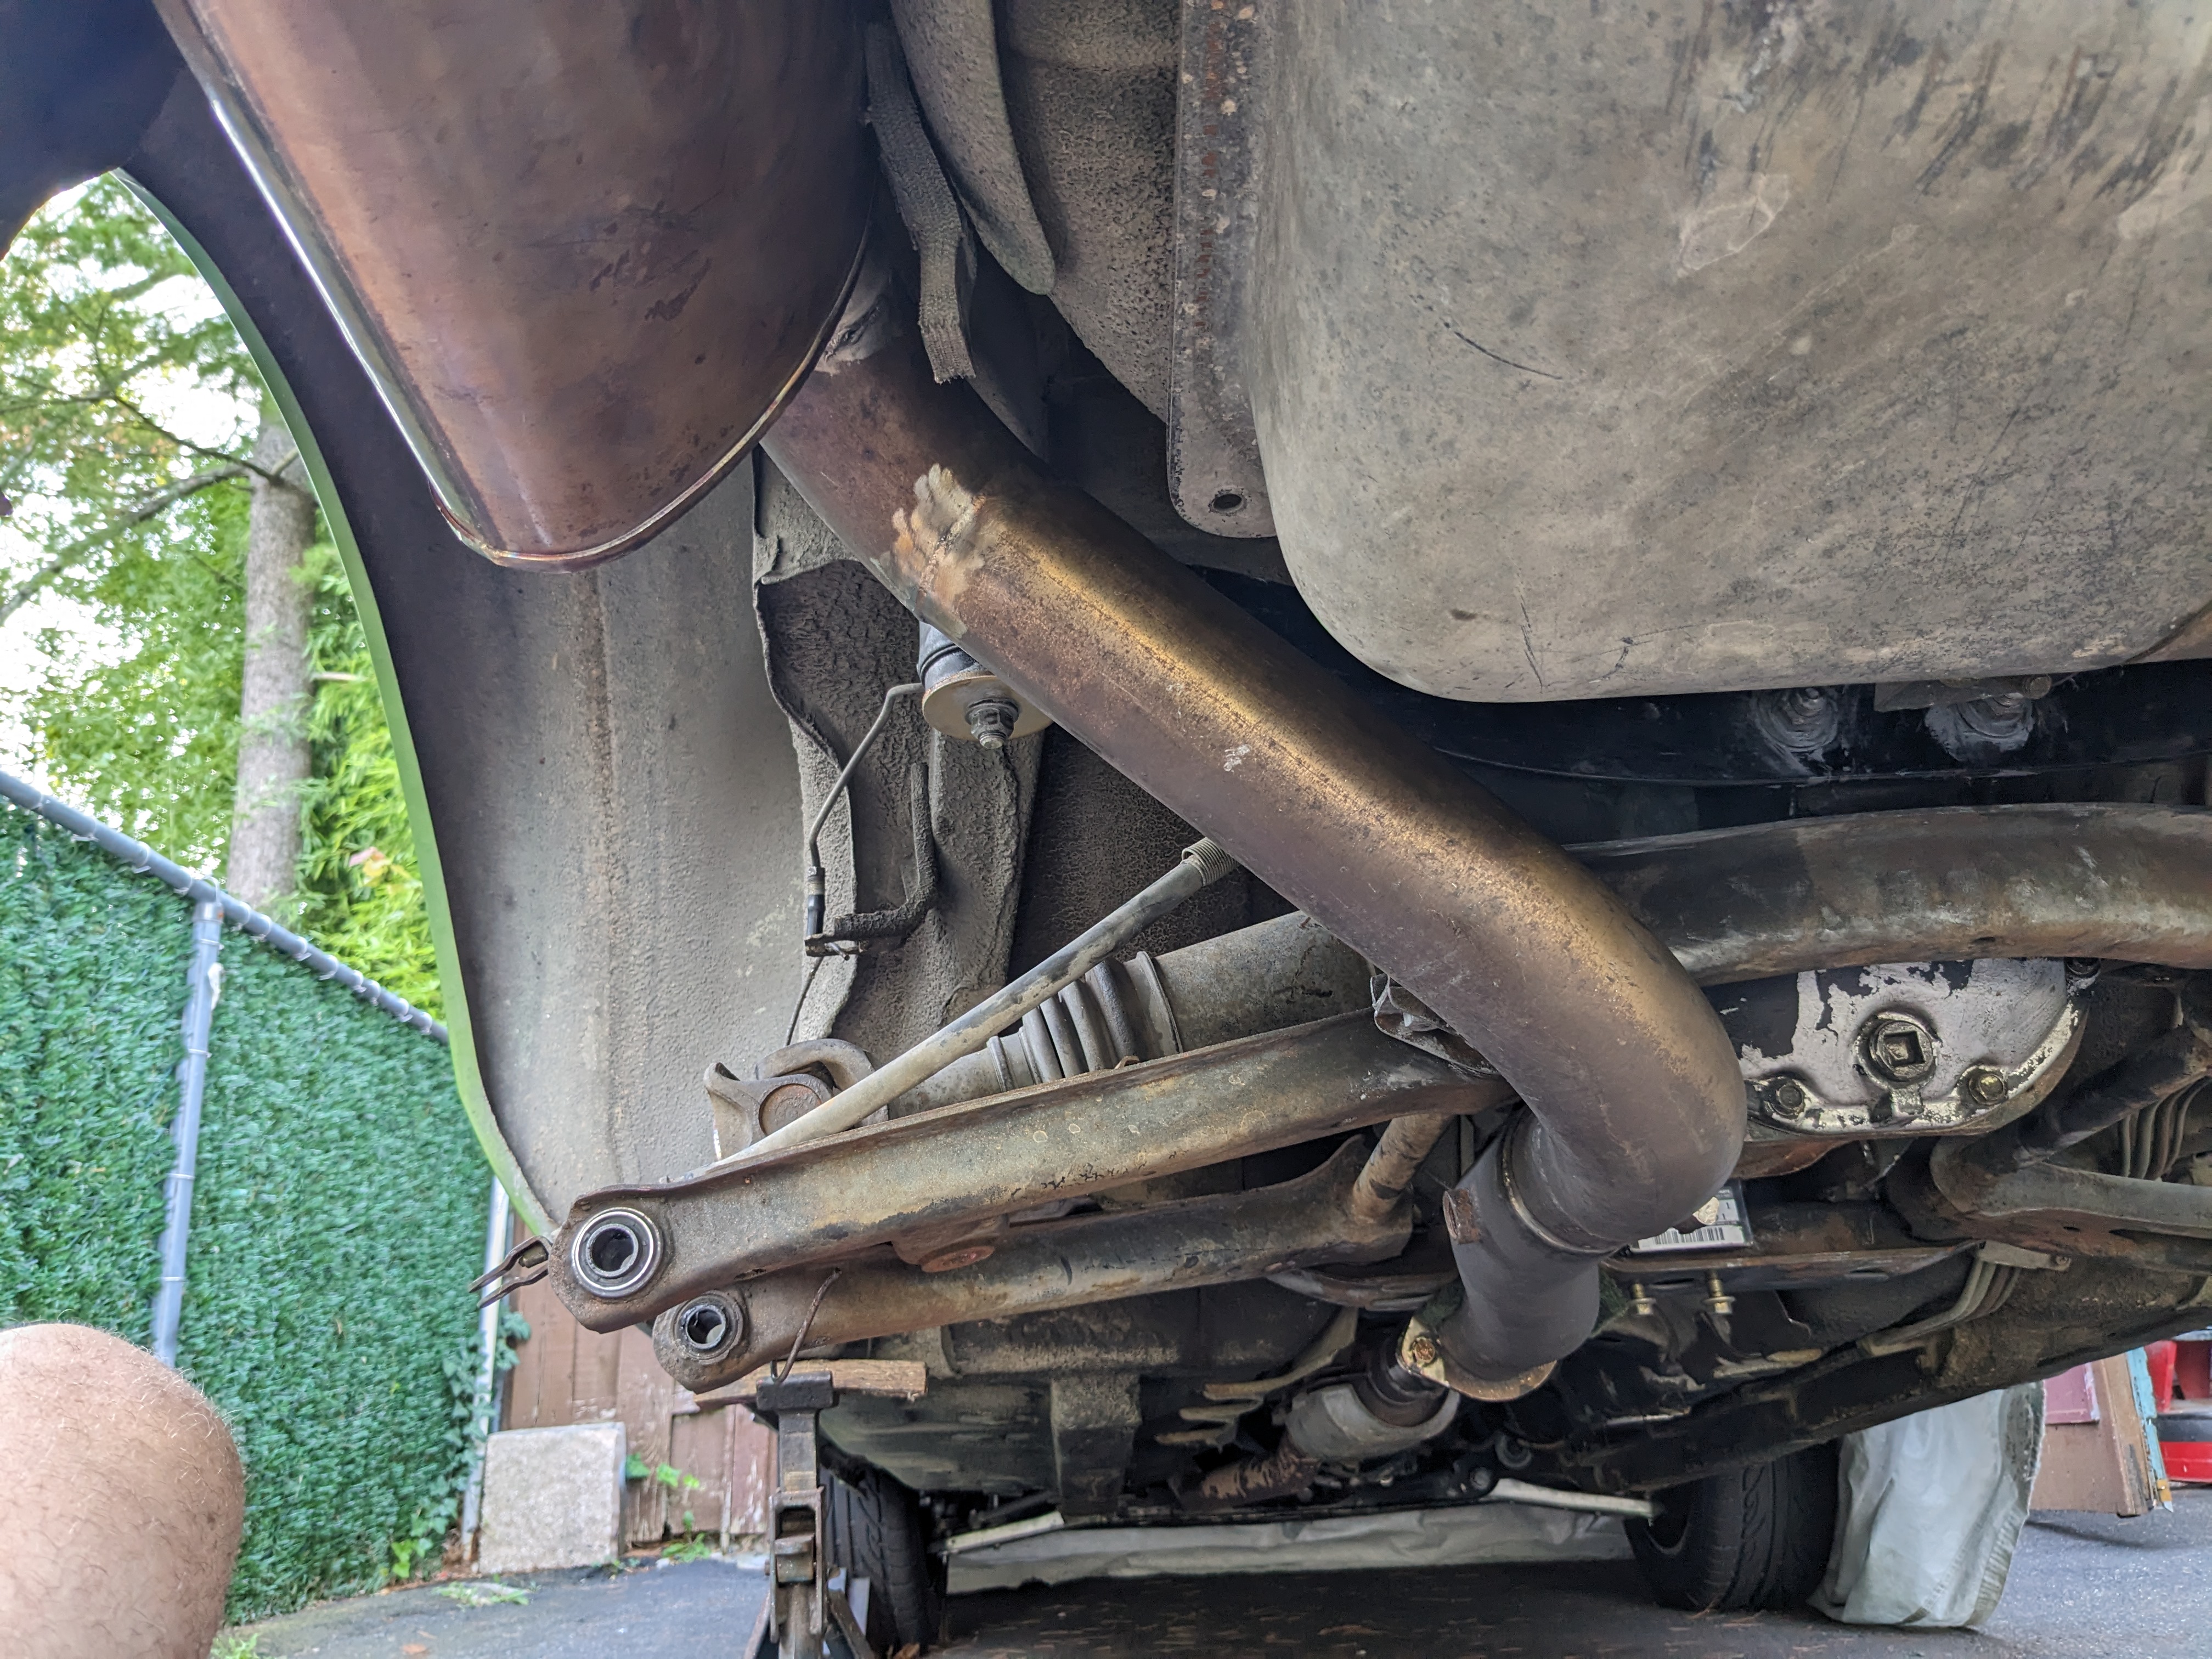
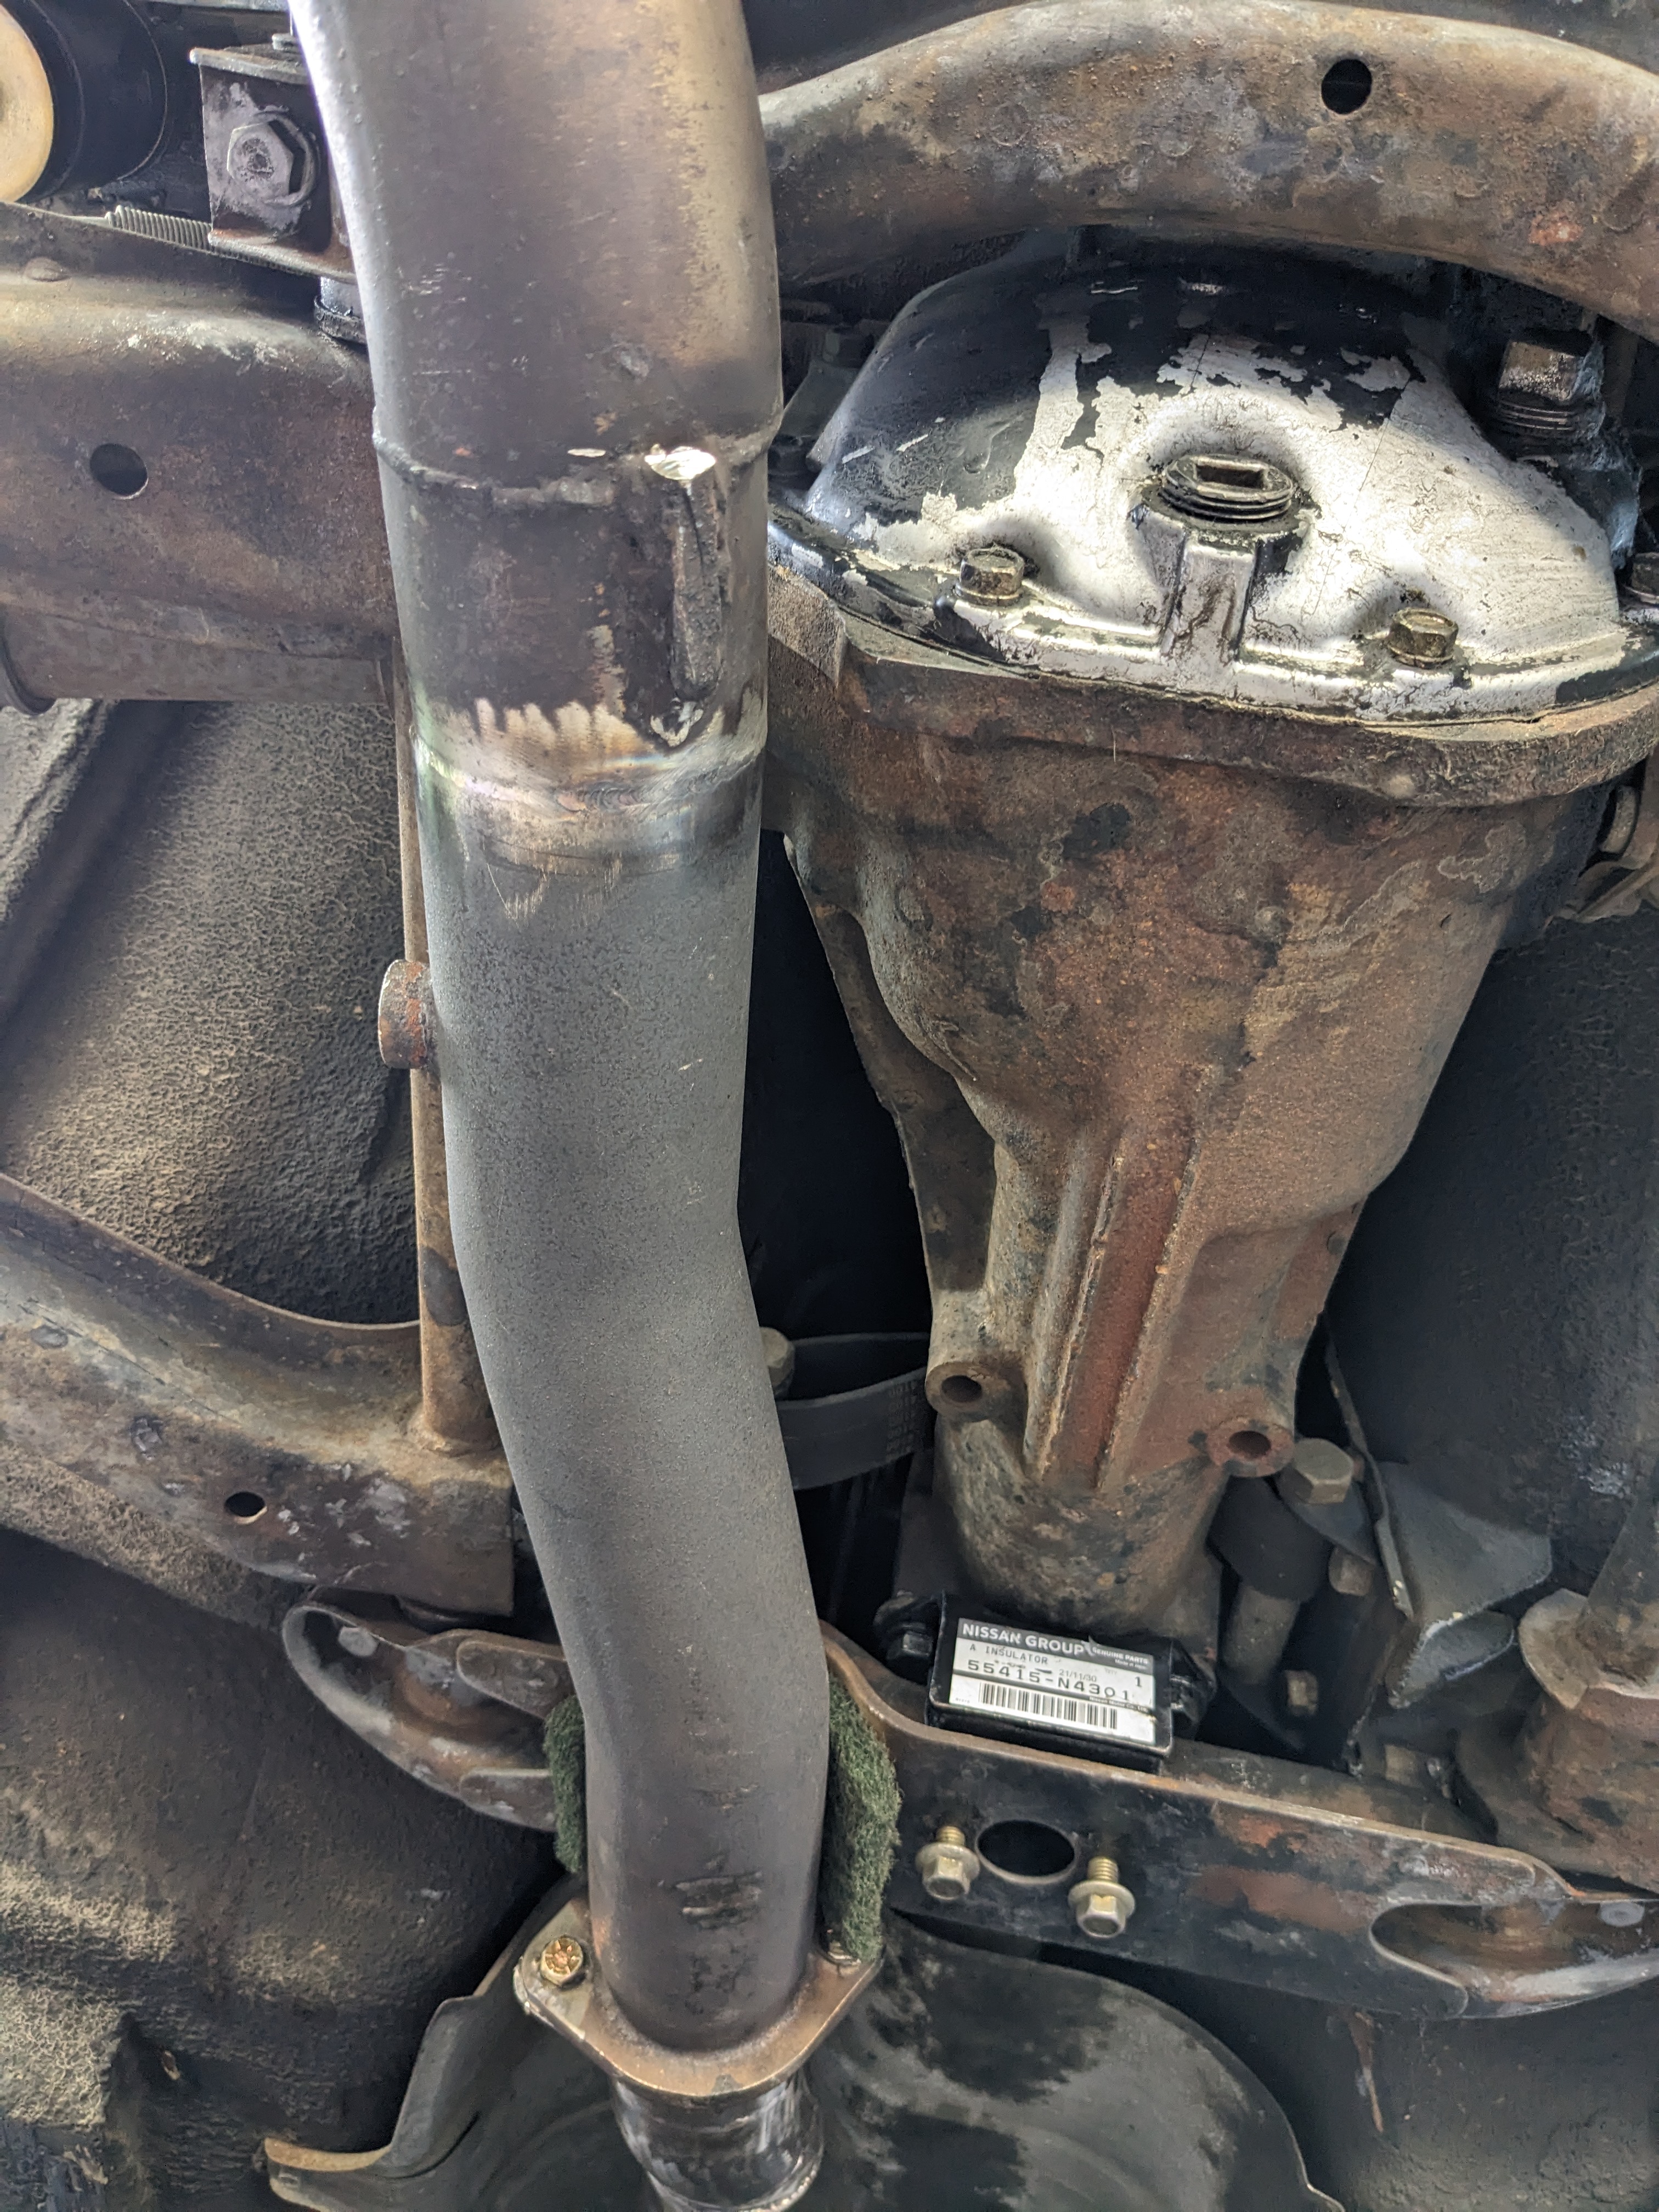
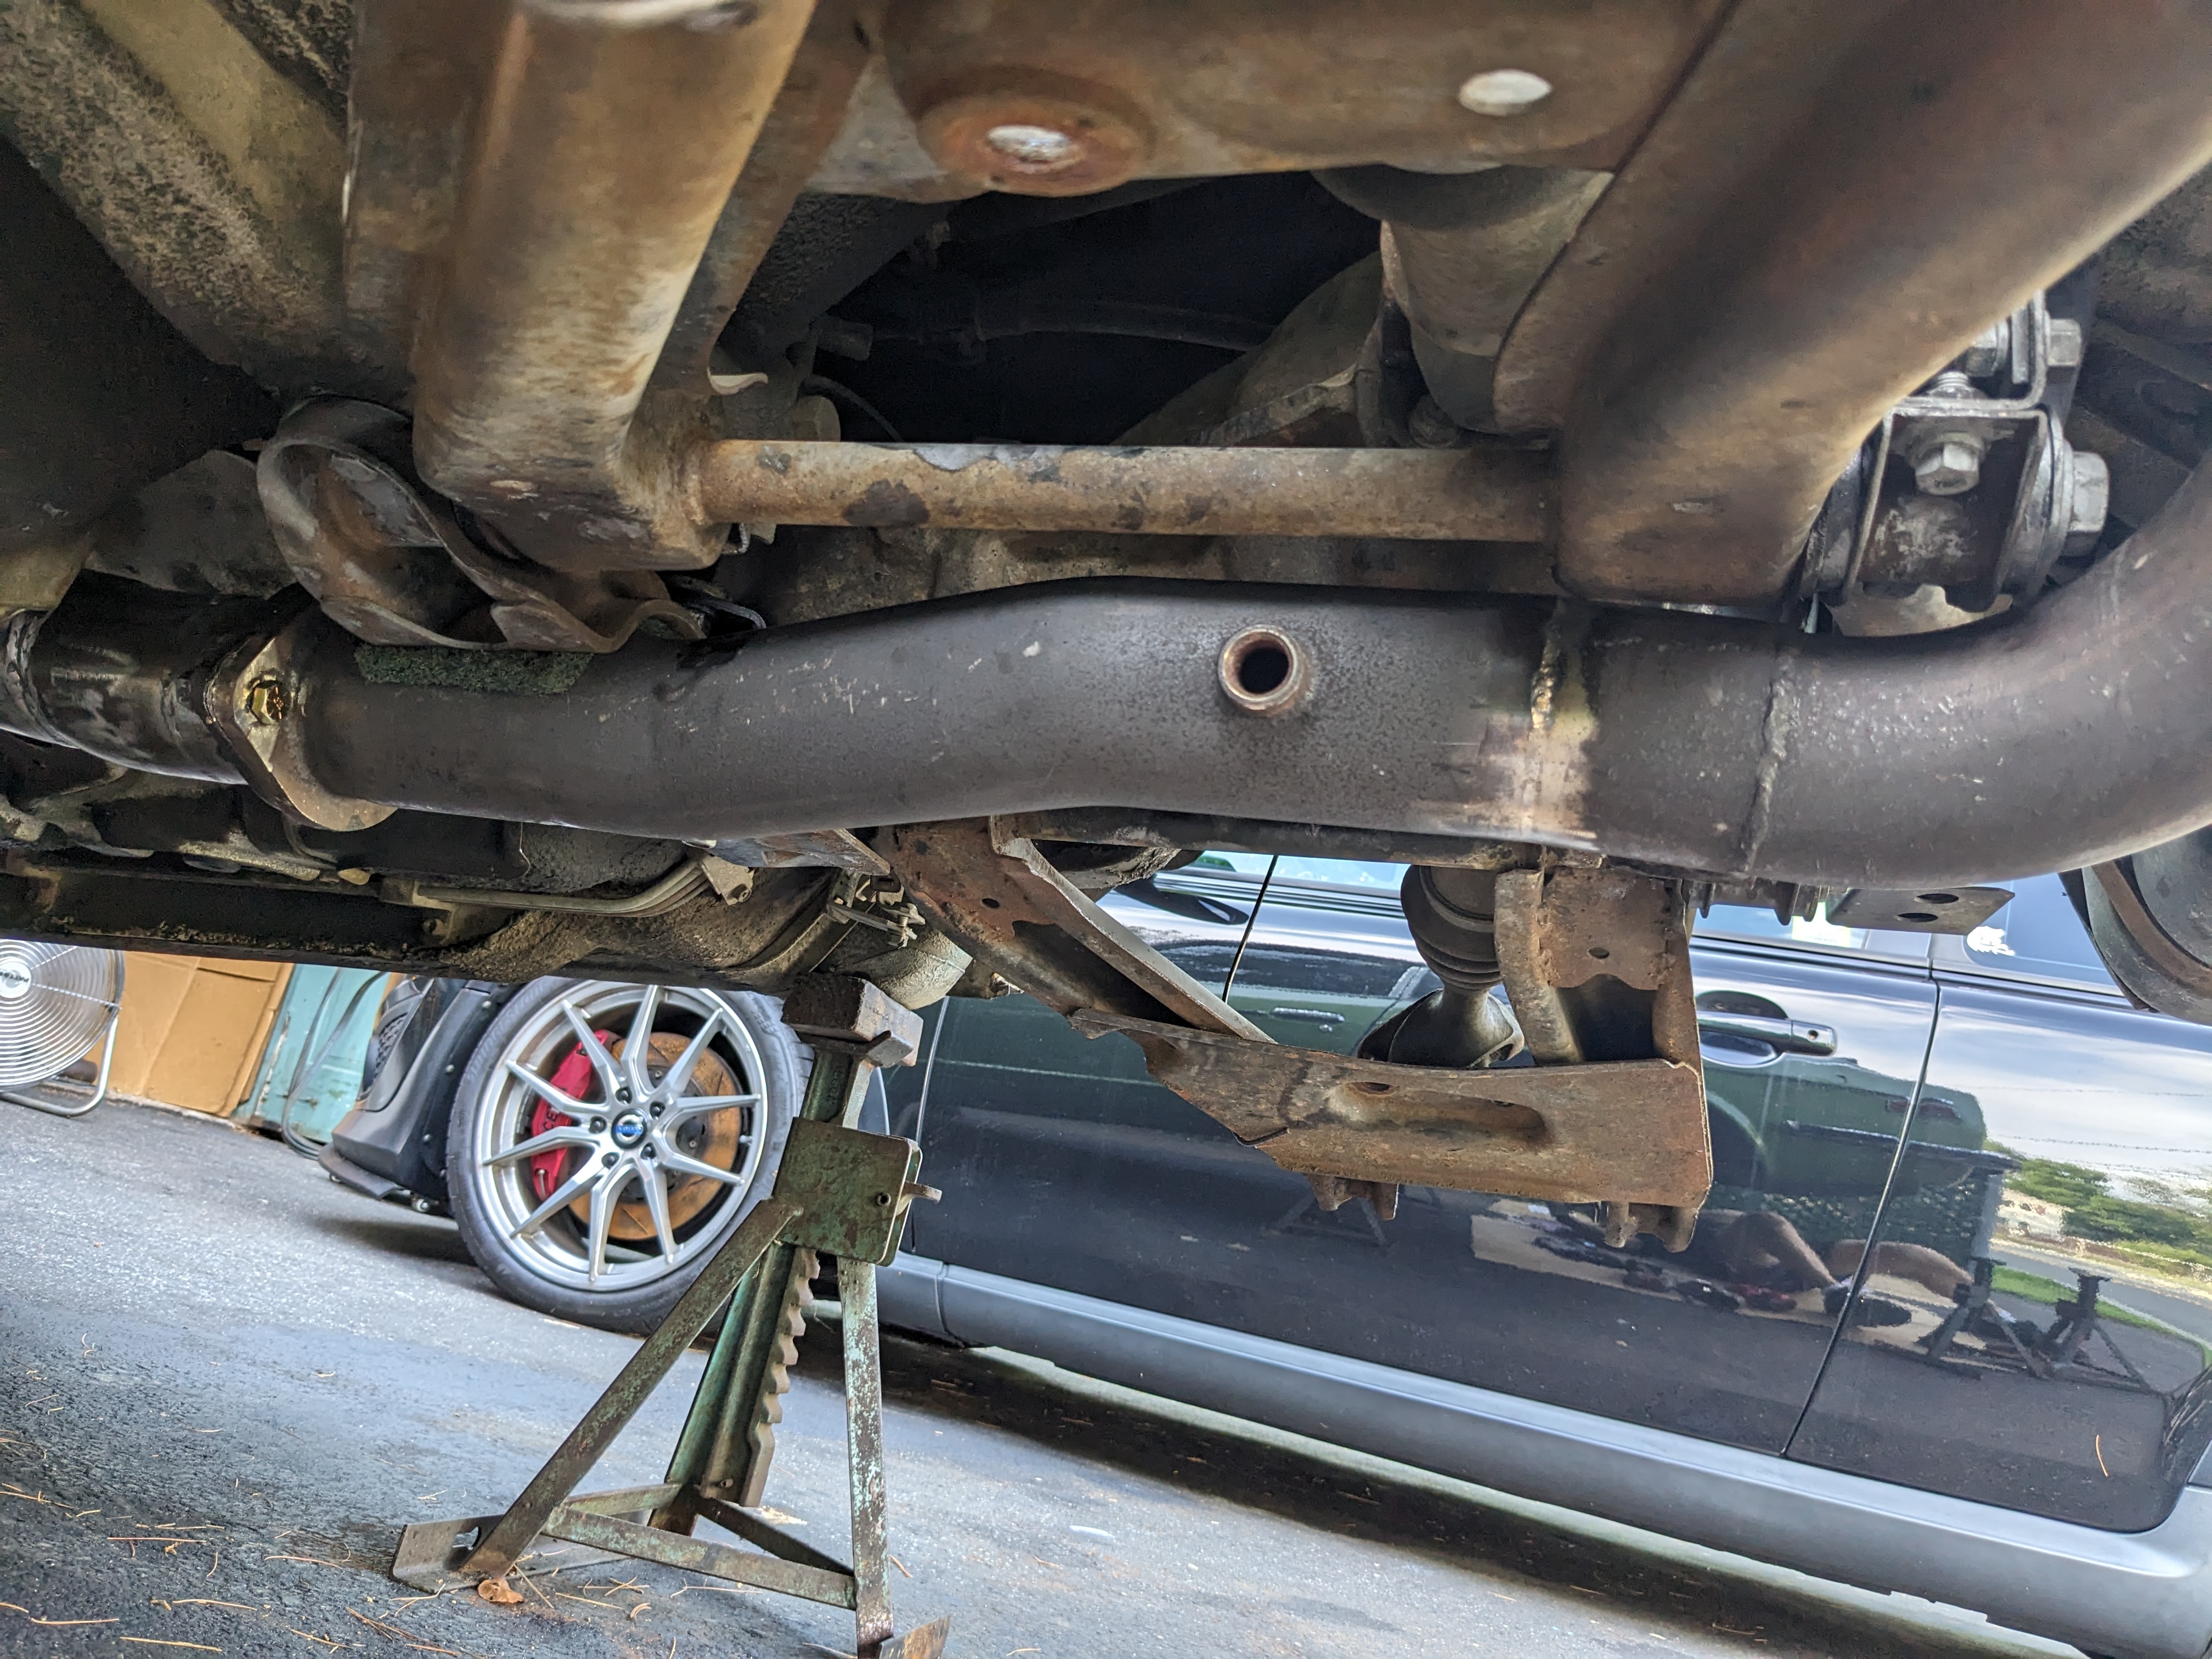
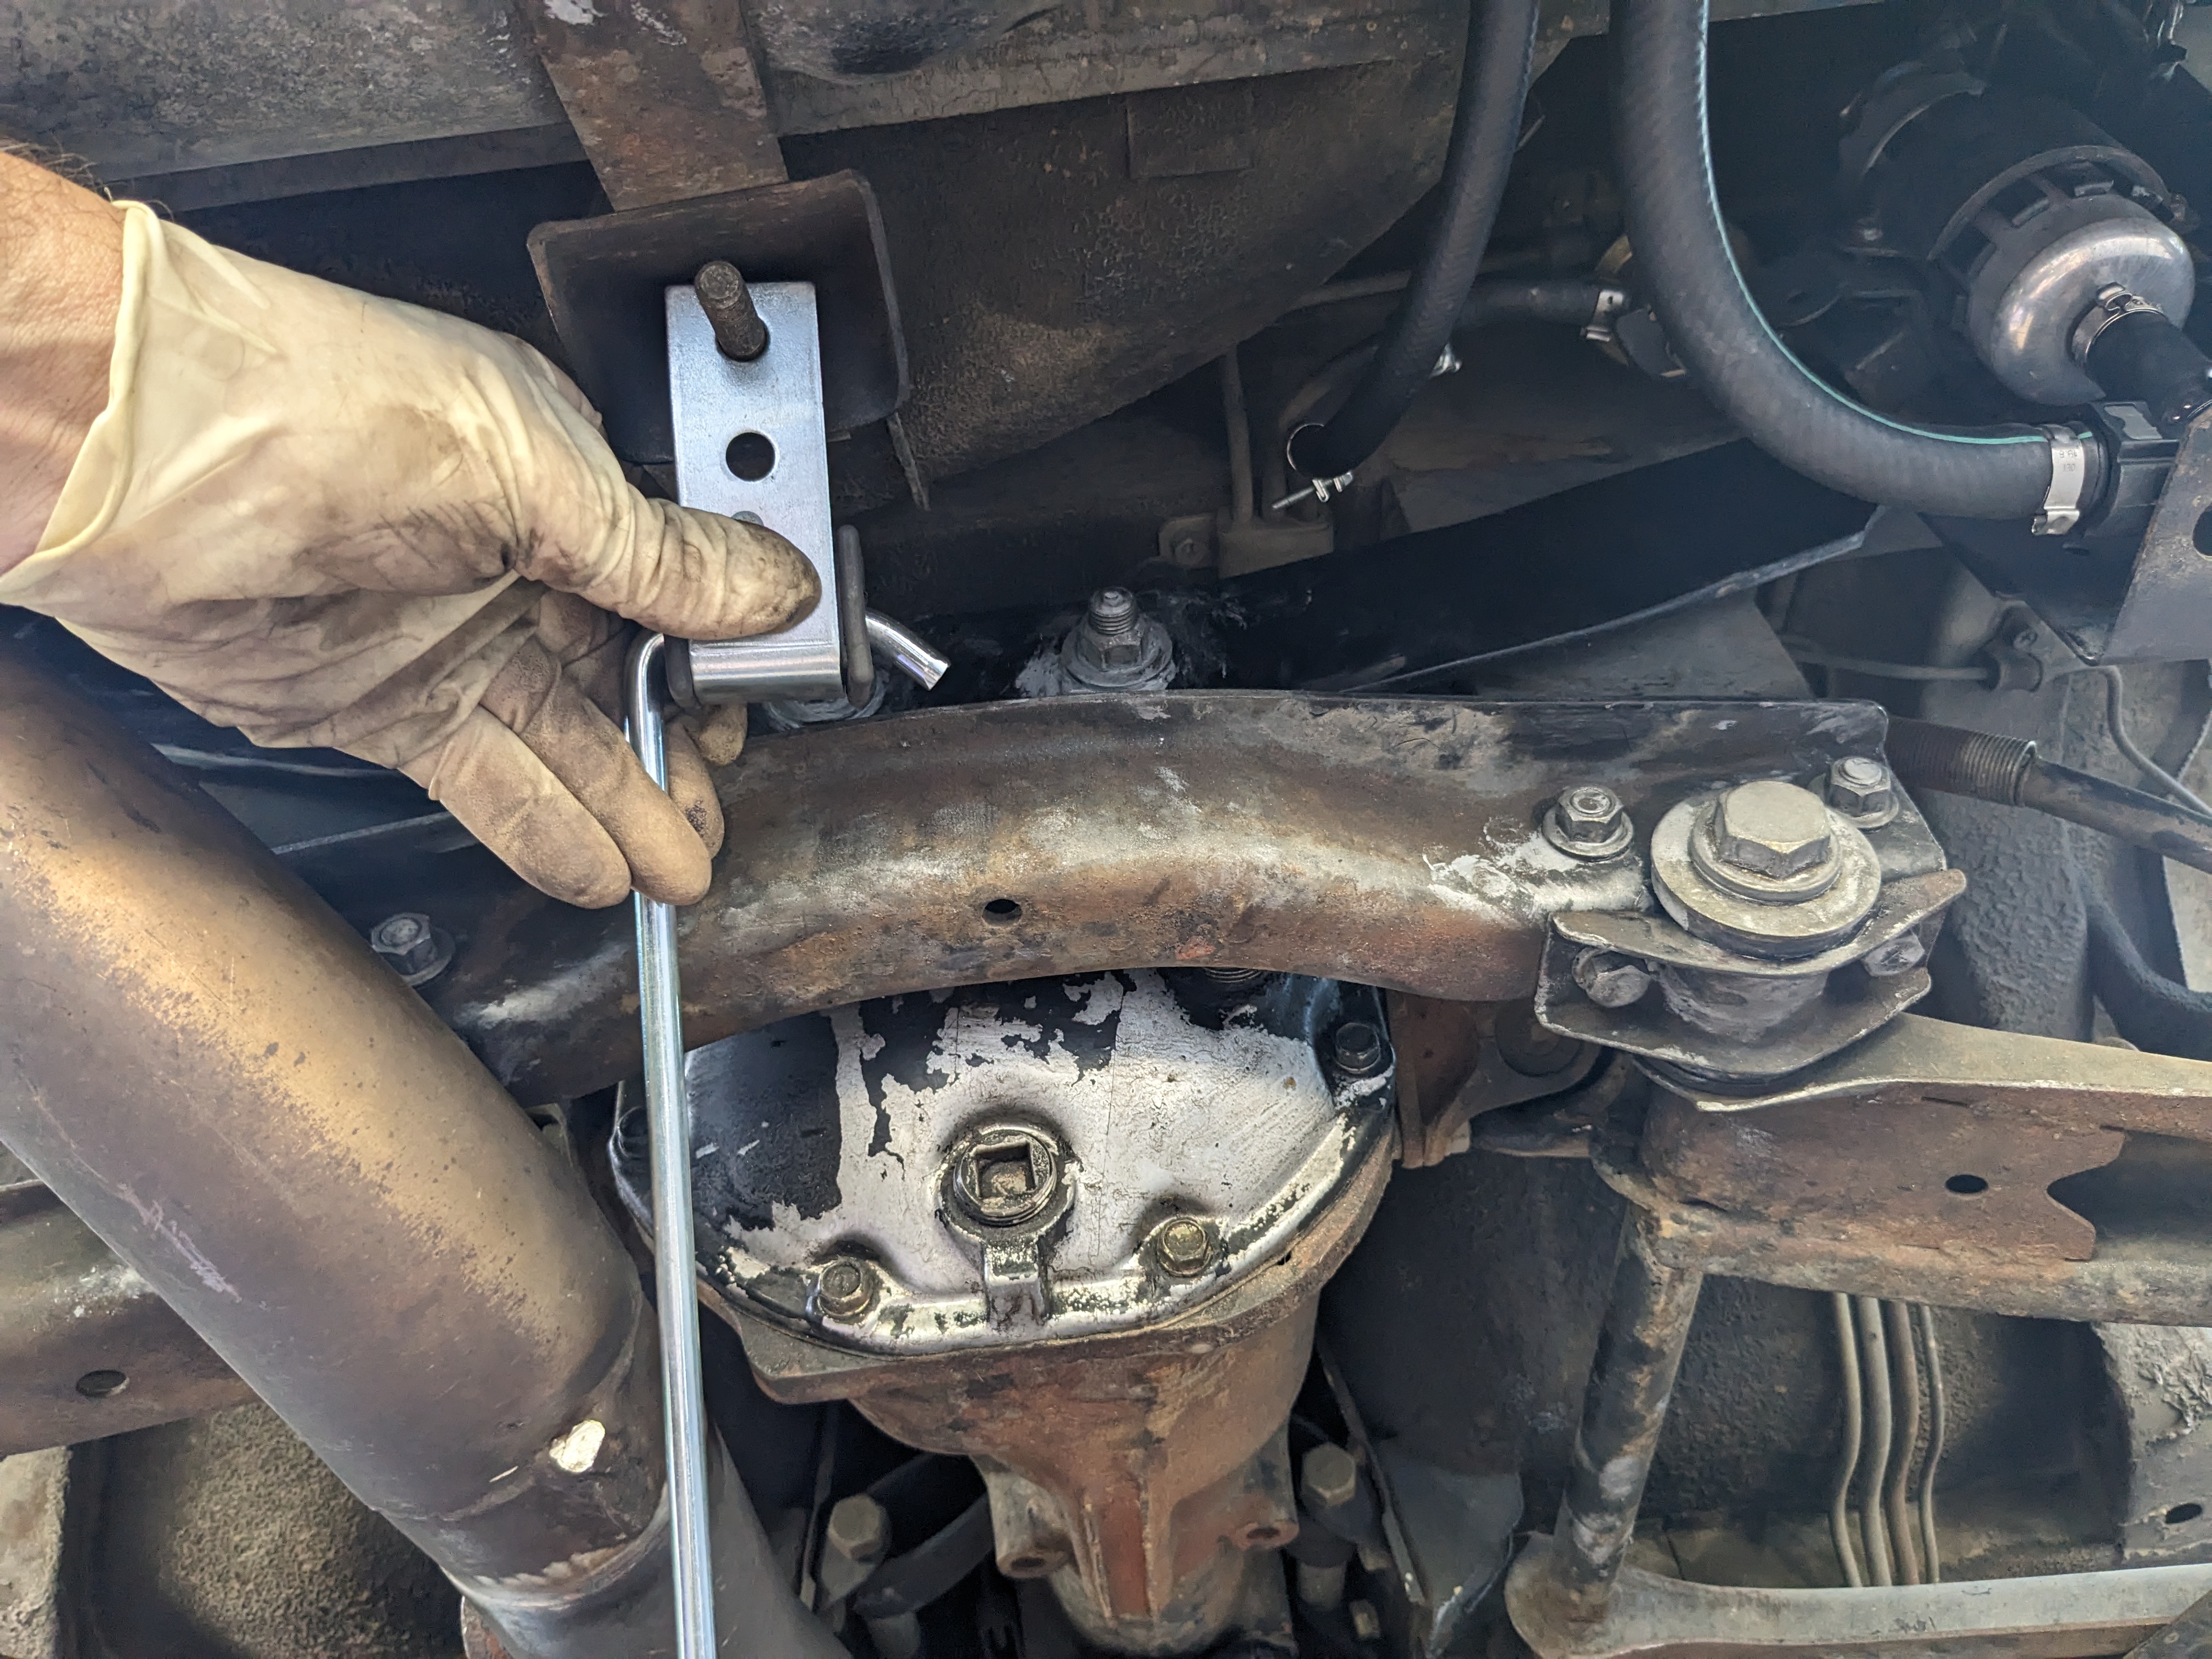
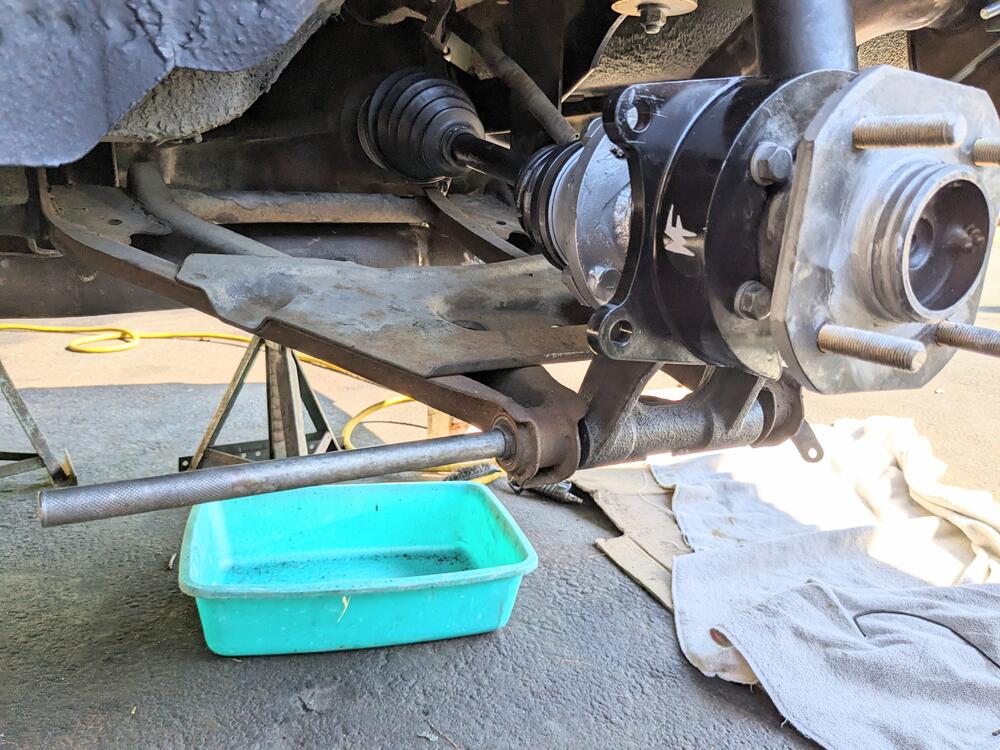
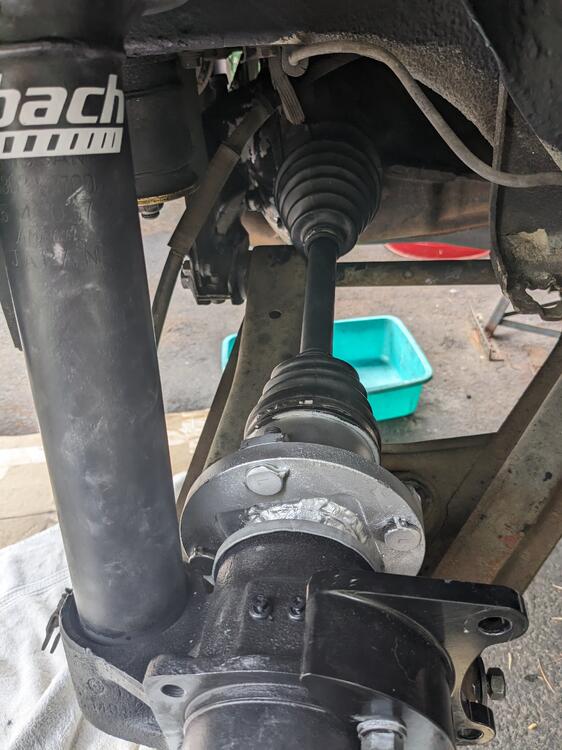
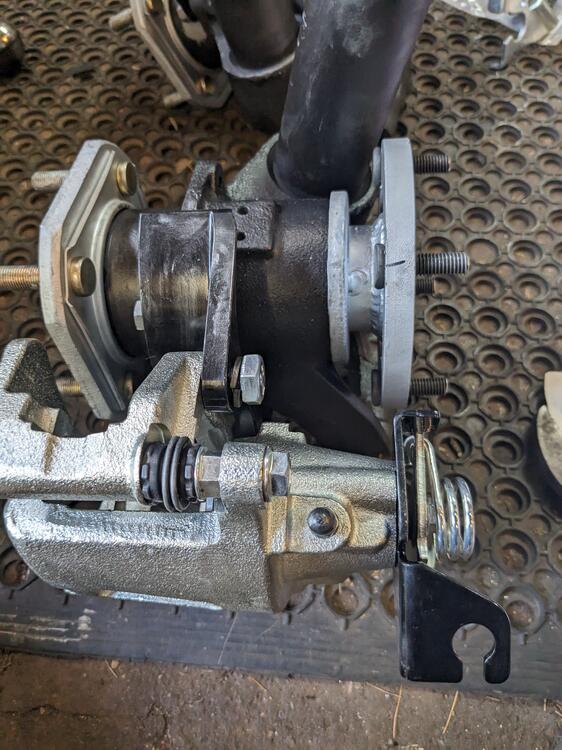
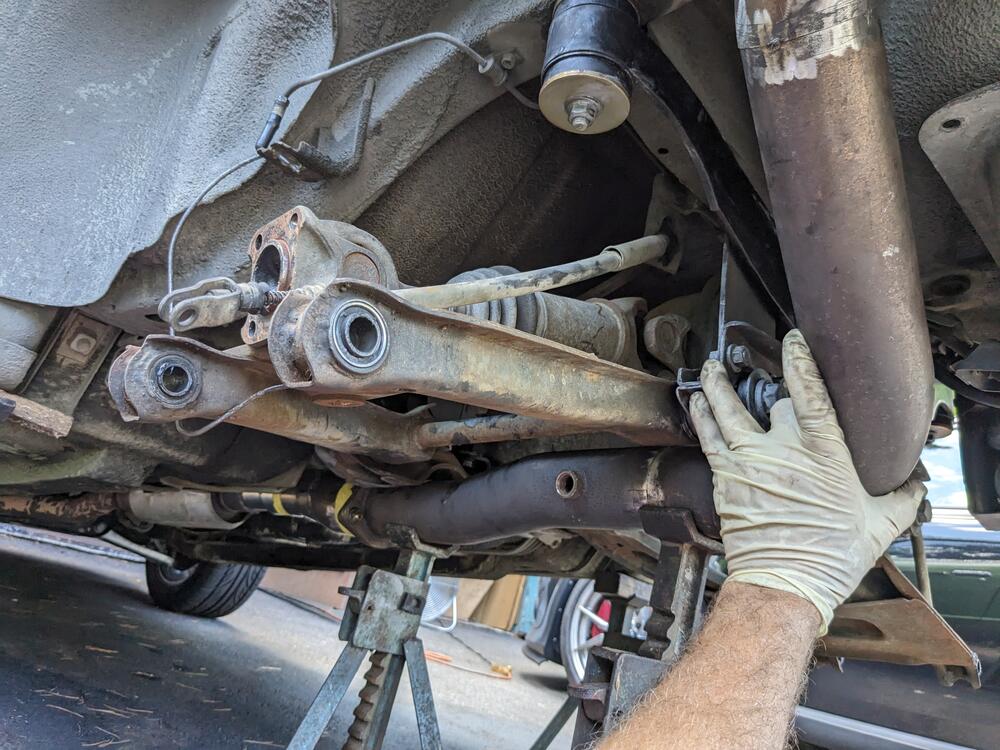
So.... I got some work done on the rear suspension & CV conversion. First, I started to assemble the rear struts only to find the spring was waaayy to short - then I figured out I put the rears on the front - I'm used to cars where the front spring is typ[ically longer than the rear, and I just assembled it that way. SO, I had to remove both front struts, remove the .002 springs & put the .001's on instead, then assemble the rears with the 002's. The fronts (Eibachs) are so short that the upper seat is loose at full drop. Didn't get many pics today, it was so f'ing hot I was dripping all over everything. Only got the right side in. Checked the right axle & stub against the 300ZX T right axle (#NI8442), overall the later axle is longer when fully extended. With it installed (with outer CV now at it's inner end of travel), I had about 1/8 - 3/16" slack between the flange & CV, so no bind will occur. I was going to change the axle seals in the diff, but the ones I got off RockAuto are the wrong dimensions - with the axle inner stub out, I got the numbers off the seal R15 35 55 11 The seal I have is clearly too small (when measured). I went back with the dimensions I now have off the seal & figured out the National 711070 matches the 35/55/11mm dimensions. I have no obvious leaks from the seals, but I really wanted to do them now. The way these axles are installed with studs on the flanges, the hub spindle bolt has to be removed to get the axle out right axle in the diff, located in the outer flange clearance at full drop clearance at normal ride height - not very scientific, and it's unclear form the pics, however there is much more play as the axle lifts getting the clevis pin back in was fun - I had to double-nut the spindle & work it back & forth on it's axis to get the pin to drop, then I also had to knock the spindle fore/aft to get it to fully seat in the housing


-
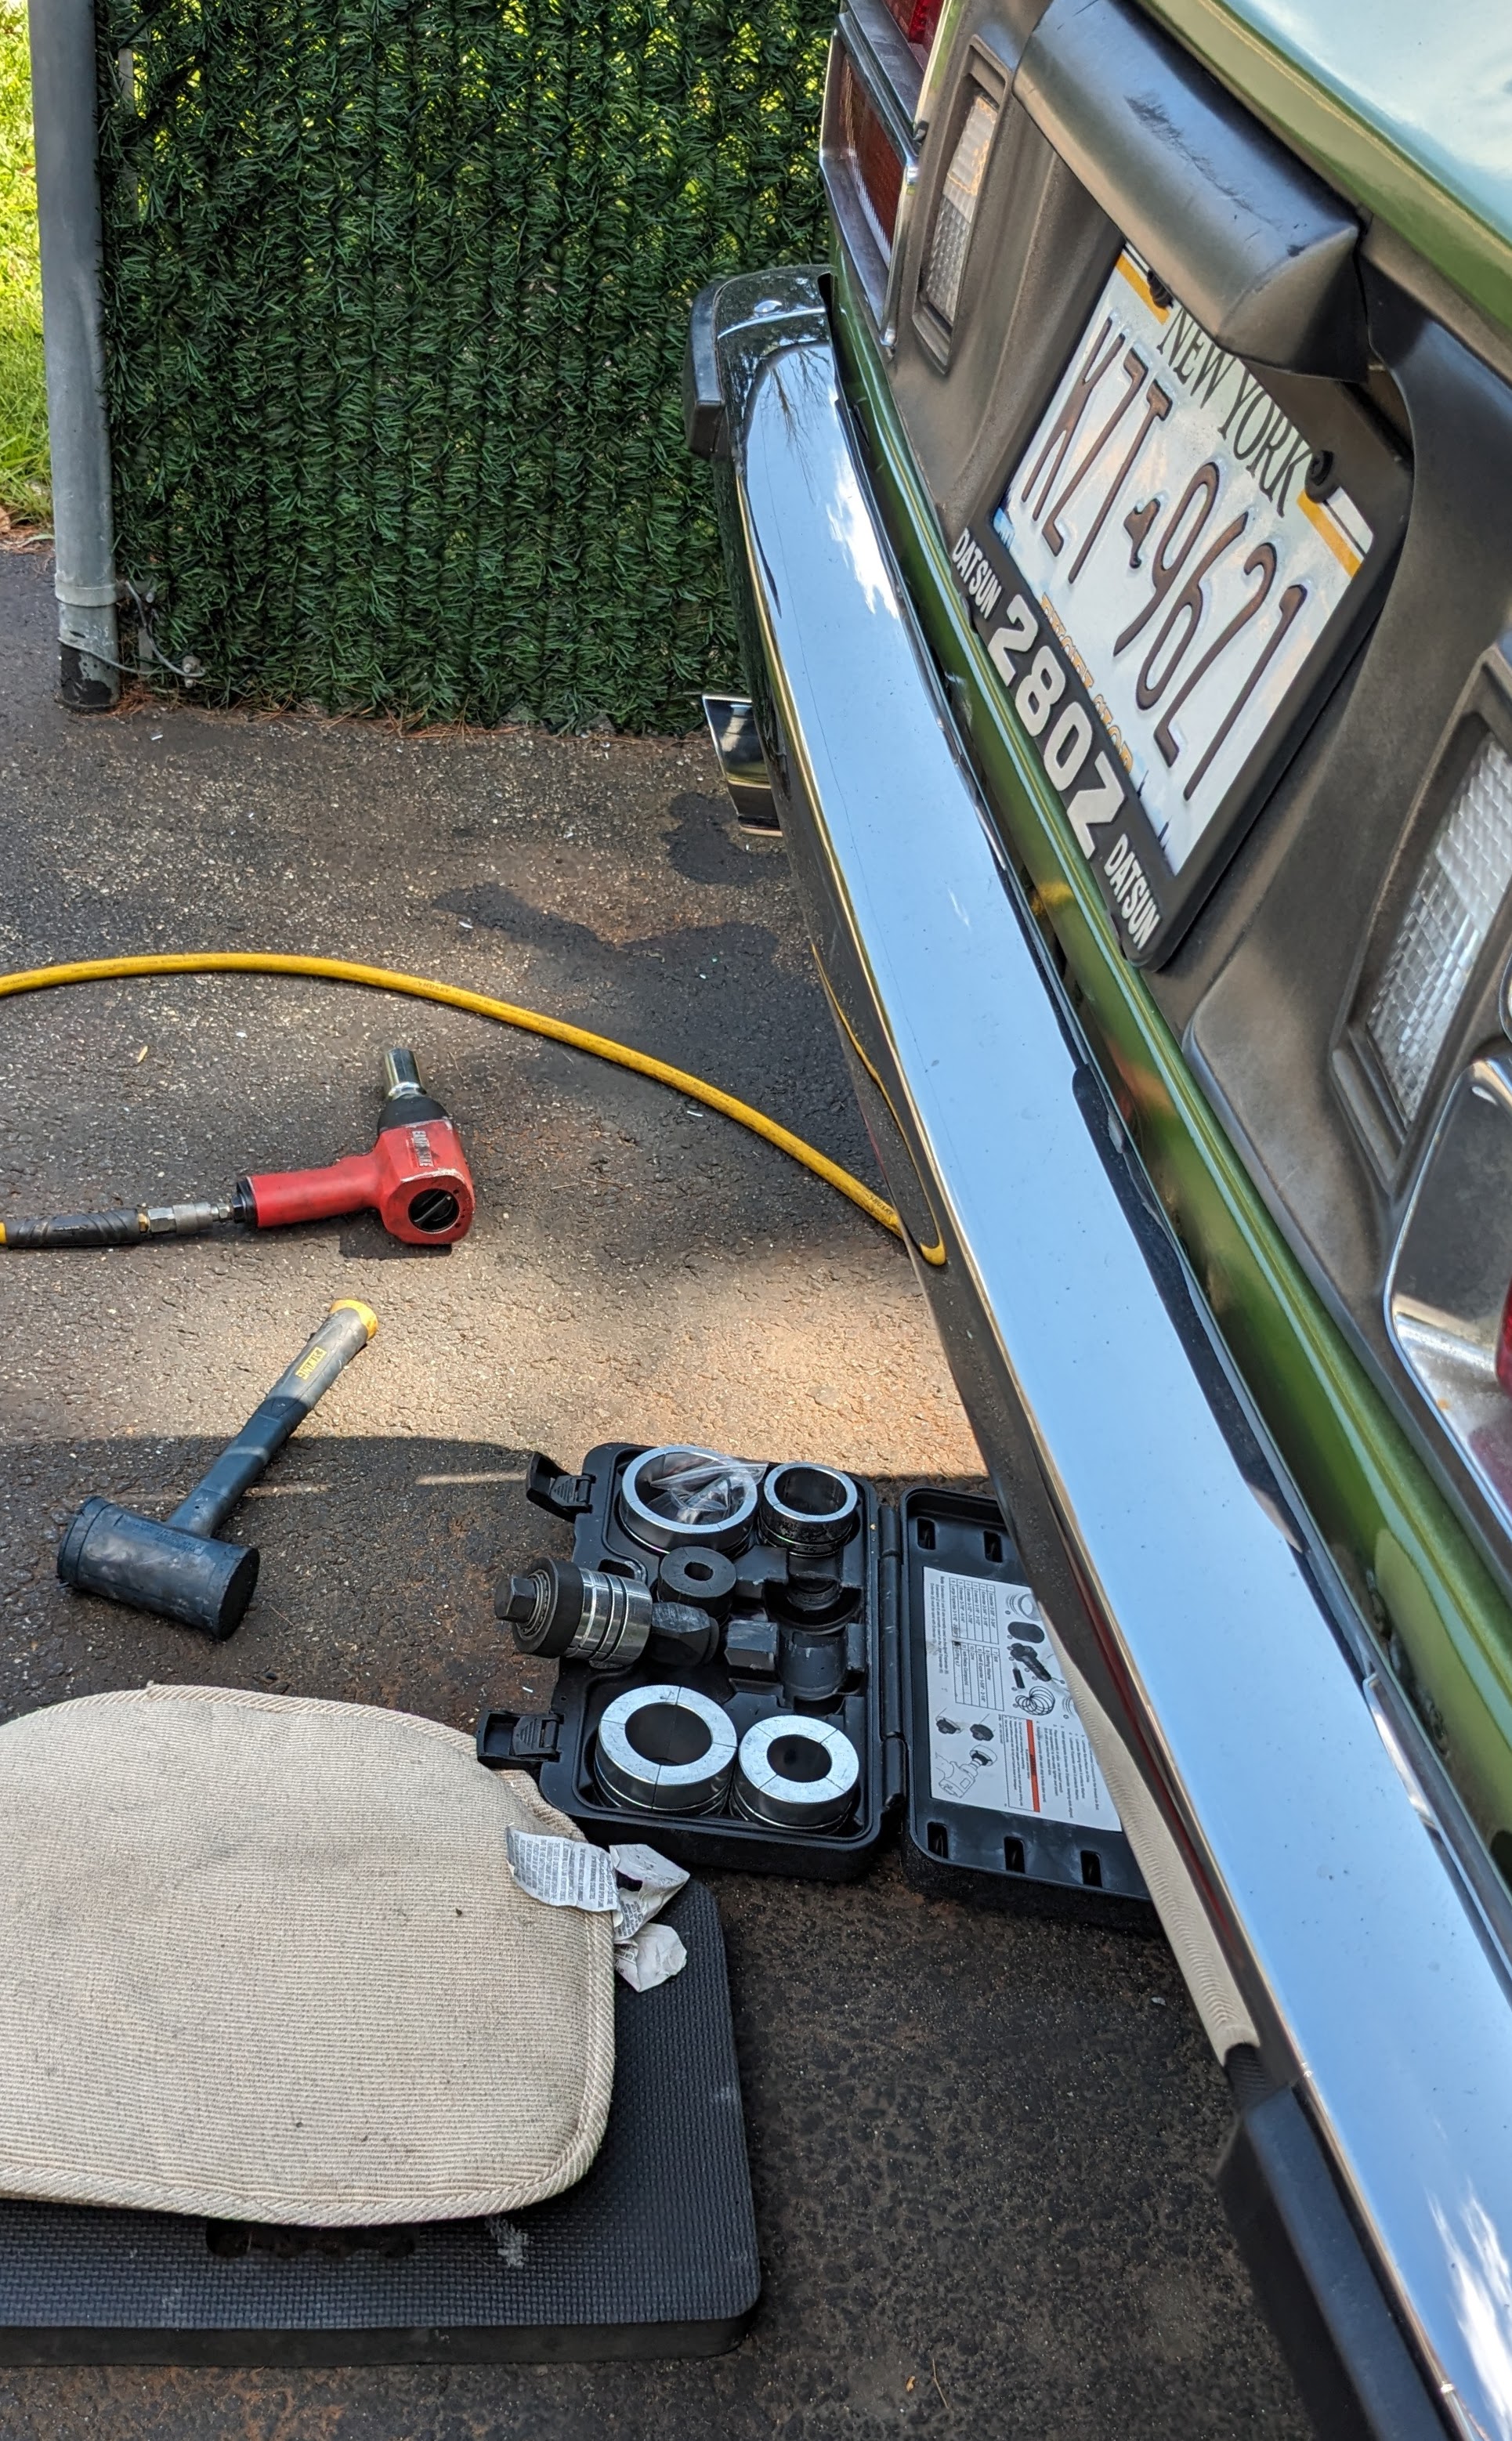
Youtube of exhaust note, during warmup
-
-
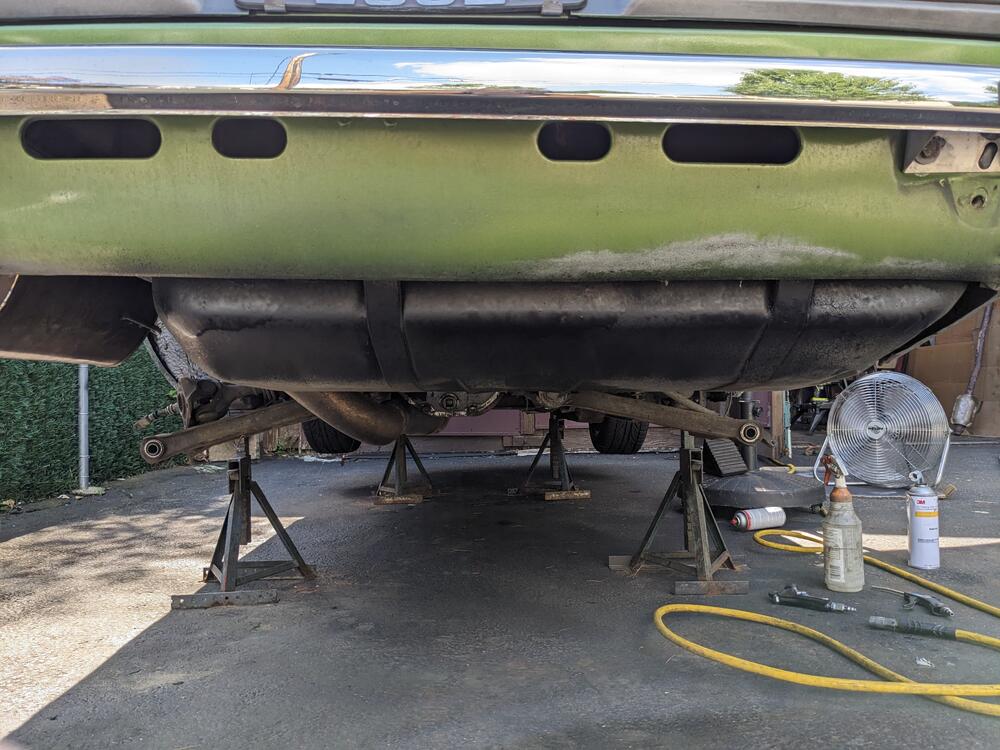
Still don't have the rear back together - I forgot I needed to clean (power washed, dried, rinsed with turps, wire brushed) & apply the 3M stone guard (1 can) & Undercoat (1 can) first Did the back off the Gas tank while I was at it


-
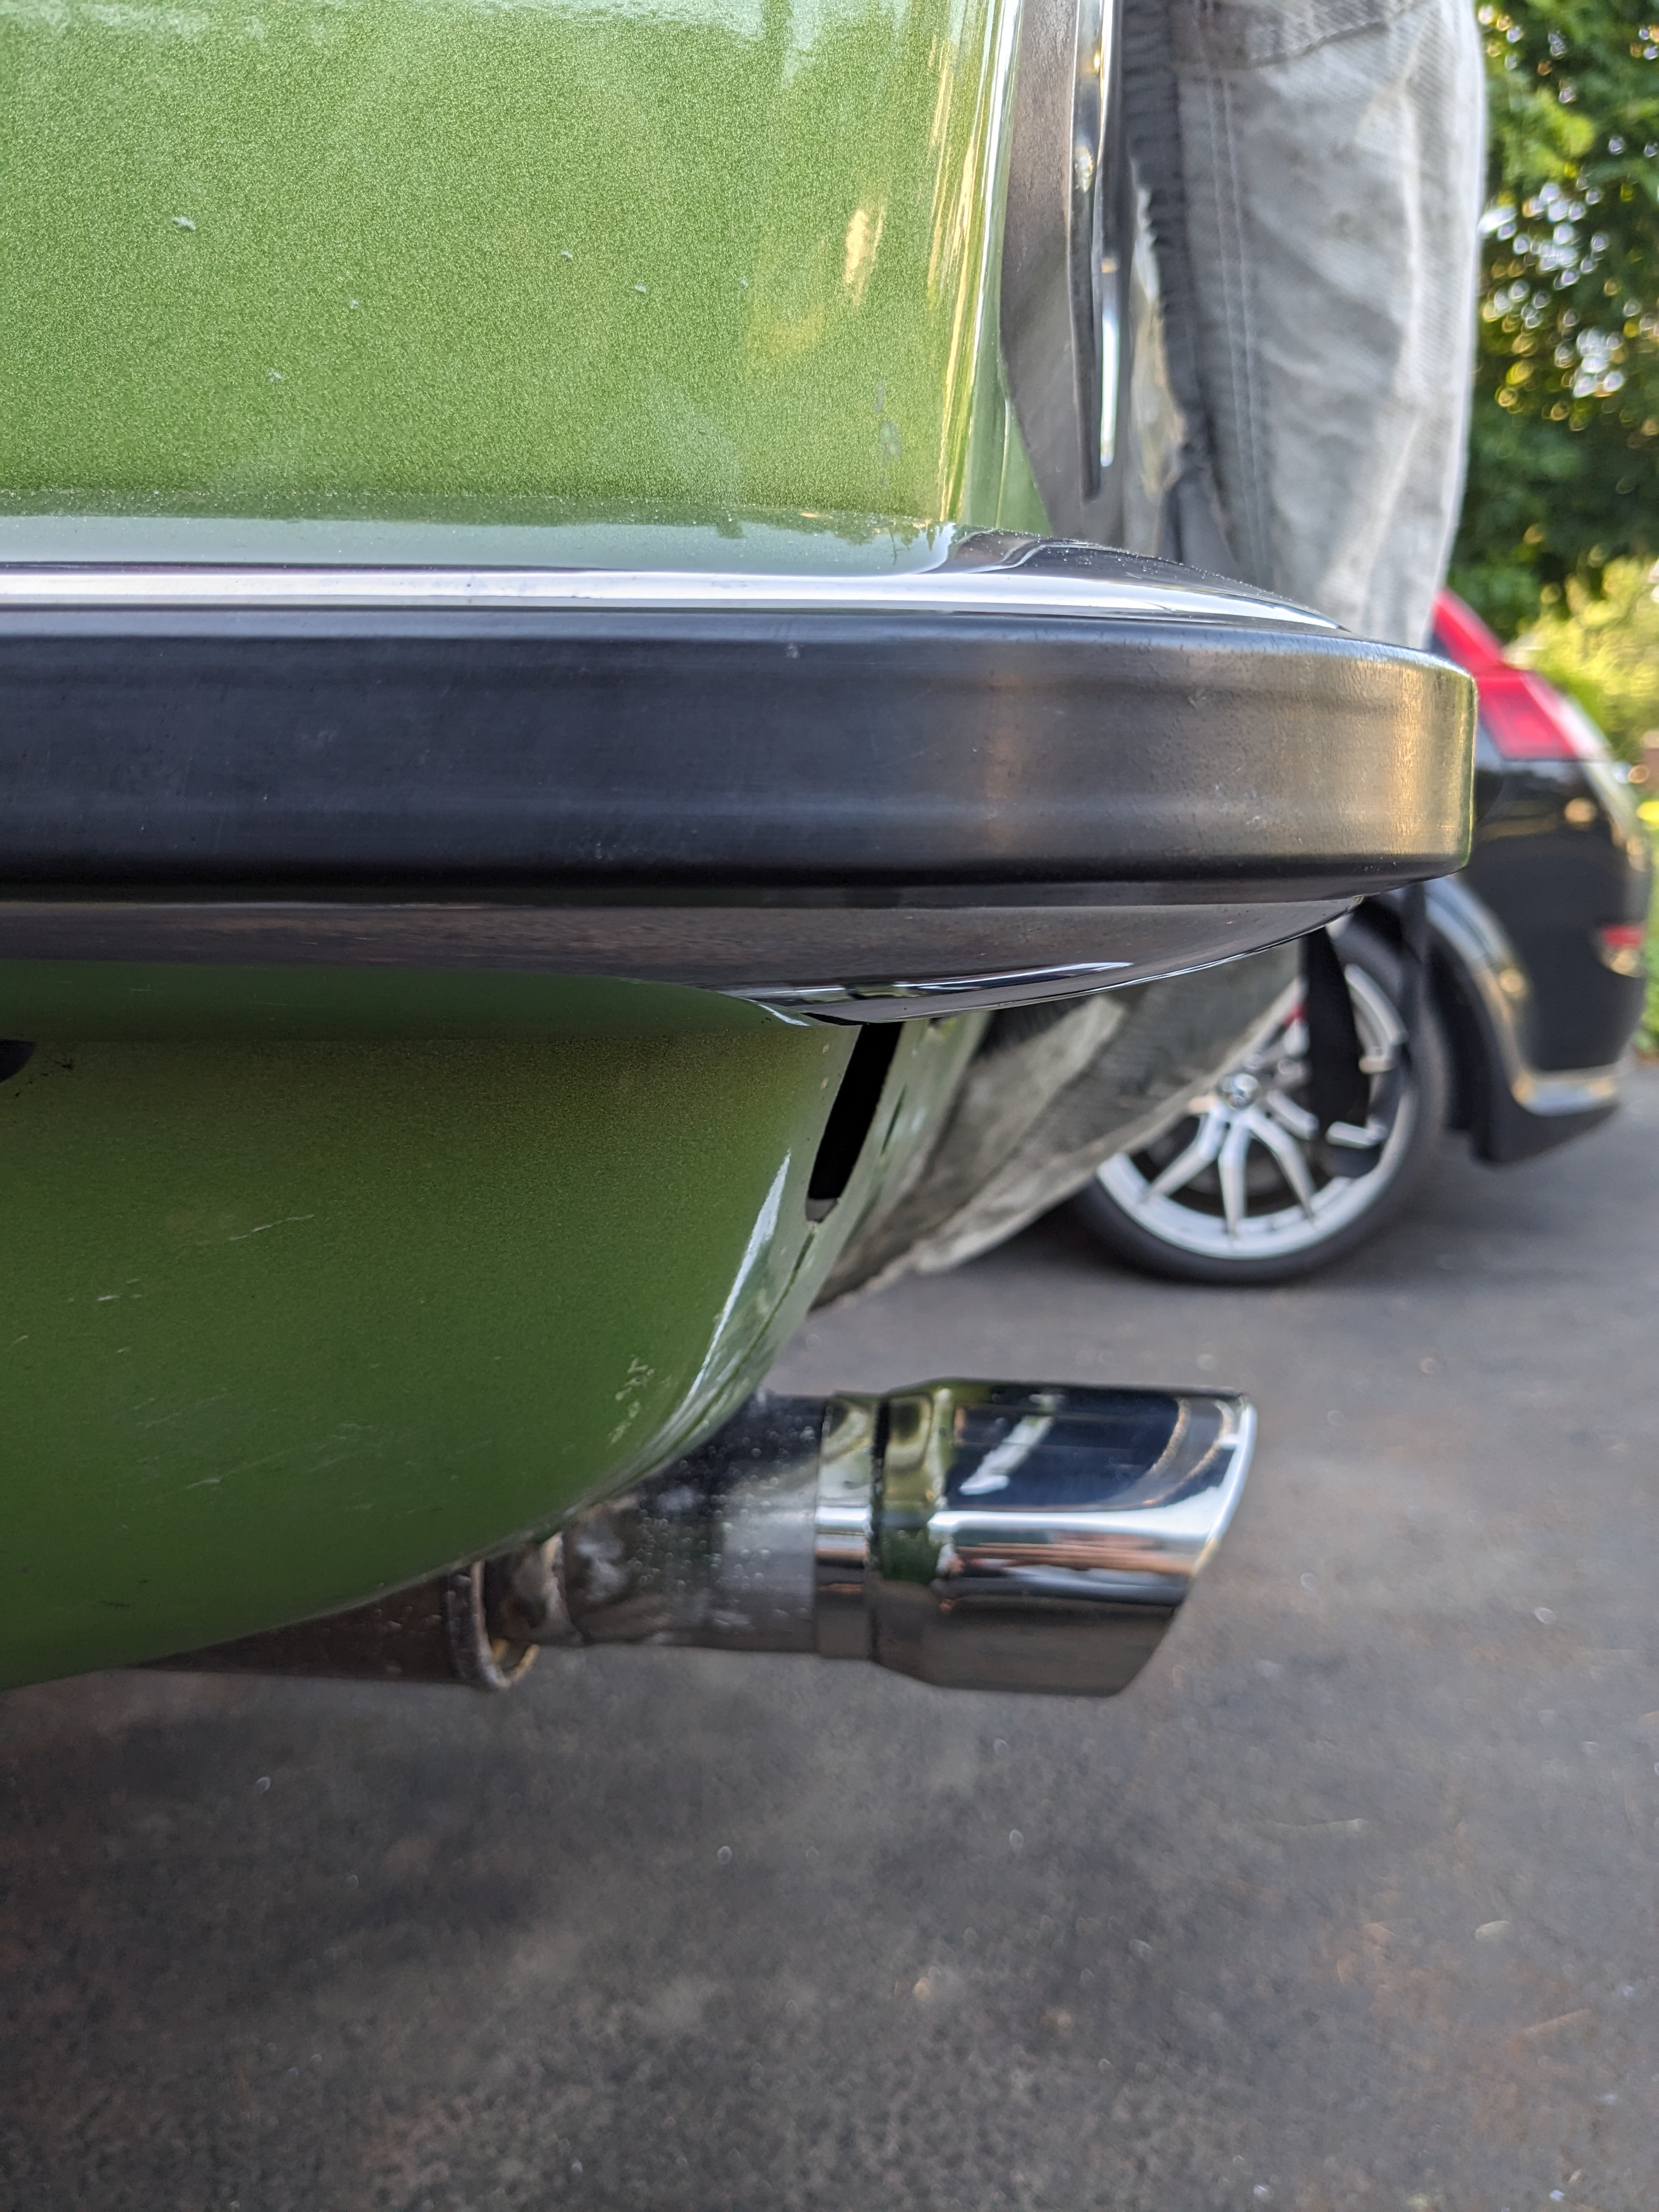
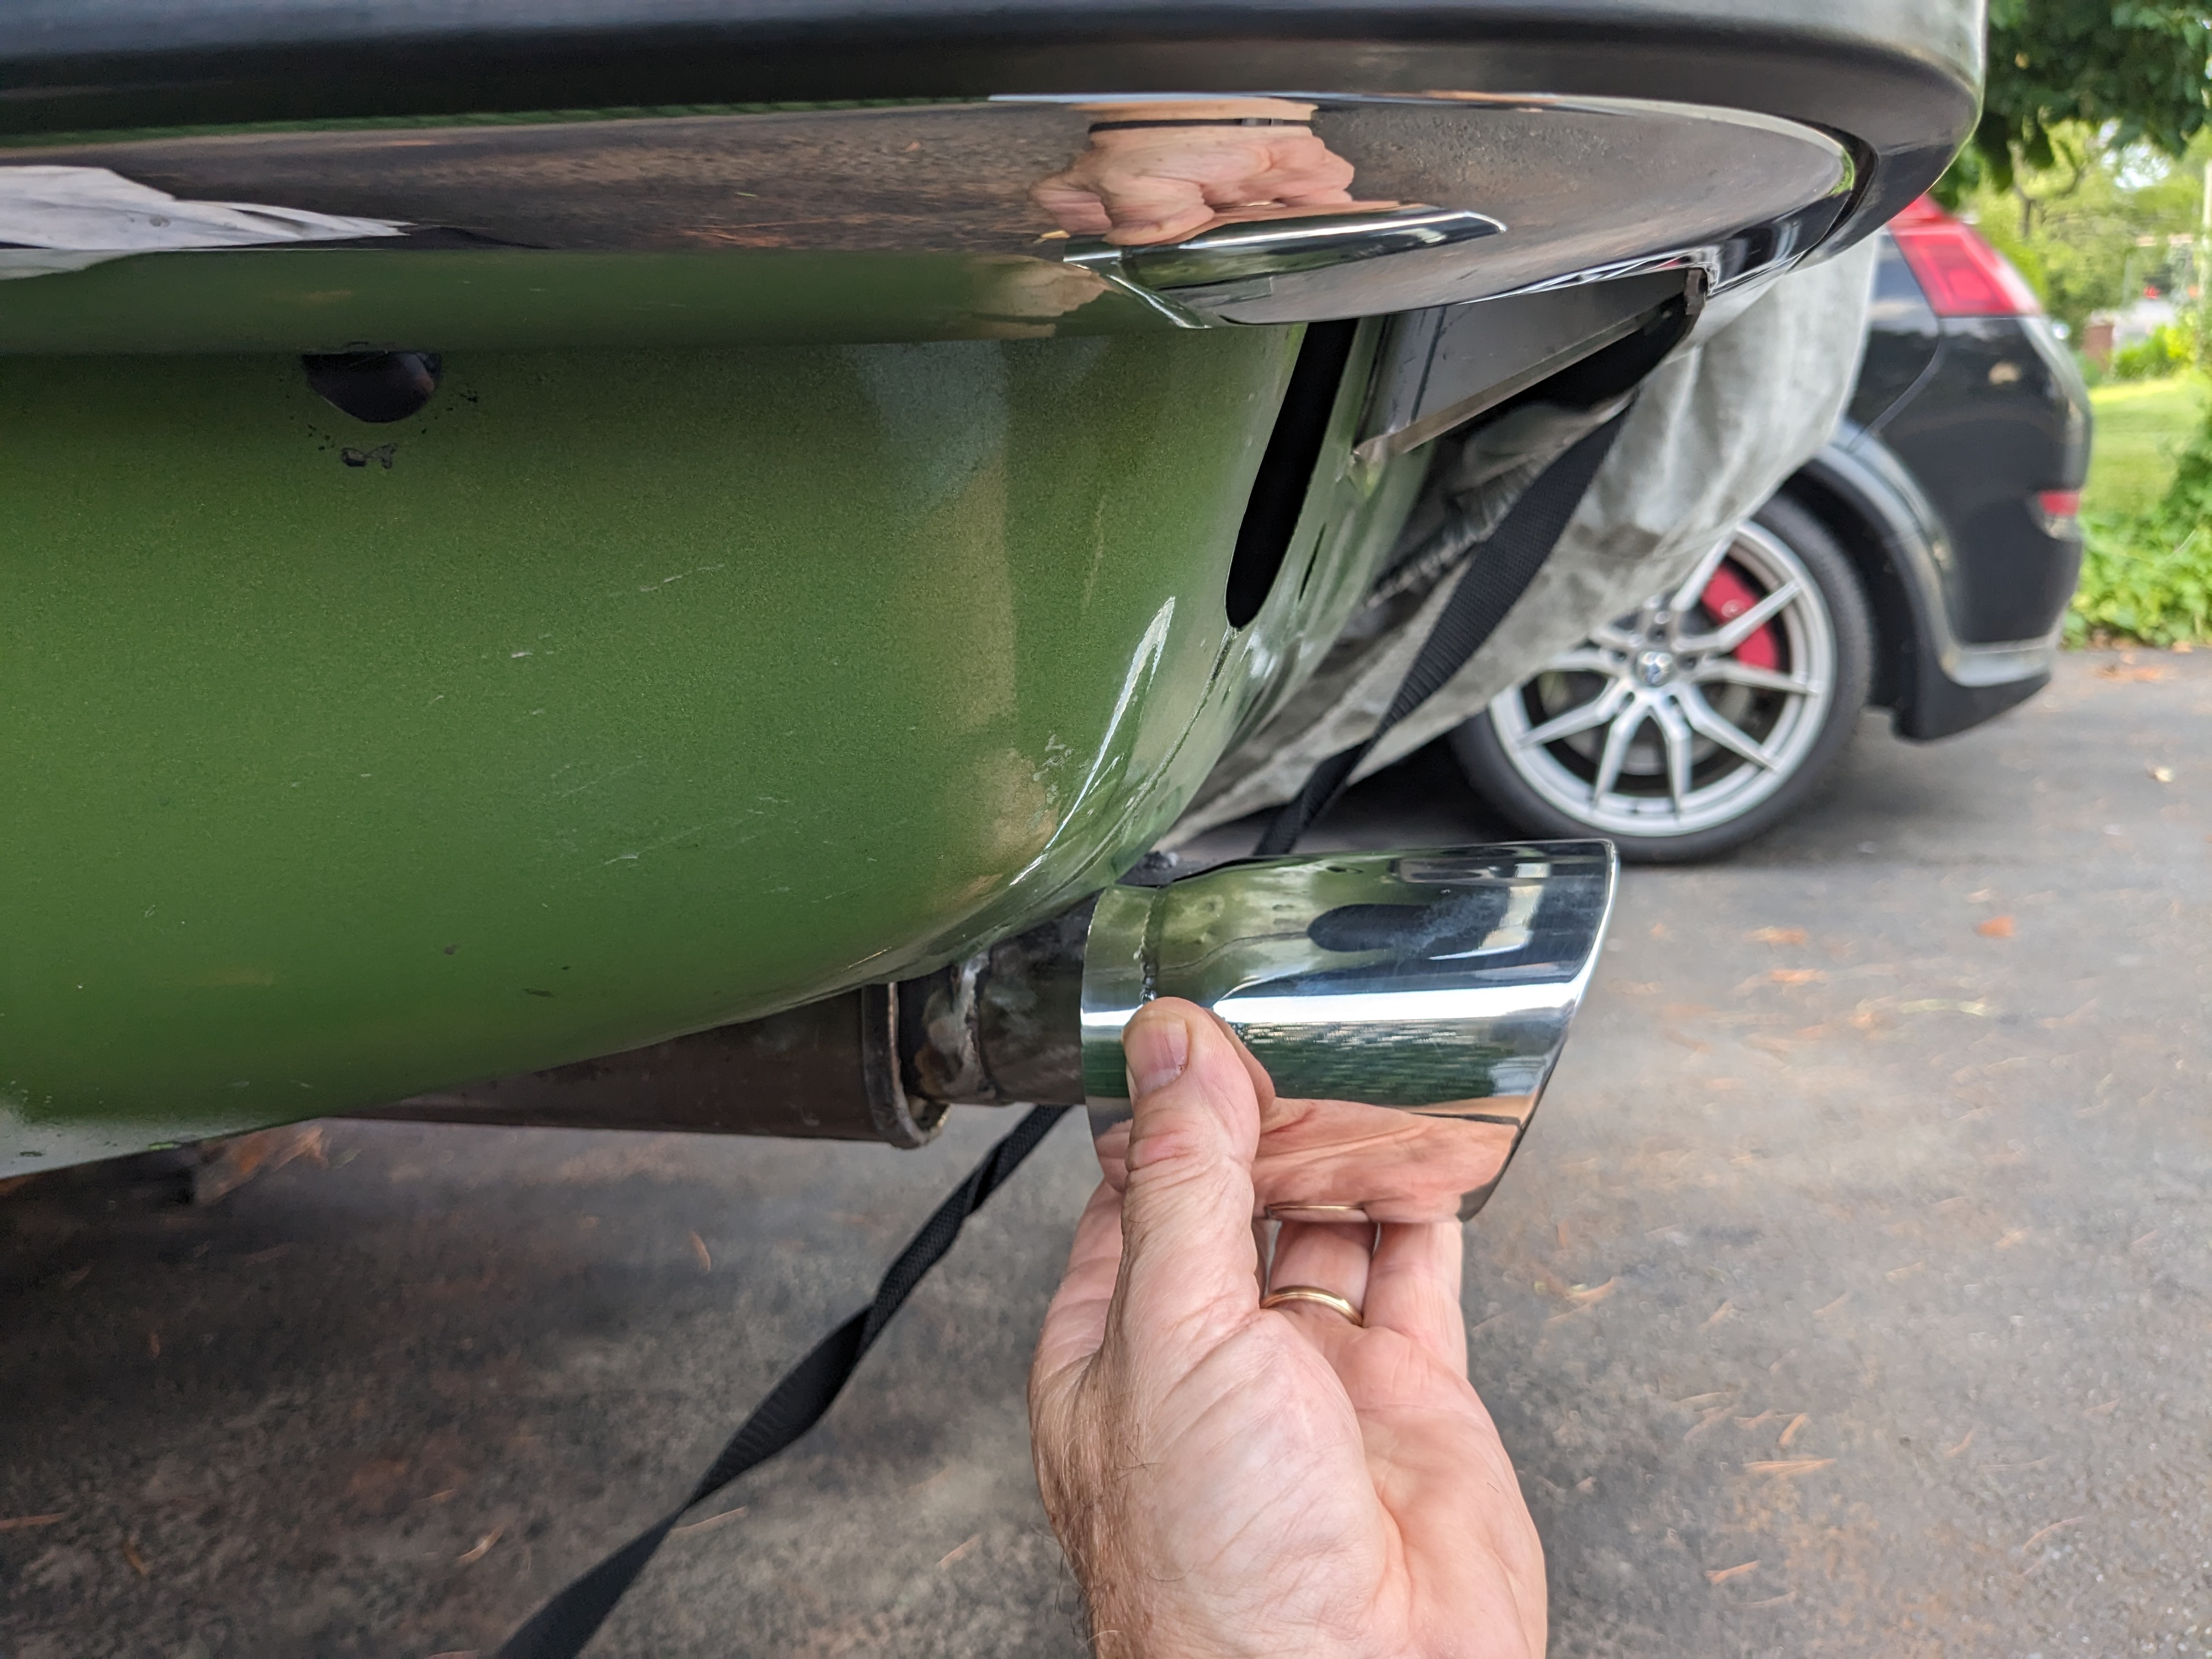
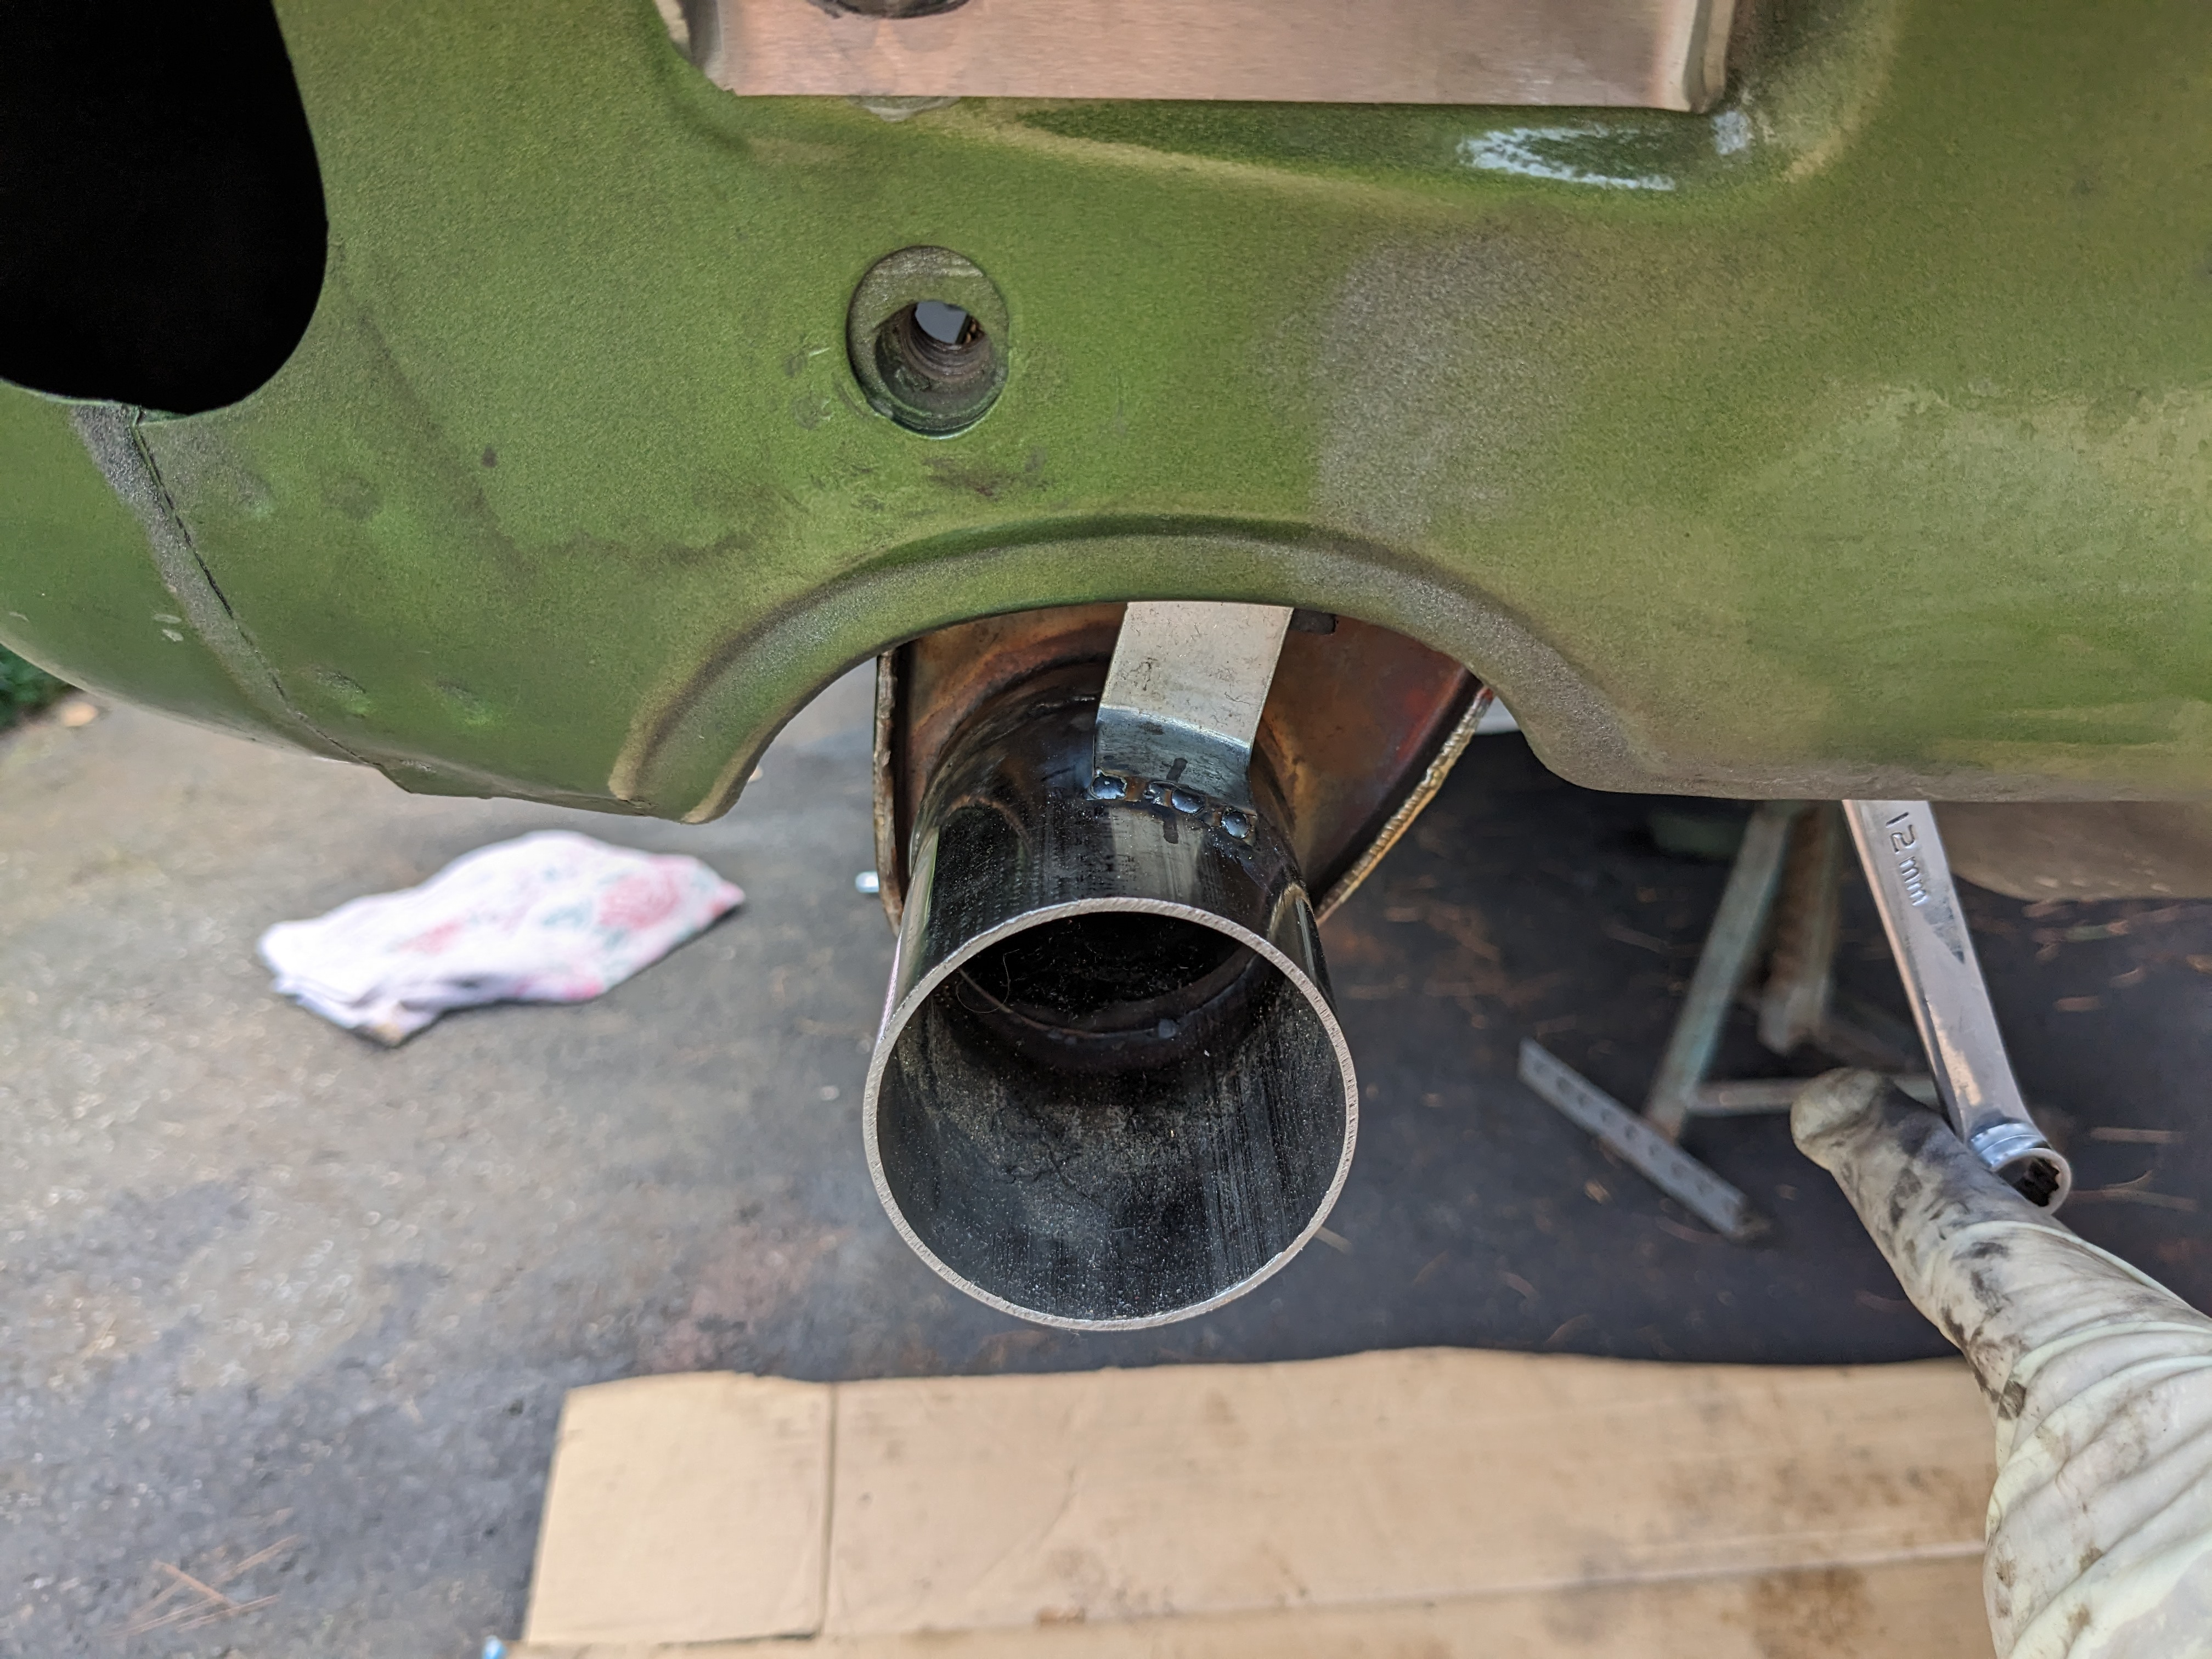
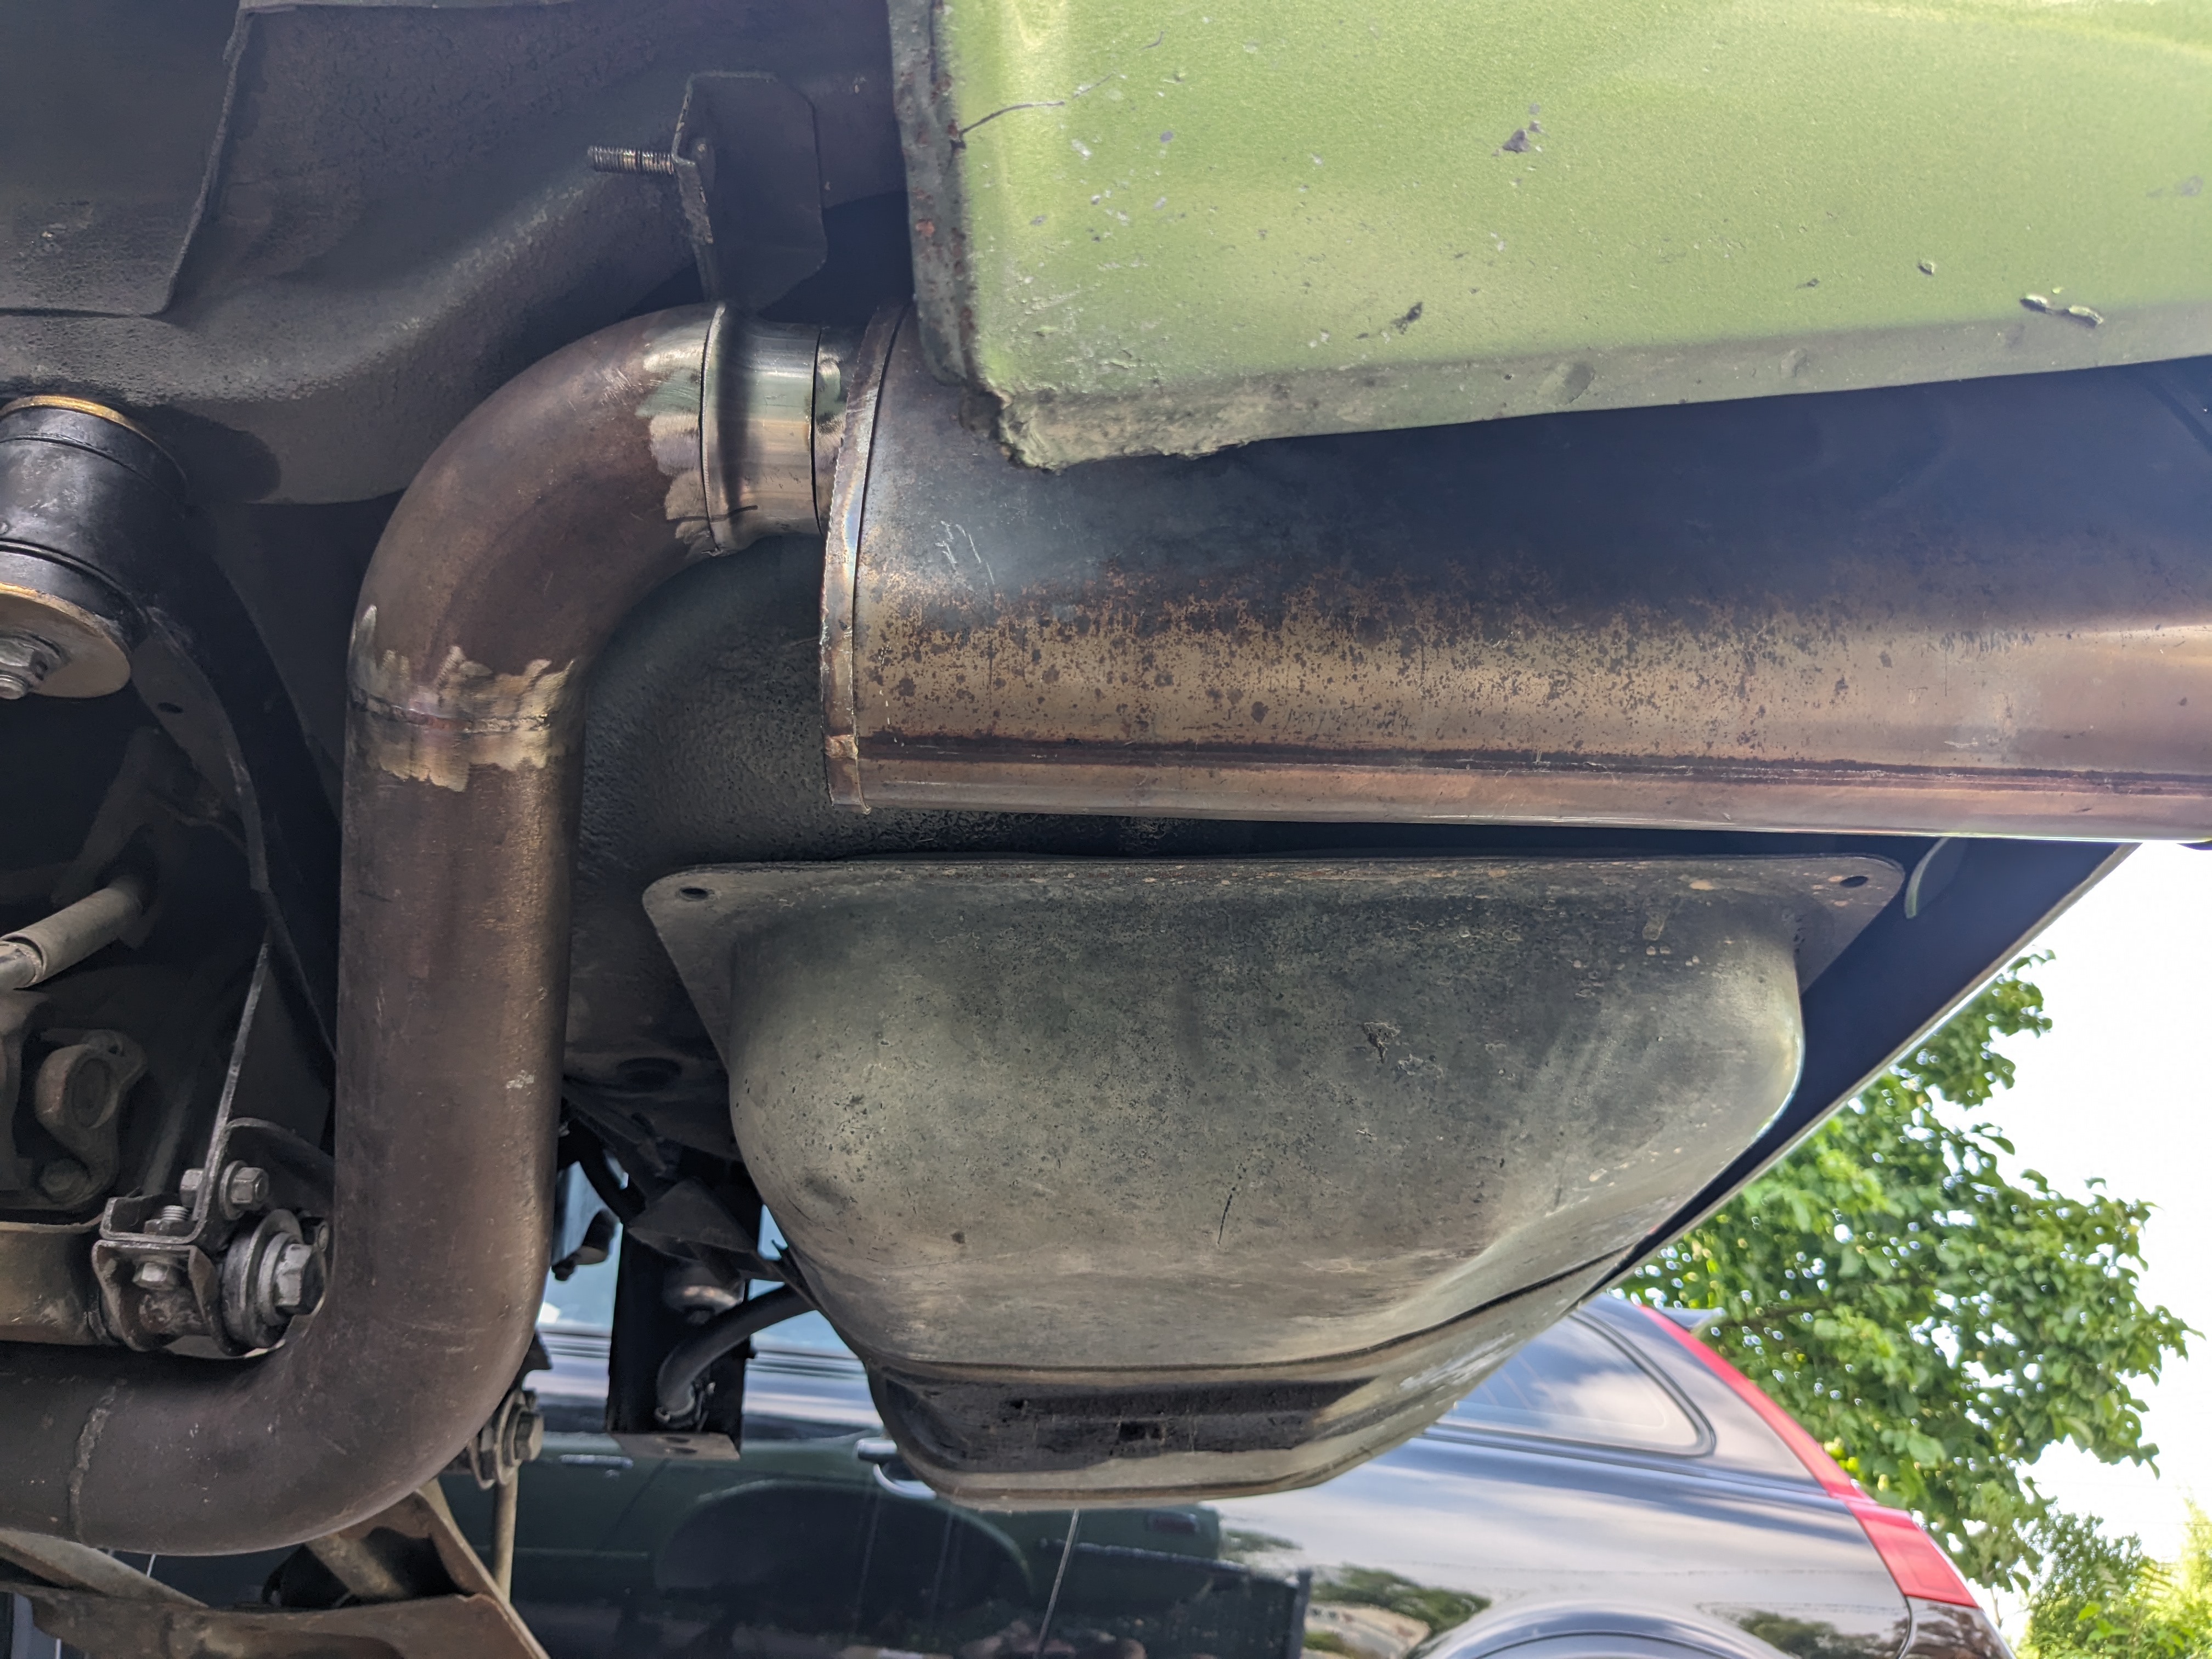
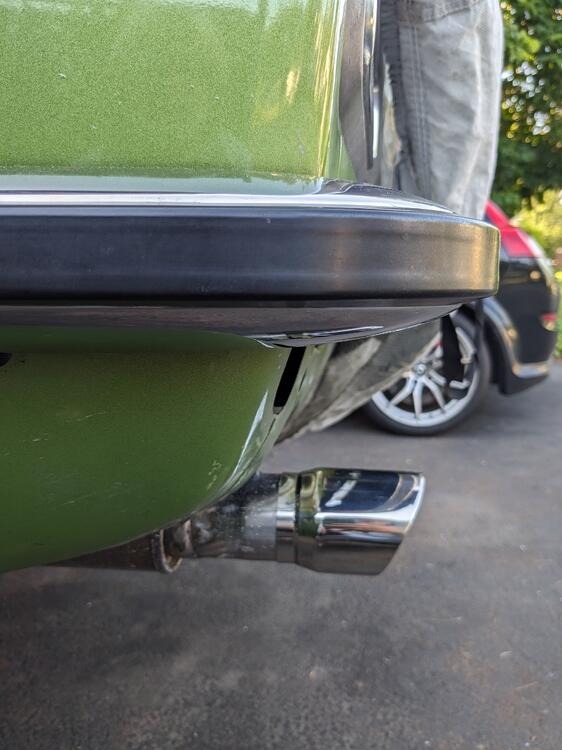
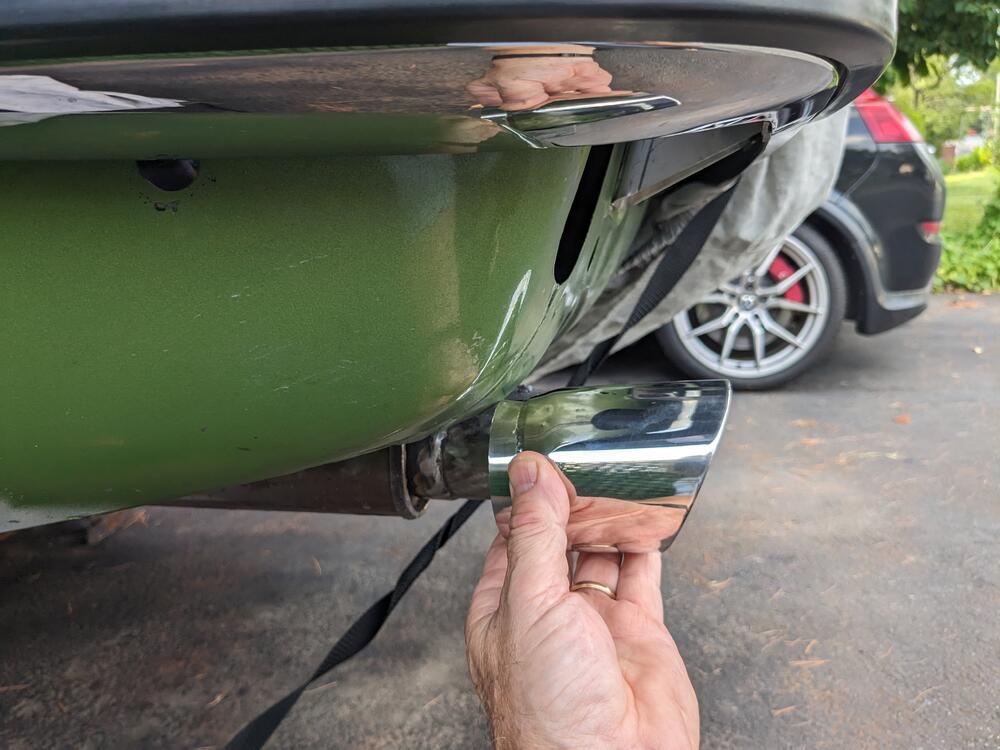
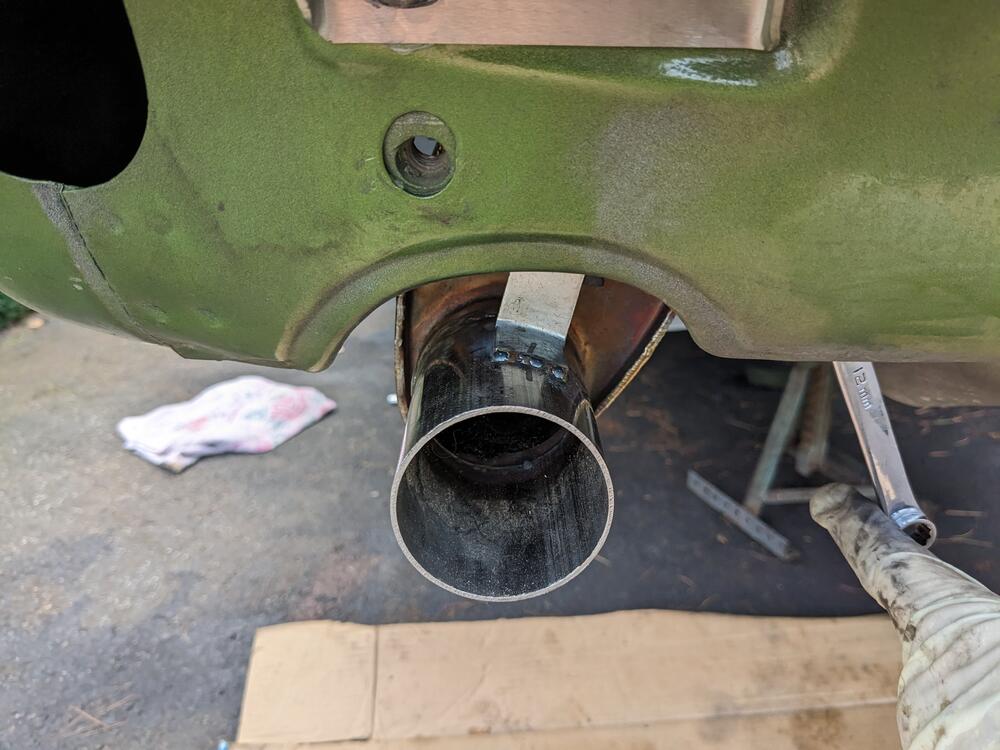
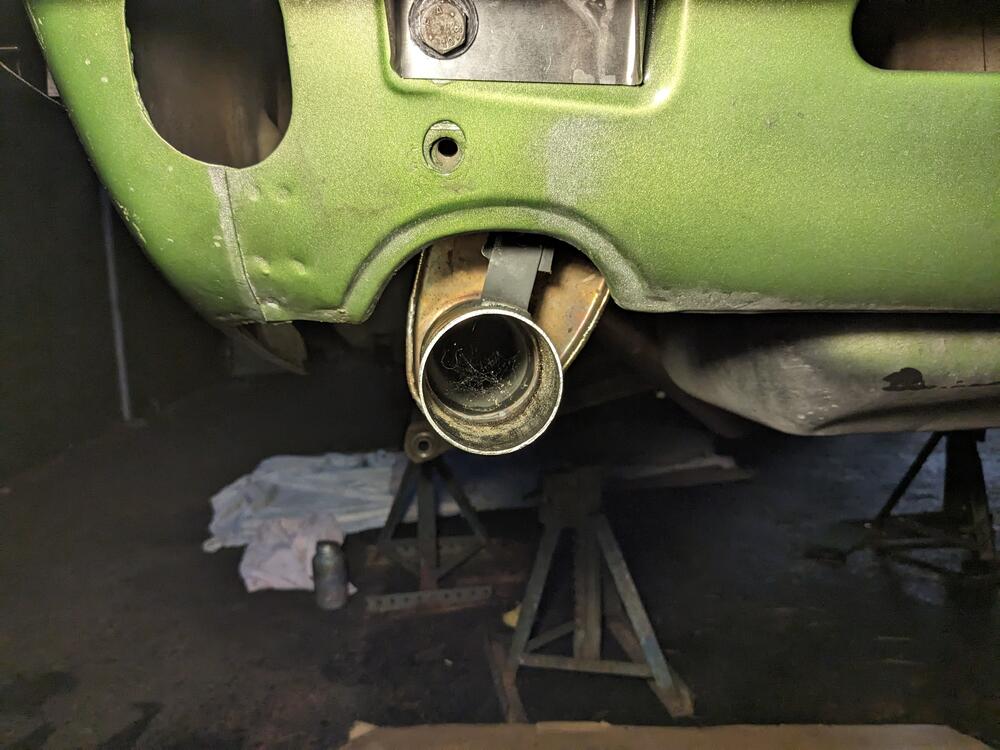
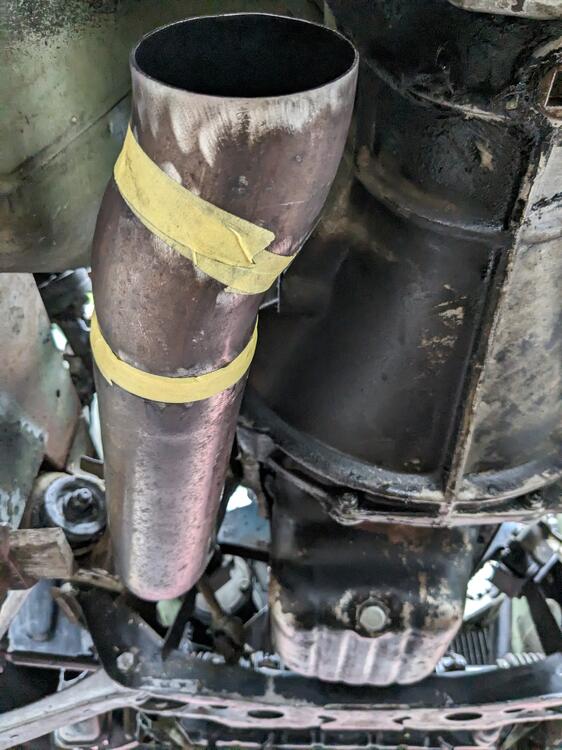
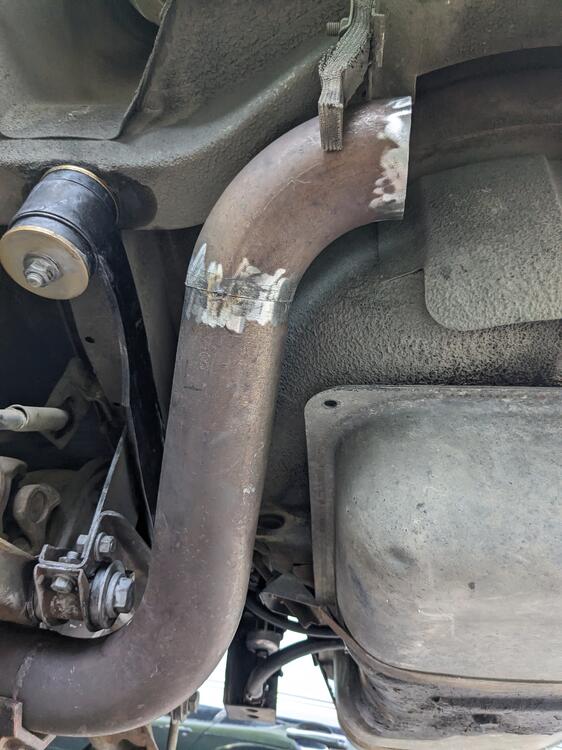
Expanded the tailpipe to get a tight fit for the tip, set it close to the bumper depth, to hopefully avoid exhaust discoloration of the taillamp

-
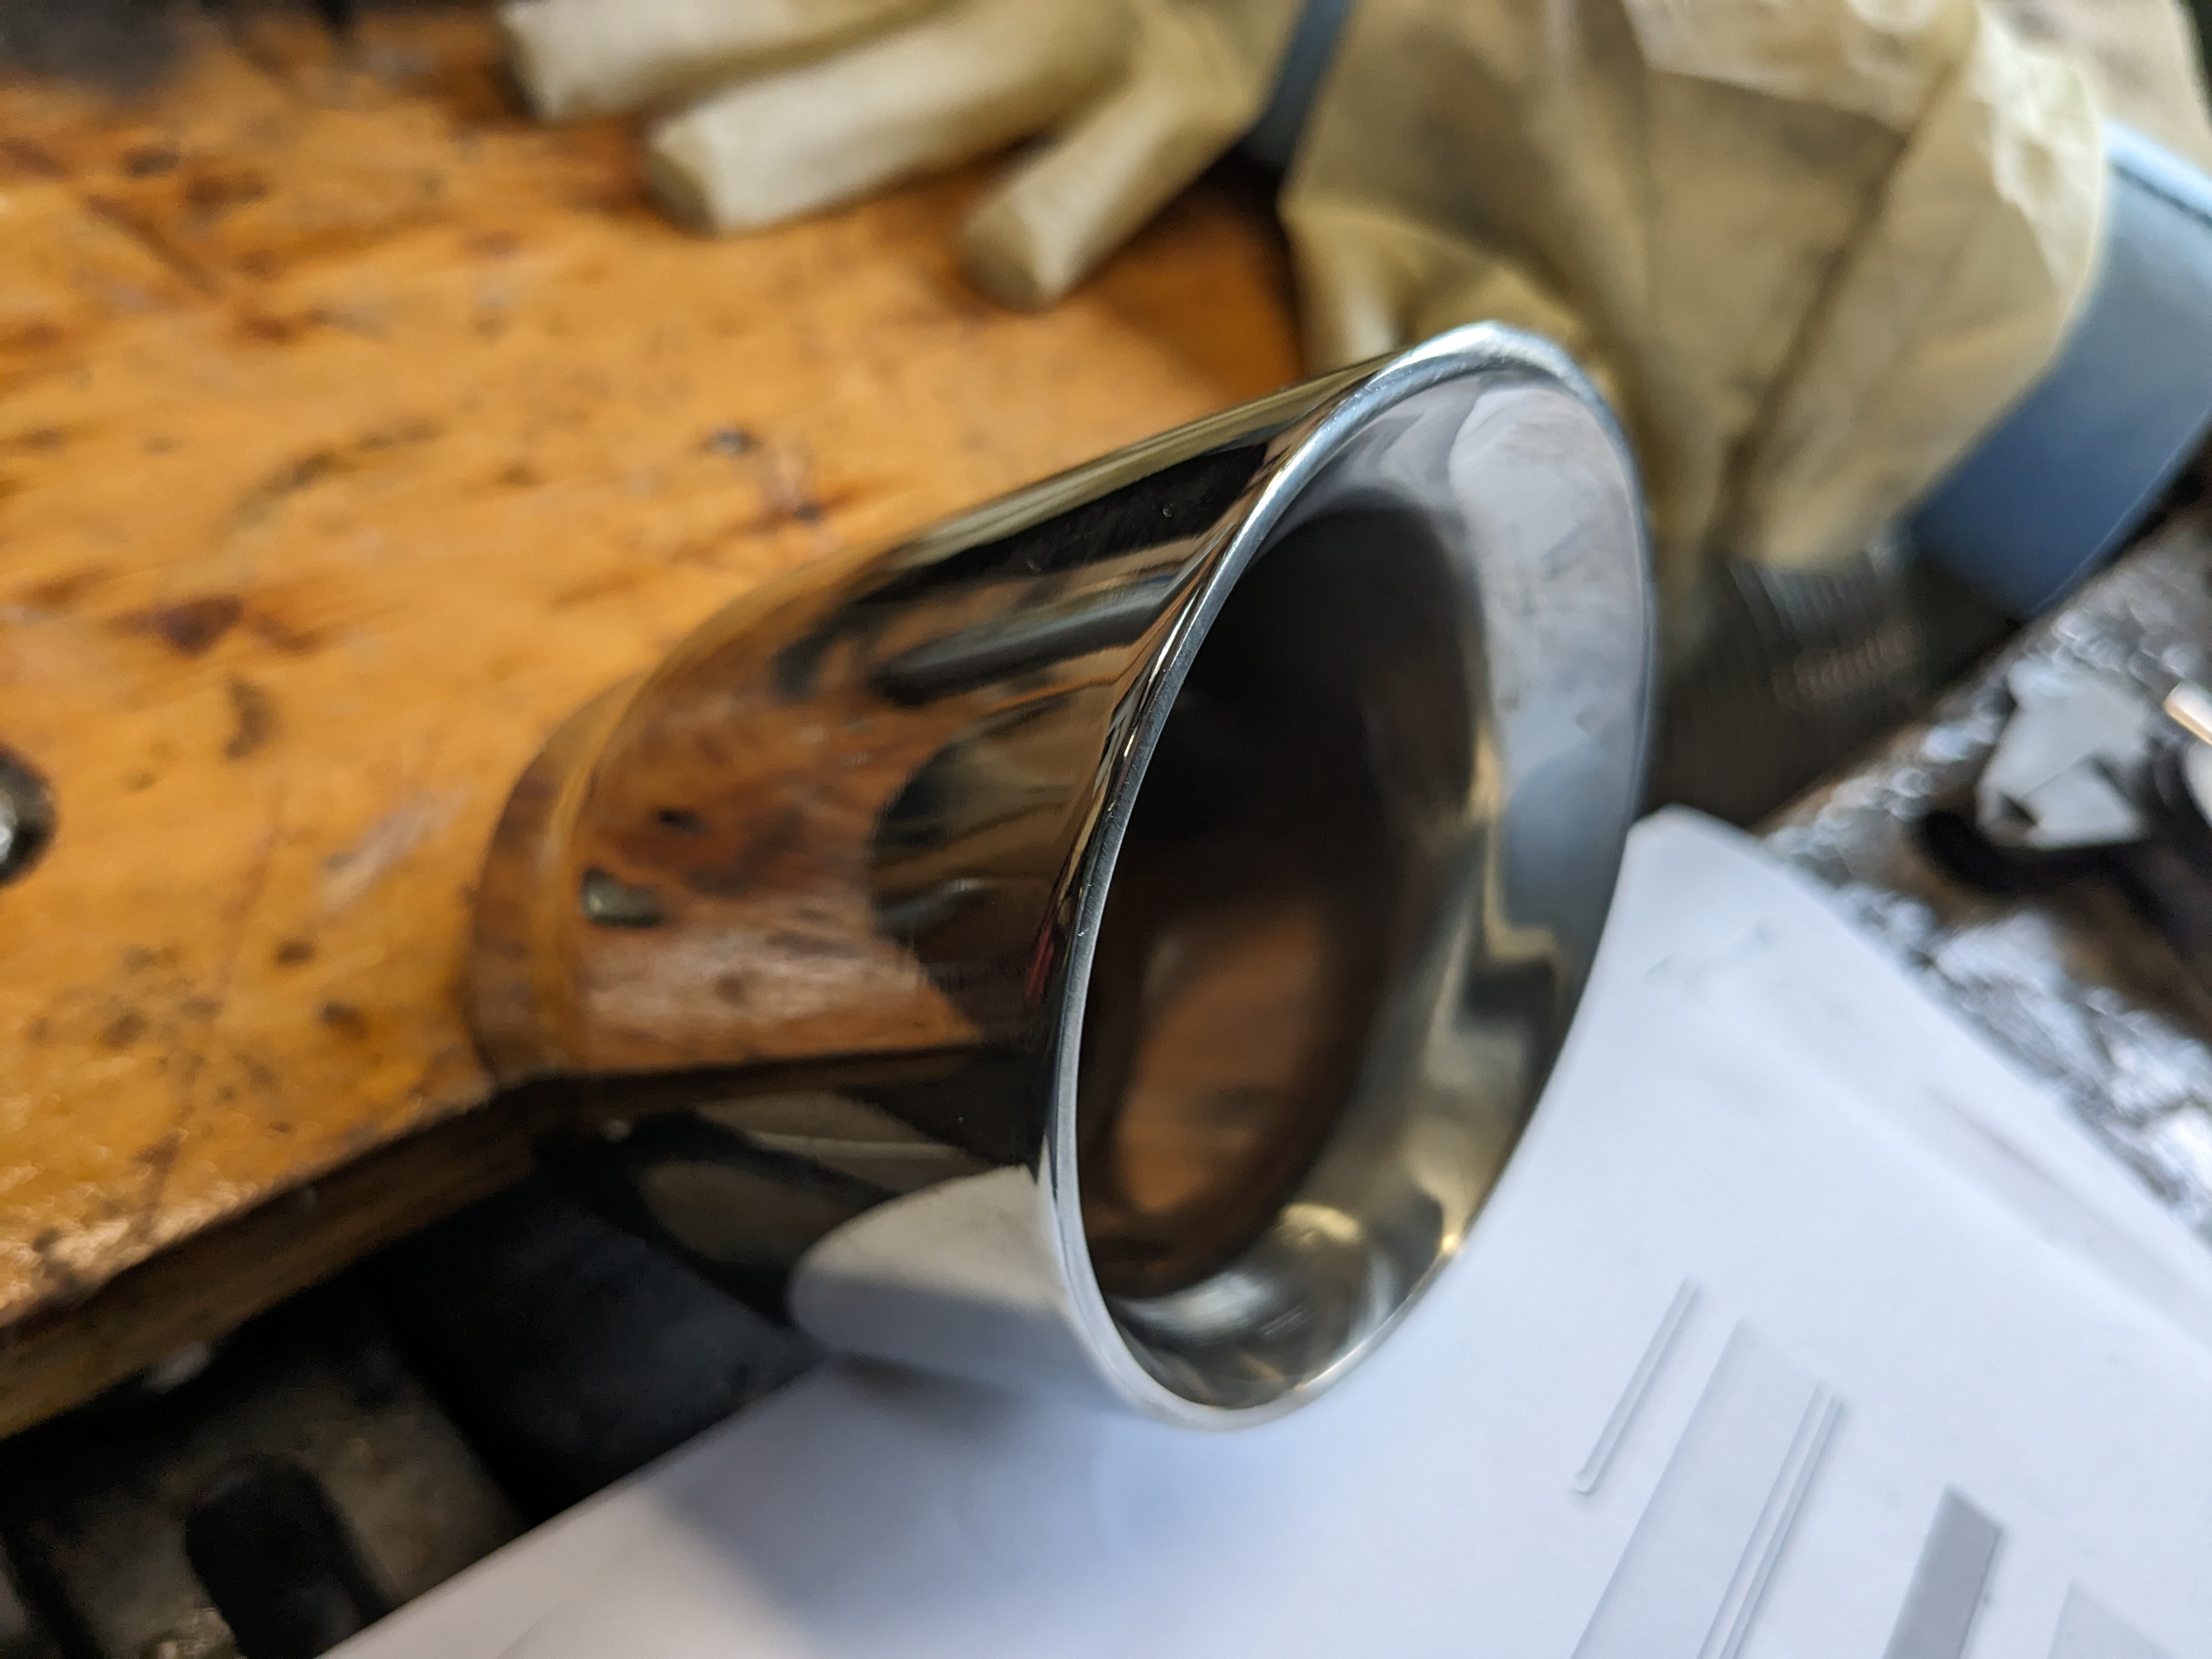
RedTail Perf. Exhaust tip finally arrived. Nicely constructed pieces. This particular transaction with the company was a PITA though. Anyway, to question would be how much to have it protrude relative to the skinny bumper install. Didn't have much luck finding pics online to refer to. I can cut a couple inches off the tailpipe & set it like this:

-
That's kinda what I figured - the energy required to tap the outer bearing race(by way of the flange) into the hub is far less than the load it will see in use. The inner bearing is pressed uniformly, the way I did it, so not an issue there.
-
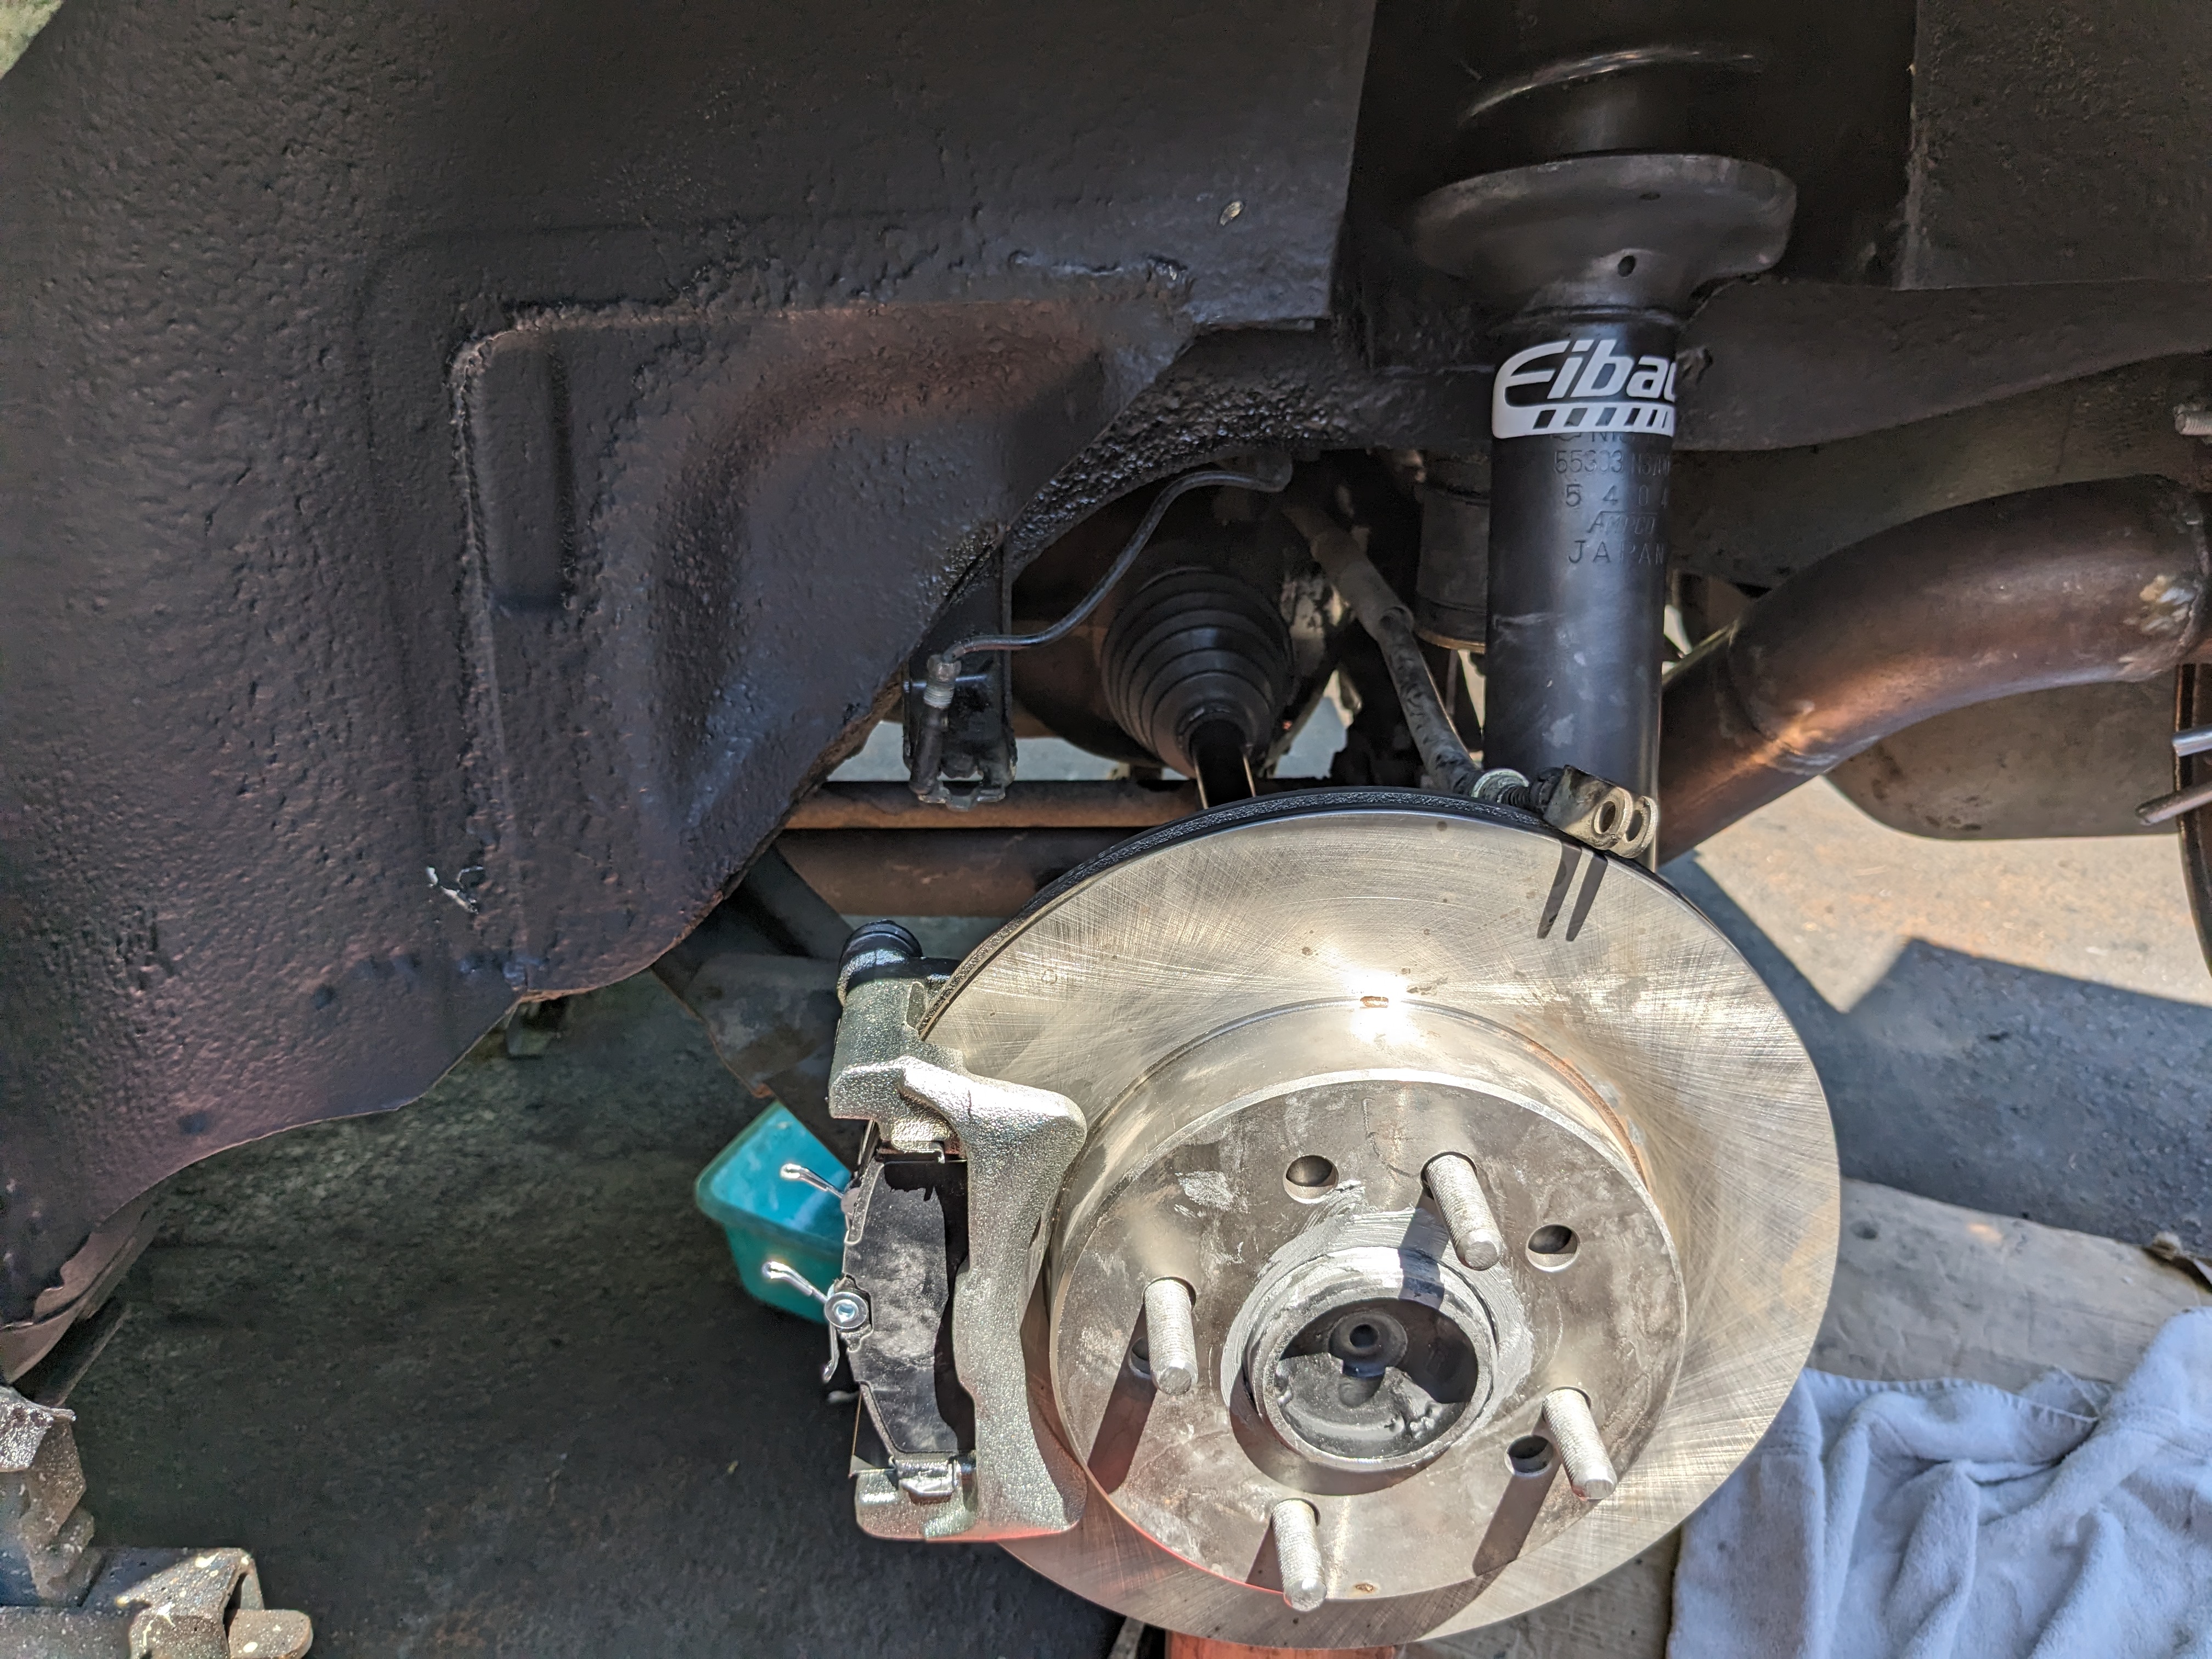
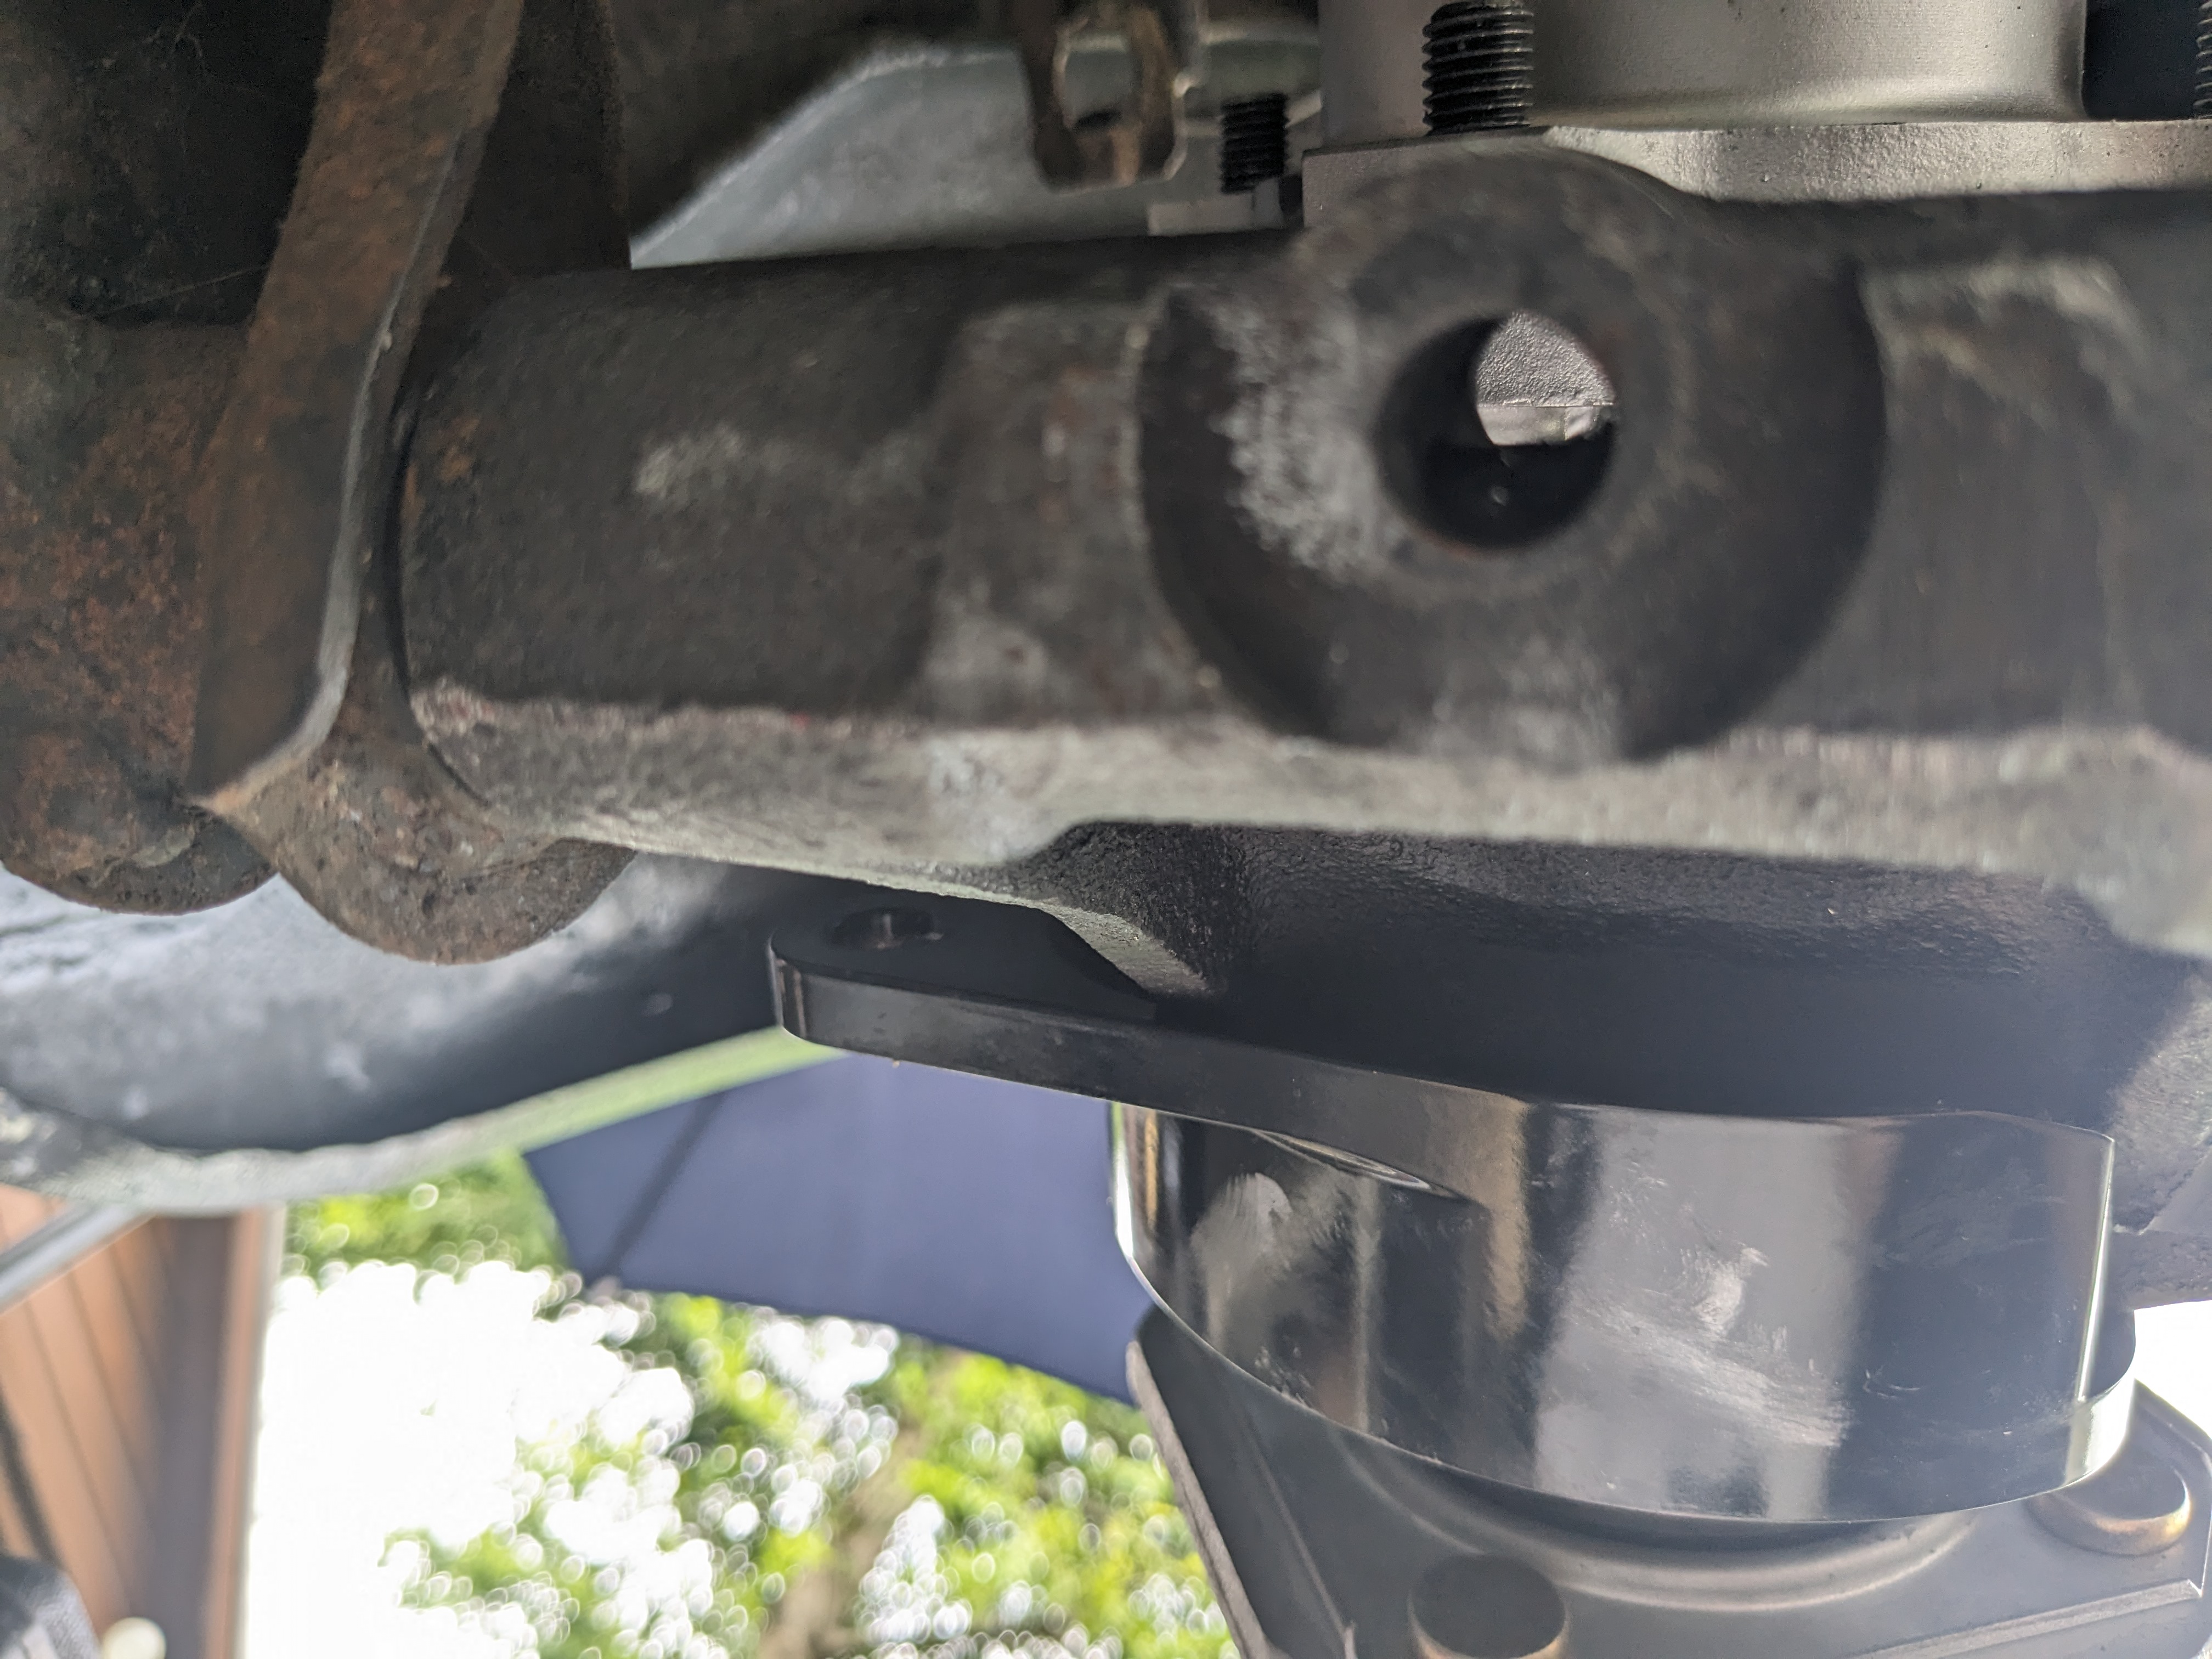
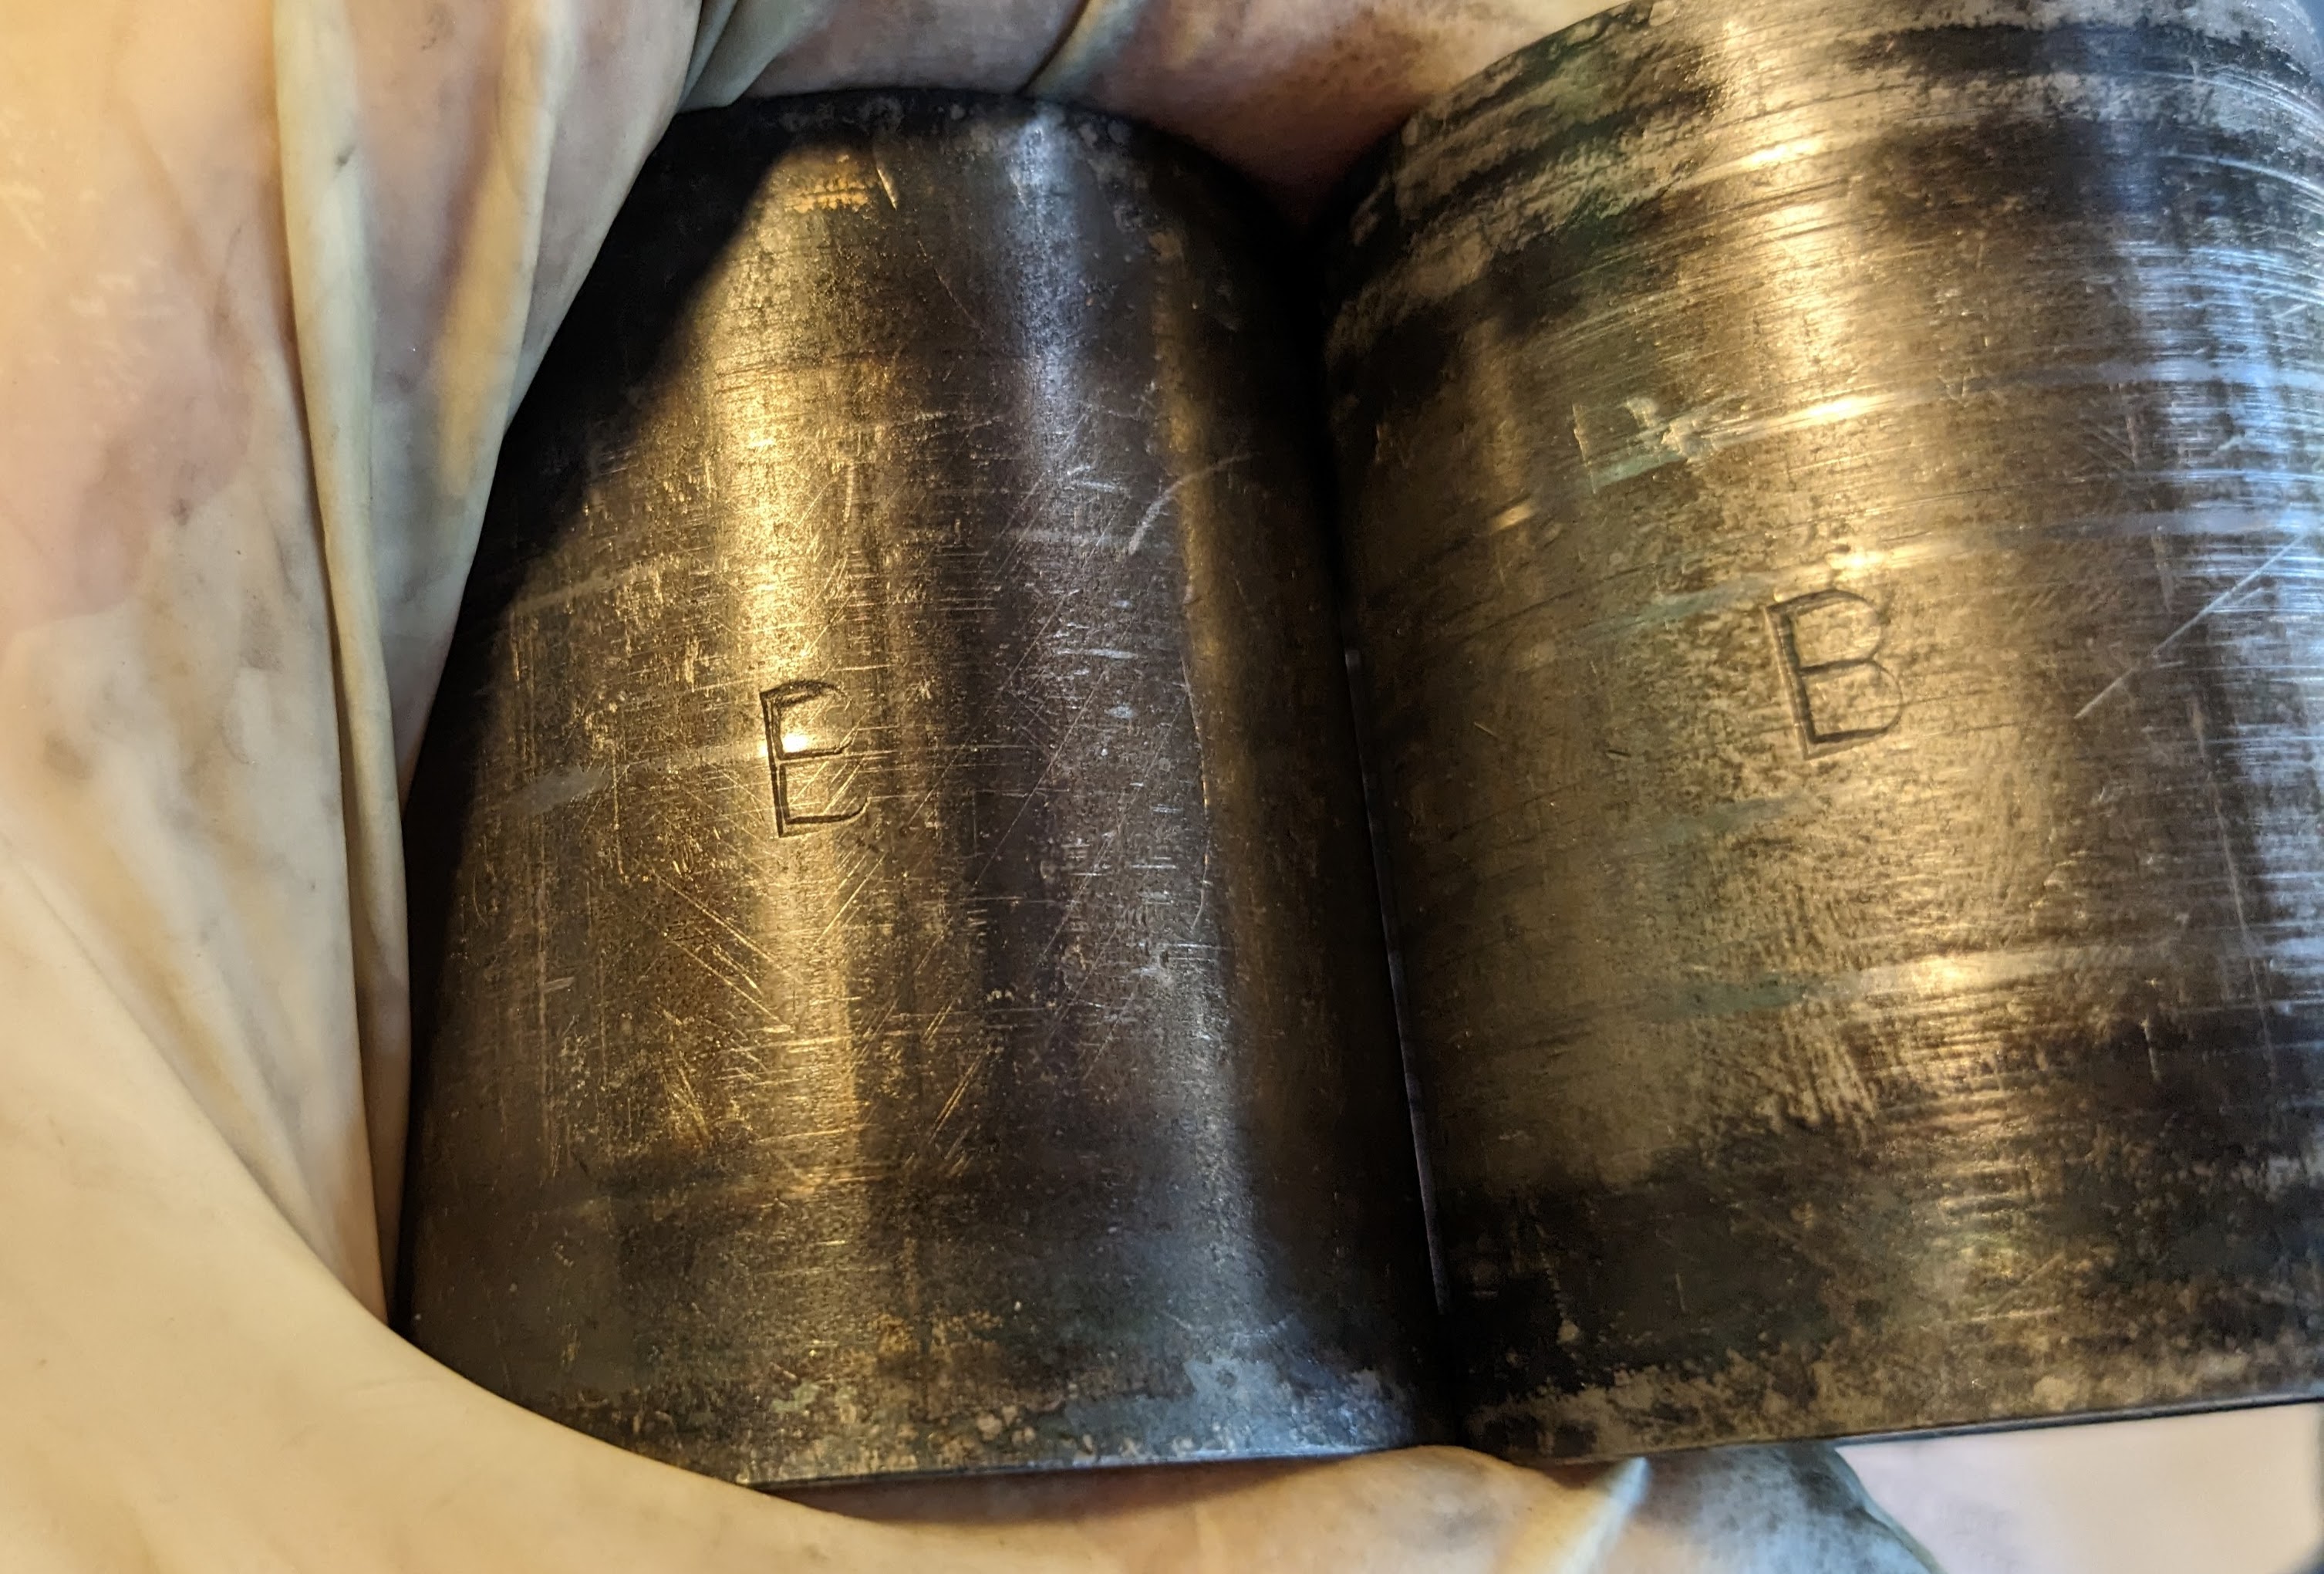
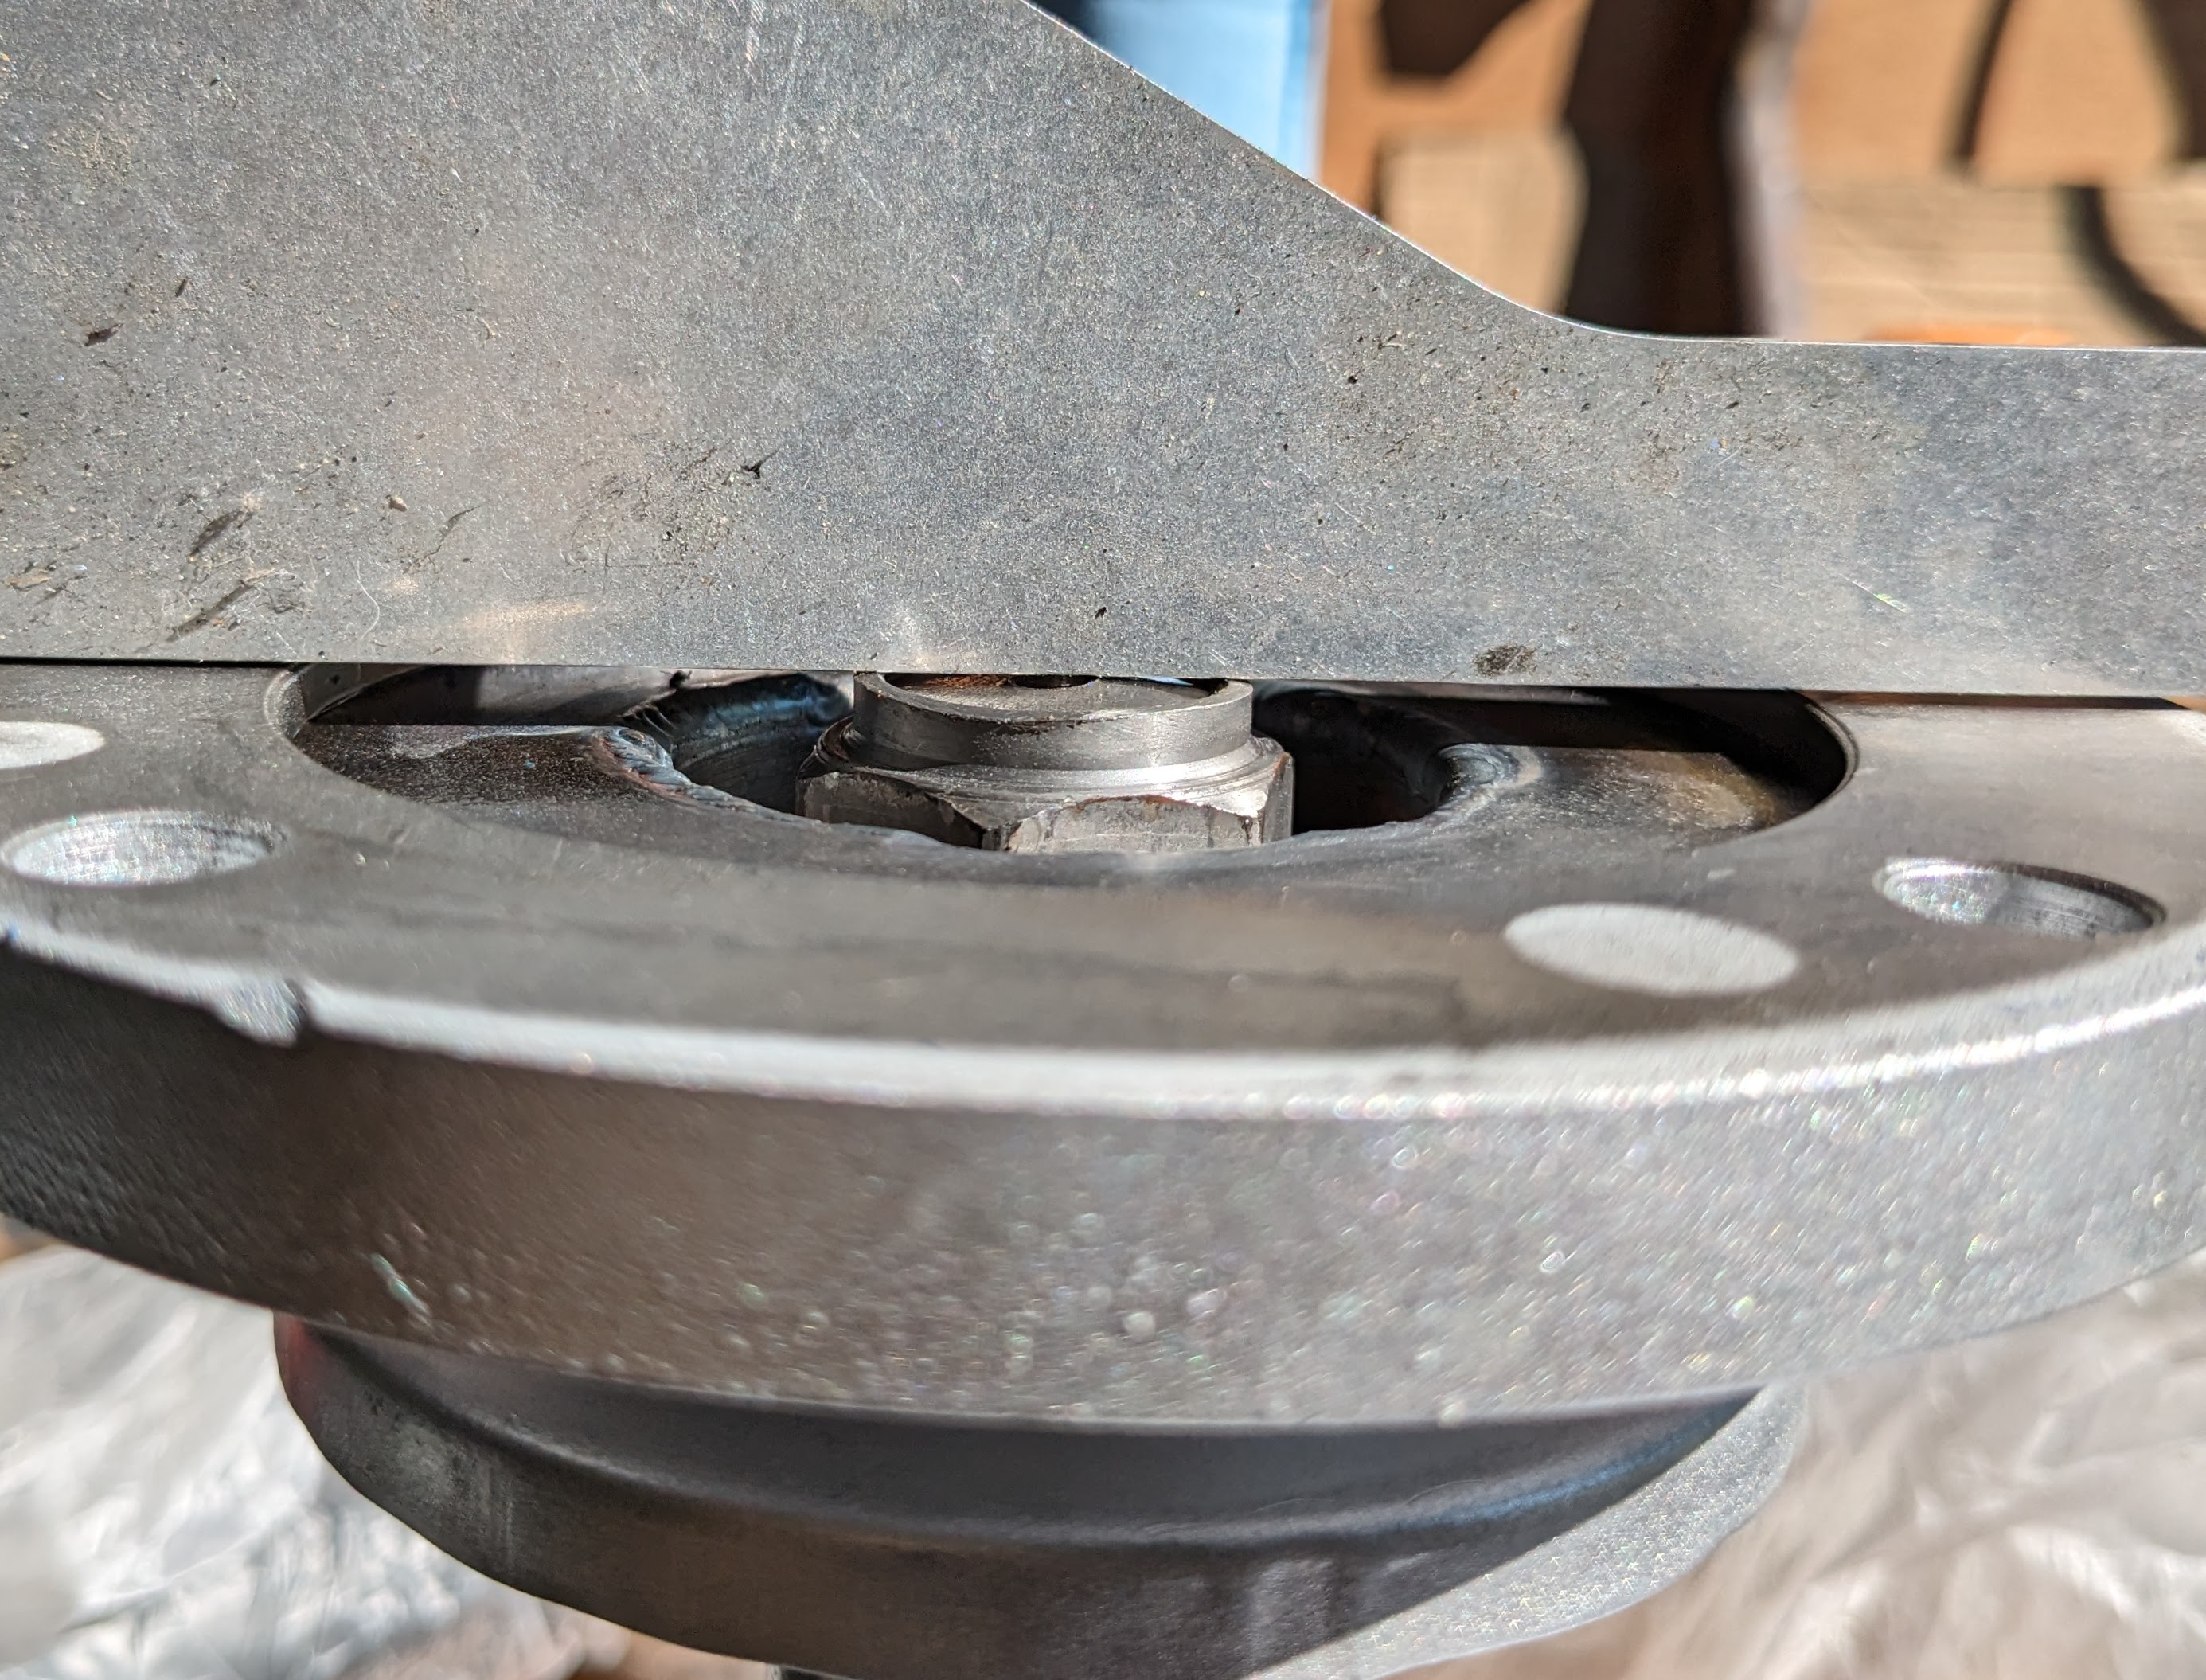
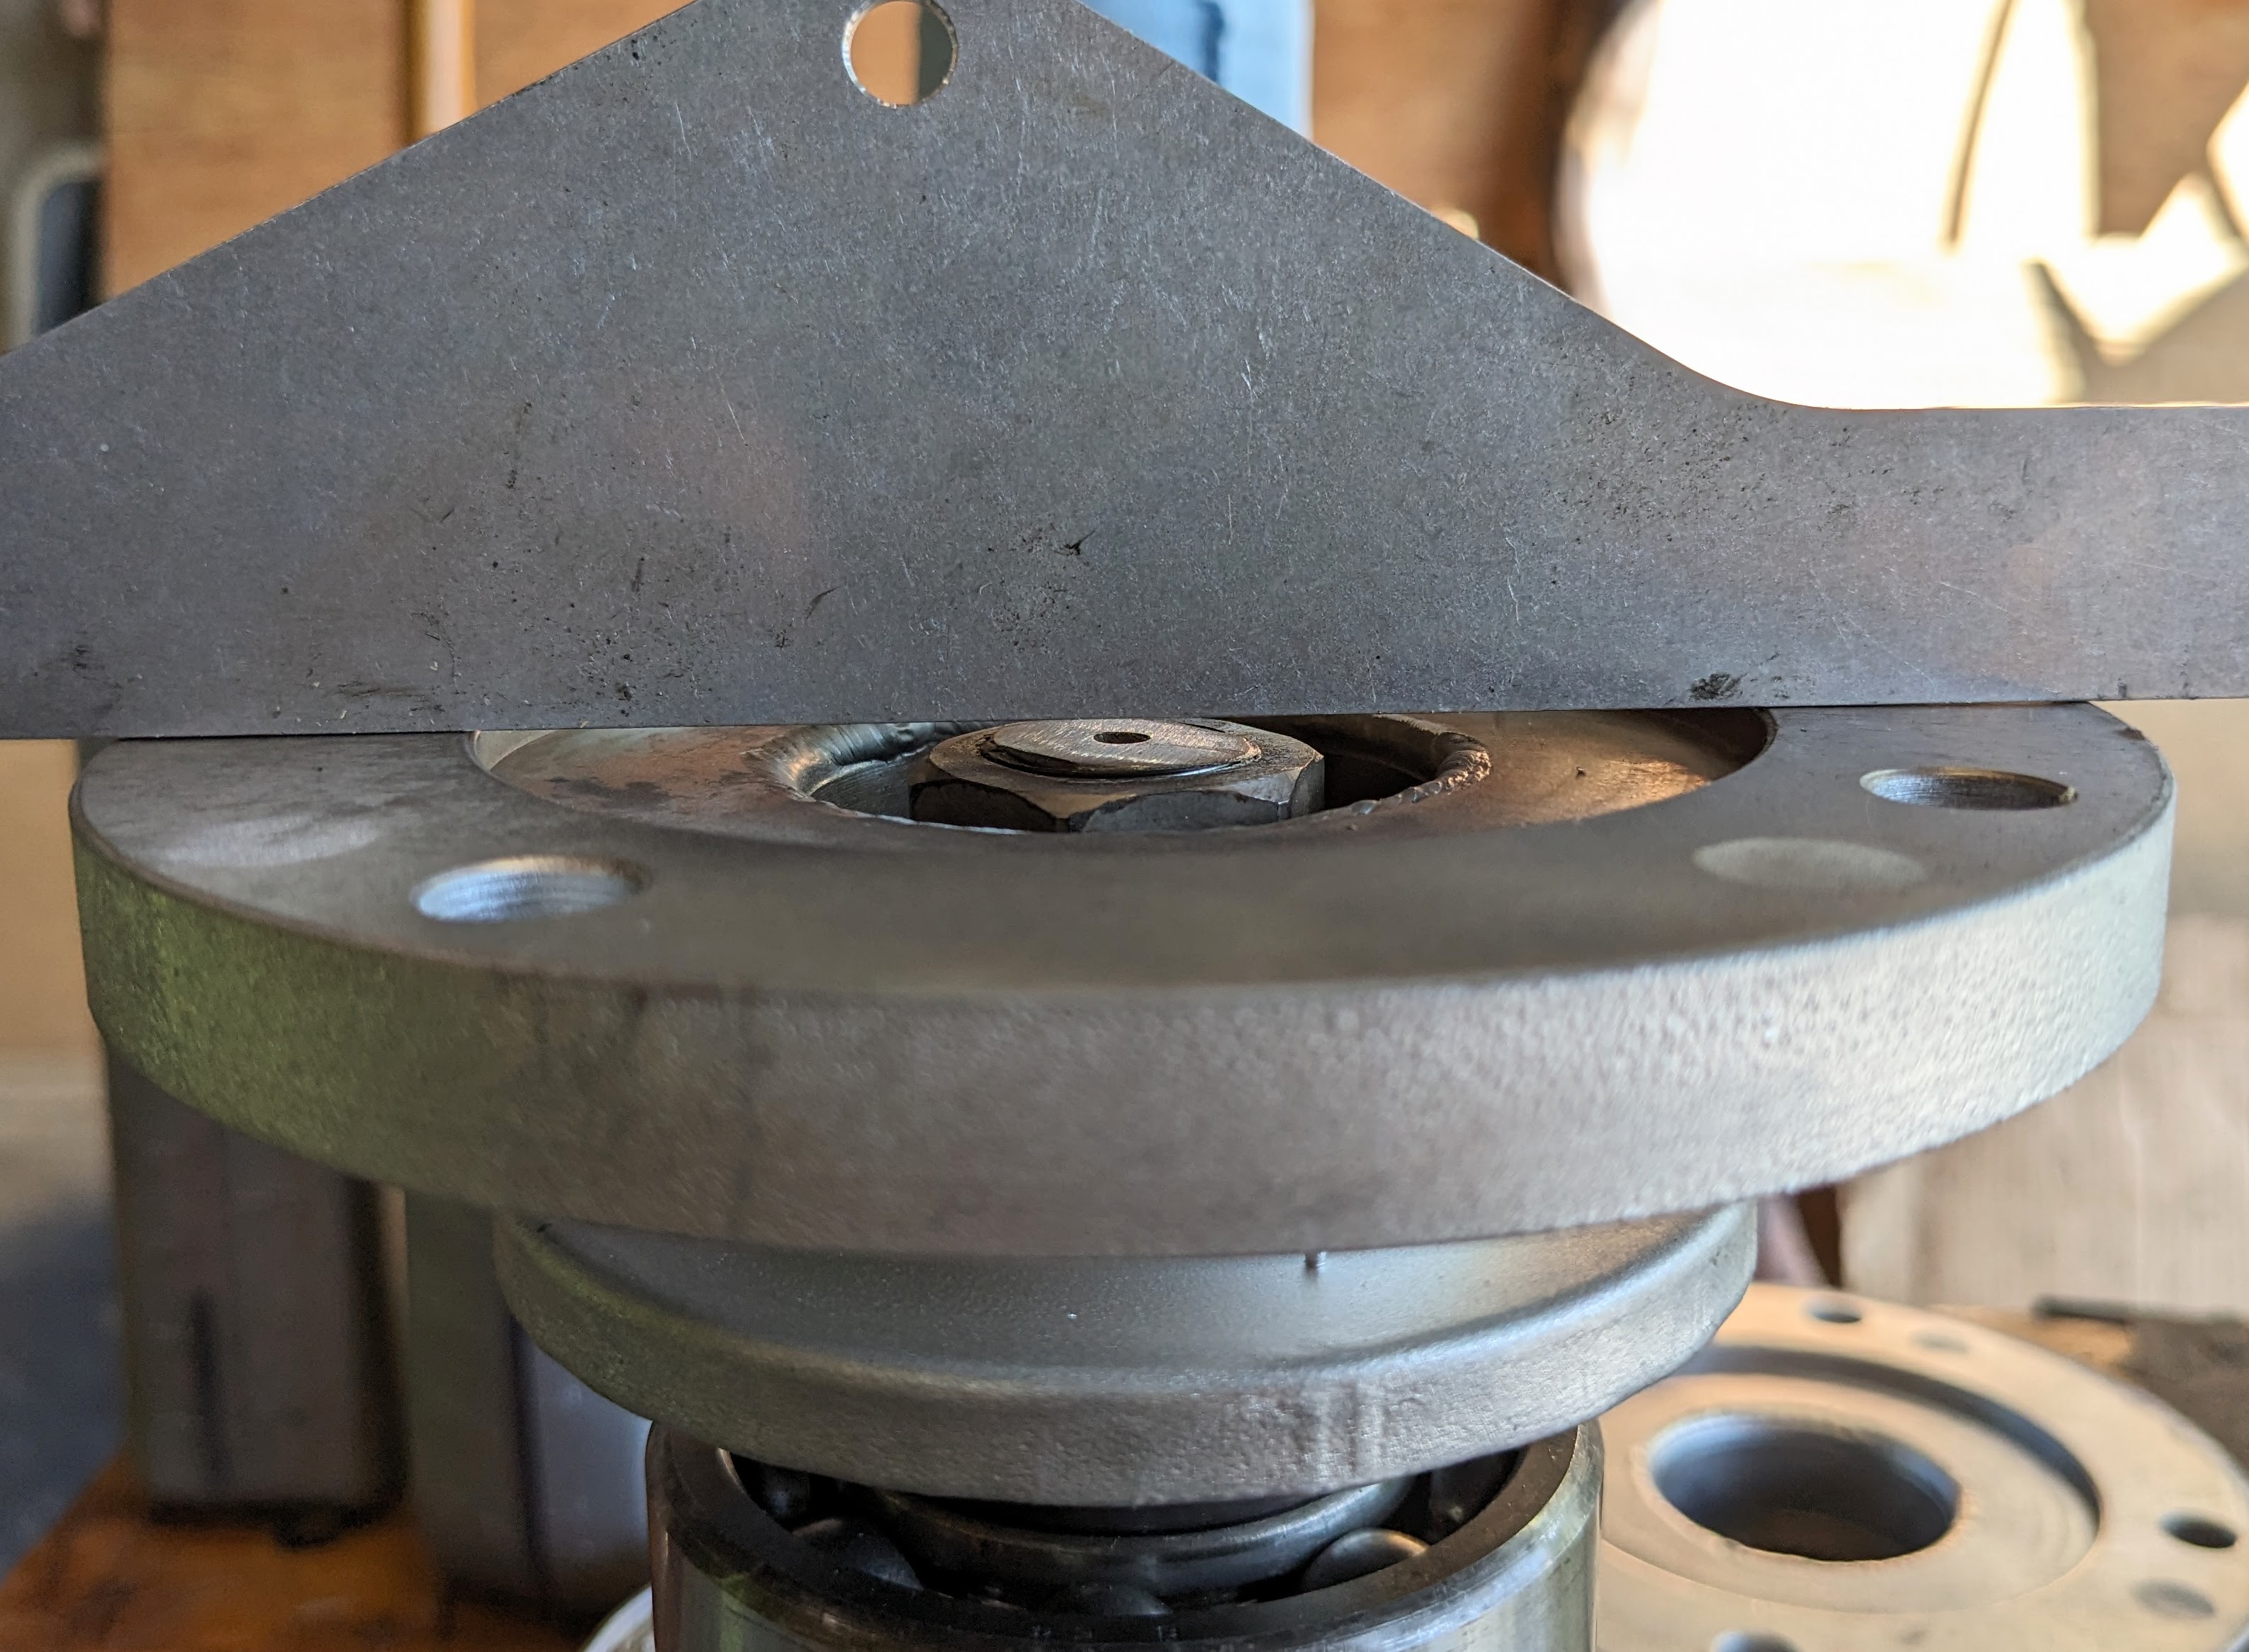
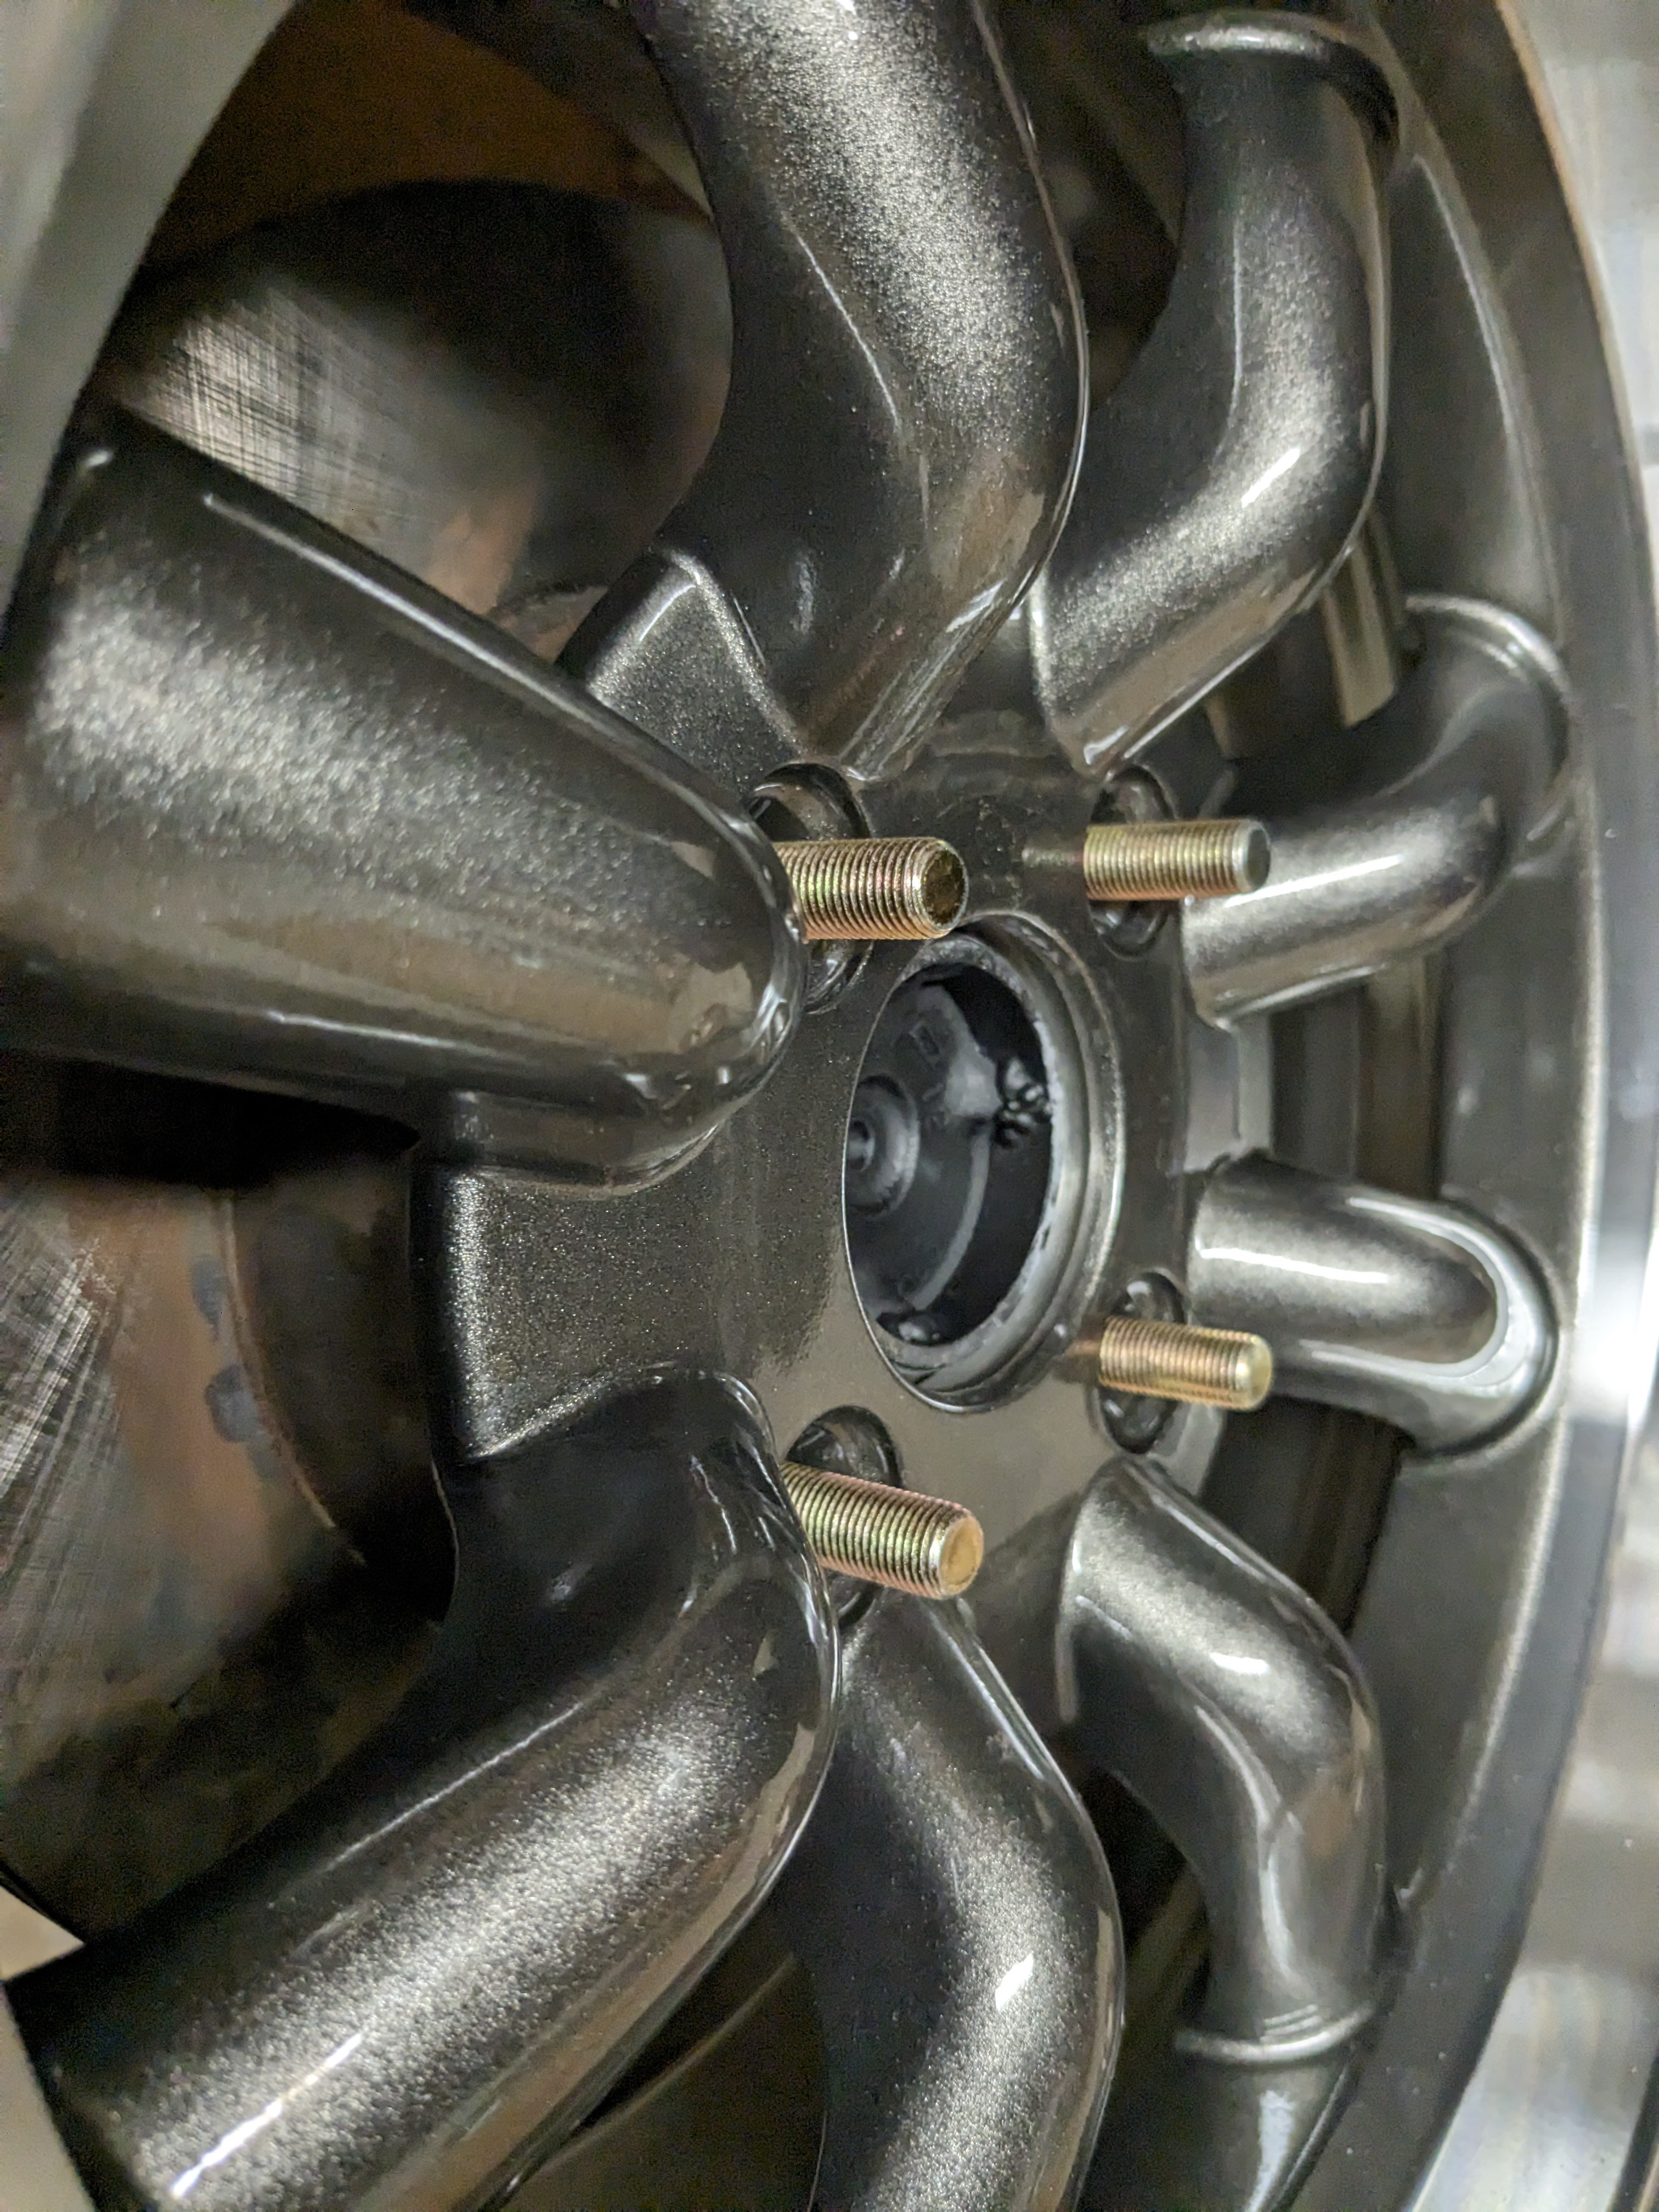
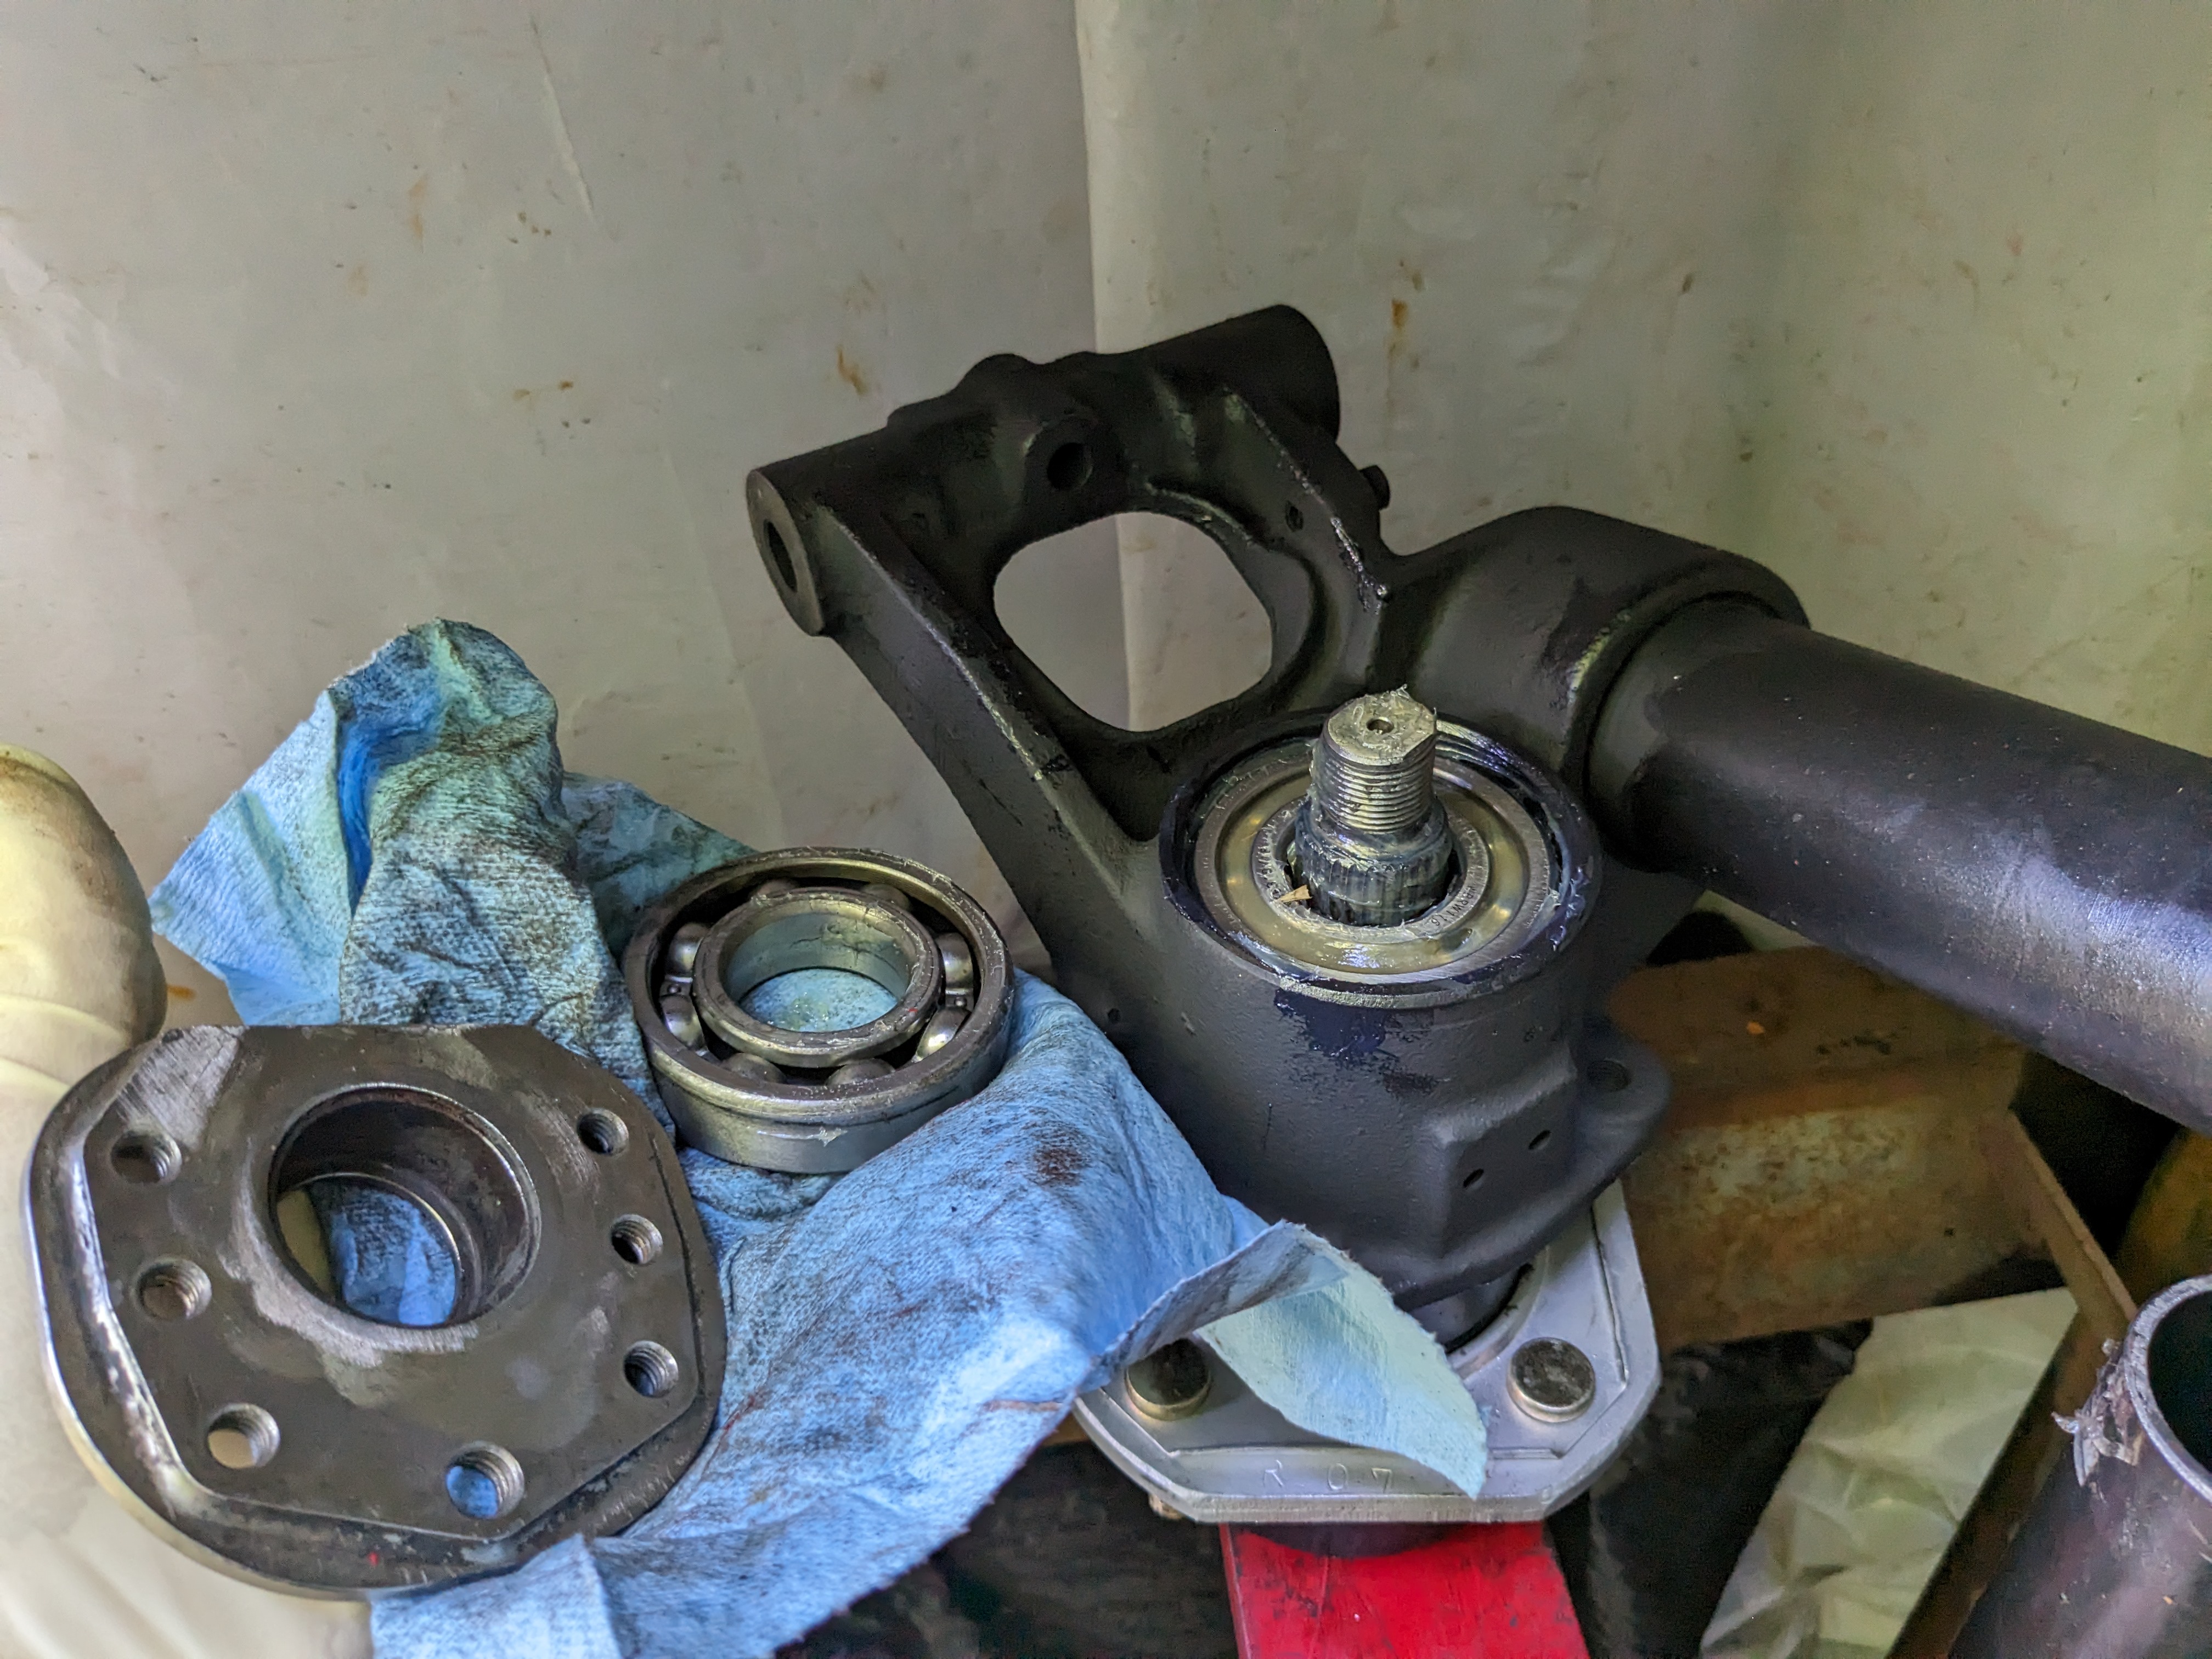
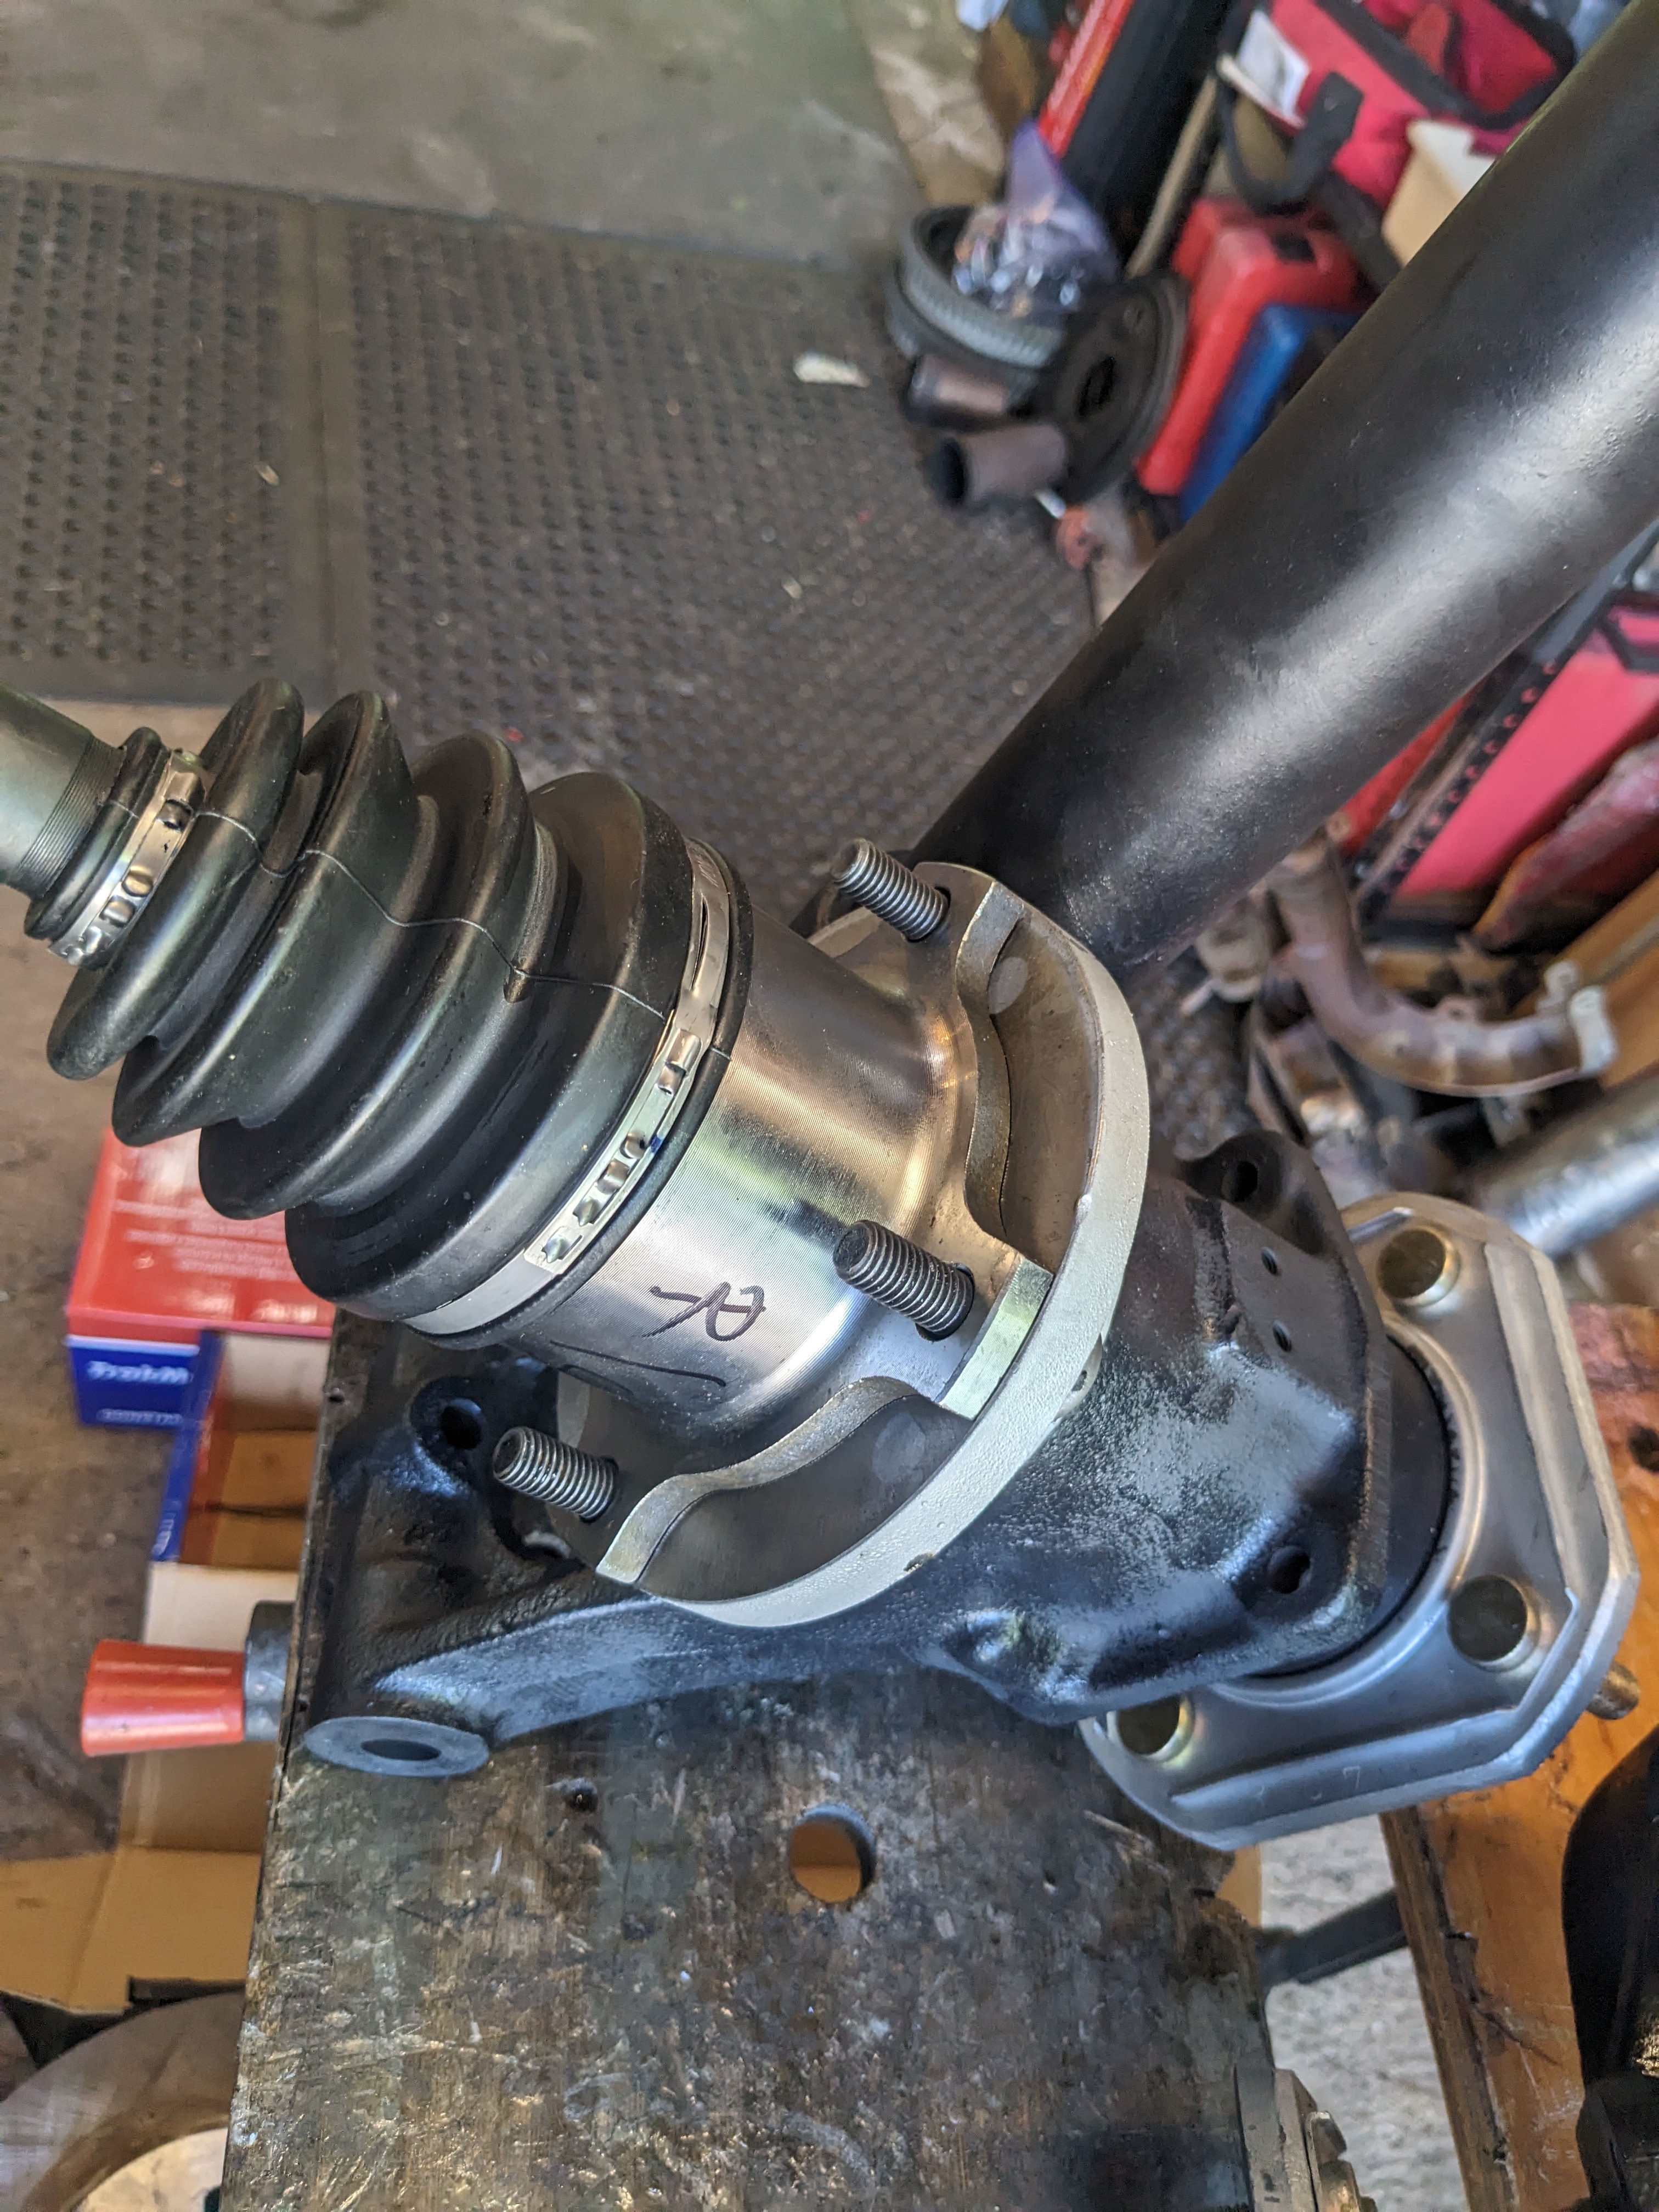
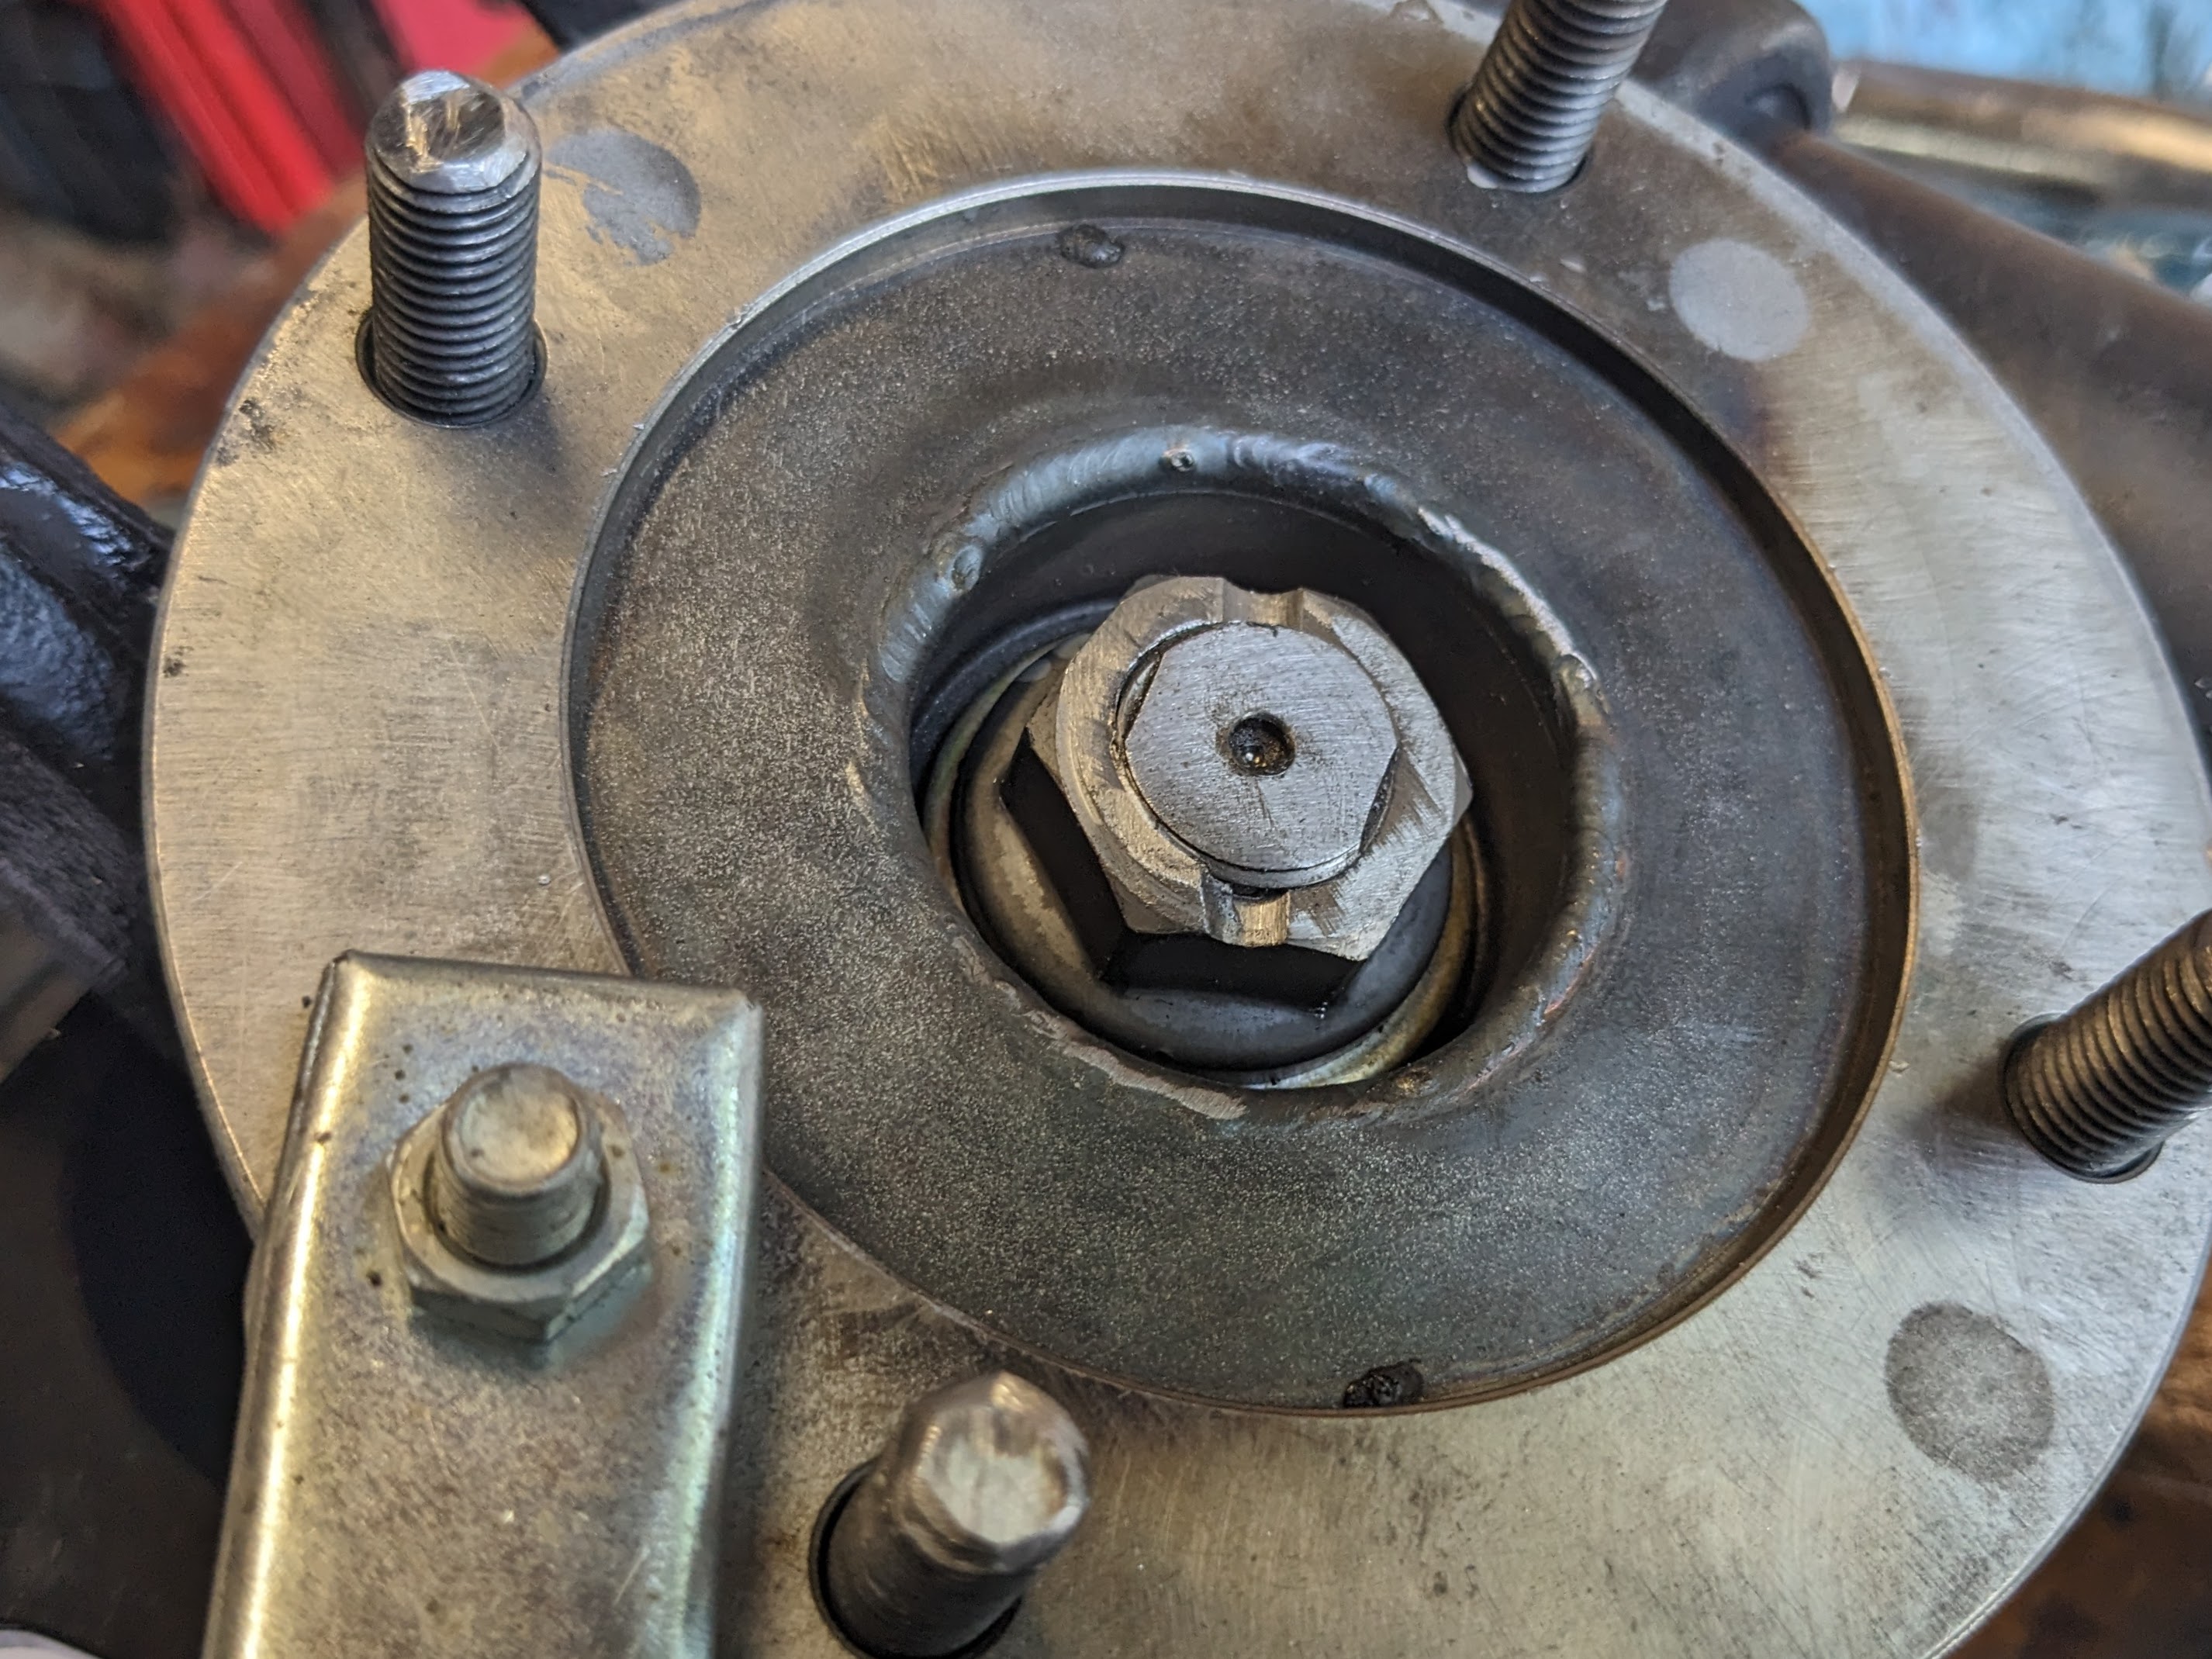
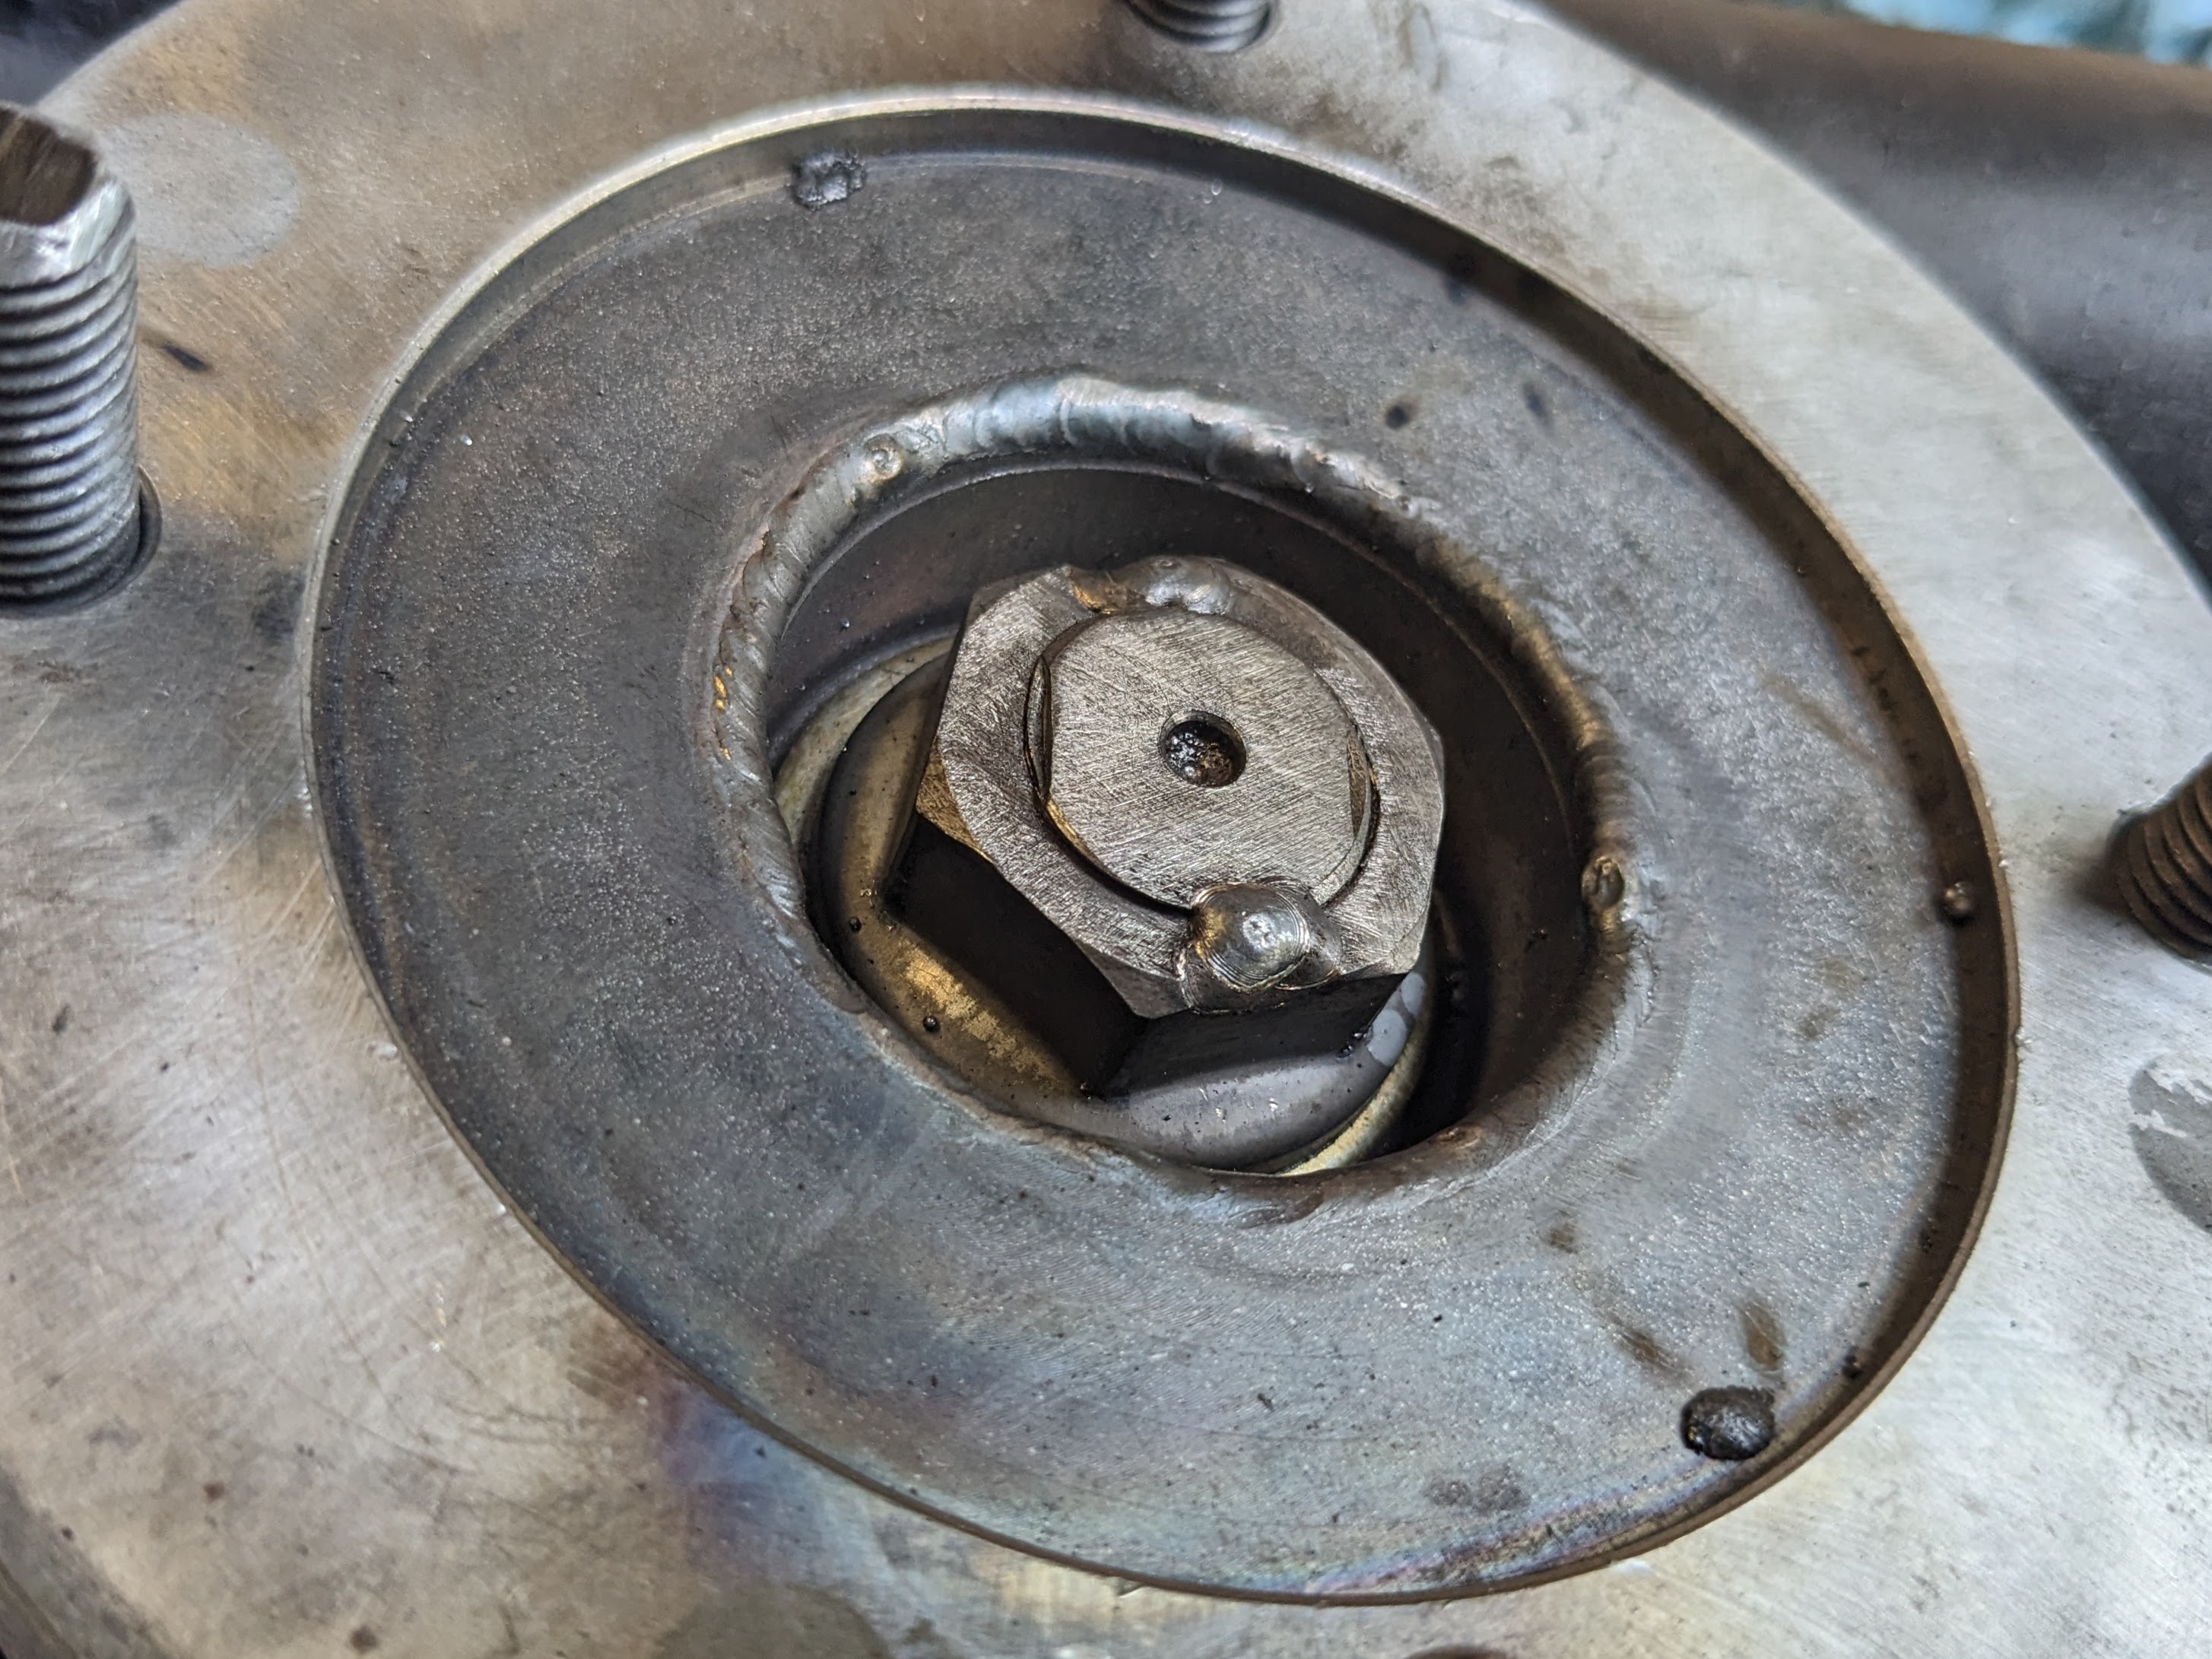
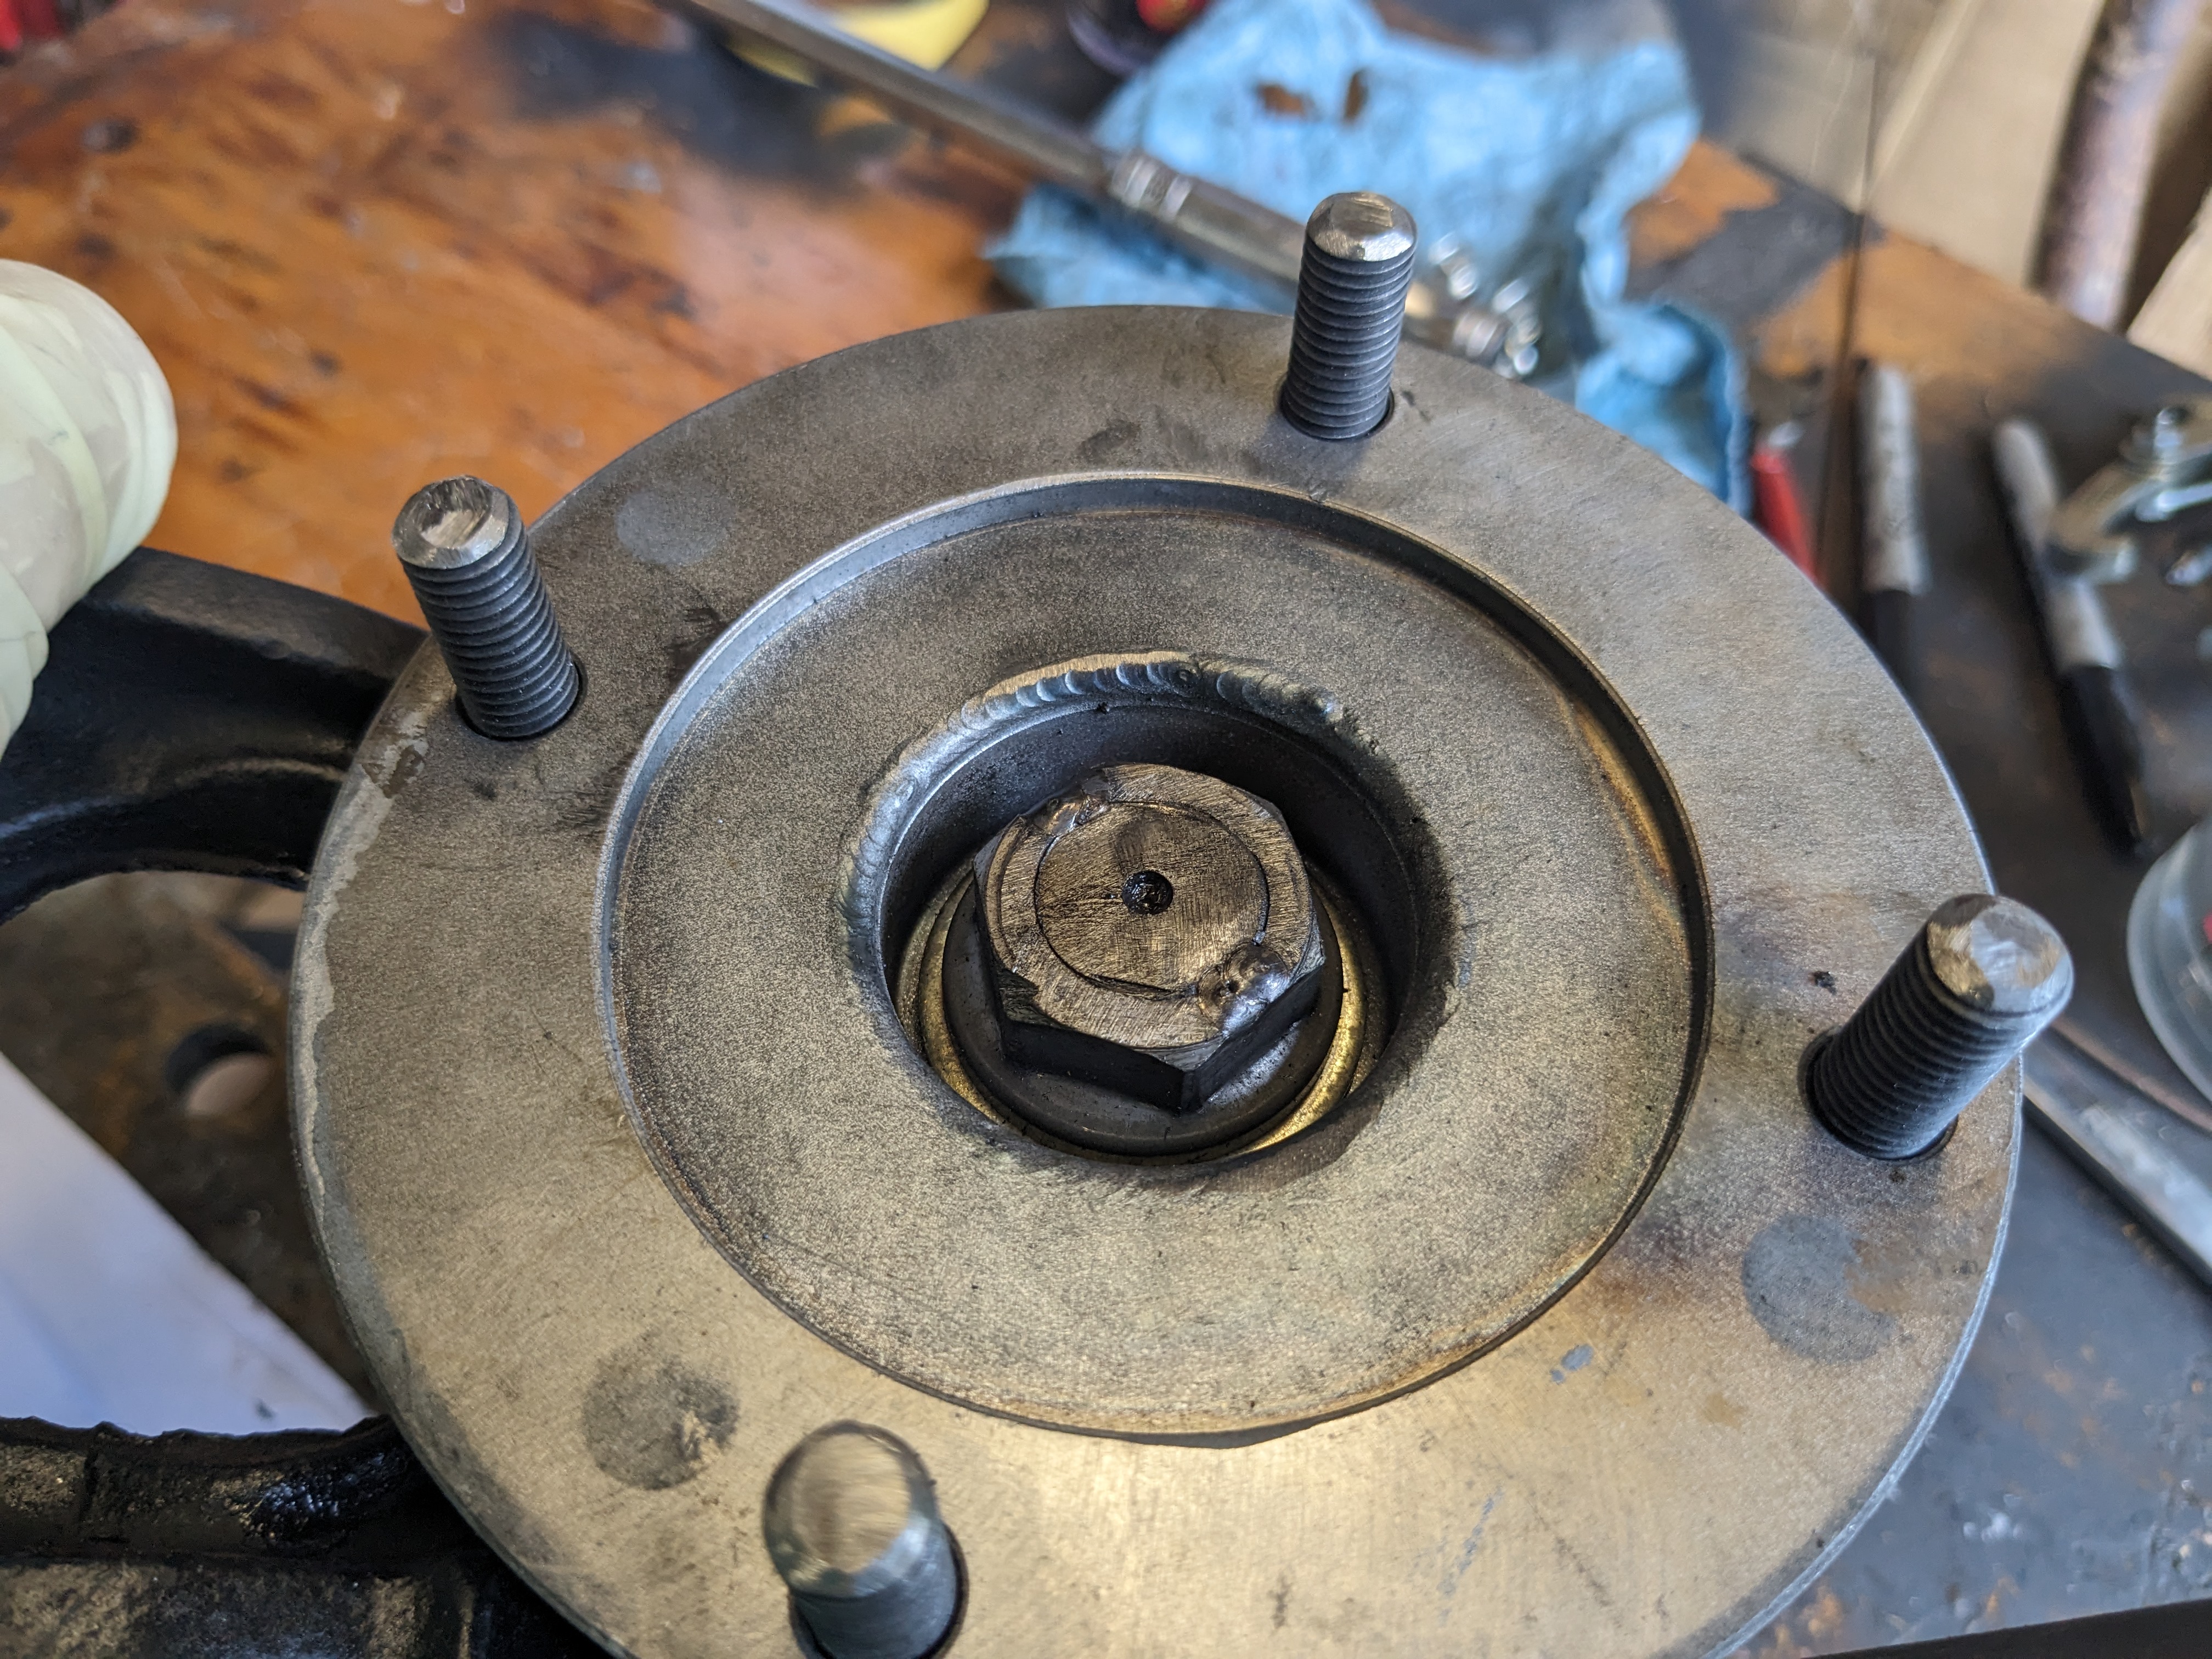
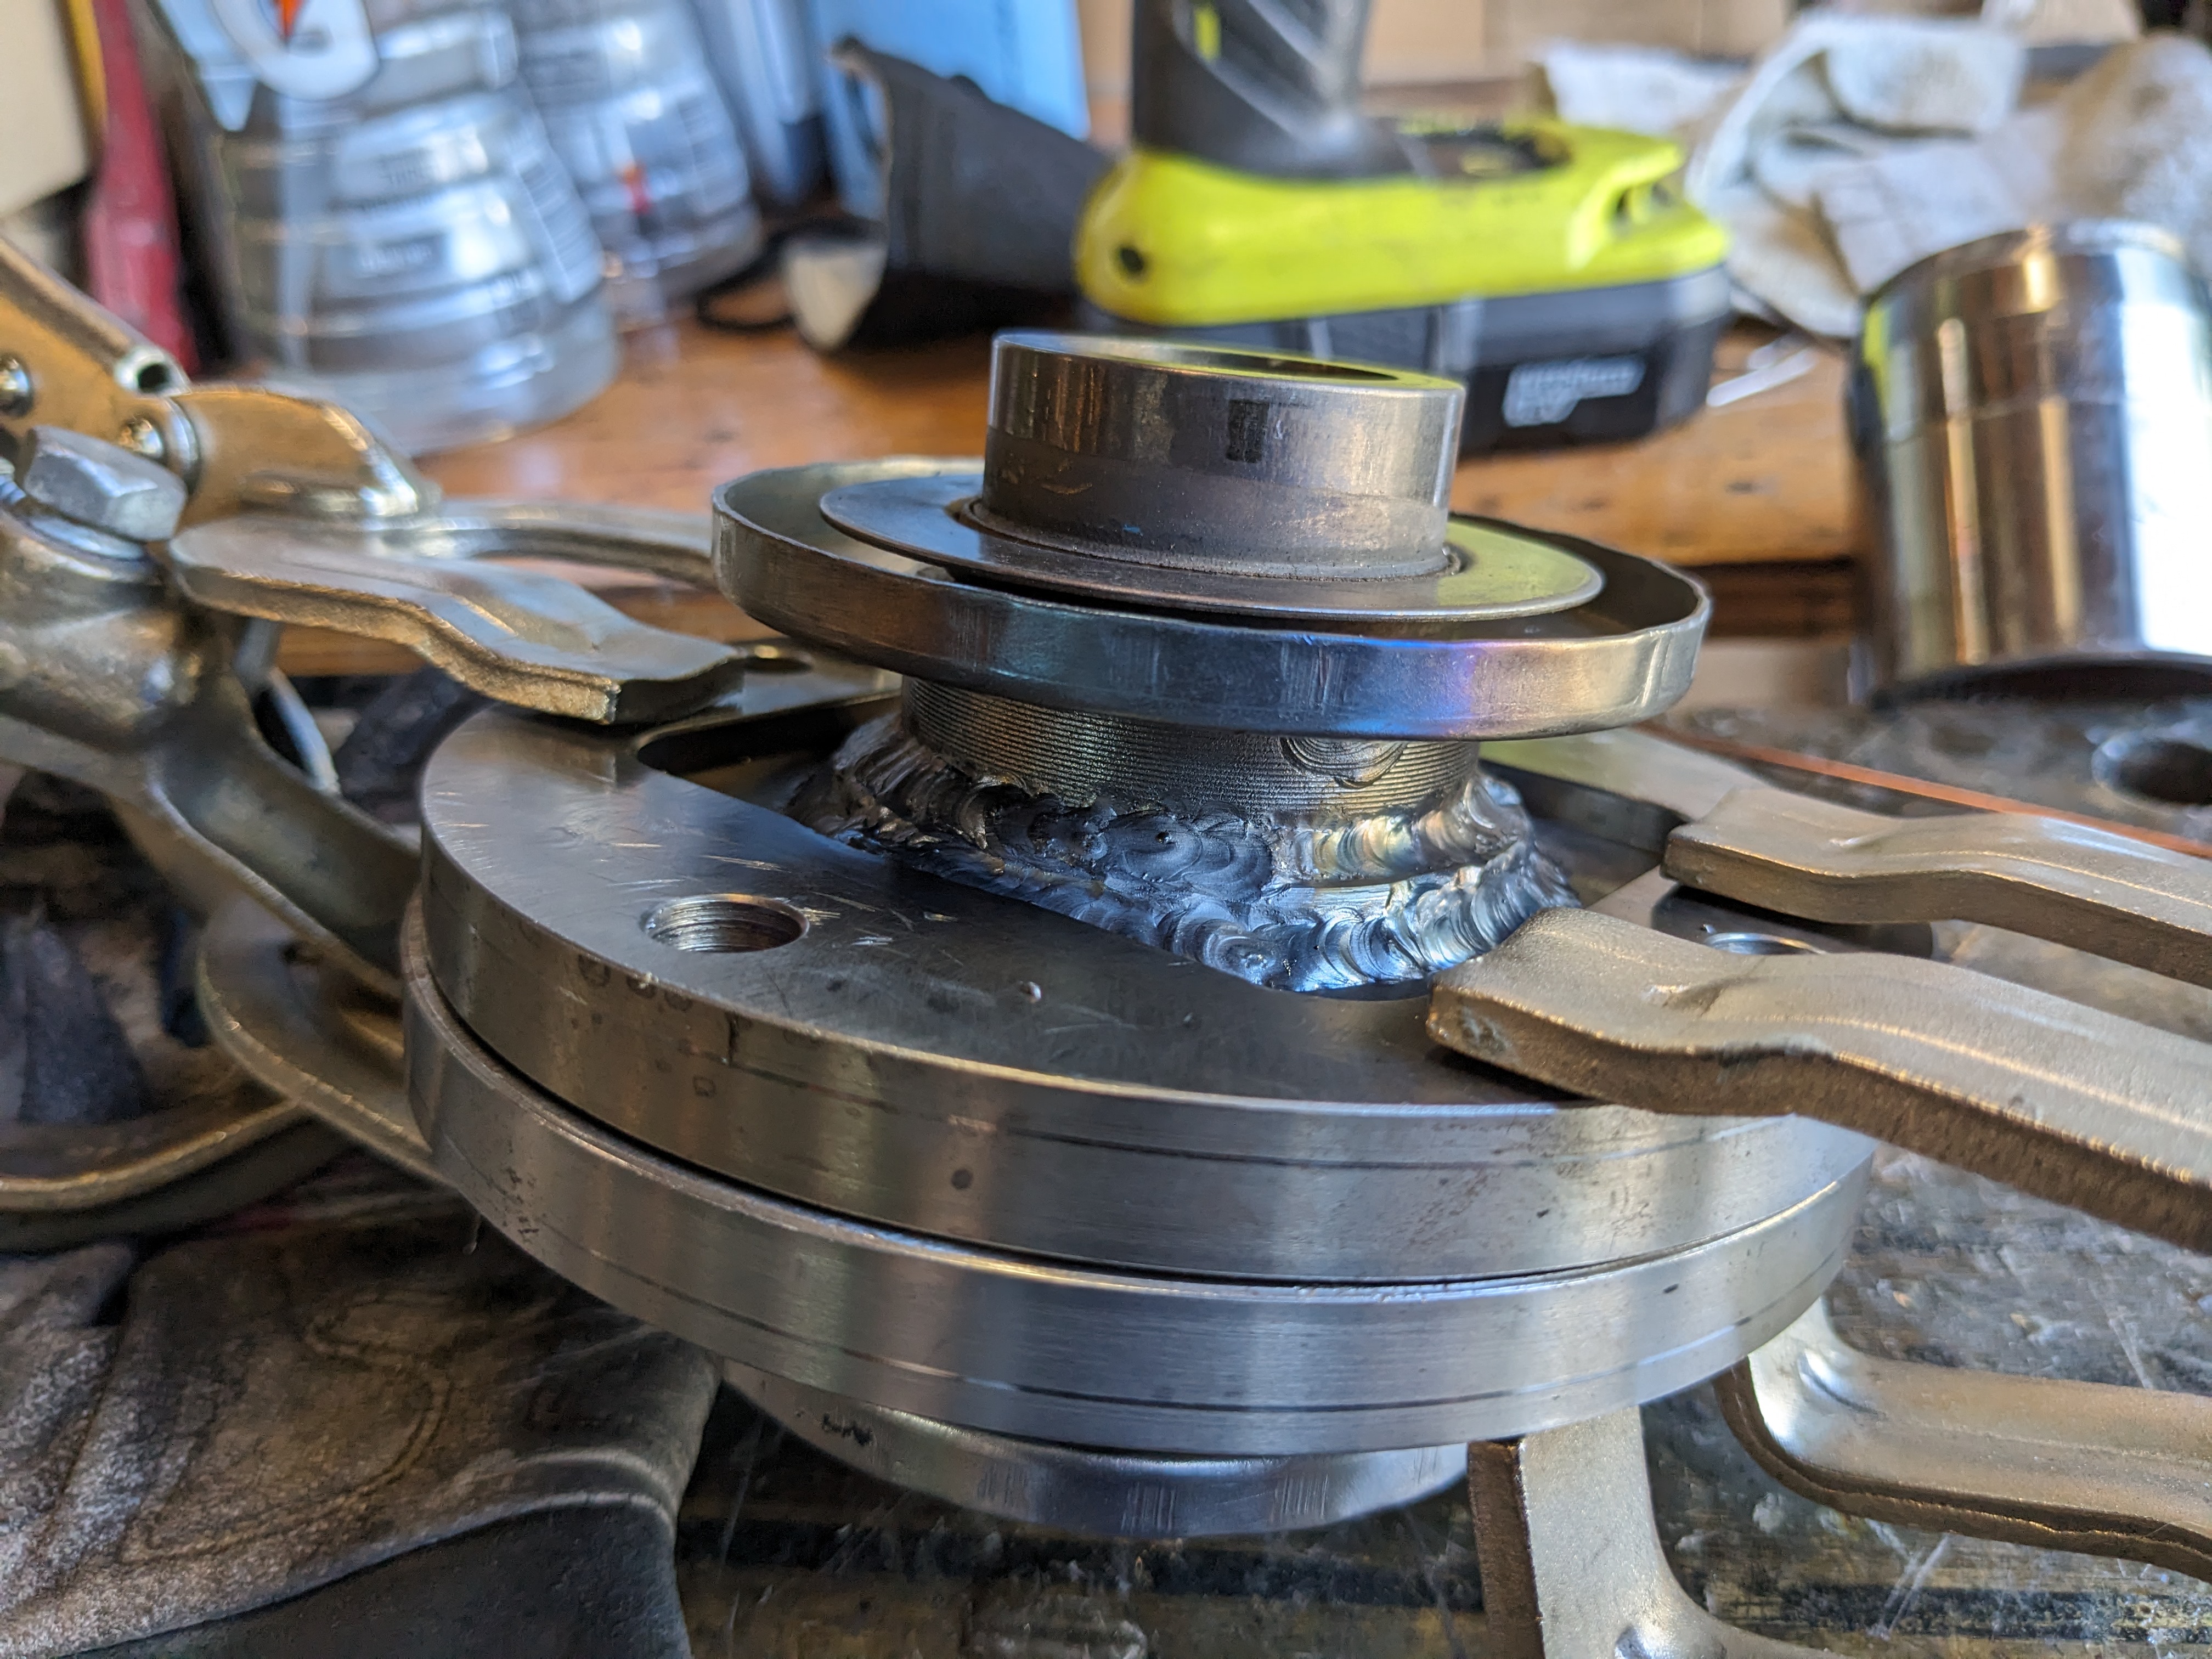
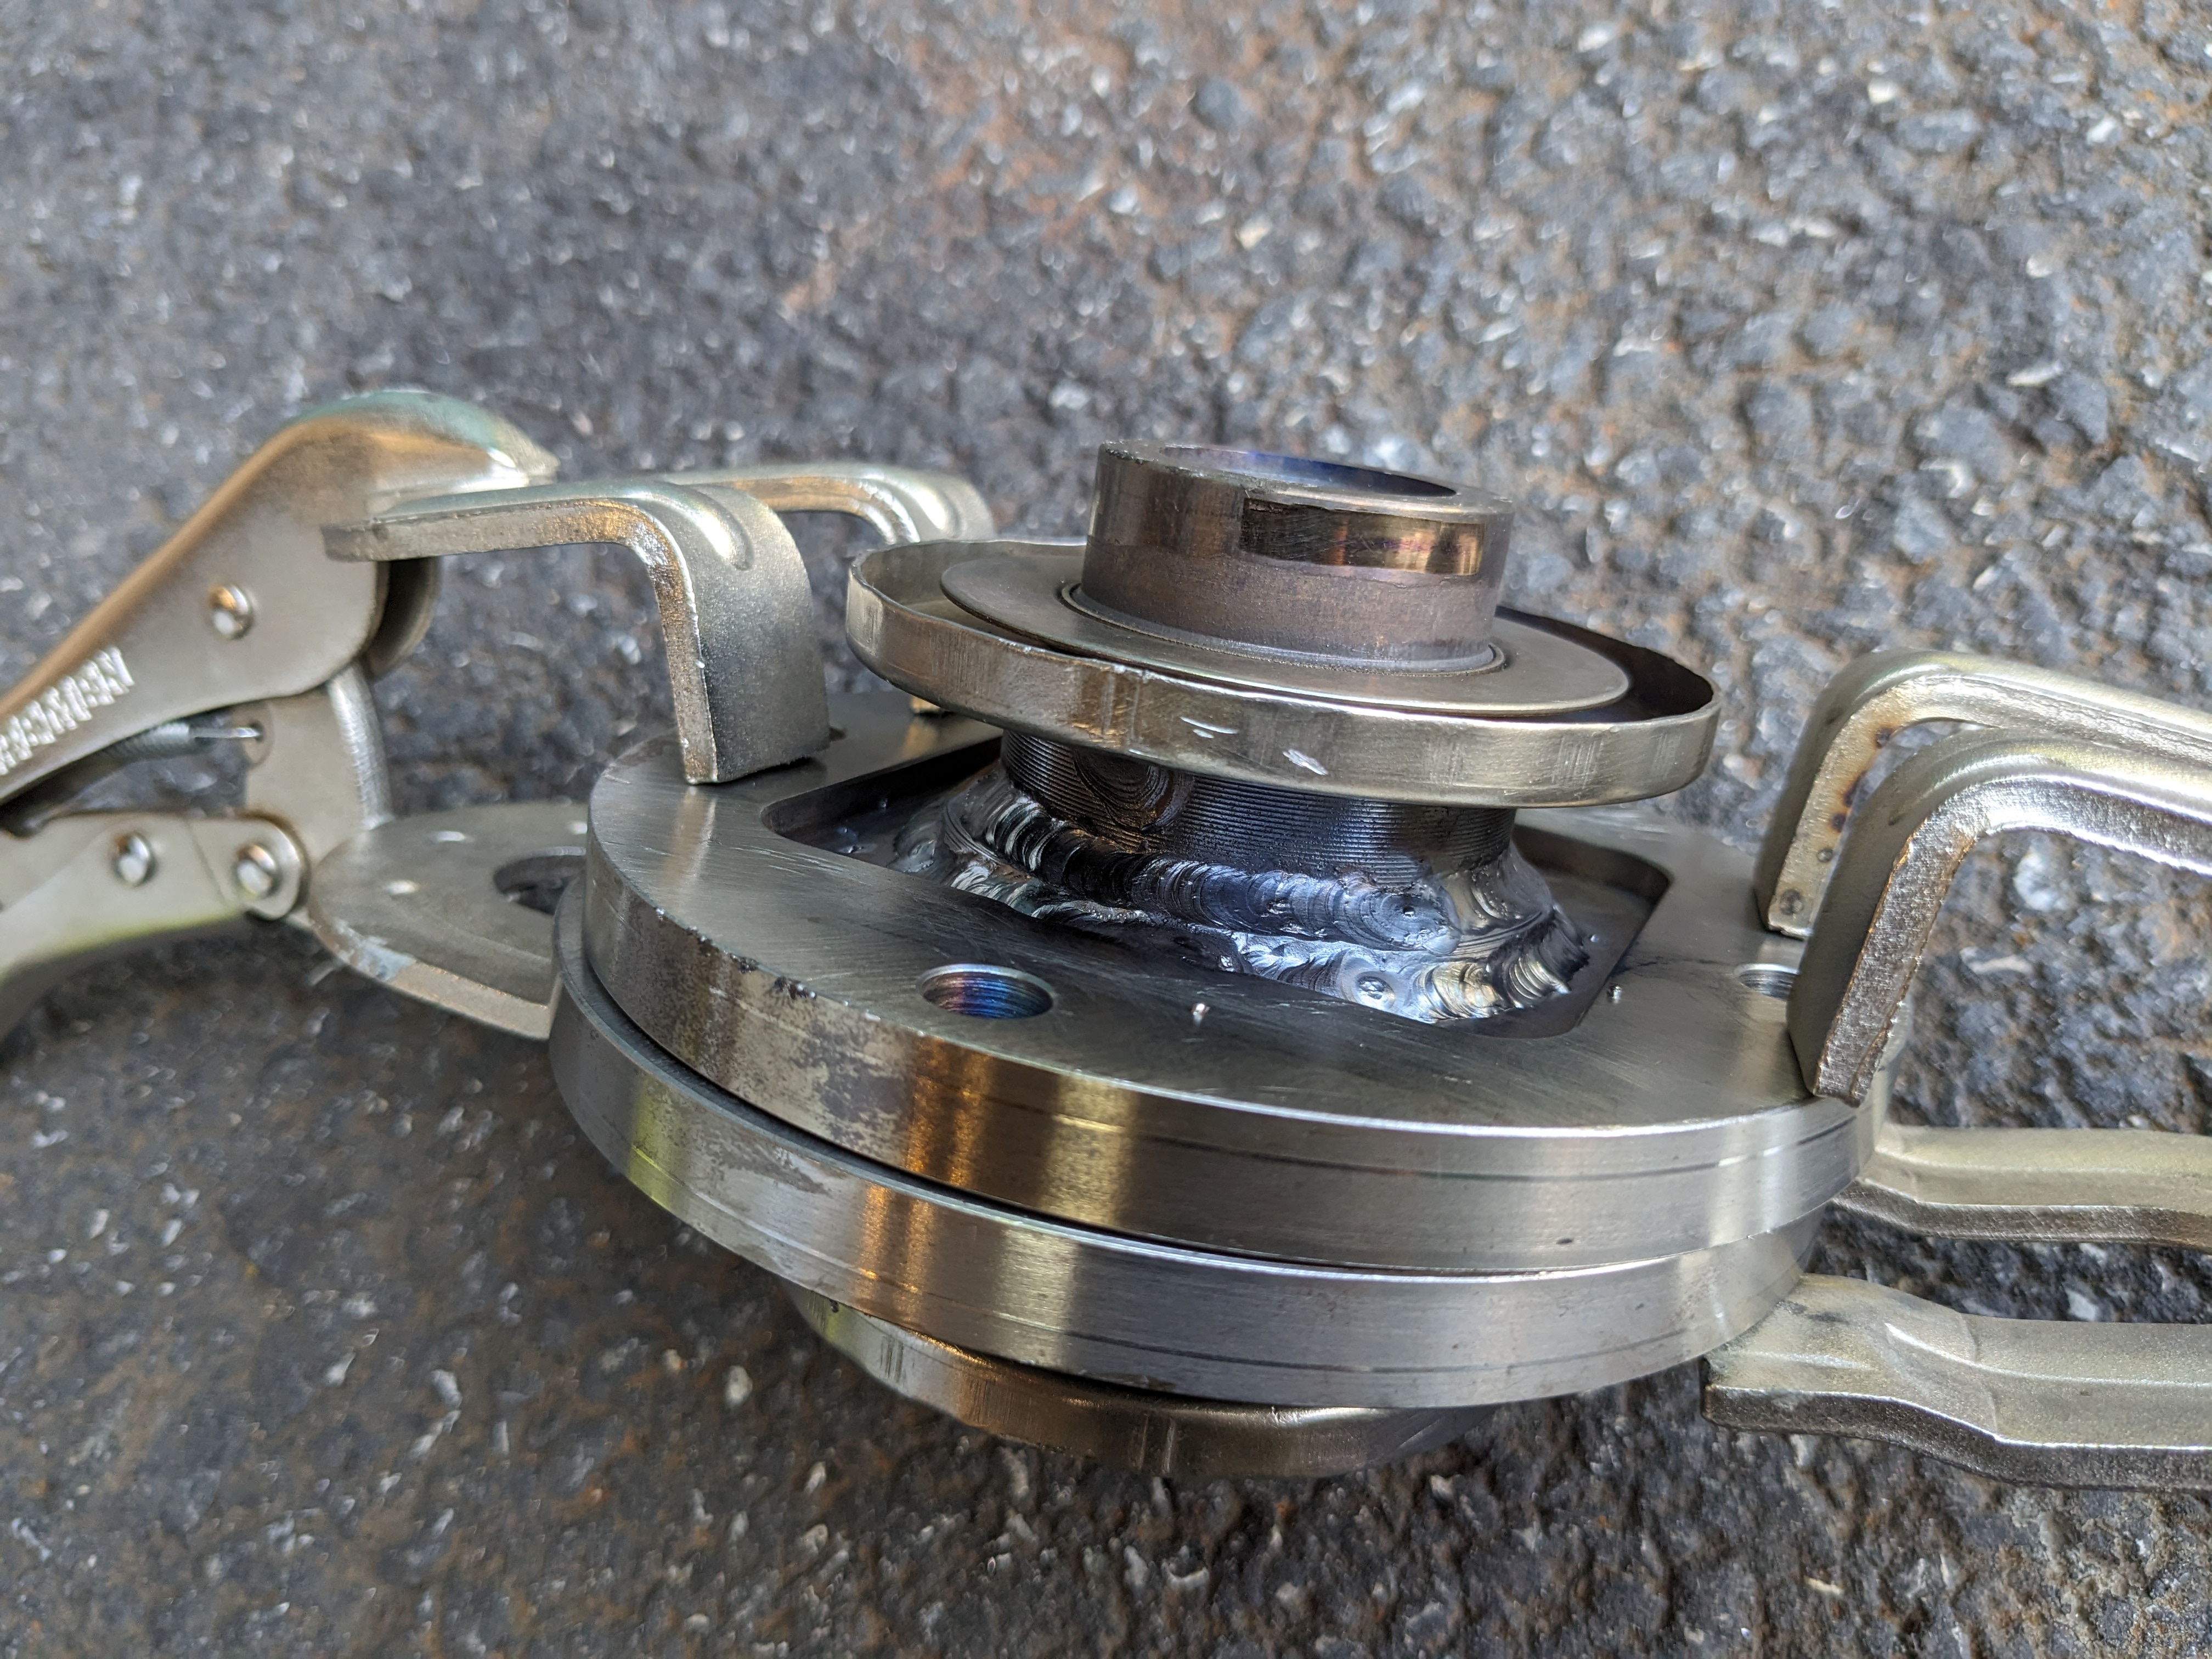
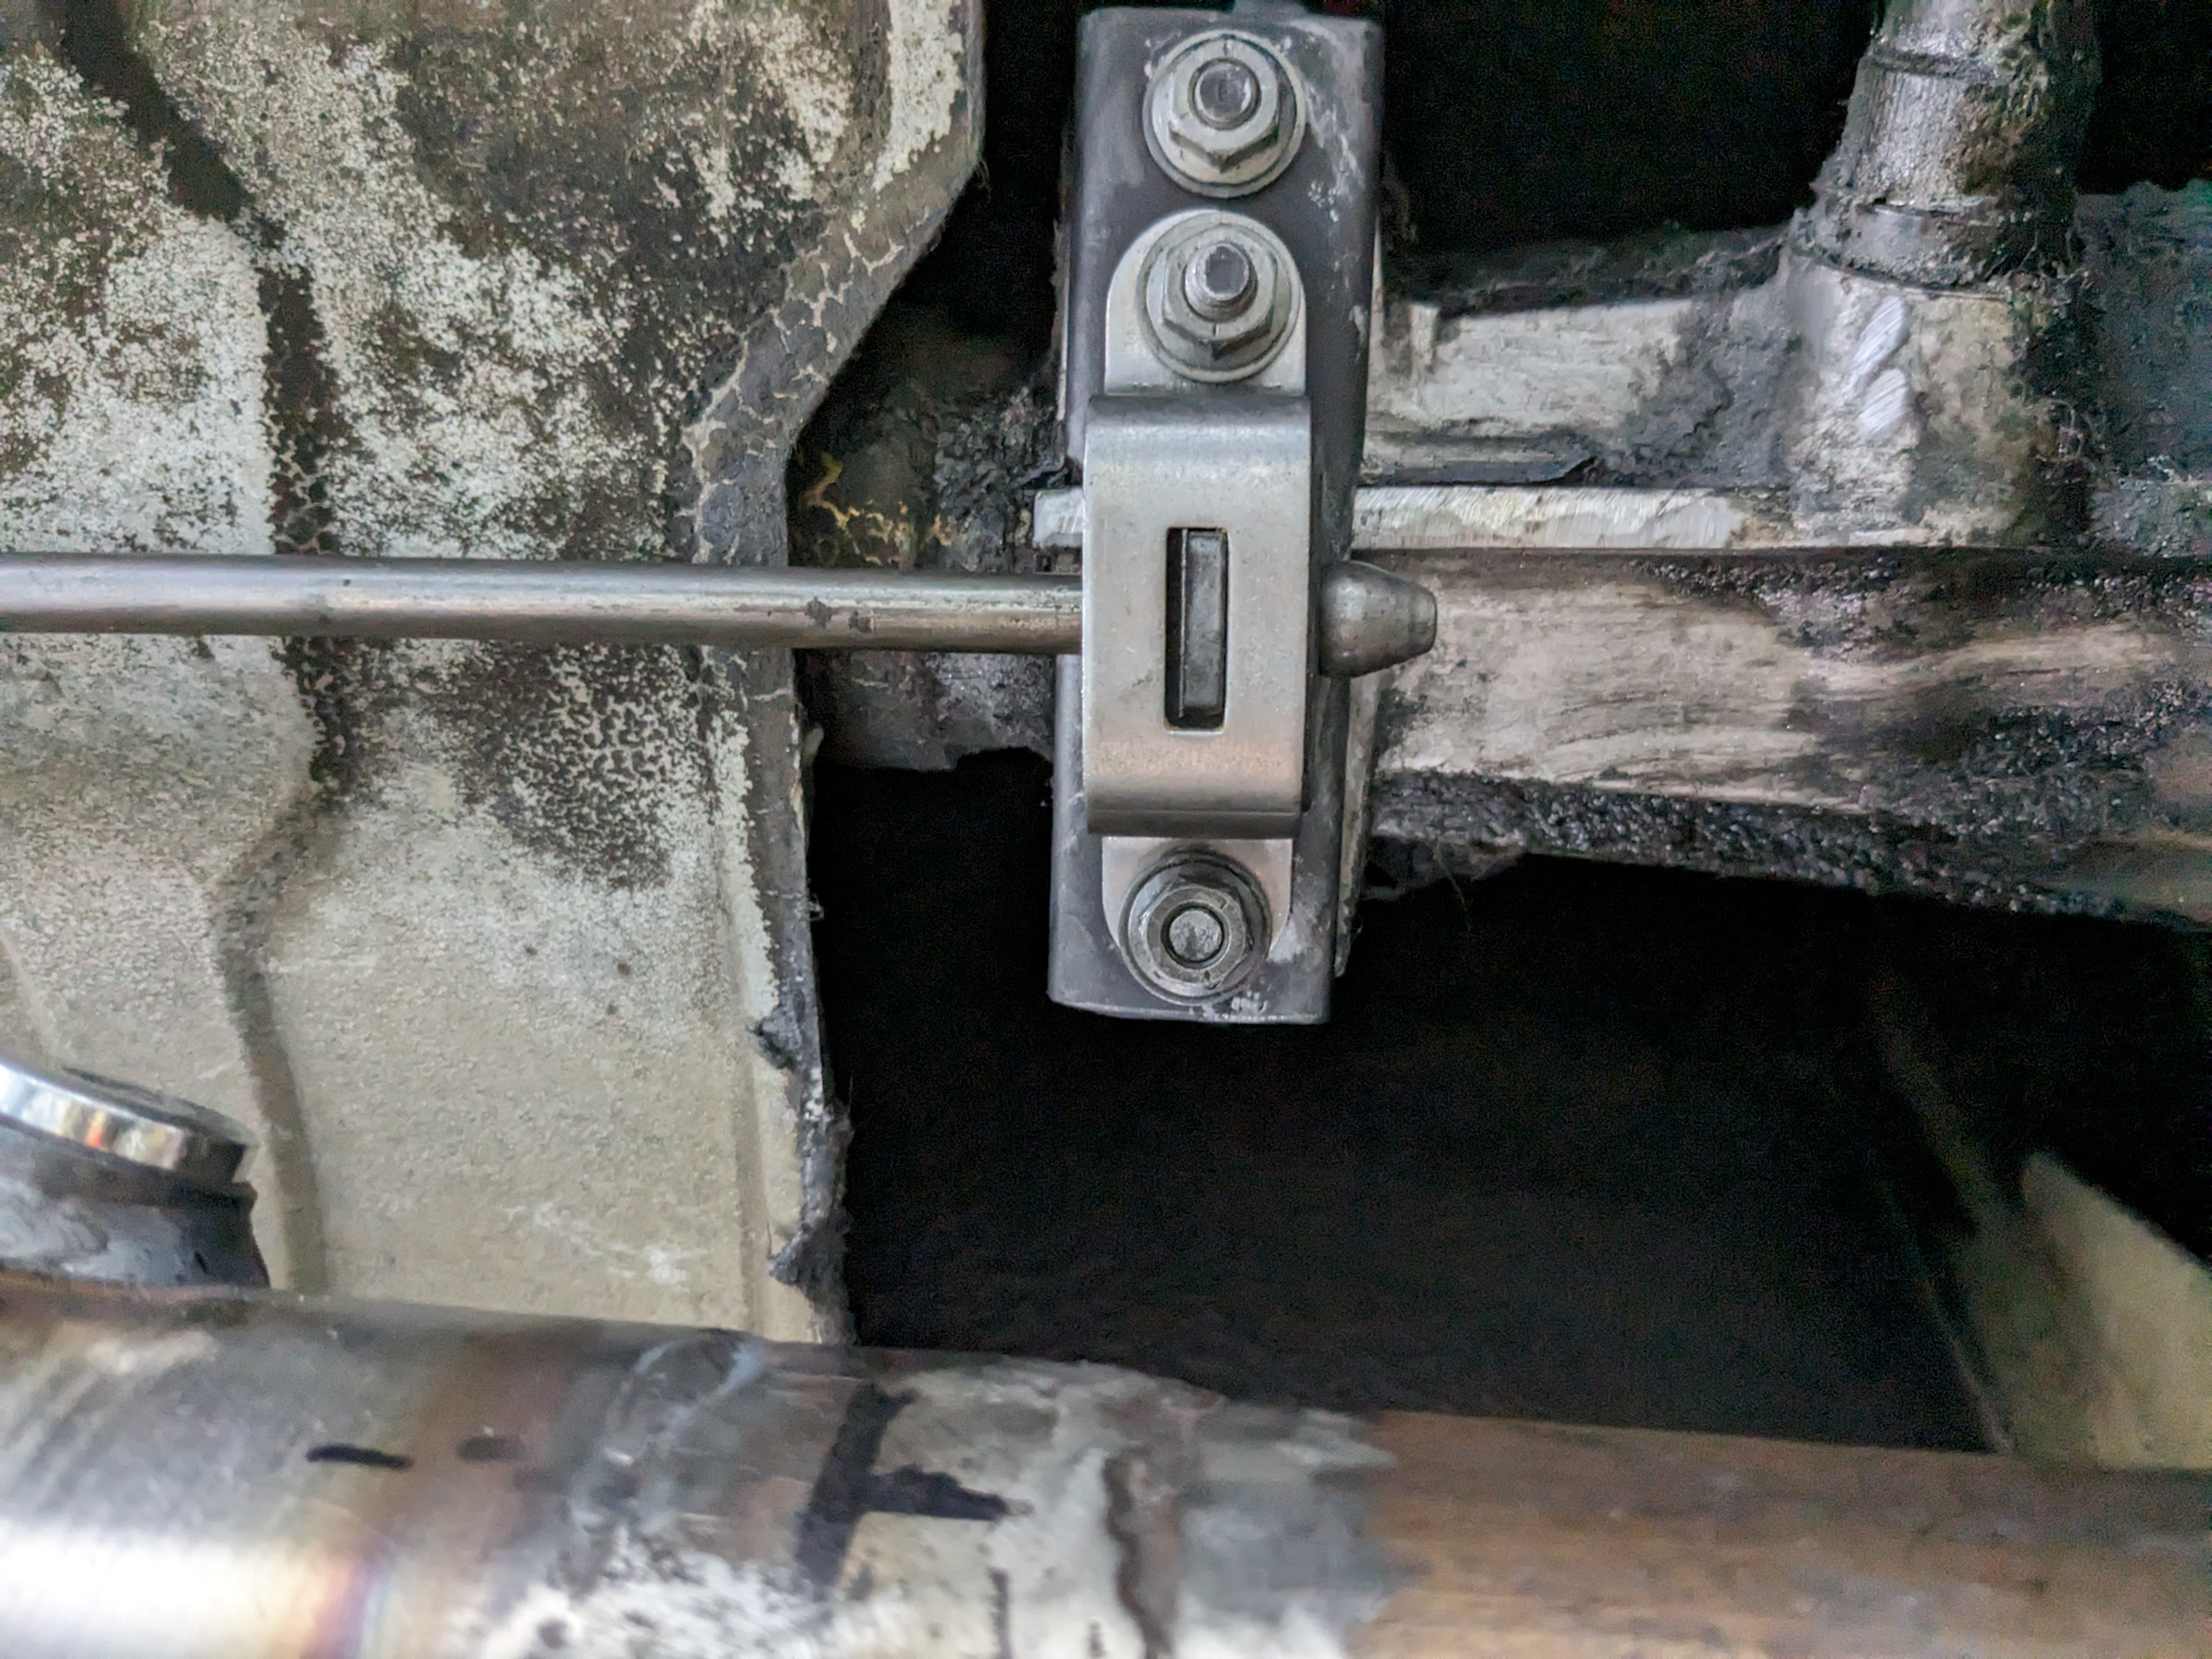
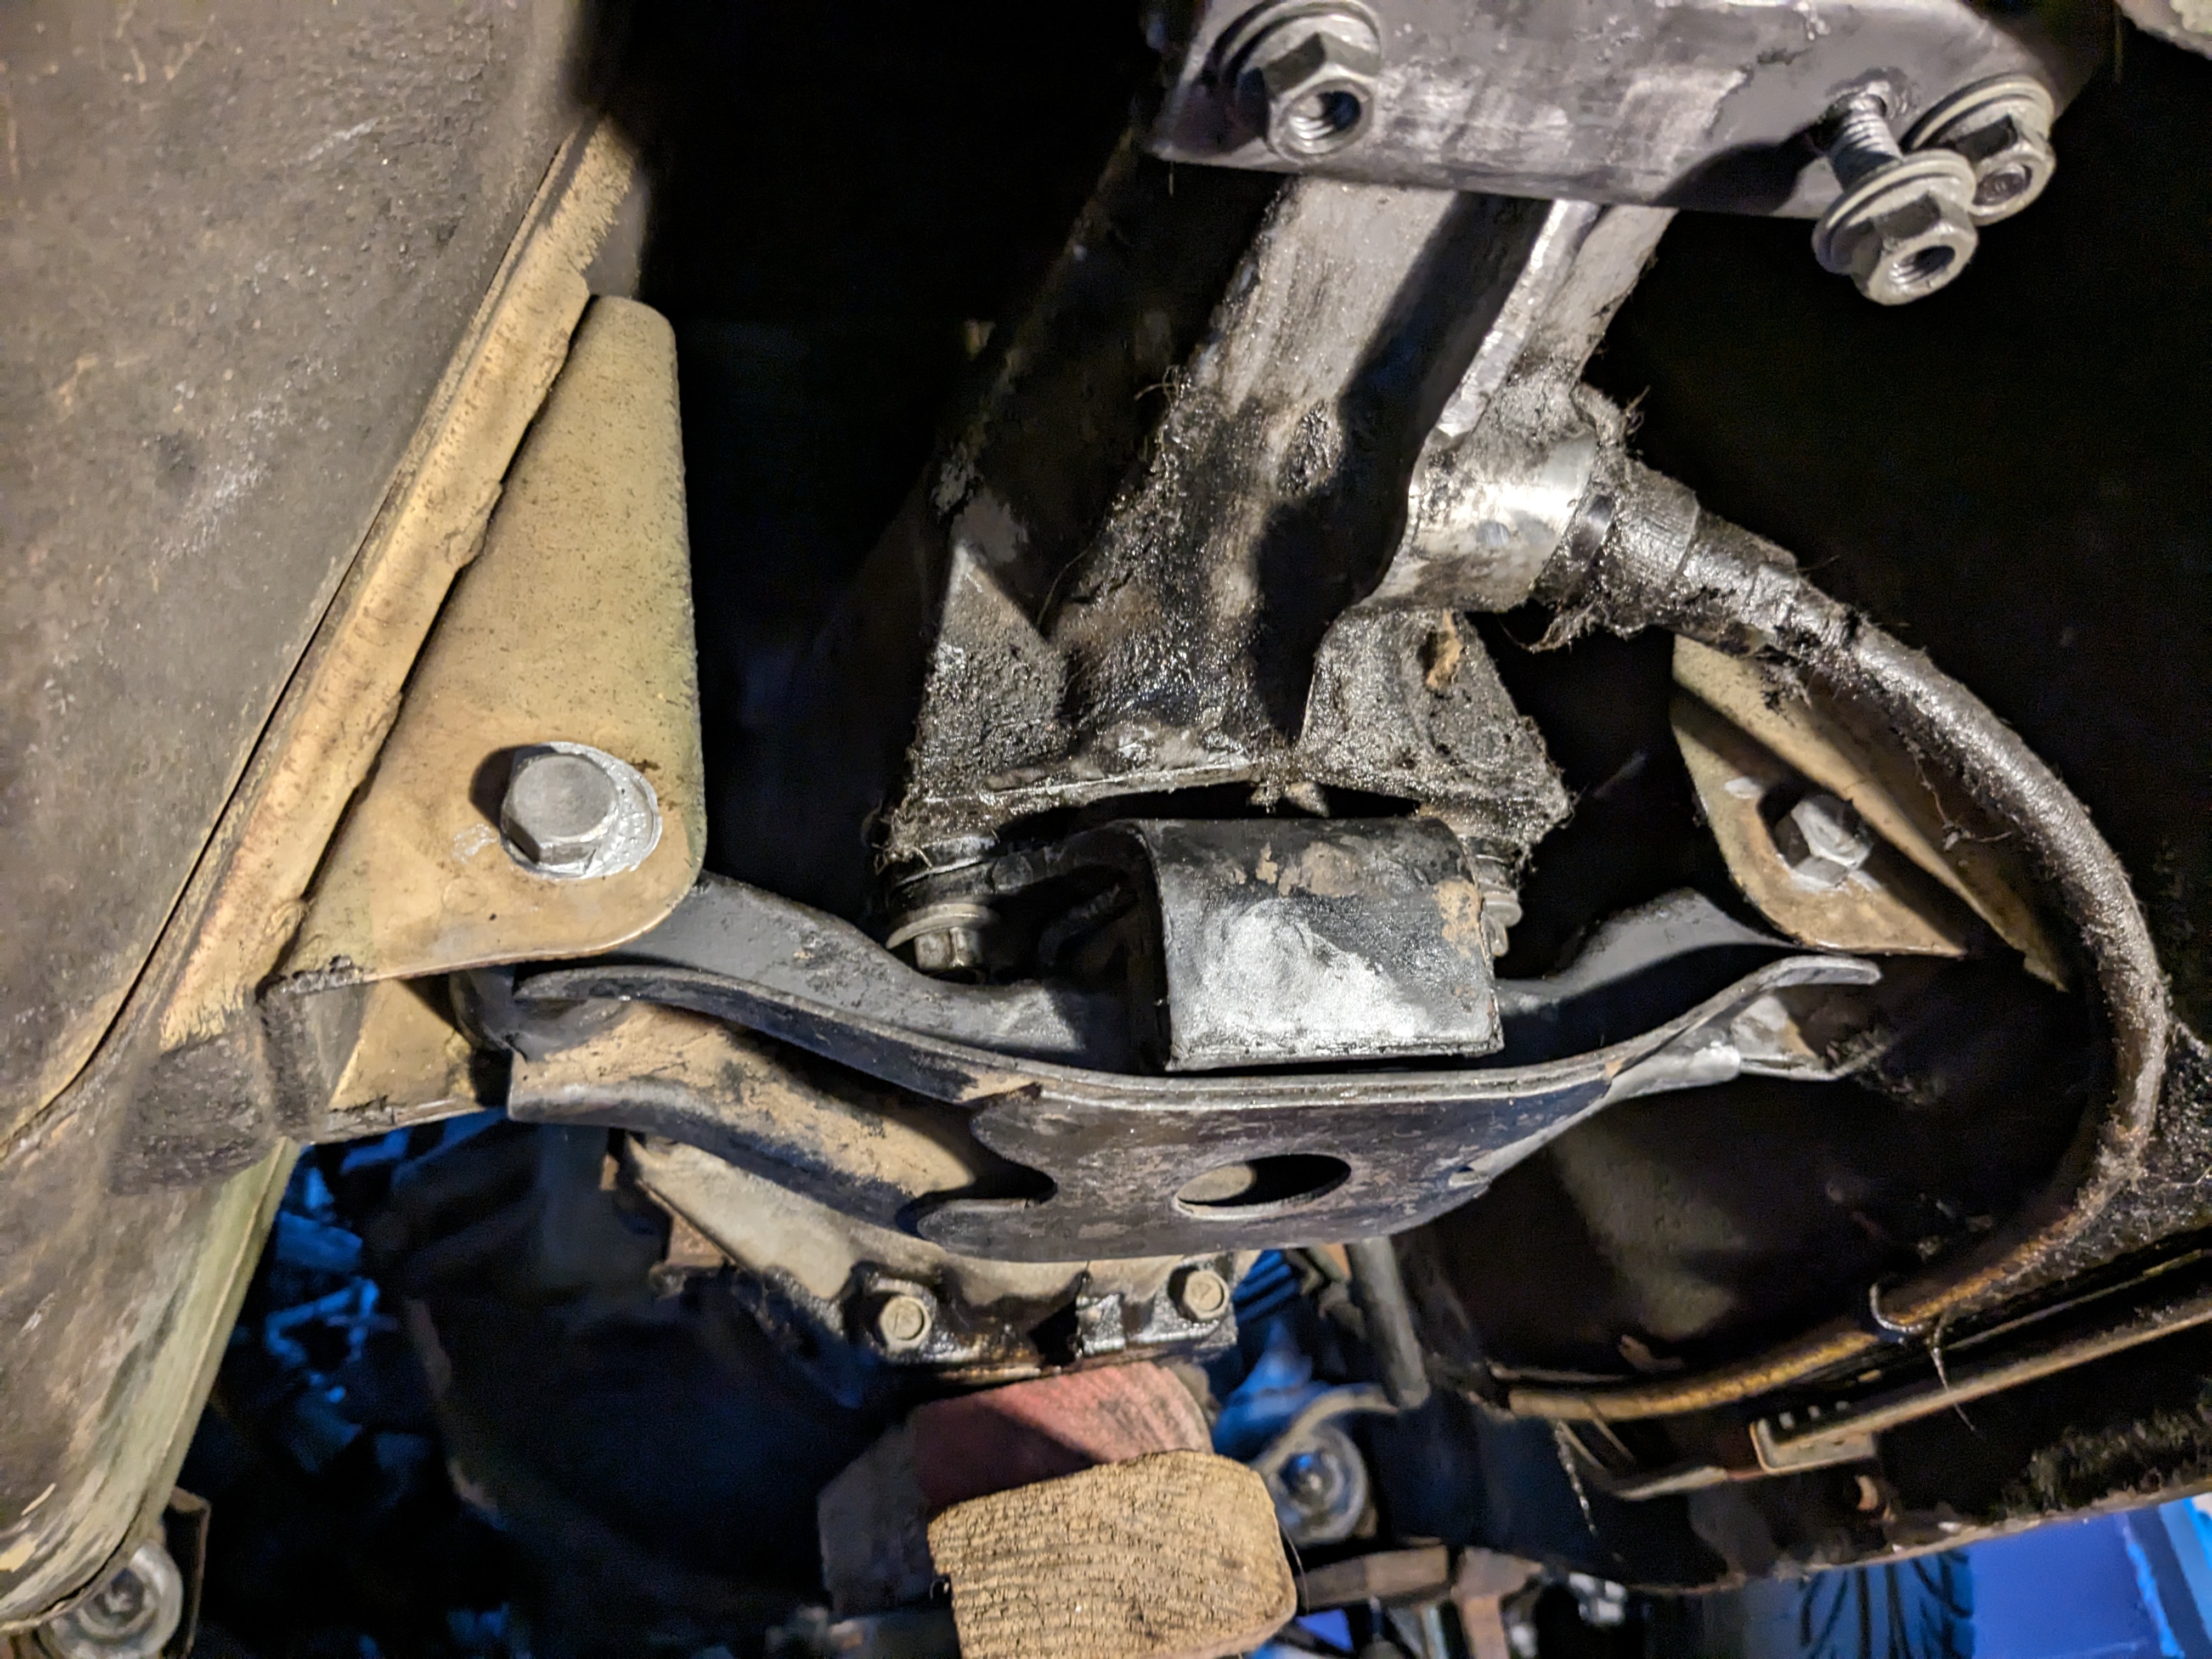
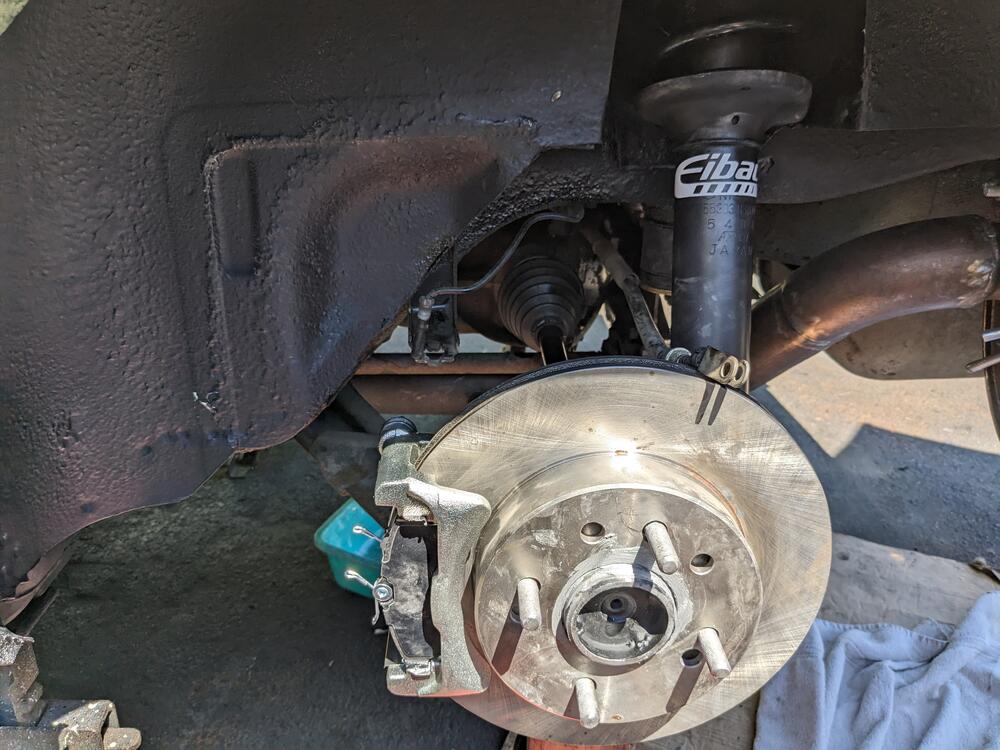
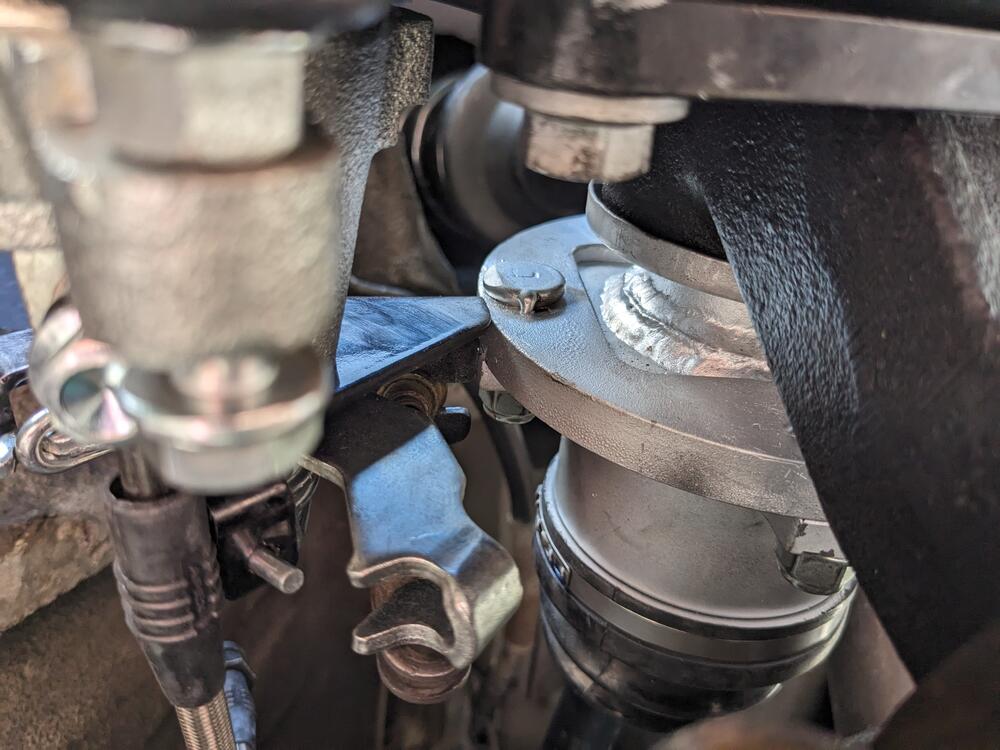
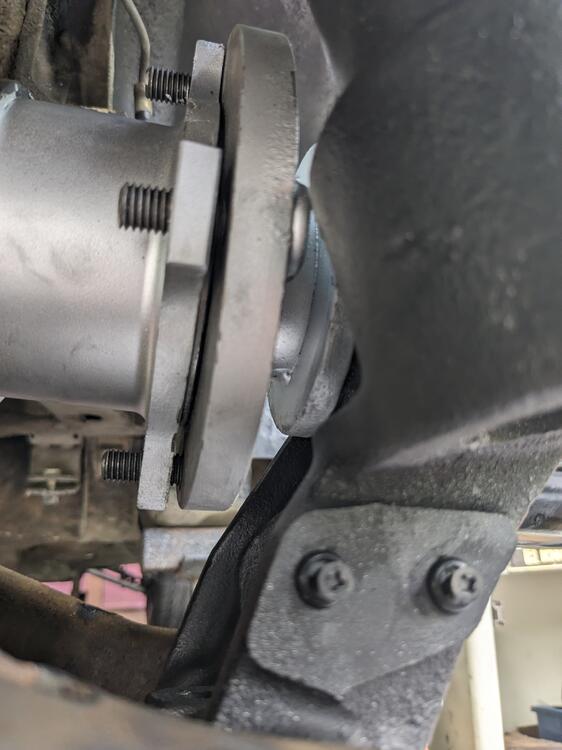
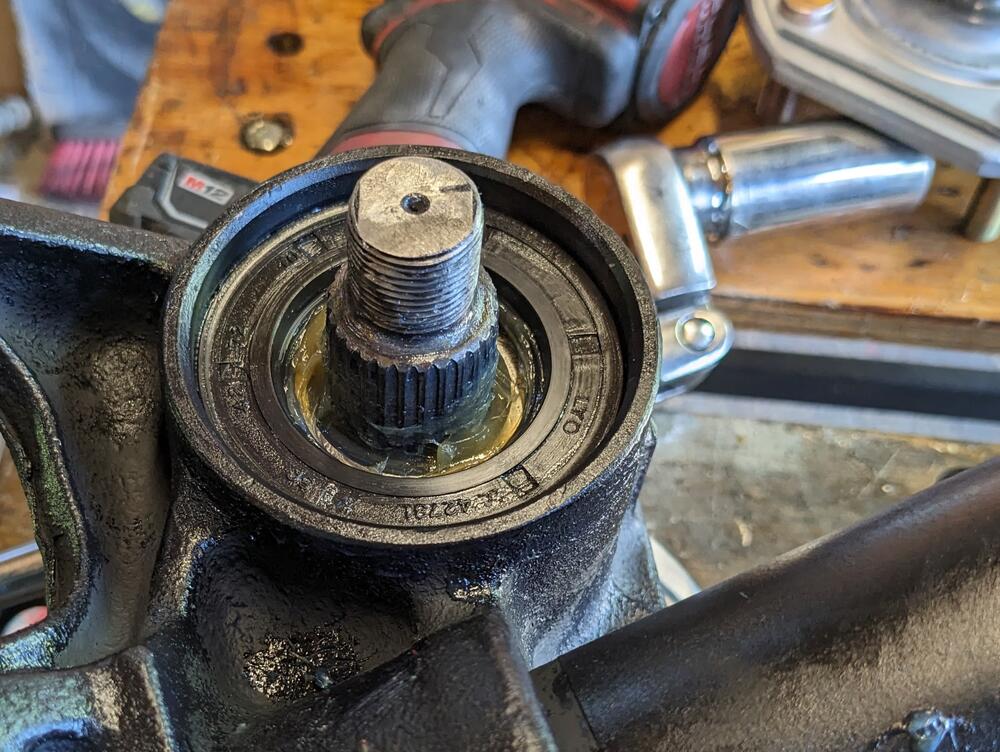
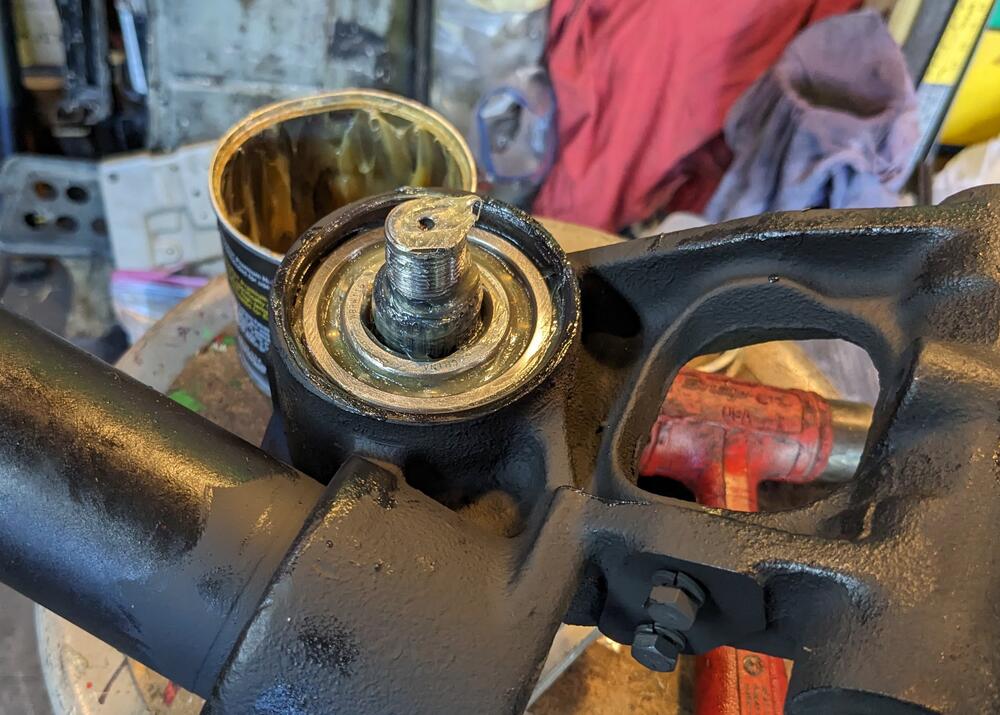
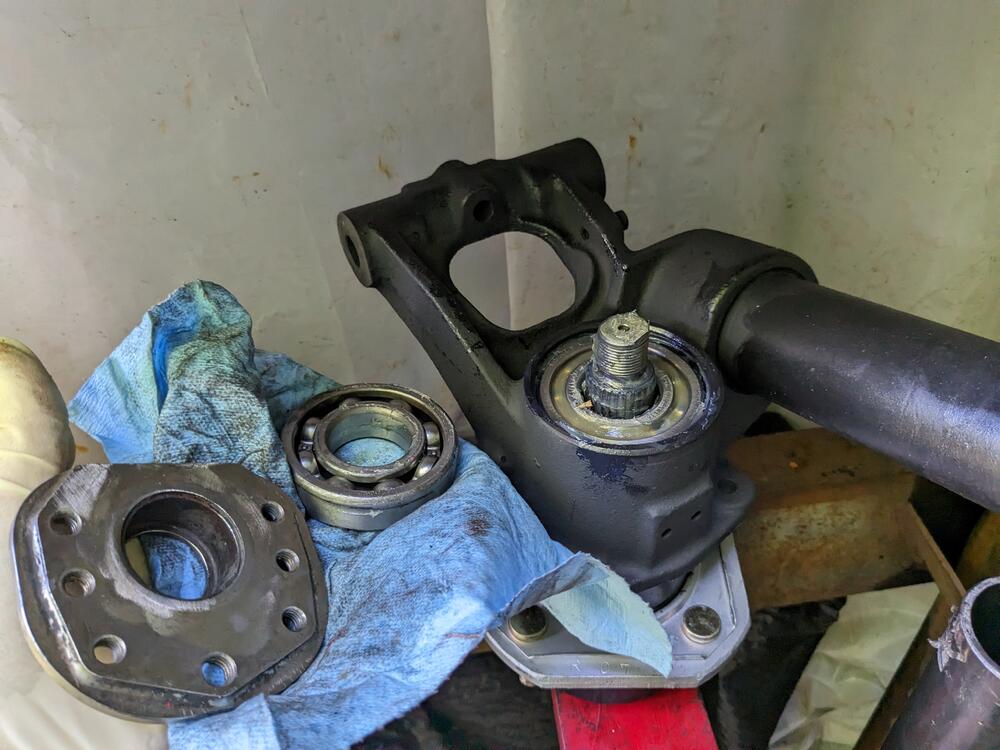
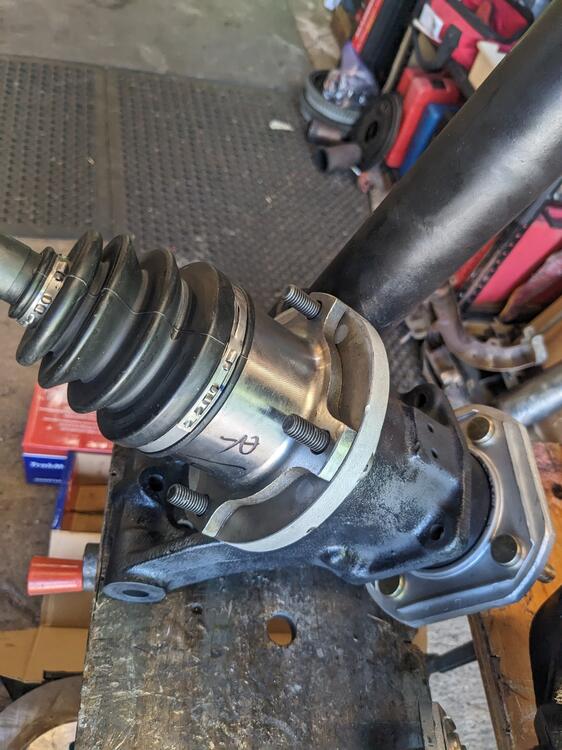
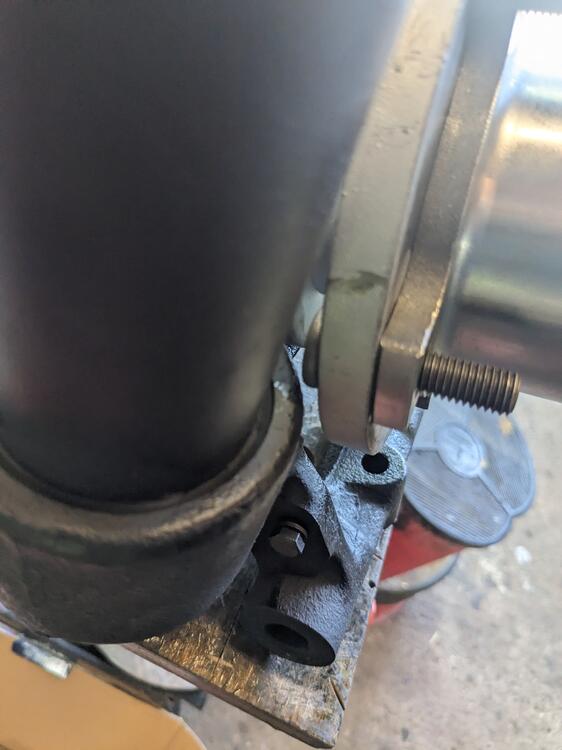
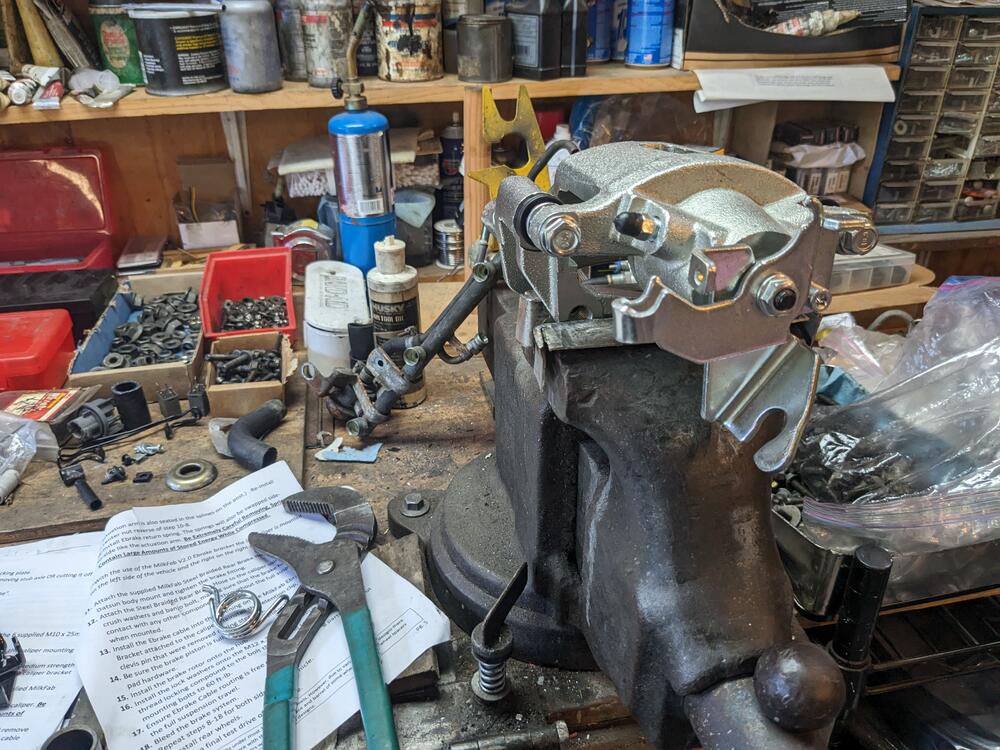
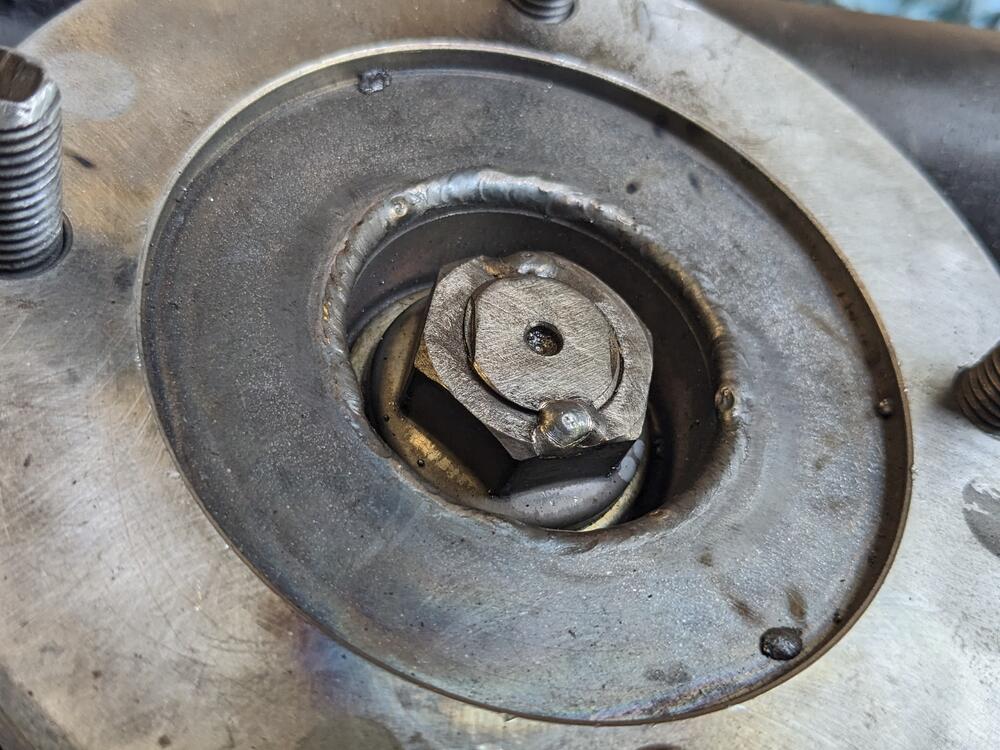
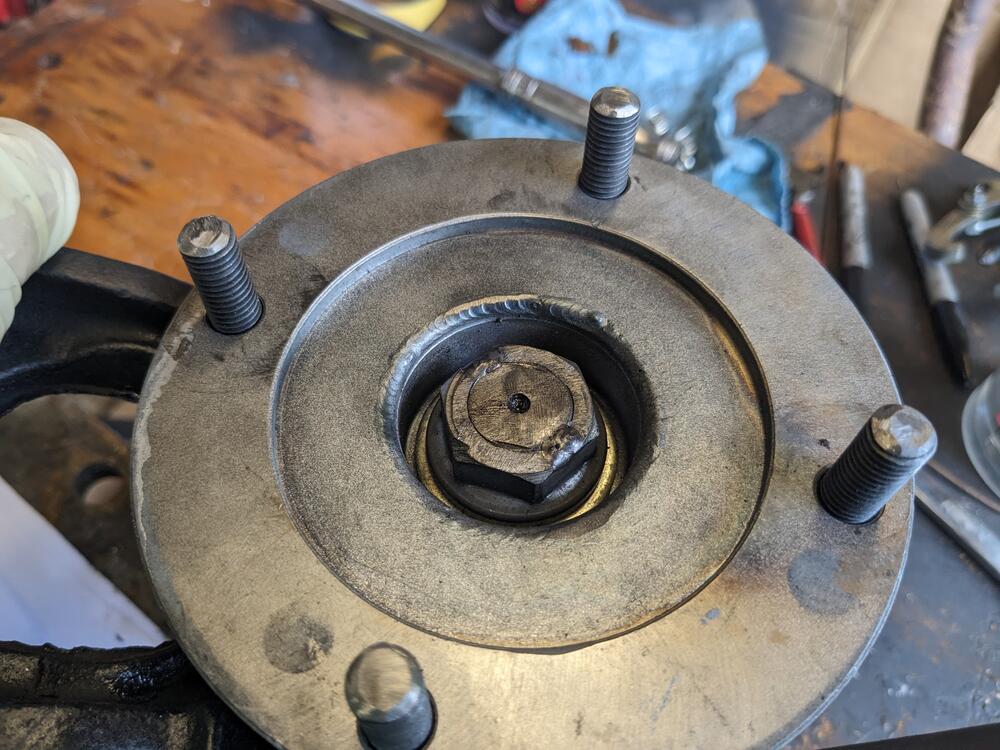
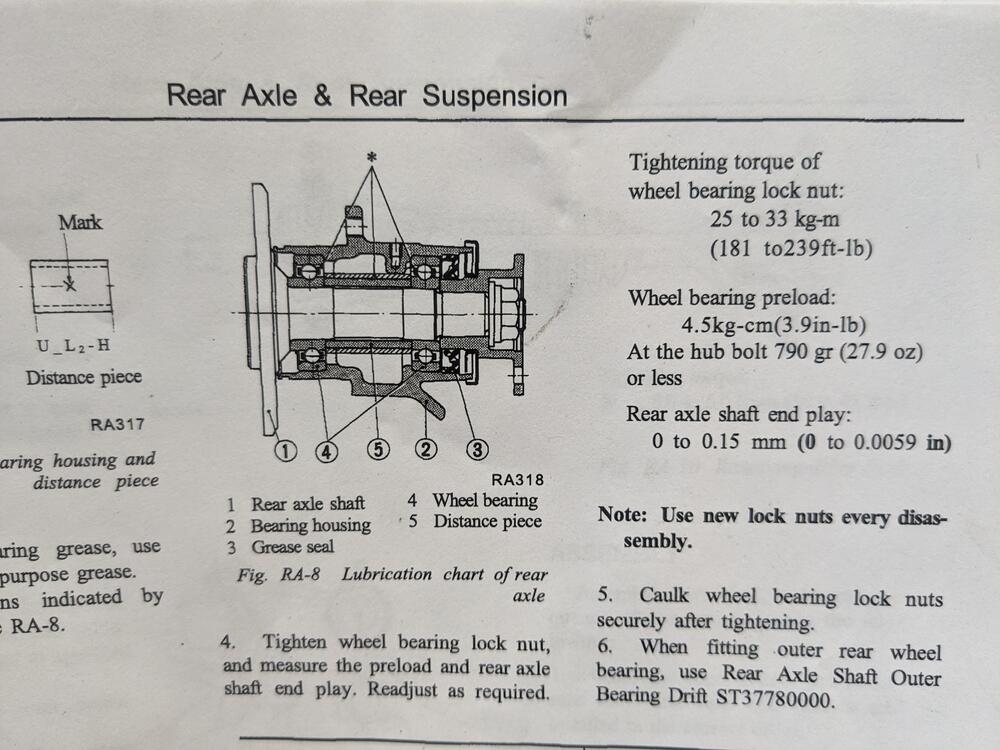
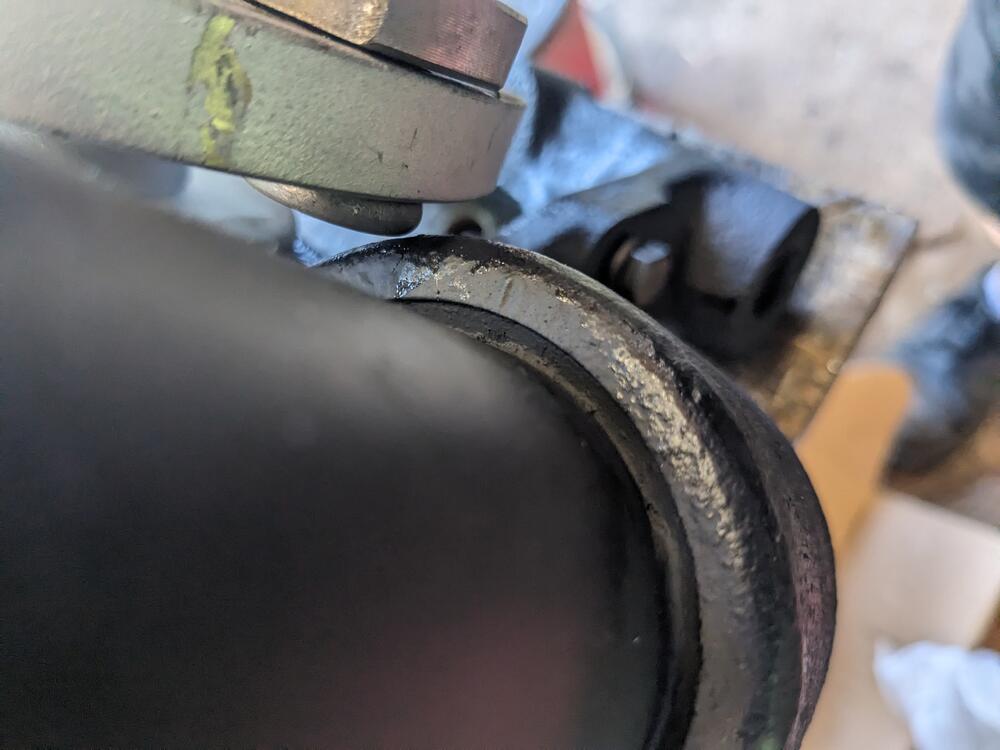
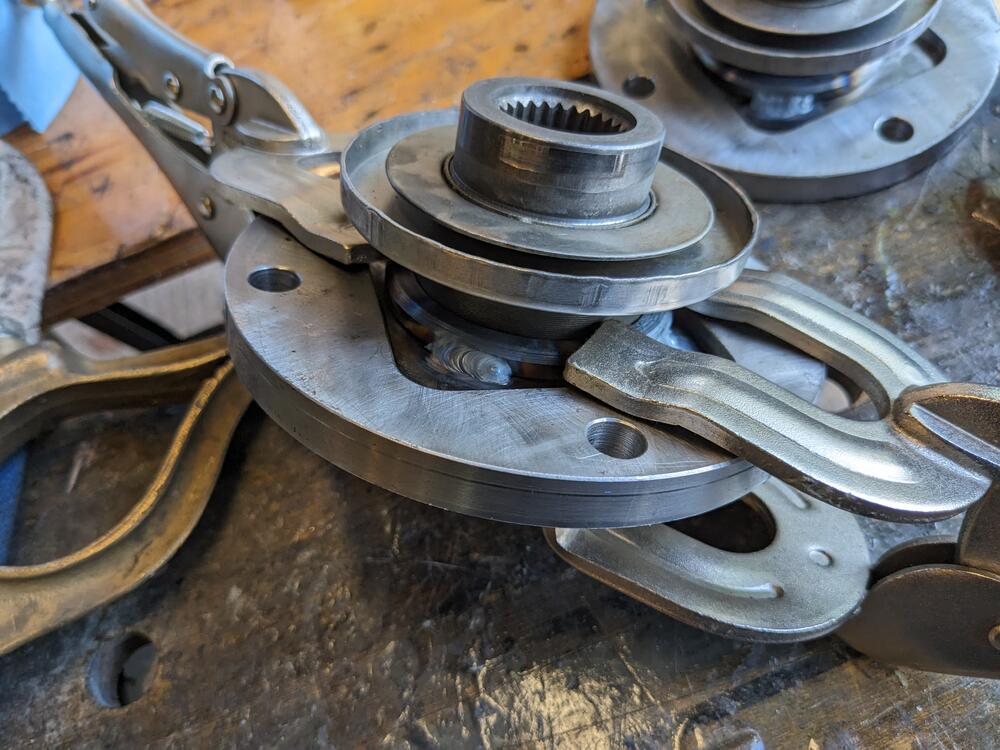
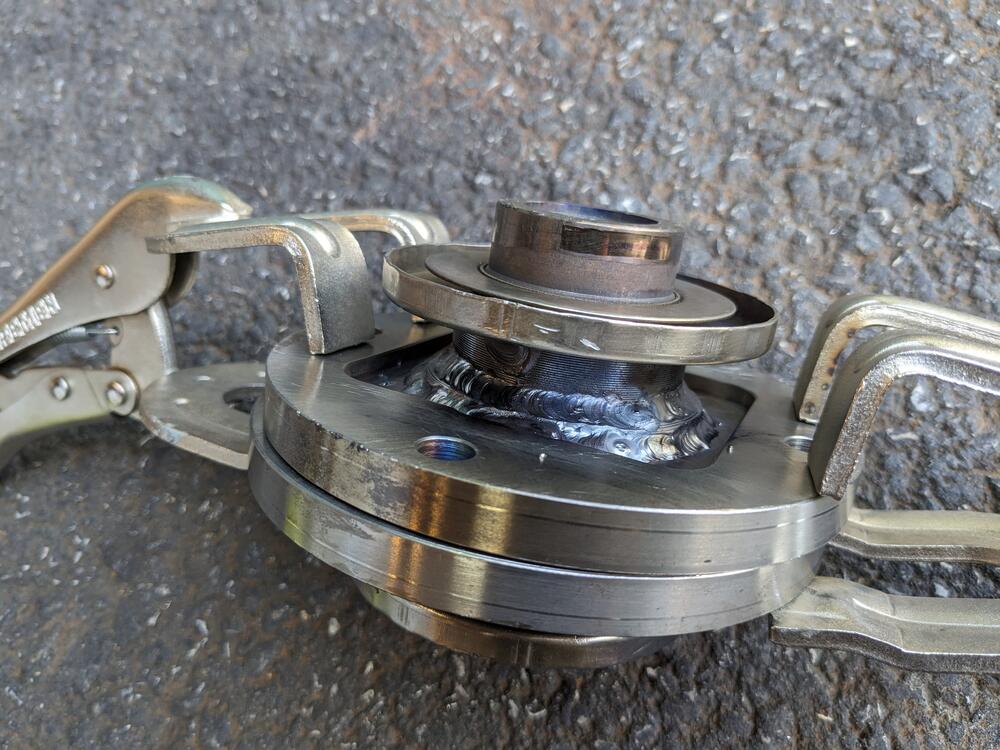
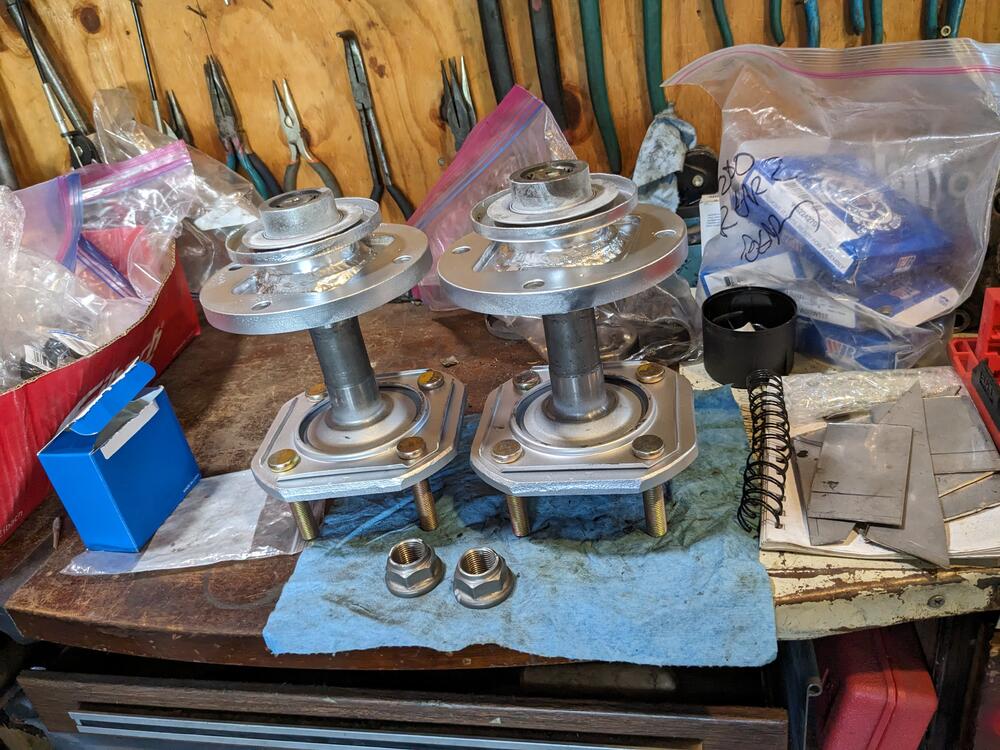
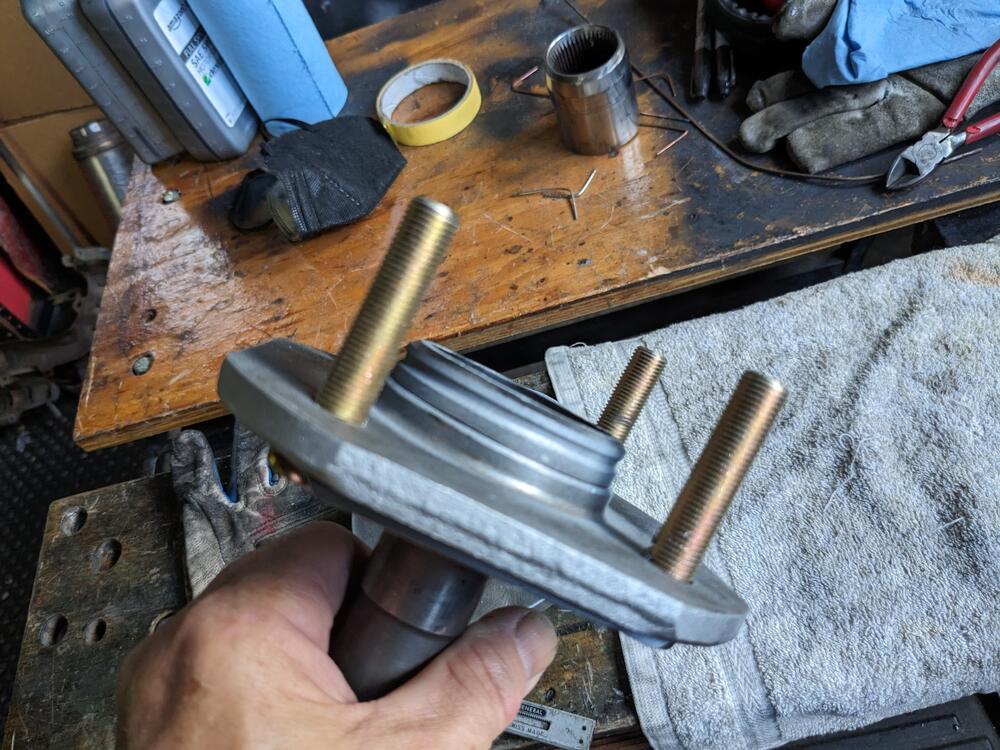
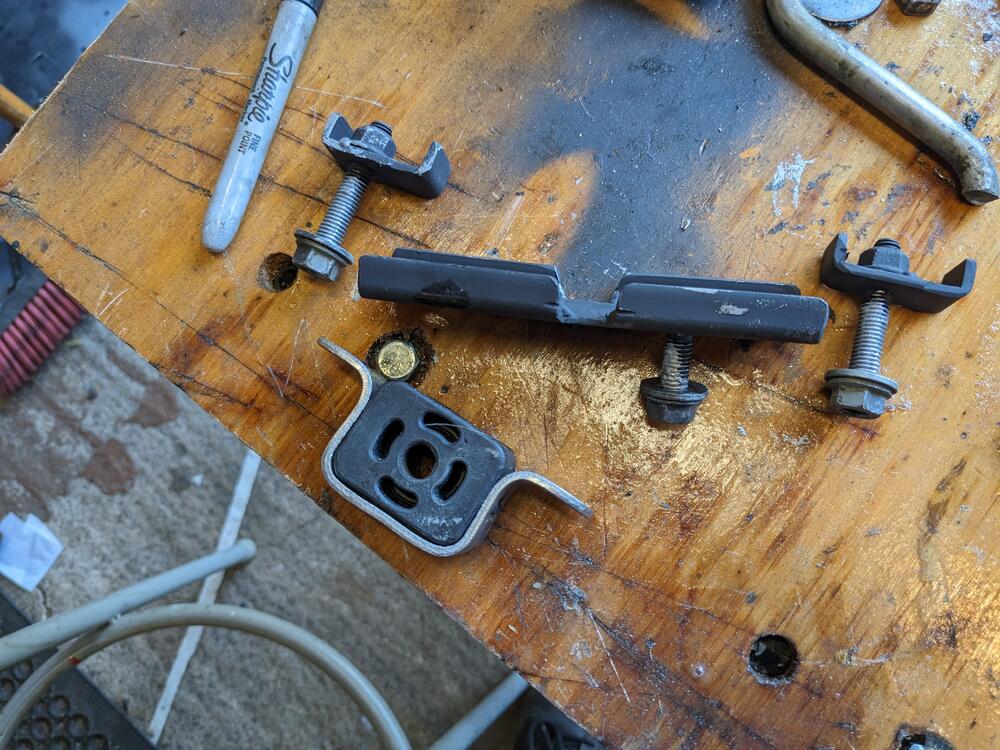
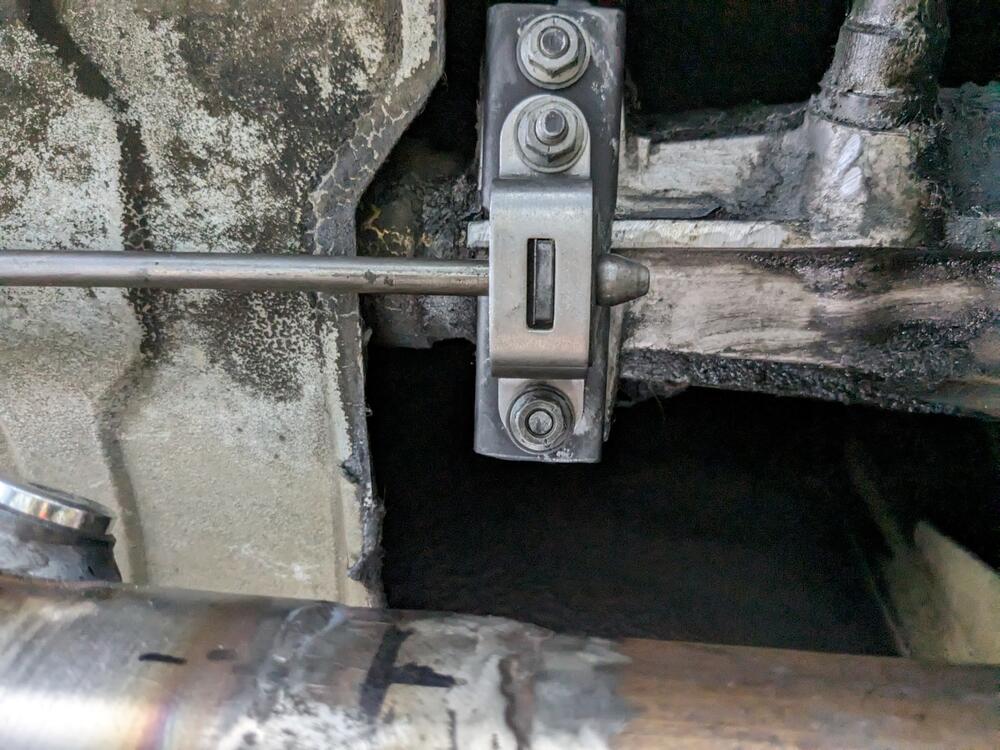
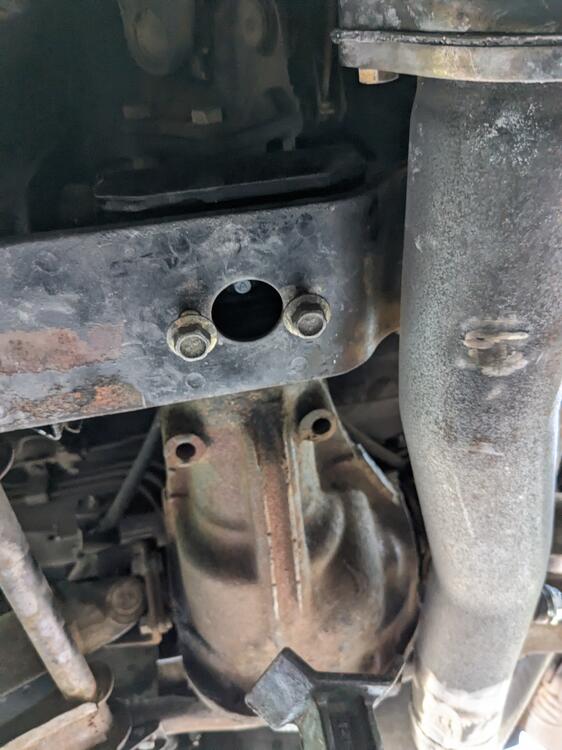
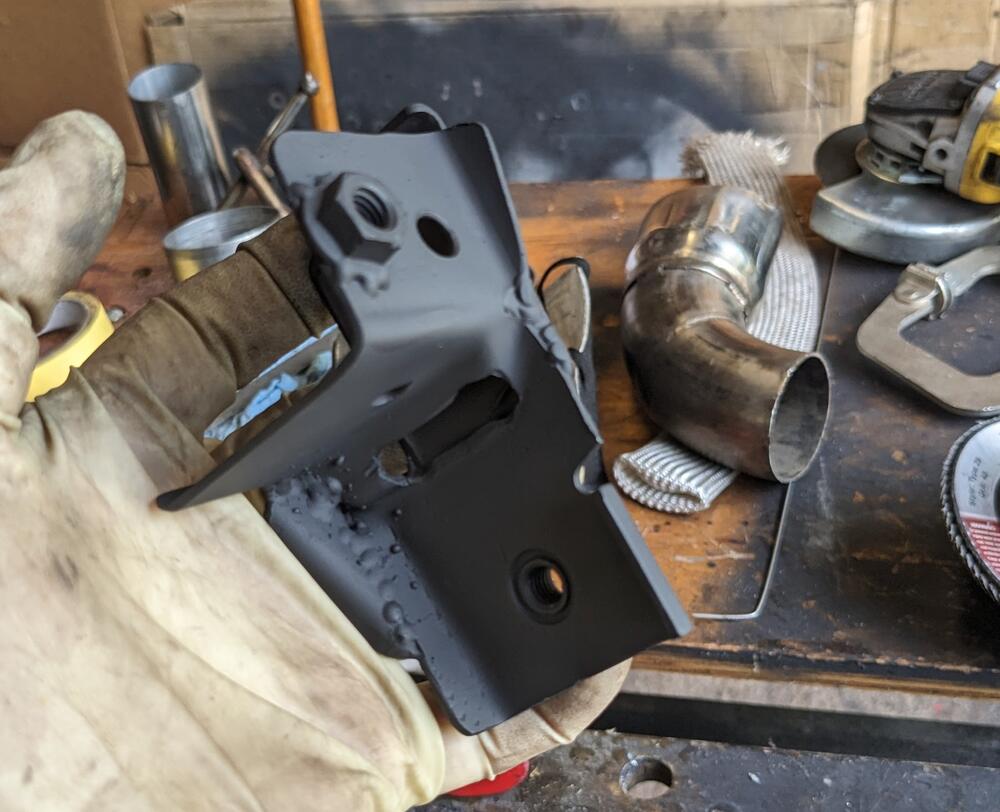
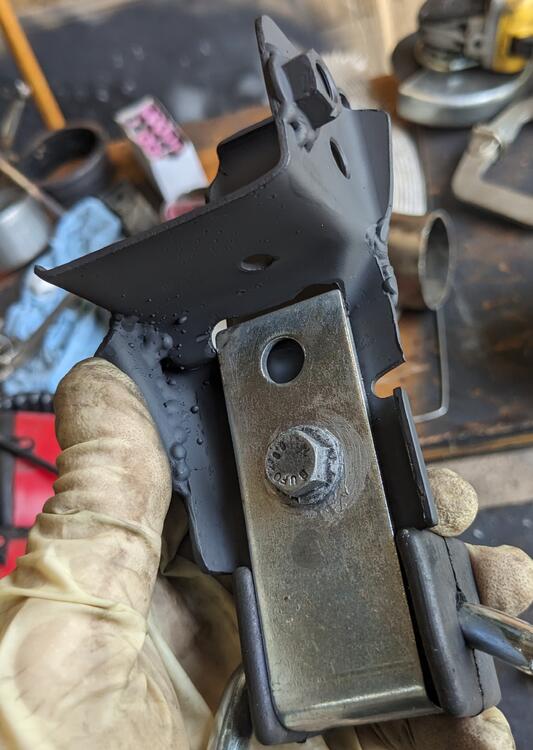
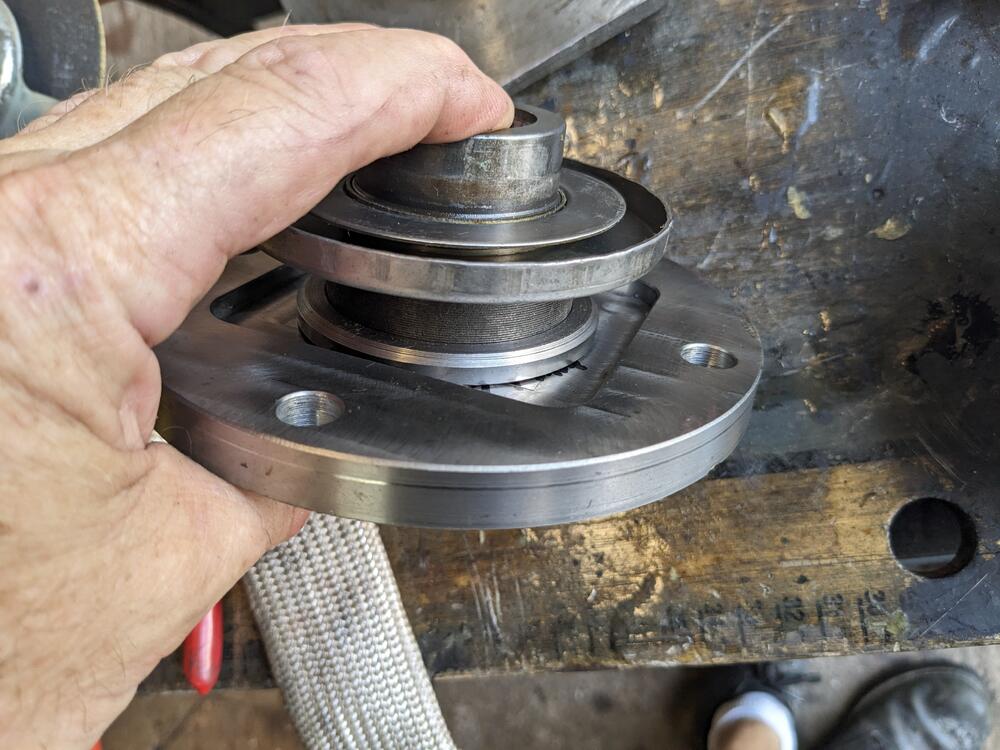
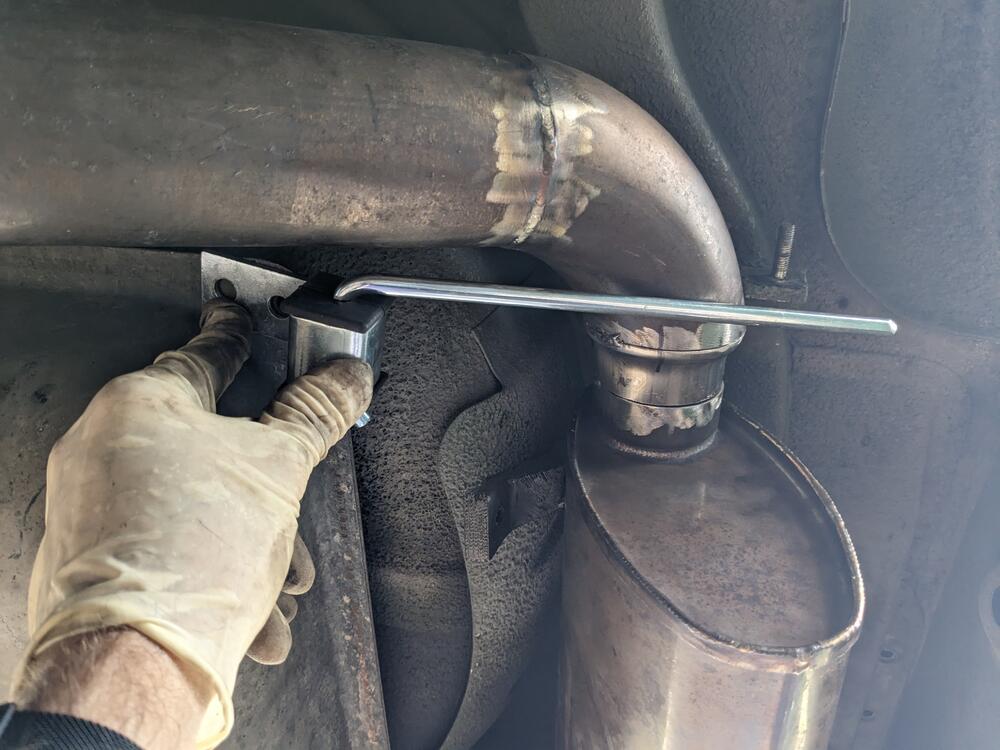
Slow going today. All I got done was the bearing & spindle/hub assembly, and a couple odds & ends. Besides pressing the outer bearing onto the spindle first, I didn't find the FSM particularly helpful in terms of assembly directions. It is important to only apply pressure to the side of the race being inserted, to prevent bearing damage, but I couldn't see anyway to press the spindle with bearing into the hub that didn't involve applying load to the inner race as well. I ended up just tapping the outer flange evenly around the circumference to seat the outer race of the outer bearing in the hub. To install the inner bearing in the hub and on the spindle, I just used the old bearing, so both inner & outer races were loaded evenly. Before I did any assembly I did another dry run with the old bearings to determine if I needed to cut it down to clear the CV. I did need to. Took the nuts off, cut off the shoulder. Reassembled. Clearance is good here - about a 1mm off the CV inner cup Both distance pieces were marked B pressing the inner bearing, after greasing the backside of the inner & outer bearing cavities & installing distance piece. Used an old camber plate from my 98 XC to apply load to inner & outer races, and still clear the spline shaft #2 inner grease seal going in. It is pressed all the way in, according to the FSM diagram , just doesn't look like the lip is going to have much surface contact with the inner hub flange I then torqued the nut to 195ft/lbs. drag feels even, no end play. I have no way of measuring 3.9in/lb. My 1/4" drive Snap-on torque wrench is not accurate below 10in/lb I had notched the nuts, so I could tack weld them to the spindle without creating a weld- mound that would interfere with the CV cup clearance. #1 MIG welded. In the unlikely event I ever need to remove them again, I can cut the tack weld as easily as cutting the stake shoulders of the original #2 I found the wheel studs I bought for the rear were actually 2.25", not 2" as listed. Test fit the spindle with a rotor to check depth. I had to cut them down to 2" or the wheel nuts won't seat after Another catch - with the larger OD CV flange, clearance off the Strut cast base is an issue - I had looked at that, but without it being assembled, there was no way to be certain what would be best approach. I opted to use press-studs, similar to wheel studs, just M10x1.5 They were longer than needed, so I trimmed about 1/4" off, as assembly on the car may become an clearance issue cut After that I test fit the MilkFab brake caliper brackets & swapped out the eBrake as per their instructions. parts removed MilkFab eBrake bracket positioned, cable levers reversed L/R as per their instructions checked offset with a rotor, everything looks good Going to be out of town until next Friday, so have to wait to get it all back in the car.


-
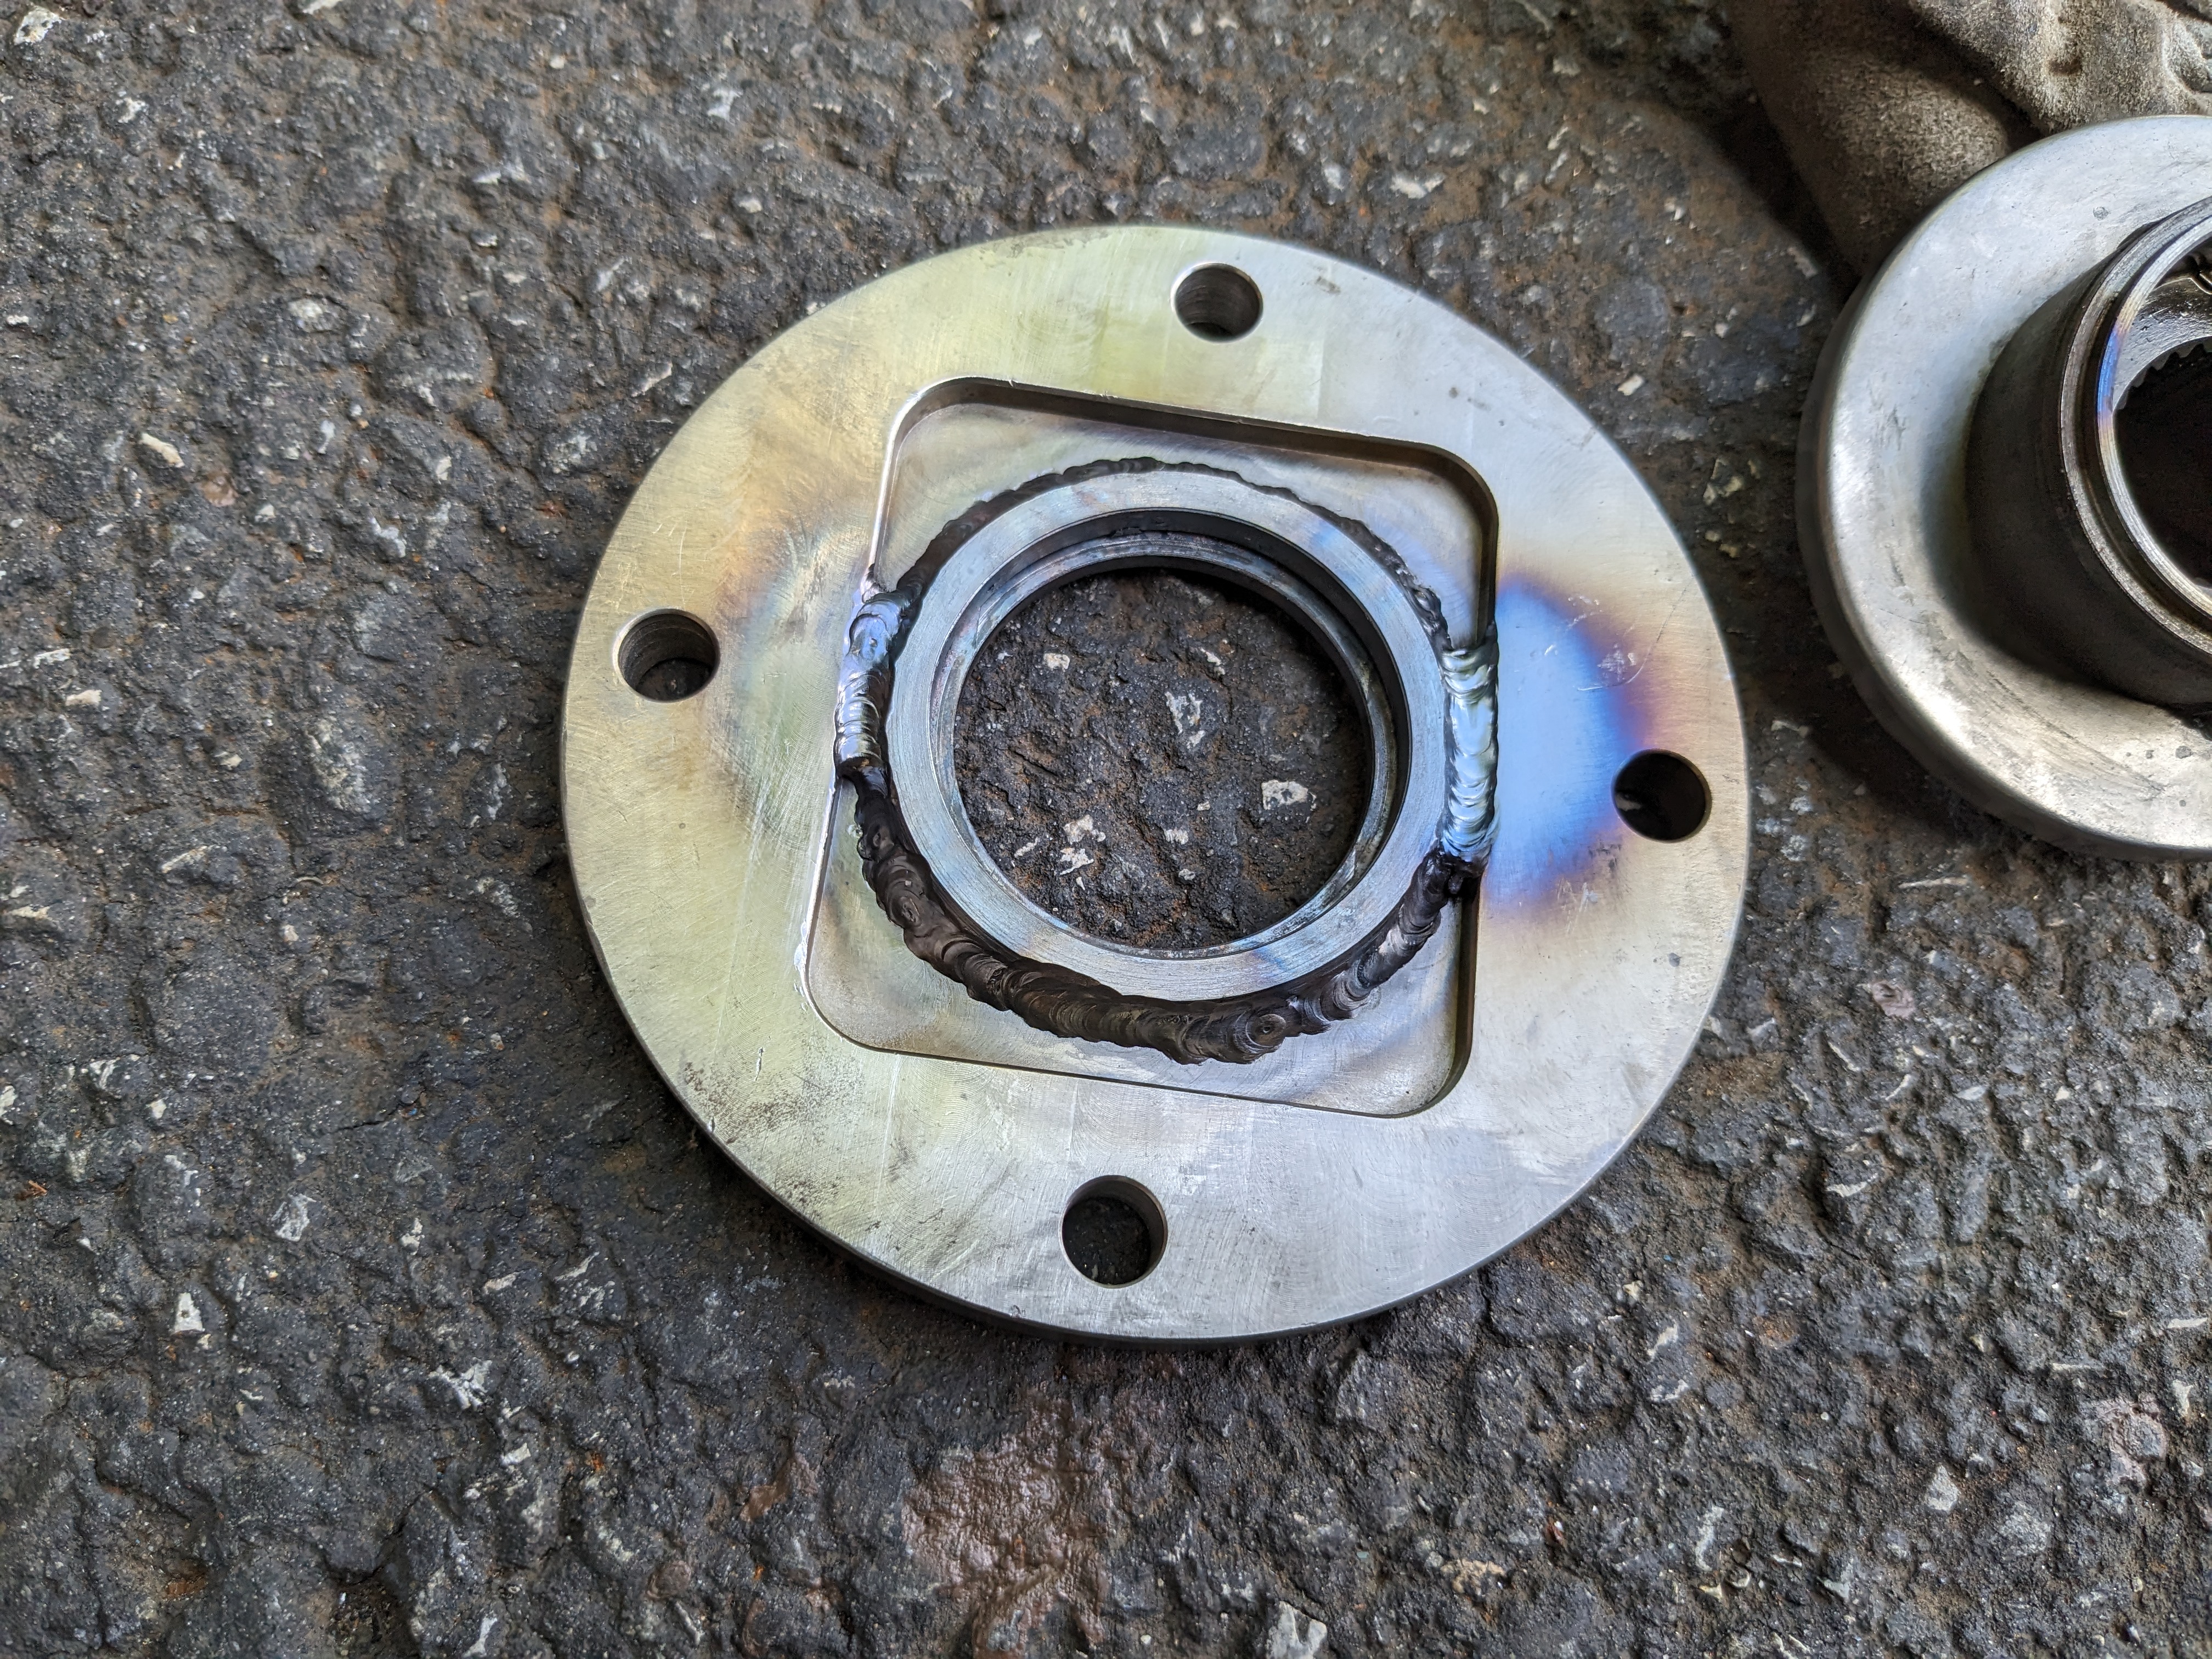
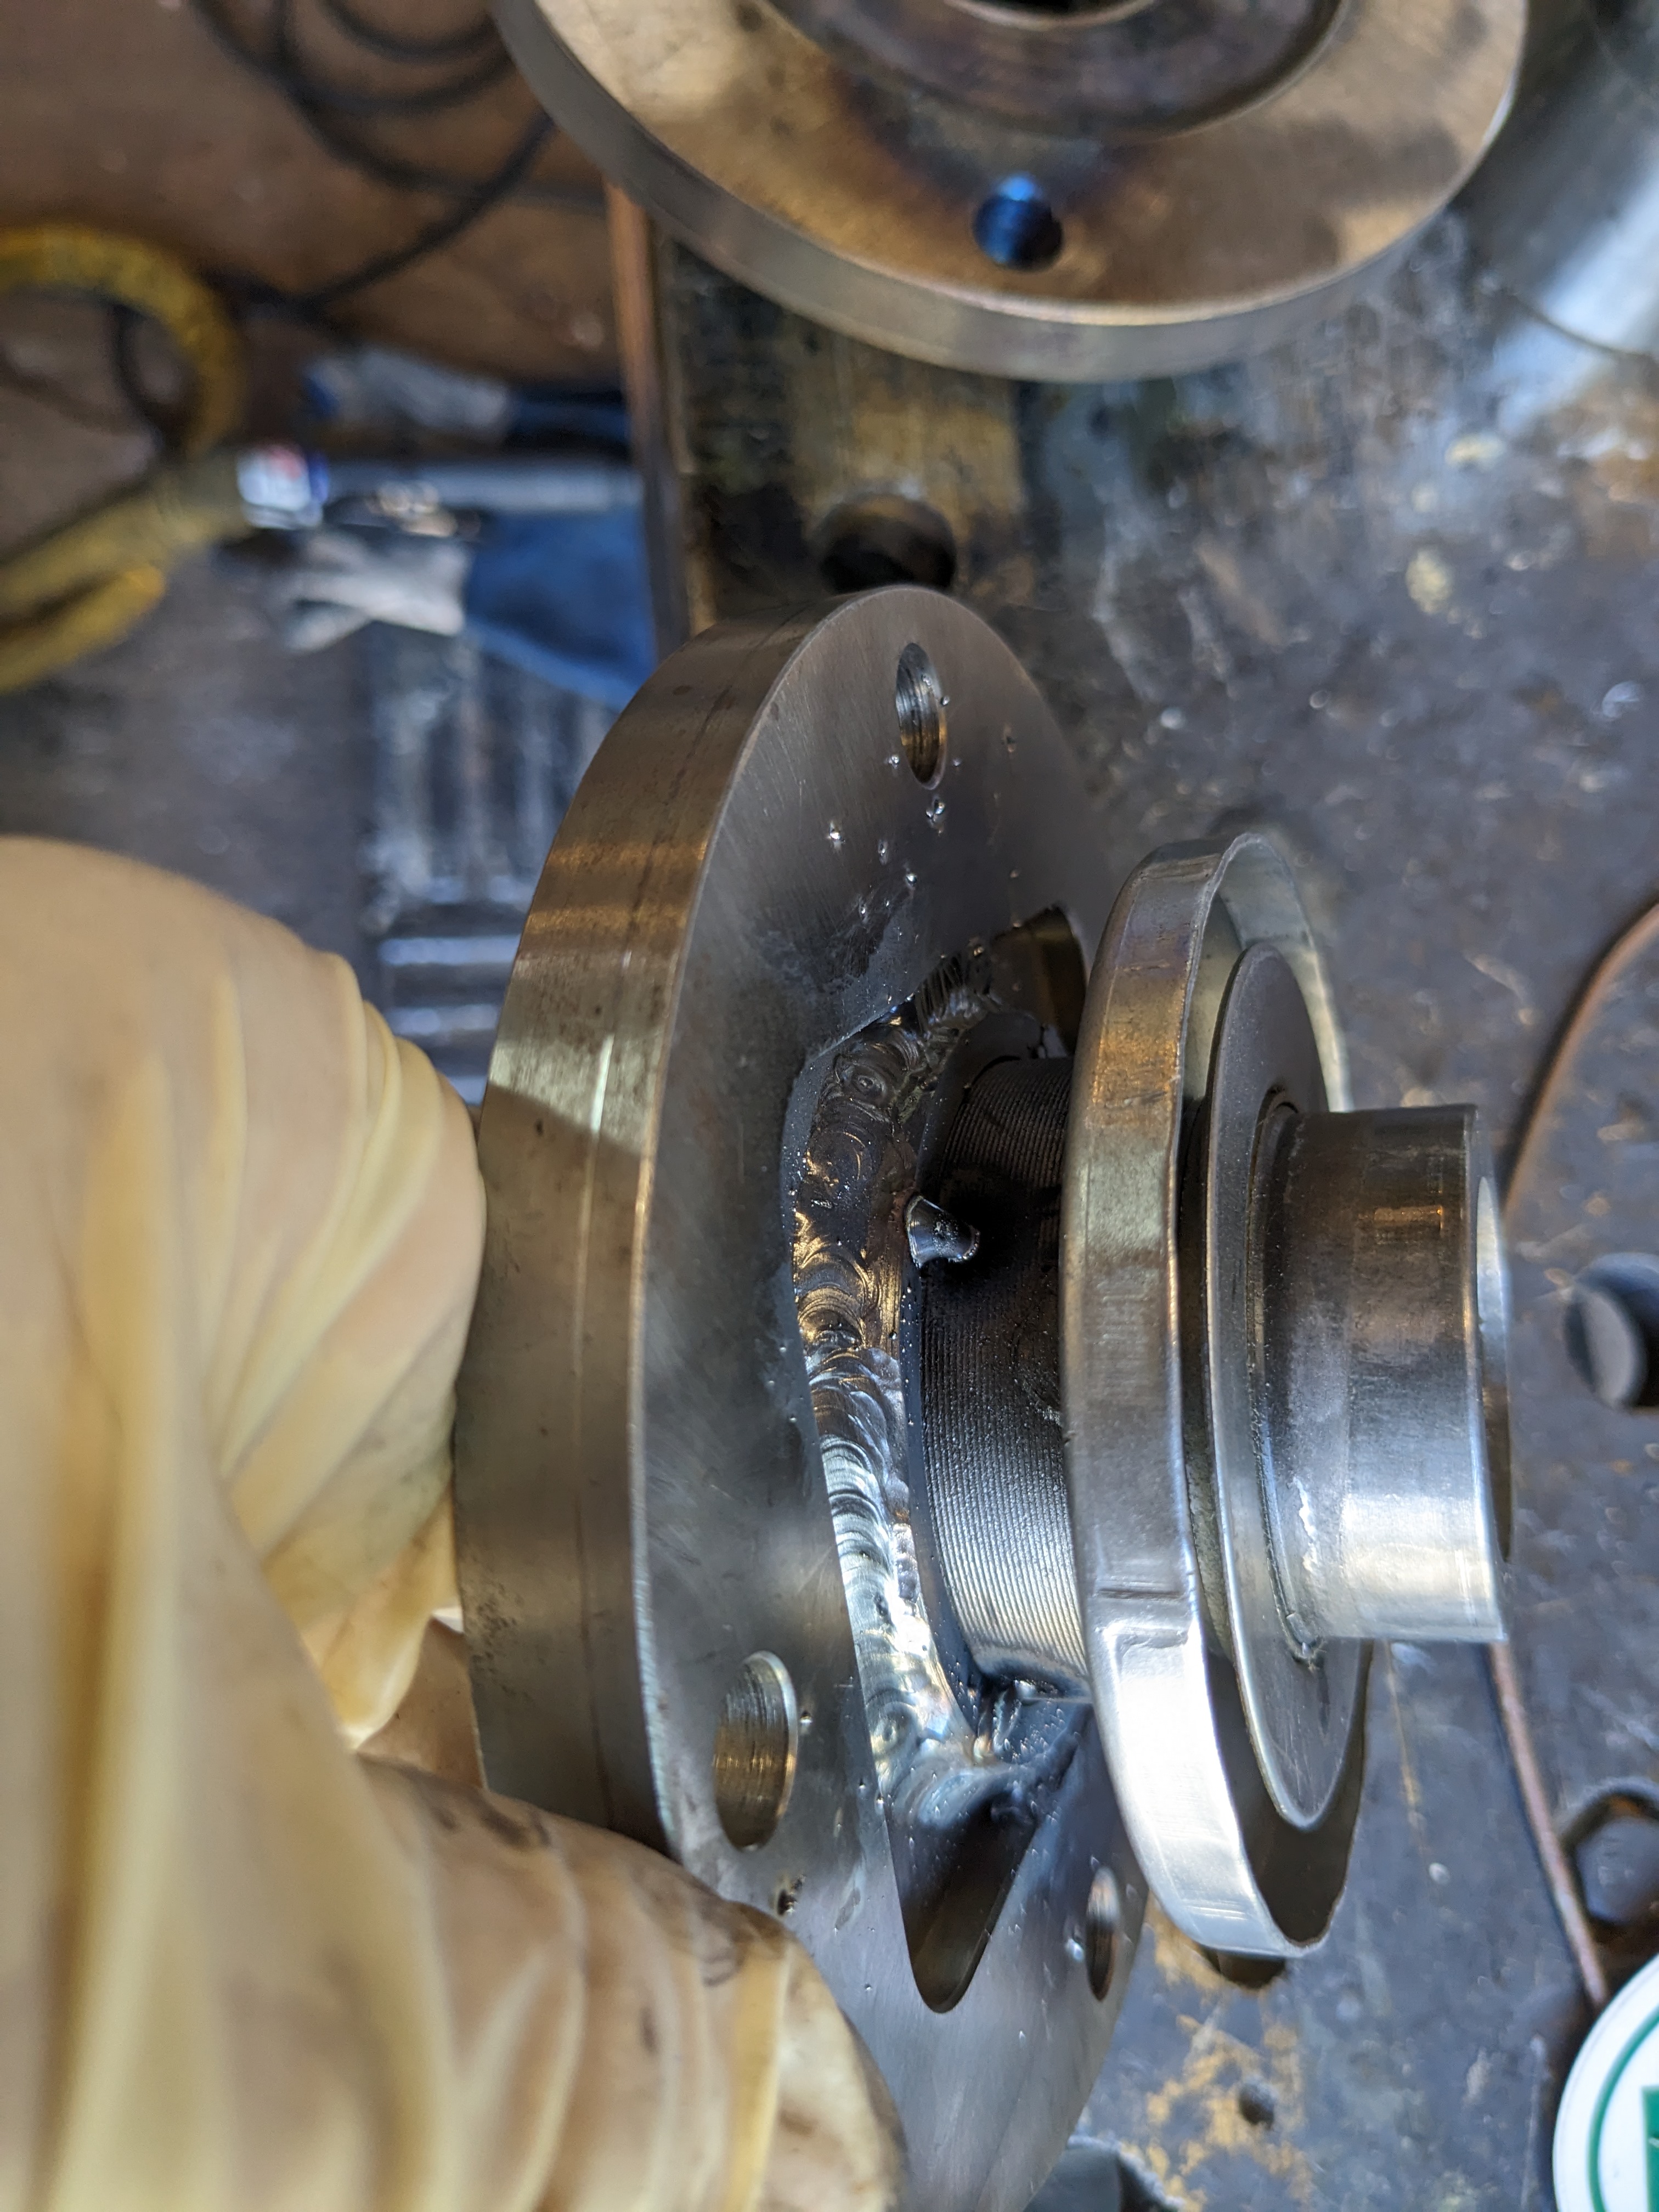
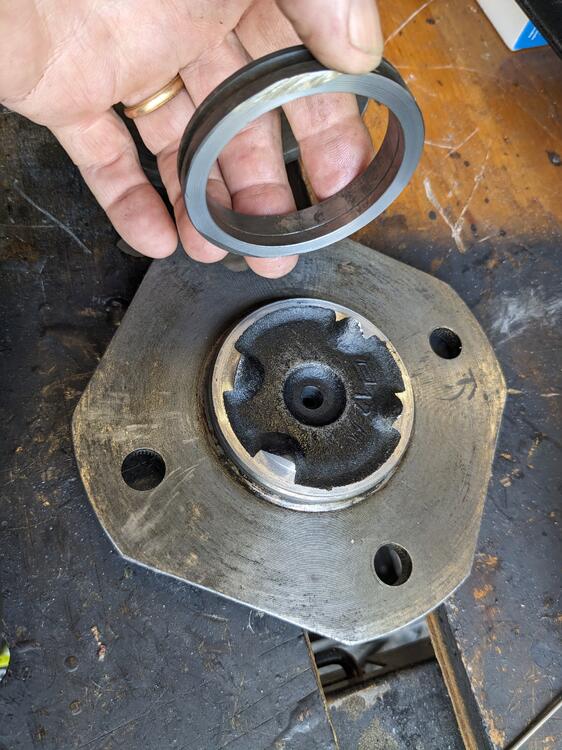
If a flange were made that didn't have the 5mm rectangular recess for the stock flange (useless anyway, since we all know the flange OD is not concentric), and just had a 49mm bore, then one could 'just' machine off the stock flange (can't just cut it off on the backside or offset will be too shallow) & have the shoulder machined. Then there would only be a deeper shoulder, and only one weld around the hub. I believe it is better to weld around the hub that out at the flange where it is much more prone to warping.
-
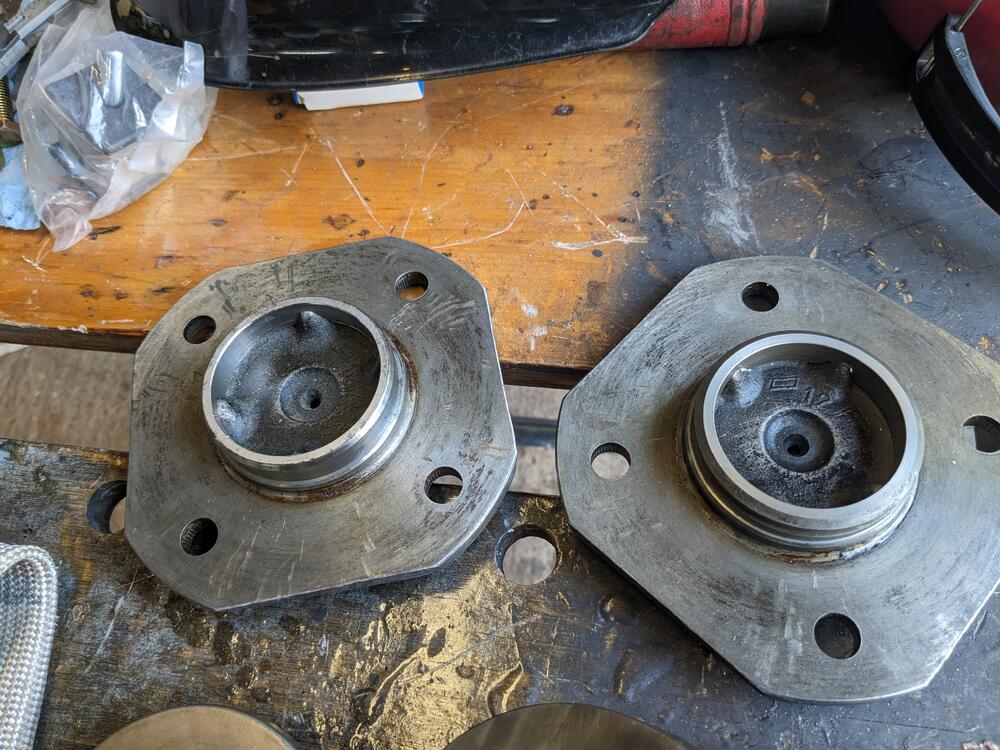
I assumed they matched pairs to a car - but I will check the markings to make sure I put the correct one on each side.
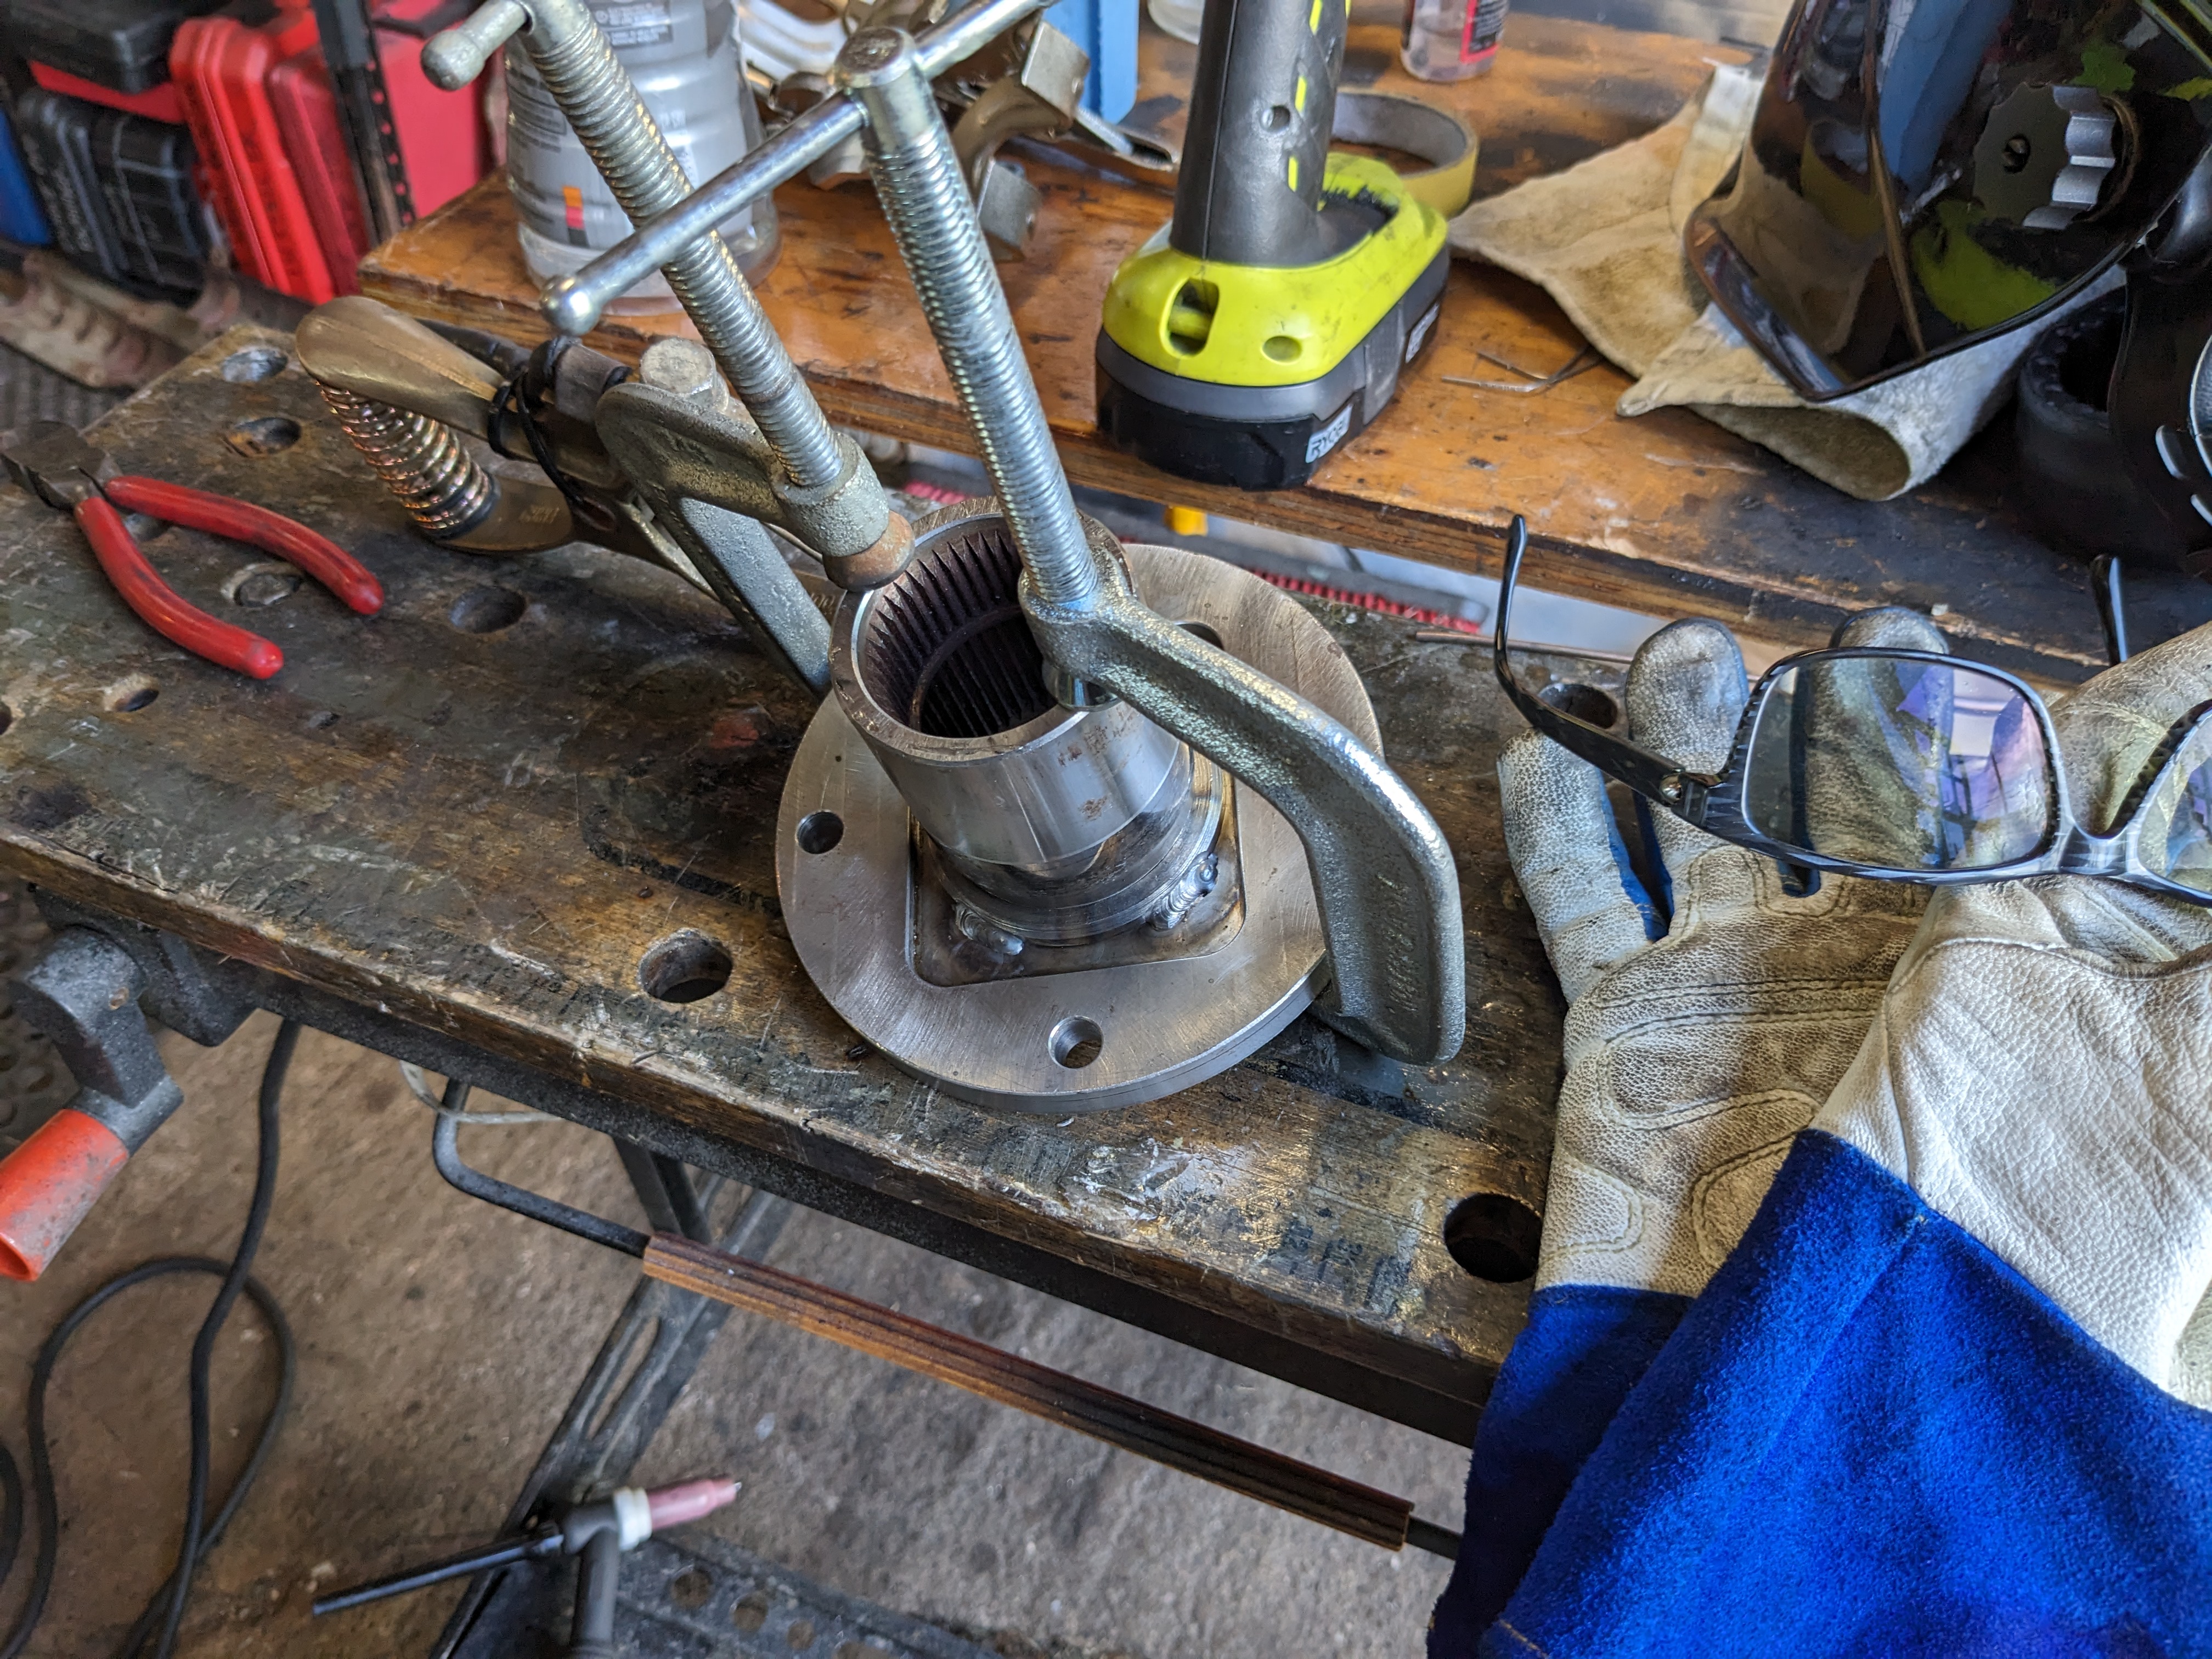
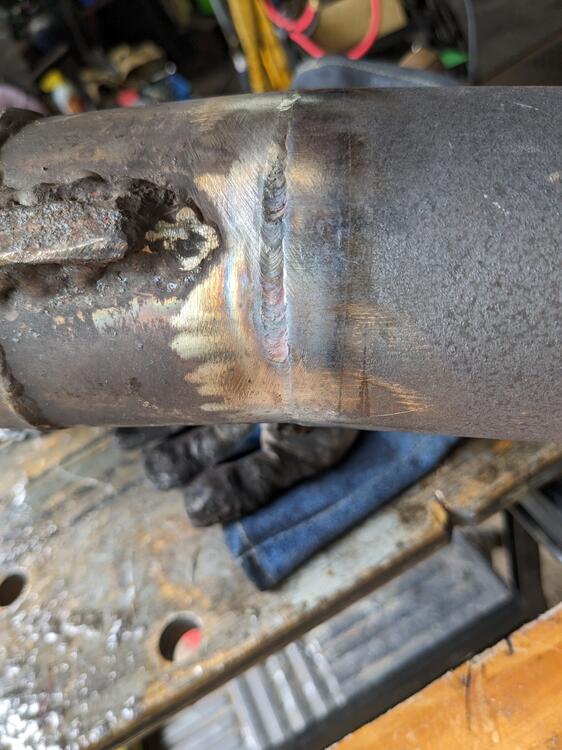
-
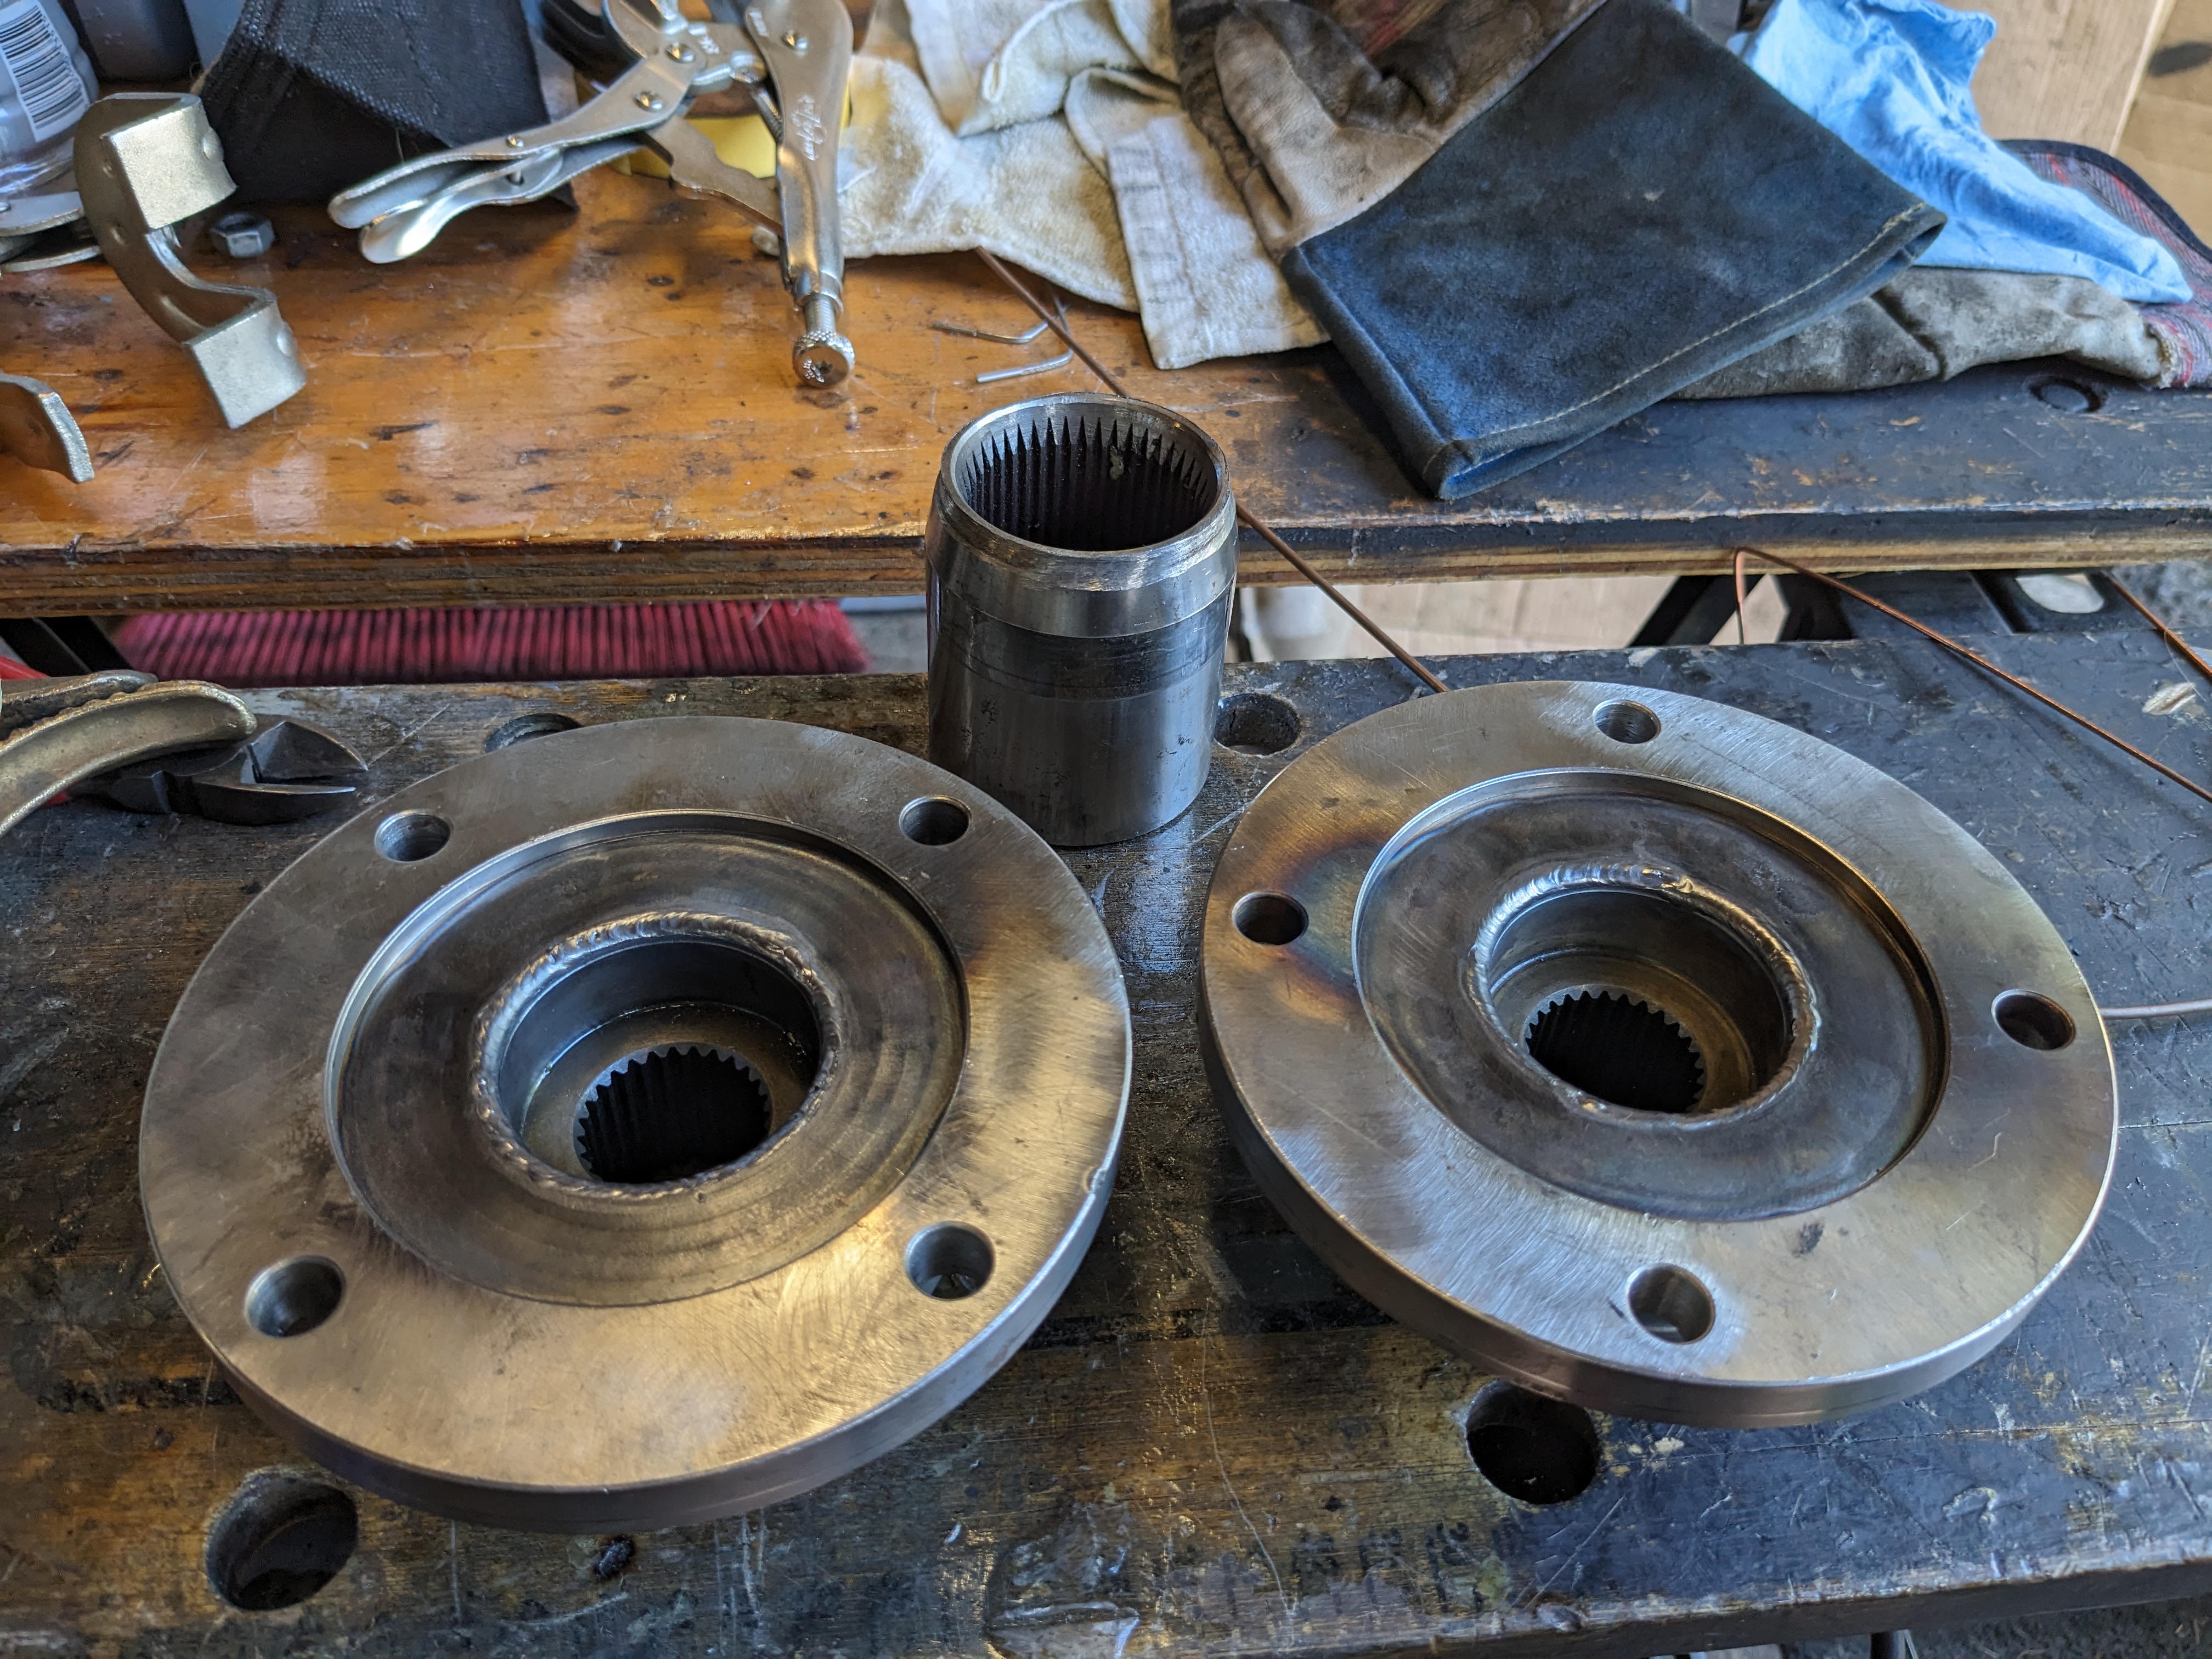
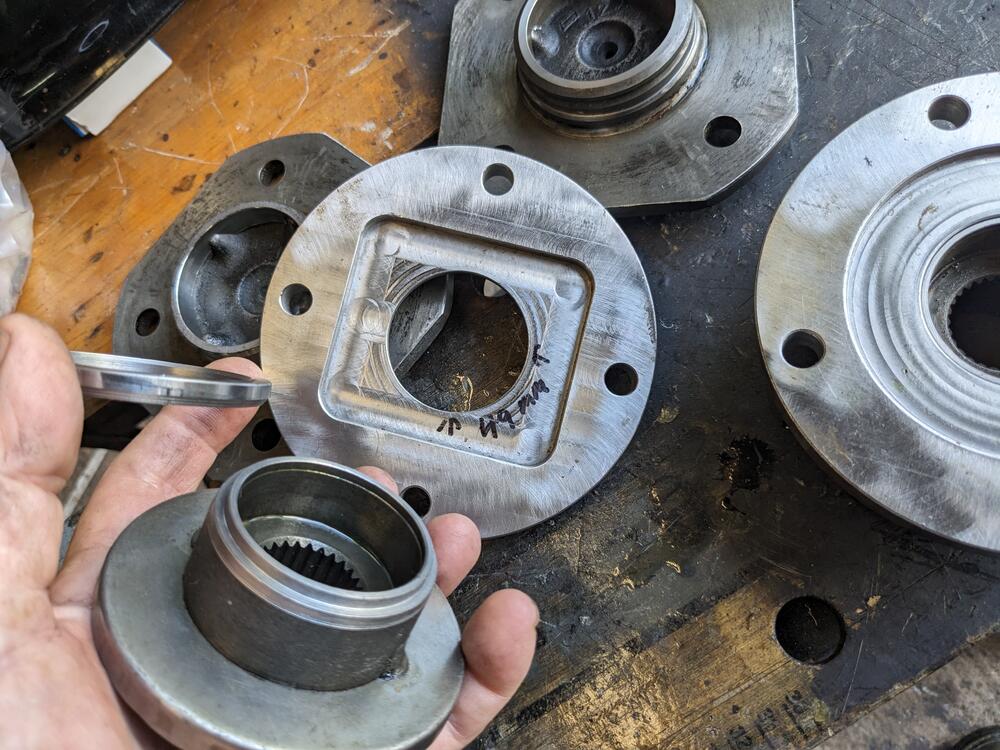
I am - I did today actually. Got put off with all the exhaust work. Good thing, since I only weld a few times a year, I had practice before doing the flanges. This was all TIG work, not wire-feed MIG. All the pieces are mild steel, at least they puddle/ flow at the same rate. I wanted the stock offset, as I have seen several posts & YT vids where the Silvermine flange offset was an (binding) issue - especially if the car is lowered at all. He does say it's only for stock height cars, up to 1" lowered. I'm using the Eibach spring set from MotorSport, so I don't know if that ends up more than an inch difference or not. Clamped the outer ring so I could weld it flat. removed the hub/flange so I could weld the outer ring. I added a collar to act as a heat sink & prevent the ring from warping. Got a little hot on one side, but it's far enough inboard that I didn't get any distortion - getting down into the narrow gap on two sides was a bitch - which was another issue with some of the ppl using these flanges as intended. After that I (MIG) tacked the hubs into the flanges - with them clamped in a vice to make sure they stayed flat then I welded the inner lip, to make sure they stayed put before seaming the outer ring to the hub Then finally welded the rings to the hubs - kept the two clamped to together to act as a heat sink pressed 2" studs space for CV flange, without diminishing total spacing from diff to outer flange Hopefully get it all back in the car tomorrow - wheel bearings, strut inserts, driveshafts, rear disc brakes


-
Somehow I missed the reply - thank you SteveJ. It's interesting that the Male pin tool is listed as being for molex - the old (late 70's) VAG crimp & release tool kit I have includes an array of interchangeable Molex removal sleeves, but not ones that fit the male/female Yazaki sizing. Perhaps I lost some sleeves over the years. The nice thing about that tool is that it is spring loaded, so it pushes the terminals out after relieving the spring tab. I'll get the variants you've listed, since they work for this application. Thanks again!
-
Coming back to this for a minute - since 2.5bar FPR are not easy to come by, what about using a 3bar regulator & going with newer (lower rated) injectors that don't require the ballast? As far as I can determine stock 280Z injectors are 188c/min or 17.9lb/hr @ 2.5bar - most if not all injectors are sold rated at 3bar values. Can't find a calc right now that will provide a calculation to determine what value injector will run 17.9lb/hr @ 3bar....
-
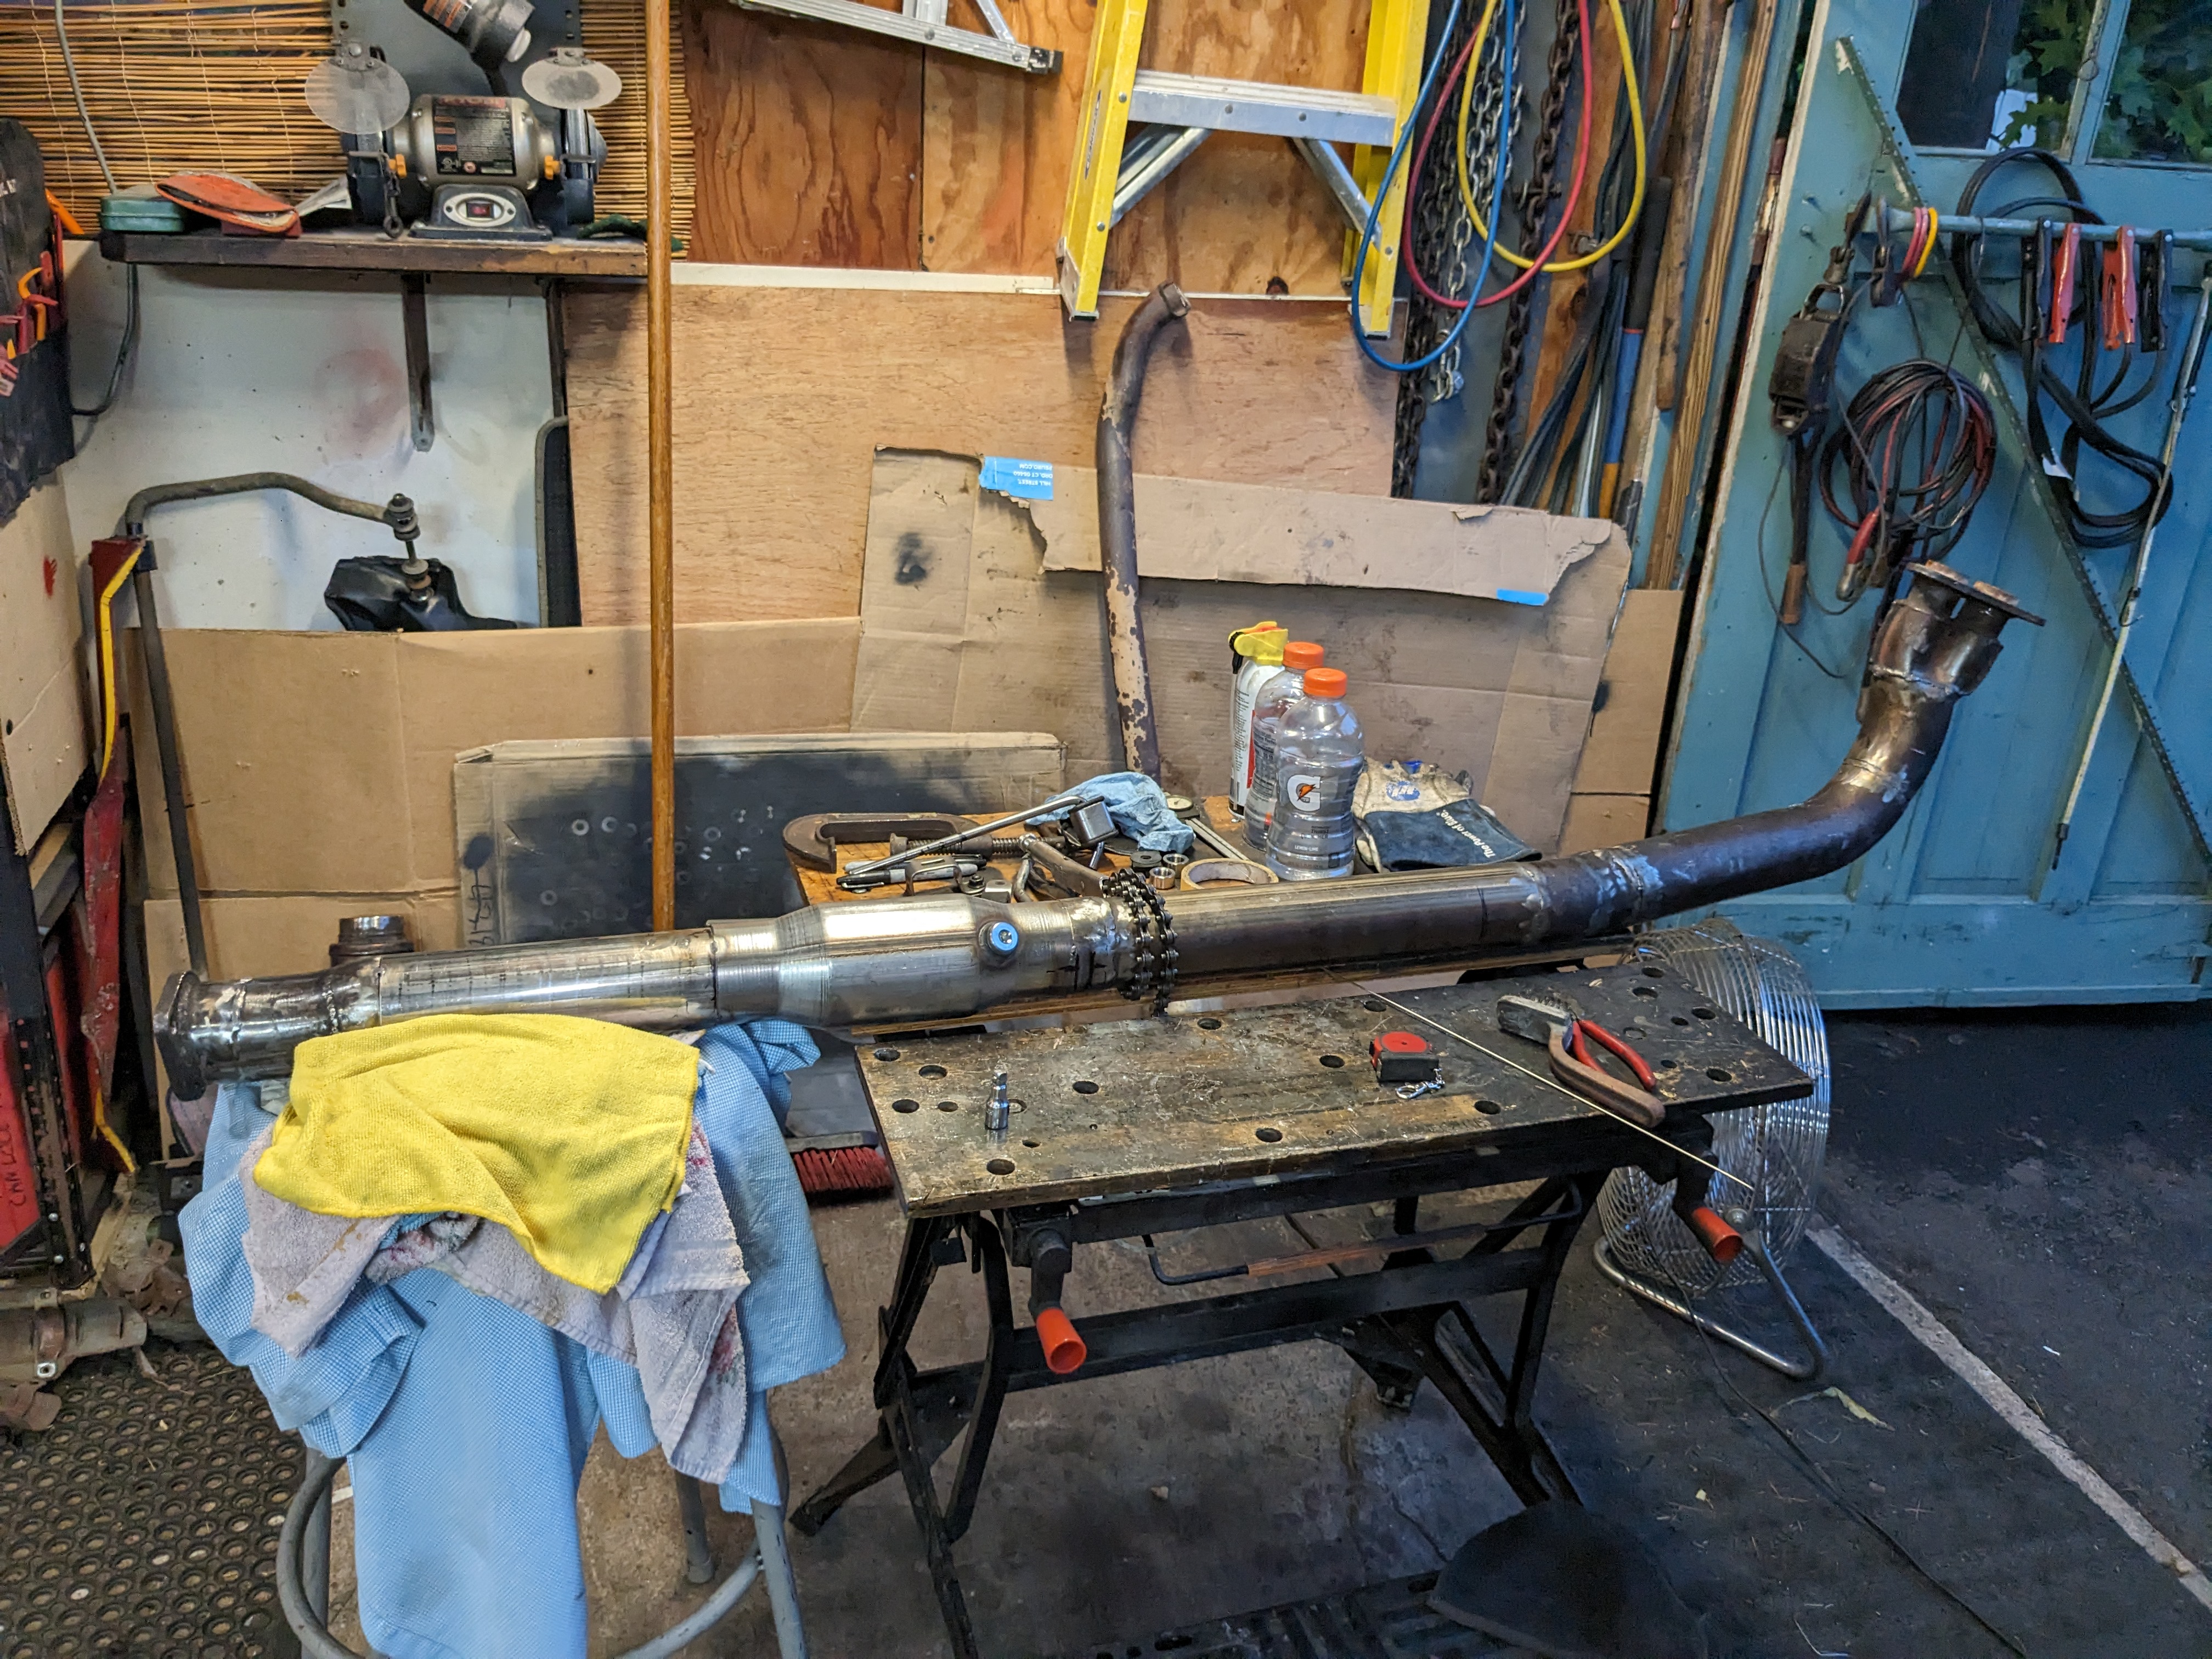
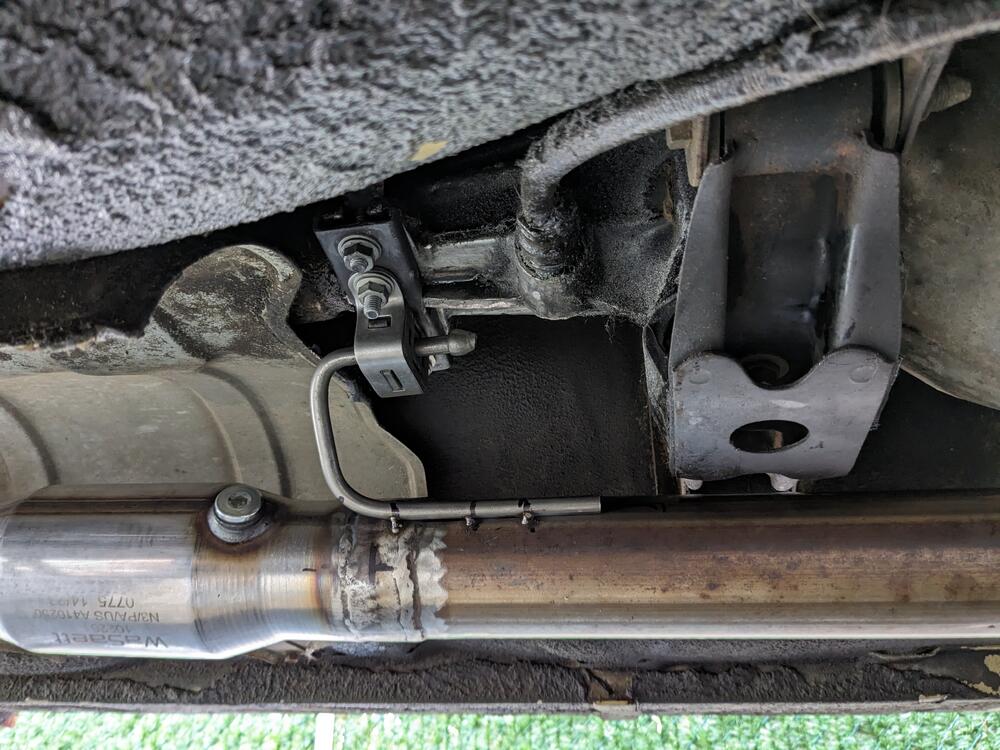
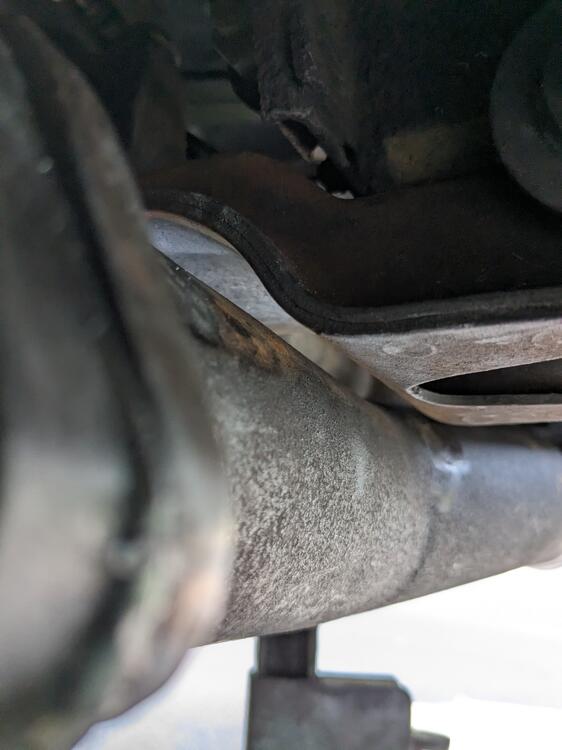
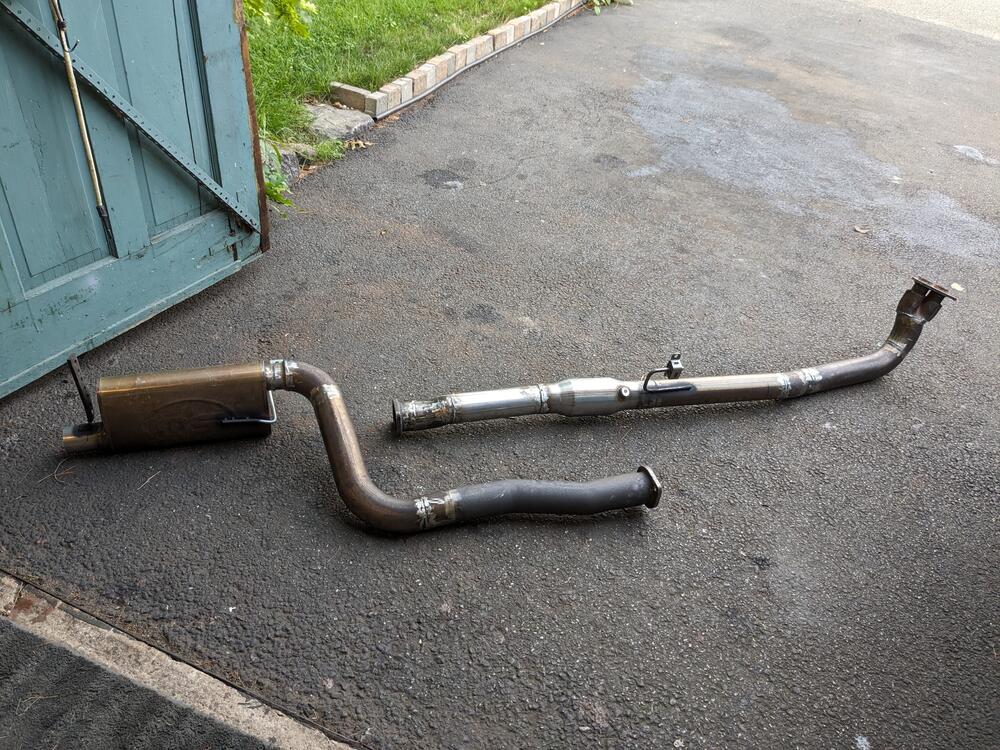
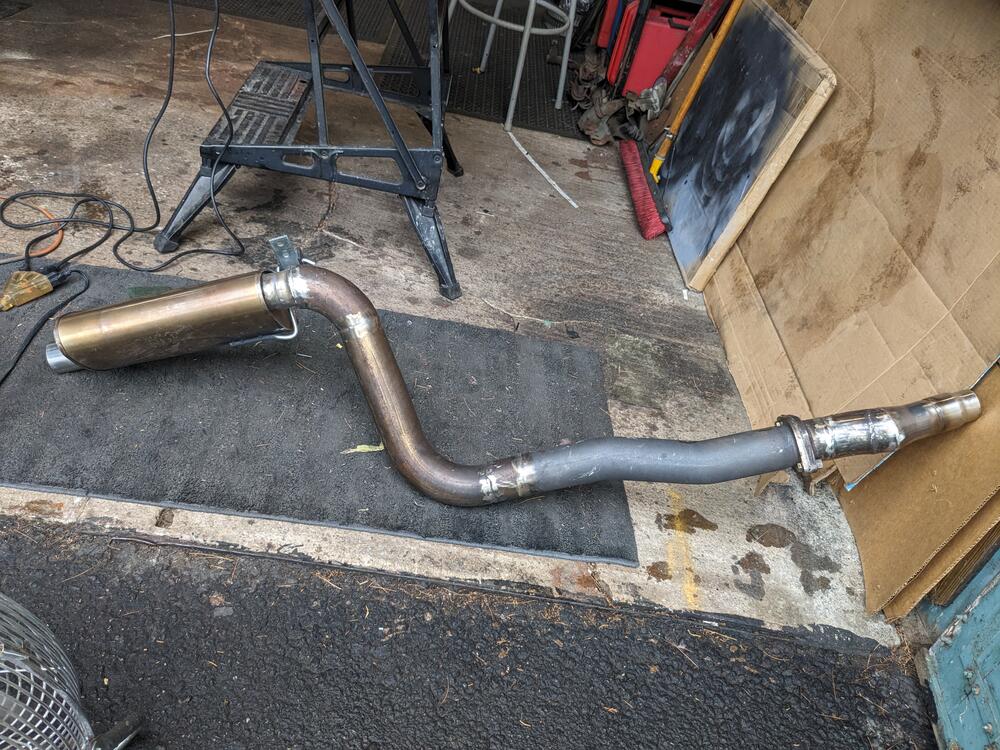
Welded up all the seams, took almost 4 hours(!) After that, I had to reinstall it to figure out the center mount. I decided to make one that used the stock mounting points Once I had that figured out, I tacked it in place & then removed the entire exhaust to finish the mount welds for this & the rear muffler hanger Archie was hanging around me much of the day I had forgotten about the trans mount / carrier bushings, so I did those now put the exhaust back in (hopefully for the last time) clearances still good Hangers Still waiting for the Redtail Performance tailpipe 😞


-
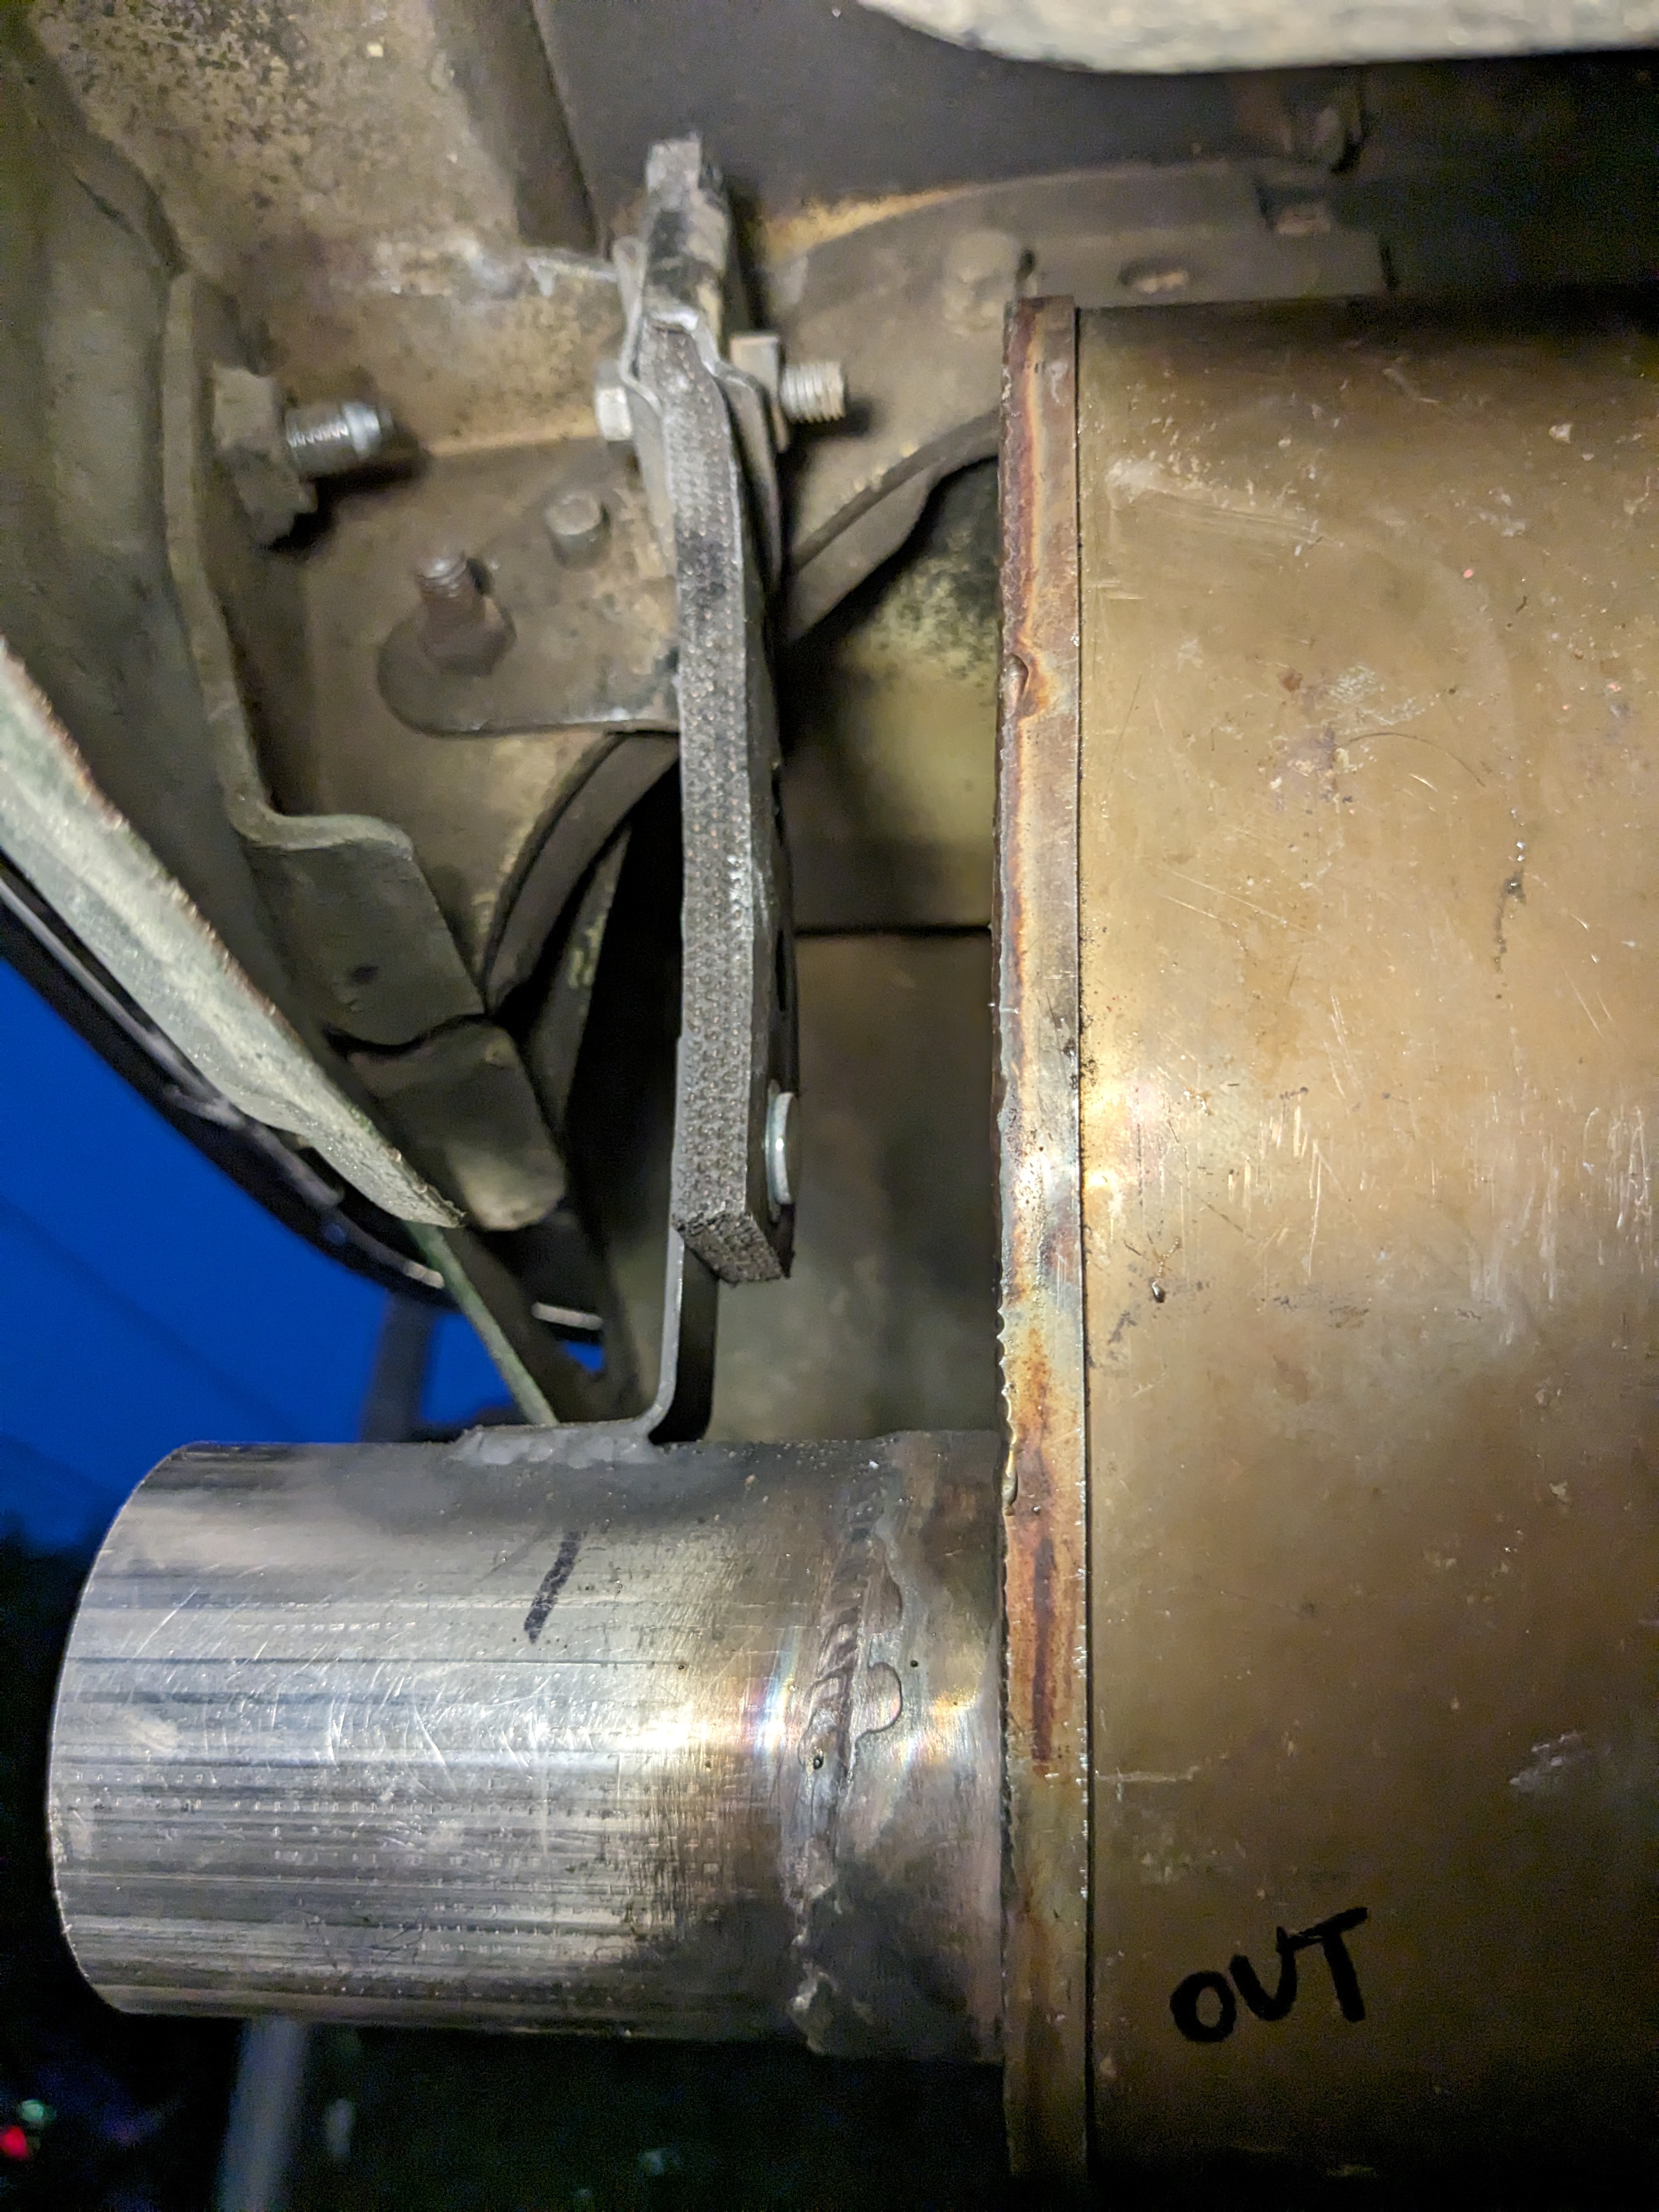
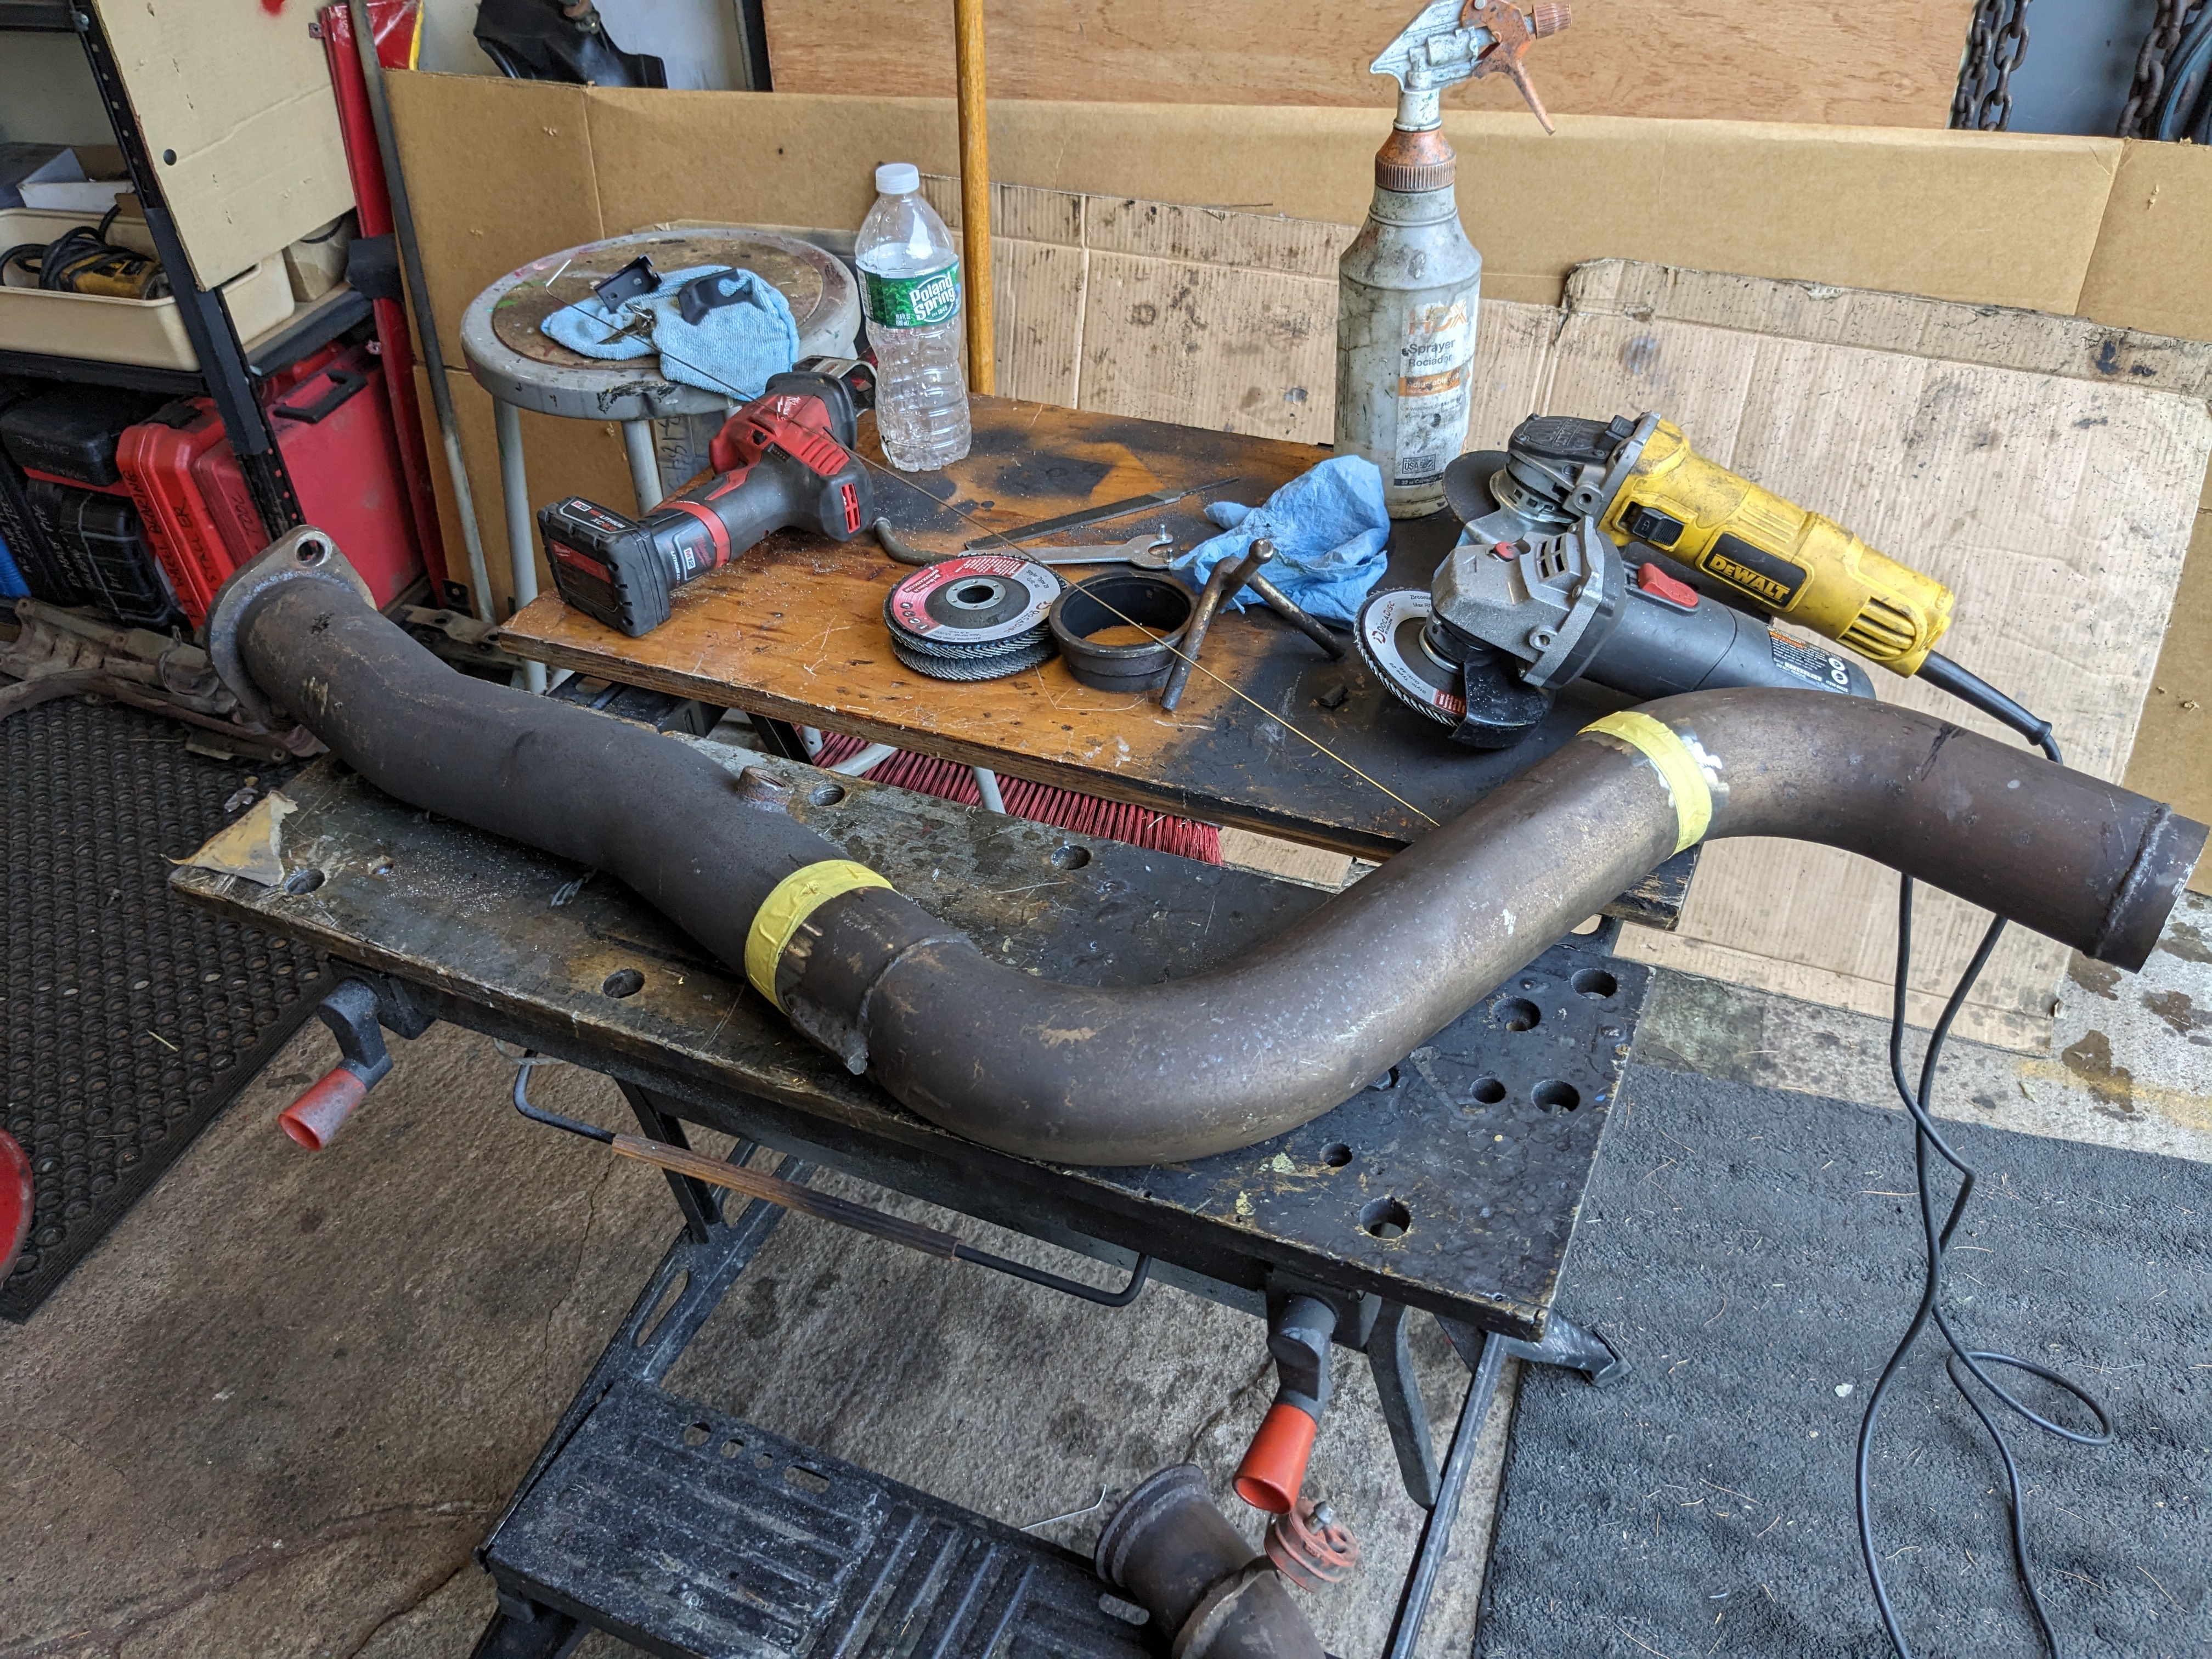
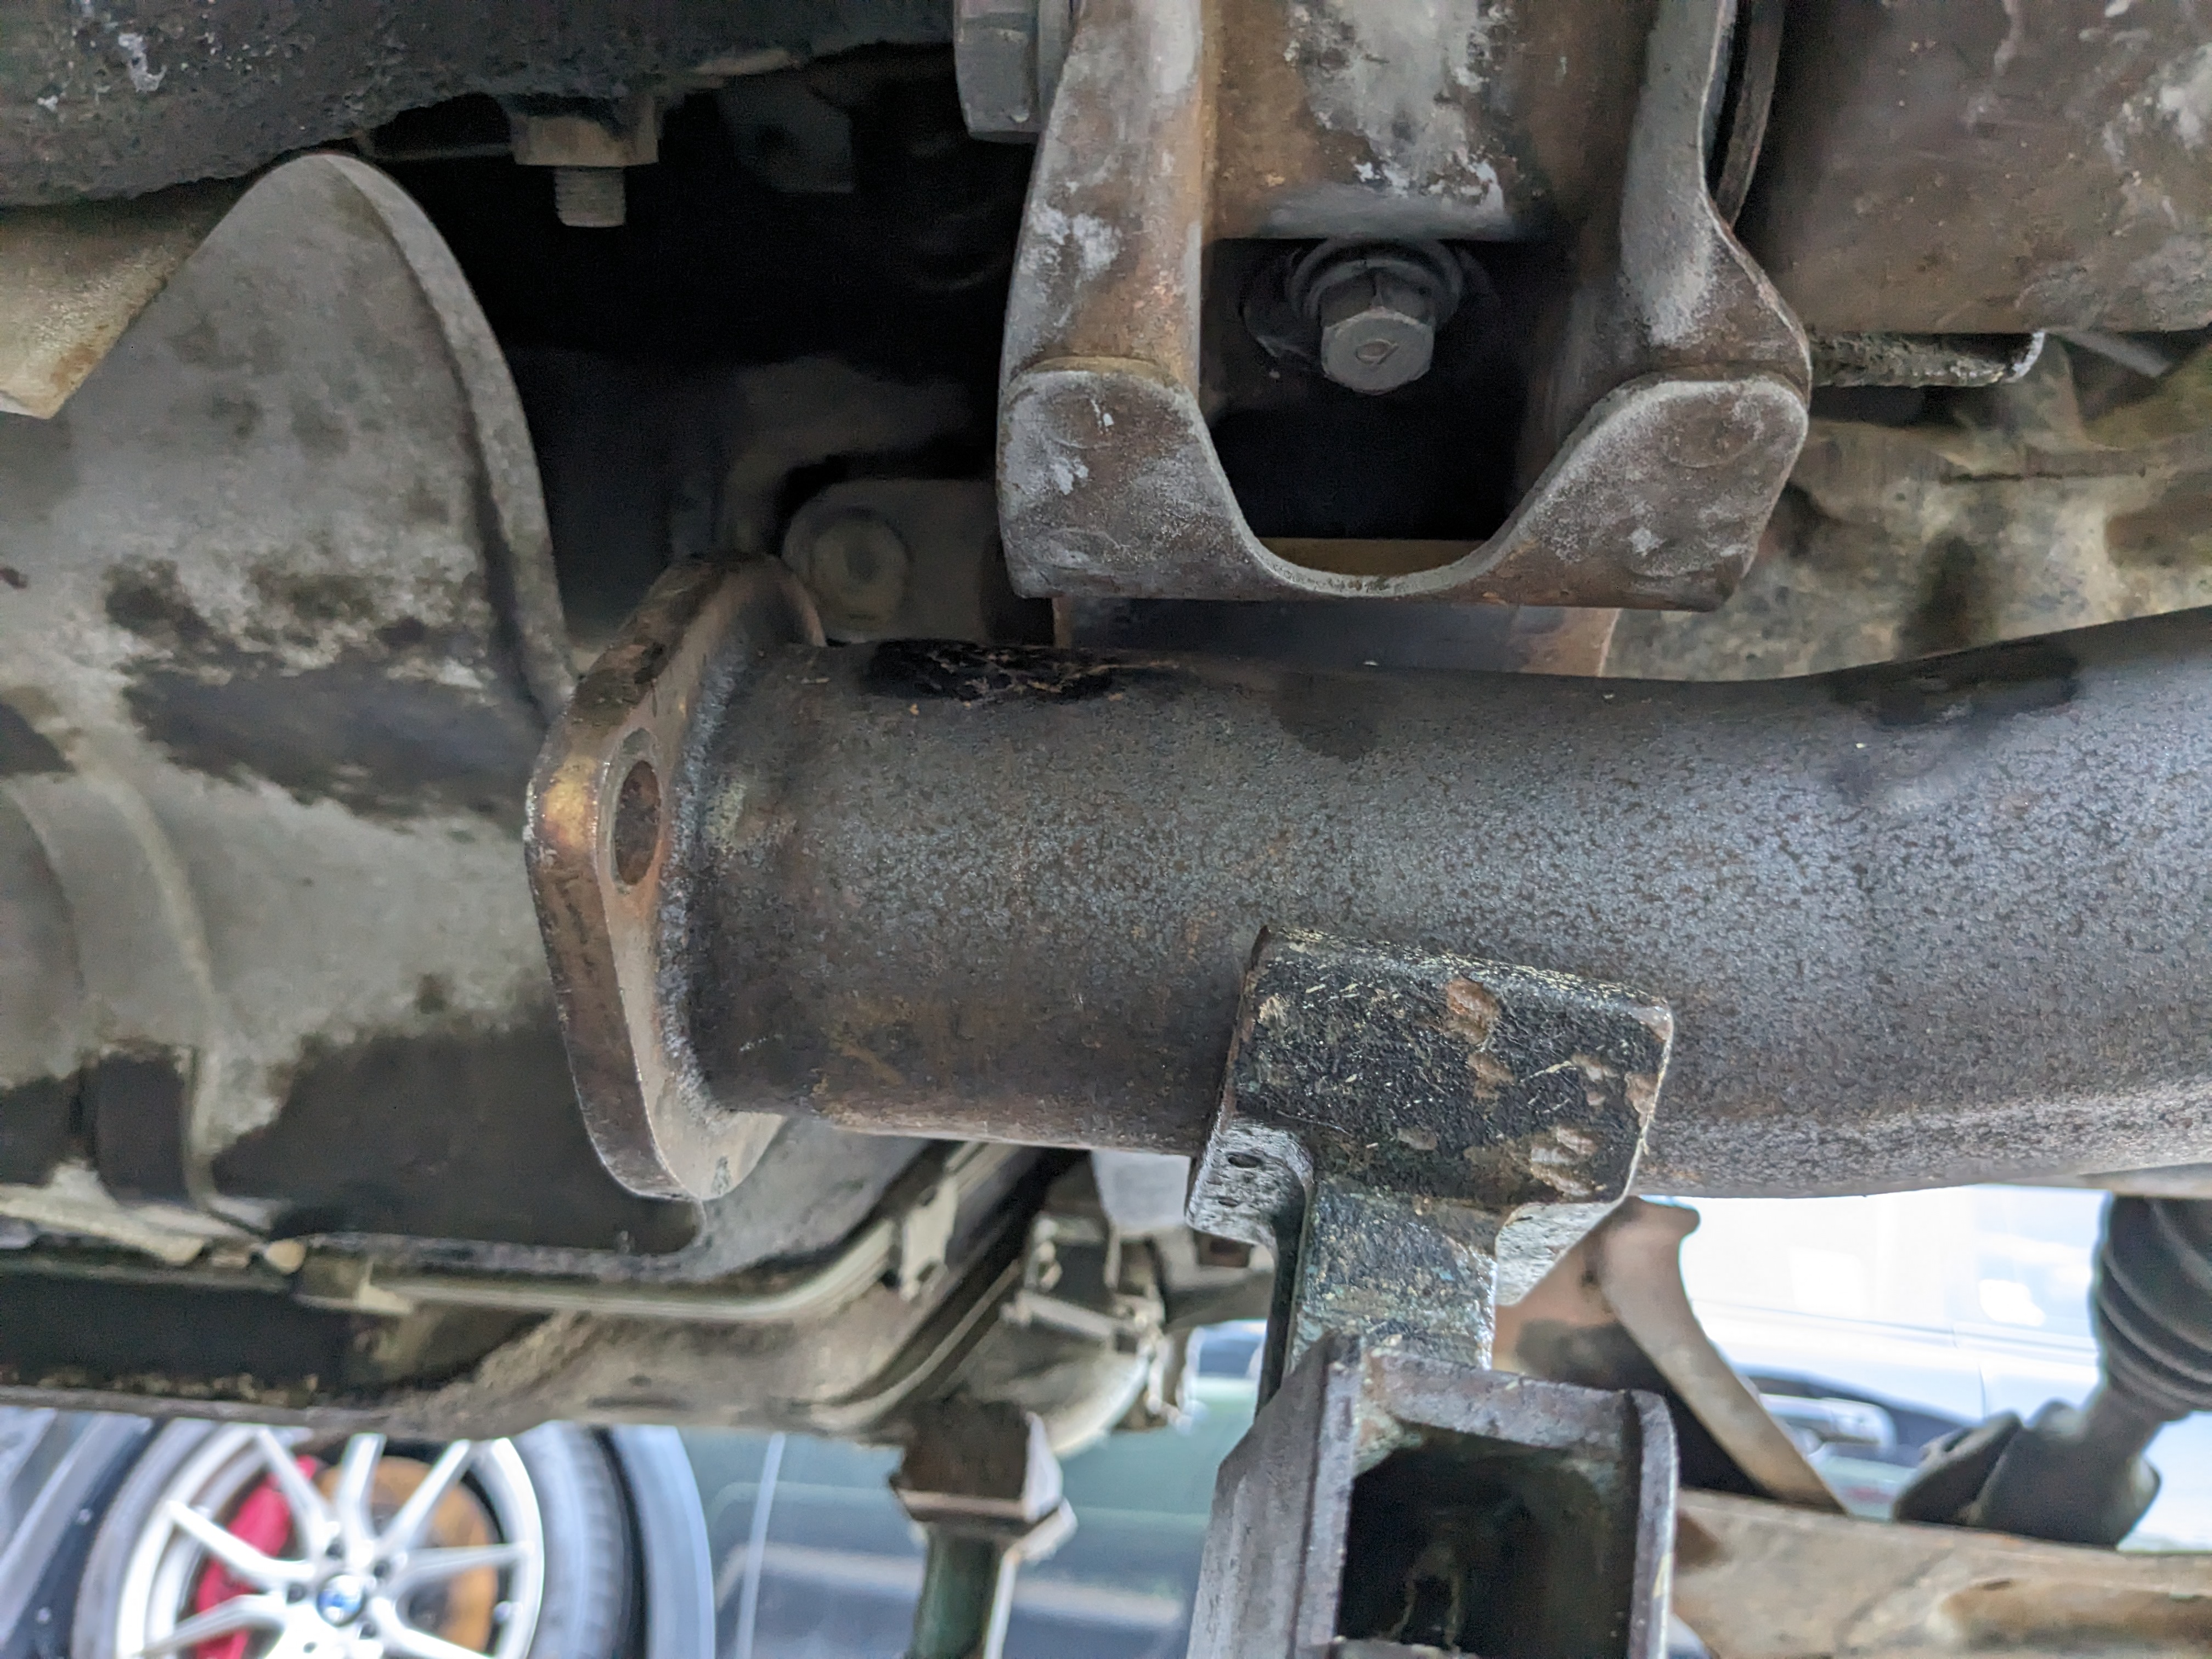
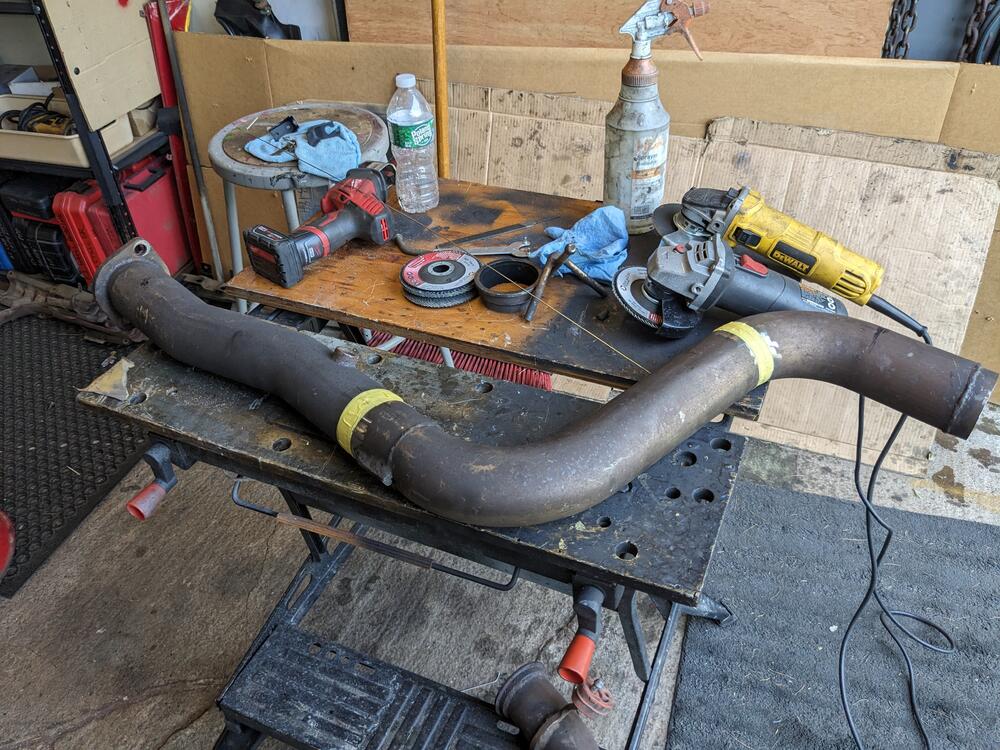
Got the rest of the front section figured out. No room for the 3" resonator though. Added a dogleg to get good alignment with the rest of the front section added a straight section off that, into a 3" cat, then another 10" section into the mid connection good clearance all around fitted the cat behind that 10" section between cat & dogleg into 3" flange removed again to tack rear mid section re-installed one more time to figure out the hanger off the transmission case, then removed. Now I have to seam weld all the junctions


-
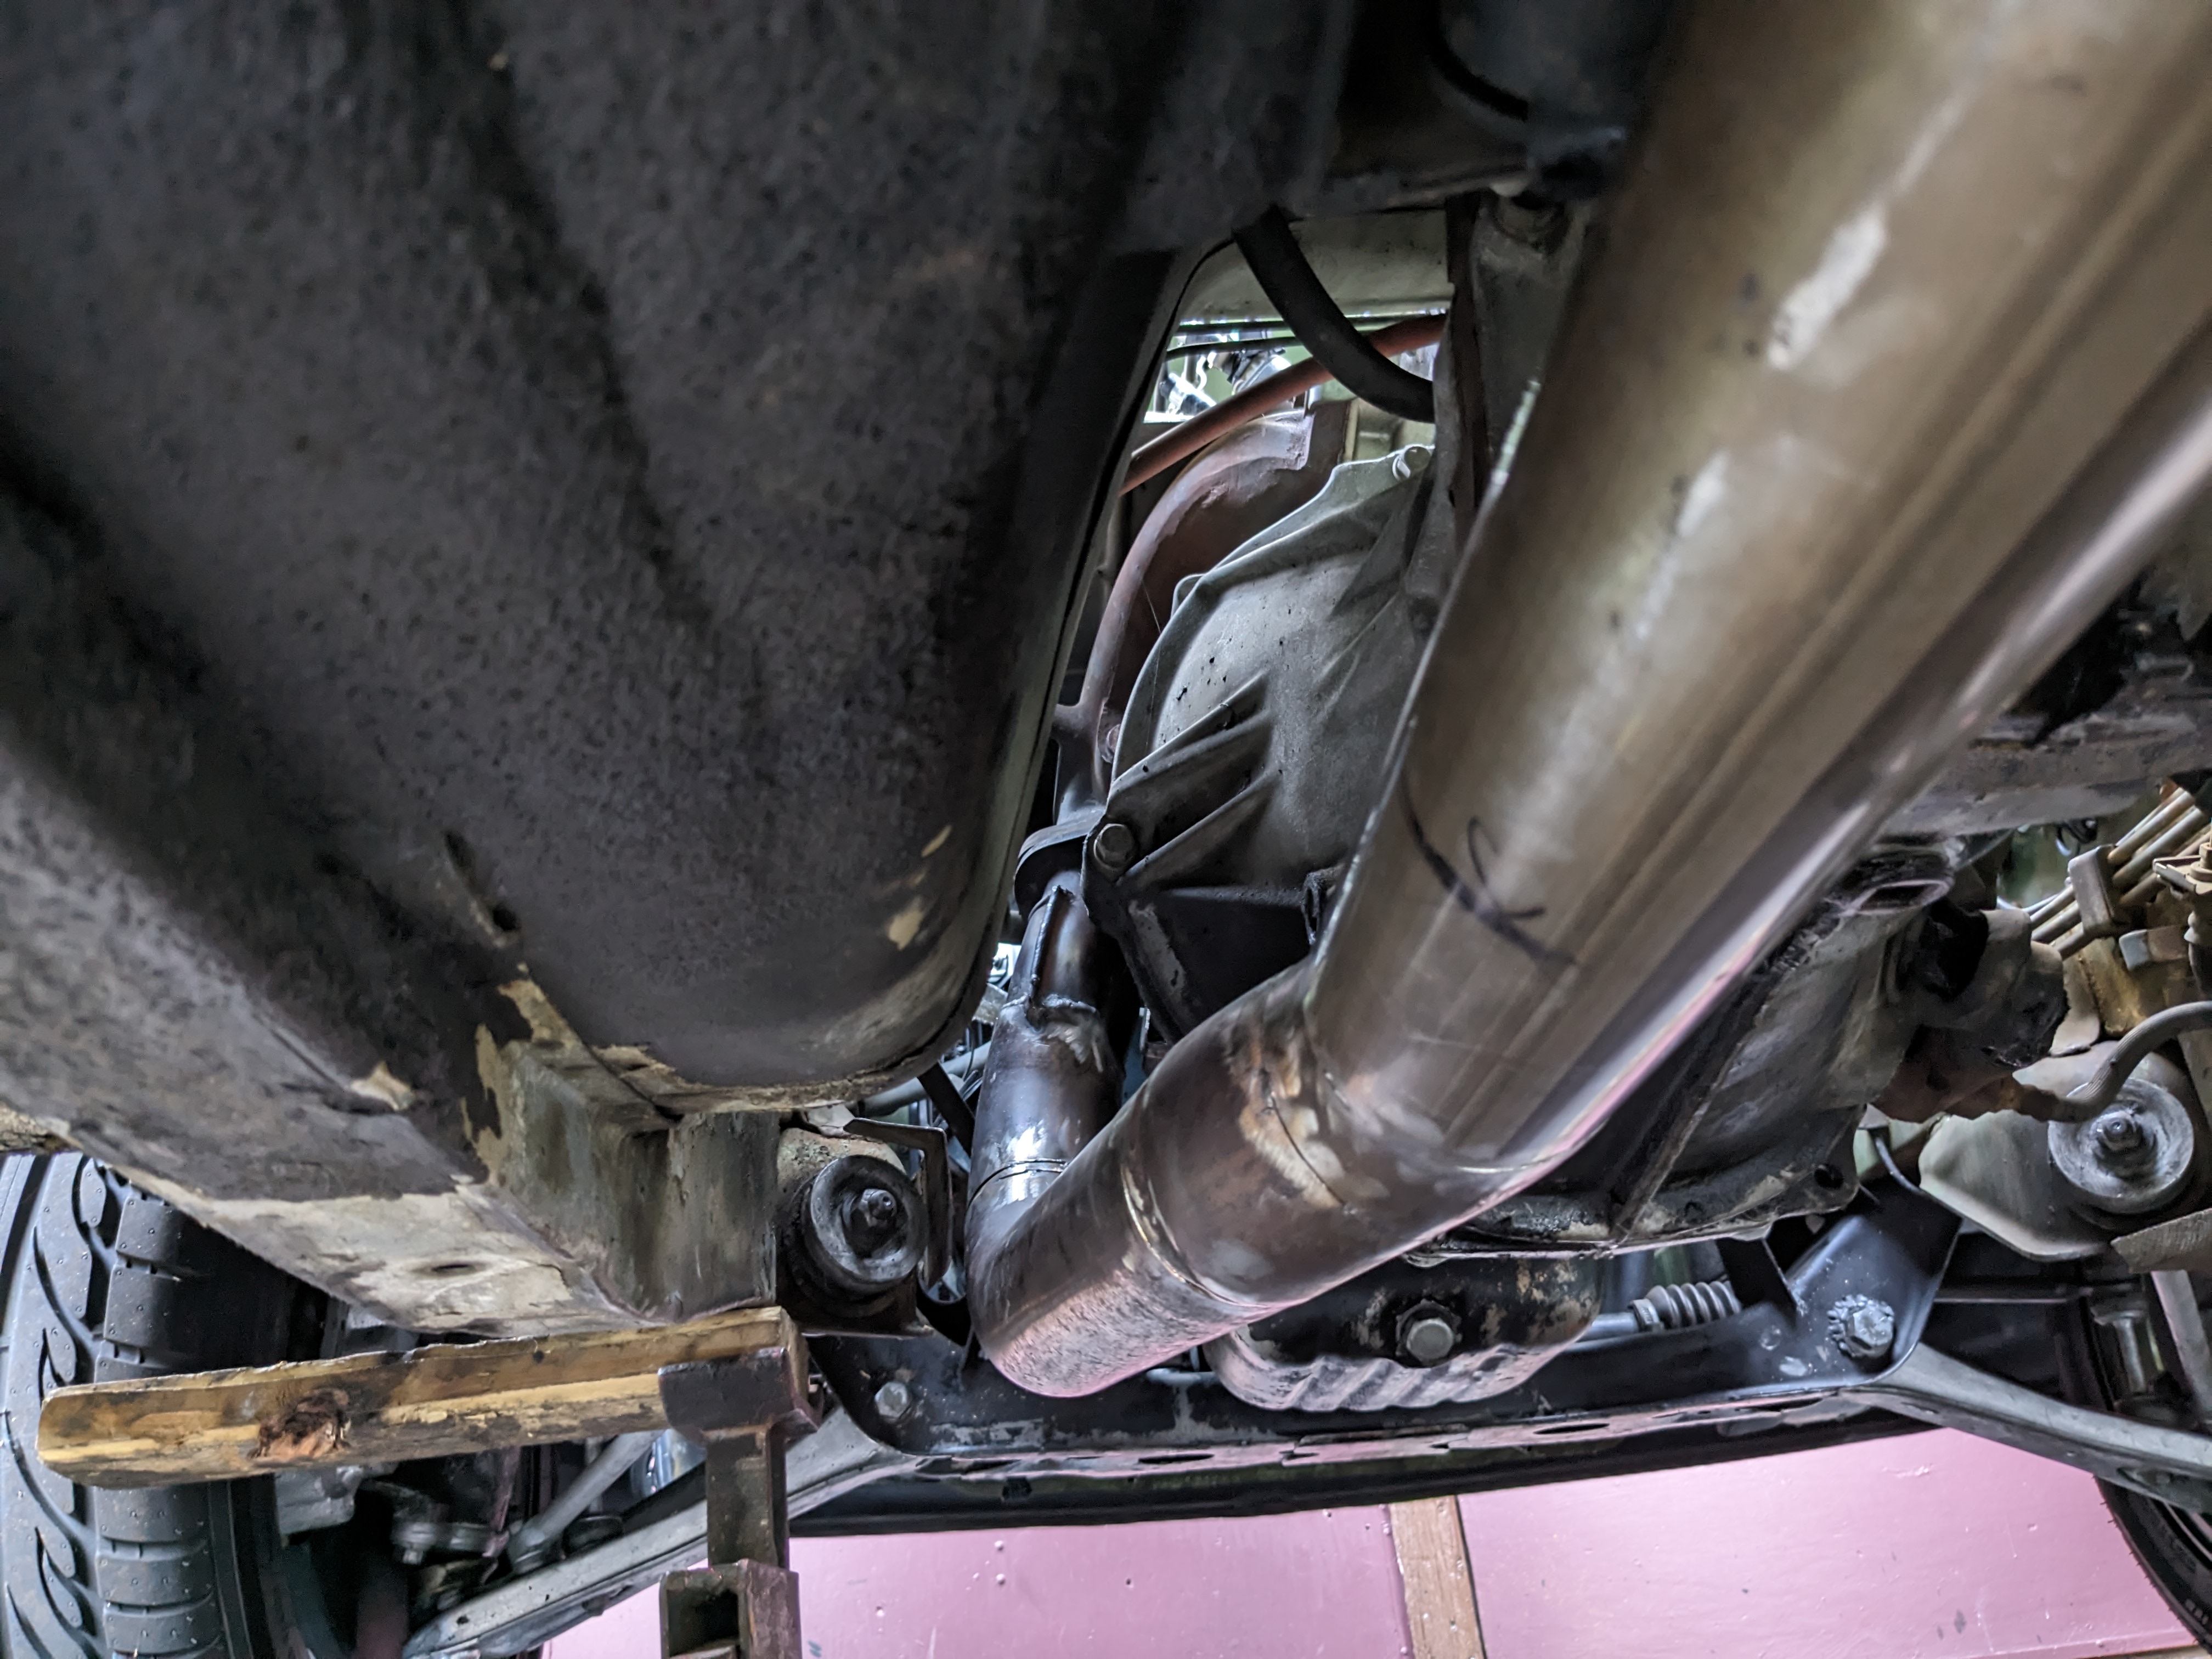
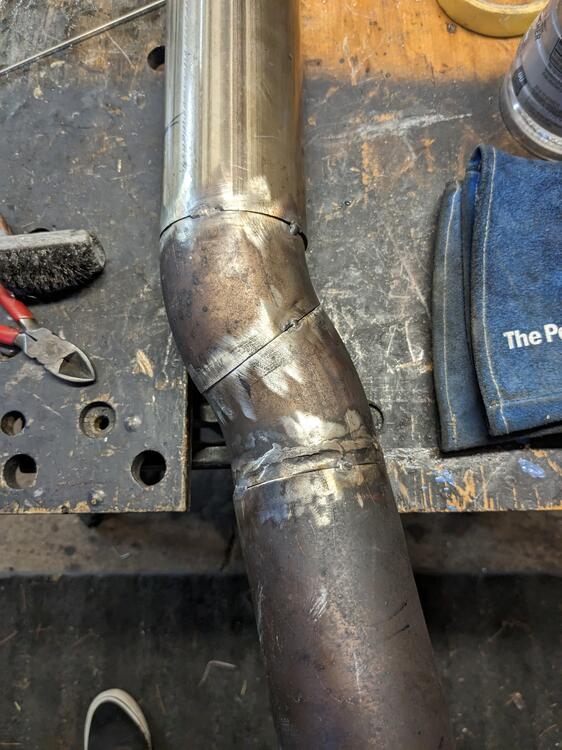
Change of plans - I removed the front pipe. One of the Datsun guys on Turbobricks said the 2-1 junction is a severe choke point. His solution was to make a new 2-1 section in 2" pipe I can't weld something like that, Dealing with welding those to the flange, and the collector are extremely awkward, from my experience with the first header on the K24, I'm not willing to risk it. Stock front pipe. Flange. Making 2" pipes fit the flange would be tricky. I thought about using a 1 7/8" holesaw to get it close, then grinder to get the rest. I don't have a spare DP, so just not worth it. taper point, only about 1.5" ID in there So, I cut off the upper section of the DP where it's approx 3" wide & modded another section of my old C30 3" exhaust to fit. after a bunch of back & forth, I tacked it here. To minimize the reduction in the stock collector I cut it so there is only about 1/8" tuck. test fit - clears the heat shield (next to my finger) by the same amount as the stock pipe - just looks like there's no clearance It was raining at this point, so I took it down & seam welded the joint. But.. it moved, so I had to cut the pipe & add a pie cut (to be welded later) to get the pipe pointed where it needed to go New cat & used resonator from a Volvo S40 T5.
-
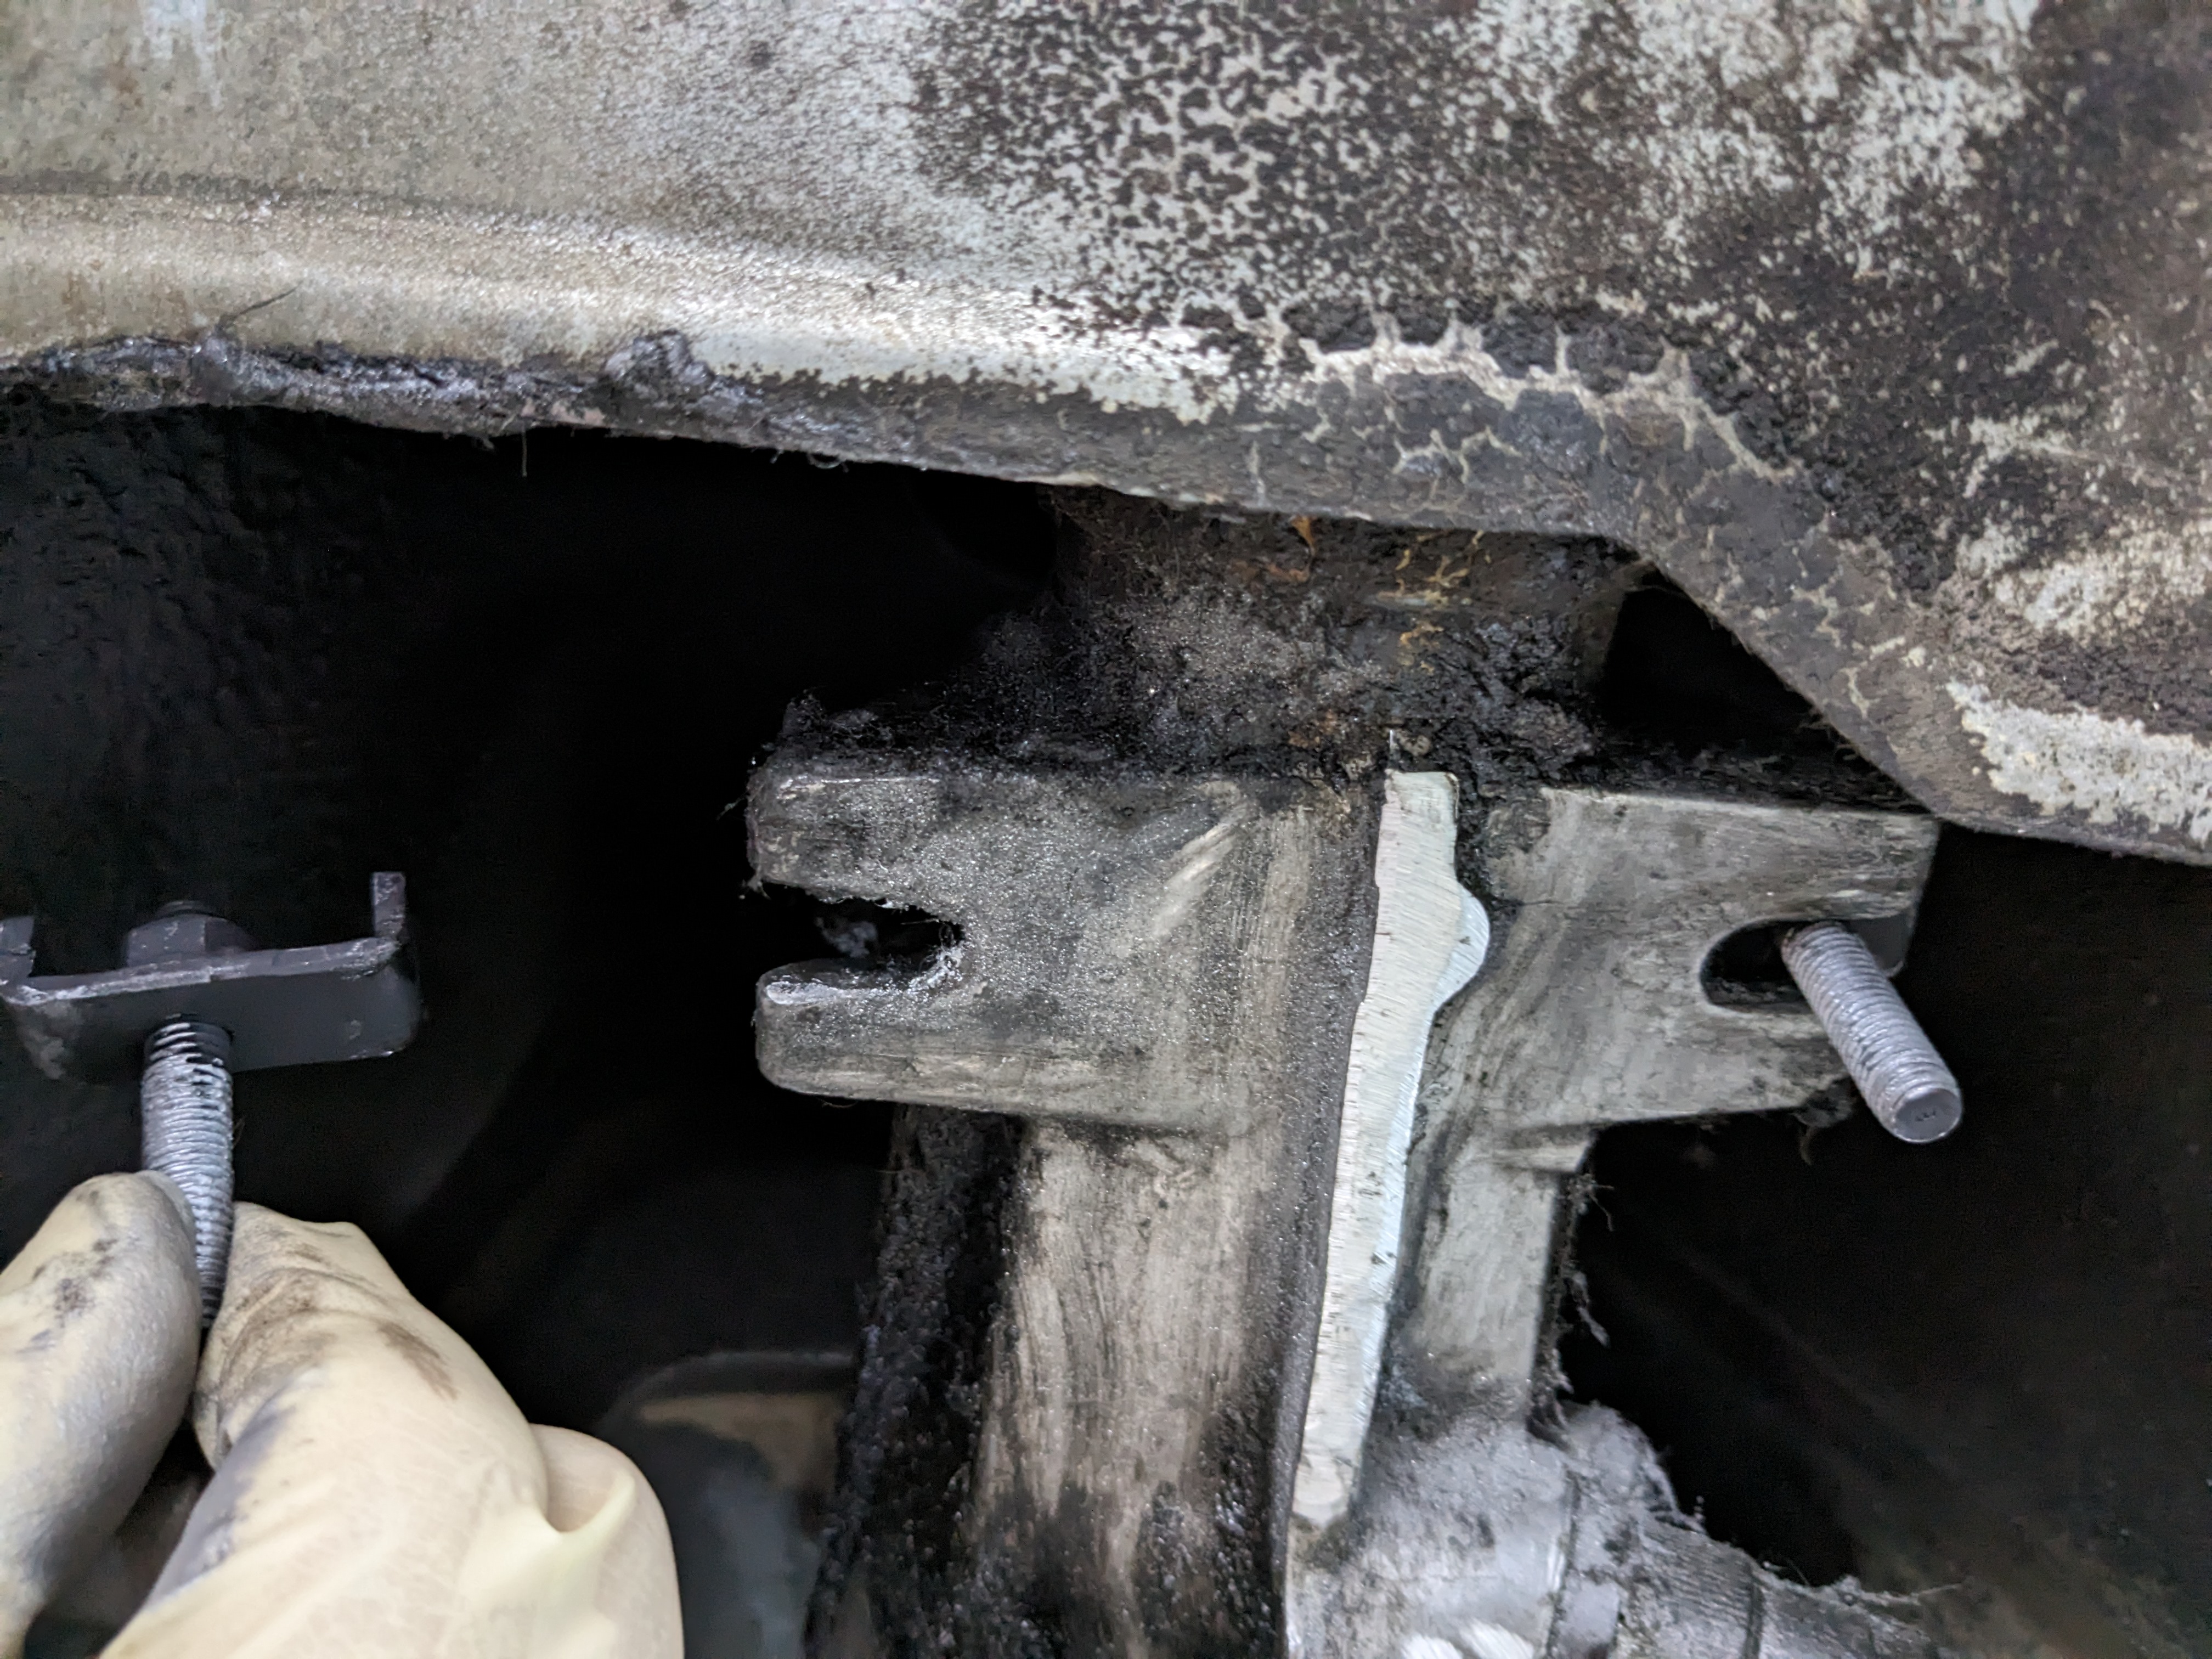
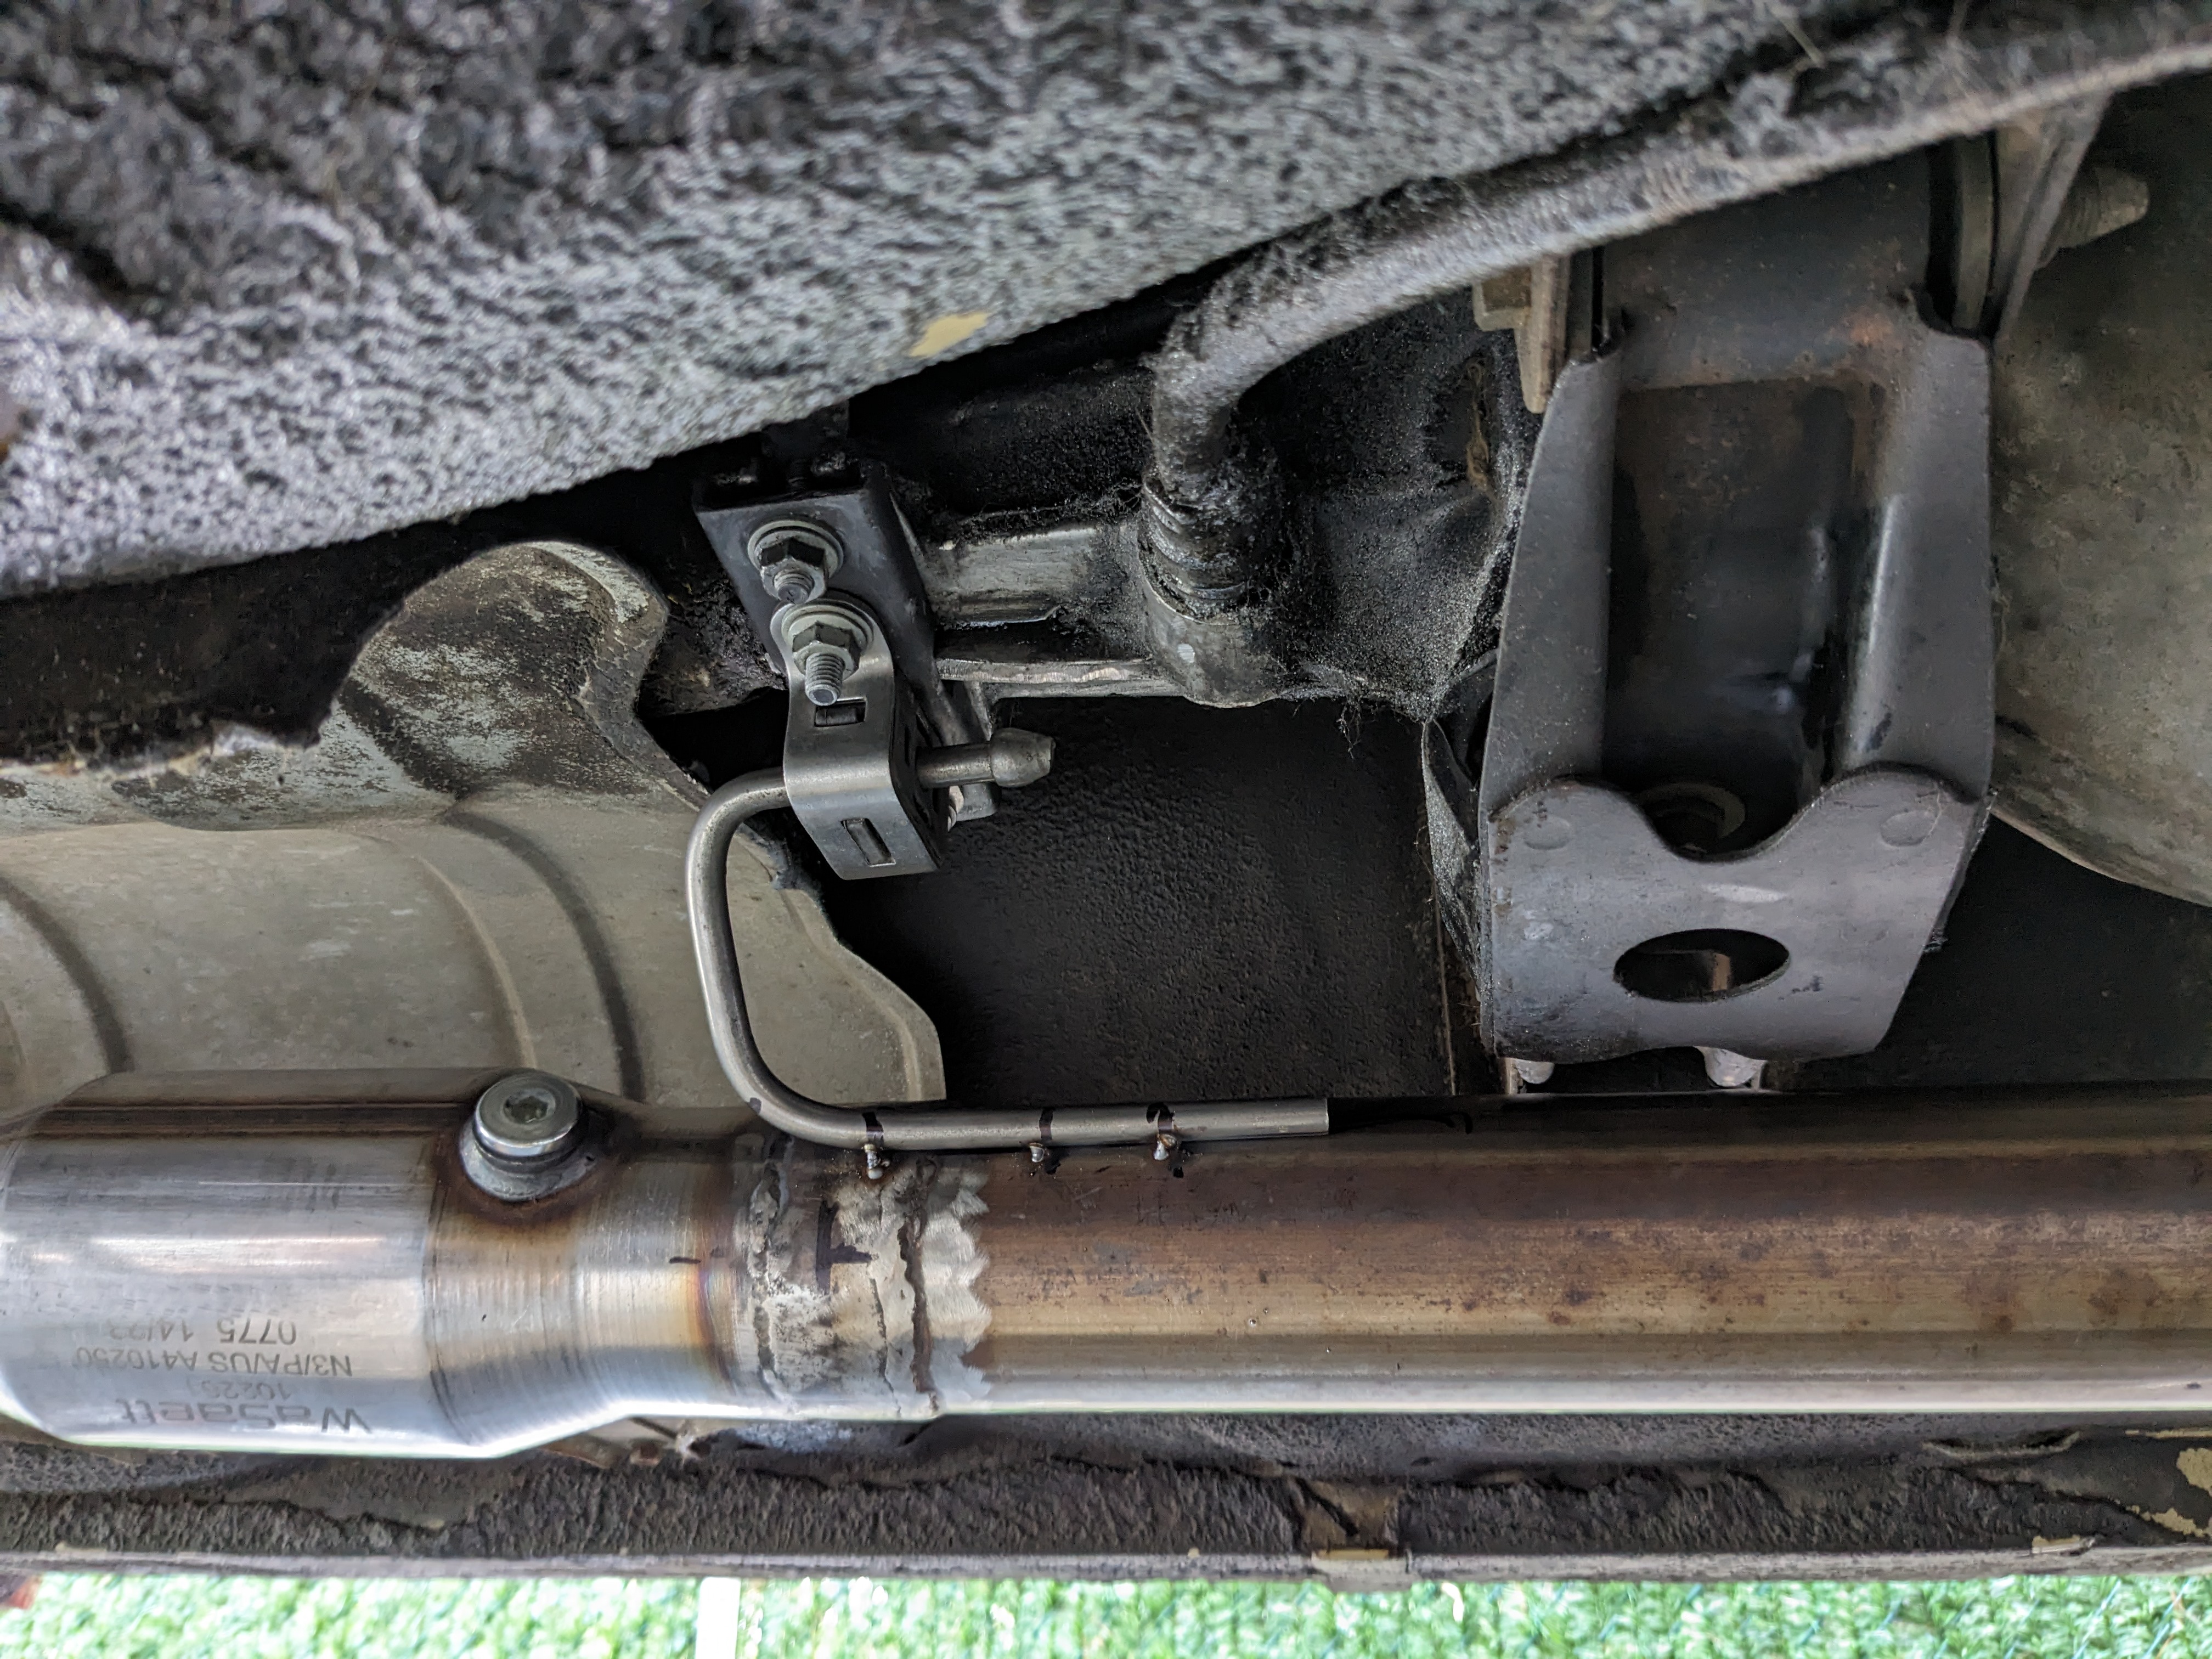
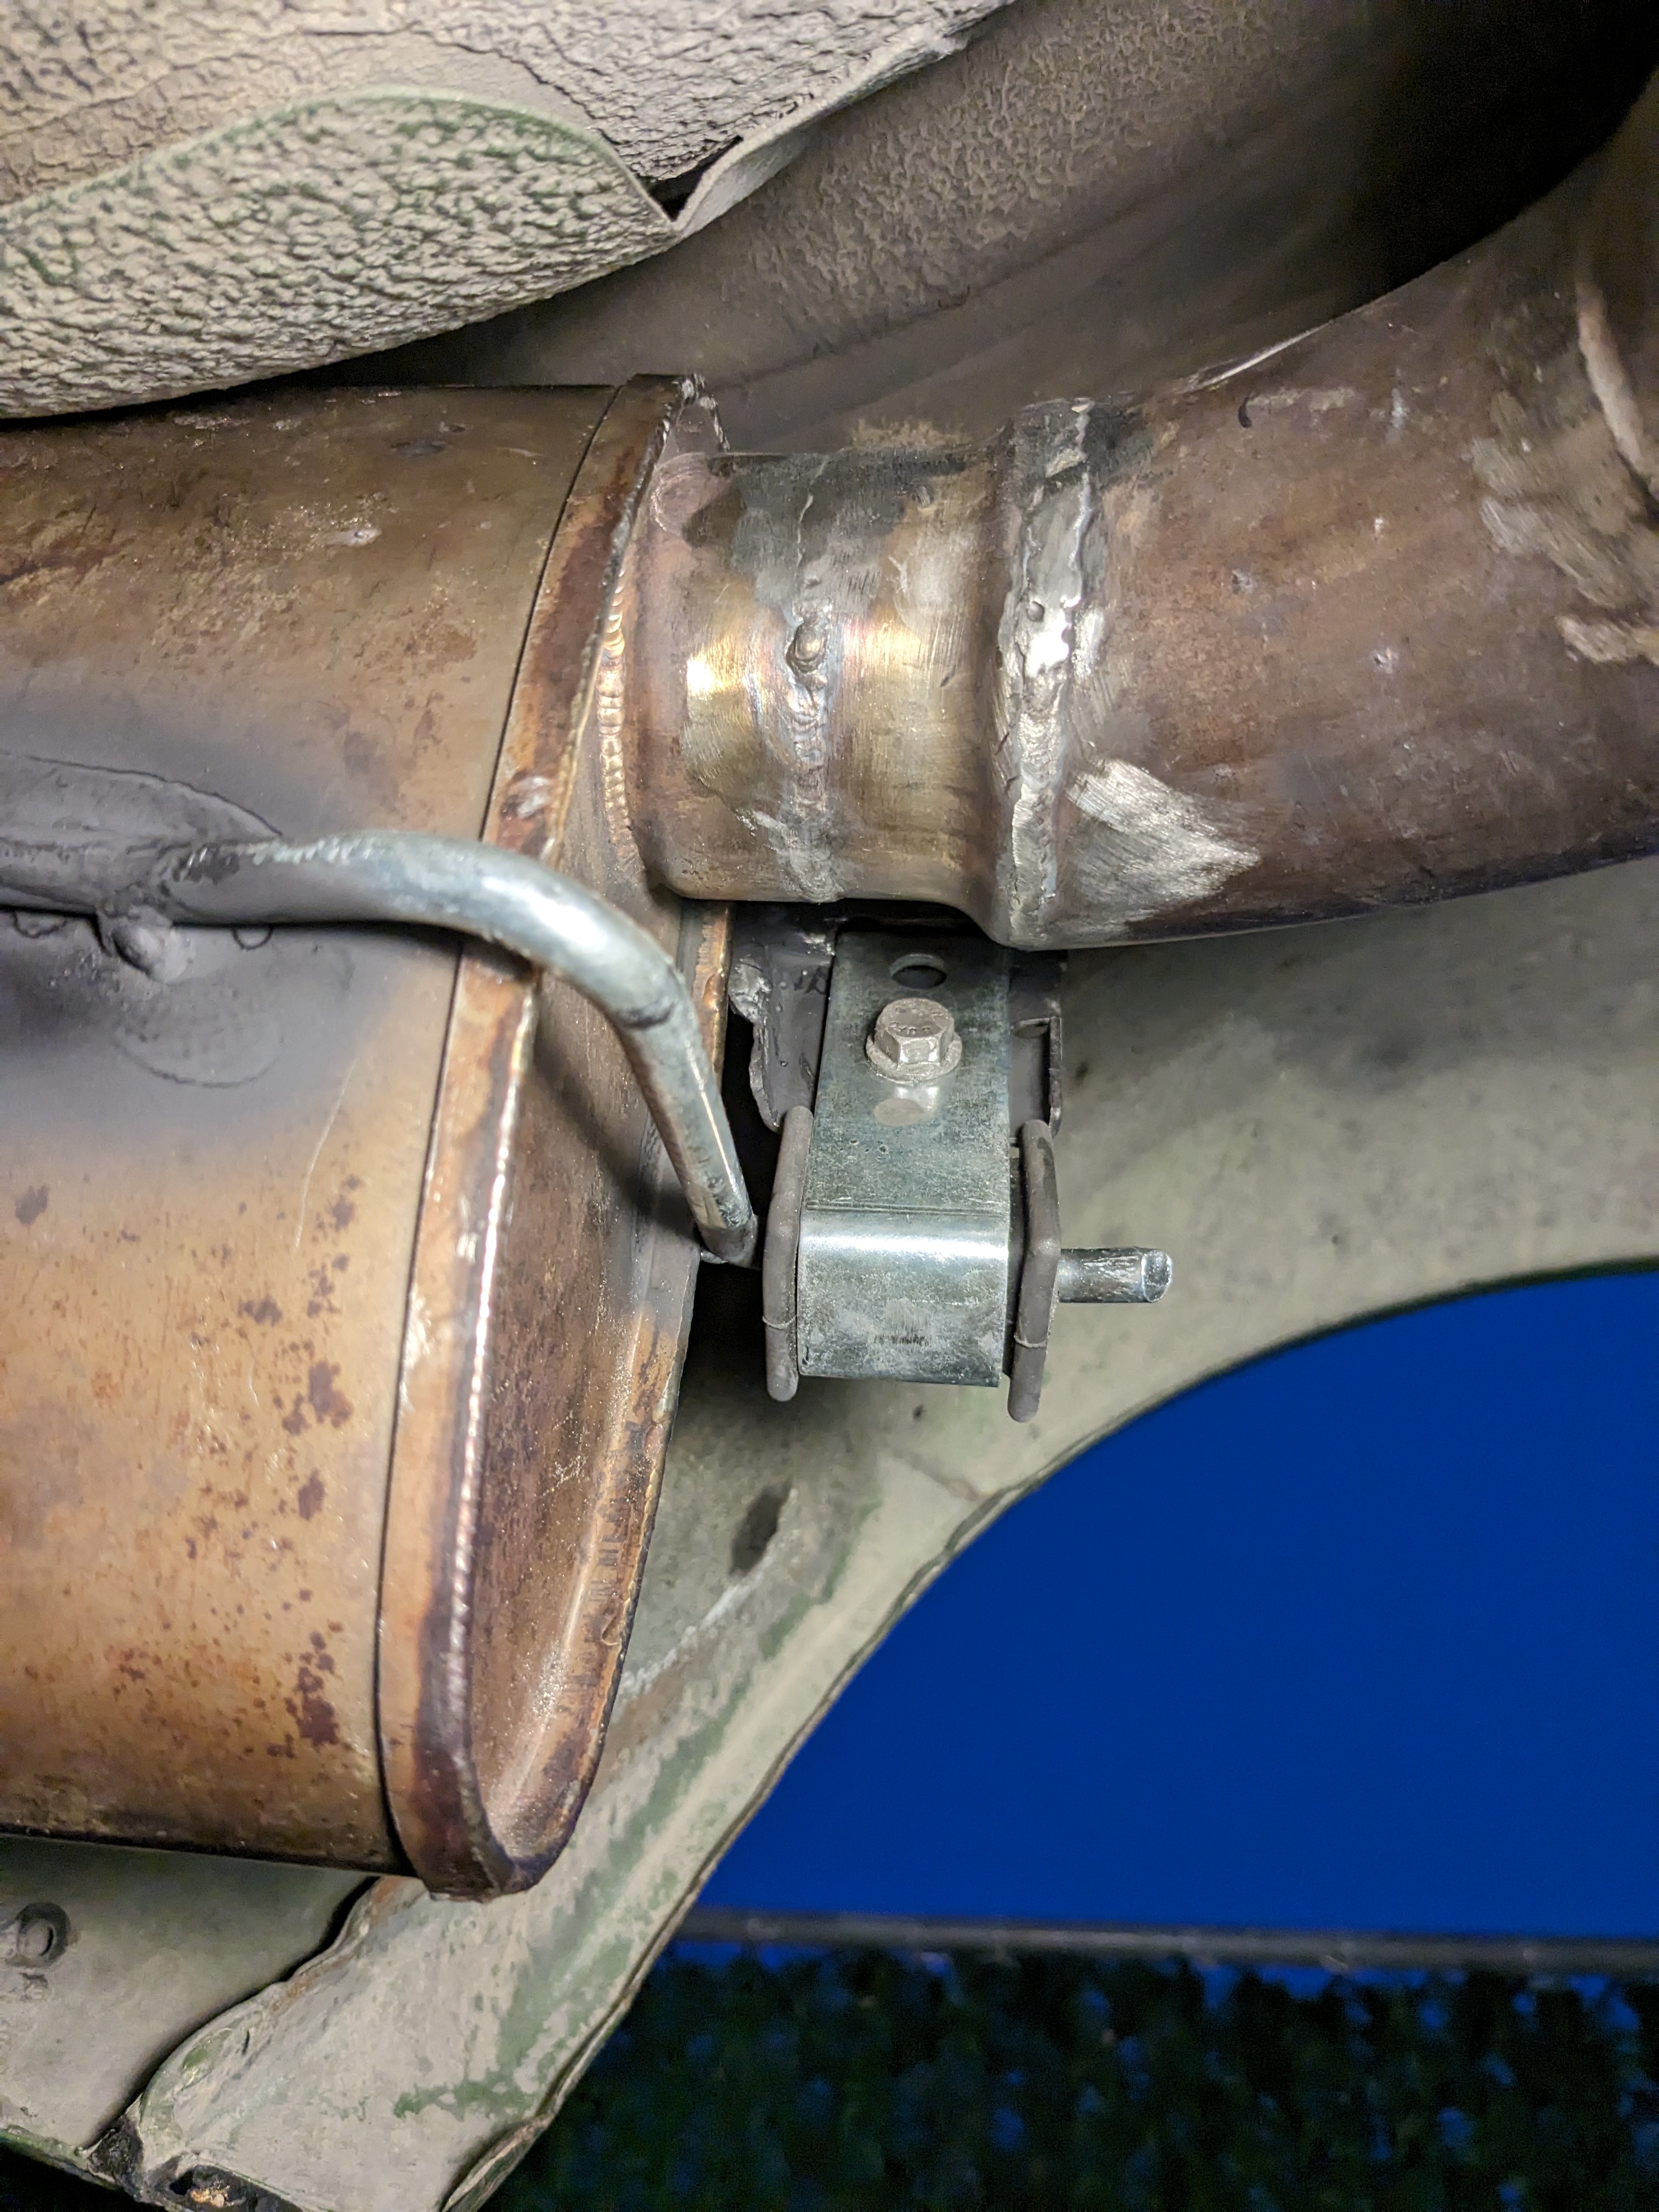
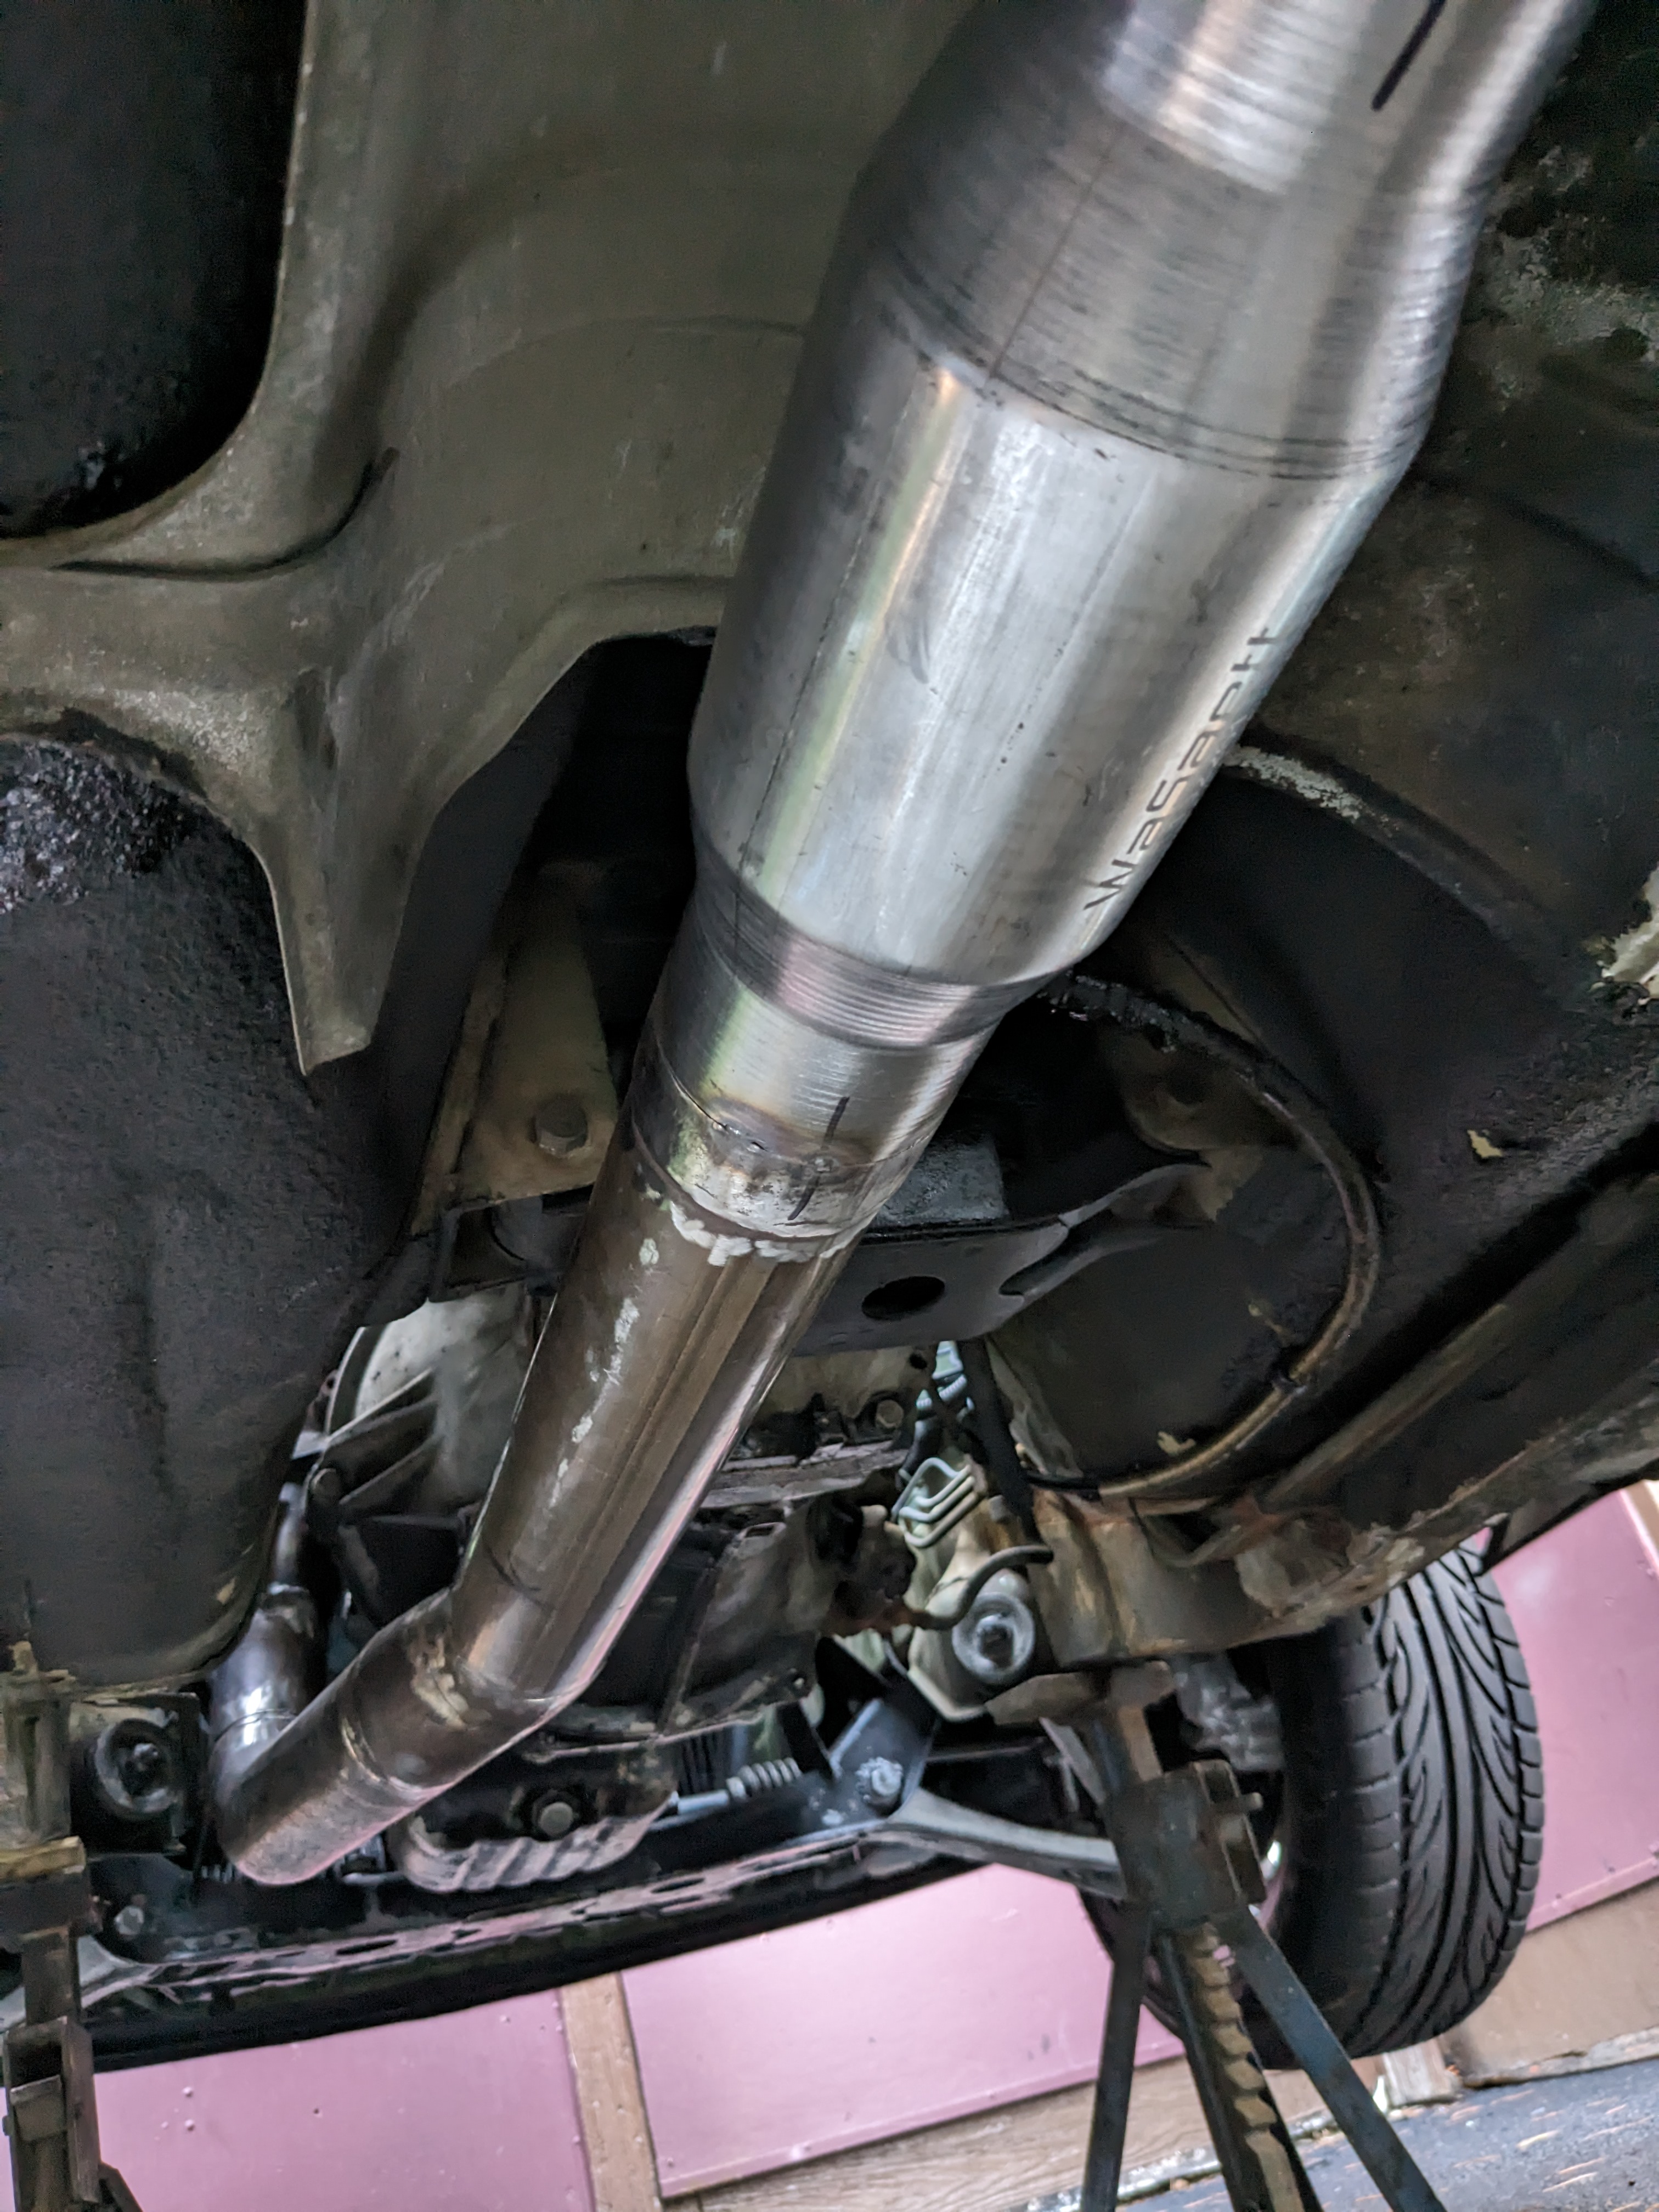
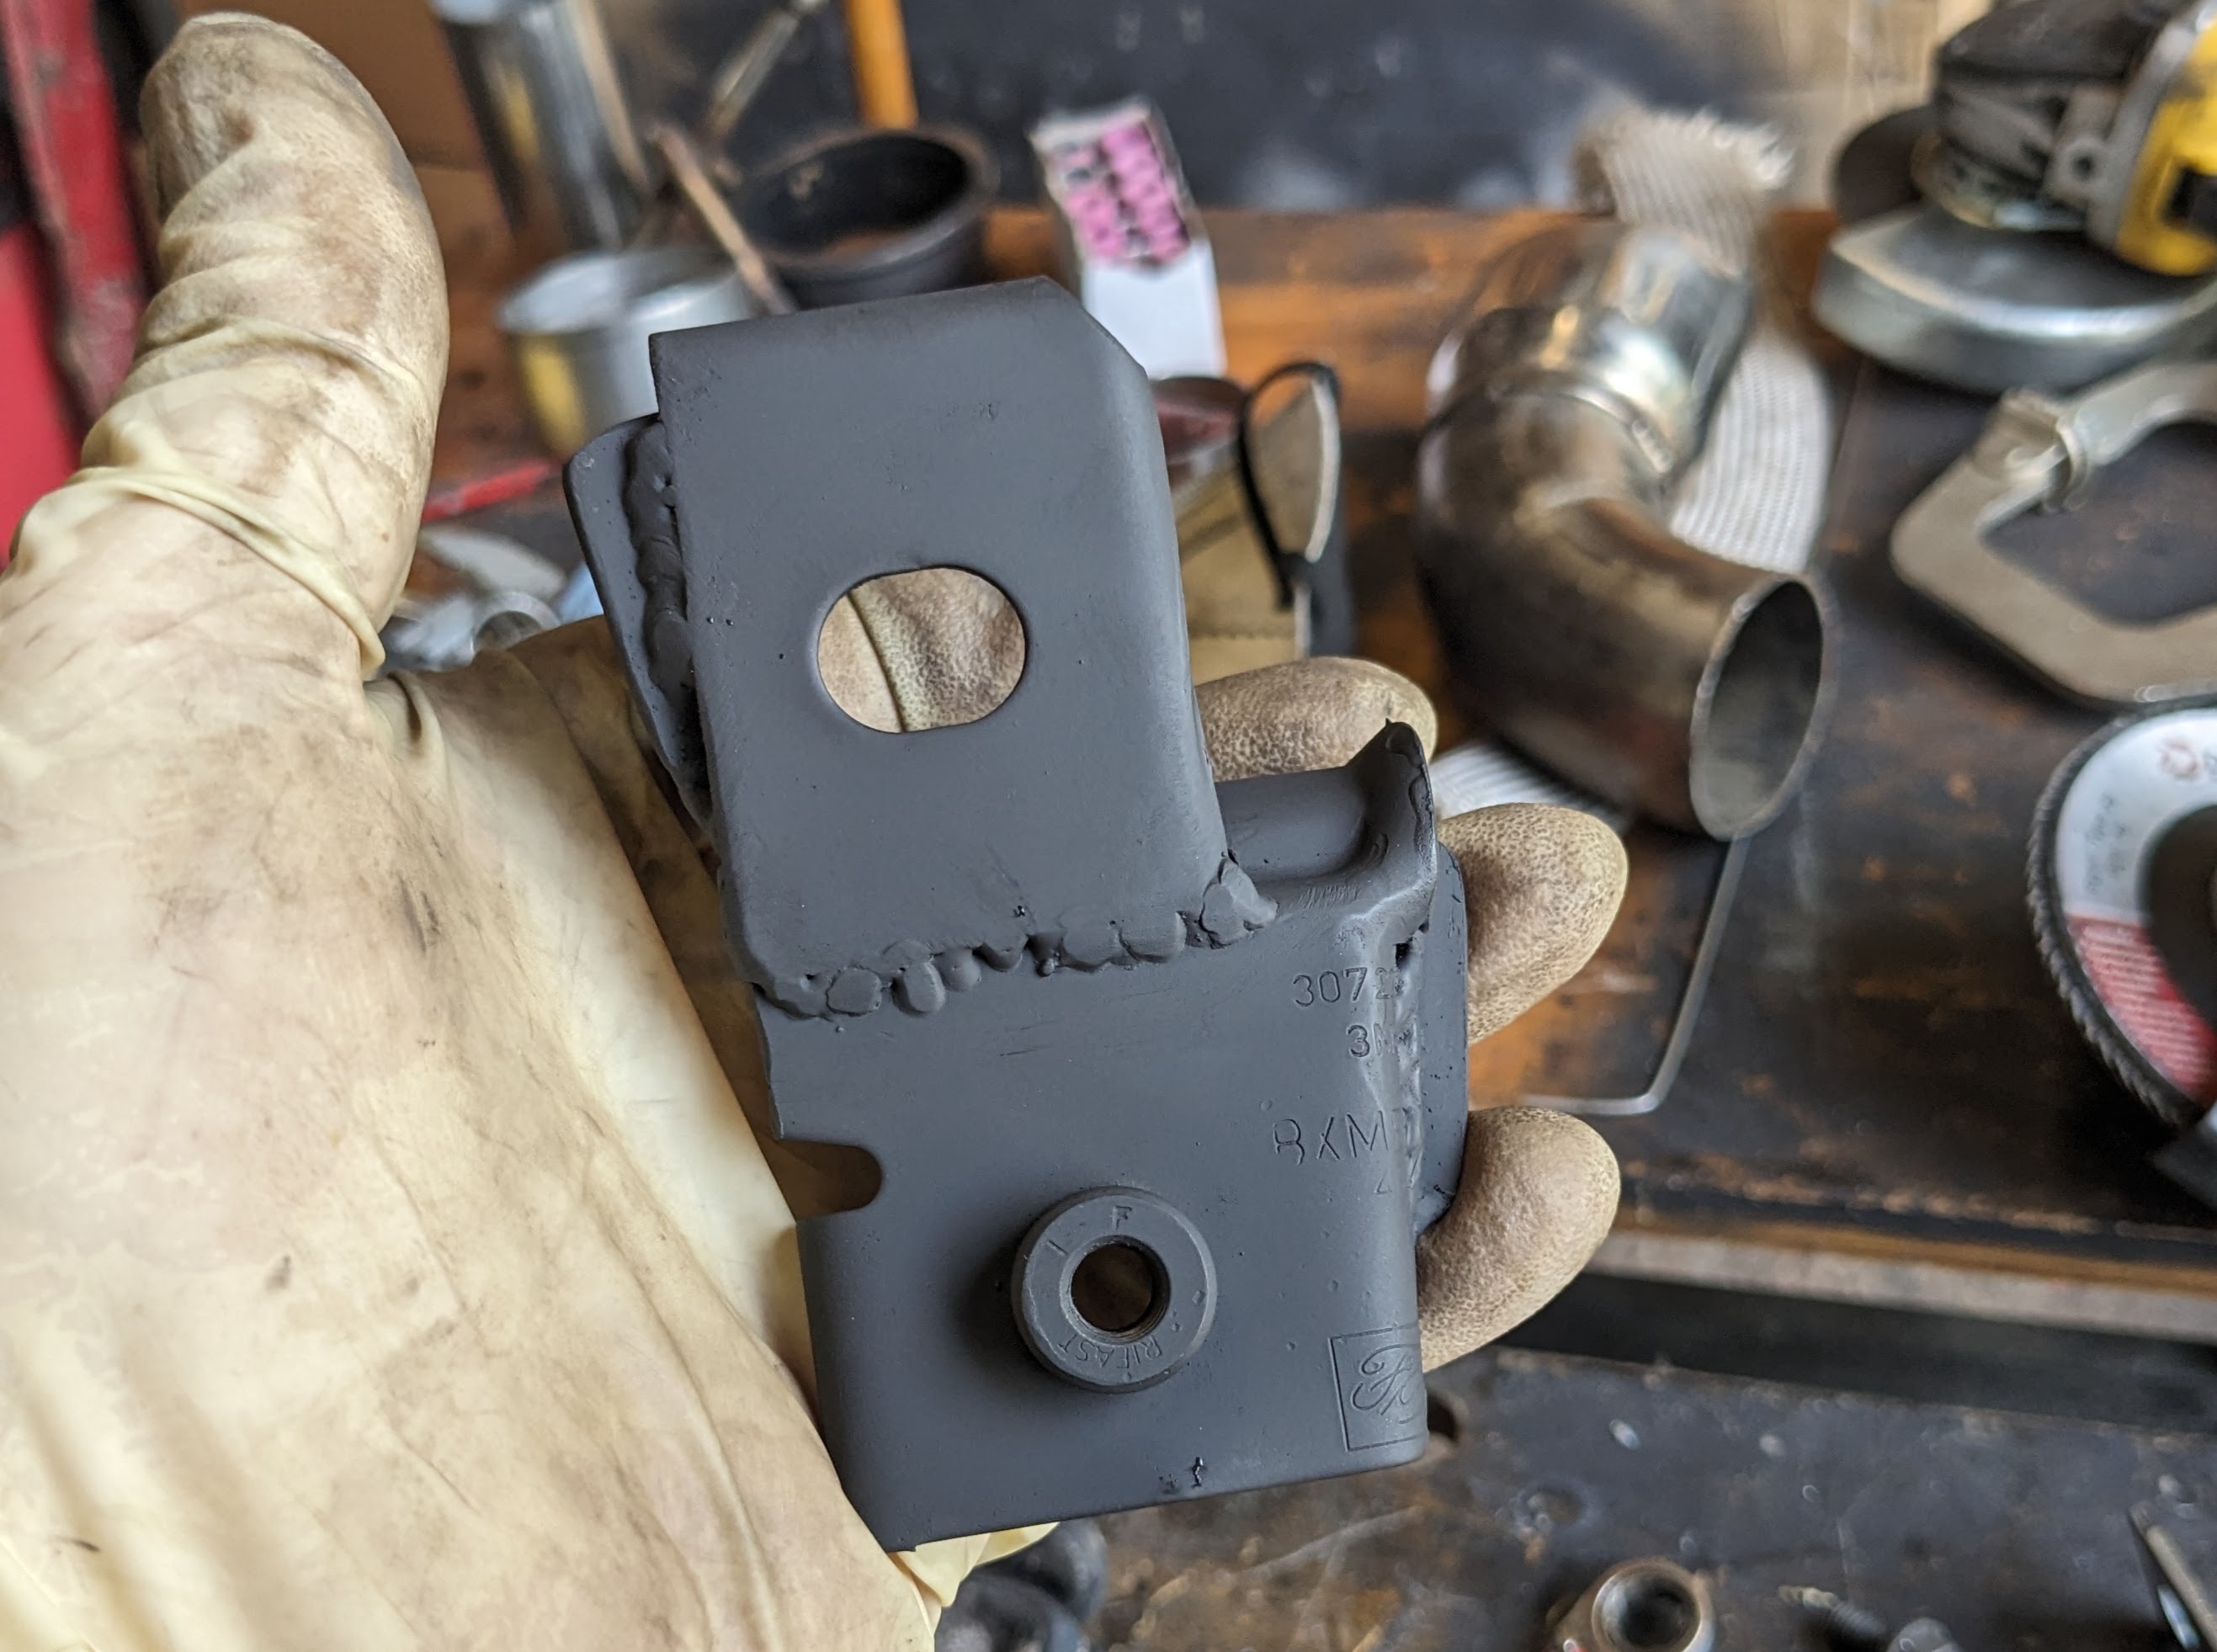
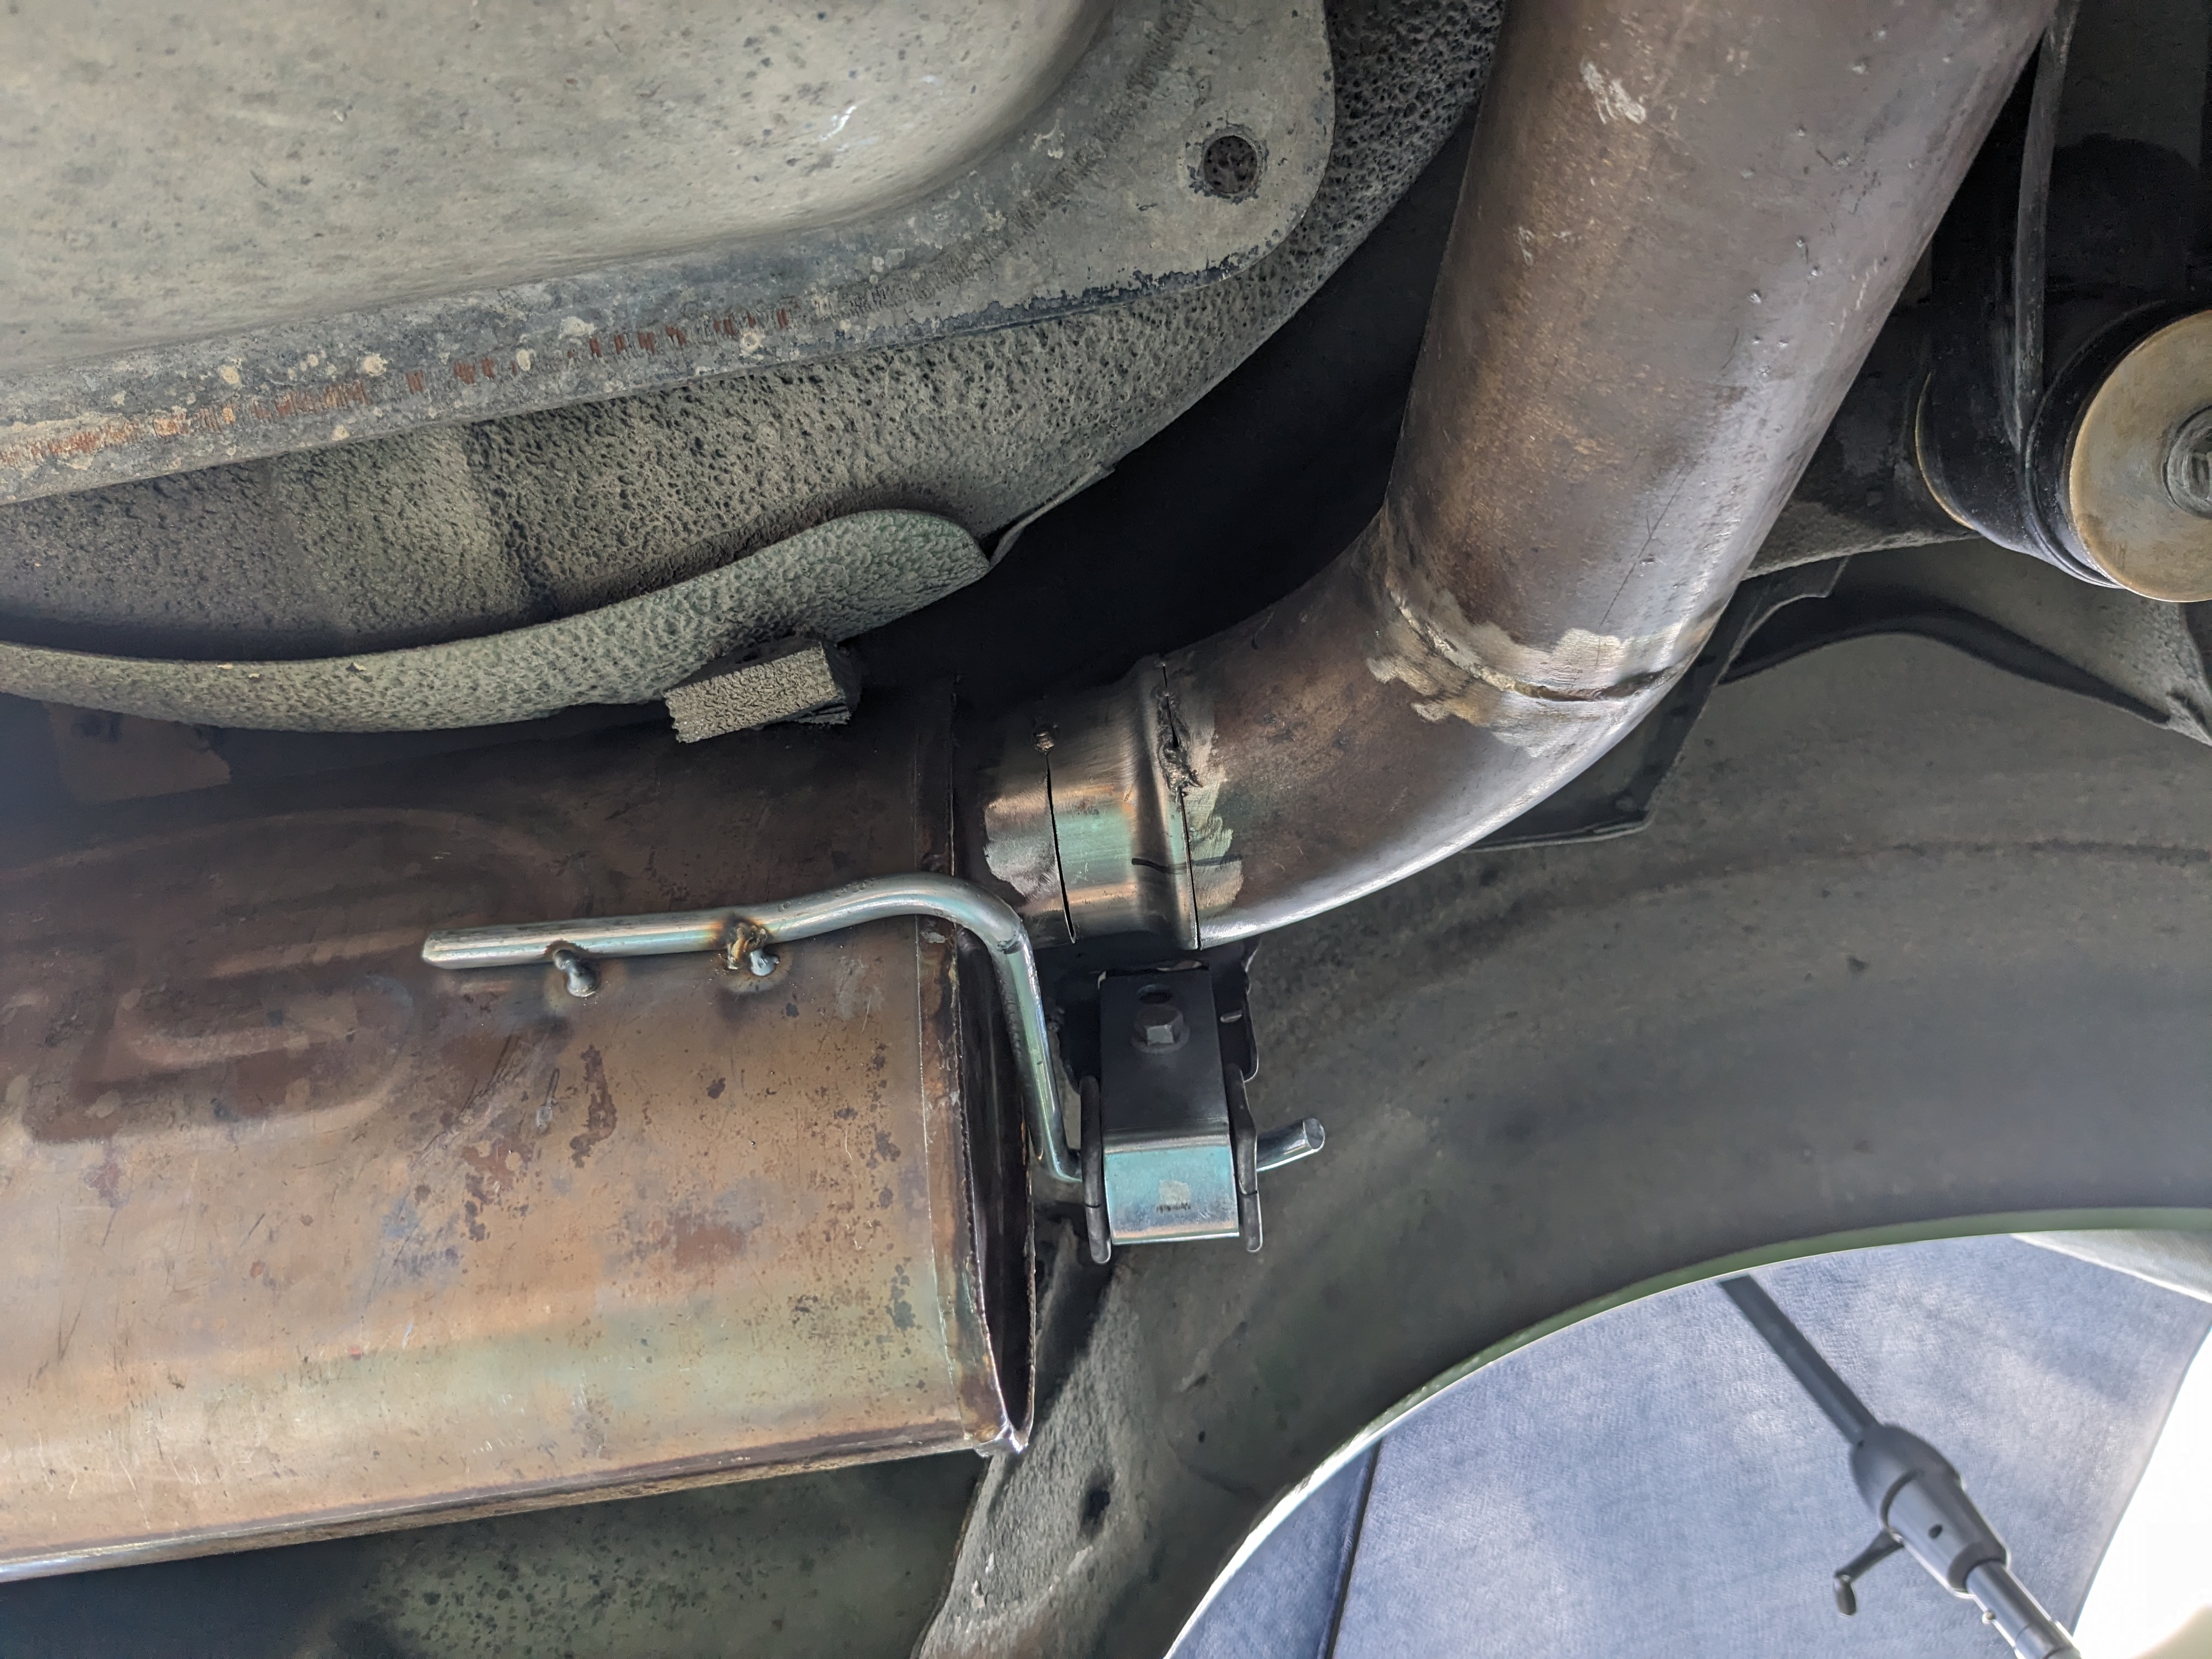
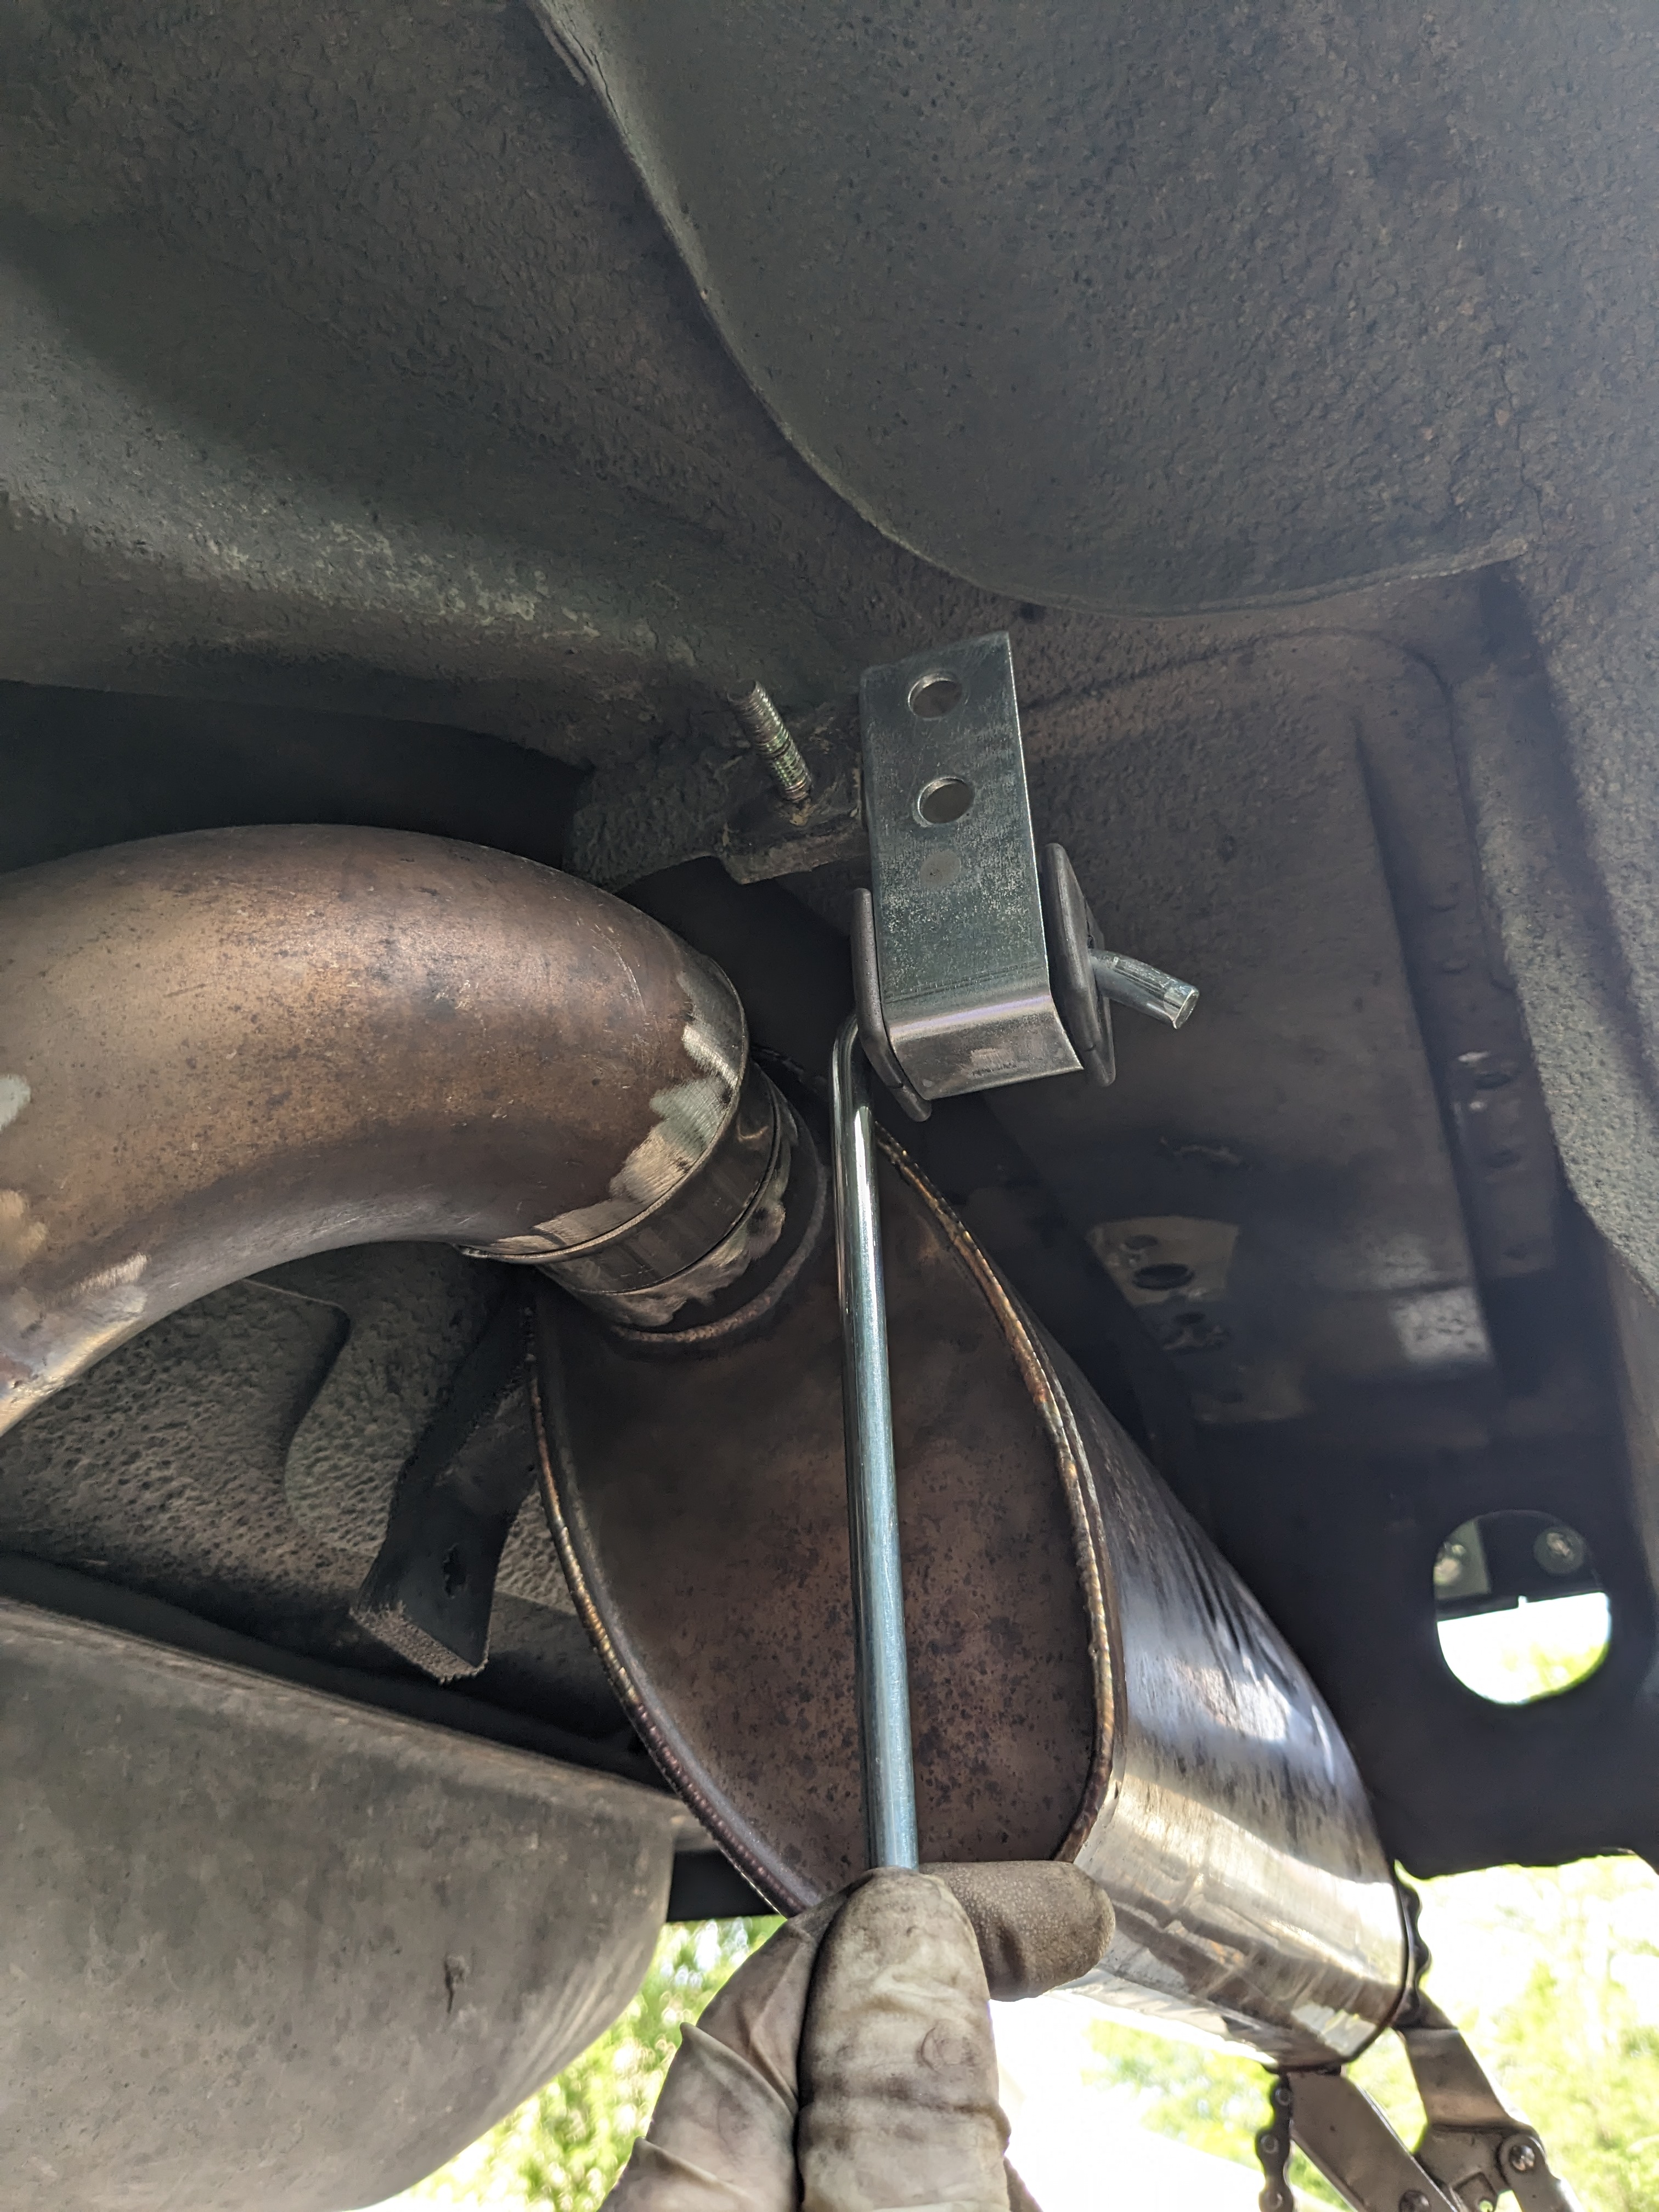
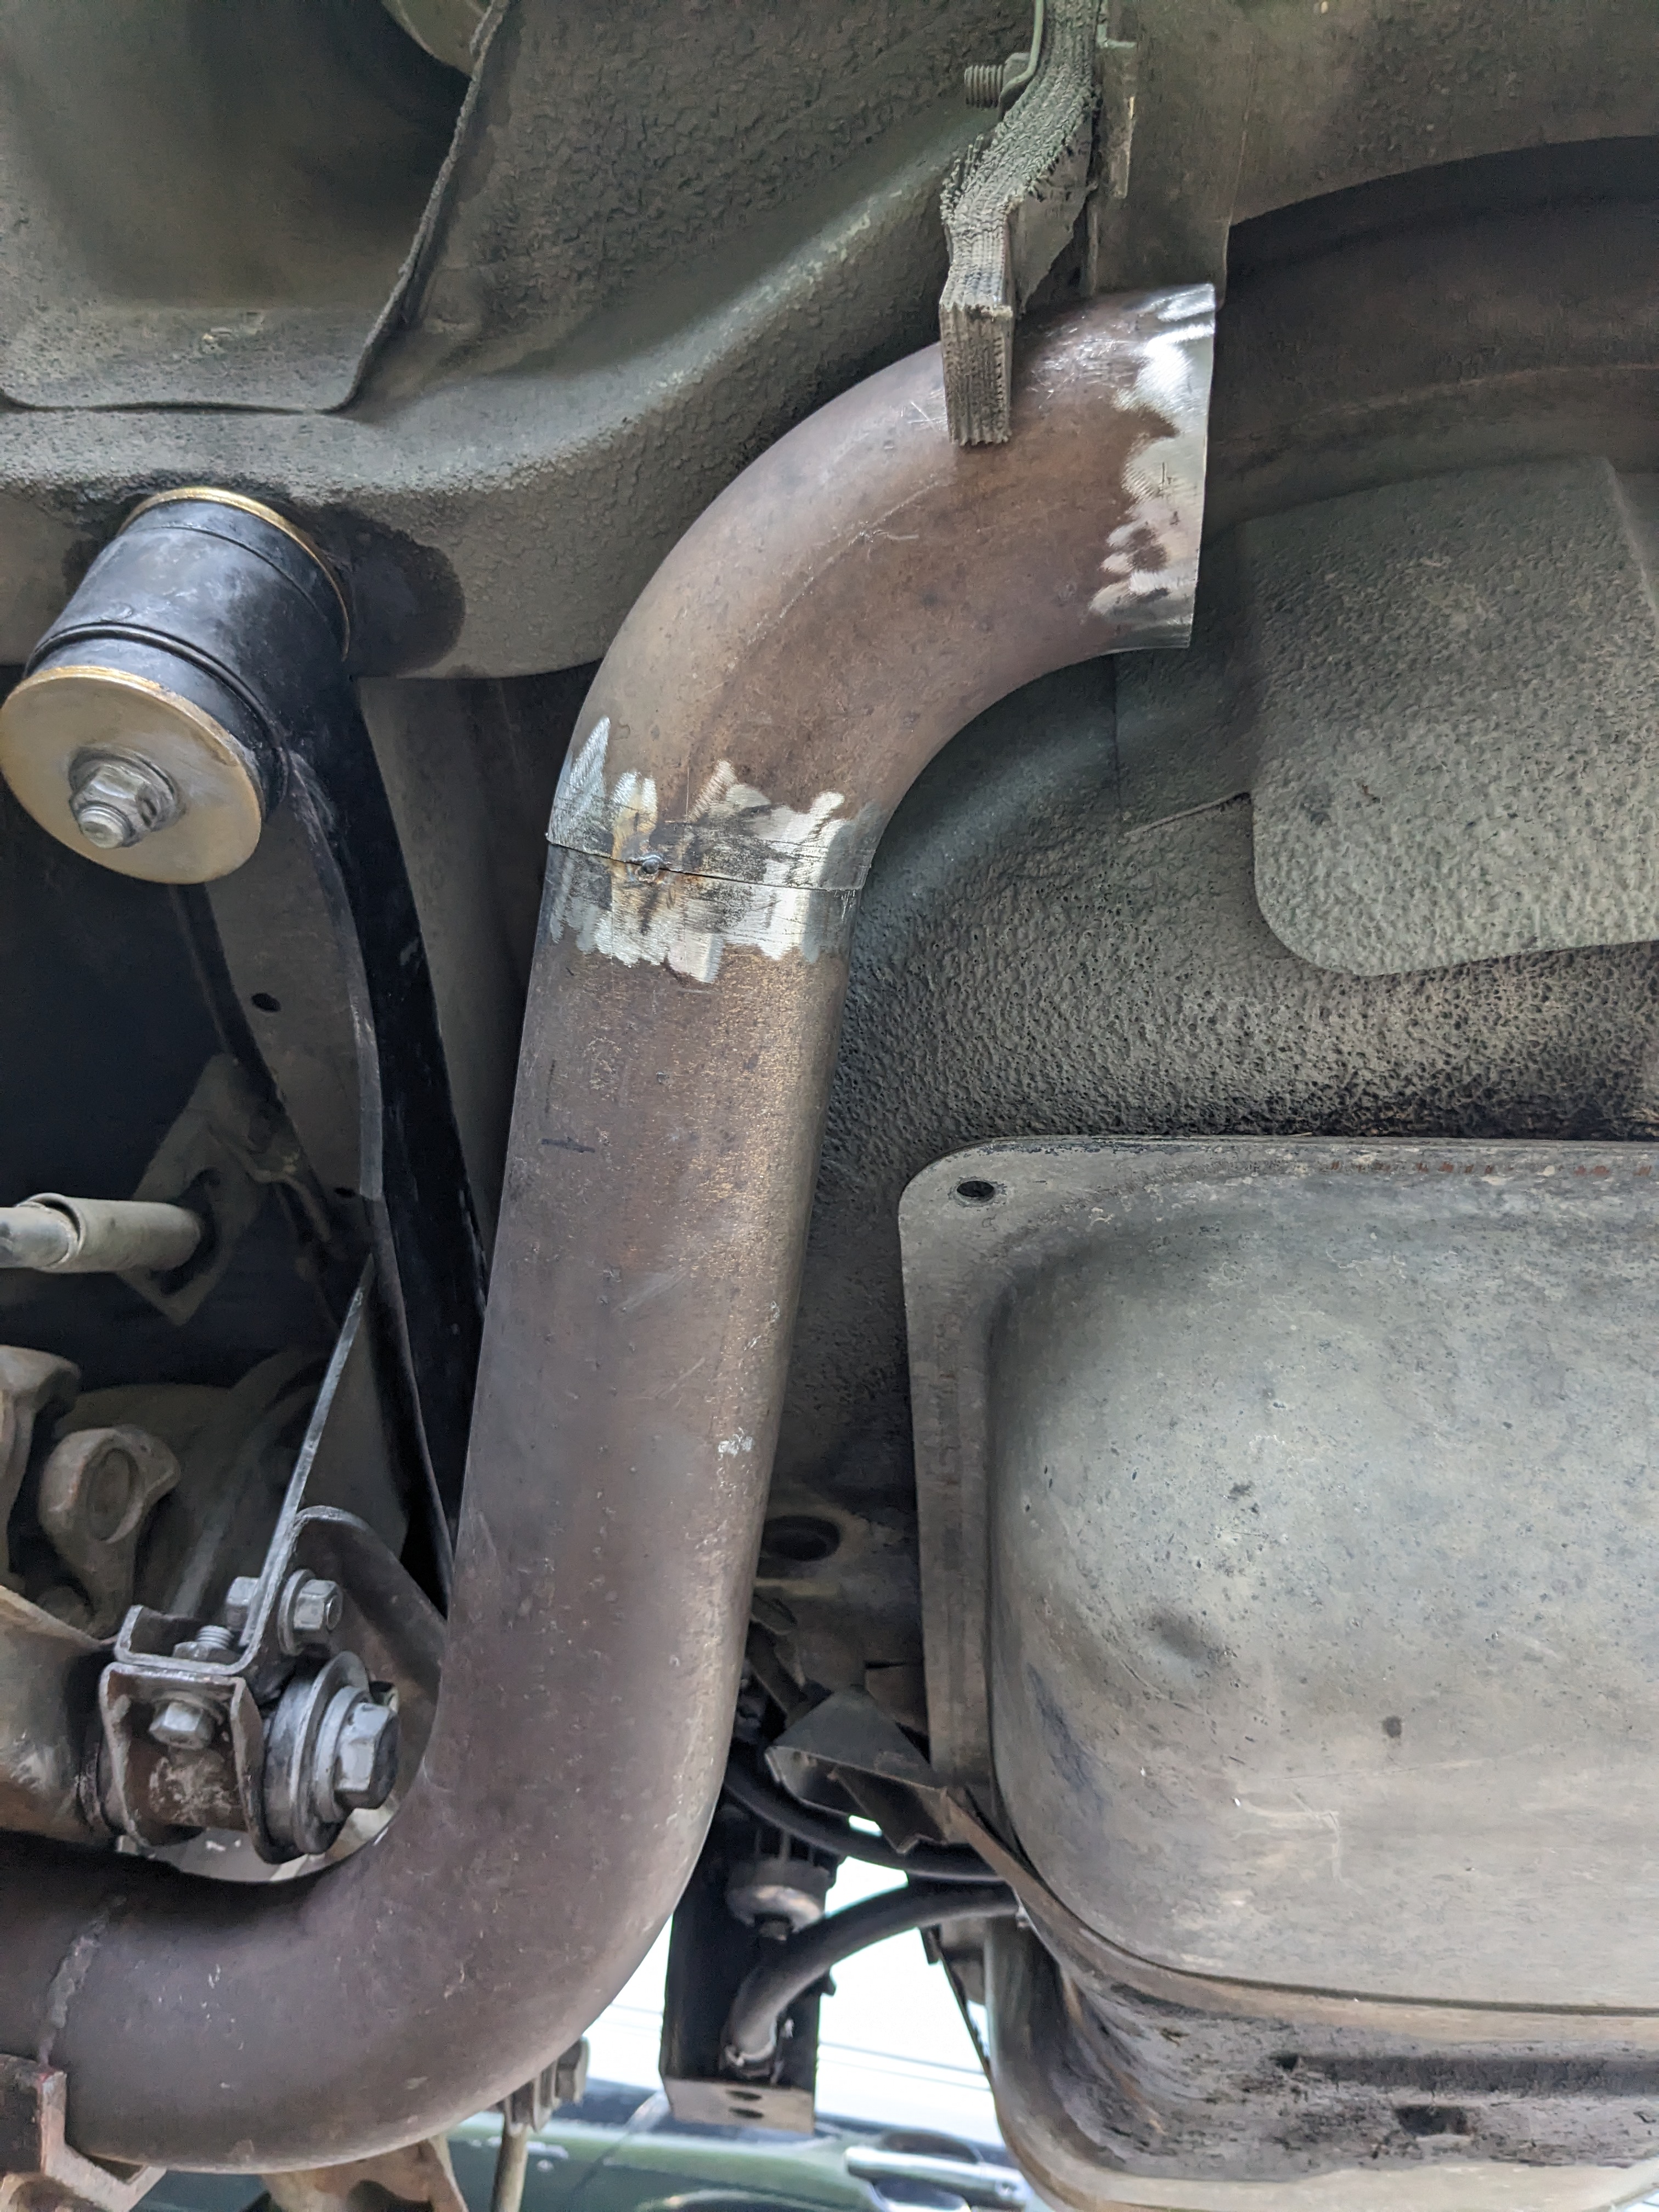
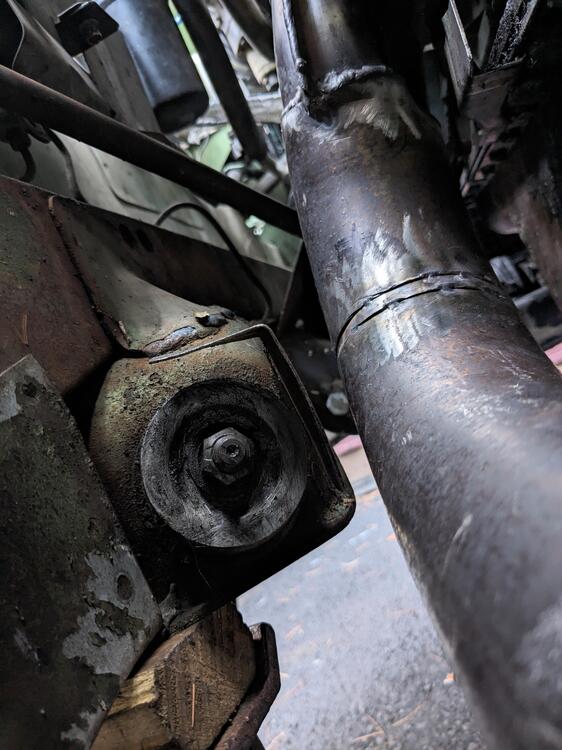
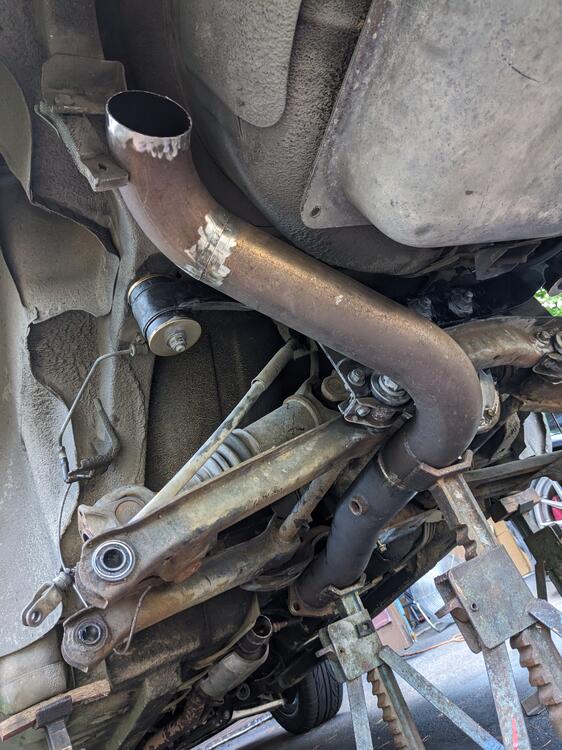
Made a bracket (from a Volvo dash support) to utilize the stock hanger point at the front end of the muffler reinforced to make sure it can't flex. The lip at the top tucks over the frame bracket muffler hanger attachment in place. Drilled an inboard hole in the stock welded bracket to positively locate the new bracket. With that figured out, I tack welded the hanger to the muffler Removed & finished the seam welds for the muffler inlet & tailpipe section. Just have to weld on the Redtail exhaust tip when it gets here.


-
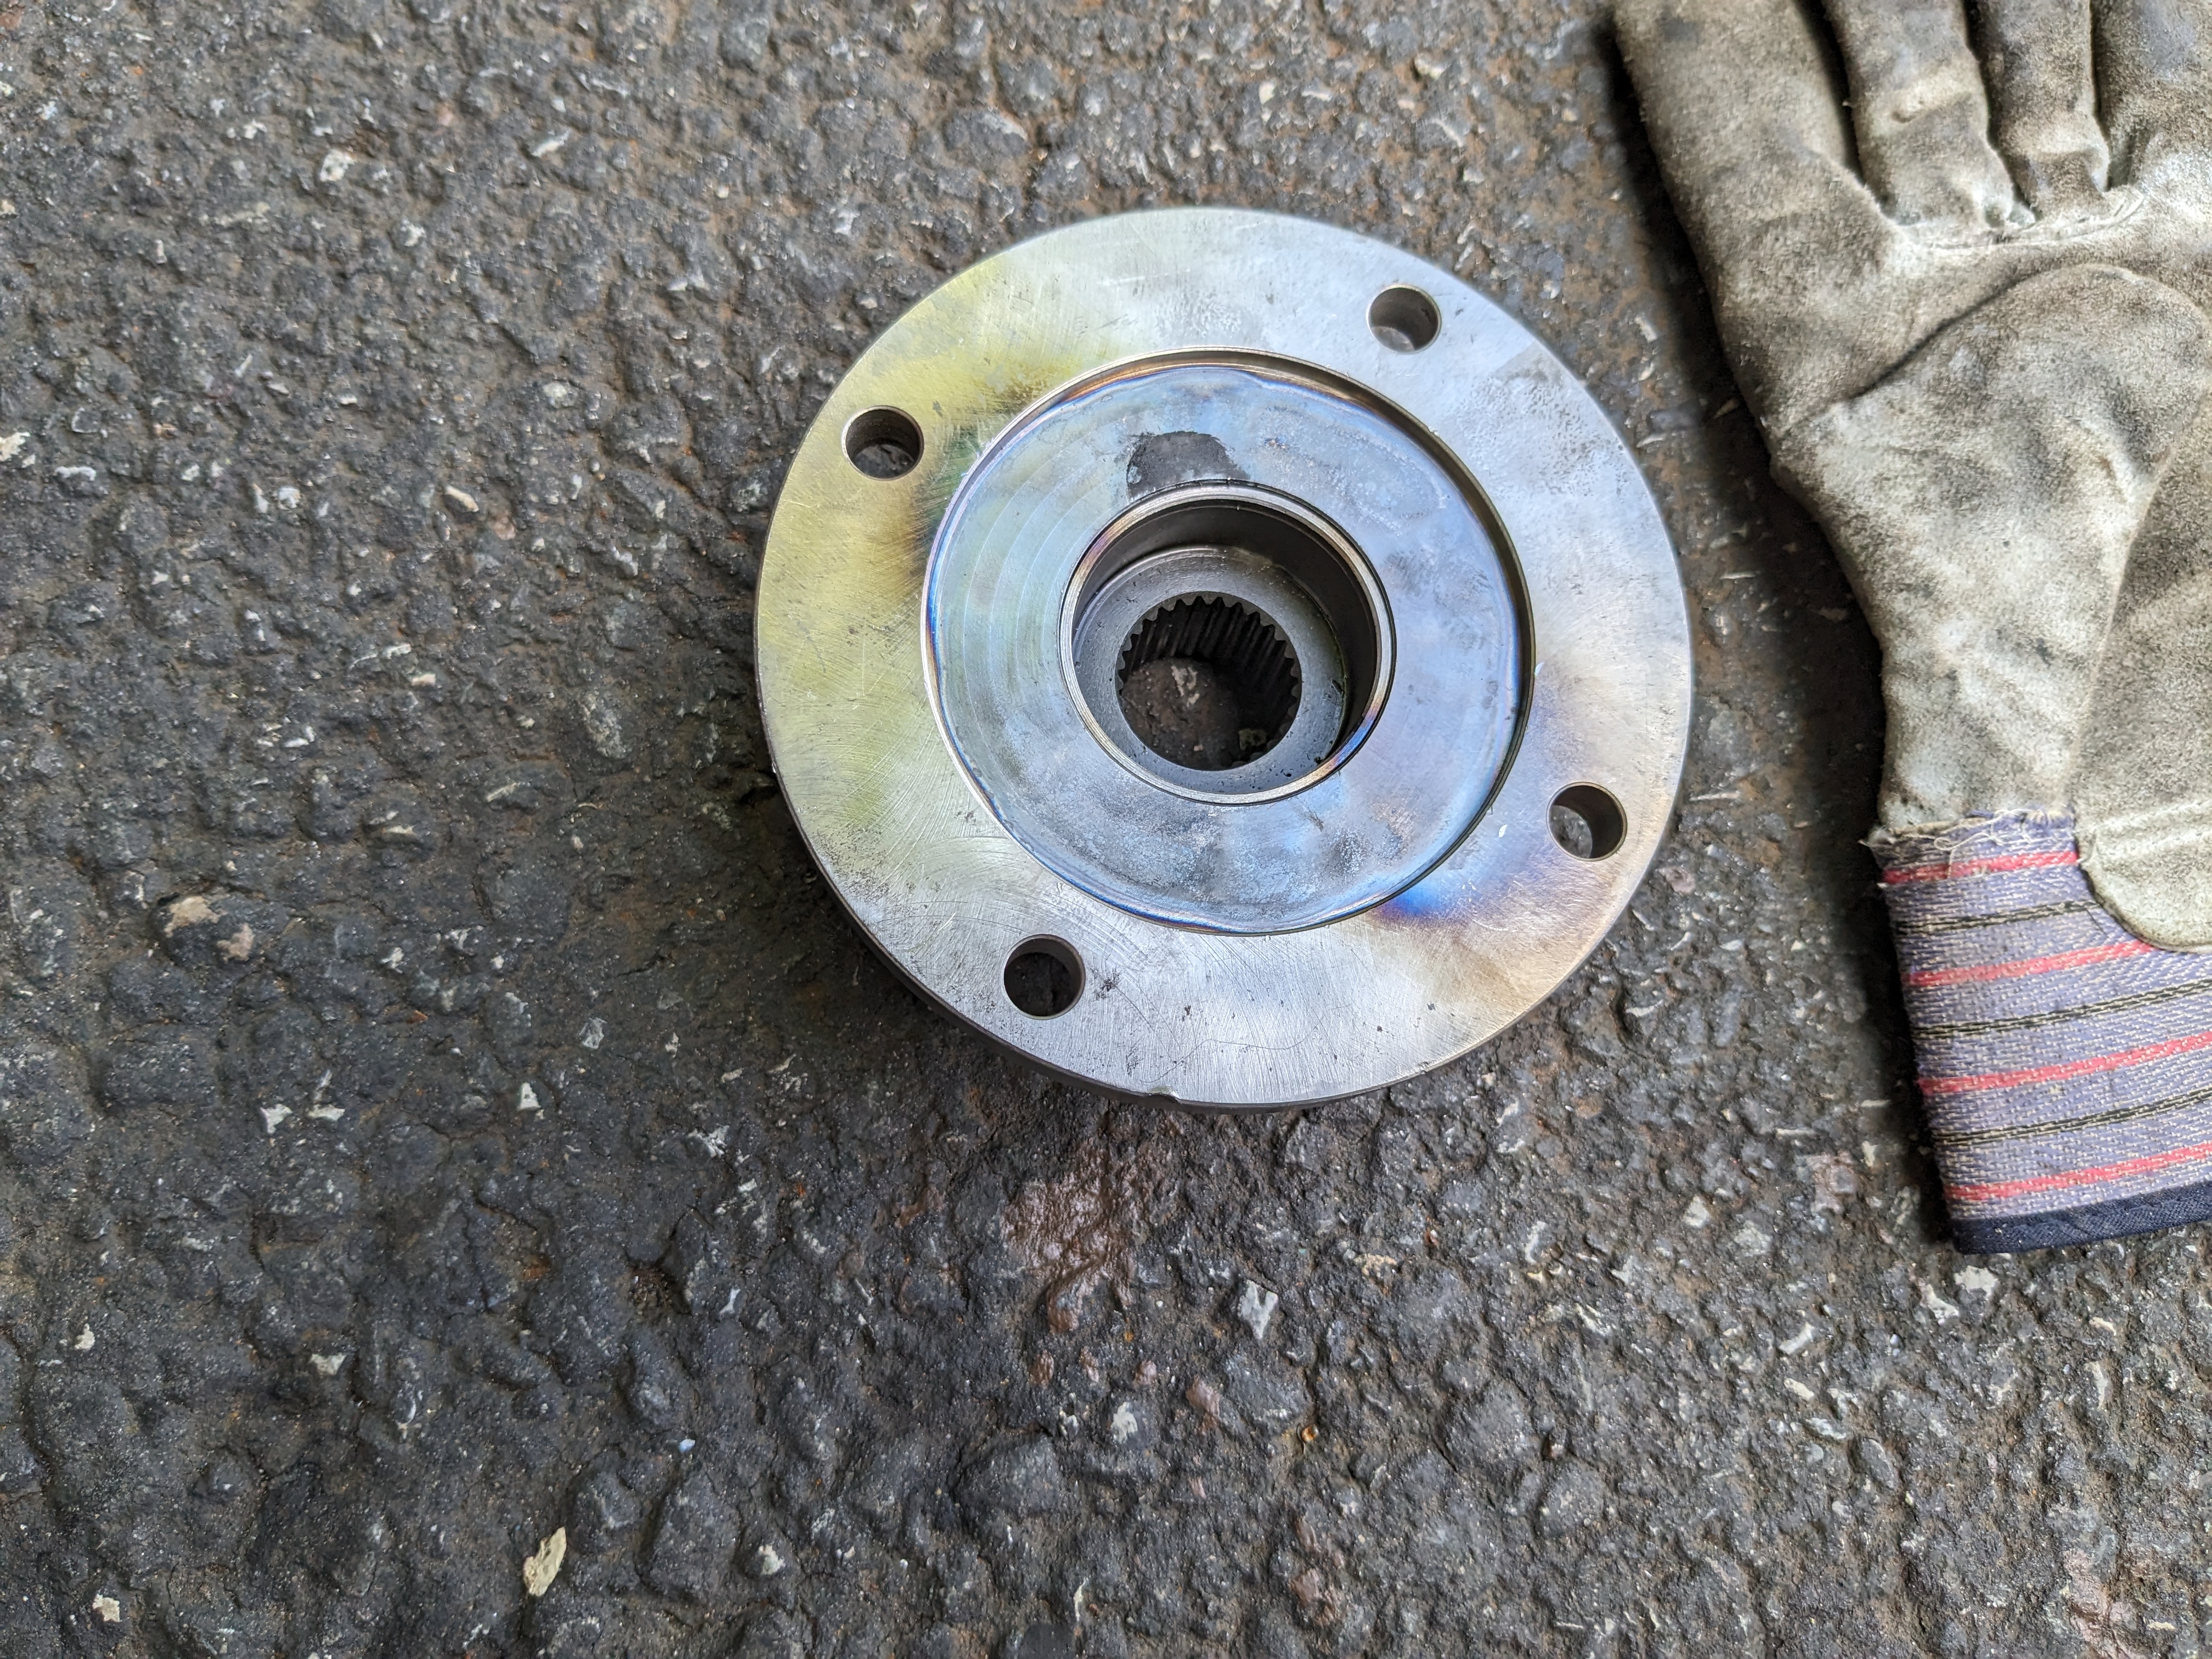
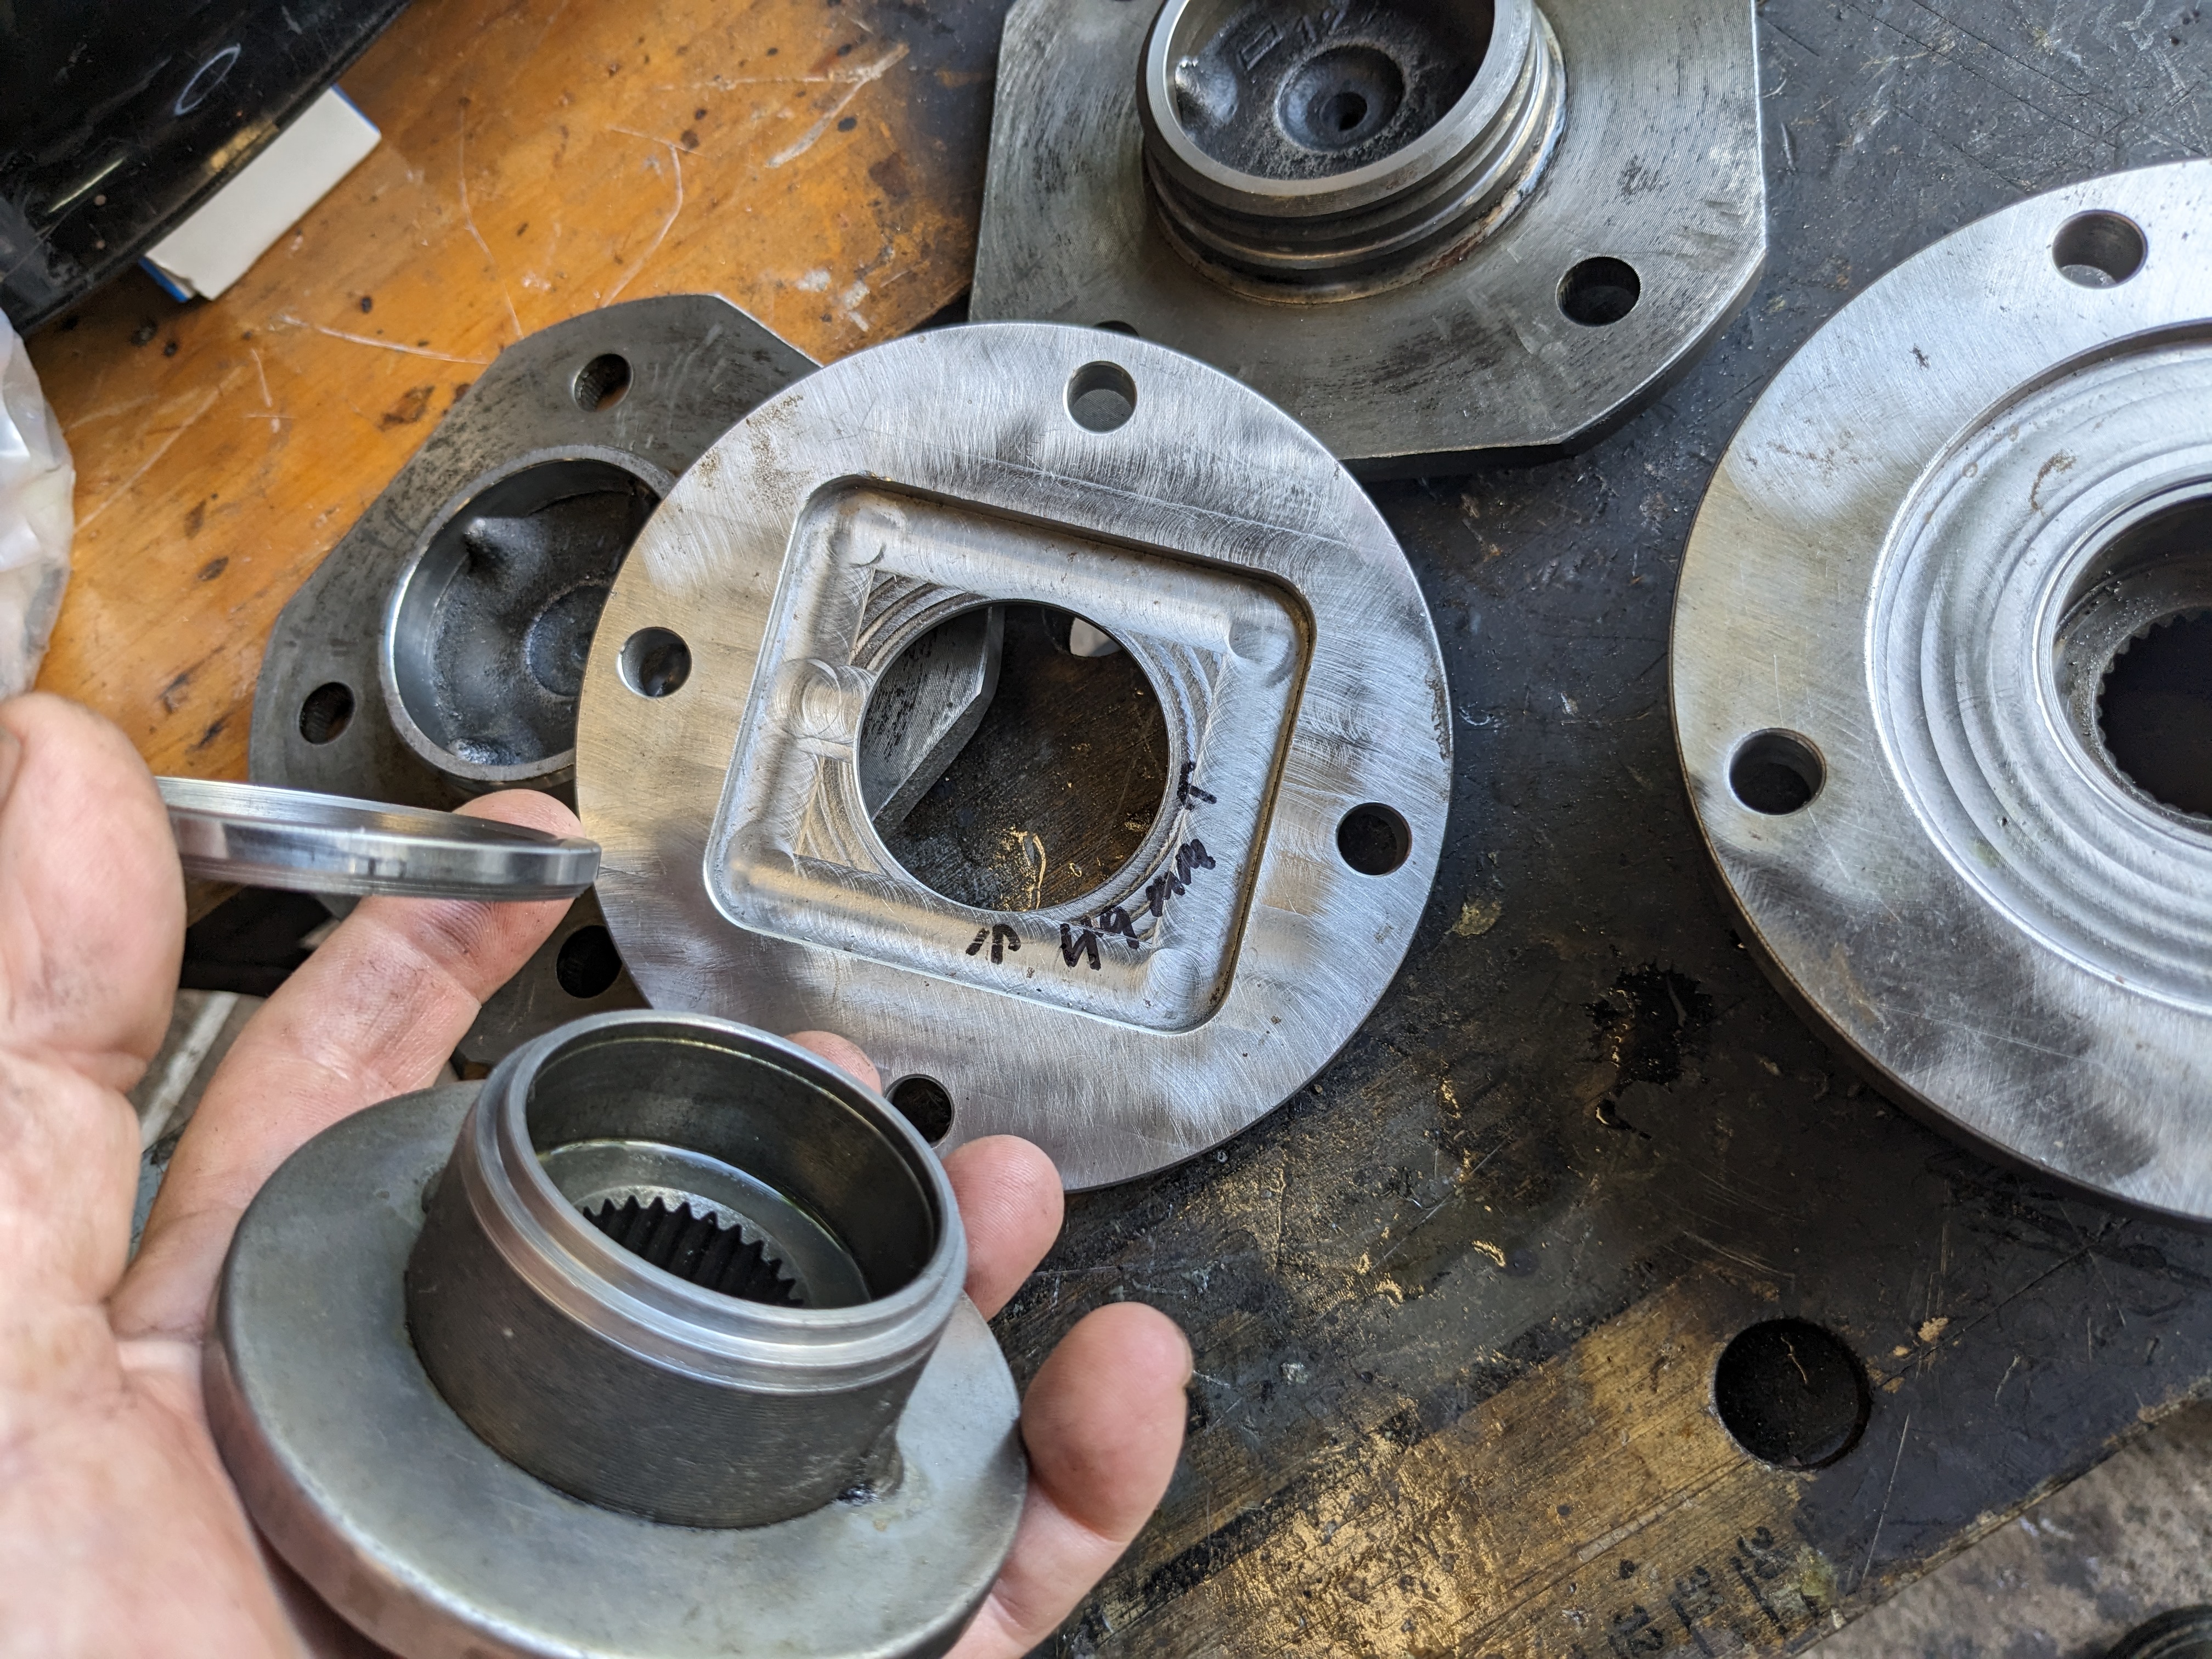
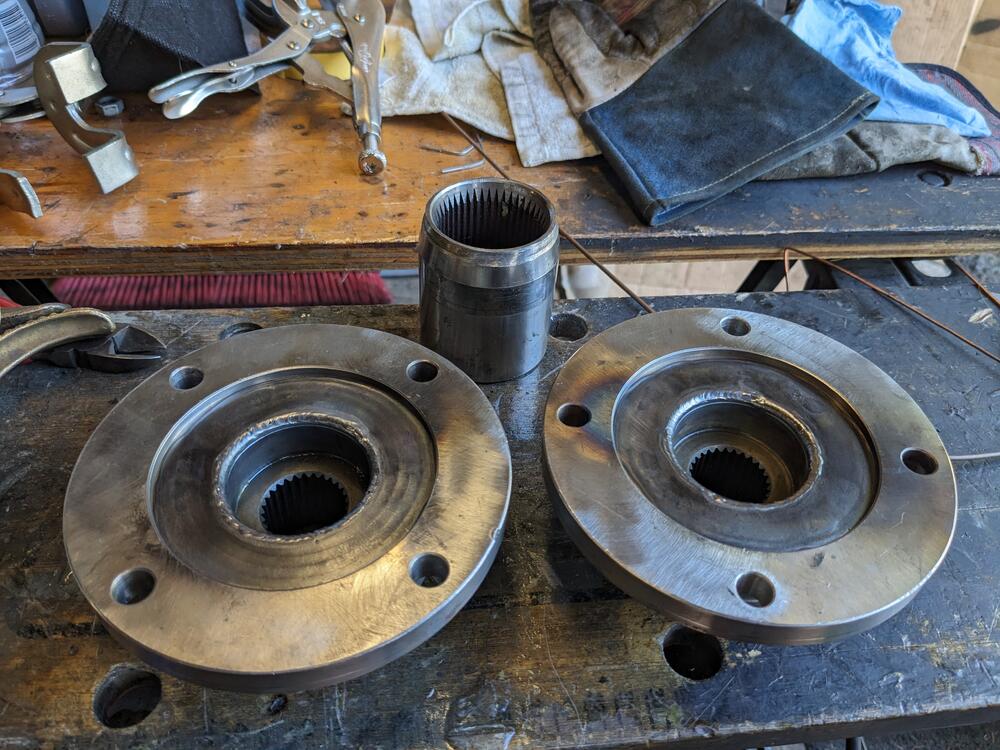
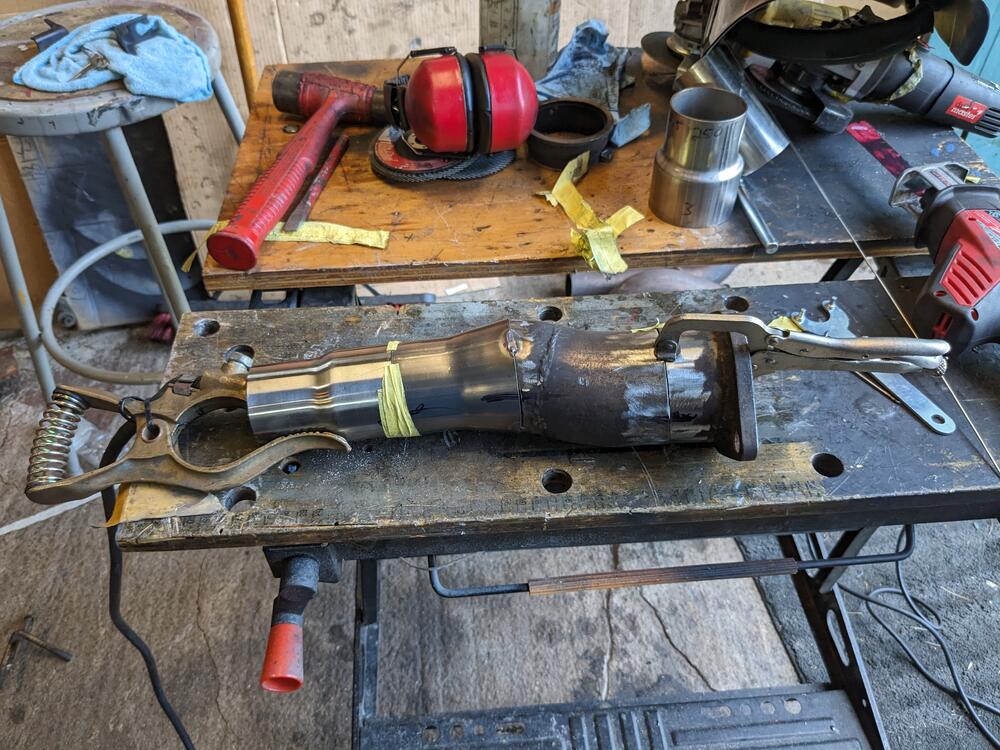
Got the stub axles & flanges back from the machine shop. Now I have to weld everything. Hubcentric flange for locating the wheel Inner flanges modded to accept the Silvermine flanges (also modified to be centric). Collar is to increase the weld surface area Will be like this. Total depth to inner surface is 29mm, same as stock. 4mm inset for CV cap, which I will remove if the stub axle depth becomes an issue
-
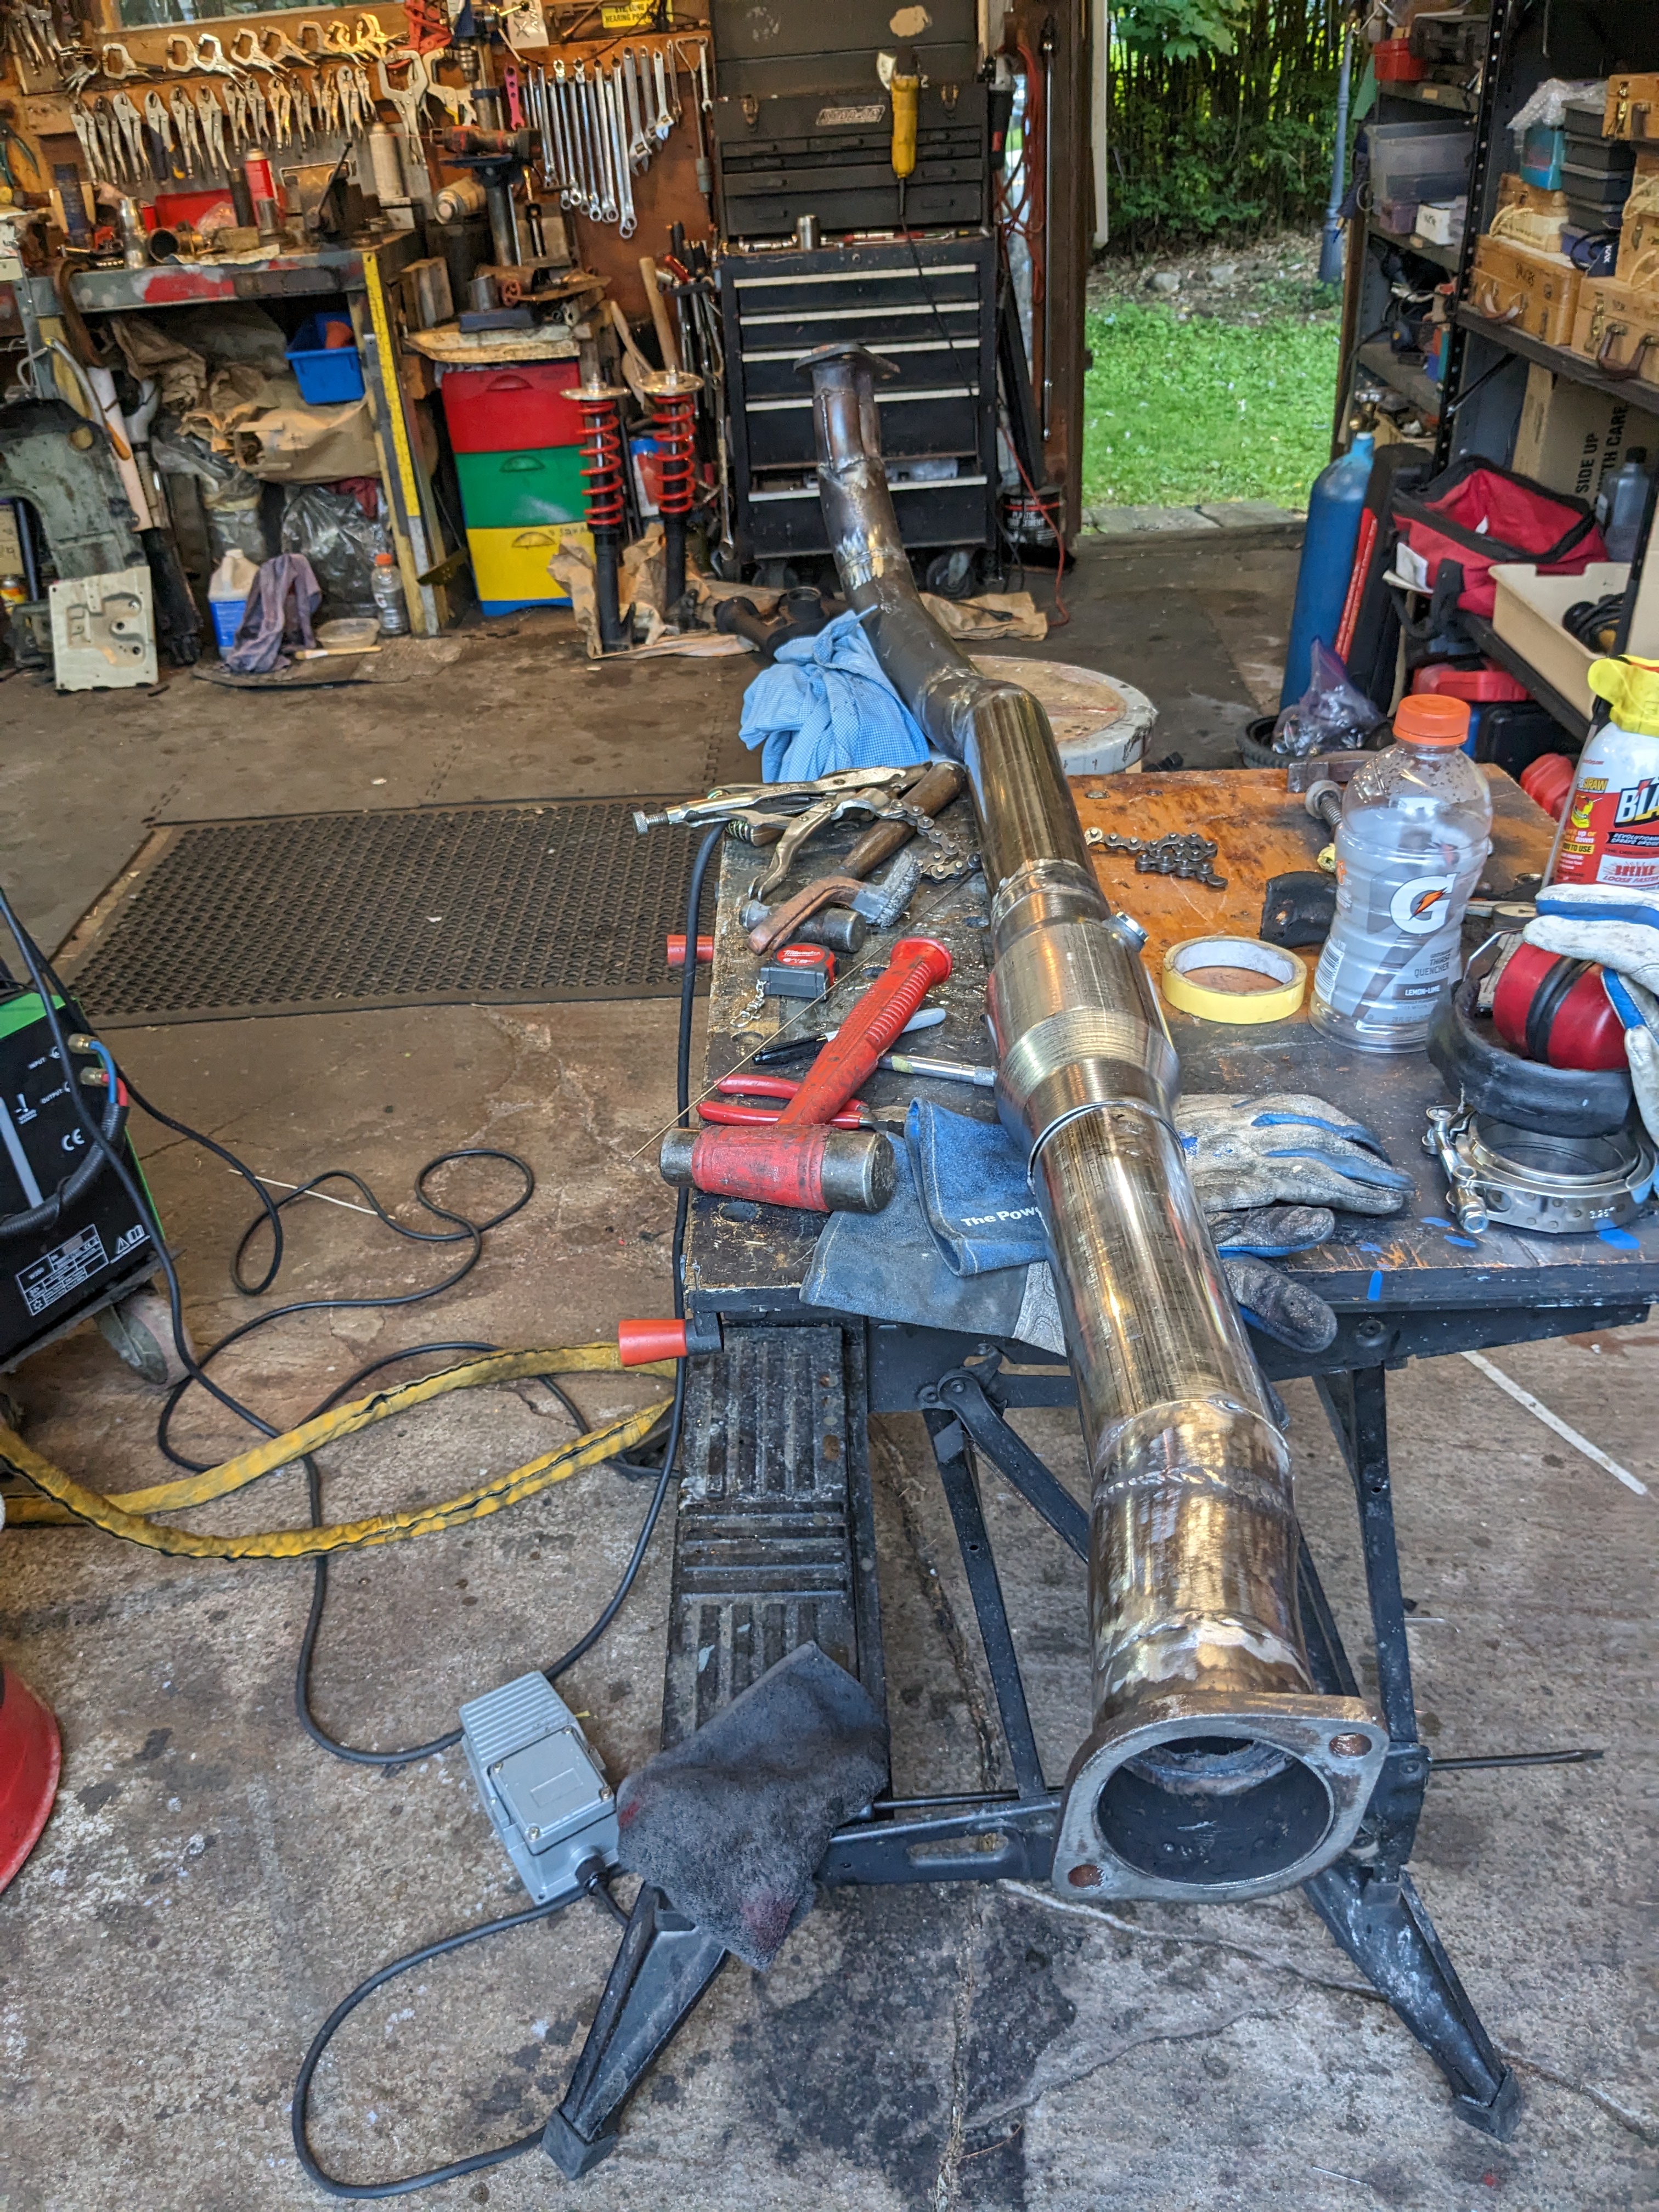
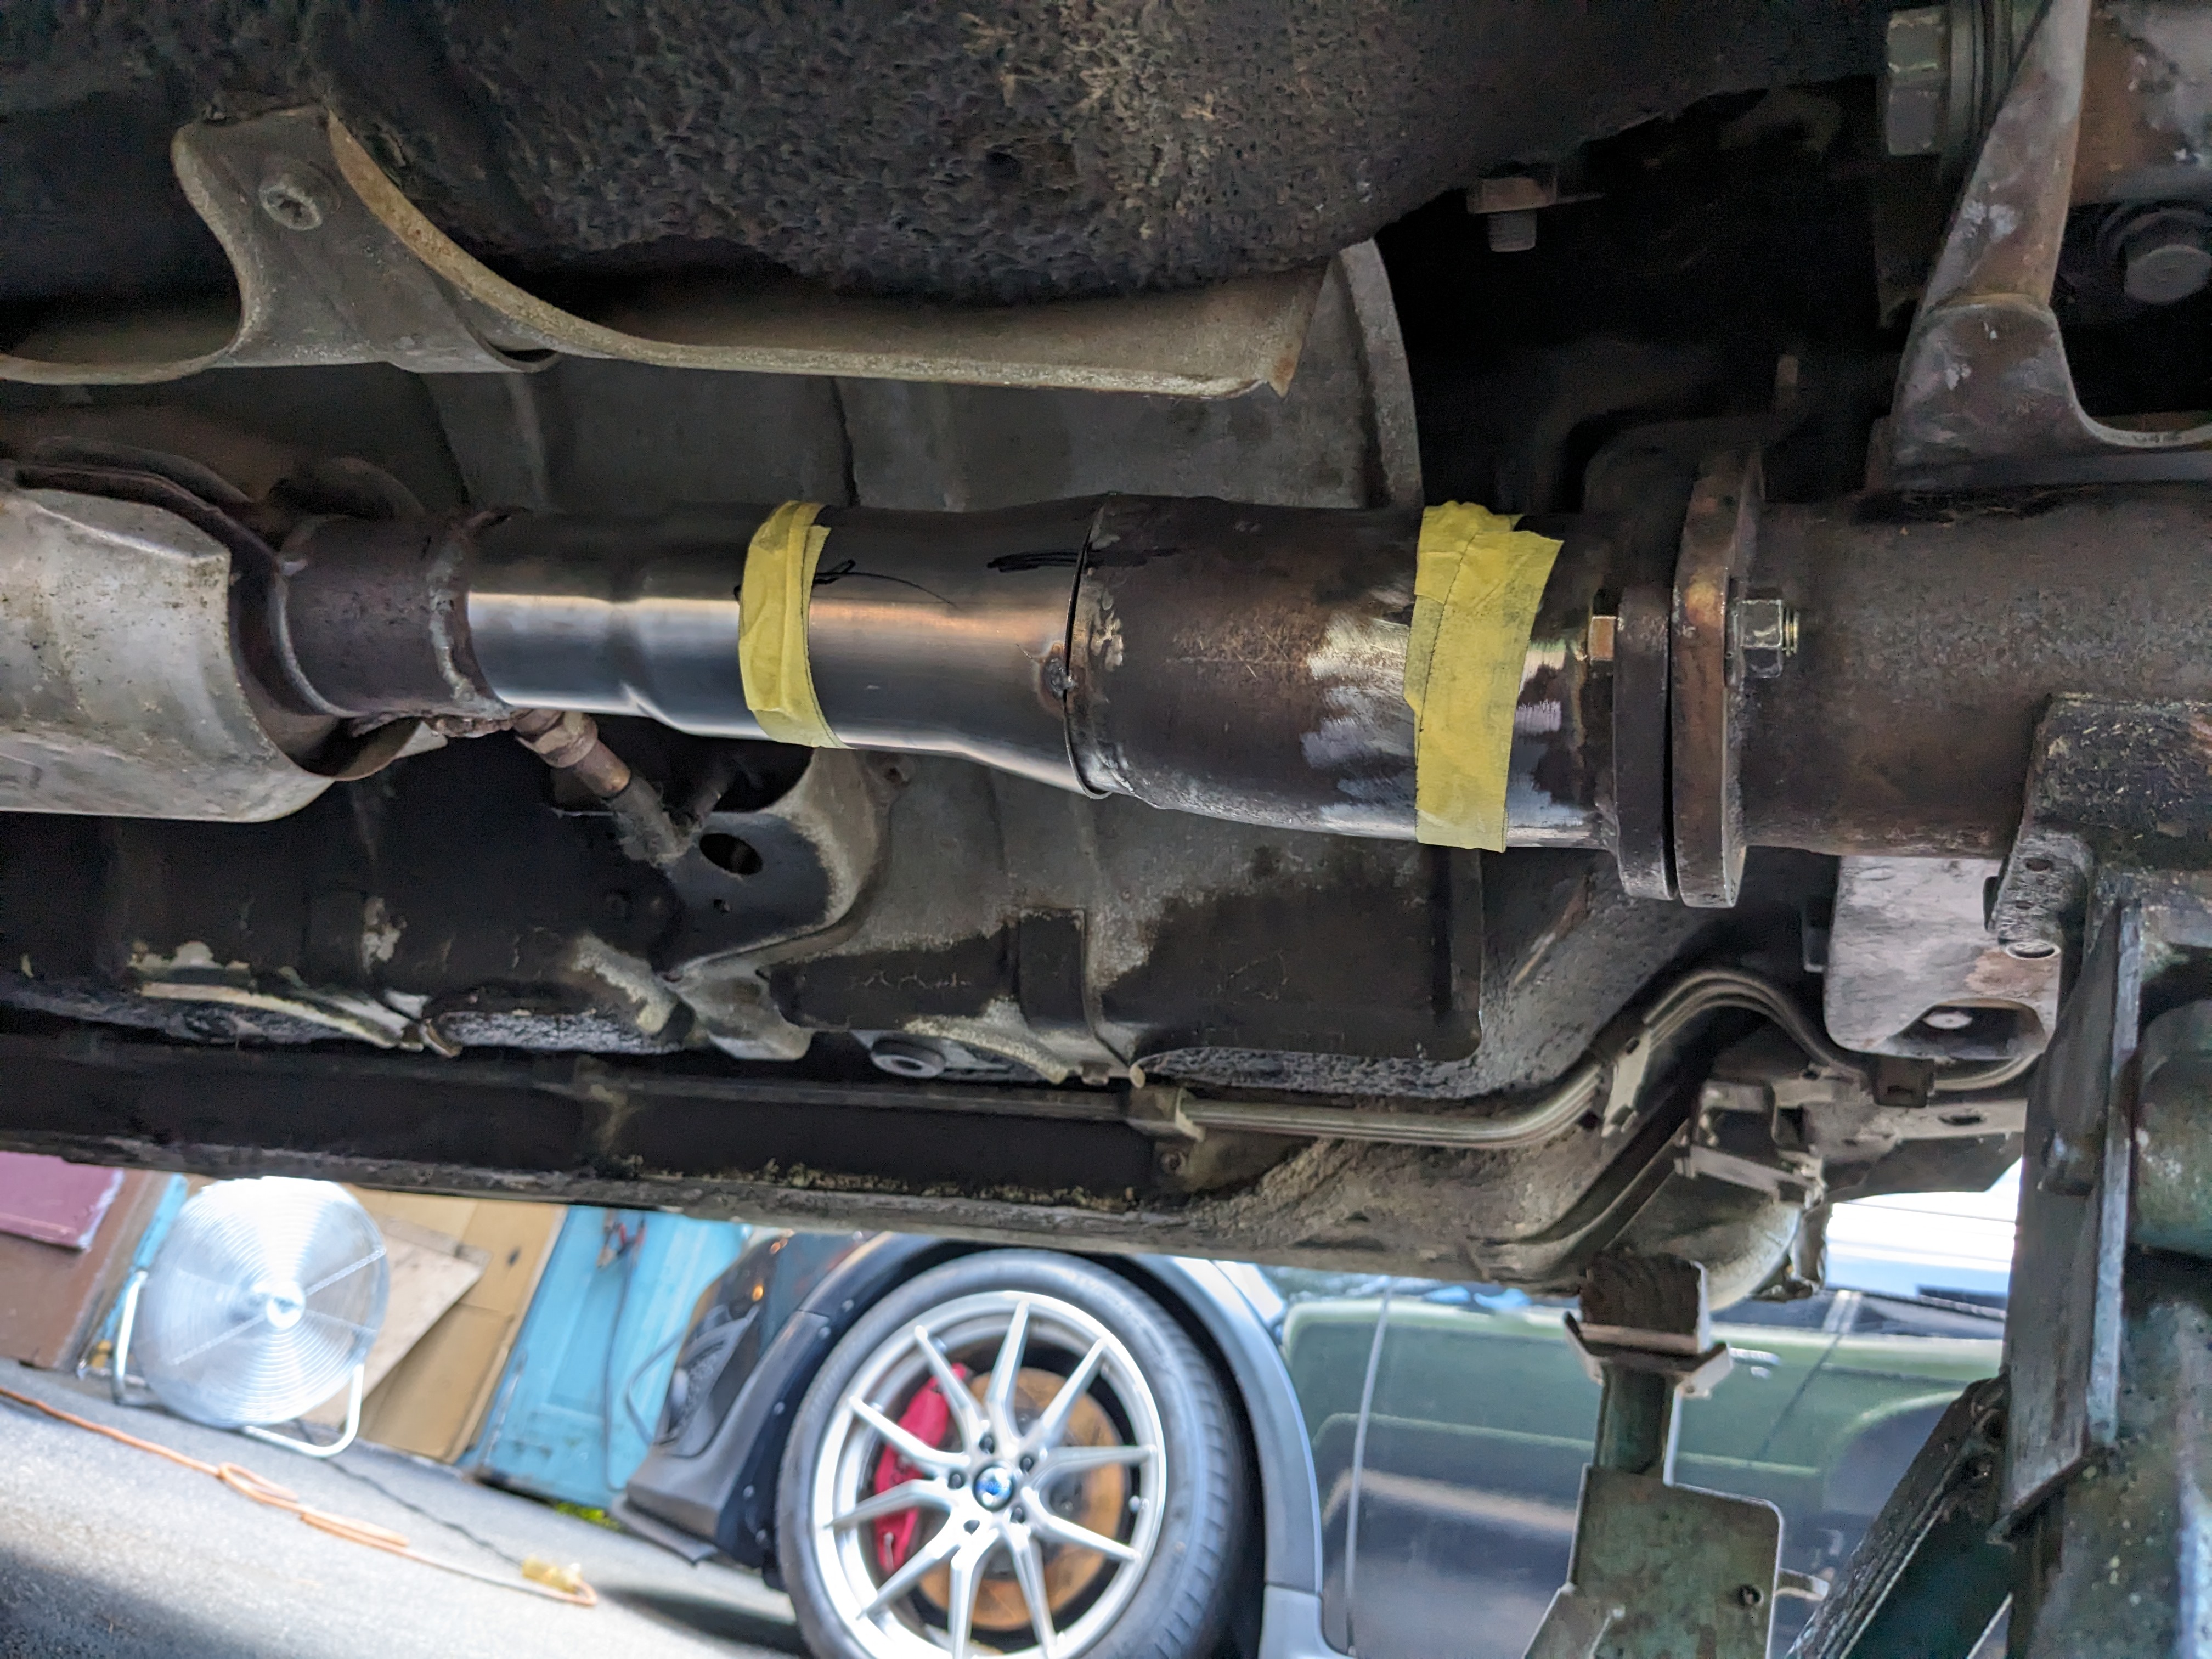
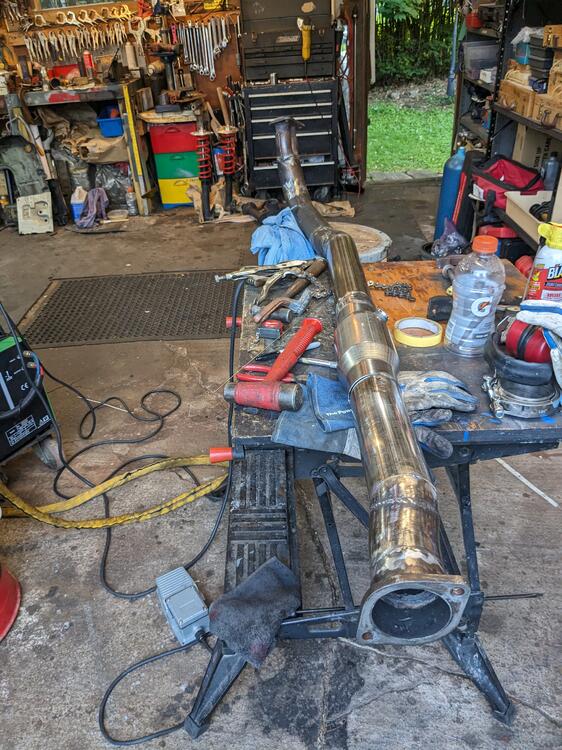
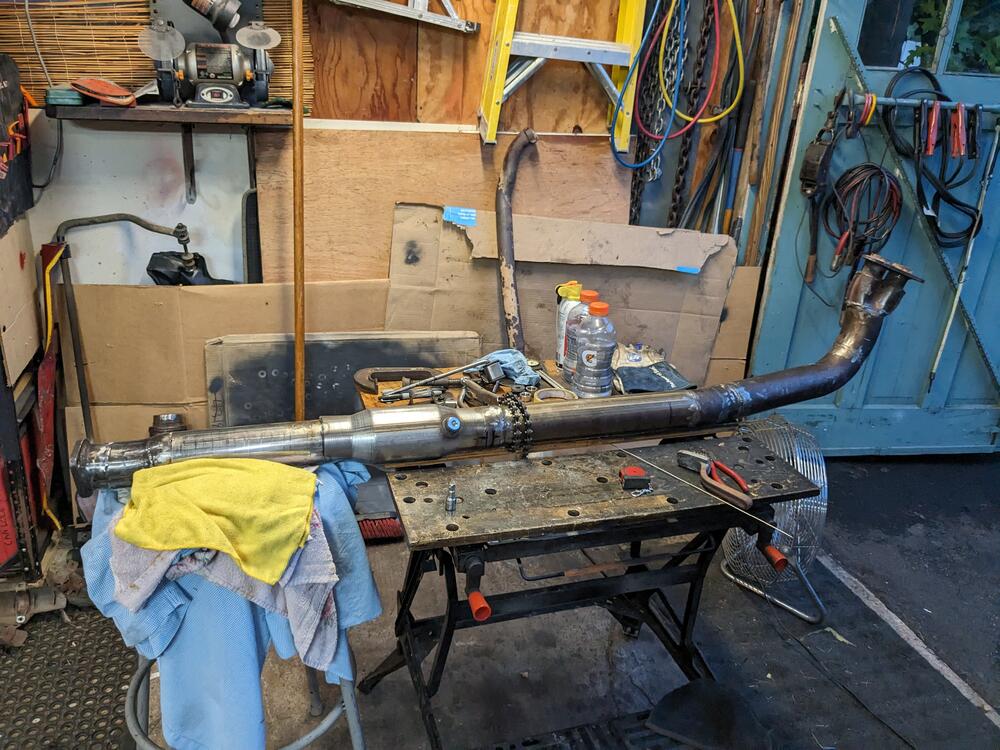
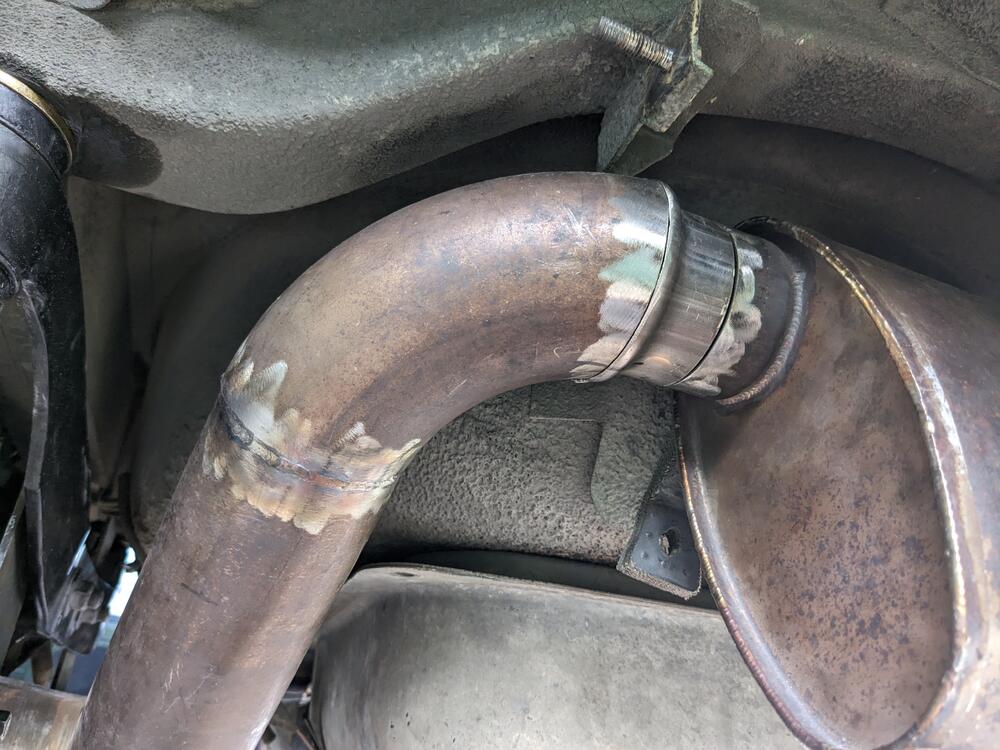
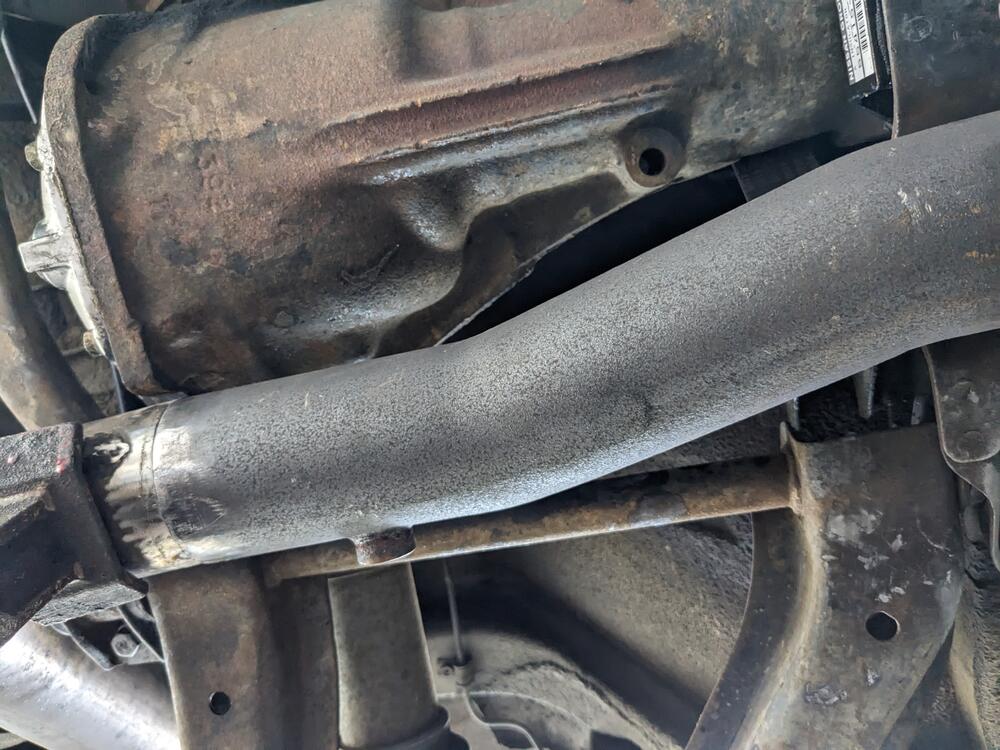
TIG for this - it's all stainless. I could use my MIG I suppose, but I don't have stainless wire for it. TIG is cleaner for pipe anyway. Where I had good butt-joins, the welds are clean (enough, I'm not a professional). Where there was discrepancy/offset, so so much. More work on the exhaust today. Got all the tacked seams welded, and figured out the muffler placement cut down the 3"-2.5" step for the available spacing have to figure out the hanger here, have to make sure it pulls it slightly away from the spare well like this maybe or here, to push it away from the spare well. There is a hole in each corner of the gas tank, I could use this one, and add a smaller outward placed one to locate the strap from potential rotation maybe one set here


-
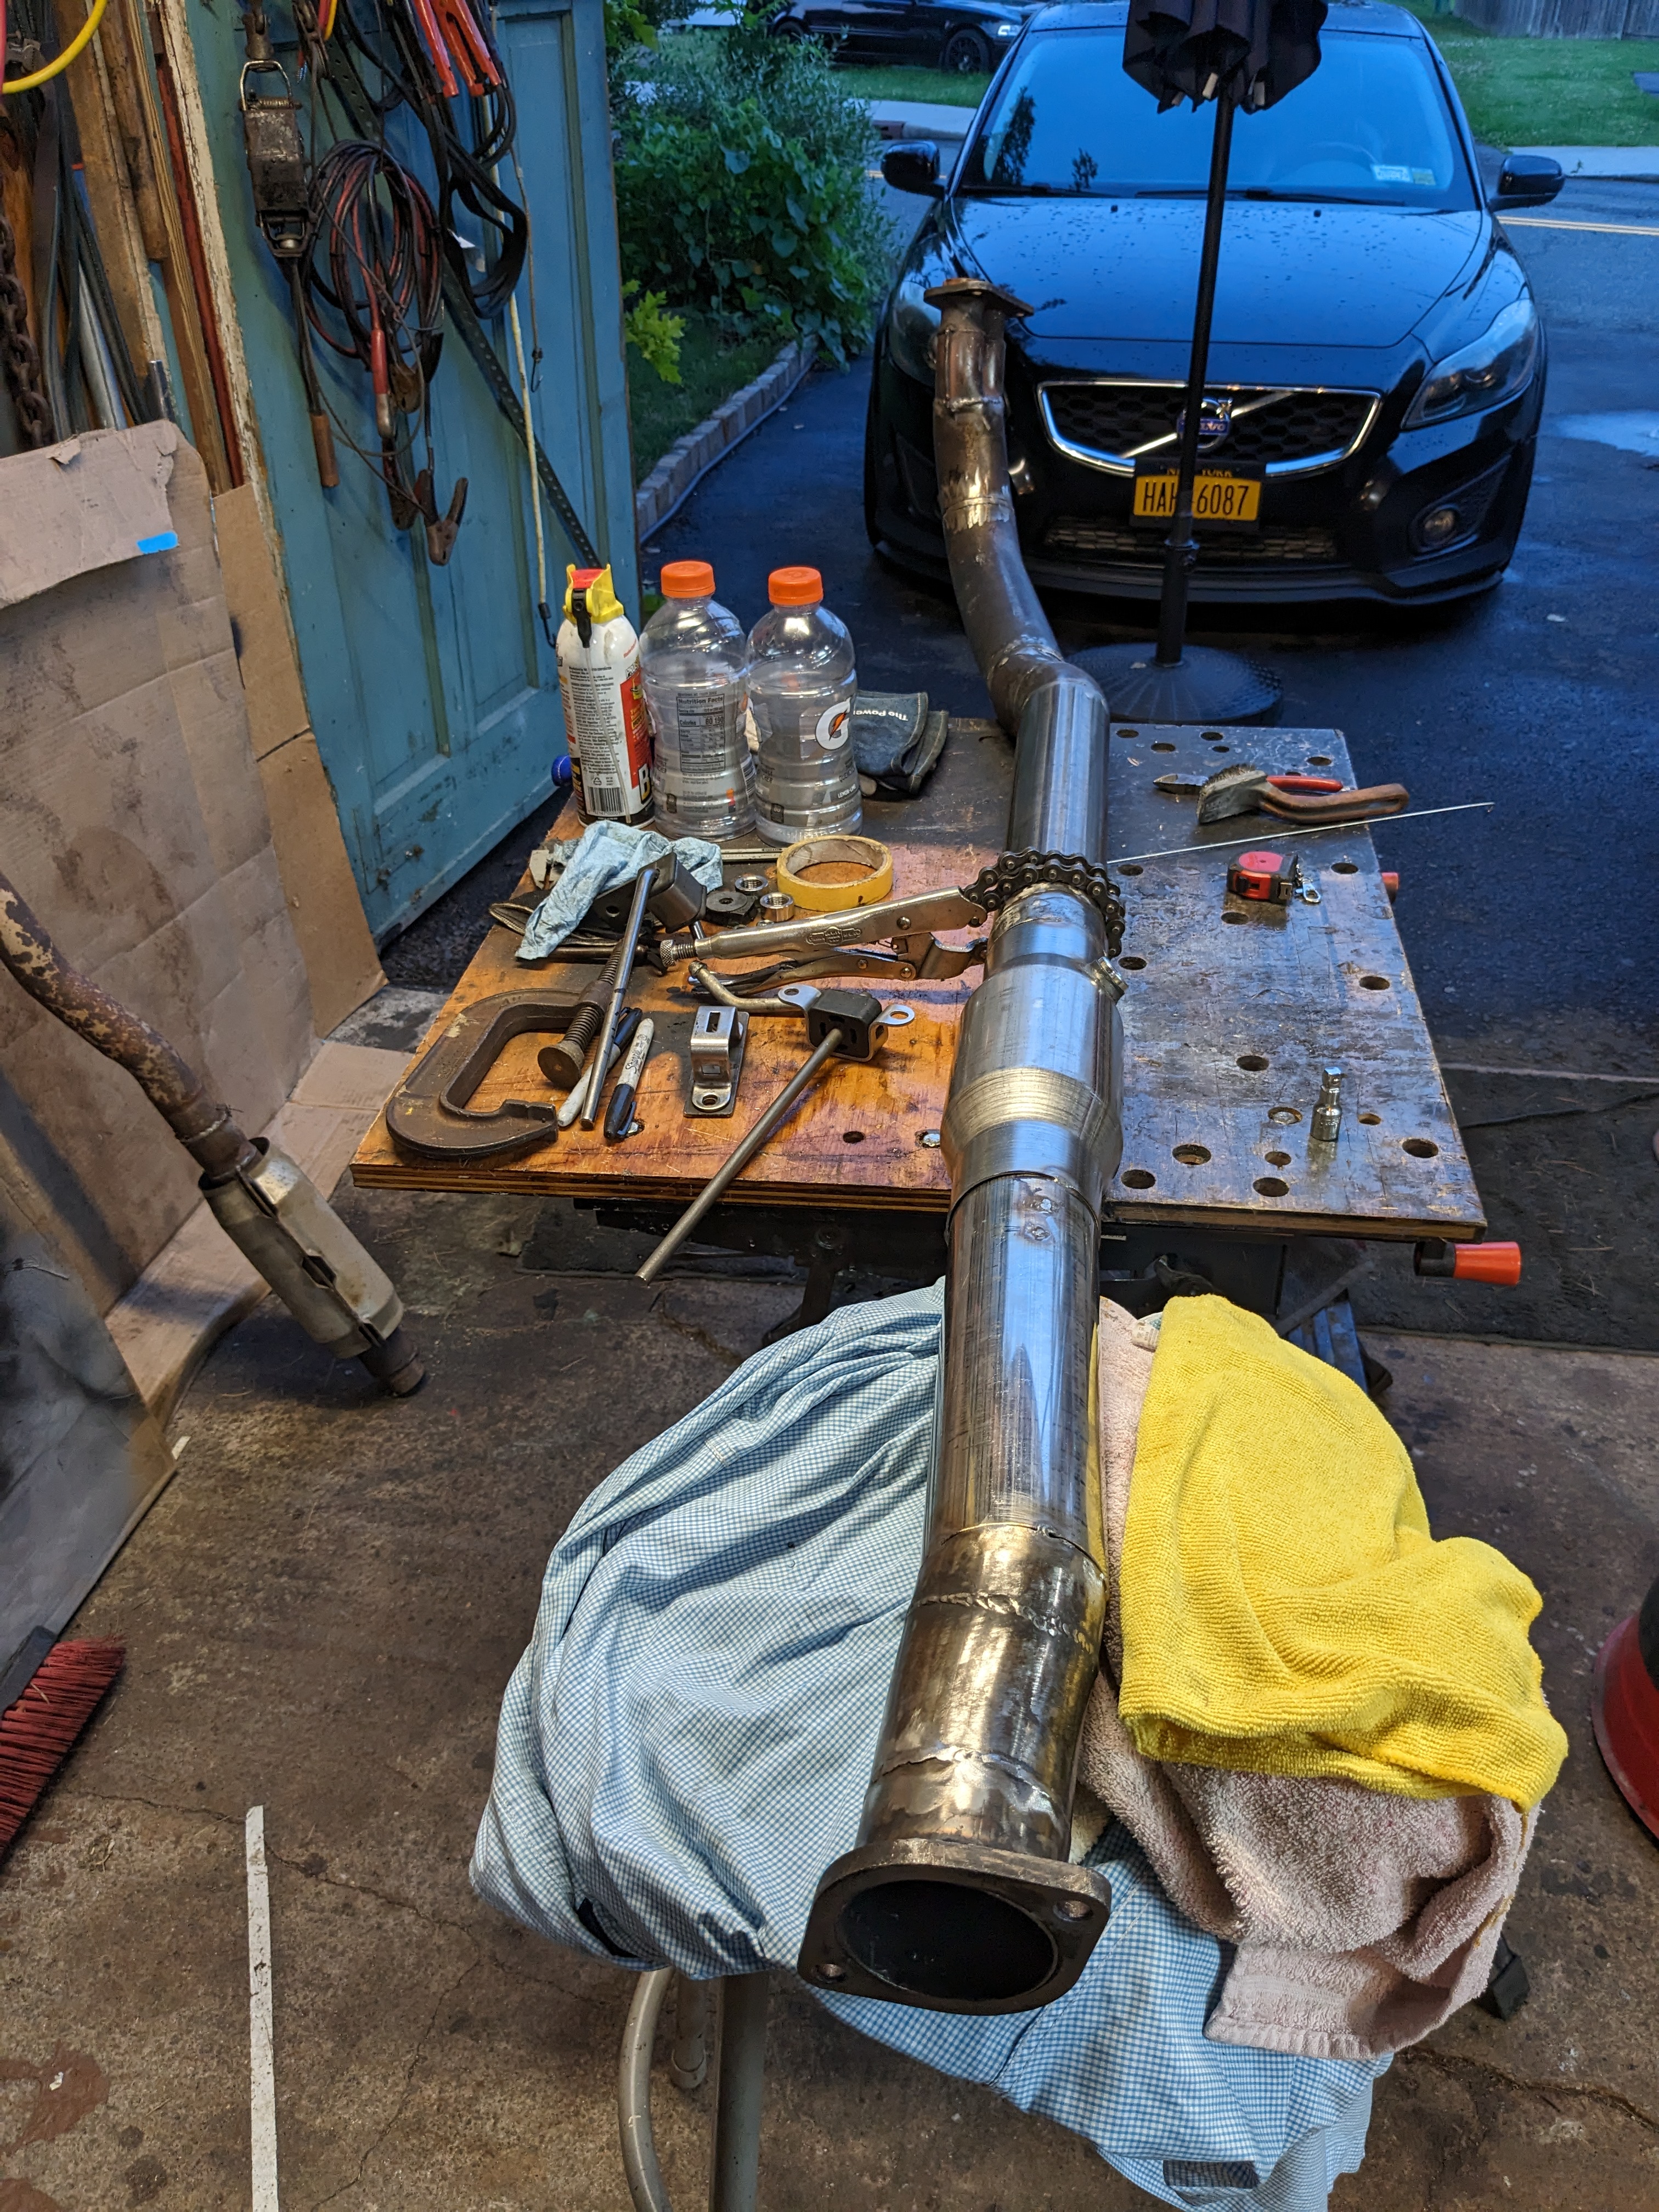
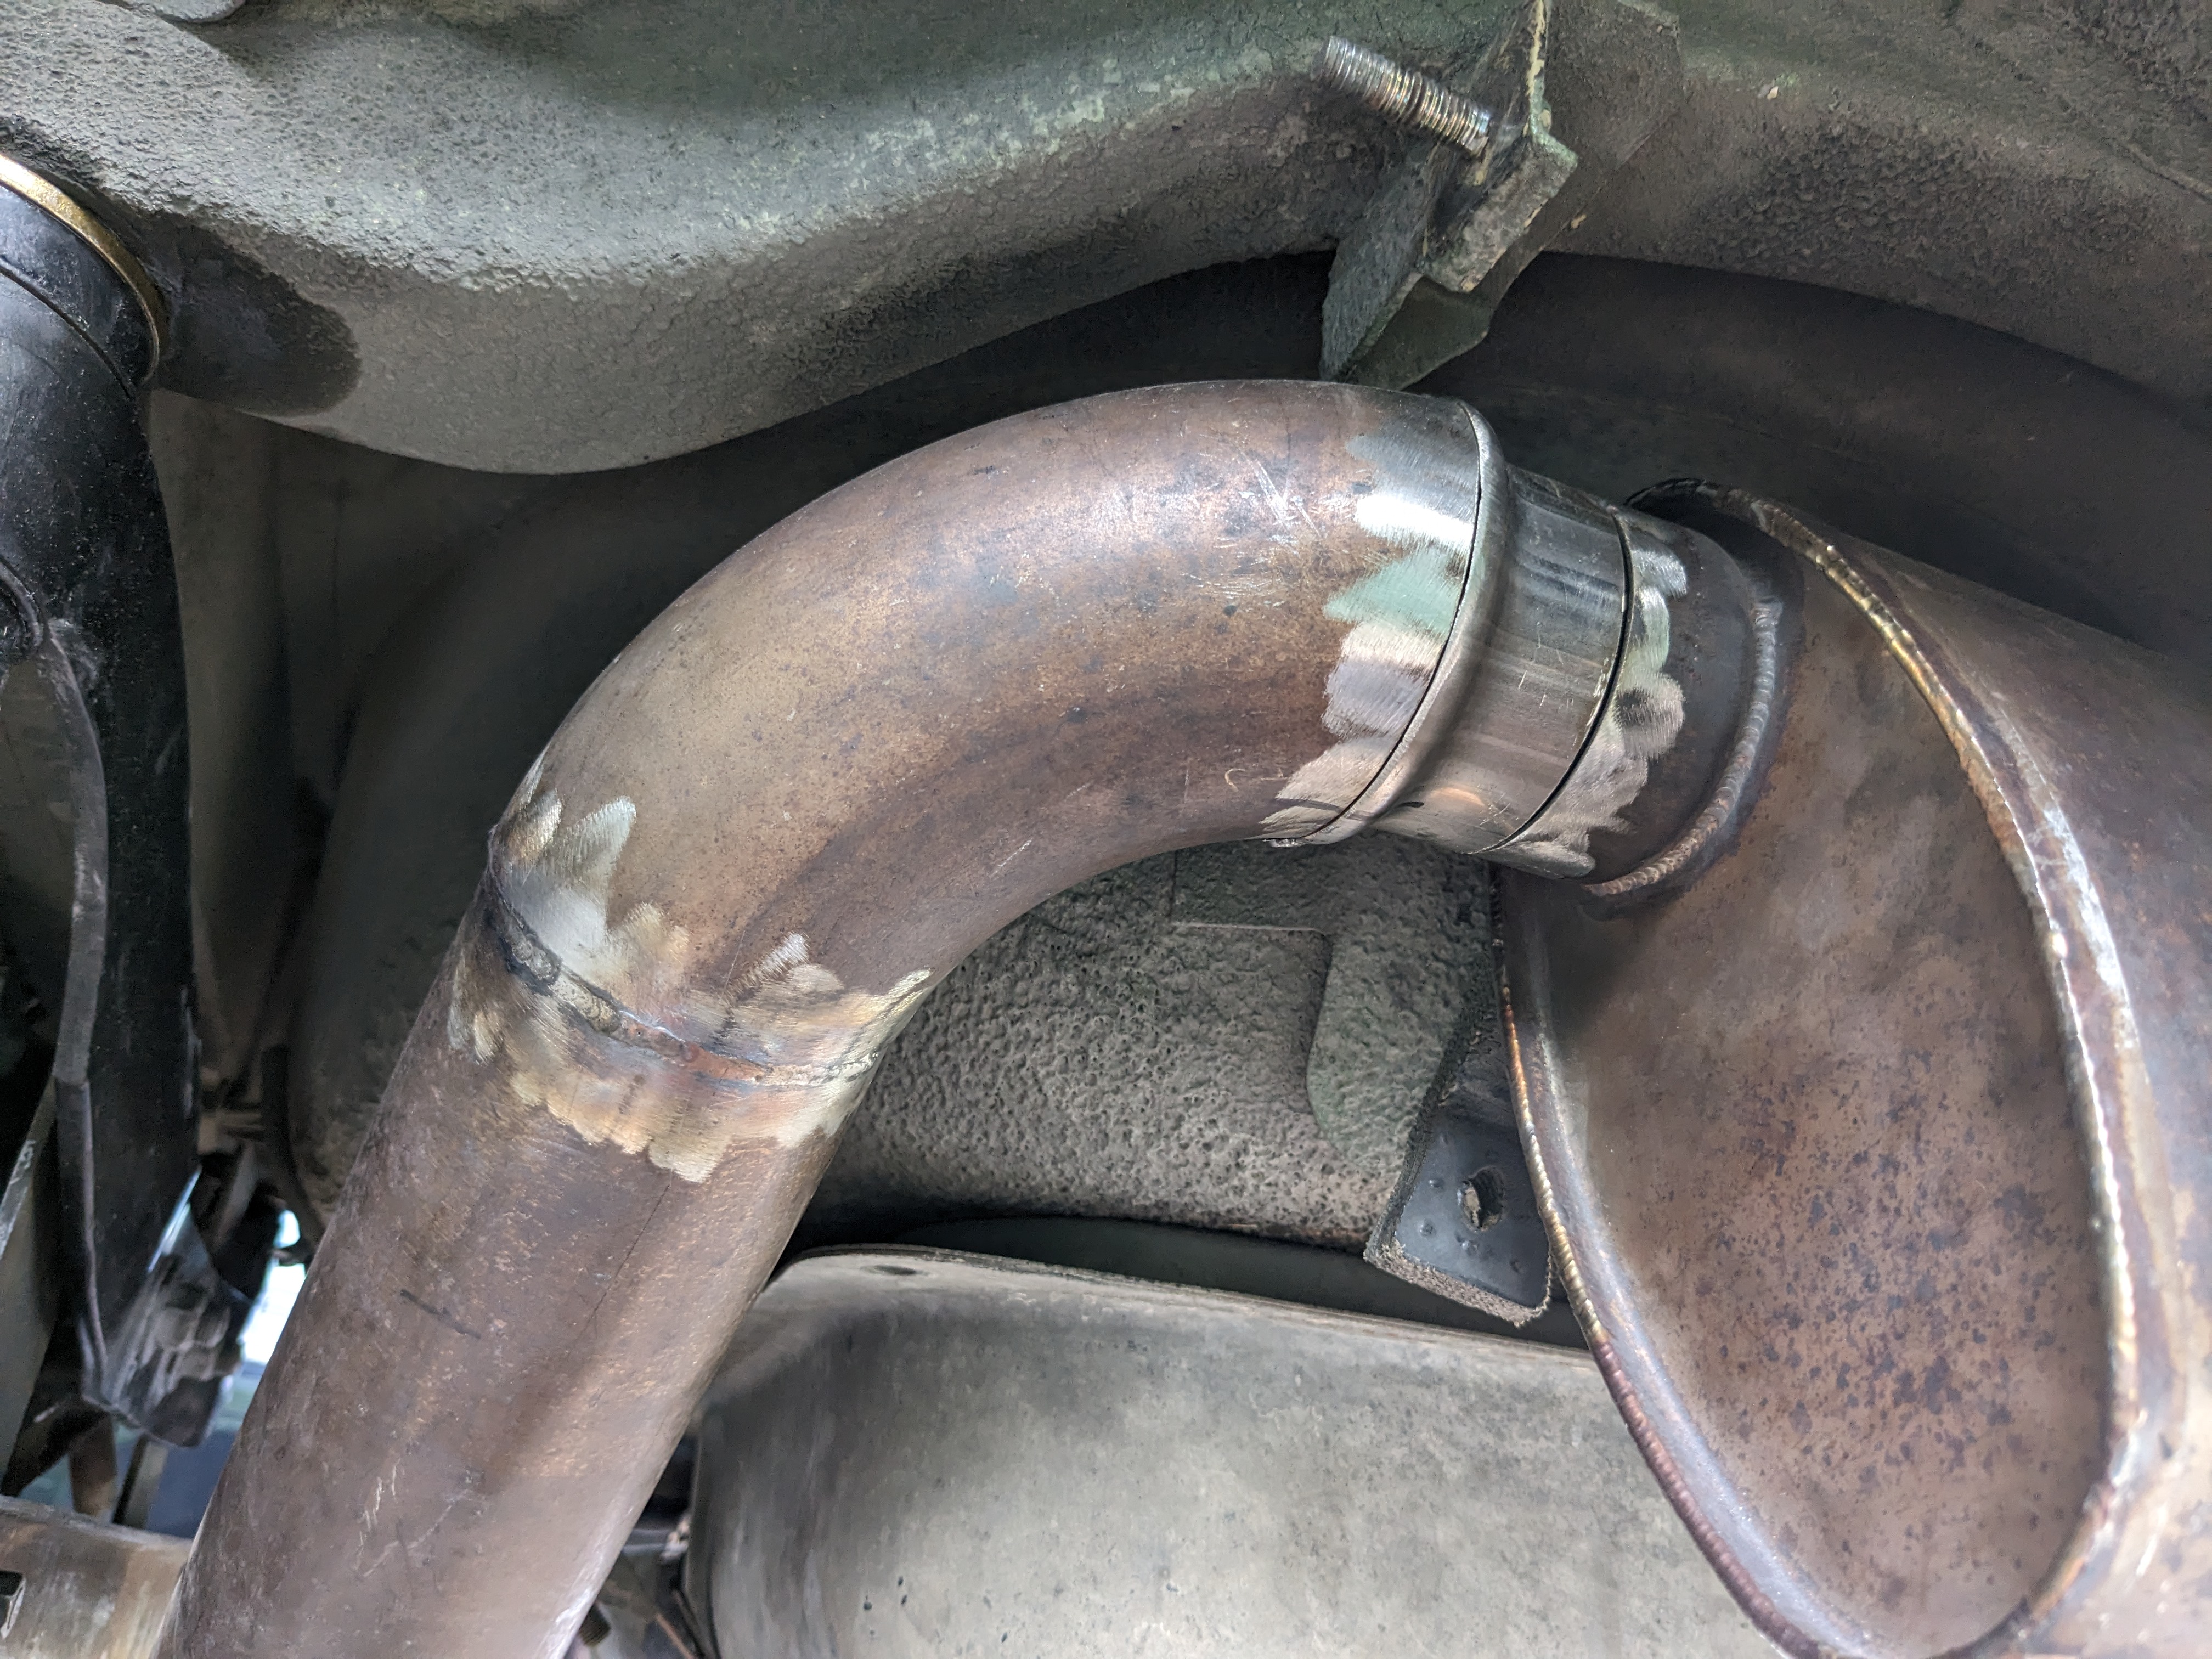
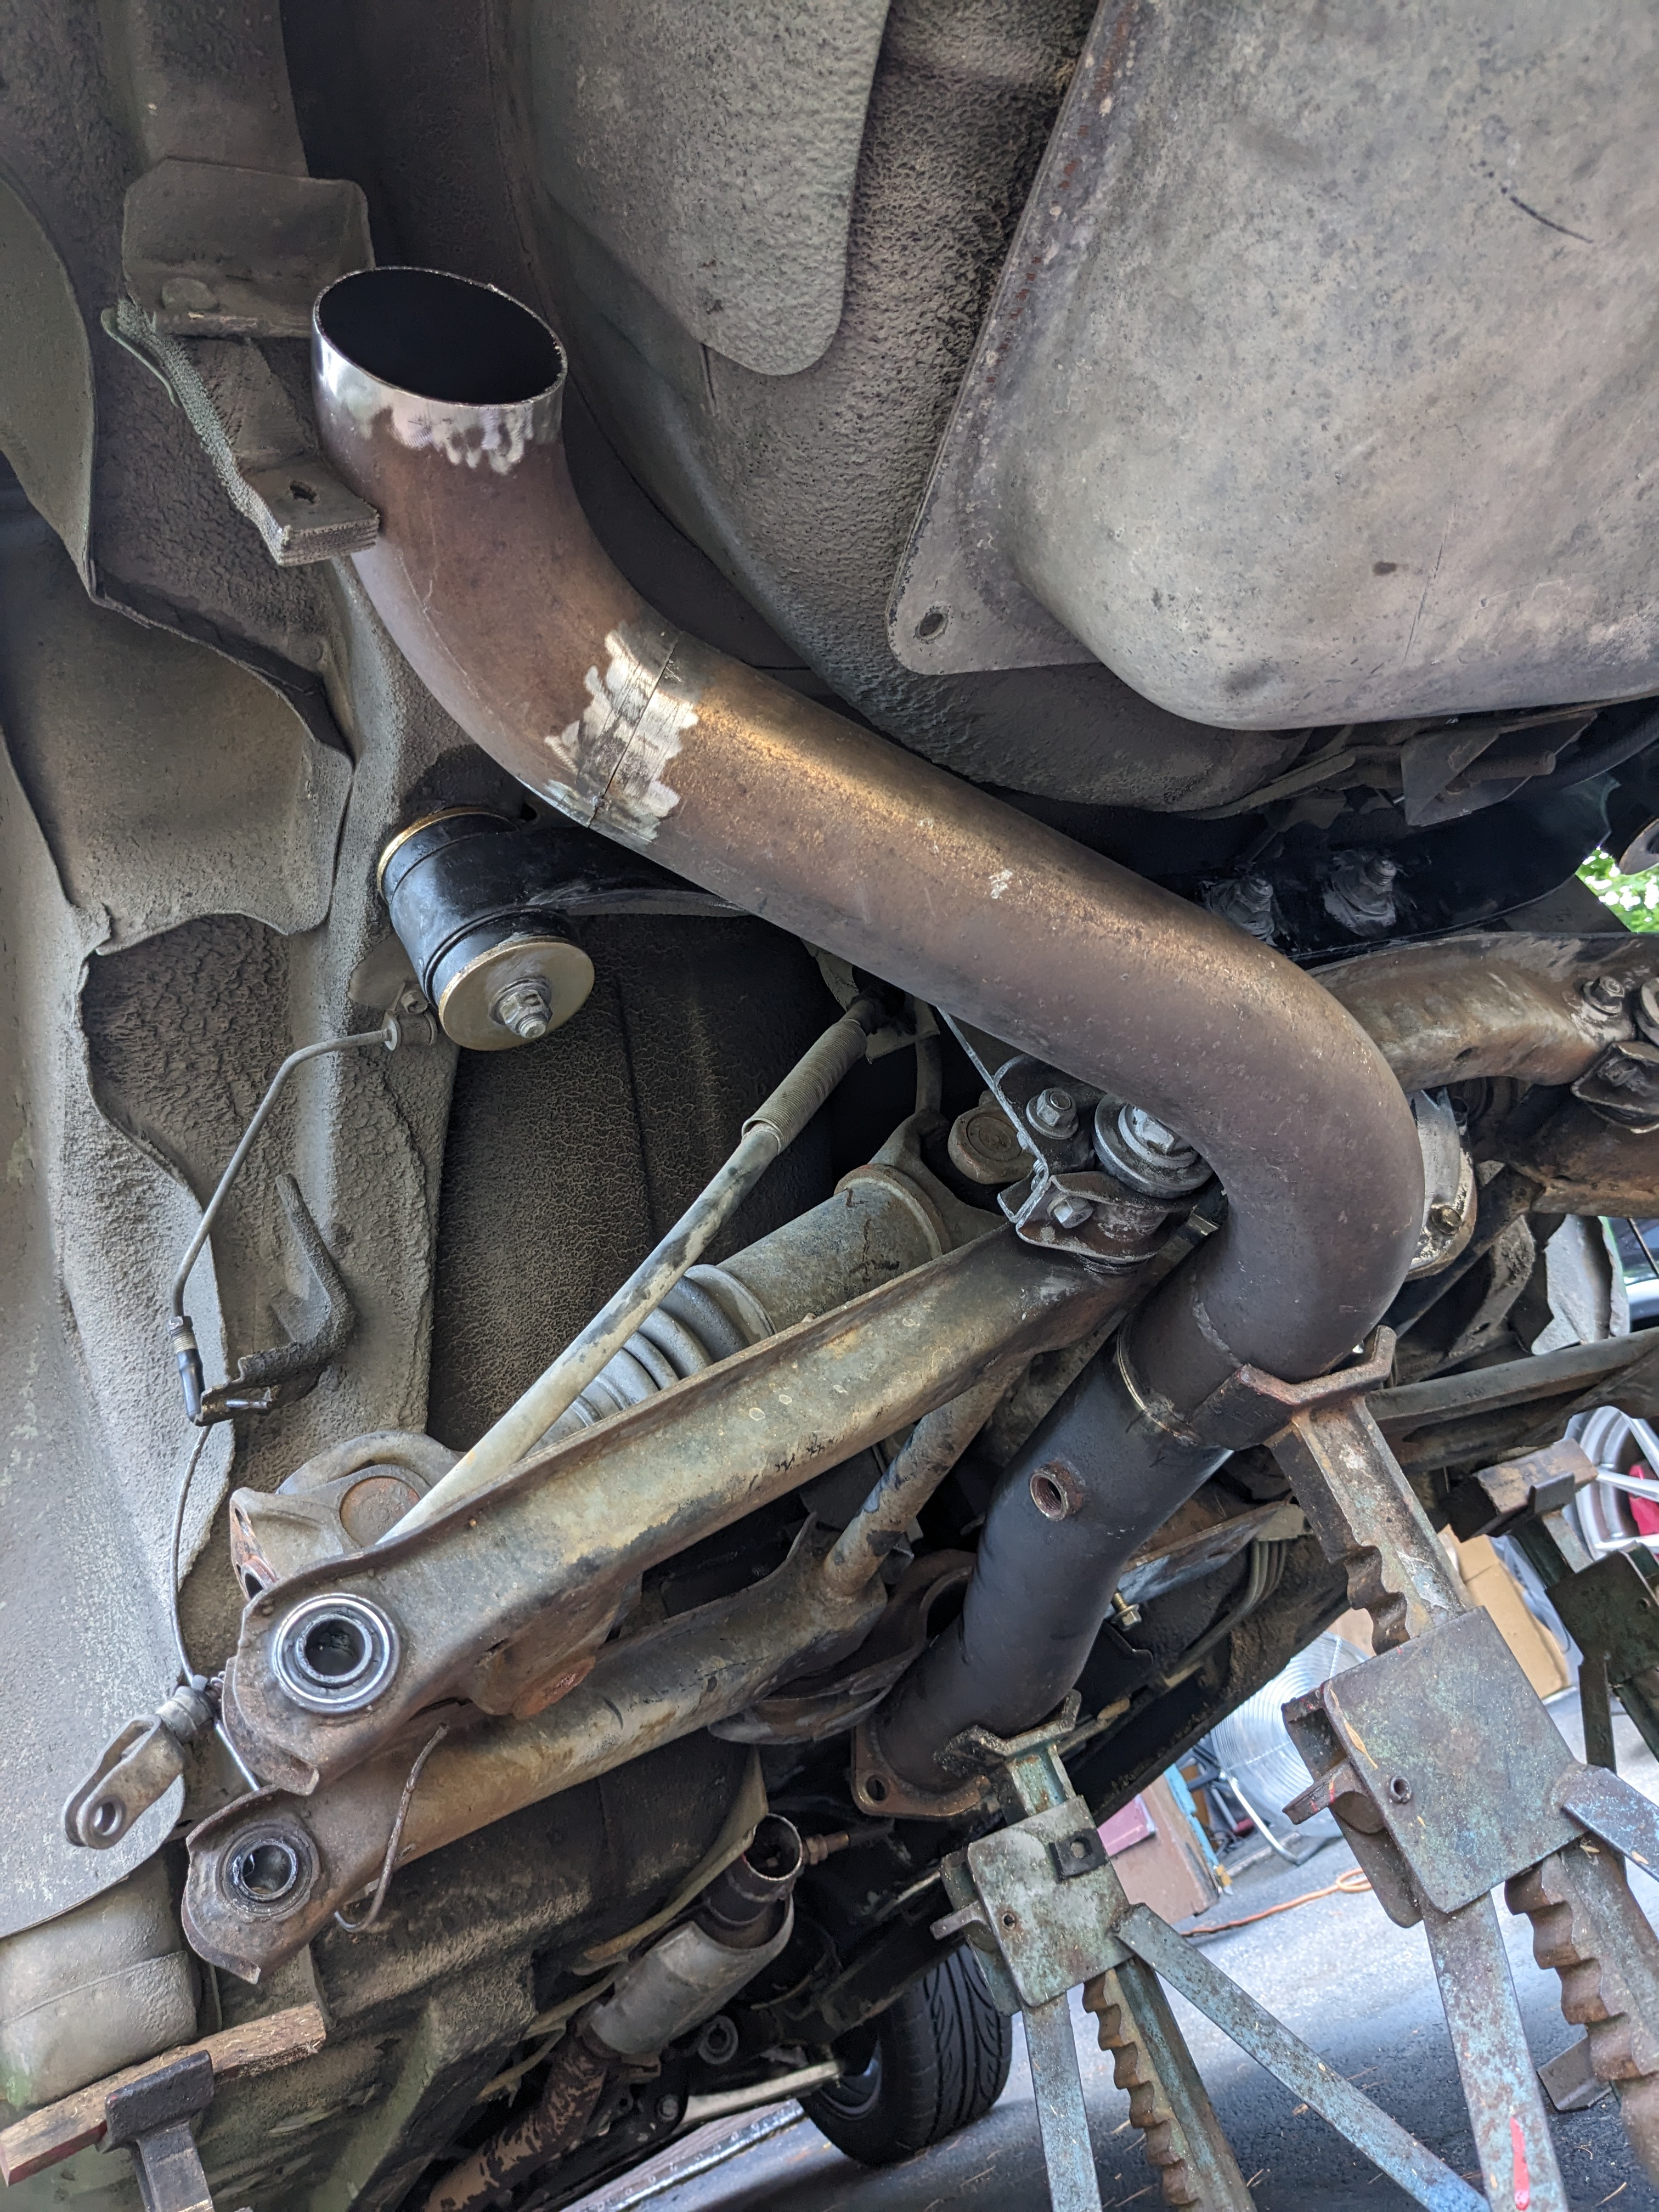
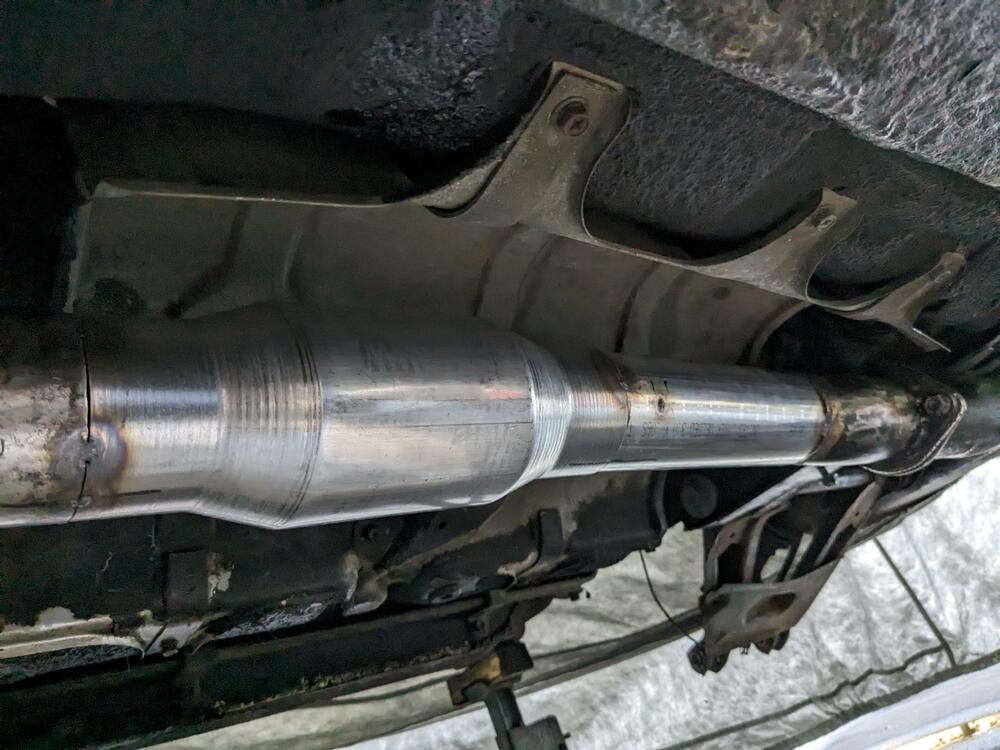
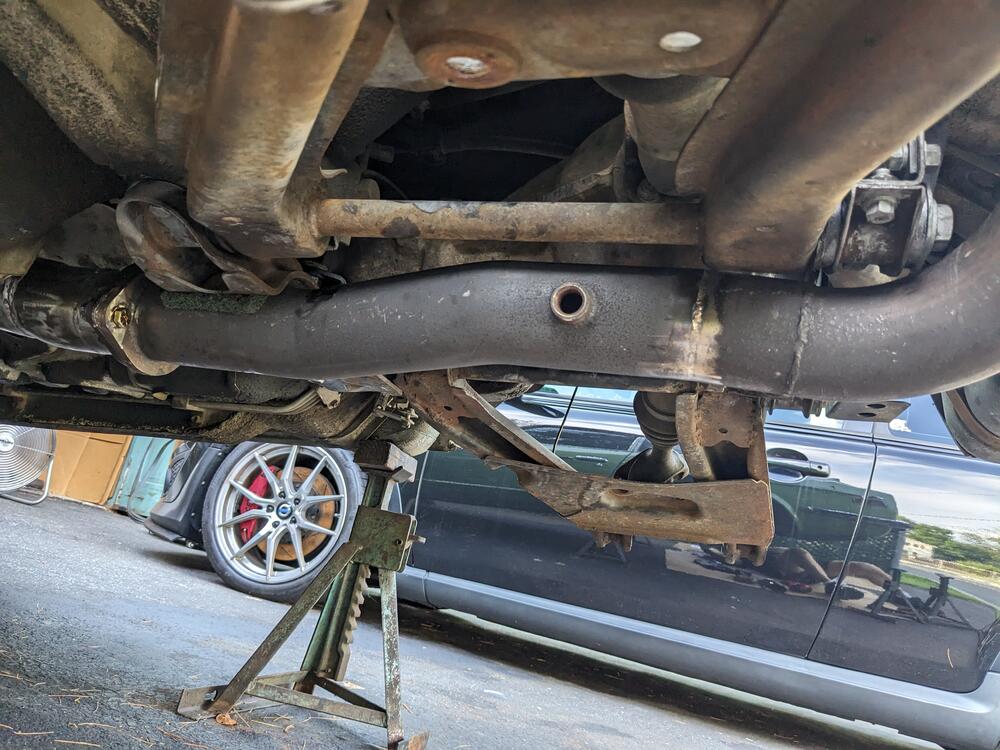
Since I had to cut off the exhaust to deal with all the rear suspension work, I decided to put together a 3" SS rear section, starting after the existing cat, then going to a 2.5" Stainless Works rear muffler (ran it on my X1/9 K24 swap for a few months). The 3" SS exhaust I put together from a exhaust I had made years ago for my Volvo C30, before I converted it to AWD & had to make it all over again. Forgot to take pic before I cut it up - this is what it was Eyeball the general placement, then cut, & tape together to check clearance off the forward crossmember and lower control pivot & diff casing tack welded, then recheck fit I'll be adding a 3" - 2.5" step from this into the muffler looks pretty good step down & dogleg to attach to existing exhaust/cat. I'll rework the entire exhaust forward of the 2 bolt 3" flange when I do the VQ35DE 2"-2.5" - 2.5"- 3" steps


-
Degreased, then soaked the rear tube/hubs in acid, then cleaned up & treated them with rust convertor. I'll paint them tomorrow.
-
Finished the steering wheel. sanded the epoxy, primed & painted reinstalled the horn contacts & pad retaining ring Back in the car
-
@Captain Obvious - question for you - do you know the correct pin release tool for these Yazaki terminals? I have a 70's VAG terminal set that has the barrel-type release tool, but the sleeves are not the correct ID/OD of the Yazaki. I used a pick to remove the old ones, which was fine here, however I'd like to be able to remove good ones without damage 🙂 Any pointers to a source?
-
Modified the vintage aftermarket wheel to fit. Cut the hub from the original worn out wheel. The advantage of this is that it will sit further away from me. With my height, the stock wheel is too close to me when the seat is correctly placed for clutch pedal operation. This wheel is shallower. welded after this - forgot to take pics added JB weld to fill the minor gapage on the front side