HusseinHolland
Free Member
-
Joined
-
Last visited
Everything posted by HusseinHolland
-
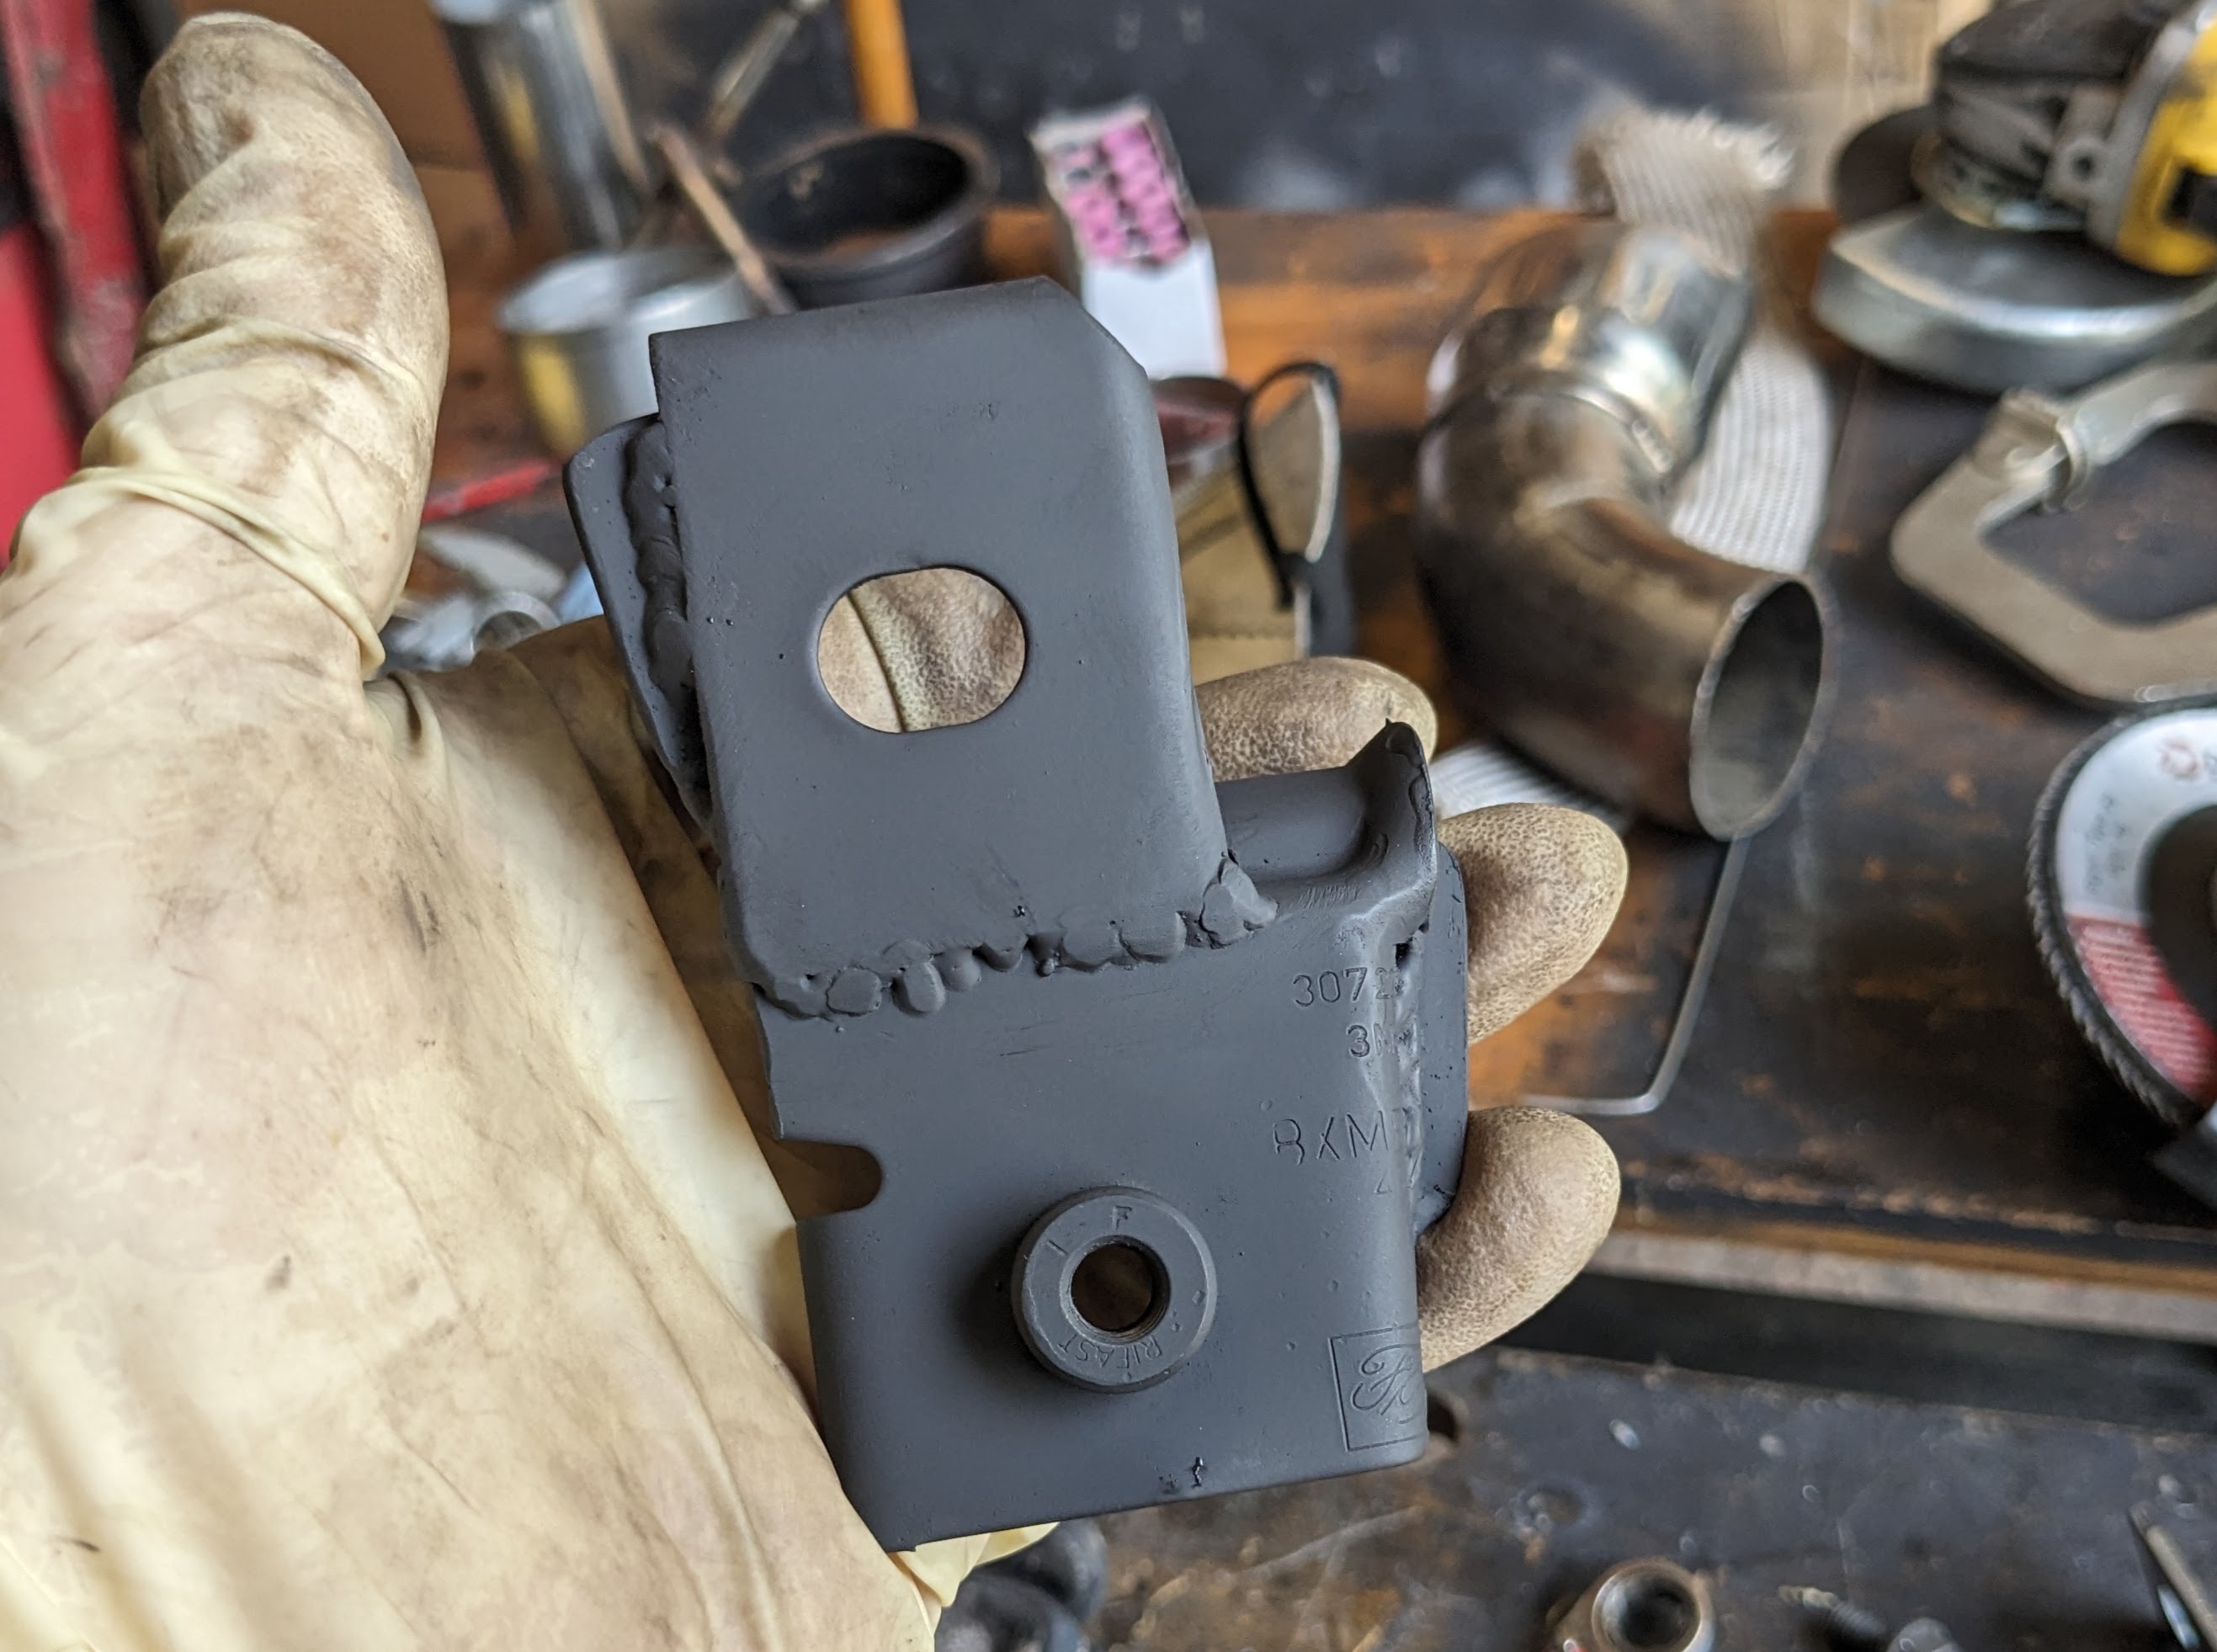
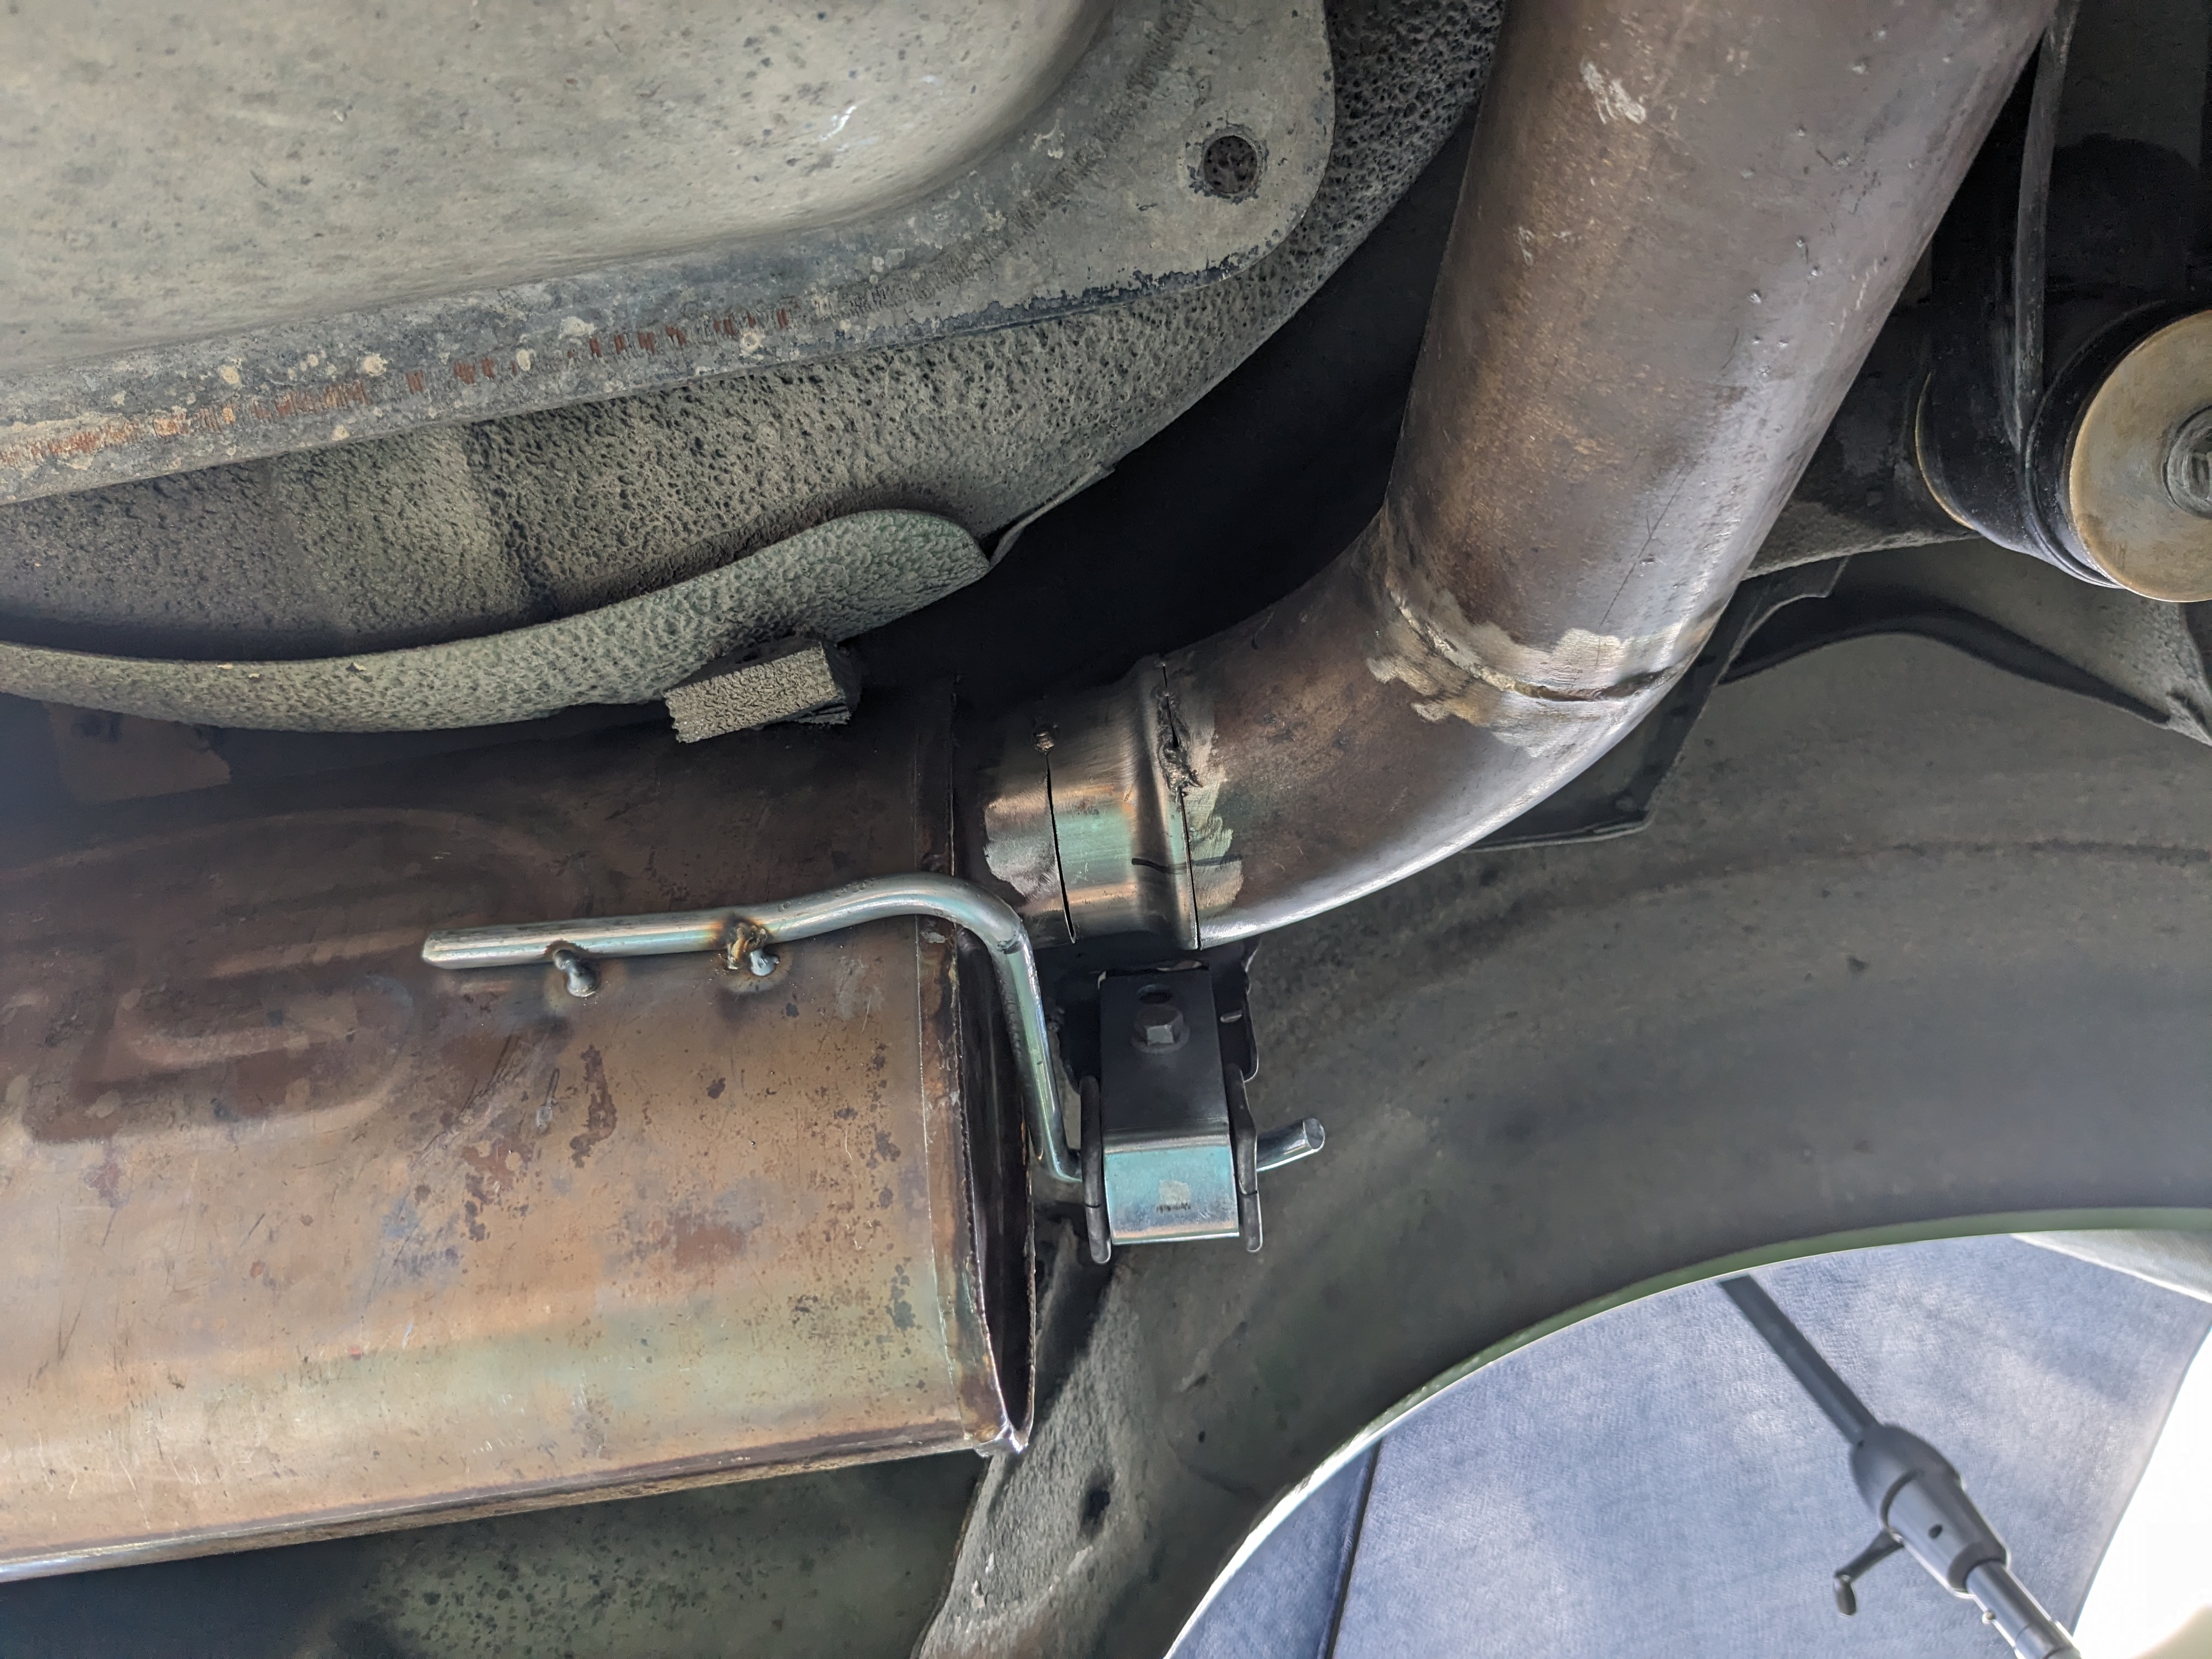
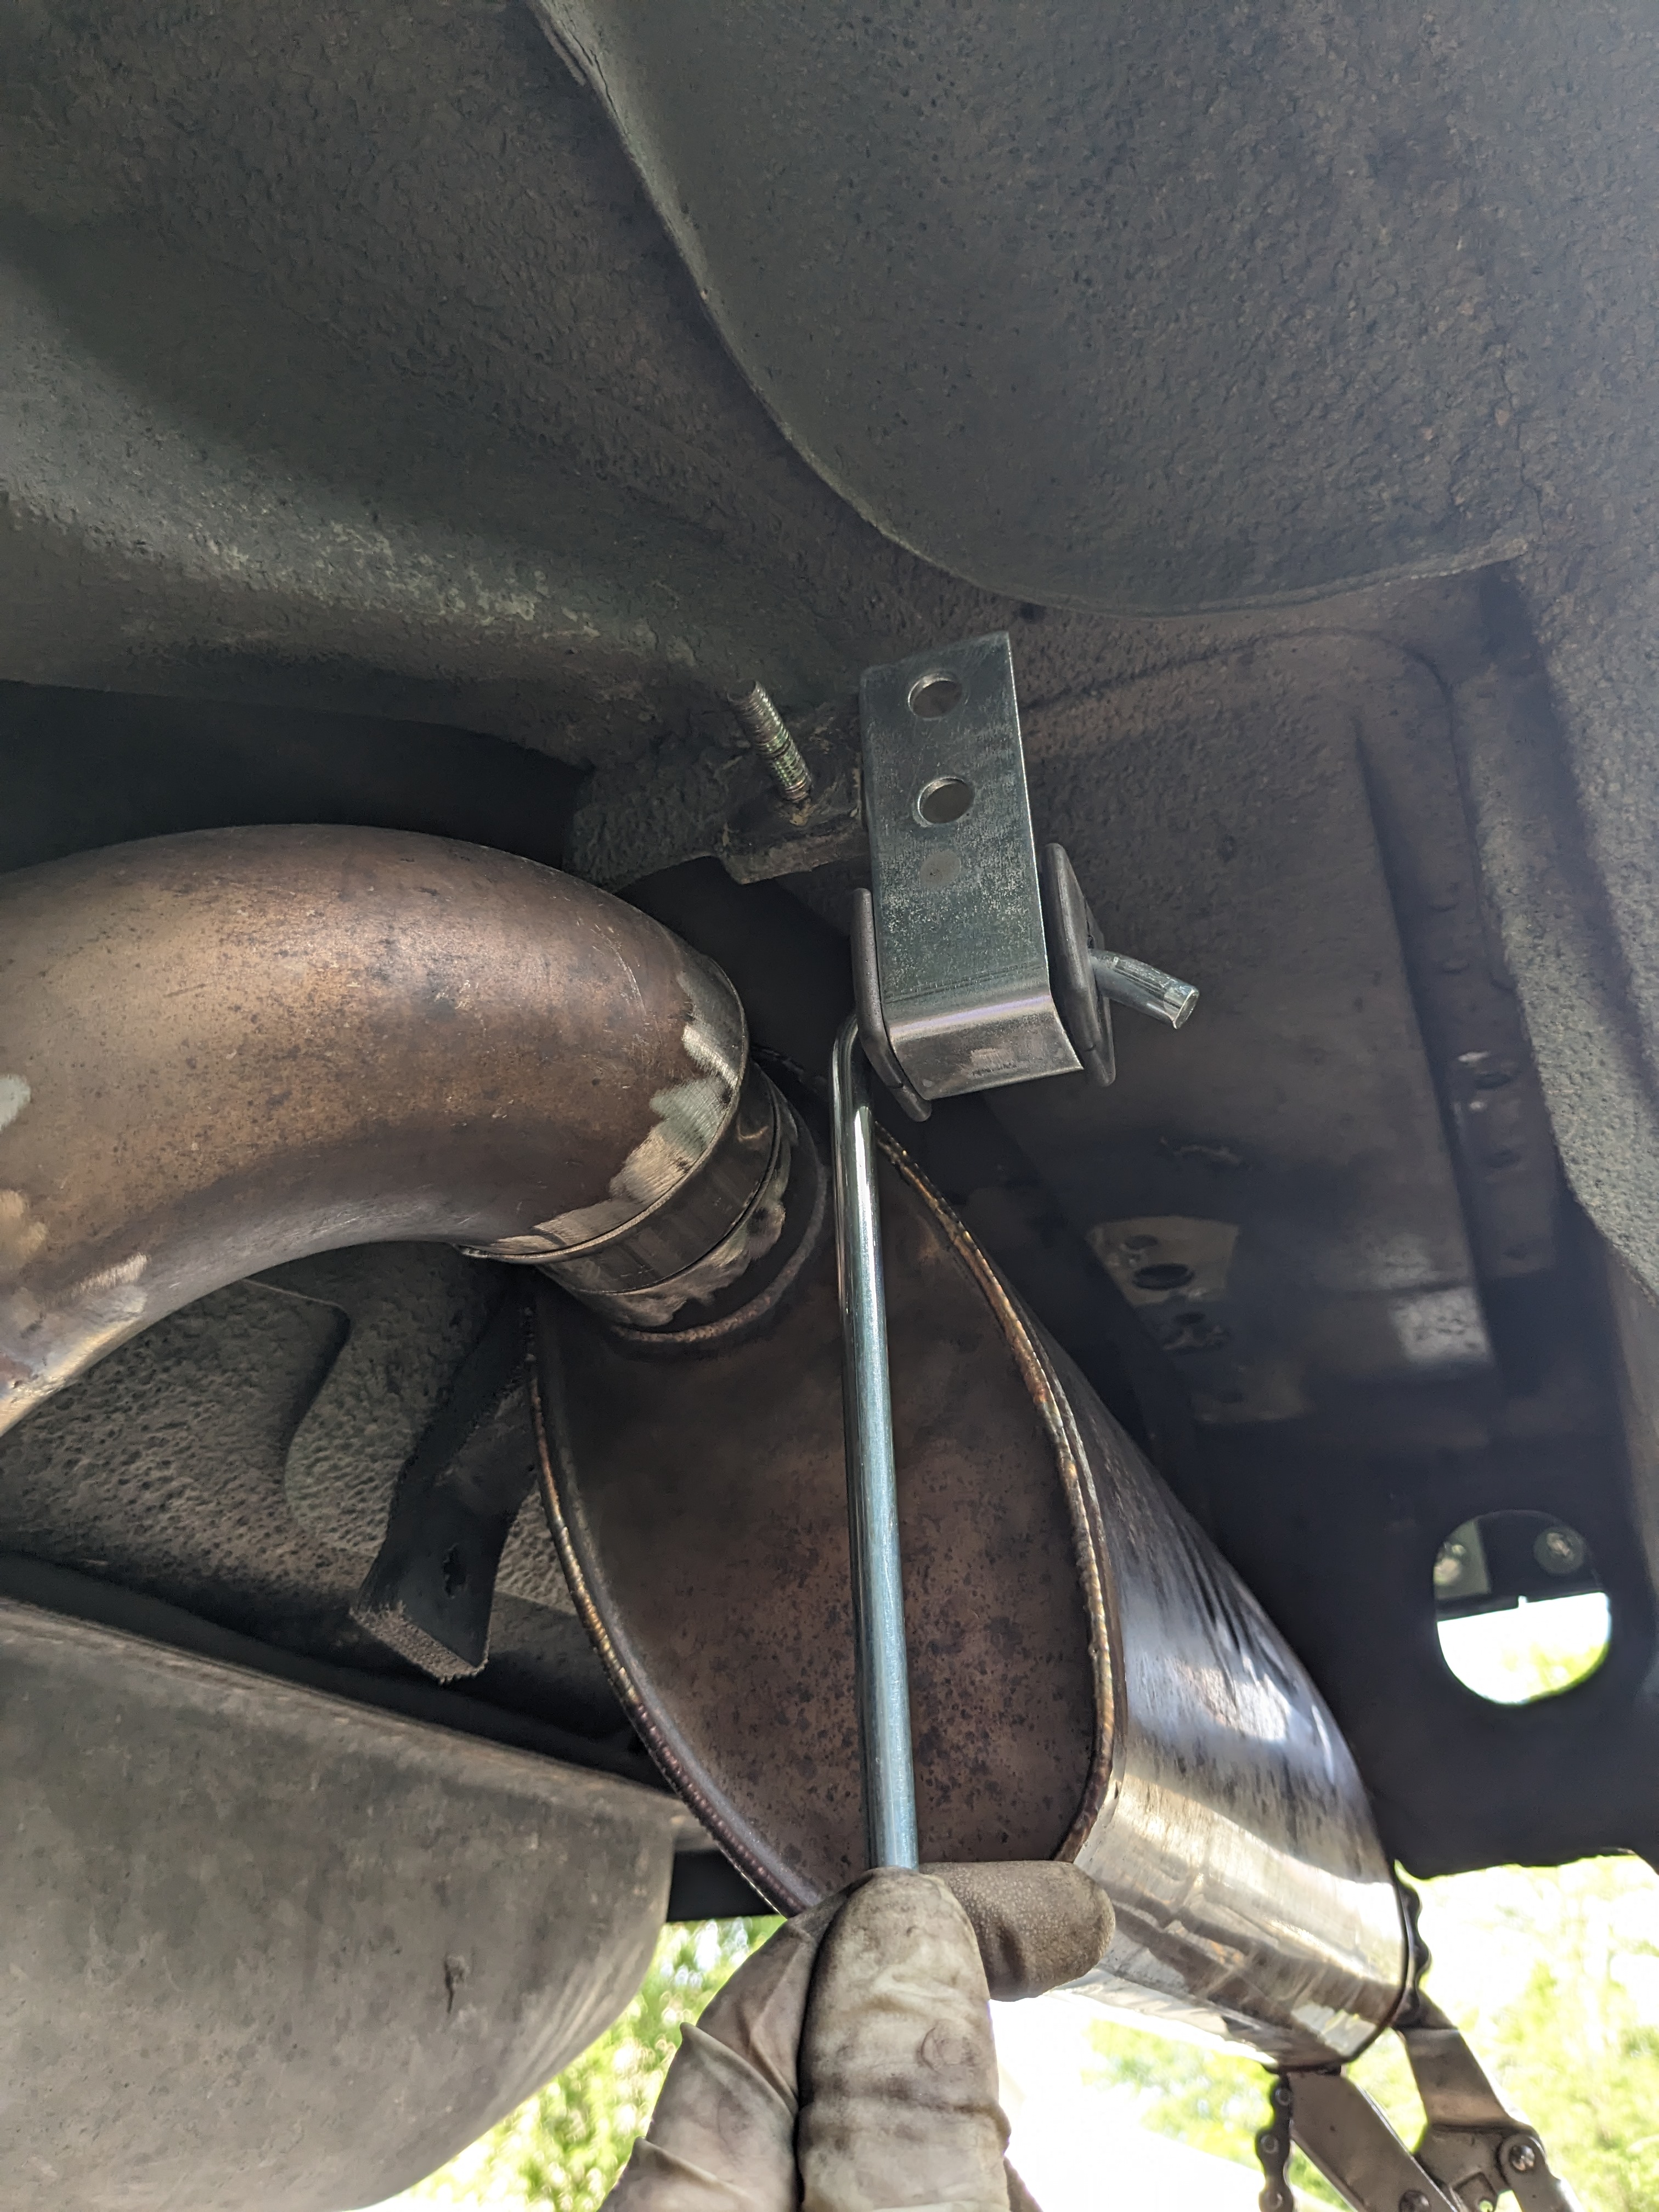
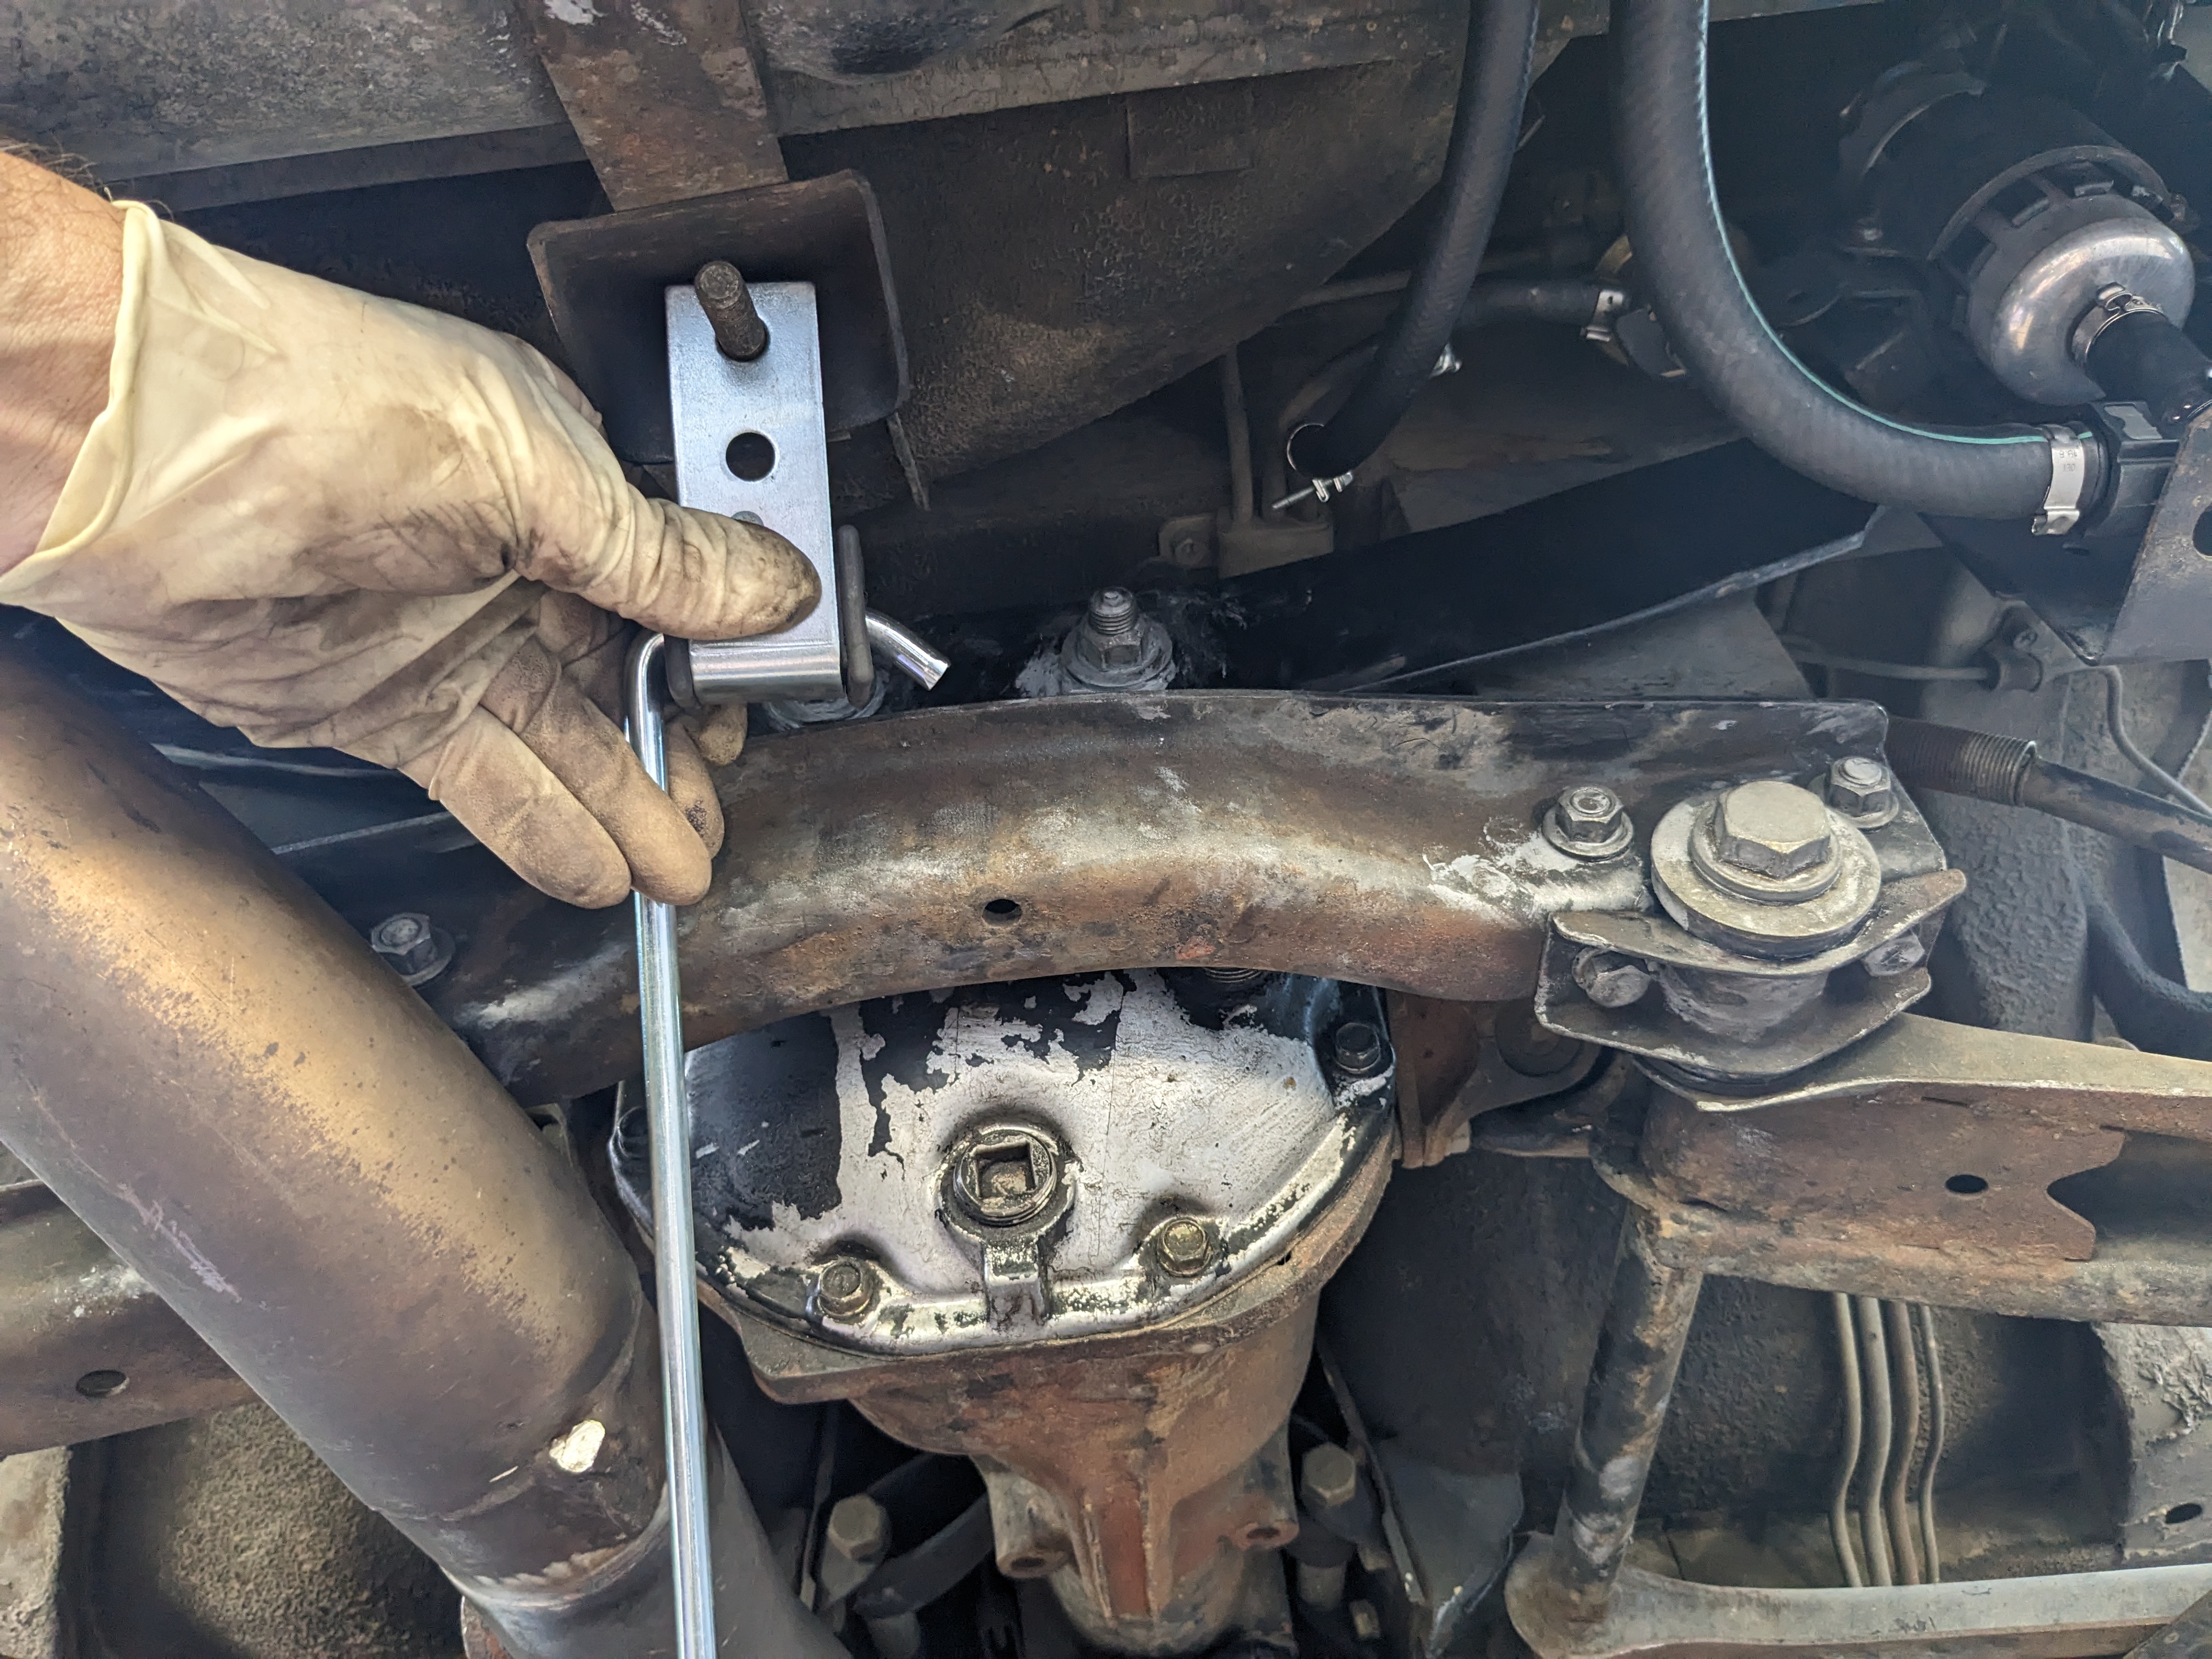
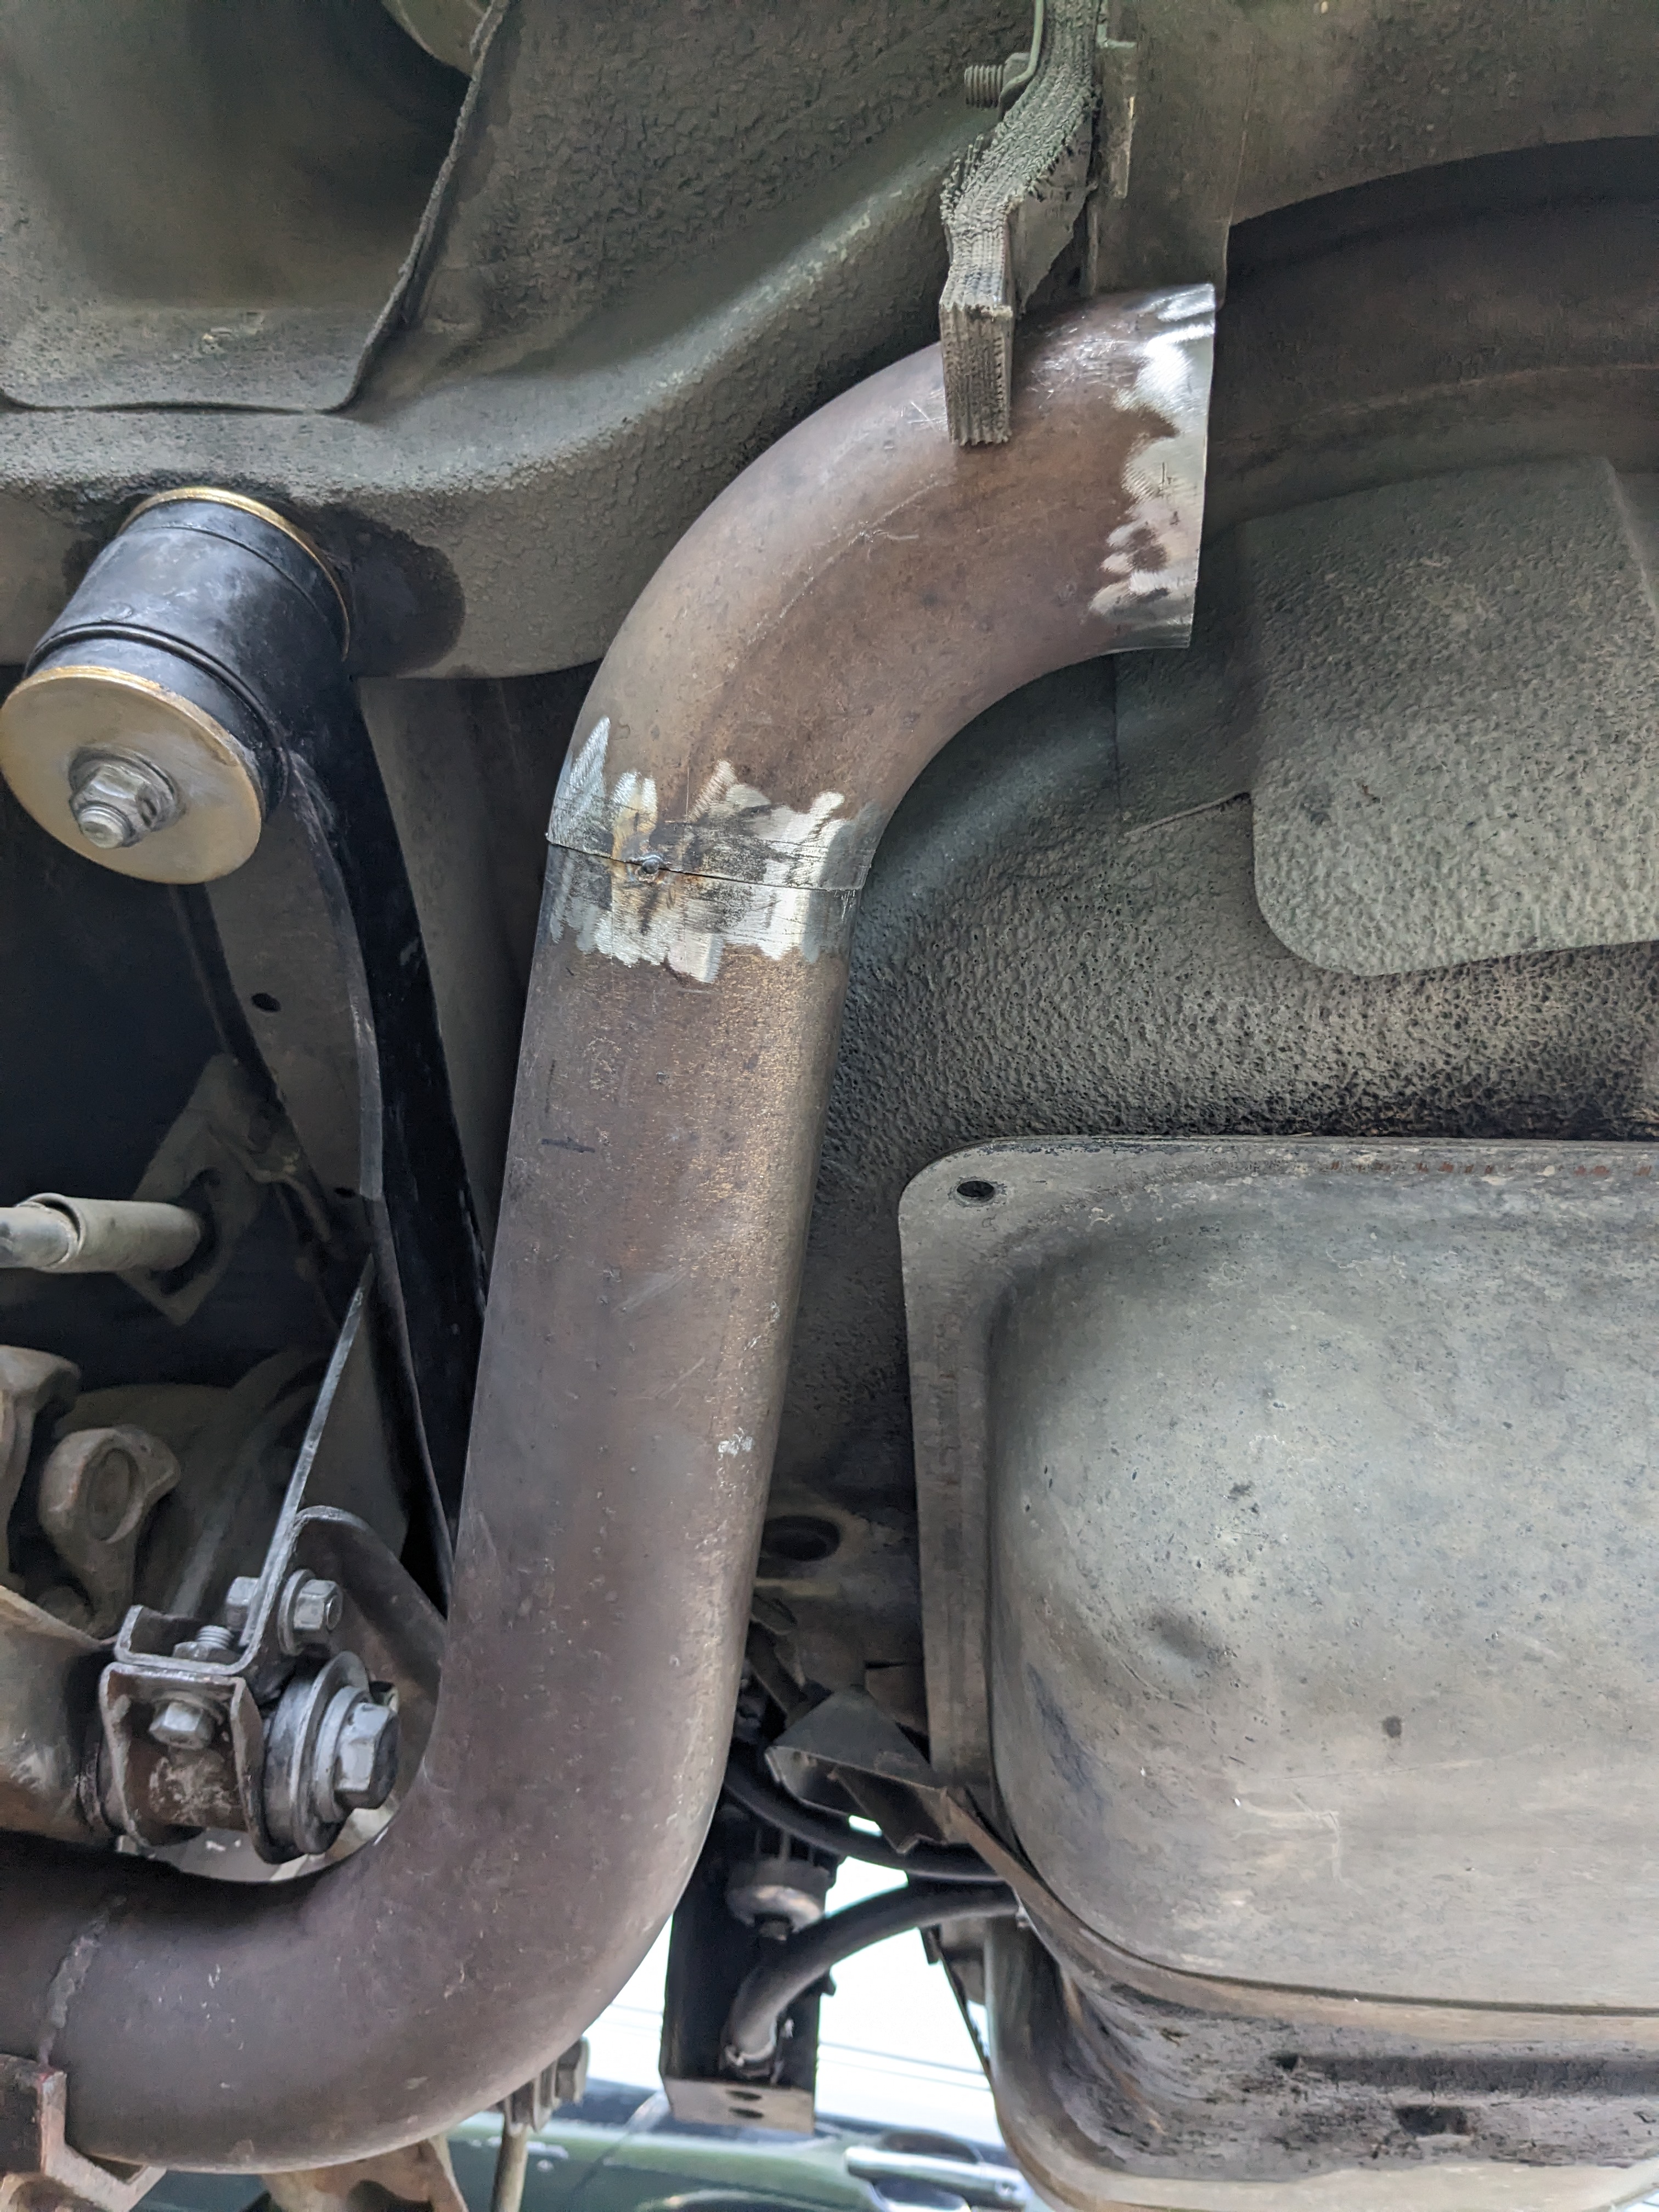
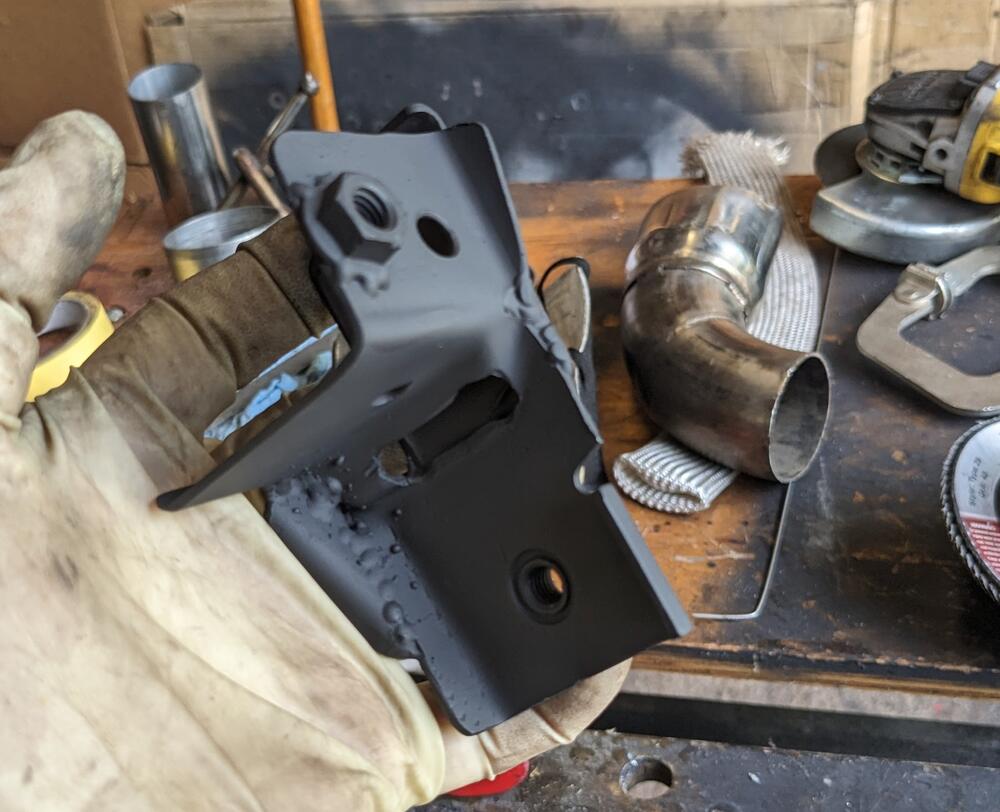
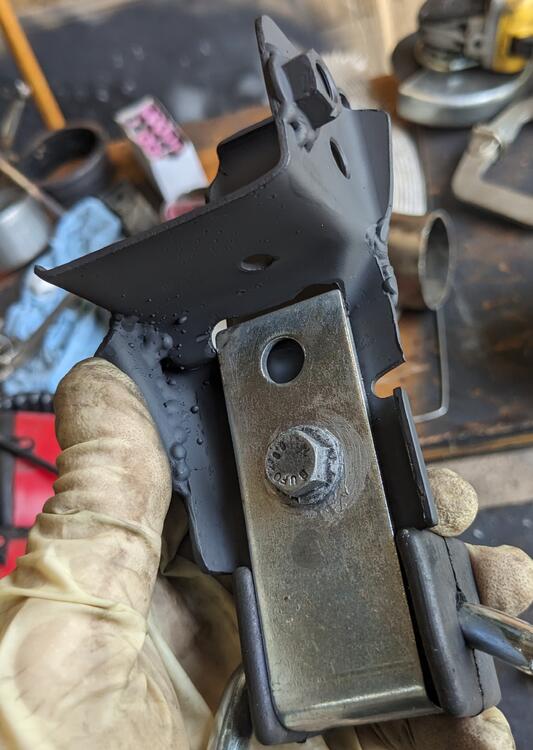
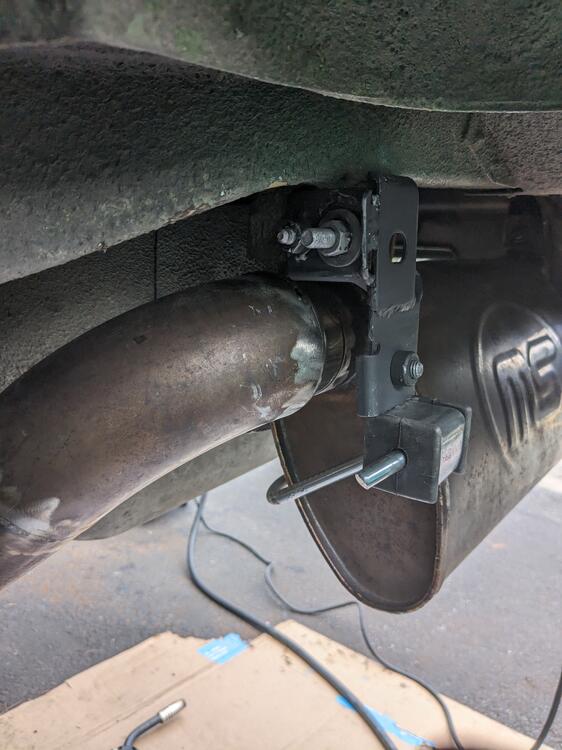
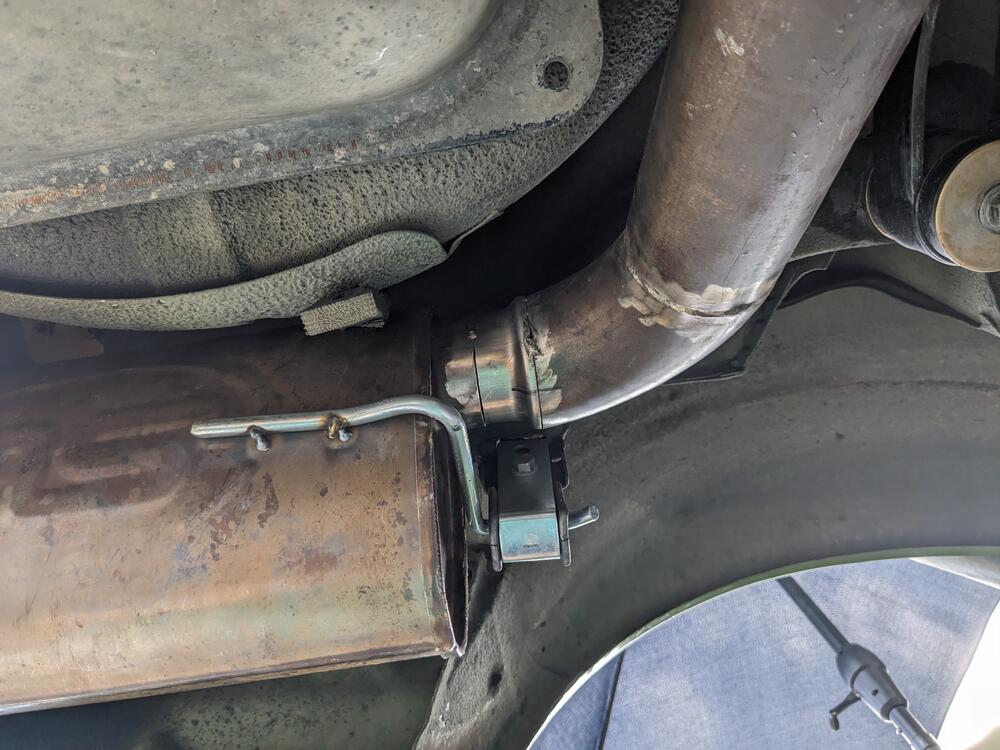
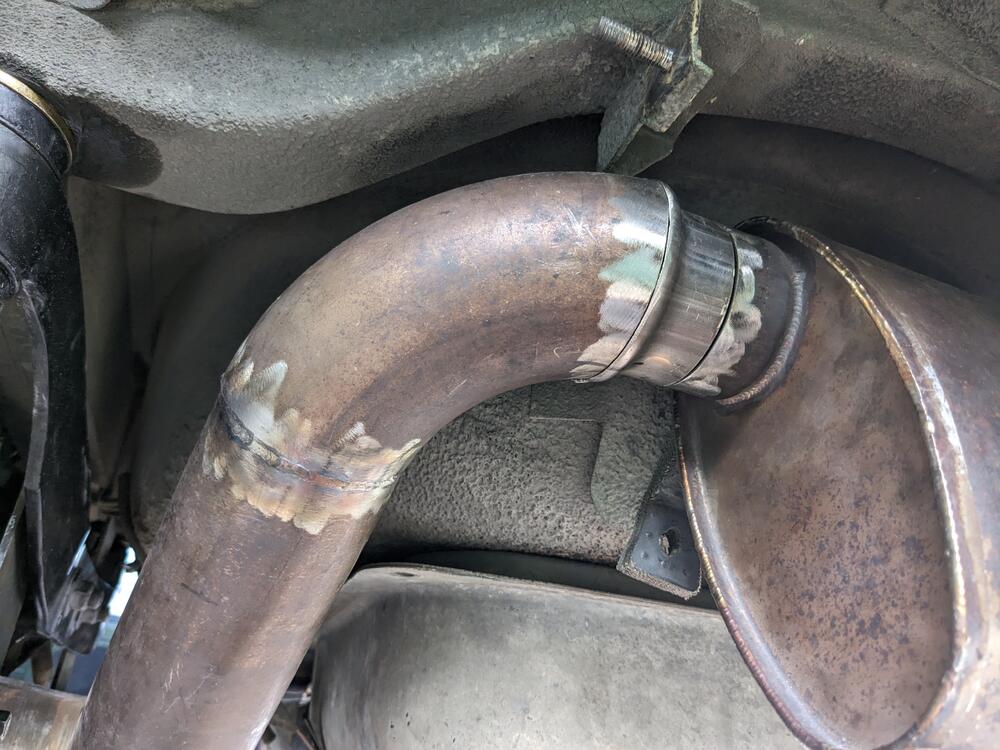
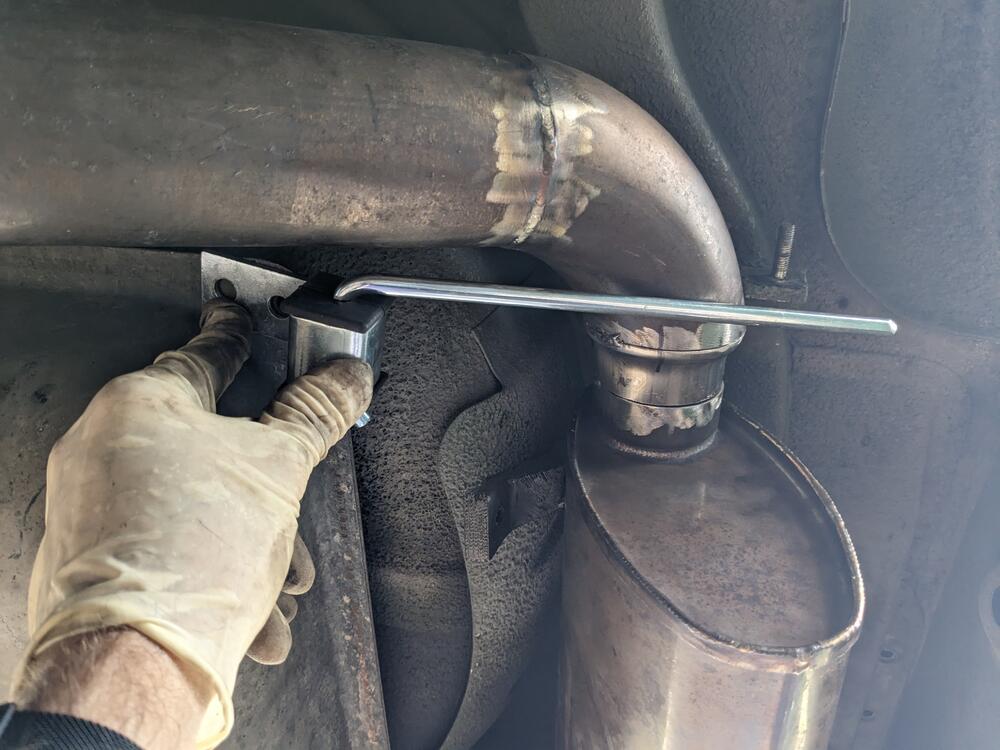
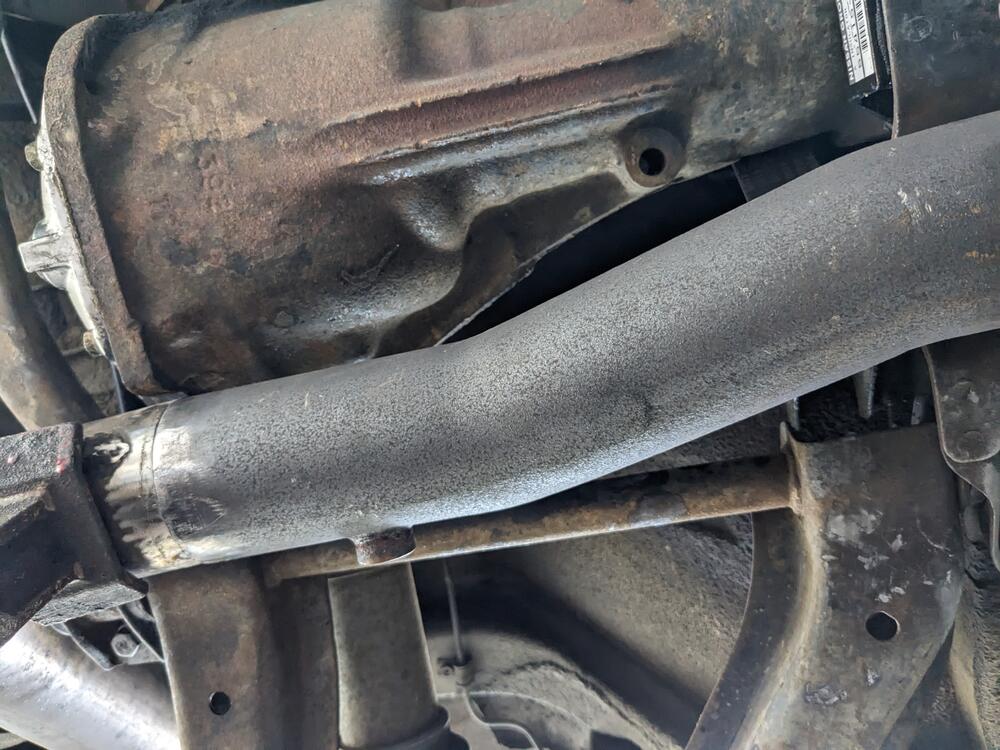
 Made a bracket (from a Volvo dash support) to utilize the stock hanger point at the front end of the muffler reinforced to make sure it can't flex. The lip at the top tucks over the frame bracket muffler hanger attachment in place. Drilled an inboard hole in the stock welded bracket to positively locate the new bracket. With that figured out, I tack welded the hanger to the muffler Removed & finished the seam welds for the muffler inlet & tailpipe section. Just have to weld on the Redtail exhaust tip when it gets here.


-
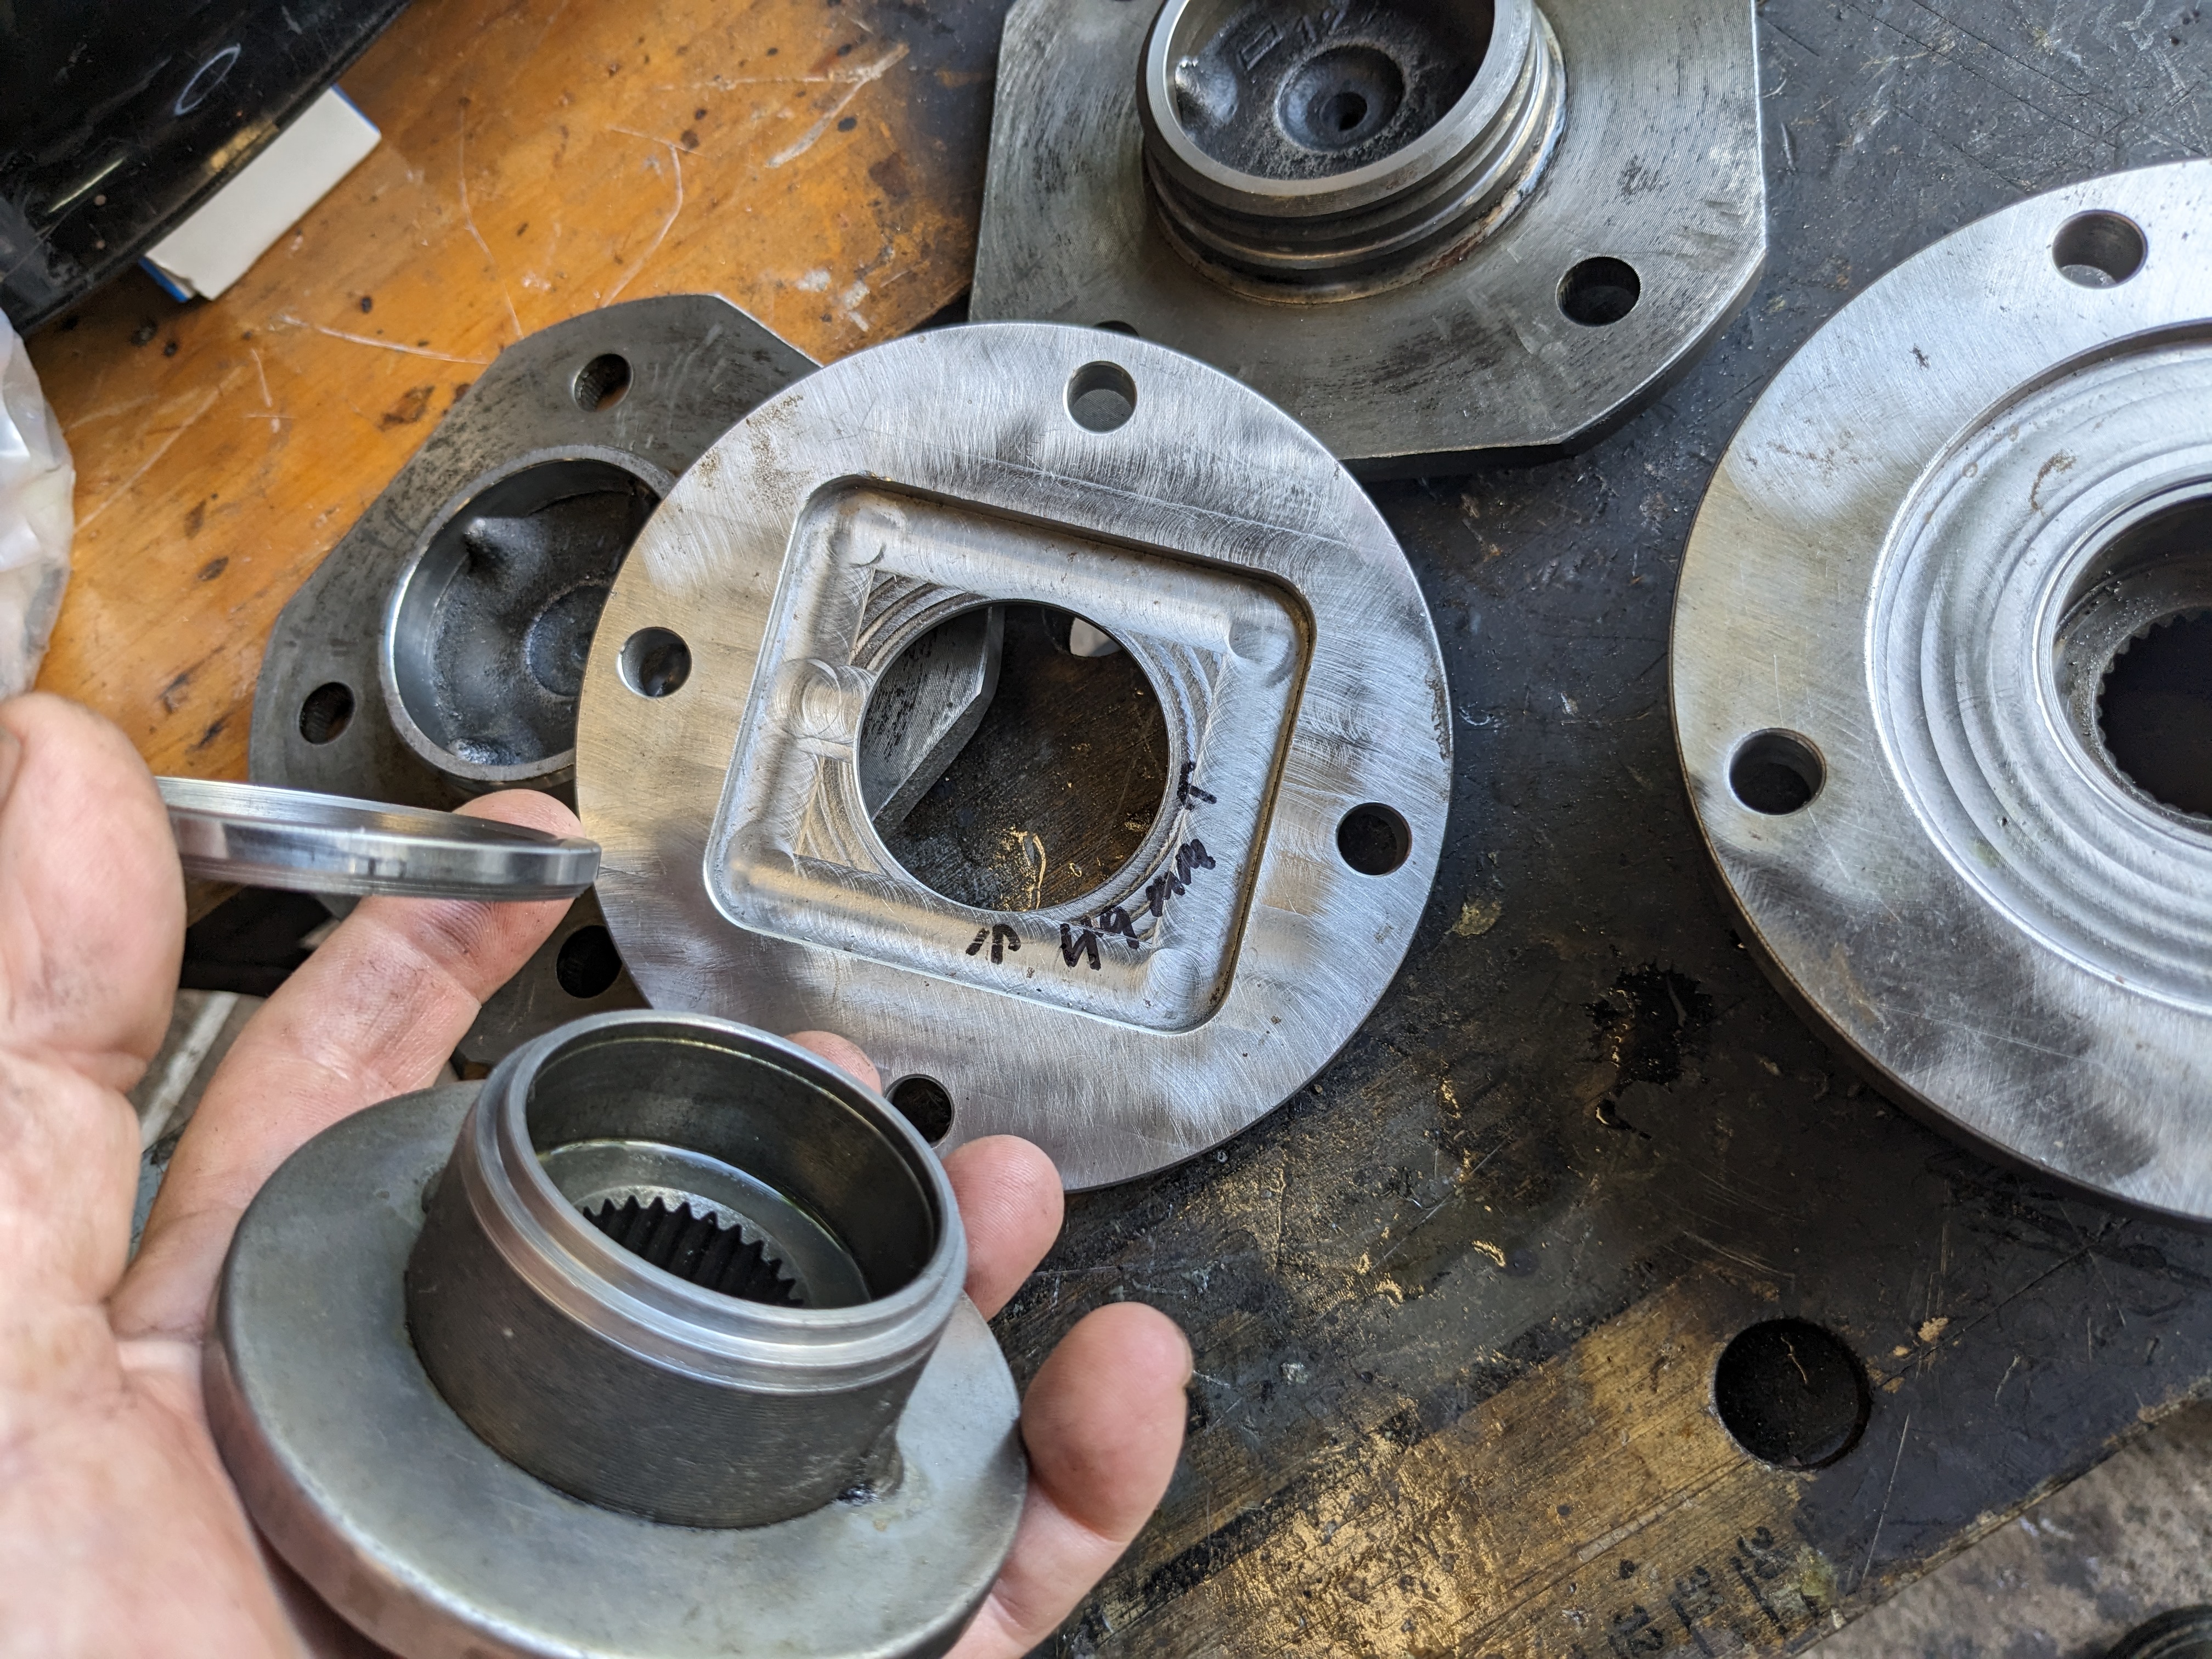
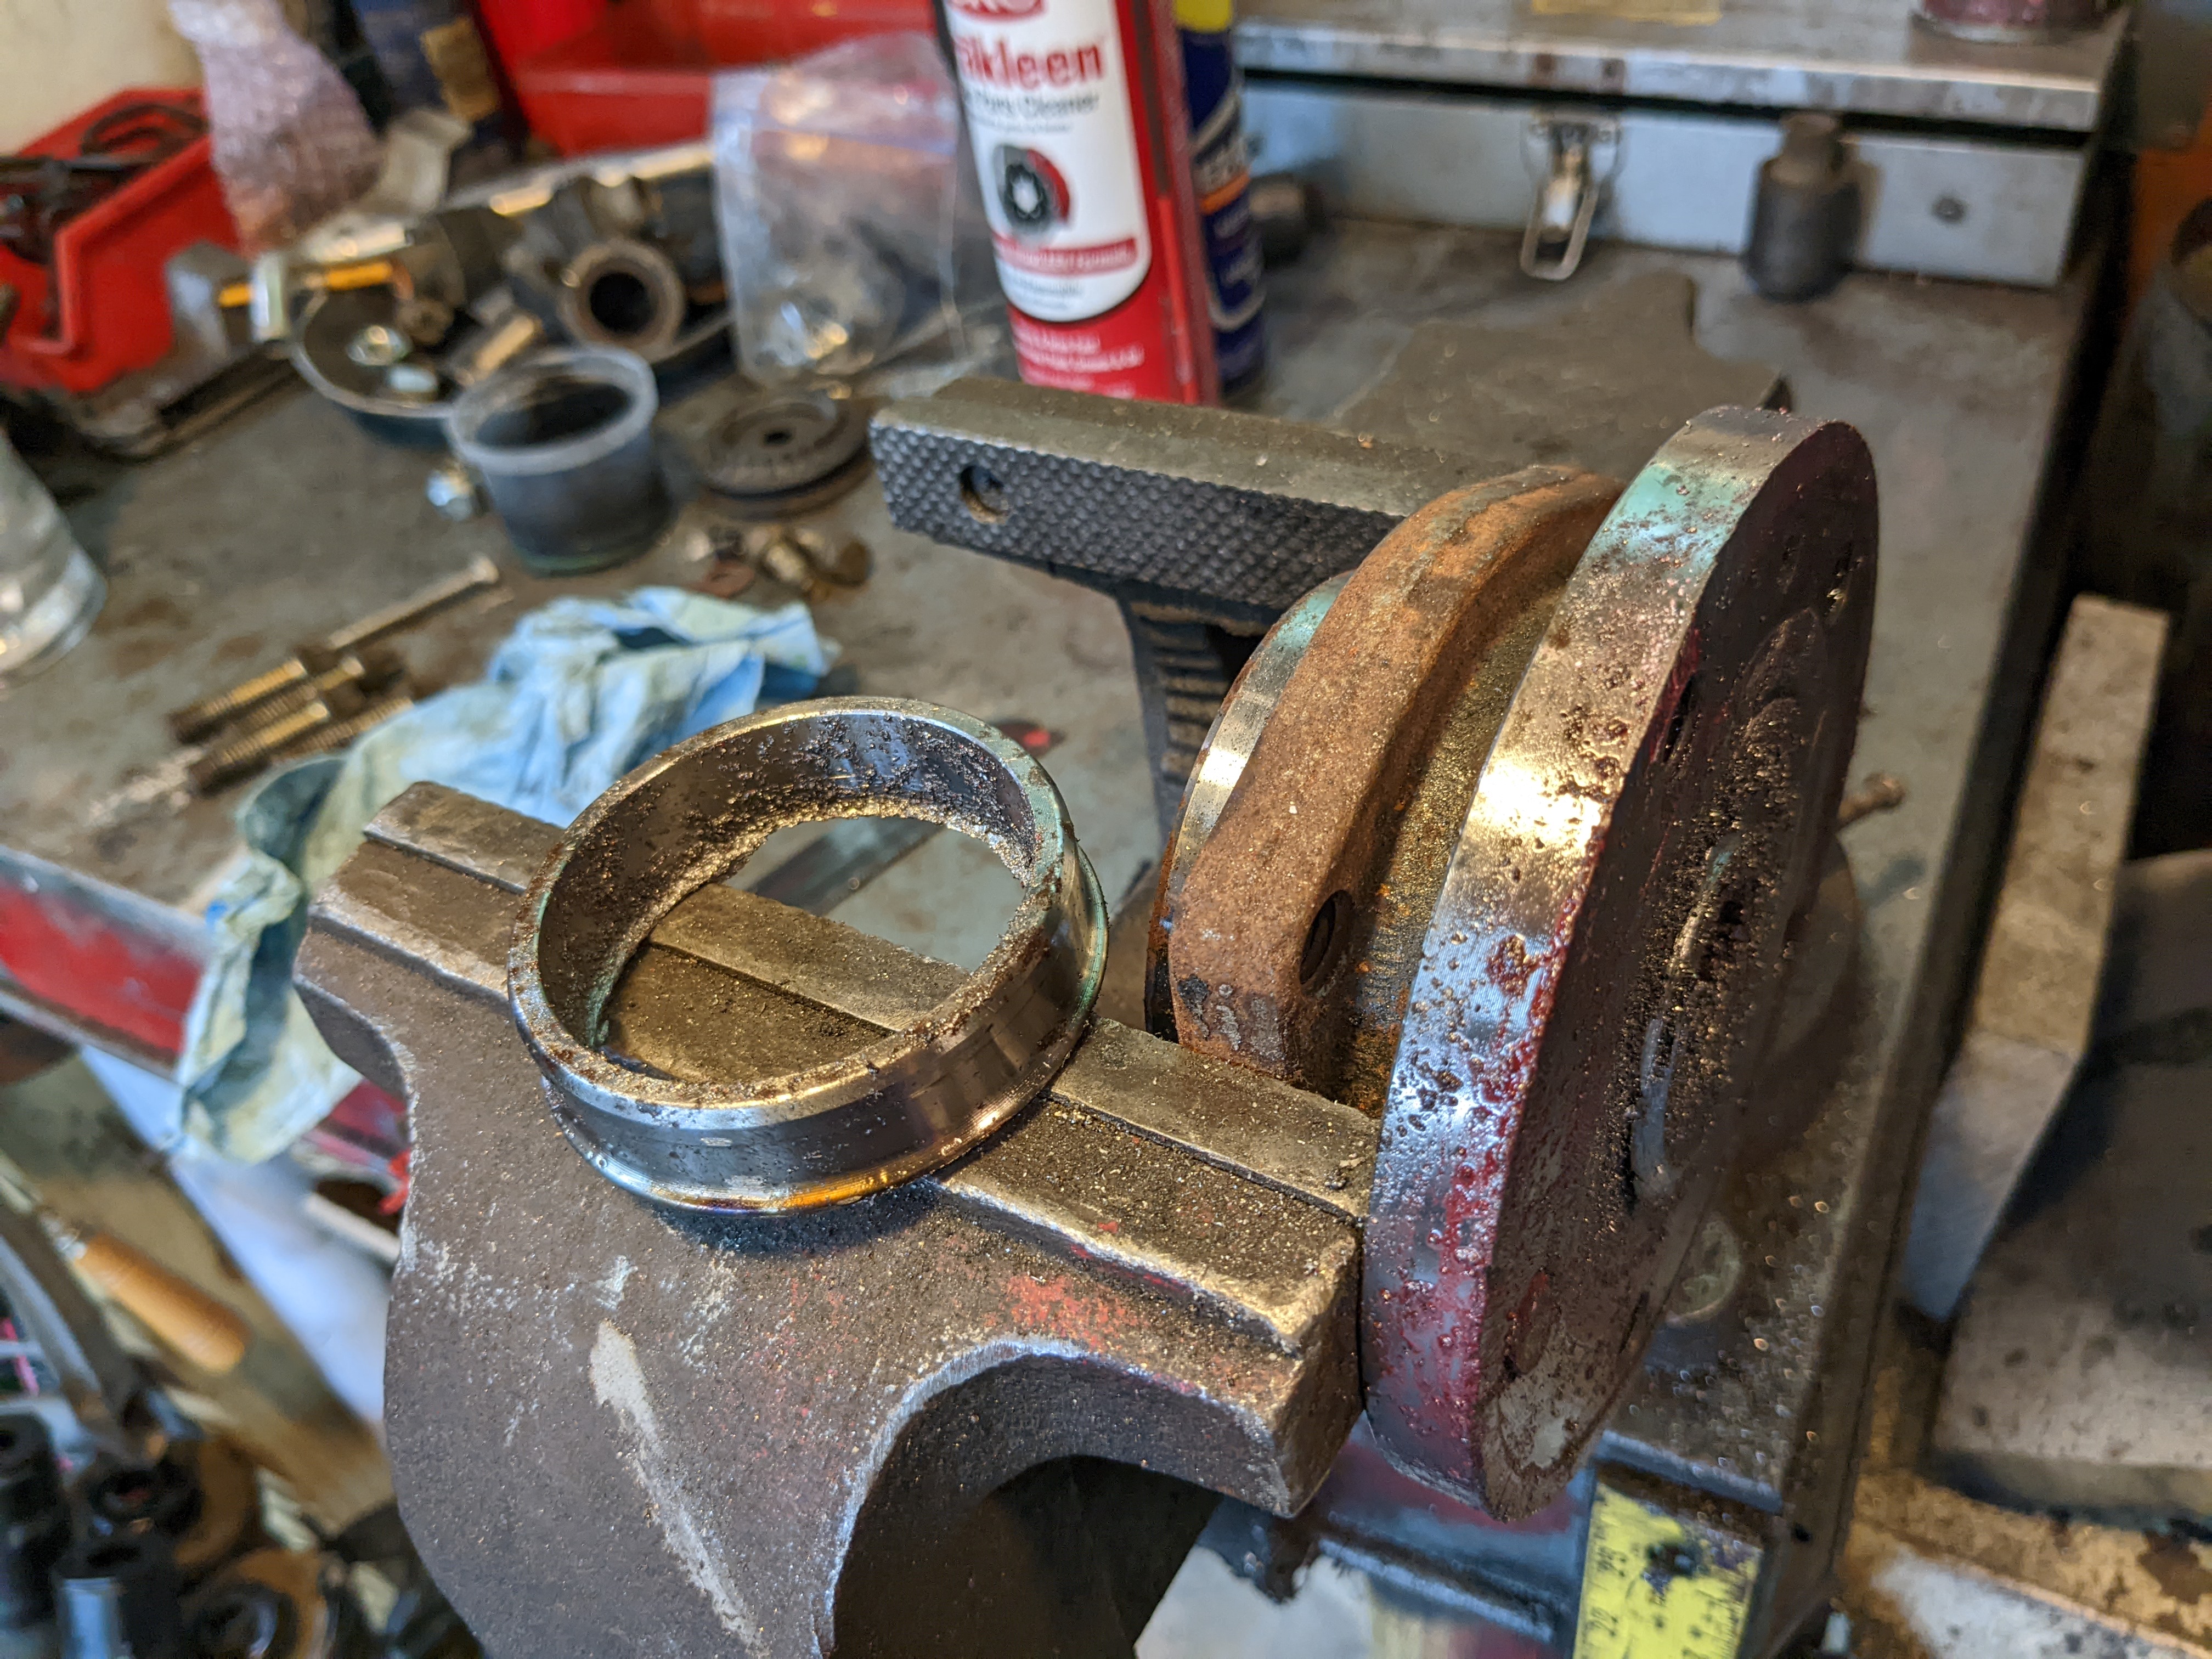
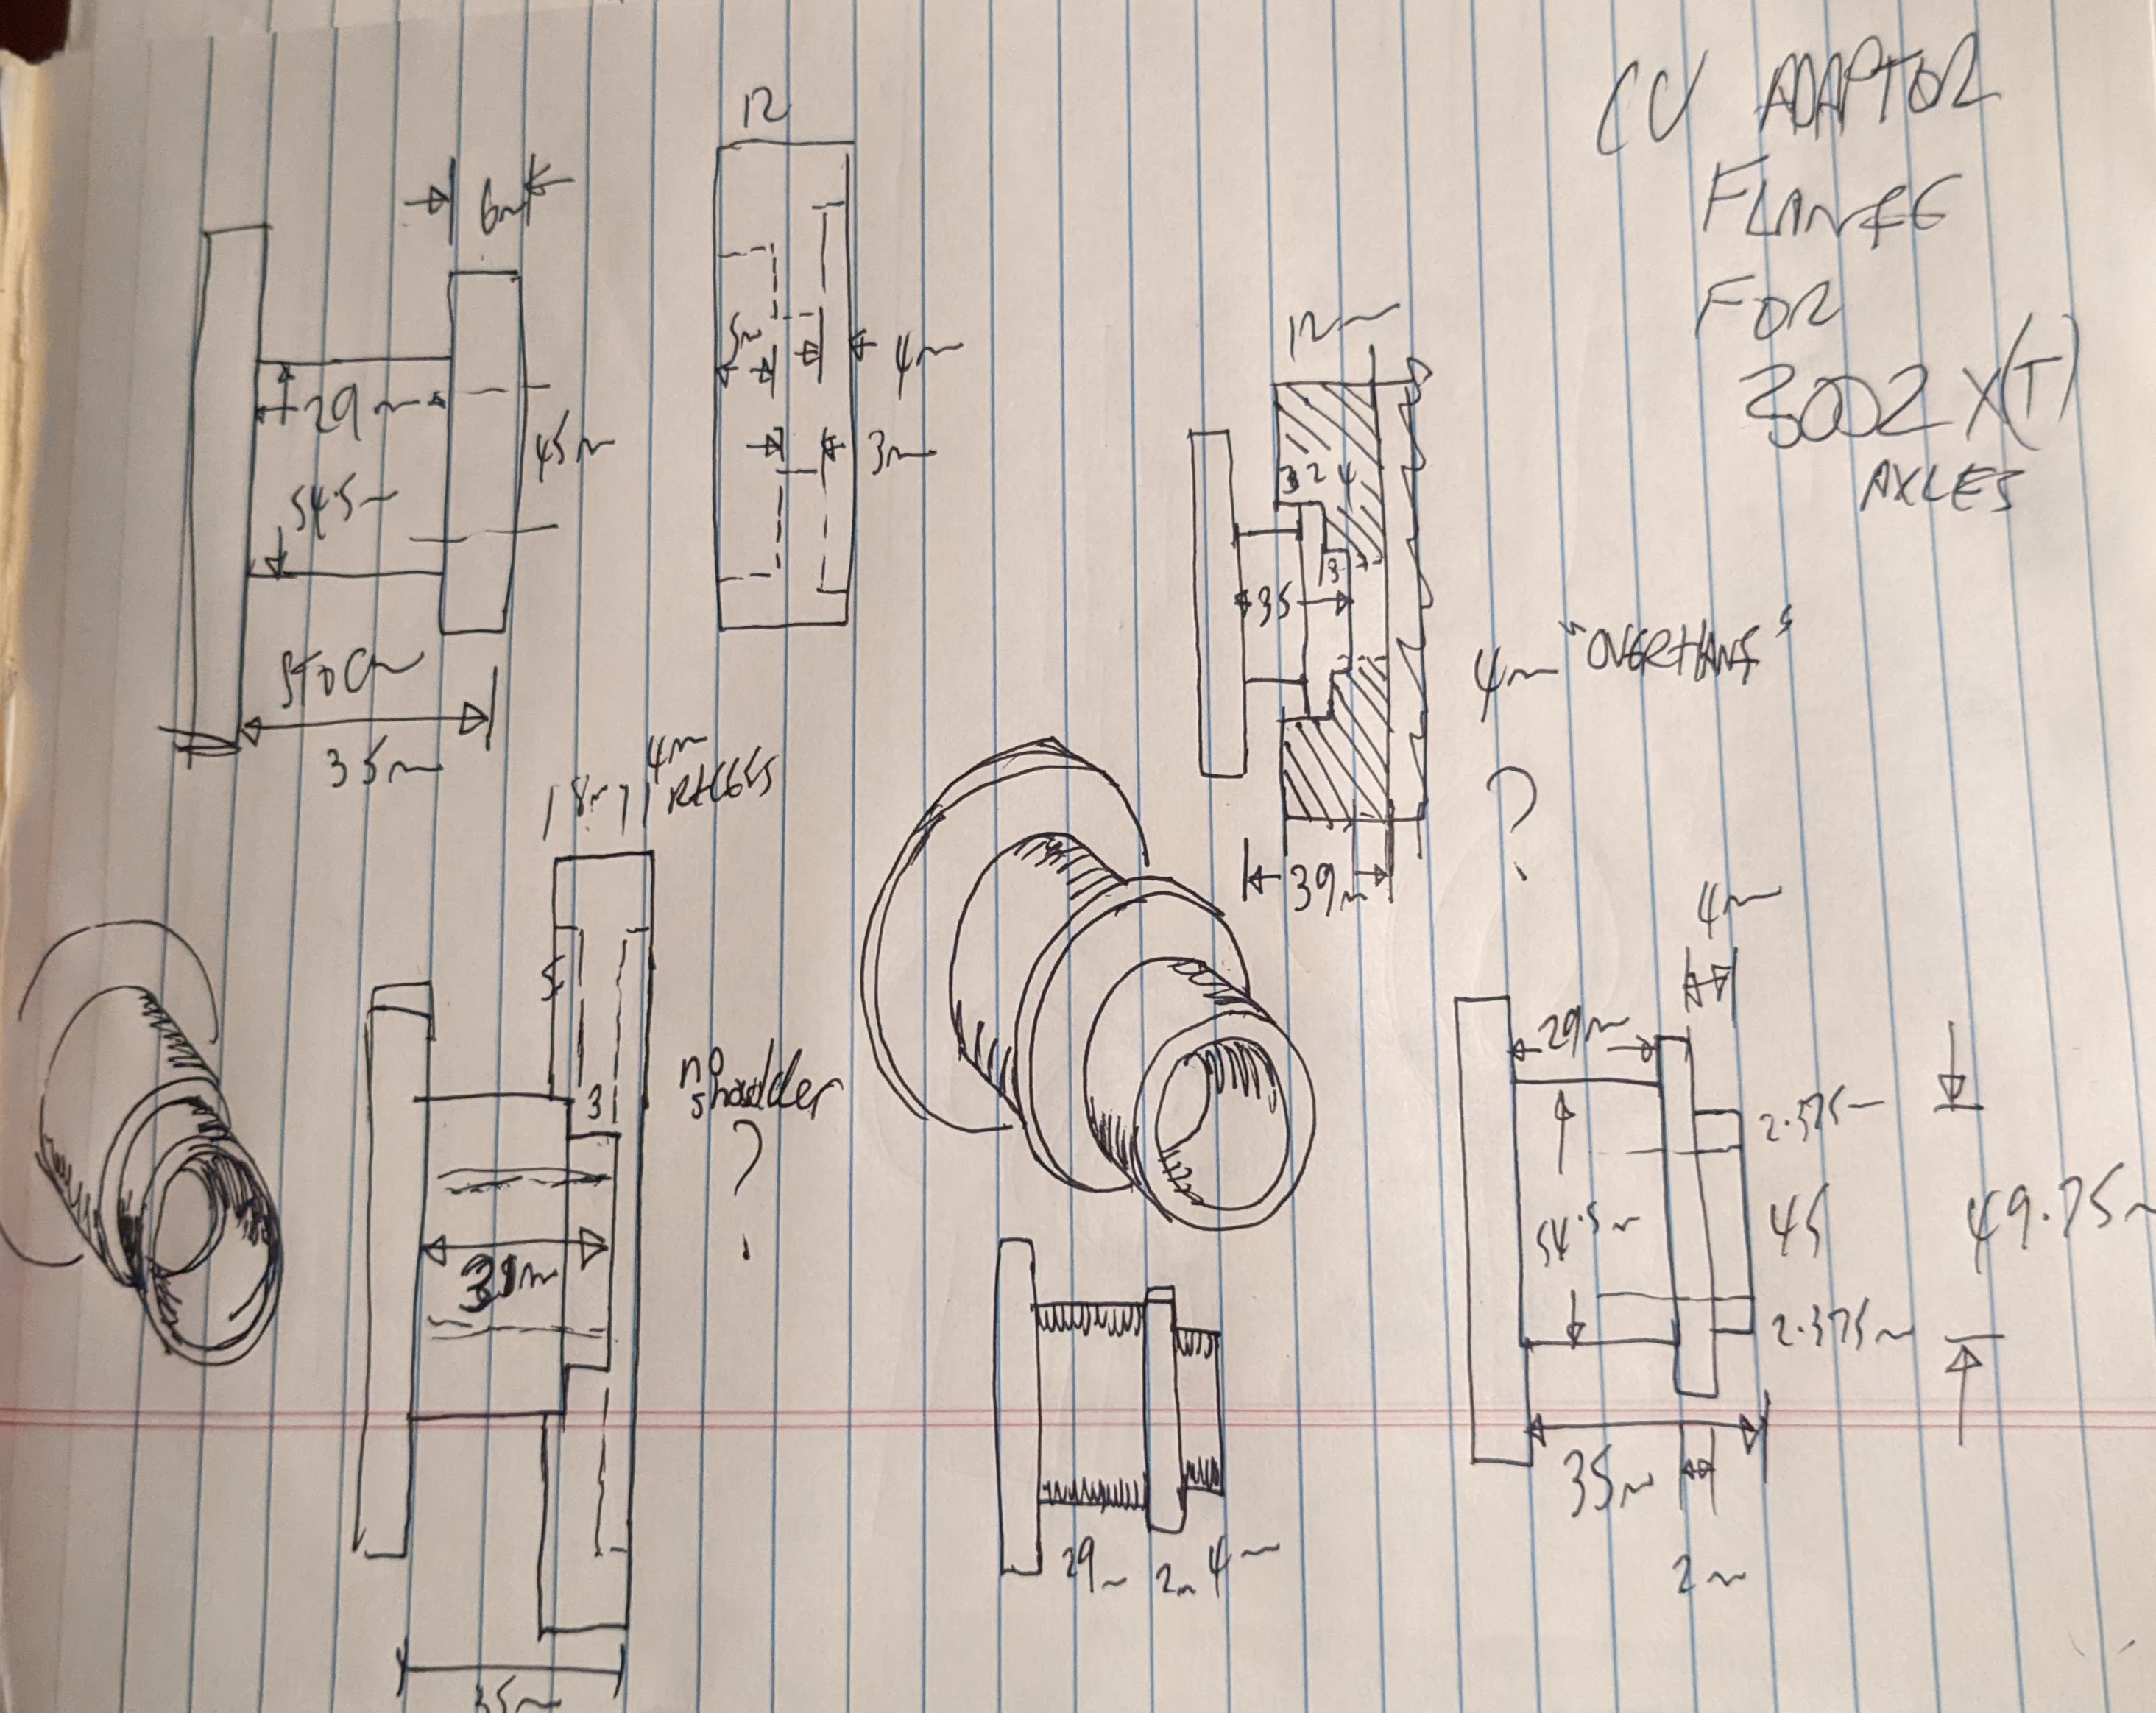
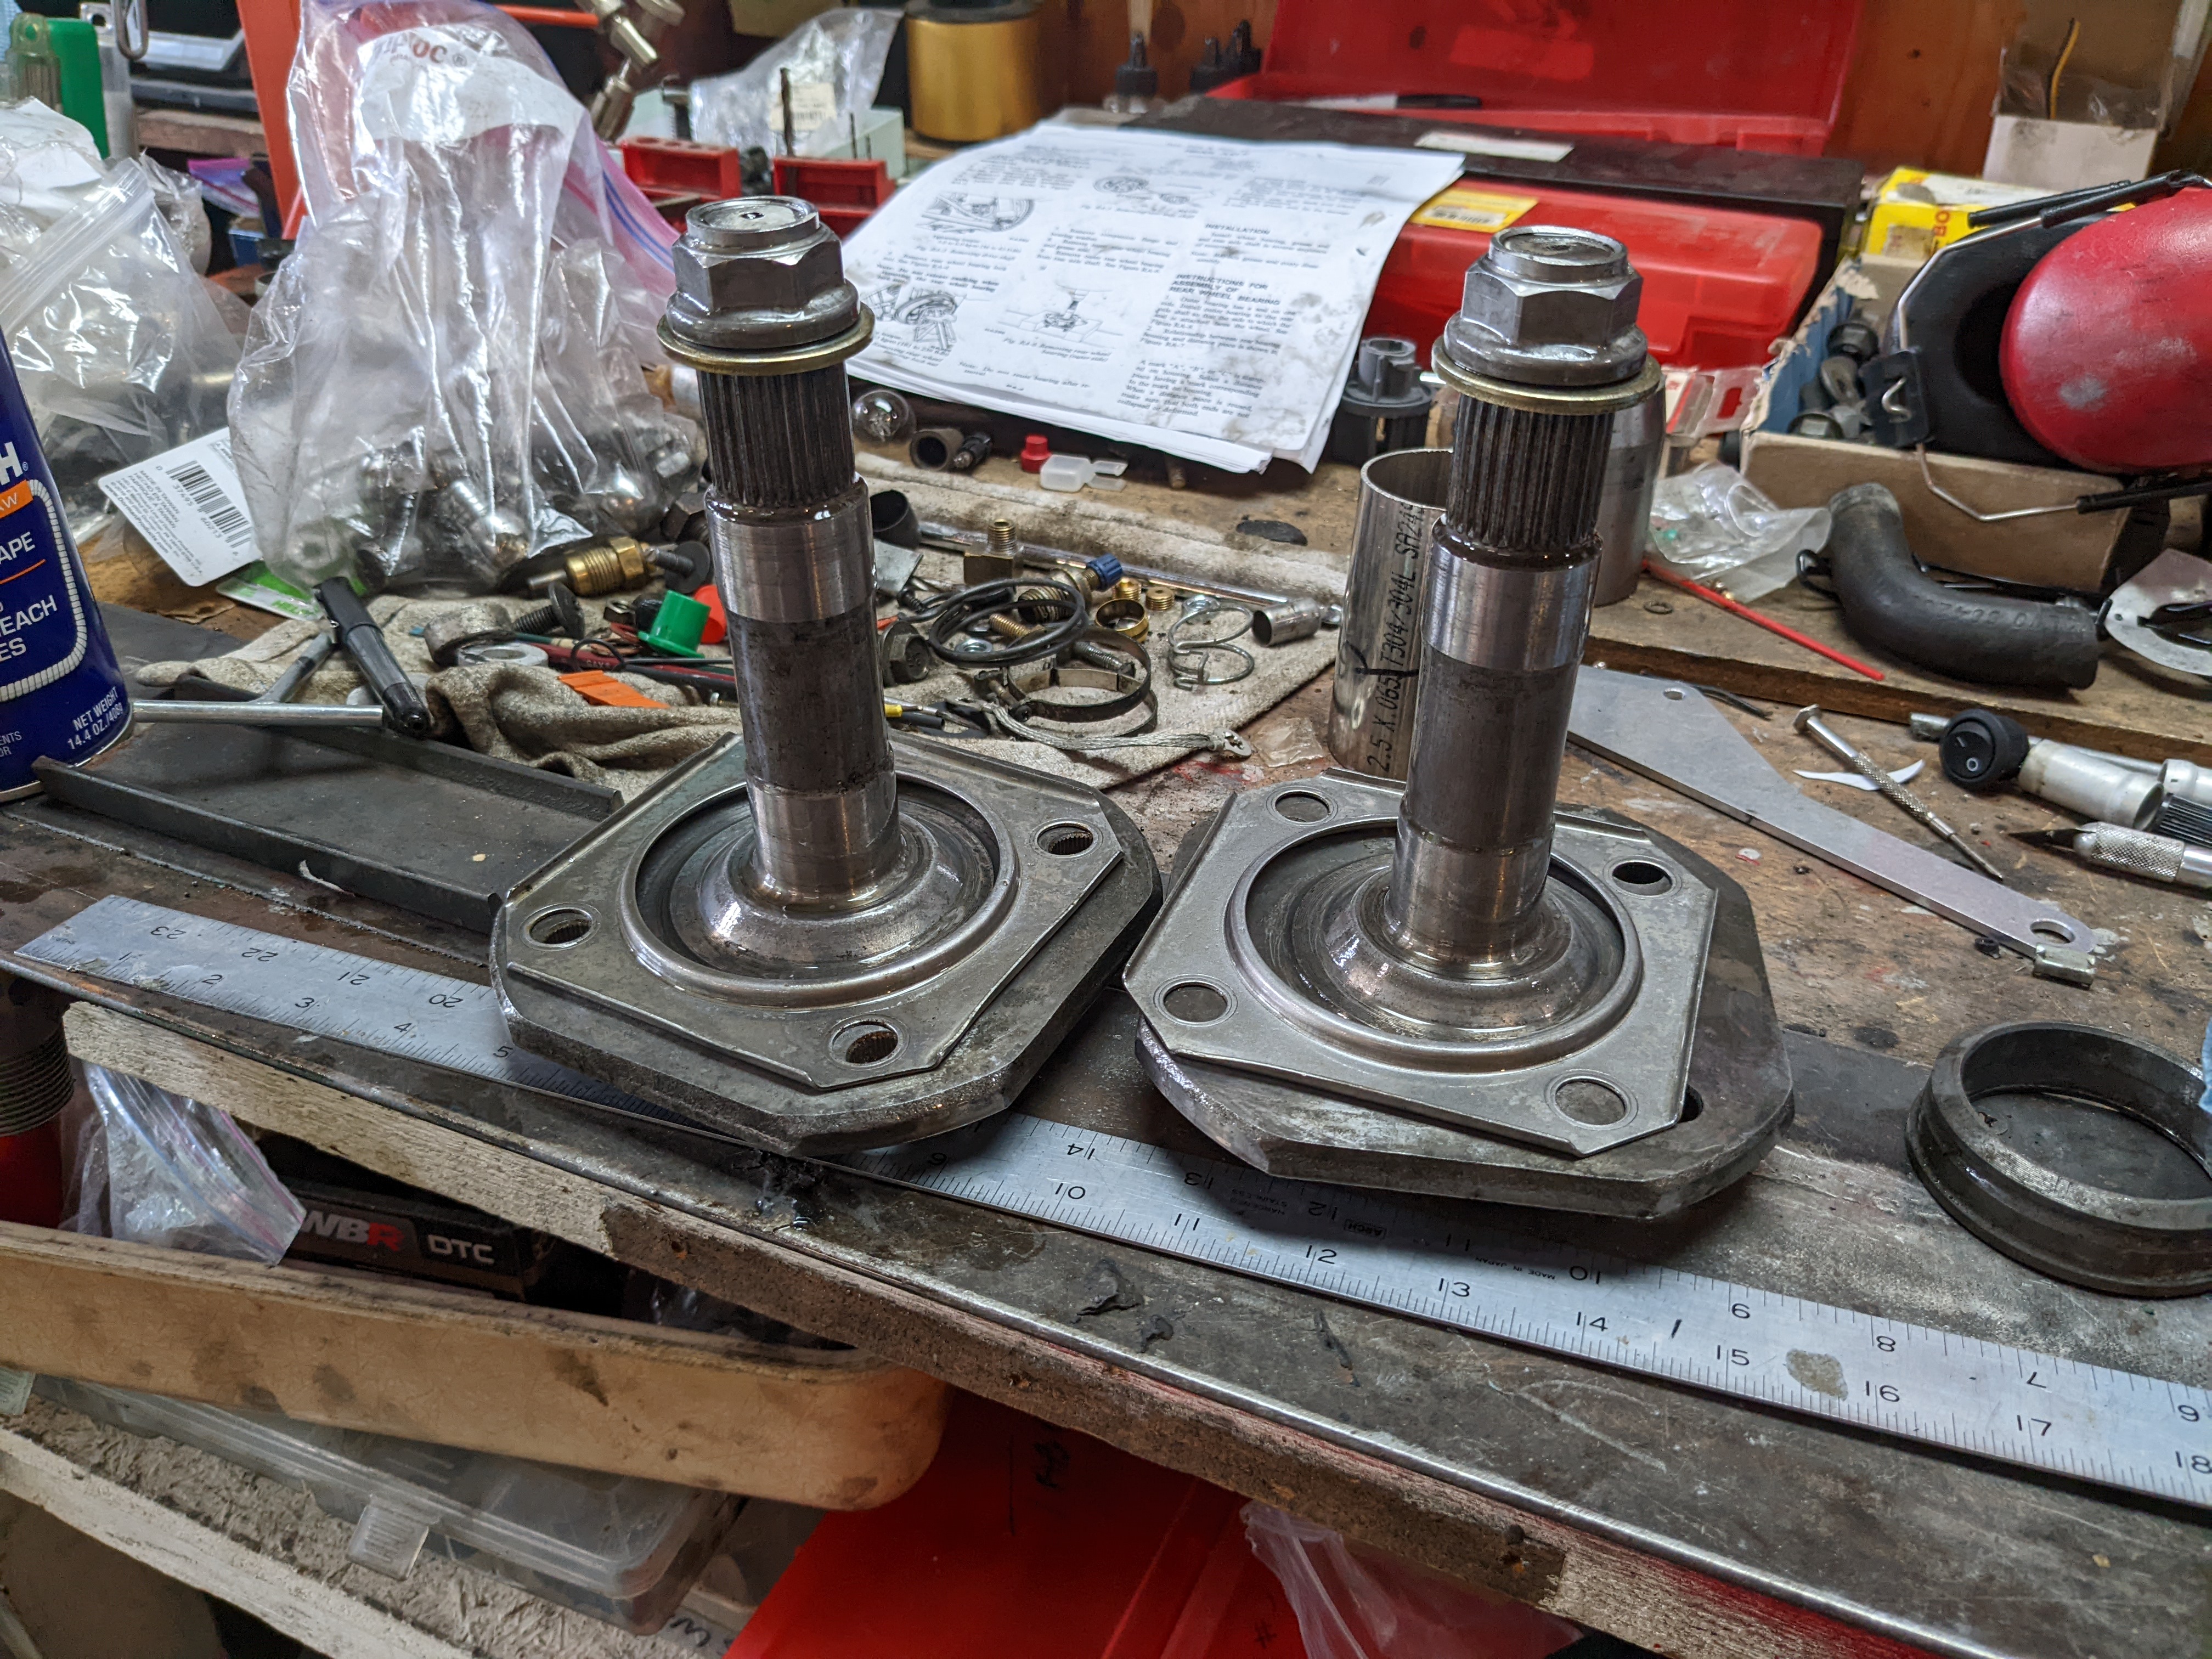
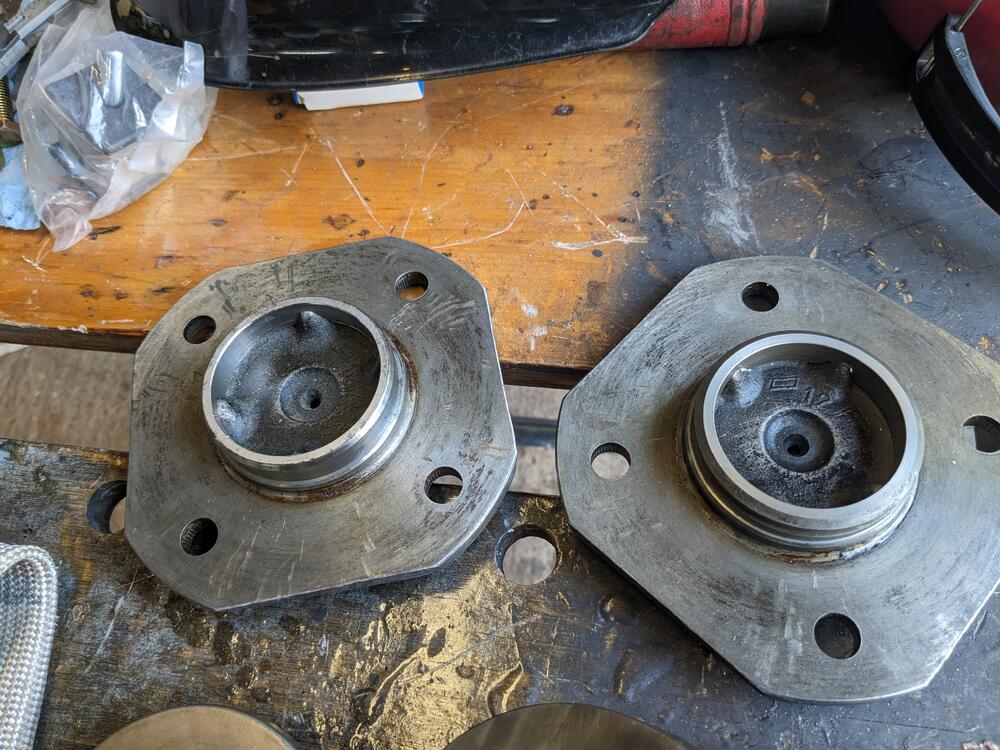
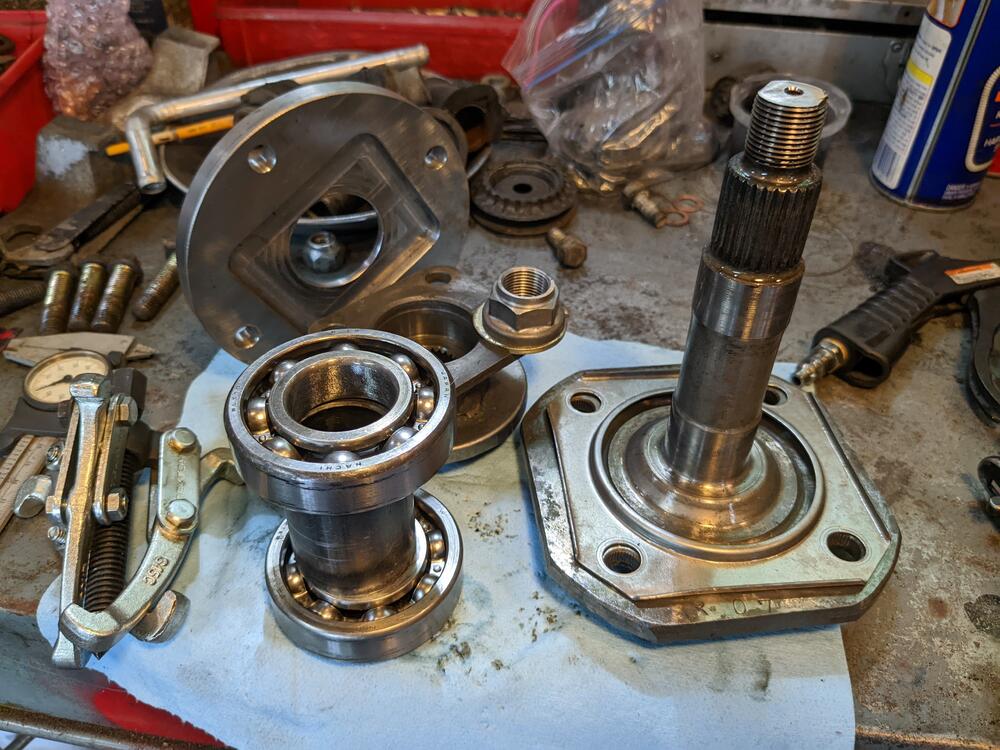
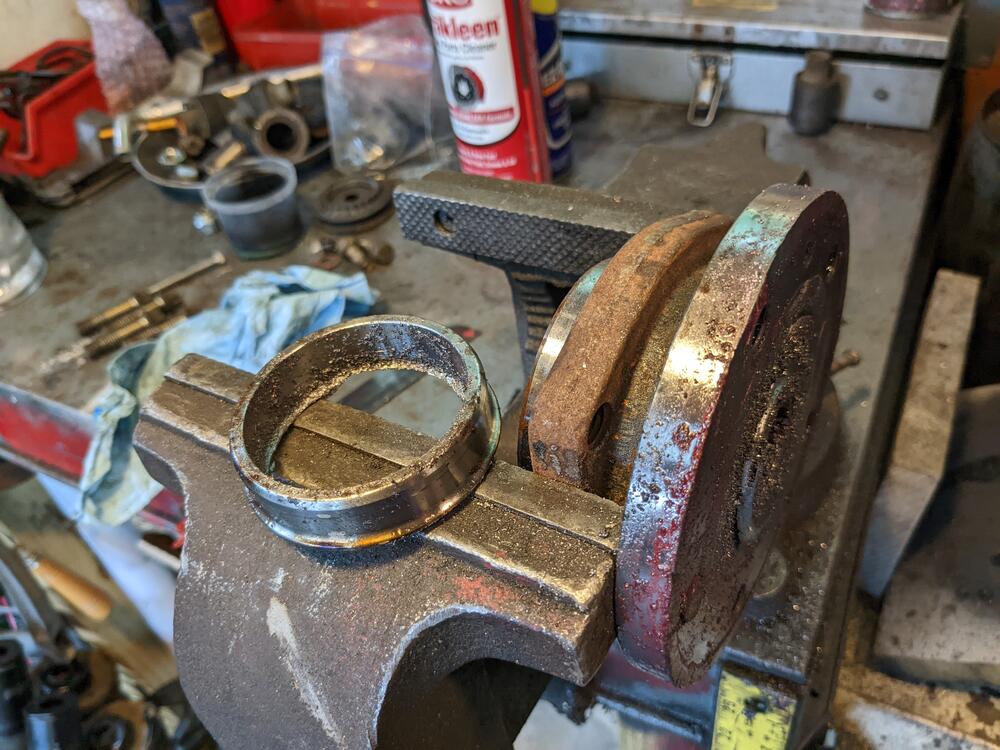
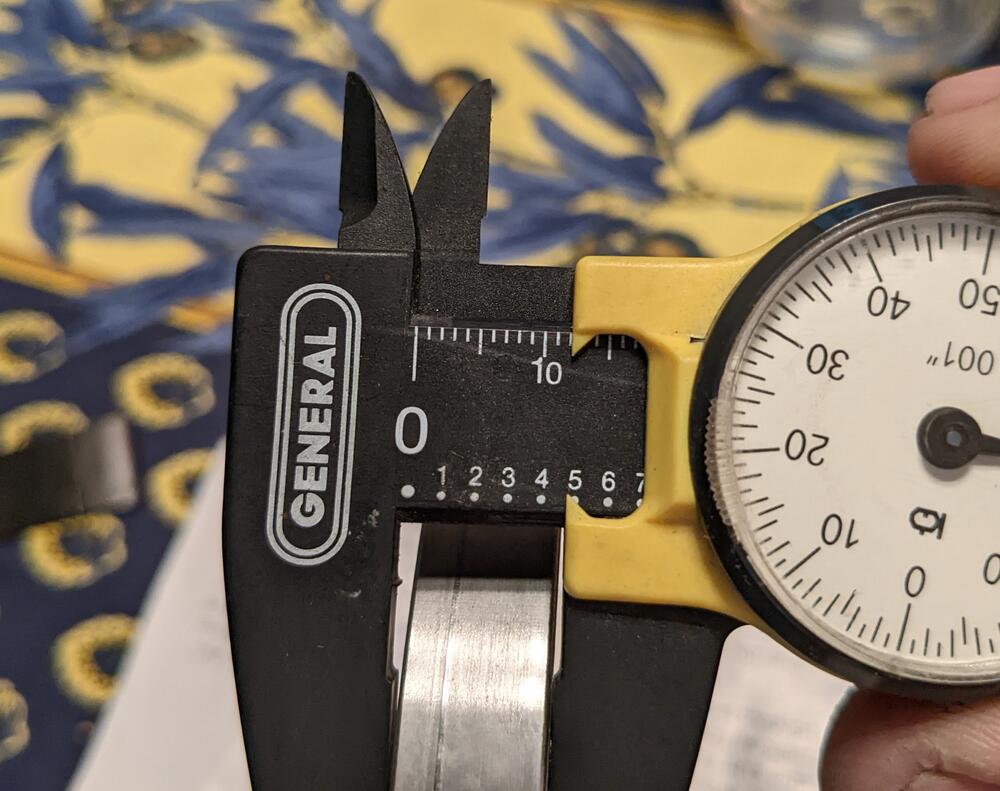
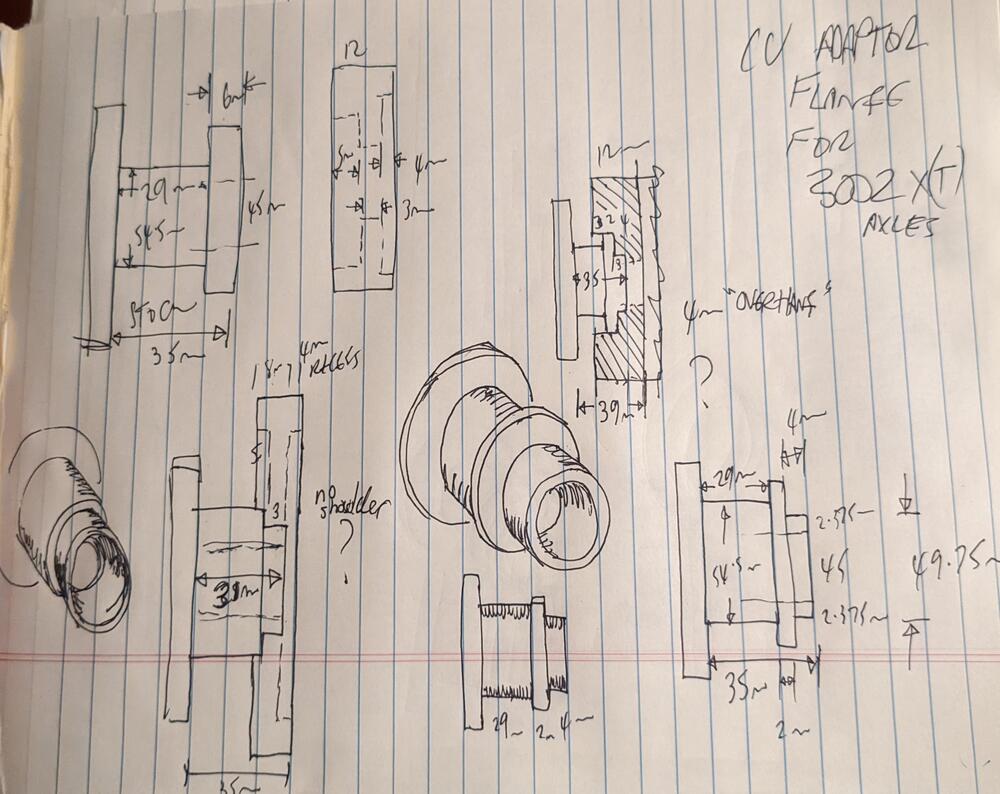
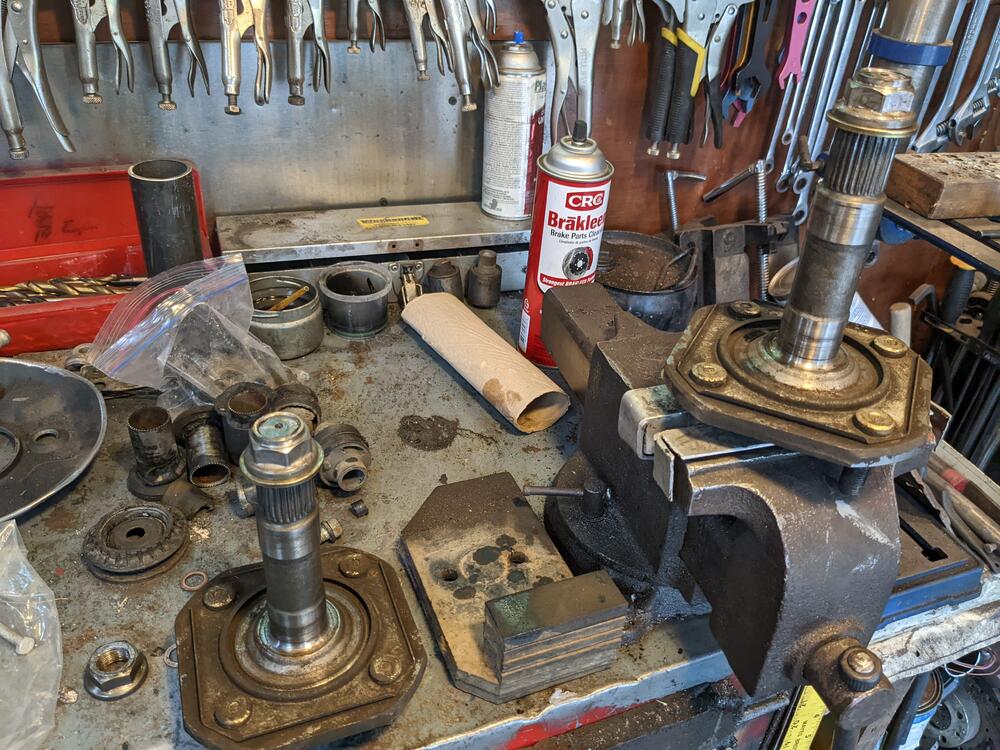
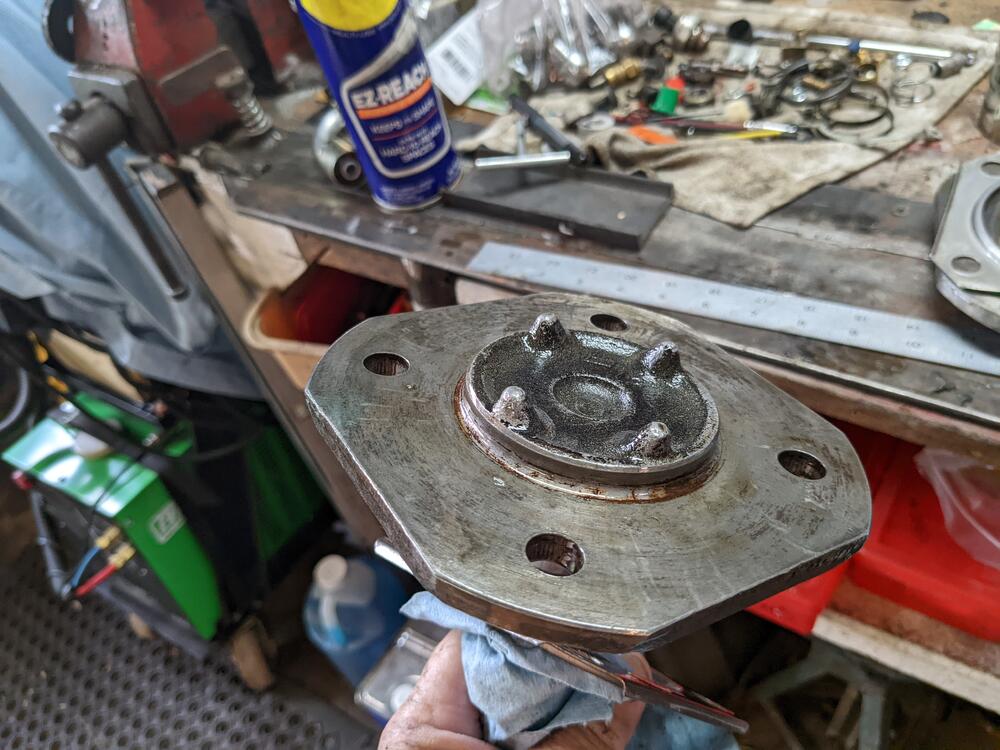
Got the stub axles & flanges back from the machine shop. Now I have to weld everything. Hubcentric flange for locating the wheel Inner flanges modded to accept the Silvermine flanges (also modified to be centric). Collar is to increase the weld surface area Will be like this. Total depth to inner surface is 29mm, same as stock. 4mm inset for CV cap, which I will remove if the stub axle depth becomes an issue
-
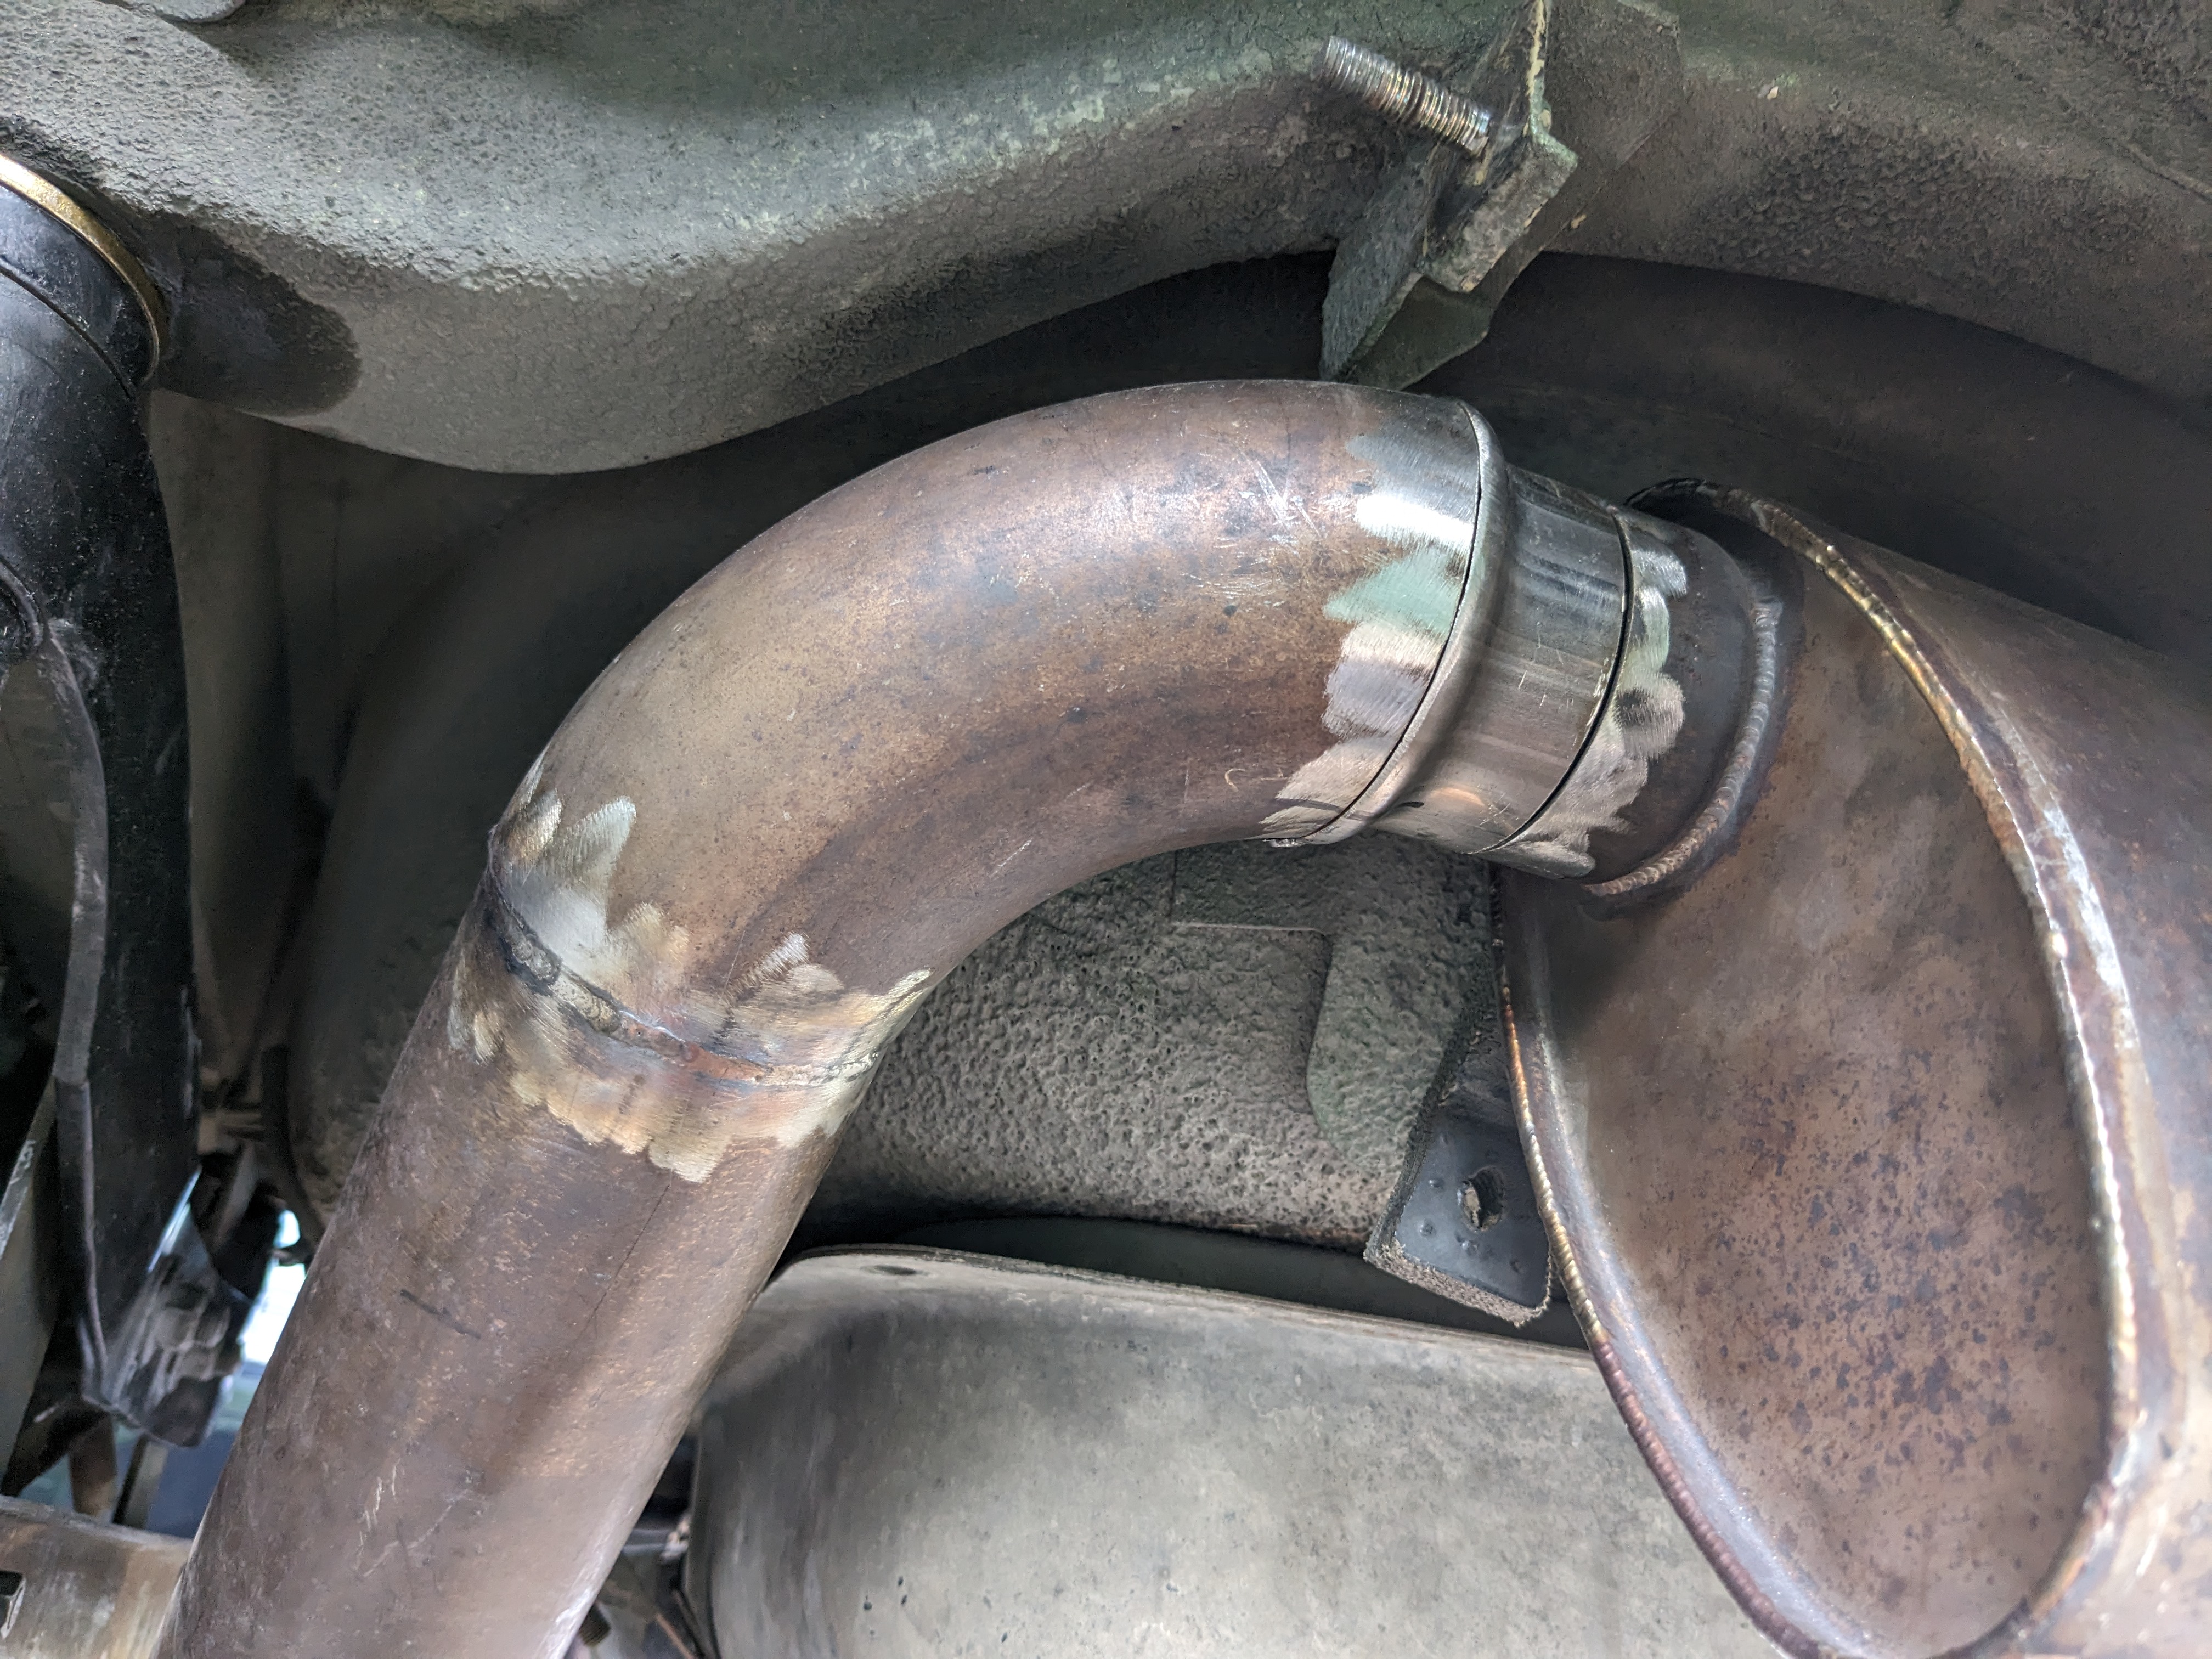
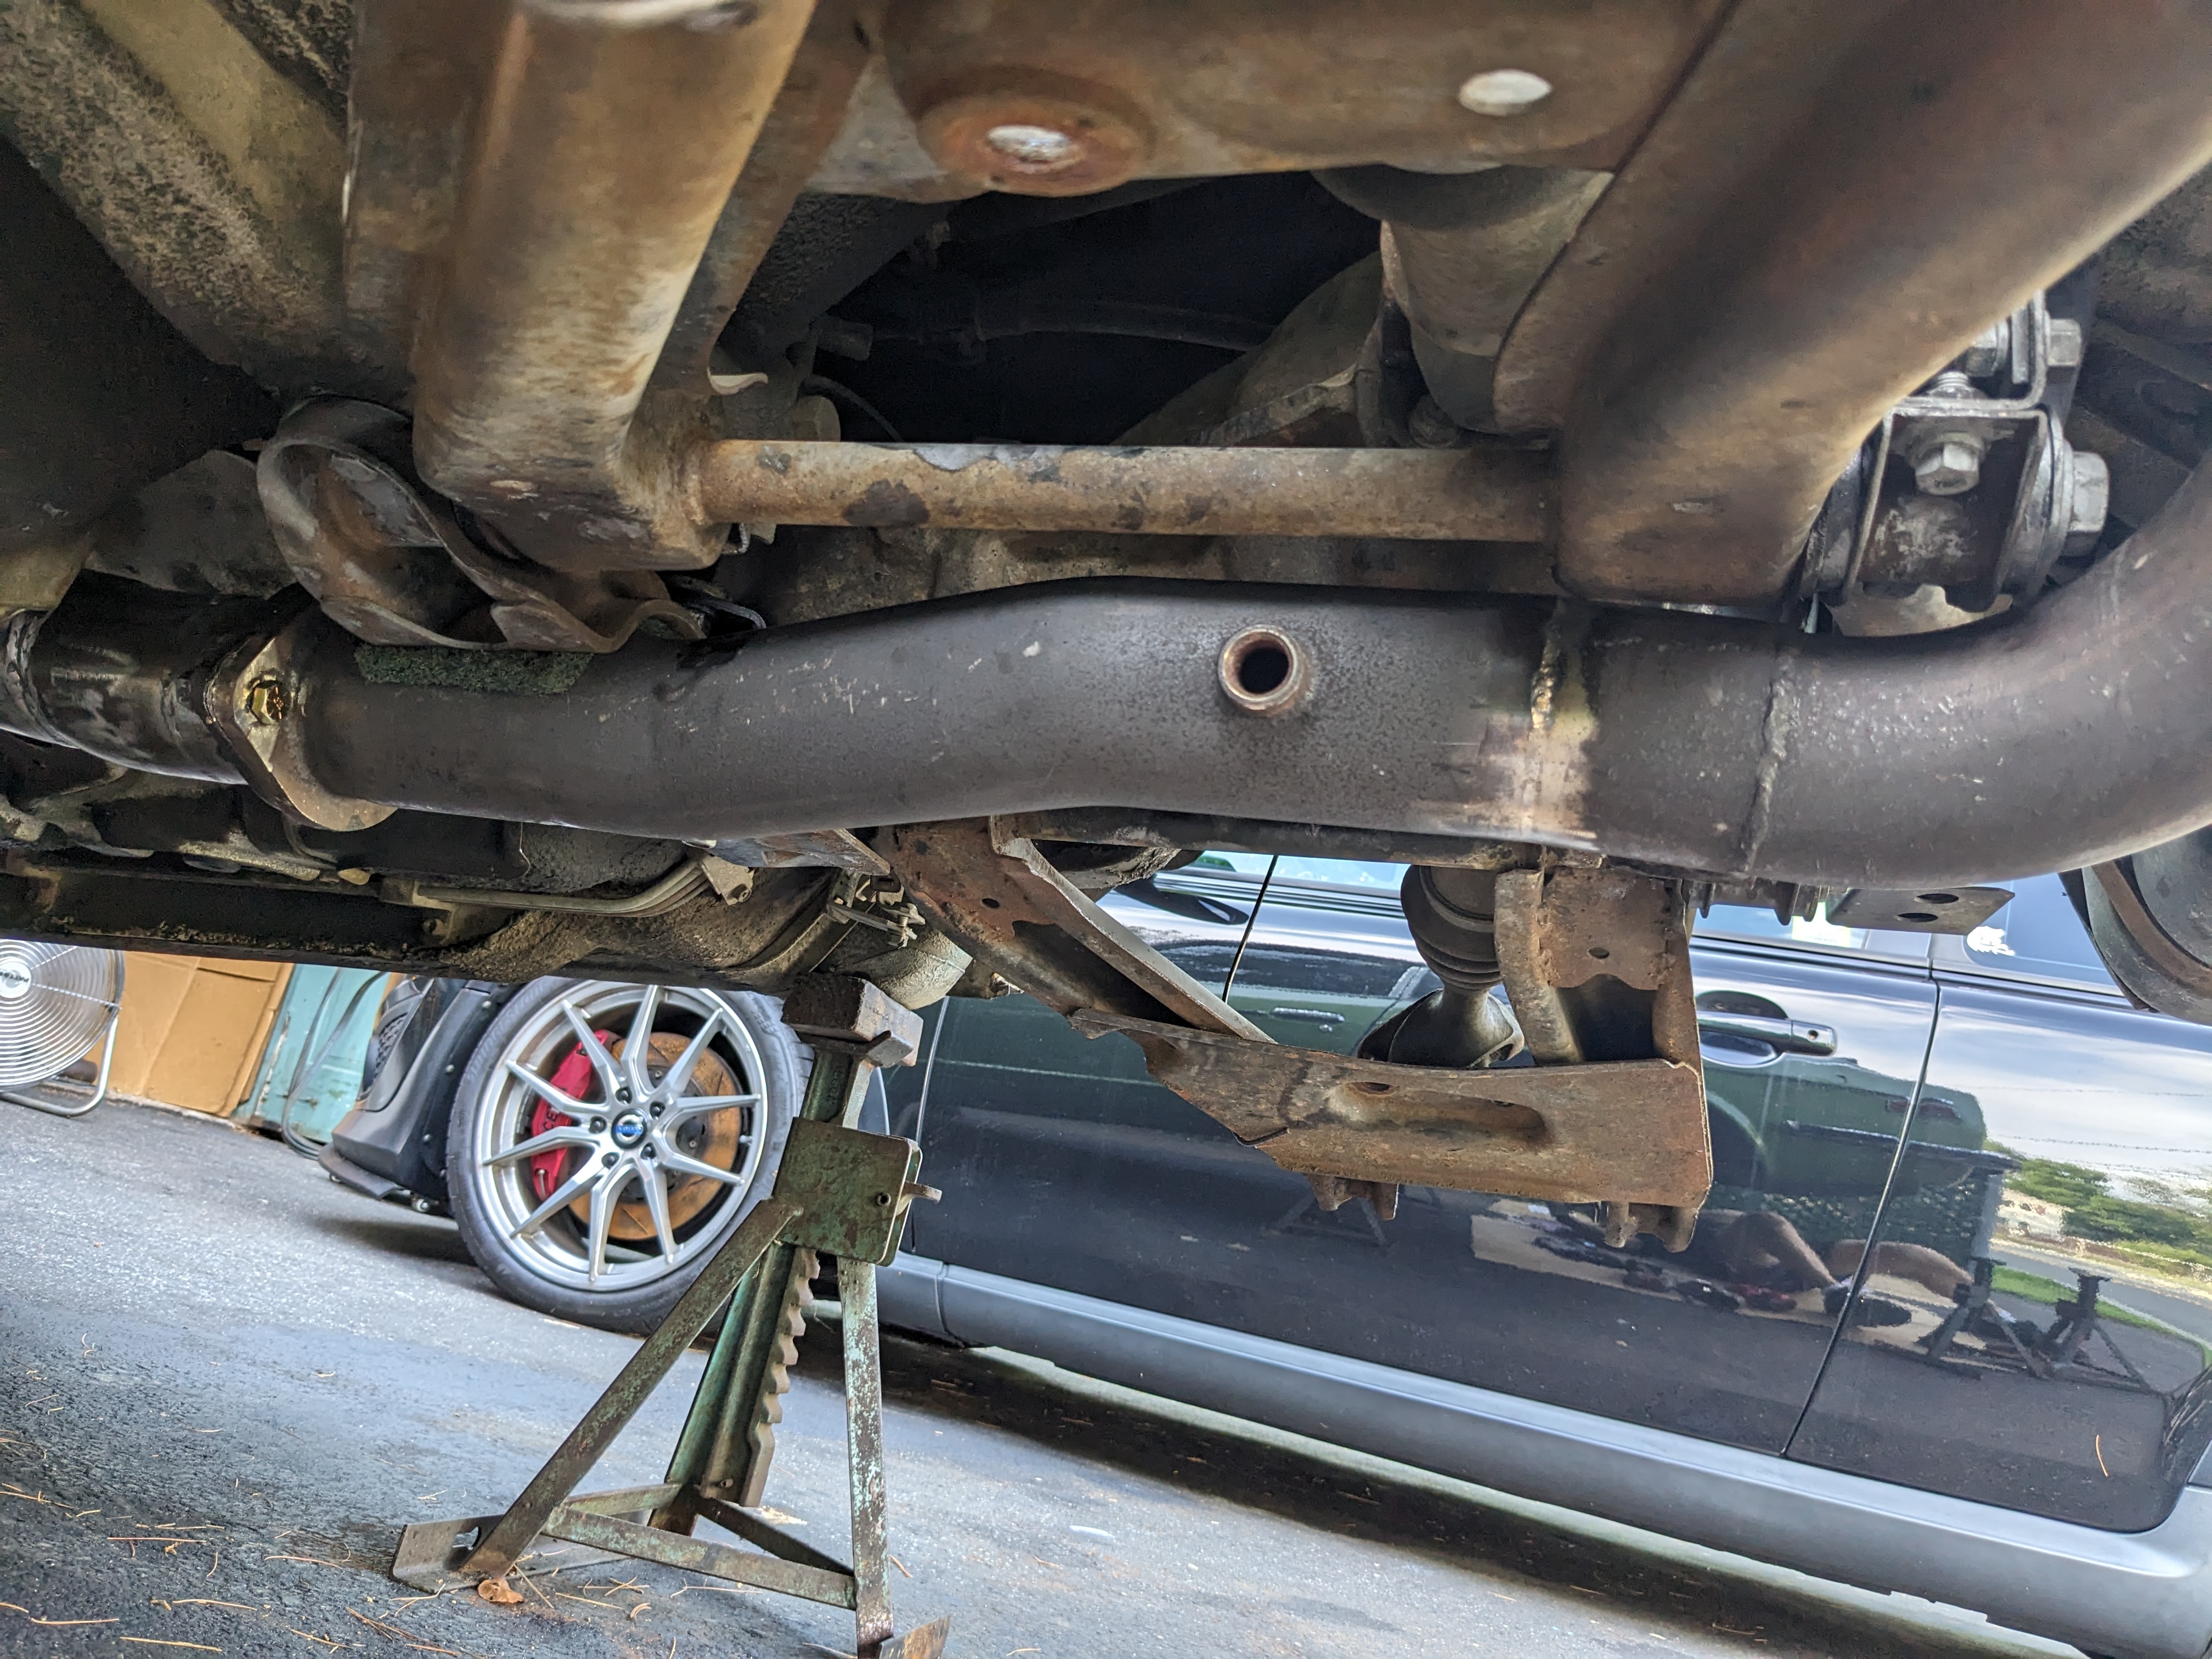
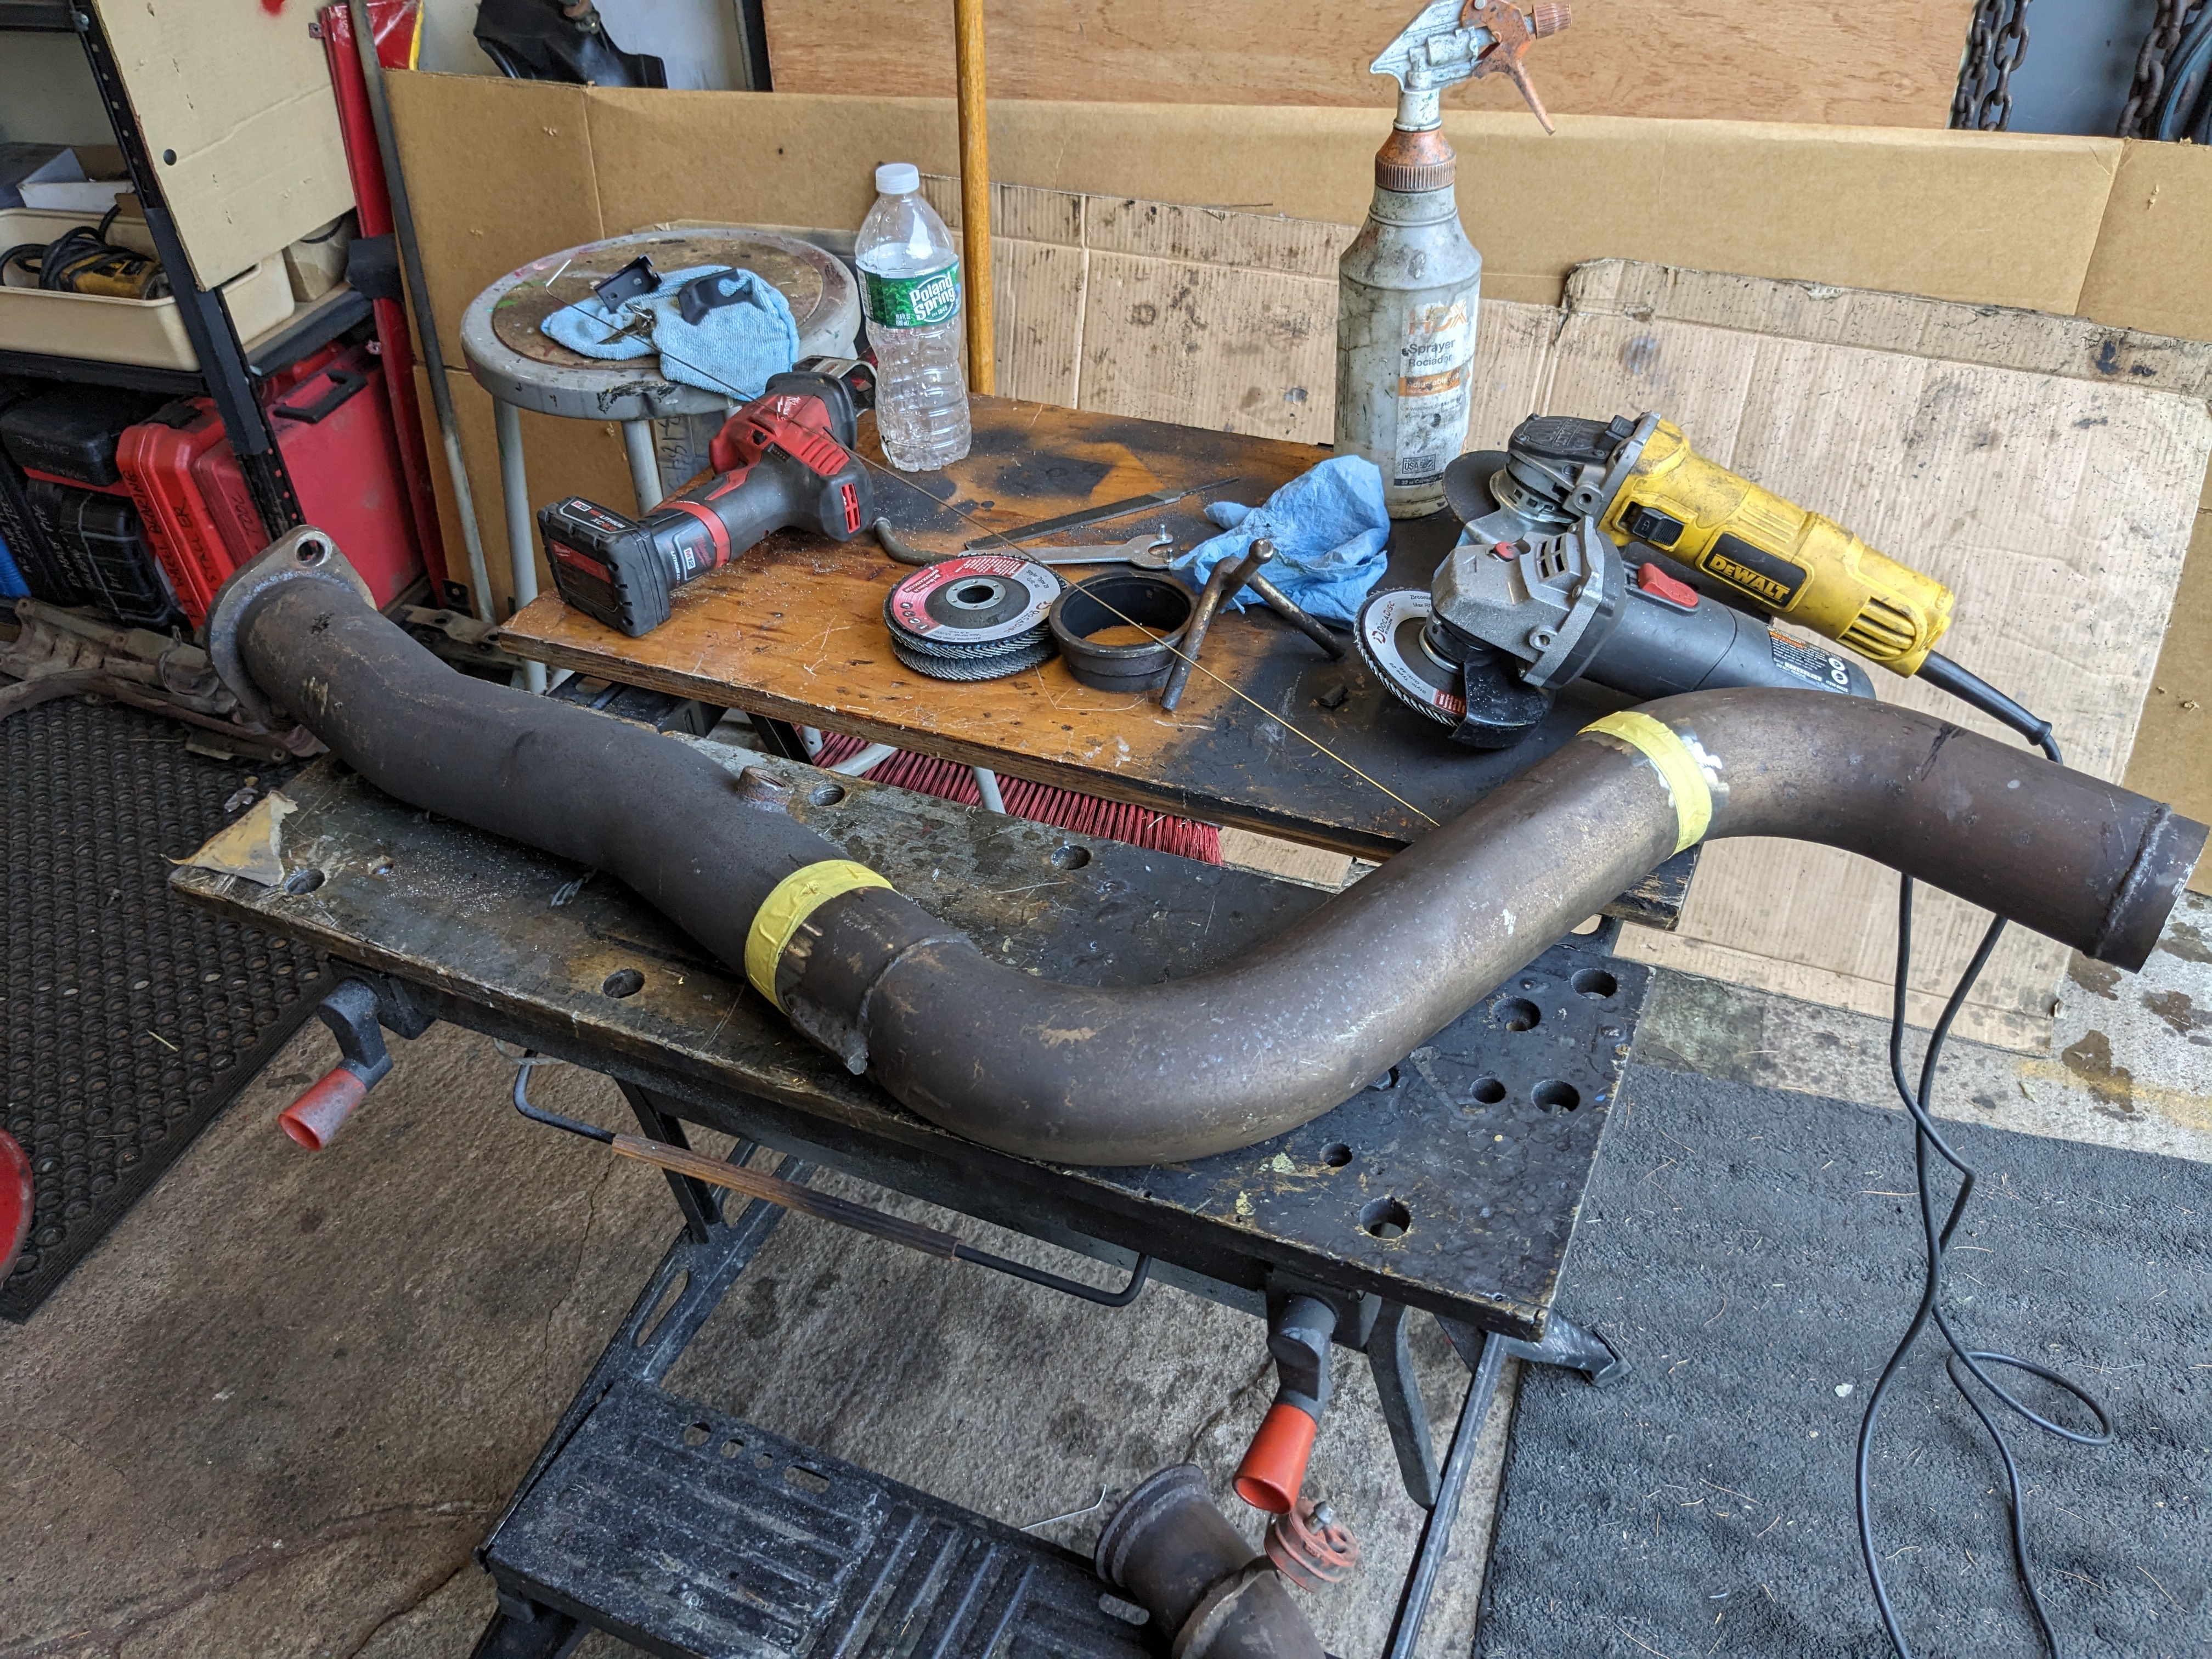
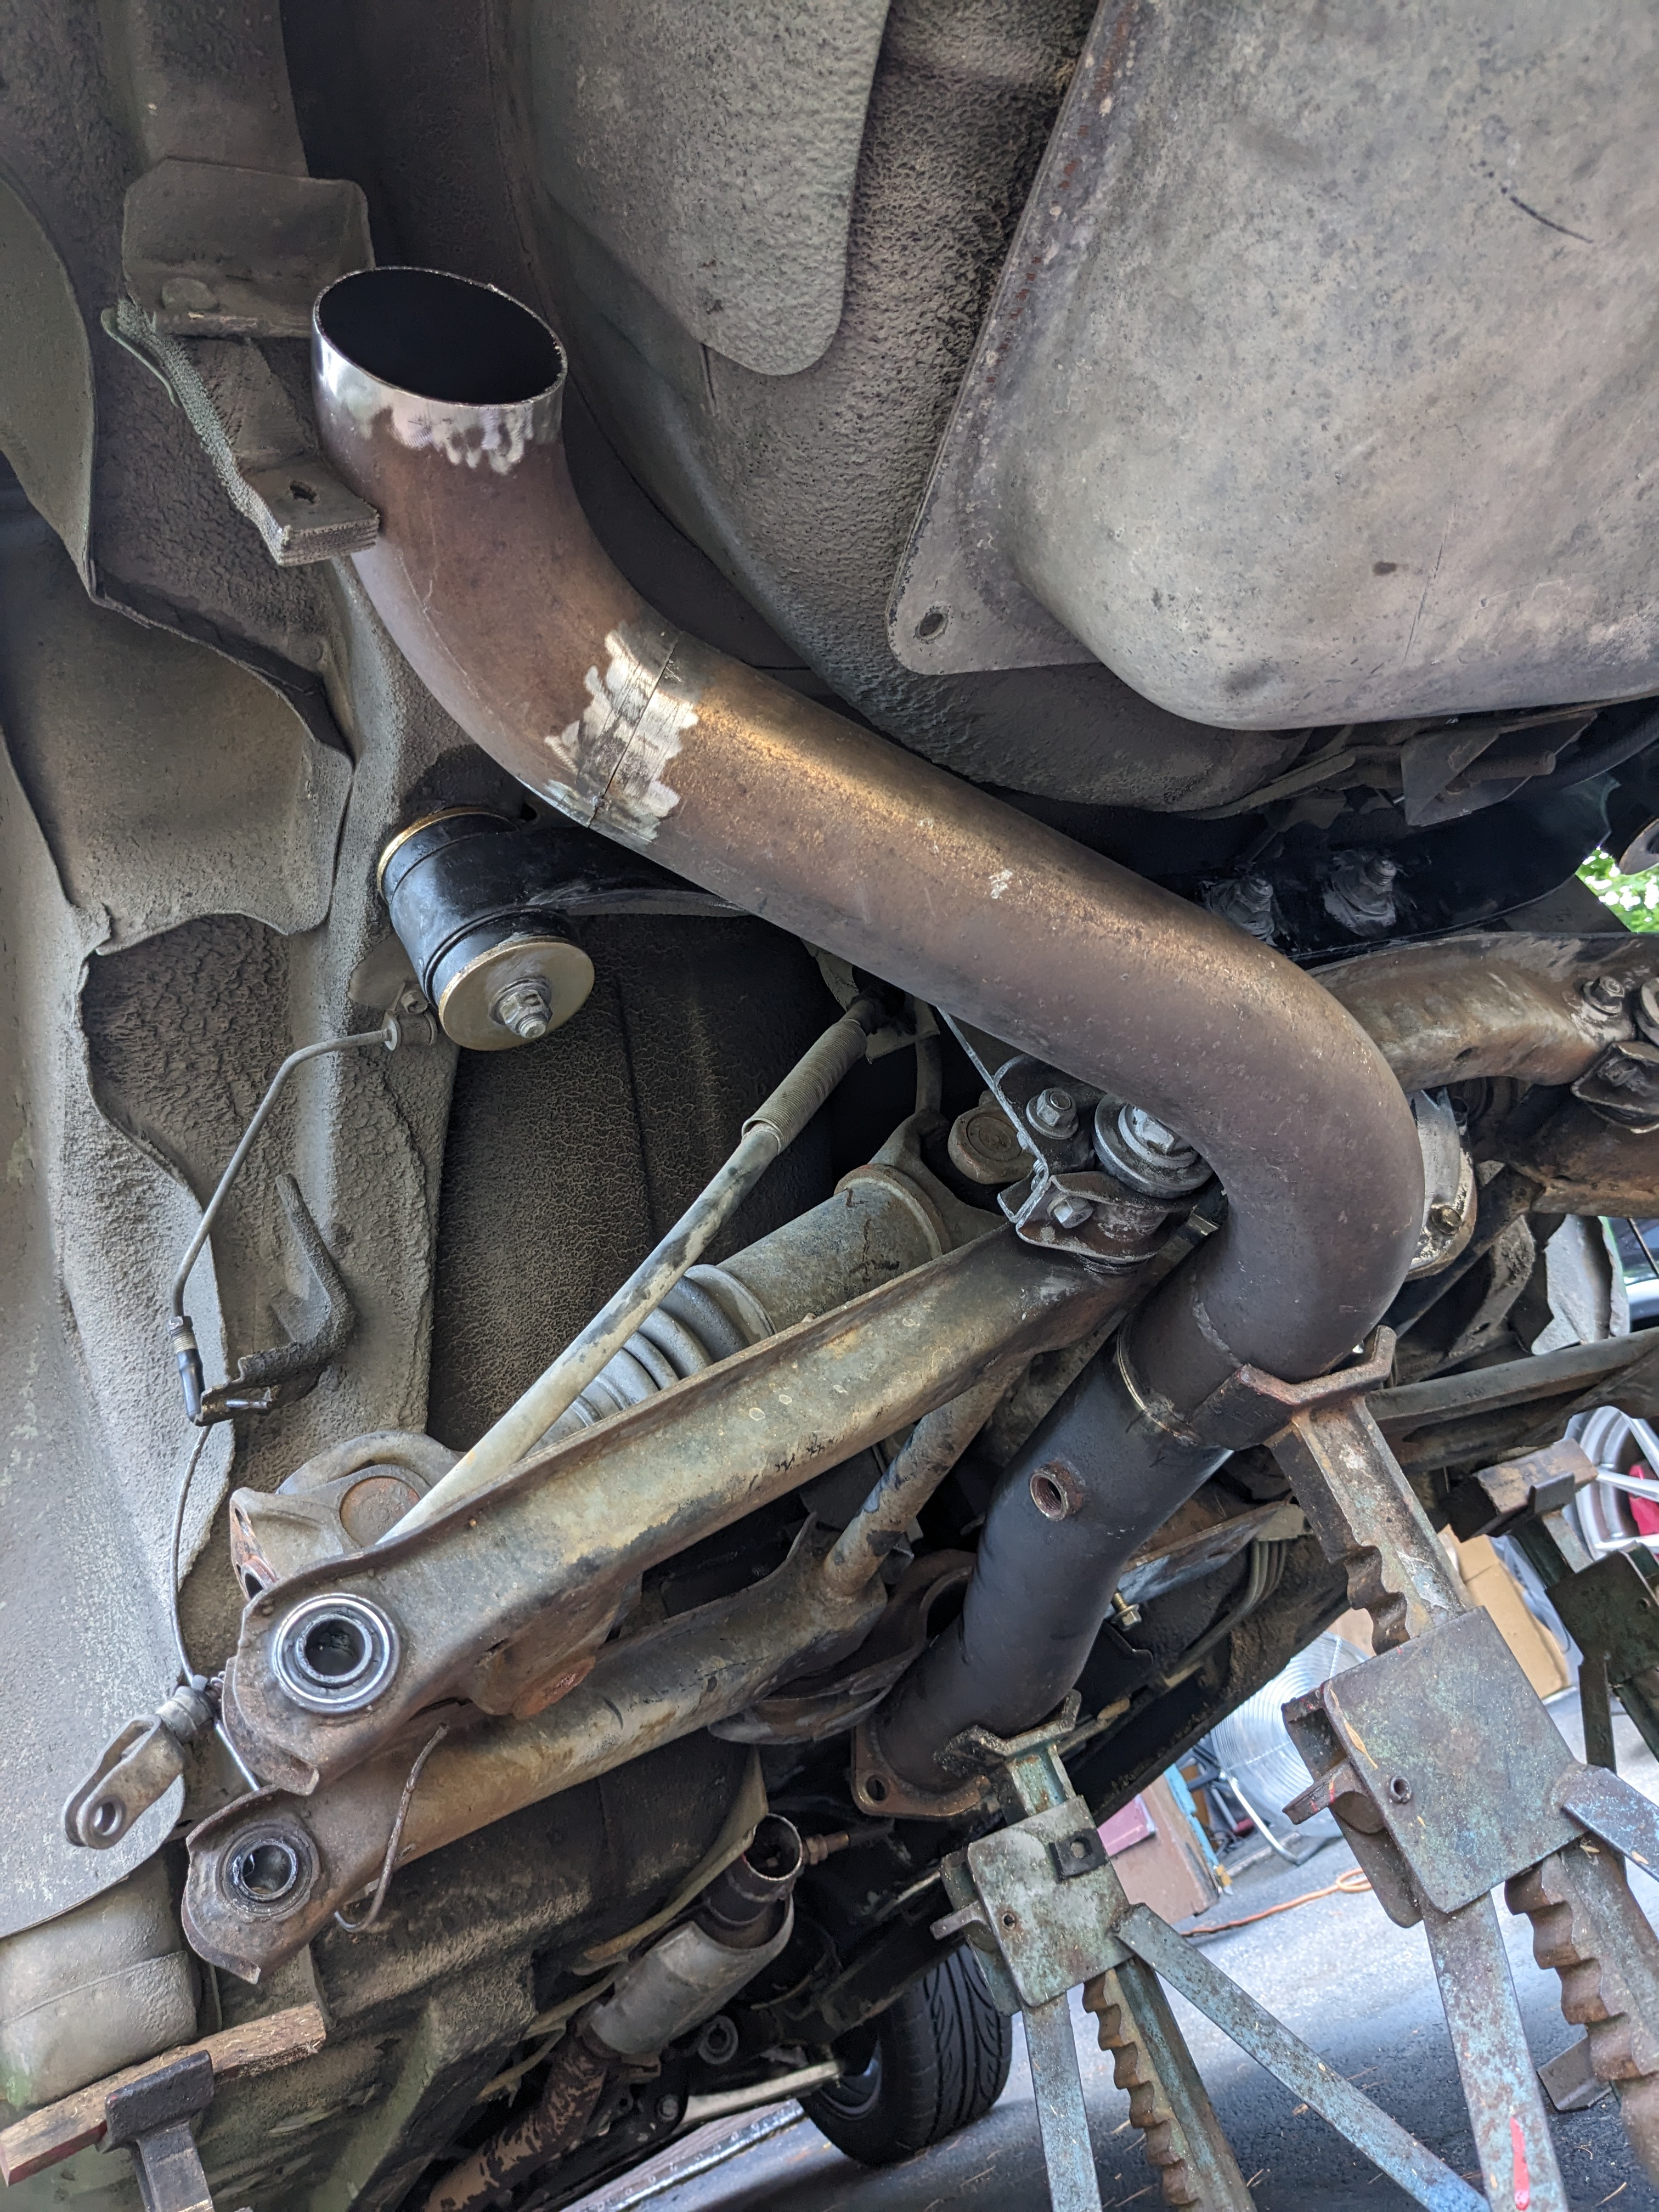
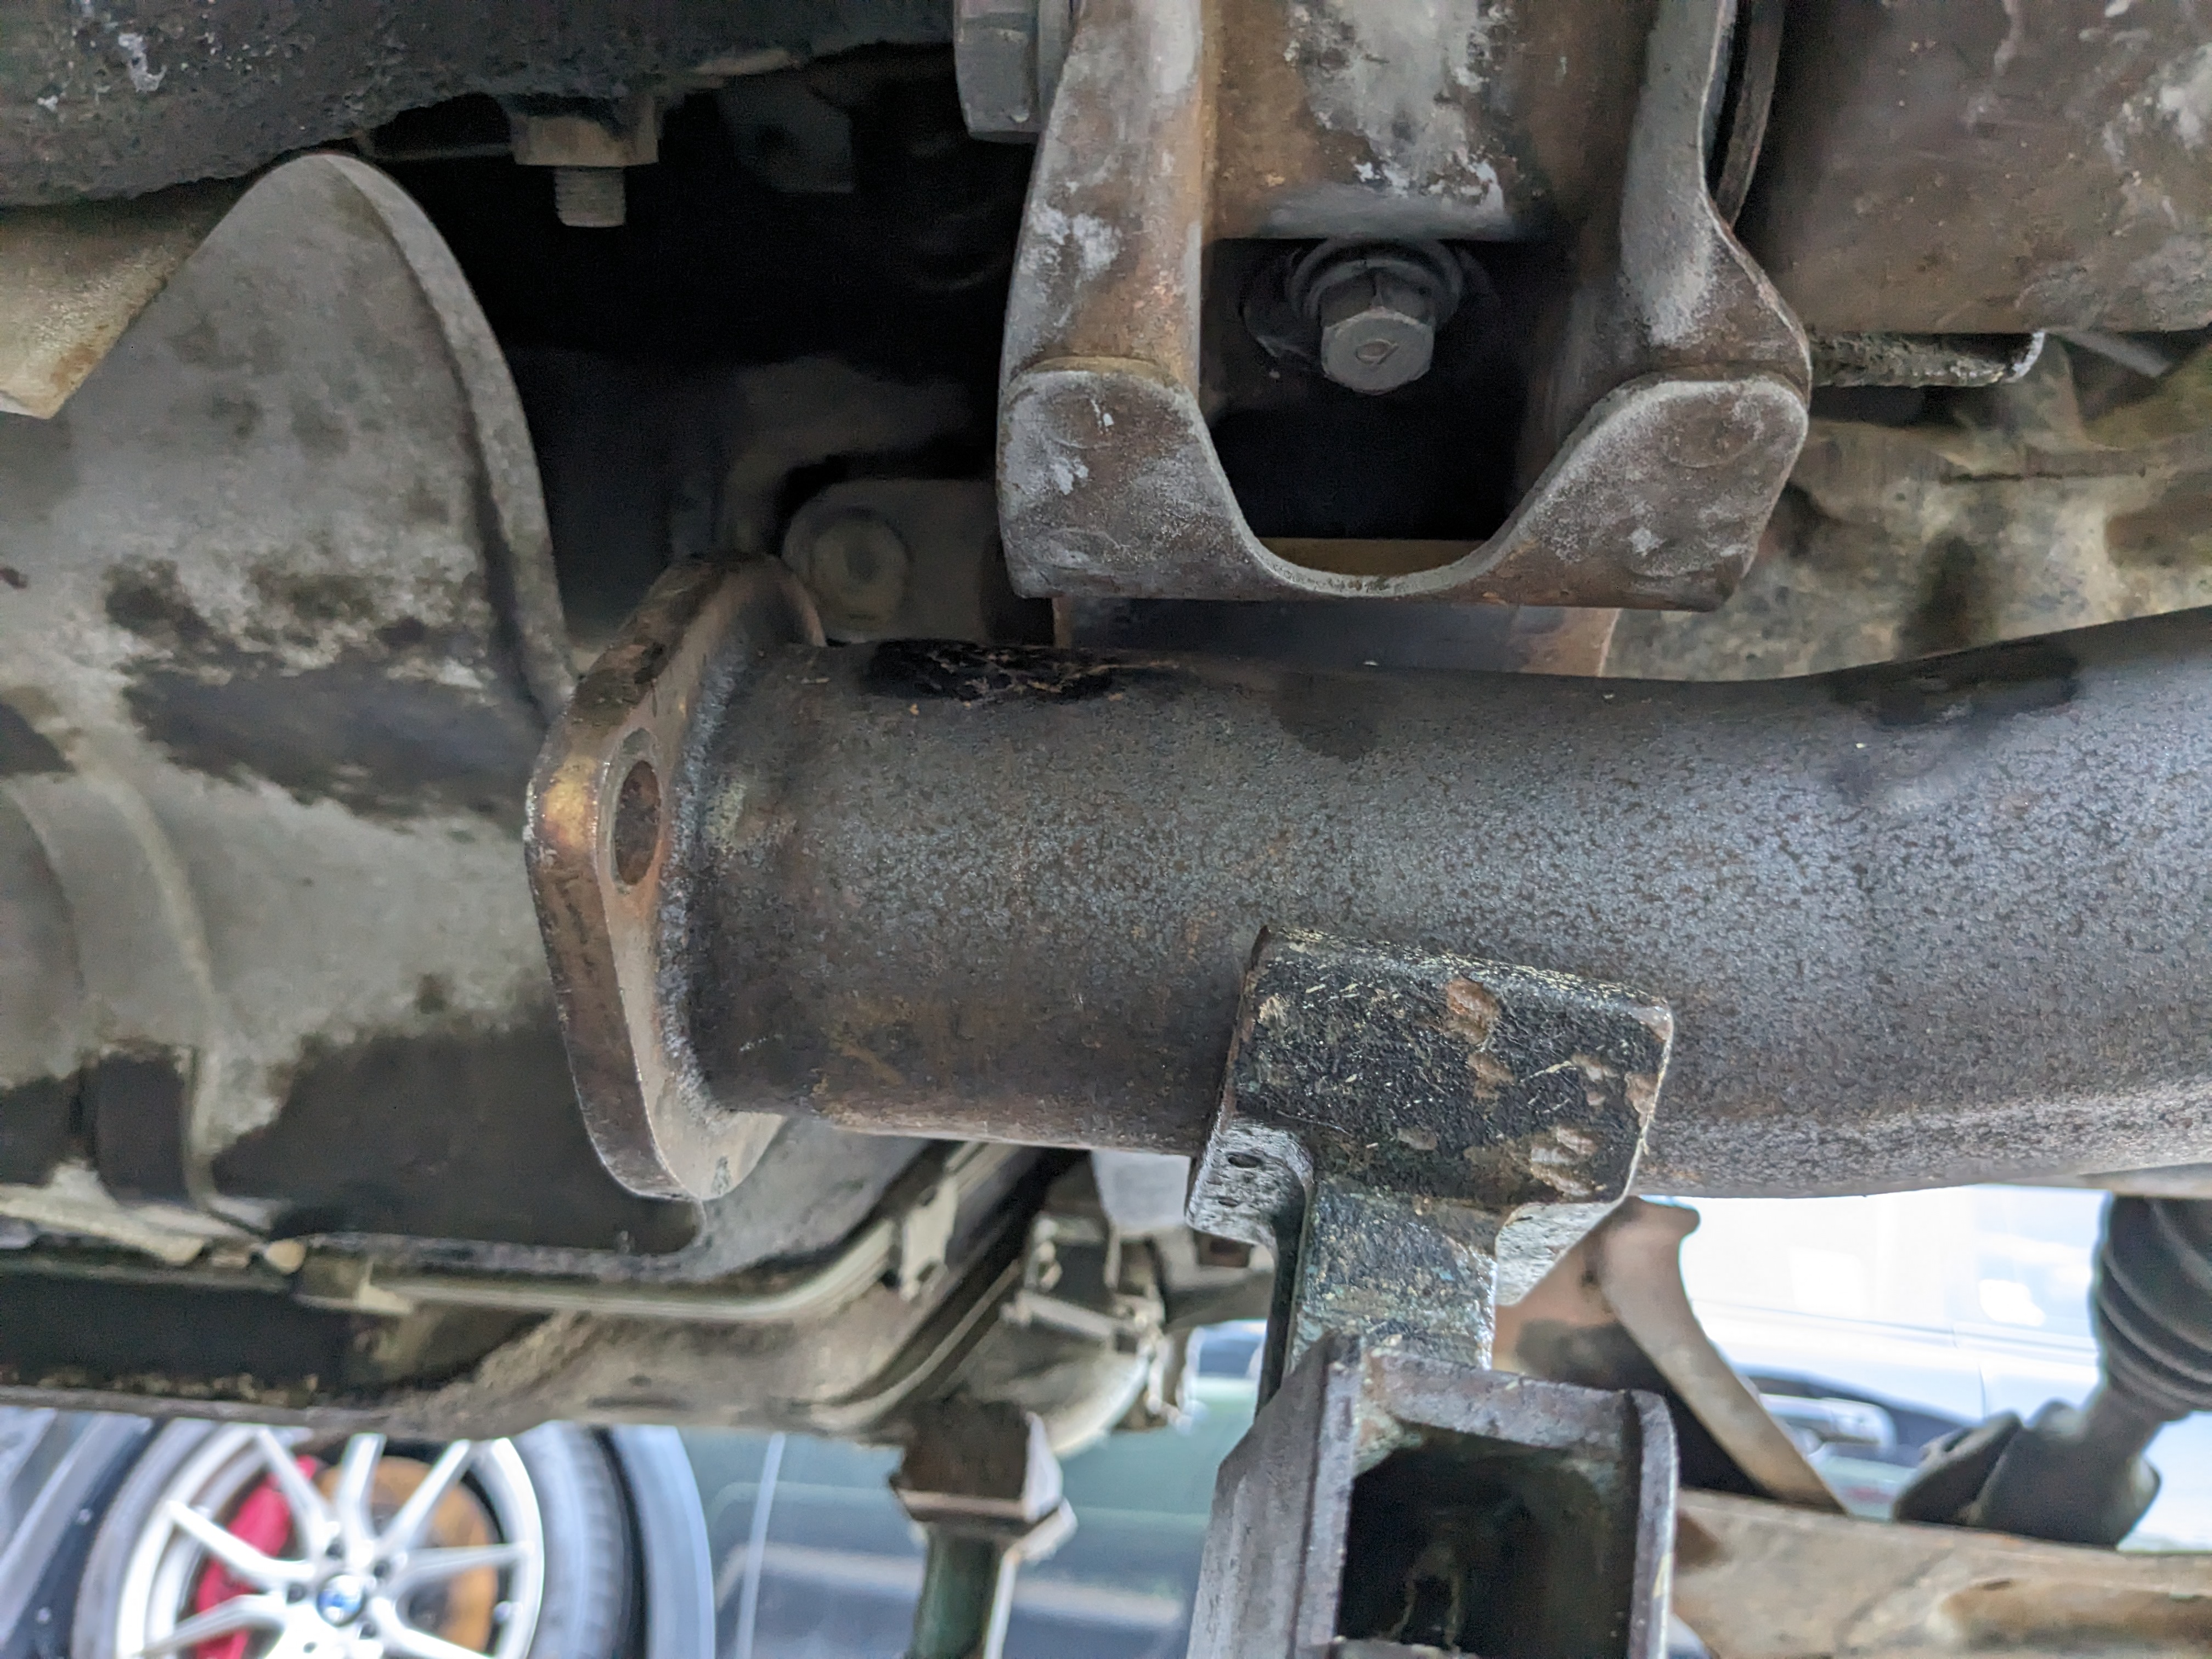
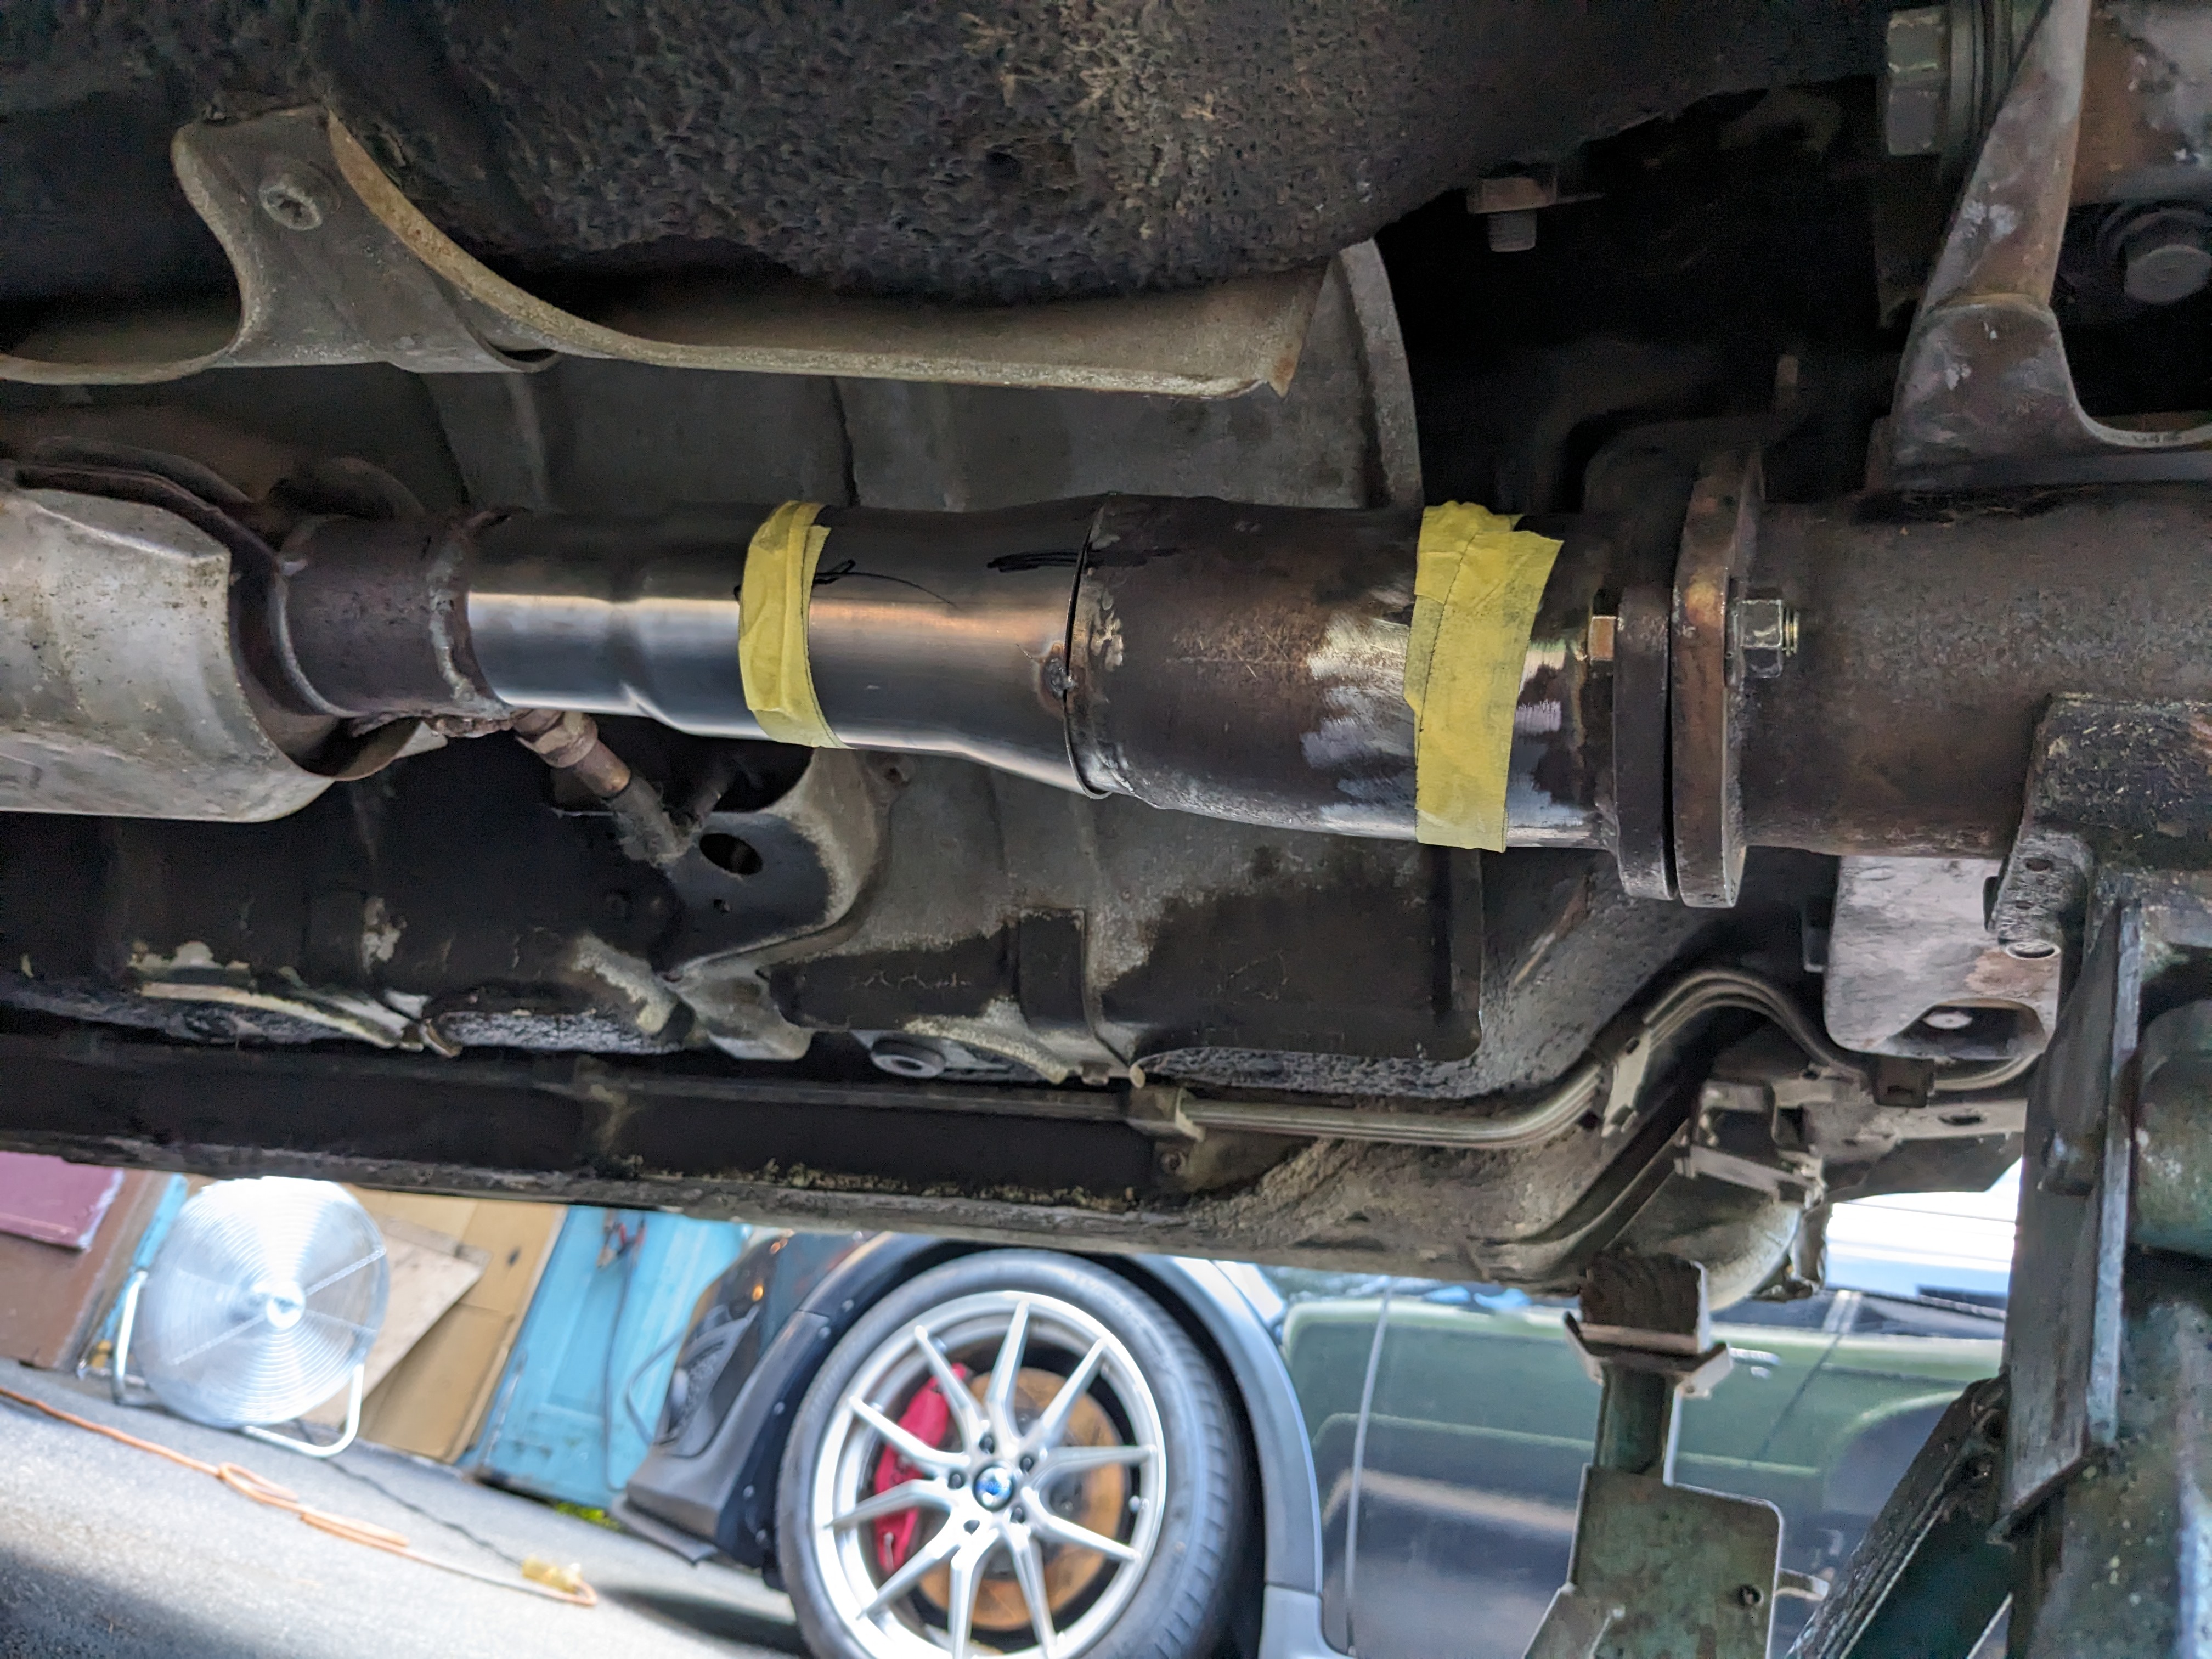
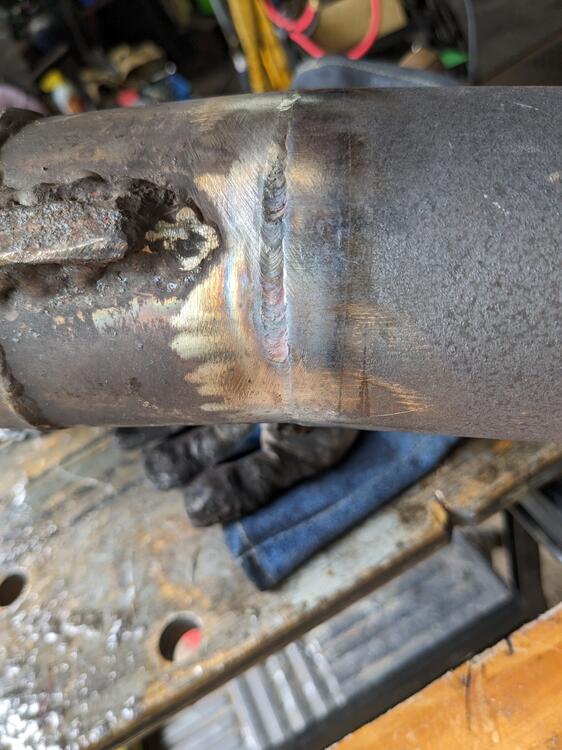
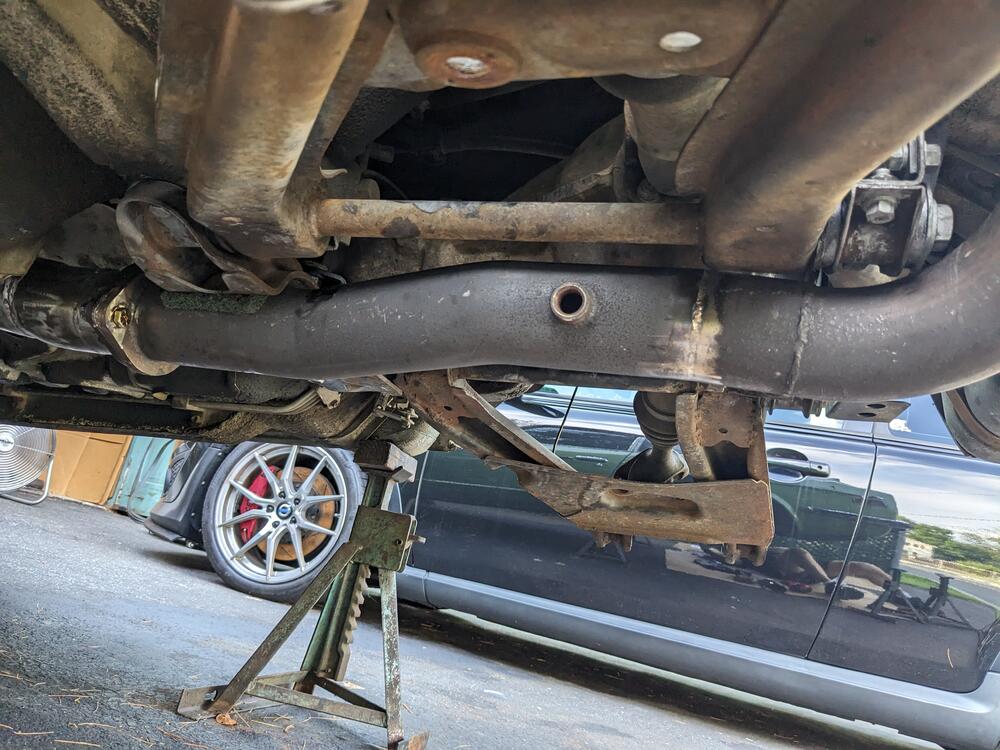
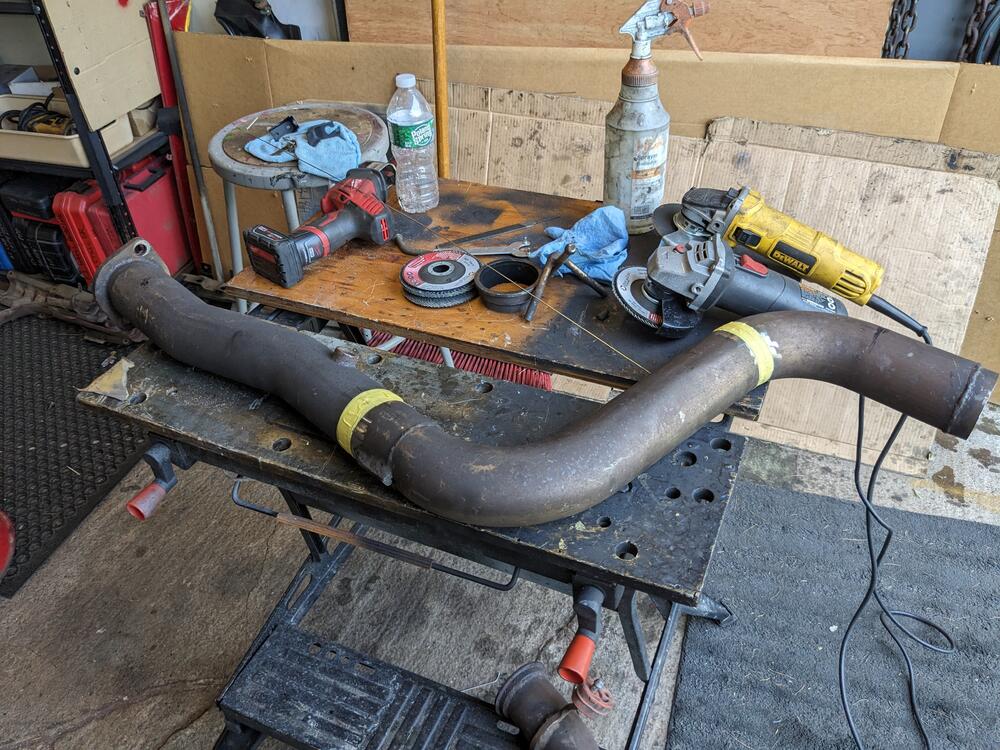
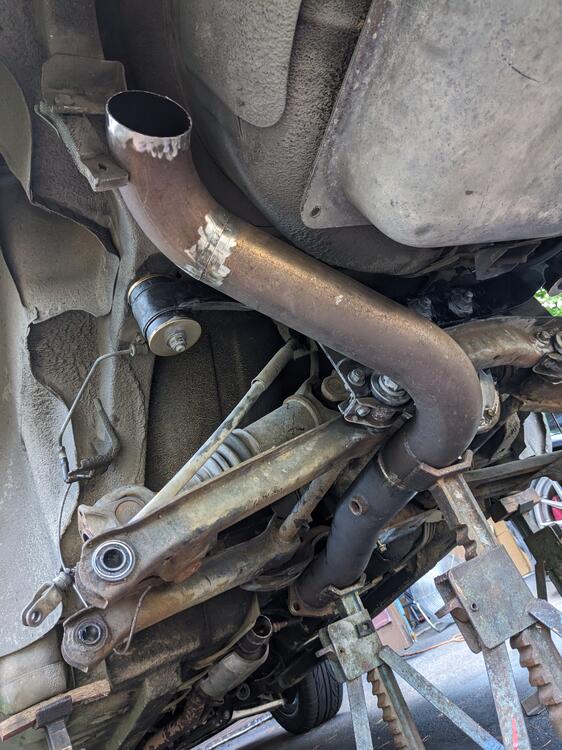
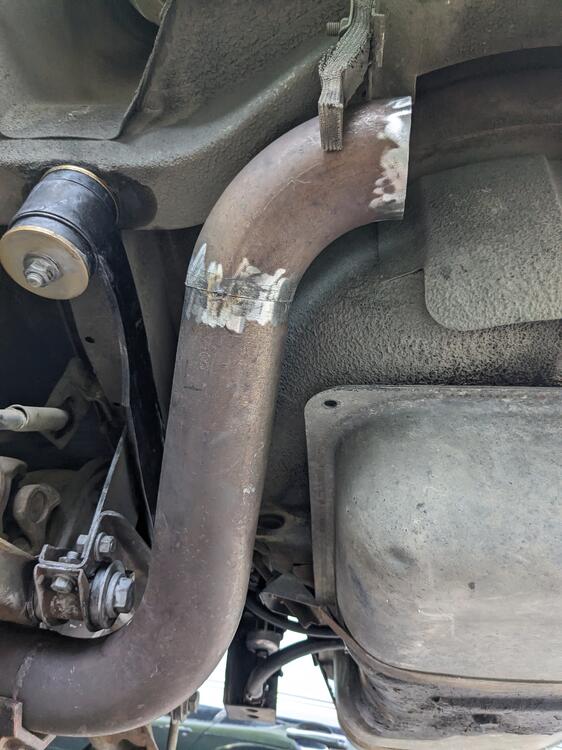
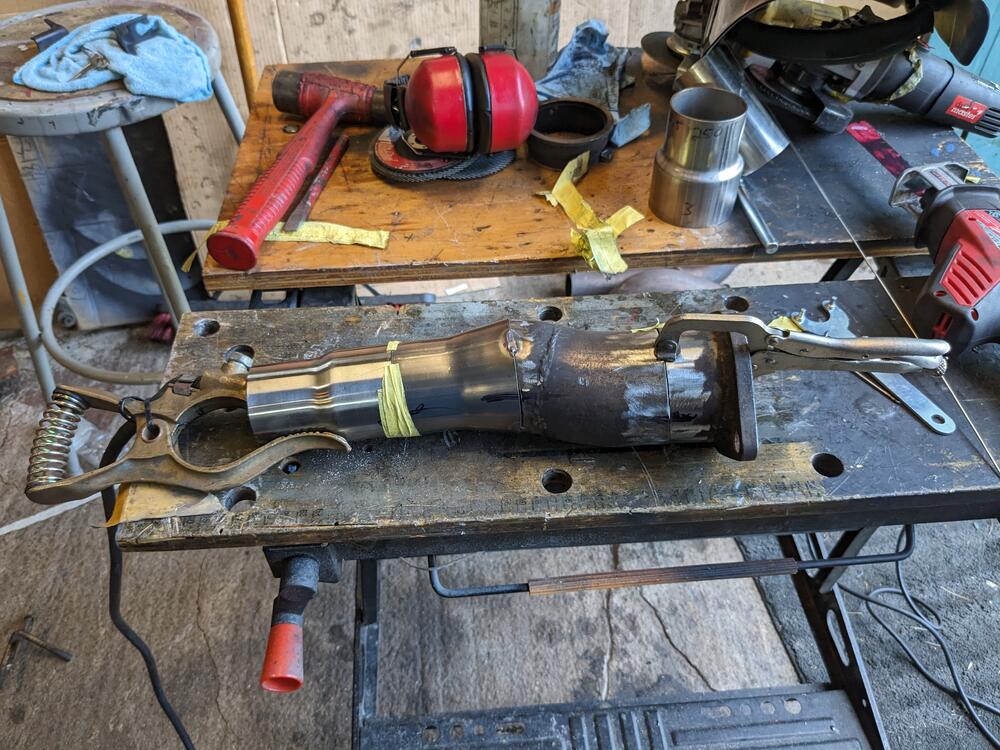
TIG for this - it's all stainless. I could use my MIG I suppose, but I don't have stainless wire for it. TIG is cleaner for pipe anyway. Where I had good butt-joins, the welds are clean (enough, I'm not a professional). Where there was discrepancy/offset, so so much. More work on the exhaust today. Got all the tacked seams welded, and figured out the muffler placement cut down the 3"-2.5" step for the available spacing have to figure out the hanger here, have to make sure it pulls it slightly away from the spare well like this maybe or here, to push it away from the spare well. There is a hole in each corner of the gas tank, I could use this one, and add a smaller outward placed one to locate the strap from potential rotation maybe one set here


-
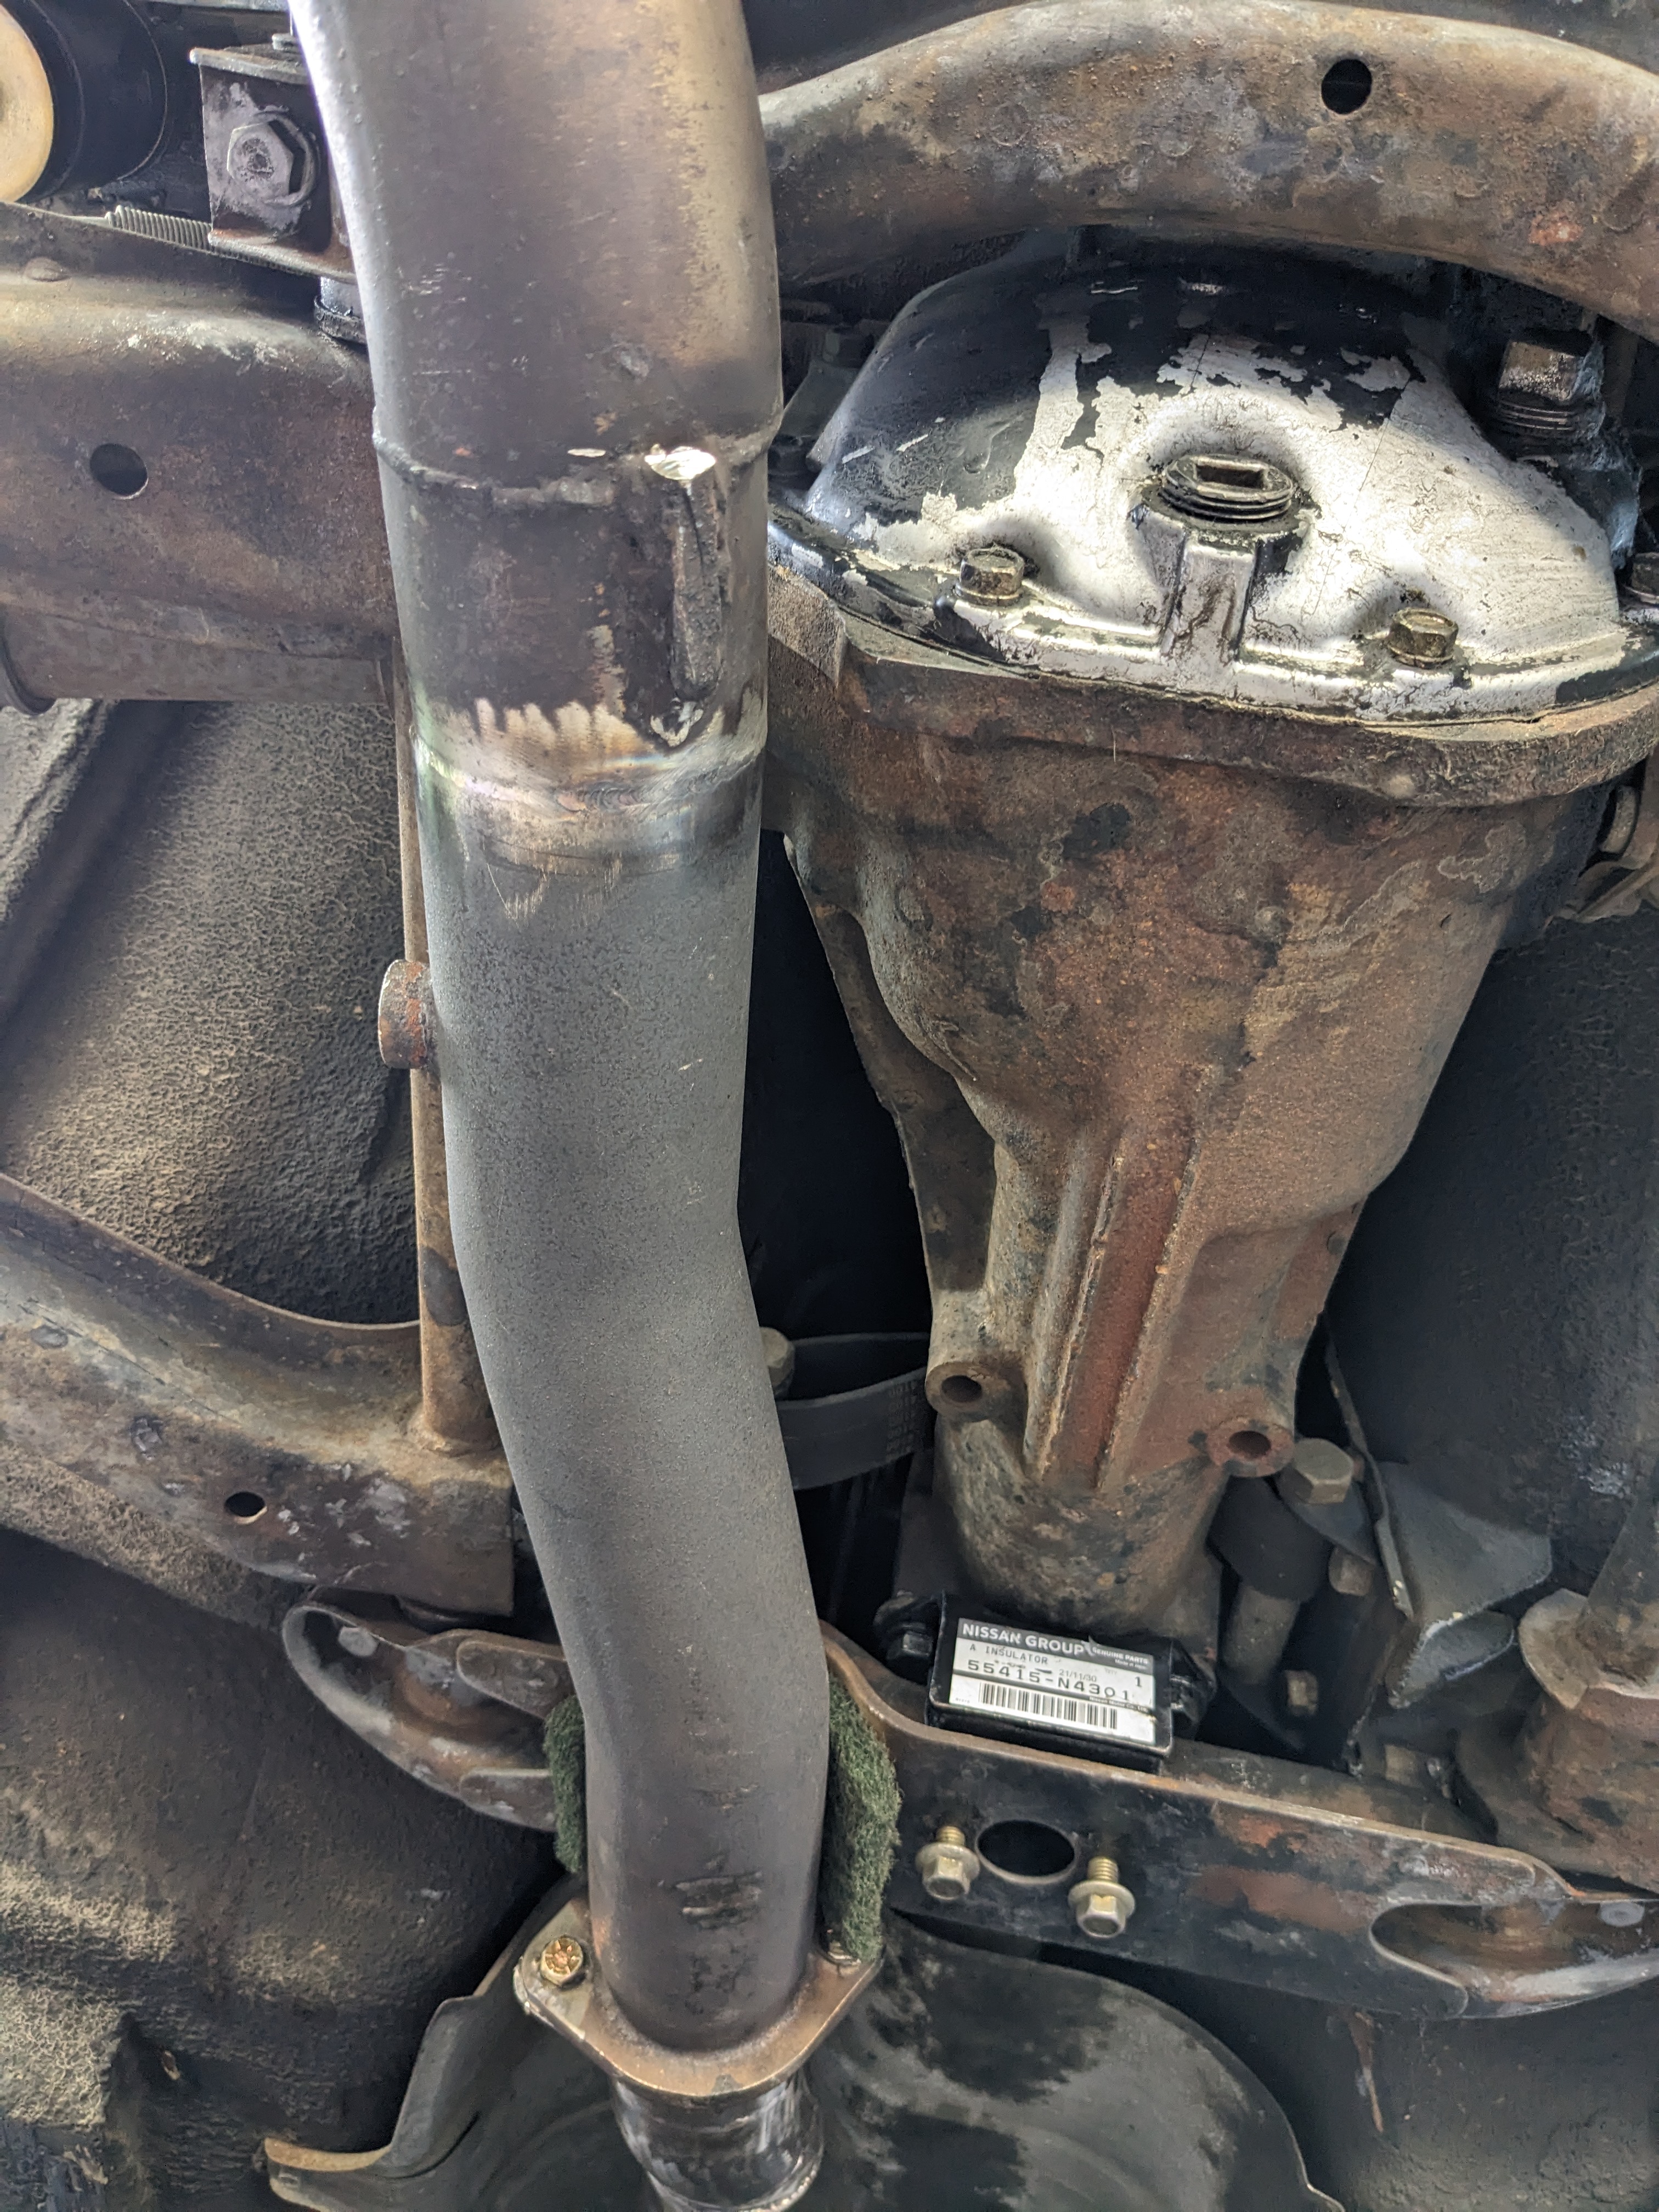
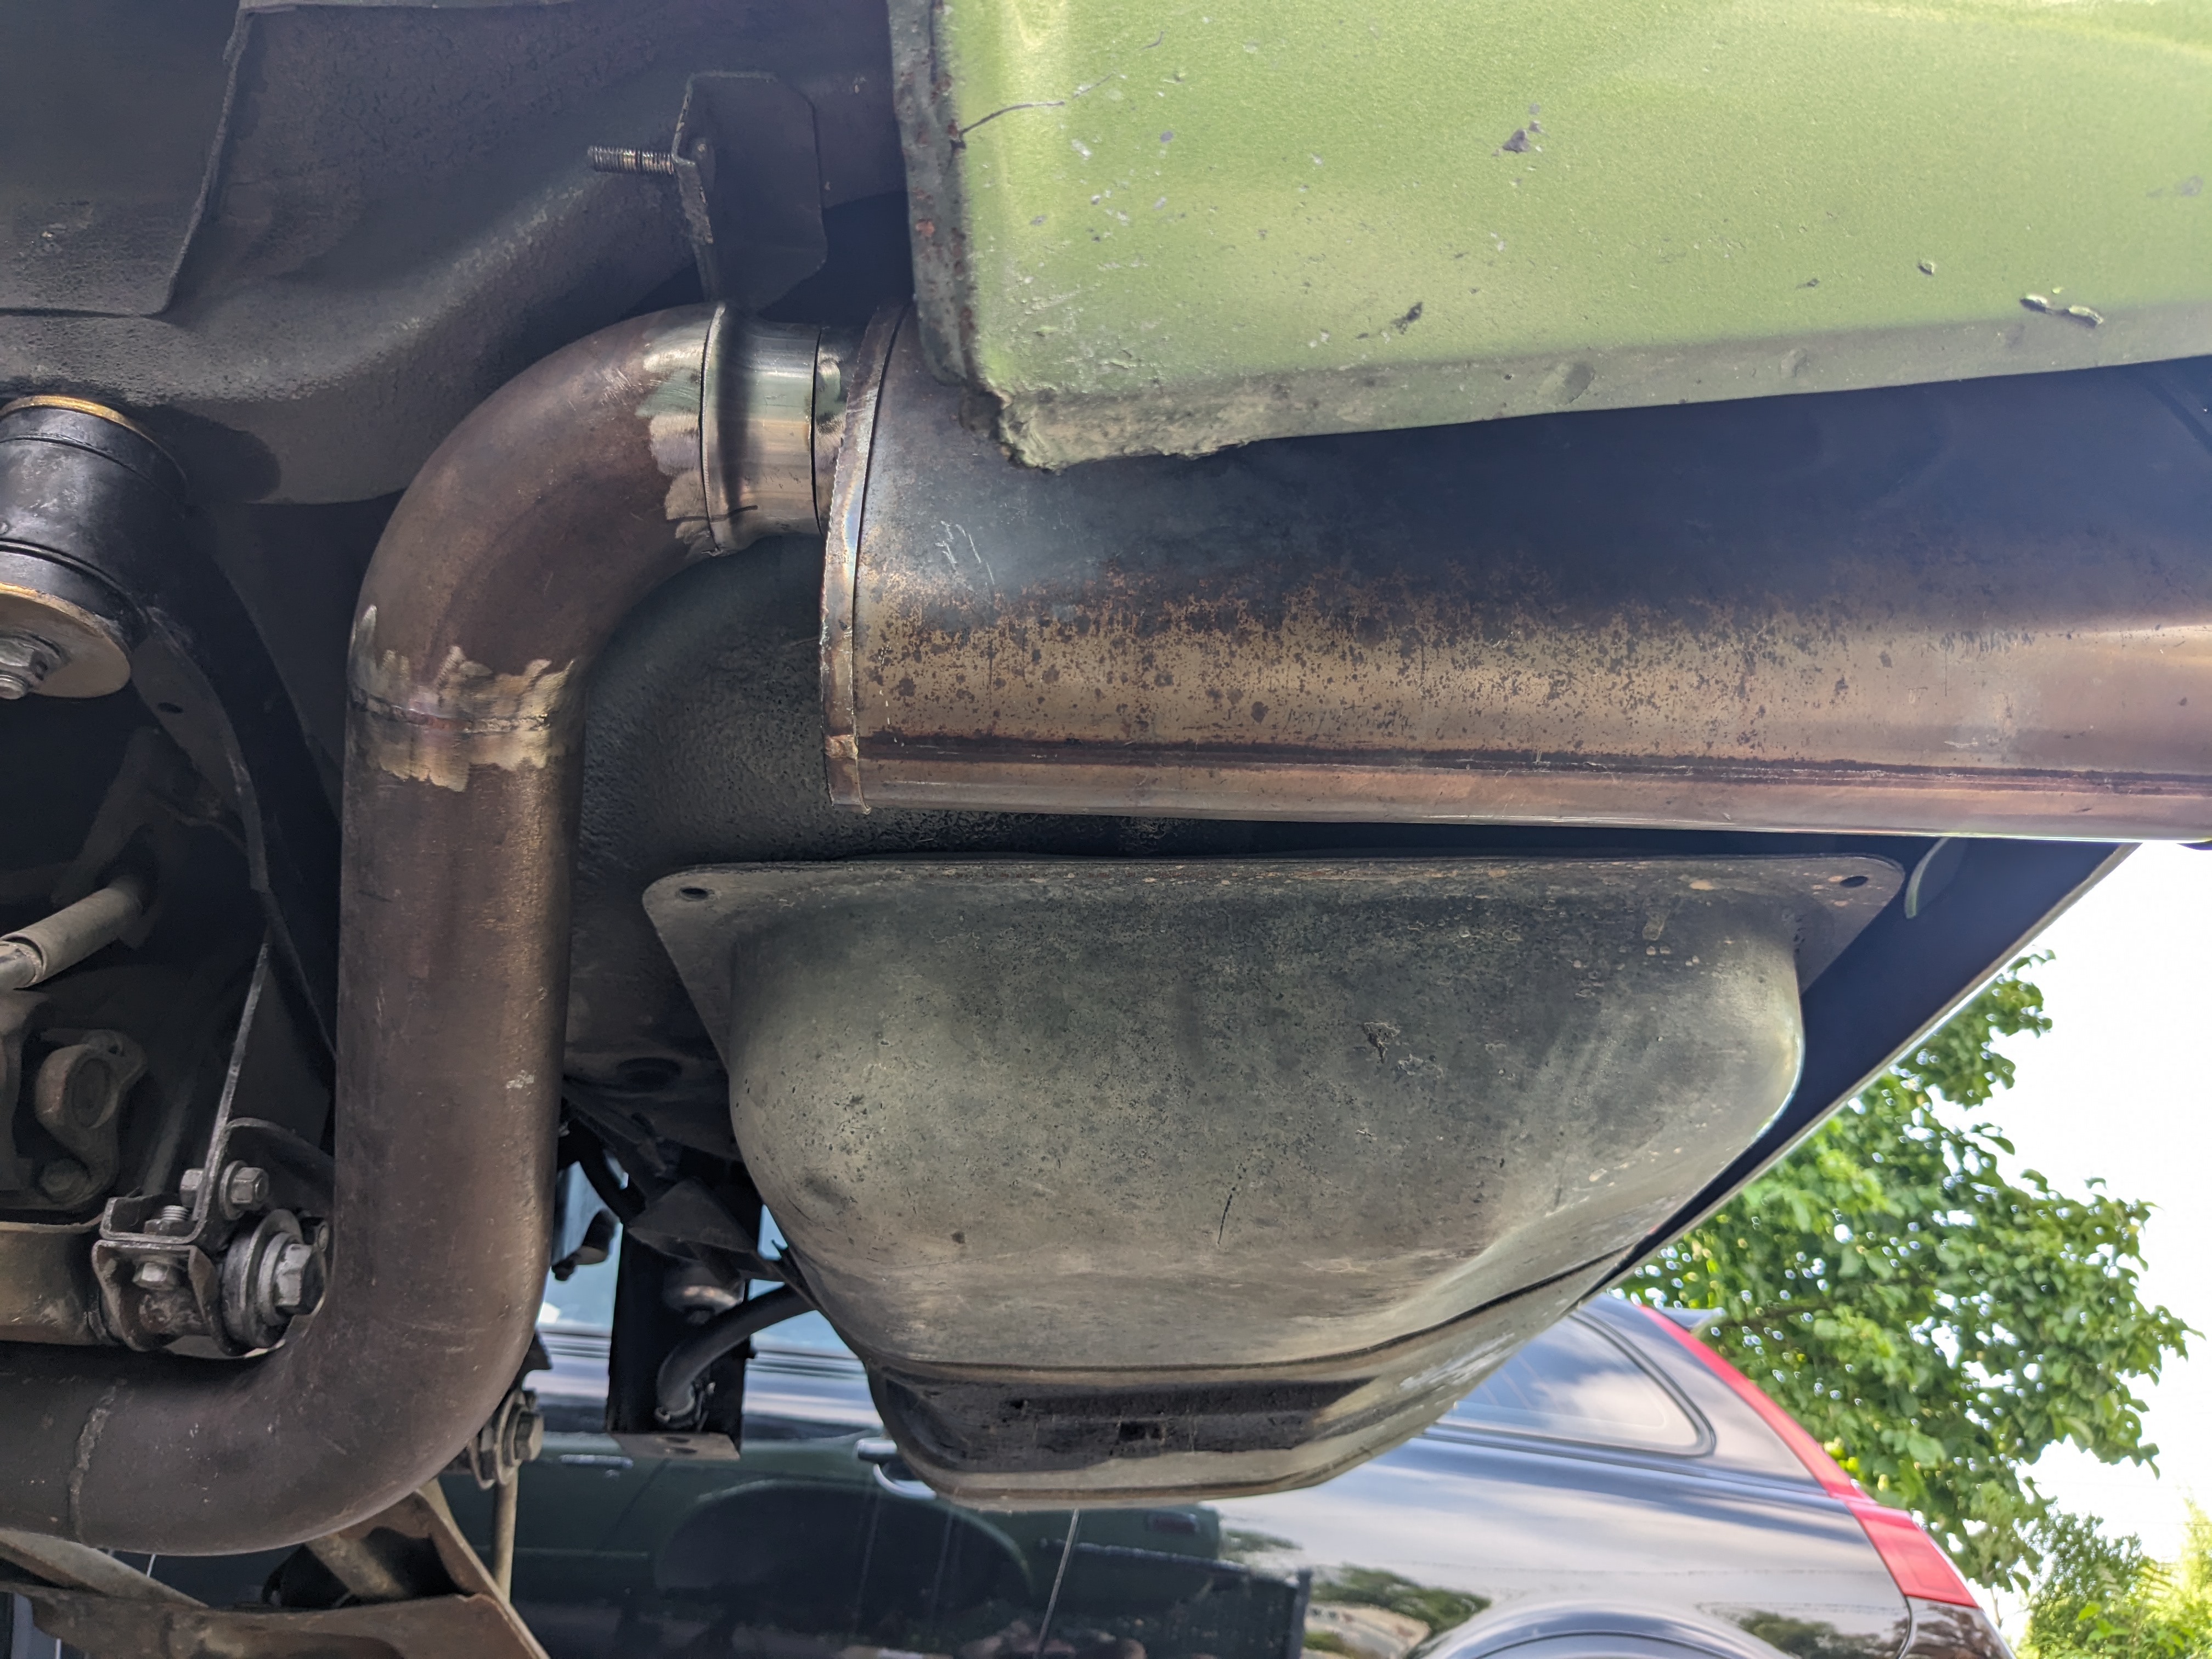
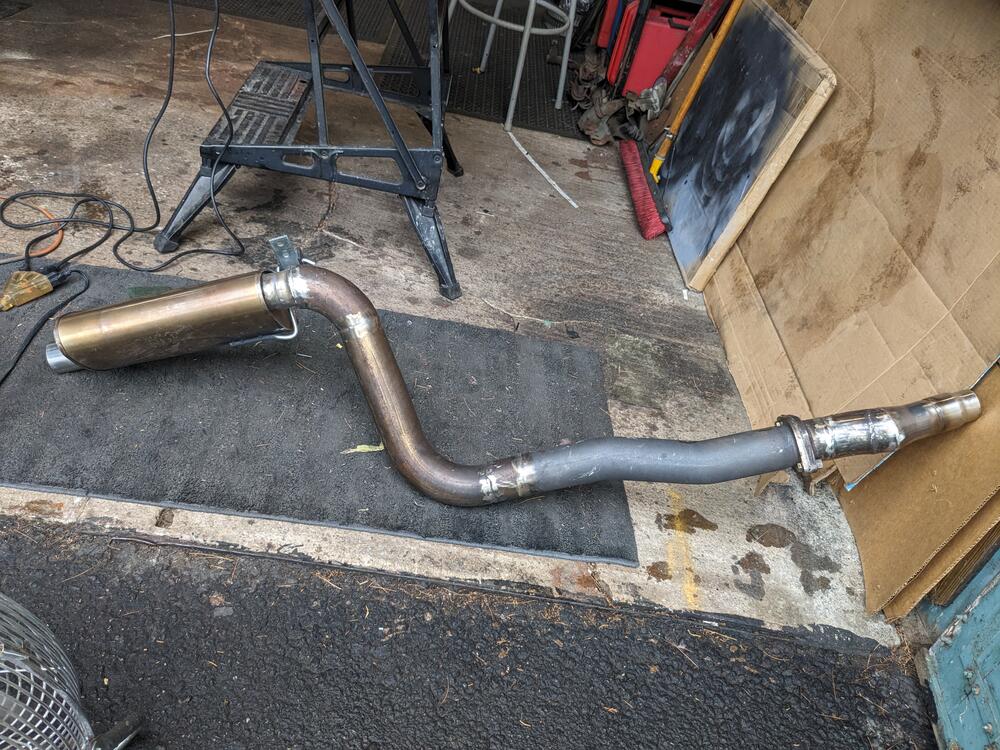
Since I had to cut off the exhaust to deal with all the rear suspension work, I decided to put together a 3" SS rear section, starting after the existing cat, then going to a 2.5" Stainless Works rear muffler (ran it on my X1/9 K24 swap for a few months). The 3" SS exhaust I put together from a exhaust I had made years ago for my Volvo C30, before I converted it to AWD & had to make it all over again. Forgot to take pic before I cut it up - this is what it was Eyeball the general placement, then cut, & tape together to check clearance off the forward crossmember and lower control pivot & diff casing tack welded, then recheck fit I'll be adding a 3" - 2.5" step from this into the muffler looks pretty good step down & dogleg to attach to existing exhaust/cat. I'll rework the entire exhaust forward of the 2 bolt 3" flange when I do the VQ35DE 2"-2.5" - 2.5"- 3" steps


-
Degreased, then soaked the rear tube/hubs in acid, then cleaned up & treated them with rust convertor. I'll paint them tomorrow.
-
Finished the steering wheel. sanded the epoxy, primed & painted reinstalled the horn contacts & pad retaining ring Back in the car
-
@Captain Obvious - question for you - do you know the correct pin release tool for these Yazaki terminals? I have a 70's VAG terminal set that has the barrel-type release tool, but the sleeves are not the correct ID/OD of the Yazaki. I used a pick to remove the old ones, which was fine here, however I'd like to be able to remove good ones without damage 🙂 Any pointers to a source?
-
Modified the vintage aftermarket wheel to fit. Cut the hub from the original worn out wheel. The advantage of this is that it will sit further away from me. With my height, the stock wheel is too close to me when the seat is correctly placed for clutch pedal operation. This wheel is shallower. welded after this - forgot to take pics added JB weld to fill the minor gapage on the front side
-
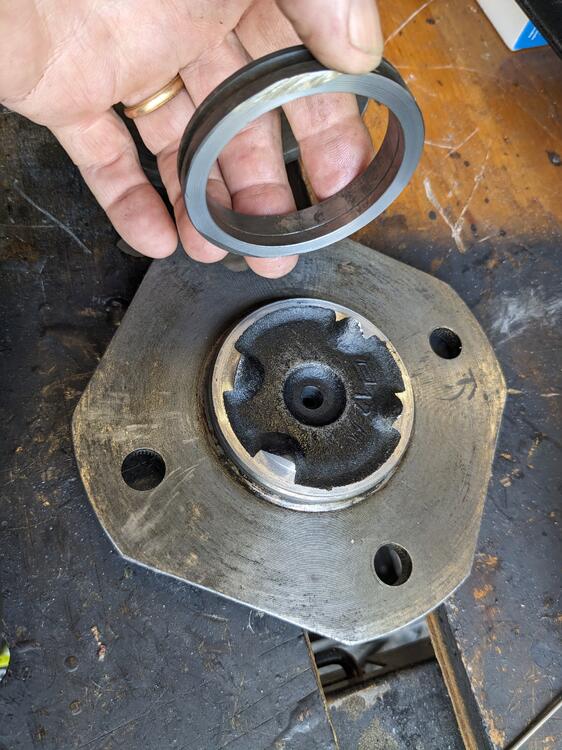
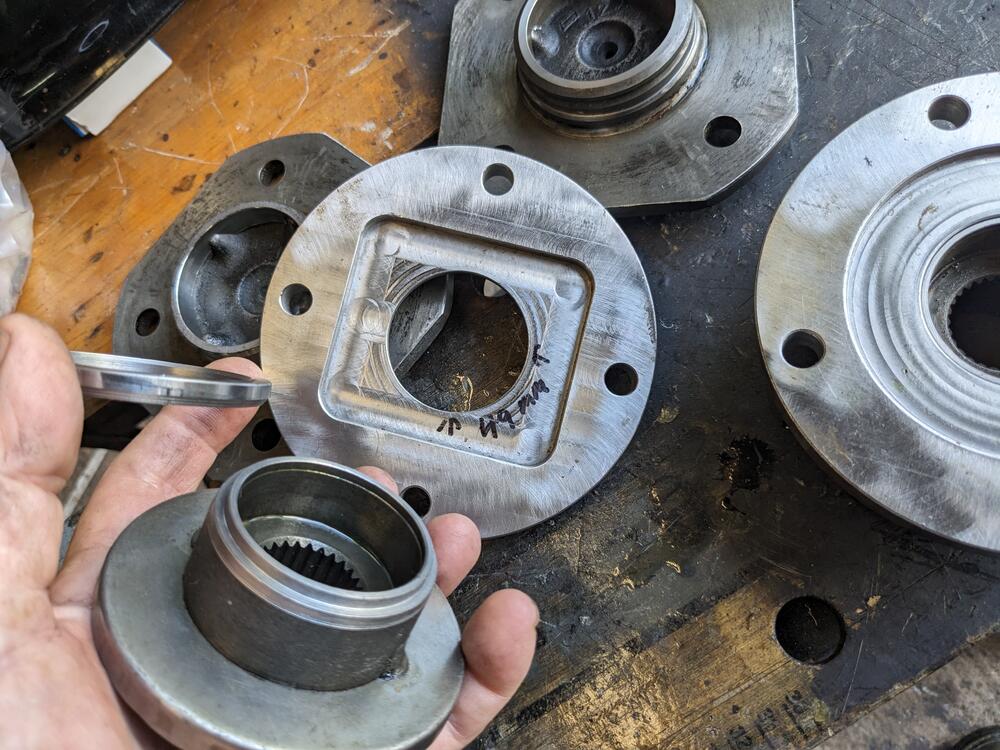
Dropped off the stub axles to get the outer flange nubs cut to accept a centering ring, and the inner flanges to be cut down to 25mm, with a 3mm depth shoulder 49MM OD. Silvermine flanges will have the center cut to 49 (from 45)mm to seat on the shoulder, with a total depth of 29mm same as stock offset. I'll add pics when I get them back
-
Thank you ! That's the thread I read originally, then couldn't find - that confirms the need to have the flange flush with the existing depth, which is what I plan to do anyway.
-
I'll see if my local Nissan dealer can get them - or even better, has them. 43262-W1200 - about $6 . The stock ones are 19mm deep, standard flanged locknuts should be shallower, so thanks for the suggestion. Worst case, I can tack the new nuts with my MIG after they are torqued.
-
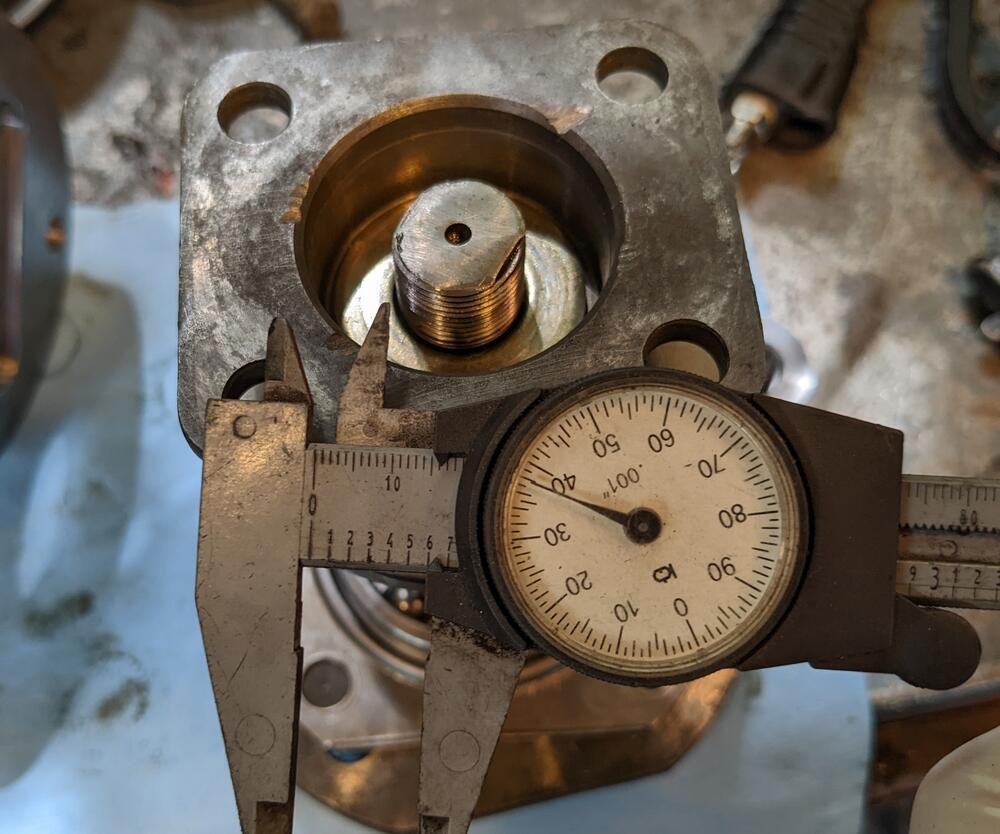
I think I mentioned it last week, but not specific to Silvermine. The pics above clearly show the Silvermine flange design - they cut the inside to a depth of 4mm to allow the stock flange to sit that far in. Still means 8mm depth is lost for the new CV shaft. I want the flange set to the same depth as the stock one. Haven't found a thread that gives the exact length of the stock driveshaft compared to the 300ZX T axles. Good idea on tacking the nut. I've been reading the thread he laid out - there are a lot of conflicting posts within it - ppl using custom axles, 300ZX NA axles, etc., etc.
-
The Trakmotive axles do come with the Silvermine kit, I asked him that when I ordered the flanges. He said the binding issue is with cars lowered more than 1"
-
I posted separate work threads in the appropriate forums, I assumed that was the correct approach for the site. I didn't see where the build thread category was hidden until GrannyNot asked if I had one... I'm not using aftermarket control arms. The whole point of modifying the flange setup from the way Silvermine supplied it (loosing 8mm depth) is to avoid the binding that can occur (supposedly only with lowered cars). I've communicated with him by email regarding changes to his design, but he wasn't too helpful. My car already has 250K miles, I don't really want to keep the stock shafts for when I do the VQ35DE conversion. I'd rather deal with it now than later.
-
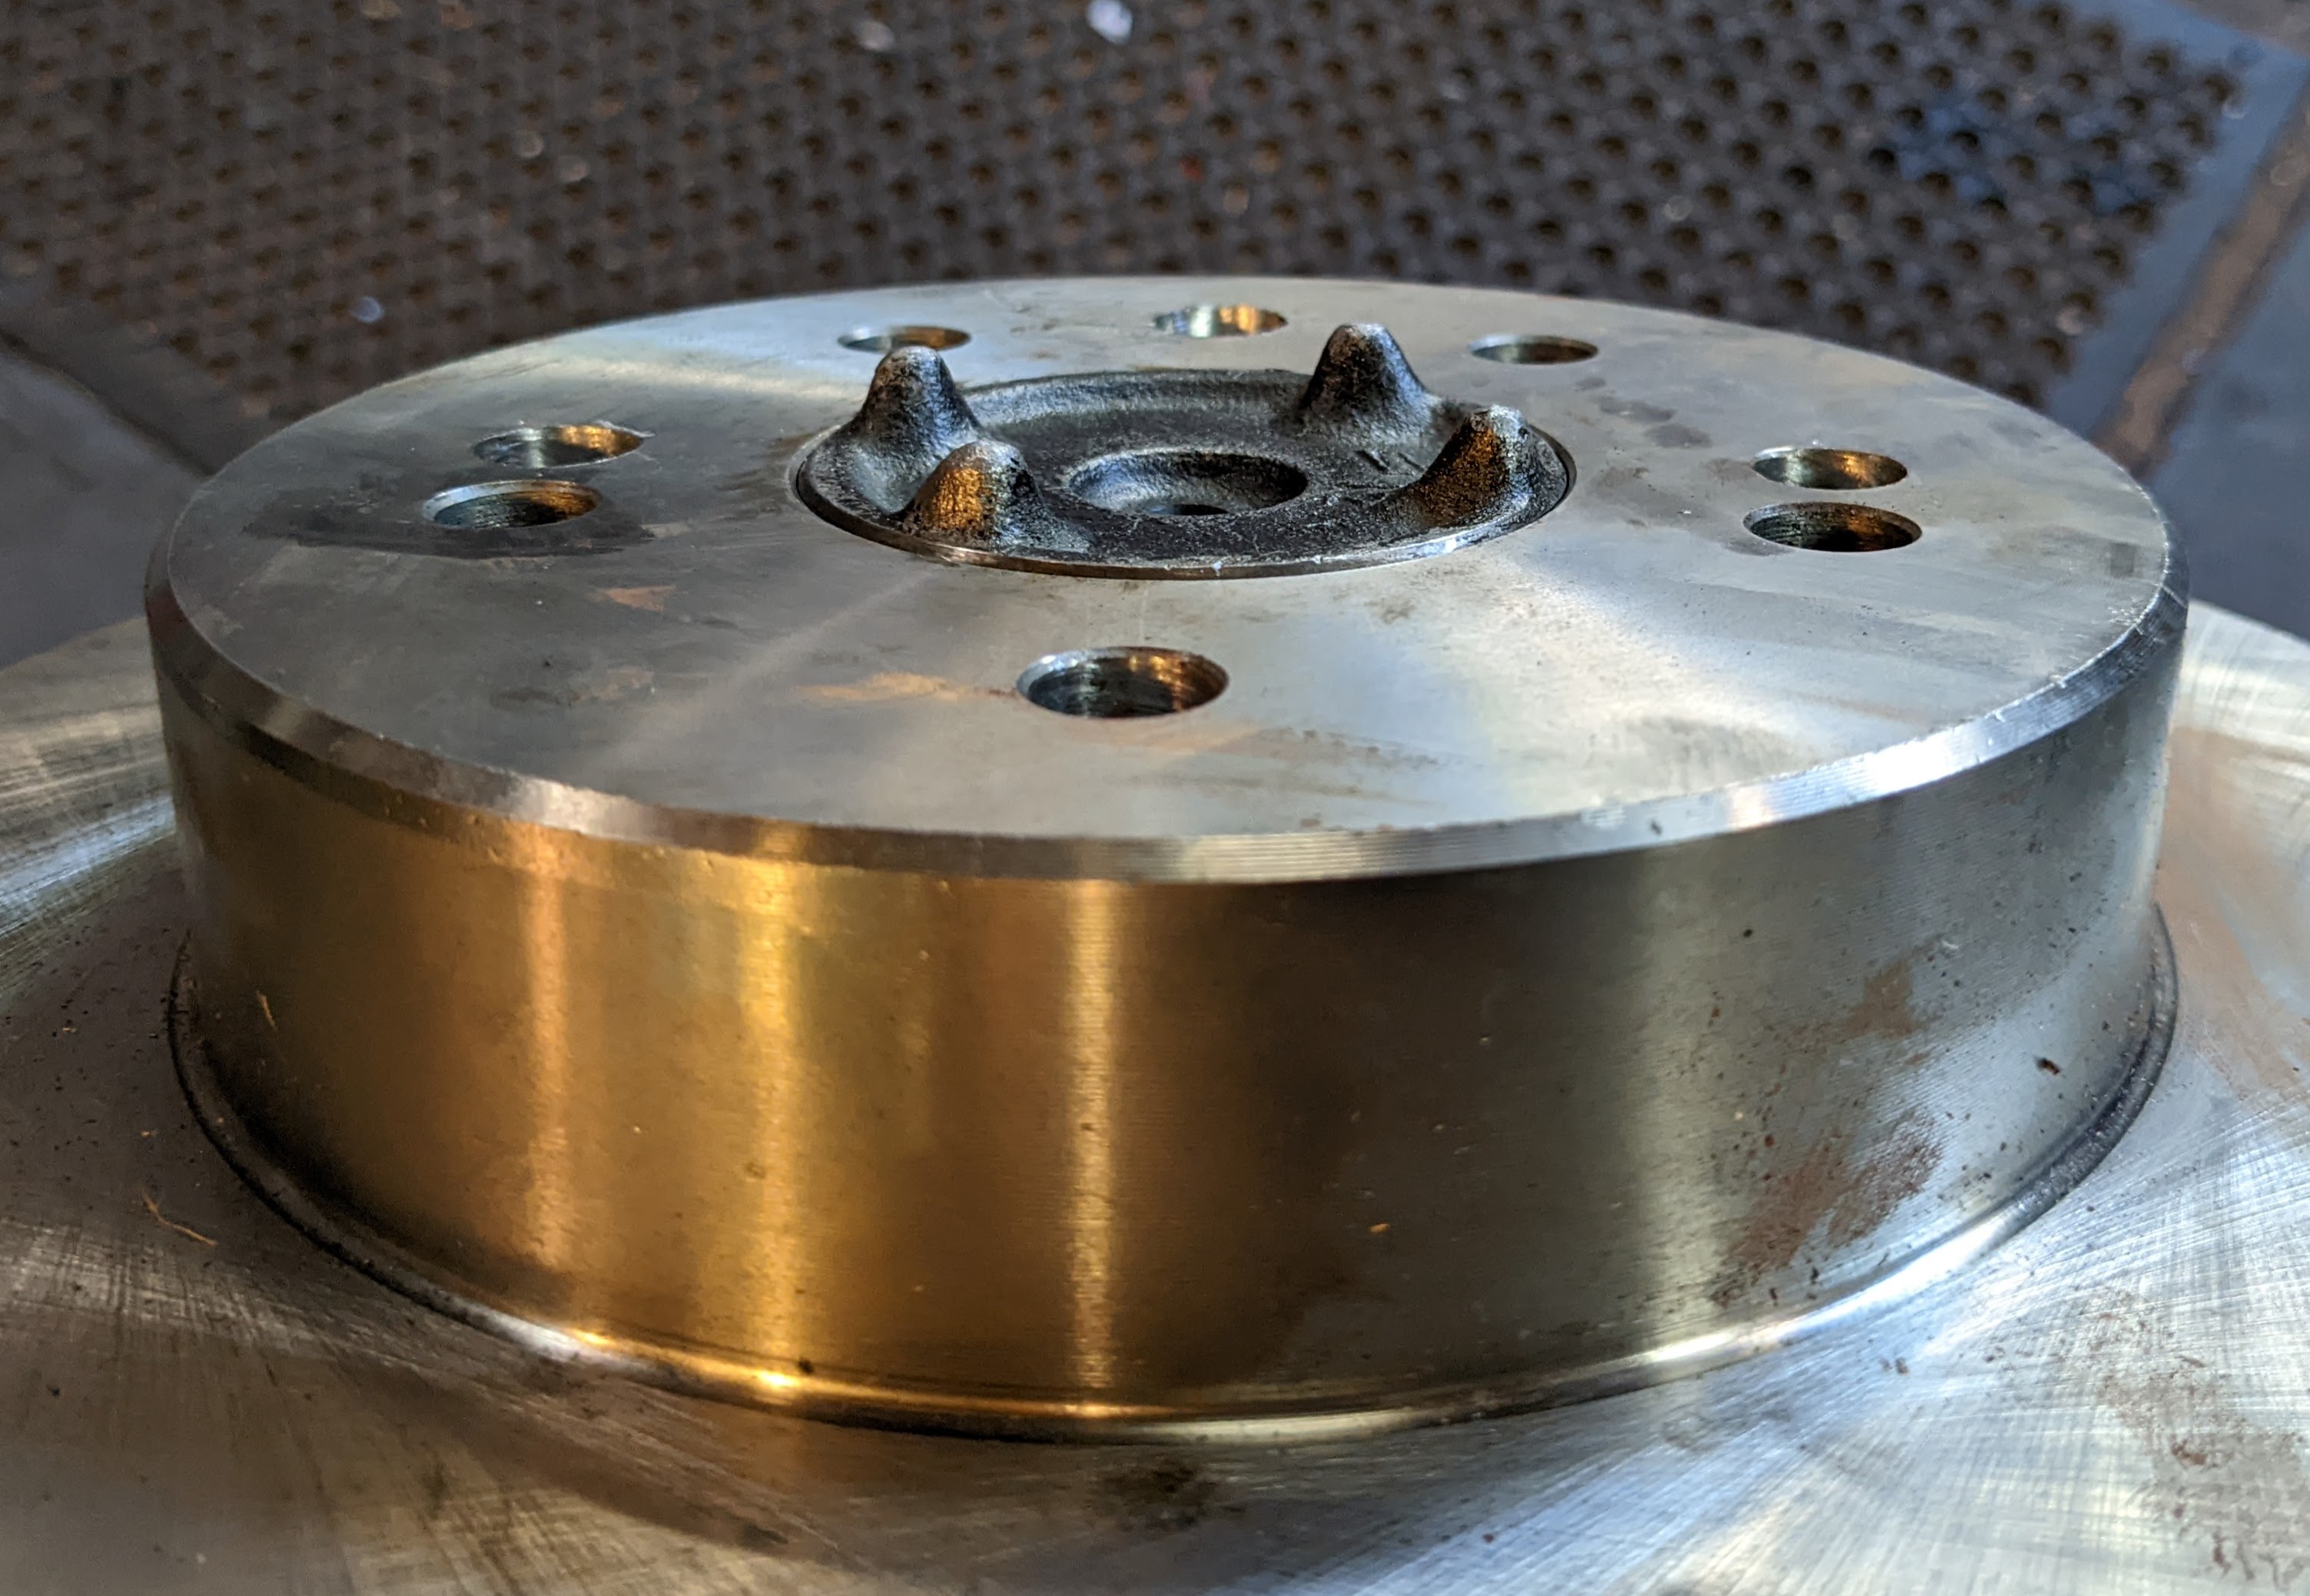
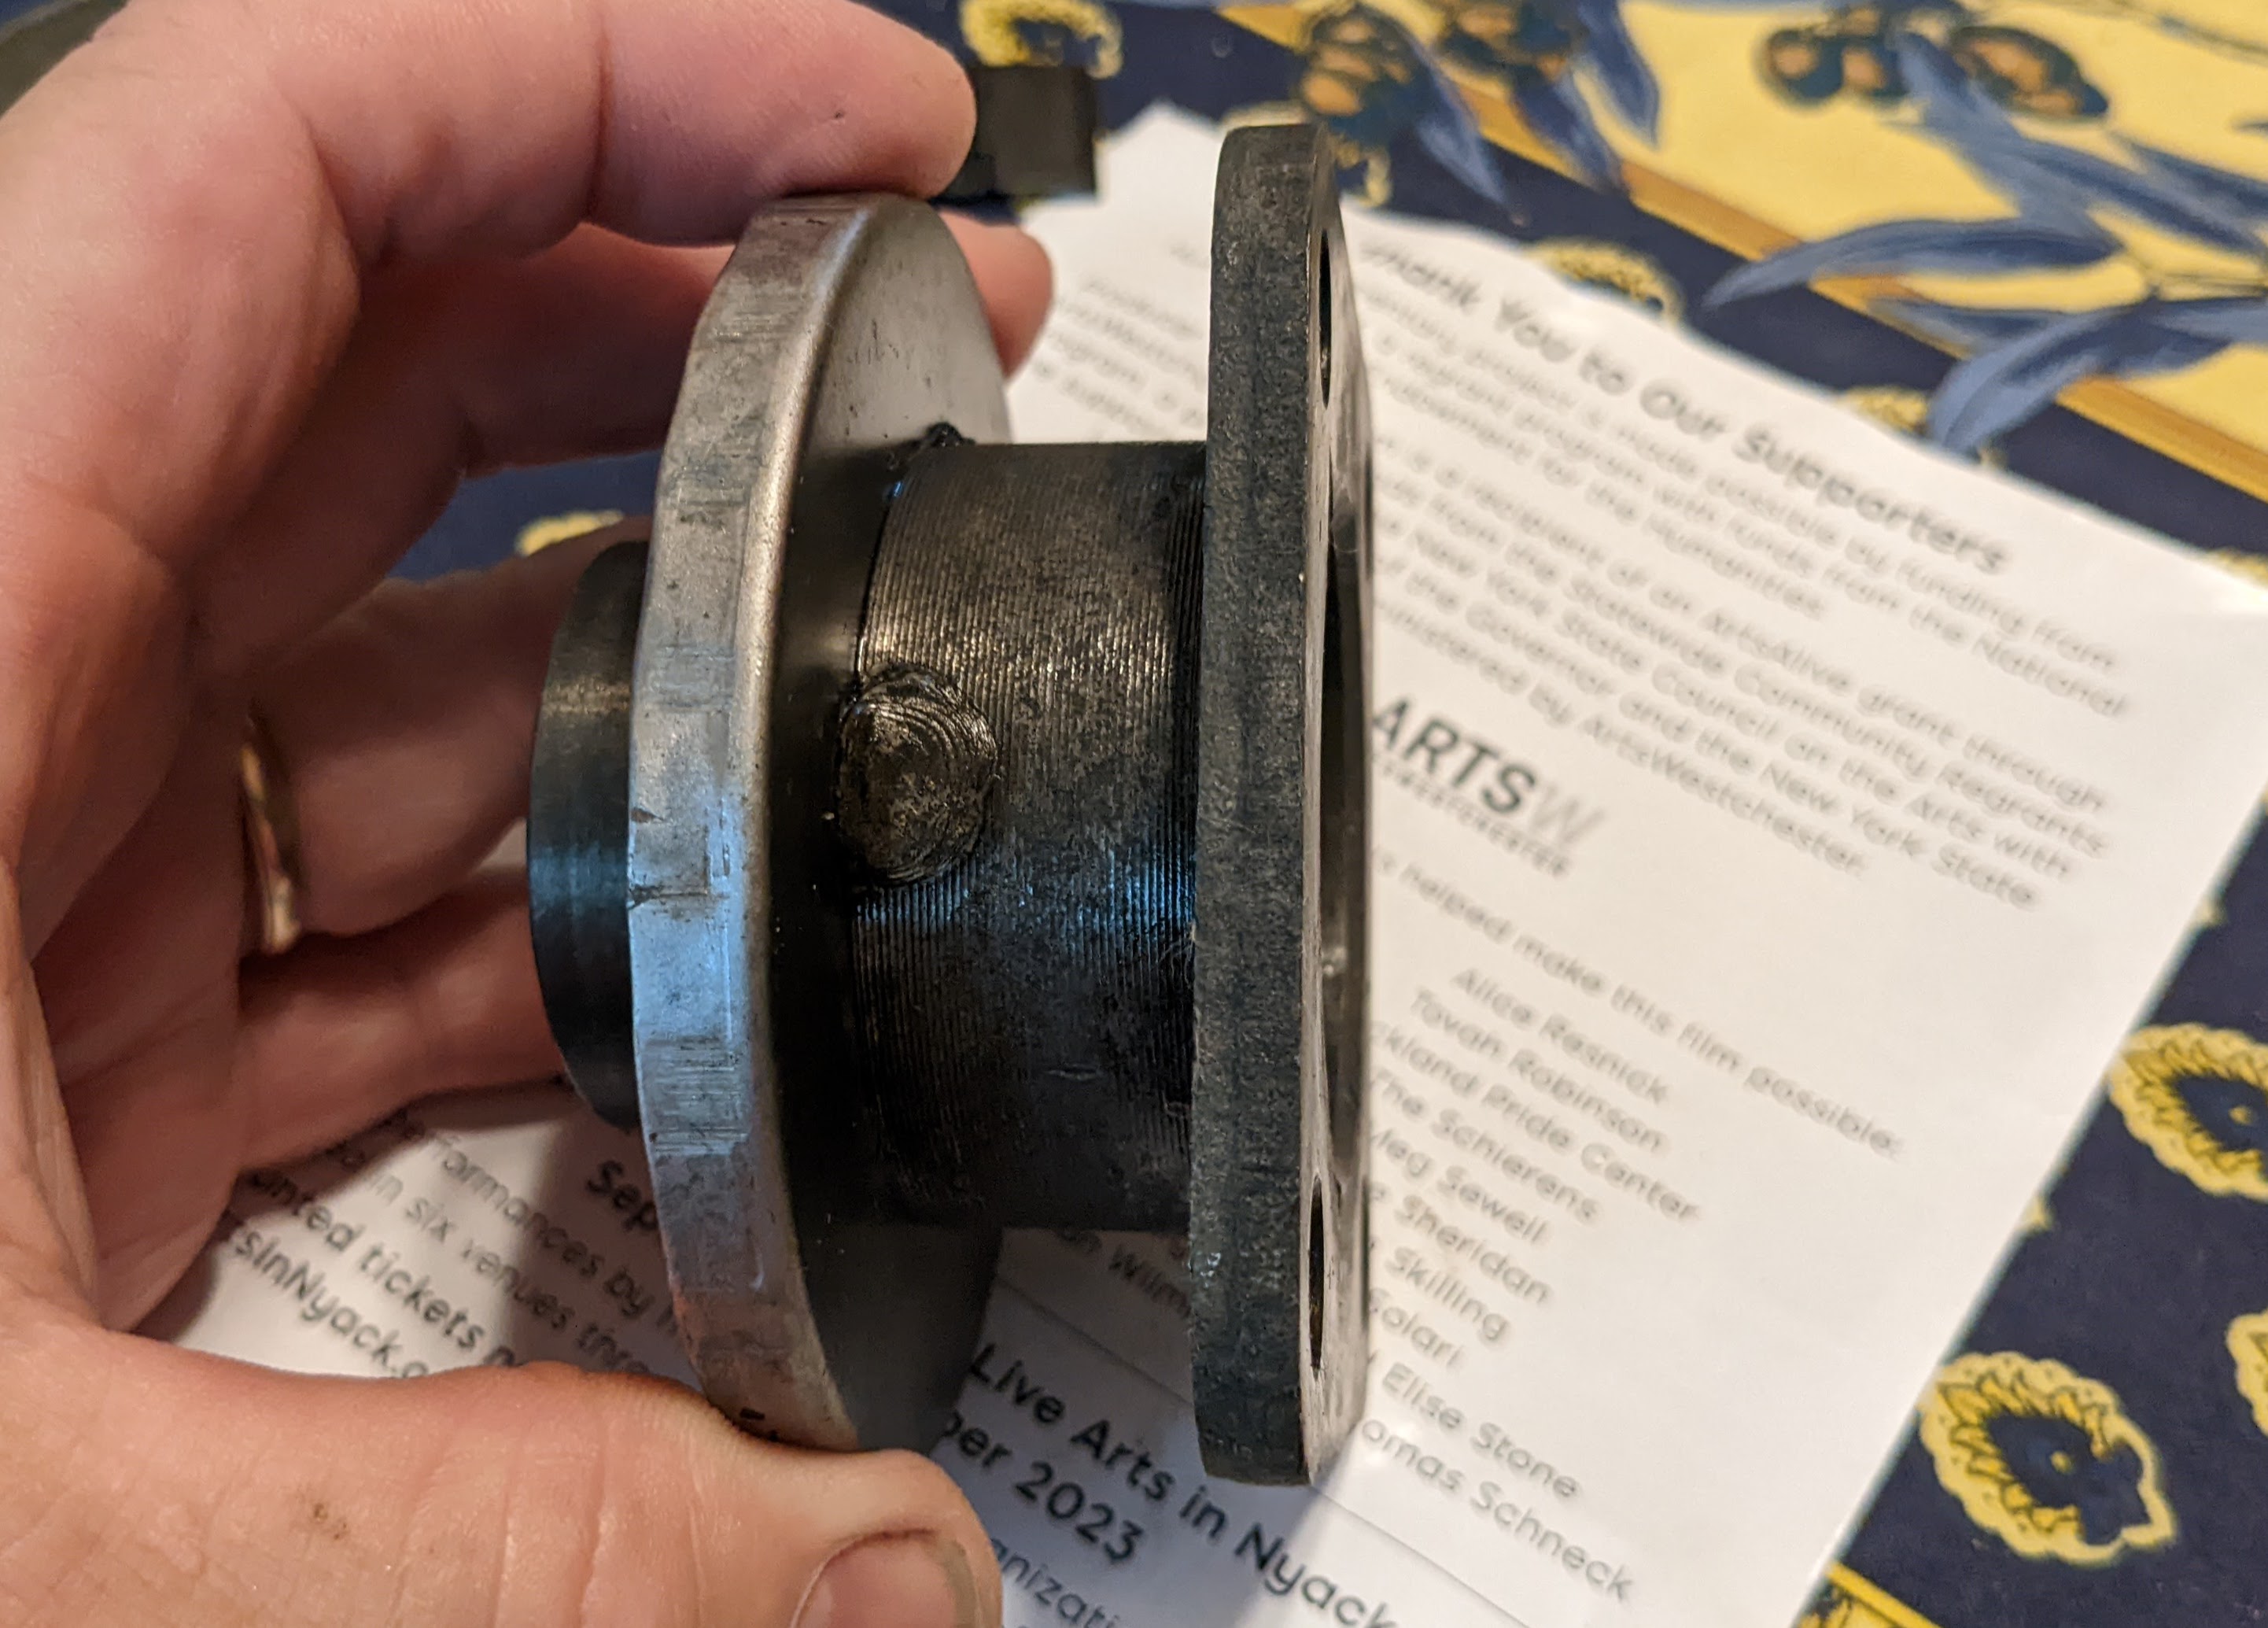
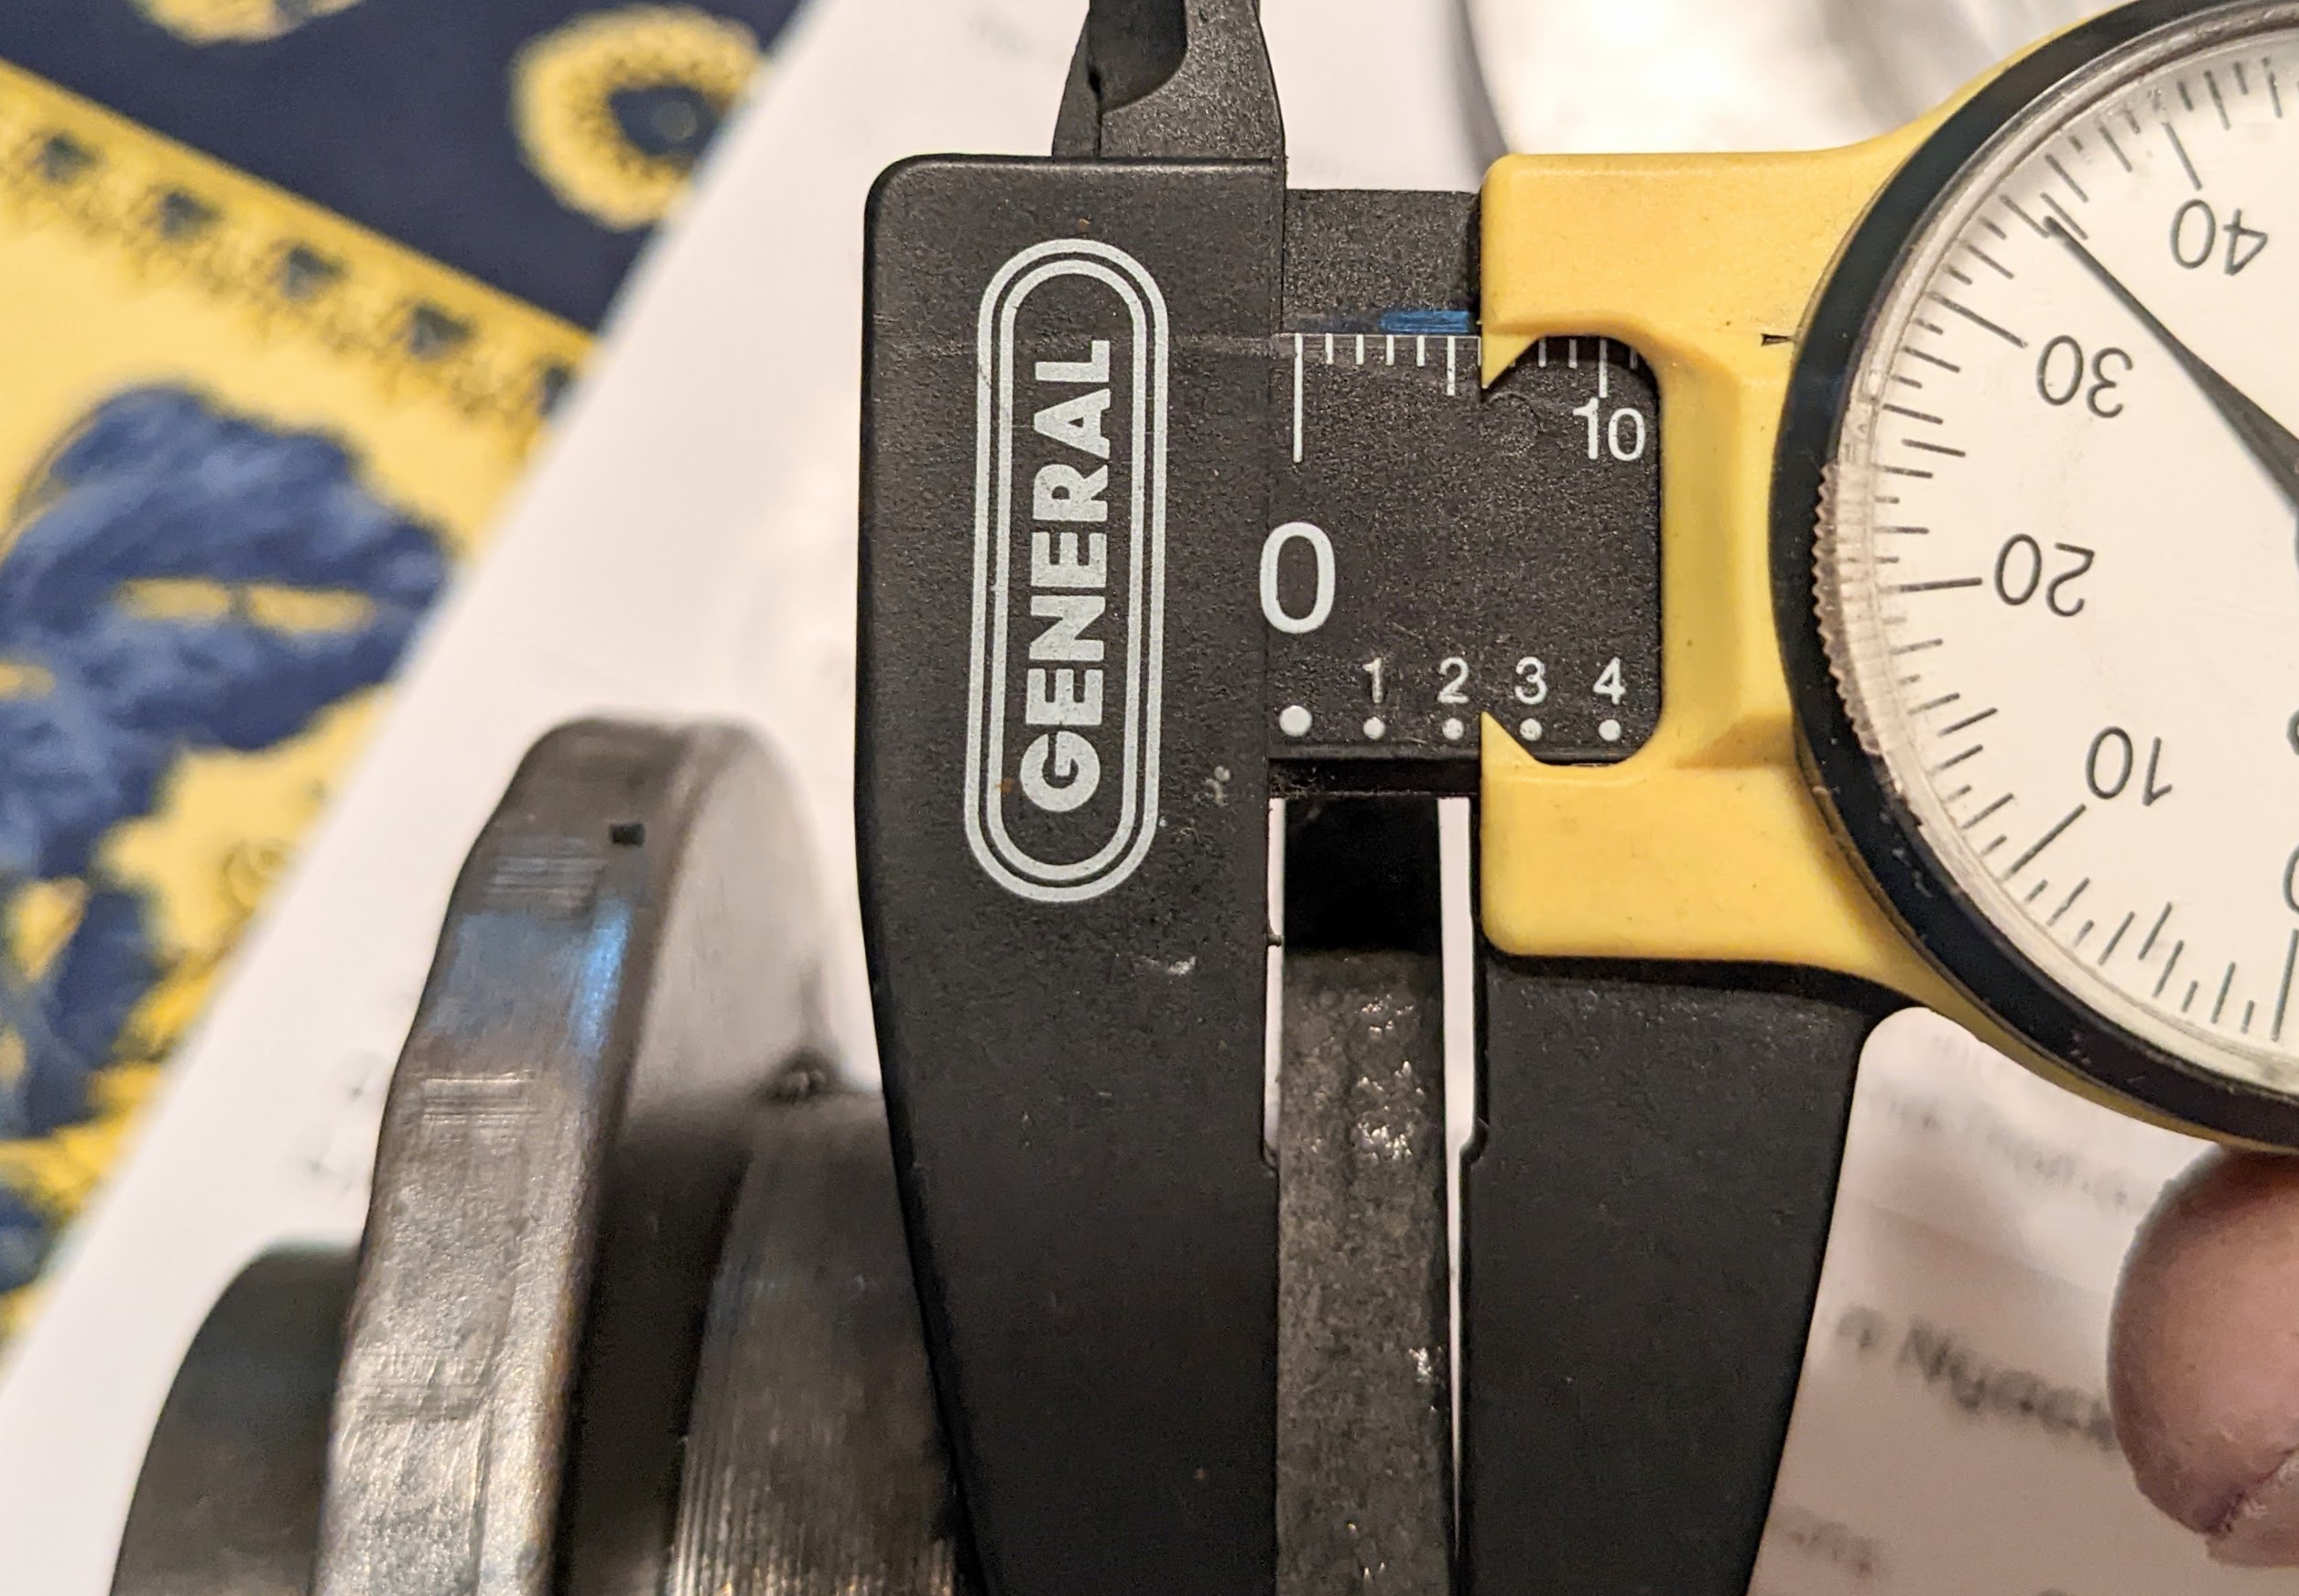
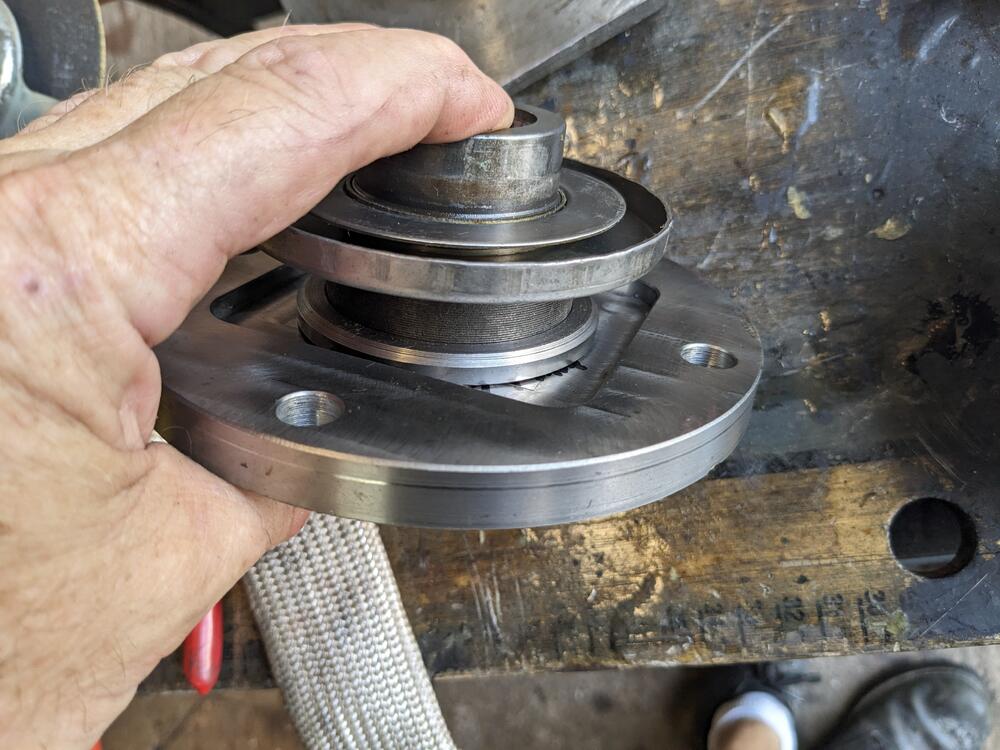
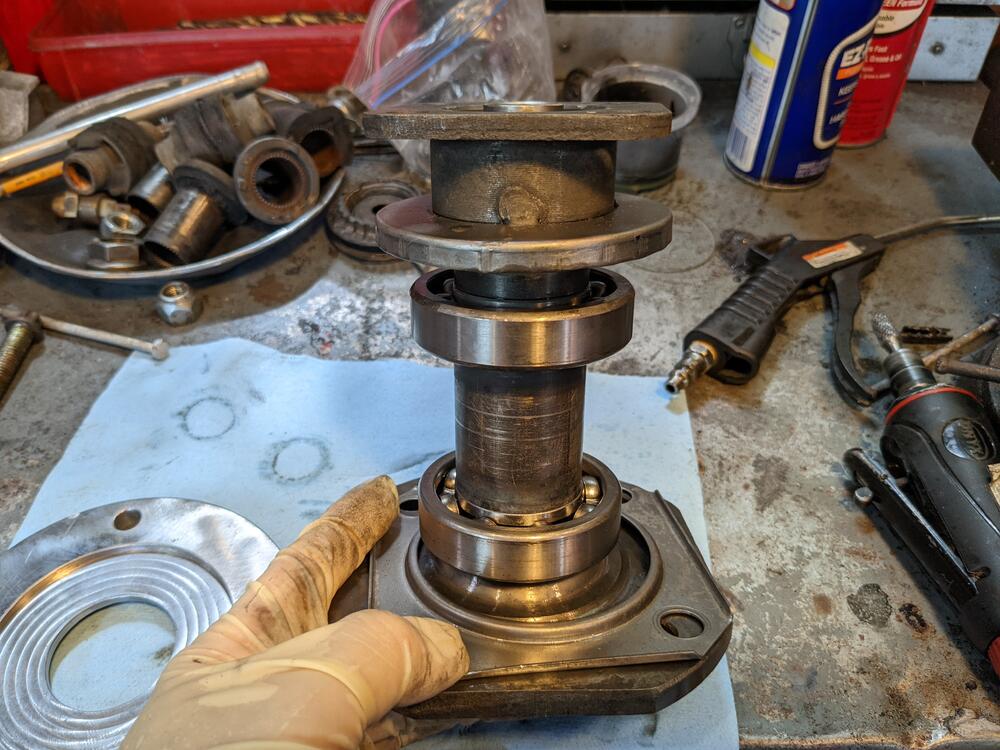
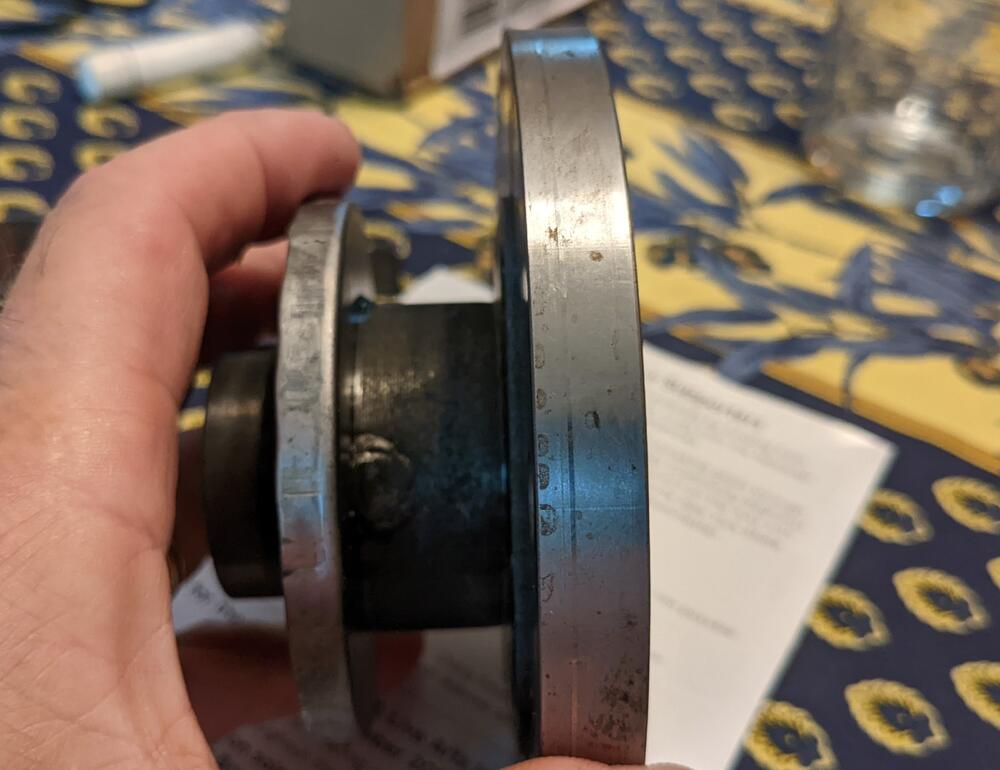
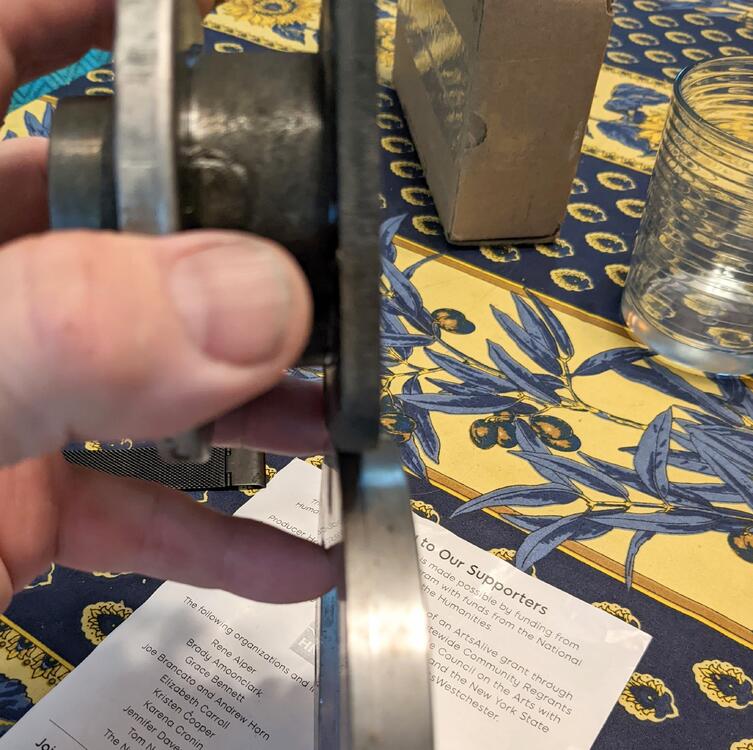
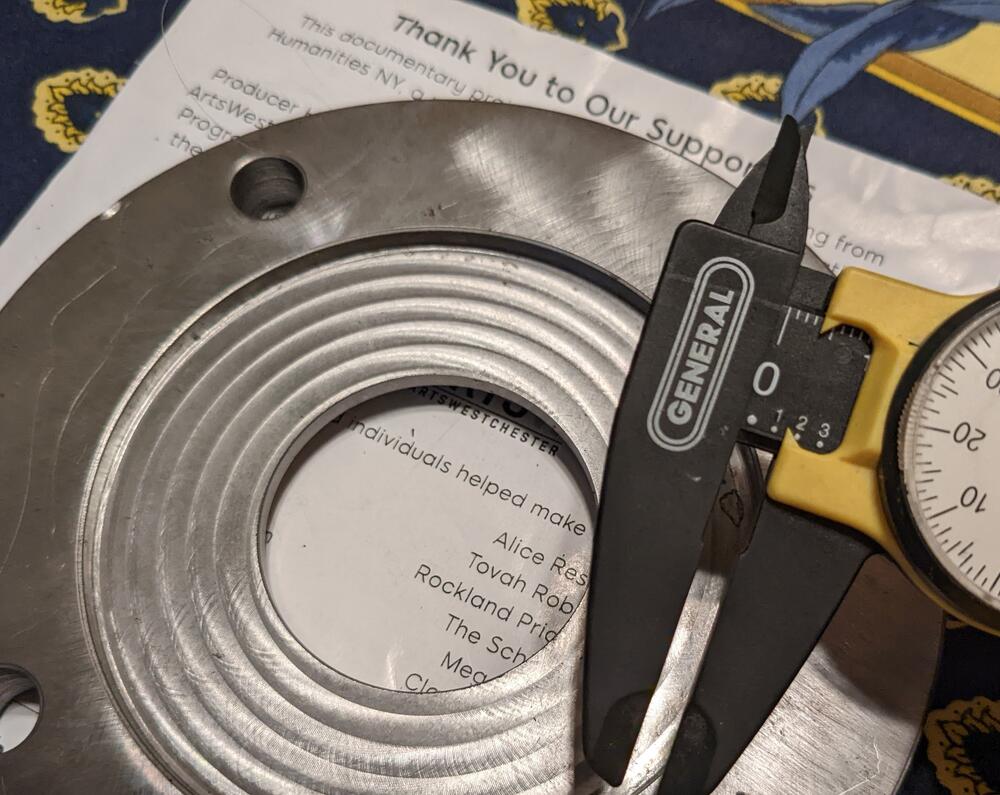
Stub assembled with bearings, sleeve, inner flange, washer & nut. I enlarged the ID of the old bearings so I could do this test without needing a puller for more than the inner flange. I can flats to the stub, to allow it to be peined in place. I'll need to cut 3mm off the nut, so the flange will be minimal. I guess I can also loctite the nut instead of flying on the pein. Alternatively, I leave the lip as is, and remove the CV cup cover. 16mm from washer to outside of flange. Nut is 19mm. Torquing the nut may reduce the height by a mm, I suppose. The CV adaptor gets welded to the old flange. As I stated above, the problem with the design is that I loose 8mm off the travel of the CV shaft, hence my desire to re-work it so that the modified flange sits at the same depth as the stock flange (35mm off the back side of the dust cover) For the hub-centric rings, I'm going to have the existing nubs shouldered so the sleeves sit concentrically outside them. The rings cannot be more than 12mm deep. centering rings cut from used Volvo hubs - OD matches OD of existing Datsun flange (63mm), so no issues with fitting the rotors EDIT: not sure why the site is duplicating images - it won't allow me to delete this one, either


-
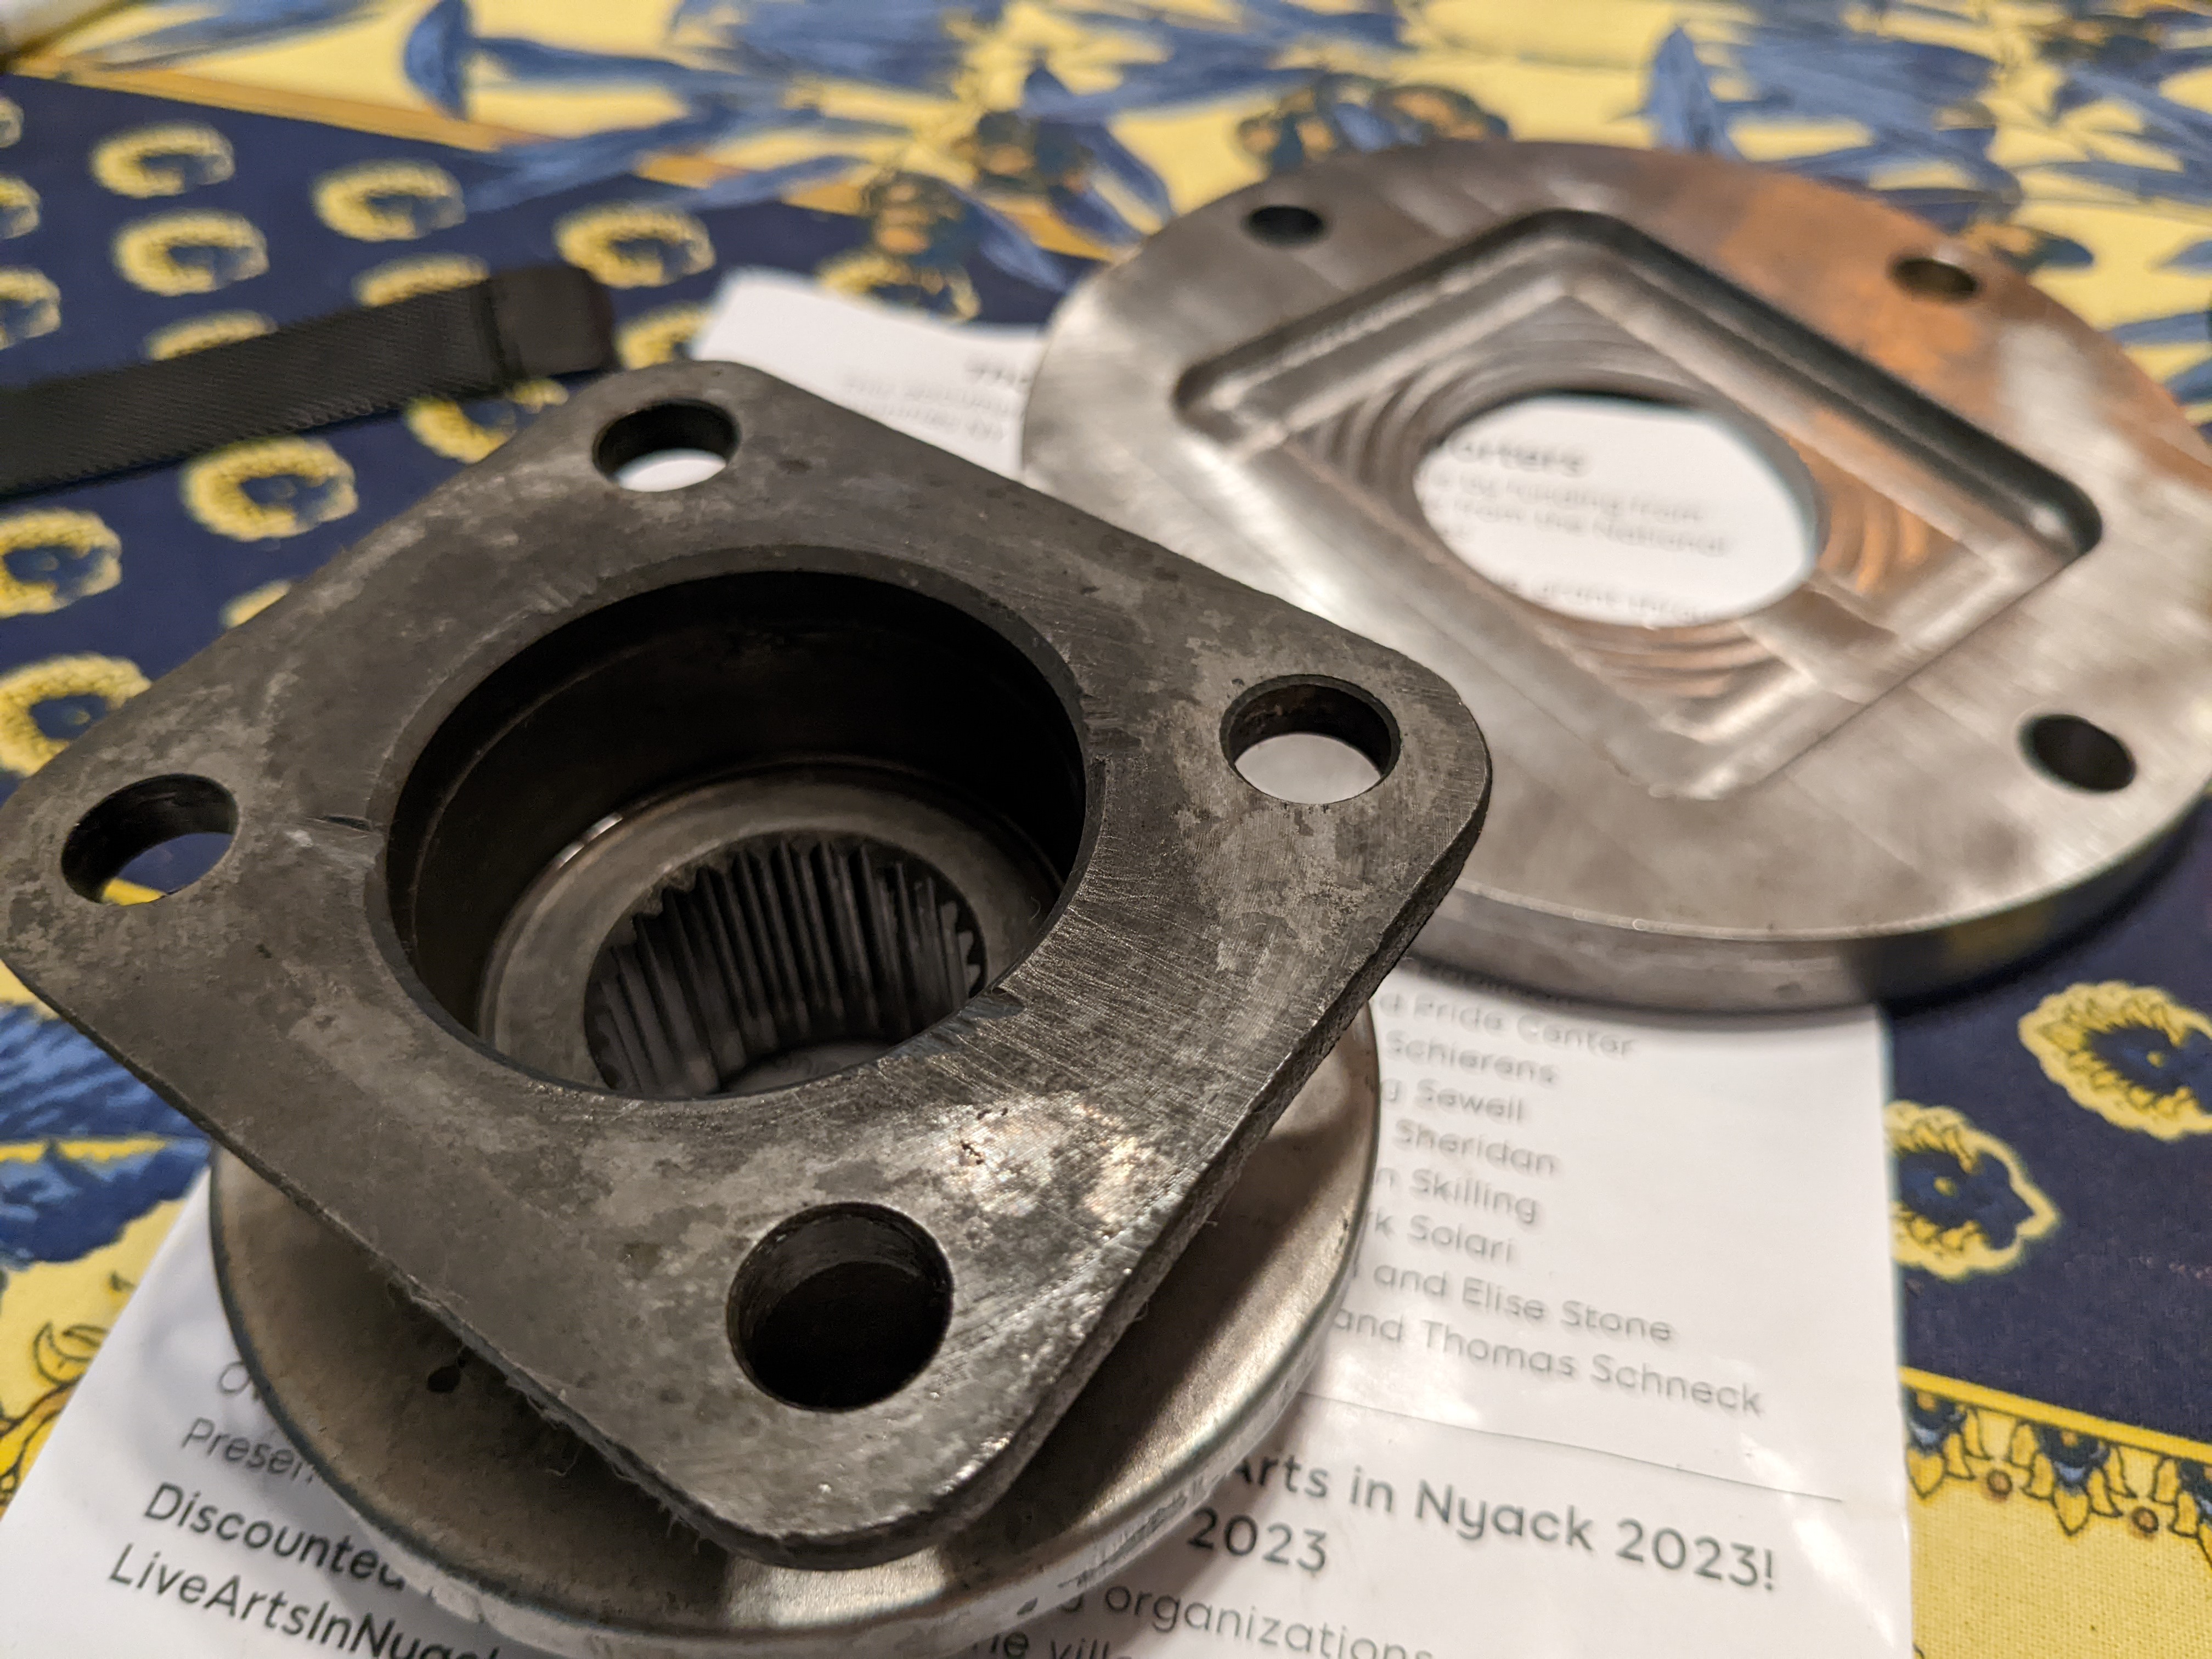
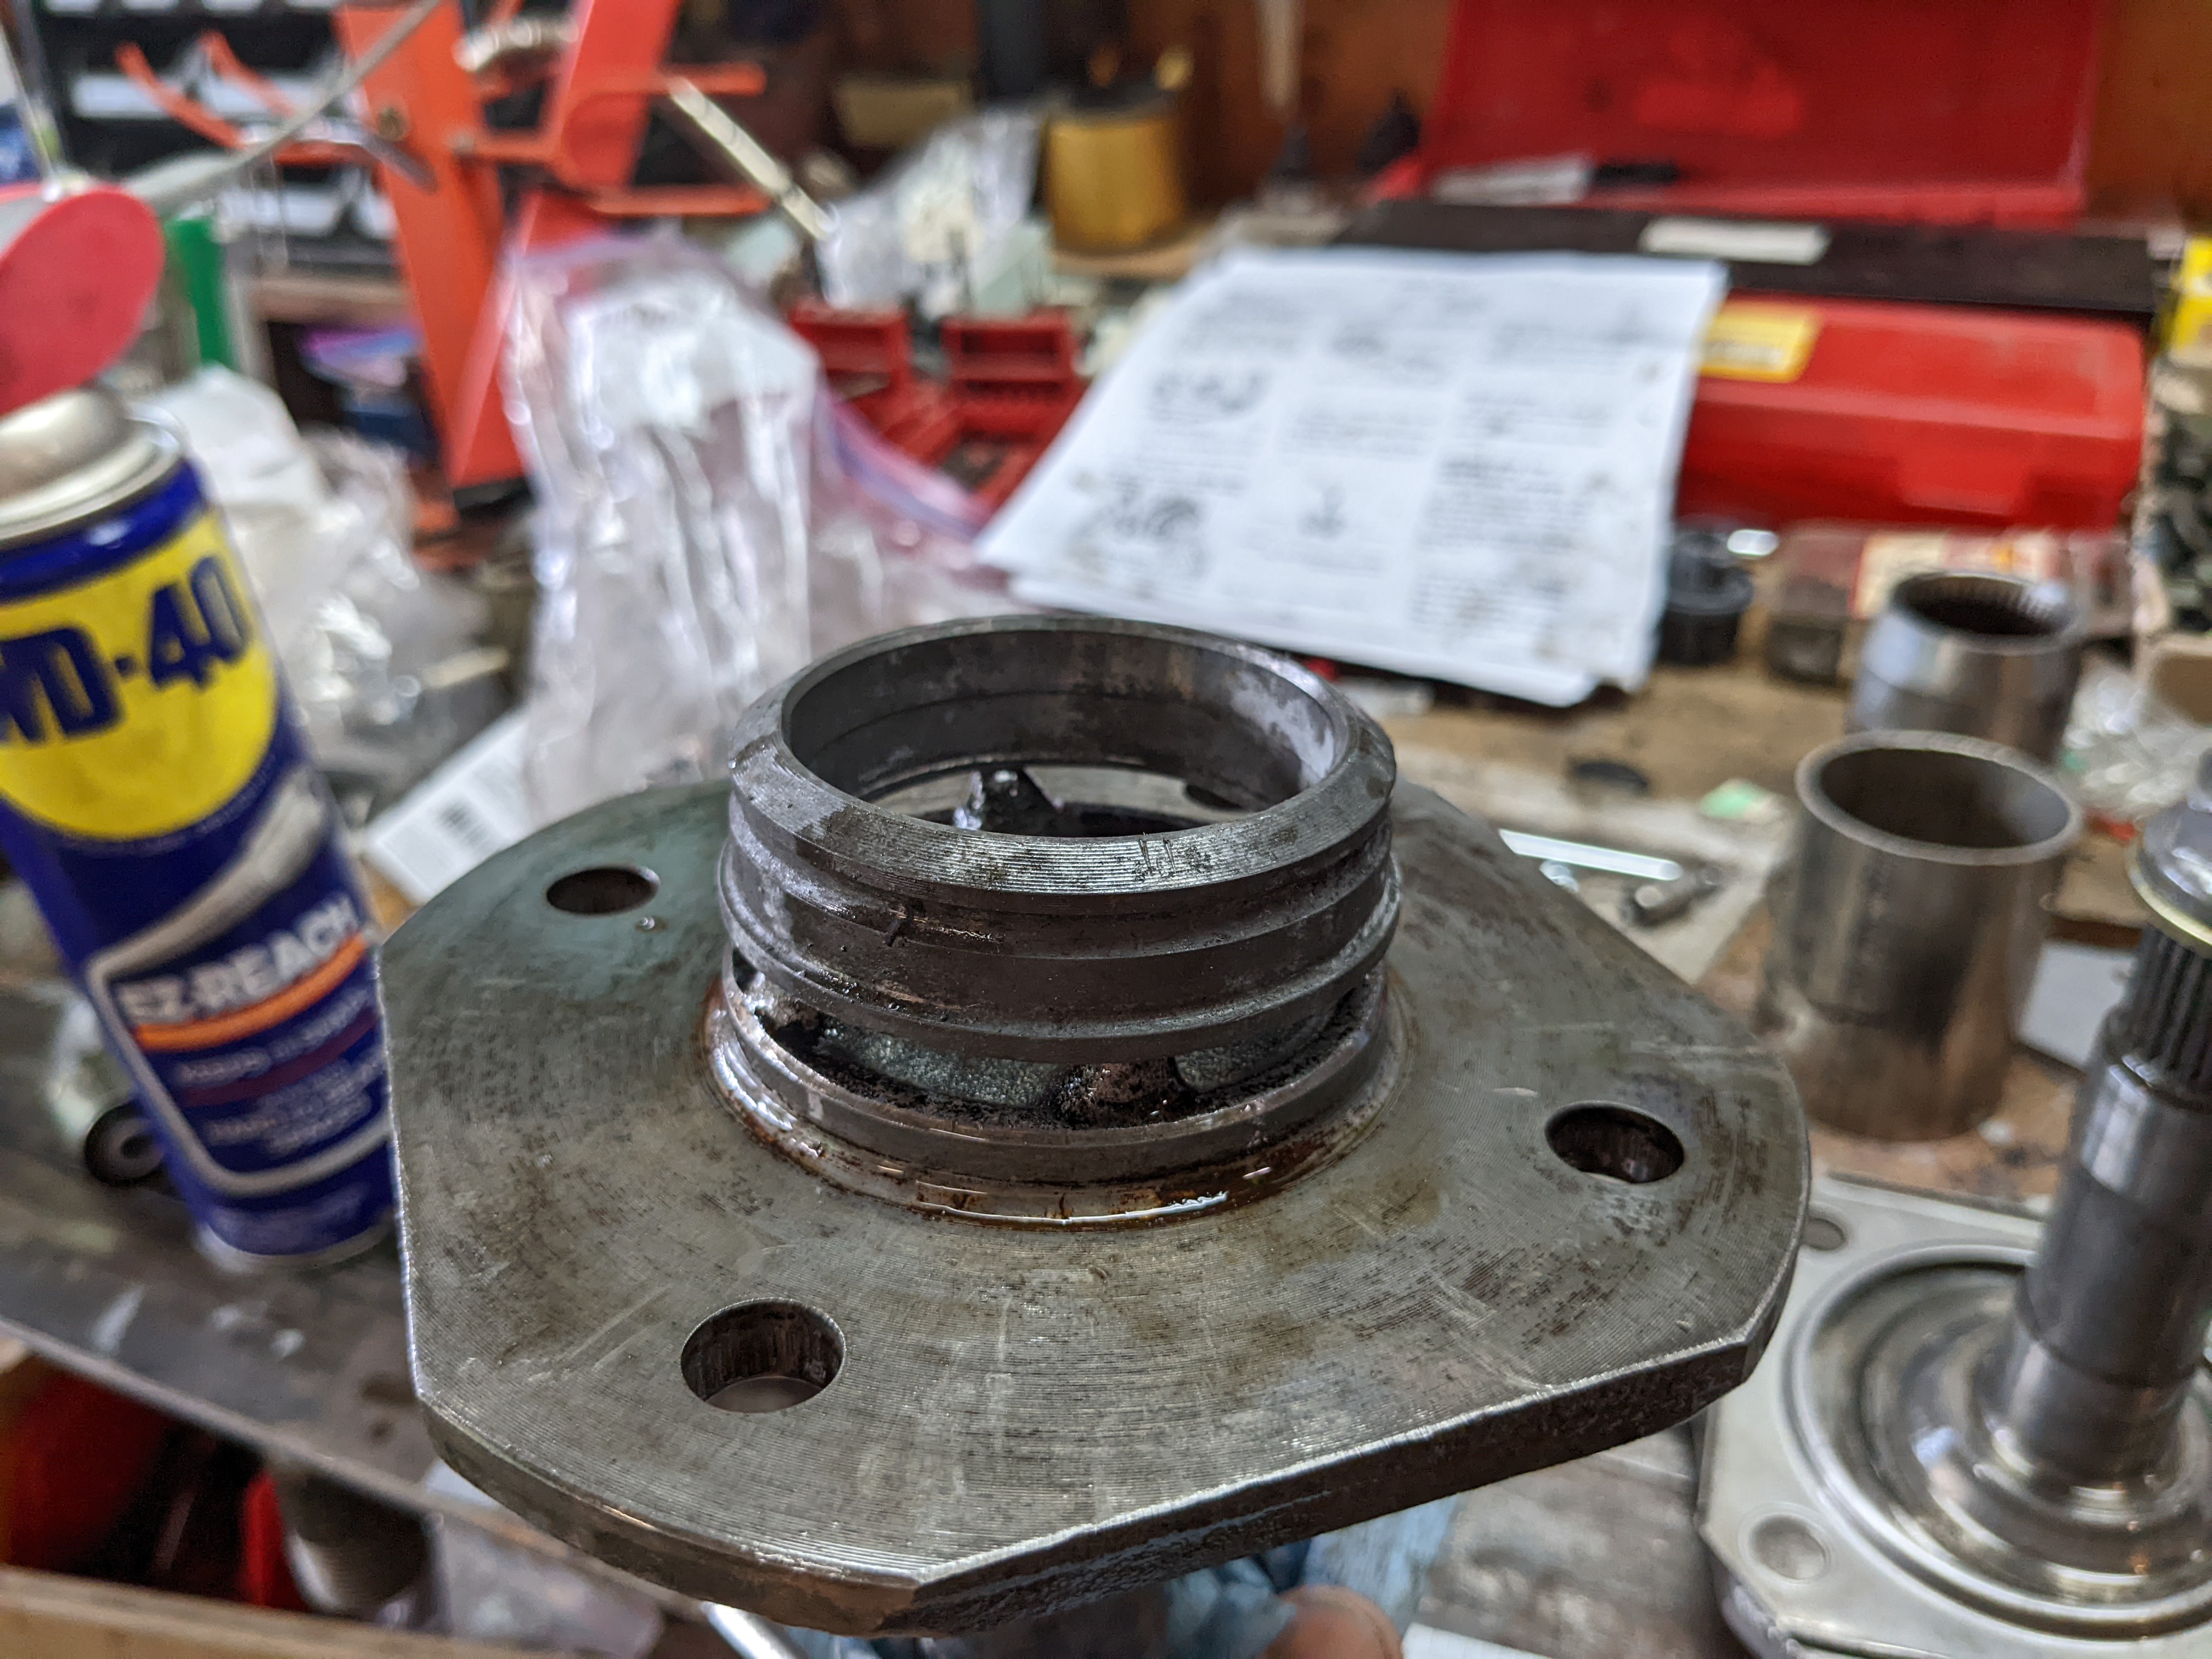
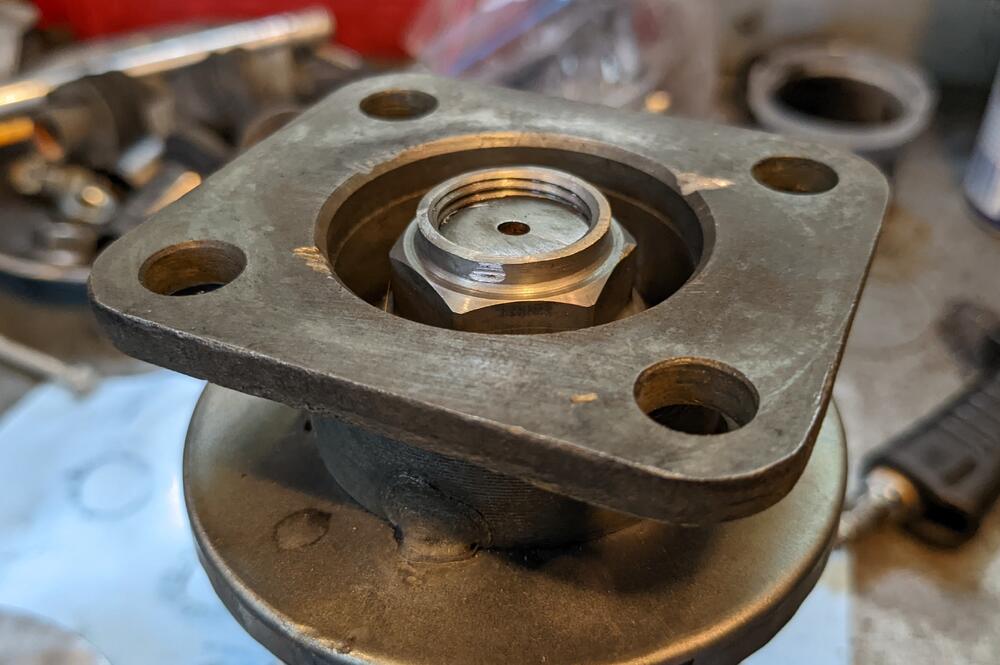
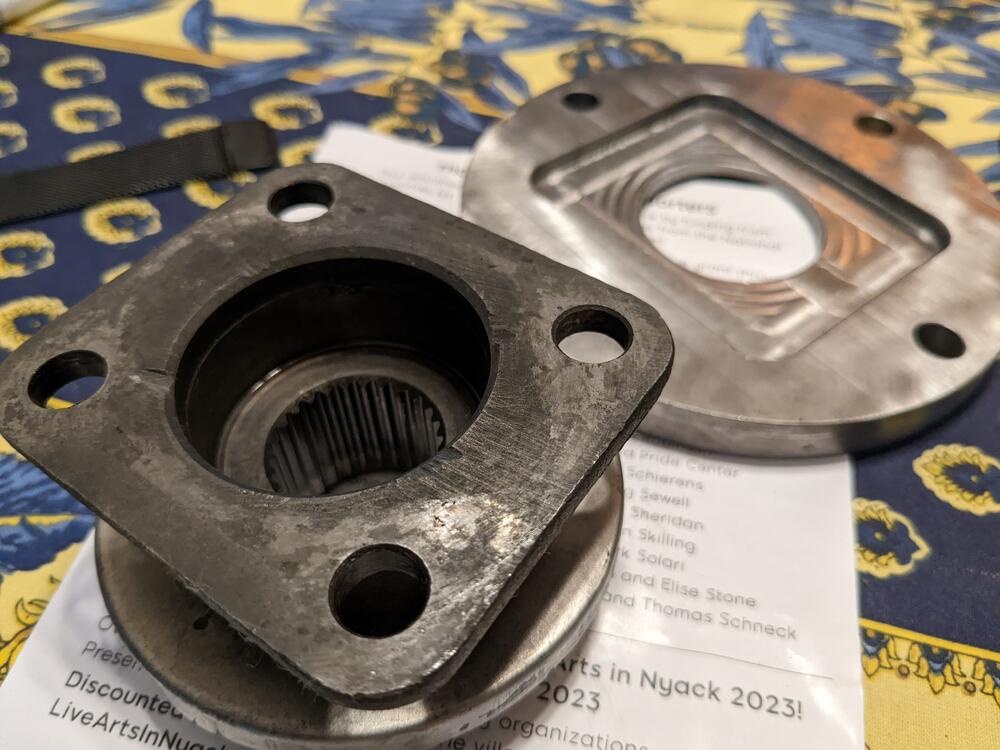
I bought the Z31 ('87 300ZX T) axles (NI8435, NI8442) that go with the Silvermine flanges - Trackmotive brand off RockAuto. What I don't like is that the existing flange doesn't sit in all the way, so there is about 8mm lost in terms of overall depth for the new axle, which as we know is longer than stock. The other factor is the one you mention, that Nissan didn't bother making the flange concentric with the hub/axle, so that has to be addressed. The way the plates are supplied, they are supposed to be welded in to the recess provided, but since the stock flange isn't hub-centric a jig of some kind is required to center the weld flange to the hub. What I'm thinking of doing is removing the inner flange & having the hub shaft turned with a 4mm shoulder for the new CV flange to seat on, so I can get the flange surface back to stock depth. That should prevent the CV from bottoming out & binding, I hope. stock flange 6mm thick new flange is 12mm Old flange only sits 4mm into recess other side recess for CV cup is 4mm


-
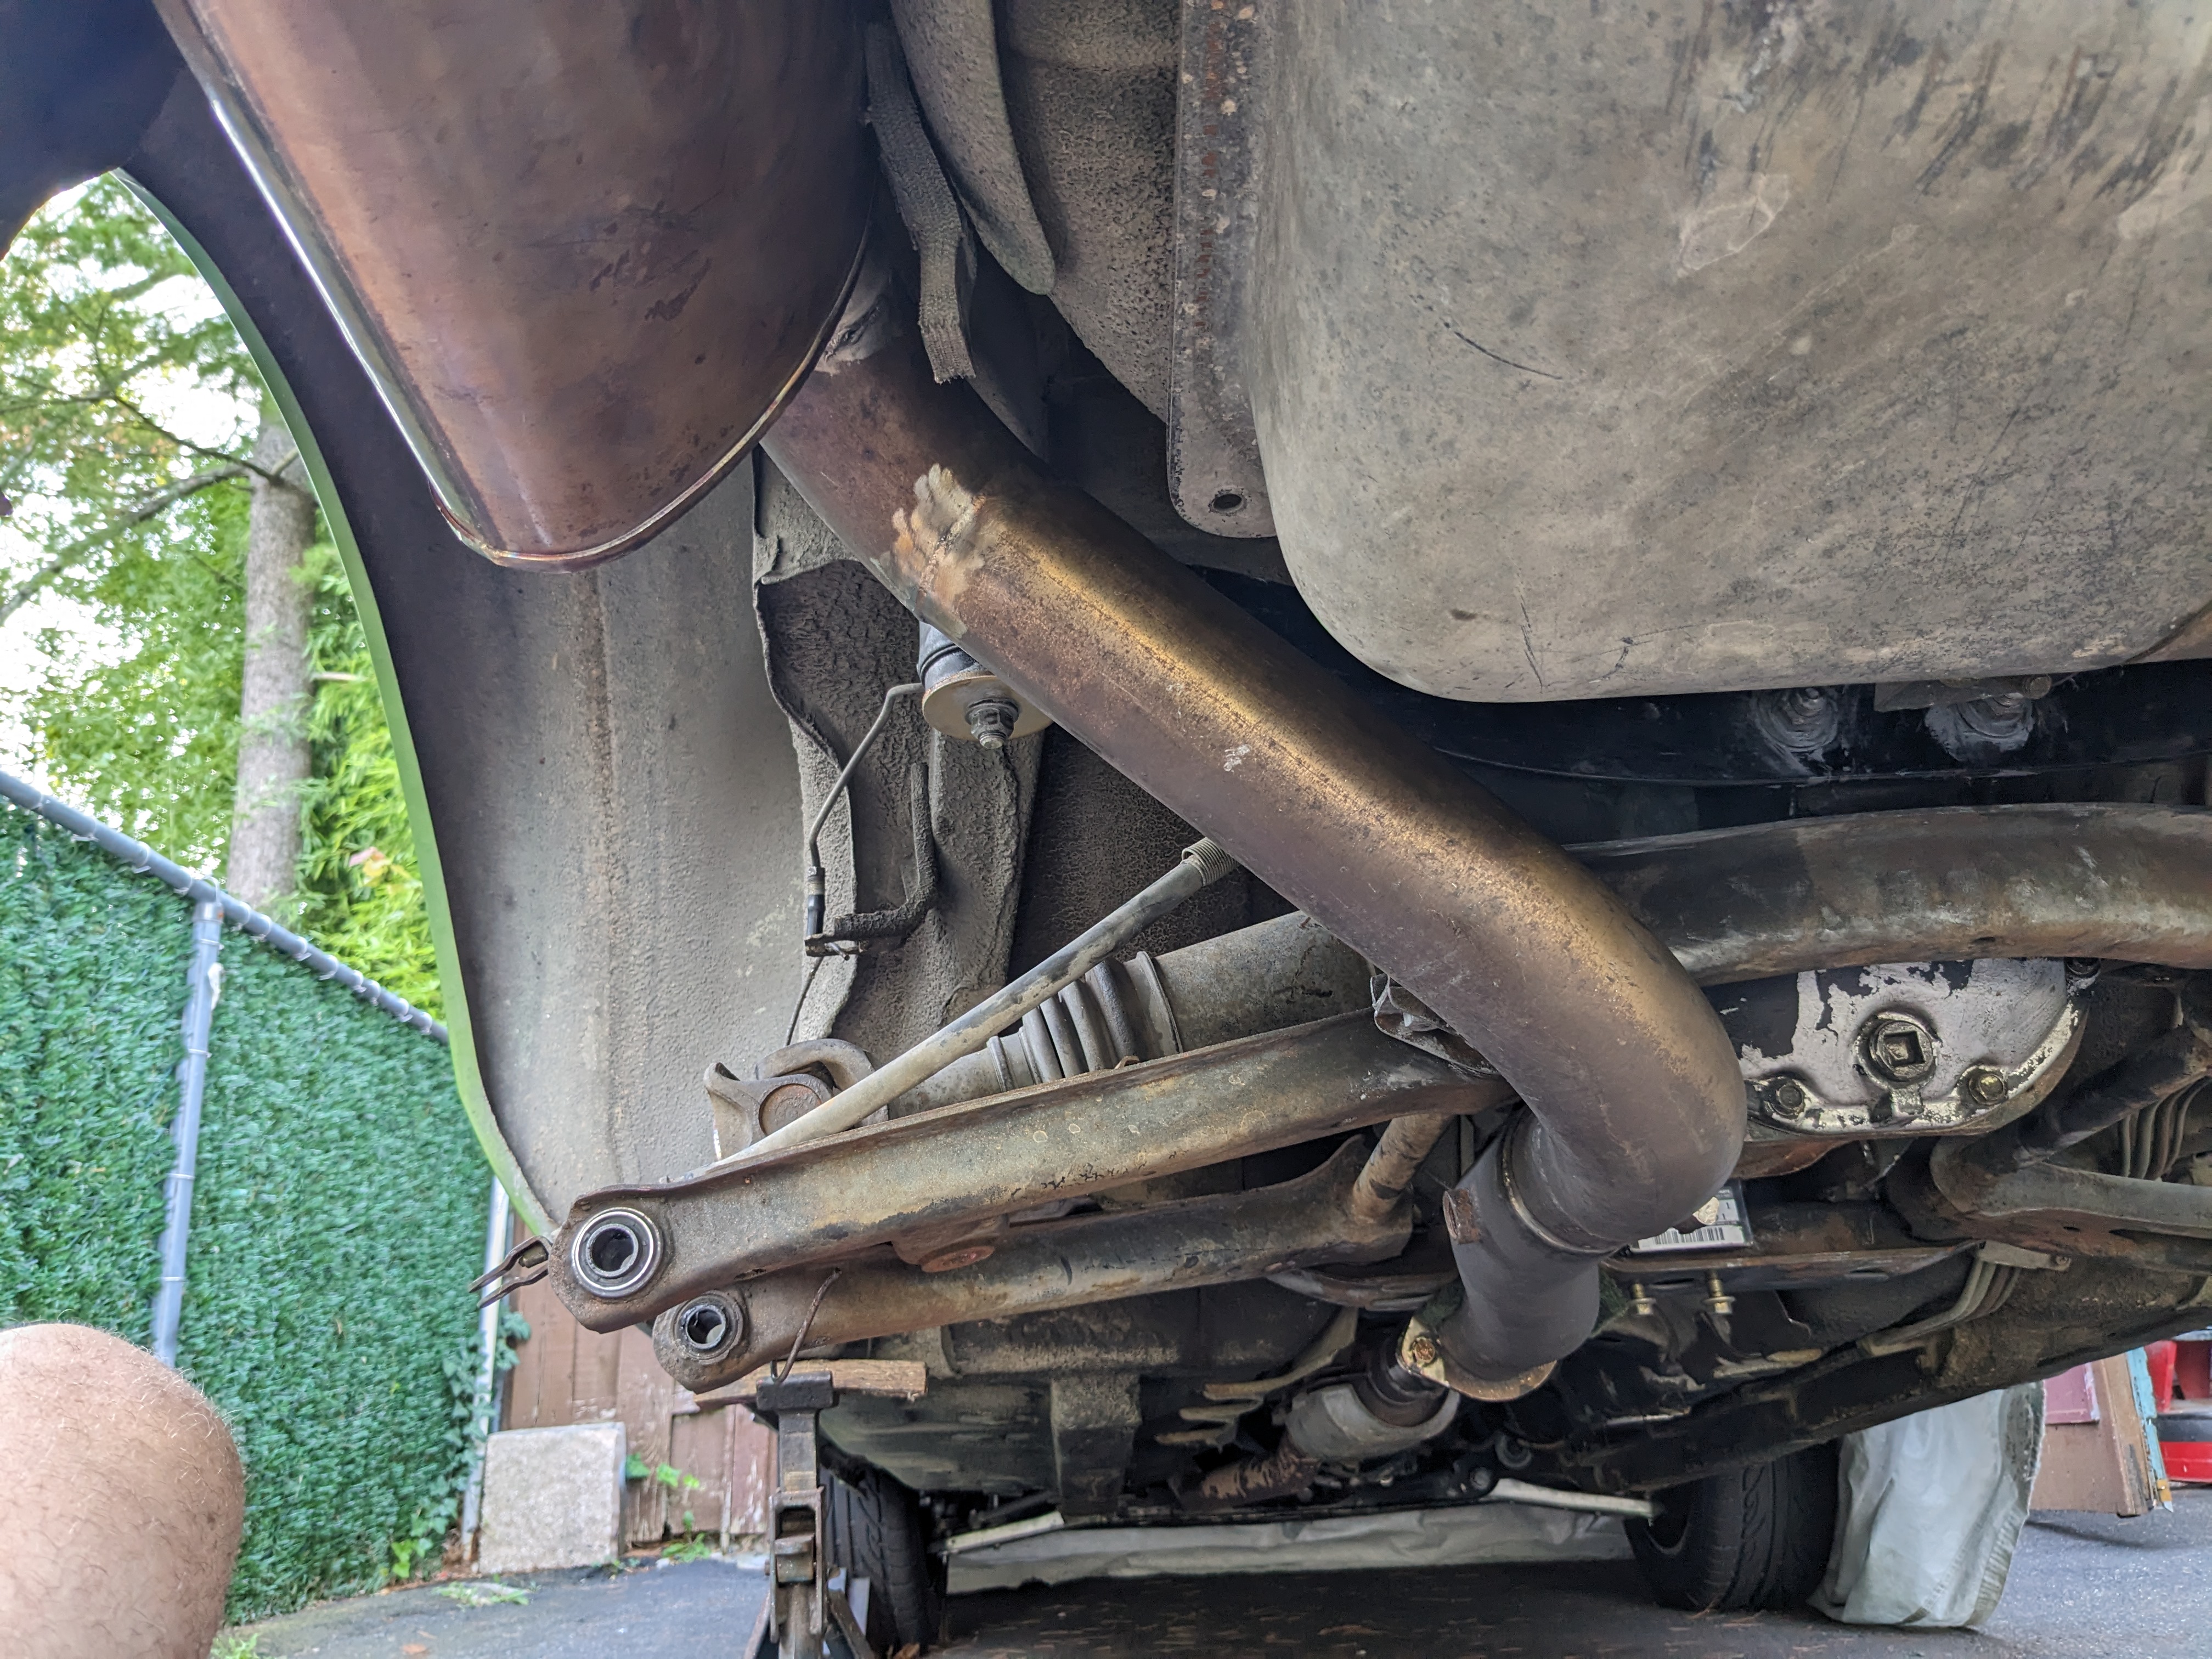
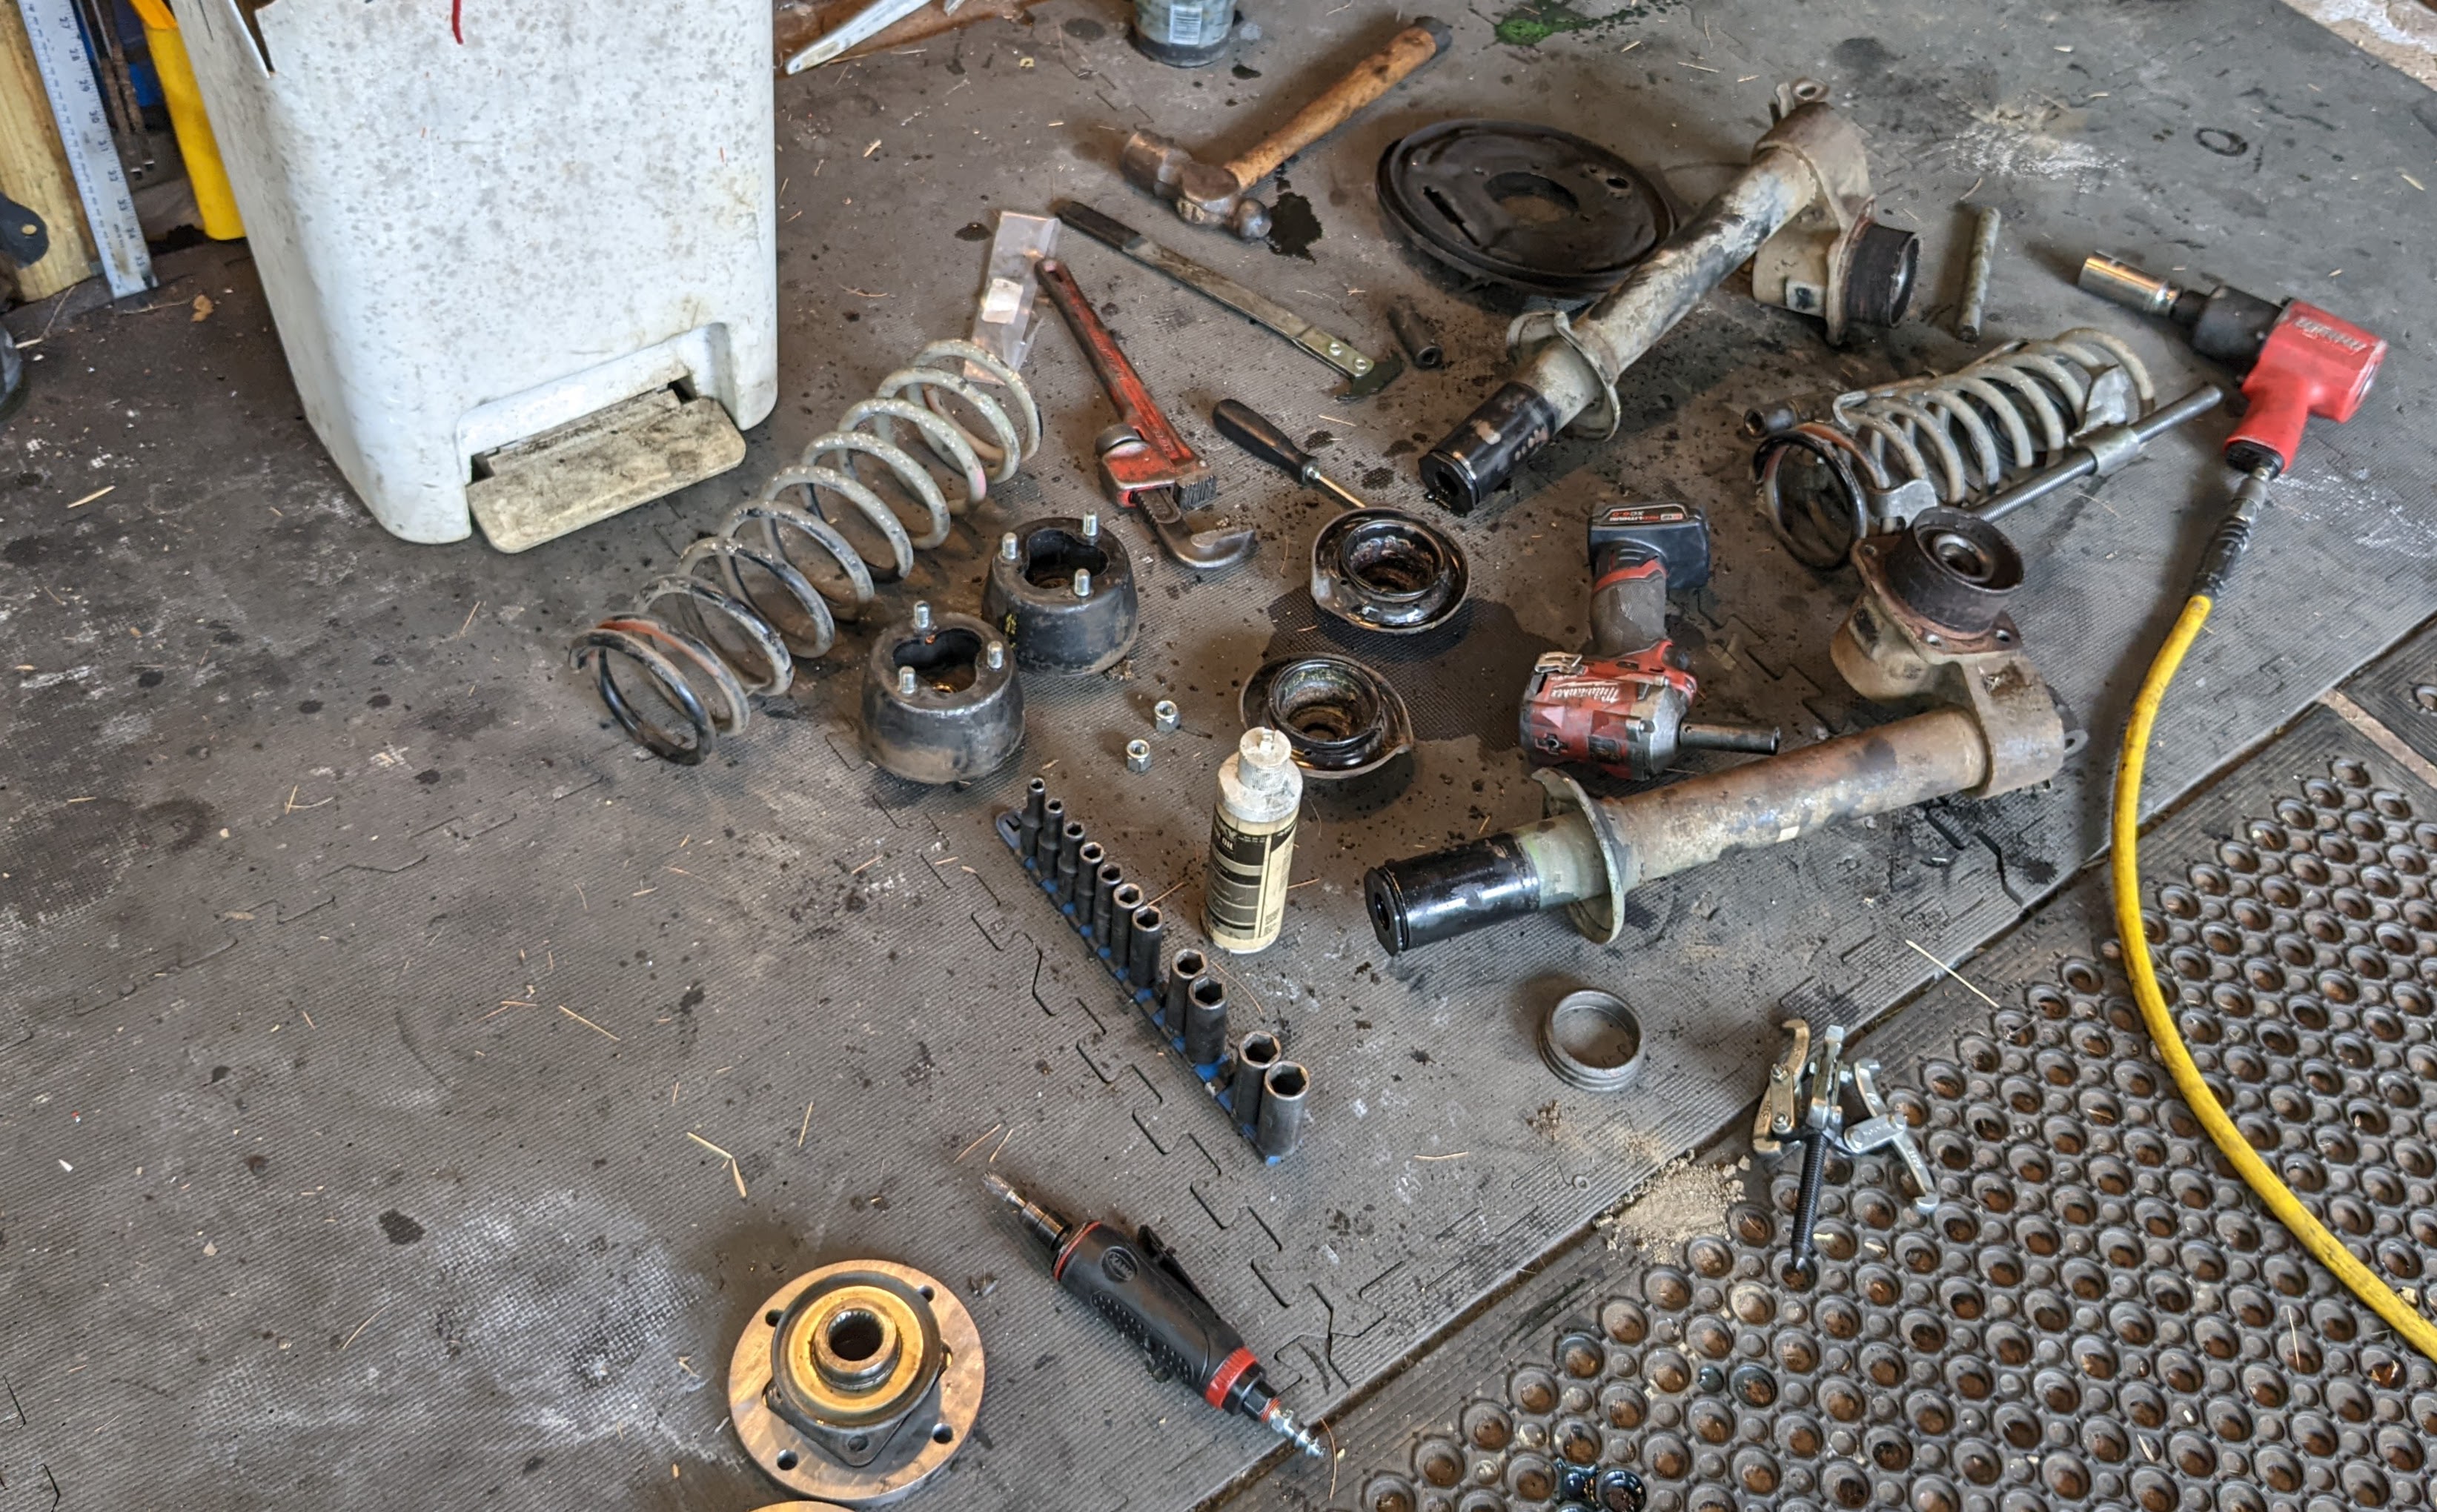
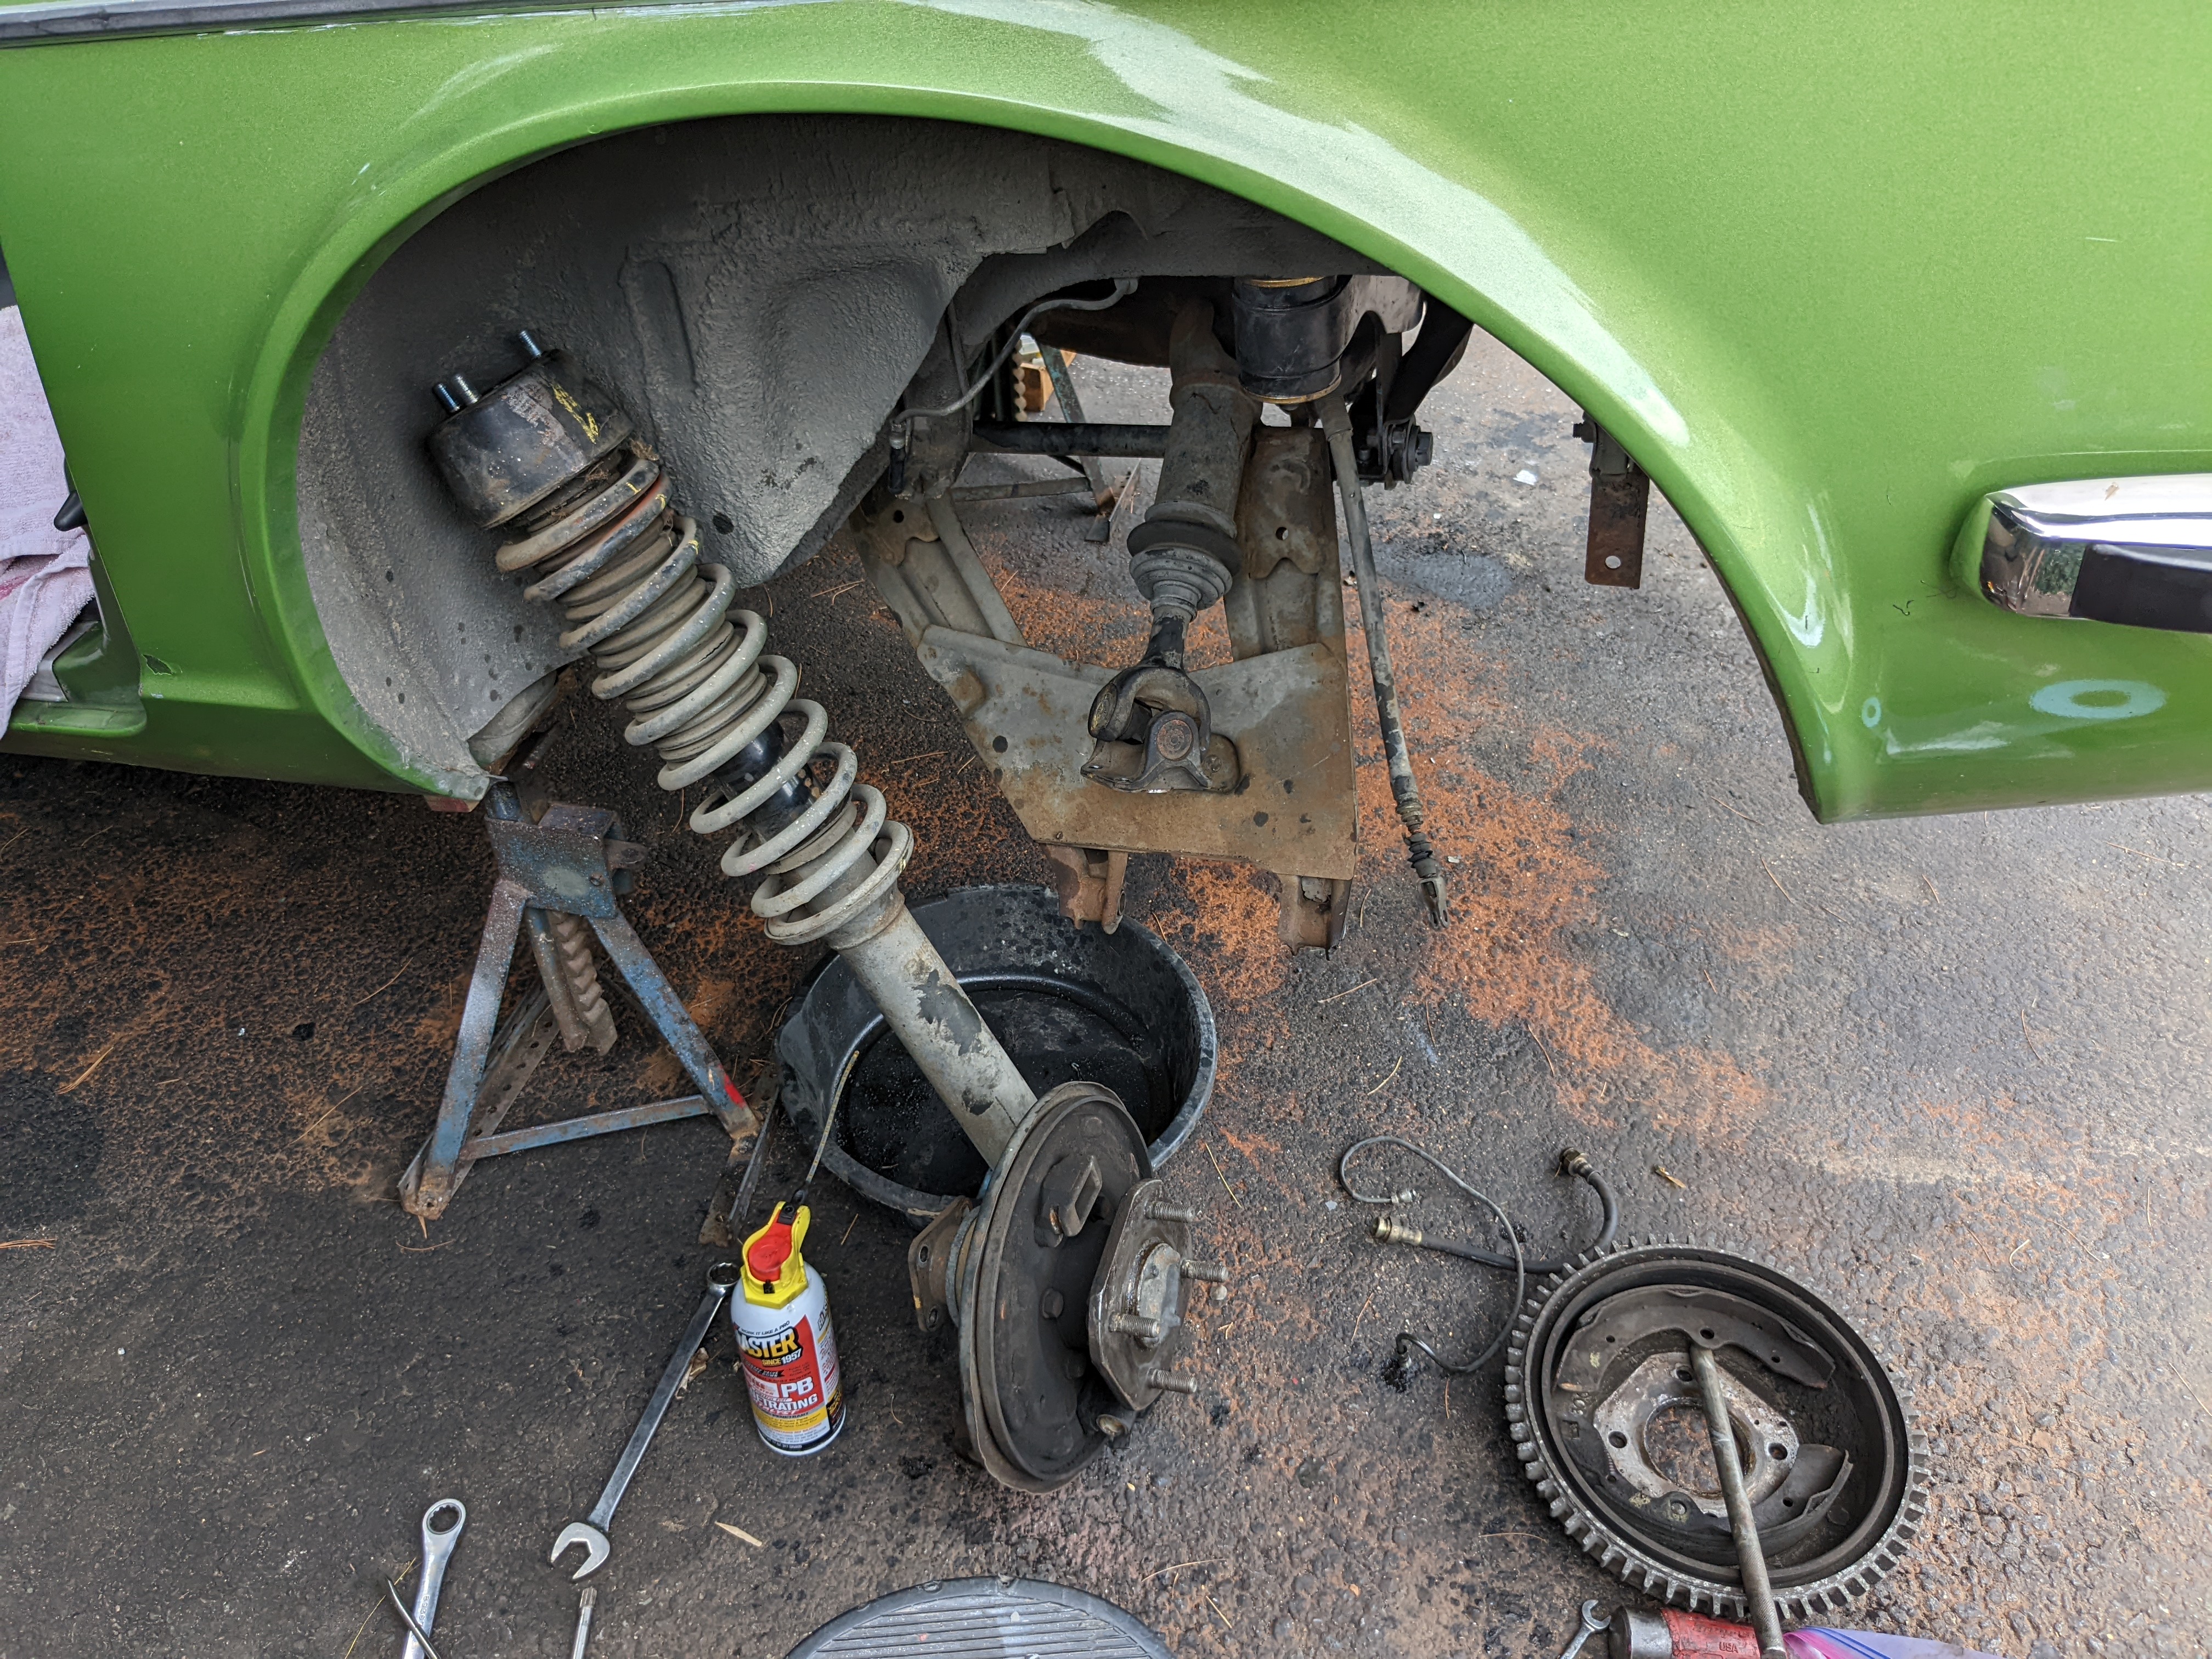
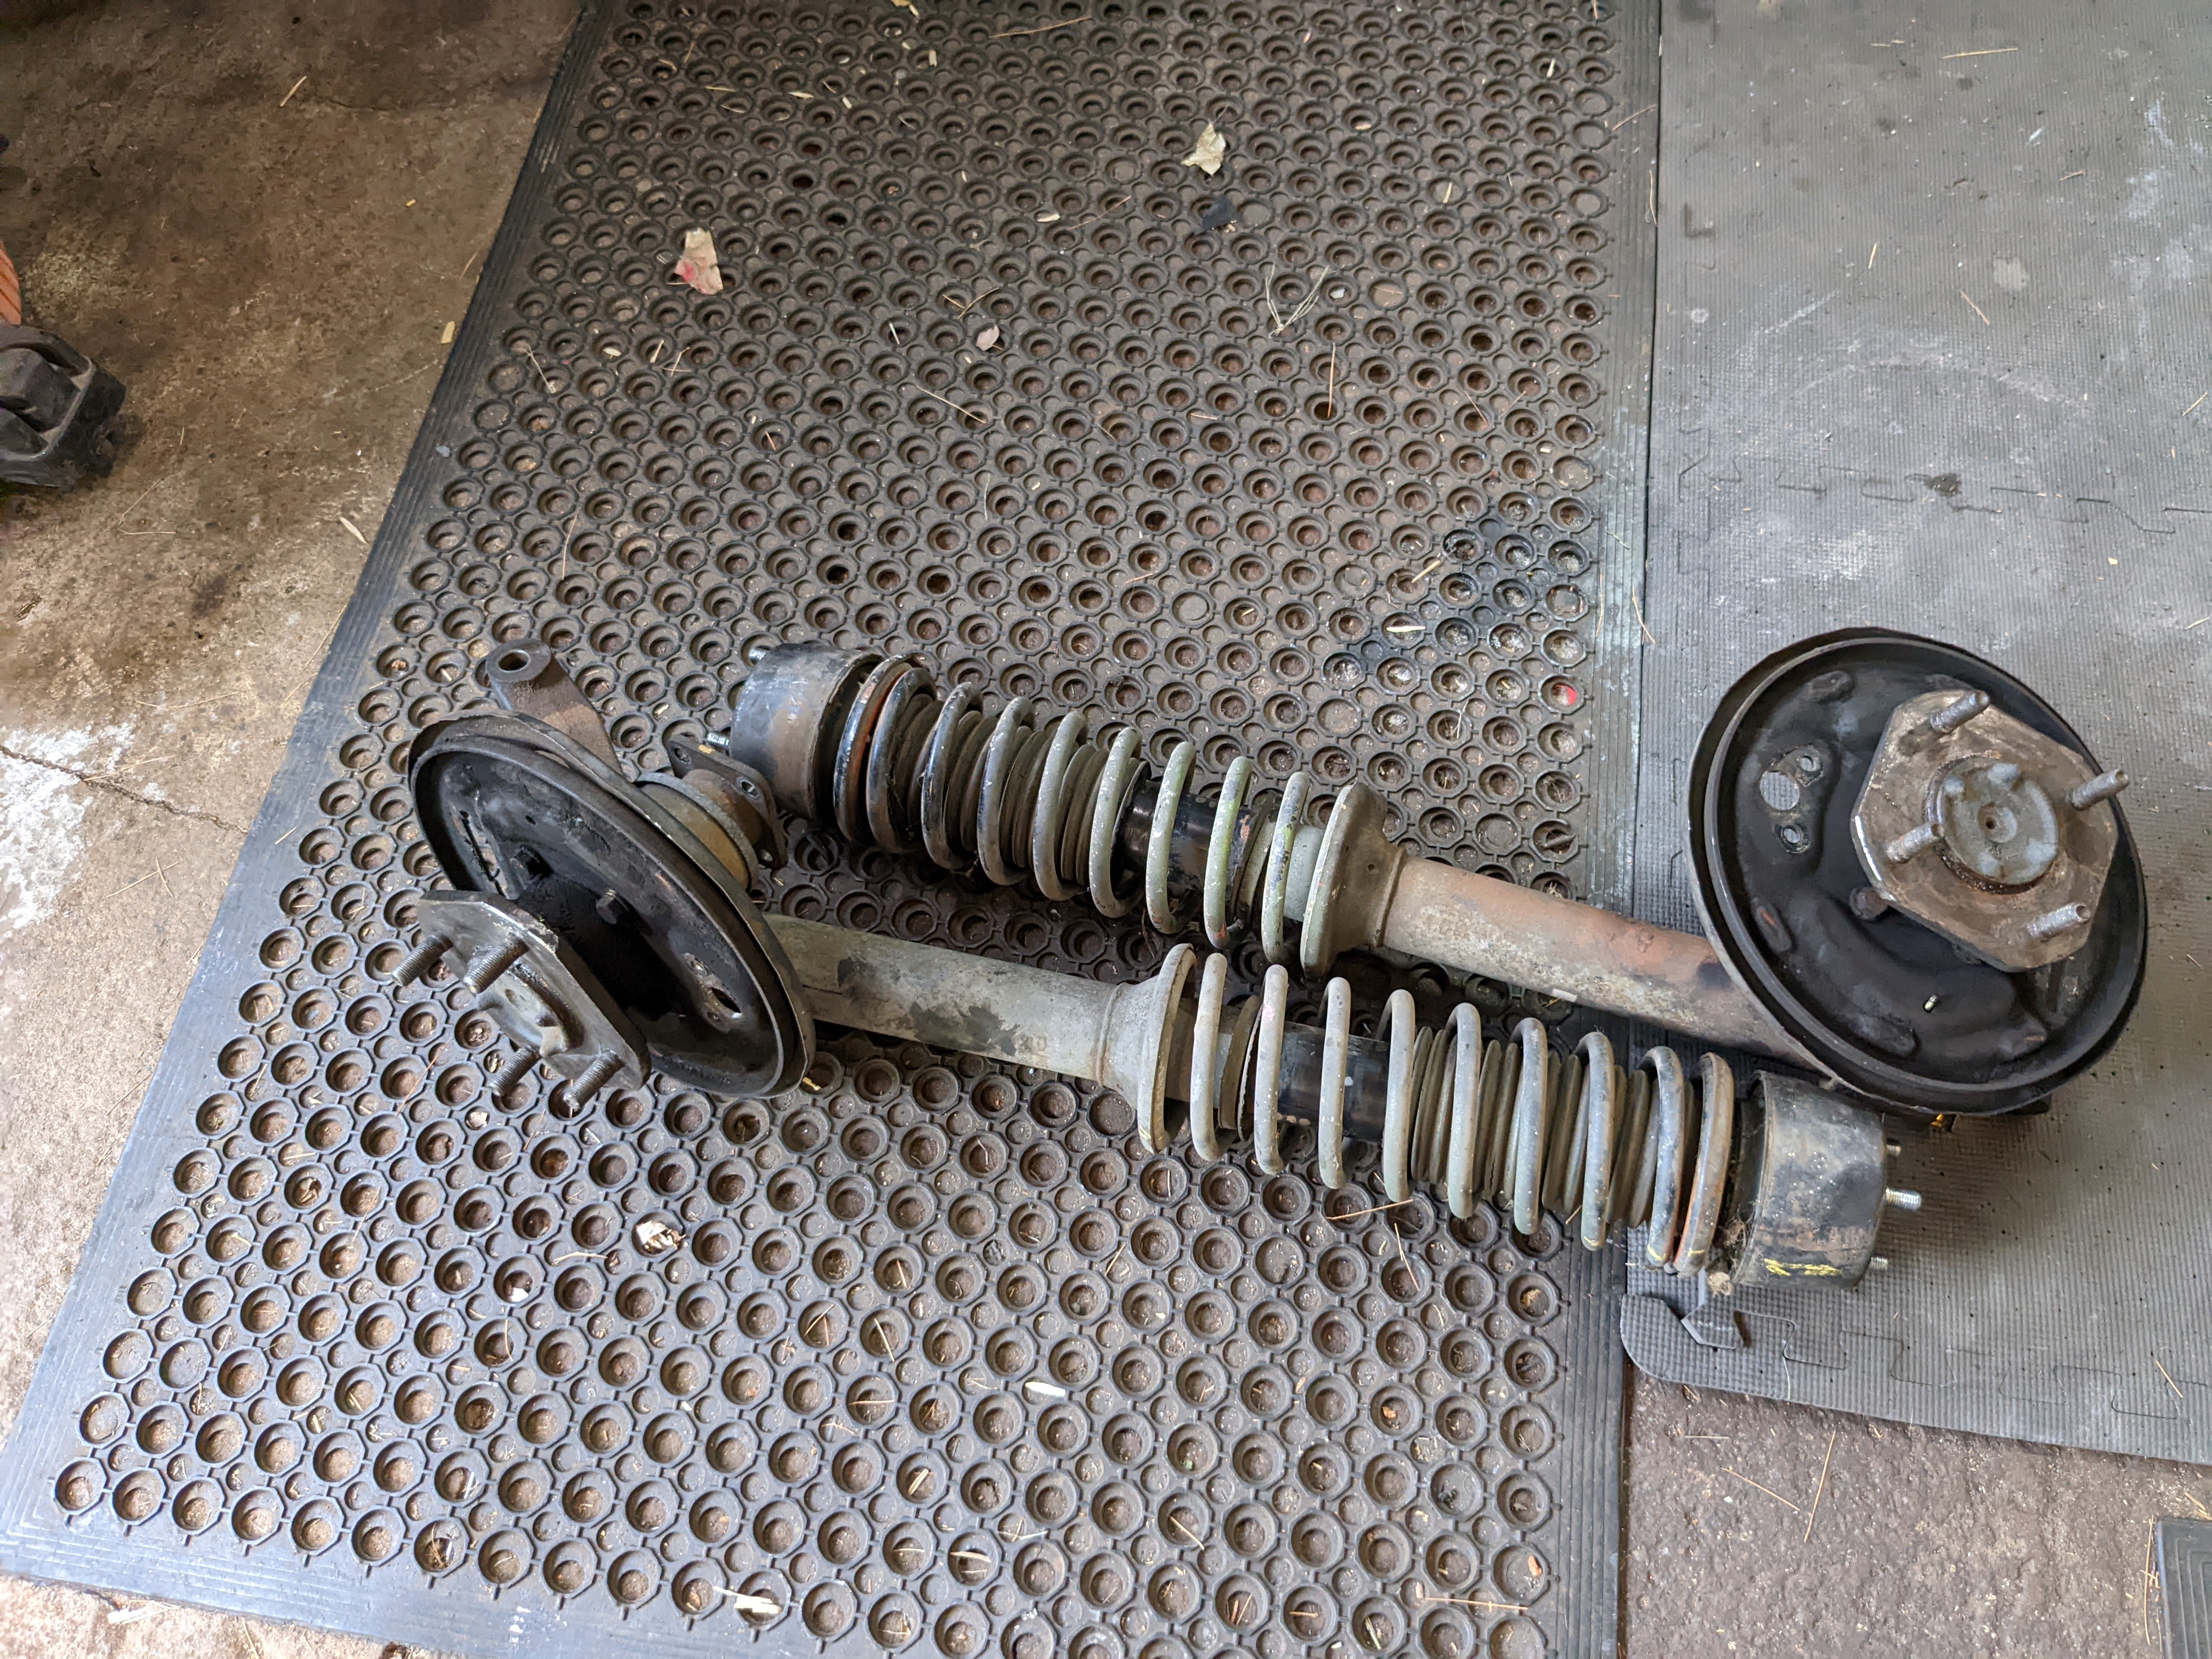
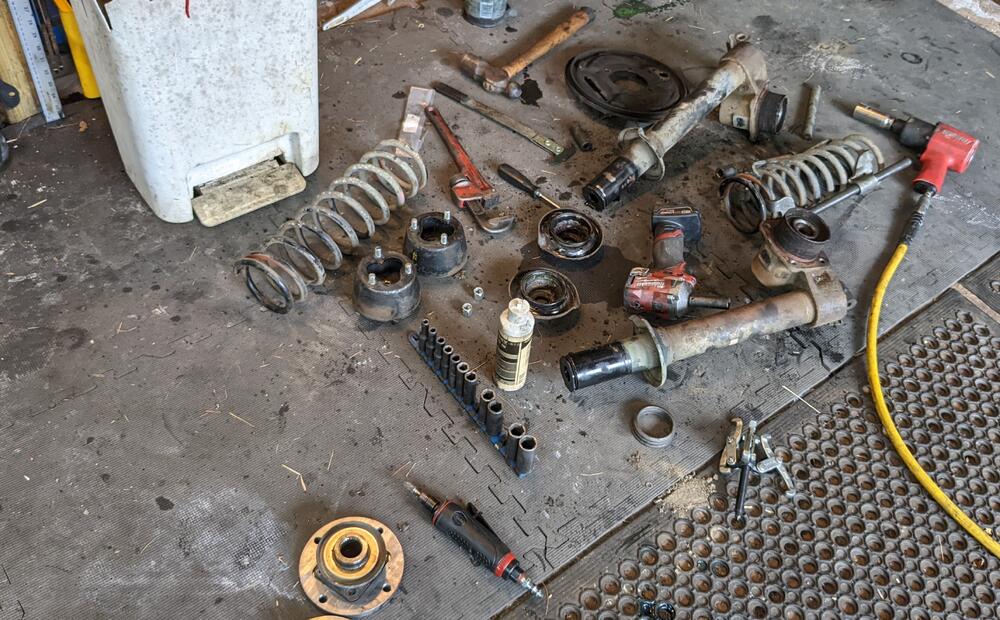
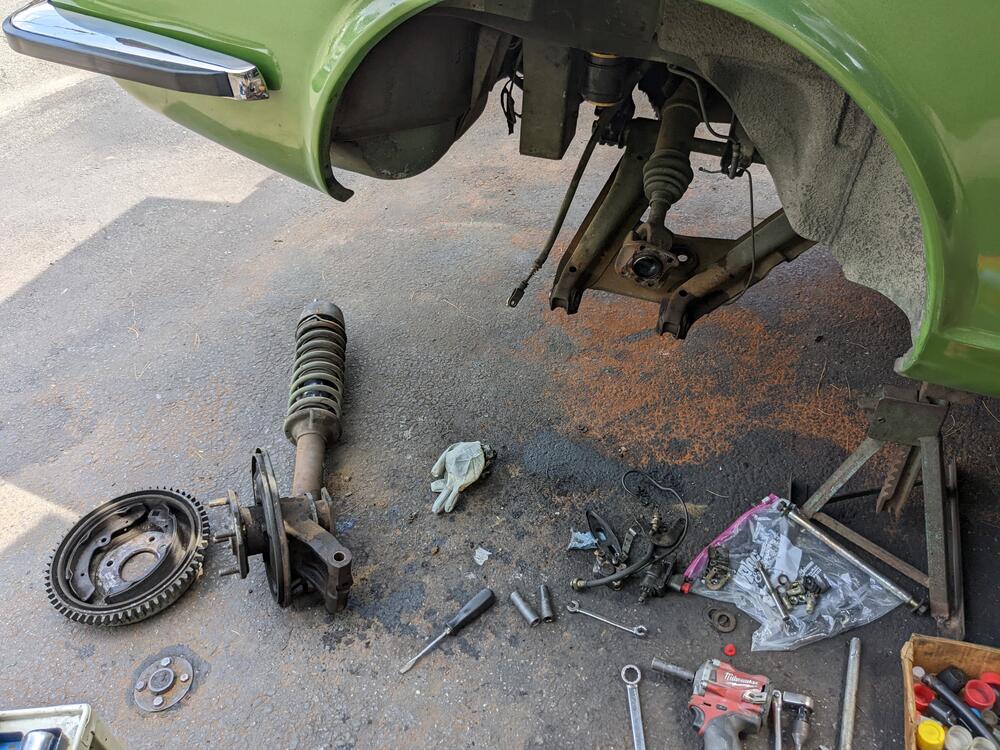
Took the rear struts & hubs apart after doing the Fuel pump setup. Removed the drum brake back plates that are no longer needed. cut down the nub of the spindle, to make sure the Z31 CV cap doesn't hit removed the (too short) wheel studs & cleaned the outer flanges Still not happy with not having a hub seat for the wheels I may weld on a sleeve (cut from a Volvo), that will allow me to use a hub centric ring (65.1 - 73.1) to set the Konig wheels. Have to have the nubs turned down in that case, to get a good seat for welding


-
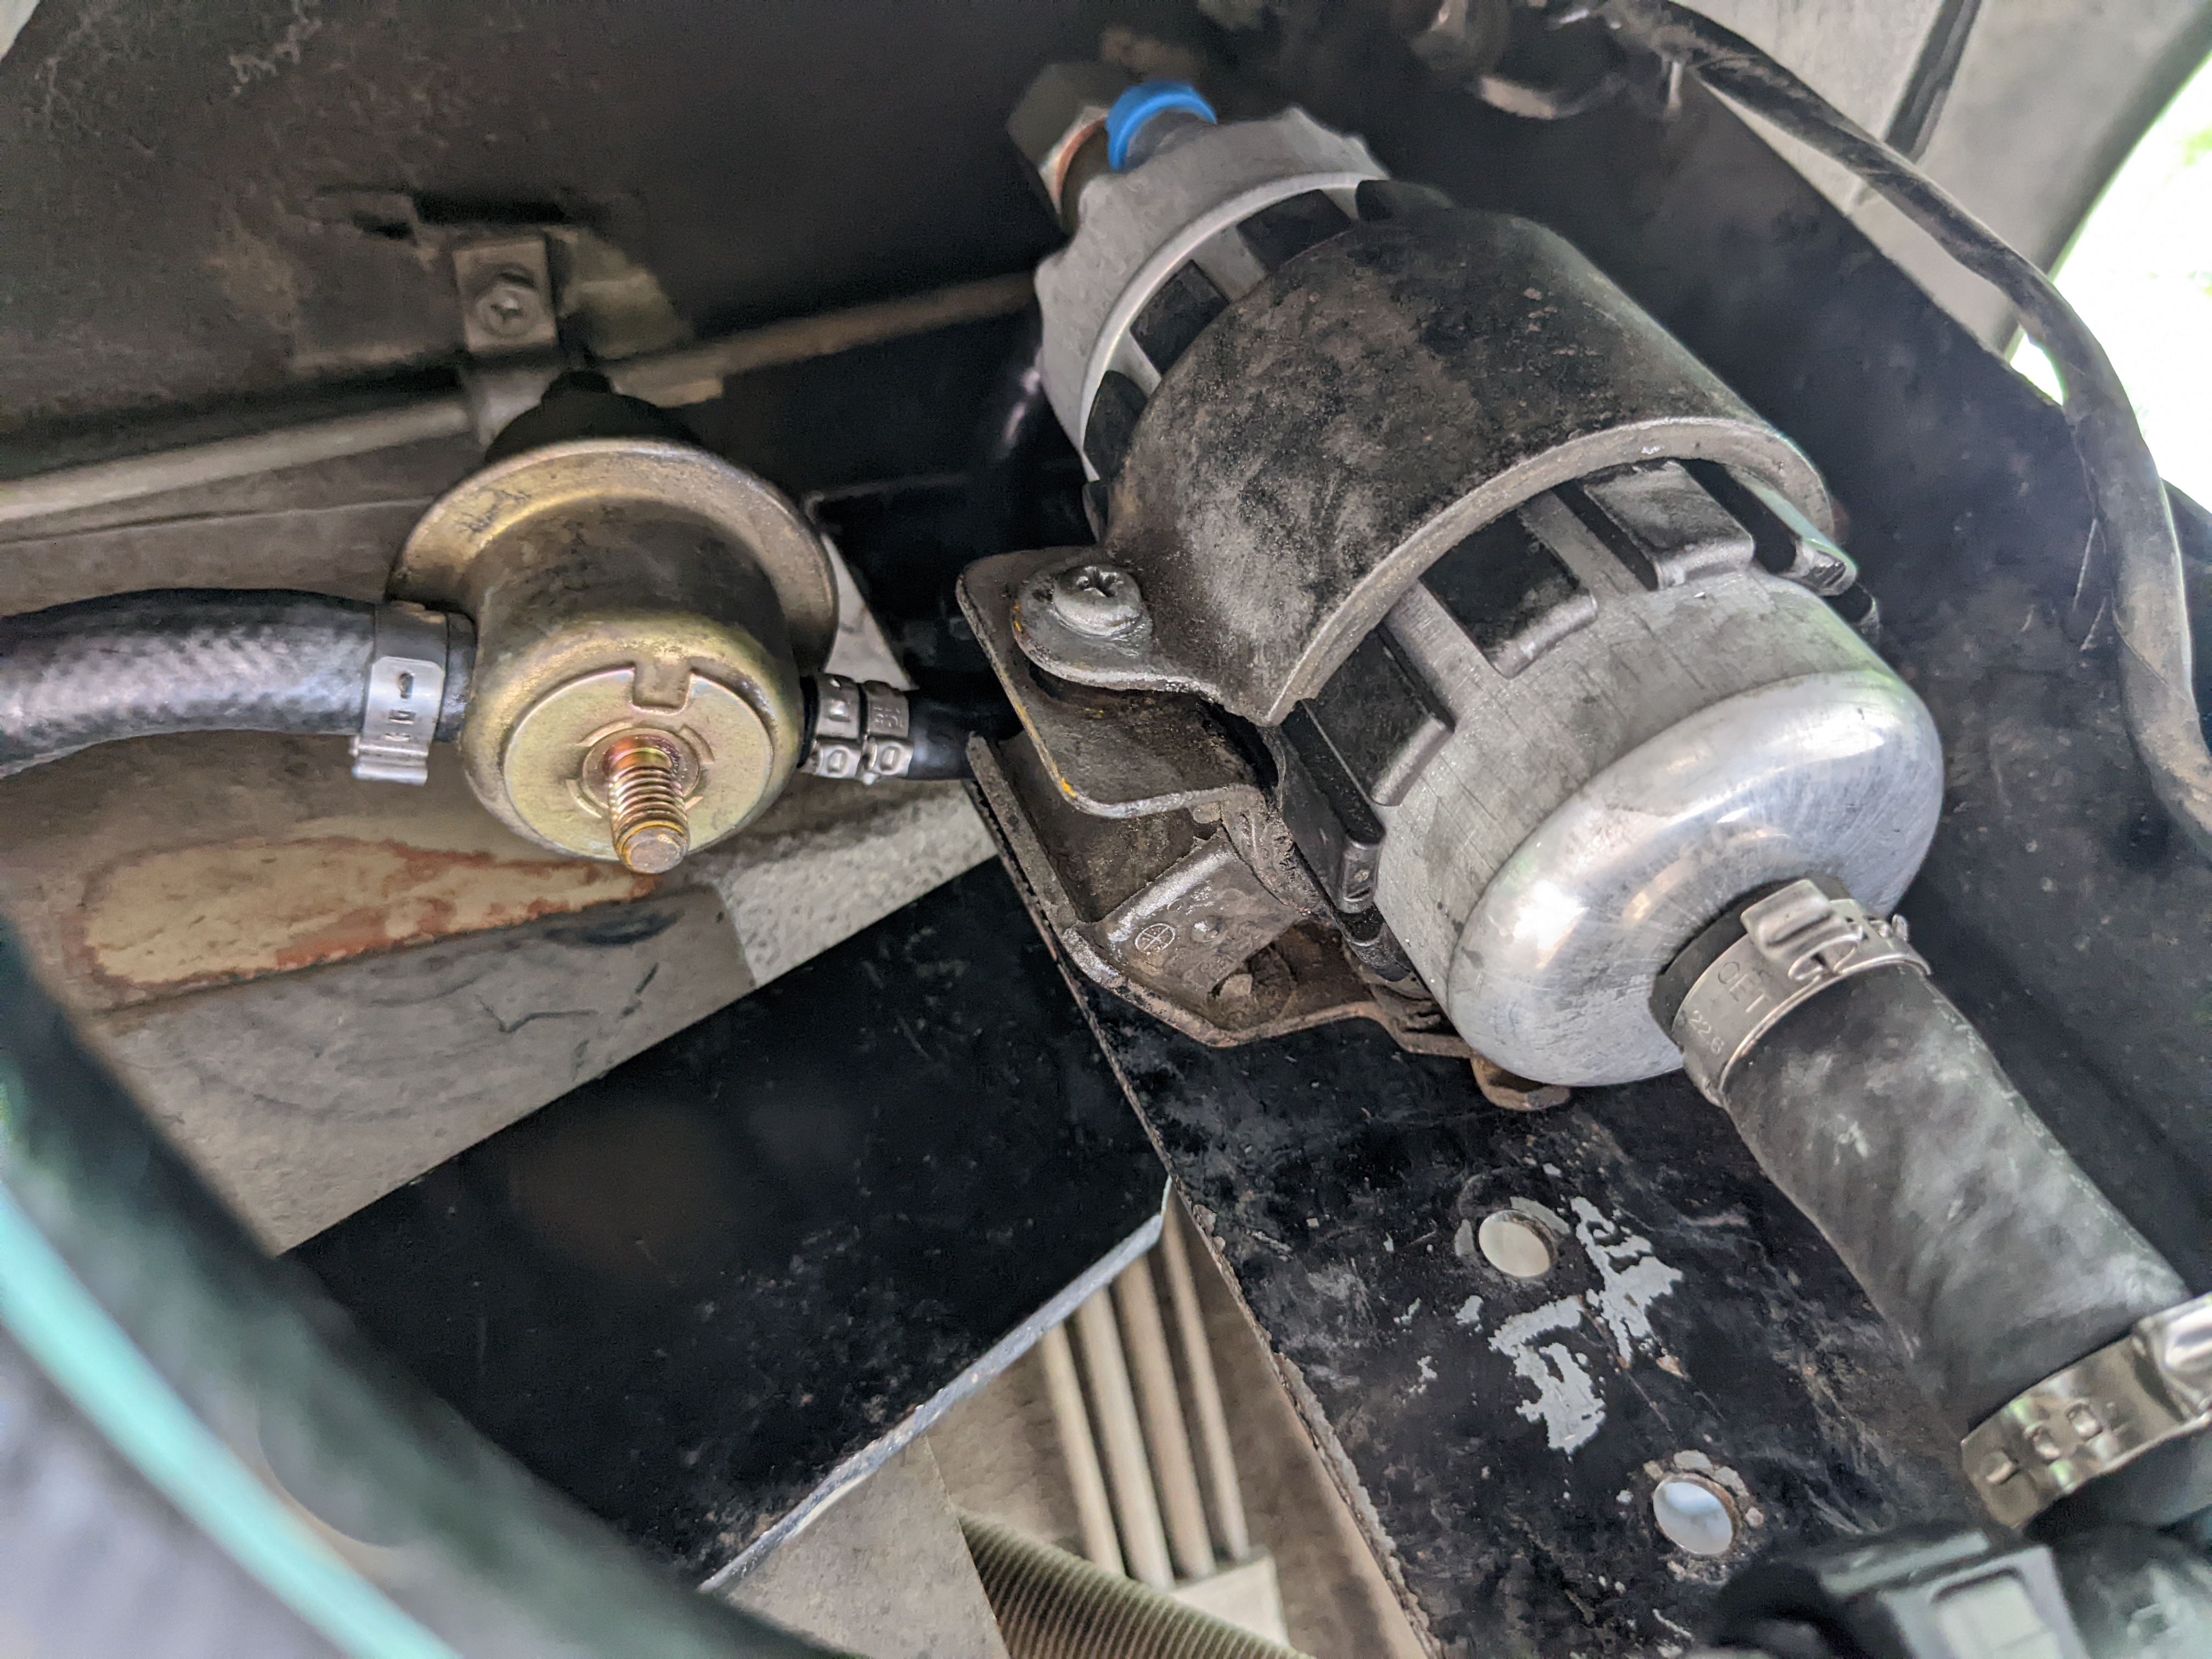
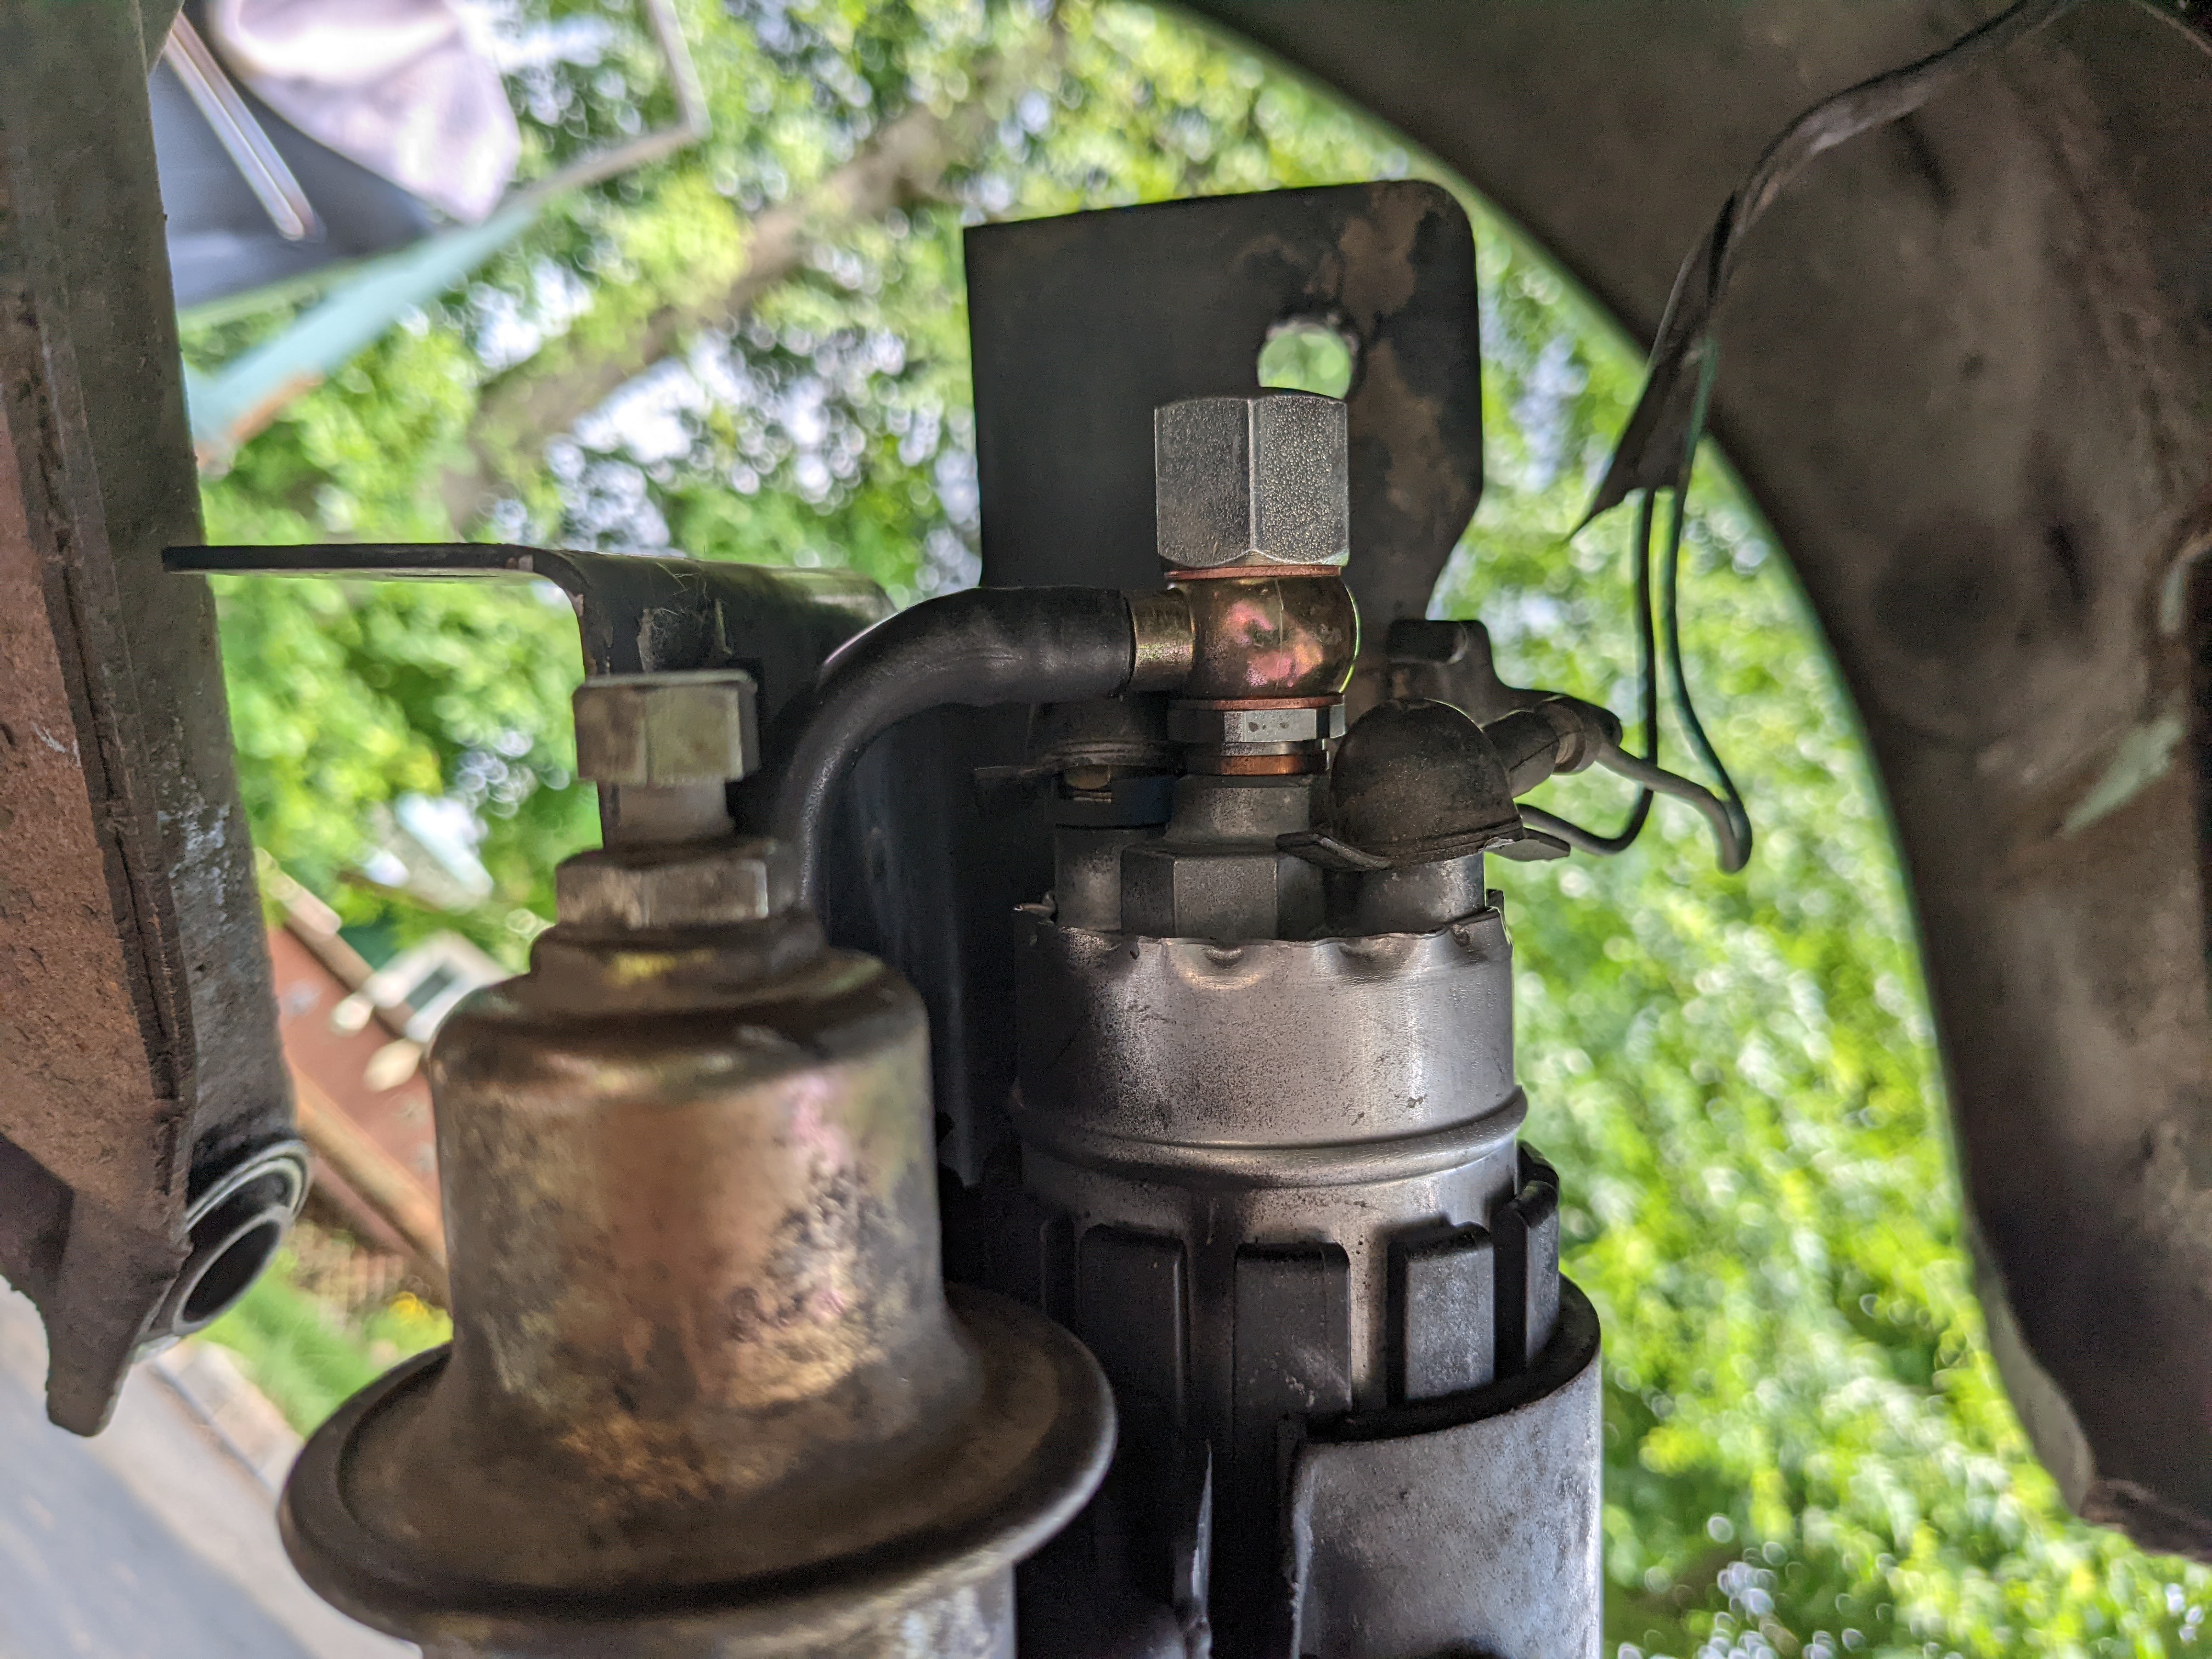
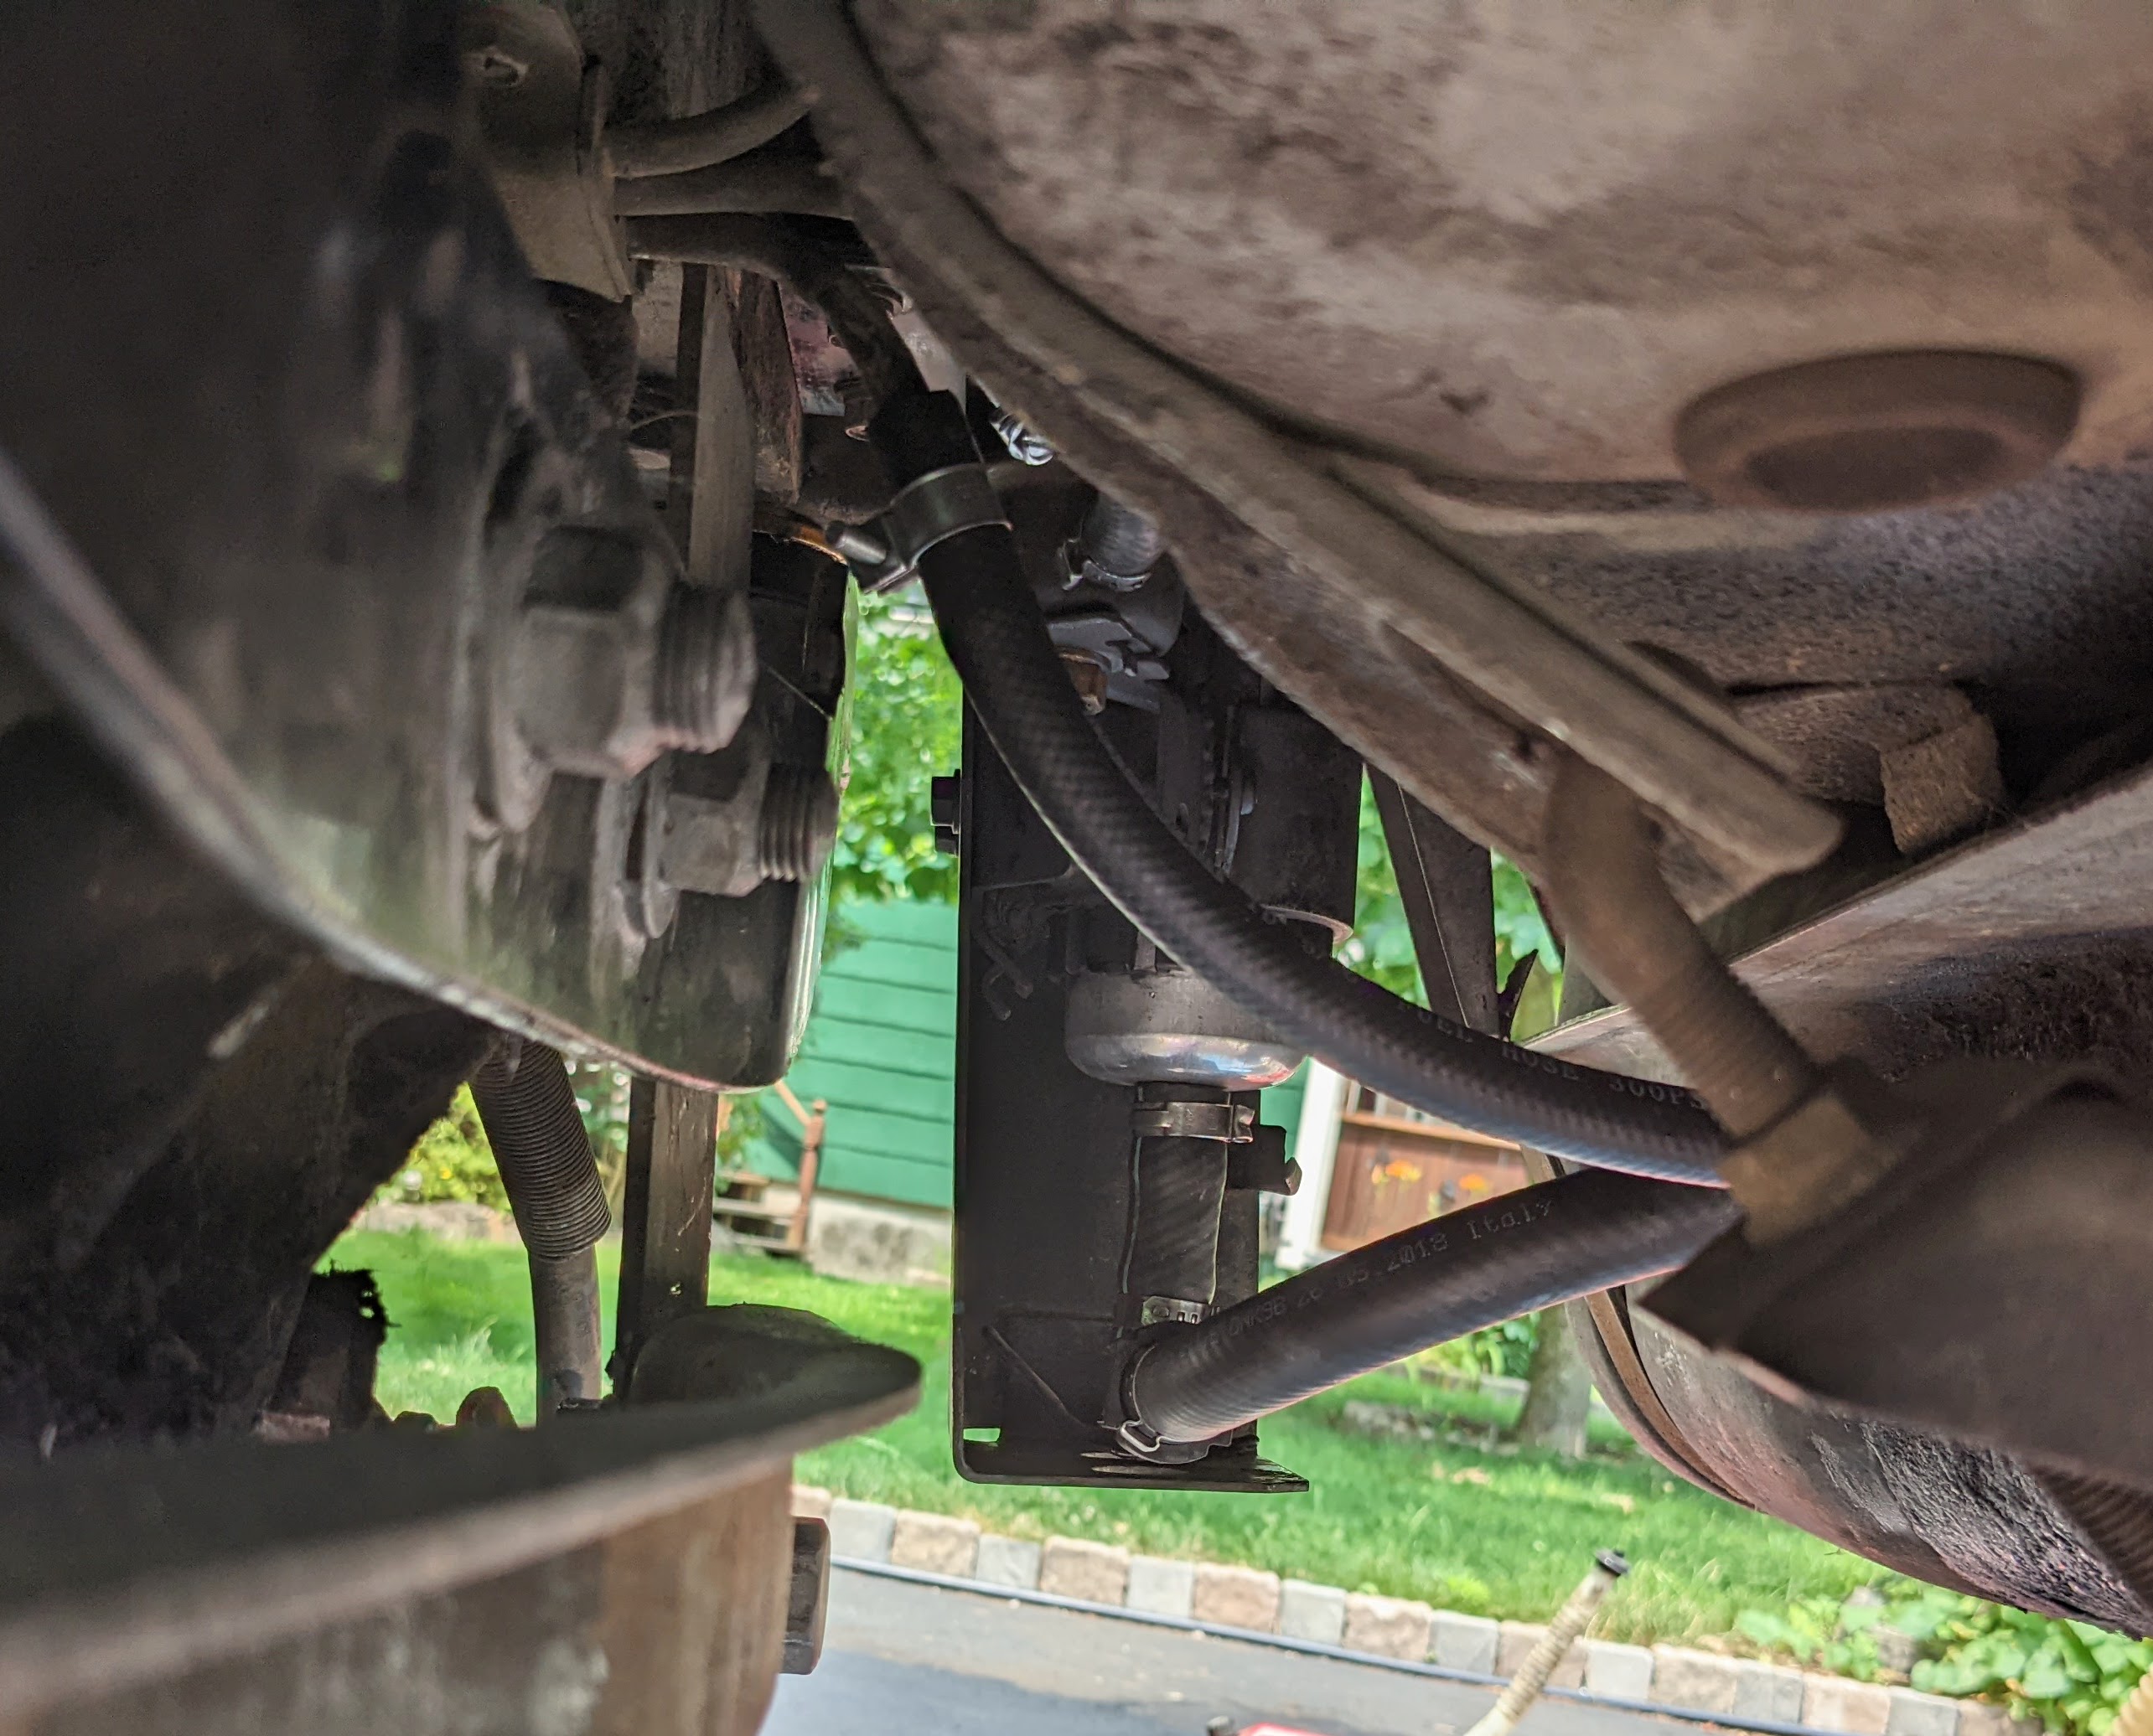
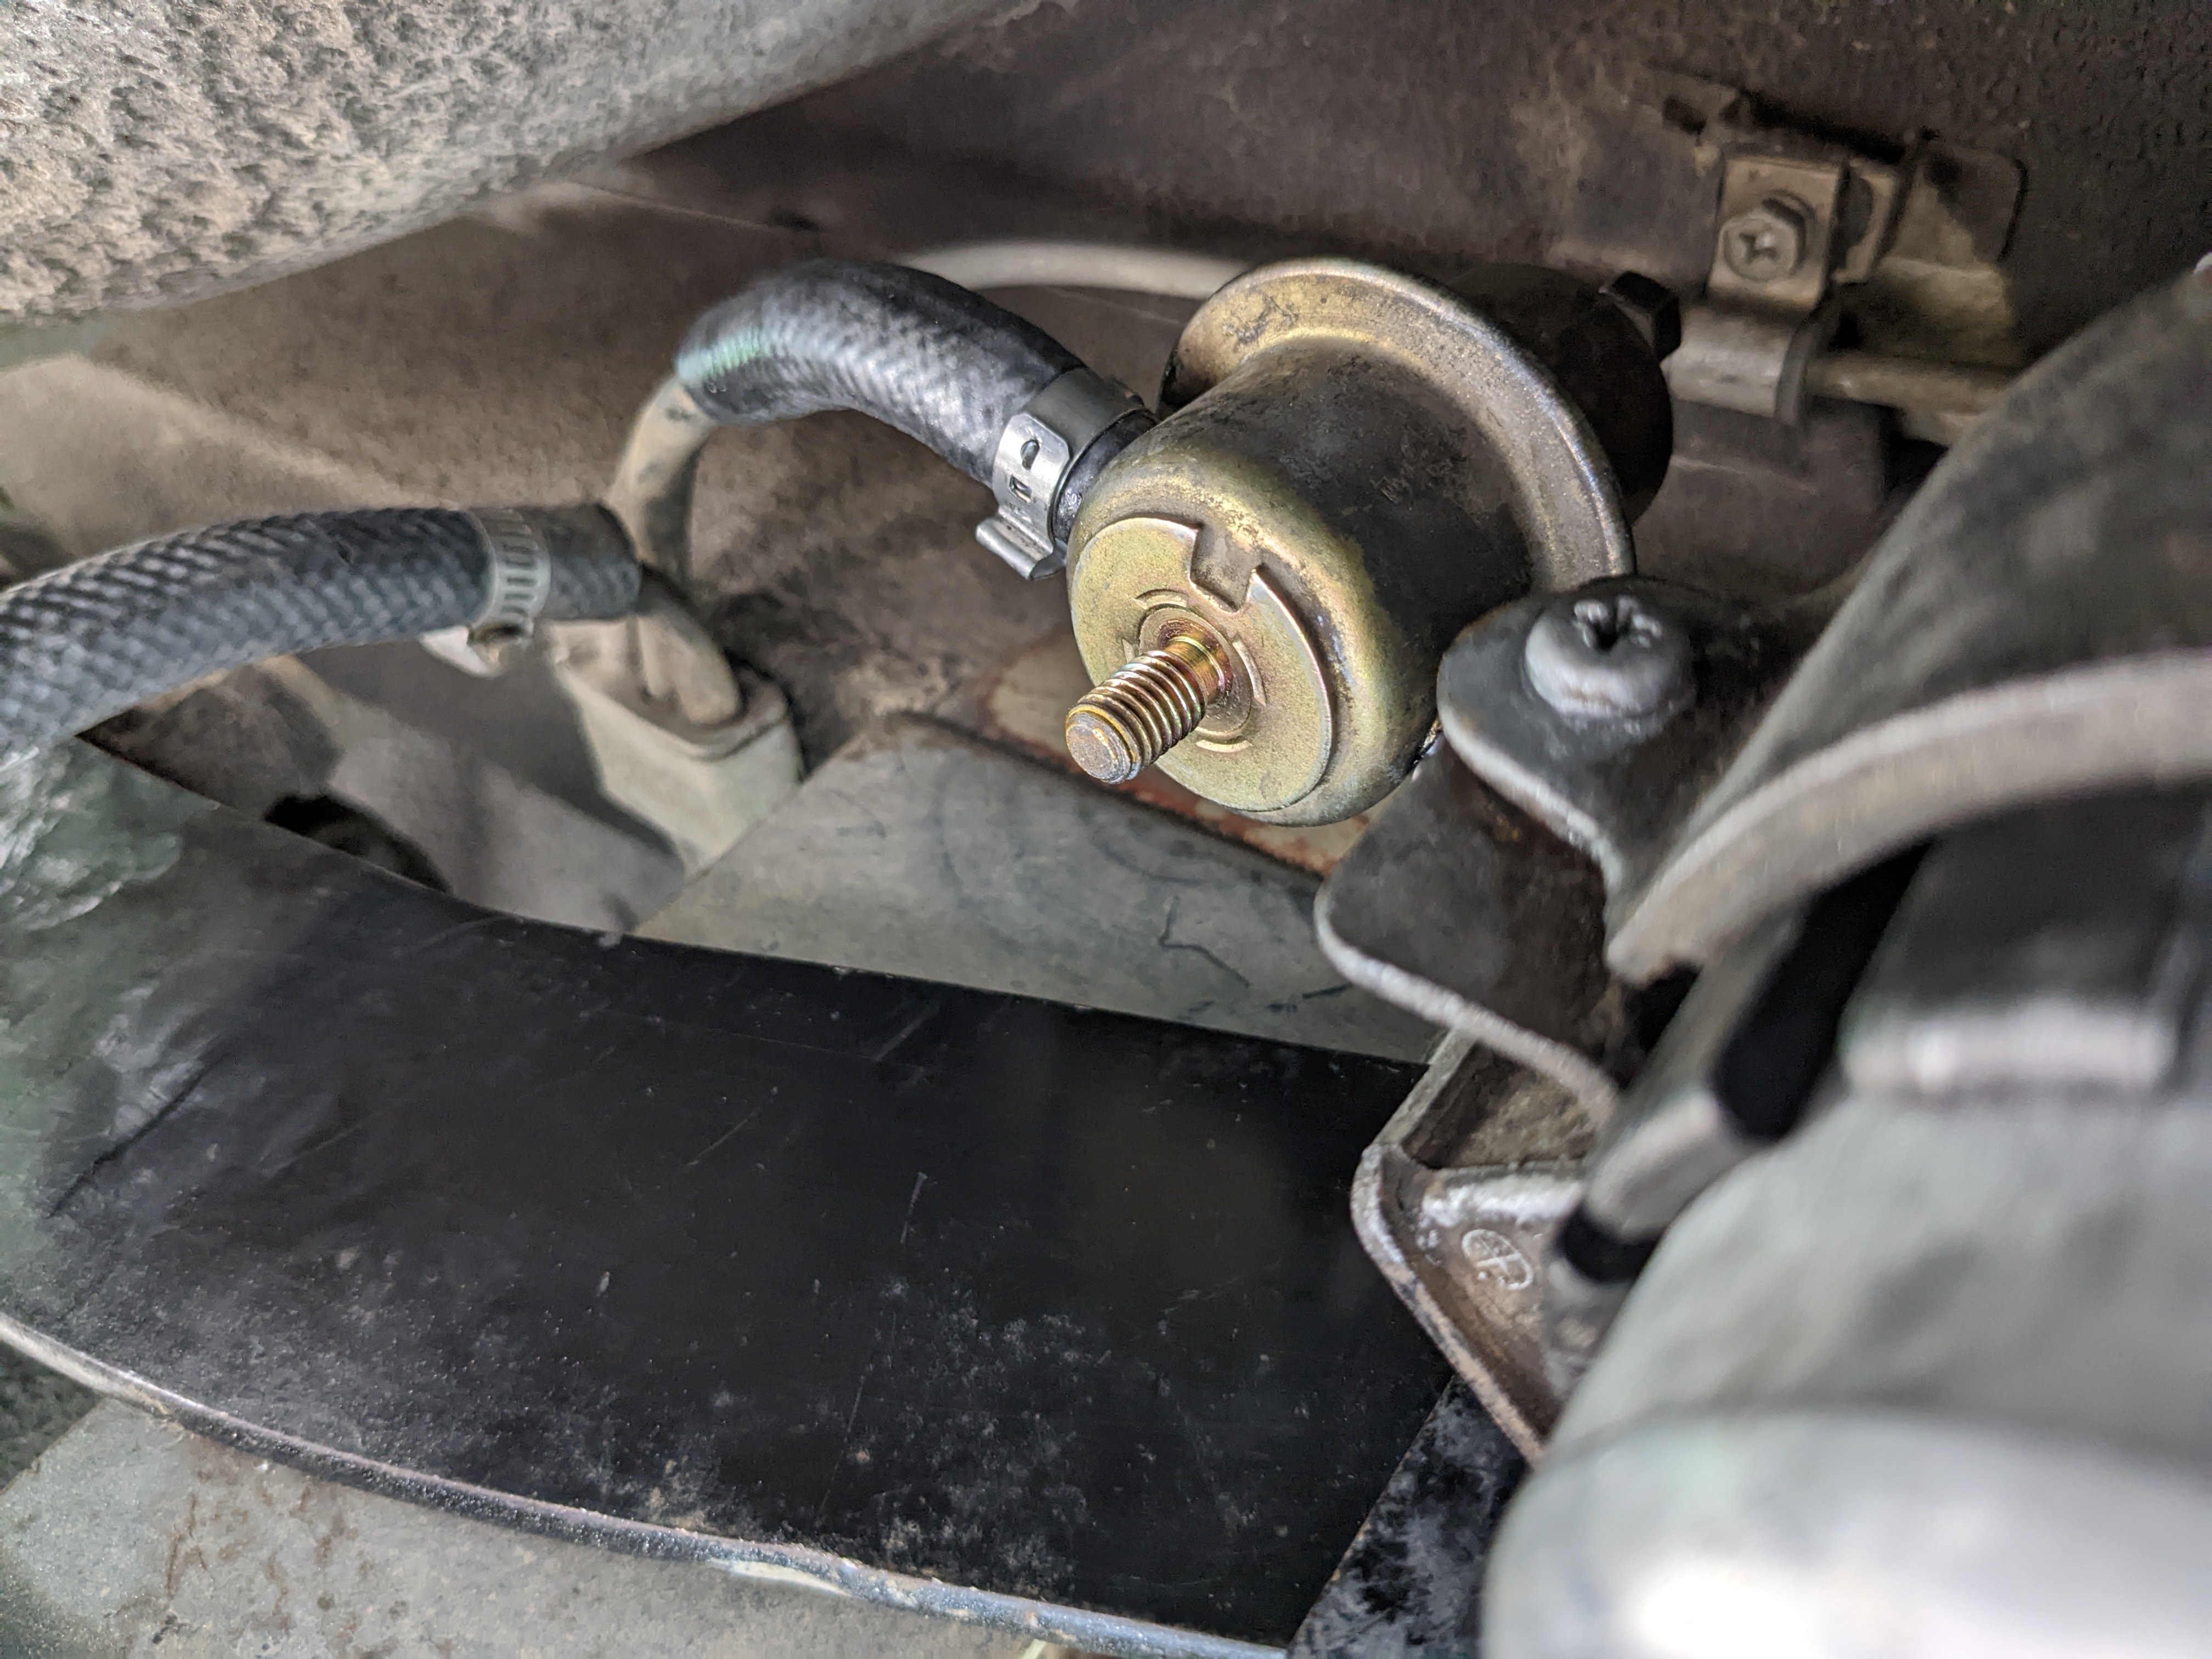
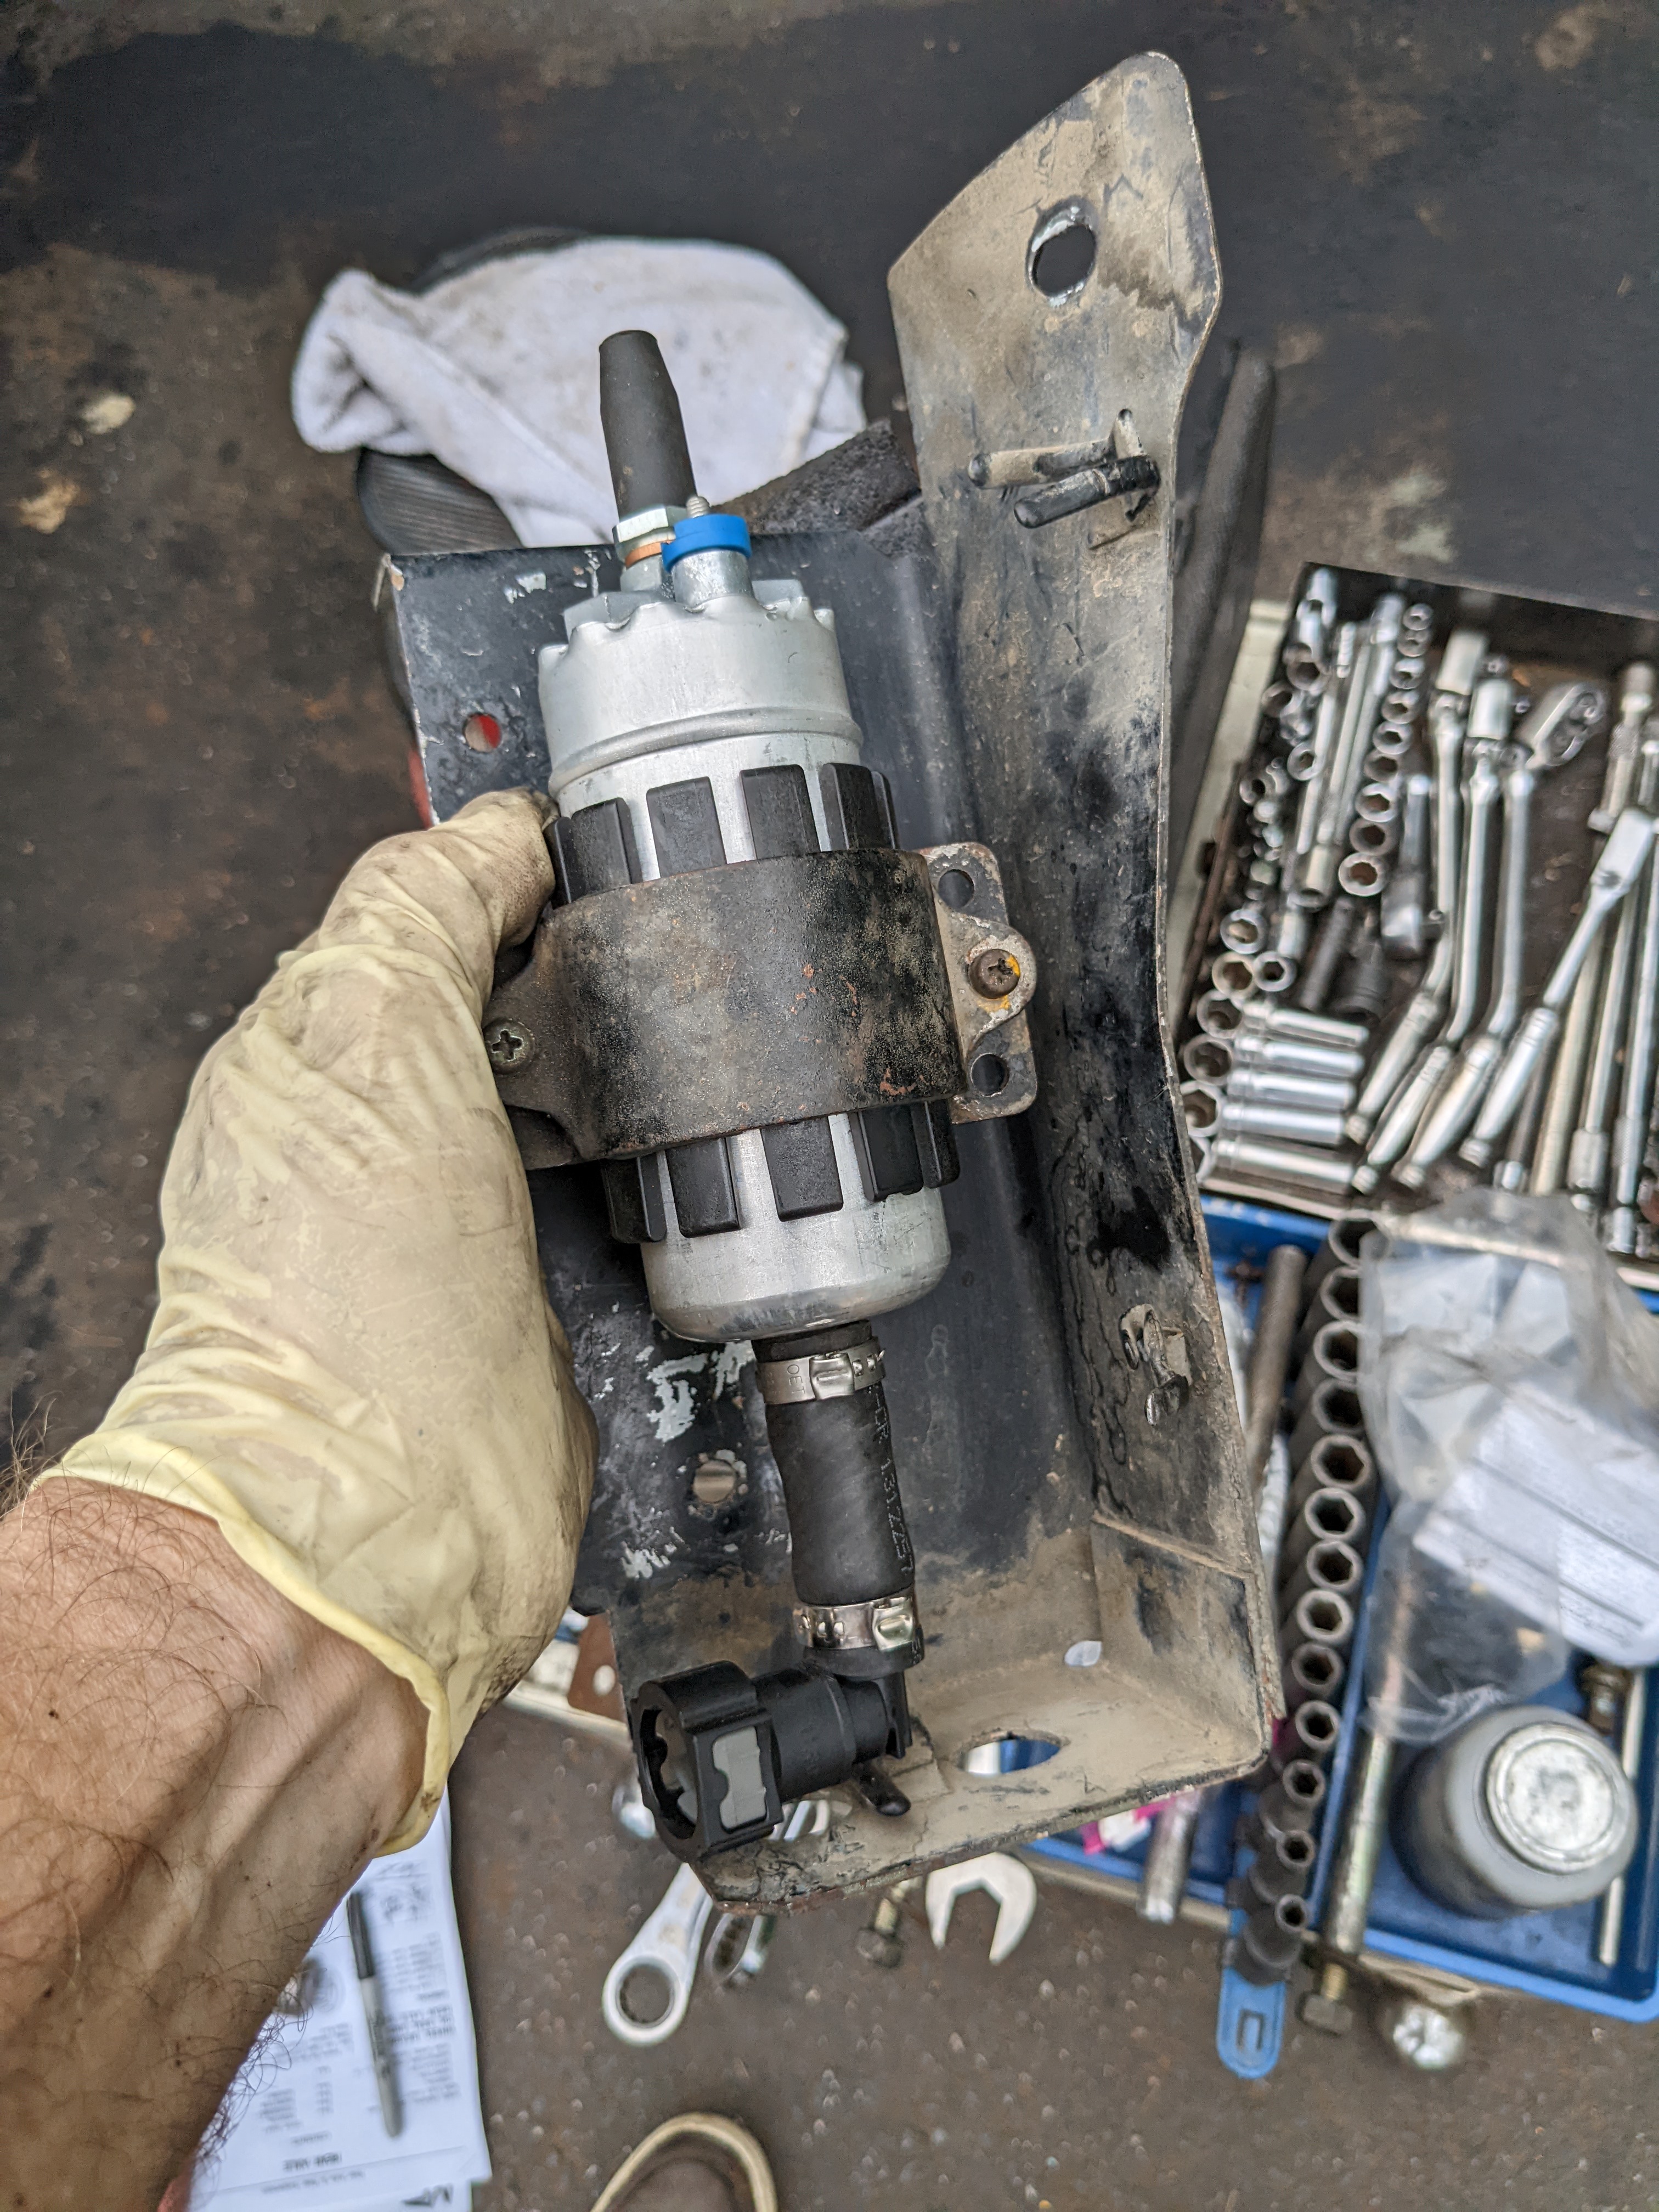
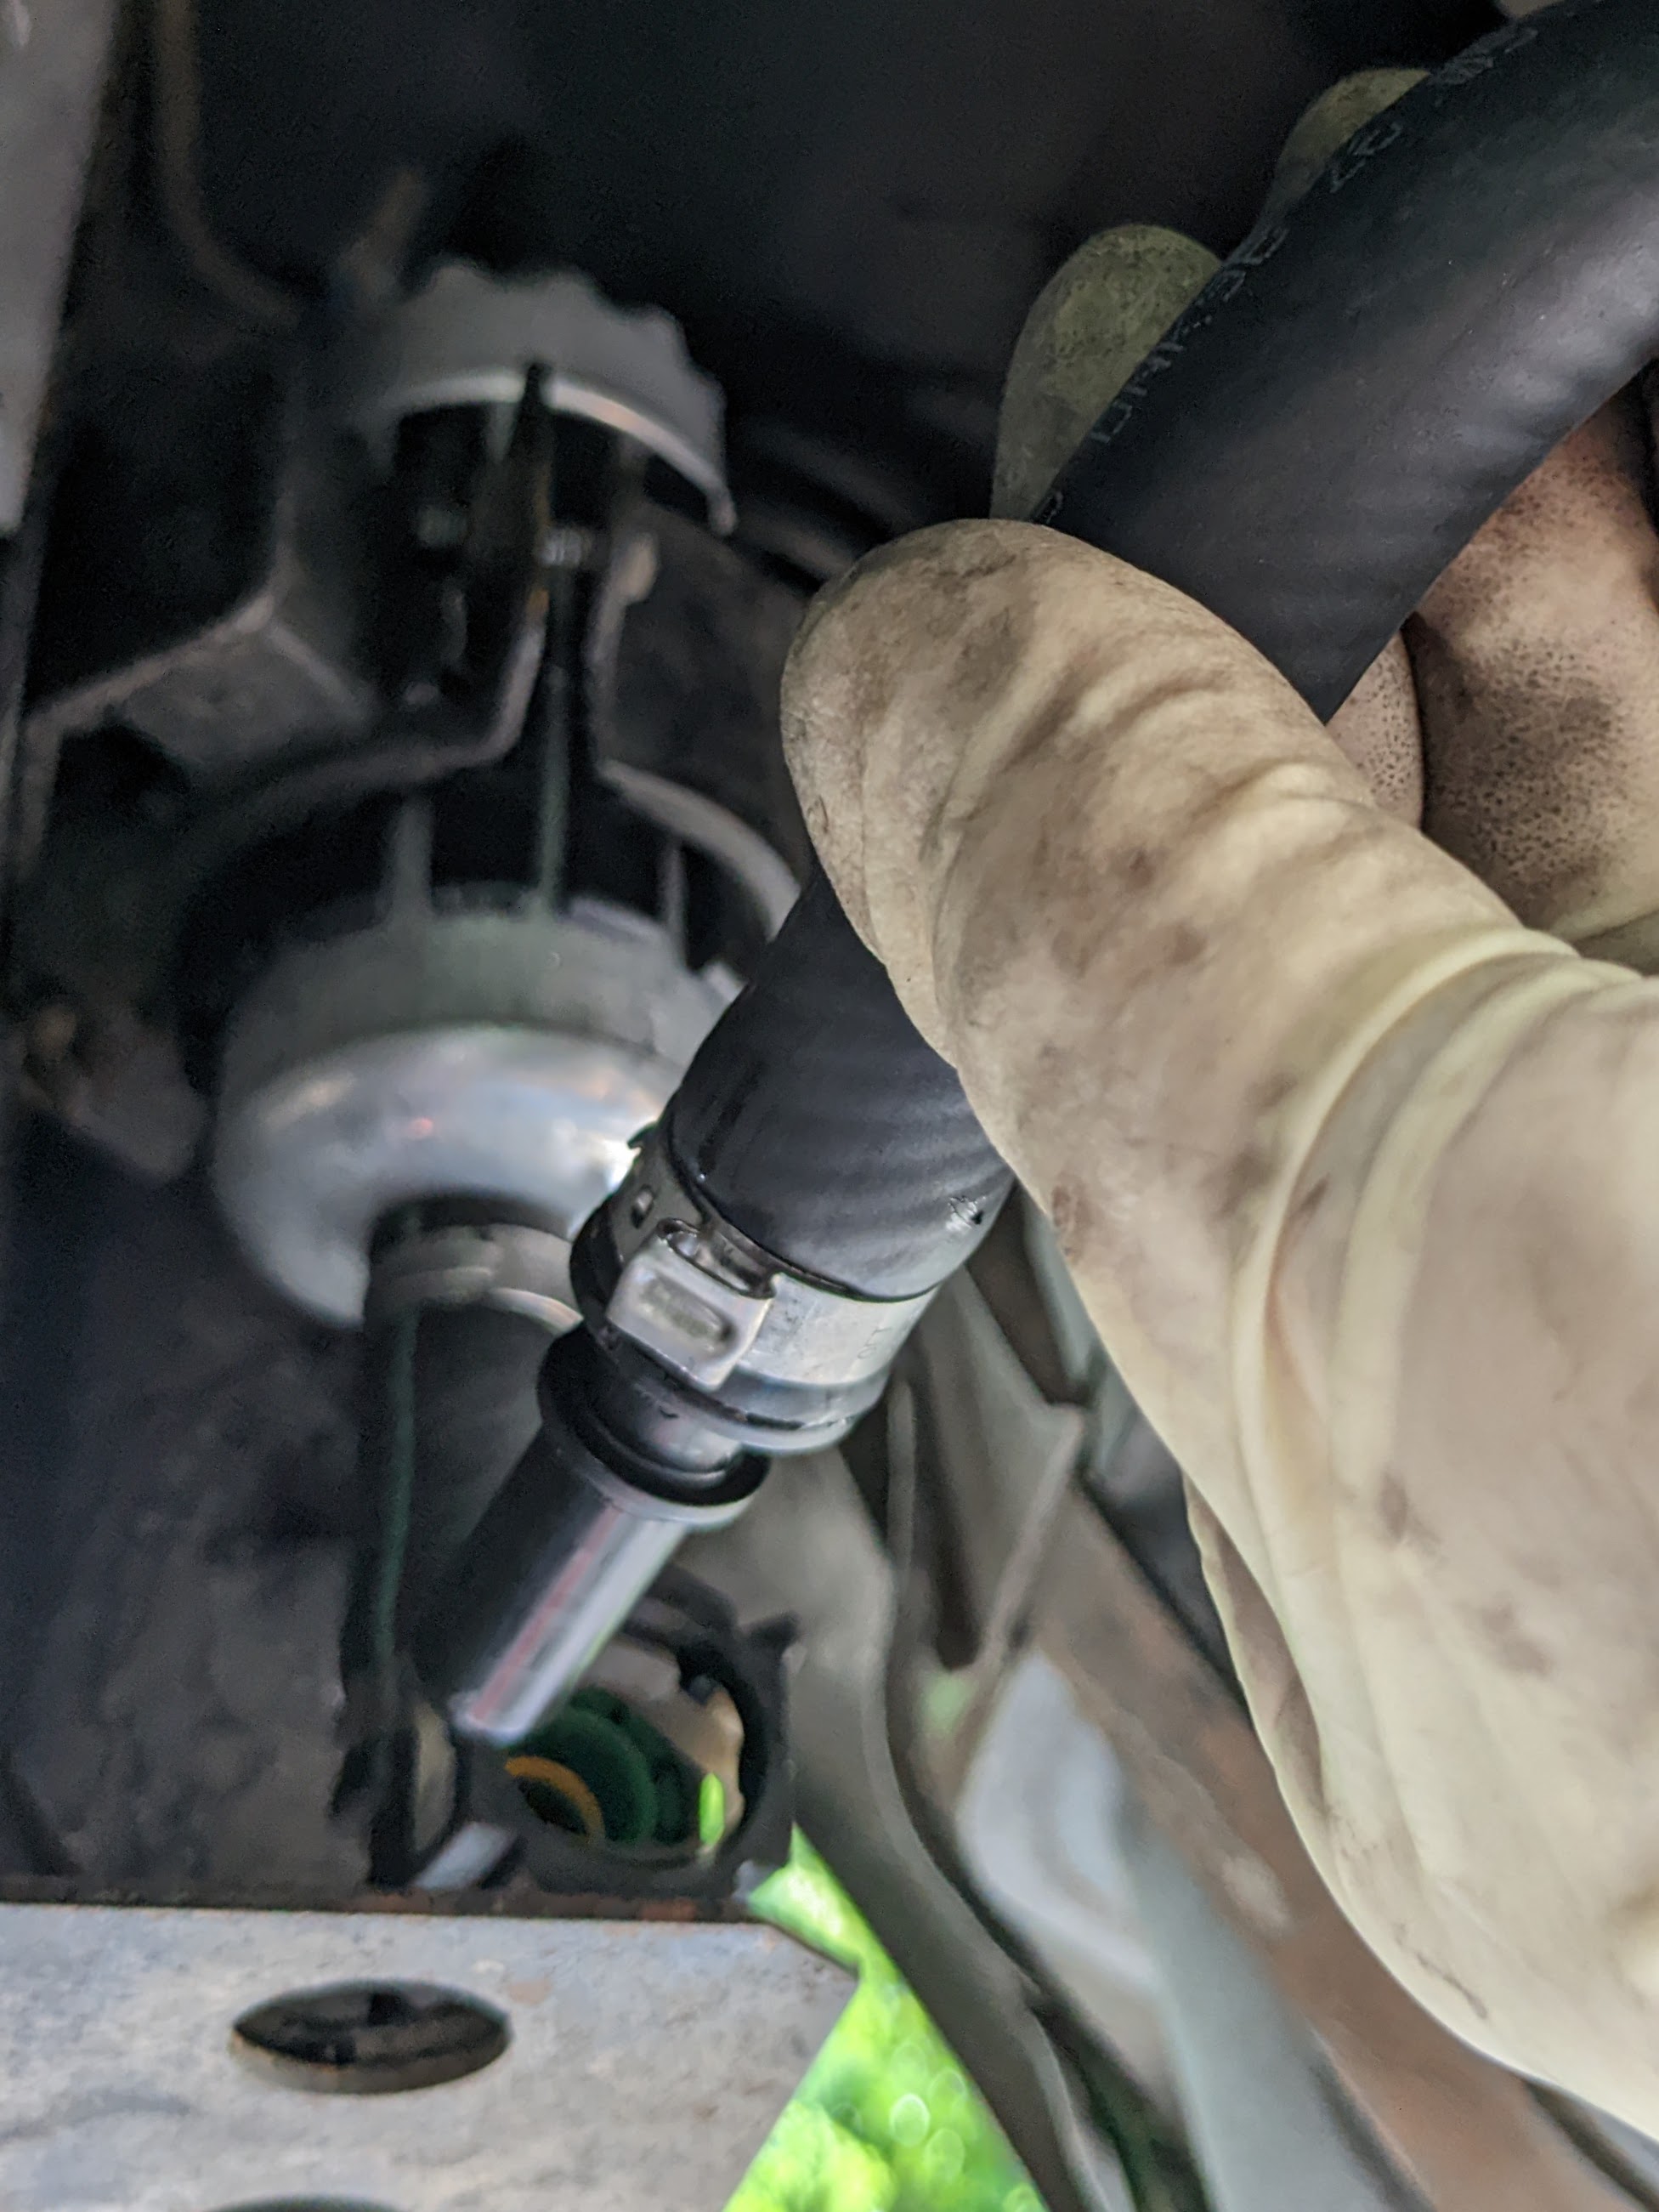
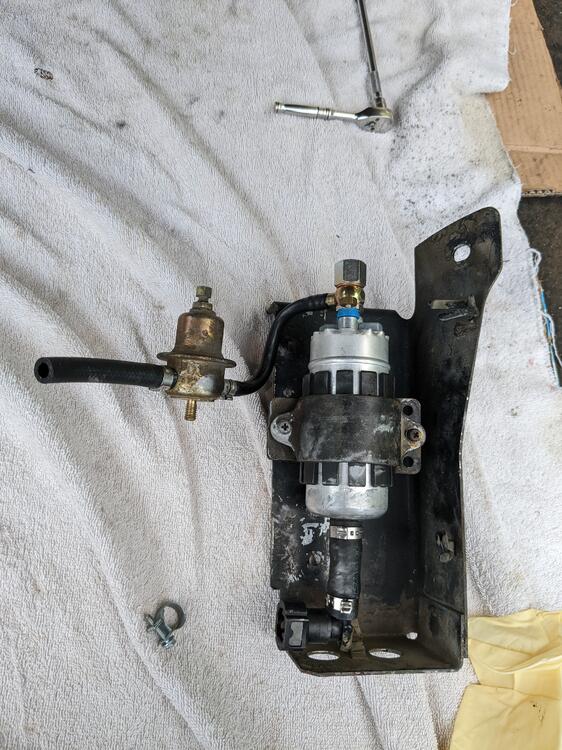
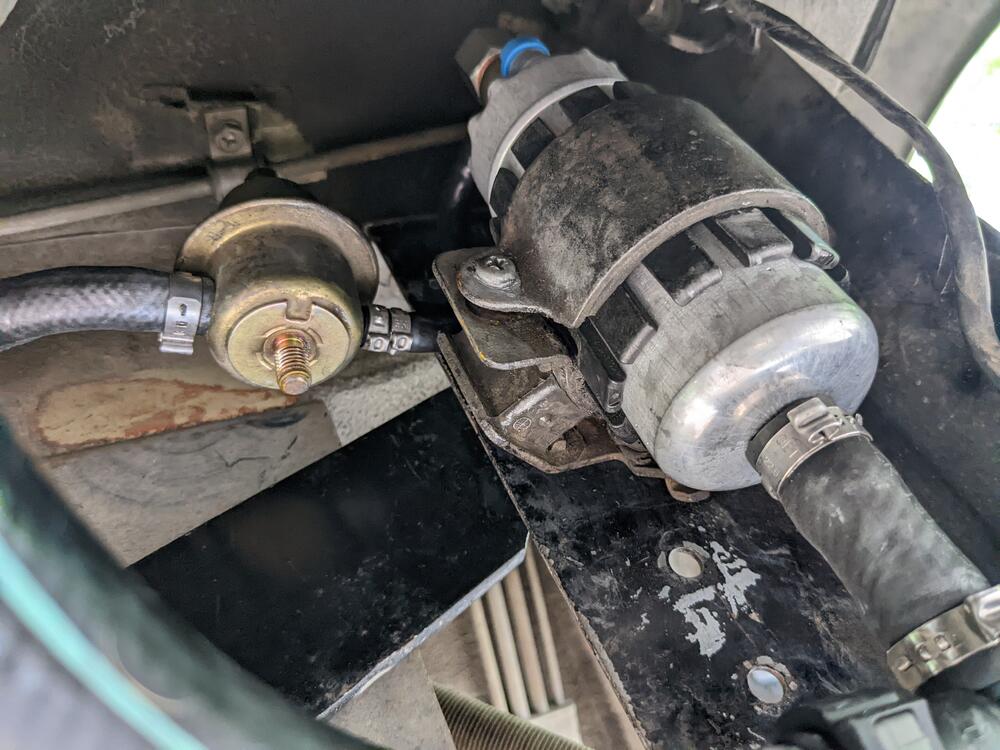
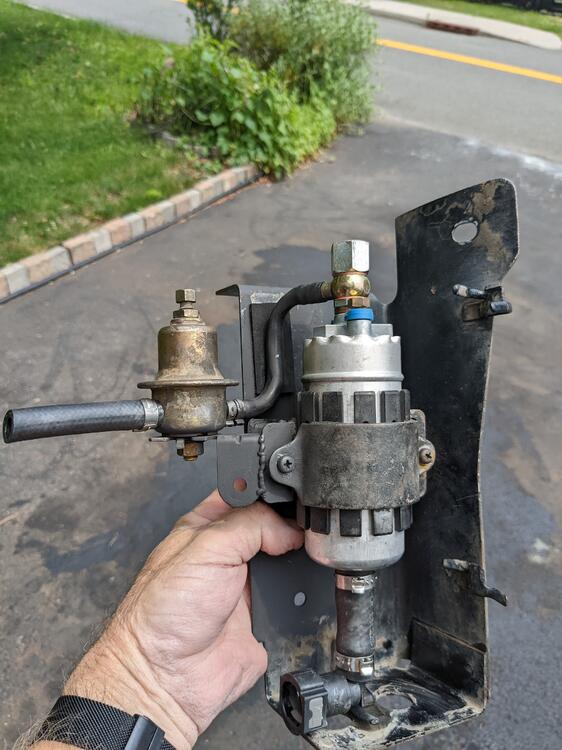
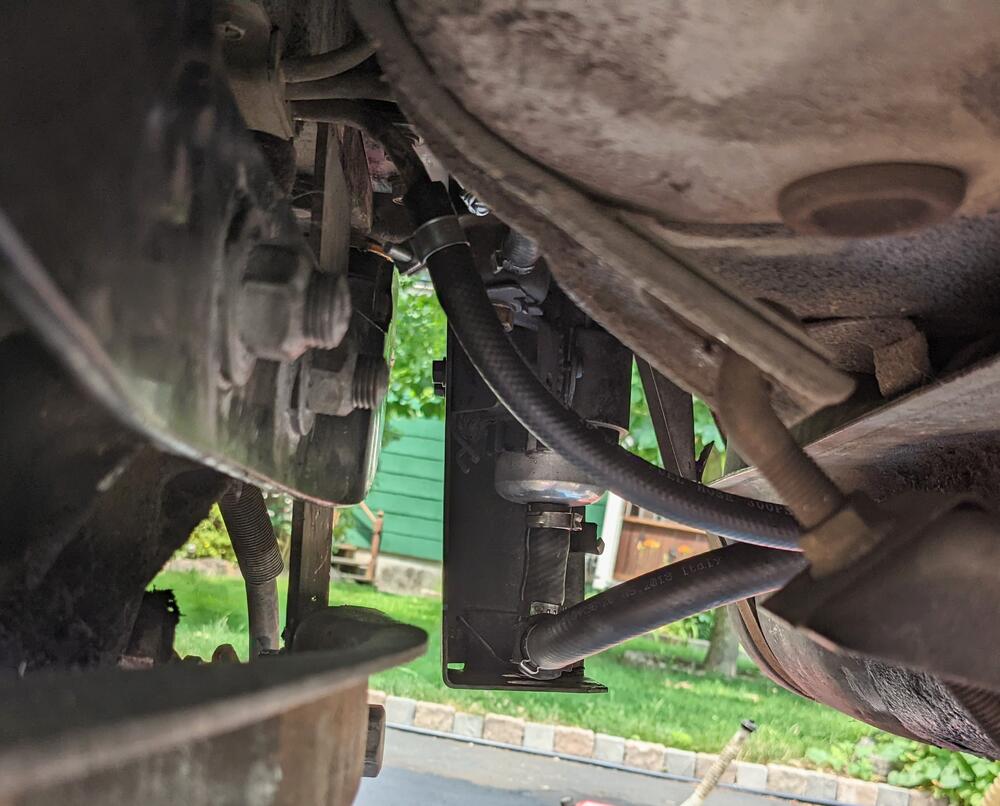
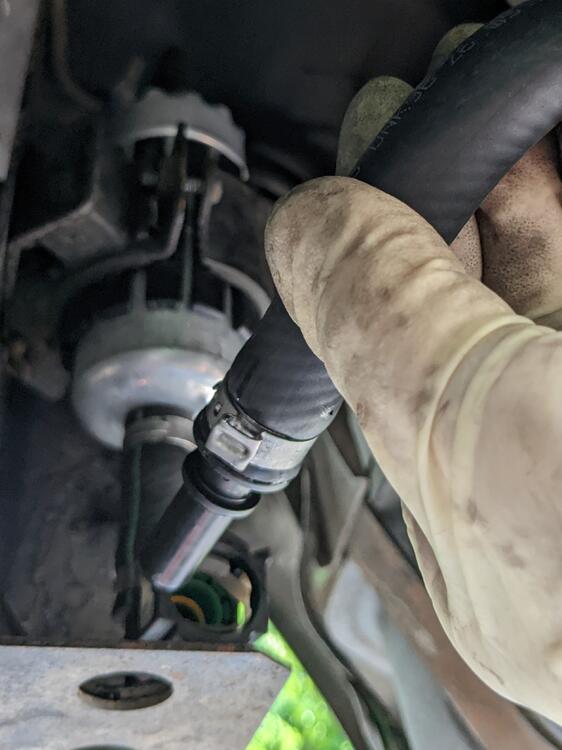
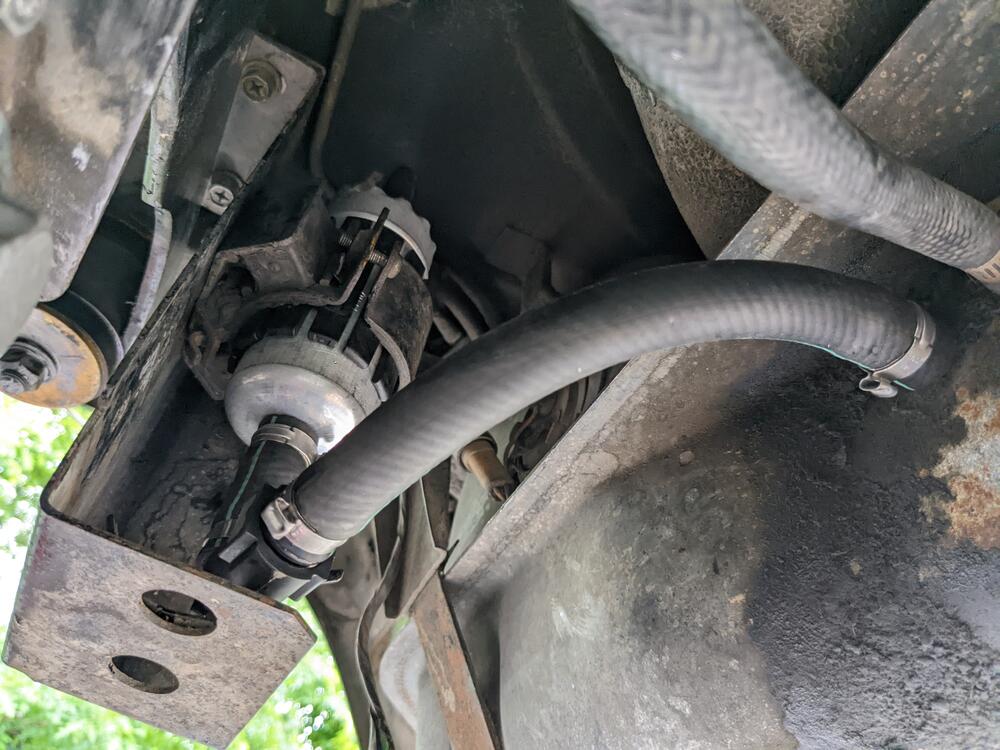
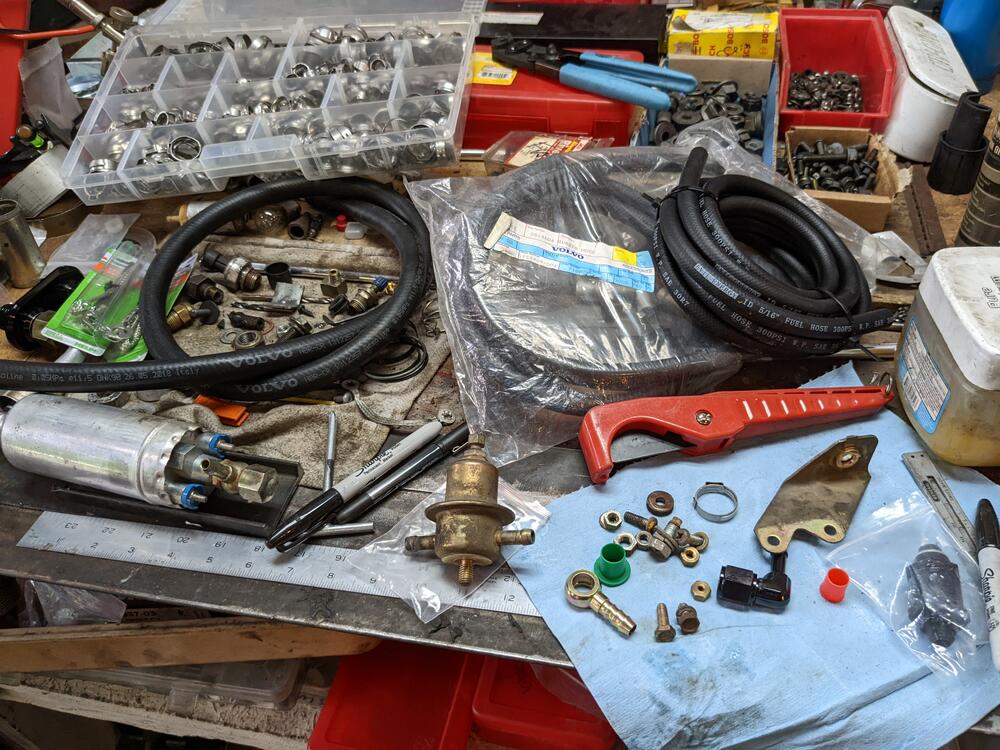
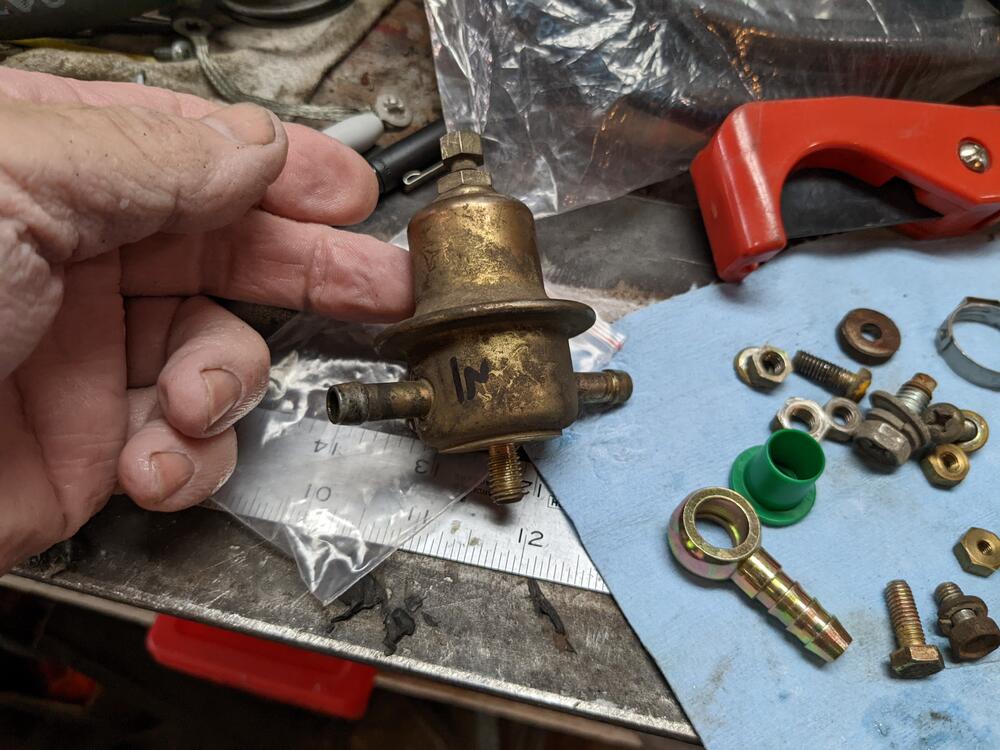
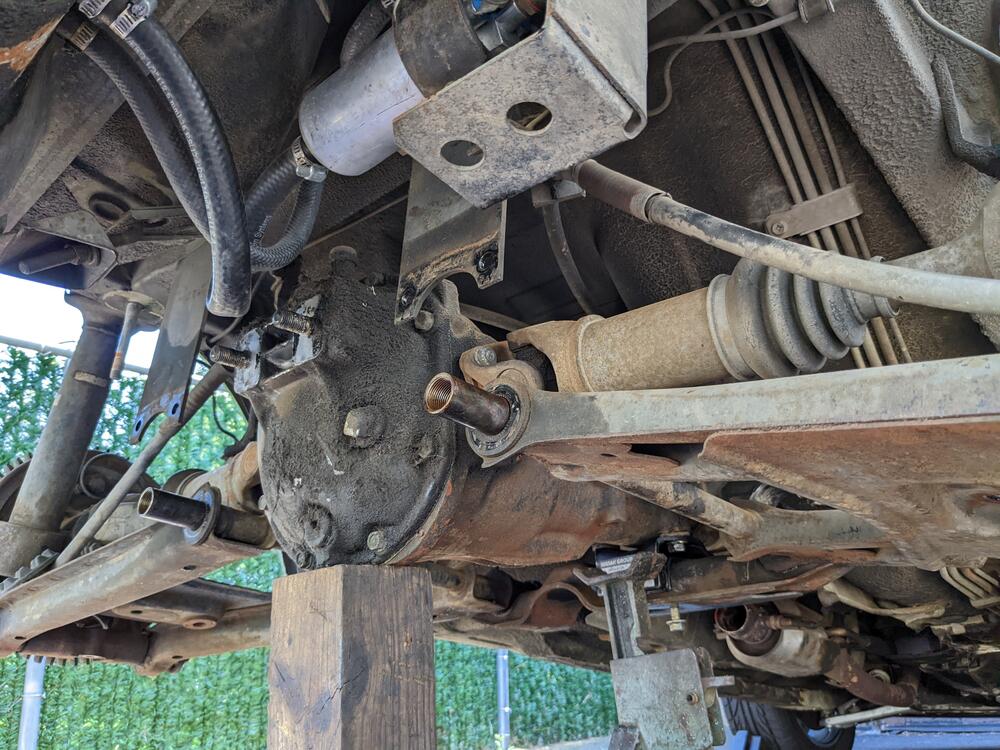
Finished up the fuel pump/pulse damper install today Used some preformed nylon line cut from a Volvo, mostly likely. That put the pulse damper where it needed to be to connect to the feed hard line With that figured out, I made a bracket to support it welded to the fuel pump bracket hook up the pump wires before installing the assembly All up out the way now Installed the correct return line , that was also the wrong ID


-
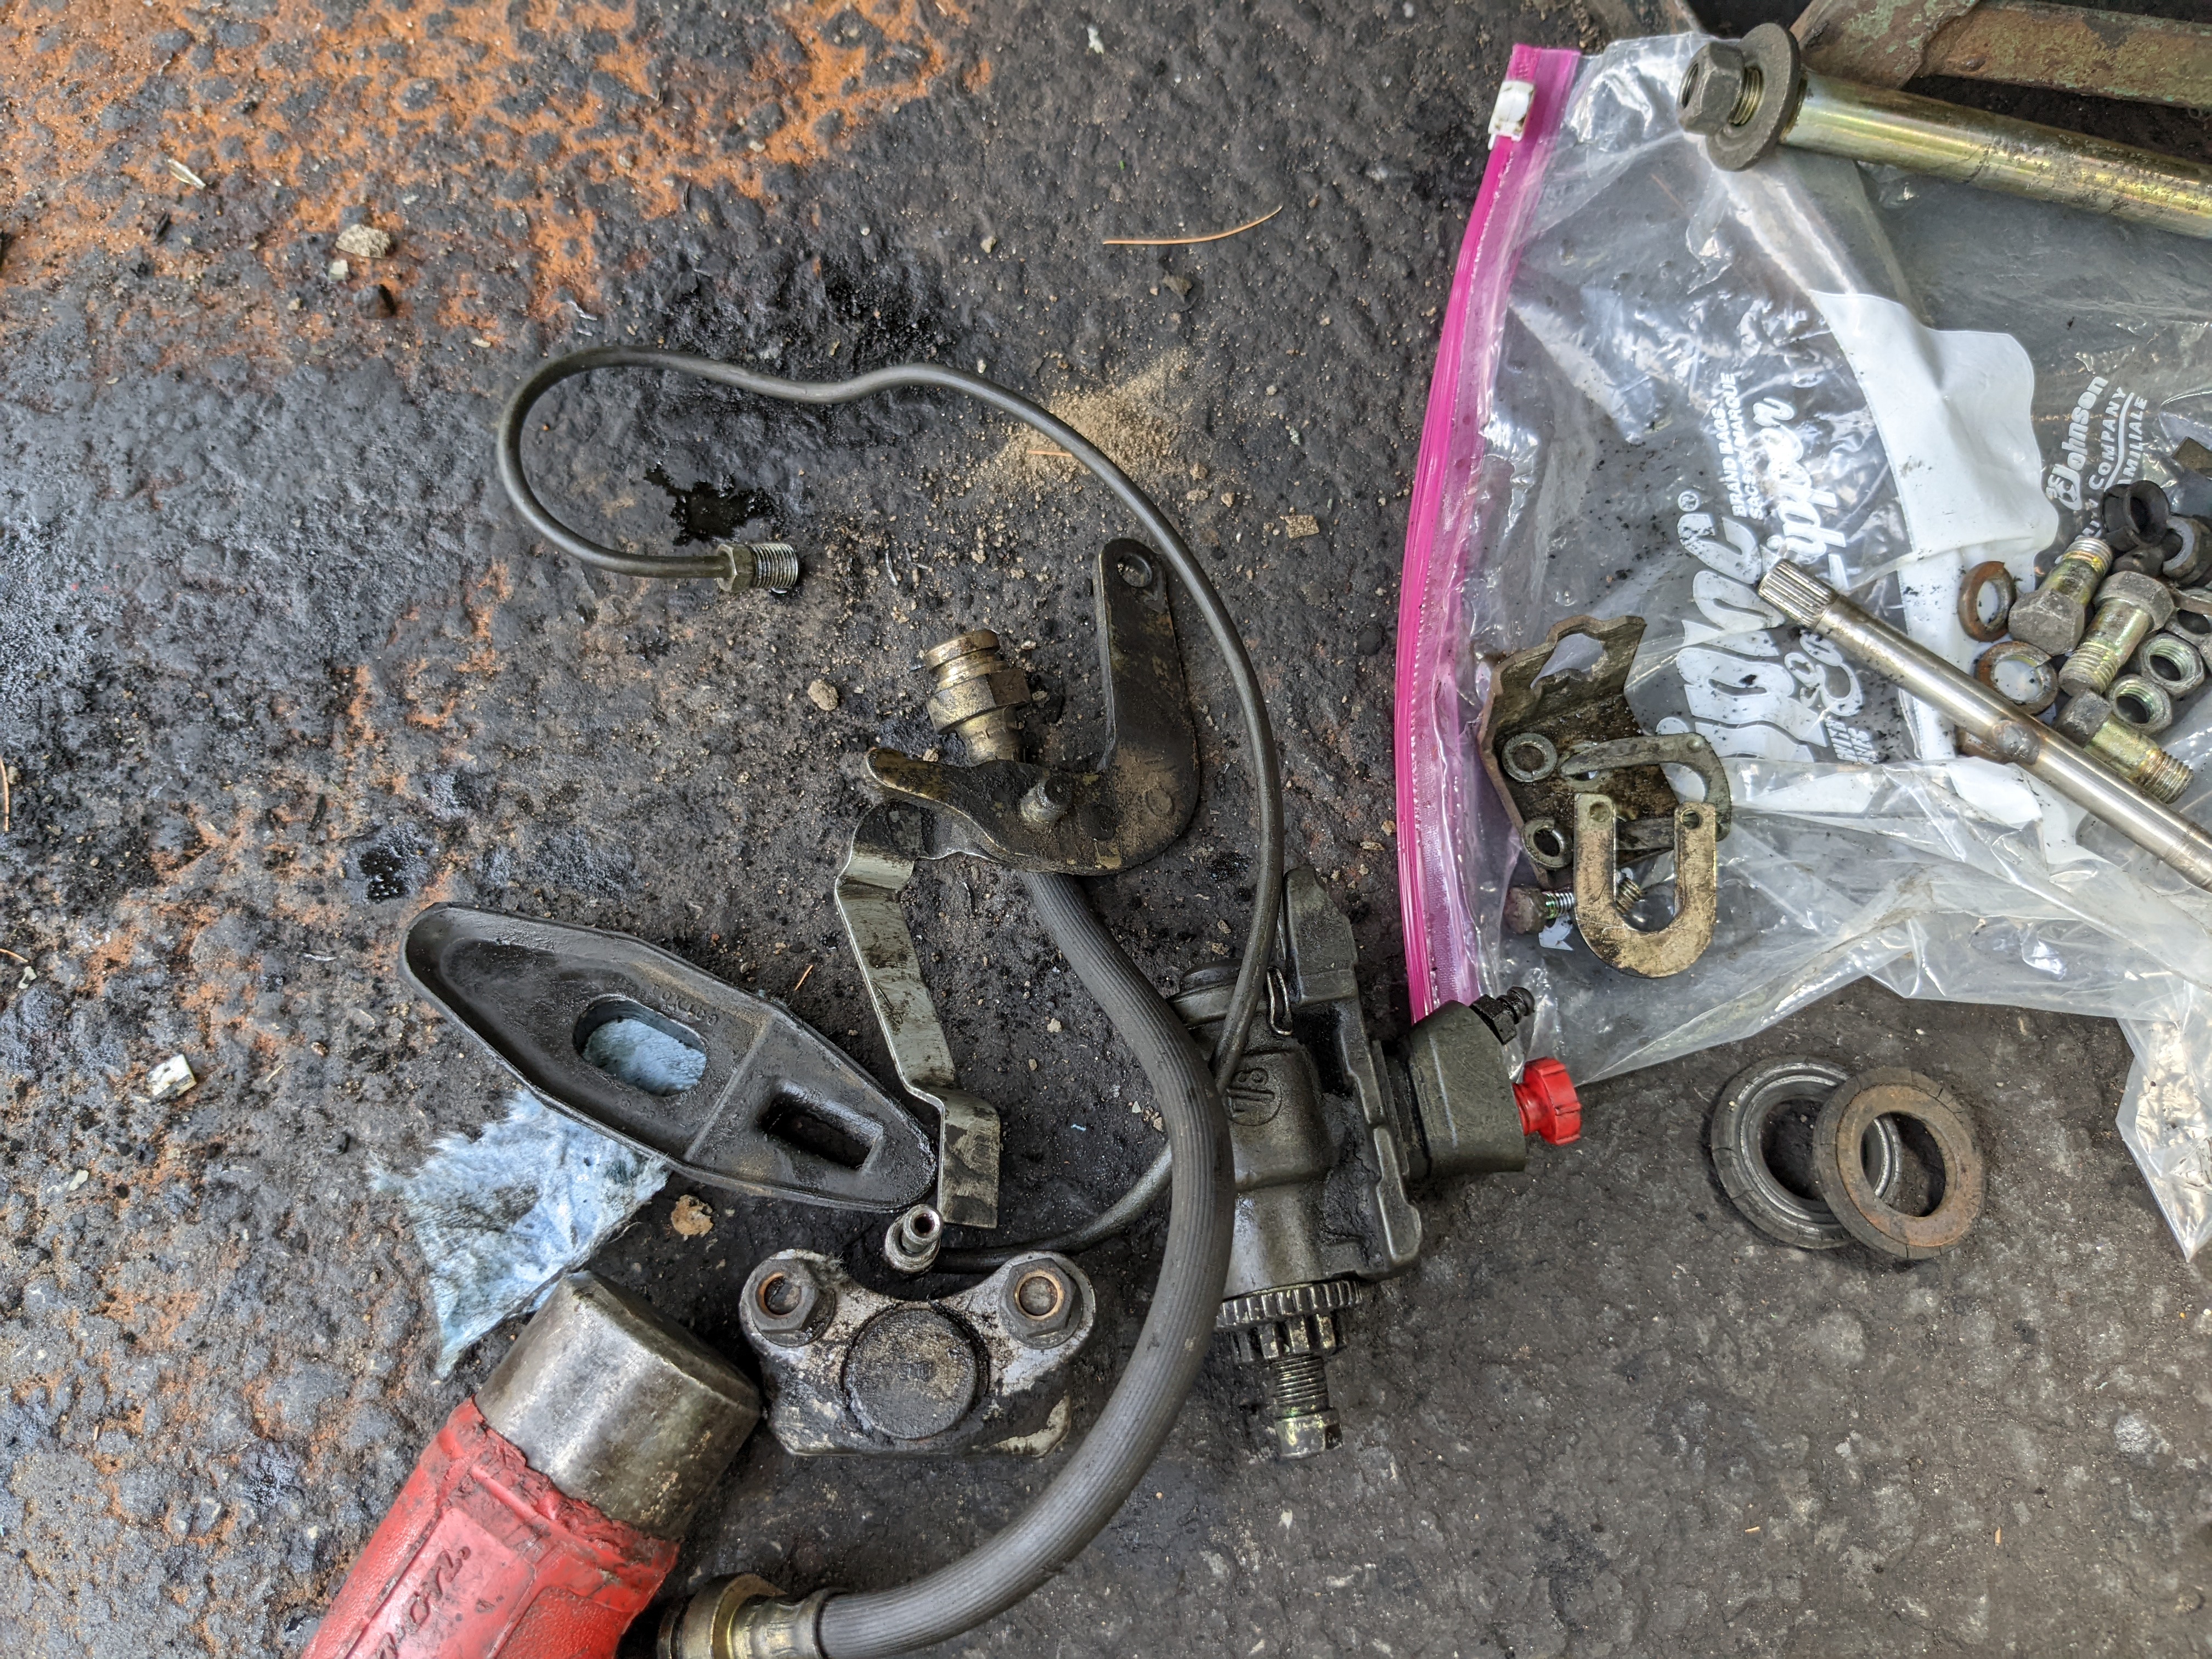
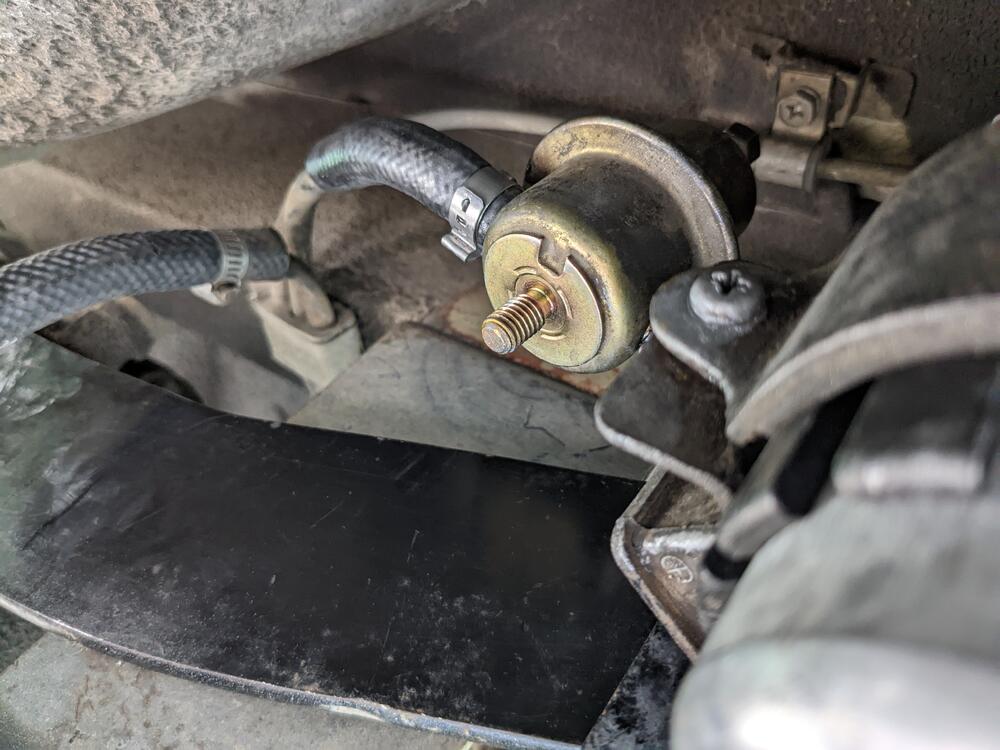
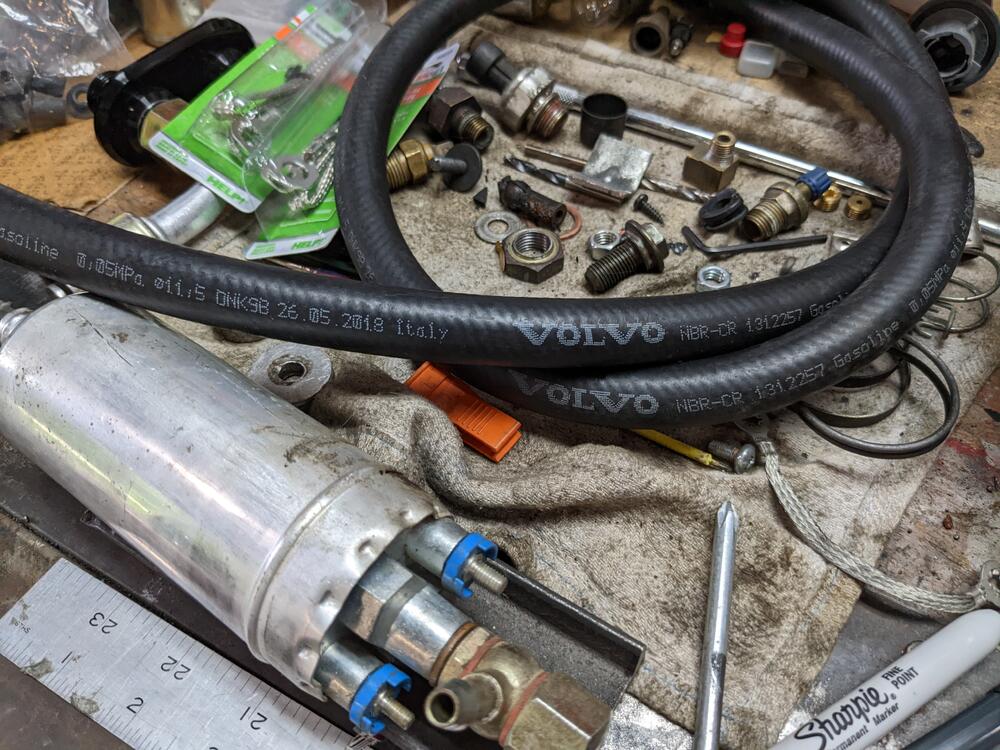
Dropped the (aftermarket) fuel pump & feed hose today. I don't like the way the pump is fitted either. Original schematic of layout redrilled the mount plate to rotate & move the (new Bosch) pump up & out the way somewhat, adding Quick -Release fittings, to get rid of the large loop on the low pressure suction side Volvo fuel hose 1312257 11.5mm ID sold by the meter . I was going to put an inline filter here, however both versions I purchased were less that 3/8 OD, probably close to 5/16 Have to fit the pulse damper above. I won't need it with the VQ35DE install, so I'm going to make it easier to remove


-
There are plugs to be removed so that grease fittings can be inserted? I was going to hold on to the pair that are not hammered. I figured the brake parts may also be worth something to someone, so I'll clean everything.
-
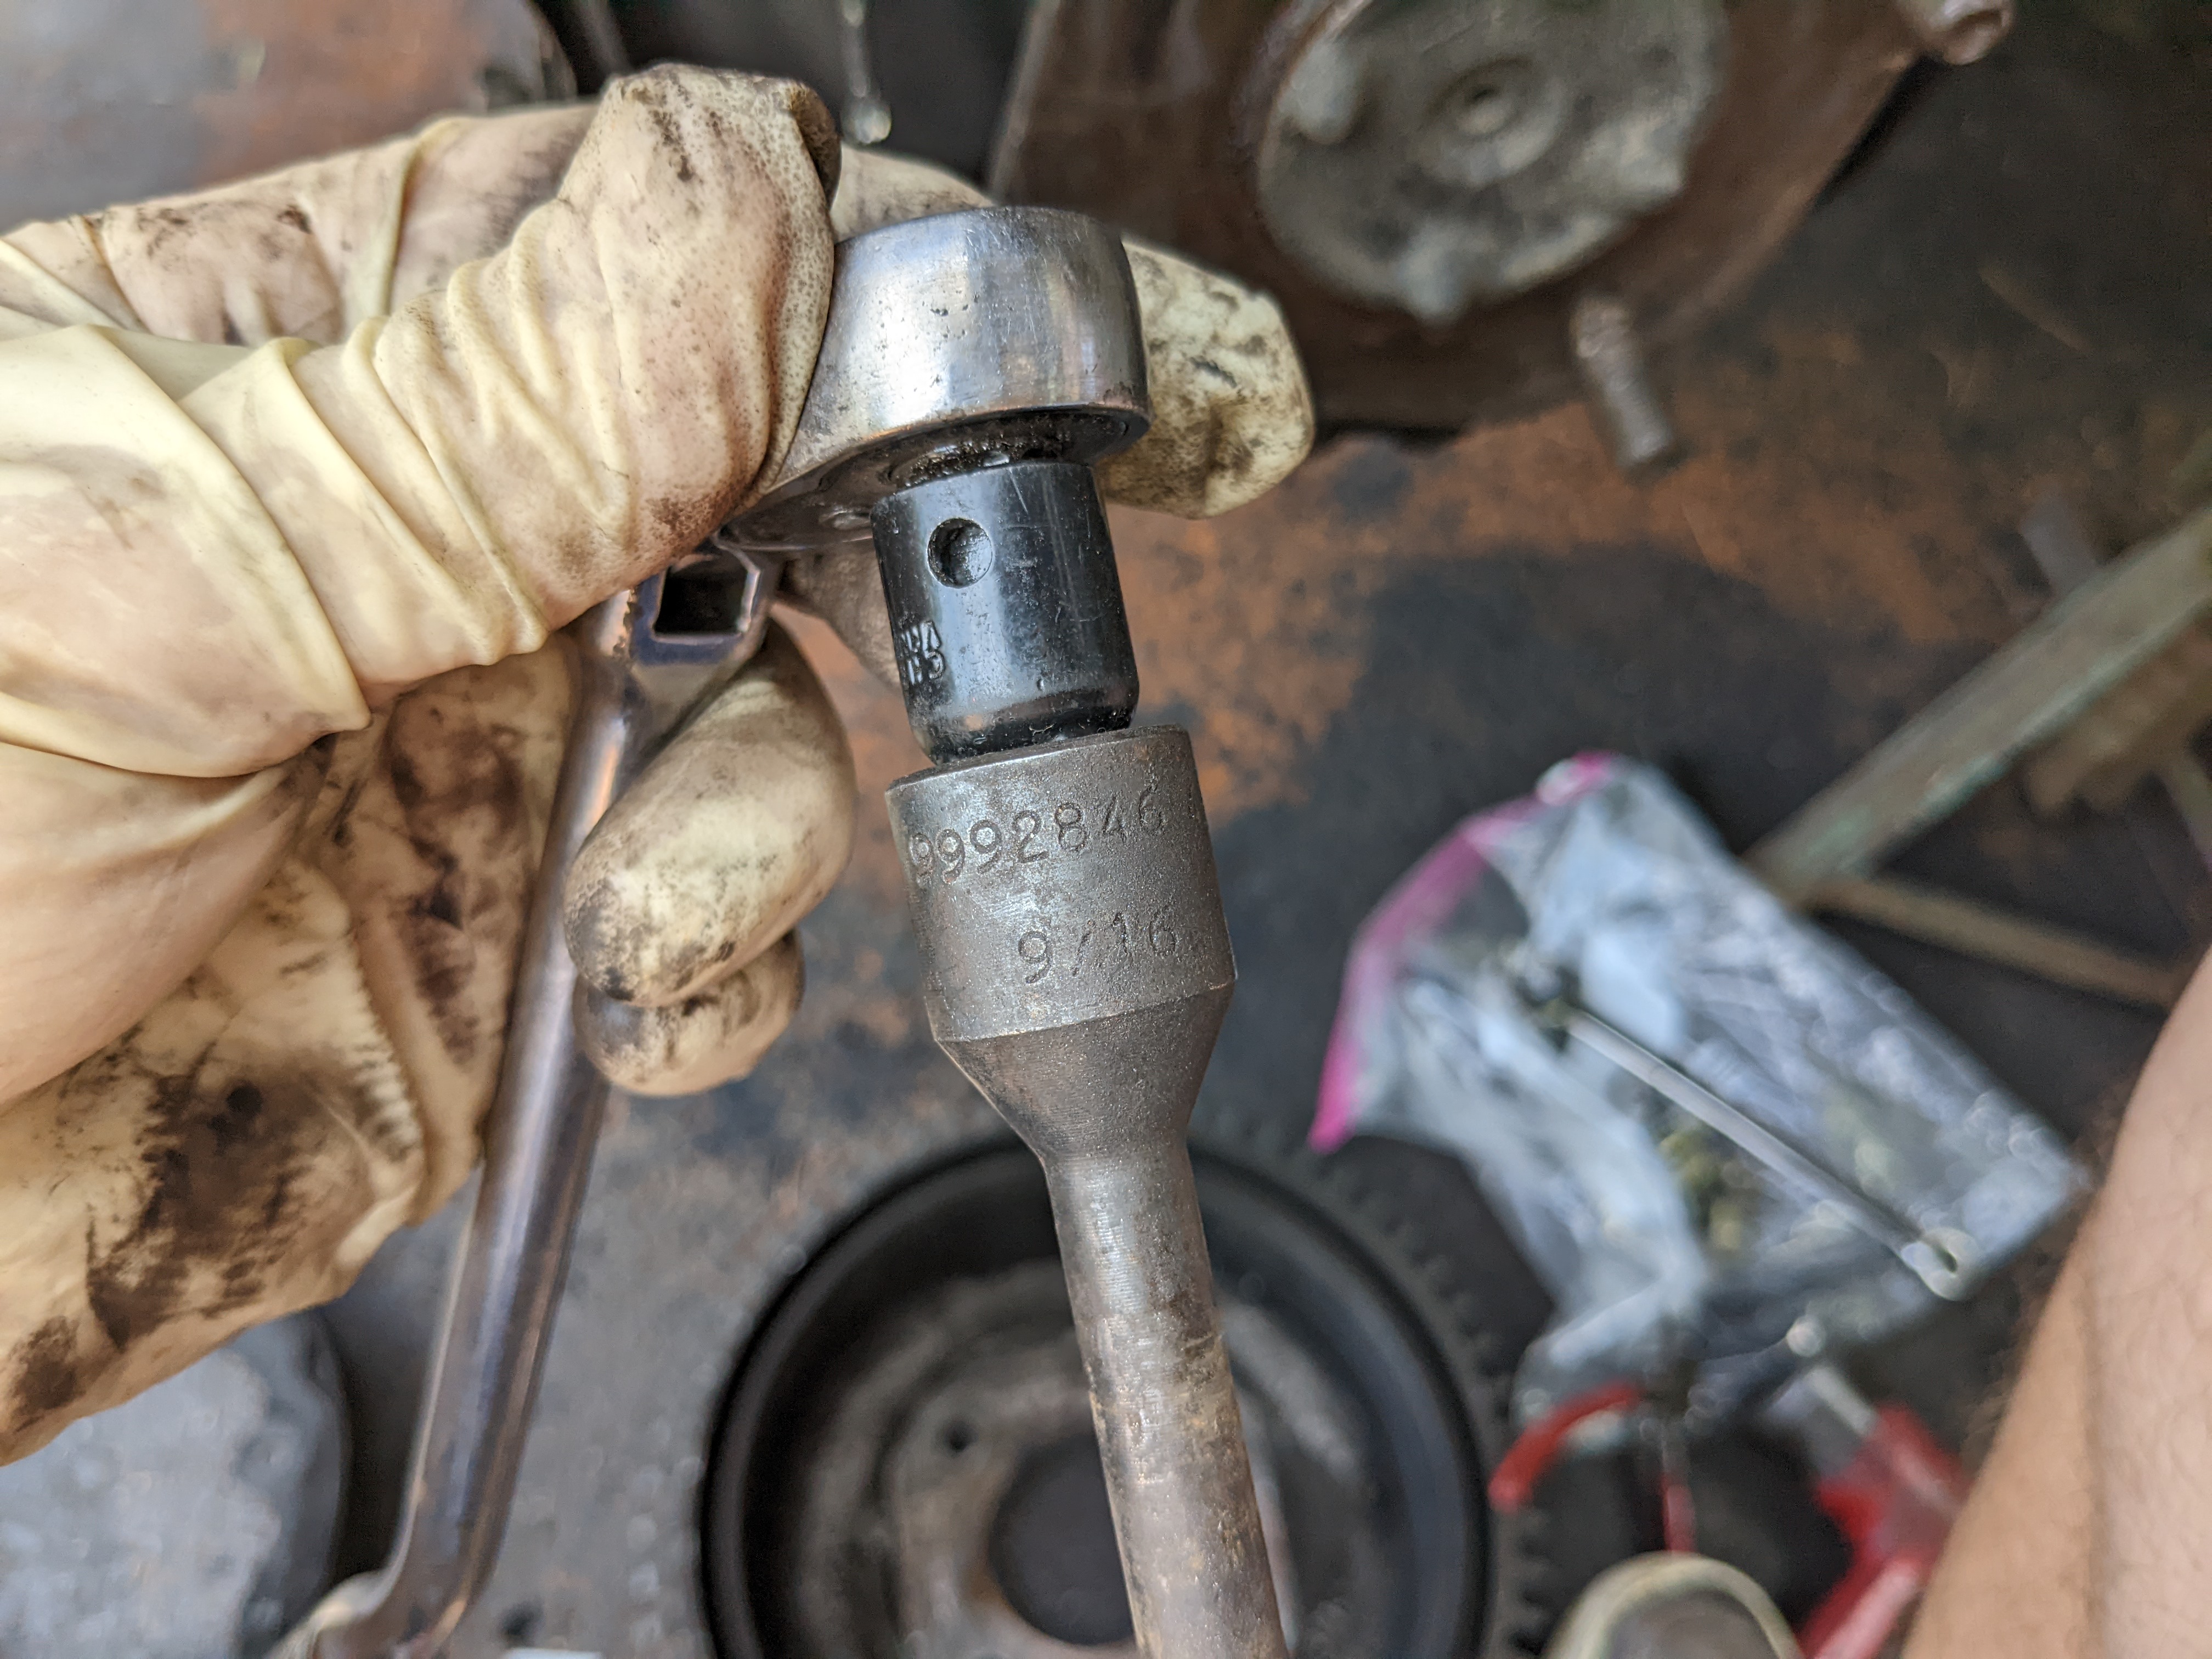
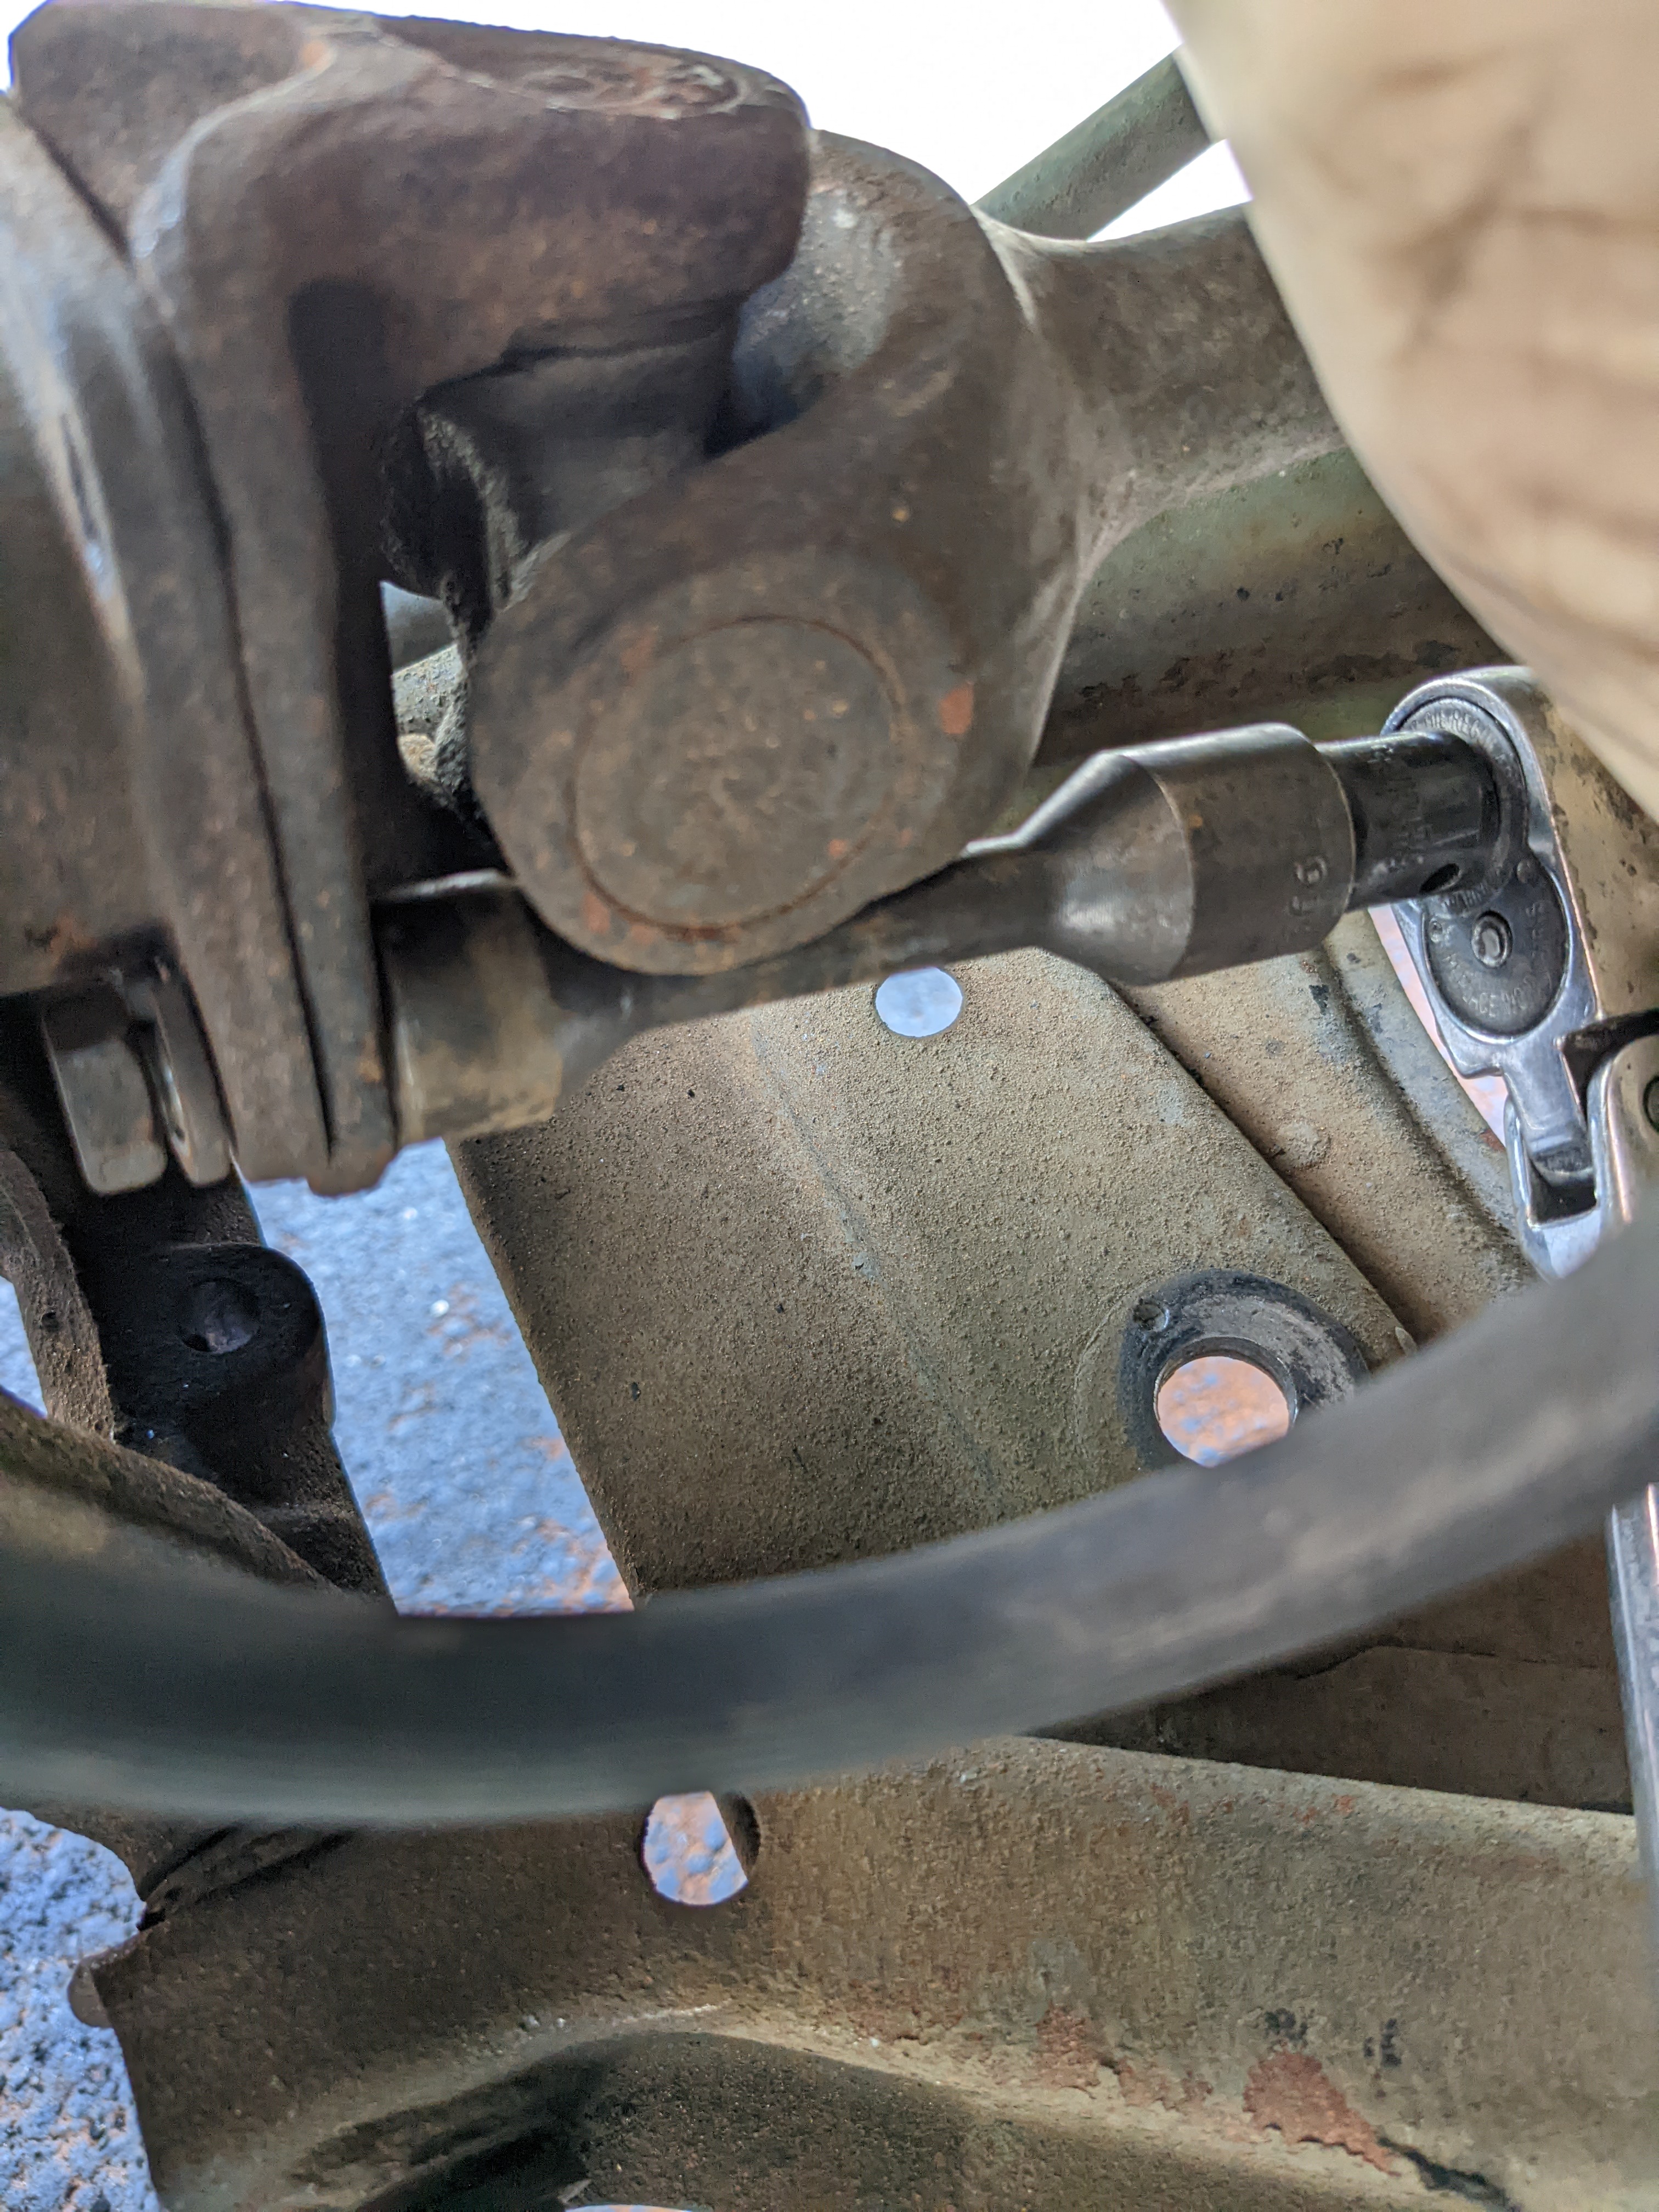
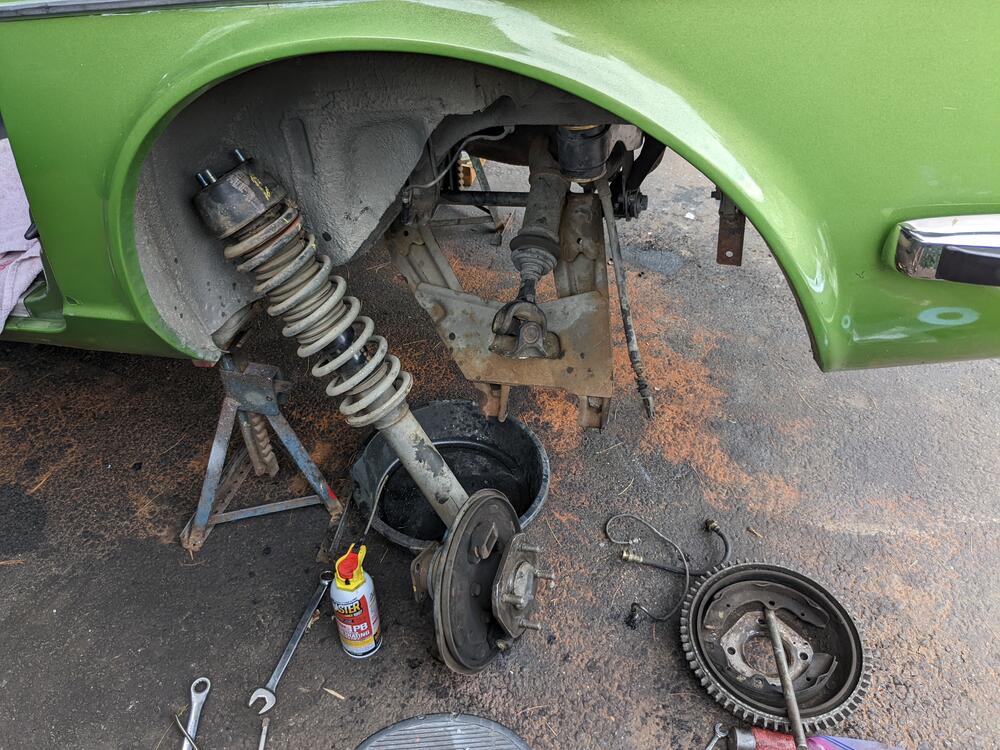
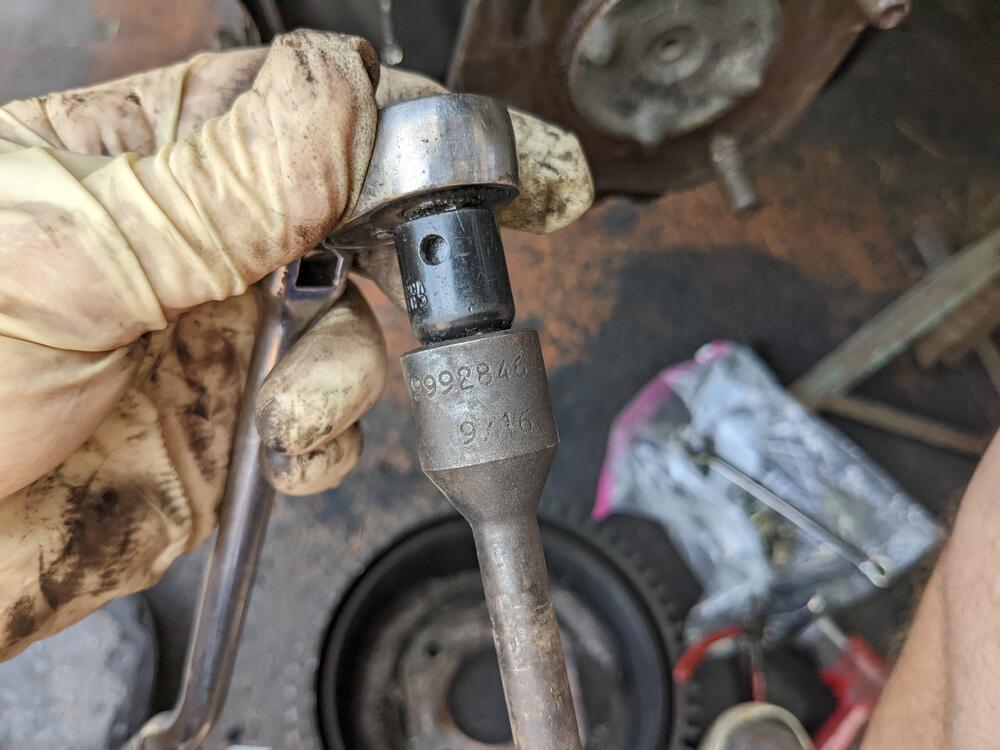
Dropped the struts/hubs after work, no drama. All drum brake parts removed. I don't want to hack up the back plates, so I'm going to pull the spindles. This Volvo tool (999-2846) intended for old RWD prop shafts fit the Z U-Joint Hopefully I'll have the hubs apart tomorrow, and replace the strut inserts and coil springs


-
The Chevy V8 (LR4) & 4l60e trans are going in the Volvo wagon I made into a pickup truck last year. I just need the Z safe to drive for now.

-
Did the mustache bar bushings and the inner control arm bushings. If I can't extract the outer c/arm bushings in-situ tomorrow, I'll have to drop the arms entirely. I'll get the trans jack if that happens, I'll need it anyway for the V8/4l60E drivetrain. Forward bushings are longer than the rears. For mustache bar, the original bushing sleeves need to be kept, so I holesawed the rubber out & wire brushed the sleeve of residual rubber rear bushing sleeves came off with just a little soaking old remnants
-
That all just the (cat-related) floor temp monitoring system that CA models had - there are two warning indicators in the center console, one for cat temp & one for floor temp (monitor is above rear muffler in cargo floor) Yeah, all that fuel hose mess is going away. I have an assortment of Volvo fuel hose with the proper rating, I may also convert to quick release & nitrile lines in preparation for the VQ35DE conversion. I'm not going to strip the floors now, just cleanup any loose material & spray fresh 3M Rocker Schutz & undercoat in exposed areas. I'm vacillating on what to do with the exhaust - I may just make a new 2.5" rear section with new muffler that will be detachable ahead of the subframe. That way, when I do the VQ35DE, I can tie into that instead of having to make the entire exhaust from scratch. I don't think I want to go to 3" on the exhaust. I have no use for all that shielding once I replace the exhaust, but I'm still going to clean it up. I think for now I'm just going to do the bushings in place - the axle conversion I'll going to put off as I don't want the car to be down for very long, and getting the companion flanges machined to be concentric for attaching the adaptor flanges is a variable I can't control, time-wise. I need this to be roadworthy so I can take the Volvo pickup off the road to get moving on the V8 conversion. So, just bushings, struts & brakes for now. After that, I still need to make the AC work if I'm going to drive this for the summer & fall.
-
Yes! They (whomever the PO used to take it to in CA) cut it to replace the cat, and the rear muffler, but kept all the original hardware & mount straps, which is kinda cool to have.