


HusseinHolland
Member
-
Joined
-
Last visited
Everything posted by HusseinHolland
-
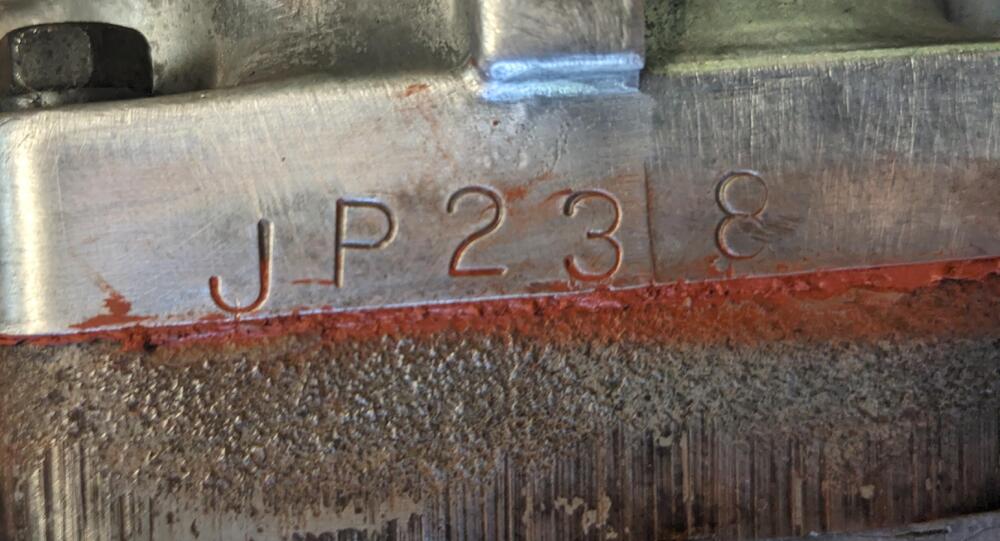
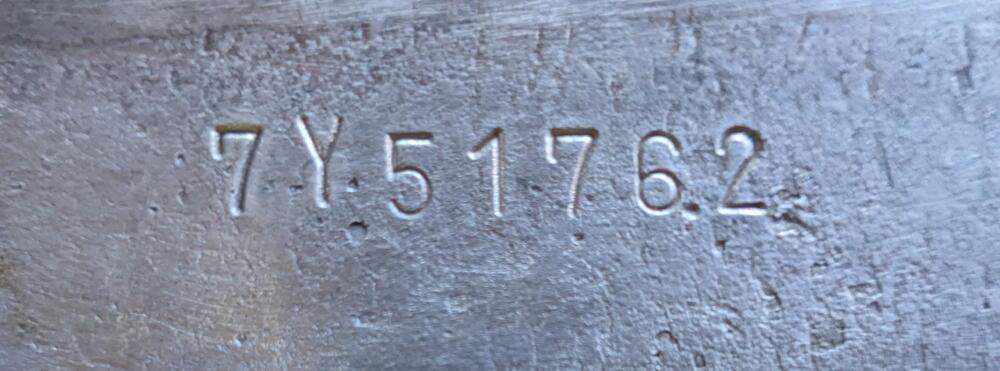
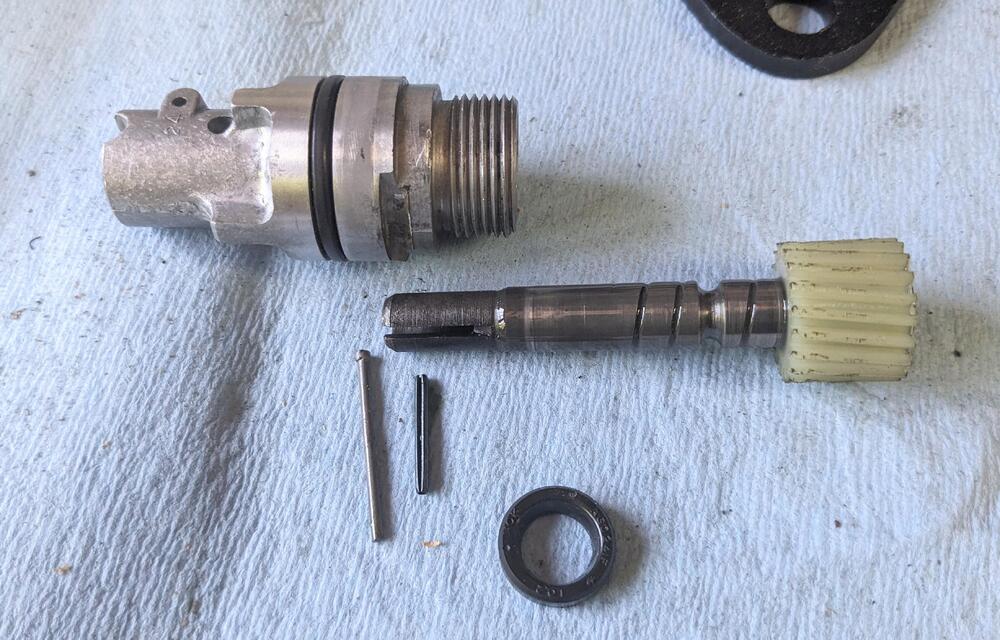
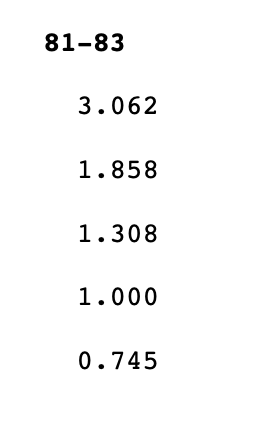
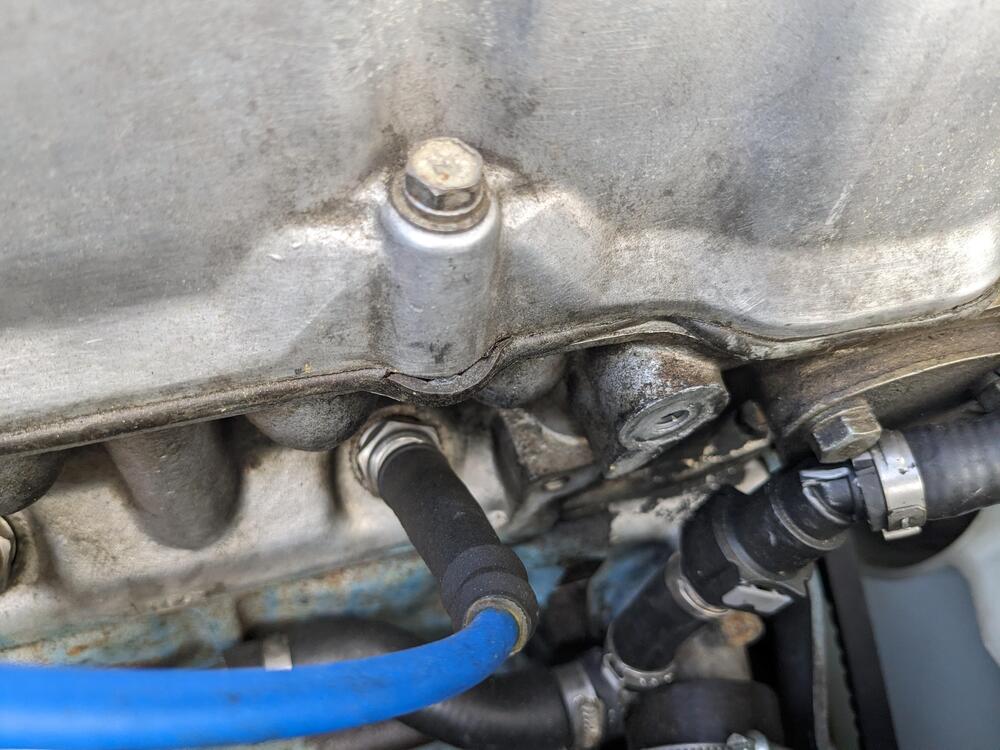
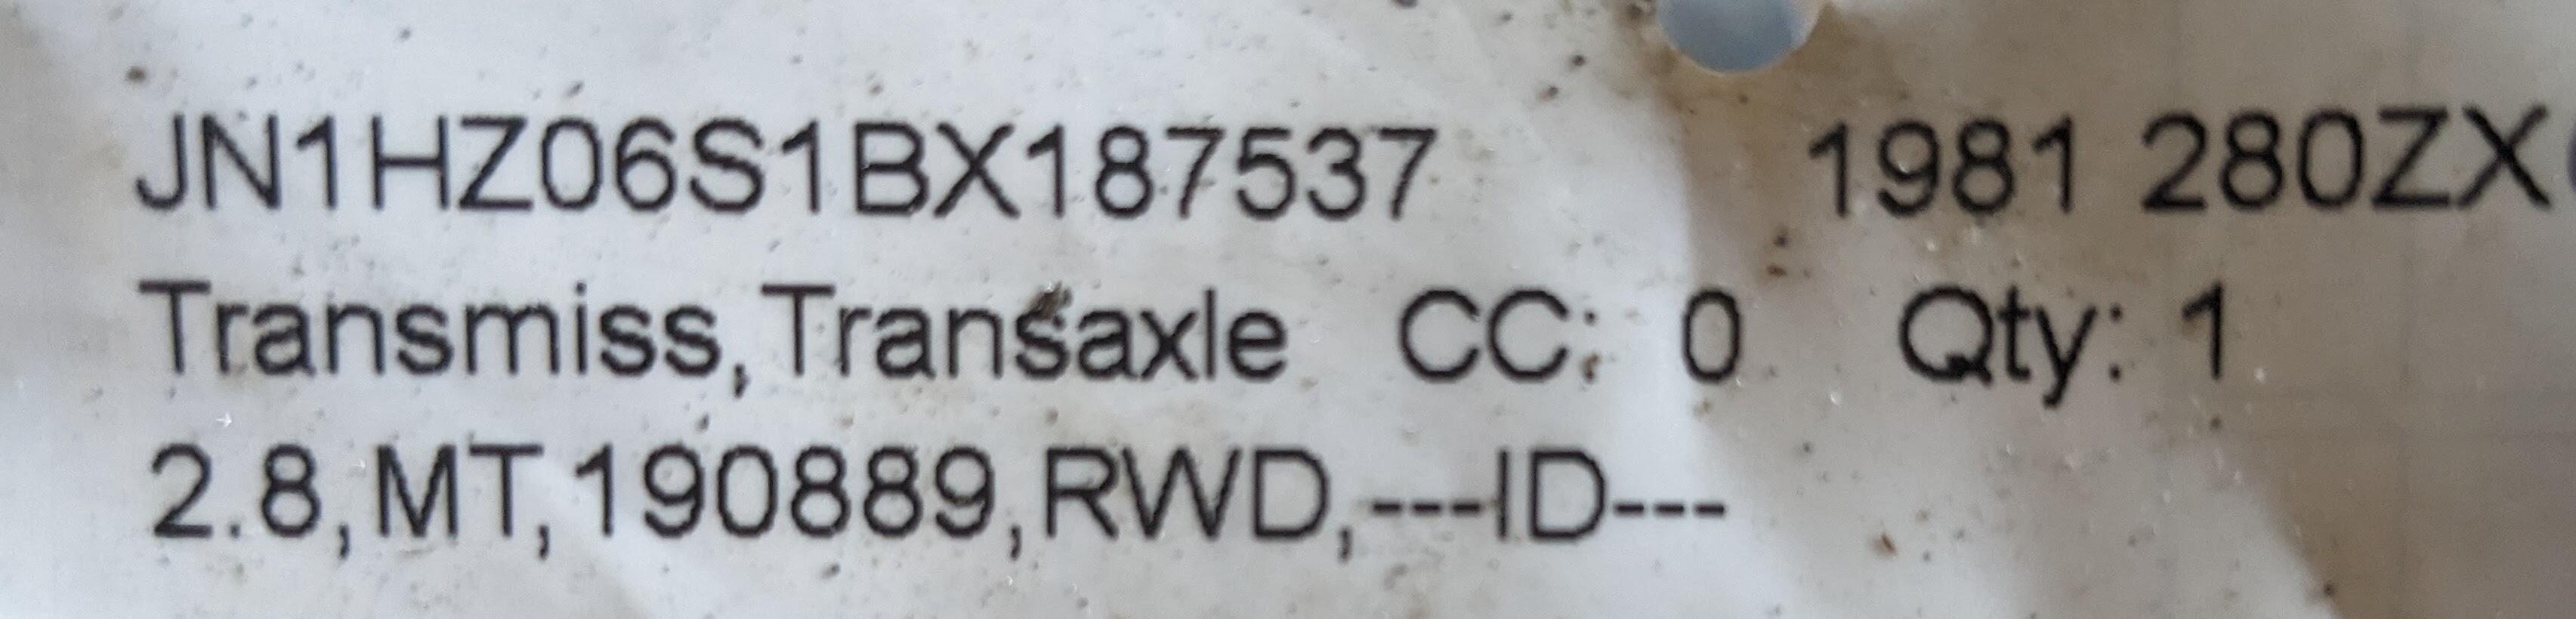
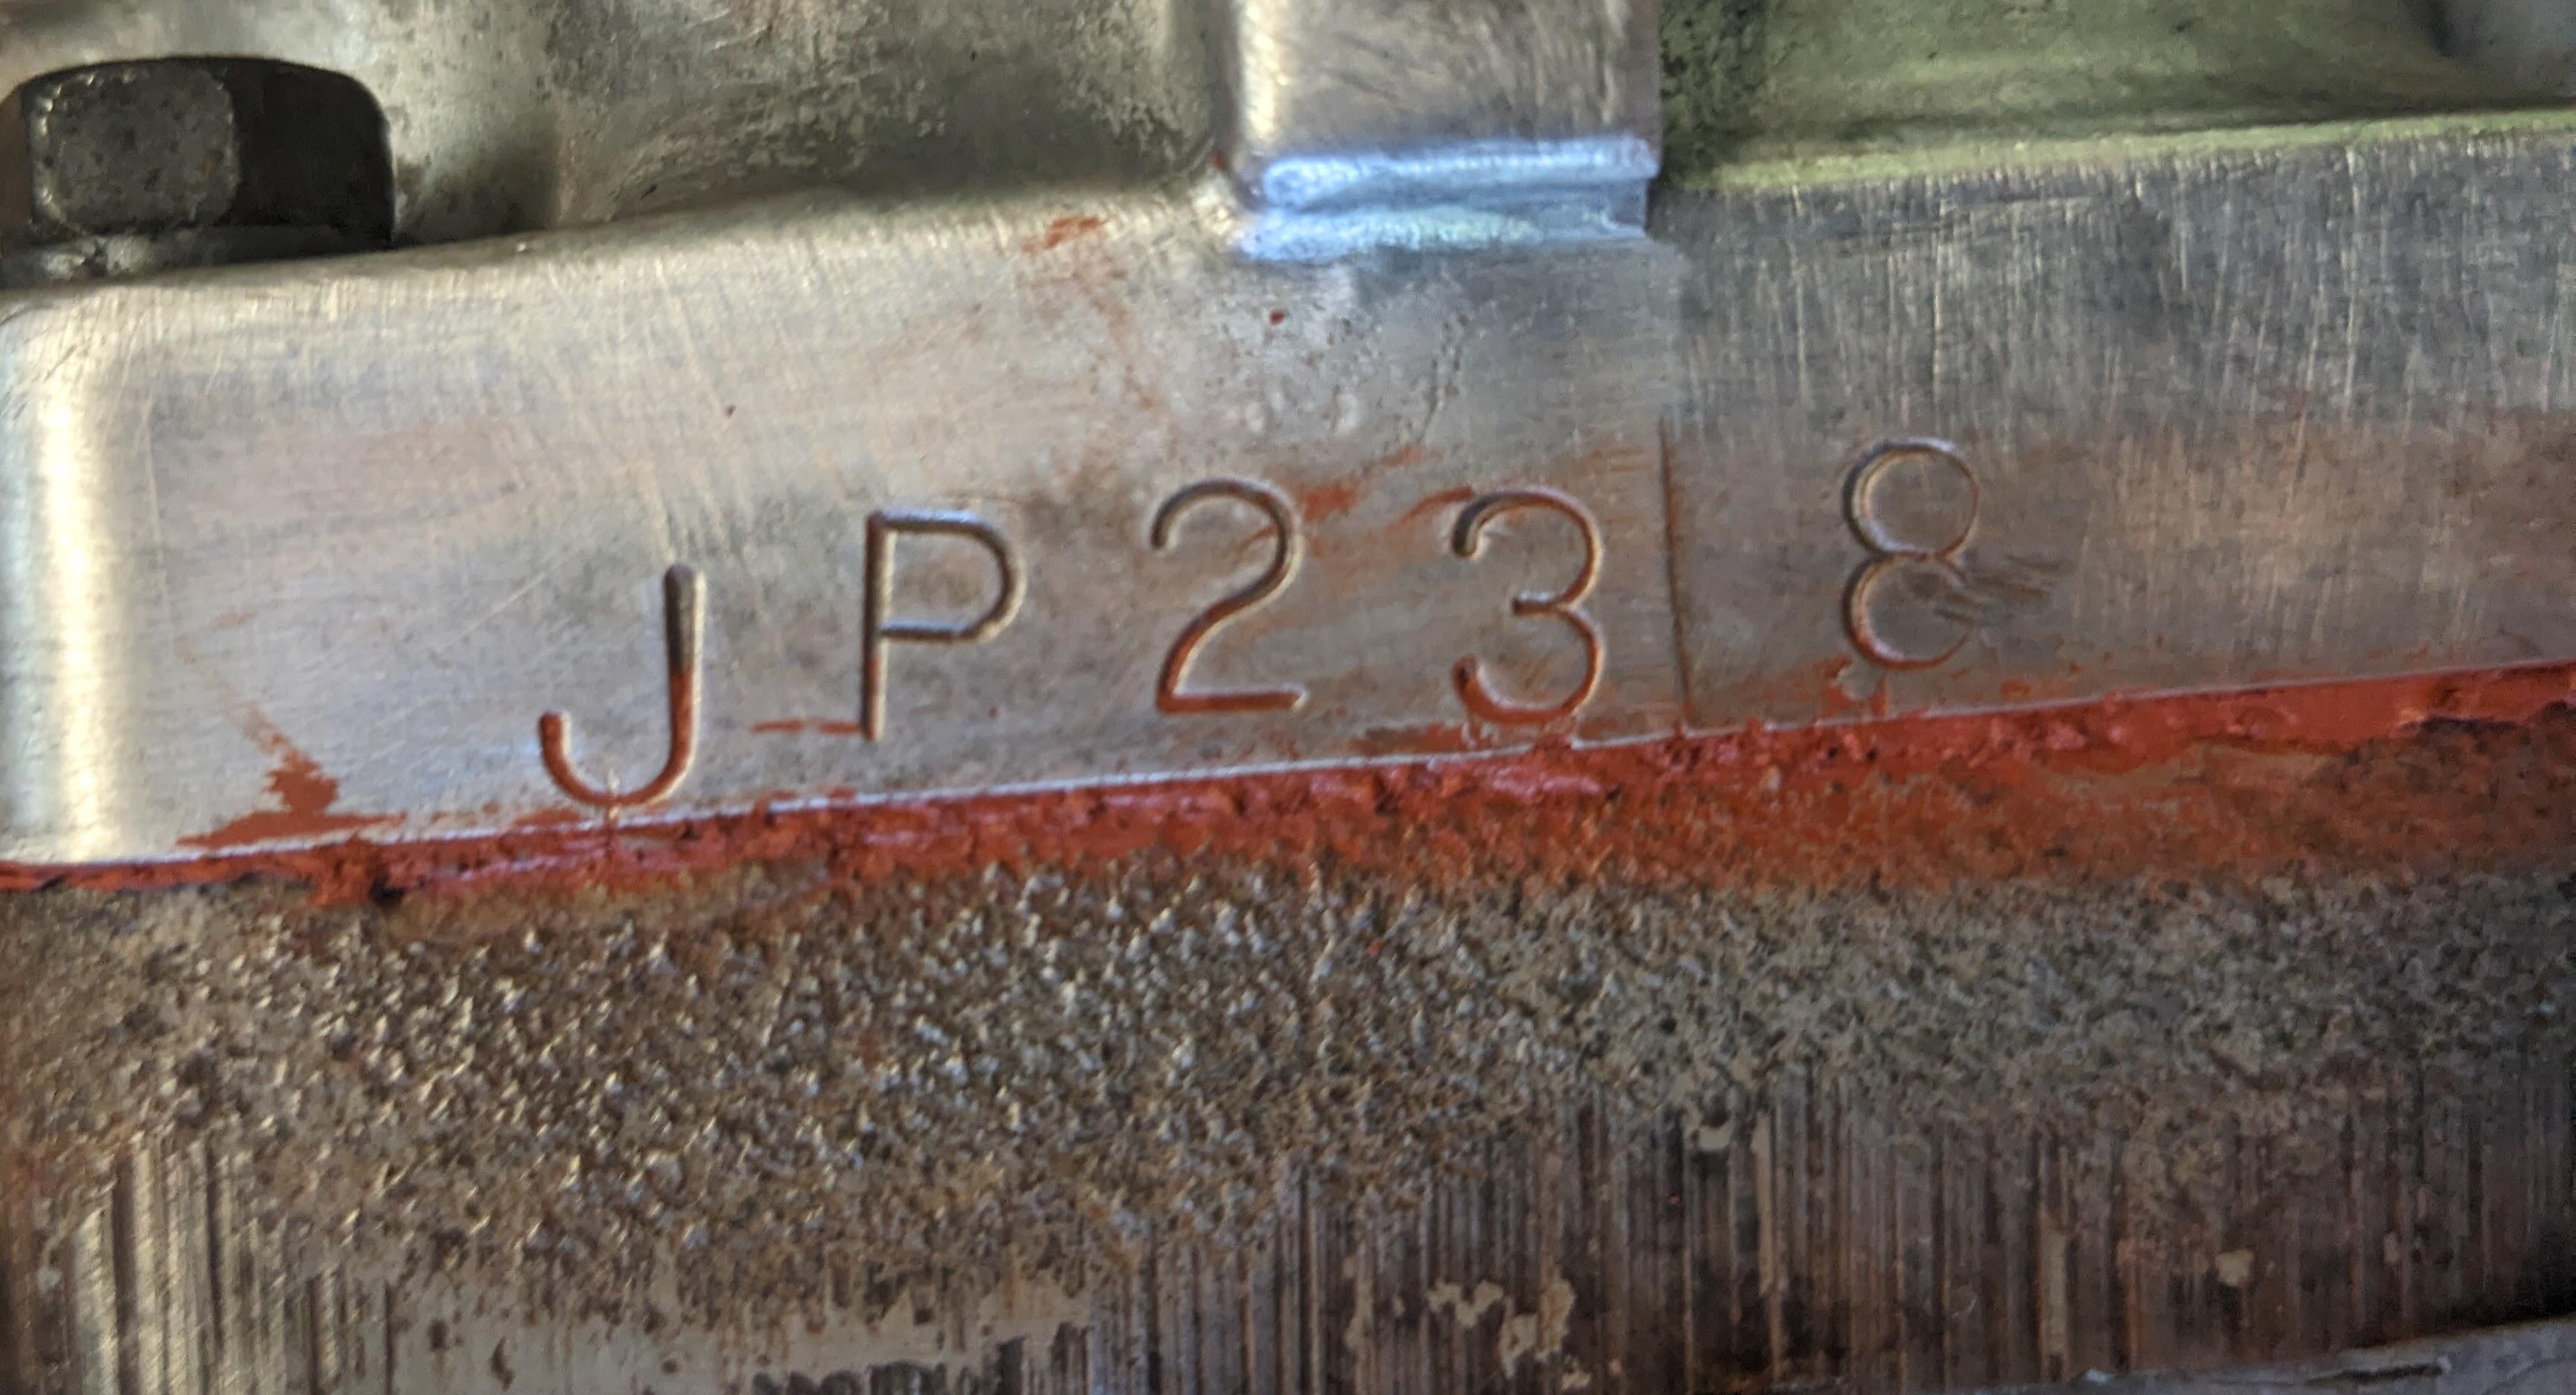
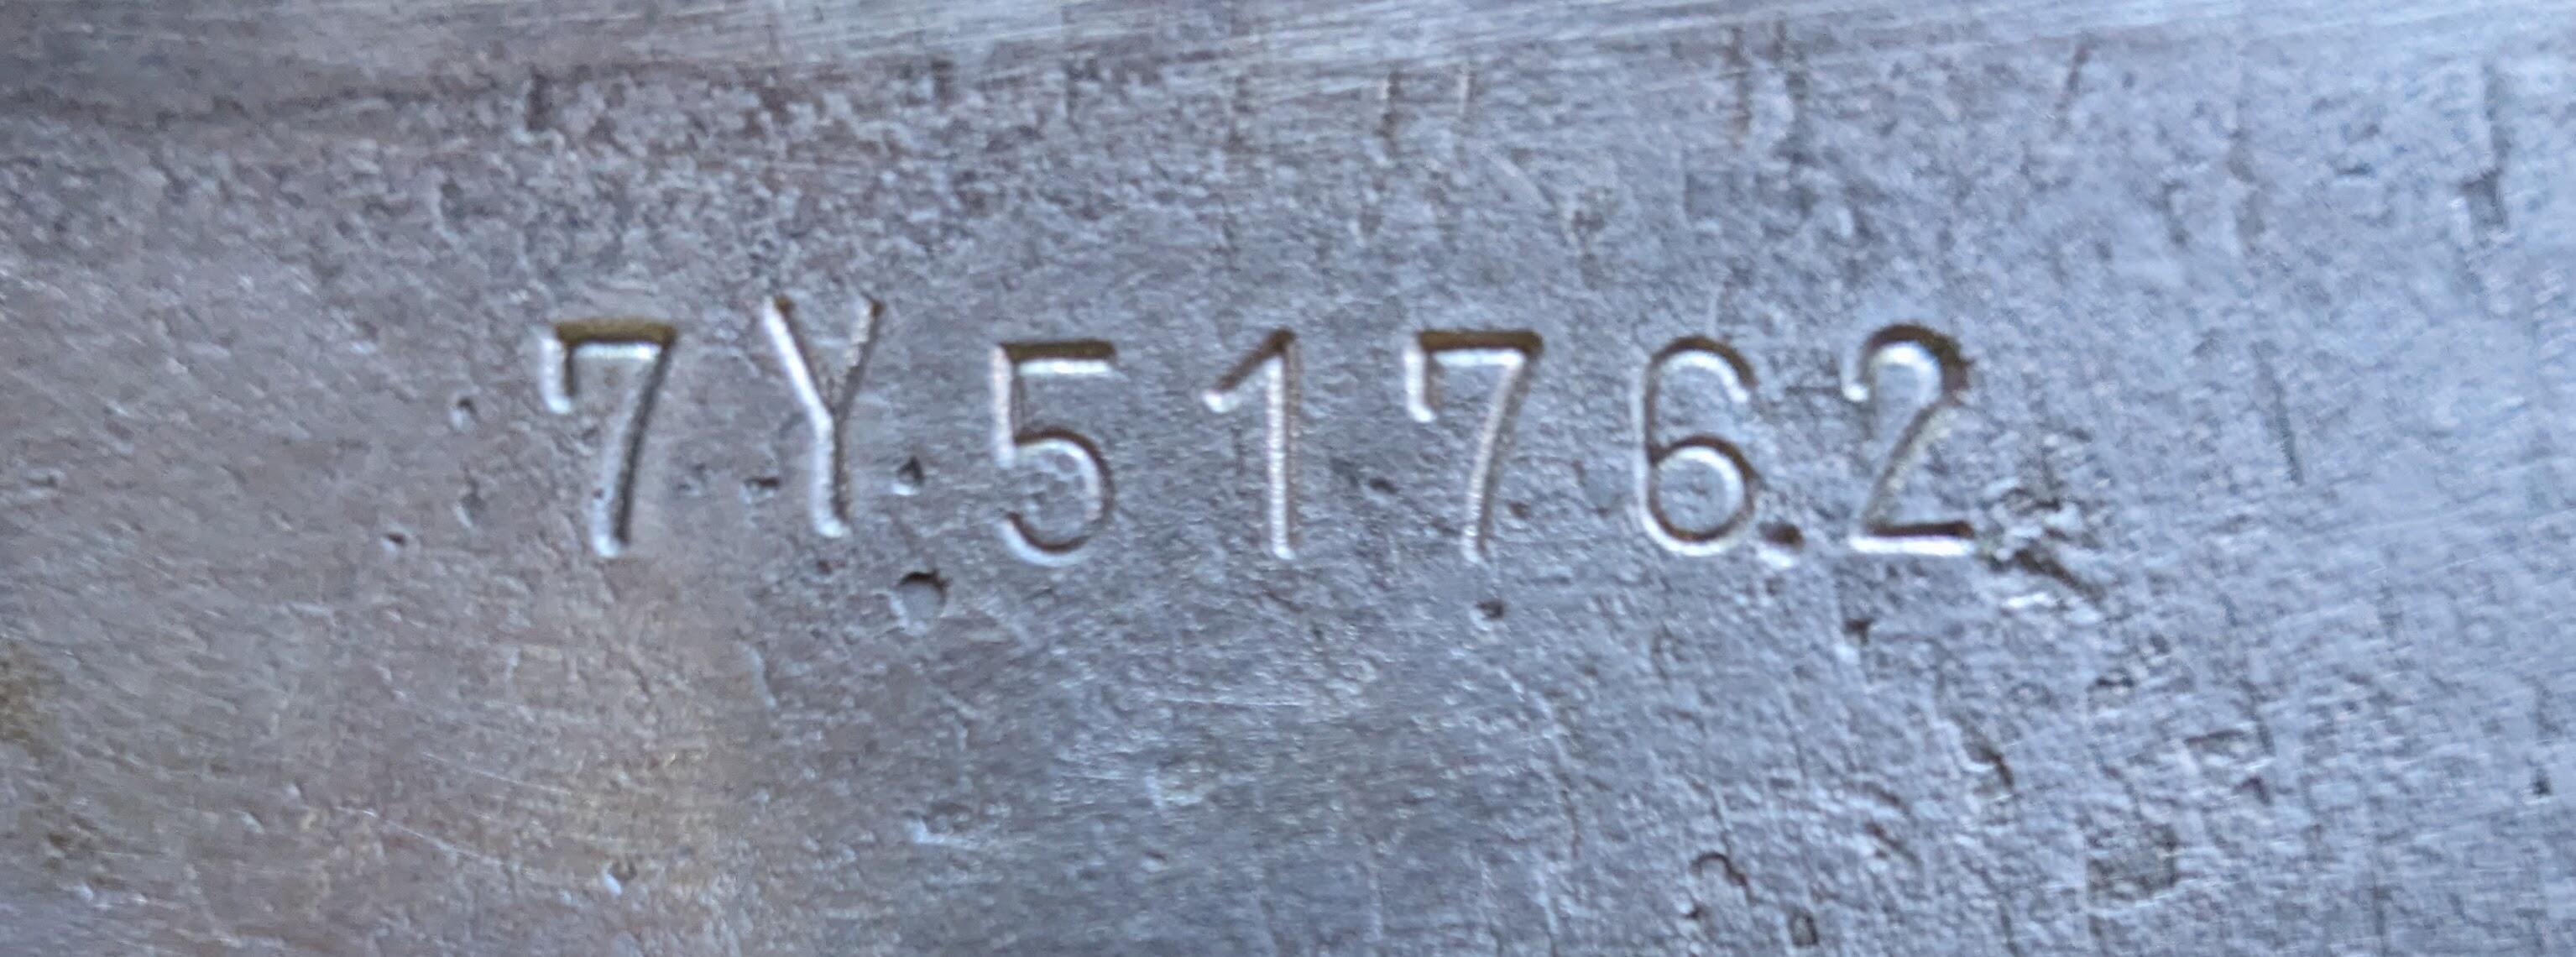
 Z/ZX Gearing chart After driving my 280Z 500 miles this past weekend, I can honestly say I can't live with the 4 speed until the drivetrain conversion happens. Mine is in rough shape - 3rd gear whines like a tractor gear set, and in 4th, the shifter rattles & the whole thing sounds like it's gonna explode when I drive over 80 for any duration. There were a couple sprints on the way down & home where I got up over 90, and the car felt pretty good (I had previously felt the nose to be a little flighty at speed, however I think that is mostly the roadway I normally drive on - since I did not experience the same feel on the interstates going to Carlisle PA), but the trans, not so much. Anyway, I have found a 81 280ZX 5 speed, so I bought it. Previous searches last year hadn't come up with any success. Not exactly cheap, but I figure I can sell it on DTR. I'm going to order the 280ZX clutch kit, just wondering if there is anything else I should be aware of besides swapping over the speedo drive gear. ID numbers for trans 19tooth white gear Gear ratios. 1981 280ZX had 3.90:1 FD, vs. 3.54:1 for my 75.
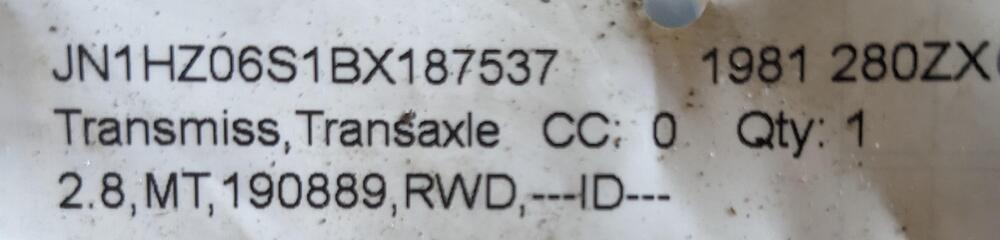
-
Great to meet you also! I will definitely be there next year, so we can catch up. I'm hoping to have the V8 conversion done on my Volvo pickup by then. I'm also going to have to look for a 5 speed trans for the Z - it's gonna be couple years until I get the 350Z drivetrain in, and the 4 speed I have is in terrible shape.
-
Indeed 😆 I did go over to the Z section, and talk to a couple of 240Z owners, people around my age. Most of the people around the tent - East Coast Z? were either a fair bit younger or older, and seems pretty much engrossed in their own stuff. Both those guys made that way over to the Volvo section, so I chatted with them a little bit more around my car. One of them ended up hanging out with a bunch of the Volvo guys at the tent.
-
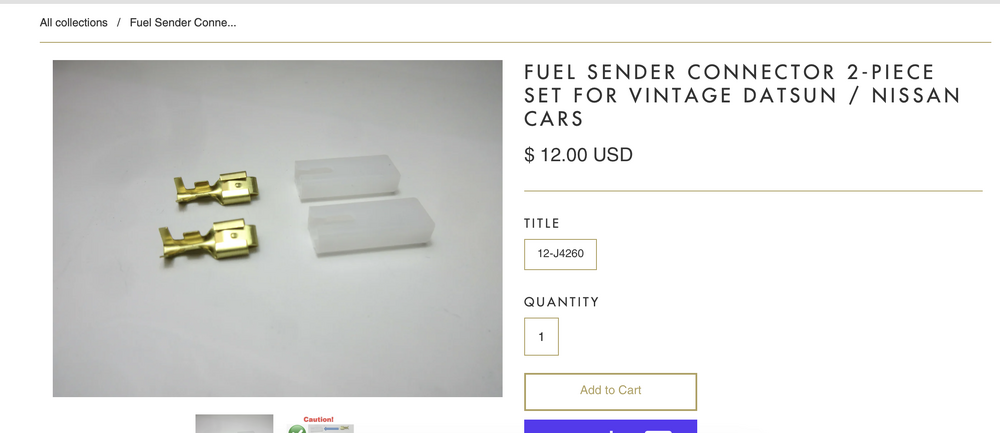
They are just 6mm spades, but the type that has the spring tab. I have a bunch I bought off AliExpress. The sleeves I just notched myself This is a vendor selling them already prepped
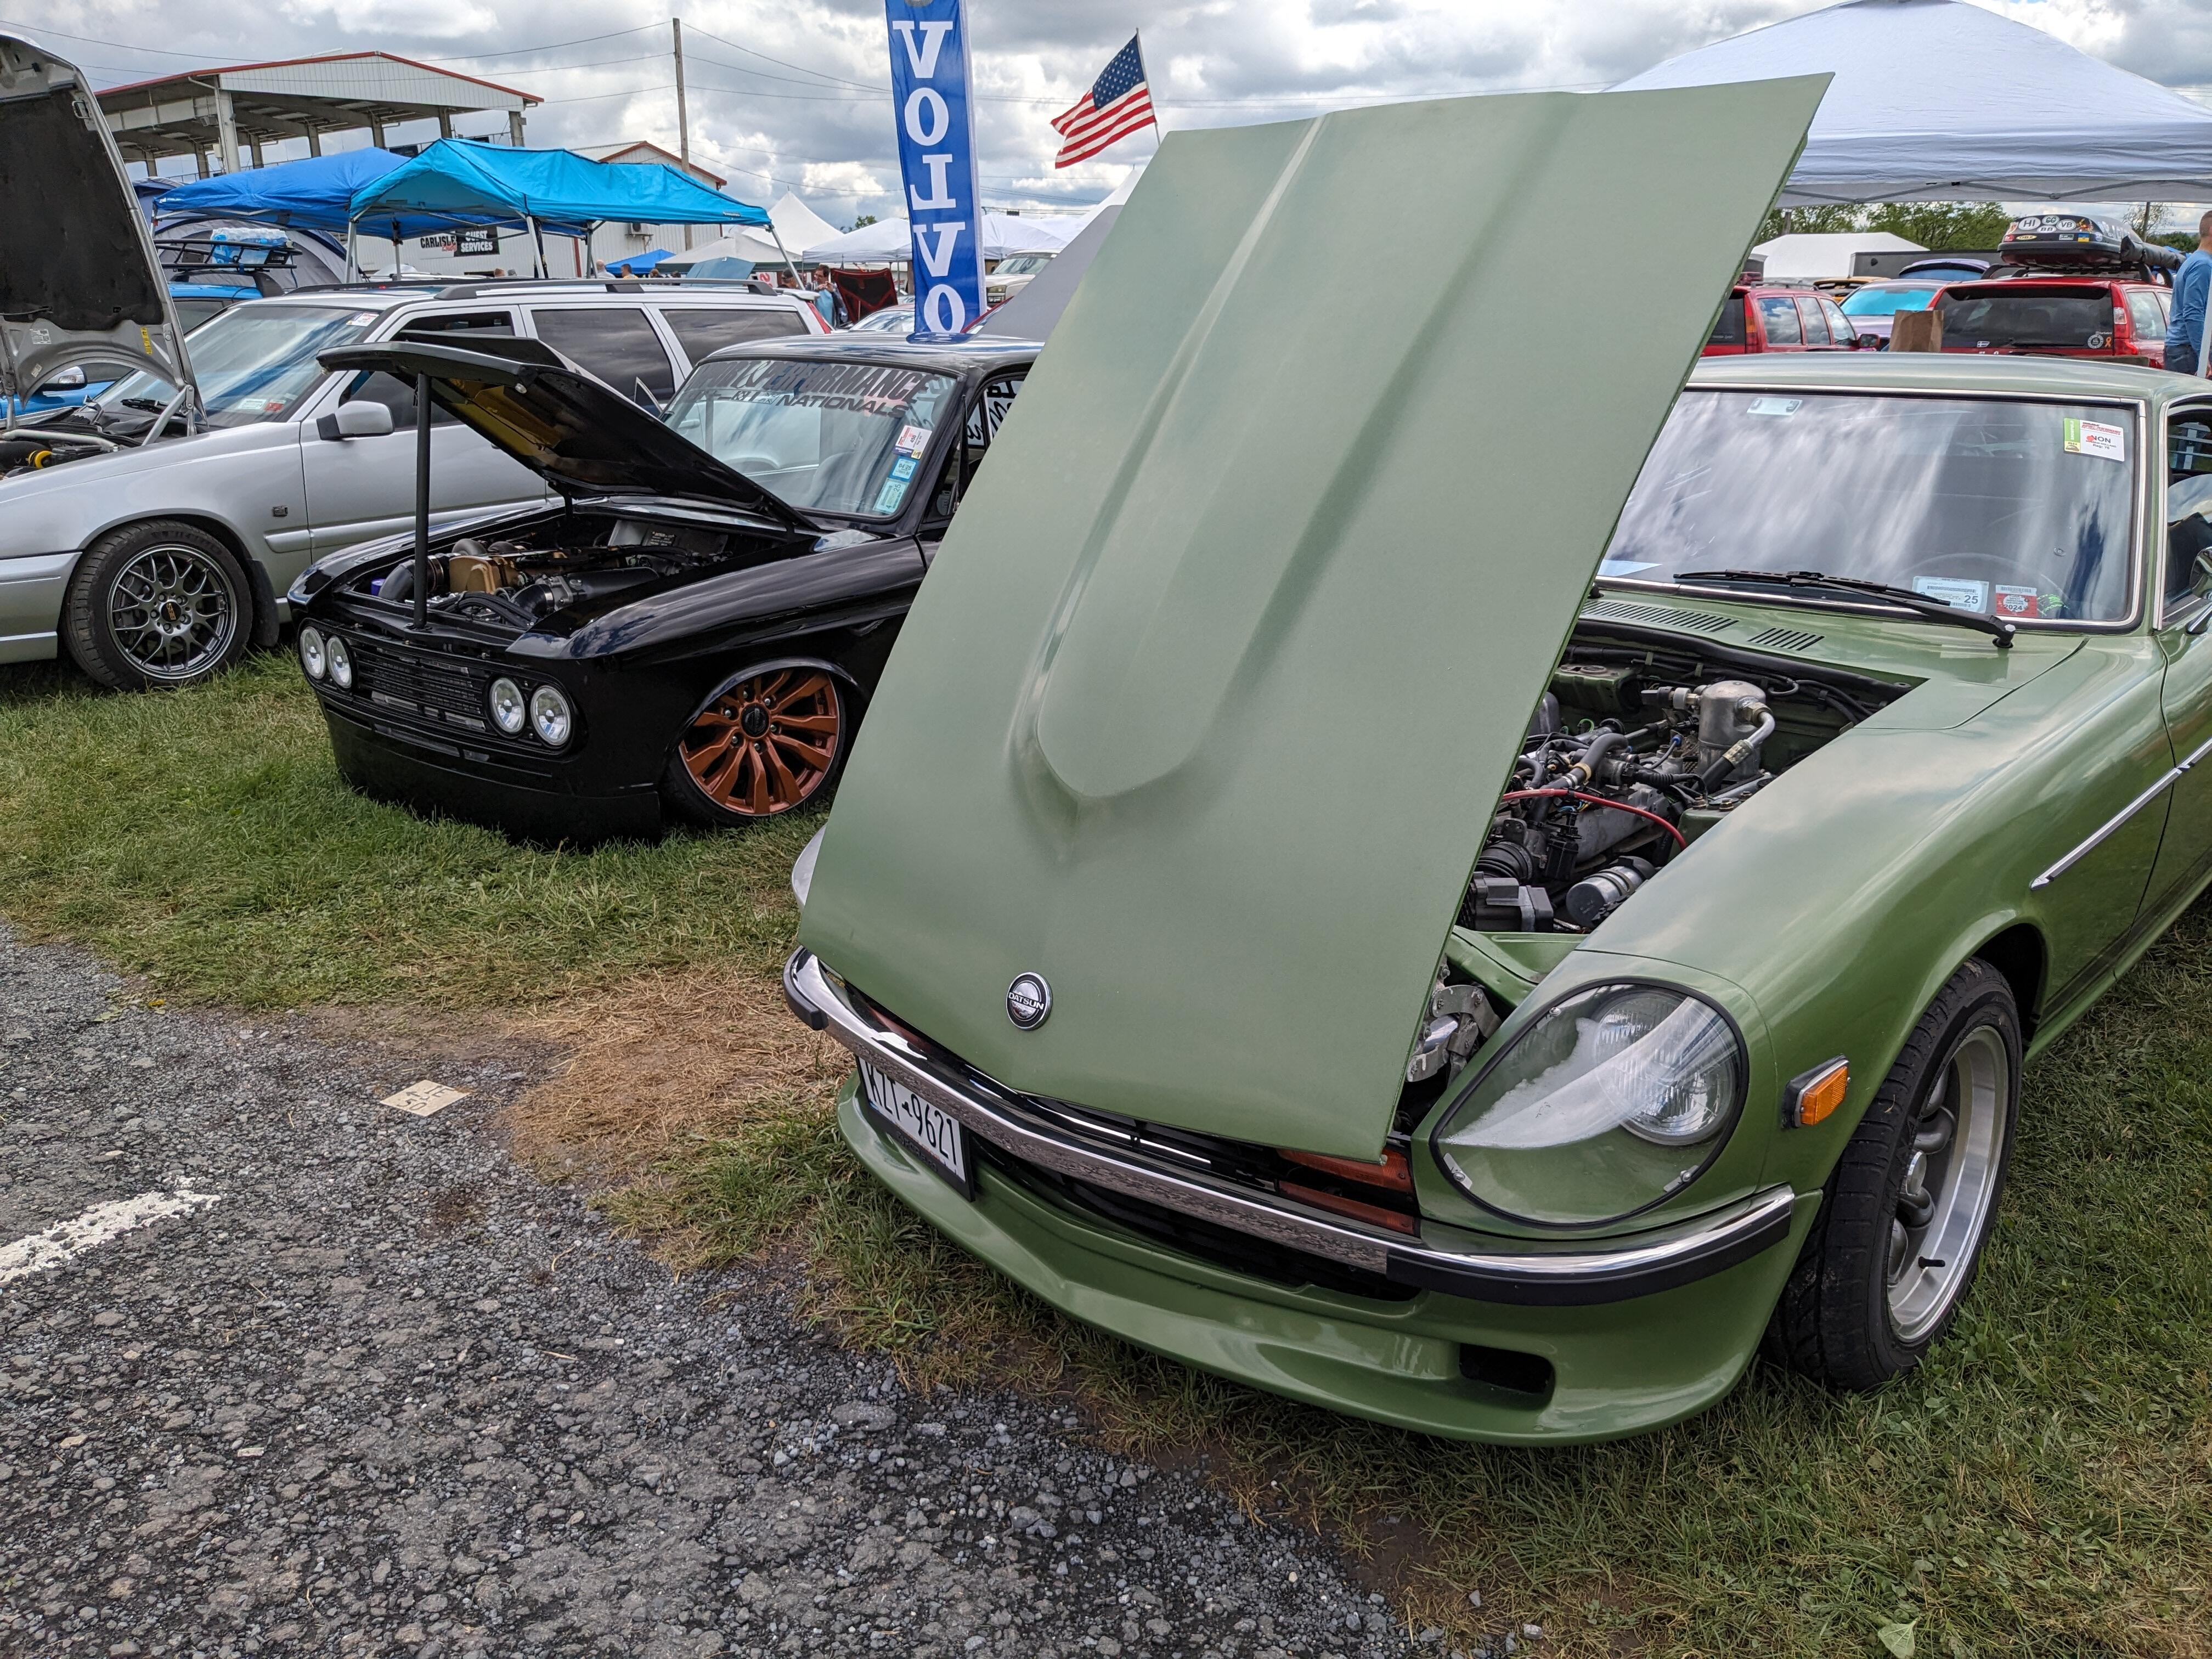
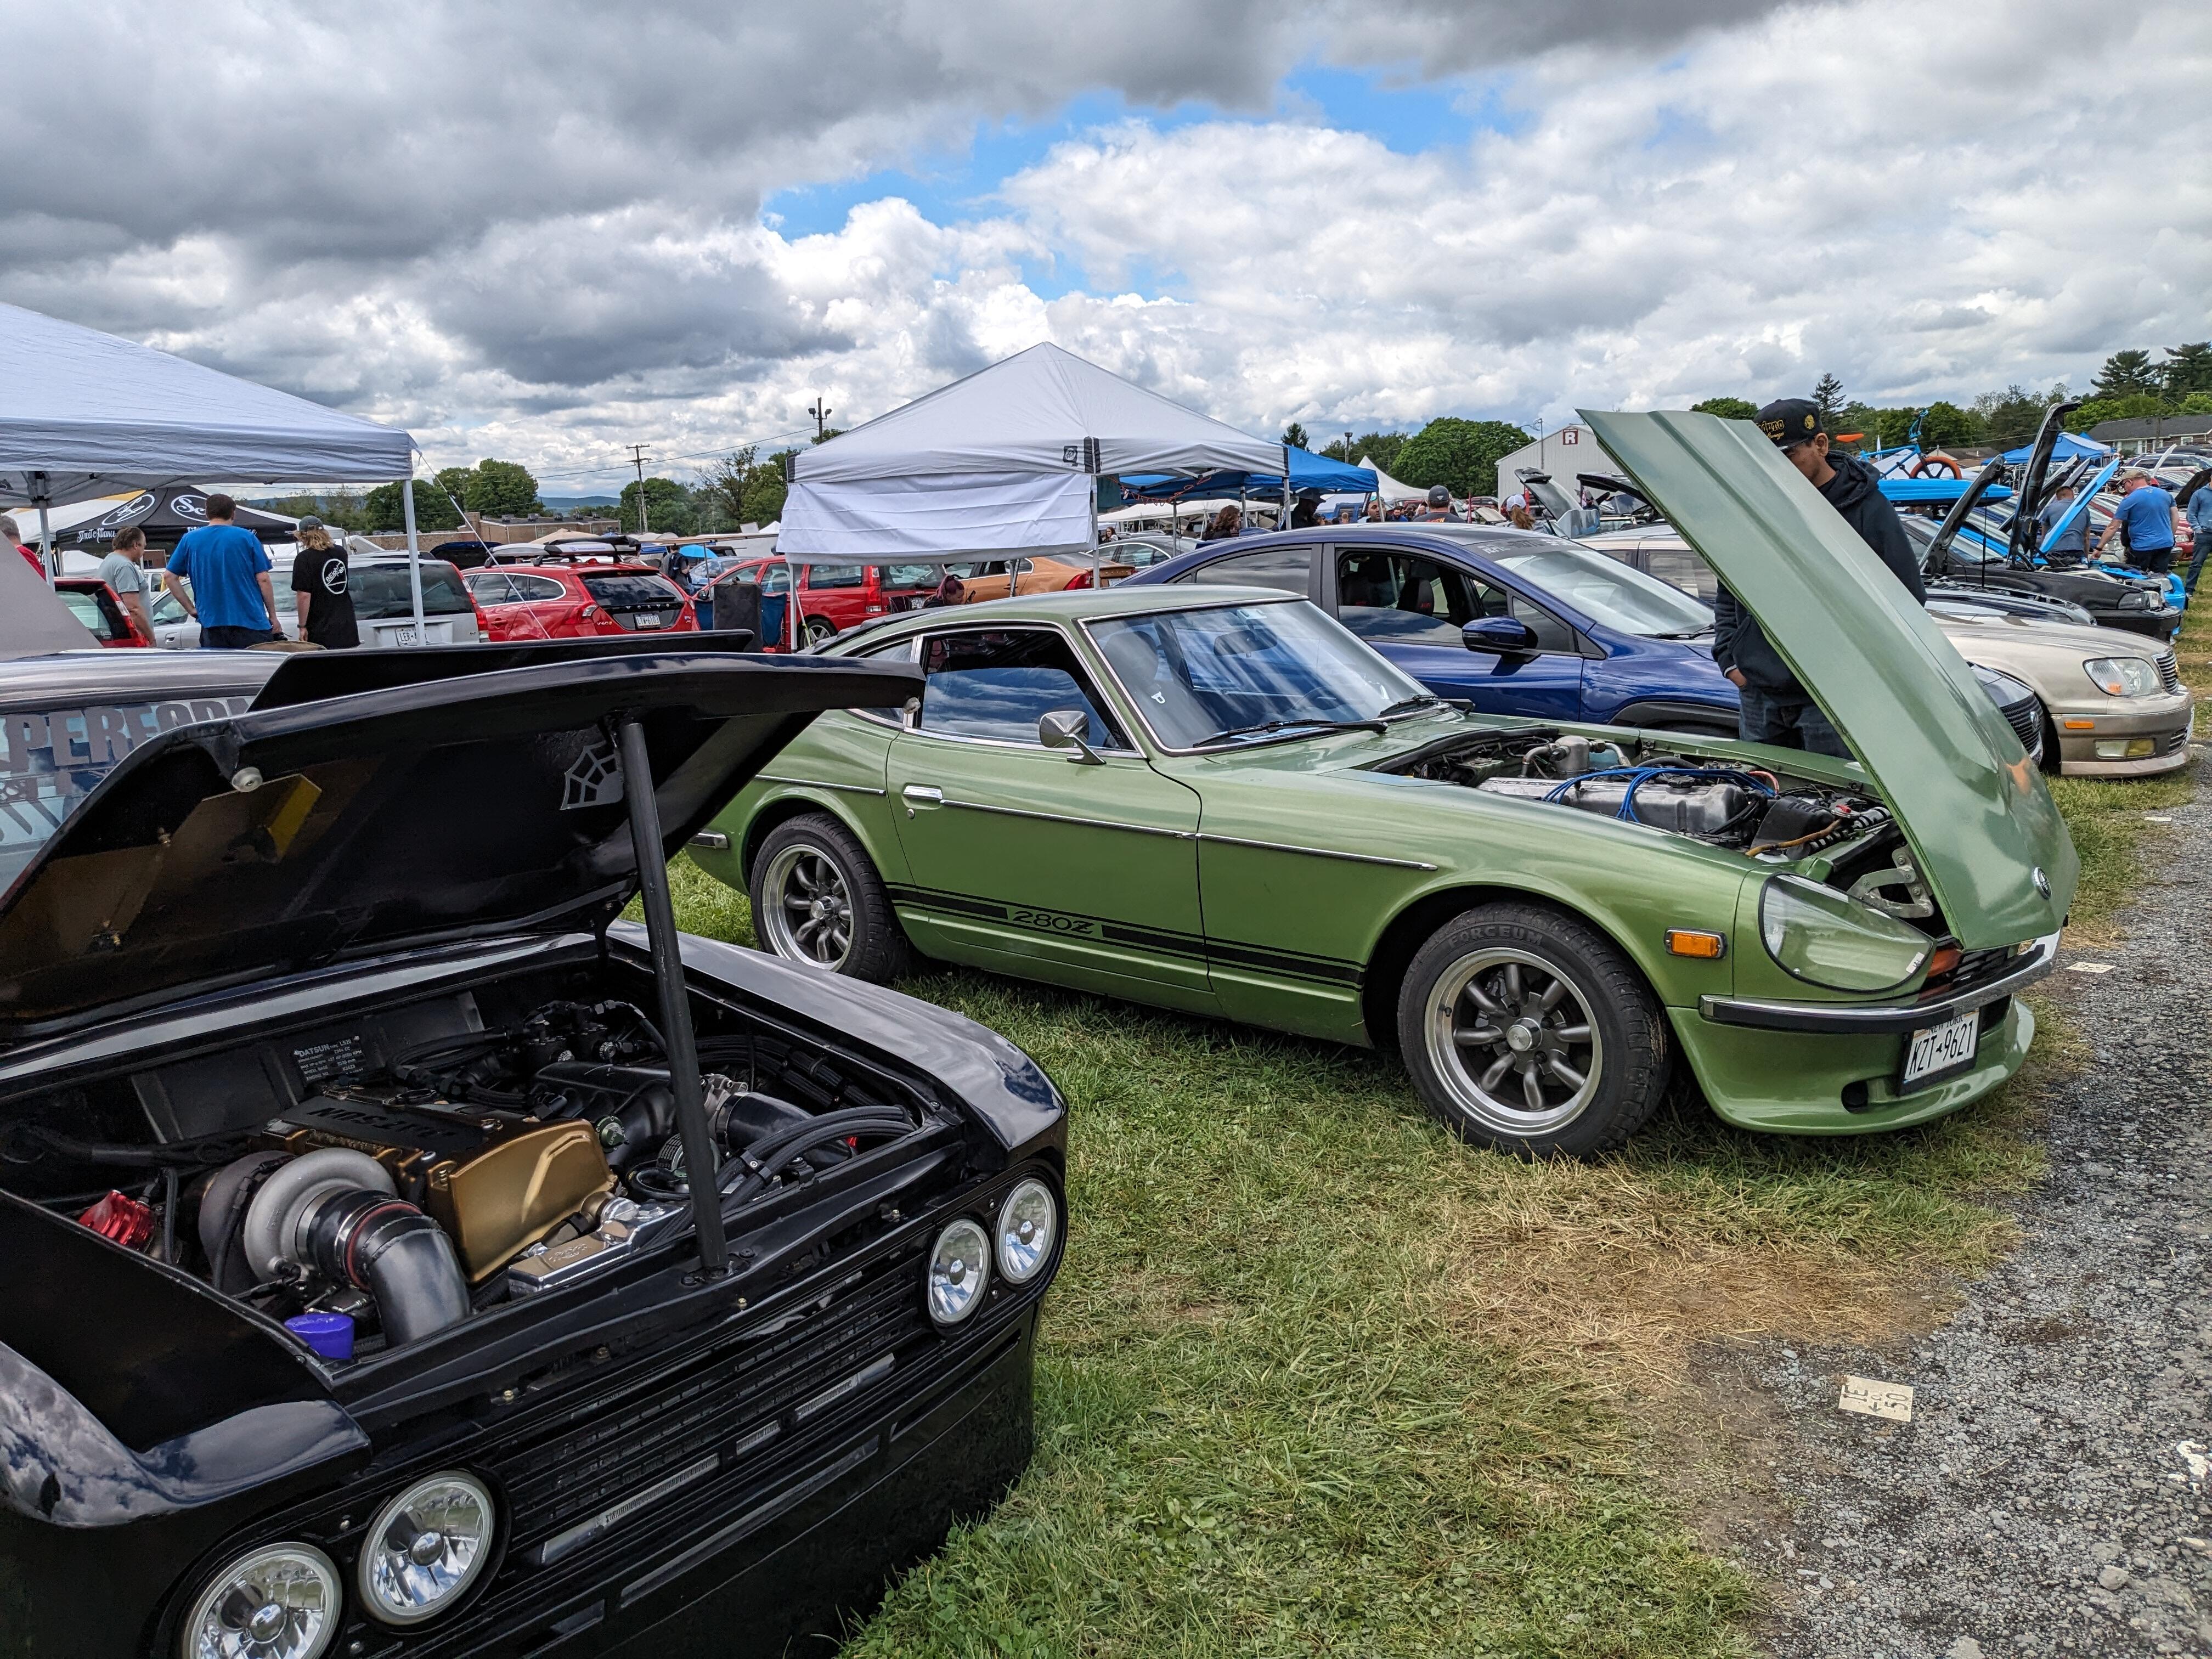
 I was - last year I took the Fiat, the year before my Volvo pickup truck. I usually rotate vehicles depending on what work is going on with them. Video someone took of it - I usually park with the Volvos I'll be parked with the Volvos again, don't know any of the Datsun ppl that were there last year.
I go every year - maybe next year then. I'd love to meet you, and look over your Z & get some other ideas from the later releases 😁
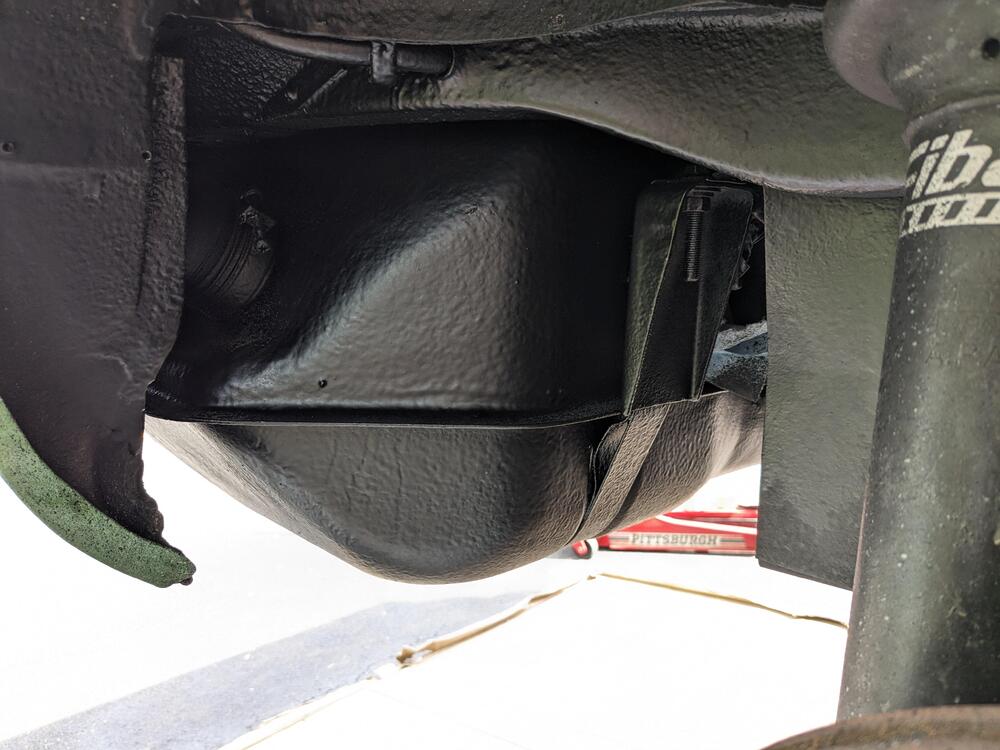
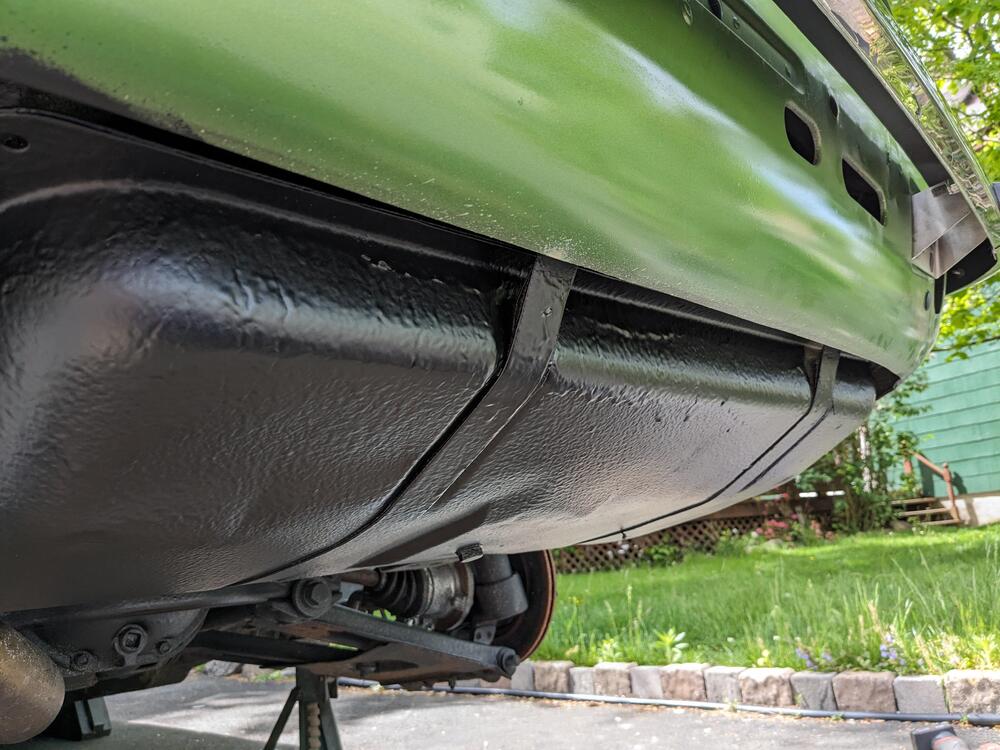
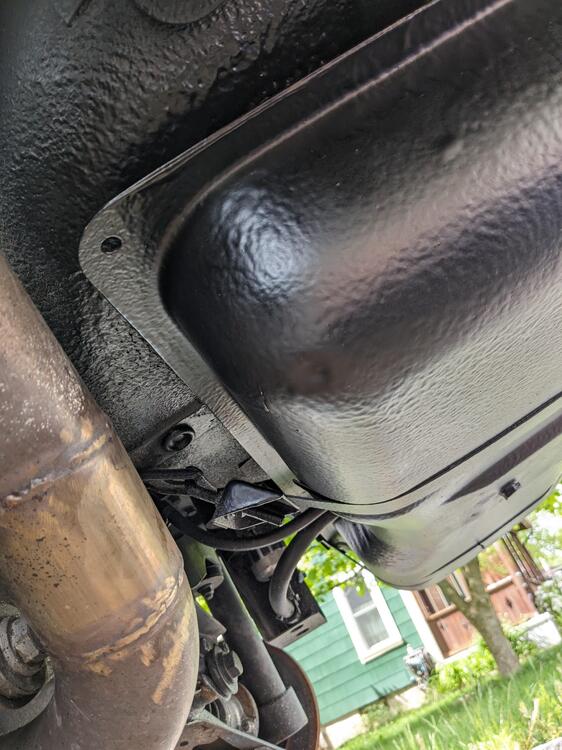
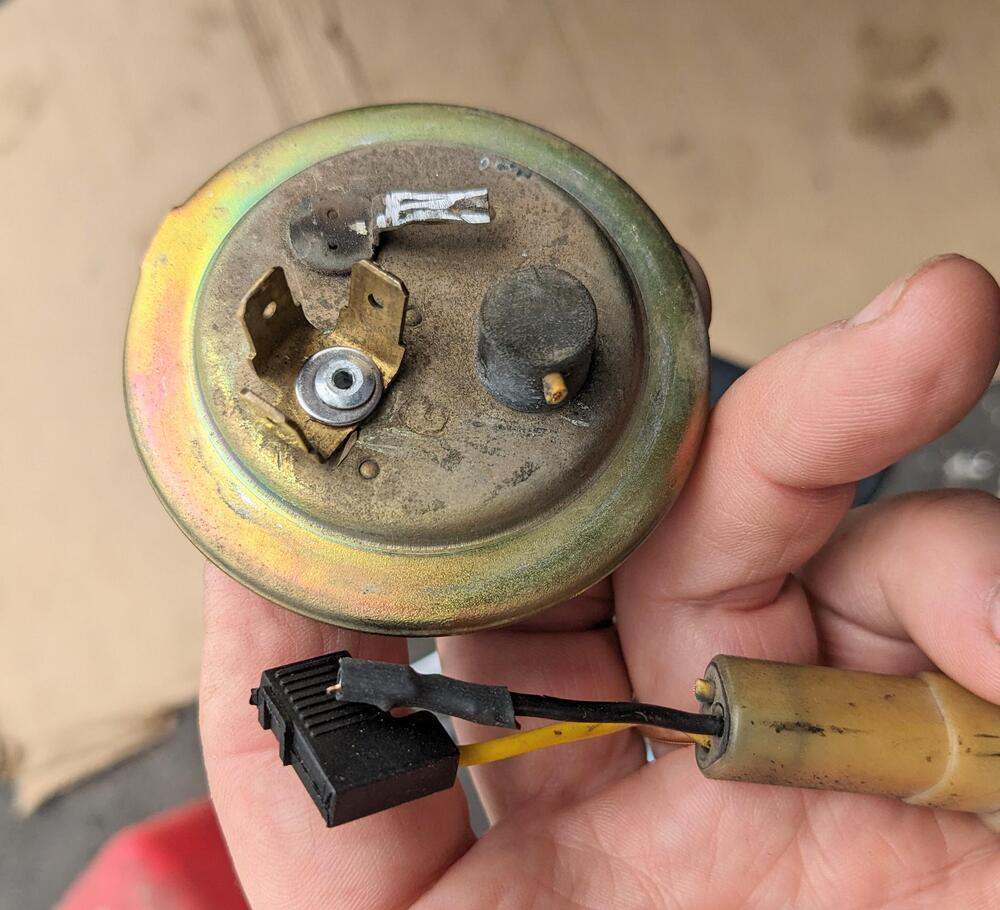
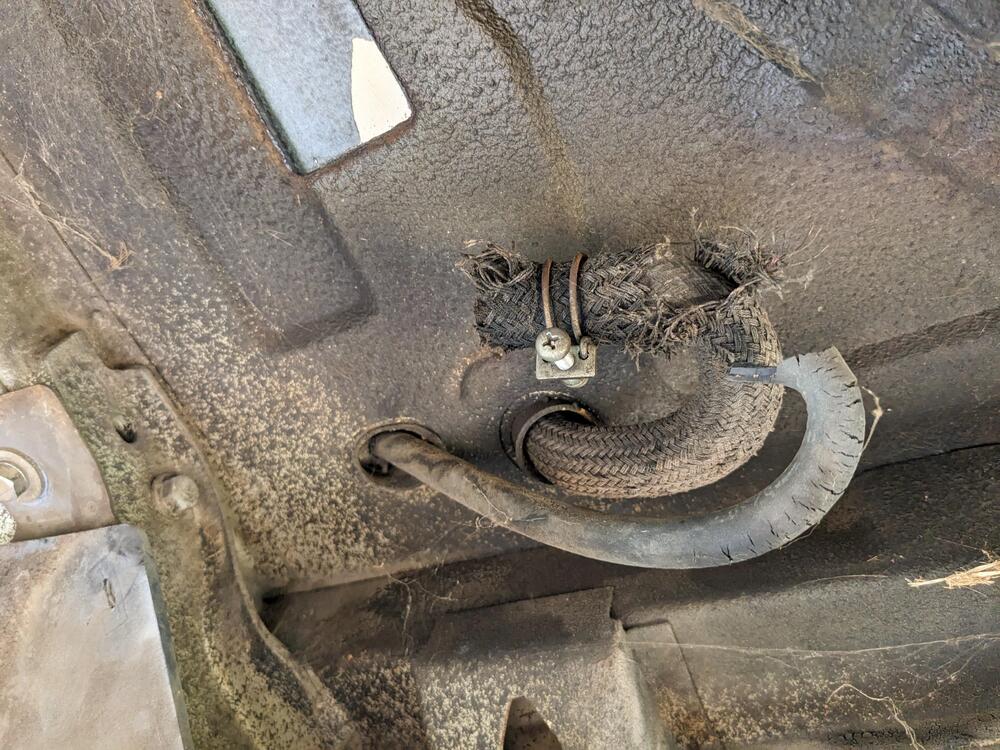
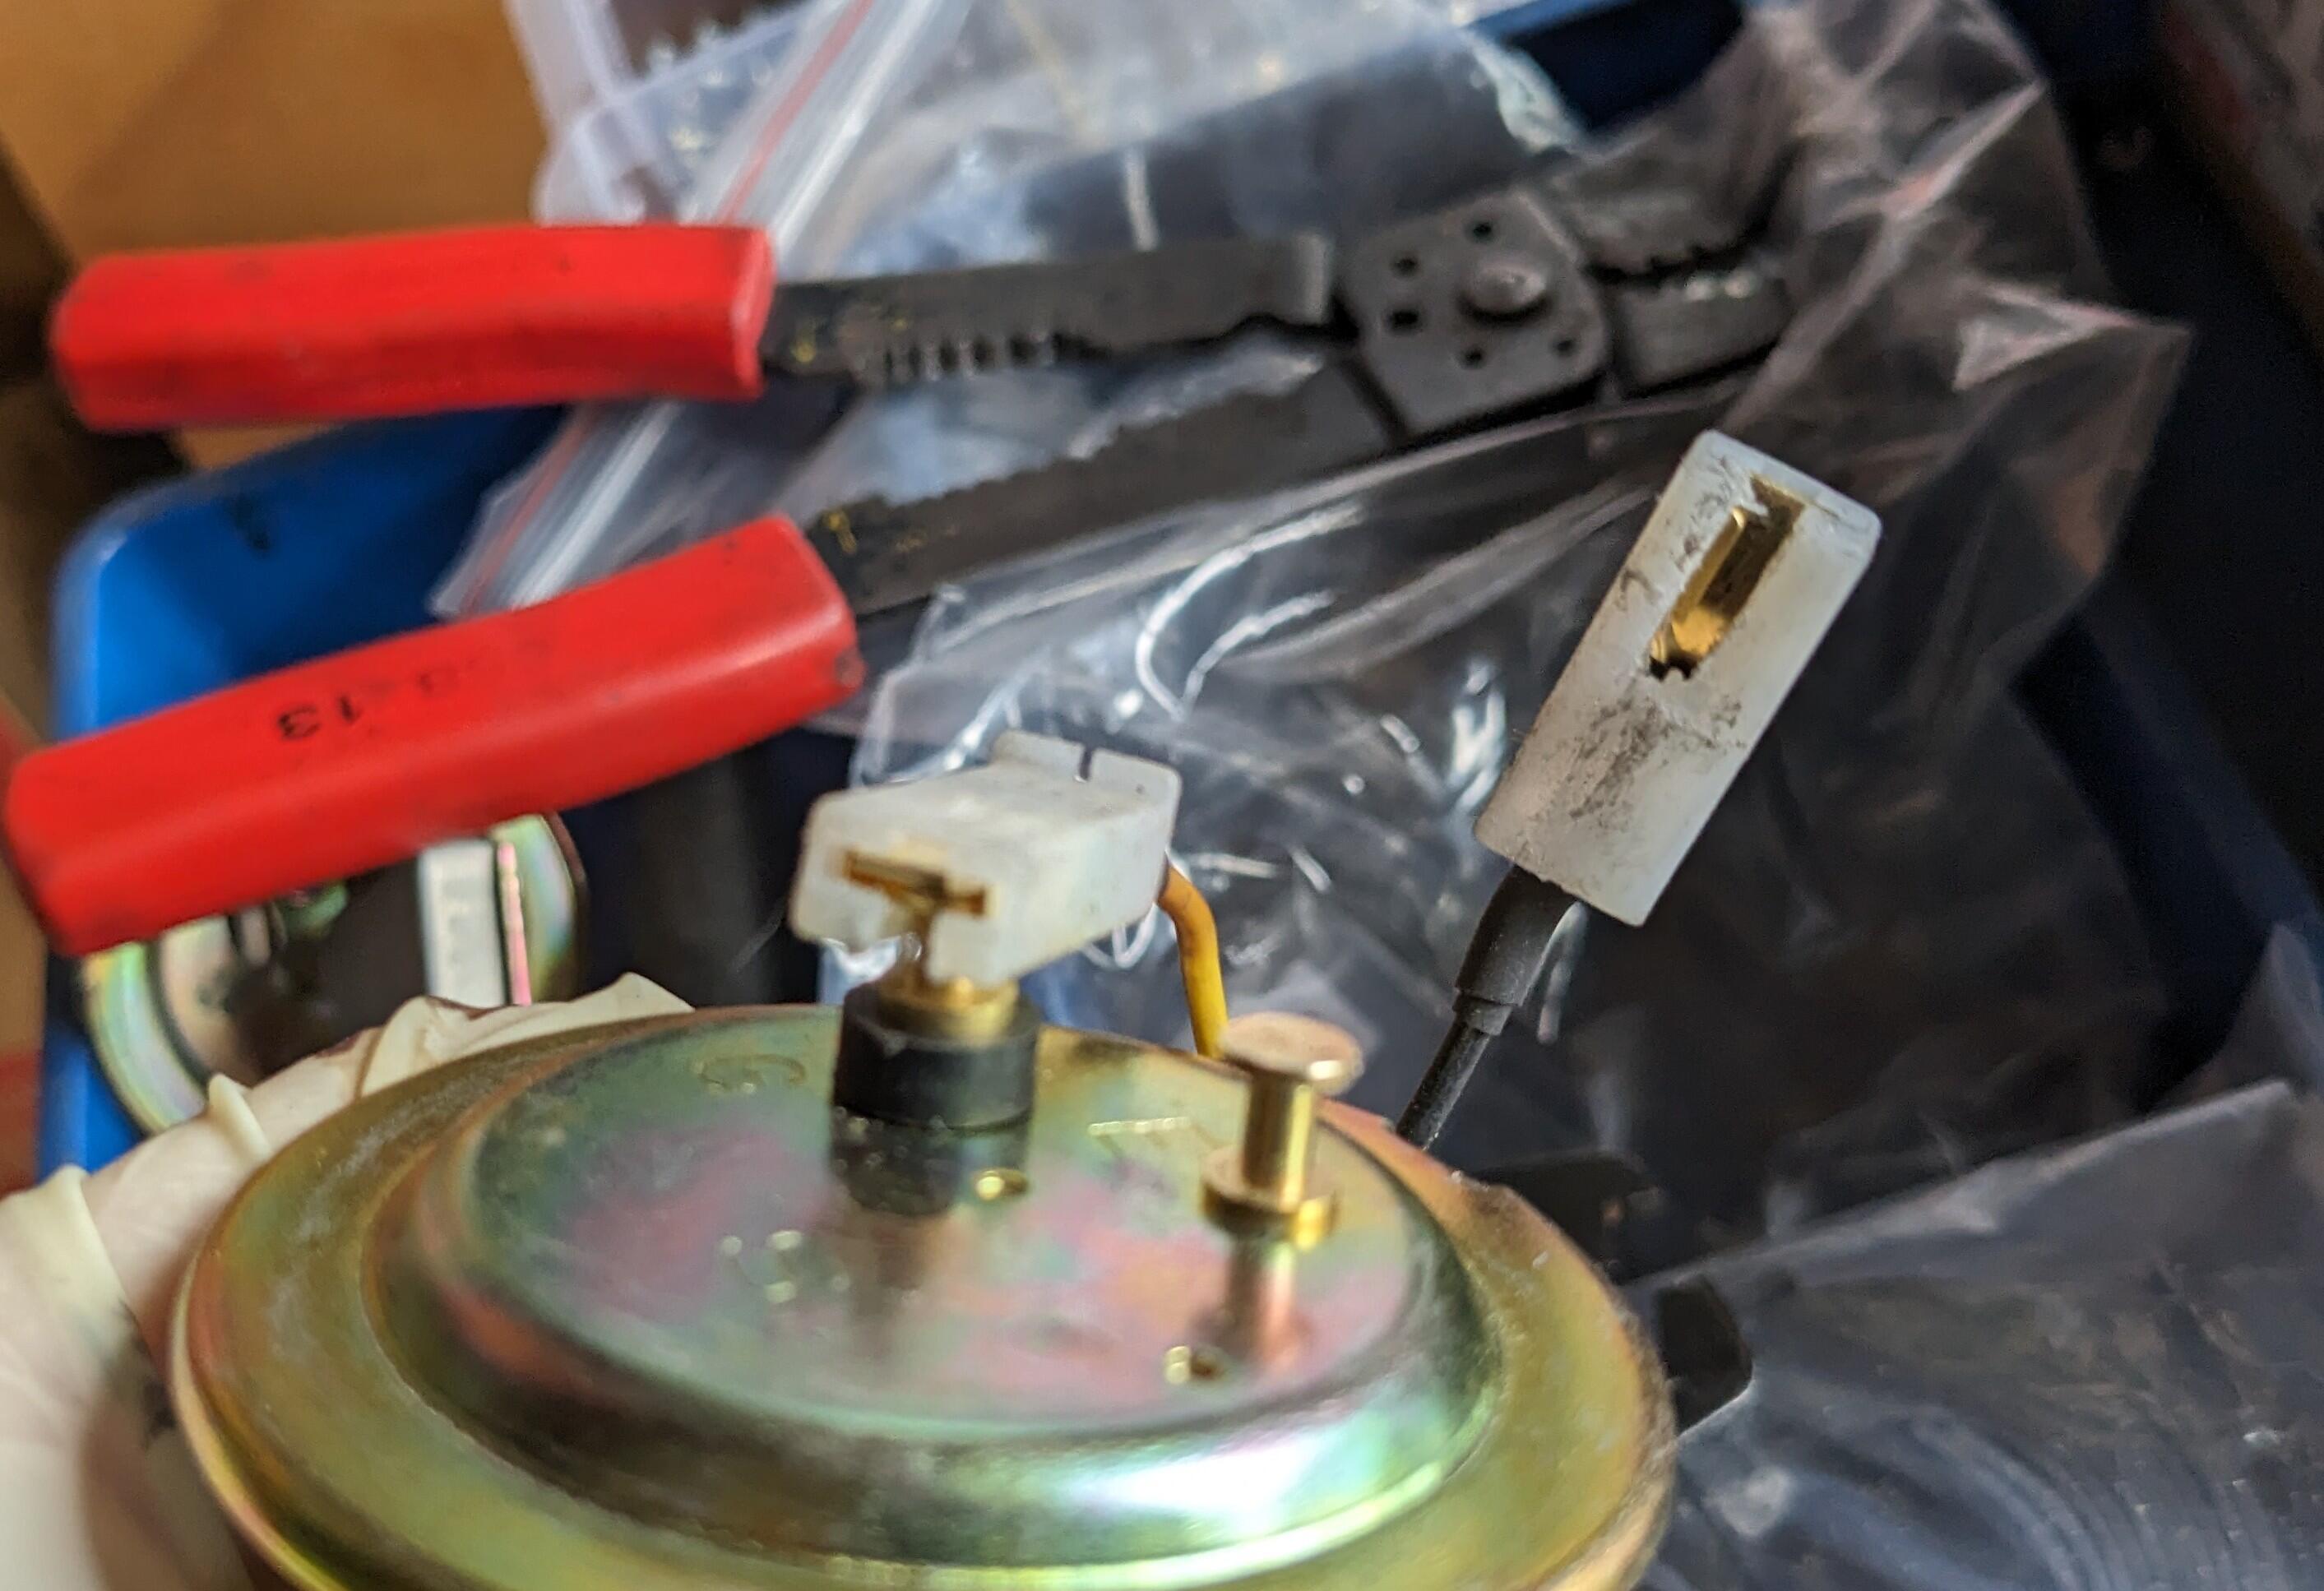
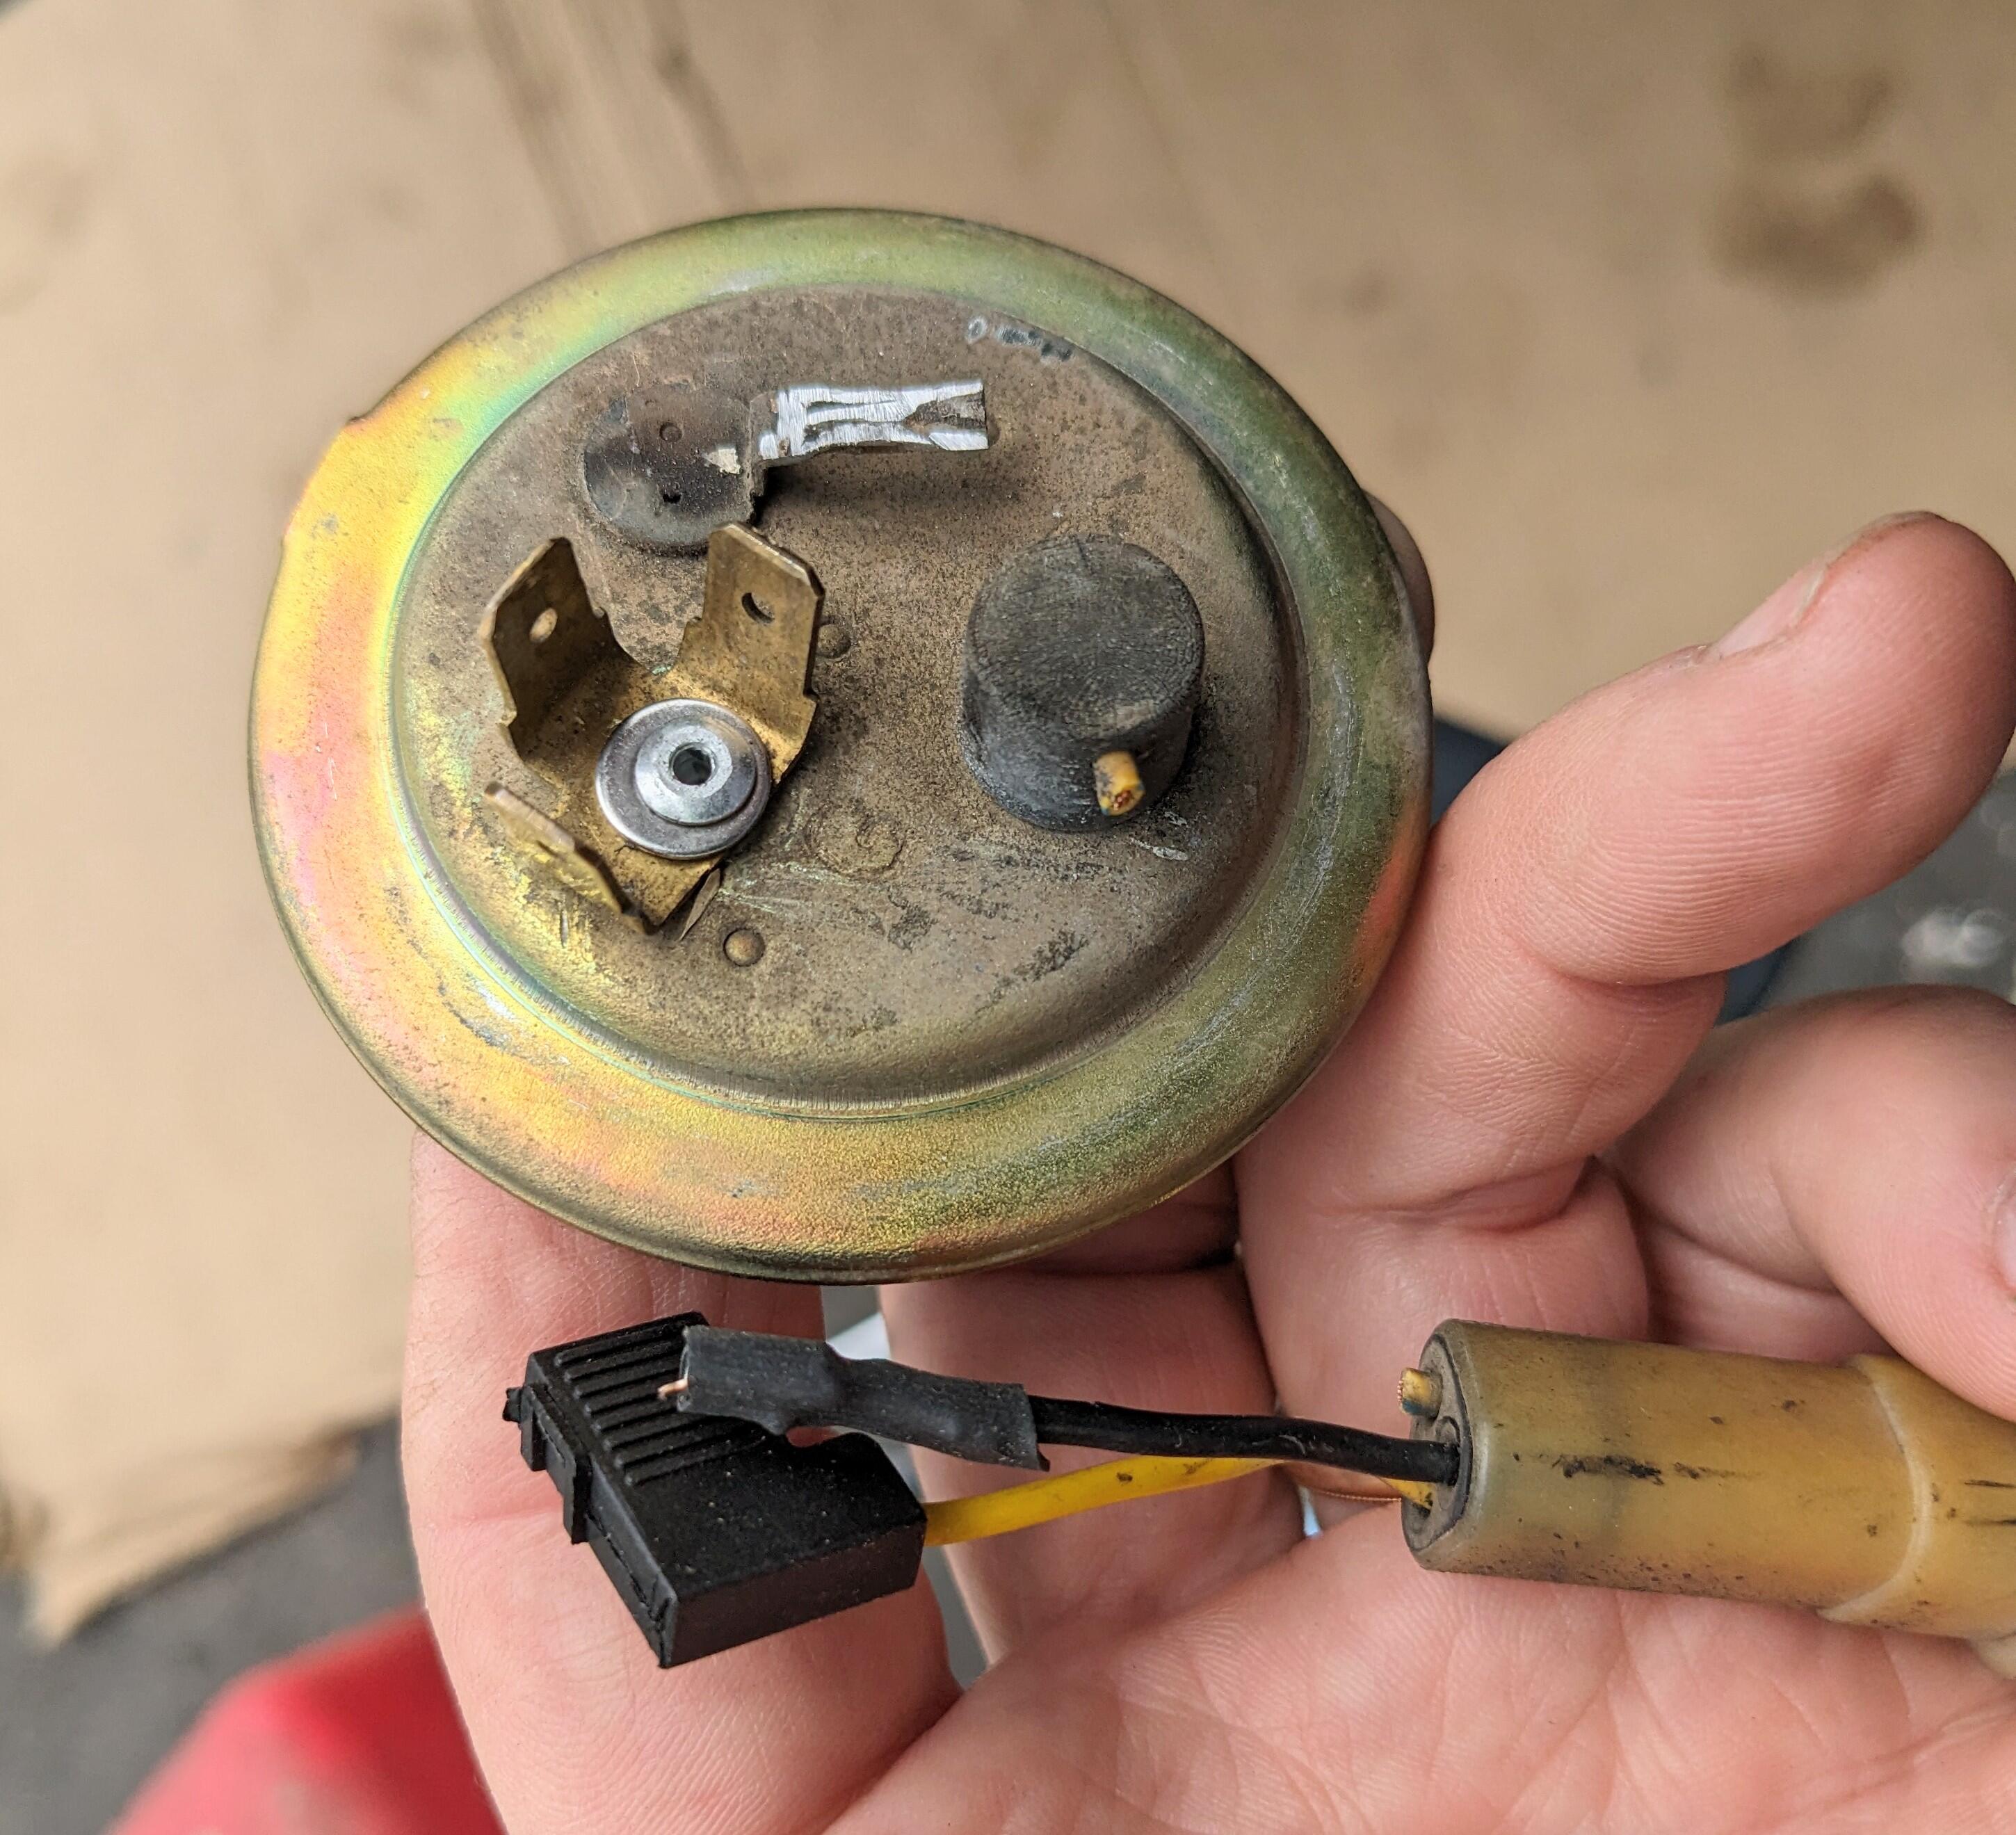
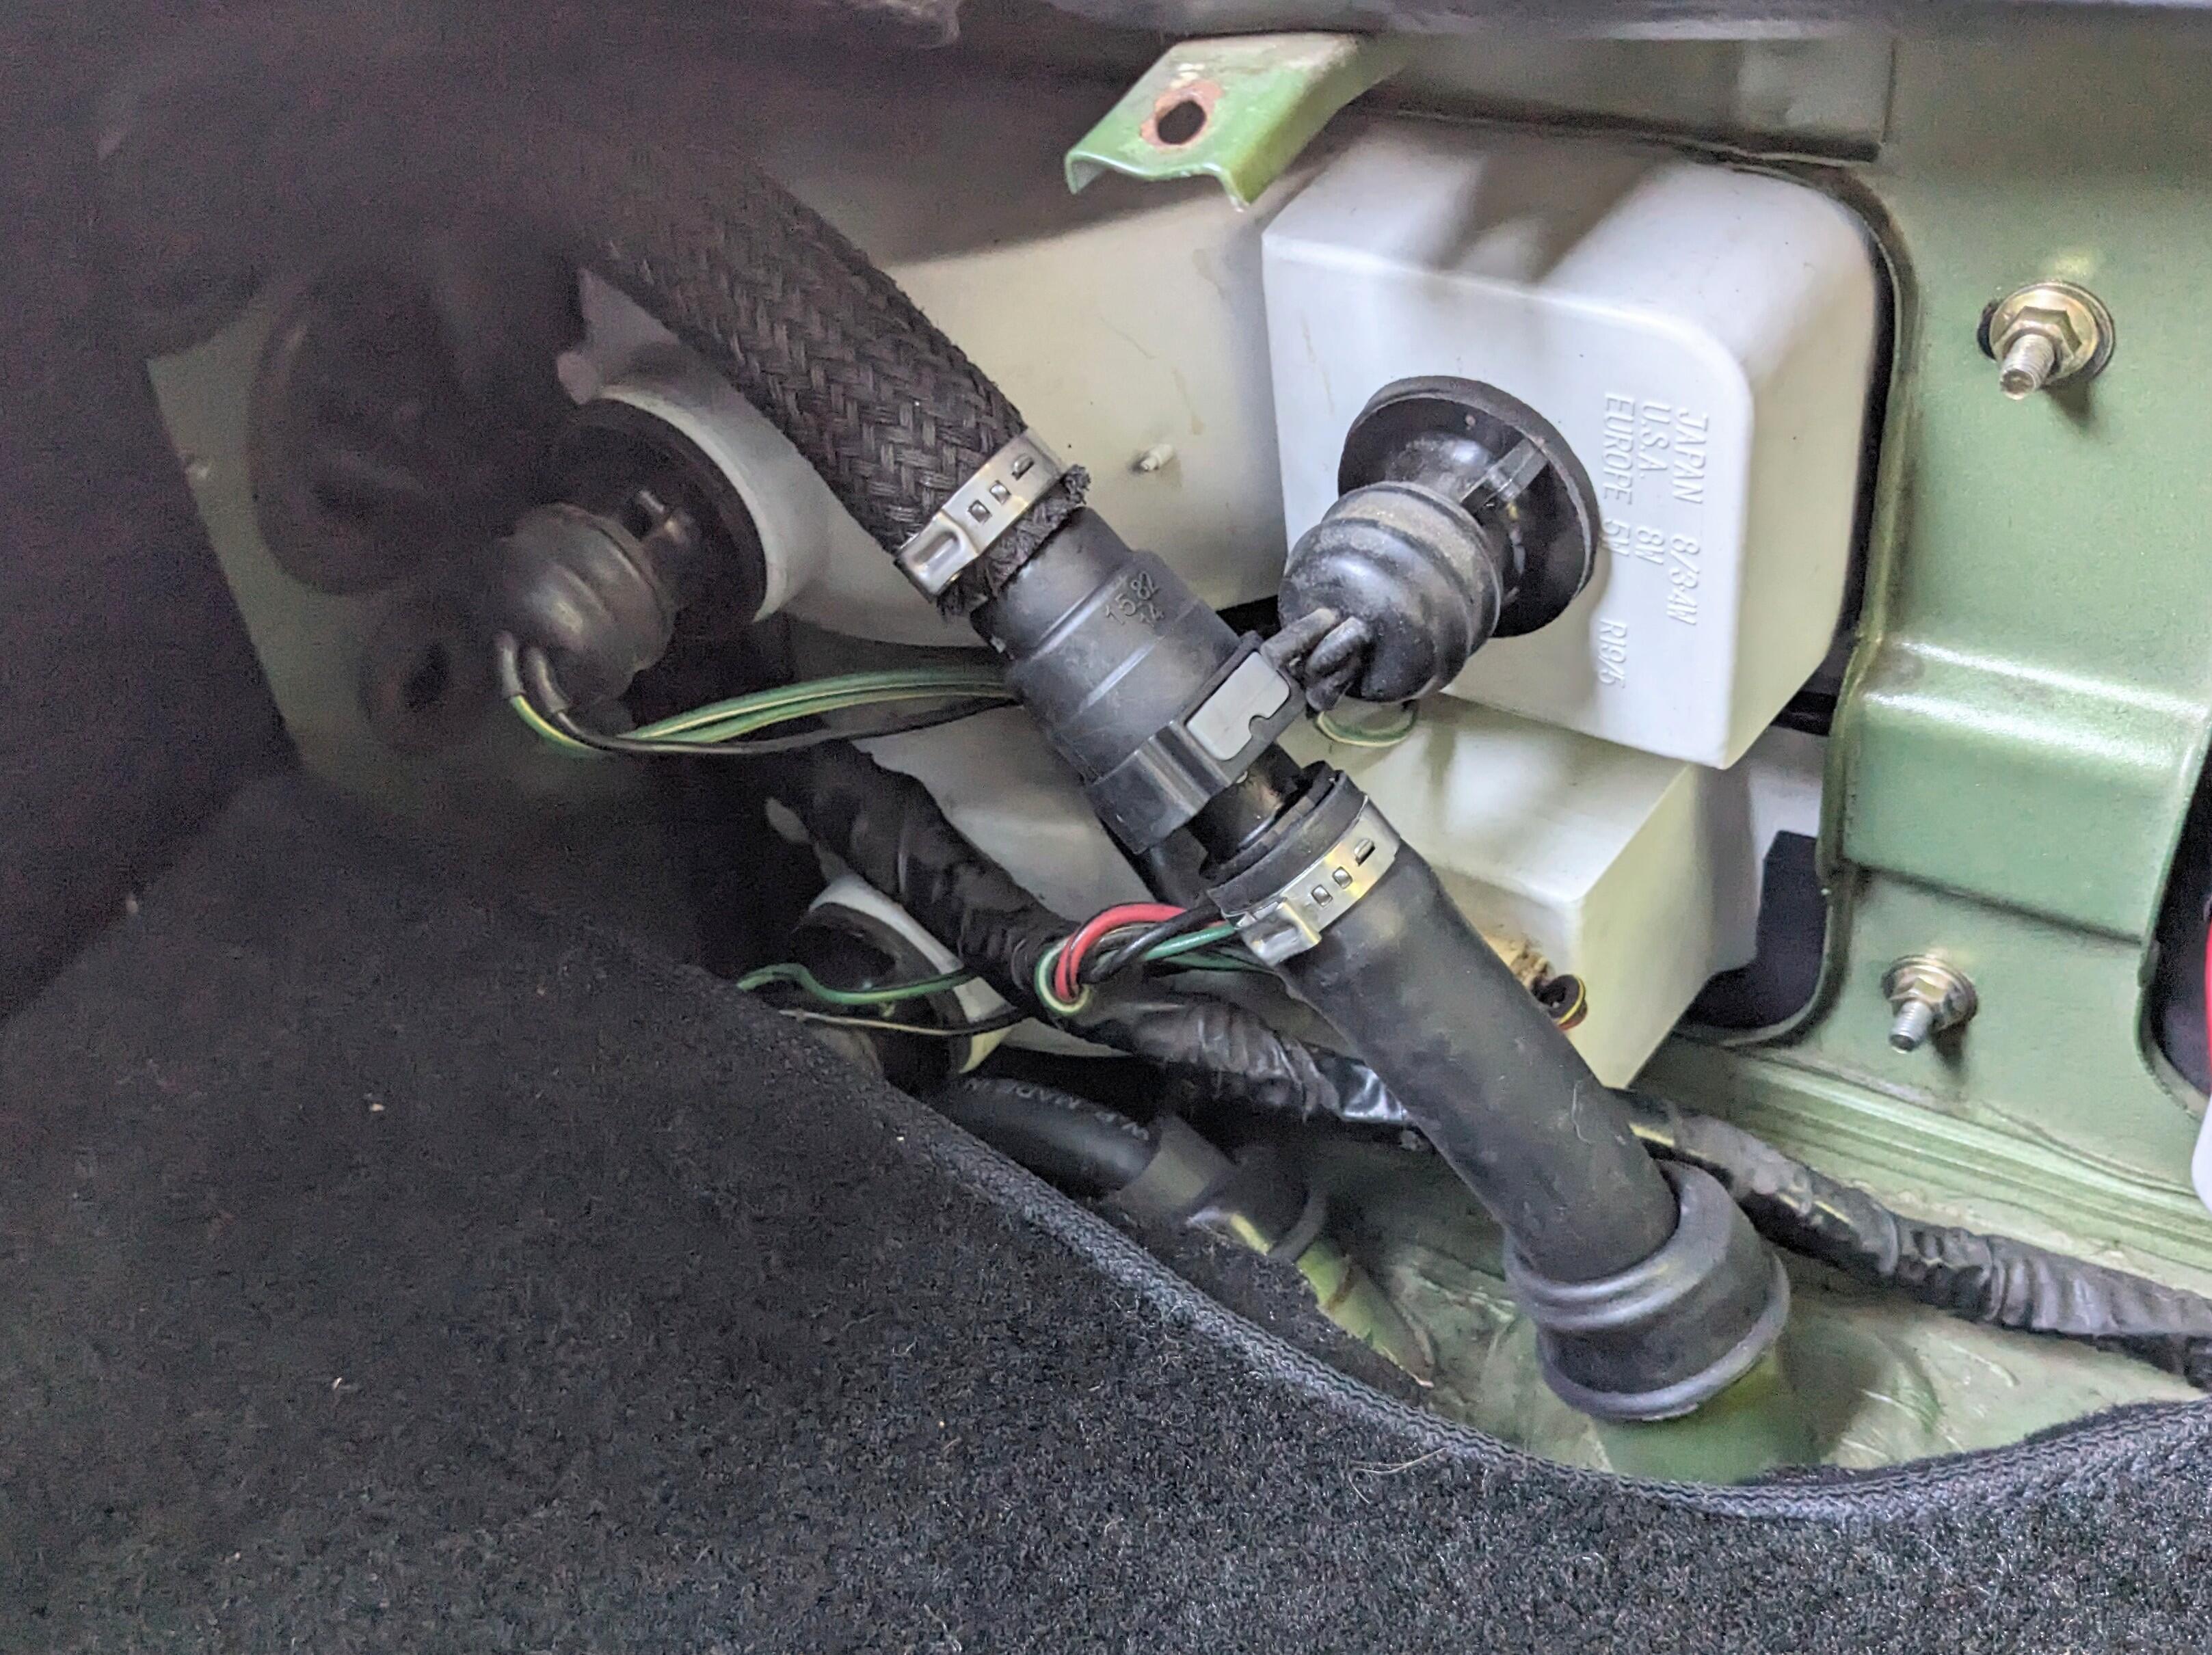
Had to leave work early as when I went to fill the Z tank, gas started pouring out past the sender oring 😭 I assumed I had not seated it correctly, which seemed hard to fathom, but it must have rolled when I was tightening the lock plate. I got home after losing prolly 3 gallons or more - the needle had dropped from around 2/3 to under half after the 20 min drive. I was praying I didn't pass anyone smoking with an open window - I'm pretty sure there was a fuel mist in my wake. I drained about 4 gallons to get the level below the sender. Couldn't see anything wrong with the o- ring, but I reinstalled with the original as it appeared & felt to be a thicker wall. Adapted the harness Put the gas back in, and the big leak was gone, however the new sender (off AliExpress) was leaking around the ground pin. Now I was wishing I hadn't mutilated the original sender when I cut the wires off. When I did that I yanked on the gauge terminal and it pulled out of the sender. So now I had to fix the original sender just so I could put it back in until I get a new replacement quality unit. I riveted a Volvo coil terminal connector using the original nylon spacer and the inner seal seat for the gauge terminal. Installed, no more leaks That done, I wanted to take care of the appearance at the tank and the rear valance as they both looked kind of s*****, and I'm going to the Carlisle Import Show in the AM . So I sprayed the tank with 3M chip protection, then after an hour and a half, the 3M undercoat. Metal splash guard sprayed separately, and installed after I took this pic.
I was - last year I took the Fiat, the year before my Volvo pickup truck. I usually rotate vehicles depending on what work is going on with them. Video someone took of it - I usually park with the Volvos I'll be parked with the Volvos again, don't know any of the Datsun ppl that were there last year.
I go every year - maybe next year then. I'd love to meet you, and look over your Z & get some other ideas from the later releases 😁
Had to leave work early as when I went to fill the Z tank, gas started pouring out past the sender oring 😭 I assumed I had not seated it correctly, which seemed hard to fathom, but it must have rolled when I was tightening the lock plate. I got home after losing prolly 3 gallons or more - the needle had dropped from around 2/3 to under half after the 20 min drive. I was praying I didn't pass anyone smoking with an open window - I'm pretty sure there was a fuel mist in my wake. I drained about 4 gallons to get the level below the sender. Couldn't see anything wrong with the o- ring, but I reinstalled with the original as it appeared & felt to be a thicker wall. Adapted the harness Put the gas back in, and the big leak was gone, however the new sender (off AliExpress) was leaking around the ground pin. Now I was wishing I hadn't mutilated the original sender when I cut the wires off. When I did that I yanked on the gauge terminal and it pulled out of the sender. So now I had to fix the original sender just so I could put it back in until I get a new replacement quality unit. I riveted a Volvo coil terminal connector using the original nylon spacer and the inner seal seat for the gauge terminal. Installed, no more leaks That done, I wanted to take care of the appearance at the tank and the rear valance as they both looked kind of s*****, and I'm going to the Carlisle Import Show in the AM . So I sprayed the tank with 3M chip protection, then after an hour and a half, the 3M undercoat. Metal splash guard sprayed separately, and installed after I took this pic.

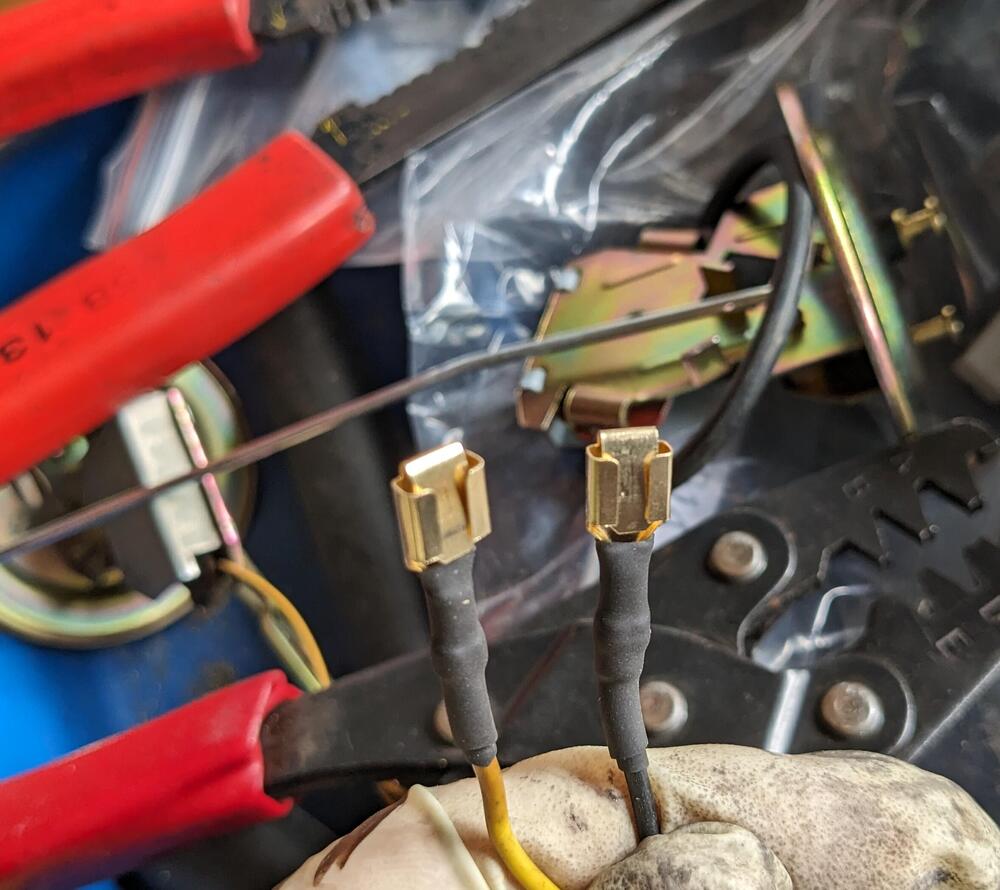
 Thank you - I did a little searching & found that there are vendors selling the spades with slotted boots/covers. Now I know what they came with, I can use the appropriate spade type that has the spring tab inside, I used regular spades, which will lose contact over time .
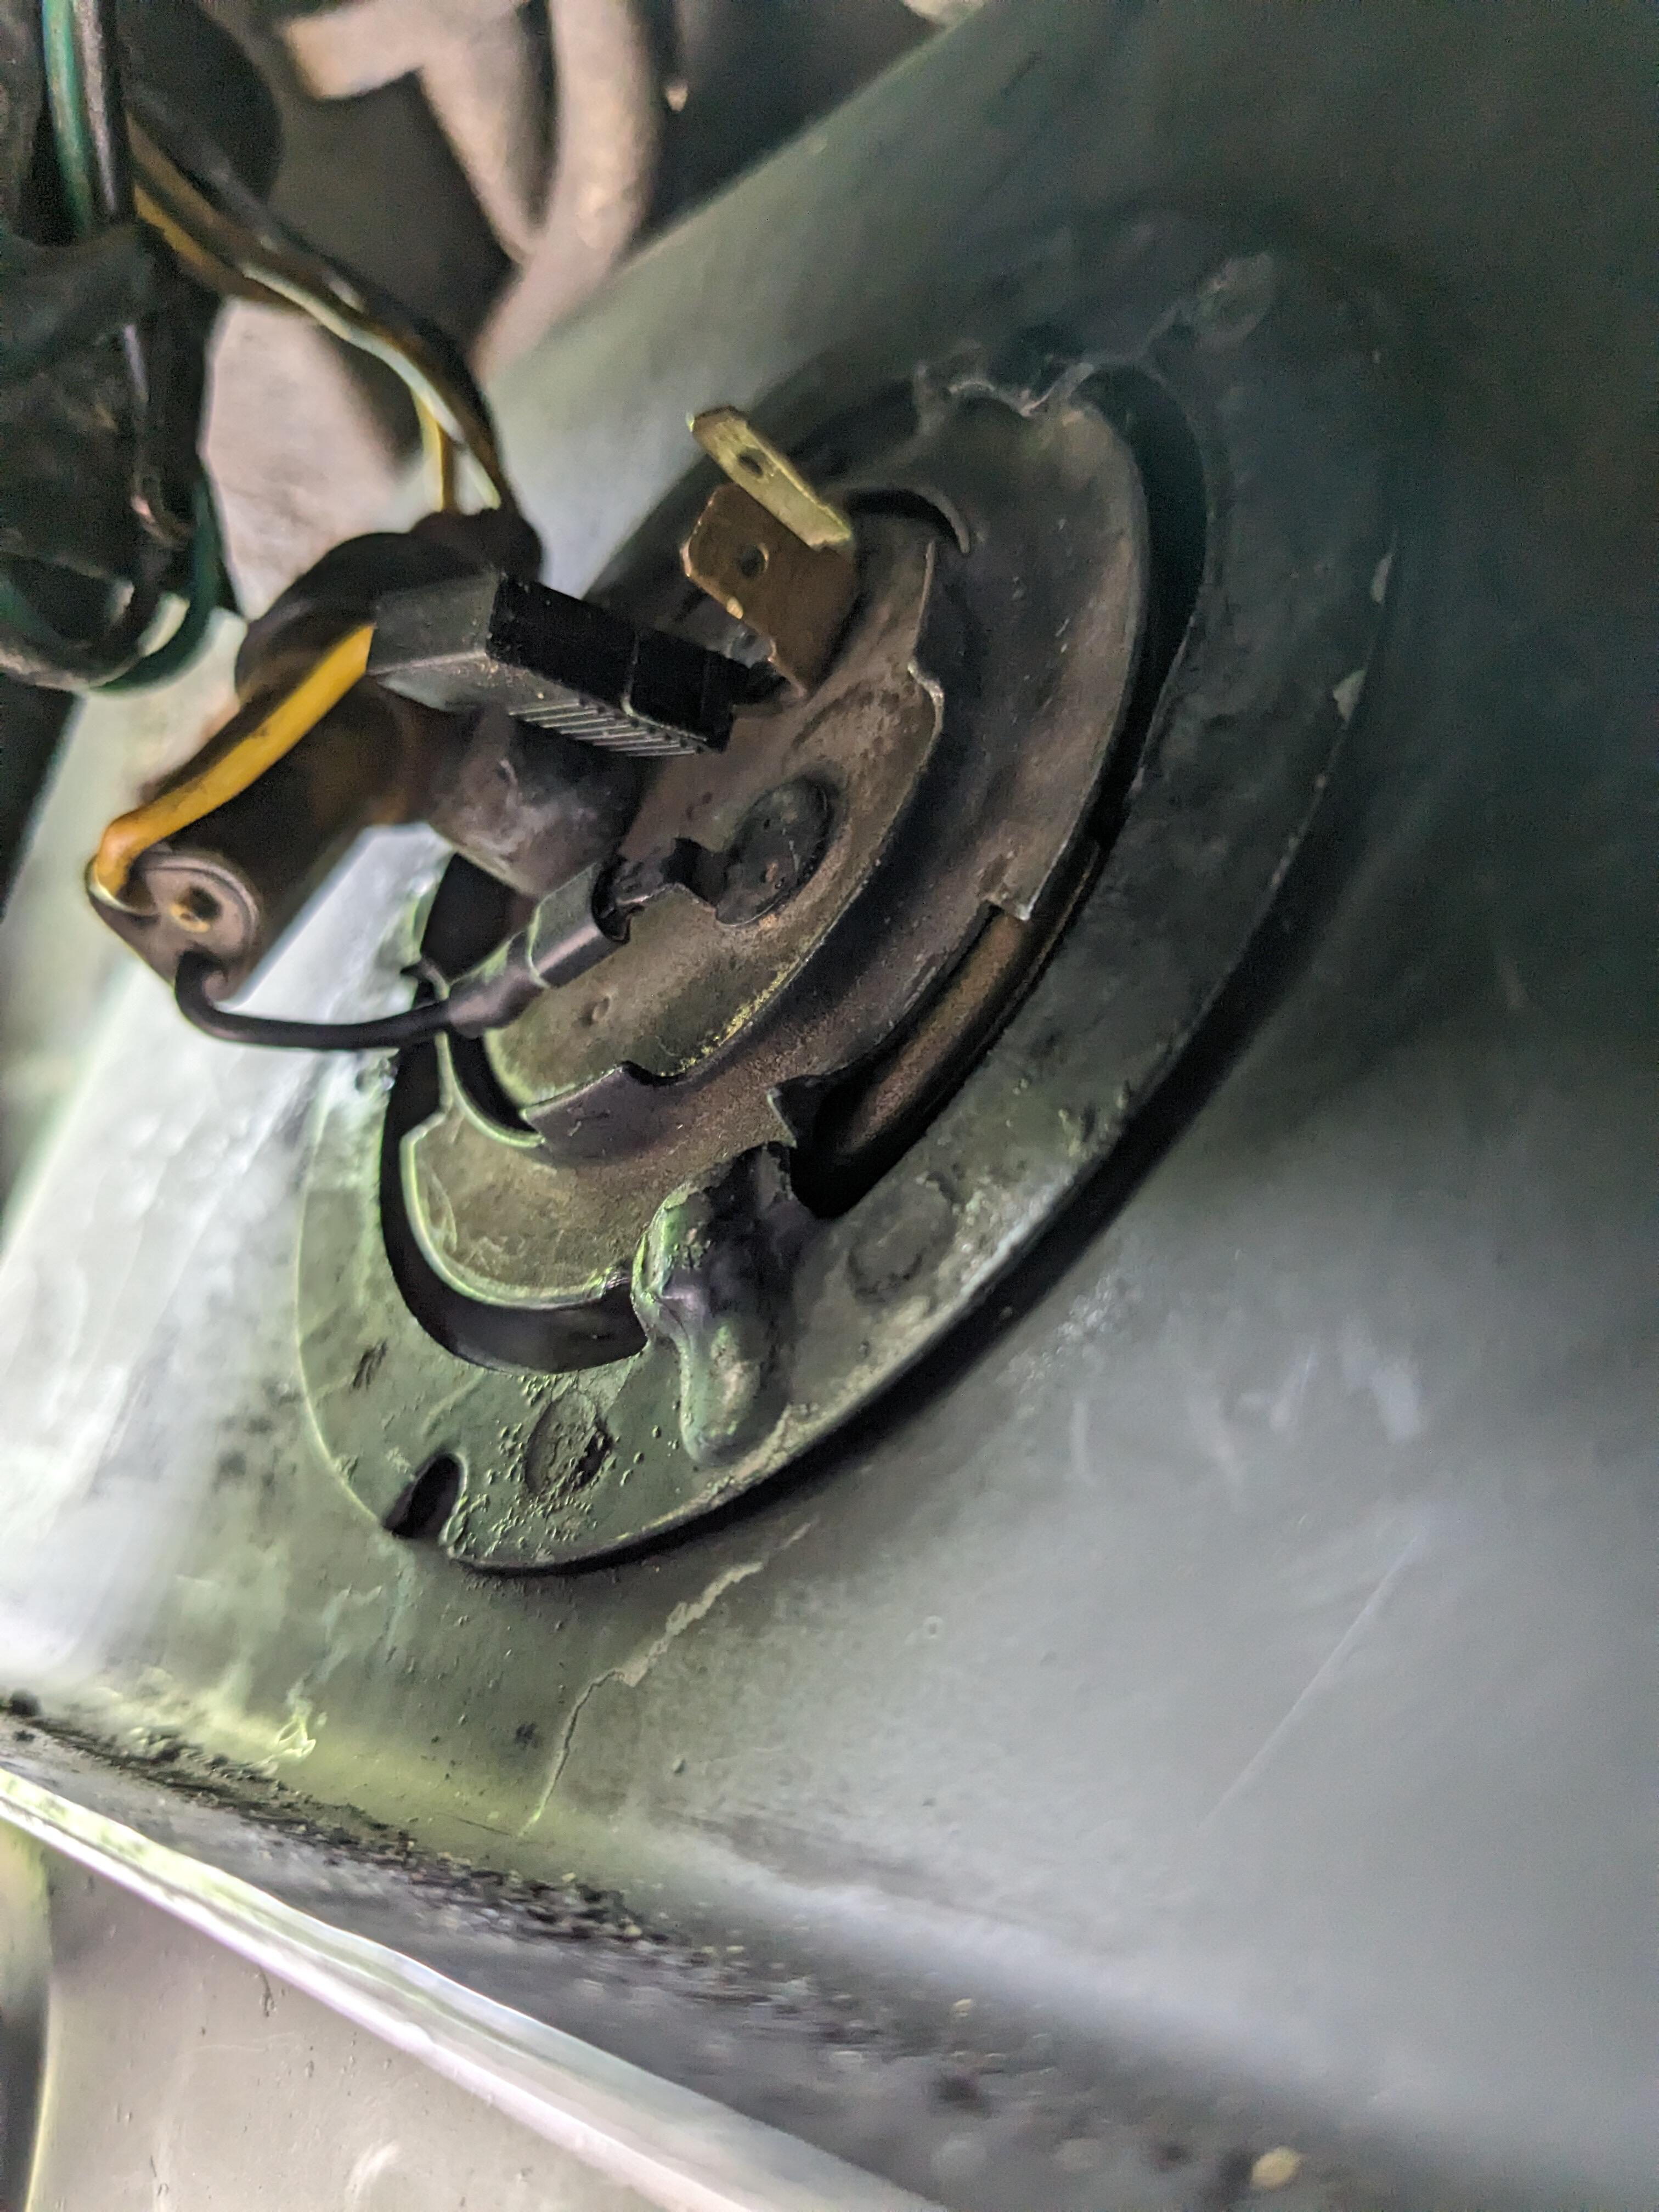
@hotsho111 - I looked back at the earlier pics to see what you used to connect the gauge wires - on mine, I had to cut the connector off the stock sender & add spade connectors as a stop gap. I don't know what the factory terminals are supposed to look like for the earlier replacement sender that has no level warning sensor.
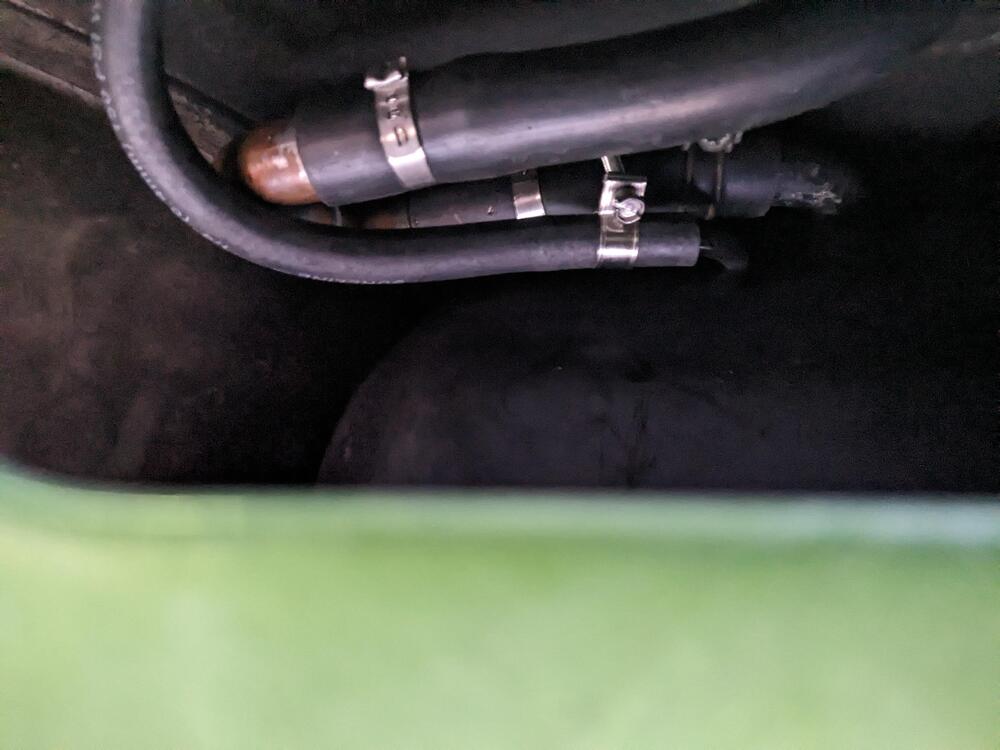
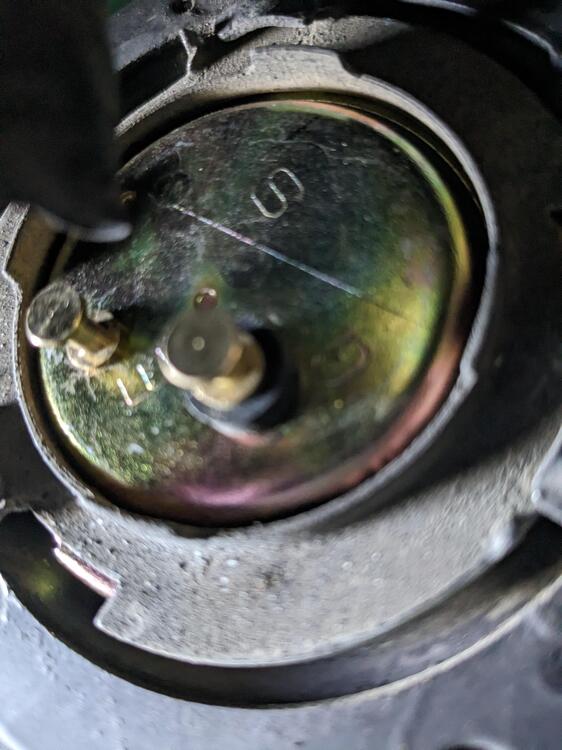
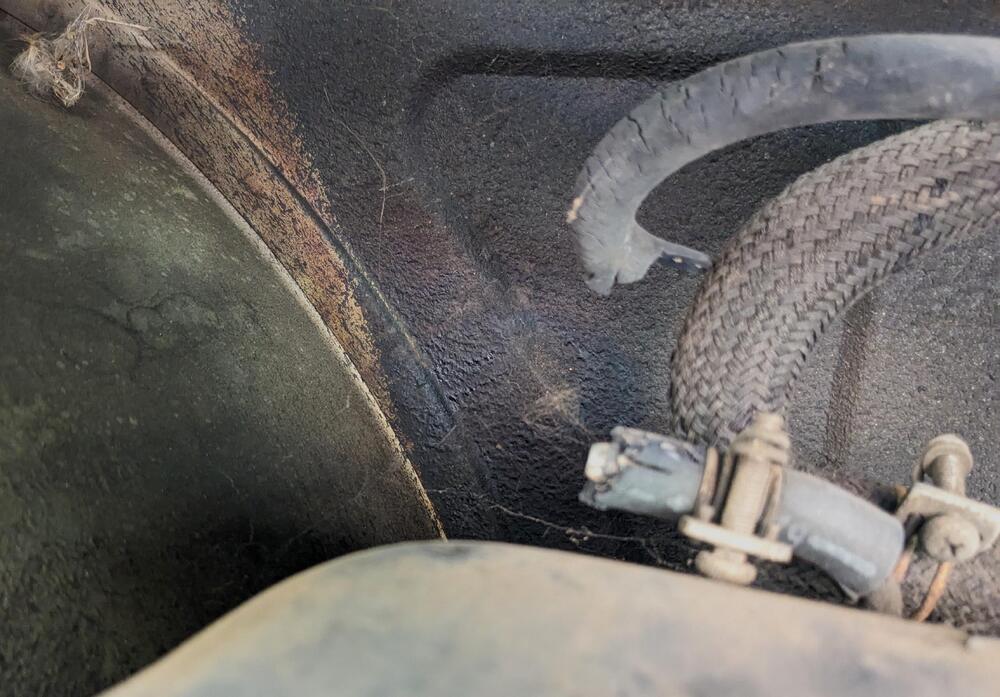
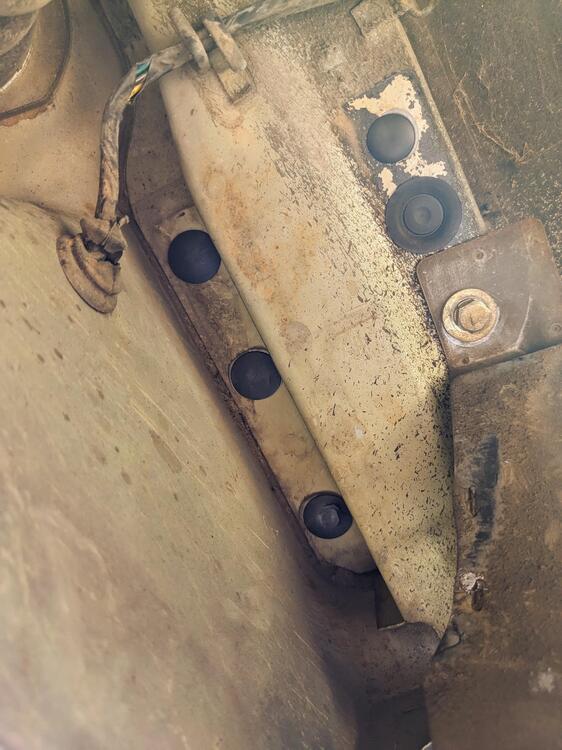
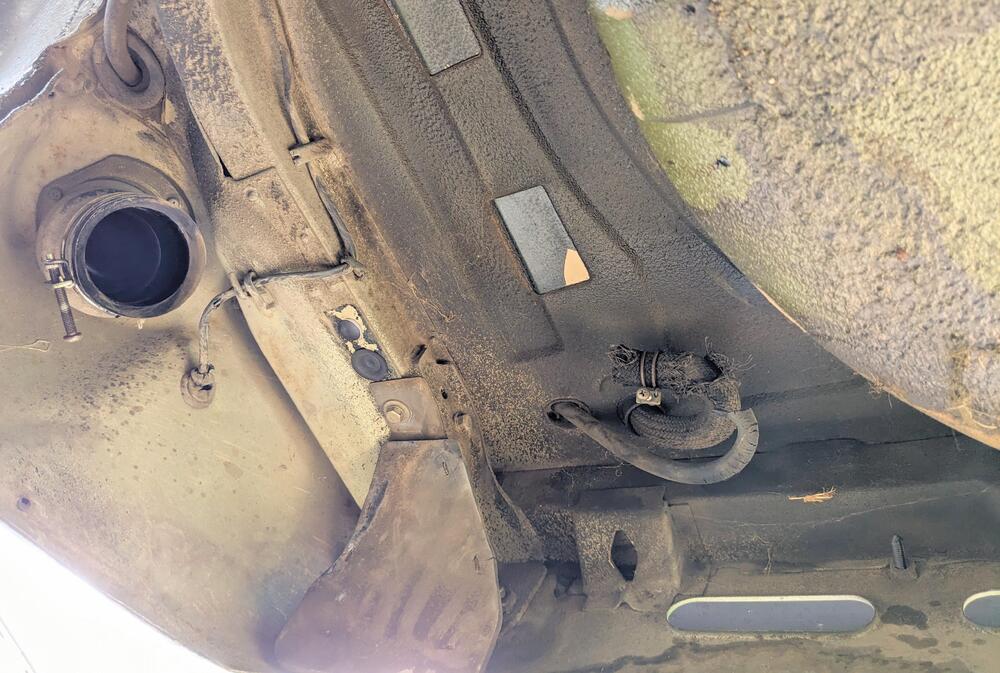
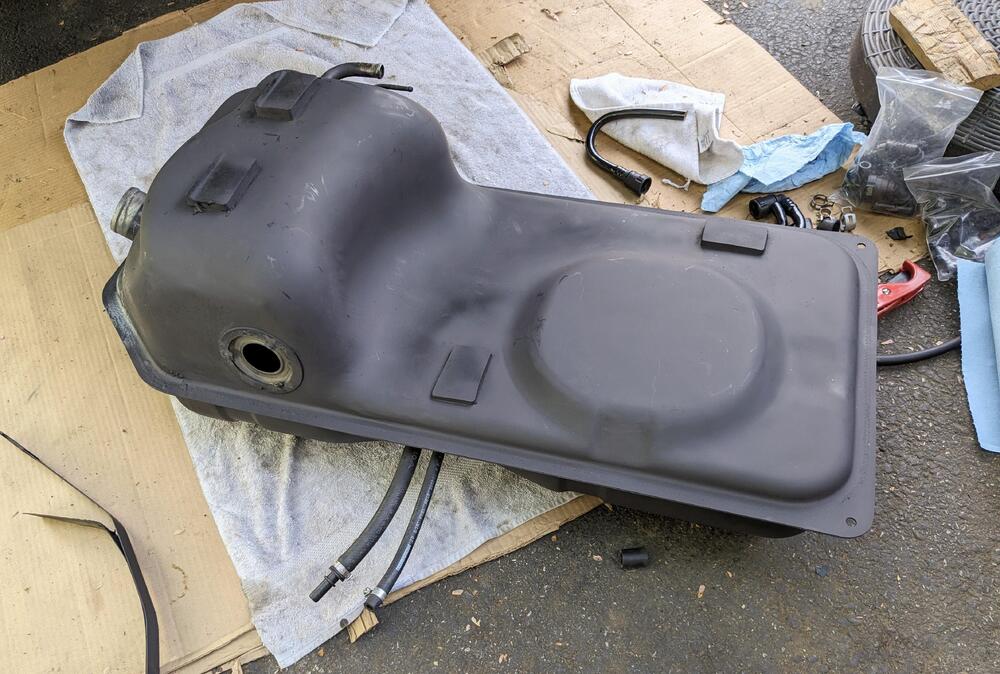
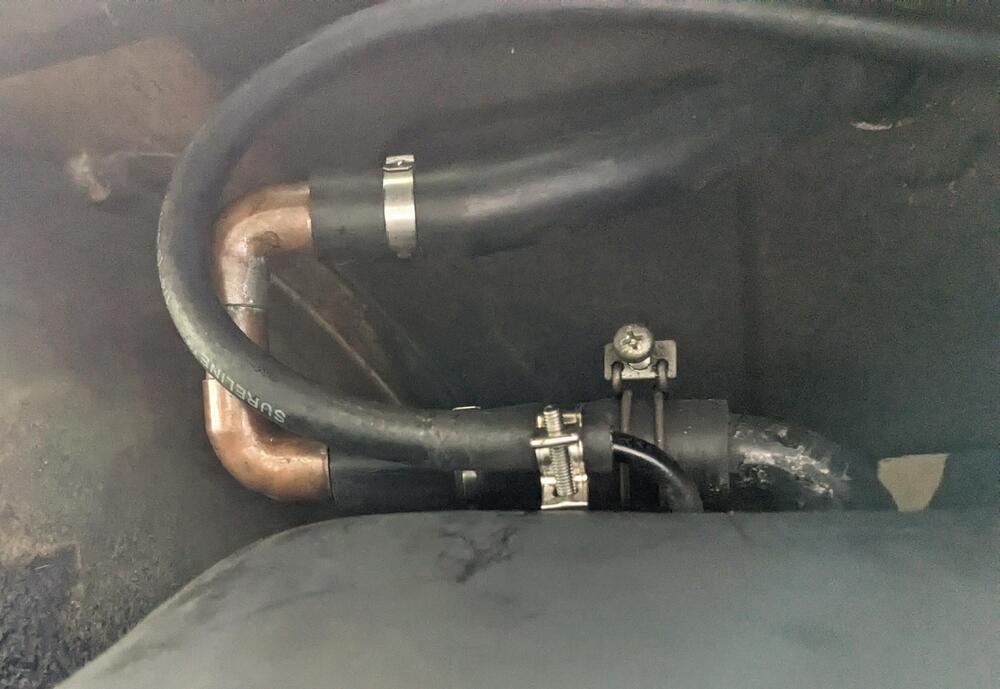
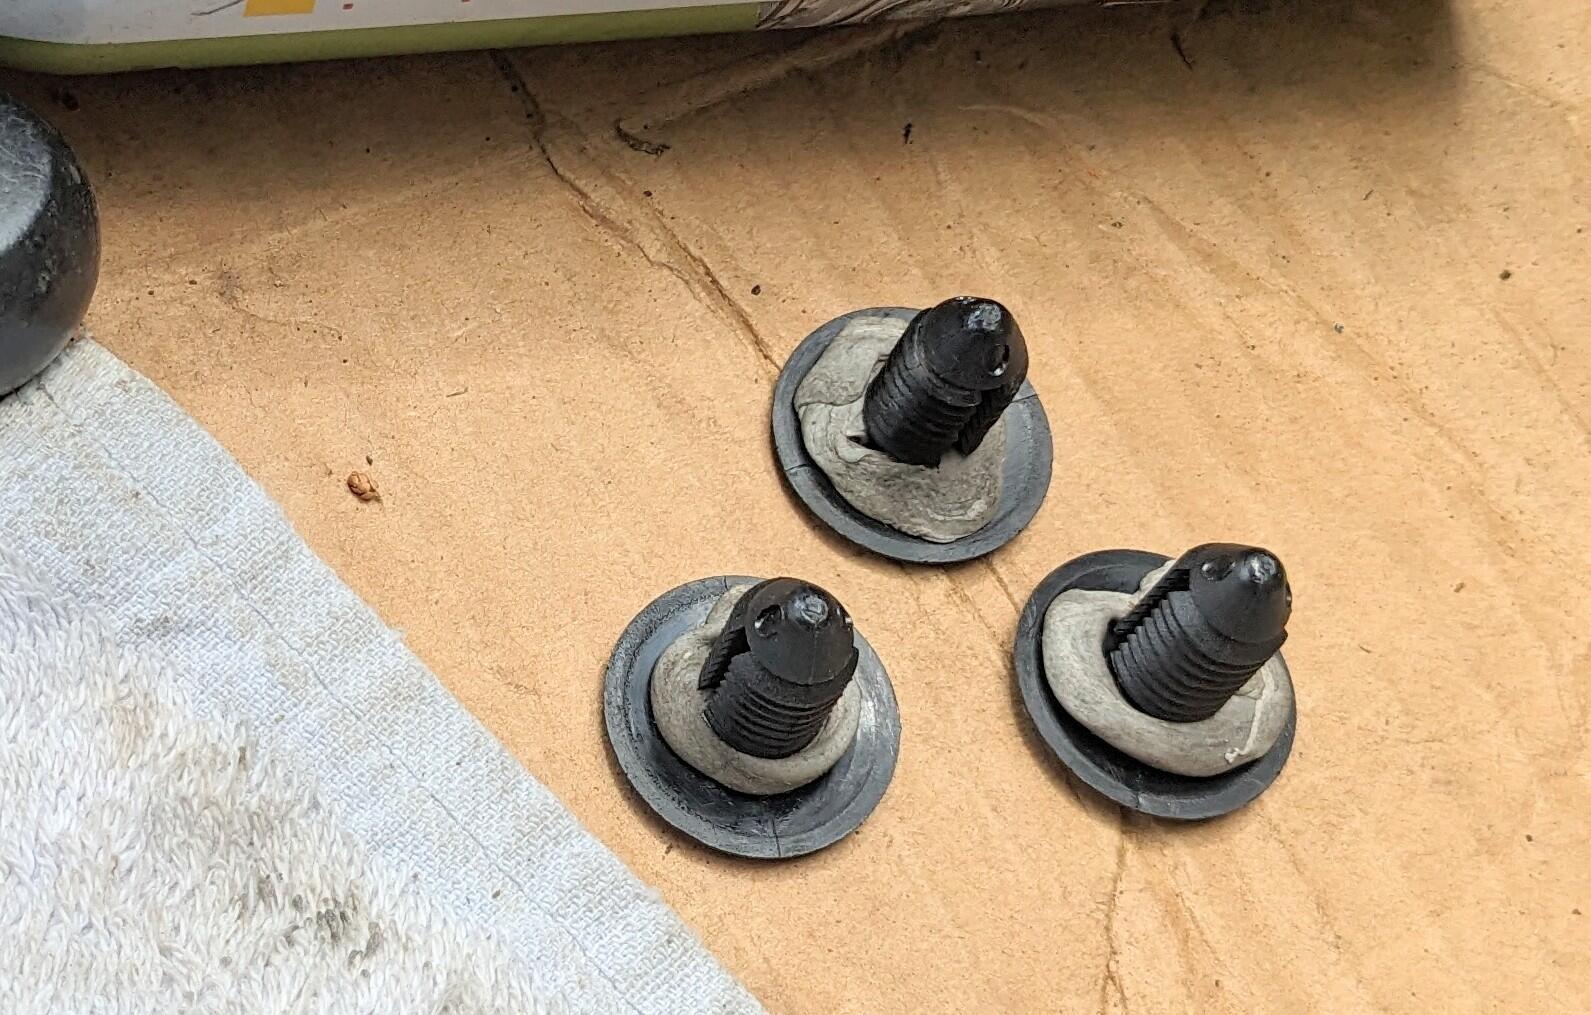
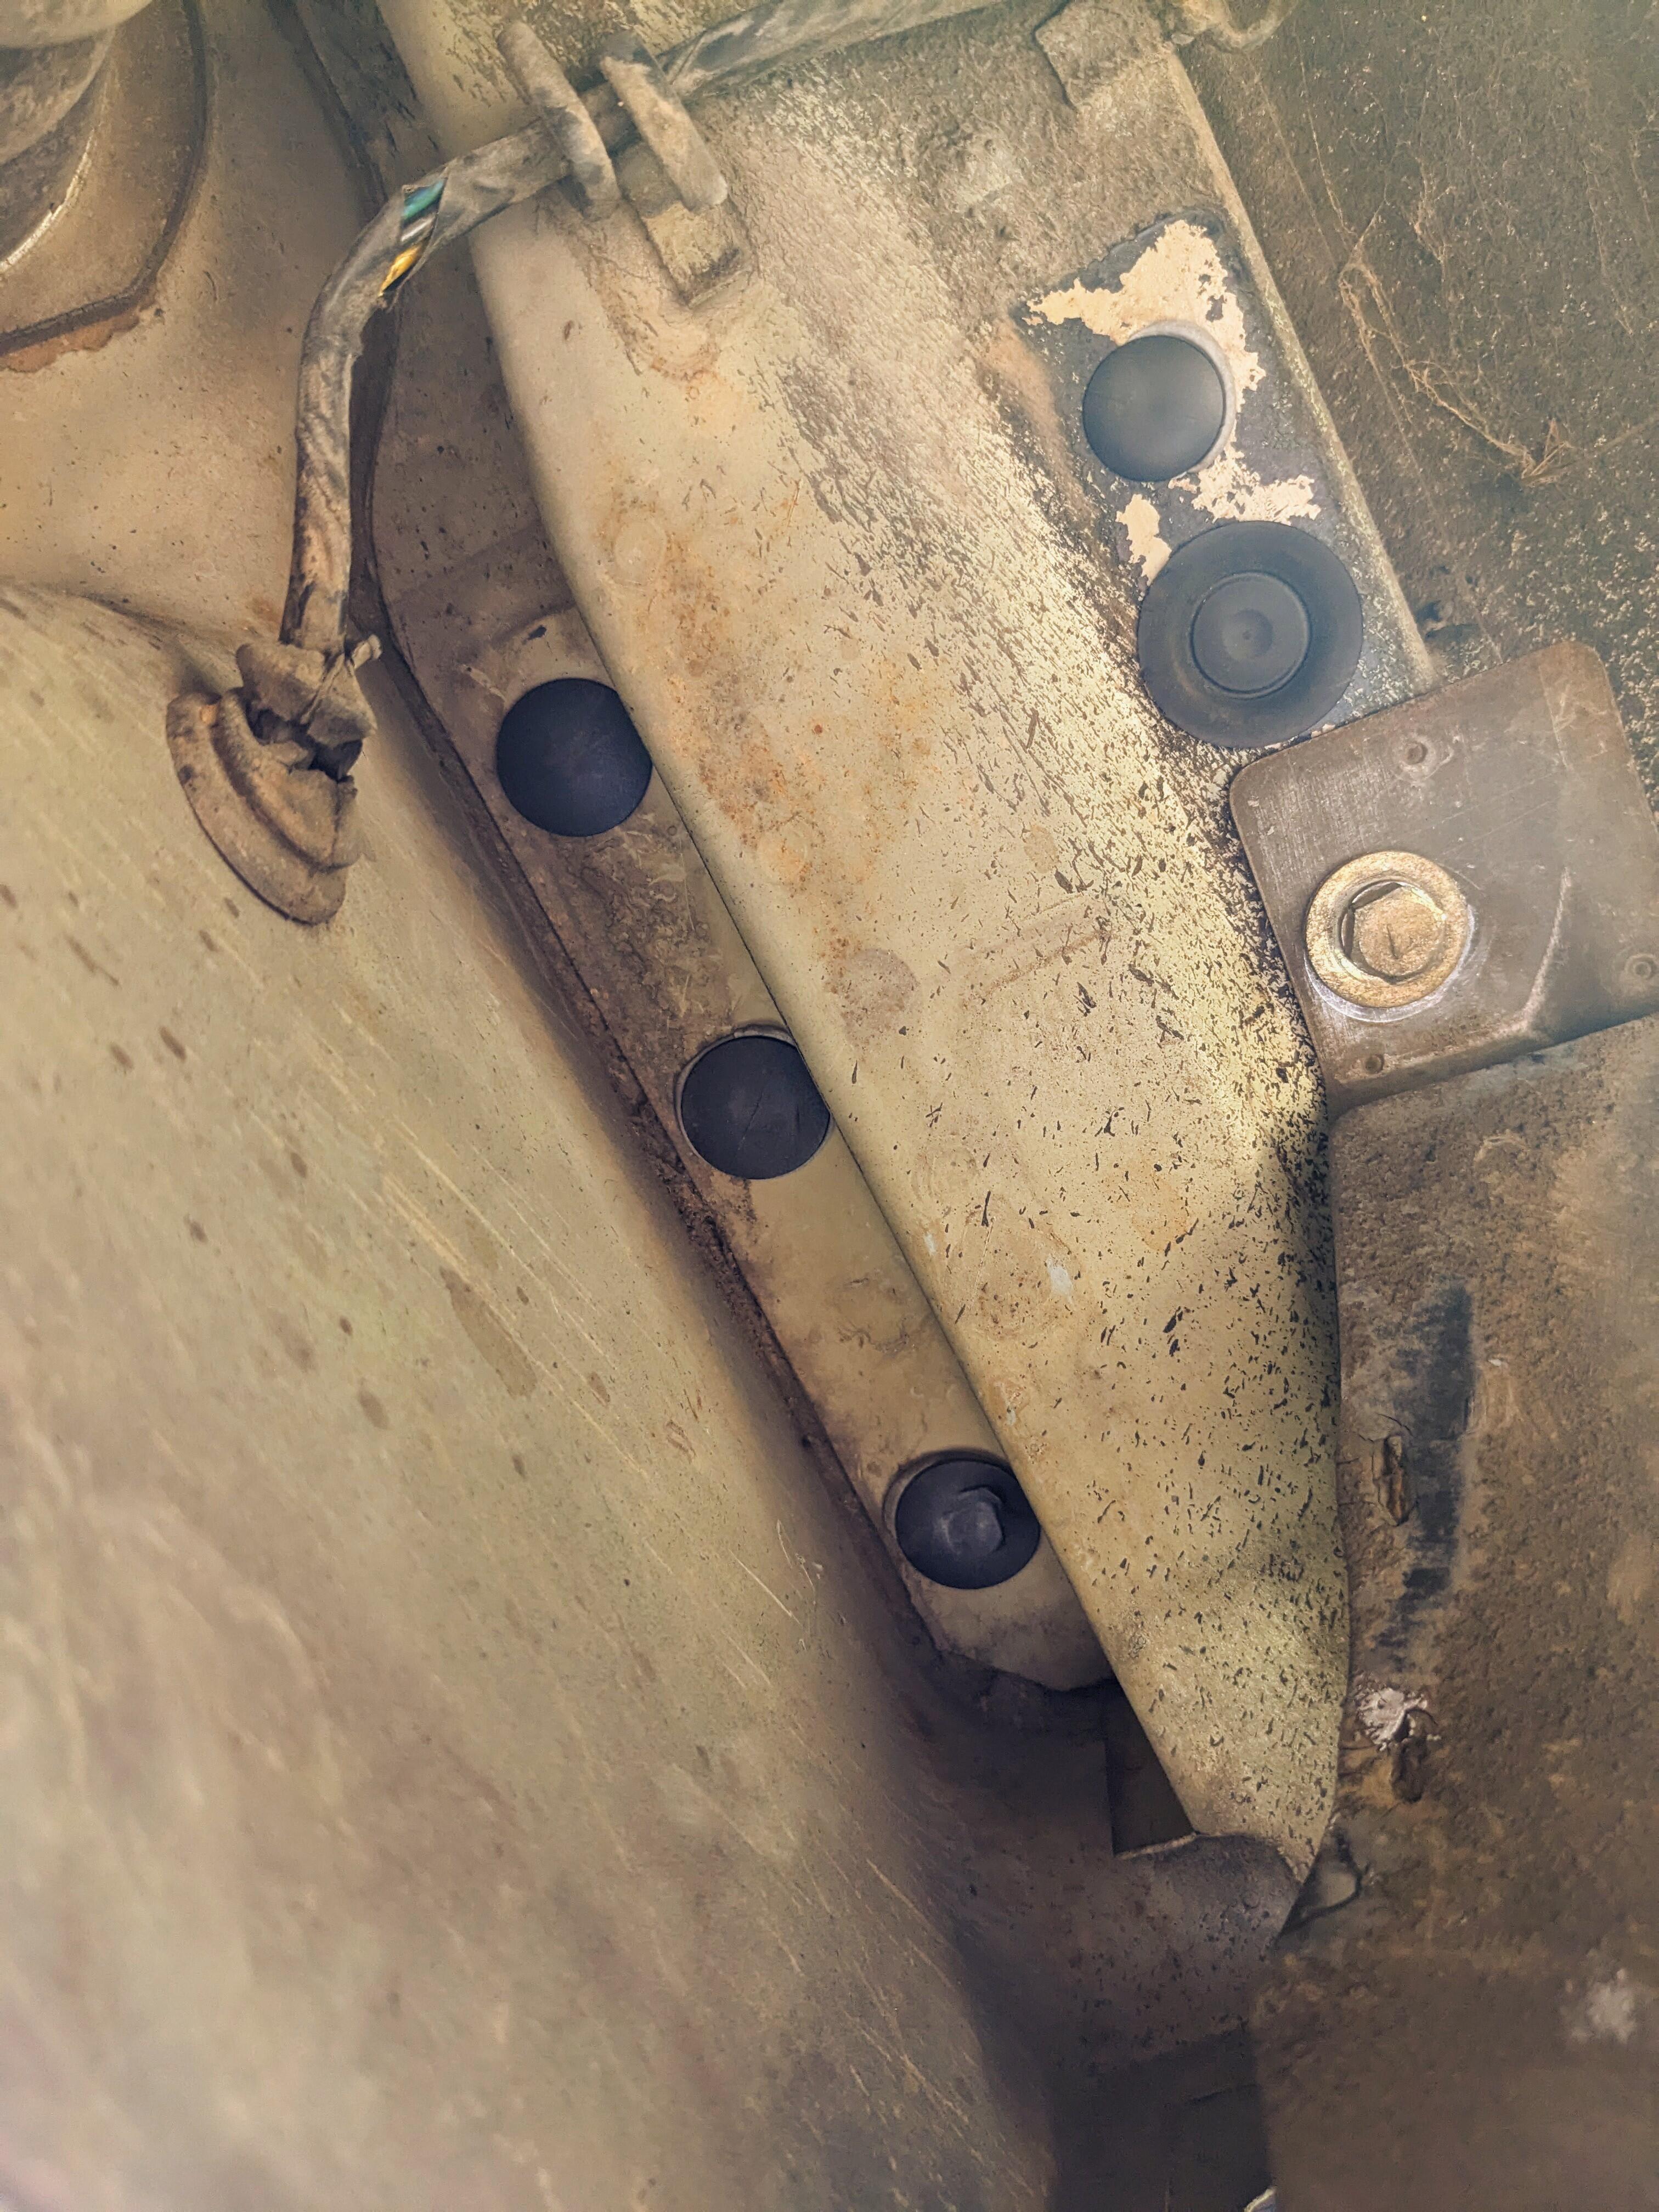
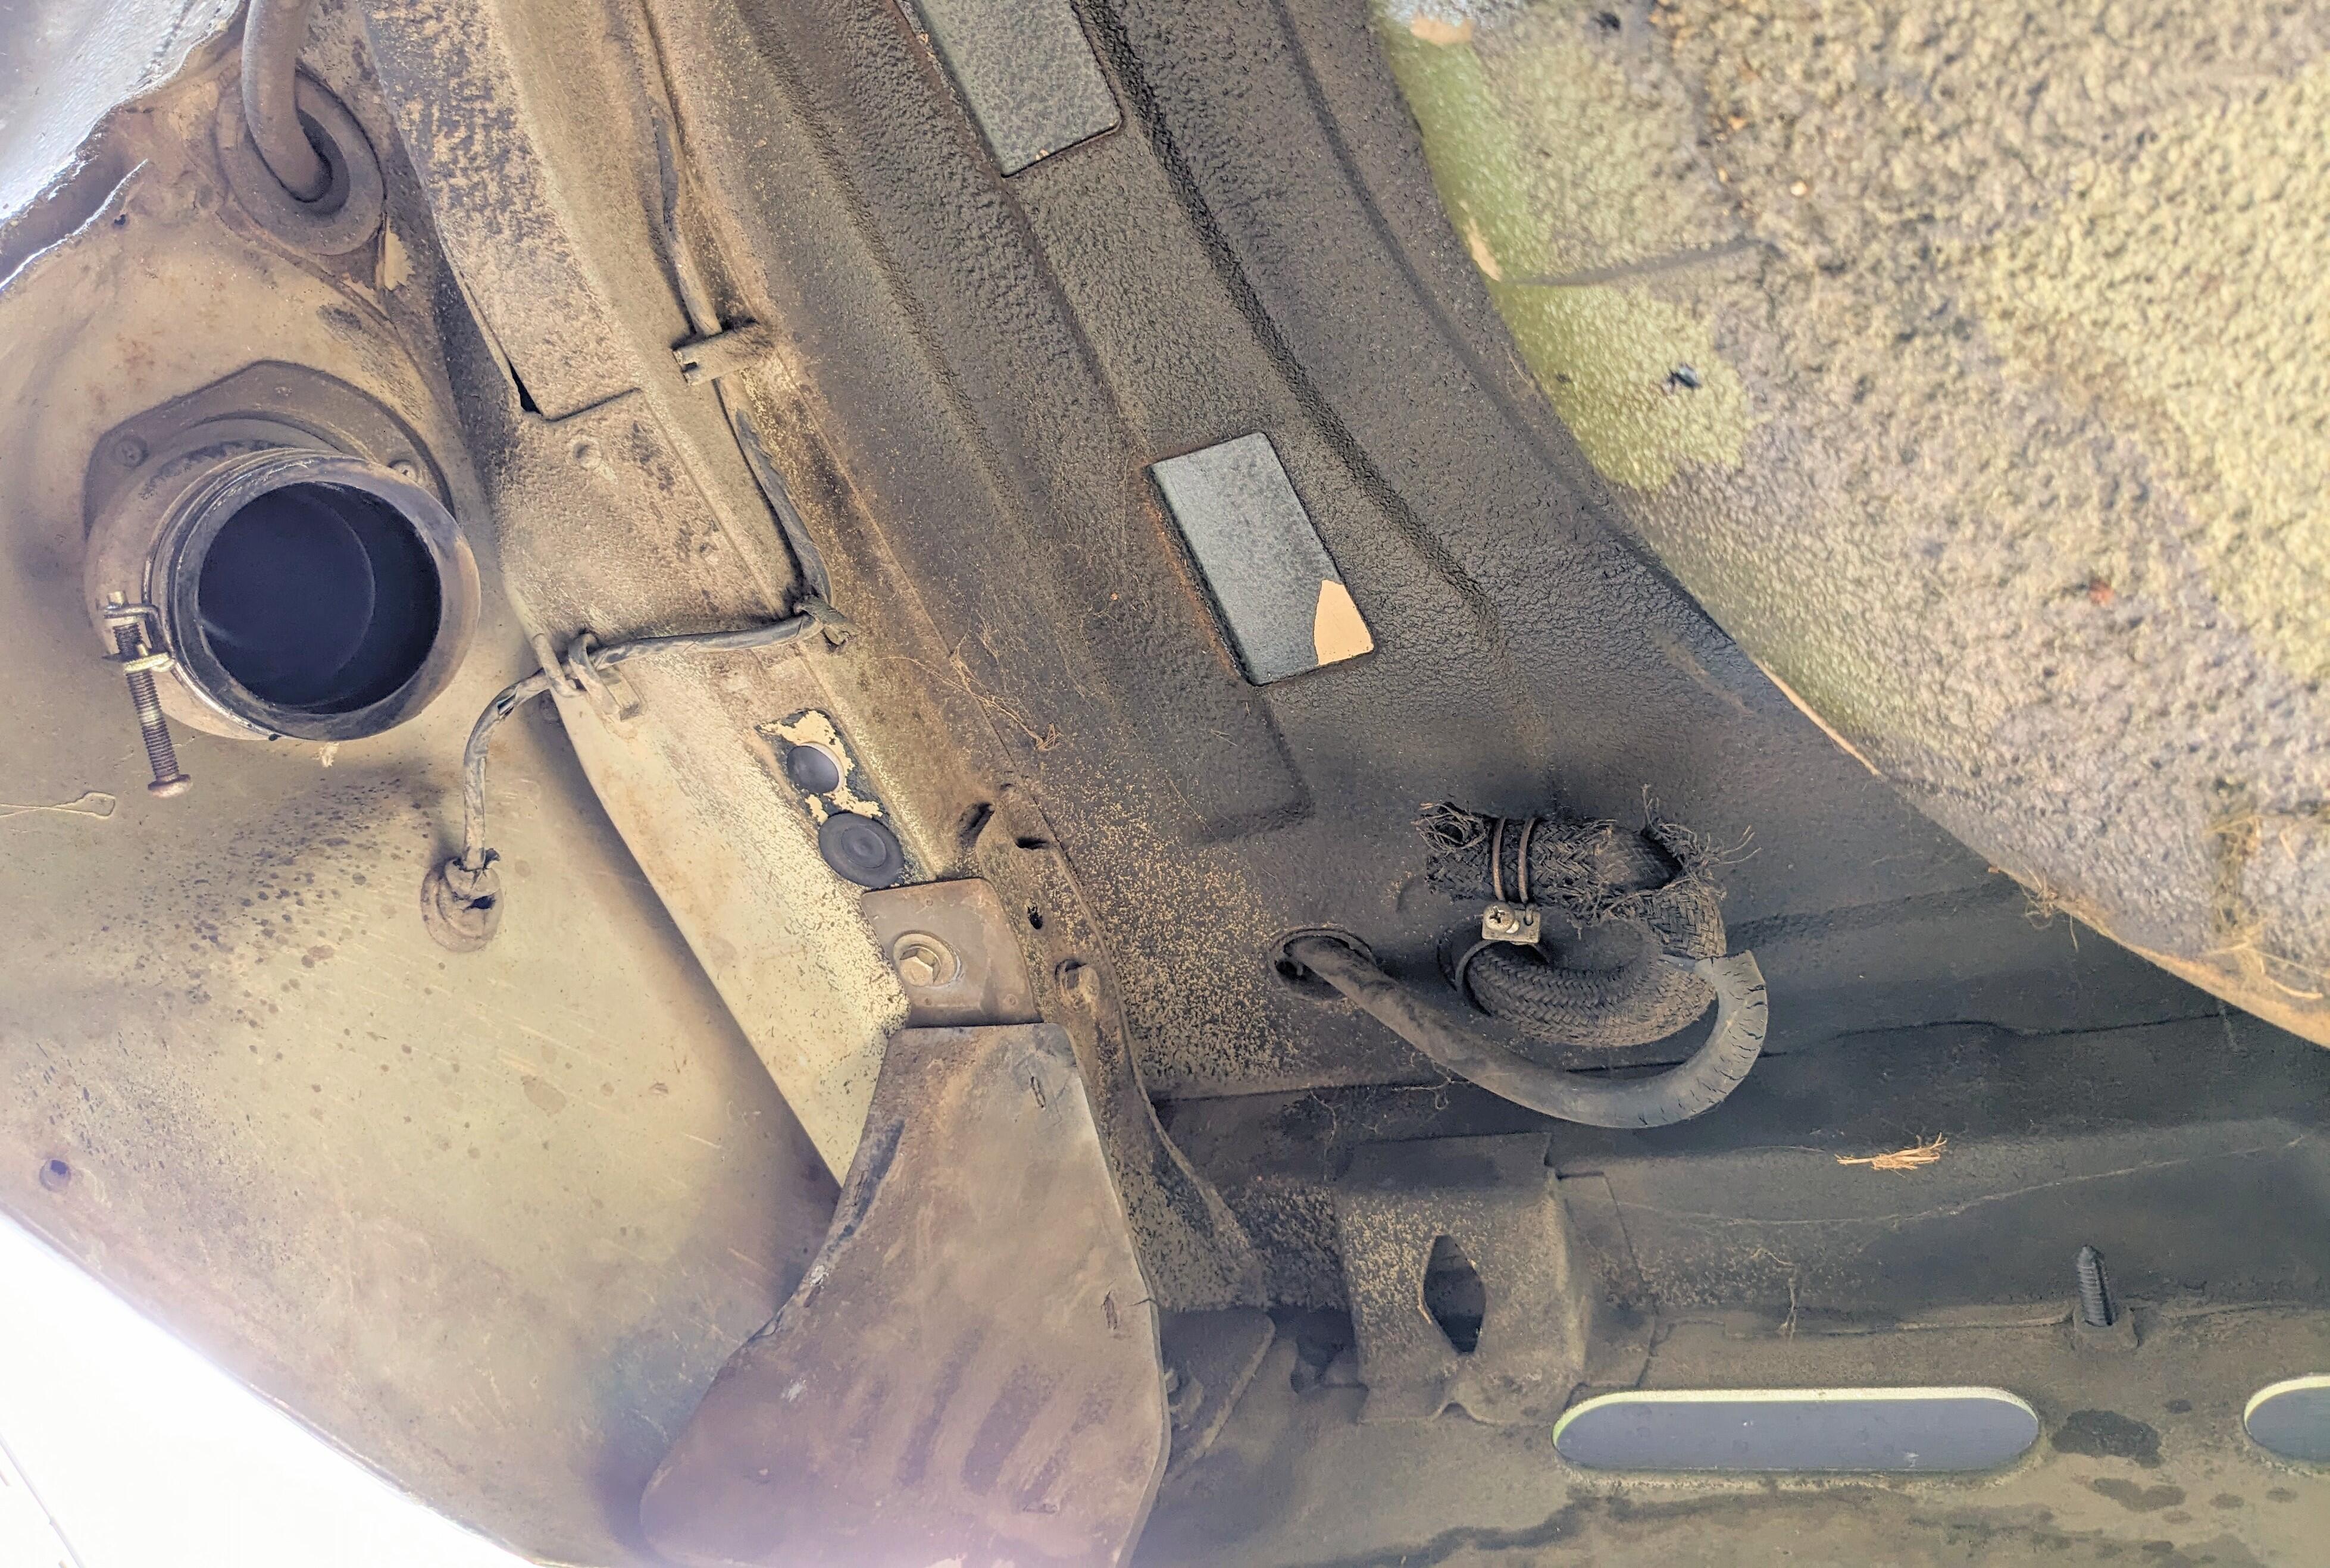
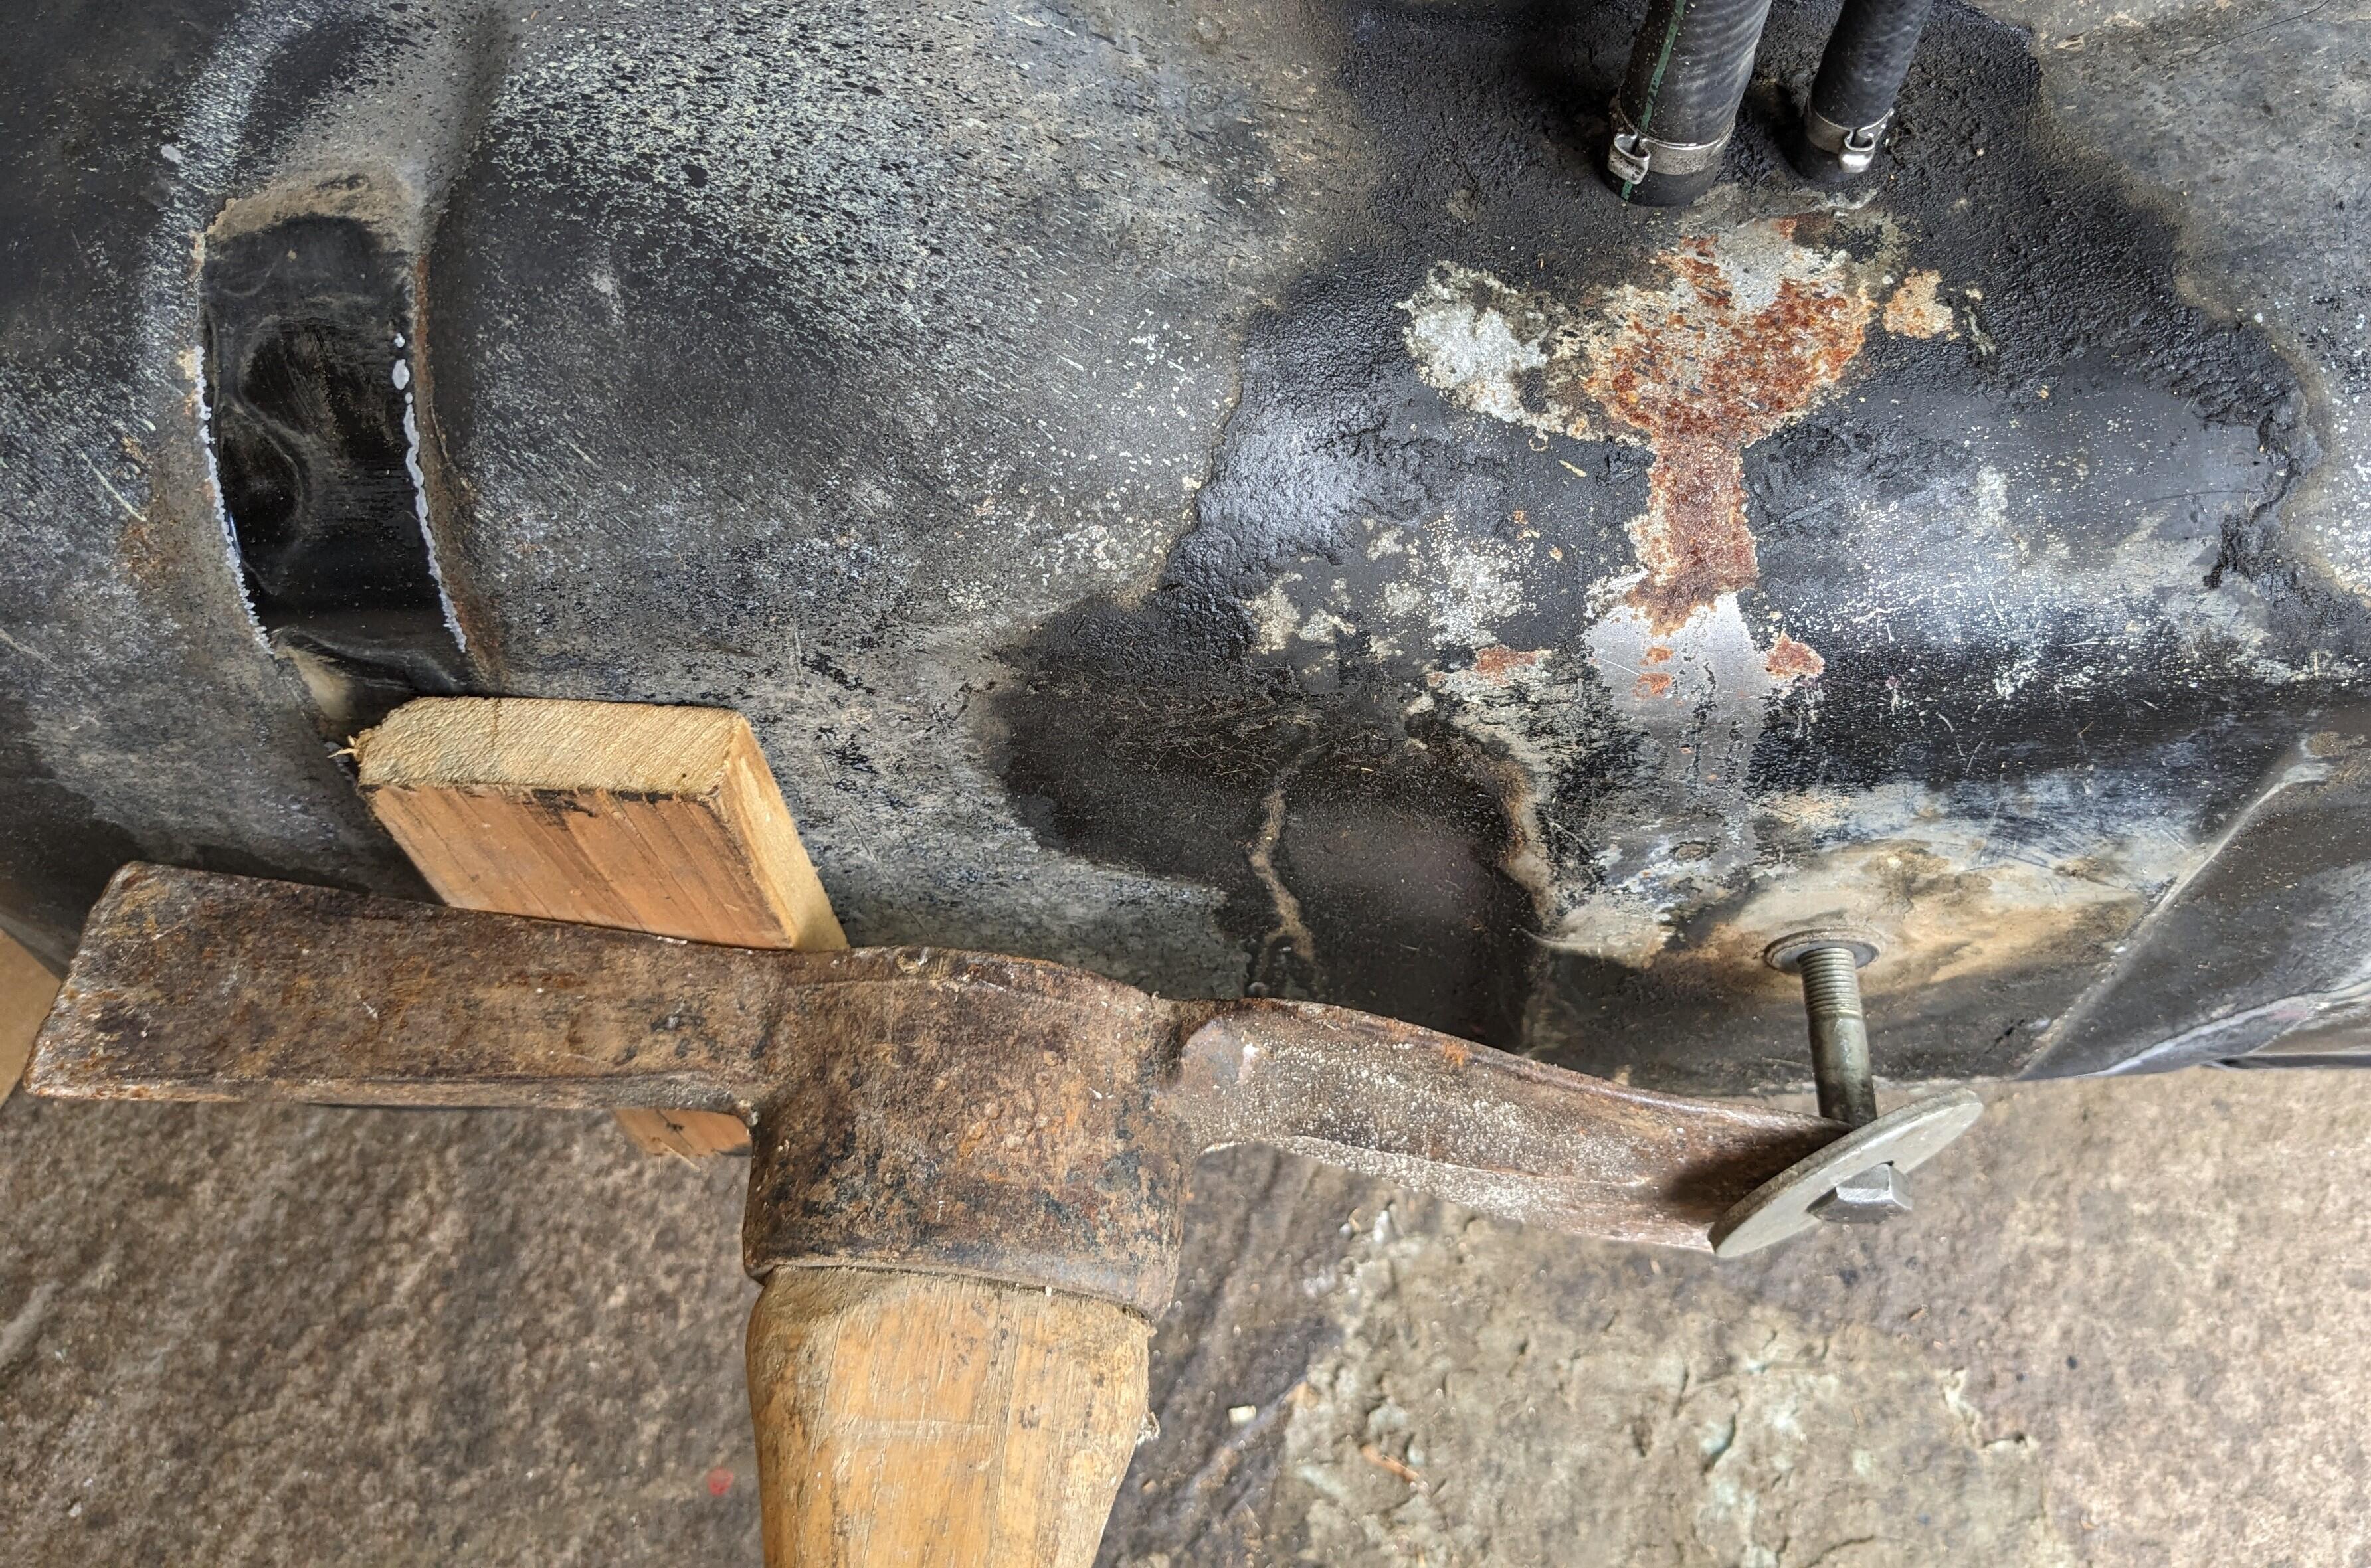
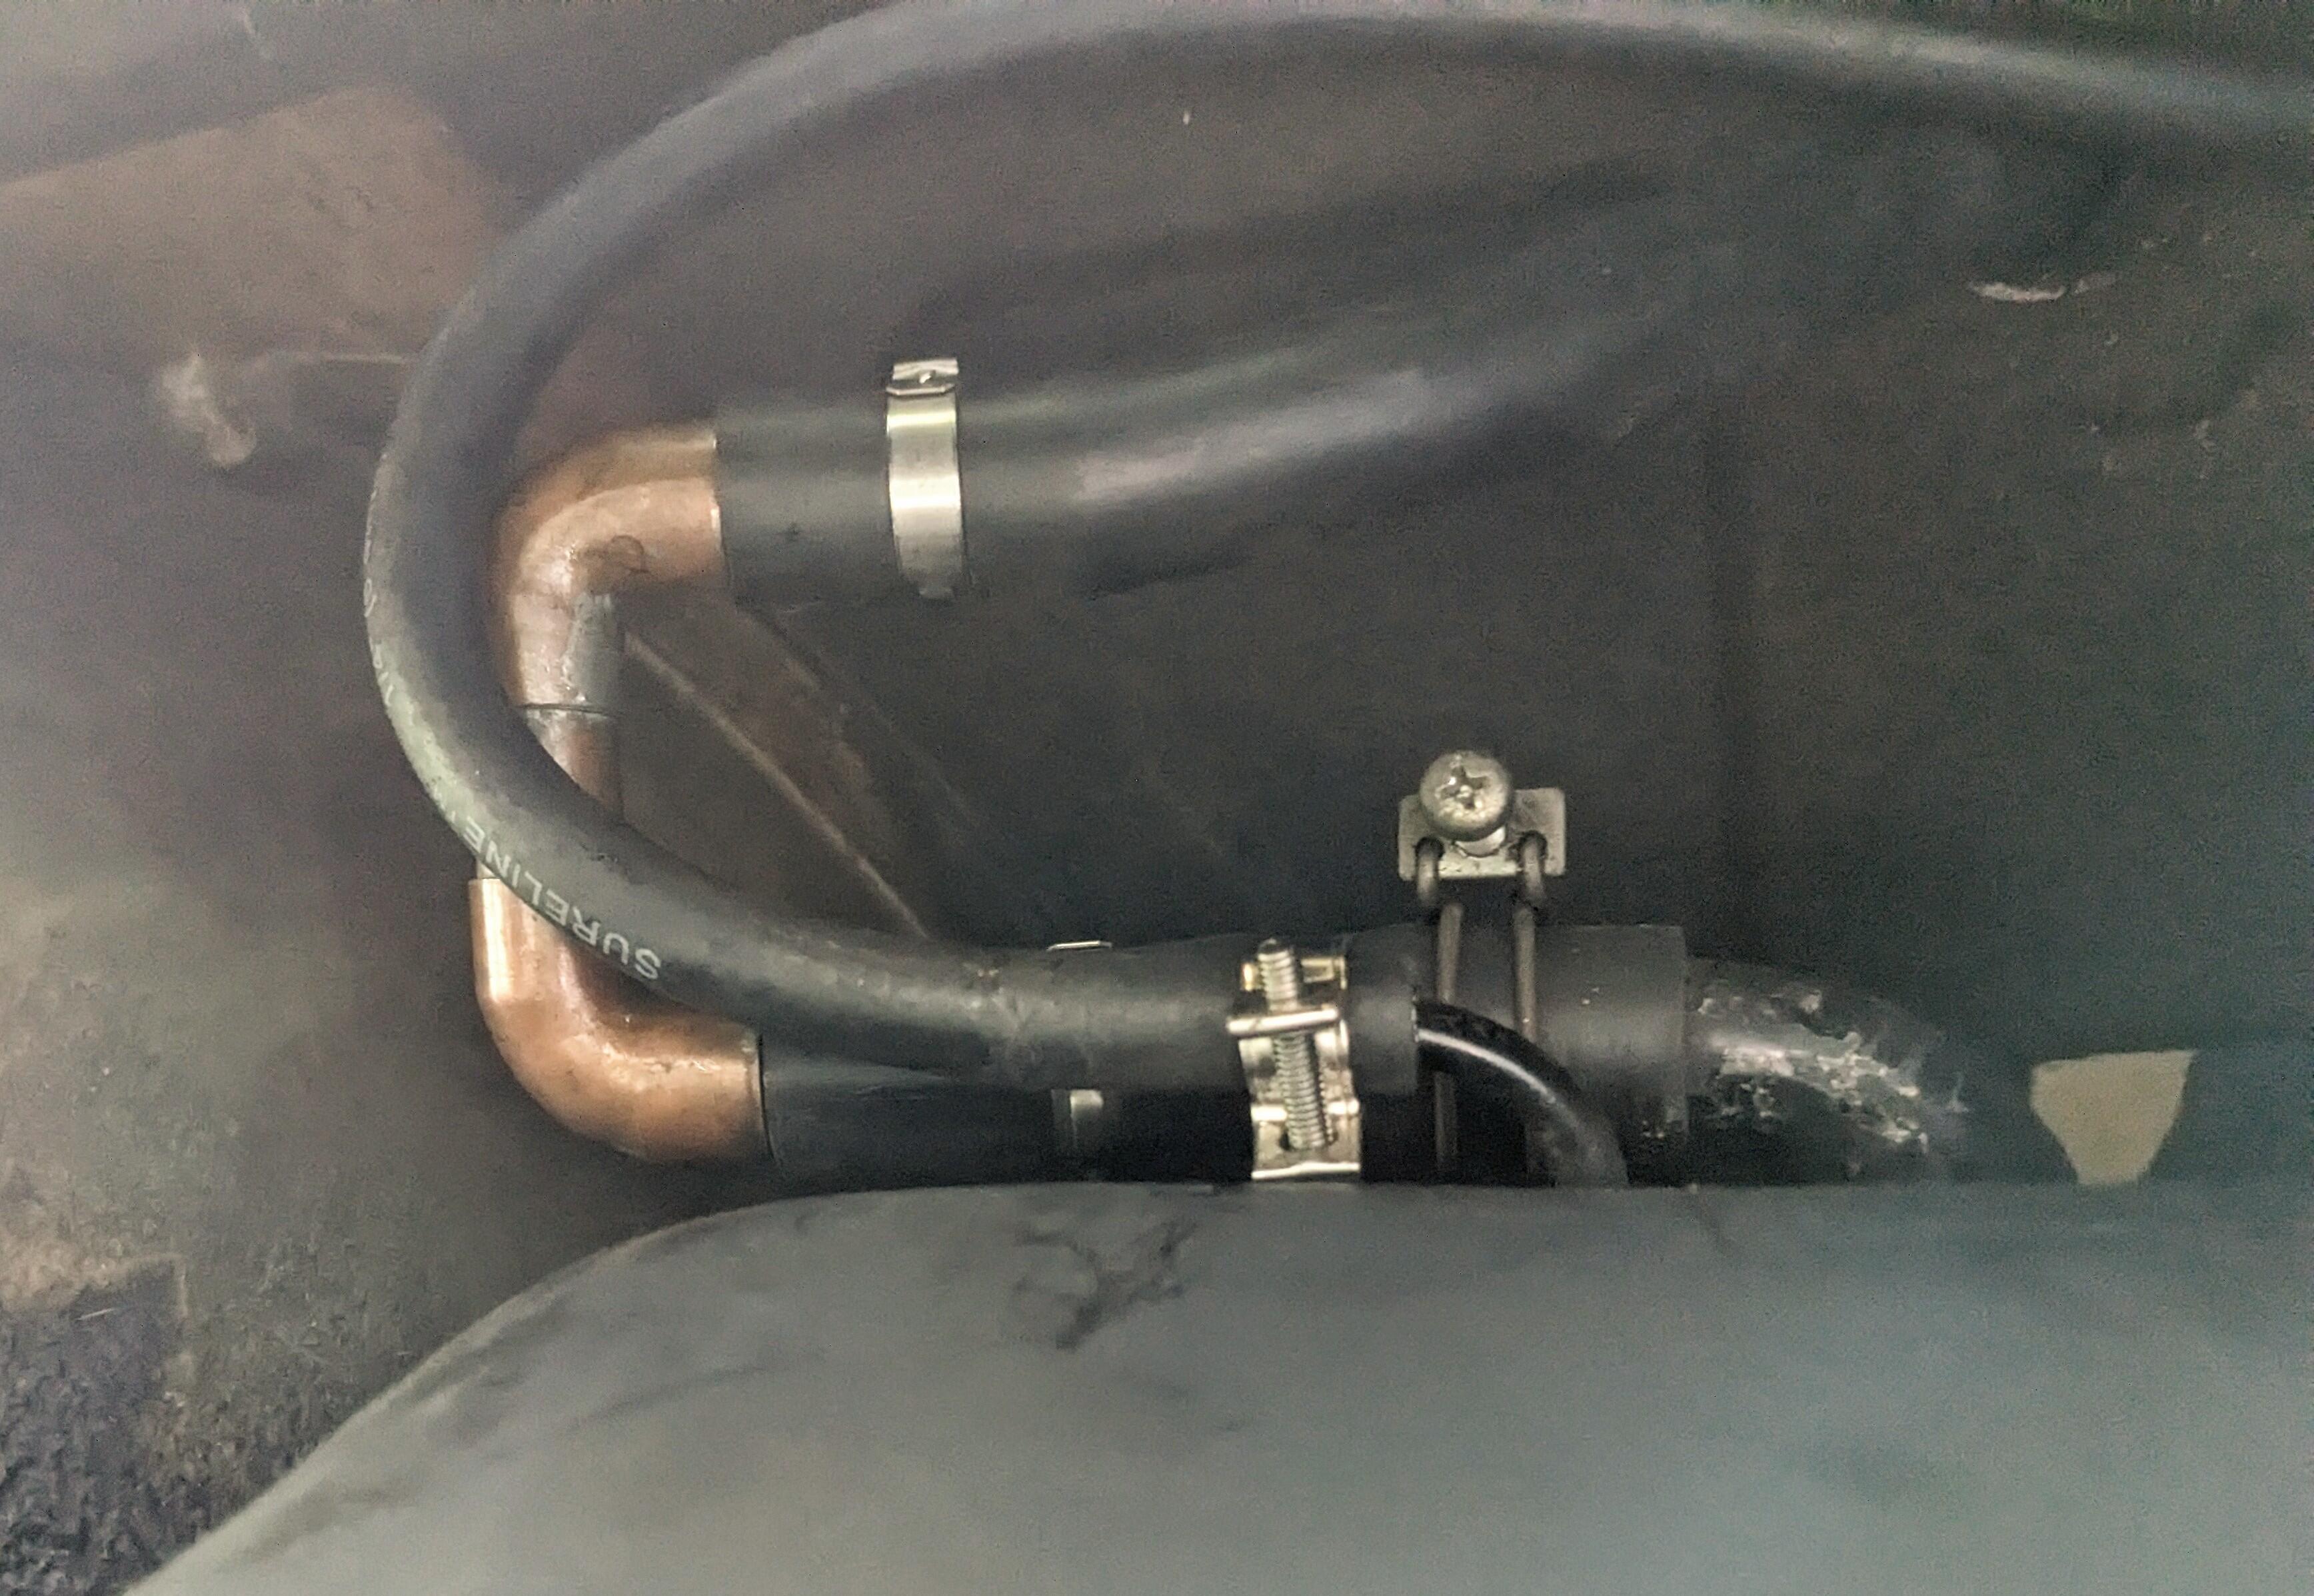
I might as well add my pics here - since it's related to the original thread. Drop the tank, and found the source of my gas fumes/overflow when filling. Smaller vent line off the tank was ruptured. I actually realized I could have seen that if I looked through the louver slots in the tail panel Manual for reference filler neck base & clamp in great shape. Removed the remnants of the right side bumper shock, and plugged all the holes. Added butyl to ensure a seal Had to pull out the bottom of the tank a little. I realized there was no way to lever in there from the fuel sender port as there is a baffle in the way. So I just put a threaded bolt in the drain plug and levered the sucker out evenly working around the circumference of the bolt/plug hole Degrease / clean and paint tank. Made an elbow to replace the original large loop, the small line I just ran a longer piece, so it could loop gently Visible through louvers beneath bumper. For the inside, I cut the original hose - most of the inside was perfectly good there was no cracks in the the material, so I just ran a splice section from the tank, and used a large quick connect to join the two. new grommets for the lines from ZcarDepot. I did find out that I put the sender in upside down, as when I started it the gauge pegged full. Drained about 4 gallons, prior to doing the work. I realized the notch in the sender plate was supposed to be on the right not on the left - upside down in this pic
Thank you - I did a little searching & found that there are vendors selling the spades with slotted boots/covers. Now I know what they came with, I can use the appropriate spade type that has the spring tab inside, I used regular spades, which will lose contact over time .
@hotsho111 - I looked back at the earlier pics to see what you used to connect the gauge wires - on mine, I had to cut the connector off the stock sender & add spade connectors as a stop gap. I don't know what the factory terminals are supposed to look like for the earlier replacement sender that has no level warning sensor.
I might as well add my pics here - since it's related to the original thread. Drop the tank, and found the source of my gas fumes/overflow when filling. Smaller vent line off the tank was ruptured. I actually realized I could have seen that if I looked through the louver slots in the tail panel Manual for reference filler neck base & clamp in great shape. Removed the remnants of the right side bumper shock, and plugged all the holes. Added butyl to ensure a seal Had to pull out the bottom of the tank a little. I realized there was no way to lever in there from the fuel sender port as there is a baffle in the way. So I just put a threaded bolt in the drain plug and levered the sucker out evenly working around the circumference of the bolt/plug hole Degrease / clean and paint tank. Made an elbow to replace the original large loop, the small line I just ran a longer piece, so it could loop gently Visible through louvers beneath bumper. For the inside, I cut the original hose - most of the inside was perfectly good there was no cracks in the the material, so I just ran a splice section from the tank, and used a large quick connect to join the two. new grommets for the lines from ZcarDepot. I did find out that I put the sender in upside down, as when I started it the gauge pegged full. Drained about 4 gallons, prior to doing the work. I realized the notch in the sender plate was supposed to be on the right not on the left - upside down in this pic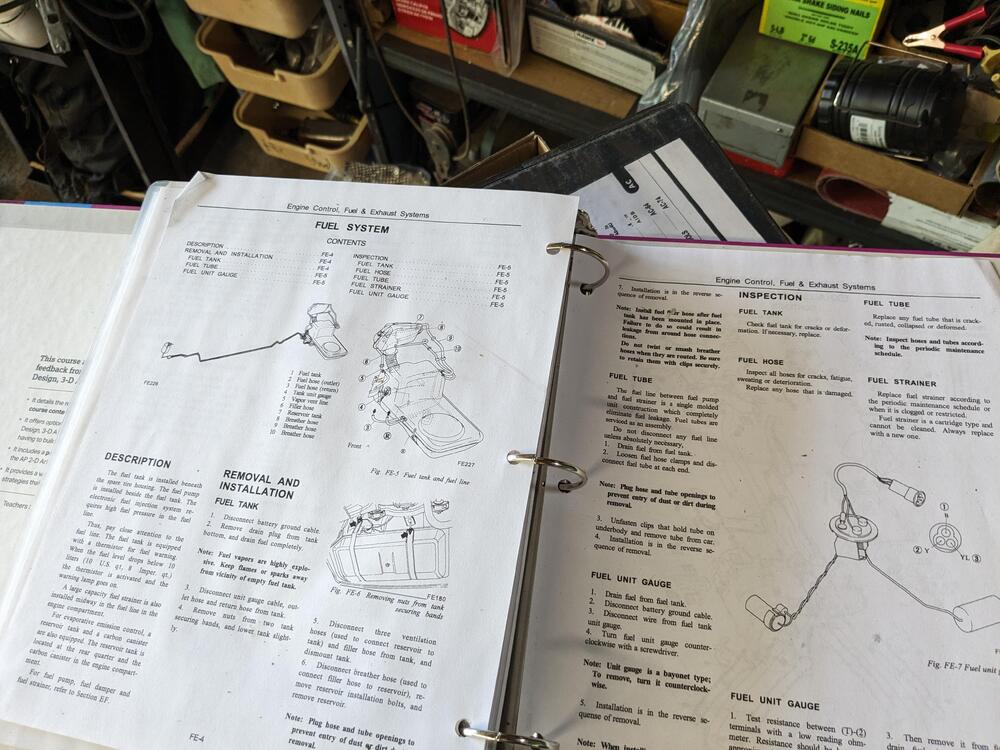


 I'll look on their website - if that's the one they sell as a tranny jack, I need it anyway.
No - just a floor jack. Do you mean one of their transmission jacks? I was going to put the car up on jack stands, and use the floor jack to support it, with a wood block to hold it.
To drop the tank, only the large hose on top needs to be disconnected from the vapor tank end when dropping? Or can the vent hoses be accessed from above the tank as you lower it? Should have asked this sooner - I want to drop the tank & check what's leaking on top of mine before I drive 500 miles this weekend...
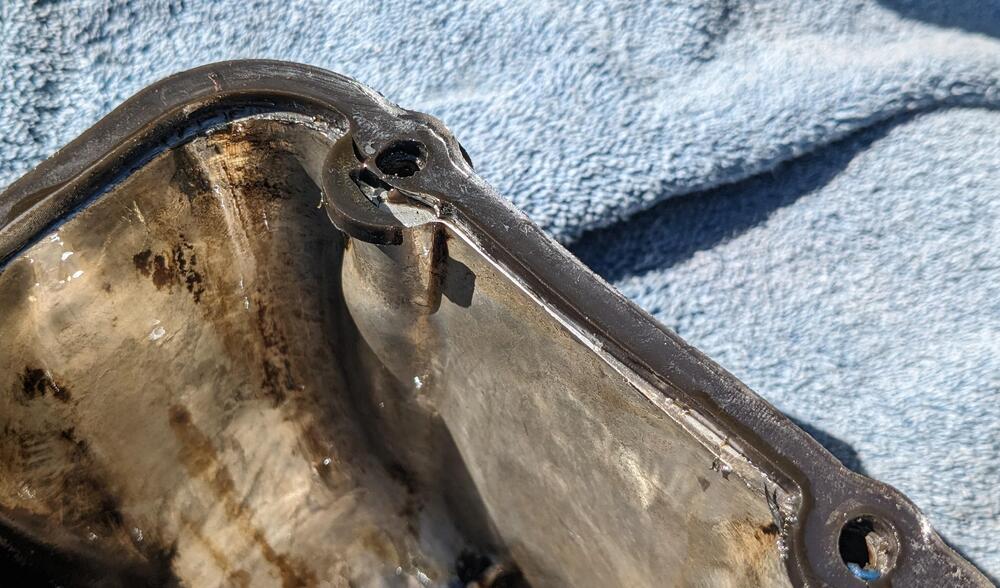
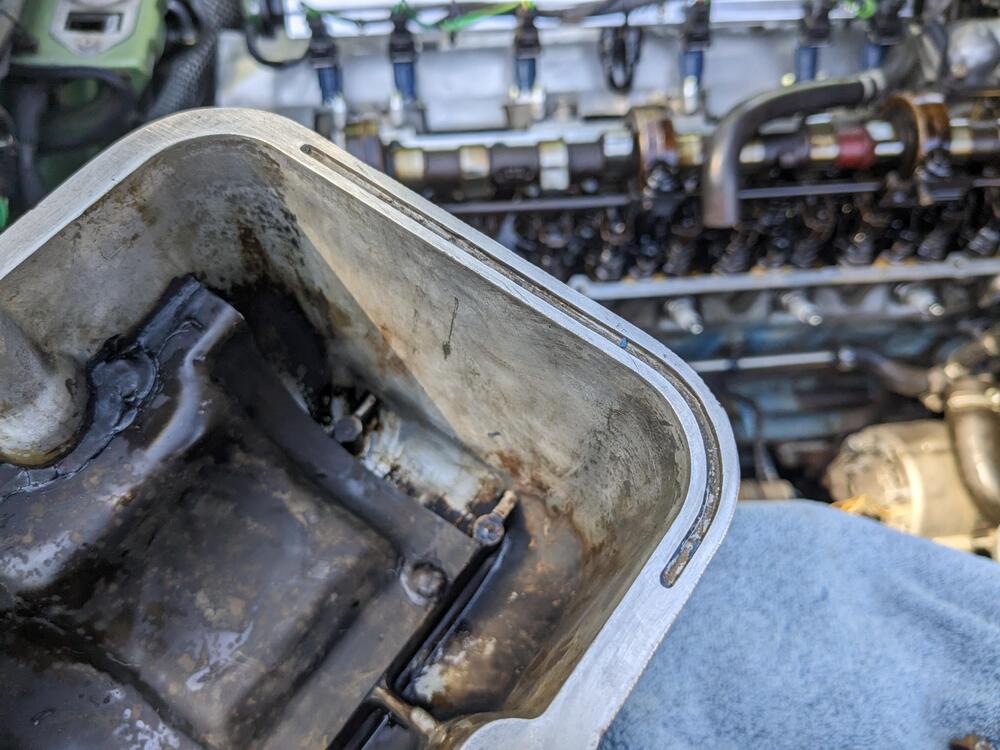
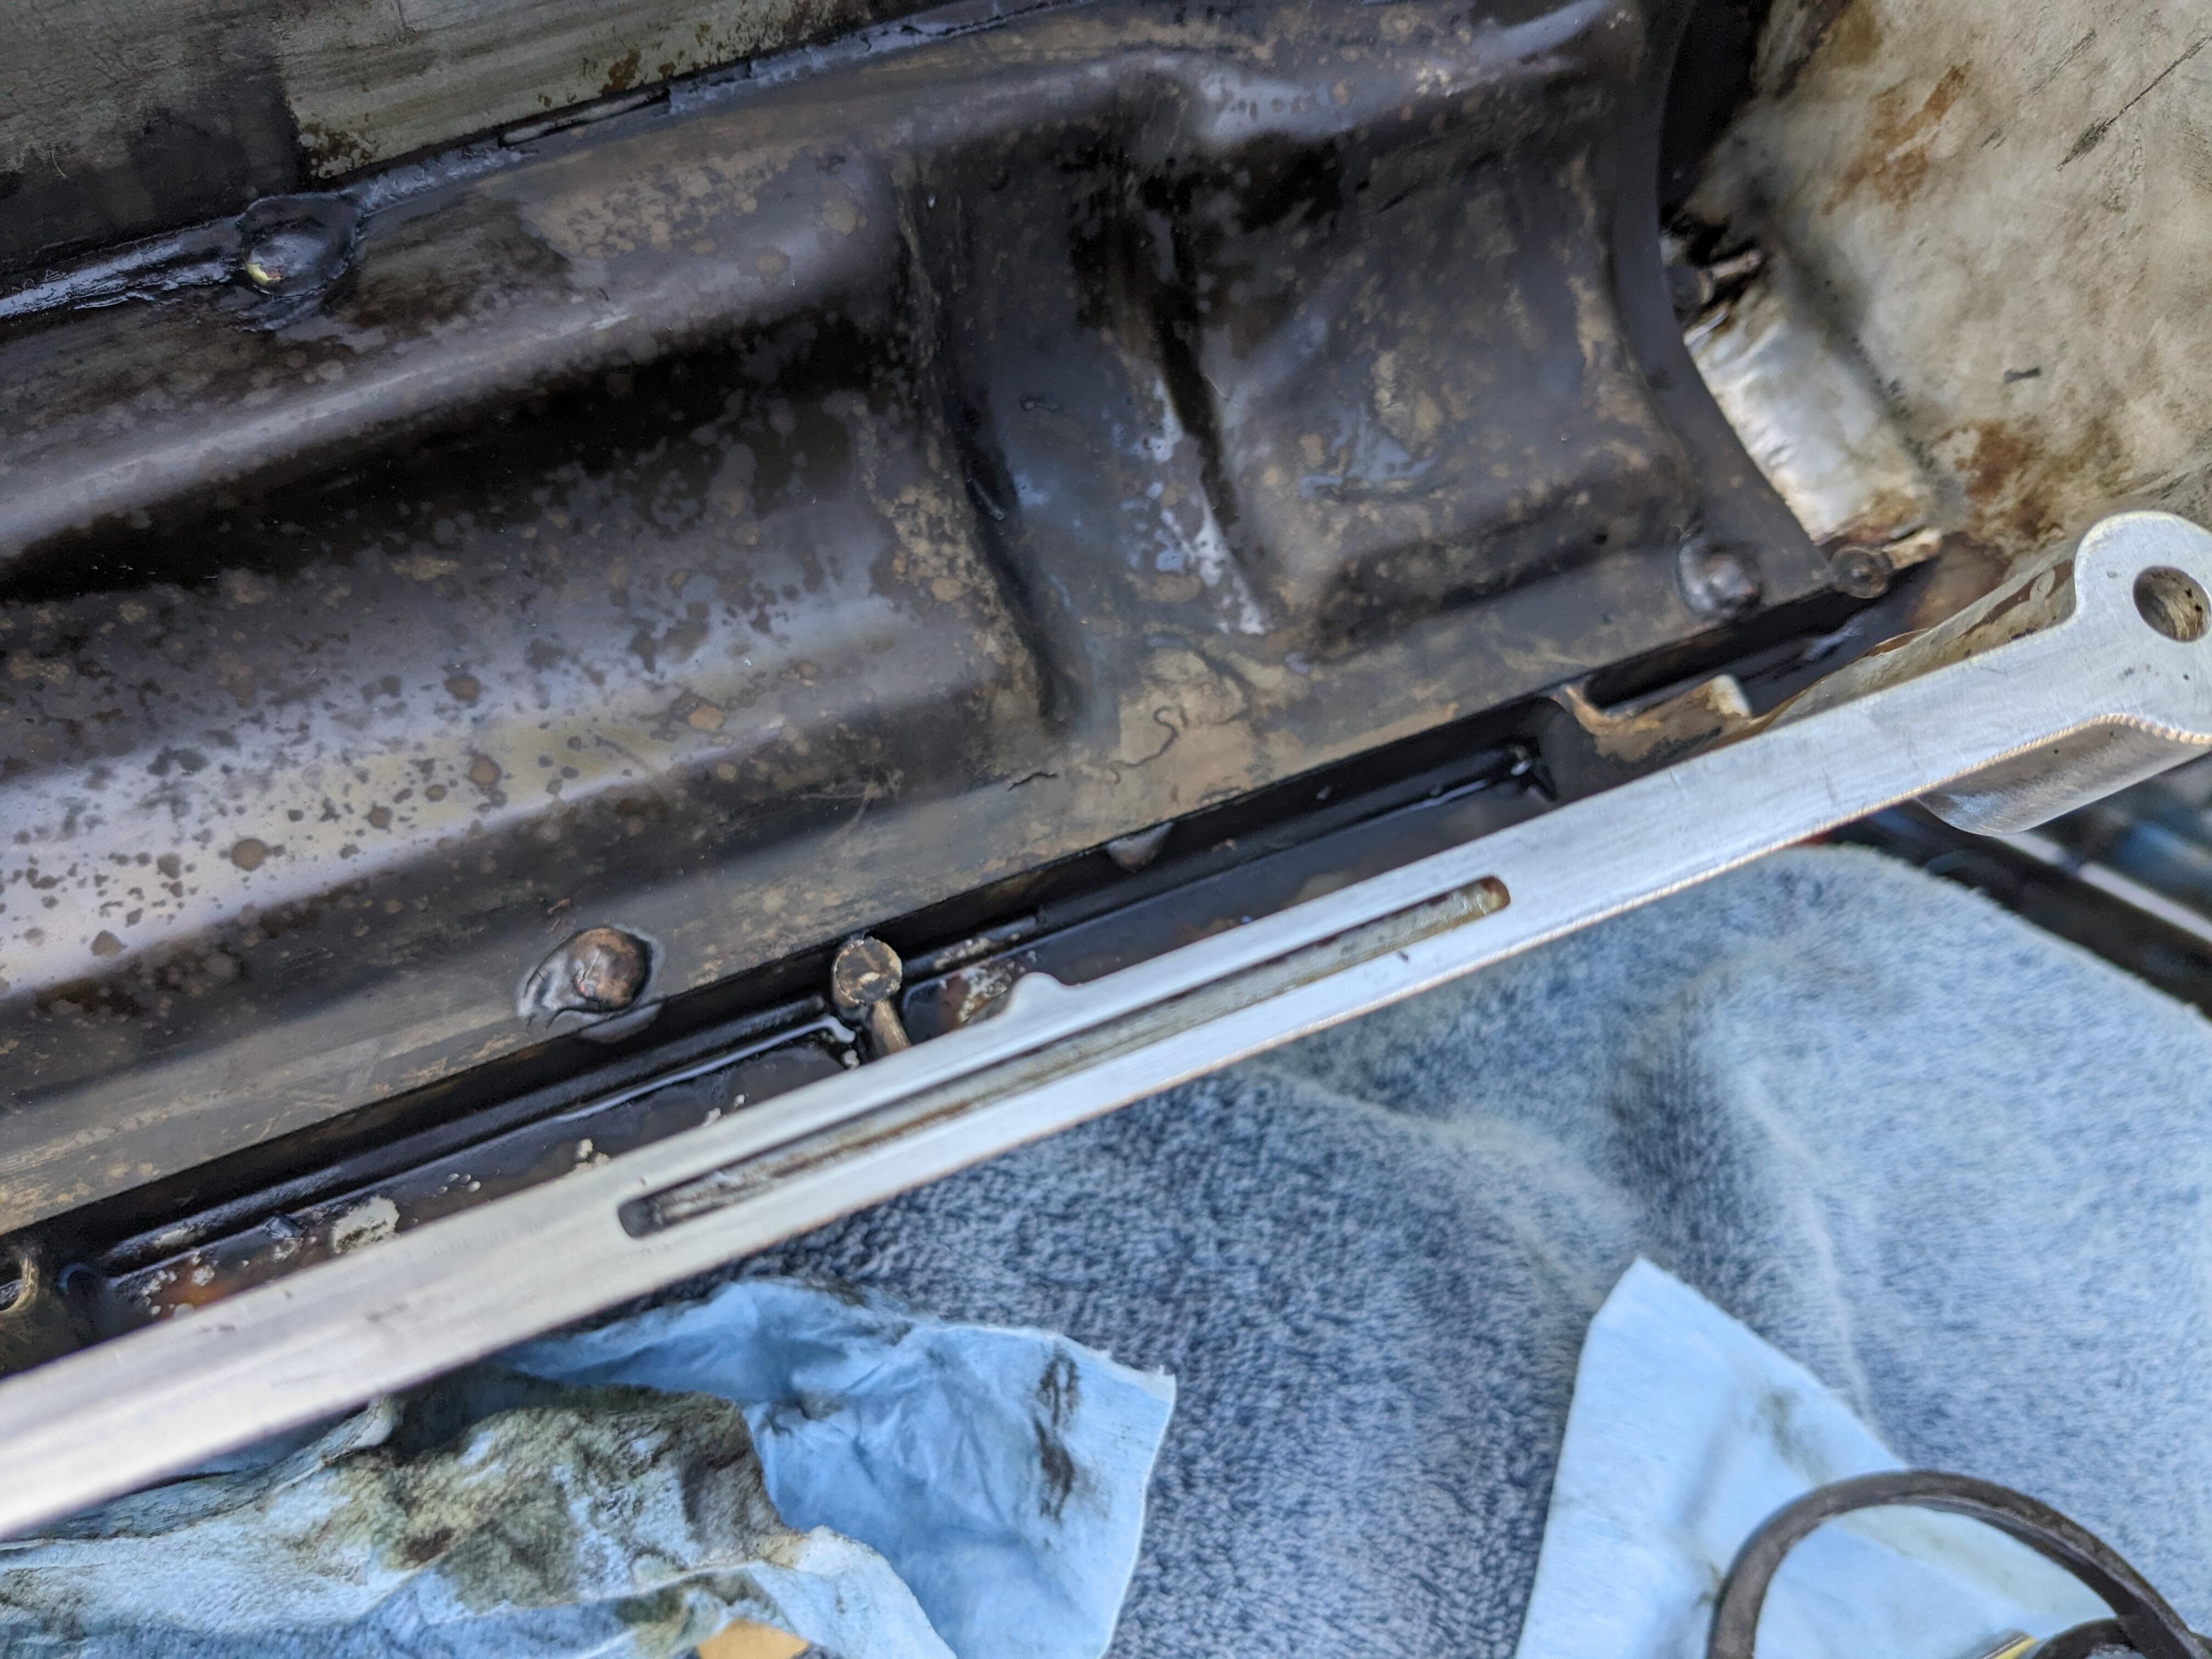
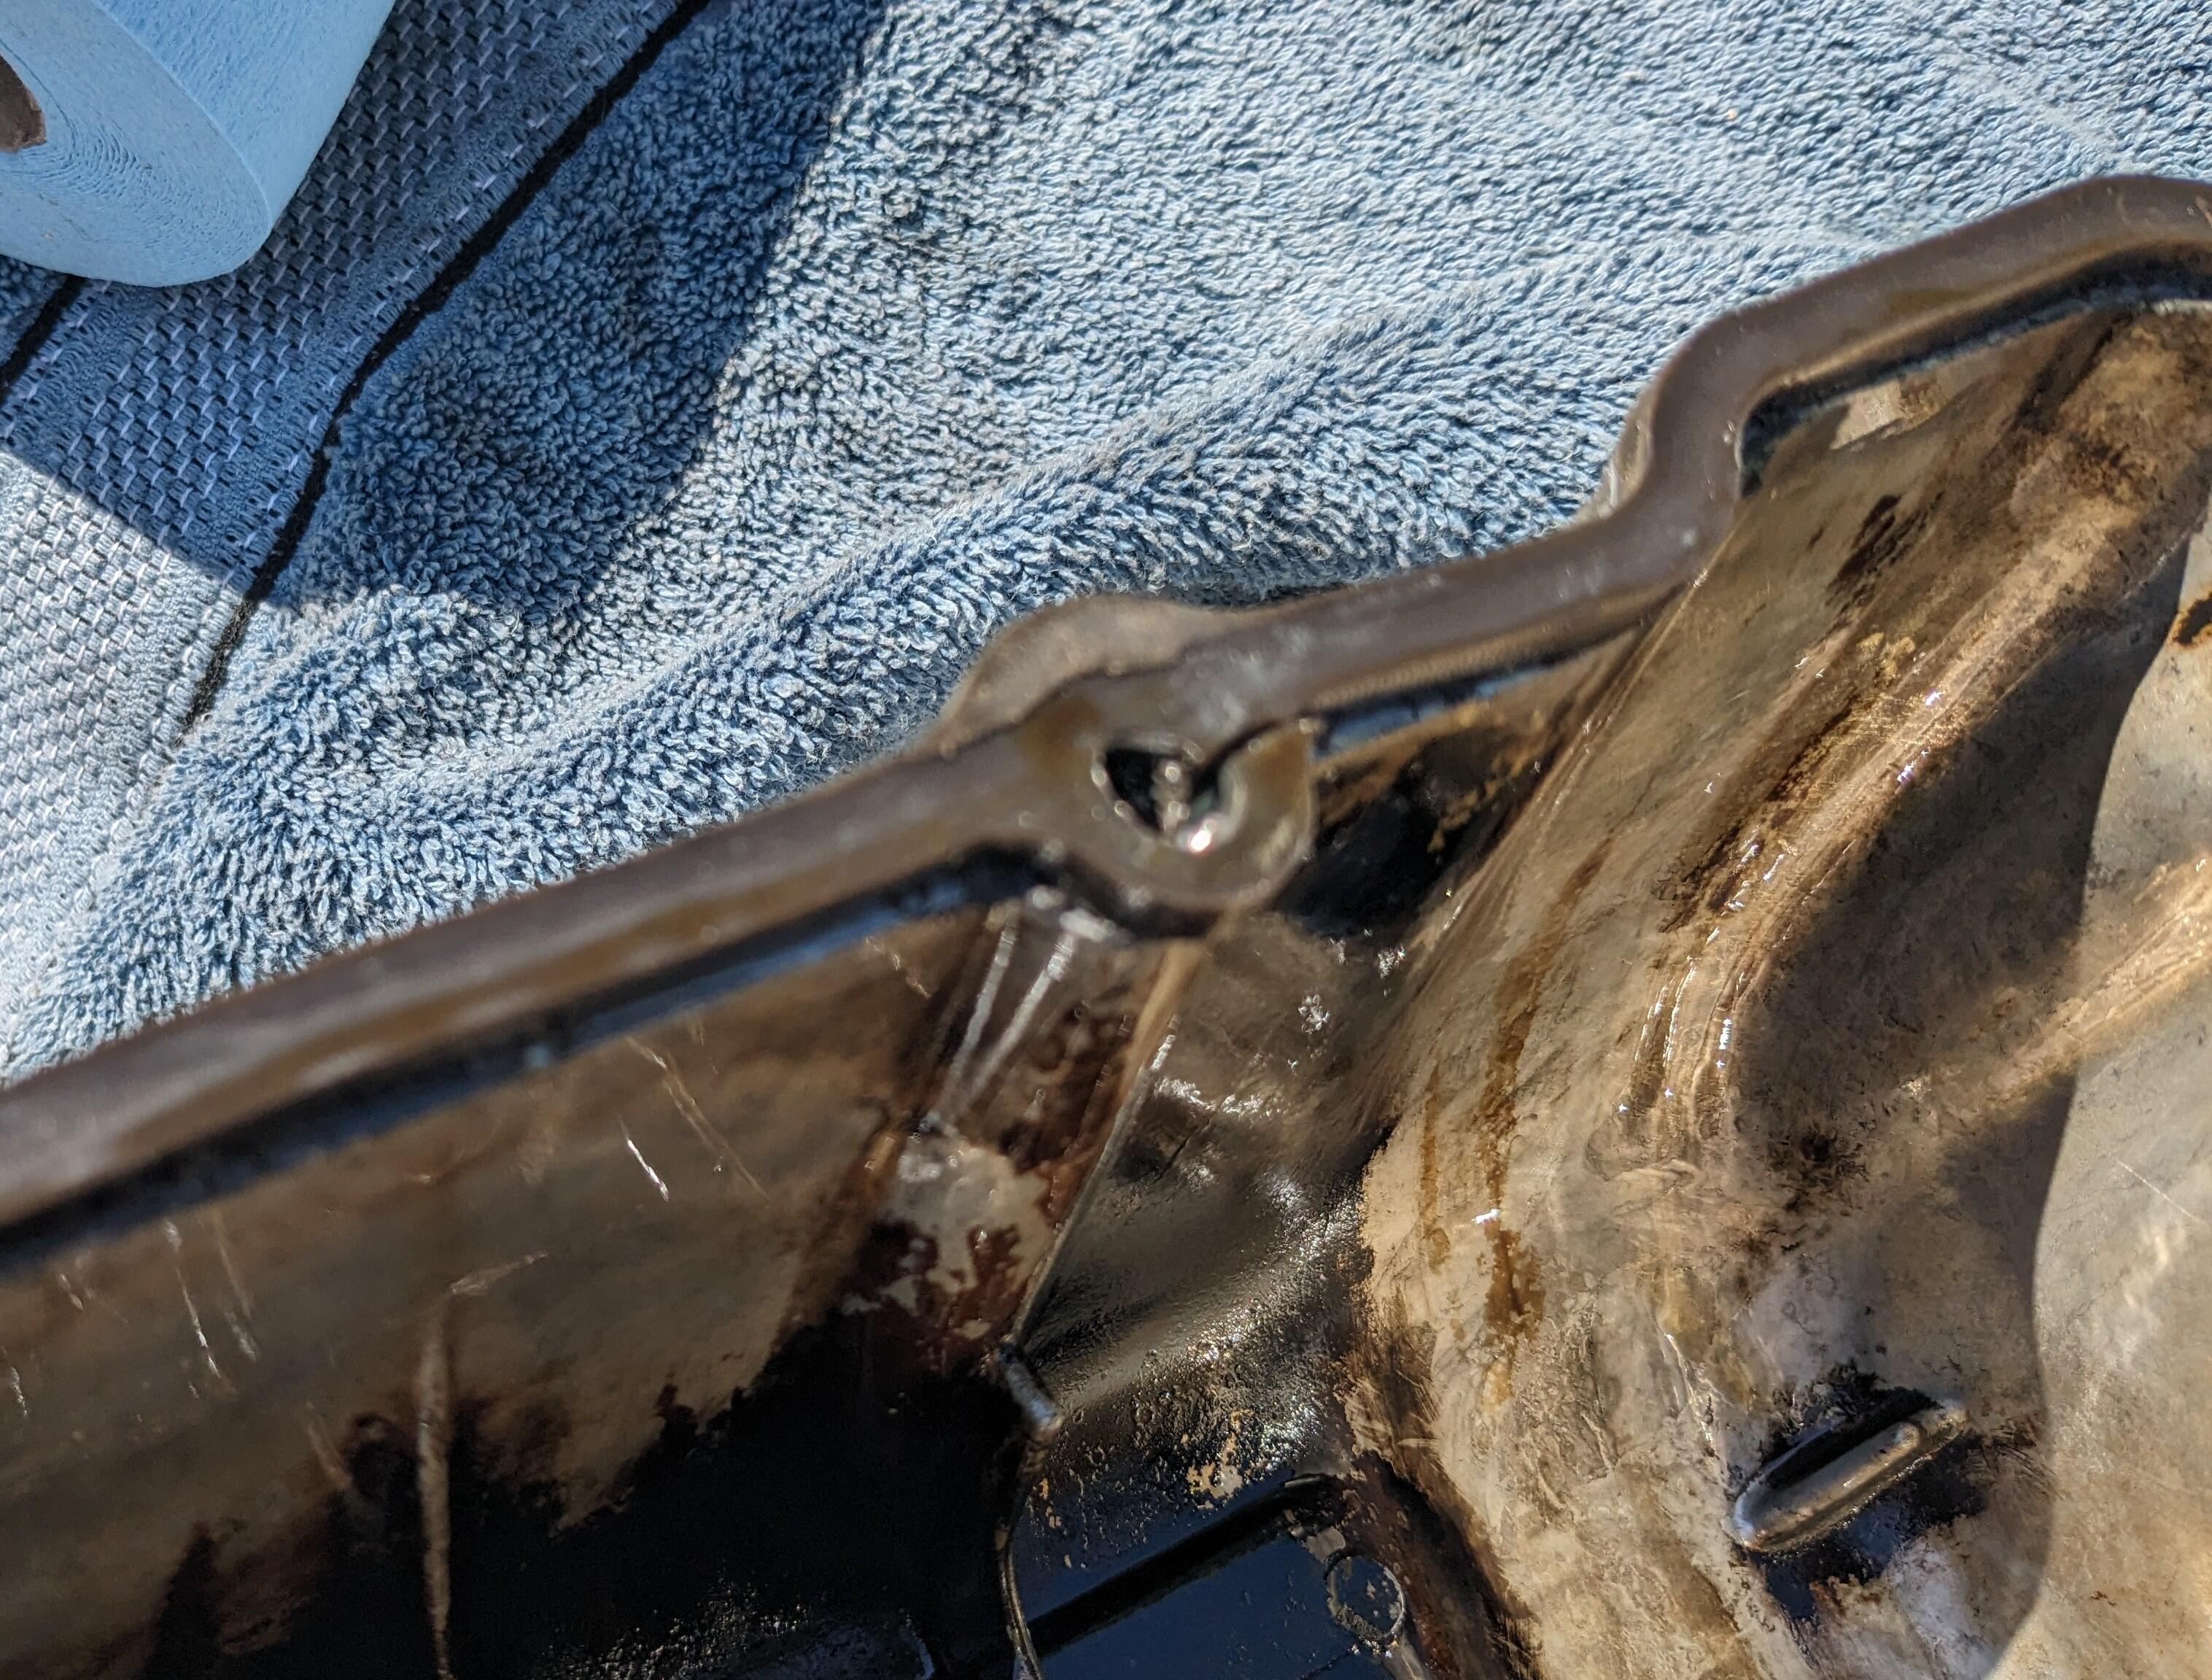
Cork/rubber composite gasket arrived last night, so I changed it out after work The silicone one (Milkfab is responsive to my inquiry) has torn in several places - note that I did not over torque the cover, in fact they probably could have been snugged tighter, as it took minimal effort using a 1/4 short rachet to crack them free. Main tear that was pushing out in the left rear corner - note that they spec a bead of silicone to adhere the gasket to the cover. That was allowed to set up prior to install. Other internal tears I thoroughly cleaned out all the silicone from the gasket retention grooves in the cover. I could find nothing in the factory manual that referenced using any sort of silicone or other agent to secure the stock type gasket. Noting the staggered offset of the gasket at the gear end
I'll look on their website - if that's the one they sell as a tranny jack, I need it anyway.
No - just a floor jack. Do you mean one of their transmission jacks? I was going to put the car up on jack stands, and use the floor jack to support it, with a wood block to hold it.
To drop the tank, only the large hose on top needs to be disconnected from the vapor tank end when dropping? Or can the vent hoses be accessed from above the tank as you lower it? Should have asked this sooner - I want to drop the tank & check what's leaking on top of mine before I drive 500 miles this weekend...
Cork/rubber composite gasket arrived last night, so I changed it out after work The silicone one (Milkfab is responsive to my inquiry) has torn in several places - note that I did not over torque the cover, in fact they probably could have been snugged tighter, as it took minimal effort using a 1/4 short rachet to crack them free. Main tear that was pushing out in the left rear corner - note that they spec a bead of silicone to adhere the gasket to the cover. That was allowed to set up prior to install. Other internal tears I thoroughly cleaned out all the silicone from the gasket retention grooves in the cover. I could find nothing in the factory manual that referenced using any sort of silicone or other agent to secure the stock type gasket. Noting the staggered offset of the gasket at the gear end


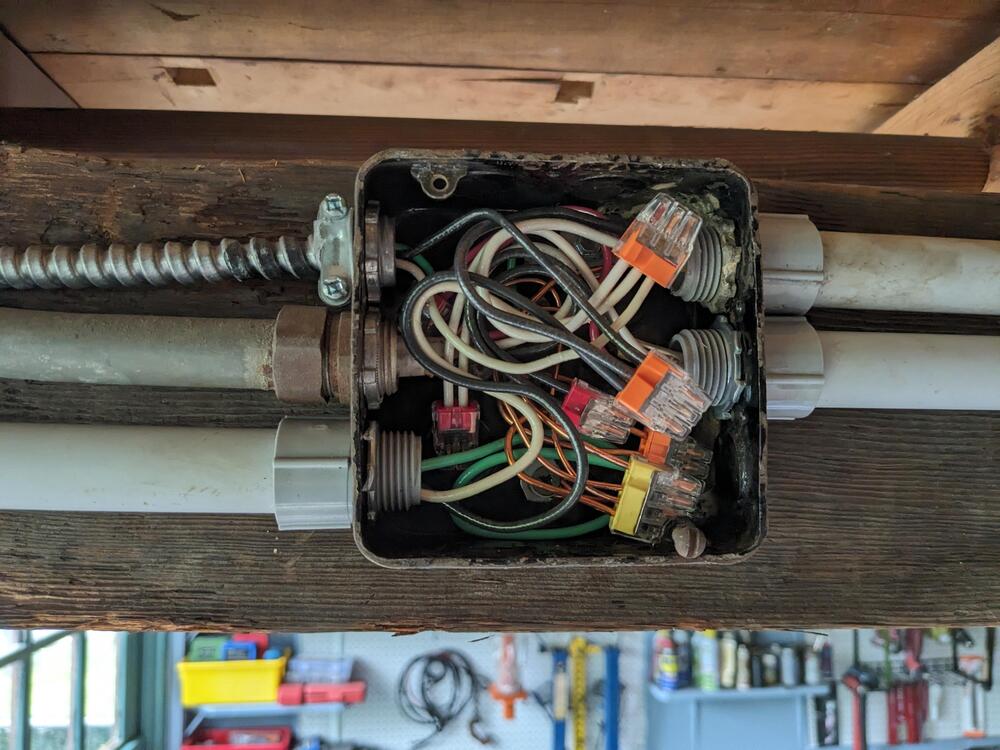
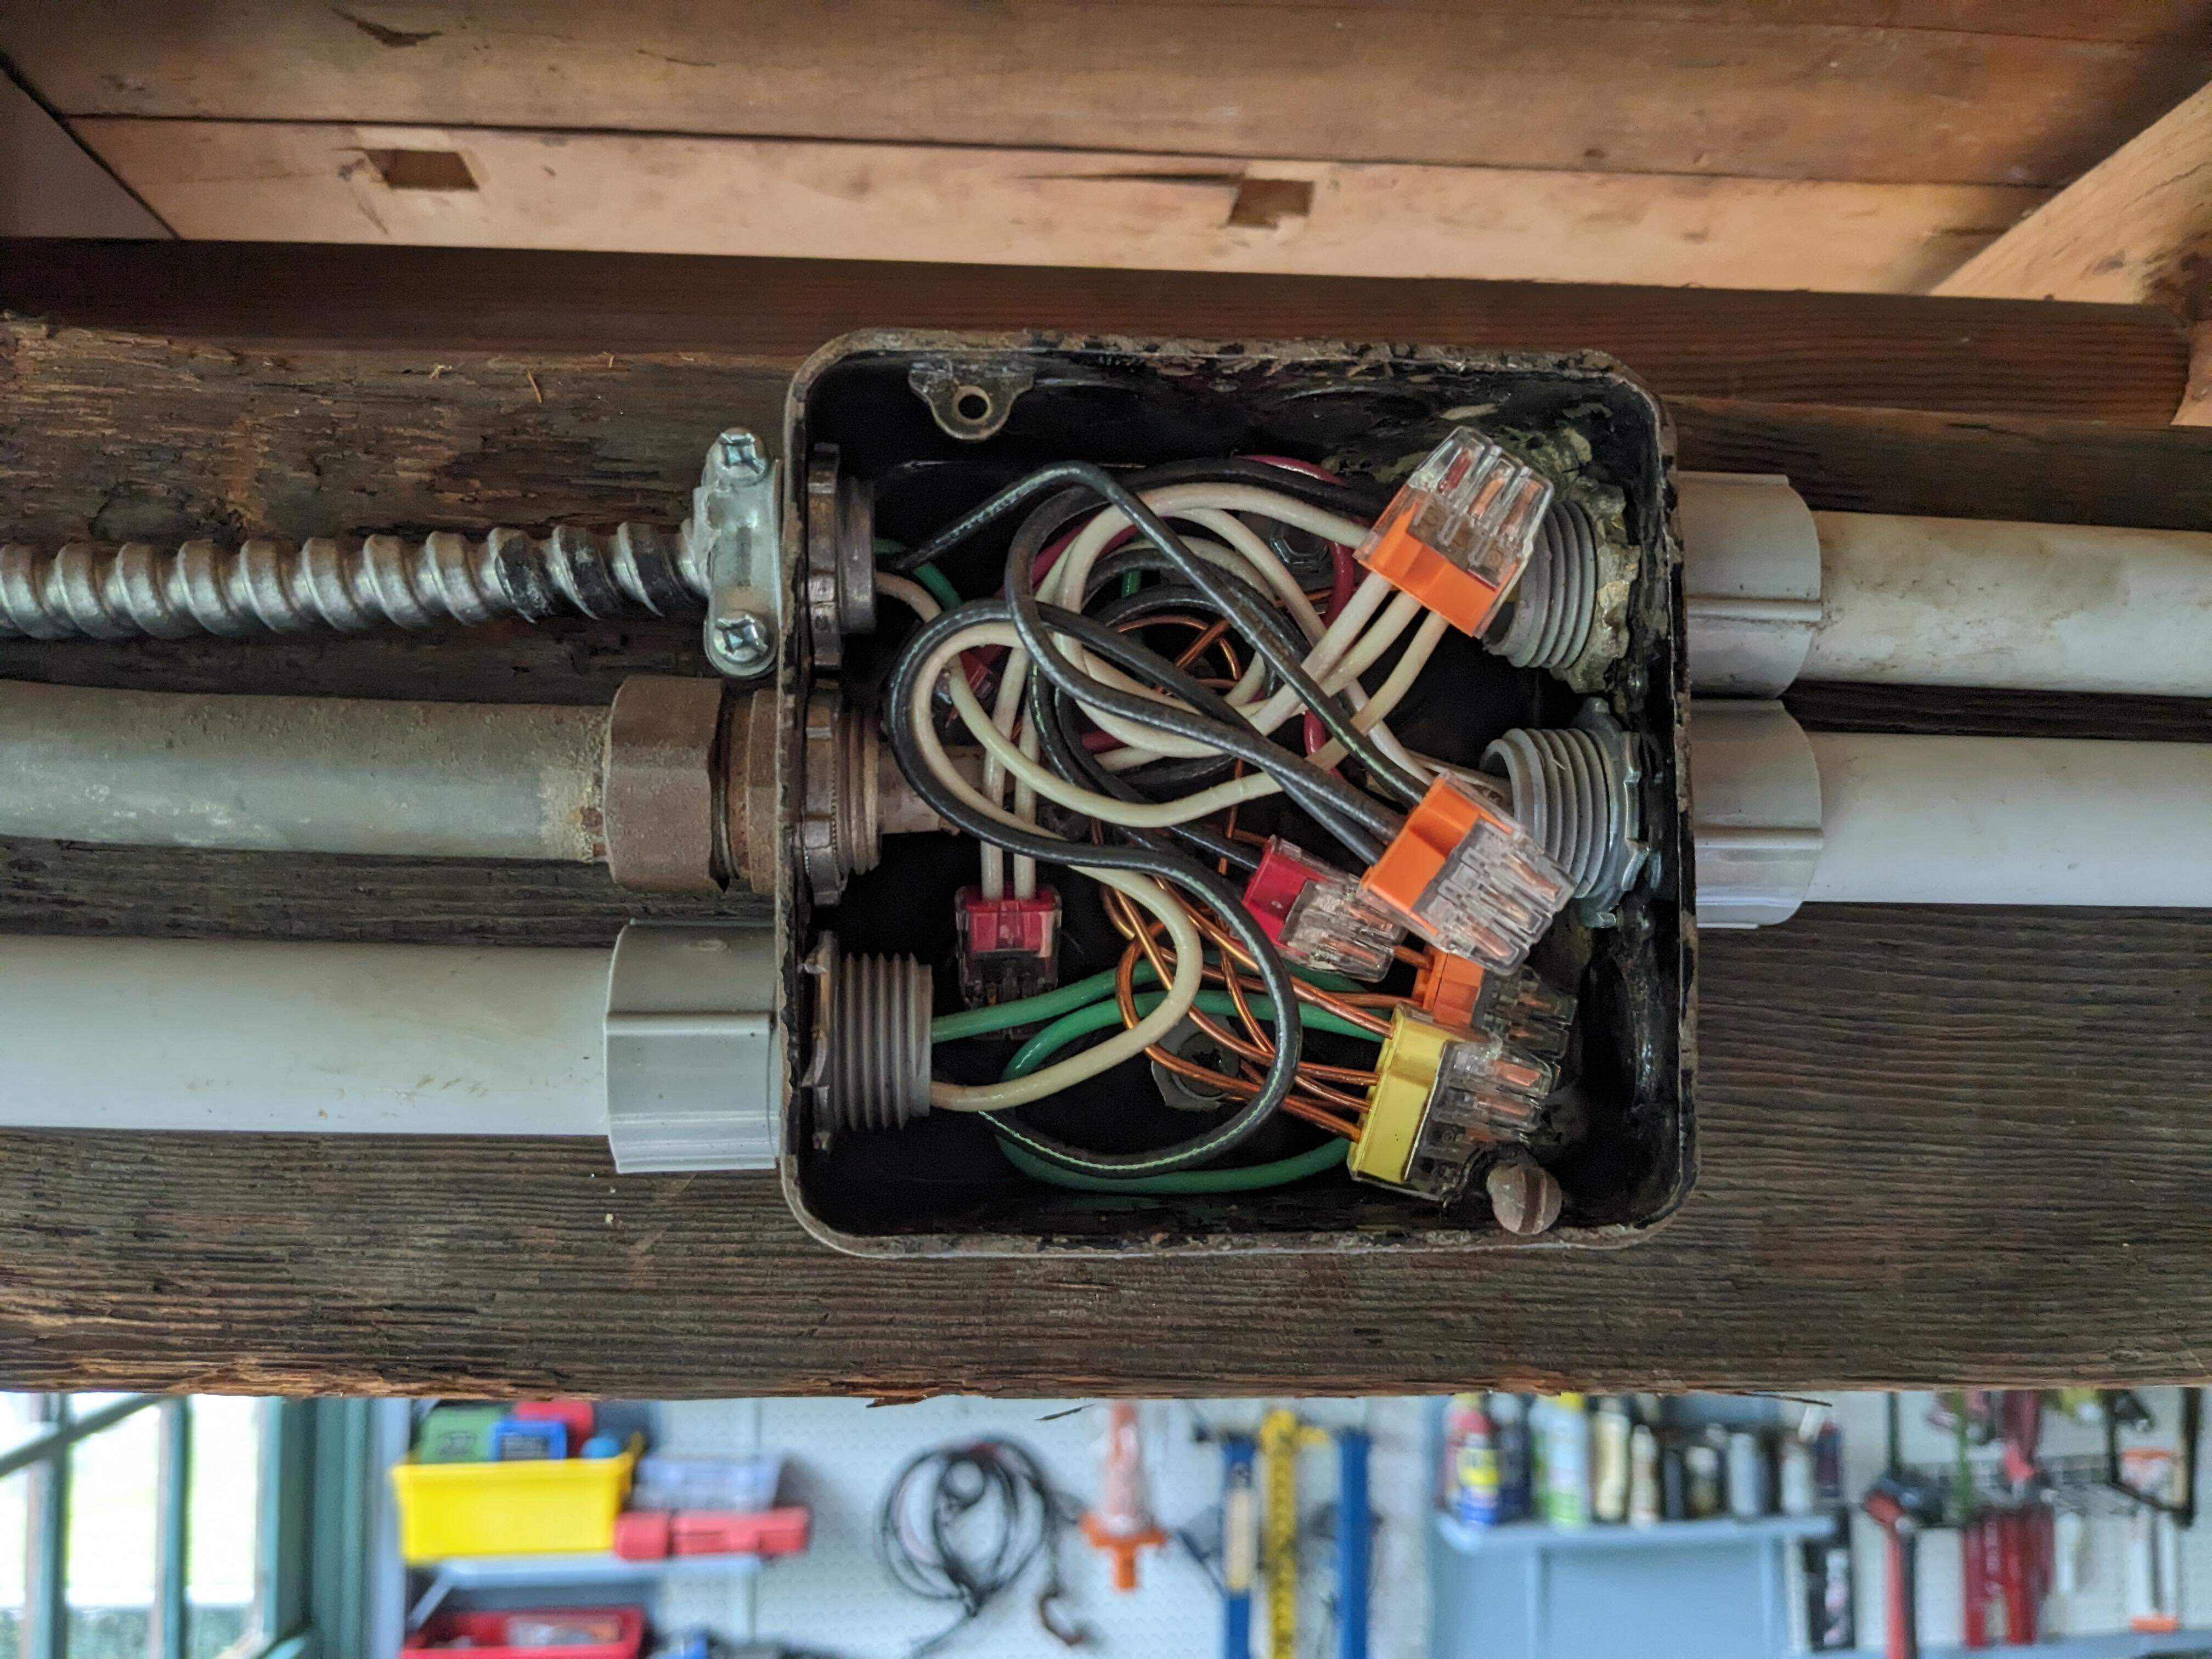
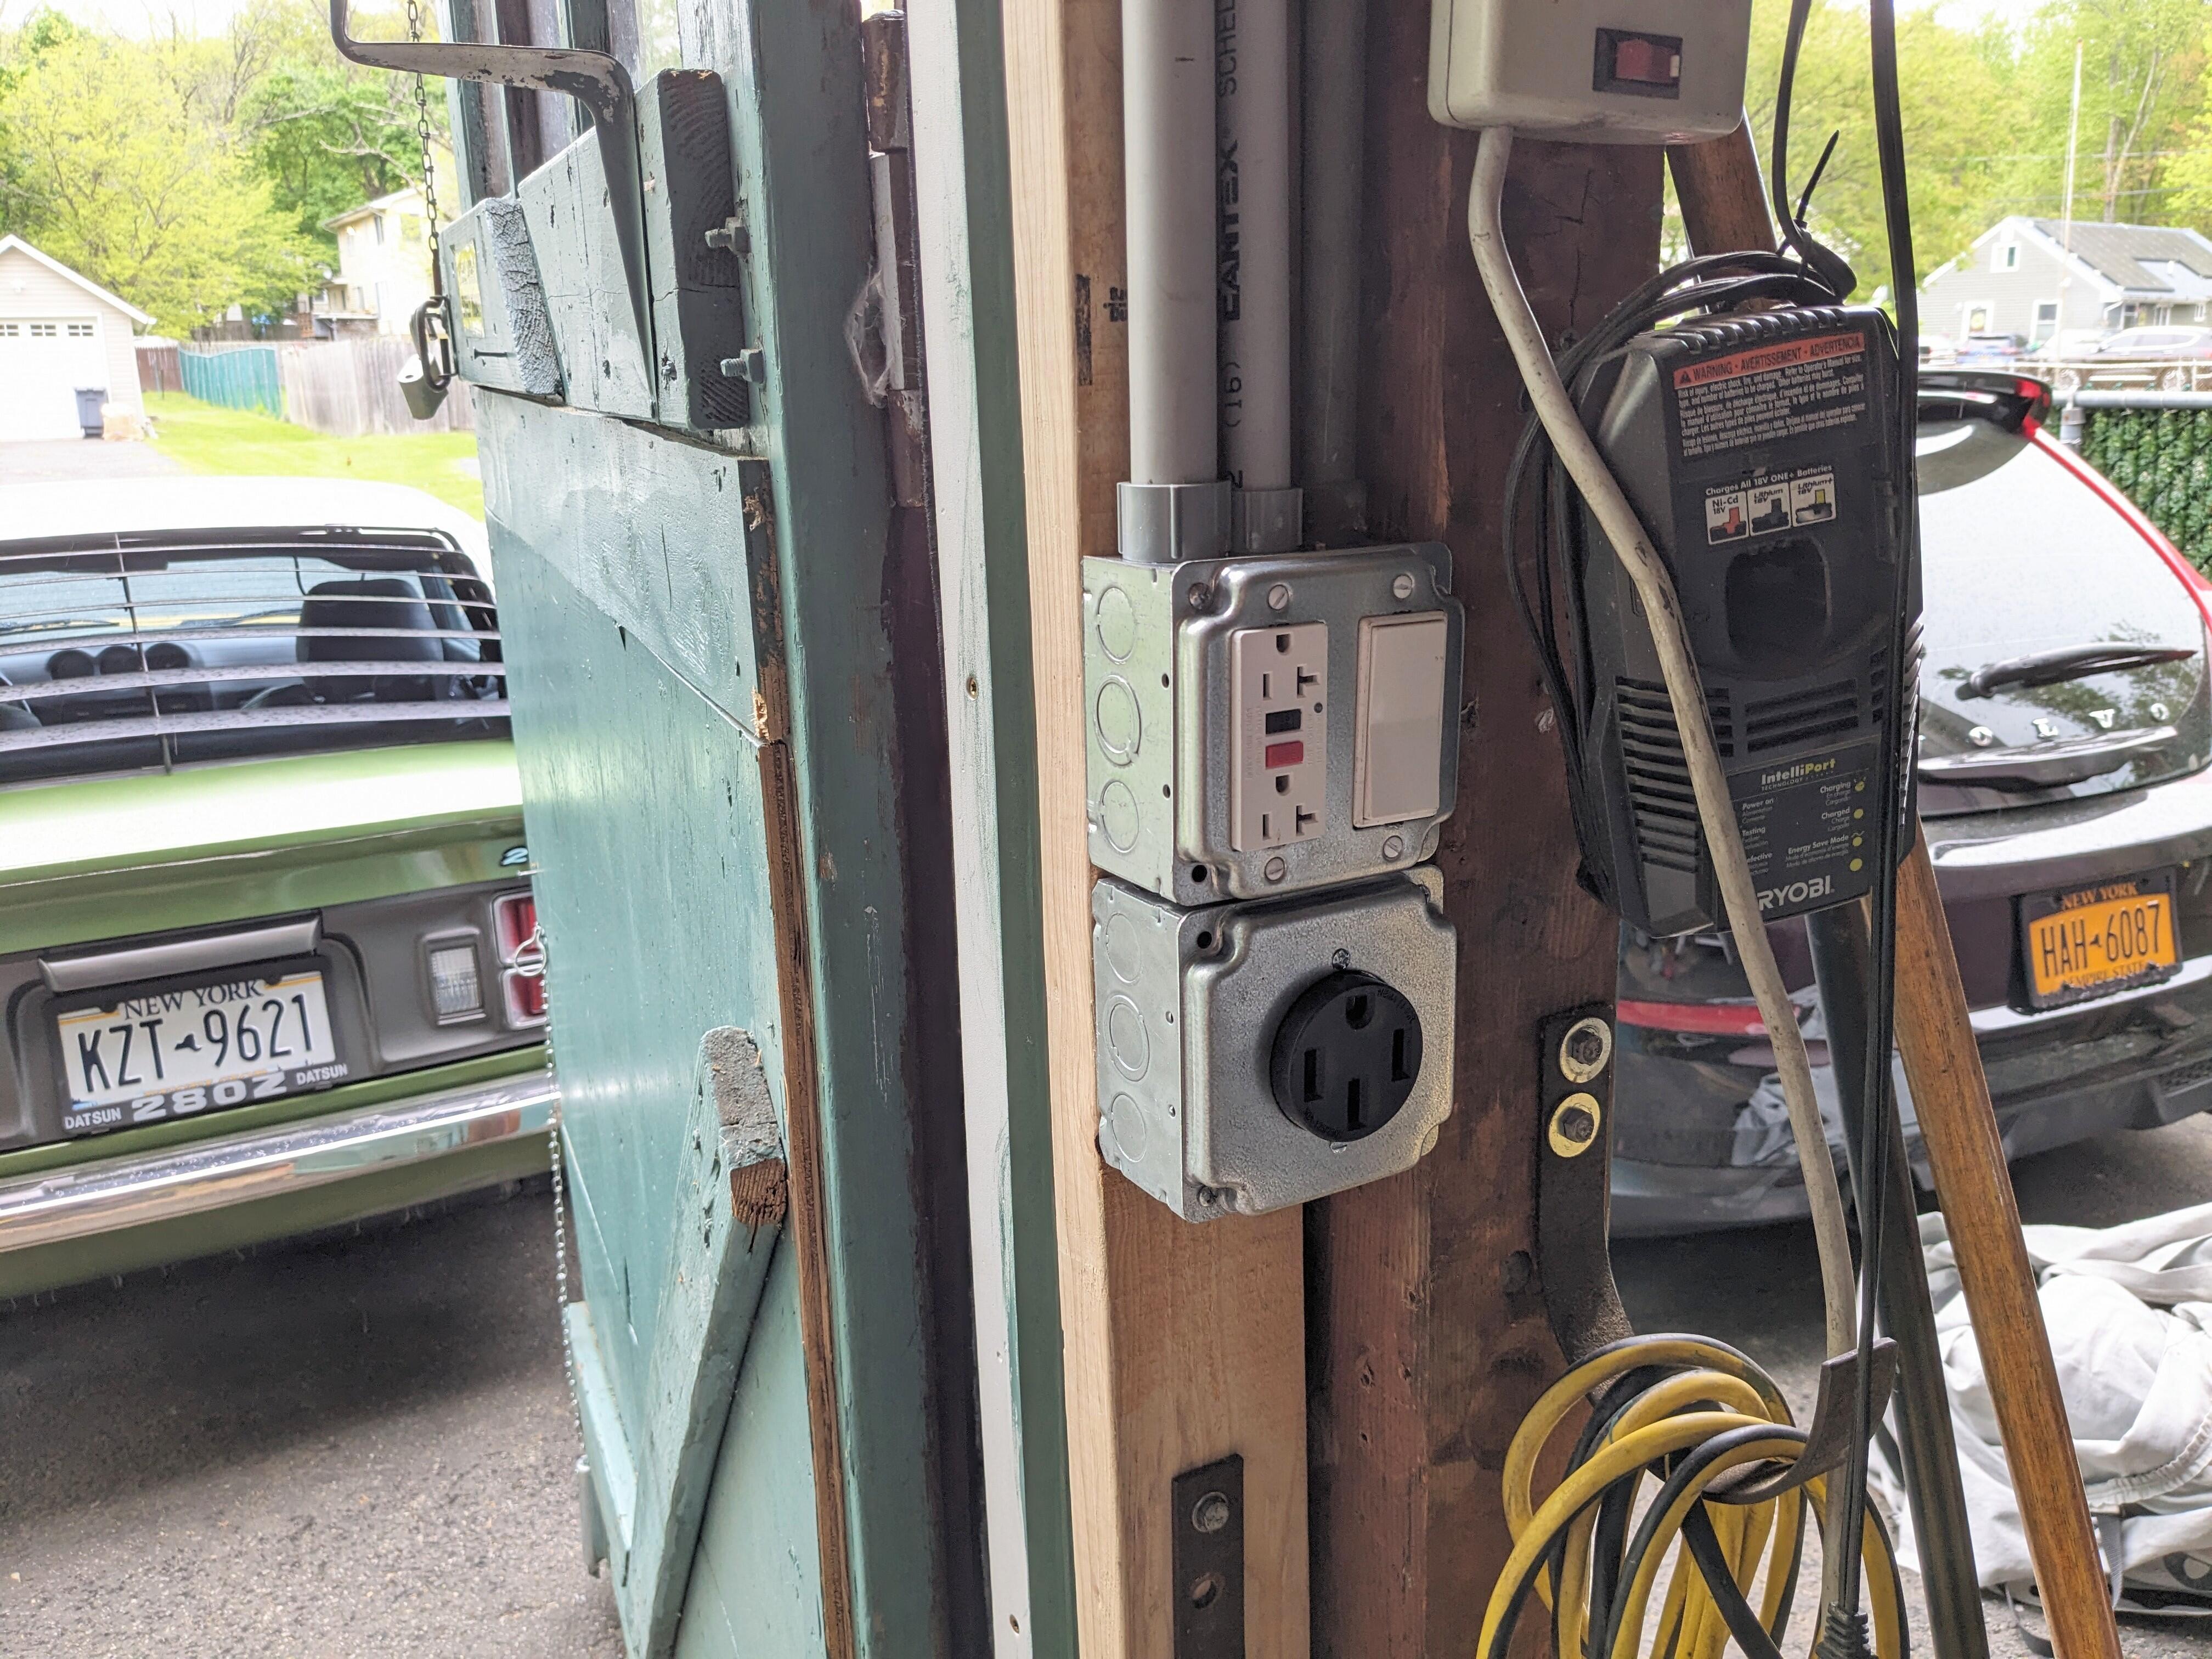
 For the time being, I added a junction box to replace the old single fuse sub panel, and added 12AWG from there to the new sub panel, to one of the phases. I understand doing this is not to any code. I only have the few circuits running off it, until I get the 6AWG underground feed in place, then I'll properly wire the sub panel with the two phases and connect the 240 branch. Added a ground from the panel to the conduit used to supply the 120v supply Wiring to the 240 outlet above, waiting for the 10AWG individual wires, then I'll wire the receptacle added a GFCI receptacle & a regular on the load side, by the door, separate fused branch from the branches in the west addition and what will be on the south wall. I will continue that branch into the north wall when that addition happens All the conduit tidied up on this side now After that - the (Electric) power steering pump on the C30 is on the way out (130K miles) - making a nasty scream under load (cornering). Looking online, the FoMoCo part is pretty indestructible, except for the lower shaft bearing, which is not in an oil bath like the upper one. The unit is not intended to be serviced, so a Filter cutter is required to cleanly cut off the motor cap. after that, the reservoir is removed by stretching the Oetiker clamp, then the pump is removed, followed by a drive gear , c clip & washer - then the motor shaft can be tapped out of the upper bearing. bearing destruction New Timken bearing installed more to come
Yeah - I would not want to be the passenger. My wife is a really good sport 🤪
Back in 2016 I went to the Tail of The Dragon with 30 other C30's from across the country - the car handles really well in this type driving
It's a great car - interior is quite unremarkable (Ford era Volvo), however for my size it is extremely comfortable & pedal position, etc., is perfect. I don't have any interior pics besides a couple from when I replaced the upholstery with leather. It is 6 speed manual. I converted it to AWD after putting a larger turbo/tune in it, as FWD just gave too much wheelspin . Plenty of exterior pics, it's a good looking form 😁
For the time being, I added a junction box to replace the old single fuse sub panel, and added 12AWG from there to the new sub panel, to one of the phases. I understand doing this is not to any code. I only have the few circuits running off it, until I get the 6AWG underground feed in place, then I'll properly wire the sub panel with the two phases and connect the 240 branch. Added a ground from the panel to the conduit used to supply the 120v supply Wiring to the 240 outlet above, waiting for the 10AWG individual wires, then I'll wire the receptacle added a GFCI receptacle & a regular on the load side, by the door, separate fused branch from the branches in the west addition and what will be on the south wall. I will continue that branch into the north wall when that addition happens All the conduit tidied up on this side now After that - the (Electric) power steering pump on the C30 is on the way out (130K miles) - making a nasty scream under load (cornering). Looking online, the FoMoCo part is pretty indestructible, except for the lower shaft bearing, which is not in an oil bath like the upper one. The unit is not intended to be serviced, so a Filter cutter is required to cleanly cut off the motor cap. after that, the reservoir is removed by stretching the Oetiker clamp, then the pump is removed, followed by a drive gear , c clip & washer - then the motor shaft can be tapped out of the upper bearing. bearing destruction New Timken bearing installed more to come
Yeah - I would not want to be the passenger. My wife is a really good sport 🤪
Back in 2016 I went to the Tail of The Dragon with 30 other C30's from across the country - the car handles really well in this type driving
It's a great car - interior is quite unremarkable (Ford era Volvo), however for my size it is extremely comfortable & pedal position, etc., is perfect. I don't have any interior pics besides a couple from when I replaced the upholstery with leather. It is 6 speed manual. I converted it to AWD after putting a larger turbo/tune in it, as FWD just gave too much wheelspin . Plenty of exterior pics, it's a good looking form 😁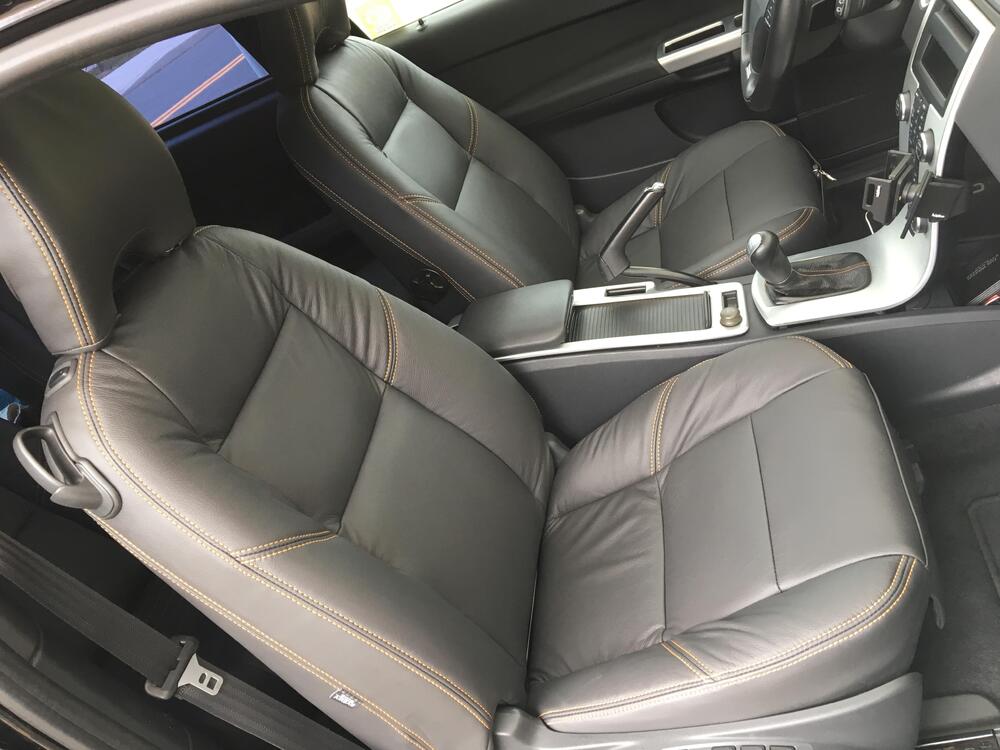
 Small amount of work accomplished today, between chores & visit from a good family friend who had moved upstate. Go the junctions on the center beam connected for the attic lighting branch, the overhead lighting, and the outlet on the me main door post. Also ran the 3/4 conduit from that box up & over to the south wall, where it will ultimately connect to the feeder branch coming down the south west corner post. Separated all the 12/2 and 14/3 wiring into their own conduit. I worked in layers starting with the grounds, then neutrals, then travellers, switch outputs and finally the hot feeds Had to make schematics for each junction, to make sure I didn't mis-connect anything, having a 3way switched circuit for one branch of the lighting makes me check 3 times at least. Hopefully get more done than this tomorrow.
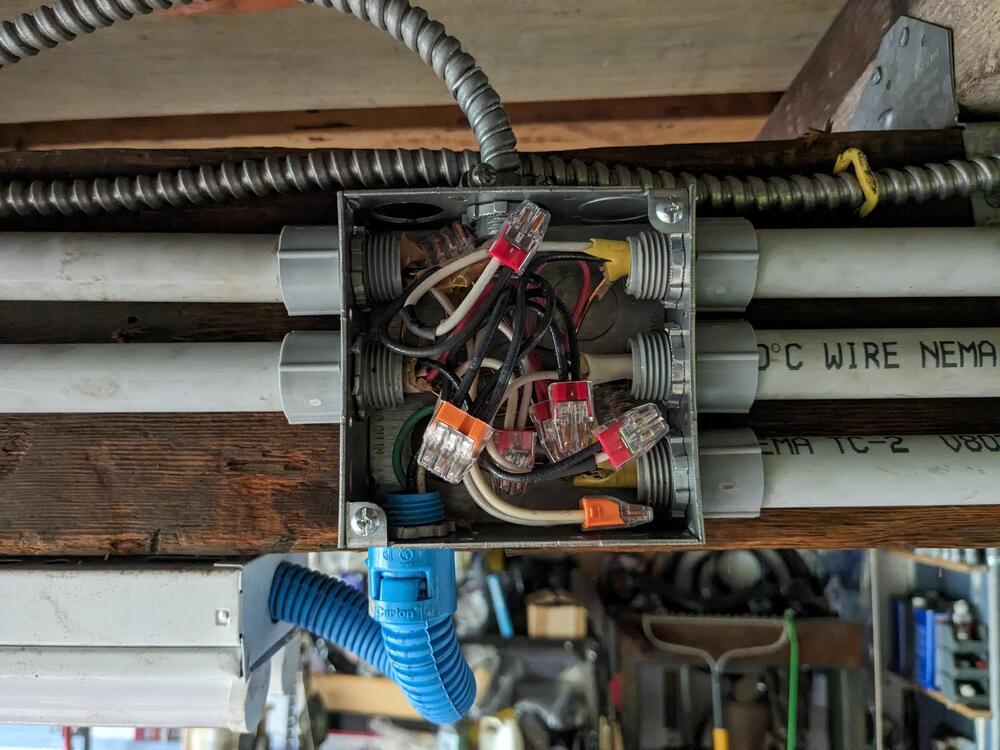
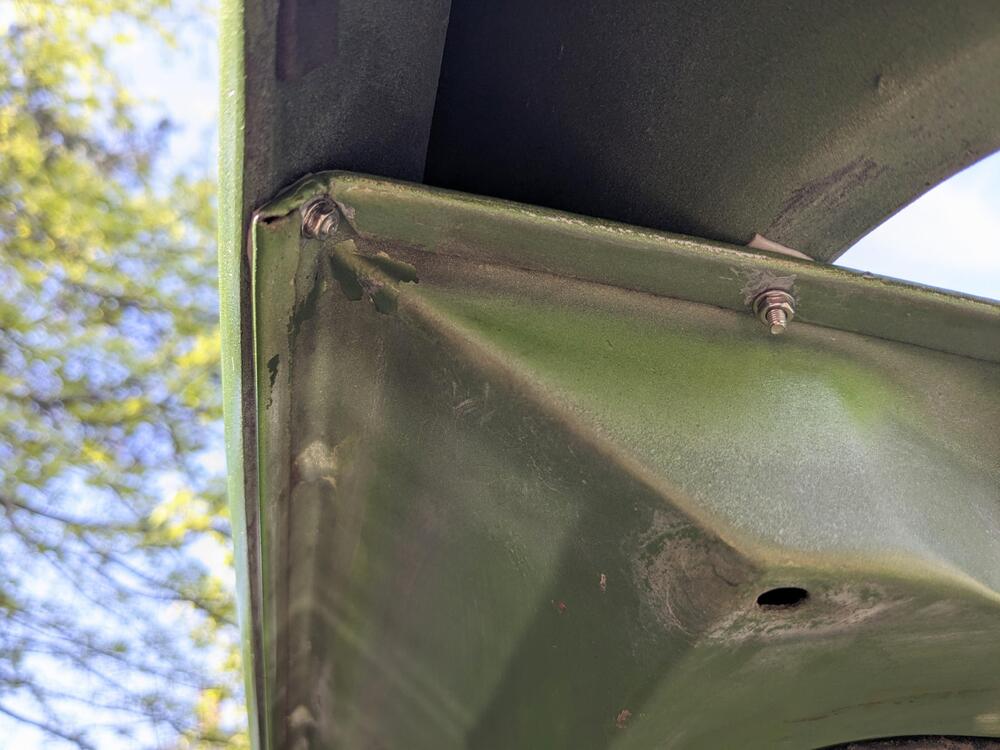
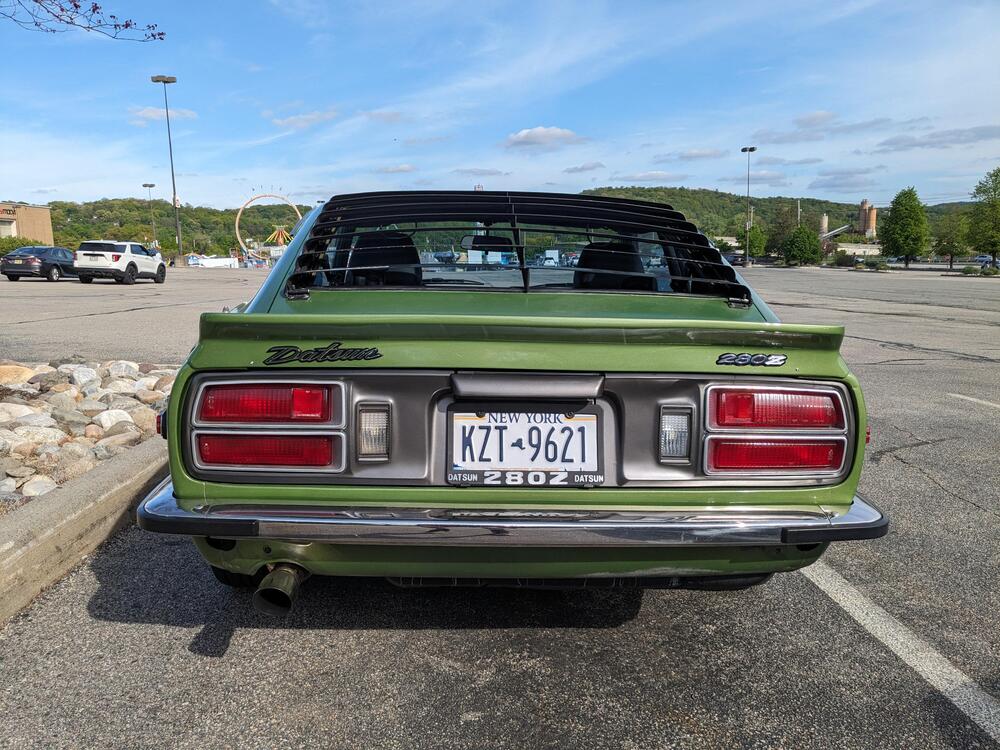
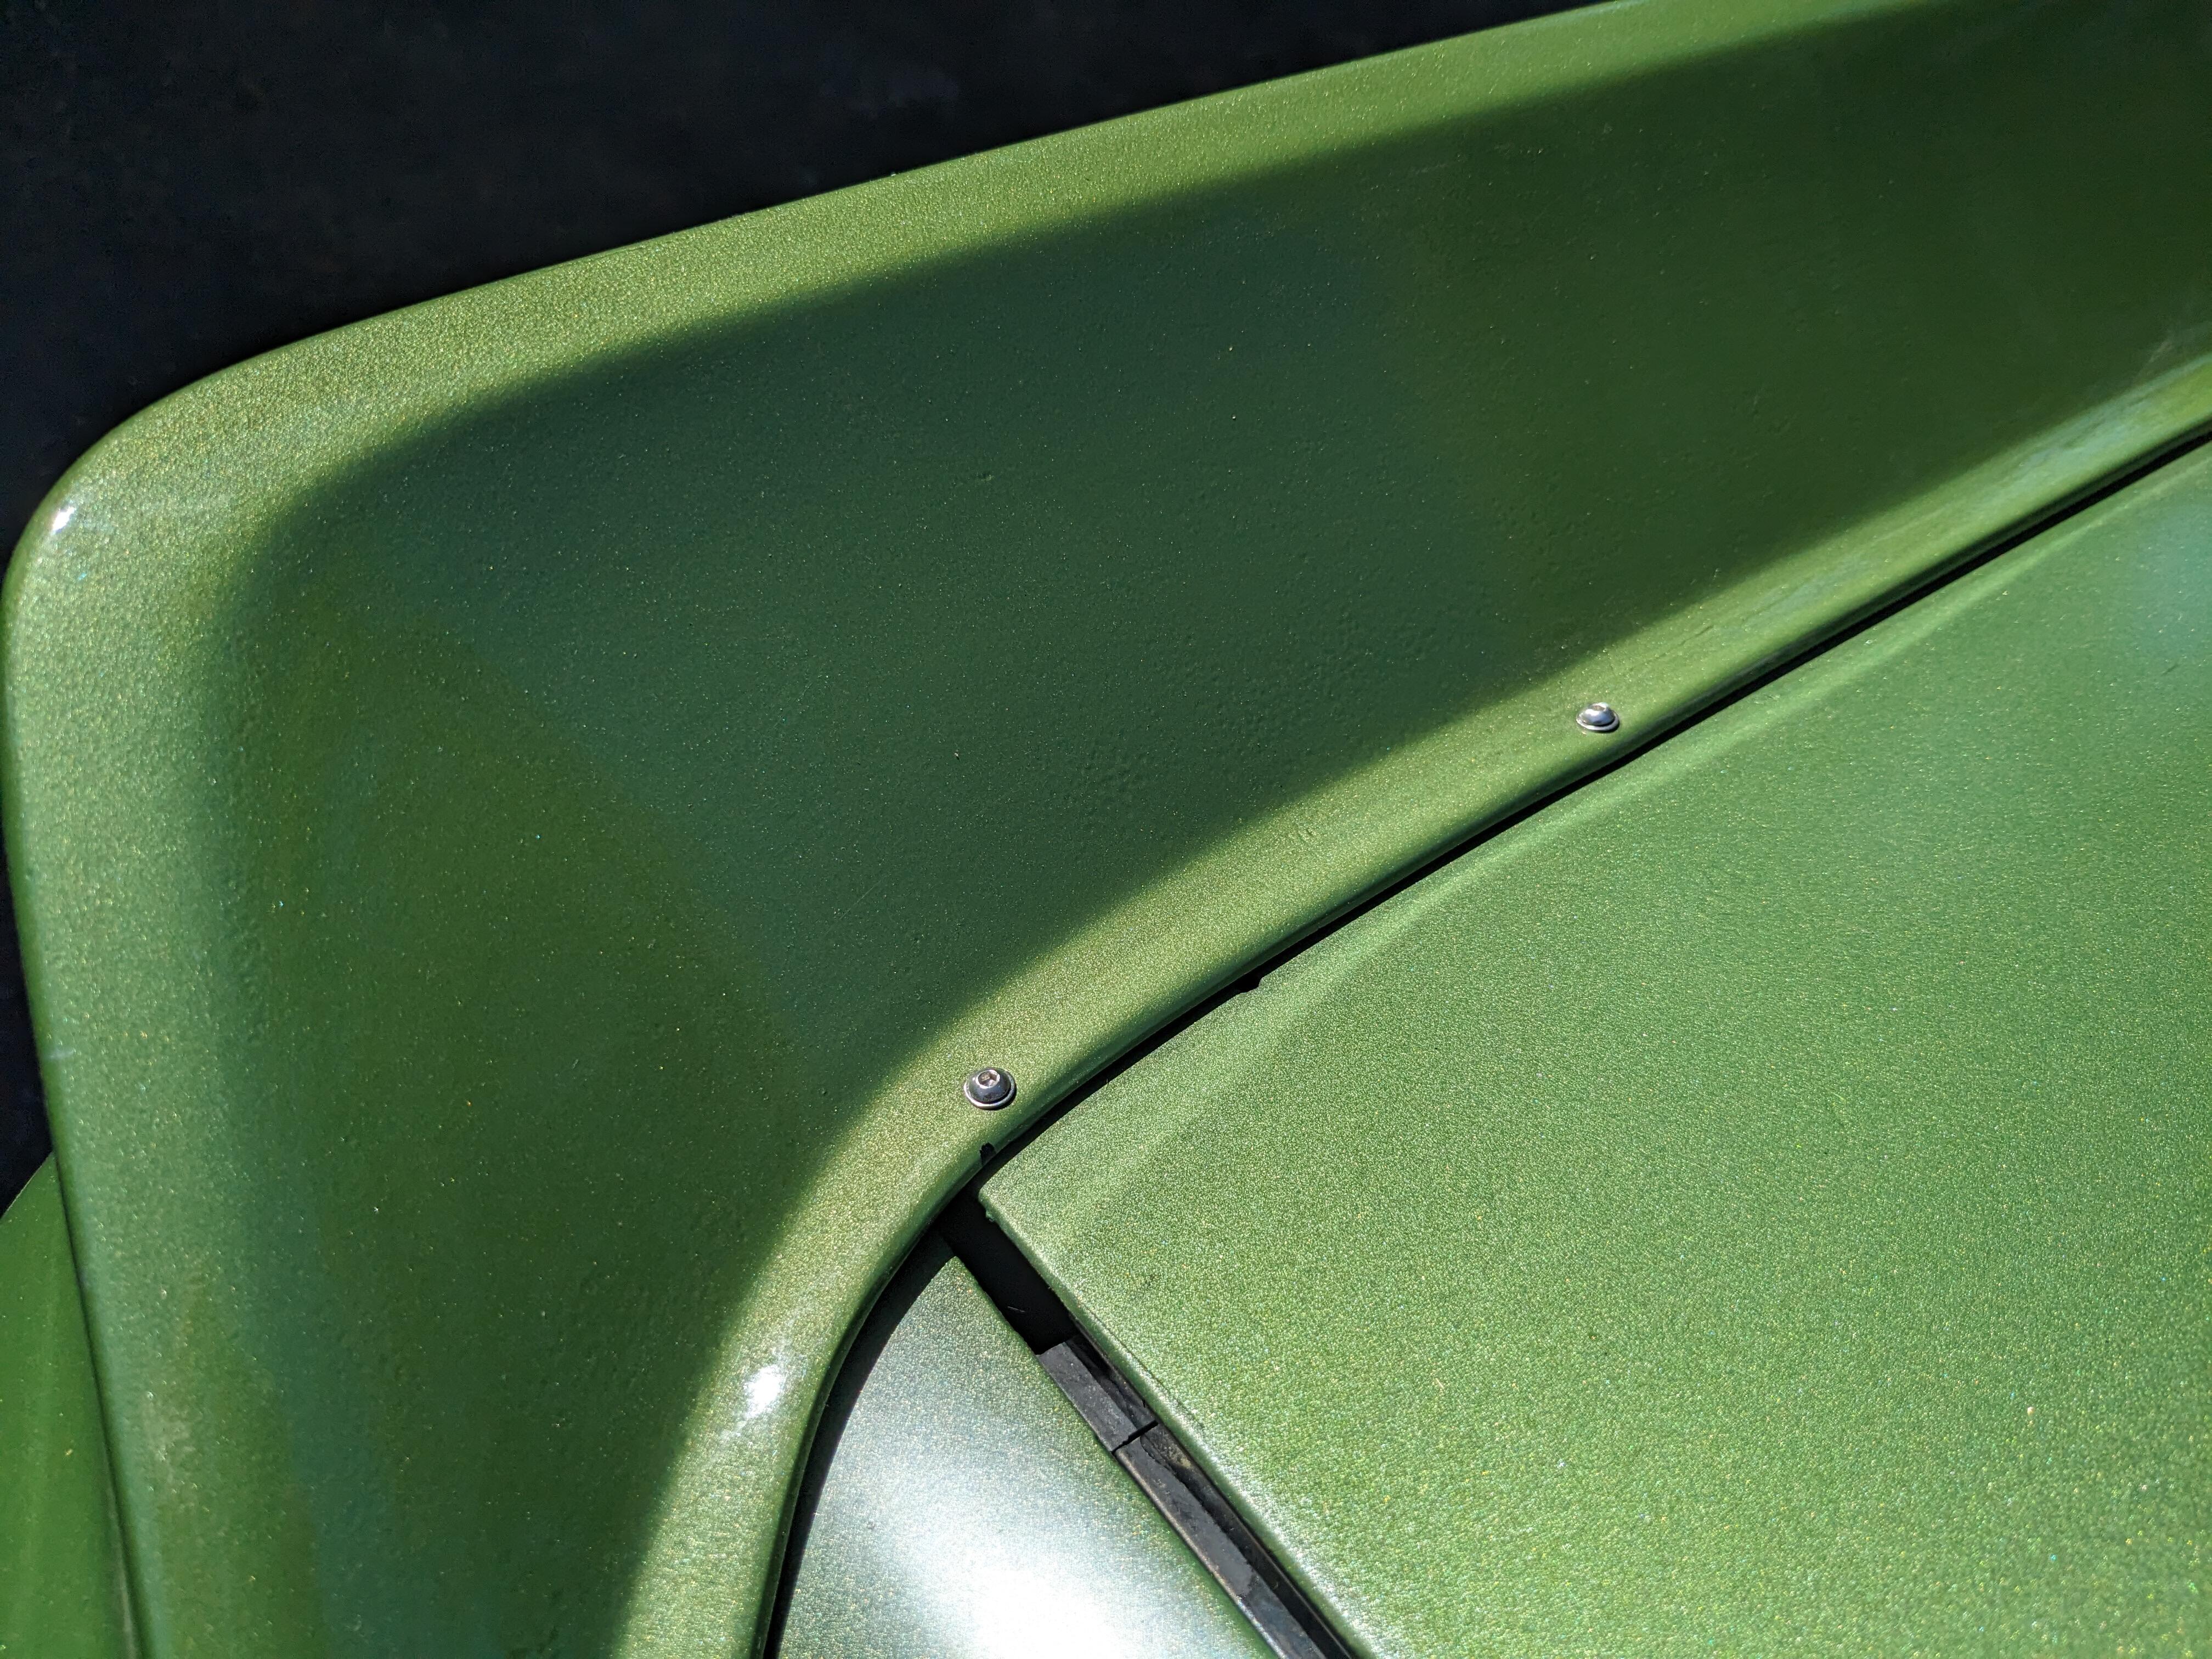
 Details on the Xenon rear spoiler install. The way it's designed, the end caps press against the rear quarters. The issue there is that the pressure causes the spoiler to pull away from the hatch along the top, and on the back edge. To counter that, I added two more M3 SS machine screws to the outer edge of the hatch, and to the vertical outer edge. screw heads are visible from the outside, however I'm OK with that.
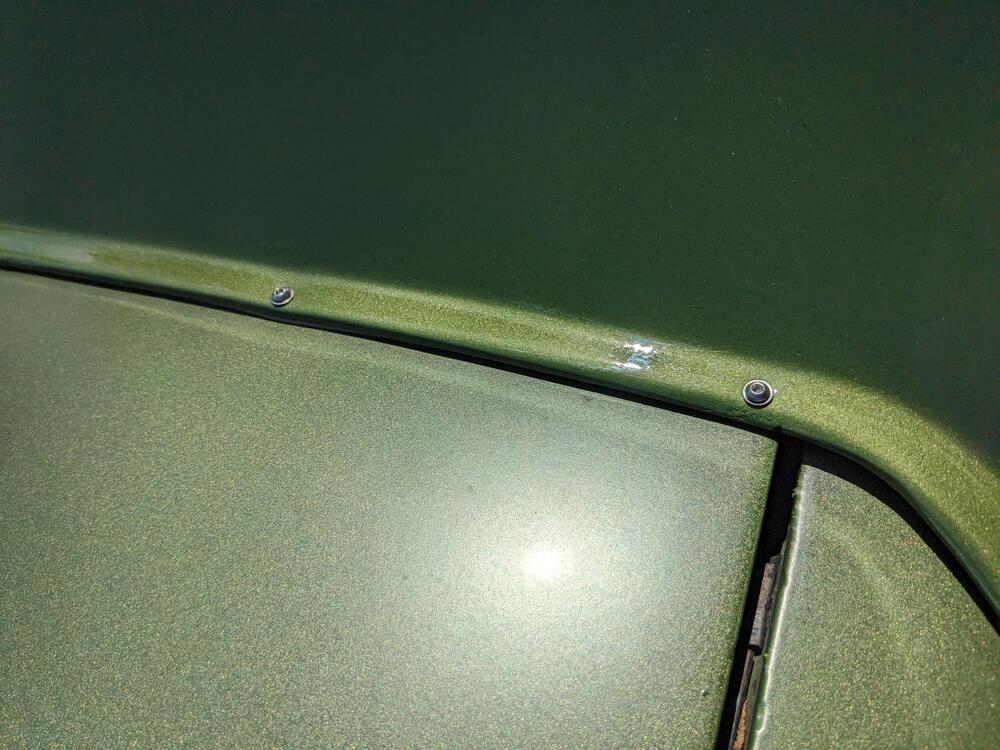

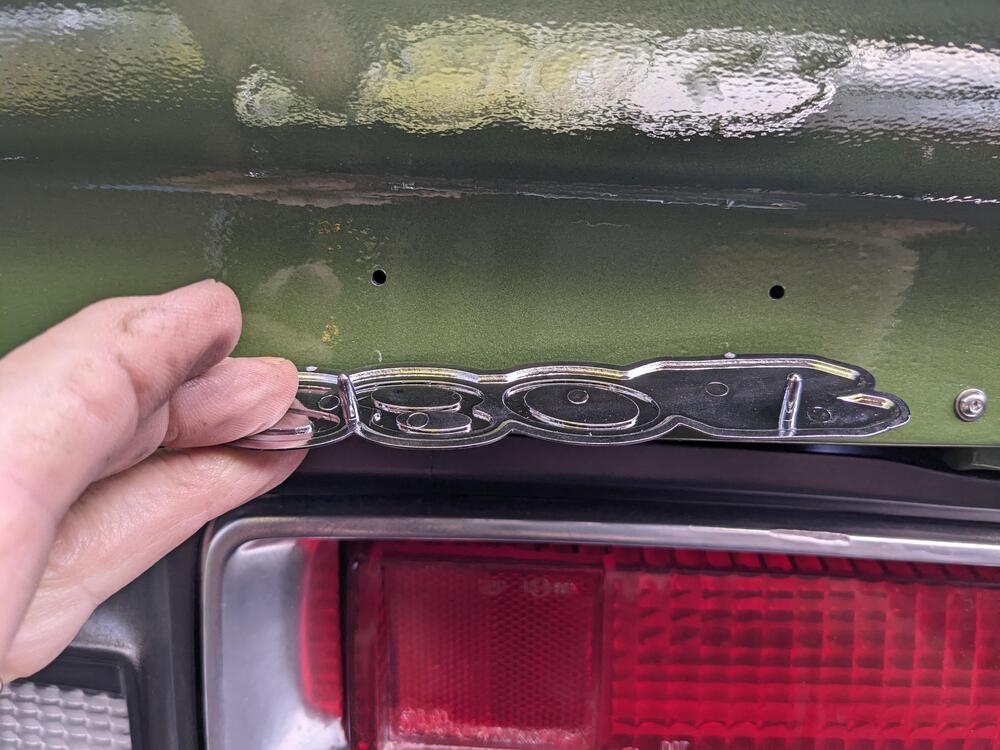
 Hello Steve - I have them - they come with the new emblems - the spoiler is thicker than sheet metal, so I don't k now if the clips will lock into place. I didn't want to risk drilling what would then be an oversize hole in the spoiler & have the clip not work as intended.
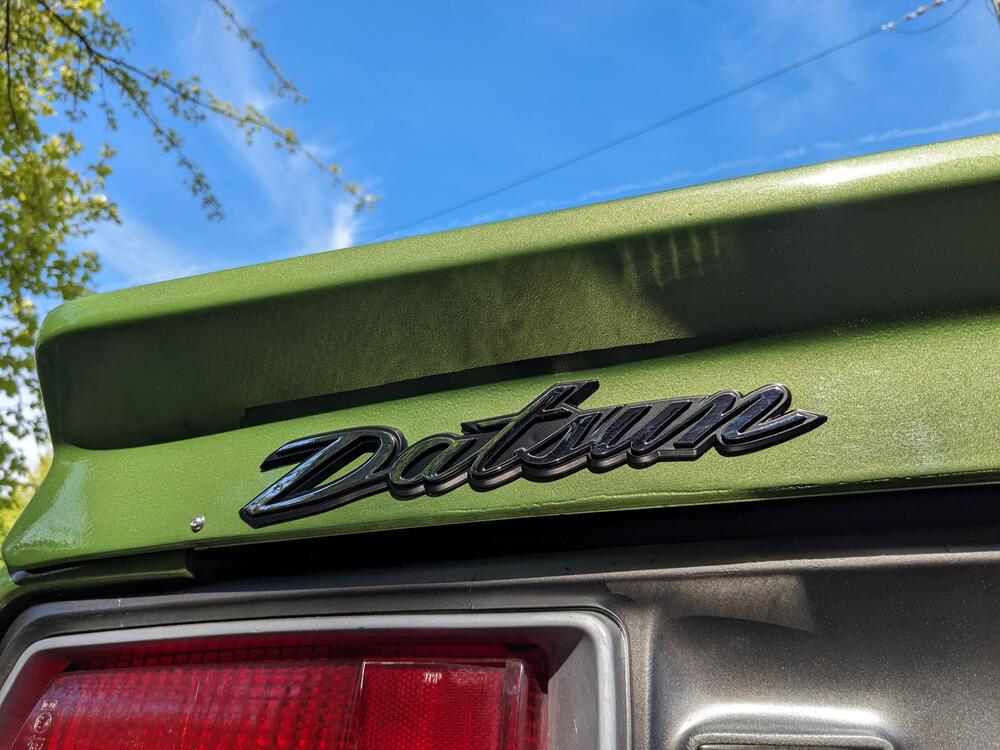
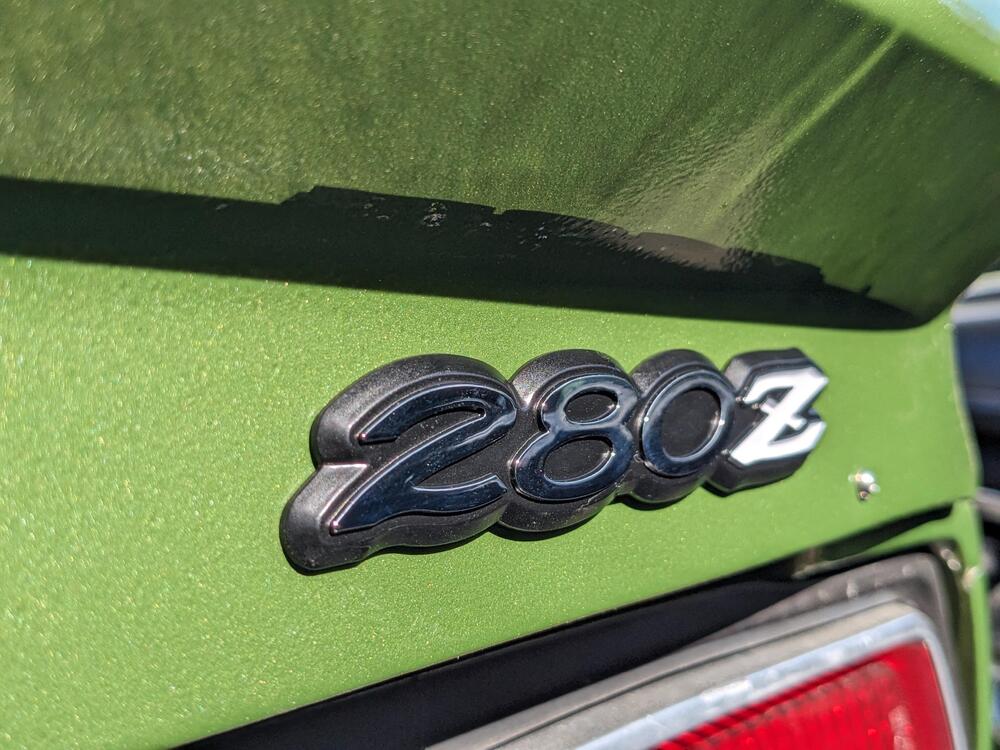
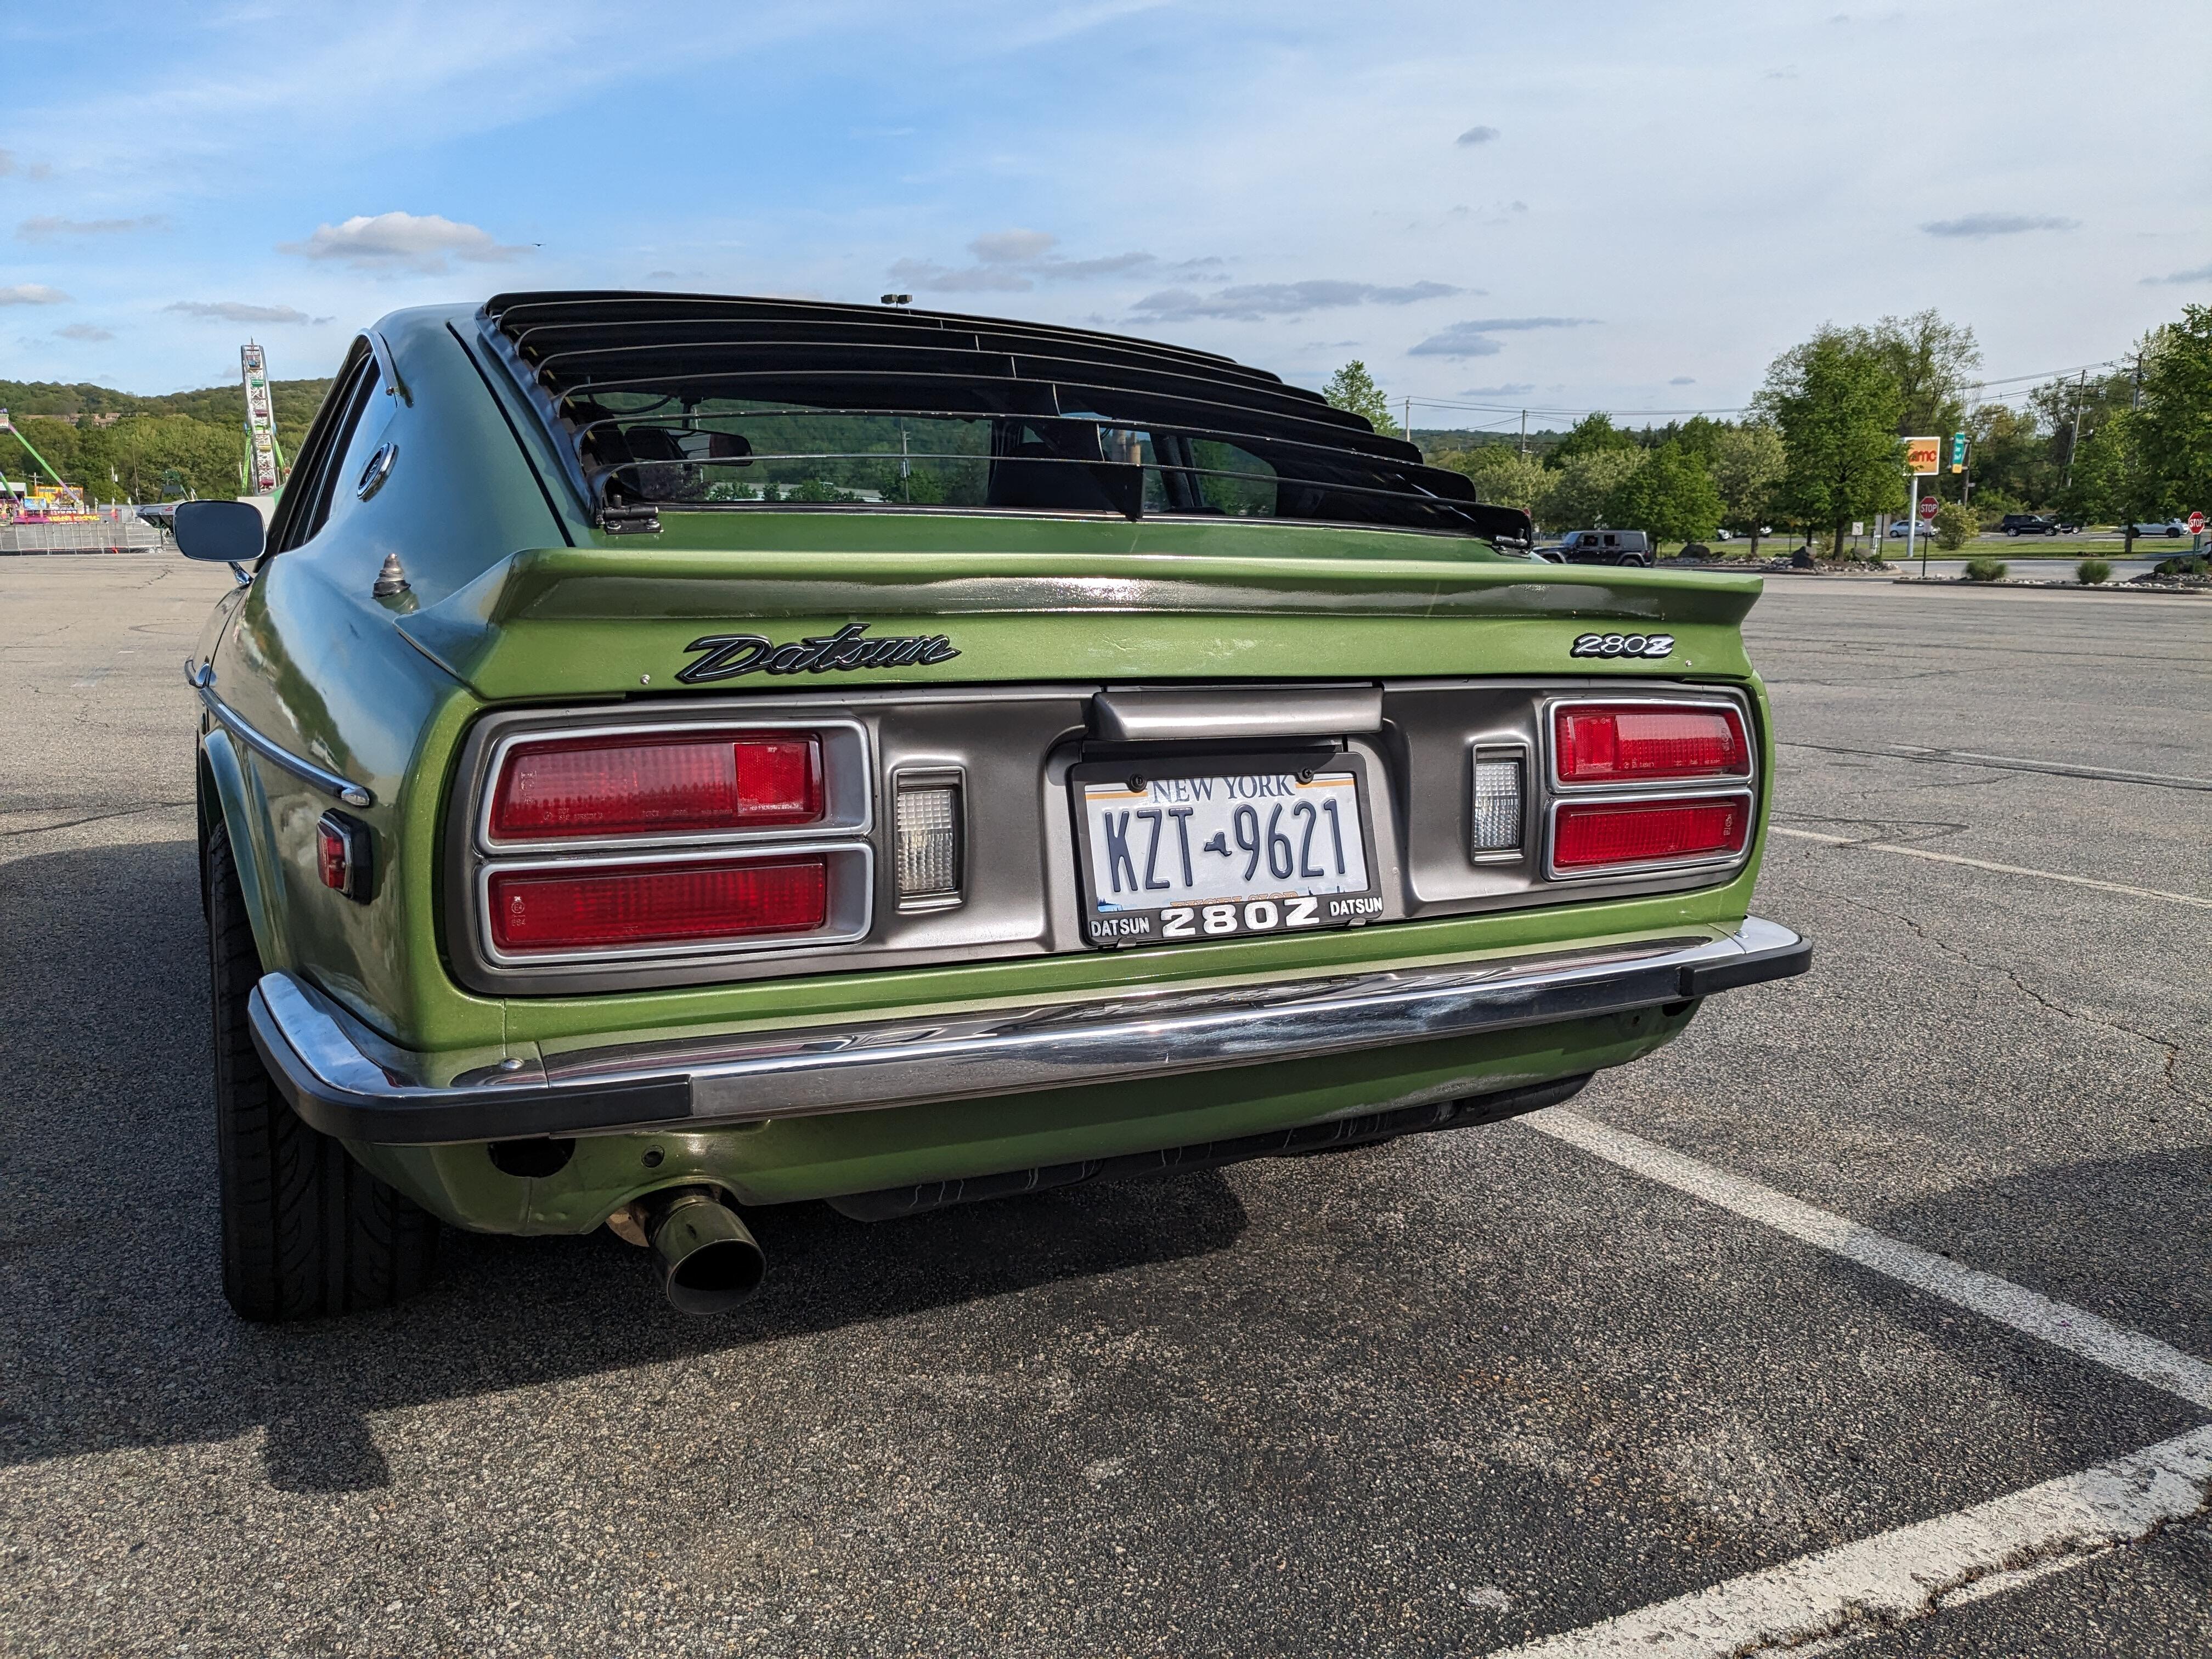
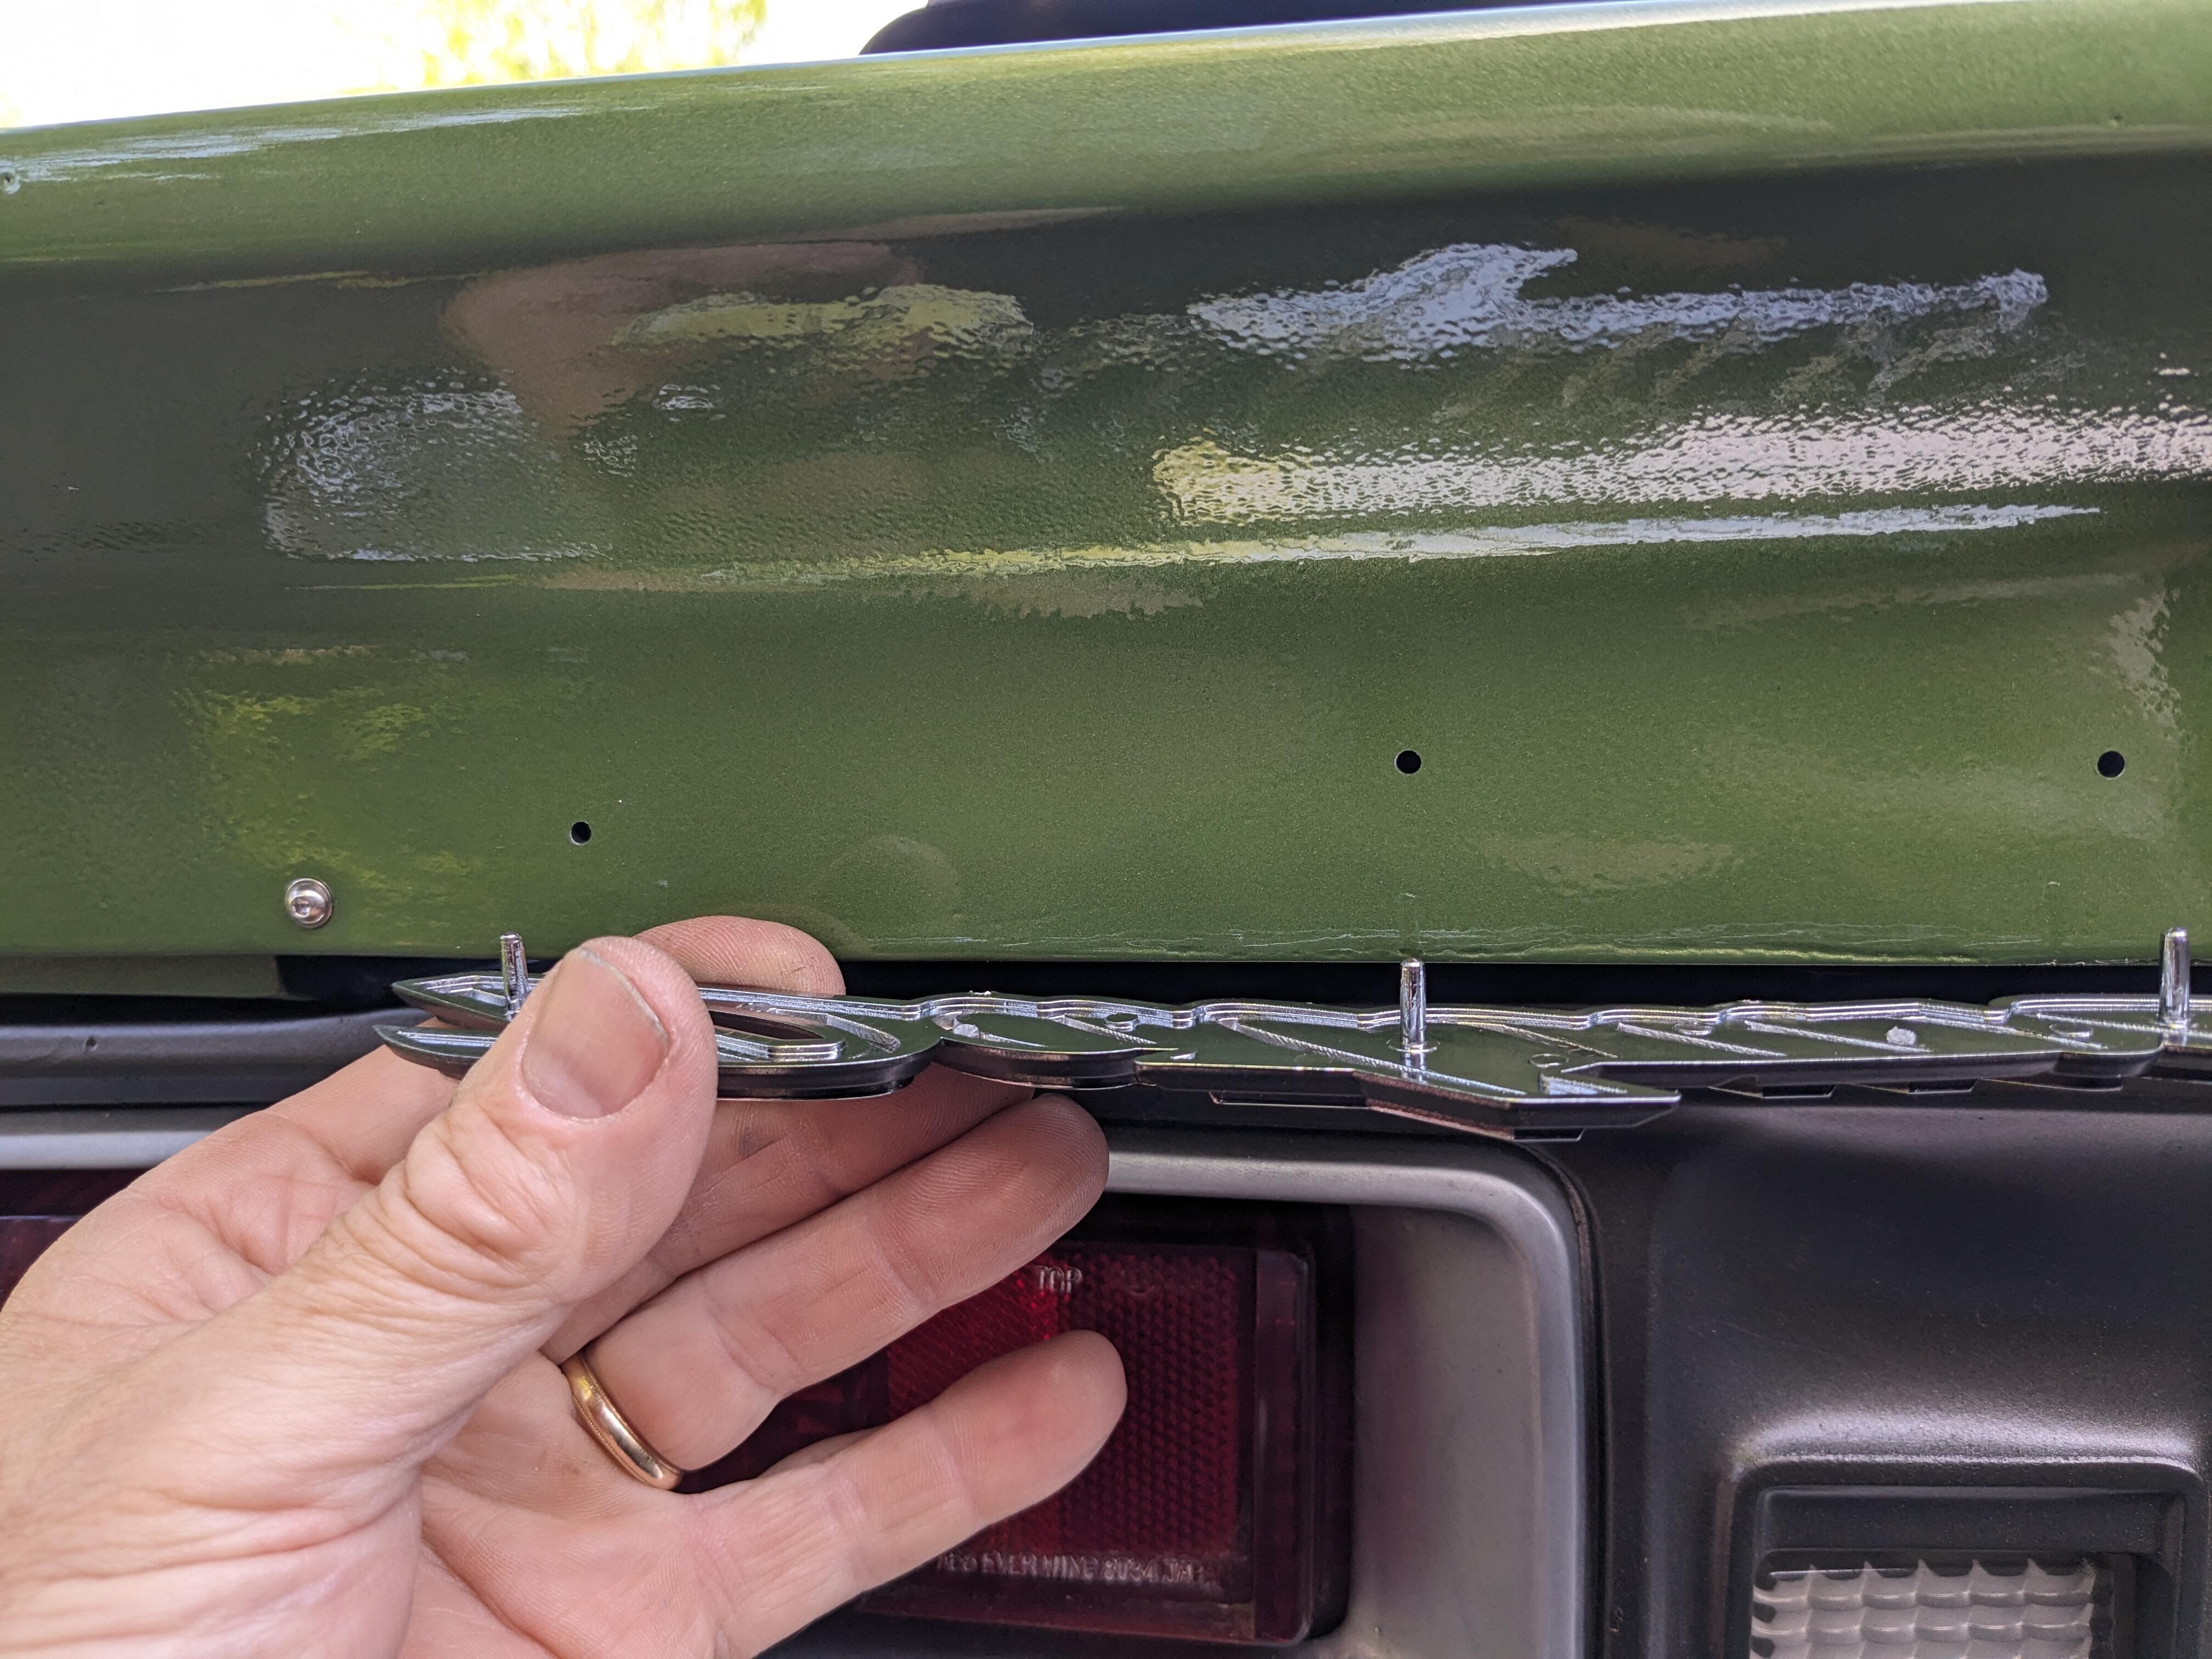
Got the new Datsun & 280Z emblems today (from resurrected classics). I contemplate the location of the Datsun emblem a bit, since on the hatch, it is set on a diagonal - it's obviously not really intended to be set in a horizontal spot. I ended up angling it very slightly to mimic the hatch fitting 280Z set horizontally, 15mm up from bottom edge I just drilled the spoiler slightly under the pin size, so it's a press fit
Hello Steve - I have them - they come with the new emblems - the spoiler is thicker than sheet metal, so I don't k now if the clips will lock into place. I didn't want to risk drilling what would then be an oversize hole in the spoiler & have the clip not work as intended.
Got the new Datsun & 280Z emblems today (from resurrected classics). I contemplate the location of the Datsun emblem a bit, since on the hatch, it is set on a diagonal - it's obviously not really intended to be set in a horizontal spot. I ended up angling it very slightly to mimic the hatch fitting 280Z set horizontally, 15mm up from bottom edge I just drilled the spoiler slightly under the pin size, so it's a press fit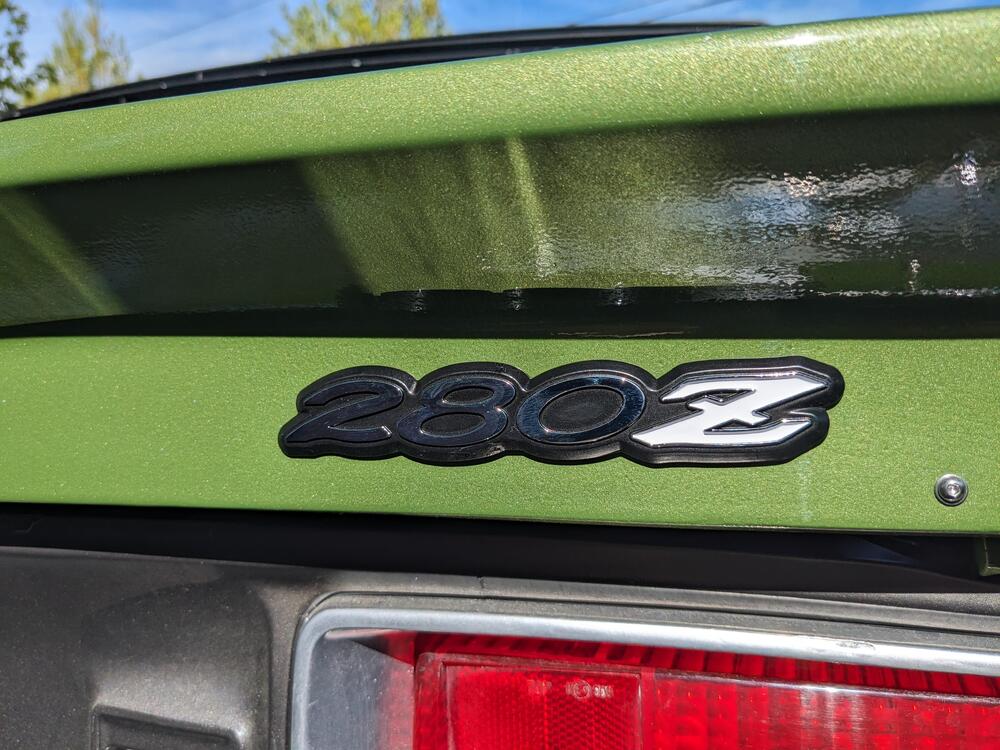


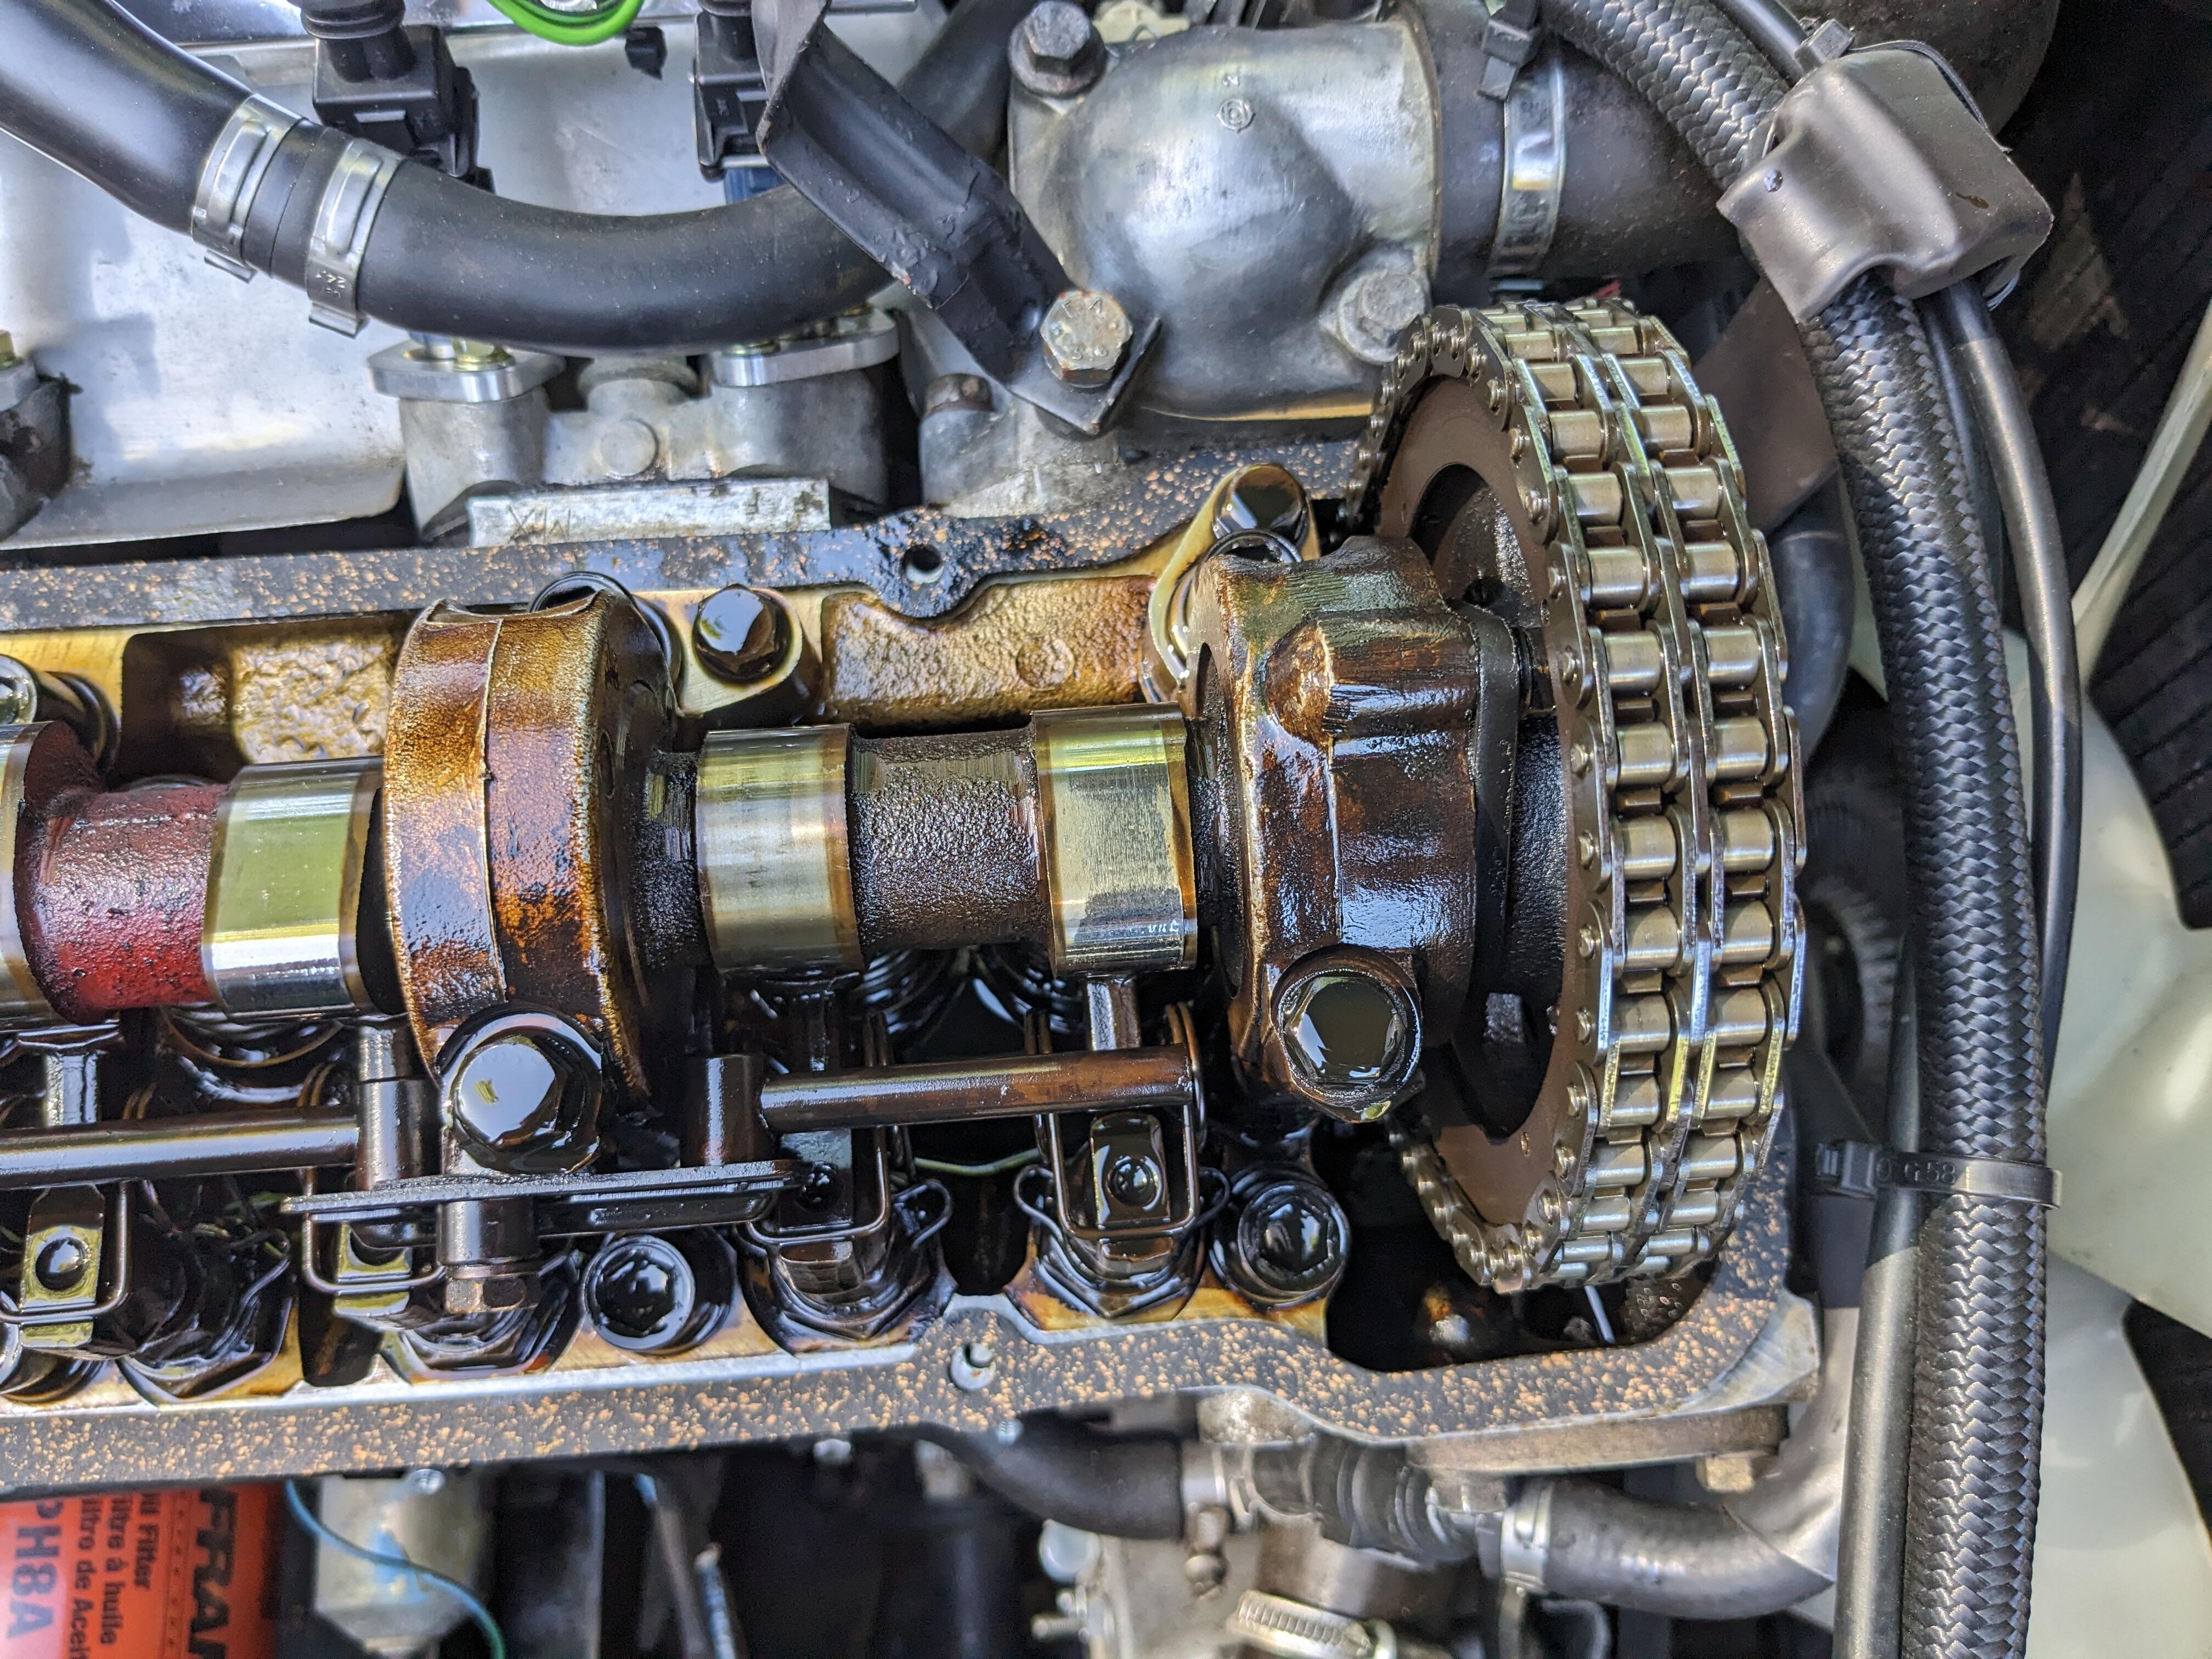
 Yes - I got that - you can see the shoulder placement in my second pic - when reversed, it is stretched on the area between #1 & the cam chain
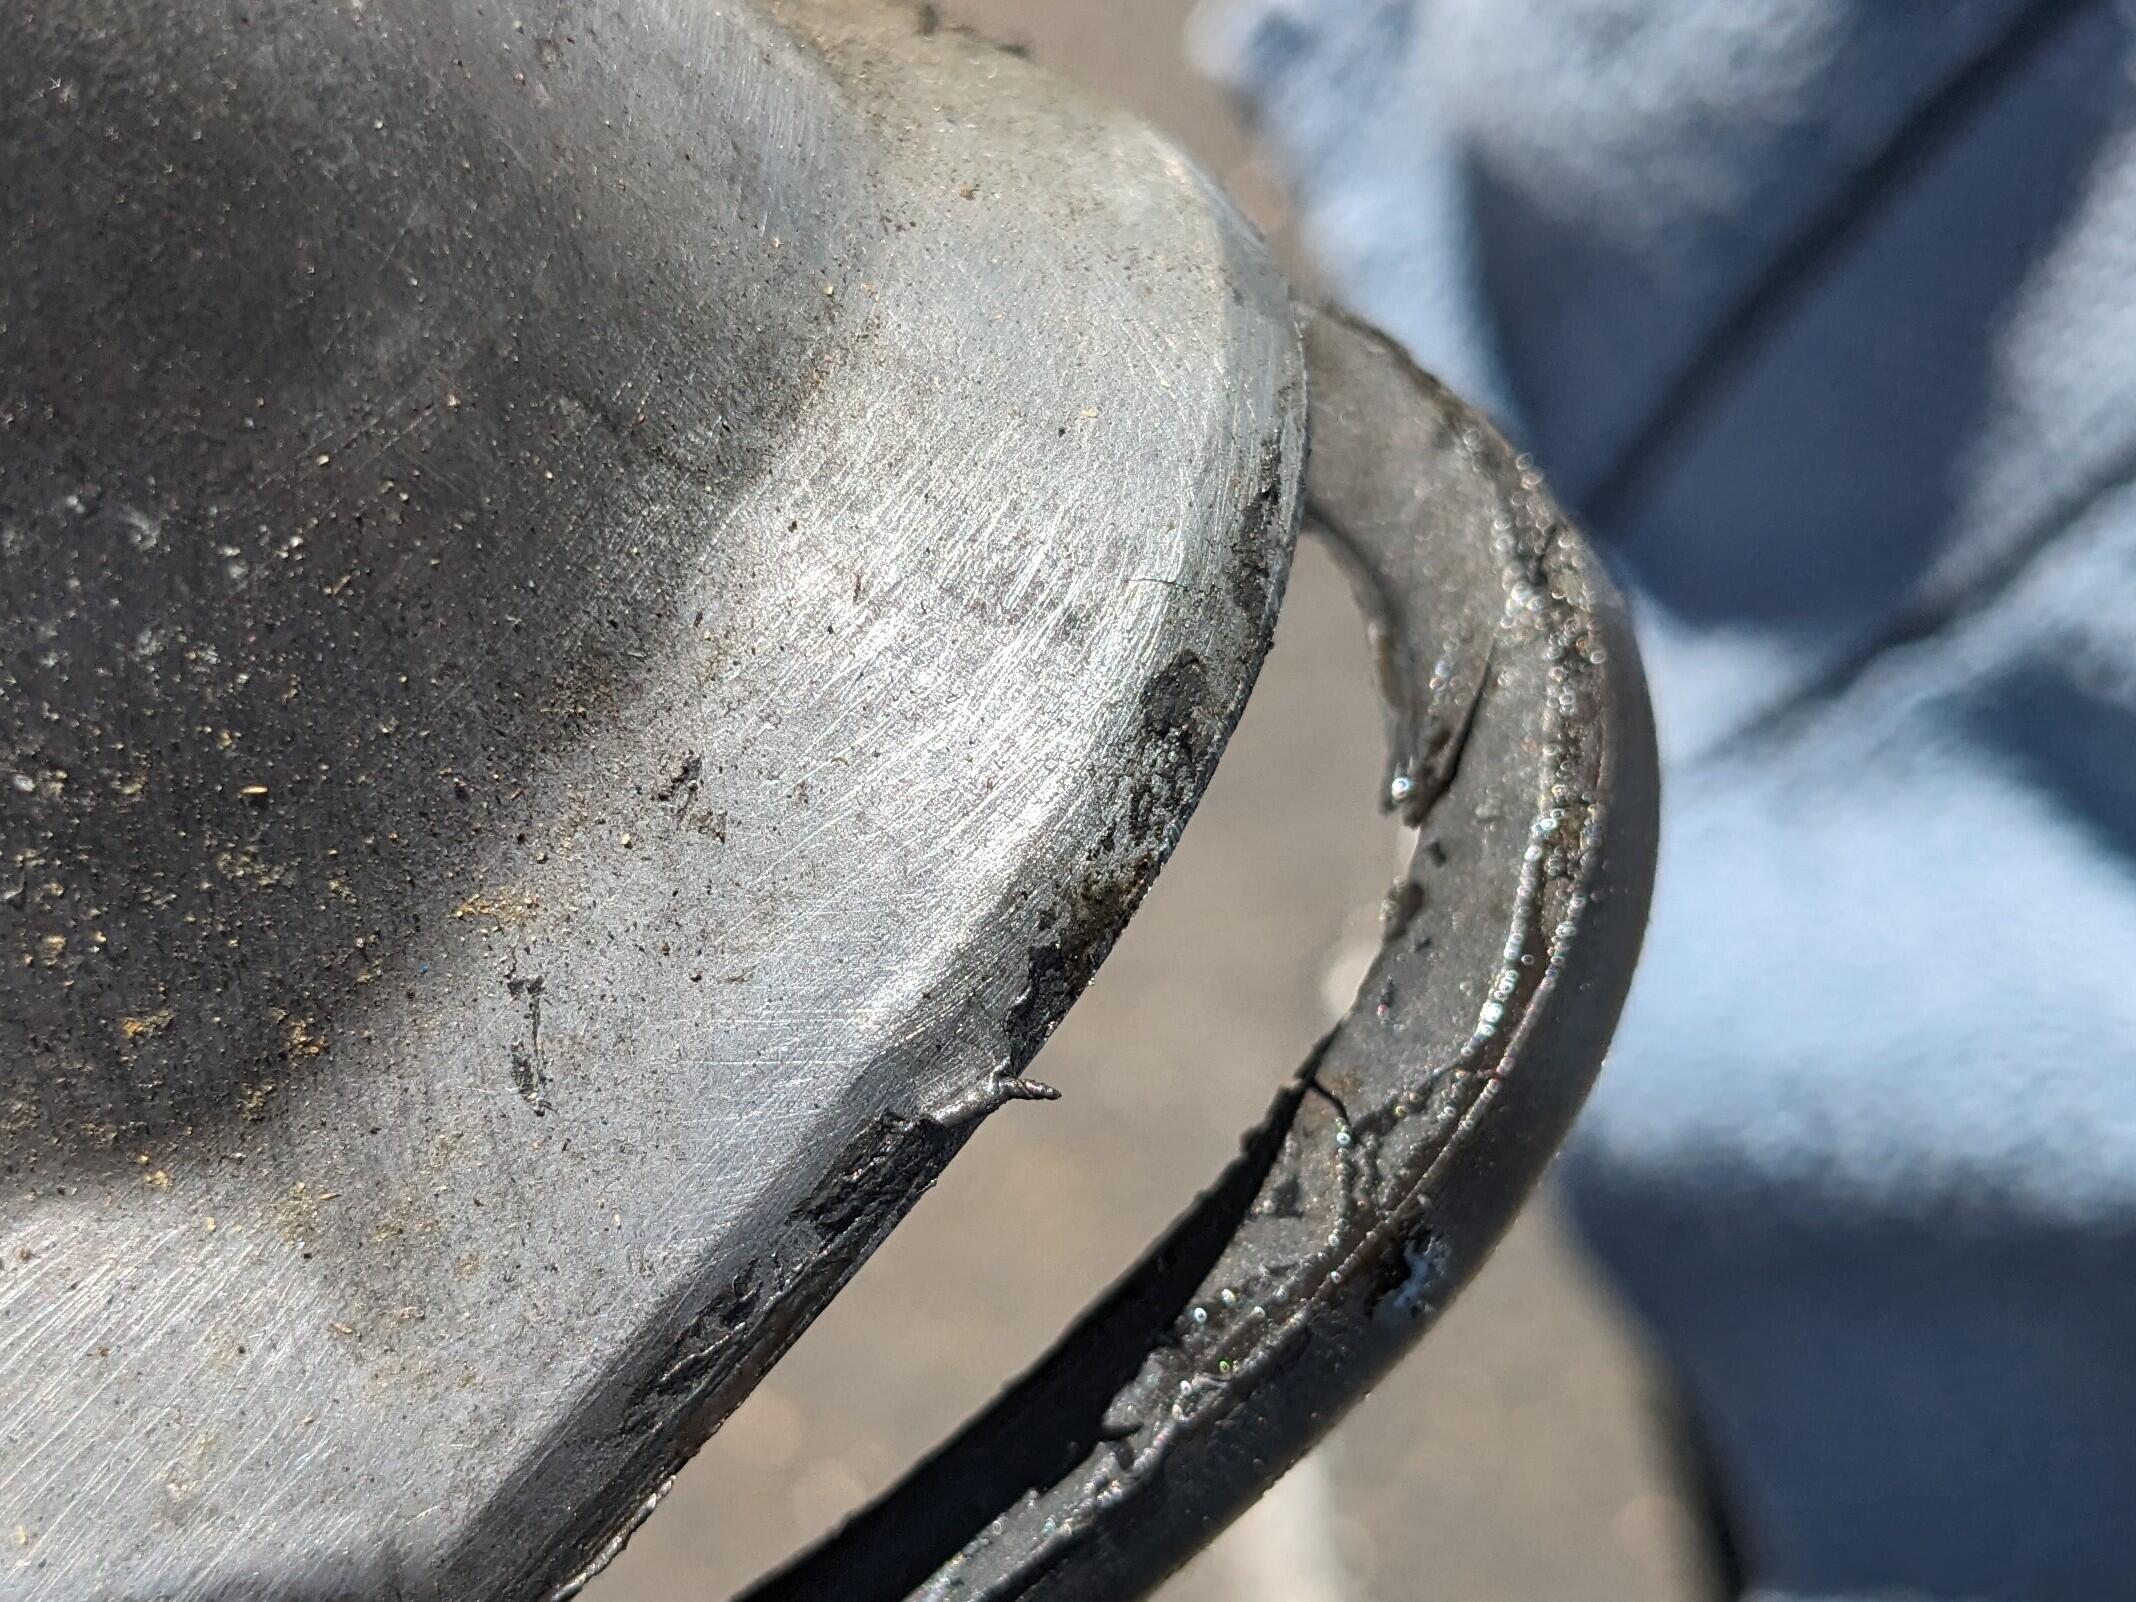
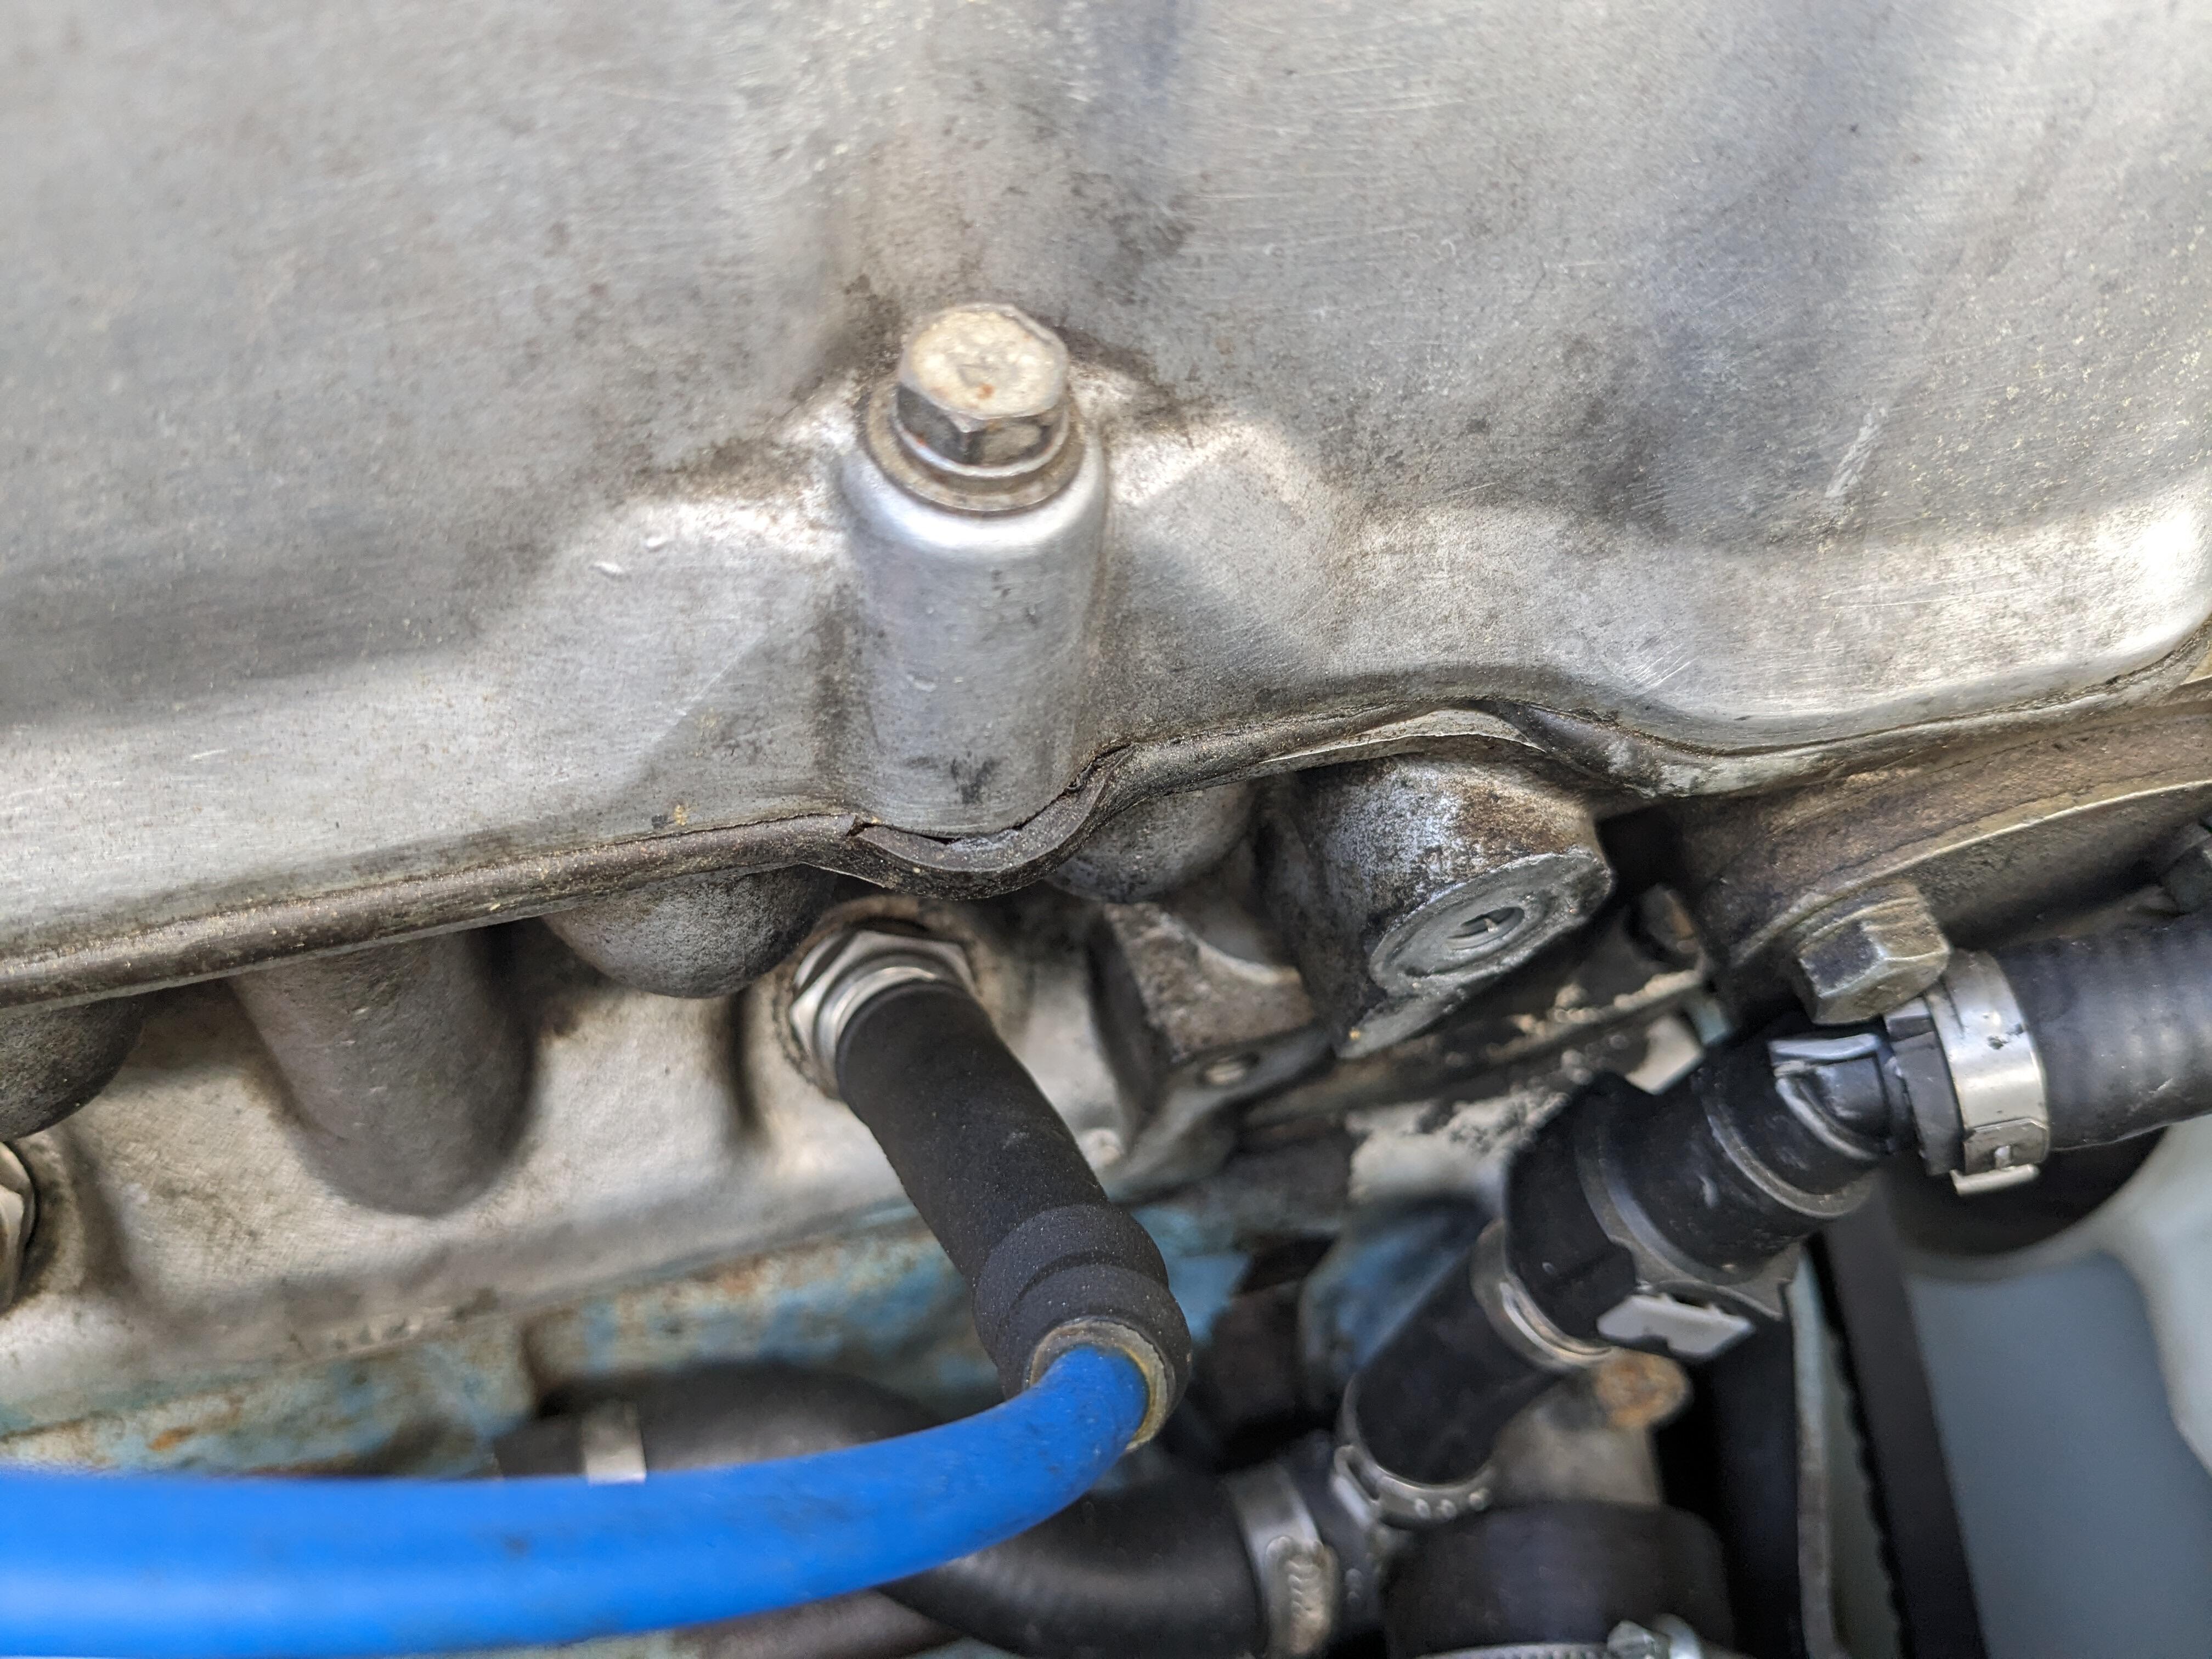
Not good - this gasket is coming apart - just noticed this spread. Driving about 500 miles round trip next weekend to the Carlisle Import Show - so I've ordered a Mahle cork/rubber version to tide me over. I've emailed MilkFab.
Yes - I got that - you can see the shoulder placement in my second pic - when reversed, it is stretched on the area between #1 & the cam chain
Not good - this gasket is coming apart - just noticed this spread. Driving about 500 miles round trip next weekend to the Carlisle Import Show - so I've ordered a Mahle cork/rubber version to tide me over. I've emailed MilkFab.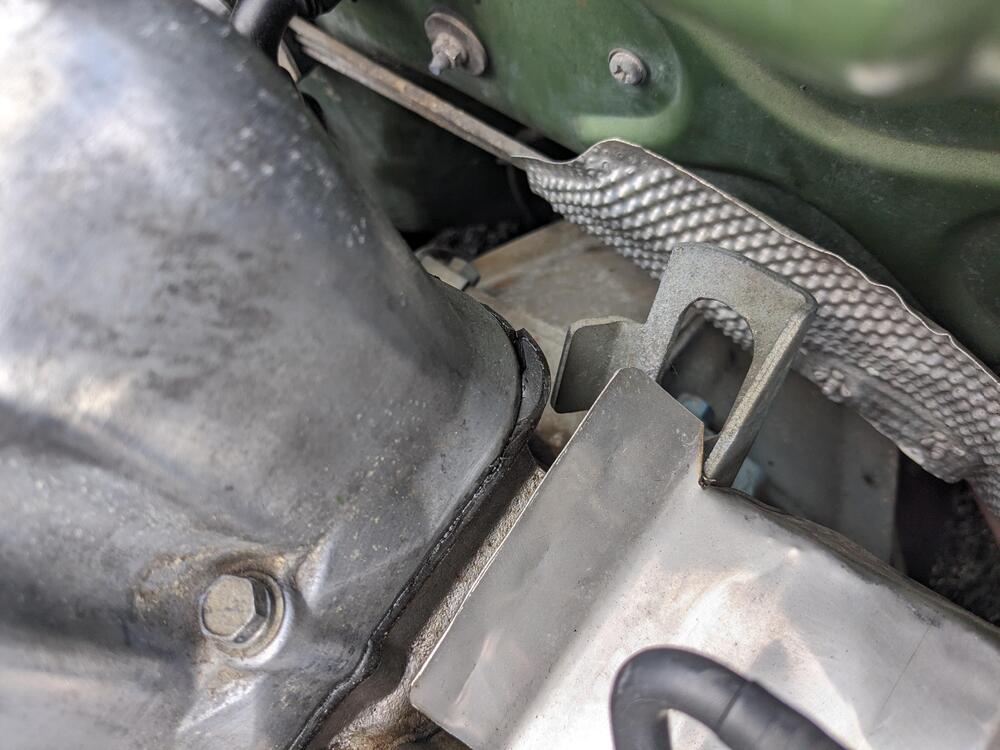


Important Information
By using this site, you agree to our Privacy Policy and Guidelines. We have placed cookies on your device to help make this website better. You can adjust your cookie settings, otherwise we'll assume you're okay to continue.