Everything posted by SteveJ
-
Possible fuel problem. 1976 280z 2+2
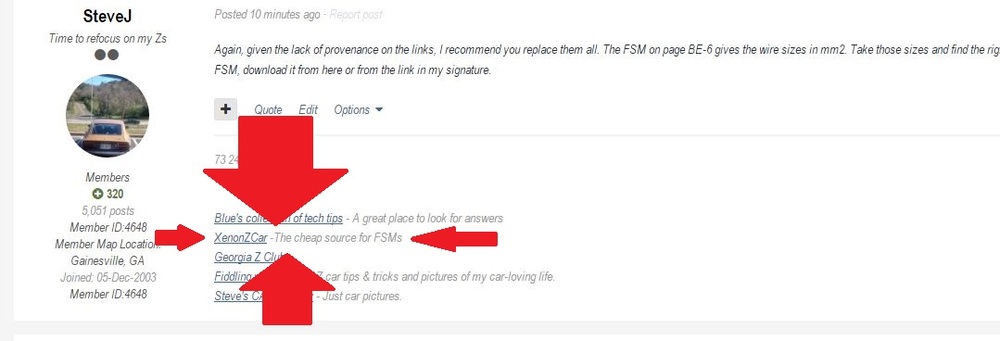
Do not use the AtlanticZ. Use the FSM (Factory Service Manual). As for the link in my signature, refer to the attached picture. You will not get ready-made fusible links from a parts store. You may be able to get fusible link wire from them, and you will have to cut the wires to length and attach lugs to the ends. If you don't get a good crimp on the lug, you will have issues further down the road. On the other hand, you could purchase ready-made fusible links from the links I posted. I'm not sure why you insist upon being so obtuse, especially when you appear to lack the requisite knowledge to perform the repair properly.
-
Possible fuel problem. 1976 280z 2+2
Again, given the lack of provenance on the links, I recommend you replace them all. The FSM on page BE-6 gives the wire sizes in mm2. Take those sizes and find the right table on this site: http://www.rapidtables.com/calc/wire/awg-to-mm.htm. That will give you the gauge of the wire. If you don't have a copy of the FSM, download it from here or from the link in my signature.
-
Possible fuel problem. 1976 280z 2+2
1. Don't trust that chart. 2. Fusible link wire should burn up and leave the insulation intact. Considering the condition of the one link, that doesn't look like what happened in your car. 3. You can get genuine links from your local Nissan dealer (http://www.courtesyparts.com/oe-nissan/24161a0100 and http://www.courtesyparts.com/oe-nissan/24161y0100) or MSA (http://www.thezstore.com/page/TZS/PROD/12-4329 - with covers if you need them or just these links: http://www.thezstore.com/page/TZS/PROD/12-4334, http://www.thezstore.com/page/TZS/PROD/12-4335, http://www.thezstore.com/page/TZS/PROD/12-4336) Image courtesy of MSA. These links don't cost that much, and they can prevent very expensive electrical fires.
-
Possible fuel problem. 1976 280z 2+2
That'll cause some issues. I hope those other home-made links are made of fusible link wire and not regular wire. Judging from the destroyed one, I'd doubt it.
-
Ballast resistor
What year Z, and where did you get the wiring diagram you were looking at? From that I can give you a better detailed description of what should be going on.
-
'78 Fuel Pump Relay gone bad?
Okay, the harness at the fuel pump relay has 4 wires: white/black, black, green/blue and green/blue. If the white/black wire never has 12VDC+, you don't have the voltage to energize the coil. If the black wire does not have continuity with the negative post of the battery, you have a grounding issue. If you see voltage on the white/black wire, you have continuity between the black wire and negative post, and you jumper the green/blue wires together to get a running pump, you have a relay issue. Of course, with no oil pressure and the alternator still, you will not see voltage on the white/black wire.
-
"Thee" SU Float Level Tool
https://jimsgarage.wordpress.com/2006/09/14/the-grose-jet/
-
Possible fuel problem. 1976 280z 2+2
For your first problem, if it fires when starting and quits when the key is in ON, it is either the ballast resistor, ignition switch, or wiring issue between the switch and ballast resistor. For your other problem, what is the voltage? Have you compared the output of your charging system against what it says in the factory service manual?
-
Wow not even half way there
Yeah, but you're probably Army, and I wasn't typing slowly.
-
Wow not even half way there
Um, do you actually have a filter on that respirator? And I'm not talking about that nose bra you have on. What brand/model respirator is that? You'll need a HEPA cartridge to go on it. Do you know how to test the seal?
-
Finally got one...now to make it mine: 1973 240z Refresh / Personalisation
I've been chasing a fuel starvation myself at WOT. It showed up before my engine swap, but I was able to make the carburetors richer to compensate. Now that I have a 2.8 with higher compression, I have the SUs as rich as I can reasonably make them. My fuel pressure is low, though. You may want to check fuel pressure to verify whether or not that could be contributing to your problem.
-
Wow not even half way there
Hang in there. Many of us probably have seen worse.
-
Wow not even half way there
Are you finding much bondo?
-
78 280Z Electrical Fan (Not how to install)
Without knowing what else is on the circuit, what controls the circuit, what gauges the wires are, and what is the power draw of the fan, I wouldn't recommend it. Do you have the stock fan mounted on the engine? How about posting a picture of where the electric fan is mounted?
-
Showroom Z 1970 month???
@Captain Obvious might have some insight.
-
Showroom Z 1970 month???
-
1971 Series I Project for $3K in Orlando
I found its cousin in the Atlanta area: https://atlanta.craigslist.org/wat/cto/6056995502.html $1500 for a roller missing doors, glass, and most of the sheetmetal. Also what is there is somewhat rusty.
-
Low miles, original paint 280z
I'm going to say that it will fetch at least $19,000
-
This has Captain Obvious all over it
No, I'm a sparky. That's why I'm interested in the TIU tester.
- I need everyone's help on this
-
This has Captain Obvious all over it
Actually, I'm still diagnosing electrical systems. The ignition module tester would get a workout from me.
- I need everyone's help on this
- I need everyone's help on this
-
78 280Z Alternator question
Be sure to post what you find out about the alternator and wiring. It may help someone else out in the future.
-
Would not want to be in this one
I bet that left a mark.


