


.JPG.cfcada9cf1c1b502df3f5f2f2ca3ff36.JPG)
SteveJ
Community Member
-
Joined
-
Last visited
Everything posted by SteveJ
-
The pictures aren't showing up on my end. I'm not sure if that's a you or me issue.
-
So, from how the circuit is wired, saying pin 20 should have continuity with ground appears to be an error. This is based on the assumption that you are still working on a 75 with the corresponding control unit. Pin 72 is ground. There is a resistor and relay coil between pin 20 and pin 72. In addition, pin 20 & pin 36 are connected at the EFI relay. Pin 36 goes back to the AFM. It gets 12VDC+ when the key is on and the AFM flap is open. This operates the relay coil to run the fuel pump. From my research pin 20 is to indicate engine running. This site gives a good accounting of the pinouts from a BMW site: https://www.firstfives.org/faq/ljet/ecu_pinout.html I also attached a PDF of the file. L-Jet ECU Pinout.pdf

-
I will describe this as if you are using Nissan fusible links. You should have a black fusible link (https://zcardepot.com/collections/electrical/products/fusible-link-wire-black-280z-75-78?variant=49681656086840) connecting the white wires. You should have a green fusible link (https://zcardepot.com/collections/electrical/products/fusible-link-wire-black-280z-75-78?variant=49681663656248) connecting the white/red wires. The black fusible link is for main power. The green fusible link is for the ammeter. What exactly do you mean by "I cant seem to get continuity to pin 20 of the ecm"? Continuity with what? What test are you running? What page in the FSM?
-
-
I used to use Hella housings. However, I noticed that an original headlight was Koito. When I found the Toyota kit used Koito housings, I decided to go that direction. Then it turned out that the Toyota kits were cheaper than getting the Hella housings.
-
And for completeness, I'll re-post the link to the video on changing the headlight housings.
-
And it's a lot easier to change the headlights on the 280ZX, too. I think I had to remove the carbon canister to get to the right headlight, but it was so nice not having to crawl under the car.
-
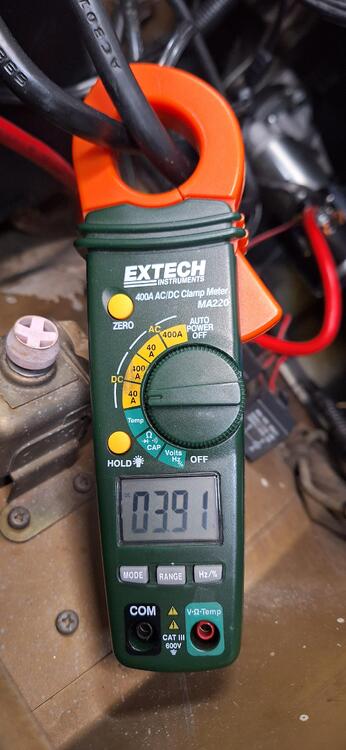
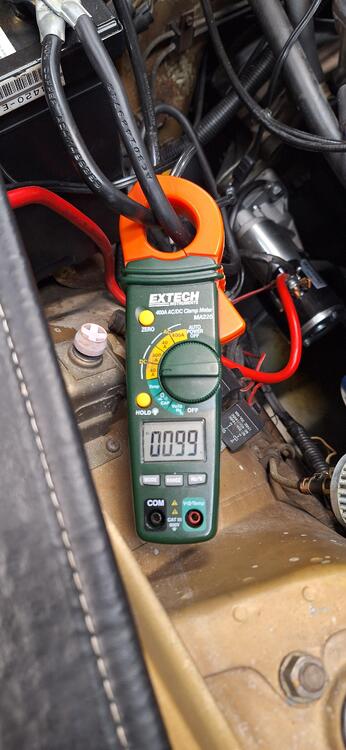
The current drop is significant. Here is the current draw with the clearance lights (all exterior and gauge lights are LED in my cars). Here is the current draw with the LED headlights. So the LED bulbs draw about 3A. That's less than 1/3 the current draw of conventional headlights.
-
-
Strange. It worked for me. Here's basically the same thing: https://tinyurl.com/4444a7dr It's a short URL to go to Google Shopping for the Toyota part number 81110-60p70 Edit: I think I know what threw you off. It comes up with NLA for one vendor, but you can select another vendor who still has the Koitos available.
-
Auxito H4 bulbs: https://www.amazon.com/AUXITO-Brighter-50000LM-Ultra-Bright-Lifespan/dp/B0FM7ZVR4Z Koito H4 housings: https://tinyurl.com/e8rcpjwd I've been using them for years. Others who have used them at my recommendation like them, too. The Koito housings come with a relay kit. You don't need to use it.
-
That could have completed the circuit for the compressor.
-
Thank you for posting your follow-up on here. Posting results can help other members in the future.
-
It is a Frontier alternator. I sent you a PM.
-
There's your problem. You need the switched source. I just looked at your last post. Too much noise happened between your posts unfortunately, so I missed them. I apologize if you post again before I save this edit. Now that I looked at your photos, let's dissect... Those aren't really jumpers. They are going to the correct terminals, but contact could be marginal. You also don't need the jumper between 2 & 3 because... The red wire going to the alternator post will serve as the battery sense. The rule of thumb is to have the source of that wire come from as close to the battery as possible, but we don't need to quibble about that. So another potential point of failure is whatever is going on under that electrical tape between the white/black and green wires. My recommendations: Use a proper connector for your jumper on the voltage regulator connection. (I know a guy...) Show how attached the green wire to the white/black wire.

-
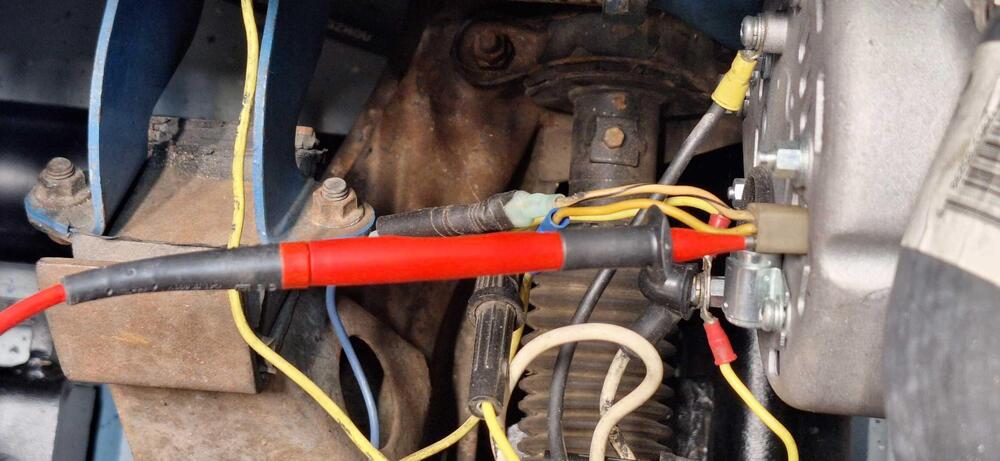
Yes, it's kind of low. However, you have all of us here at a disadvantage. We can't see what you did. (Hint: post a picture that clearly shows the wires you jumpered.) To test things, follow this procedure. Have the car off. Remove the 2 pin connector from the alternator. Measure voltage to ground at the yellow wire. It should read about battery voltage. It helps if you stick you probe into the back side of the connector. Turn the key to ON. Don't start the car. Measure voltage to ground on the white/black wire. It should read about battery voltage. Report your readings in steps 3 & 5. Here's an example of getting the meter probe on the back side of the connector.
-
Just follow the picture from the first post. The white/black gets jumpered to the blue wire next to the white/red wire. The white/red gets jumpered to the yellow wire. The white/black wire goes to the alternator. It needs a switched source. In the internally regulated alternator, this is referred to as the L (lamp) terminal. The blue wire next to the white/red is a switched source, so it connects to the white/black wire. The yellow wire goes to the alternator. It needs a constant source connected to the battery. In the internally regulated alternator, this is referred to as the S (sense) terminal. The white/red is electrically connected to the battery via a fusible link, so it has constant power. I advise you to leave the engine harness side of the wiring intact. Cut the connector off the voltage regulator and jumper the wires on that side.
-
Is this the post you were referencing about making your own? To go down a rabbit hole, here's an aluminum glove box: https://skillard.com/products/datsun-240z-aluminum-glove-box?srsltid=AfmBOopKRupFQbRuynY3YsSU82FYv9mZITO2DRh030kbo90s3HFIW4pH And you can print a plastic one: https://www.yeggi.com/q/glovebox+240z/
-
I know it from 20+ years of reading posts on this site.
-
White & White/Black - Speaker Blue/Red - Power Antenna Blue/White - Power Antenna
-
Get the tank fixed or get a new tank from S30.WorldYou're welcome to come hang out with me at the Mitty at the end of the month. The Group 3 race will look similar to this.That's okay. I just wanted to post the link. I was too lazy to go down to my cars to look.Red Yellow (Corrected as per @Captain Obvious )








Important Information
By using this site, you agree to our Privacy Policy and Guidelines. We have placed cookies on your device to help make this website better. You can adjust your cookie settings, otherwise we'll assume you're okay to continue.