Everything posted by SteveJ
-
May have really screwed up
Yeah, a little later I found myself wondering how it could have gotten out of sync, since I don't recall seeing anyone describing touching the chain while doing the valve stem replacement.
-
Z Proto: The next z reveal
Good point. It's not like electric motors have a displacement.
-
May have really screwed up
If you ever do this again, make sure the car is in gear and wheels are chocked before you apply the compressed air. That will keep the pistons from moving. How much PSI were you using? Someone else will have to provide guidance on the timing chain, but yeah, you're going to have to reduce tension to get the chain on. Life is a cruel teacher. You get the test first and the lesson afterward.
-
where to buy complete ac kit
From Nostalgic AC, it looks to be around $1650 plus the cost for them to integrate controls.. That includes the crimping tool. You'd still need the freon and vacuum pump to draw down the system prior to adding freon. For that, find someone with a good vacuum pump. Don't rely on a HF special. Moisture in the system will degrade performance. You also want to find air leaks before you dump freon in.
-
Where connections go to
@Wally, @Zed Head is correct. I'm pretty sure the ring lug is a body ground. There should be a threaded hole in the fender nearby. If you are considering re-using the AC lines, block them off. A better idea is to remove the AC stuff completely if you're not hooking it up and get a better setup when you do want AC. For the bottom photo, you need to give a wire color. In other words, pull down the protective sheath, clean the wire, and report the colors.
-
Ignition coil specs for 240Z
@Captain Obvious posted a picture in another thread recently, but here's the text version of how to do it. Black/white to the coil positive Green/white to one side of the ballast resistor Black/white to the other side of the ballast resistor Black wire from distributor to coil negative Now you saw that I mentioned black/white twice! How do you tell them apart? Make sure the car is off. Make sure the green/white wire and both black/white wires are disconnected in the engine bay. Using a multimeter, measure continuity from the green/white wire to each black/white wire. The black/white wire with continuity to the green/white wire goes to coil positive. The other black/white wire goes to the ballast resistor.
-
where to buy complete ac kit
Unfortunately, it's pretty much "There ain't no such thing." The generic kits from MSA and the like are for people who can work without any instructions. With Vintage Air, it seems like you need to be lucky enough to find a dealer who will work with you. Many of their dealers are muscle car guys. If you have a good dealer nearby, you will have better success. You might want to reach out to Nostalgic AC. Their products are similar to Vintage Air. They don't rely upon a dealer network. With either Nostalgic AC or Vintage Air, you will need to piece together the system. This isn't exactly rocket surgery though. I believe Vintage Air used to have a guide on component selection. You'll need Compressor with bracket (Nostalgic AC has an L series specific bracket by the way.) Condenser (possibly with fan to keep air moving past) Drier Evaporator (Vintage Air and Nostalgic AC both have evaporators combined with defrost units. That's what I would use.) Controls (I believe that you can pay Nostalgic AC to retrofit their controls into your current control panel.) Hoses with fittings Crimping and cutting tools (for a DIY install) No matter what, you'll be installing yourself or paying someone to install.
-
Rebuilding the harness
If I was aware of them, then the problems wouldn't be unforseen. 😉 Anyway, that's part of posting a detailed plan is to see what you might be missing. I might have the bandwidth to compare your plan to the BE section of the FSM and wiring diagram, but unless I know exactly what you're thinking you need to do, I can't guess at what you overlooked. If you replace connectors on the components/dash harness, make the engine harness slightly longer to compensate for losing length where you replaced connectors. Helpful hint: After you download a PDF of the wiring diagram, go to the Autodesk website and download a copy of Design Review. Design Review is made to create drawing markups on native Autodesk DWF files, but it can also open JPG and PDF files. This would allow you to make notes on the connectors you need throughout the engine harness. If you need some guidance after downloading both, I can help you then.
-
Rebuilding the harness
Anticipate having to replace the connectors on both the harness side and the component side for many components like the headlights and front turn signals to name a couple off the top of my head. You'll have to replace all of the connectors between the engine and dash harness, unless you want to source a lot of Yazaki connectors. That's about 70 wires at that junction. You will need to pull the dash and remove the harness to change all of the terminals and connectors. Otherwise you won't have enough room to work. Don't scrimp on your stripping tools or crimping tools. Try to match wire colors with the existing wiring. You might have to clean up the wires to figure out what colors you need. I haven't found a source with a straight line for the tracer. I have only found spiral tracer. Here is one source. It may help you budget: https://www.sherco-auto.com/striped-tracer-wire.html If you have space, get 2 4x8 sheets of pegboard. Take your existing engine harness and string it up on the pegboard (zip ties and pegboard hooks). Then use the other to build the replacement harness to make it where you copy lengths. As for re-using connectors, the round ones are Yazaki. Look up Eastern Beaver as a source for those terminals. I hope you have a good budget. For the spade terminals, look up Vintage Connections. Write out a detailed plan. Post it here, but in a new thread. We can look at what you're missing. The plan should also have your budget, supplies, etc. Make sure you can afford the endeavor.
-
Getting the 73 Back on the Road
Easy night for me tonight because I'm running out of parts I need to put on before the first test drive. I installed LED bulbs on the markers and turn signals. I also had to replace the left front marker because corrosion had taken its toll on that poor lamp socket. Fortunately I already had a replacement in my parts stash. I also installed the license plate light I purchased from @jfa.series1. It looks good, Jim. I was going to install the horns today, too, but the Amazon envelope with the horns was empty when it arrived. Fortunately Amazon customer service immediately dispatched another set, so I might have them tomorrow. After I get the horn relay, elbow for the heater hose, and new tires, I will be ready for a road test. Considering how it had been off the road for 11 years, it's not bad that it's almost ready to roll in just about a month and a half.
-
Transmission fluid 280z 1978
NO! One false move, and you would be looking to pay for a replacement transmission. You want to remove the plug, not break the case. For the fill plug, find a thick 19 mm or 3/4 inch open end wrench. Use a brass hammer, deadblow hammer, or rubber mallet to hit the wrench to loosen it. If it doesn't want to turn, try turning it SLIGHTLY clockwise (tighten) and try to loosen again. Also as stated elsewhere, heat can help.
-
Rebuilding the harness
It's difficult to say because we don't know what year Z you're working on.
-
Getting the 73 Back on the Road
Tonight's goals were Drain the old coolant out of the radiator Remove the carburetor cooling lines and plug the thermostat housing Replace the generic lower radiator hose with a properly formed one This was a good thing to do. Many of the hoses for the carburetor coolant lines (and EGR) were just about rotten. I got the new lower radiator hose on, and with a lot of effort I got the hard line for the carburetor coolant lines removed. I bought a 5/8 elbow to replace the 3-way fitting, but I realized that I should have purchased a 3/4 elbow. After some sleuthing online, I found the 3/4 elbow and ordered it. The thermostat housing is plugged, and I can finish the rest after I get the elbow later this week. While I'm waiting for the plumbing, I can start installing the LEDs that should start arriving tomorrow. I want to take some load off the parking light circuit. If I'm lucky, the tires will be here before the end of the week, too. So let's set a date. I think I should be ready for a shakedown cruise in a couple of weeks.
-
Z's on BAT and other places collection
I will say that I didn't notice anything strange about the shifter position while driving it.
-
Getting the 73 Back on the Road
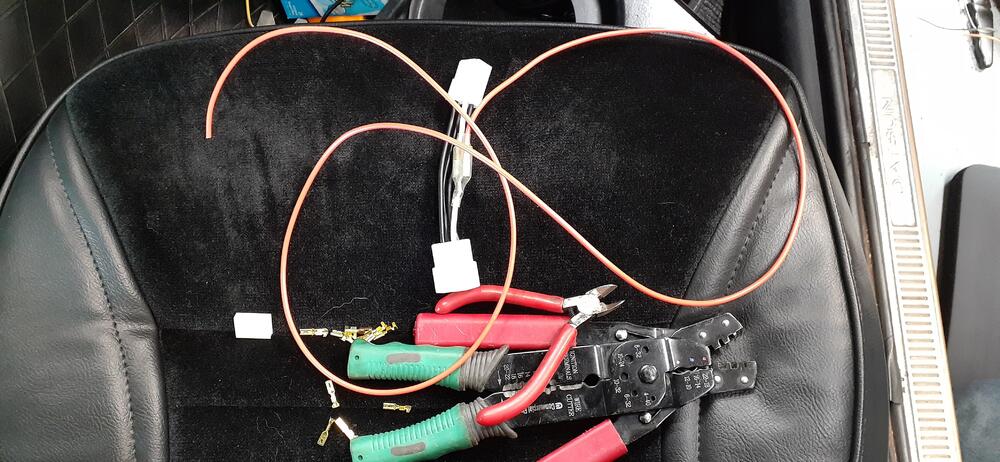
I haven't been neglecting the 240Z for the past week. I have just been waiting on finishing things before posting about them. Early in the week I purchased a premium $20 Dual brand receiver from Walmart to install in the car. No CD, no tape deck, but it has USB, Aux, and Bluetooth. I wrestled out the old Audiovox tape deck and shook my head on how I wired it 28 years ago. The only good thing was that it was an excellent benchmark to show how far I have progressed over that timeframe with regard to my wiring skills. One of the challenges was finding a source for the constant 12VDC source. A long time ago, I jury-rigged getting the power from the map light. Yeah, that wasn't happening twice. Using the FSM wiring diagram and my multimeter I figured out my solution. The 12VDC switched source would be coming from the 3 wire connector for the radio. The ground would come from the 3 wire connector for the rear defrost switch. The 12VDC constant would come from the rear defrost relay. I made jumper harnesses for the ground and 12VDC constant. I connected everything and tested the stereo. It worked...except for the right front speaker. I tested the wiring, and found the positive wire was broken somewhere. I decided to start looking at how to install the speaker enclosures. Early on I discovered the old speakers were too deep. Fortunately I had to source speakers for the 260Z to fit the enclosures, so all I had to do was order another set of Pyle speakers from Amazon. Again, nothing but top shelf stereo equipment for me. After the speakers arrived, I put the stereo end of the speaker wires into a connector. I also started fitting the enclosures. I had to trim the driver's side to clear the dead pedal. I also had to get some longer M6 bolts for the hood release bracket, but I plugged the wires into the speaker and got the enclosure mounted. Then I went to work on the passenger side. I decided to remove the fuel pump relays since they are not being used any more, and I removed the relay bracket. I did dry fit of the enclosure and trimmed it to go in more easily. After plugging in the speaker I went to install the relay bracket...Well, that took a lot longer than I hoped. It doesn't line up that great, especially with regard to the top bolt when you have the lower bolts cinched down. It doesn't help that you can't see how misaligned thing are unless you can miniaturize yourself and contort your body just right. Anyway, after an hour or so, I finally got the bracket mounted. I plugged in the stereo and tested. Yes, I have tunes for my next road trip. After I was happy with the stereo install, I pivoted to the hazard switch. I got the retaining ring loose and pulled the old switch through the dash. The connectors came apart with a little coaxing. I dug out the replacement switch that I found despite buying it 16 years (and one move) ago. I got the wife to direct me while I tried to line up the switch with the opening in the dash. That's another thing that took a LOT longer than I remember it requiring. UGH! I managed to get the retaining ring on without pushing the switch back through the dash. After installing the knob, it was time to test. The turn signals worked. Now for the hazards...Nothing. Dang it! Fortunately I knew where to look. It was my own blog where I broke down the turn signal circuit. I saw that the white wire from the battery fed the circuit. I checked for continuity between the wire at the dash harness/engine harness junction and the fuse box. No continuity. Dang it! After dinner I removed the center console. I also pulled the stereo. I removed the screws holding down the fuse box so I could pull it toward me for examination. It took about all of 5 seconds to find a connection that pulled loose. I got it reconnected and buttoned up everything. I LOVE removing/replacing stuff for about an hour to work on something for 5 seconds. Anyway, I tested again, and all worked fine. I found the bulbs loose on the tachometer, so I got them plugged in for the turn signal indicators. I tested the horn again. Well, it almost makes noise...I figured it might be time for a new relay. Who knows? I might need to clean or replace the horns. I sat down and ordered a bunch of LED bulbs and looked for a horn relay on RockAuto, Z Car Depot, and MSA. No one has a friggin' horn relay anymore. When the hell did that happen? I found a generic horn relay on ebay and ordered it.
-
Part Identification
My research corresponds to what @CanTechZfound.
-
ZCON 2022
They are trying for Barber. Talledega Grand Prix is the backup plan. I can tell you that getting the track commitment is one of the most difficult parts of organizing the event. The next most difficult is finding an appropriate locations for the car shows. For instance, for 2018, we approached Chateau Elan for the judged car show (and convention hotel), and they basically said, "Oh Hell F'n NO!" Fortunately for us, Z1 Motorsports had relationships with Road Atlanta and the venue for the People's Choice shows. Anyway, I hope to see a lot of you guys in B'ham.
-
ZCON 2022
That settles it. We'll establish the CZC base camp at Cliff's place. 😉
-
ZCON 2022
And I heard from a friend who is at ZCON it might be in October. I'm in either way.
-
ZCON 2022
Dang it. I posted this first in the 510 Open Discussions. The rumor mill was right. ZCON 2022 will be in September in Birmingham, AL. I hope I'll be paying more attention when I'm prepping my Z than I did in selecting the forum...
-
Oops...Wrong forum
See the Z Open Discussions for my post on ZCON 2022.
-
Transmission fluid 280z 1978
The only way to get to the drain plug is underneath. The easiest way to remove the fill plug is underneath. NEVER attempt to drain the transmission without first verifying you can open the fill plug. Yes, you could fill at the reverse switch, but that is a pain, and again, you have to be under the car to get to that.
-
Hood Spring assembly
Well that's interesting. It appears as though the 73 (my car) has a slightly different grille as the mounting tabs on my car clearly bend up. And...the parts catalog bears that out: 62300-E4601 is for the 70-72 and 62300-N3301 is for the 73. The different grille accommodated the 73's bumper mounts.
-
Hood Spring assembly
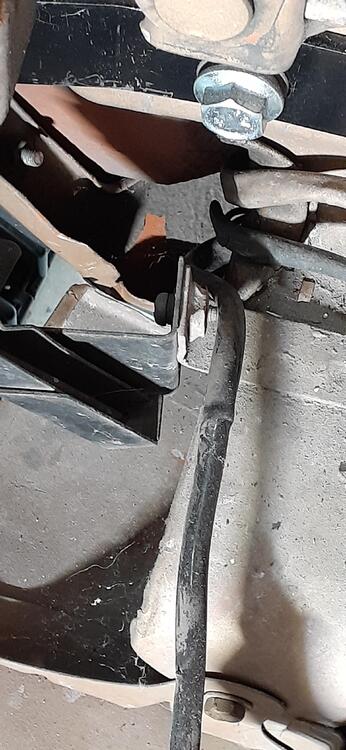
As @Terrapin Z said, the tab for the lower mount needs to be turned up. Look at about 1:09 in the video. Here's a closer photo, but the wiring for the headlights obscures it a little.
-
Hood Spring assembly
Make it a 6 pack of Diet Dew. I don't drink alcohol like normal people.


