Everything posted by SteveJ
-
Getting the 73 Back on the Road
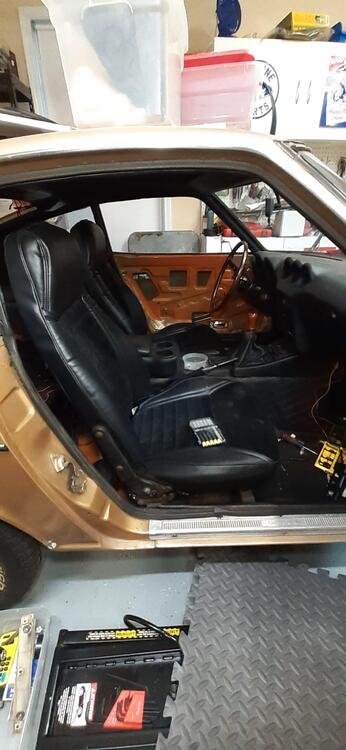
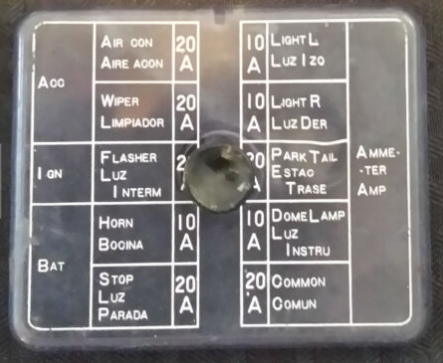
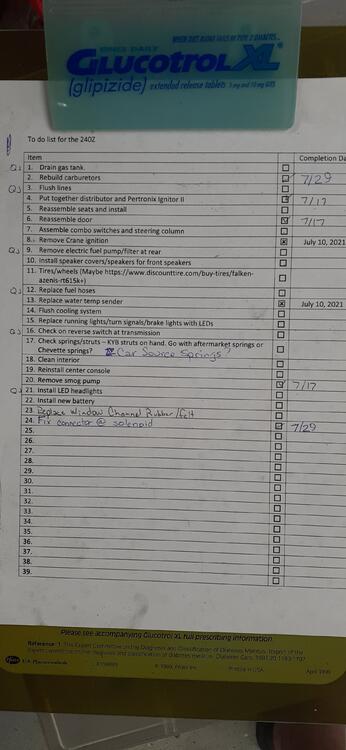
I thought things went well tonight. I got the center console prepped and installed. The biggest challenge was trying to figure out how the fuse box lid should be attached to it. Having never seen it attached properly I had to guess. I know I didn't it differently from stock, but I was happy with the result. It looks less redneck than what a previous owner did. With the quick install of the center console, I turned my attention to the seats. I got them in and secured. I couldn't help but just sit in the driver's seat for a little while. I haven't been able to do that for a few years. After enjoying the view and thinking of what is left to do to actually get the car on the road, I finished off the evening holding up the window channel rubber to the frame and putting the steering column cover back on. It's starting to feel like a car again instead of a collection of parts taking up a bay in the garage.
-
1970 240z electric fuel pump question
Was the fuse pulled when you tested? The readings sound like it wasn't. Likely, the green wire is the one that goes to the back of the car where the fuel pump would reside. @cgsheen1 was giving you good direction. You can get the inertia switch here: https://www.amazon.com/gp/product/B07RBK4873, but you will probably need to modify it. I bought one, and like the reviewers on Amazon said, the switch is wired to a normally open contact. It should be on a normally closed contact. It wasn't too difficult for me to move the pin, but I'm used to doing things like that. You might want to look around a little more for a green wire with an inline fuse. It may be covered with electrical tape. That is how it was wired from the factory. I'll see what I can find with poking around in the wiring of my car this weekend. I have a sneaking suspicion I know where the wire for the fuel pump is routed in the wiring harness.
- Ignition switch trim ring
-
Ignition switch trim ring
I don't think the trim ring was intended for that type switch. Unfortunately the type switch that used the trim ring went NLA many years ago. I last bought one 8 years ago. It was a Beck Arnley 201-1179, and inside the box the switch was bagged with a Nissan part number label. The switch you have should work. It just won't look the same.
-
Putting in a replacement L-28
"eh" is Canadian for "You know what I mean?"
-
Ignition switch trim ring
Can you post some photos?
-
Getting the 73 Back on the Road
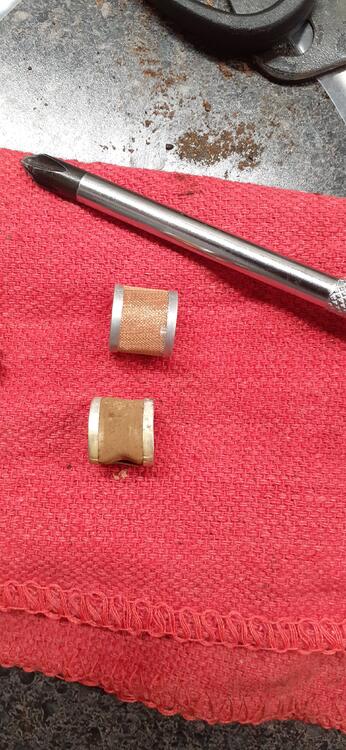
Today's episode is "While I'm at it..." Since the seats are still out of the car, I figured it would be a good time to replace the center console with one I've had lying about for 8 years or so. I removed the console and removed the ash tray cover. The cover was pretty dirty, so while I'm at it, it would be good to clean it. I transferred the clean cover to the replacement console, and then I proceeded to remove the outer shift boot. Well, it was pretty old, and some of the threads broke. Then I looked at the rubber shift boot. It was torn. While I'm at it, I might as well find the replacement boot I bought many years ago. (Okay, so the wife found it for me. She knows the spare parts room better than I do.) I also found another outer boot during the search. The shifter was pretty sloppy. The bushings were MIA when I bought the car in 93. While I'm at it, I'll find the brass bushings I bought 4 years ago and install them. It only took searching the same places twice to find those. I followed the tech tip on Blue's ( @240260280) page (link below) and used my vice to press in the bushings. I even had Wendy shoot a video of me pressing in the second bushing. Well, I couldn't crank down hard enough with the vice to get the bushings flat enough to fit inside the fork. So I took the shifter to the 20 ton press. THAT got the bushings flat enough. The shifter slop is gone. During all this, I got the drawstring out of the old outer shifter boot and threaded it into the new boot. Tomorrow I will attach the rubber boot to the transmission tunnel, attach the outer shift boot to the center console, and get the center console back in place. If it all goes quickly enough, I might start getting the seats back into the car.
-
1970 240z electric fuel pump question
Yes, the fuses are in the same locations. The outer labels on the stock fuse box cover (Acc, Ign, Bat, Ammeter) give the power source.
-
1970 240z electric fuel pump question
There is wiring in place for an electric fuel pump. Follow what I posted, and we can help you. I haven't messed around with the electric fuel pump wiring on the 240Z because my 240Z has the modification that Nissan designed for that year. However, I do understand the FSM, and I'm trying to guide you on how to figure out how to wire it in. Please go back and read post #6.
-
"Air Supplier Tube" Question
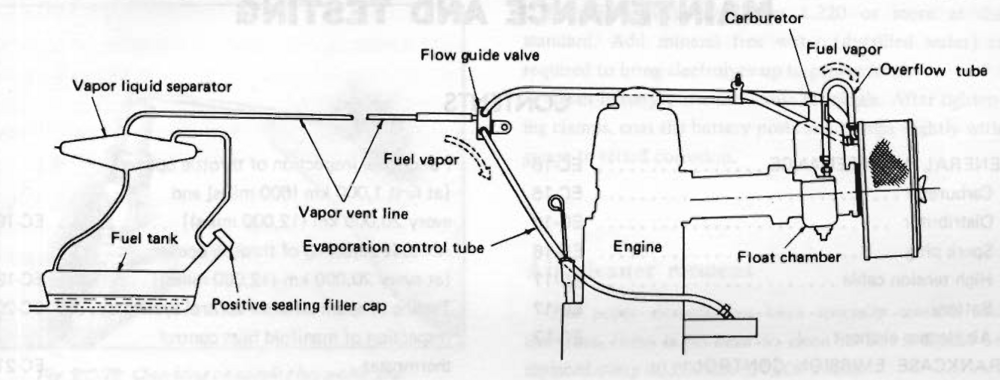
I believe it goes to a hard line to the engine bay. If I'm correct, it's represented in this drawing by vapor vent line. This is from EC-15 in the 72 FSM.
-
Getting the 73 Back on the Road
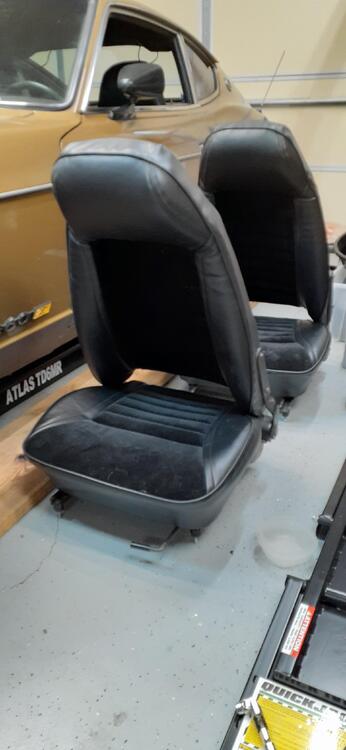
I started putting the seats back together last night, but I ran into a glitch. I counted and recounted the screws, and I found I was 1 short. The wife made a Home Depot run today to get a M8x1.25 machine screw and some 5/16 star washers. I used the new screw on the first seat, and as was putting the second seat together I noticed I had an extra screw. Apparently my counting skills were not what they should have been yesterday. So the seats are together and ready to go into the car. I'm going to pull the center console first because I want to replace it. The replacement console is sitting the hatch area of the car.
-
For Sale: Front Bumper Overriders (Bumperettes) 1973 240Z
@Tirnipgreen Is this something you're looking for?
-
Where can I find a valve spring compressor tool
Here's an alternative: https://www.amazon.com/Jack-Sealey-Valve-Spring-Compressor/dp/B000R9ZITC It was mentioned in this thread:
-
1970 240z electric fuel pump question
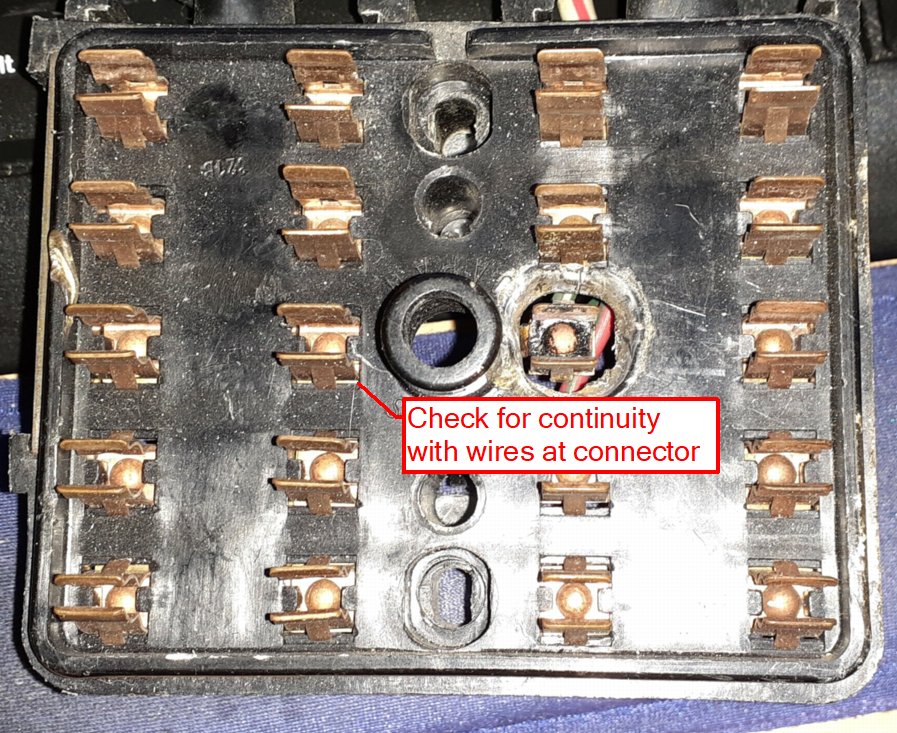
The green is usually related to the black/white. There is one green that is downstream of the fuse for the black/white in the fuse box. There is another green that branches off the black/white for the fuel pump. So, how can you tell which green wire this may be? Pull the middle fuse on the left side of the fuse box. Set your meter to continuity. Check each wire for continuity at the connector with the black/white and green wires to the right side of the middle fuse. See photo. For each wire that did not have continuity with the fuse box, check again but with the left side of the middle fuse. If the wires had continuity with the right side of the fuse, that means they are downstream of the ignition fuse. If the wires had continuity with the left side of the fuse, that means they are part of the circuit that feeds the fuses for the ignition fuse and fuel pump. Post the results of your test, and let's continue from there.
-
Missing door lock bell crank hardware
-
Z's on BAT and other places collection
If you want to know why the Z32 looks the way it does, the best thing to do is go to a ZCON where Toshio Yamashita (aka Yamasan) is presenting his story of the design. If you saw the competing designs, you might say that Nissan picked well. Anyway, Nissan did have a more affordable sports car (sports coupe) at the time. The 240SX/Sylvia slotted in well to the old 240Z role except for the lack of an engine in the North American market to keep up. Of course, with the strong Yen at the time, it was about impossible to have a sports car built in Japan that was "affordable".
-
Series 1 water and oil gauge?
Well, the ammeter is also held in by the wires going to it. Make sure you try this with the battery disconnected.
-
Datsun 810 1984, not a Z but need help with temperature gauge.
You could post photos or look at what RockAuto has. It's probably the same sender.
-
Series 1 water and oil gauge?
Posted to the wrong thread.
-
Getting the 73 Back on the Road
I installed the Nissan door striker latch. After a little adjusting, the door closes and latches just like it should. Before I did the install, I asked the wife to pick out which latch was stock and which was aftermarket. She picked the wrong one, but I thought it was for good reasons. We compared the two, and she pointed out some details that I didn't noticed on first inspection. The Nissan latch is on the left. The aftermarket latch comes down too far at the top, and it looks thicker on the left side. I'm thinking that it may not allow the striker to come in far enough to latch reliably. After being satisfied with the door, I turned my attention to finishing off the carburetors. I installed the banjo filters, buttoned up the carburetors and installed them back on the intake. They will be ready when I need to call on them to fuel the engine. Here's a photo of the new filter next to the old, rusty filter. I finished up the evening by replacing some connectors at the solenoid. That allowed me to mark another thing off the list. The window channel felt should arrive on Monday, so it will go in next week. The new air cylinder for the QuickJack is estimated for Wednesday, so I should be able to get the car in the air the following weekend.
-
Getting the 73 Back on the Road
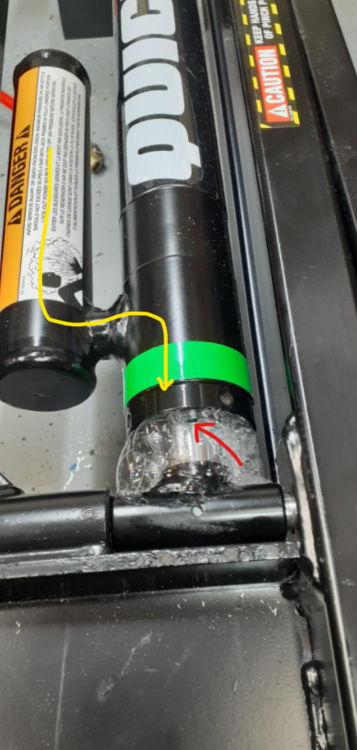
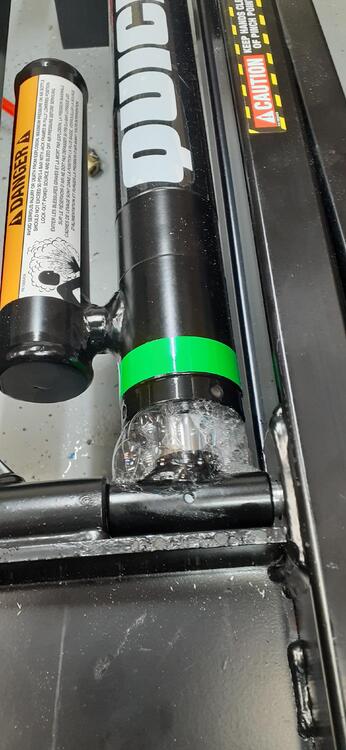
The leak is at the seal of the piston where the silver shaft goes in. Only air can leak out. The hydraulic seal is functional. Apparently it is still safe to use like that, but the new part should be sent out. I don't mind having to replace it myself. It's a pretty straightforward procedure from what I can tell by looking at it (and from the email the support person sent). I have to undo a couple of bolts, remove the bad cylinder, slide in the new cylinder, put the bolts back, put air in the air cylinder, and bleed the hydraulic cylinder. I don't envision taking too long.
-
Best Penetrating Oil?
I wonder if that's a California thing with Kroil. I ordered it from Amazon in the past without being a "Business Member", and I had no problem with putting it in my cart today. Do you have any friends in Arizona who could order it for you and smuggle it across the border in case you need it in the future? 😉
-
Getting the 73 Back on the Road
Well, the QuickJack support team is quick to respond. With a couple of emails back and forth, they were able to help me find the air leak. Now I am waiting on the remedy. Once the QuickJacks are operational, I can drain the gas and replace the tires. I might leave the car up in the air with the new tires until I finish so I don't flat-spot them. Parts are arriving today. I only had aftermarket door striker latches in my parts collection, so I ordered what I hope is a Nissan version from Z Car Depot. I also am expecting the banjo bolt filters for finishing off the carburetors. On Monday, I should receive the window channel that I ordered from an ebay seller in Thailand.
-
Intermitent start and no turn signals when it does not.
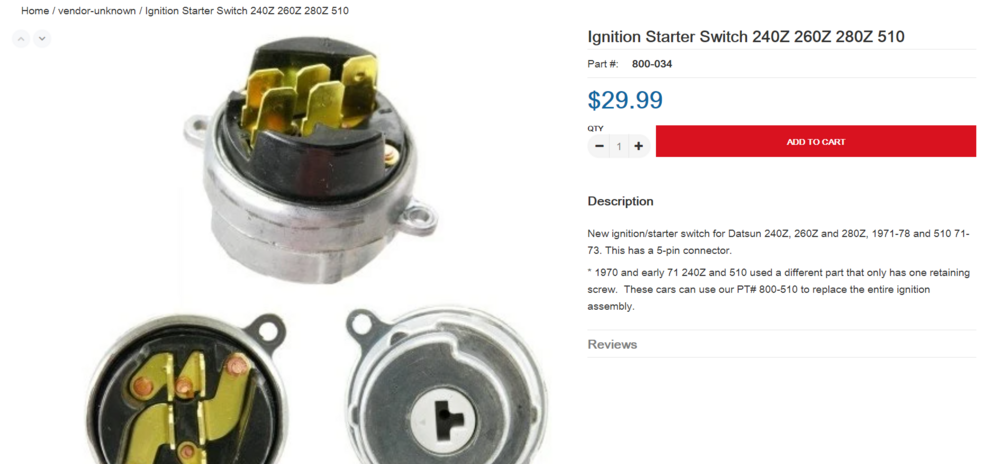
https://www.rockauto.com/en/catalog/nissan,1970,240z,2.4l+l6,1209147,electrical-switch+&+relay,ignition+starter+switch,4700 https://zcardepot.com/products/ignition-starter-switch-240z-260z-280z-510?_pos=2&_sid=8b6530aba&_ss=r https://zcardepot.com/products/ignition-switch-with-keys-240z-260z-280z-510?_pos=2&_sid=6af94aebf&_ss=r Of all of the lights, only the turn signal switch power goes through the ignition switch. Based on what is on the Z Car Depot listing for the part, you may want to get their 800-510. It's up to you.
-
Need a little help
That only shows a few of the connections in the steering column. Again, I suggest you make a chart with the details above and share it here.


