


.JPG.cfcada9cf1c1b502df3f5f2f2ca3ff36.JPG)

SteveJ
Free Member
-
Joined
-
Last visited
Everything posted by SteveJ
-
 Grommets, you say?
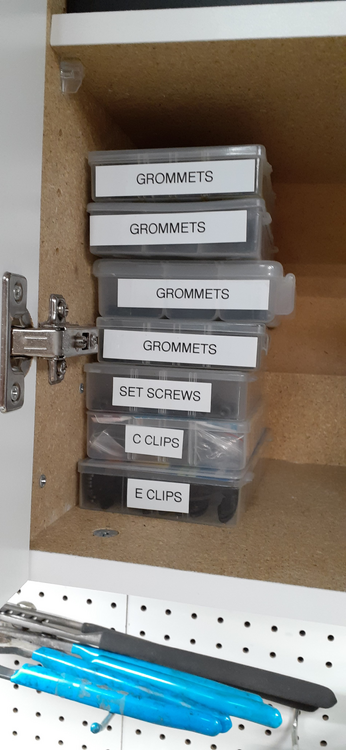
-
Talk to these guys. No personal experience, but they seem to have a following in GA. https://sixescustom.com/
-
Revisiting for clarity. The female YPC round terminals can be removed with a iwiss/icrimp weatherpack tool. The model number of the tool is WR01. I might have mentioned this elsewhere, but I thought it would be good to have the information reside here. It seems like the WR01 is only sold as a kit with a crimping tool or with other extractors. Frankly, the other extractors look like they would work on the YPC 6.3 and 2.8 mm connectors. https://www.amazon.com/IWISS-Extractor-Removal-Metri-Pack-Connectors-3/dp/B08PKLZXCX
You can see me removing the clevis pin on the clutch pedal in this video. Here's a video of a bench I made to make it easier to get myself under the dash to reach up to things like the clevis pins. Also @Zed Head posted a tip many years back about how to use some thread to get the clevis pin back in. I think this may be it. And again here.
Well, eventually I might remember to try my experiment with a substitute. We can also double-check the wiring to see if there's something wrong. At least we know your wiper motor is good.
It's not too foolish to expect a new part to work. At least you had the good sense to examine the sending unit carefully, and you could fix it. Nope, not foolish.
Most of my getting into the doors has been to Work on door locks/latches Install door mirrors After taking off the door panel, chrome trim on the door, and upper window frame, I usually work the window out of the regulator. That involved moving the regulator up and down to get the rollers aligned. That may be tricky for you if the regulator is binding. I don't remember if I took out the regulator to clean/lubricate, but I never tried to take out the window with the regulator attached.
This may help, too.
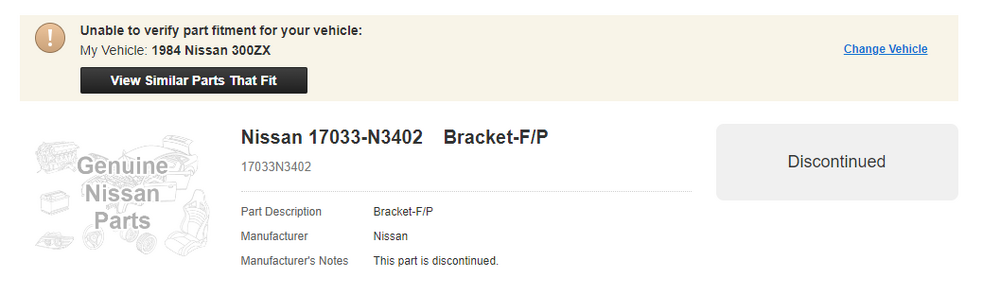
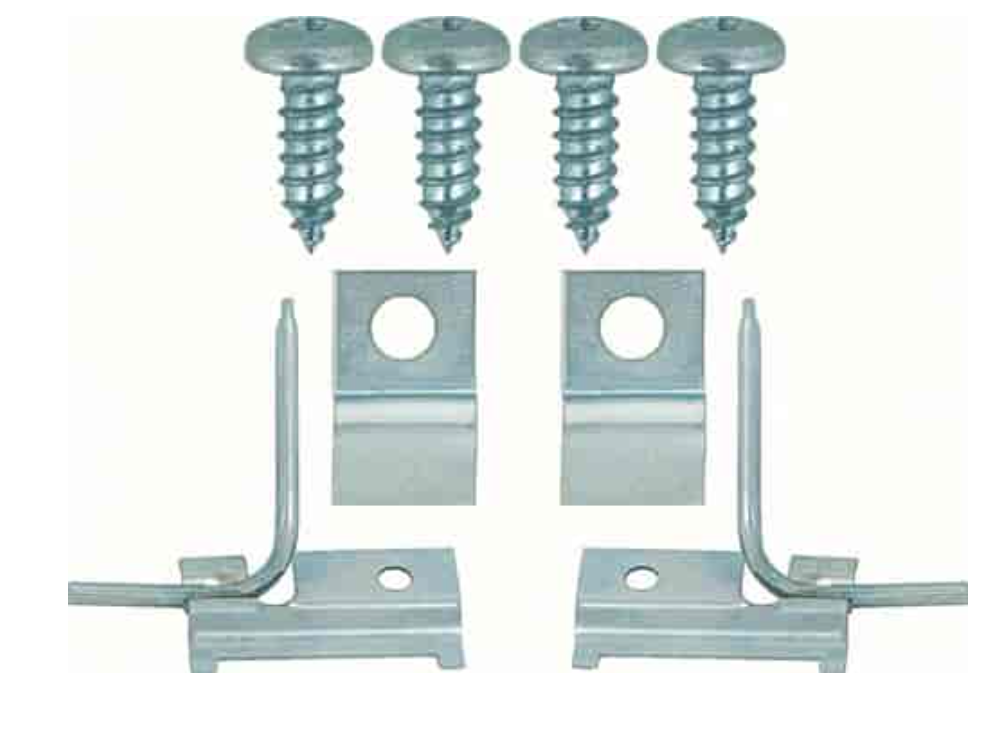
They are NLA in the states. Are they available on your side of the pond?
 Unless they changed things, Group Harrington bumpers are stainless.
Maybe something like these could be adapted. https://www.cjponyparts.com/cj-classic-trucks-windshield-washer-spray-nozzles-pair-chevrolet-c10-1960-1966/p/WWSN1/?year=1966&srsltid=AfmBOorzg5qObYNknNhDqvXyS_t8abztLRhItbJum_qInnfrWnpOpfubXSM This Mopar kit may have some potential, too. https://www.jegs.com/i/OER/691/K6671/10002/-1?srsltid=AfmBOoojCCedoDtafRJ2MaSH0UE_E_OP_mHOQiGg3JuaZmjOAOAouJVNd2o
Unless they changed things, Group Harrington bumpers are stainless.
Maybe something like these could be adapted. https://www.cjponyparts.com/cj-classic-trucks-windshield-washer-spray-nozzles-pair-chevrolet-c10-1960-1966/p/WWSN1/?year=1966&srsltid=AfmBOorzg5qObYNknNhDqvXyS_t8abztLRhItbJum_qInnfrWnpOpfubXSM This Mopar kit may have some potential, too. https://www.jegs.com/i/OER/691/K6671/10002/-1?srsltid=AfmBOoojCCedoDtafRJ2MaSH0UE_E_OP_mHOQiGg3JuaZmjOAOAouJVNd2o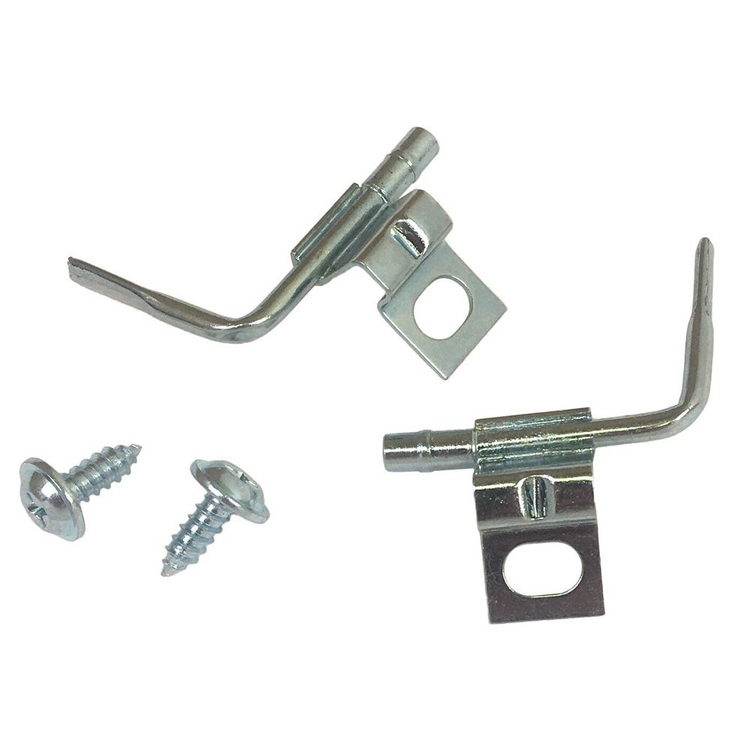
 I figured there was a good chance the tach would work. I learned about disconnecting the TIU a long time ago from reading about the ZX distributor swaps. It's common knowledge with us old farts who have been on this board forever. I actually had that come up about 10 years or so ago. A friend did the ZX distributor swap on another guy's car, and it ran like crap. He brought the car over to my place, and one of my first questions was about the TIU. He quickly disconnected it, and the problem was gone. I don't know how you have the CAS signal wired to the MS or what you did with the wires that the old distributor connected to, but somehow the TIU was getting a signal to ground out. That was what was messing you up. The tach doesn't really care too much about what device is grounding the coil negative to fire the plugs. It's basically just looking for that pulse.
If air is flowing through the AFM, the flap is open. If the engine dies, the flap closes, and the car kills the power to the fuel pump. Are you sure the tank is clean. I have read about people having rust in the tank, and a flake blocks the outlet. The car dies and the flake falls down. The car starts, but when the tank is stirred up, the cycle repeats.
I haven't read many posts on this thread, but I just came across this YouTube short. It seems relevant.
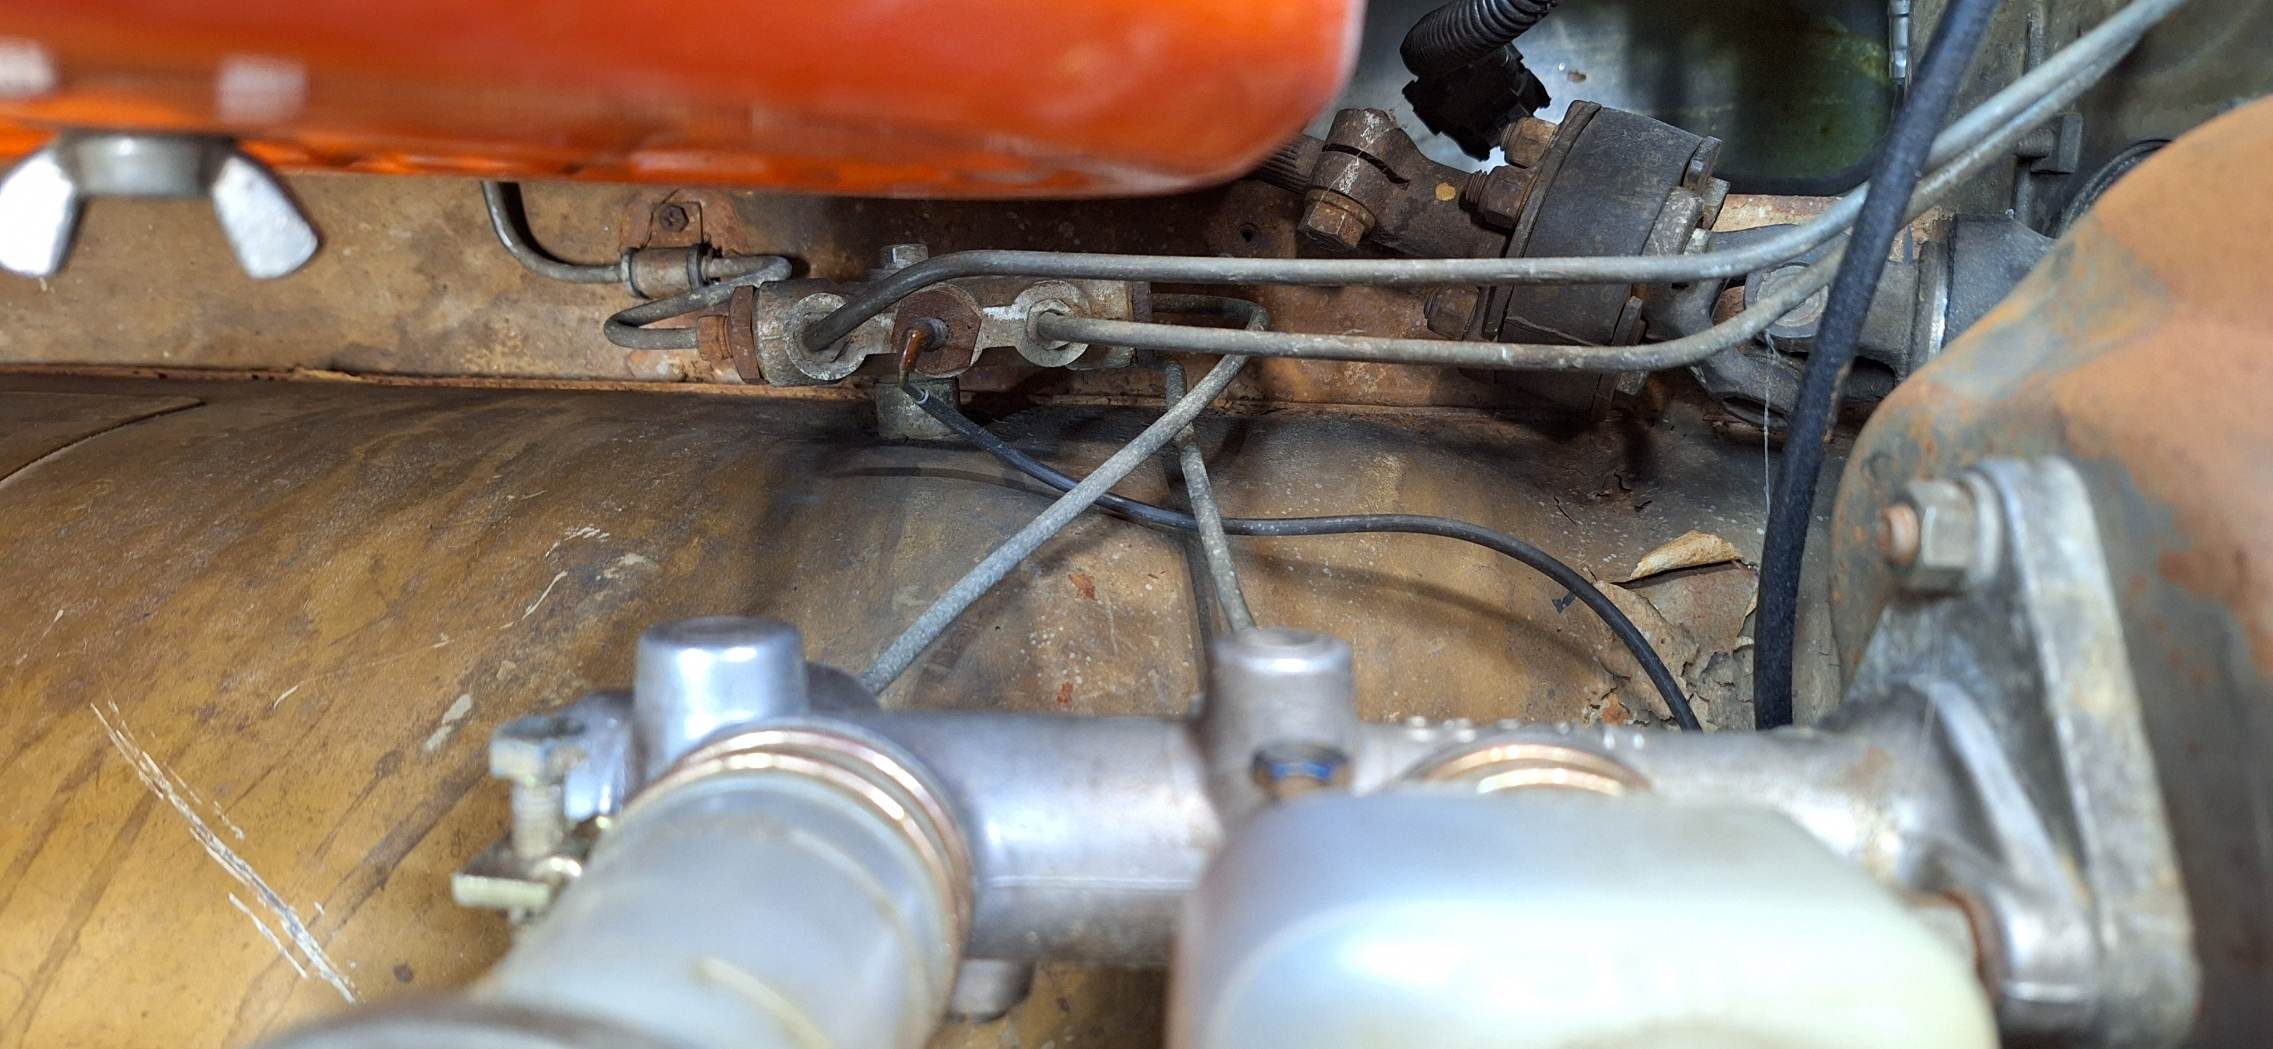
Nope. Look down. (Brake MC in the photo to orient you.)
I figured there was a good chance the tach would work. I learned about disconnecting the TIU a long time ago from reading about the ZX distributor swaps. It's common knowledge with us old farts who have been on this board forever. I actually had that come up about 10 years or so ago. A friend did the ZX distributor swap on another guy's car, and it ran like crap. He brought the car over to my place, and one of my first questions was about the TIU. He quickly disconnected it, and the problem was gone. I don't know how you have the CAS signal wired to the MS or what you did with the wires that the old distributor connected to, but somehow the TIU was getting a signal to ground out. That was what was messing you up. The tach doesn't really care too much about what device is grounding the coil negative to fire the plugs. It's basically just looking for that pulse.
If air is flowing through the AFM, the flap is open. If the engine dies, the flap closes, and the car kills the power to the fuel pump. Are you sure the tank is clean. I have read about people having rust in the tank, and a flake blocks the outlet. The car dies and the flake falls down. The car starts, but when the tank is stirred up, the cycle repeats.
I haven't read many posts on this thread, but I just came across this YouTube short. It seems relevant.
Nope. Look down. (Brake MC in the photo to orient you.) The stock ignition grounds at the TIU on the blue wire. If you are using a MS to fire the ignition, that means you two incompatible ignition systems connected to your car. Is the MS connected to the negative terminal of the coil? Post a copy of the wiring diagram for the ignition you are using. Disconnect the TIU. Wrap the ring lugs in the factory harness individually with electrical tape. Reconnect the blue wire at coil and reconnect the distributor. See if you still have your problem.
That is DEFINITELY the one. It has the diodes and everything.
The 73 buzzer is a different animal. I haven't studied the other wiring diagrams enough to know if it was used earlier. According to the factory wiring diagram, the buzzer @Matthew Abate is looking for has 3 wires. Two are positive feeds, diode isolated, and one ground wire. One of the positive wires goes through a set of normally closed contacts at the driver's side door switch. Those contacts are connected to two of the 3 wires on that switch. Only one of the wires on the driver's door switch grounds on the switch.
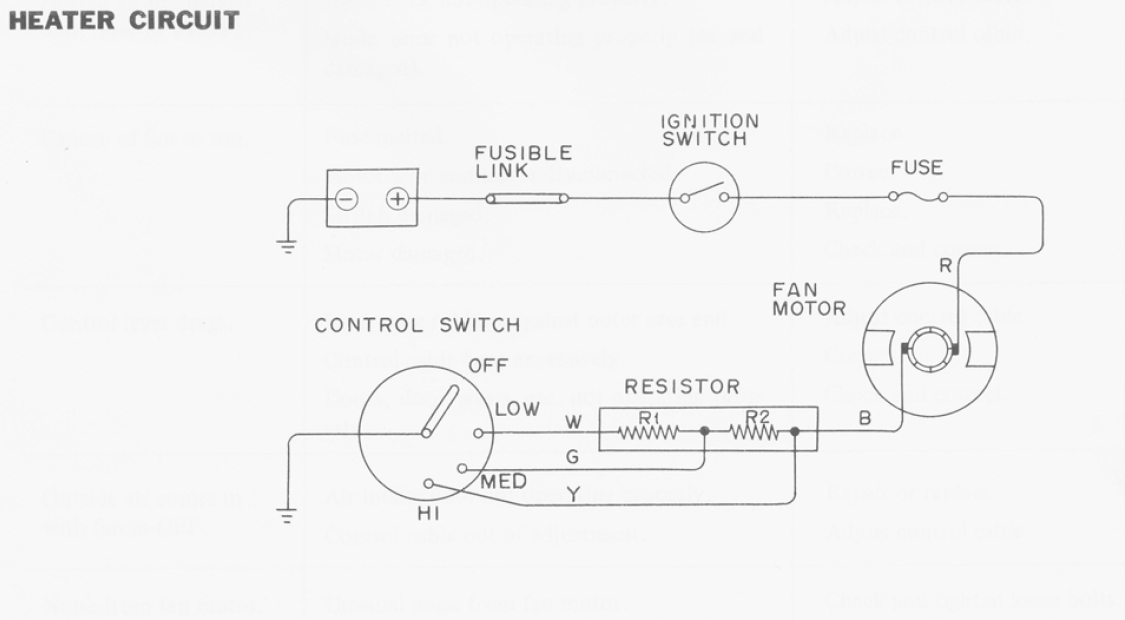
Snipped from S30-heater.pdf. That file may be on the downloads, but I couldn't find it easily.
The stock ignition grounds at the TIU on the blue wire. If you are using a MS to fire the ignition, that means you two incompatible ignition systems connected to your car. Is the MS connected to the negative terminal of the coil? Post a copy of the wiring diagram for the ignition you are using. Disconnect the TIU. Wrap the ring lugs in the factory harness individually with electrical tape. Reconnect the blue wire at coil and reconnect the distributor. See if you still have your problem.
That is DEFINITELY the one. It has the diodes and everything.
The 73 buzzer is a different animal. I haven't studied the other wiring diagrams enough to know if it was used earlier. According to the factory wiring diagram, the buzzer @Matthew Abate is looking for has 3 wires. Two are positive feeds, diode isolated, and one ground wire. One of the positive wires goes through a set of normally closed contacts at the driver's side door switch. Those contacts are connected to two of the 3 wires on that switch. Only one of the wires on the driver's door switch grounds on the switch.
Snipped from S30-heater.pdf. That file may be on the downloads, but I couldn't find it easily.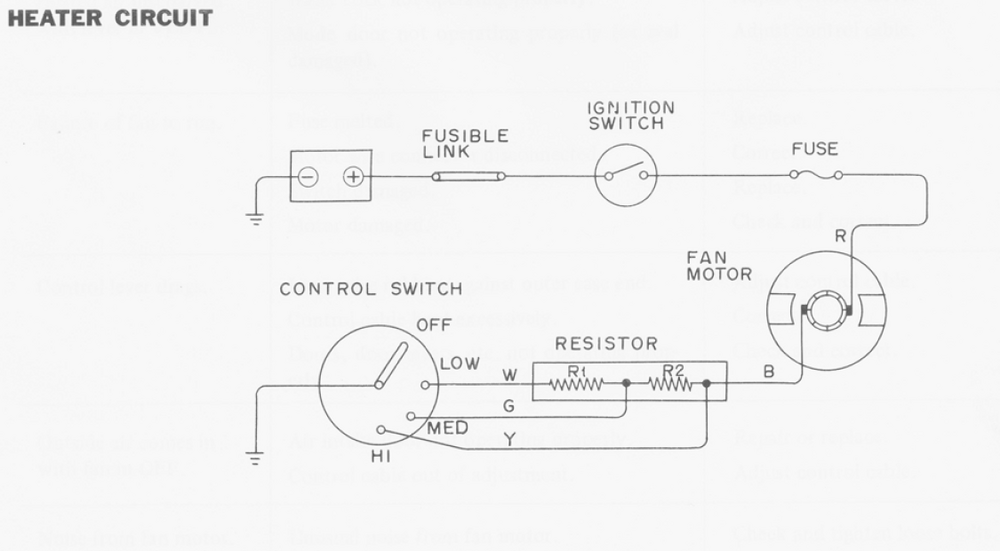 So my wife is wrong. I AM good for something! I'm glad you could get to the bottom of your problem.
If @grannyknot was operating the hazard switch in between the successful and failed operations in his video, I might be inclined to think that.
I'm not a big fan of the 2 pin electronic flashers. Maybe it's the cheap Chinesium aspect, but the type I was buying had some intermittent performance issues with LED bulbs that I have not seen with the 3 pin flashers. Anyway, if you're running incandescent bulbs and have intermittent performance of the turn signal, that indicates that you don't have enough current flowing through it. The intermittent performance with the electronic flasher tells me that the issues is probably between the flasher and the turn signal indicator. That would point to the switch or one of the connections to the switch.
So my wife is wrong. I AM good for something! I'm glad you could get to the bottom of your problem.
If @grannyknot was operating the hazard switch in between the successful and failed operations in his video, I might be inclined to think that.
I'm not a big fan of the 2 pin electronic flashers. Maybe it's the cheap Chinesium aspect, but the type I was buying had some intermittent performance issues with LED bulbs that I have not seen with the 3 pin flashers. Anyway, if you're running incandescent bulbs and have intermittent performance of the turn signal, that indicates that you don't have enough current flowing through it. The intermittent performance with the electronic flasher tells me that the issues is probably between the flasher and the turn signal indicator. That would point to the switch or one of the connections to the switch.


Important Information
By using this site, you agree to our Privacy Policy and Guidelines. We have placed cookies on your device to help make this website better. You can adjust your cookie settings, otherwise we'll assume you're okay to continue.