.JPG.cfcada9cf1c1b502df3f5f2f2ca3ff36.JPG)

SteveJ
Free Member
-
Joined
-
Last visited
Everything posted by SteveJ
-
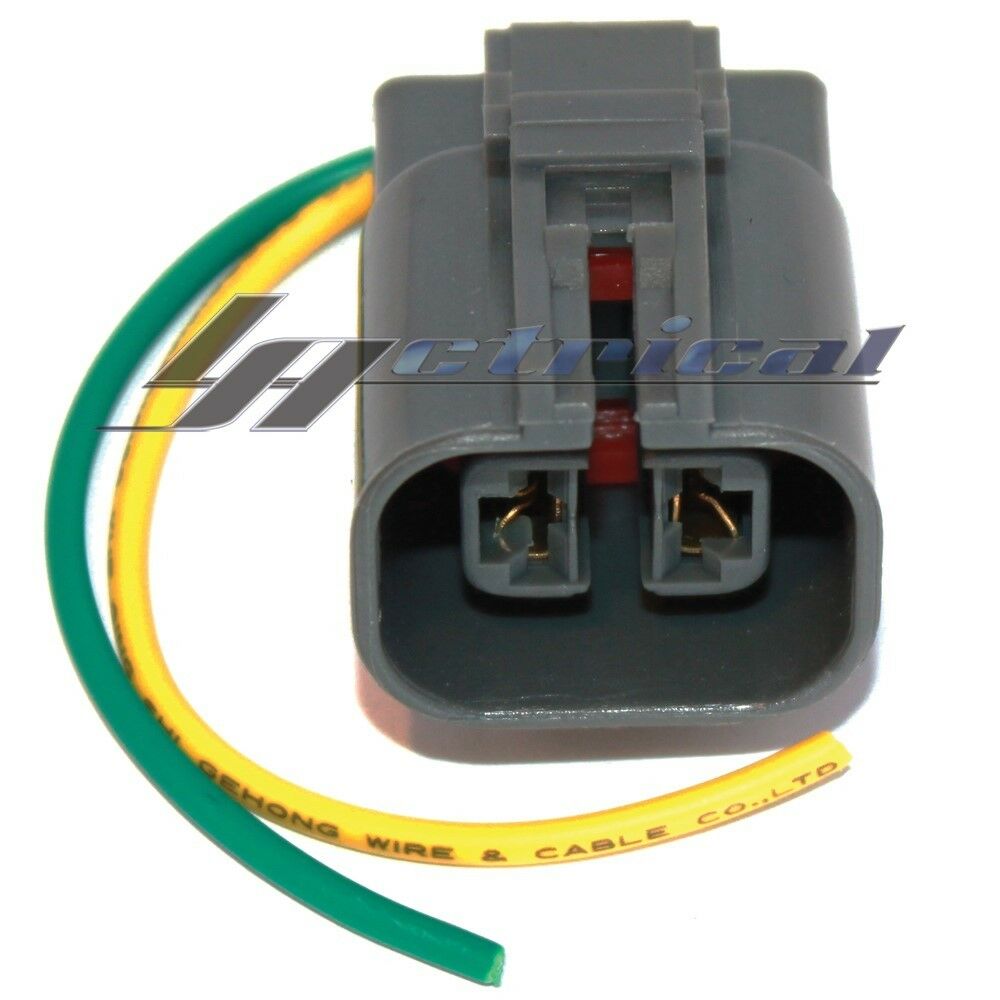
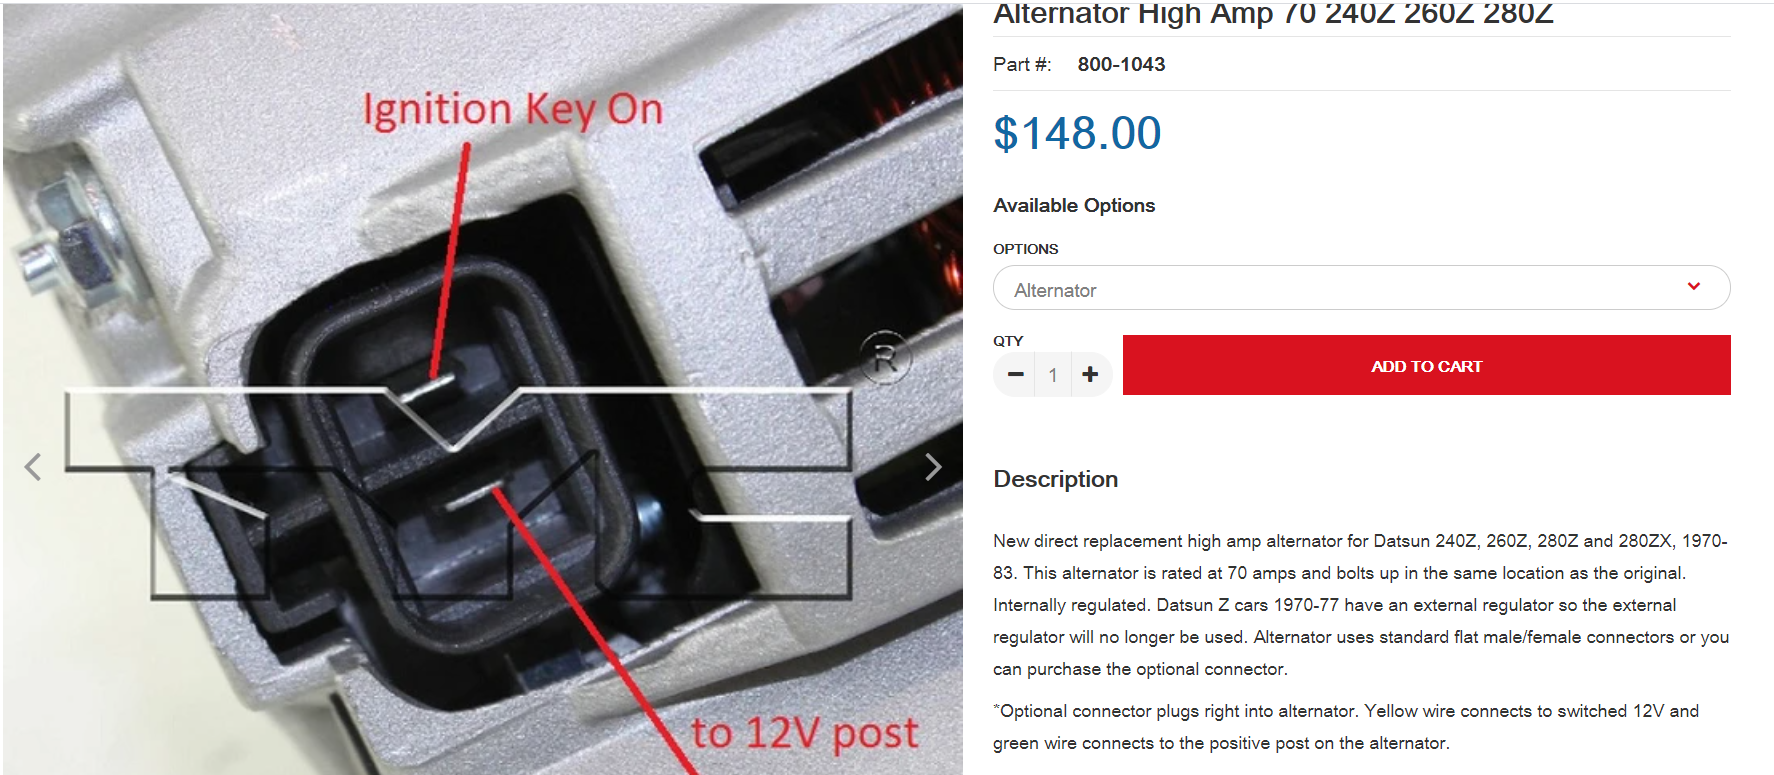
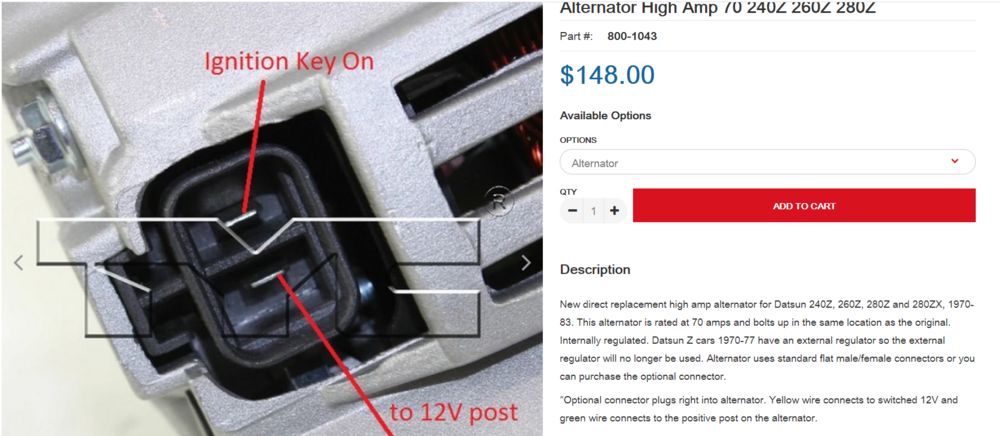
 If I understand your question, I answered it in post #7. I did some digging. The alternator in your photos is probably this one: https://www.obbstartersandalternators.com/13778n-lr170-757b-lr170-757br-lr170-765-lr170-766-p-894.html. I saw the 13778N sticker in your photos. I looked up alternator wiring for the Frontier and found this: https://www.ebay.com/itm/302008182071. Picture below. That has the color wires described on the ZCarDepot site. From looking at some other images online, I would think that the Earth terminal is where I have the arrow drawn in the picture below. Can you post photos of the wire damage? Also before testing, verify which wire in the two wire connector goes where. If you can't see any markings on the alternator itself, you may have to resort to purchasing a Haynes manual for the Frontier to get the wiring info: https://www.amazon.com/Nissan-Frontier-Pickup-Pathfinder-Manuals/dp/1563926105/ref=sr_1_3?dchild=1&keywords=nissan+frontier+haynes&qid=1632625664&sr=8-3

-
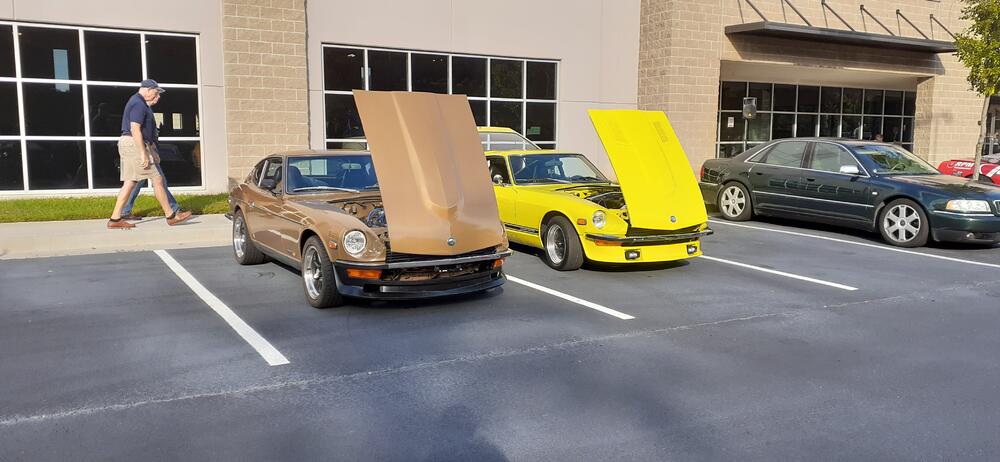
I took the 260Z to one of the regular car meets I frequent. A fellow GZC member was there, so we parked together.
-
For the diode, you can find a description here: http://www.zhome.com/ZCMnL/tech/280Alt.html For the jumpers at the VR connection, you can get the 6.3 mm 6-pin non-latching connector from Vintage Connections. You can use that connector for the diode. Unplug your VR. Set a multimeter on continuity. Look for the black/white wires from the engine bay harness going to the connector. Test each for continuity with the vertical pin on the T connector at the alternator. The diode would point to the T connector. You can also check with Motorsport Auto to see if they have this in stock: https://www.thezstore.com/page/TZS/PROD/classic12h04/12-4067 It already has the diode.
-
It's what I suspected. I don't think the people at ZCarDepot are not being intentionally deceptive. They understate the changed necessary to integrate the GM alternator into the Z wiring. It would be nice if they just mounted the proper T connector to the alternator AND advise buyers about the need to jumper out the VR for the 70-77.
-
Have you jumpered out the external VR? For the switched wired, you may want to get a 6.3mm 2 pin connector from http://vintageconnections.com/Products/Connectors On the wiring harness T connector, the vertical part of the T is the switched wire. As @Zed Head said, you will probably need a diode on the switched wire, otherwise, you may backfeed the ignition circuit. The arrow (line) on the diode points toward the alternator. The diode can go between the green wire and the connector, or it can be integrated into the jumper for remove the external VR from the circuit.
-
This is why I asked @RJK to post photos. What @Zed Headposted is 100% correct for a 280ZX alternator. HOWEVER, I believe @RJK could conflating the 280ZX alternator with another 70 Amp alternator sold by ZCarDepot. This is the other alternator that is explicitly listed at ZCarDepot.
-
Um, that would not be caused by an MSD ignition. That would be caused by some combination of old battery, bad alternator, and bad voltage regulator. Post pictures of what you're talking about with regard to the new alternator.
-
There was never a wire from the VR to the fuel pump. The yellow wire from between the alternator and the VR is the neutral from the alternator. It had enough voltage and current to energize the coil for the fuel pump relay. If the relay is gone, there is no circuit to control. You have two open circuits.
-
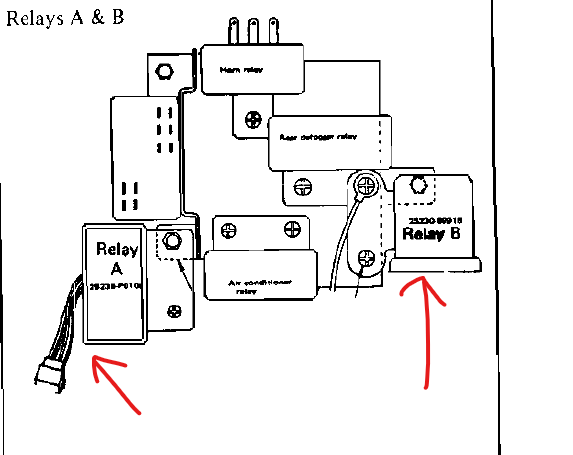
It's been a long time since I removed the piggy back harness for the fuel pump relay. I'm not sure whether or not I trashed it. Anyway, I believe the piggyback harness is between the voltage regulator and the engine bay harness. You should be able to identify a yellow wire that should branch off the harness to the passenger compartment. It goes to the fuel pump relay in the kick panel. The easiest way to defeat the factory modification is just to unplug the relays in the passenger kick panel. Are you looking at connecting the new fuel pump power wire to the old factory wire running back to the fuel pump?
-
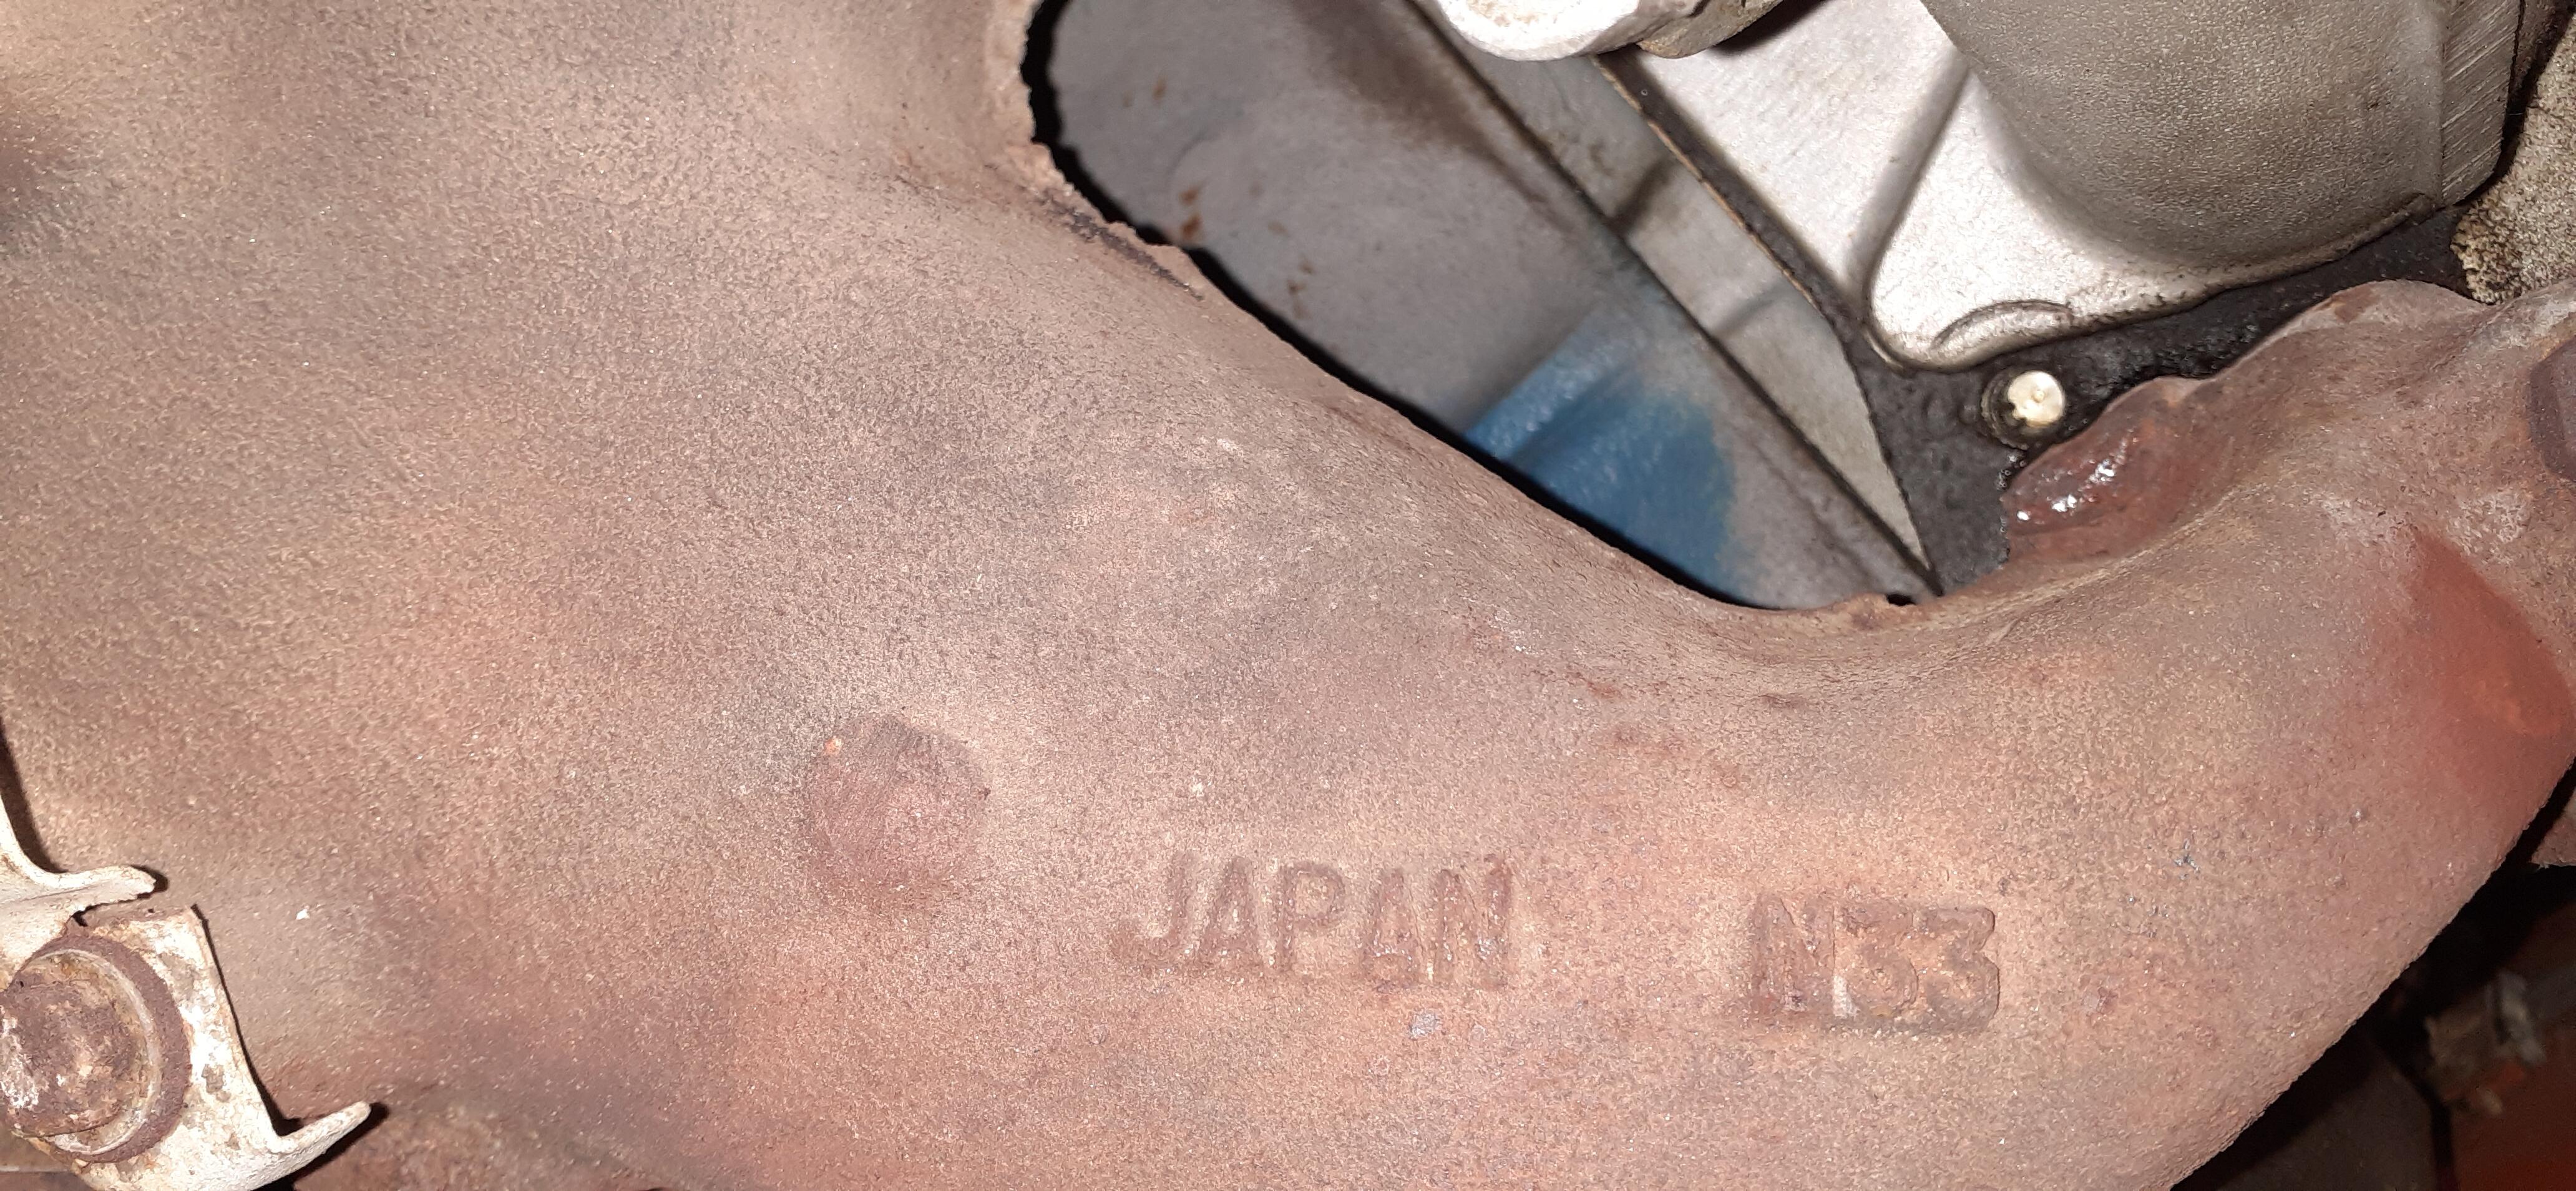
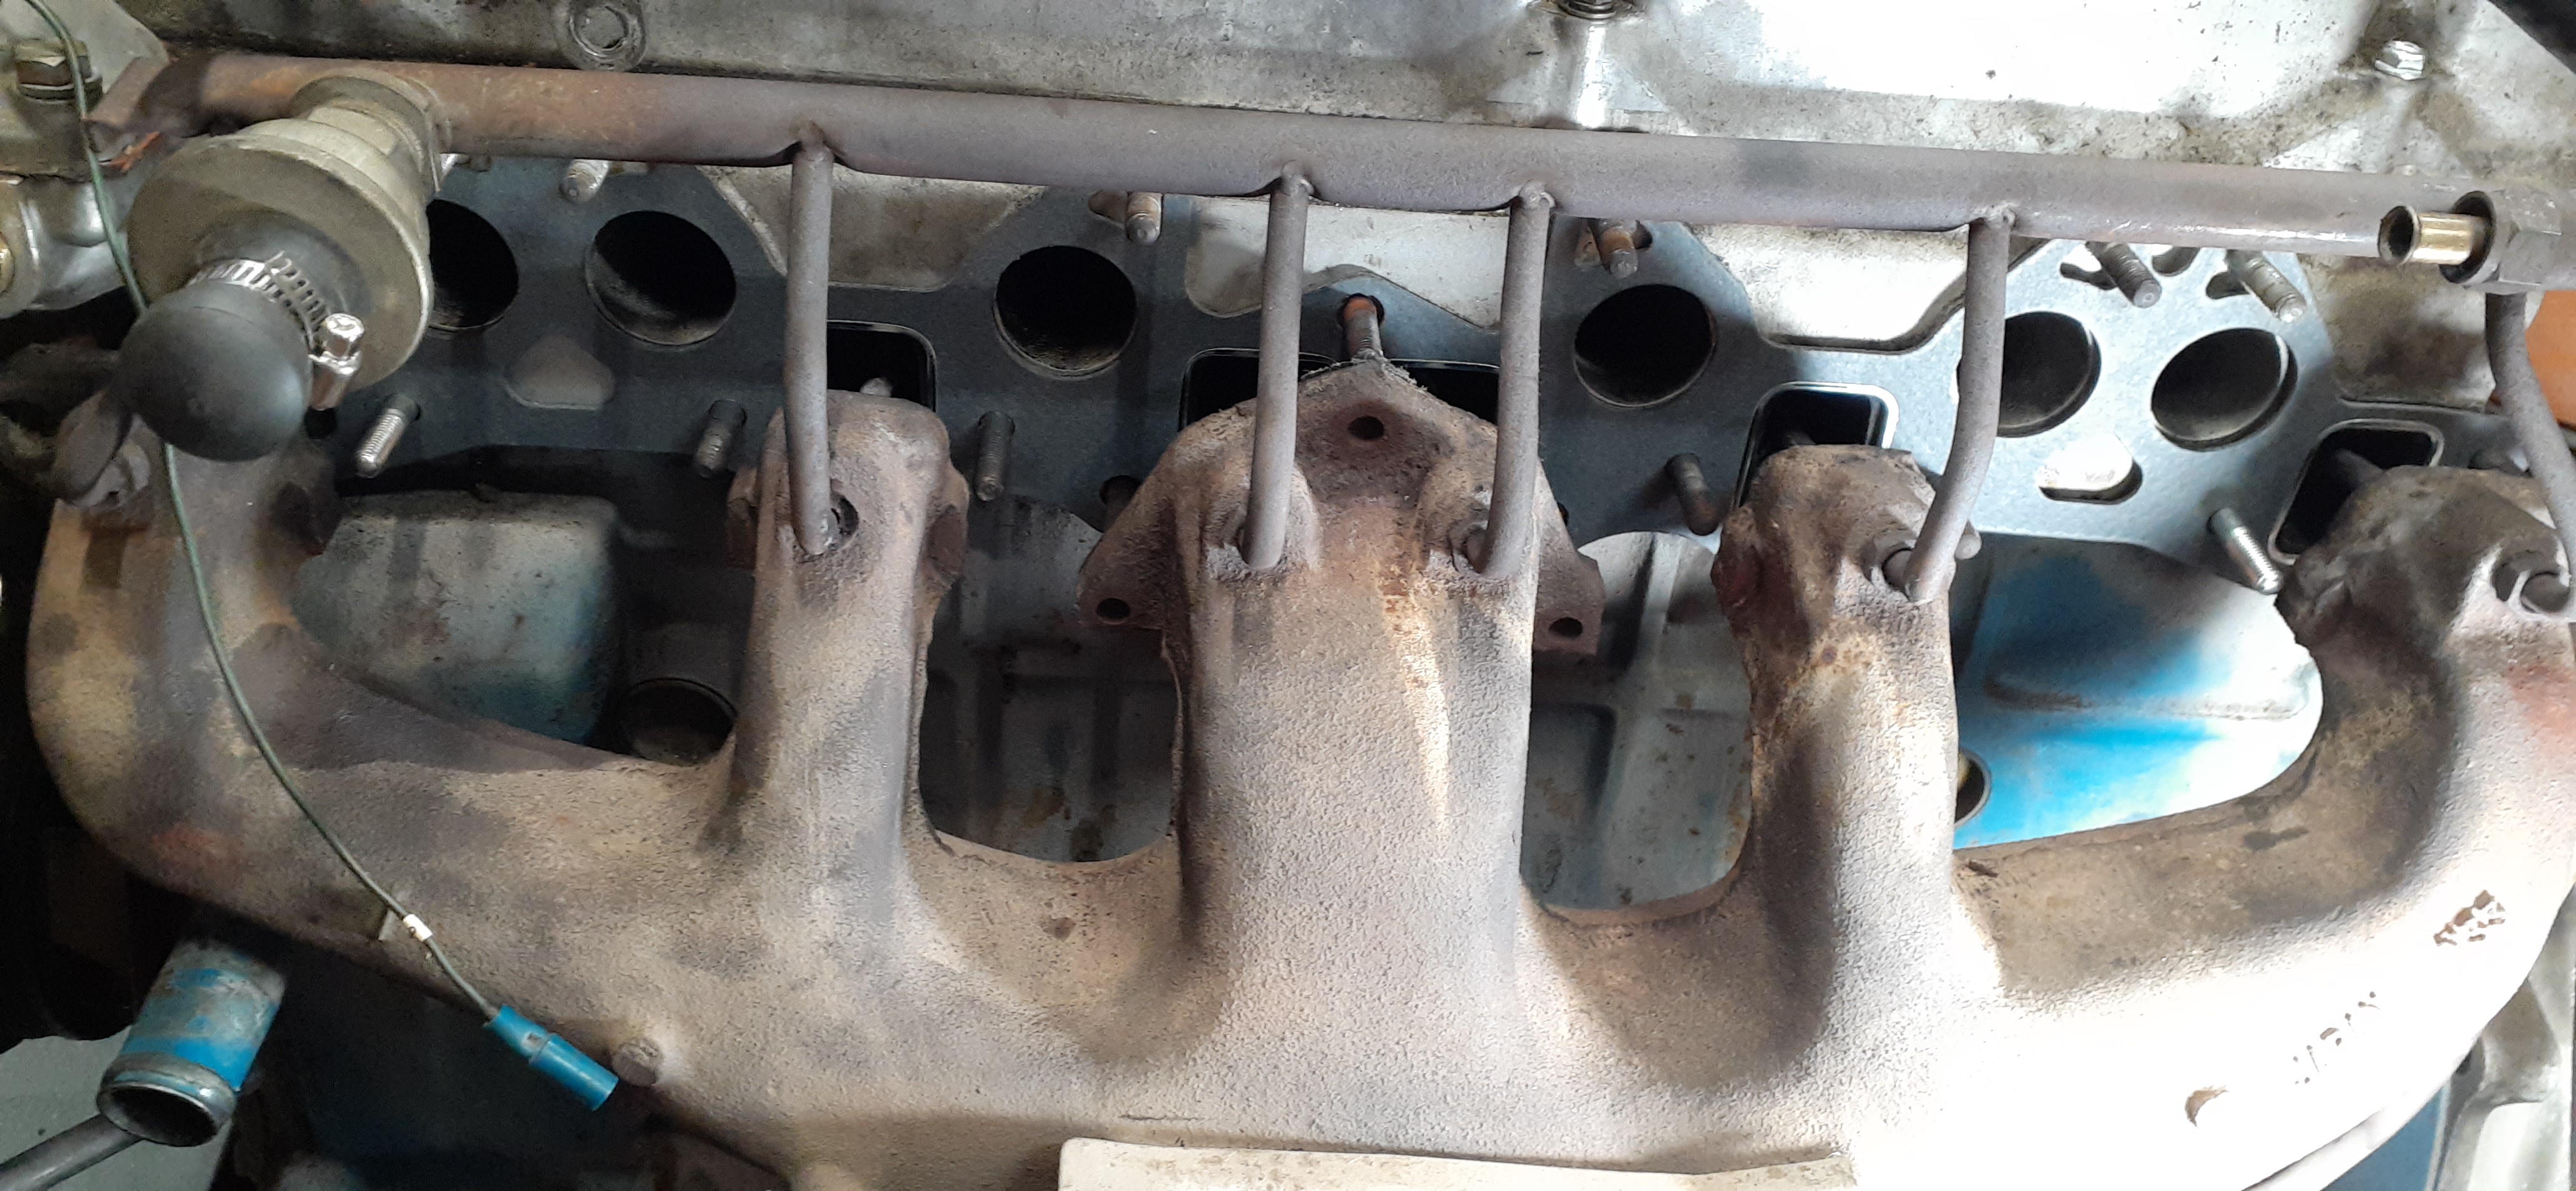
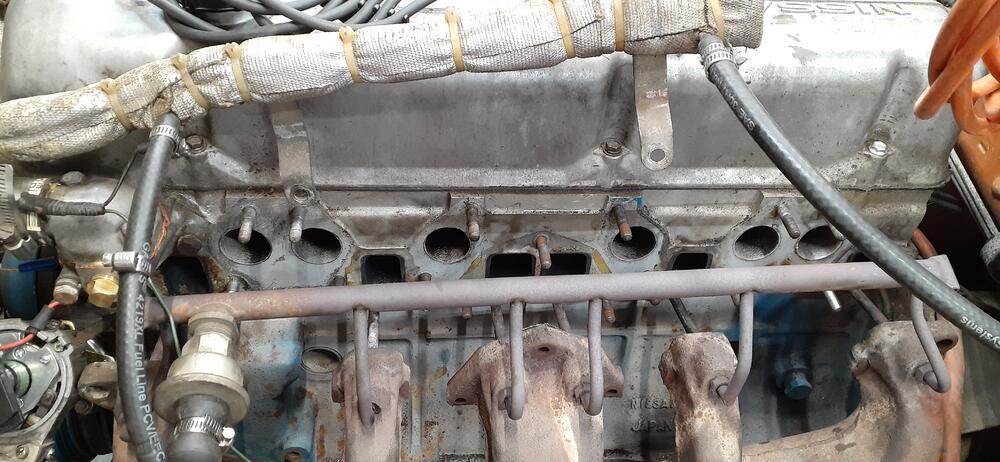
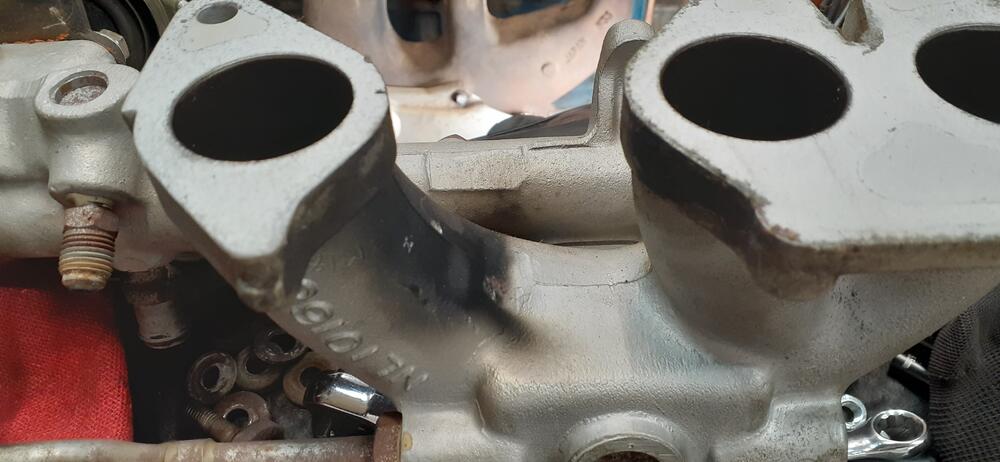
I finally decided to replace the gasket for the intake & exhaust manifold today. I also found some clues as to why my previous effort to tighten the intake didn't work. Among other things, I got a really good view of where about 17 years ago I found that a stud was missing near the #6 exhaust. I just didn't have the skills back then to take things apart and put in a new stud. I also found the nut was missing under the #5/#6 intake runners. More on that later. I also had one stud around the exhaust come out with the nut attached. Fortunately, I had spare studs already on hand. After working everything loose, I removed most of the old gasket. I had to scrape off only a little remaining material. I thought it was clean enough for the new gasket. I worked the new gasket into place relatively easily. Before putting the intake back in place, I took a quick look at it. There was definitely an exhaust leak at #2. Also, there were signs of a leak below the #5/#6 intake runners. I did wipe it down a little. You can see the smears below the intake. Anyway, I got the intake and exhaust cinched down nicely, and the carburetors are back in place. Tomorrow, I will re-balance the carburetors since I hope I have rid myself of all of the leaks around the intake and exhaust.


-
It helps to share some of the surprises, especially when people join here because they want to "wake up" an old Z. On the other hand, I haven't been documenting some things like the oil leaks from dried up seals...
-
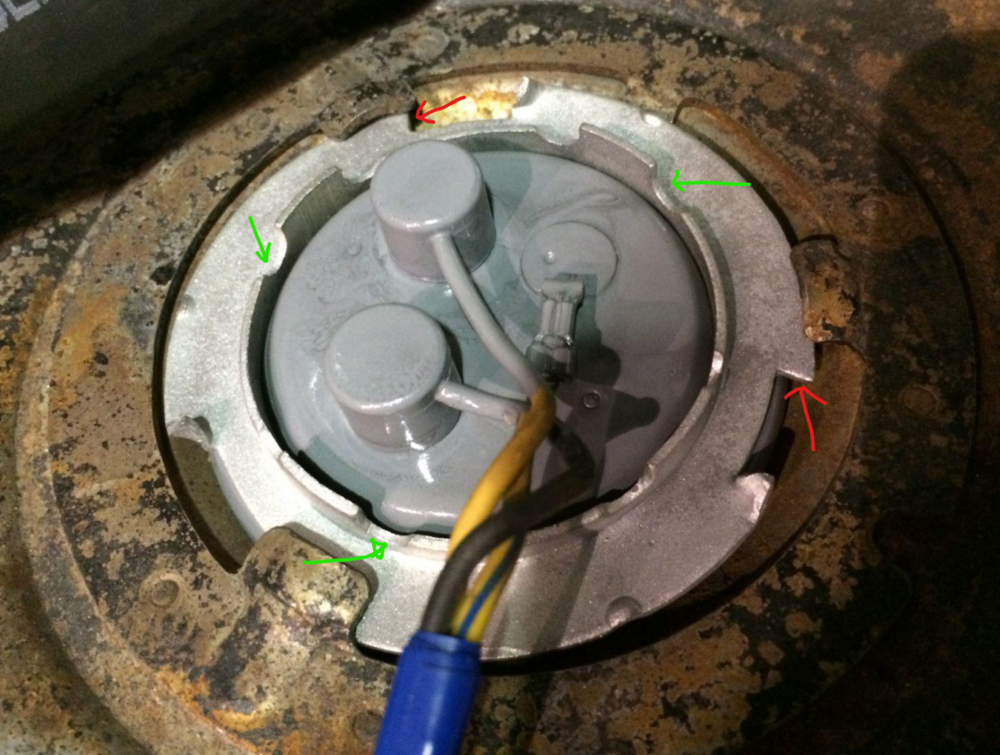
On my 240Z and 260Z, I used about any tool I could fit to press on the flat areas at the red arrows. You can't push too hard there, as you may warp the ring. The early cars didn't have the inner ring area where I have the green arrows. I would think after removing the sending unit wires and low fuel level wire that you may be able to get a set of pliers that open wide enough to go across that area. Hat tip to @siteunseen for the picture I lifted from this thread:
-
Yes, imagine the clip below the hole. It holds onto the arm going through the hole. Maybe I can use one of my spare mechanisms for show and tell.
-
I'd just have to remember where I stashed my diodes...
-
I can make them, too.
-
D'oh! I was going from memory. I'm getting too old to do that.
-
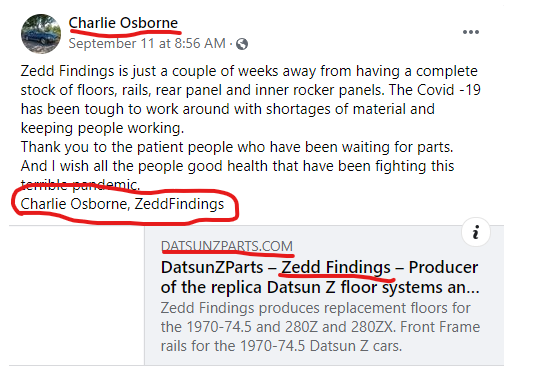
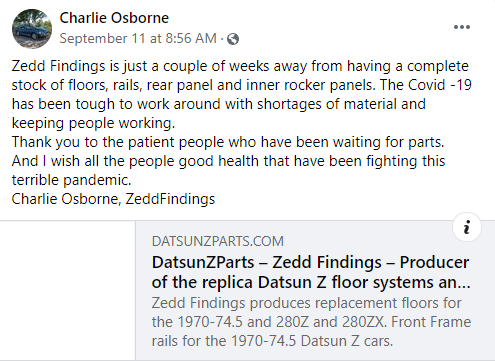
Here, take this: Maybe this will help you with identifying the players... I would suggest that you be patient. I have seen a person get black-balled by shops because he came across as high-maintenance. I don't think you'll find someone else at Charlie's price point who would be more reliable. One more screen shot for good measure:


-
Go ahead an buy a timing light. https://www.amazon.com/dp/B000EVYGV4/?th=1 (Note, there is also a more expensive one with dwell if you think you might ever deal with points.)
-
https://jdm-car-parts.com/products/datsun-240z-260z-280z-battery-frame-se?variant=731393333 Cover: https://jdm-car-parts.com/products/reproduction-original-battery-top-cover-set-for-datsun-240z-260z-280z-lhd?variant=13941872197741 (Sold out)
-
Did you get a 40A alternator or did it have a higher rating? The 40A needs an external VR.
-
Let's not go too far, shall we?
-
If Charlie retired, it was only in the last couple of days.
-
Good to know. That eliminates one of the extra variables. Don't forget to check the valve lash and timing, too. Those are important to have correct before futzing too much with the carburetors.
-
Actually, I had a 24F in my 240Z a long time ago and made the mistake of driving it without having the battery fully secured. When I made a right turn, the battery moved left, and the positive post contacted the engine. Fortunately, I put out the electrical fire before the car burned up. I am all for using the 24 instead of the 24F based upon my personal experience.
-
Welcome. This thread I started on getting my car back on the road after 11 years in the garage may be helpful to you.