panchovisa
Free Member
-
Joined
-
Last visited
Everything posted by panchovisa
-
 Yah J Z, I just put my ear to the end of a long screwdriver. Stethescopes are just for guys with too much money (doctors?).
 -
Michael, I'll be in my garage this weekend and will take some photos for you. Regarding the e-bay auction tou sent me to, those tubes are for "banjo" bolts (metric at that and tough to get), while the photo of your carbs shows hose nipples for the breathers. So, not directly compatable.
-
Mperdue, the second output on the regulator is for a mechanical fuel pressure gage. If you don't have one then plug it. No need for a fuel return line when using a regulator with electric pump with pressure bypass (Holley, Carter, etc.). The regulator limits the fuel to carbs from the pump, the pump (electric) runs continously, but when regulator limits the flow the pump "bypass valve" opens and the pump "freewheels". You will need breather lines from the bowls. If your floats don't stick, or the pressure is not to high, they will only pass vapor. BUT, they could also pass fuel. So vent the bowels to a "catch tank" to keep fuel off your exhaust. PM me if you need photos of what I'm talking about. Pancho EDIT:I see you are using the positive displacement mechanical pump. This will not "freewheel" and you will need a return line to fuel tank. This is not an area I'm familiar with. It might require two regulators in series, with the first set to a higher pressure than the second. One port of the first reg would feed the 2nd reg and the second port of the 1st reg would be the return to the fuel tank. Go electric, it's much easier.
-
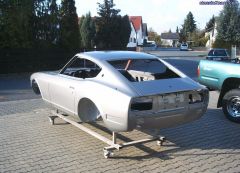 Be still my heart!
 -
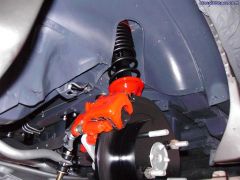 Looks very clean and neat, but that is not paint on the rotors is it? If it's not just the "lighting" then please clean them down to bare iron before appling brakes. The paint will ruin your pads and probably score the rotors.
 -
I could use a "single digit salute" design for certain occasions. Or an "I can't drive 55" design to flash patrol cars parked on the shoulder. A nice "Z" logo could work for me.
-
Teflon lined braided hose should be used. Rubber lined hose not meant for hydralic applications. Might work for clutch because line pressure is low, but steel hardline would be better.
-
Now don't be modest. Maybe a Tom Seleck look a like. Hawaian shirt, shades, jaunty pose, something like this maybe: http://www.classiczcars.com/photopost/showgallery.php?si=tomohawk&limit=&thumbsonly=0&perpage=12&cat=552&ppuser=&thumbcheck=0&page=1&sortby=&sorttime=&way=&cat=552
-
Those that can, do. Those that can't, teach. Your teacher will give high marks for this insight (not). My other favorite quote had the word "breats" in it, maybe you can recall it?
-
Tom, I just haven't found any ready made braces I like. Guess I'll make my own.
-
Tom, thanks for the photos. I will be getting my tripple Mikuni set up ready soon and will make the mods before installing. I really like your strut brace, where did you get it?
-
I belive that what he might call indy cars today were called champ cars in his day. They raced many places besides Indianapolis. The sanctioning body was probably U.S.A.C. (post war), or possibly something like A.A.A. (pre-war). Not much racing duing most of the forties, remember the war effort actually cancelled Indy for years. Just because you can't find much on him on the internet doesn't mean he didn't race. Remember that it will not appear unless some historian places the information on the web. I'd be interested also to know more about racing in the early years.
-
I used a propane torch with a wide tip to warm under coating. Scrape it off with a putty knife (use an old low oil drain pan to collect the soft tar), and then wipe the small remains off with rag soaked in lacquer thinner (have plenty of ventilation, and wait to use rag AFTER turning off torch!!!)
-
Chris, a surge tank is very good. A built into the fuel cell surge tank is best. ATL sells cells with surge tank and also surge tanks that can be fitted to existing cells. Still you do not want to run multiple pick ups to one pump. From my experience: I had two pick ups tee'd before a single low pressure Holley pump. My car died while driving around the block. The pump had gone bad. Replaced the pump and even with 12 gallons in a 15 gallon cell I couldn't get fuel to the carbs. I had to physically prime the fuel line before the pump to get fuel to carbs, even though the pump was mounted at a height equal to the BOTTOM of the cell. Think of it this way. Two dash 6 lines into pump, one dash 6 line out. The pump can only maintain head pressure on one of the dash 6 pick up's. The second pick up is one giant leak! Teeing the lines together after multiple pumps (which each act as one way valves)allows you to scavenge the corners of the fuel cell (the poor mans surge tank) and stops the "leak". Multiple pumps do NOT increase flow because that is a function of the size of the final fuel line to carbs. A single dash 6 line to your pressure regulator will only flow what it can, at your pressure setting, regardless of how many pumps.
-
Chris, I have dual electrics on my car. Main reason is to pull fuel from both pick-ups in my fuel cell. Second reason is for redundency. You should have one pump for each pick-up, NEVER tee two pick-ups together to get by with one pump! I've tried it and you WILL have problems. You CAN, and should tee the lines together AFTER the pumps. With one pump use ONLY one pick-up in the fuel cell.
-
If the "funds were no issue" I'd have both!
-
Scott, it is not an easy question to answer. First and foremost you MUST select the ride height you car will sit at. I cut some 4x4 lumber to mock up the ride height and placed them at the front and rear inner pivots of the suspension. Lower the car carefully down onto the "spacers". Next you will need to know the diameter of the tires you will use. Use a floor jack to raise the suspension untill the spindles are 1/2 of the tire diameter from the floor. Cut another wood spacer to hold this dimension, it can sit under ball joint. Install the strut, shock, upper spring seat, lower adjustable seats, camber plates, and BUMP STOPS. DO NOT install springs. Measure the free length of your springs. Find the spring rate from your supplier. Estimate the total weight and f/r percentage of your car (check an old road test in a magazine). If your car weighs 2,000 lbs with 50/50 weight distribution then each corner holds up 500 pounds. If your springs are 250#/in then the free length will be (500#divided by 250#/in) 2 inches shorter. If the free length of these springs are 10" the length at ride height will be 8". Tape the lower spring perch to the strut 8" from the upper spring seat. Contact your spring supplier to get the "STACK HEIGHT" of your spring. This is the lenght of the spring when the coils touch each other and the spring rate goes infineate. The difference from the stack height to the 8" ride height of your spring is the MAXIMUM amount the suspension can move upward from the static ride height. It is VERY important that your bump stops contact BEFORE this happens. Cut another piece of wood 1" less than the spring stack height minus the spring ride height. When this piece is added on top of the piece under the ball joint your bump stops should be starting to compress. Adjust your lower spring seats up or down, and cut new spacer to sit on top of ball joint spacer untill you have gotten things where they belong. Also remember that at full droop it is best if spring maintains (this would be at the free length of spring, 10" in this example) contact with the upper and lower spring seat. When you are happy that you have enough adjustment range (equal amount up and down) on the lower spring seat then measure from end of strut to beginning of adjustable collar and have them welded there. This is how I did mine (I had to because I was changing the ride height and adding much taller tires and many other new pieces). Sounds like a lot of work, but how much work is it to start all over, and how much money can it waste?). Pancho EDIT: It is very common to find that you need a longer spring of the same rate. Now is the time to find out! EDIT #2: It is also common to find that you may need to re-think your intended ride height because of lack of travel in your shocks (or to have to section the struts for shorter shocks). All good resons to mock it up.
-
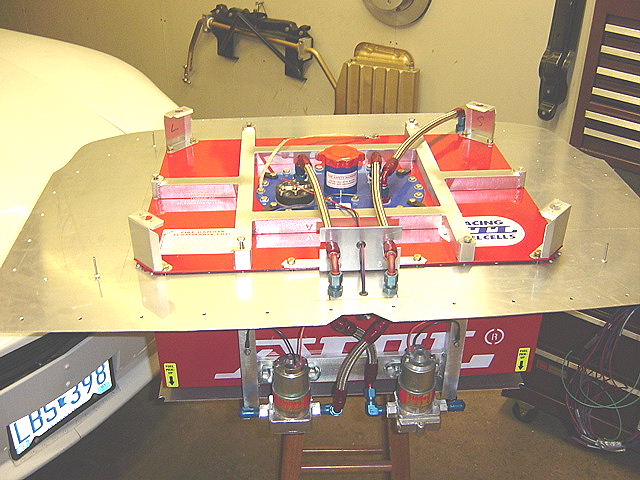
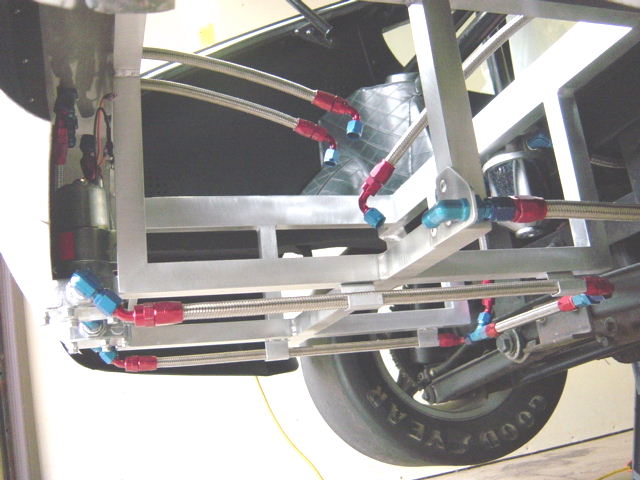
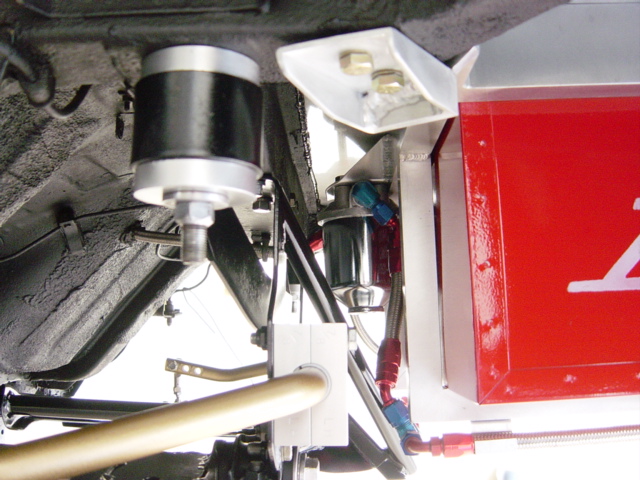
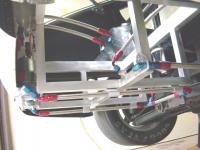
I have built Z racers with 22 and 15 gallon ATL cells. The 22 gallon tank had about a 1 1/2" offset into the carand had 1 1/2' x 1/8" straps with stand offs welded to ends. The basic frame at the floor area was 1" steel box tube. At the bottom of the cell I made it the way Greg Pickett did in his Trans-Am Vette. It was 1/8" x 1" angle iron with a 20(?) gage plate covering the bottom of the angle iron frame. To connect the upper and lower frames I used 3/8" round bar stock bent with a 5" radius. Long sides had ends to the lower corners with radius bend centered on upper frame. Short sides were reversed with radius bends centered on lower frame. All in all cheap and easy to make. The 15 gallon install was more "show" and made from 1 x1" and 1 x 2" aluminum and was a bolt in (and rivit in) type of install. I will attach a photo, sorry I can't find my old car photos of the 22 gallon.


-
I wish tomohawk was here to transmutate this for us.
-
Just got an e-mail joke from him today. Think he is just working hard.
-
My first car was a 1956 Chevy 2 door. White over green, 6 cylinder, automatic. The car was 18 years old (I was 20). Paid $500, drove it 35K miles and sold it for $550. Only car I made money on. Oh, had one snow tire and no two tires matched. Fun keeping it on the road during a Jackson Hole winter!
-
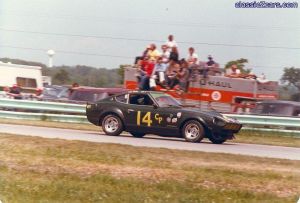 Jeez! I think I might be that guy on the fence with the dark shirt and red hat. If this was taken at RA between turn 7 and 8 in 1978 or later (I think thats my colbalt blue 1978 VW Scirroco behind me, my first new car) it could be me. Freeky.
 -
Reddog, here is a photo. No angle in the direction you seek is given. I would assume it is 90 degrees to the shock rod angle. 240z-chassis-measurements.zip
-
Quote: "but it's in the spirit of the classic sportscar ad not to insinuate that he's doing street racing or other illegal stuff." Now you see the problem, people/police reading intent to comit illegal acts. Better to just wait until an illegal act is commited and enforce the existing laws. Or if ricers are the target here then what about adding suburban soccer moms that can't remove the phone from their ear? Wait a minute, that is already a traffic violation here (in MN it's called inattentive driving, $150 ticket). Wonder what the cops would do about me? After all I'll be driving a full race Z on the street as my commuter car. No stickers though, and I'm a potbellied, gray haired, caucasian, near senior citizen. Bet it's no problem for ME.
-
Eric. SO sorry. I was talking about the rod on your slave cylinder.