Everything posted by panchovisa
-
monster 240Z
-
Crossmember, rack, coupler
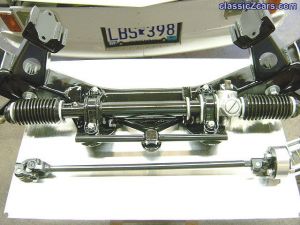
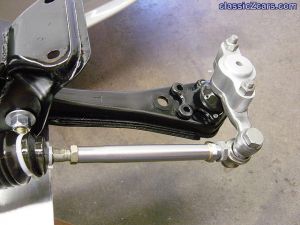
Crossmember modified for higher jacking point (my car is to low to get jack under front crossmember). Steering coupler is aluminum for more road feel than rubber/plastic/urethane can give. Plus with the big tires I'm going to put on I don't want to have to "wind up" steering before the tires turn. This set-up will also help build upper body strength (I need some!!!).
-
Spherical bearing C. arm
No rubber or urethane here. Teflon lined spherical bearing pressed into front control arm. Retained with steel sleeves welded to arm. Steel spacers to locate arm in cross member. Had to change pivot bolts from metric to 9/16" and drill out holes in cross member. Alot of work, but have solid pivot that will work with adjustable T-C rods without binding.
-
racing tie-rod, etc.
Special tube tie-rod with 5/8" rod end. Short steering arm and special extra thick "bump steer" spacers (1 and 1/4" thick). Tie rods are RH thread at inside end. So I had to take two steering racks to get both inner ball joints to be right handed thread. Anybody need a steering rack with two left handed inners???
-
Competition oilpan
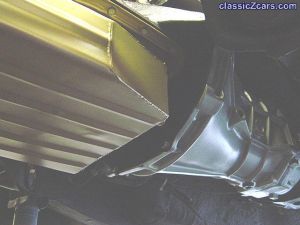
Another vintage part from the old Datsun competion catalog. Has additional oil volume, trap doors to keep modified pickup covered in oil, and has a windage tray with scrapers to collect oil off of crank. I believe that I have seen modern copies of this design on this site.
-
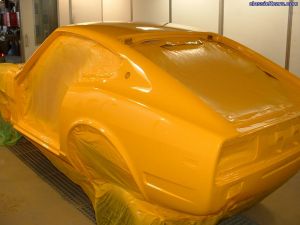
more yellow
-
Not be able to engage any gear after power drive
I'm thinking the throw out bearing blew up/burned out. The car doesn't lurch when started with clutch pedaal depressed (so there is still a clutch disk). When engine is running grinding noise (seized/blown throw out bearing). Can't select a gear while running (trying to force seized/blown bearing against pressure plate harder. Probbably sounds like grinding the actual gears.) Sorry, but the guys are right------you will have to drop the tranny.
-
Wrecked - RR Quarter
-
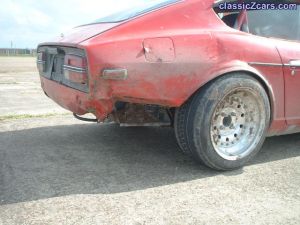
Wrecked - RR Quarter
I rate this photo a one, because it is not good to wreck a just finished car. Looks bad, but fixable. Bet you just couldn't wait to do more body work (sarcasm). Hope it doesn't take to long or cost to much (but I think I know the answer already).
-
Replacing the chassis
Zrush, I said 50 plus (as in no upper limit). I know what you mean, the first build of my car totaled 38K, I'm afraid to know the truth when I finish the second build (next year)!!!!! I just wanted to throw out some reality to our new poster. Daydreams are cheap, the real thing costs big time.
-
Replacing the chassis
Cont: With the power of V10 the Datsun drive train is out. Stick with Doge gearbox and consider some live rear axel (NASCAR Ford 9", check Speedway Engineering). Get rid of the Macphearson struts up front also and go with a double A-arm coilover set-up (Speedway again, and Carerra (sp?) for coilovers). Don't skimp n the brakes, top of the line all the way around! Figure power assited steering is a must (weight + big fat tires). Full custom interior, cooling, electrical, exhaust (side pipes YES), and every other pain in the arse system will need custom fabrication. All that is Z car is body (with custom flairs for big meats). I see at least 30K for decent job and 50+K for killer show car. Hope you don't have kids that need college anytime soon.
-
Replacing the chassis
Nice idea, but the design and execution of the chassis modification will determine how happy you will be later. I see two ways to do the job. The first is to replace everything forward of the firewall. The second is to cut away from inner rocker to inner rocker and from bottom side of cowl to begining of storage compartments (or all the way to taillights!). In the first case you will need to add a roll cage to tie in new front clip to rest of body. Additionally full length framerails tied into roll cage would be senseable. You can not expect to be able to add "point loads" of front clip to thin sheet metal of Z firewall (I don't care how big the end plates are!) In the second case a full custom chassis can be made with the remainder of the body hung from it (non-load bearing). I myself would go with the second option using stress aluminum panels bonded to a box tube space frame with a tubeular roll cage (fully triangulatedas much as possible. One seat/two seat/ street/full race) In either case unless you have an engineering background, or SERIOUS practical knowledge, the services of a local racecar builder are in order.
-
Rear Control arm bushings!
Did the bushing set you bought come from this site: http://www.suspension.com/nissancars.htm If it did I can tell you that the outer a-arm sleeves must be removed. The bushings do not need to be pressed in, they slip in quite nice. Generic instructions (should be outlawed) should be read and then thrown away, substitute common sense if they don't jive with whats in front of you.
-
Differential Repairs???
Looks like it could also be a "chill" That would be a piece of cold cast iron which they would put into the mold to start the solidification of the molten cast iron. In either case you can rest assured that there is nothing wrong with the cast case. Now if the internals are good your in business.
-
Stuck Head Bolts!! @#$%@#$%*
Combine both methods. Apply smooth tension on breaker bar (3 ft tube hadded to strongest handle you have. Half incher should be good) and get friend to hit over top of allen bolt (thru the handle etc). I would use a plain swivel handle (cheaper) rather than a ratchet handle. If you don't have one get one with a replacement gaurantee (you may break it!!!!).
-
Help, front disk brakes!
Oh, forgot to tell you that you CAN get new hubs/bearings/seals from Nissan for about $280 each.
-
Help, front disk brakes!
With the hubs off the car and on your work bench, remove the four bolts from the disk side into the hub (you have already done this). Place the inside face of hub on your work bench and use a rubber/plastic mallet to hit down on disk. The disk and hub have rusted together and you need to break them loose. Clean the rust off of hub before you put new disk back on.
-
Differential Repairs???
After spending many years in the patternmaking and foundry business I think I know what it is. I wish you had bigger picture from a couple of angles so I could be certain. It looks like errosion of the mold. The sand mold (most likely "green sand") was formed by packing sand around a pattern. When the sand and flask was removed the foundryman would have used compressed air to blow out the mold. If he got the airhose too close to the sand he could have erroded the sand. When the mold was assembled and filled with iron the erroded area would "look" like it had been repaired. Unless you see dis-similar metal (filler rod/braze) the defect in case is just normal casting defect and affects nothing except asthetics.
-
Paint done 1
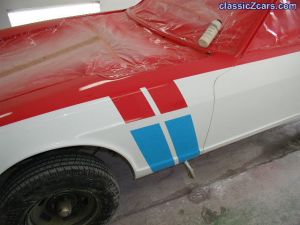
Ron, looks soooo nice! How are you putting the numbers on, sign painter or graphic decals? If you need some vintage supplier decals let me know and I'll dig thru my stuff. All that hard work prepping sure pays off when the paint goes on!
-
BRE Stripes
-
What's a Steering Cooler?
"and when I went to gewt the hydraulic hoses, they kept asking me if I had the cooler. " I think the proper response would have been "No, do I need one? Can you get me one?"
-
Camber Plates
hm, Thanks for the heads up! I saw a mention about this in a trade magazine. Good to know someone was satisfied. I agree, welding is neater, unless the car is already "done" then bolt-in will save some flaming undercoating/burned paint.
-
Sump Design
drunkenmaster, The second design has the windage tray design I was talking about. The first design could be redesigned to also incorporate it, if the builder cares too. Most people don't know that a proper sump can free up horsepower lost by "drag" of the crank/rods trying to spin thru suspended oil mist in the crankcase. There are amazing aerodynamic forces in play, especially in stroker engines at high revs.
-
Sump Design
Drunkenmaster, It looks fine, except for the shallow area. Your crank will be wipping up an oil foam. The shallow area should be filled with slots that will take the oil to lower level away from crank. On the "downwind" side of the slots should be a "wiper" (raised sheet metal blade angled to catch spray off crank and direct it to lower level of pan through slots and then to deep sump). This is usually called a windage tray. See if the maker is interested in doing it right, if not I'd pass because you'll have more oil control problems (lost HP and reliabilaty) than the larger capacity will cure. Sorry, but you asked. Any racers care to add anything I didn't mention?
-
How loud are twice pipes?
Not so fast. Note that I was able to run TWO muffs. Will you fit one or two? Do you have the room? Running two pipes to one muffler doesn't seem quite right.


