kmack
Free Member
-
Joined
-
Last visited
Everything posted by kmack
-
 The first 280ZX turbos came out in'82 (I believe) and ended in '84. Don't quote me on this as I'm not a big fan of the ZX's. But it was the in the last few years of the 280ZX's. As for the P-90 head, you got me on that one. Try checking out Brian Little's "Datsun Z Garage" website. He has a really good breakdown list of which heads came out in which years and which blocks came in which years. His site used to be on earthlink but it has moved and I don't have access to where it's at right now. I'll try to post it tomorrow.... His site also has some pretty good tips on building up a good strong L28 motor. Good reading at least.
 -
The all-knowing, all-wonderful Carl speaks again! Thanks, Carl. What he says here is true. Walk into a true-restoration shop and start asking "general" questions, and you'll be lucky to get the time of day. When I was looking for someone the straighten the front end of my Z (frame machine work), I asked members of my Z-club and hit all the local hot spots for hot-rodders on Friday nights. Just ask people and they're more than happy to divulge info about where they got they're work done. After 4 weeks of asking questions, I settled on checking into 3 shops. 2 of the shops looked like no more than someone's garage, but the 3rd (and my choice) was a clean, professionally run body shop with 5 restorations in progress. The shop owner even had a restoration album showing pictures of all his "works of art." I talked to him about what I had wrong with my car and what I wanted done. And told him that I would bring the car by for him to give me an estimate of hours needed to complete the repair. I brought the car in on a trailer (completely stripped) the next day, he gave me an estimate and told me when he could start. 2 weeks later I dropped off the car. There was only one time that he called and said he couldn't do any work to the car that day, but that he would get back on it the next day. It still only took 3 days for 10 hours of frame machine time. But as promised, the car was perfectly straight. In this case, I had no problems shelling out $350 for a now straight front end. The guy was even happy to answer my questions about paint products. FWIW: I after I had the frame work done, I asked him what he'd charge to paint the car, given that the car had already been stripped of all paint and had nothing but a light coat of primer to avoid rust. He quoted me $4000 for a base coat-clear coat system. Which included 4 coats of base and 3 coats of clear, each sanded and buffed. Total paint time would be 4-6 weeks. If I'd had the money, I'd have jumped on it! The Mustangs he had in the shop that were being painted looked like glass! Anyway... Bottom line: Nothing good comes cheap and don't expect it to. Be prepared and go in knowing exactly what you want and what you expect. If you don't know, then research it and find out. In the long run, you'll both be much happier and you'll both come out ahead.
-
Check out this thread right here on our own site! Internet 240z Club > Z-Car Related Stuff > Racing > Meet the new boss, same as the old boss... You may want to try and get in touch with Dan Baldwin. He's running a 3.1L stroker in his 240. He could at least give you an idea as to what is involved with building up such a motor. The only advice I can give is to hunt down a 280ZX turbo block to start with. It's a little heavier than the regular 280 ZX block and canhandle the added displacement better.
-
Here's a link to a guy that a really sweet, beefed up 280ZX turbo motor: http://members.home.net/drax77/newpage.html I'm still looking for info on a 3.1L
-
There is a website out there somewhere (I know, I've seen it but can't remmebr what is was called) that gave a good write-up on building a 3.1L motor. They also mentioned that do it right would run a few thousand dollars. As for making a turbo motor, there is a guy in San Antonio's Z-Sport club that right now is building one. I don't believe he's making a 3.1L turbo, but he is getting pretty close to that. I'll see if I can get in contact with him to see what all he is doing to it.
-
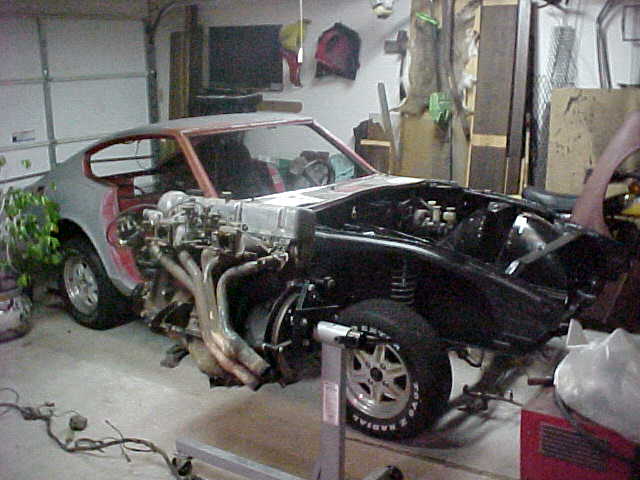
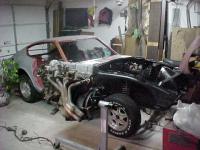
(And yes, my garage is carpeted!)
-
Finally got the engine in, inspite of the rain and dreary weather.
-
Both could be done, but You'd be better off in the long run to use a 280 block with a 240 head rather than boring out a 240 block. Try to find a 280ZX turbo block if possible. It has more meat around the cylinder walls than the regular 280 blocks. Either one is good really. Just make sure if you're pulling from a junk yard to get one with low milage (less problems). As for the head, it used to be that the elusive E31 head was the more desirable, but more and more people are finding out that the E88 head is just as good if not better (depending on who you talk to) than the E31. It's a straight bolt up, although you may want to see about increasing to the 280 valves (larger diameters) also. There are plenty of websites that can give you information about this. Some on this site can help also. Start out at zhome.com and go from there.
-
An interesting idea popped into my head yesterday while driving my company's Jeep Cherokee around. It has the 4.0L High Output straight six with a standard and is very easy to get a second gear scratch out it. Now I figure if it has that much power in such a heavy vehicle, what would it be like in a 2300 lb Z? Since the engine is an inline six, there shouldn't be any major mods other than the mounts and working up some way to attach the trans. Or could you use the Jeep 5 speed? Has anybody done this or heard of it being done? Just a real quick reason why I'm thinking about this. Last weekend I went to a Porsche Club of America race (PCA) down in South Texas. My Z would fall under the 6 cyl. class - XC3. The only cars that were running in that class were a Turbo MR2, BMW M Roadster, and a Lotus Esprit. The Lotus was very slow, the BMW didn't seem all that fast (could have been the driver), but the MR2 was pretty quick. Now 4.0L of power with lots of torque on a short 2.1 mile course should bump the MR2 out of contention. Just some idle rambling thoughts...
-
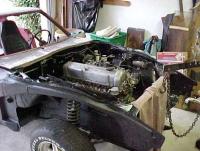
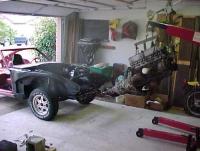
This picture was taken 12-6-01: The car is on the ground, undercoating is finished, brakes and fuel lines hooked up, engine wire harness in place, one week from dropping the engine back in! It's about time, I haven't driven this car since Jan. of '96
-
There are four screws that hold the panel to the dash. You need to remove the control knobs from the heater controls and the fan switch. The panel should pull out about an inch or two. The sliders for the heater controls is mounted to the back of the radio/heater panel by four screws. These have to be removed before the panel can be taken completely out of the car. Remove the glove box liner and then reach in behind the panel to get to the four screws (mine had phillips head screws). It's a little tight but not too unbearable. Removing the passenger seat helps. It's more fun trying to get the screws started when putting everything back together. The other option is the disconnect the cables from the heater controls. Not a good option if the dash is still in the car, IMO.
-
If you find out you still have the dim lights at idle even after you fix your dimmer switch (or jump it), there is something else you might try. My wife had an '80 Fiat X1/9 which are notorious for having weak alternators. I had the same problems with dim lights at idle but it also carried over to everything else, including turn signals, wipers, headlights. A relatively quick fix was to run two (2) 8 or 10 gauge wires from the alternator to the starter (instead of the standard one 10 or 12 gauge wire). The other part of this was to install an additional ground wire, either off the transmission or engine to the body. The result was amazing! After the fix, you could drive with the lights on, defroster on, stopped at a light with the turn signal on, in the rain, and actually have the windsheild wipers work!
-
I believe you're talking about the area that the fender bolts to. If so then the only way you can replace this section is to cut a good one out of another car. I have yet to see any major rust problems on junk yard cars in this area, but then again, I live in Texas!
-
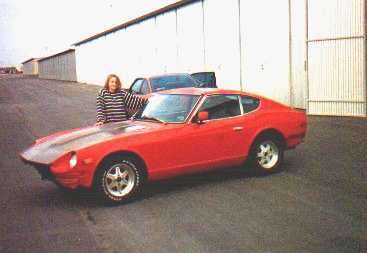
Well, here it is in the beginning.... '71 Series I bought in 1993 from 2nd owner. I was going to college then and didn't have a lot of money, so all I did was get it to where I could start it and move it whenever I moved. Got a house in '96 and that's when the resto really started. I have more info on my website.... www.geocities.com/kenshobnob (That's my (now) wife standing beside the car.)

-
You can re-thread the hole even in an aluminum head without worry. The best way is use a "Heli-coil" system. The kit comes with a larger dia. drill bit and thread tap, and the a set of coils to the size thread you are replacing. You drill out the old threads, then tap new threads and insert the coil. In some cases the coil insert is actually stronger than the original threads were. These kits can be found at just about any bolt and screw shop or a compitent tool supplier. Check out: www.newmantools.com for a little more info. Kmack
-
I would not use Teflon tape on any exhaust studs. I have seen teflon tape degrade to next to nothing on a coolant testing apparatus at 450 degrees F. Exhaust temperatures are much higher. The best thing to do (and what I'm doing now) is to remove all the studs you can, clean up all threads (on the stud and in the head), then put them back using anti-seize. IMO, this is much better than using teflon tape. Other thing is, if you don't wrap the tape on the threads in the right direction, then they just unwrap as you put the stud or bolt in. Then it does you no good. More hassle than it's worth. Kmack
-
For anyone else interested in a rotisserie, I have plans worked up on the stands I built specific for the 240Z. All dimensions are correct and have been used. Plans can be emailed. Follow the link on my website: www.geocities.com/kenshobnob ps- these are free, unless you want me to build them. kmack
-
I'm in the process of doing this right now on an exhaust stud. So far I've broken 2 of them. I did the thermostat housing about 7 years ago. Yes, I've been down this road before. If the bolt is broken off flush with the head, the only way to get it out is to drill. Take a center punch or a sharp metal punch and put a "dent" in the bolt as close to center as you can. Start drilling with a small diameter bit first, like 1/16" or 1/8". That way you can correct your center mark somewhat. Once your hole is drilled in the center then you can step up to a larger bit. Step the bit size in increments, though. It really makes it easier. The hole and thread size of the thermostat housing, exhaust, and intake manifold studs are designated as M8 x 1.25. This is a metric designation. You will need a tap this size and a metric drill bit of 6.8 mm. This is roughly 1/4", but don't use a 1/4" bit. It is too small and you won't be able to tap the threads. Go slow and use a little cutting fluid or light weight oil when tapping, it'll help. Above all, be patient and thorough. Good luck. kmack
-
until
Texas Hill Country Wine Trail Z Sport Wine Lover'Z Tour February 14-15, 2004 Once again it is time to start making plans for the 4th Annual Z Sport Wine Lover’Z Tour. This year promises to be the best yet. We have reserved a block of 15 rooms at the Sunday House Inn & Suites, so give them a call and make your reservation early so you won’t get left out in the cold. This year’s scheduled wine stops include Sister Creek, Grape Creek Vineyards, Becker Vineyards, and the Chisholm Trail Winery on Saturday, with dinner in Fredericksburg Saturday night at the Auslander Restaurant. Sundays plans include a stop at the Wildseed Farms and then on to Texas Hills Vineyards, Spicewood Vineyards and Driftwood Vineyards. Start making plans now. See Details We will meet at the Luby's on Loop 1604 & Blanco Rd, (San Antonio, Tx) at about 8:30 am. www.z-sport.com -
until
3rd Annual Z-Sport Car Show will be held again this year at World Car Nissan (IH-35 at Topperwien). Registration opens at 10am, show starts promptly at 12 noon. Classing structure is as follows: Stock 70-78 Stock 79-89 Stock 90-96 Stock 350Z Modified 70-78 Modified 79-89 Modified 90-96 Modified 350Z Daily Driver 70-78 Daily Driver 79-89 Daily Driver 90-96 Other Datsun/Nissan/Infinity Best of Show Best of Class (Stock, Modified, Daily Driver) Dealer's Choice Award Judging will be based on ZCCA Class Rules with the exception of the classing structure as listed above. Trophies awarded at the end of the show (usually about 4pm). Registration form is now online at: http://www.z-sport.com/mar-zcar-show.htm Fee is $20 before March 6th, $25 after. -
until
Z-Sport's First Annual Dyno Day Shootout. See additional info on this thread: http://www.classiczcars.com/forums/showthread.php?s=&postid=45095#post45095 -
until
Come join us for the 15th Annual ZCCA National Convention in San Antonio, Texas June 17-21, 2002. Visit www.z-sport.com for registration information.