kmack
Free Member
-
Joined
-
Last visited
Everything posted by kmack
-
 Thanks for the hint Daniel. My gauge reads almost to Full after filling up, but drops very quickly once headed down the road. But it will sit just above empty for almost 100 miles! Since my tank is out being "Renu"-ed right now, I'll head home and see if I can adjust it some.
 -
I would think a lot would depend on what sanction of racing you are planning on getting into. Wheel-to-wheel racing is going to have a completely different set of standards and requirements than Autocrossing. Typically, autoX only requires a solid mounted battery, good tires, good seatbelts, and that nothing be loose in or on the car. Check with the sanctioning body of the type of racing that you want to get into. They will be able to tell you what needs to be done to the car before it is allowed on the track.
-
Al, Read this thread. http://www.classiczcars.com/forums/showthread.php?s=&threadid=1309&highlight=fuel+tank+vent+hoses
-
The choke nozzle is the actual piece that the needle slides into in the body of the carb. It sticks out from the bottom and is what the fuel line coming from the float bowl attaches to. I suggest replacing it only because it might be worn a little and could let extra fuel pass that richen your mixture and give you false readings when you try to tune the carbs. I replaced my needles and choke nozzles on my car with ones from Z Therapy. Needles and choke nozzles were $15/ea as I recall, with a $15 core charge on the nozzles. (They rebuild them)
-
 HEY!!! That hood looks familiar!
 -
Sounds like the bushings for the shifter are worn out or gone completely. MSA has a bushing kit that you can get. Not sure exactly of the price, but I know it's not very expensive. And it's definitely worht it to get rid of the play.
-
Scott bruning (PO of Z Therapy) had a trick on his old tune-up video. Stick the big end of the needle in a hand drill. Then, using a nice, soft towel, run the needle against the towel. This will cause the needle to bend back into shape. You'll need to spin the needle pretty fast, but not at top speed of the drill. I've used this technique on needle from motorcycle carbs and it has worked well. It won't cost you anything to try it except your time. If it doesn't work, the needle from Z Therapy aren't that expensive. Get new choke nozzles while you're at it, if it comes to that.
-
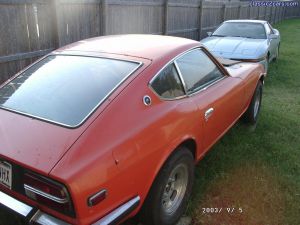
 Nice wheels. I've always liked the 5-slots. Interesting color, though. My daughter would like it!
 -
See? How nice of a friend am I when I'll let you drive MY car to a car show only because your's looked like... Well, I guess I shouldn't say that here, huh?
-
This is what I have. They're yours for the shipping cost (which shouldn't be over $3.50 Priority Mail). They aren't the cleanest, but they are solid and straight.
-
None what so ever. I'm running 6-spoke ZX wheels (14 x 6), the car is lowered about 3/4" and I have no problems. I had a set of 14x7 rims with 215/60's on the car before it was lowered and had no problems then either.
-
WHAT!?! You drove my car? When? :stupid: Oh yeah...that's when my tranny blew out on the Exploder! :tapemouth Duh!
-
If you're getting a reading on your gauge, then I wouldn't suspect the sending unit. It's obviously working. I would suspect the gauge, though. The gauge works of a bi-metallic strip for moving the needle on the gauge. Not a perfect (or accurate) science, but enough for a general reading. There has been an article (about 2 issues ago) in Sport Z Magazine about this very topic. You have two options: 1- Take resistor set up that will read the temperature you want to see on the gauge. 32 Ohms is what you need to read 193* F. Then check to see where the needle lands at this temp. and keep that in your mind as you drive the car from then on. or 2- Take your gauge apart and "adjust" it so that it reads the temperature to scale (or to your satisfaction). This 2nd option is more difficult. And I'm not inclined (or able) to discuss it at this point. If you dediced to replace the gauge, you will still run into the same type of situation as the new gauge is made the same way and has the same type of characteristics. Take your pick...
-
Damn! This is what I get for having to be at work! Oh well. The L24 is the one that was in my car last month. I did not do a compression check, but it pulled 126.9 hp at the wheels back in July. There are a few valve seals that need to be replaced based on the little bit of smoke on start up. Front and rear seals do not leak. Pan gasket does not leak. Valve cover gasket needs to be replaced and 2 bolts on the cover will need to have heli-coils put in the head. (The thread are currently J-B weld but the heli-coils would be a better fix) Rear freeze plug in the block was replaced in March of '02. And I'm a little suspect of the rings in cyl. #3 but I have no current proof of that. (#3 cyl spark plug used to run darker than the rest about 6 years ago, but now is the same color as the rest - go figure)
-
I'll trade you an recently running (was pulled out of the car last month) '73 L24 for the 4.1 VLSD. Engine is minus manifolds and coolant inlet/outlet manifolds.
-
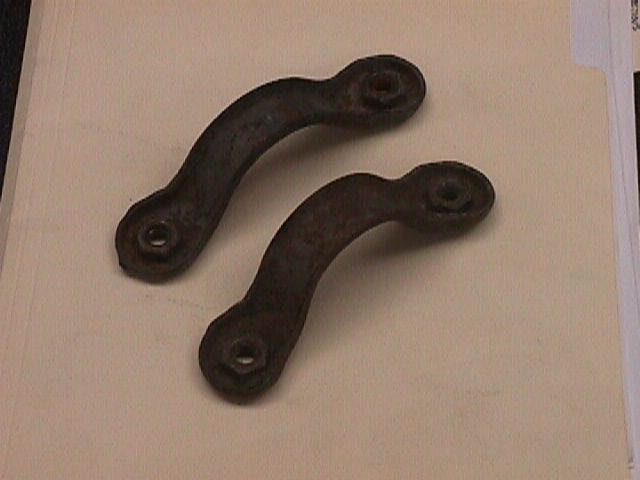
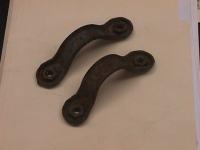
I know I have at least one of them, I'll check and see if I have a complete set and get back with you.
-
What pieces exactly are you looking for? The whole crossmember that the steering rests on? Or the small "u" shaped pieces that go on top of the rack to bolt down to the crossmember?
-
26th-z, http://www.victoriatire.com/tires.html?cart=1063230954983470&brand=Falken&NAME=Ziex%20ZE-512%20%2860%20Series%29 Check here. The 205/60R14's are the ones I have. $45/ea. The other site my have discontinued selling them.
-
For the amount of grip the Azenis provide, yes they are the best tire for the money. Only down side is there is only one size offered for a 14" rim (195/60R14). That was my reasoning for getting the Zeix. I wanted at least a 205 series tire for my car. But i have driven a 914 (6 cyl.) with the Azenis; they stuck like glue. I have also seen the 195's on another car and they don't look as skinny as I thought they would. Since you will be using a 2nd set of street tires, I would definitely go for the Azenis. Keep in mind, the Azenis absolutely suck in the rain or wet! They are not meant to be driven in the rain. But in the dry, they are freakin awesome!
-
We don't use english here in Texas, it's called "Texican"!!! And actually the sun hasn't been too hot this summer. Pretty mild really. We only got above 100* F 3 or 4 times! Lots of rain, though. Sorry I don't hang around in the chat room anymore. This new job has me running so much that I'd just be an unresponsive name on the chat anyway. Today is an exception for some reason....
-
Just to throw in my Texan vote, Fred, "logistics" sounds better to me. I vote for the 2nd one.
-
http://www.vulcantire.com/ze502_6_t.htm Although, at this time I'm running the Ziex on my 240. They are an excellant tire for street driving. And they offer a few better sizes for this model. I've also been using them in autox, although they aren't as sticky as the Azenis are. But I will say this about the Ziex: they are VERY predictableall the way to their traction limit and beyond. I have run these tires on a long track where speeds are above 100 mph. I have also gone through turns at over 70 mph with the back end kicked out and have yet to lose control of the car with these tires. They are that predictable and controlled. And for the $45 per tire price, I couldn't be happier! www.victoriatire.com I have also driven these tires during the rain on a course and they performed great. Although I like the Ziex, when these wear out I will get a set of Azenis for my car.
-
For quick reference: 85 - is for your ground 86 - is from the switched source (ie: your ignition) 30 - is your power input (from alternator, battery, etc.) 87 - is your power output (in this case to your fuel pump) 87a - would not be used in this case The 87a is the alternate power output. Relays are commonly used as a switching device. So the 87a output will power some other accessory when the main power is not switched to the 87 output. Did I make sense? Either way, it's not used in this case.
-
Only the sound came through for me. No picture. But yesterday I just saw the version from Ford for their new Sport KA. Freakin awesome. I assume this is the same thing?
-
http://www.eastwoodcompany.com/itemdy01.asp?T1=31021&Dep_Key1=BodFen Actually this is what I was talking about. It creates a flange that can be overlapped with the existing metal. Mox-nix