kmack
-
Posts
1,440 -
Joined
-
Last visited
-
Days Won
1
Content Type
Profiles
Knowledge Base
Zcar Wiki
Forums
Gallery
Events
Downloads
Store
Blogs
Collections
Classifieds
Everything posted by kmack
-
Congrats!! Dave. Glad to hear the job finally came through for you. It was great to meet you in Austin at the show, btw.
-
Hey, Brandy. Good to hear that you're at least driving the car during the day! Do you have a wiring diagram like the one in the Haynes manual? If so, does it make sense? Otherwise, yes you could maybe make things worse. I don't mean to scare. Wiring diagrams are fairly easy to read, but you have to understand some the reasoning behind the processes for it all to make sense. Get a diagram and then start by making sure that the right colored wires are going to all the right places. If some of the wires have been replaced (w/ different colors), then you may be in for a world of hurt. Based on your current description of the harnesses "rehabilitation" by the PO, you might be better off trying to find used harnesses. The unfortunate side is that you have a very early car. For the most part, all the 240Z harnesses are wired up the same (a few minor differences for extra emissions stuff like on the '73s), but the big difference is in the connector plug types. Example: a '73 rear harness may be wired exactly like one from a '71, but because of the connector types, they won't plug into each other. I had this exact same issue (although not to the same degree as you) when I rebuilt my car. The '73 harnesses were in much better condition than my '71, but I couldn't mix-n-match. I would start the search for a good clean set of harnesses for your year model (or early '71, before 6/71). If that can't be found, get a hold of, or borrow, a set of harnesses for whatever year 240 you can find. What you'll need to do is lay the two harnesses out next to each other and compare. Then fix all the things that look wrong (based on a wiring diagram) with your harness. It will mean pulling the dash completely out and lots of time spent on the floor. But when it's done, it'll also mean you can drive at night!
-
They don't have a website (I guess they spend all their time building kick*ss engines). But here is their address info: Rebello Racing 110 Second Ave. South #D-8 Pacheco CA 94553 (510)682-0103 Hope that helps. One of our members here has a Rebello 3.1L engine. Send a PM to Dreco and ask him about it.
-
Without doing any head work like port/polish, larger valves, shaving the head, etc., you won't get close to 200hp. The cam, Webers, and exhaust should only gain you about 15hp max. Keep in mind this is at the crank. I'm not sure about the pistons, though. I don't think you can get much more than the stock pistons as they are flat-tops to begin with. Domed pistons will get you into interference issues. A lighter flywheel doesn't gain you any hp, but allows you to better use what you do have. That's what is meant by "free horsepower". $7k seems like a lot to be spending on an L24 when you're in the search for 200+ hp. For that price, Rebello can build you a really nice, stroked 3.1L that will put you just over the 200hp mark, naturally aspirated. Or, for between $3-5k, you can build up a smokin' L28 Turbo that will put down close to 300hp. I've seen guys do it for less, but to get the most out of the motor you need a programmable engine management system. Sport Z magazine did an article awhile back about a guy here in TX that dropped an L28T into his 240. At the time, the most expensive thing he had in the system was the ECU (about $1500). He could spin the tires almost at will at 70 mph! If I remember correctly, he was getting close to 400 hp at the wheels, but he kept blowing the head gasket.
-
Yes, the plastic ball joints just need to be pried off. A good flat-head screwdriver works great. When putting mine back together, I used a little Lithium grease inside the ball joints and on all the shafts. If you have any type of corrosion of rust on the shafts, take some emery cloth or a somewhat fine grit sandpaper (200-400 grit) and clean them up. Especially on the bell-cranks shaft on the firewall.
-
Anybody looking to do an L28 swap into their 240Z? See the following: Valued Customer, The following parts will be specially priced for this weeks upcoming Manager Special, October 5-11: Jacks only $0.99! Master Cylinder Clutch only $7.99! All Doors only $21.99! All Engines only $79.911! Prices valid at all participating locations, excluding our San Antonio, Texas location. Parts availabilty may vary. Visit your local Pick-N-Pull store for details. http://www.picknpull.com
-
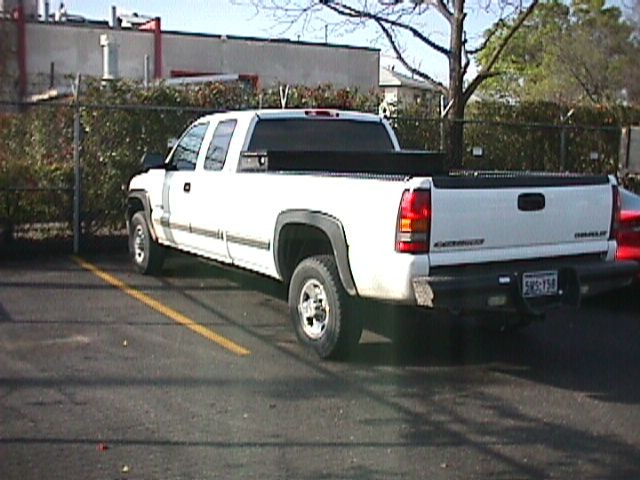
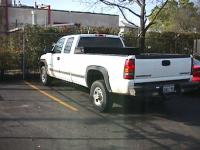
Been there..... Done that..... And absolutely love the POWER!!!! :laugh: I've got a 2001 Silverado 2500 HD w/ 8.1L (496ci). Great big monster of a truck. 2wd but still very fun. I have the longbed so it will hold 34 gallons. Low fuel light comes on at about 340 miles with in-town driving. Of course, I have a very hard time keeping my foot out of it! No replacement for displacement and just way too much fun!!!
-
Anybody know where to start looking for the oil pressure sensor on a Ford 460? I have a motor home on an '85 Ford E350 chassis with a 460ci engine. I need to re-wire the electric fuel pump but I don't where on the block the oil pressure unit is. I want to wire the fuel pump so that it will only run with oil presure or while the starter is engaged. The starter part is easy. Anybody got any ideas where to look?
-
For those that are going and don't know me, I'll be the guy wandering around in a white t-shirt with an early 240Z side emblem on the back and I'll have a blue hat with the ClassicZCars.com logo on the front. Keep an eye out.
-
But if you want to see one in person, there is a museum here in Texas (just outside of La Grange) that has one. A red one! That is a very beautiful car! Here is the website of the museum: http://www.oldcarcountry.com/
-
My vote is for Kroil. Been using it for over 10 years on cars & motorcycles. Spray on, let sit for at least an hour, with multiple applications during set time. I have never used PB Blaster, but I do know that WD-40 has never worked as well as Kroil has, for me at least. I've put the two to the test before. And I agree with 26th, when you go to remove, tighten slightly first, then start to back it out. But back it out only a little bit, then tighten again. Keep working it this way, back and forth, and it will get progressively better, easier. Here's what happens: as you loosen the nut/bolt, the rust inside the threads breaks loose, but remains in the space between the threads. As you work the nut/bolt back and forth (tighten/loosen), it slowly breaks up these rust pieces. As you work it all loose, keep spraying the penetrant into the threads; this will help wash out the loose rust. The more you loosen, the more rust you will break free. If you don't clean it out, it will jamb the threads, putting tension on the bolt, thus twisting it, and in the end, shearing it off. When ever you are dealing with rusted nuts/bolts, you MUST have patience! Take your time. If it still breaks, at least you tried. Nothing else to loose by trying...
-
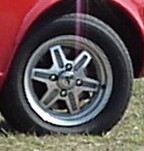
Unknown manufacturer - turbine wheel, 14" x 7" - 17 lbs w/o tire mperdue, can you tell if these have a name on them if you still have them?

-
280ZX 6-spoke Mag wheel, 14" x 6" - 13.5 lbs (w/o tire)

-
Yes, the "wonderful" Texas heat ( :stupid: ) can do strange things to plastic. From turning it into a fragile, brittle little piece of no longer usable car-art, to actually stretching it and causing longe hair-line cracks. It doesn't help that the reservoirs were made kind of thin to begin with.
-
This is also assuming that your reservoir is still in good enough shape to handle prying the old pump out and squeezing a new one back in. I've been through 2 already where the plastic was too brittle and it crumbled in my hand! :dead:
-
I'm going to be at the show for sure on Saturday. I'll hook with you when I get there.
-
If you still plan to run the car on the strip, DO NOT get the lower ratio diffy. Your off-the-line acceleration will suffer greatly. Low ratio gearing is great for low rpm/high speed driving and good gas mileage, such as freeway driving. But it will take you longer to get to those higher speeds. High ration gearing puts the power down quickly, but top end speed suffers. I have a 3.54 rear end in my 240 w/ a '73 4-speed. I run about 3800 rpm at 70 mph. If I put a 3.34 in, my rpms would be lower at the same speed of 70 mph. But my accelration from a standing stop would suffer greatly. I'm actually on the hunt for a 3.90 rear end right now.
-
If you want the power of a stroker motor, but you say you don't have the funds to do it right, why even start it? You've already got the FI and associated electrics, go back to the pick-n-pull, find a Turbo motor, rebuild it and transplant it in the car. You'll get the same increase in HP, but for a total under what the stroker would run (even with the limited mods you're talking about). Pick-n-Pull here in San Antonio wants $250 for a turbo motor (when they have them). Figure at least another $500-1000 (if you have to replace the turbo) to rebuild, although you could do it for less. And you'd still be less than boring and stroking your current motor. A 3.0L (done right) can run upwards of $3500+. You done a turbo swap and get close to 300hp with only mild mods. I'd go the turbo route unless you have your heart set on a NA stroker motor. But I'd only go the 3.0L route if you can do it right. The first time.
-
Hmmm.....the engine bits (L28) would be worth the drive to Houston. If it's anything like the '76 shell I had, it might even have the R200 under it. Mine did. Those pieces alone are worth the gas money.
-
There are no pumps of any kind in a manual transmission, unless they are added externally. Only automatics have a fluid pump in them that are driven by the torque converter. Manual transmissions "slosh" the oil around by the rotating action of the gears spinning. If the vehicle is towed on the drive-wheels, this spinning action will lubricate the gears/bearings just as if the car was being driven. There are no ill-effects caused by towing a manual transmission car on the drive wheels. Background: I spent five years in a research facility that tested transmissions of all kinds, including prototype transmissions. My job was to take them apart and put them back together. BTW, if anybody is local to San Antonio and would like a manual transmission rebuilt for them, I can do it for $200. That will include bearings, seals, and new synchro's if needed. I do not rebuild automatics, I hate those things.
-
I'll be there, along with about 10 or so of our San Antonio members. We're hoping to clean up on trophies again this year. (last year we brought 11 cars and came home with 12 trophies!) :laugh: Unfortunately, I don't think I'll show my car this year (getting too much into the racing scene). But I am planning to drive it up to the show. See you guys there.
-
The original engine for my late '71 with E31 head had steel seats in it when I rebuilt it. PO pulled the motor out at 50k and replaced with L28 back in the day. The orig. motor was never touched. I guess it can all be hit-n-miss then. Best to find out what you have is to pull it and check it then.
-
If you have the Bronze valve seats, then you either need to run a lead substitute or have the vlave seats swapped out for hardened ones. To my knowledge, only the very early cars (69-70) and the early 280's (75-76, N42 head) had the bronze valve seats, everything else has the steel valve seats. http://geocities.com/zgarage2001/heads.html
-
Well, since there was no choice for "Construction", I had to choose "other." I work for a small commercial construction firm as a Project manager. We mostly do commercial and historical renovations. But we also do some industrial and laboratory renovations and new construction. Fun stuff! But mostly I get to drive a really big truck from jobsite to jobsite and play in the dirt!
-
I've been missing it, too. Nothing in the last 2-3 weeks. Don't know if maybe it crashed with the site or not.