


Driftin Jon
Free Member
-
Joined
-
Last visited
Everything posted by Driftin Jon
-
There's also a method to take up some of the wear and slack that may occur in the rack and pinion mechanism as well. I believe the service manuals tell you to loosen the large bolt on top of the steering gear and then use a slotted screwdriver to snug up the screw in the middle of the large locking bolt. Back off 20-25 degrees and then lock the bolt back down. The procedure is in the Chilton's manual and some good diagrams are in the Haynes manual as well. Driftin Jon
-
The dipping process can be done at a company called Redi-Strip. I haven't checked for a couple of years, but they used to advertise in Hemmings Motor News. There were locations around most major metropolitan areas. I found areas of the original color on the rear panel of my '73 240 and it's what I would call a dark gunmetal grey with a very mild metalic chip in it. From a purely visual standpoint, I found the best match to be SEM bumper coat in dark fern gray metallic color code 39433 in spray cans. I suspect that an SEM dealer could also mix this color up in quarts or pints as well.
-
I did the conversion this summer. I got the carbs only and put them on the old manifold. Block off all water passages. Surprisingly, all water passages I found to be NPT (national pipe thread) fittings. Blocked everything on the manifold except PCV valve hose and vaccum to the brake booster. You will need a new linkage that you can get from Z Therapy for something like $15. Fuel mileage went from about 14 mpg to what I think is a very credible 19 mpg around town and 30-31 on the highway. I was pretty shocked by these numbers, but they're very consistent. The other thing I've found to be surprising having read other posts is that I've never had a vapor lock issue. It's not unusual for it to be 100-105*F here and the car has performed flawlessly this Summer. I don't have any insulation whatsoever on the fuel lines either. You'll like the improved driveability after changing over to the round tops.
-
I've done a track day class session at Thunder Hill. It's a real kick. I drove a car from the complete opposite end of the spectrum though..........my wife's '96 Impala SS. It's an impressive piece of iron out there on the track and surprises alot of people. Driftin Jon
-
I've got a '73 with 4 screw round tops that I installed a few months ago and they start up first time the engine turns over and run very consistently. Bear in mind that yesterday and Monday, it was a legitimate 108*F here in Redding and I have no form of insulation on my fuel feed lines. I have Pertronix ignition, but otherwise, everything is stock. I'm very pleased with the round tops and their driveability. Driftin Jon
-
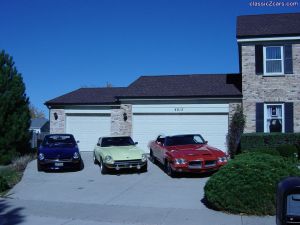
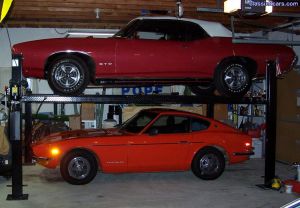 Outstanding selection of toys Greg. Ironically, I have a '69 GTO Convertible that I've owned since 1975. Currently undergoing a frame off restoration. Our son has a '73 240 Z that we finished a fully stripped rebuild of this past Spring. I've been considering a lift since my car to garage ratio is out of synch. I've got a 3-1/2 car garage, but I'm up to 5 cars, a motorcycle and a boat. I've got a 10'5" ceiling in my garage. How tall is yours and what brand is your lift? Are you happy with it? Driftin Jon
 -
I did exactly what you're planning on doing. Disassemble all body parts, including all glass. Strip to bare metal, prime all parts inside and out while disassembled. Prime first with a self etching primer, then within 24 hours, prime with high build primer. Block sand and reprime with high build as many times as necessary to get a good flat wave free panel. I then painted door jambs, inside of fenders, inside of doors, hood, hatch, etc., both base coat and clear coat, then reassemble. I then sanded any overspray that had gotten onto the outer panels while I had the car disassembled. Now base coat and clear coat the entire outside of the car. Prime first with a self etching epoxy primer, then within 24 hours, prime with high build primer. It works best if you can park the car for a long time to get the work done. Tough if the car has to be back in service every Monday morning!@ Good luck. Driftin John
-
Can you give me an idea of the condition of the '73 bumpers? Thanks, Driftin John
-
I am in Redding and haven't run the car during the very hottest times. I've had the car for a year, but last Summer it was down for a bare metal 100% strip down for a paint job. It has been in the upper 90's within the past month and I didn't have any issues with temp. As I understand it, unless you have air conditioning, a shroud was not part of the program. I've got an air conditioned 280 parts car and plan to pull the shroud and install it on my car if I get into a temperature issue. The hill you had to go over was Buckhorn Summit. All of the switchback hairpins pulling uphill may have been good cause for overheating. Pretty awsome road on a motorcycle though. Driftin John
-
I've got things put in shape and am very satisfied with the overall performance and driveability. Just need to get some air filter adapters or an older air filter assembly. Thanks, Driftin John
-
I'm assuming the rear bumper your friend has is from a 240? If so, how about a run down on it's condition. Thanks, Driftin John
-
I've got a white '73 with red interior. I did the interior 100%, every surface with SEM vinyl dye back to the original color. They have custom mixed colors in quarts, etc. that you spray with a regular spray gun. They also sell it in buzz bomb cans, but that limits your color selection substantially. I used Dark Carmine and the color match is outstanding. My car was faded to a putrid orange on the shock cover towers and they now look great. Yes, I painted the seats as well and it's holding up prrfectly after about 4 months of daily use. I live in Northern California as well and it's not unusual for it to get to 115*F in the Summer, so we'll see how it holds up. My money says it looks like it will hold up very well. Devin, where are you located in Northern California? People have greatly varied opinions of where Northern California actually starts. Driftin John
-
I think I'll probably show up and see who's got what for sale and some of what I suspect will be an awesome array of cars. I've done a track day at Thunder Hill with an instructor before and that track is a real kick to run on. They've put alot of upgrades into the facilities over the past year. Whenever I pass Willows on my way home from the Sacramento airport, I take a side trip to Thunder Hill to see what's running. As long as you sign in, they're glad to let you watch. Last week was Crotch Rocket day when I stopped by. Last year they had vintage race cars running and there were actually a Formula 1 Jackie Stewart car from the 70's. It's a great track. Driftin Jon
-
Sounds like the carbs are sold. I'll take the adapters for $25 + shipping if they are not part of the carb sale. Let me know. Thanks, Driftin Jon
-
I need the adapters to fit the old style carbs to the square mouth air cleaner if you want to seperate the carbs from air cleaner adapter. Any interest, and if so, how much for the adapters? Thanks, Driftin Jon
-
The carbs are gone........how about the air cleaner assembly? I'm just up the road in Redding and I'll be near Sacramento on Weds. If you don't get back to me by then, I can get to Sac prtty regularly. Thanks, Driftin Jon
-
 That ain't no boat. In high school, I thought it was just right. I've still got that first car from high school, but mine's a '69 convertible. There's still nothing like the torque from a big honkin' V-8.
 -
I added 3 point retractables for the same reason as you.....a lap belt just doesn't feel right and the previous owner had removed the manual shoulder belts. Probably wouldn't have liked them much anyway. I got a set of 3 point retractables from a '76 Z and had to make some minor mods. The main belt almost fits into the pocket designed into the Z floor. I had to grind about 1/8" from a contact point on the retractor, then they fit in the pocket. The bolt hole thru the floor pan does not line up though. It is about 3/4" further inboard of the existing bolt hole. I had to gring a small piece of reinforcing from the undercarriage to make a clean spot for the bolt to run through. Make sure you put a new reinforcing piece on the area so you aren't just bolting through body sheetmetal for something as critical as a seatbelt mounting point. I used grade 8 bolts as well for the extra strength. The shoulder harness retractors bolt up to the original mounting points, but they aren't very attractive. I'm going to have to see if I can find something to put more of a finished look on this area. Driftin Jon
-
The clunk in the rear end may be from something I experienced just this week. The differential mount is a rubber/steel vulcanized assembly much like a motor mount. Mine de-vulcanized and allowed the differential's nose to pull up every time I shifted making a clunking noise just behind and between the seats. Had me nervous until I got underneath and found the problem pretty quickly. Pretty easy fix with the mount available from several catalogues or the Nissan dealer for about 50 bucks. Have a good time.....you're alot further along than when I started a year ago and did a full bare metal, suspension off, glass out, interior out resto with our 16 year old son. Now I don't want to let him drive it like we had planned all of the way along. For now, he's driving the full size conversion van. Lots safer and cheaper for a 16 year old new driver. What was I thinking??????? Driftin Jon
-
I checked out your gallery and it does look like alot of the "junk" on the flat tops goes away. A couple of things from your gallery: - Looks like your overflows are not tubed in. Should they go to the air cleaners? I've read a few other notes saying that if the floats stick, you could be dumping raw gas onto exhaust system. - My choke cables come across my valve cover. I assume the routing doesn't matter as long as they end up in the right place. - I don't think the knurled knob I'm talking about is for the mixture adjustment. In the Haynes repair manual figure 3.39 on page 56, it is referred to as the Jet adjustment limiter. The jet adjusting nut is on the bottom of the carb located on the centerline of the carb body. The knob I'm referring to is on the bottom of the carb right next to this adjusting knob. - If anyone out there happens to have the Haynes manual, figure 3.33 shows the knob very well next to the jet adjusting nut. It sure looks like it just threads into the bottom of the carb body and doesn't mate up with anything else in the carb body. Comments? Thanks, Jon
-
I've listened to everyone's advice and plan to change out the square tops on my '73 for round tops. I've gotten a set of round tops from E-bay, but I've got a few questions: - I've got 4 screw round tops that appear to be in good shape. However, the knurled brass screw that goes ito the bottom of the carbs are missing. I'll check with the guy who sold them to me, but I'm not holding out for a favorable response. Can any type of proper bolt be put in place? Don't know exactly what the intention of this brass knurled knob is. - The float bowls have the fuel inlet that's cocked at an angle, but what's the other fitting, just an overflow, and is that to be piped back into the air filter assembly? - I did not get the linkage for between the 2 carbs. I assume I'll need it for those carbs and that my '72 linkage won't work from what I've read. ASny suggestions where to get the linkage? - What else stays? The '73 has at least 4 different dashpots on the manifold and linkage. Don't know what stays and what goes. I know plenty of people have made this conversion, so it can't be that difficult, but is there access to photos or instructions available? - I'm using the original N33 manifold. Probably should have just done it the easy way and bought an entire manifold/ carb/ air cleaner assembly. Too late now. It gets pretty hot here in the summer - 115*F - so I'm assuming the tuna cans would not behave very well under those conditions. Any special recommendations, I'm all ears. Thanks, Driftin Jon