


wal280z
Free Member
-
Joined
-
Last visited
Everything posted by wal280z
-
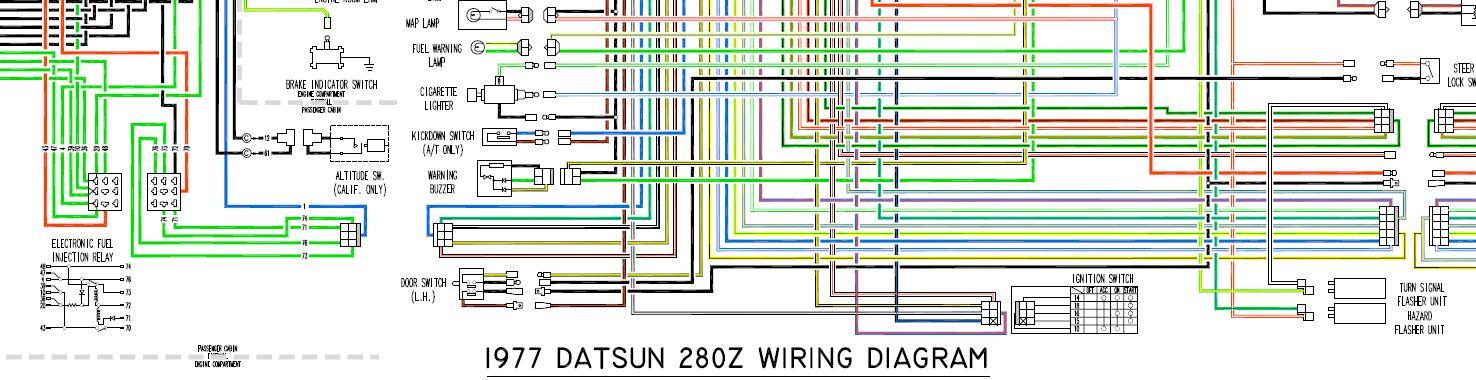
 Captain & Chas... I've made the edits, attached is Revision 'L'. Thank you both for the kind words and the skillful quality control![ATTACH=CONFIG]73723[/ATTACH]
 -
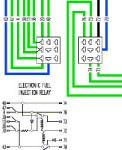
This is what I did - http://www.classiczcars.com/forums/electrical-s30/35588-upgrade-fusible-links-circuit-breakers-post301676.html No maintenance, no worries. The designed application is for 80A (each) circuits, so 100A total is not a problem. ZERO electrical gremlins since this upgrade. Look under subforum ebay/craigslist for a post submitted about "ROW52" to find donors for this application. Additonal pictures posted at hybridz.org, same user name. Wayne
-
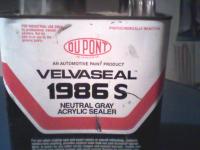
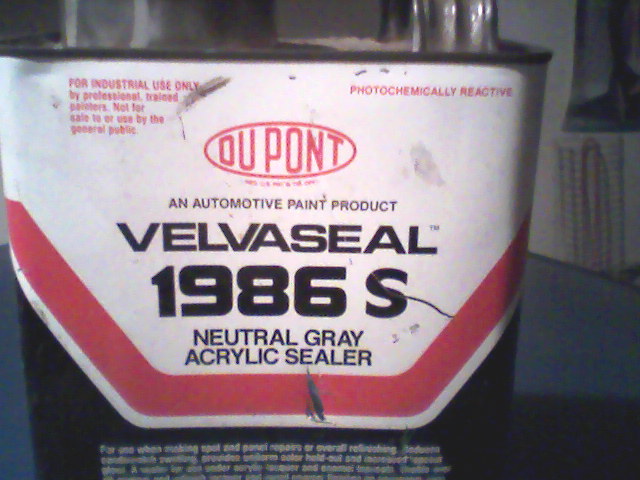
Blue - You are correct, sir. My windshelid in my daily driver (Chevy S10) was leaking, I found some +20yr old seam sealer in the garage. worked like a charm! Attached is a pic of the can (I doubt if the label is the same, but I'd bet they still make this stuff) Pretty sure I saw a similar seam sealer product from Eastwood. I think the stuff I used was intended to be sprayed on, but I used a brush and allowed it to flow into the areas that were leaking. It's been over 6 months and no leaks! I'm sure the stuff can be painted over, but as so far I'm just tickled it's not leaking!
-
This isn't anything on Ebay or Craiglist, modeerators please move this thread but I did not find an appropriate forum for this posting. Been busy but wanted to share a find for those that didn't know. FYI for all those who have a Pick and Pull brand junkyard in their area. For those who don't, and wish to make a trek or have parts pulled for them, this would be for you as well. I did a search here for "row52" and didn't see any results. Check out Row52 | Search for vehicles at self-service auto recycling yards! ... You can search nationwide for a specific vehicle in participating junkyards. VIN's listed as well as pictures as the vehicle is stationed in the yard. I've had better results logging in rather than attempting to search anonymously, FWIW Happy Searching for those obsolete parts!
-
Captain - Again, thank you for the detailed response for the necessary corrections. Here's to Revisionn K! K77ZCAR-WIRING.pdf
-
I apologize for the delay - just started a new job and other life happenings derailed my reply with revisions. Attached is Rev J, 1/19/13
-
Captain - Thank you for the detailed reply and instructions on how to fix these - it saves those people that have already printed this thing just to use some white out on their diagram and go on. I will wait until the first of next week before re-publishing, if that is OK with everyone. Gives an oppurtunity for others to chime in. I appreciate the attention to detail you seek, are you sure you aren't my long lost brother from another mother? Either that, or you must be one of my multiple personalities that has escaped and has established himself in PA now.
-
Yep, I misunderstood you - will do that for the next revision.
-
Correct - It was a matter of mistaking what was in the model drawing versus what was actually getting printed. In the model, the labels and wires were correct, however, they were 'flipped' in the paper printing. Thanks for the catch Mr. PrivateMessenger, and the verification Captain! After 8 years of hibernation, I found that I made a few changes to the color palette as well, so that is now fixed, the 'weighting' of the text is back to normal. In reference to your suggestion of having a list of revisions, the list would be the size of the drawing itself. With the help of a few others in early 2004 - making changes from 'A' to 'E', and finally published version 'F'. Two quick changes and we are at 'H'. So long as no one else is making changes to it and keeps all comments / suggestions in this thread, everyone can keep track of the changes. If I do another one, I'll make sure to include the Captain on my team of QC! Attached is version 'H'
-
Ok Z peeps... I've sent E the updated diagram. Please note the change in the file name - it is revision 'G' - 'F' is now obsolete. Also - I received a PM explaining another possible error: I did not change the diagram on this account. I don't understand how the BCDD would be wired to the AC solenoid and the AC clutch not be. I'm putting the info out there in case there is someone else who has found this as well. Of course, with both connections being bullet connectors, one could easily interchange the wires and quite possibly not see a change in performance. Thank you all for all the kind words on this product - please note any additional errors on it in this thread. Wayne
-
E - I will go ahead and make the corrections to the file and foward it to you later this week. Captain Obvious - I apologize for making you chase your tail trying to diagnose your isssue - thanks for bringing it up so corrections can be made, While I'm making corrections - any others that need tending to?
-
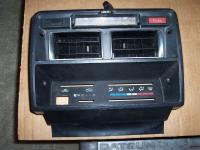
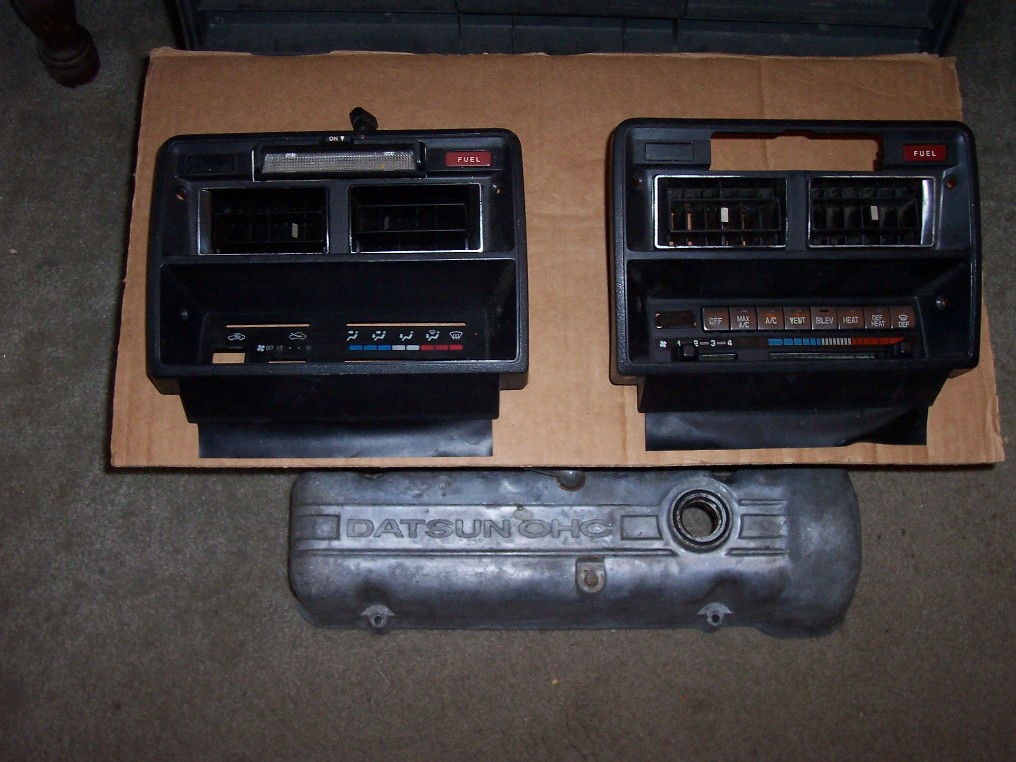
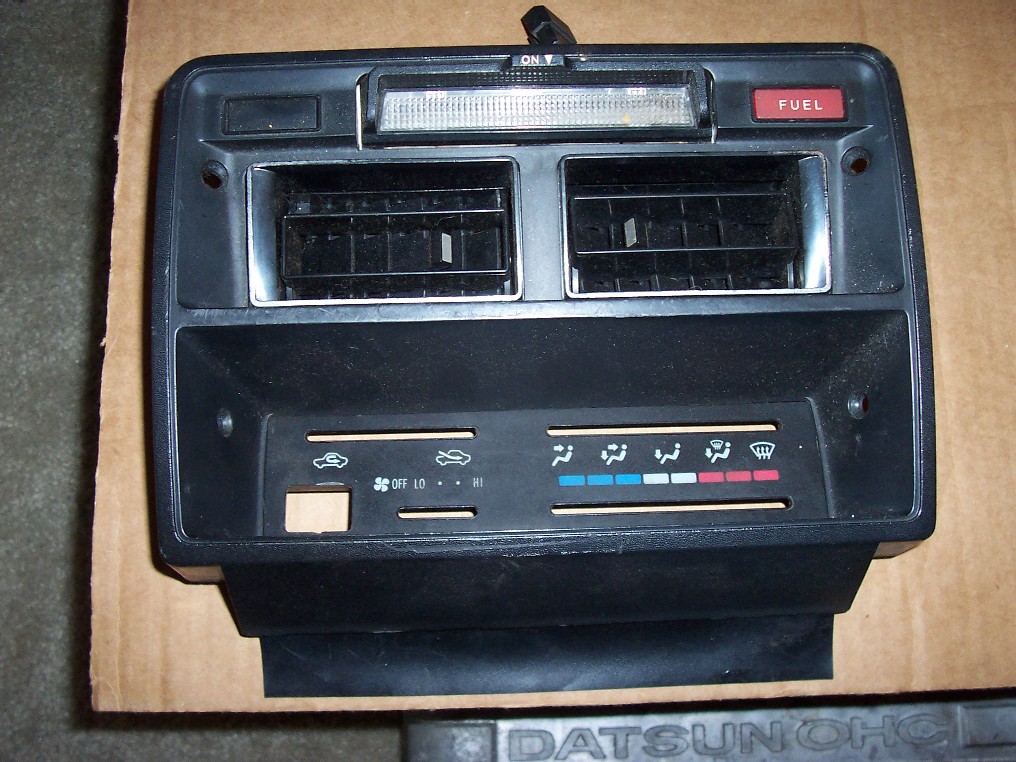
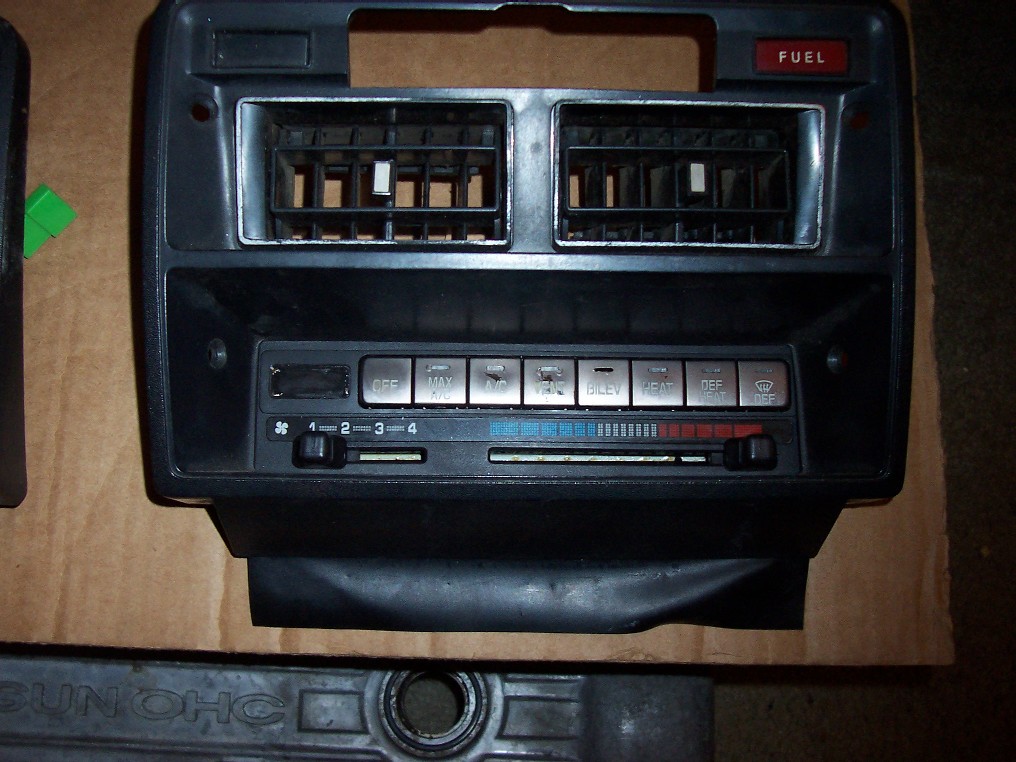
I've been searching for a more efficient and modern heater/AC unit to install into my 280. I haven't quite found one where the guts will fit inside the dash yet, but I wanted the control panel to look like it belongs there... I just want something that doesn't look like I hacked it together in my back yard. I'm not very experienced in molding plastic, nor have I given thought of making a new one. I figured it would be cost prohibitive. So, I want to retain the stock bezel. The opening of the bezel for the control unit is about 7 3/4" X 2" I've included three pictures. "Both.jpg" shows the two panels, side by side. "RAV4.jpg" is a close up on the RAV4 panel, and "SUBI.jpg" is a close-up on the Subaru panel. RAV4.jpg: I found this in a first-gen Toyota RAV-4 (I'm pretty sure it was the first gen - the local Pick-N-Pull rarely has anything newer than 6 years old). Anyways, if anyone is looking to swap control panels in their 280, the RAV4 model offers a decent look. The large rectangular space to the left of the fan switch is for the AC switch. The unit is all mechanical (except for the AC switch). I didn't get the whole control arse'y for this, but the control panel fits like a glove. SUBI.jpg: For those that have far more electrical wiring experience than I, I found a control panel from a 1994 Subaru Legacy that fills the hole size beautifully. This panel controls the servos by an electrical signal rather than mechanical cable. The temperature is cable operated. I won't be using this panel (due to the wear and the fact there is no recirc or separate AC button), but was giddy when I measured it and saw it would fit the hole. It may work for others. Anyone else have any other ideas (control panel and/or the heater/AC housing units) that would work, I would like to hear what you have found.... Thank you.

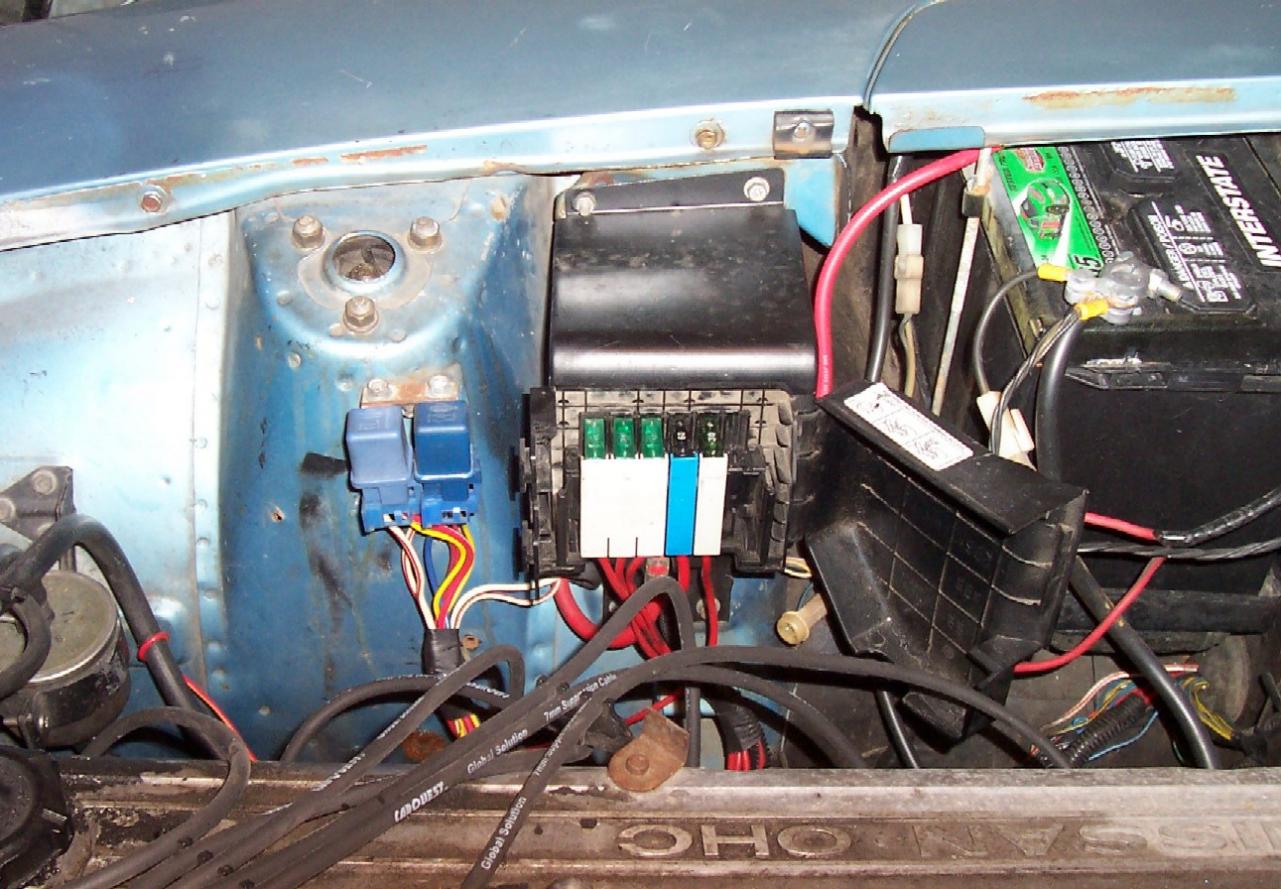
 The two red wires that I believe you are referring to supply the positive and negative supply from the battery to the FI control unit. The Positive has a fusible link and the negative does not. If I recall correctly, the connectors are (originally) keyed so that the polarity cannot be switched. There is a picture in this thread that shows off my maxi-fuse upgrade, but it does show the battery connection with the two red wires you refer to. The negative is in the foreground, positive (fusible link shown) is beyond. If you need another picture (without the fusible link covering up the connections) let me know. *edit* Both wires *should* go to the FI control unit only - but confirm with the diagram for that. Stephen - Thanks for the kudos! Wow - I just realized it has been nearly six years since I posted that thing!
If I recall correctly, the 78 has the FI relays at the relay center (aka beer can holder) underneath the hood whereas the 77 (as you know) has the FI relay near the steering wheel inside the cabin. Not sure what other differences apply - but the 78 is not a 'plug and play' to anything earlier. Use both diagrams to identify connectors and their specific uses, and you will need to splice as you go. Obviously, it would be better to get the correct harness, but it sounds like your passenger cabin harness is already hacked to mate with the 78 FI harness... I think I have a 77 FI harness that has been hacked if you want it for postage - PM me if you want it and I will confirm it's whereabouts...
Sarah, you're welcome!
Gotta do one or the other - or both. It is possible to support the engine in place while removing the cross member, although, I don't recommend this for your first time out. Here's a way I supported the engine on the other car when I removed the crossmember. http://www.classiczcars.com/photopost/showphoto.php?photo=14307 I did the following technique late summer to fix my leaky pan gasket (which, was MIA due to the PO just using silicone... yikes!) Before you replace your transmission mount, disconnect the motor mounts (one nut each side on the crossmember) and jack the forward part of the transmission to be able to allow the oil pan gasket to clear. You can only go so high before the transmission bottoms out on the transmission tunnel. Once you replace the oil pan gasket, and bolt the engine back to the mounts, then replace the transmission mount. Good Luck
I hope that works for you - I used a similar "Scosche" distribution block setup for about 8 months before the bling got ugly corroded. Of course, she was still parked outside then too....
Hi Sarah - I found what suited my needs at the junkyard - as long as you don't mind a GM logo on the plastic cover... Found this setup in the Caddy Catera platform - It is a 6 way, I only have 5 connections hooked up - 4 are stock and the 5th is for my headlight relays system. I went as far as sourcing part numbers and distributors for the contacts before giving up and just using a $0.29 butt connector to make the splice inside the cabin. I've got a few spares of these and last I remember, there were two Catera's out at Pick and Pull down here in VB two weeks ago. If anyone else is interested in this setup, I can start a step by step thread on making the conversion, as well as what to look for when getting the donor parts. Off topic - Stephen - what happened to your Z? Have I been gone that long? Wayne
The two red wires that I believe you are referring to supply the positive and negative supply from the battery to the FI control unit. The Positive has a fusible link and the negative does not. If I recall correctly, the connectors are (originally) keyed so that the polarity cannot be switched. There is a picture in this thread that shows off my maxi-fuse upgrade, but it does show the battery connection with the two red wires you refer to. The negative is in the foreground, positive (fusible link shown) is beyond. If you need another picture (without the fusible link covering up the connections) let me know. *edit* Both wires *should* go to the FI control unit only - but confirm with the diagram for that. Stephen - Thanks for the kudos! Wow - I just realized it has been nearly six years since I posted that thing!
If I recall correctly, the 78 has the FI relays at the relay center (aka beer can holder) underneath the hood whereas the 77 (as you know) has the FI relay near the steering wheel inside the cabin. Not sure what other differences apply - but the 78 is not a 'plug and play' to anything earlier. Use both diagrams to identify connectors and their specific uses, and you will need to splice as you go. Obviously, it would be better to get the correct harness, but it sounds like your passenger cabin harness is already hacked to mate with the 78 FI harness... I think I have a 77 FI harness that has been hacked if you want it for postage - PM me if you want it and I will confirm it's whereabouts...
Sarah, you're welcome!
Gotta do one or the other - or both. It is possible to support the engine in place while removing the cross member, although, I don't recommend this for your first time out. Here's a way I supported the engine on the other car when I removed the crossmember. http://www.classiczcars.com/photopost/showphoto.php?photo=14307 I did the following technique late summer to fix my leaky pan gasket (which, was MIA due to the PO just using silicone... yikes!) Before you replace your transmission mount, disconnect the motor mounts (one nut each side on the crossmember) and jack the forward part of the transmission to be able to allow the oil pan gasket to clear. You can only go so high before the transmission bottoms out on the transmission tunnel. Once you replace the oil pan gasket, and bolt the engine back to the mounts, then replace the transmission mount. Good Luck
I hope that works for you - I used a similar "Scosche" distribution block setup for about 8 months before the bling got ugly corroded. Of course, she was still parked outside then too....
Hi Sarah - I found what suited my needs at the junkyard - as long as you don't mind a GM logo on the plastic cover... Found this setup in the Caddy Catera platform - It is a 6 way, I only have 5 connections hooked up - 4 are stock and the 5th is for my headlight relays system. I went as far as sourcing part numbers and distributors for the contacts before giving up and just using a $0.29 butt connector to make the splice inside the cabin. I've got a few spares of these and last I remember, there were two Catera's out at Pick and Pull down here in VB two weeks ago. If anyone else is interested in this setup, I can start a step by step thread on making the conversion, as well as what to look for when getting the donor parts. Off topic - Stephen - what happened to your Z? Have I been gone that long? Wayne Thanks for the link. Does anyone have any experience (good or bad) with the "CVU" brand rebuilder as listed? I've heard of other parts suppliers, but never this one. If you strictly measure a good deal on the price paid, then yes, it's a great deal compared to other suppliers. That being said, I don't have any information on MSA or even Black Dragons steering racks. I'm not trying to rain on your parade, but I can't tell you how many rebuilt alternators I've replaced, due to a 'good deal'. MikeW: the Nissan P/N(s) for the "ASSY - STEERING GEAR" are: 48001-E4451; -E4452; -E4453 and (prior numbers superseded) -E8850 up to 07/73, then 48001-E3650 from 08/73 and 48001-N4150 for 2+2, according to the microfiche. I really hope to hear something positive from this "CVU" rebuilder
For what it's worth - unless the 260's are vastly different (which, they could be, besides the whole EFI issues), the dash and gauges are for informational purposes. My '77 started just fine without the dash in. The electrical signal to start and run comes from the ignition switch, part of the body harness. Now, that withstanding, wire(s) may have become pinched/shorted/open circuited during the dash removal/installation process. It sure sounds like the main circuit is disconnected from the fusible link(s)/blown fuse/open circuit. Again, your wiring may be different. :stupid: Follow the yellow brick road... or generally, in this case, the white wire(s) with a red stripe. I assume you already have a diagram to chase down the wires, yes? If not, I'm sure Atlanticz techtips has a diagram for you. Good luck Wayne
Jim My '77 had the same symptoms as yours until I upgraded to the ZX alternator and removed the VR, removed the fusible links and replaced them with a maxifuse upgrade from a Caddy Catera. Also, the headlight relay upgrade didn't hurt either. I didn't mean to avoid answering your question directly, but with the changes I made, I don't think there was a 'smoking gun' to point to. My wiring was in rough shape which wasn't helping the battery charge or regulator function correctly, and of course we all know about those fusible links. Check your voltage at the battery under all of the conditions you state and compare the number vs. the gauge reading. I'm betting it's not as much of a swing as the gauge says it is. Wayne
Thanks for the link. Does anyone have any experience (good or bad) with the "CVU" brand rebuilder as listed? I've heard of other parts suppliers, but never this one. If you strictly measure a good deal on the price paid, then yes, it's a great deal compared to other suppliers. That being said, I don't have any information on MSA or even Black Dragons steering racks. I'm not trying to rain on your parade, but I can't tell you how many rebuilt alternators I've replaced, due to a 'good deal'. MikeW: the Nissan P/N(s) for the "ASSY - STEERING GEAR" are: 48001-E4451; -E4452; -E4453 and (prior numbers superseded) -E8850 up to 07/73, then 48001-E3650 from 08/73 and 48001-N4150 for 2+2, according to the microfiche. I really hope to hear something positive from this "CVU" rebuilder
For what it's worth - unless the 260's are vastly different (which, they could be, besides the whole EFI issues), the dash and gauges are for informational purposes. My '77 started just fine without the dash in. The electrical signal to start and run comes from the ignition switch, part of the body harness. Now, that withstanding, wire(s) may have become pinched/shorted/open circuited during the dash removal/installation process. It sure sounds like the main circuit is disconnected from the fusible link(s)/blown fuse/open circuit. Again, your wiring may be different. :stupid: Follow the yellow brick road... or generally, in this case, the white wire(s) with a red stripe. I assume you already have a diagram to chase down the wires, yes? If not, I'm sure Atlanticz techtips has a diagram for you. Good luck Wayne
Jim My '77 had the same symptoms as yours until I upgraded to the ZX alternator and removed the VR, removed the fusible links and replaced them with a maxifuse upgrade from a Caddy Catera. Also, the headlight relay upgrade didn't hurt either. I didn't mean to avoid answering your question directly, but with the changes I made, I don't think there was a 'smoking gun' to point to. My wiring was in rough shape which wasn't helping the battery charge or regulator function correctly, and of course we all know about those fusible links. Check your voltage at the battery under all of the conditions you state and compare the number vs. the gauge reading. I'm betting it's not as much of a swing as the gauge says it is. Wayne Mark and others - The colors on the diagram are what the FSM indicated them to be. I did not verify with an actual harness at the time I drew the diagram - talk about a hornet's nest! On my spare harness, the FI Relay connectors look the same as yours, sans the red wire splice. Wayne
Just an observation, this would be the gauge to use in the 240's - for model years '77 and '78, they changed the font of the numbers / lettering on the gauges. The '76 matches the style of the 240 fonts. Of course, the '75 has the same fonts but that is still an amp gauge....
Matt - unless you have some strange configuration in there, a open end (17mm if I recall correctly) wrench will do the trick - you may have to play 'flip-flop' with the wrench, but it *should* be able to be inserted from the bottom and turned CCW. Once it is loose enough to turn by hand, reach above the bar and remove the fill plug. Unless someone has changed the fill plug with the drain plug..... (PS - while you are down there, change that fuel filter)
Mark and others - The colors on the diagram are what the FSM indicated them to be. I did not verify with an actual harness at the time I drew the diagram - talk about a hornet's nest! On my spare harness, the FI Relay connectors look the same as yours, sans the red wire splice. Wayne
Just an observation, this would be the gauge to use in the 240's - for model years '77 and '78, they changed the font of the numbers / lettering on the gauges. The '76 matches the style of the 240 fonts. Of course, the '75 has the same fonts but that is still an amp gauge....
Matt - unless you have some strange configuration in there, a open end (17mm if I recall correctly) wrench will do the trick - you may have to play 'flip-flop' with the wrench, but it *should* be able to be inserted from the bottom and turned CCW. Once it is loose enough to turn by hand, reach above the bar and remove the fill plug. Unless someone has changed the fill plug with the drain plug..... (PS - while you are down there, change that fuel filter)


Important Information
By using this site, you agree to our Privacy Policy and Guidelines. We have placed cookies on your device to help make this website better. You can adjust your cookie settings, otherwise we'll assume you're okay to continue.