wal280z
Member
-
Joined
-
Last visited
Everything posted by wal280z
-
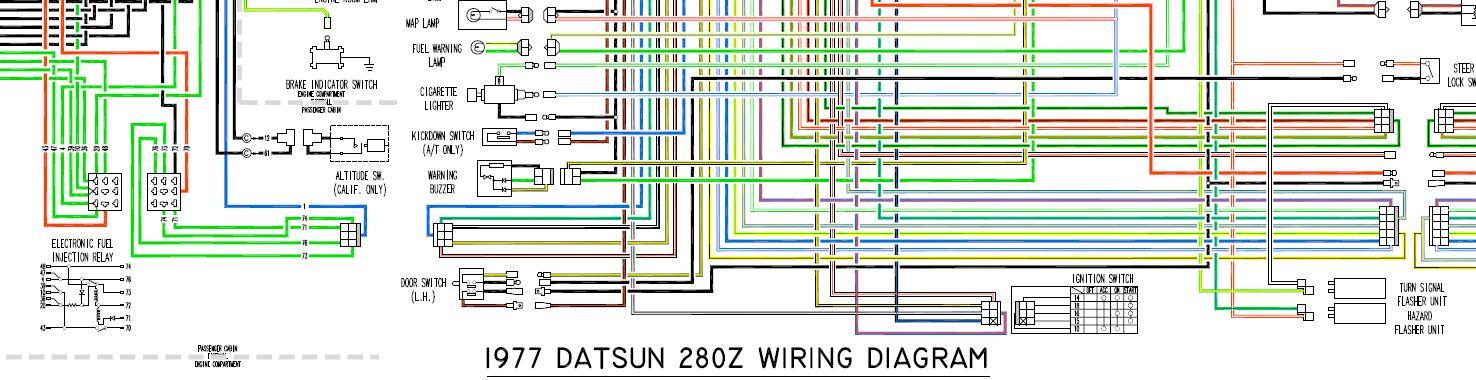
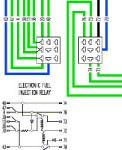
 j/k All the info you need is right here, found by searching. Search by (include the quotes) "1977" "wiring diagram" will produce (currently) very few results. Your answer lies within. Match your radio wires (as described by the mfr) to the color wires to the harness. Wayne
 -
Back in the day, AutoCad (IIRC, version 14) had what was I think a fully modeled drawing of a '57 Chevy supplied as a part of their sample drawings. Can you test your program with that to see if the programs would mesh? I will do some digging to see if I can find it at home. Just a thought... Wayne
-
We won't even start that discussion here. Got a Dremel? As Carl said, cut it and replace it with the correct piece. Wayne
-
Not sure on the 240's, but generally, once the filler neck is detached from the quarter panel, and the rubber filler neck hose is detached from the tank, you will either need to remove the clamp from the metal filler neck (at the body) or disconnect the vent hoses to the vapor tank. There is (on my 280) a rubber w/ metal frame gasket/boot that bolts on to the body in that area, making removal of the filler neck hose almost impossible w/o removing the vapor tank first and disconnecting the appropriate hoses. I just yanked a real nice one from the j/y last weekend. Any takers? Wayne
-
When you say, the bolt is pointing to the rear, do you mean that the bolt is inserted from the 'engine side' to the 'differential side'? The bolts, IIRC, are supposed to be inserted from the differential side with the shaft pointing to the engine. The flanged nuts are on the differential shaft side, if you will. The bolts in question should be a special bolt, a round head with a 'chord' shaved off. ::edit A "D" headed bolt, if that helps. edit:: :: Meaning that there is no standard wrench to put on the bolt from the differential side, it locks in place by the way it is made.:: IIRC, the most you could turn a nut was about 15-20 degrees at a time, and only with a wrench, no room for sockets (at least mine). Wayne
-
The difference in price may be due to the "low fuel indicator unit" that is w/ the sending unit Yes, it is. I just finished this last weekend. A word of advice, use a blow gun to blow away all the debris from the unit prior to loosening the retaining ring and removal of the unit. I have attempted to repair/recondition two of these units (the metal winding for the resistance the guage reads) and figure the best thing to do is to purchase a new one. Either that, or I'm using the wrong method on renewing, but that's beside the point, the low fuel light doesn't work either. FWIW, Wayne
-
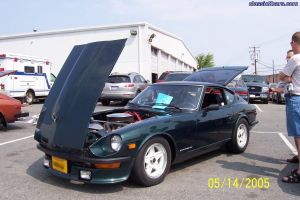
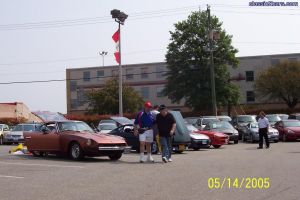
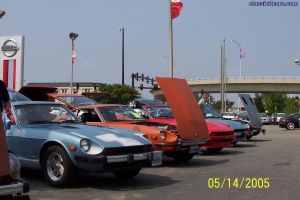 that's my beast (w/ primer spots) in the foreground.
 -
-
-
-
-
-
-
-
-
-
-
-
-
-
The interior door panels from a '75 - '76 will not interchange with latter years either. The interior lock pull is in a different location. Now to find a 75 or 76 Z so these panels will fit..., or I could just sell the darn things. Wayne
-
Carl- Thanks for the info. At first I thought that it may have come off a 810 as those were similar in nature to the 280's at one time. Looks like the PO installed a strut from a 240 then. Yes, I will go ahead and replace the entire hub/strut arse'y when I do this. Wayne
-
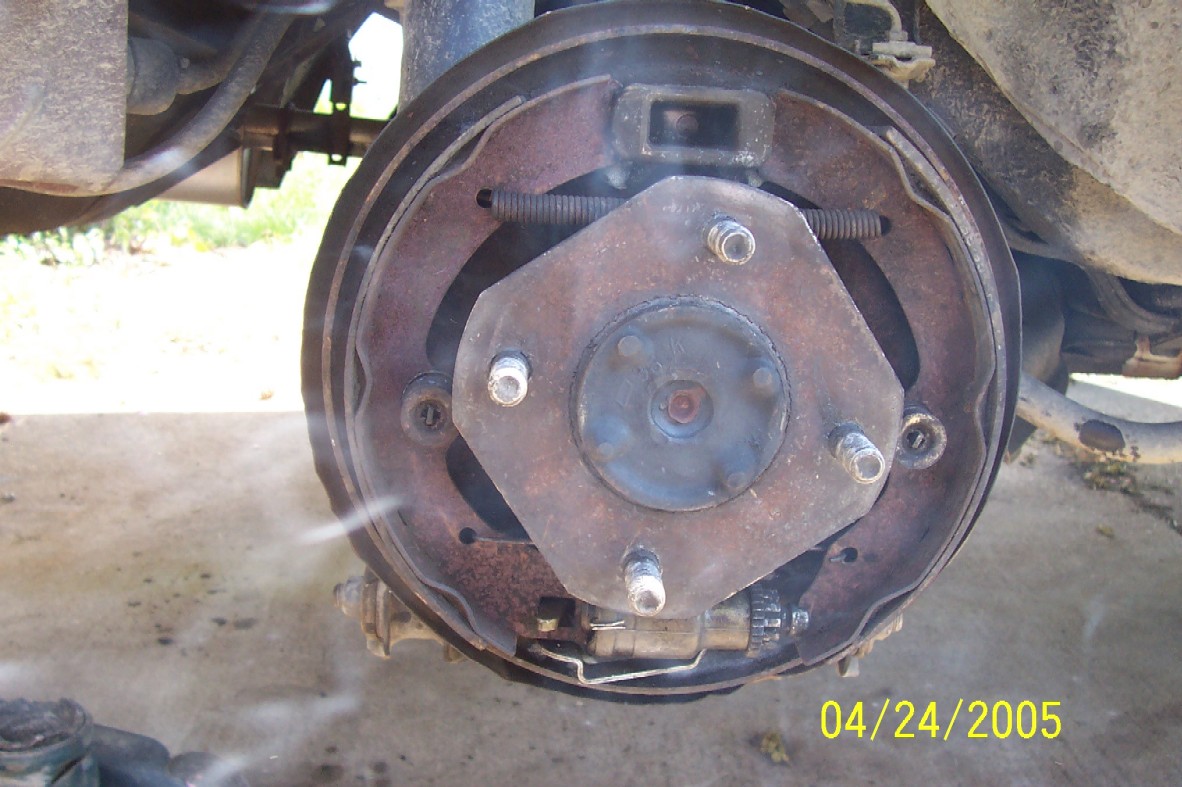
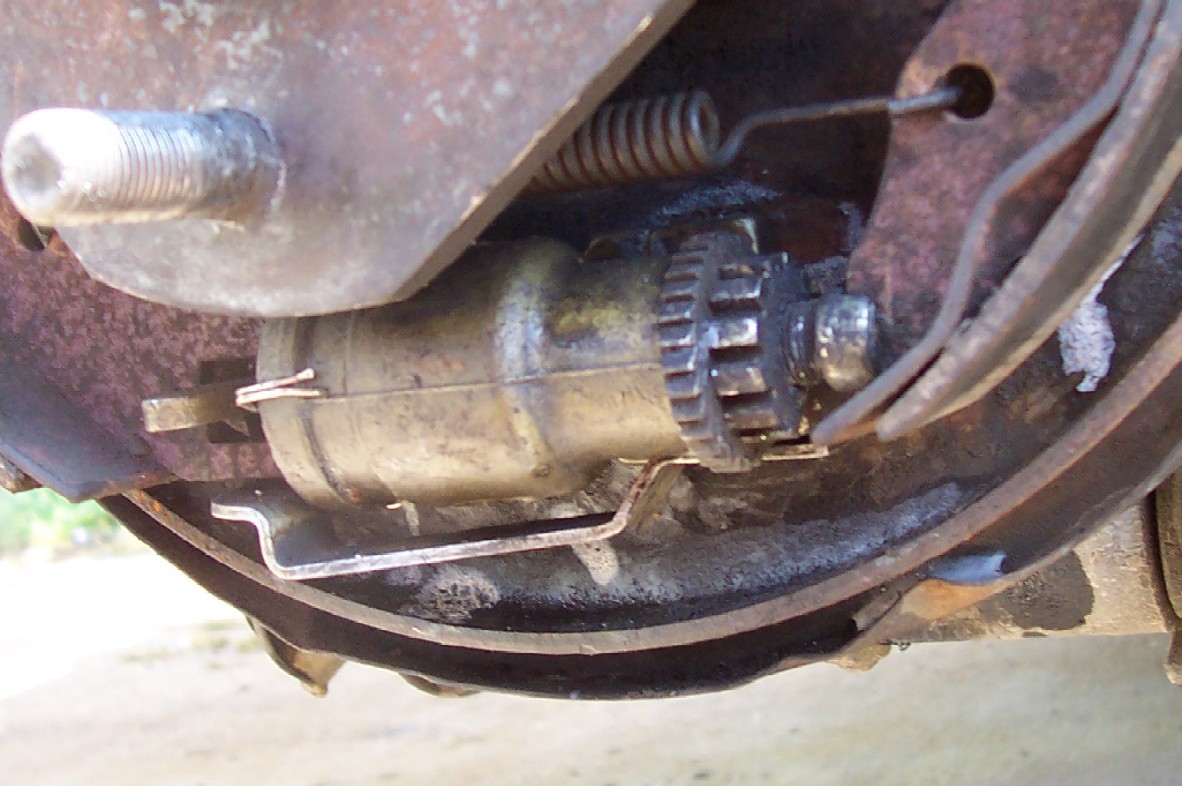
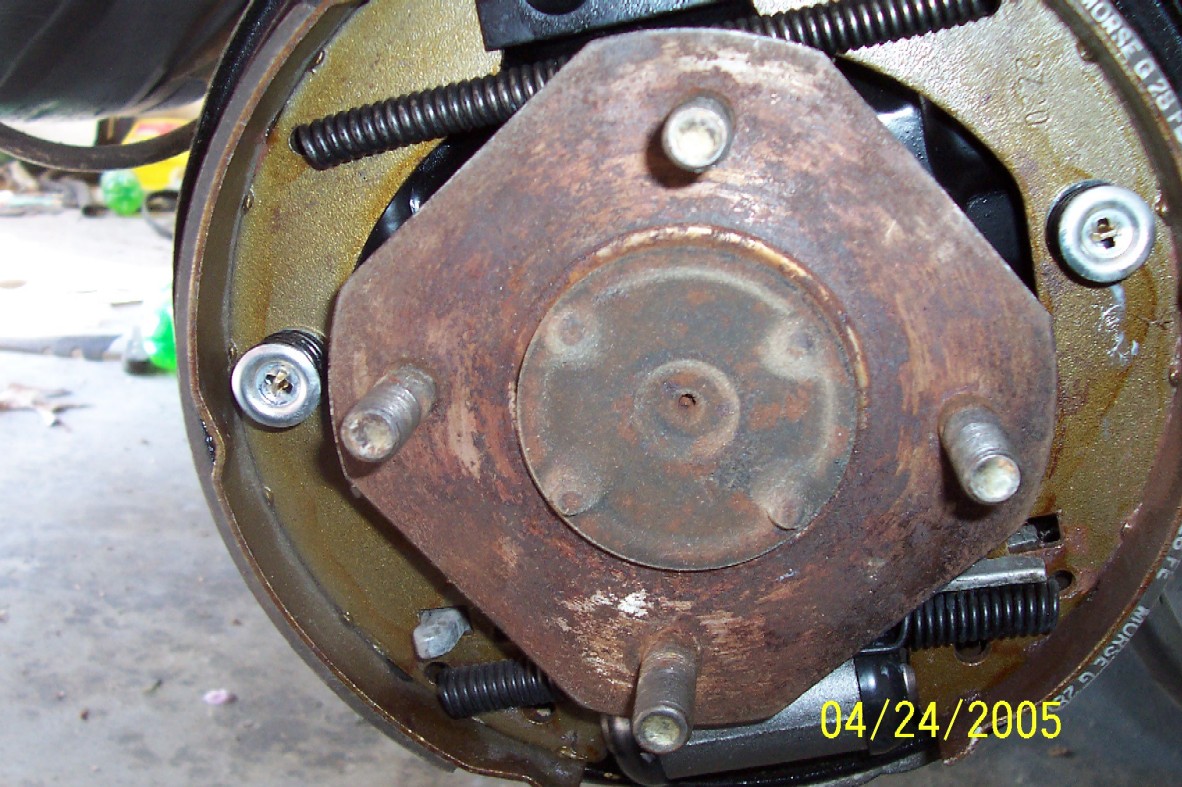
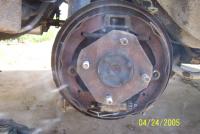
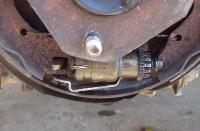
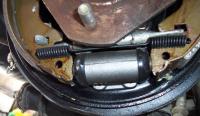
I got my right rear brake working today and found a different setup than what I am used to seeing on 280's. The first three show what is installed on it right now. 1977 280Z Mfr date 2/77. The left (drivers) side appears to be stock. The wheel cylinder is secured by two interlocking pieces of "U" shaped metal, with the e-brake rotating between the wheel cylinder and the backing plate. I wish I would have taken a pic while it was all apart. The other odd thing about this setup is the back side of the backing plate has an extra metal tab for the e-brake mechanism. I will go shoot more pics if interested. The last two show what a stock unit looks like. 1977 280Z Mfr date 11/76 My first thought was to just go to the j/y and grab a backing plate but now I'm thinking I should just go ahead and get the whole strut/axle arse'y. Any help in identifying this odd strut/axle arse'y is appreciated. Wayne


-
Stephen- That location is correct for your '78, but earlier years had them up under the drivers side dash. http://www.classiczcars.com/forums/showthread.php?postid=90125#poststop Wayne
-
Hi Mark- Just did this myself on my '77 last month... still haven't put it back together... Have you removed the bushings themselves from the rack? It adds some additional 'wiggle room' with them off Yes, the rod must be removed. I used the fat screwdriver trick and aligned it parallel with the rod, inserting it into the bottom of the 'pinch area', and a couple of taps with a BFH did the trick. **edit - be careful not to score / dig into the splines with the screwdriver ** Didn't work for me either. Yepp, that's correct. FWIW, when I did mine last month, I had the sway bar off (heck the whole front suspension off, for that matter), I think it gave me some more room. I had to wiggle the rack forward, then left, then back, then left, then forward (you get the idea) and after fighting with it for 5 minutes it came out. If you are only looking to replace the rack bushings (and not go through the repaining/regreasing/reconditioning of the rack itself), just put the bushings in after you take the old ones out.**edit Also, Blue has a picture tutorial on his website... http://www.atlanticz.ca/zclub/techtips/steering/rackbushings/index.html Wayne