Everything posted by kenz240z
-
2300 mile road trip for $250.00 240 worth it?
Eric, I'm glad to hear your adventure turned out well. Looks like you got yourself a decent Z project car. I look forward to seeing your progress with it!
-
new to me SU's
The fuel hose on the rear carb looks like regular fuel line. If so, it needs to be replaced with the correct rubber hose that Gary mentioned. It also looks like fuel has been leaking out of the rear fuel bowl. Perhaps the gasket between the fuel bowl & the fuel bowl lid has deteriorated. If you decide to try running the carbs before a thorough rebuild you can make a gasket for the fuel bowl from gasket paper. Check to make sure the fuel nozzles move freely. The fuel nozzle is at the bottom of the main carb body (it has the rubber hose connected to it). You should be able to pull it down a little over 1/4". It is common on carbs that have been sitting for a while for the fuel nozzle to be stuck. The only way I've found to get them out is to use a brass punch and tap the nozzle out. Unfortunately, this damages the nozzle and it will have to be replaced. Also, make sure the suction piston in the dome moves freely. Remove the little oil dipstick from the top of the carb and dump out any oil that is left in there. Then remove the screws that mount the dome to the carb body. With the dome removed you'll see a large spring and the suction piston. Clean all the carbon from the suction piston, and clean out the inside of the dome. It looks like you have the three screw '72 carbs. I think these carbs are basically mirror images of each other, but it would still be wise not to mix parts between them. When you get ready to rebuild them, do one at a time. That way you can refer to the other carb when it comes to putting it back together. Take pictures along the way if needed to help jog your memory, too. The SU's are really pretty simple. When you get them on the engine, make sure to adjust the valves & check the timing first. Also, make sure the points are properly gapped, and that the cap, rotor, plugs (properly gapped) & plugwires are all in good shape. Replace any of these as needed. The SU's are operated by changing vacuum conditions of the engine. If the valves are misadjusted or the timing is way off, the vacuum conditions of the engine will be out of whack and no amount of carb tuning will make up for it. So, tuning the carbs is the last step after making sure everything else is properly adjusted and in good working order.
-
help with struts
I've got the Tokico strut & spring set with the blue HP struts, too. They provide a solid, firm ride for my '73.
-
Look what I found
I'm surprised the car ran without the mouse...
-
Got into an accident with the Z today...
Jeremy, sorry to hear about the accident. The pictures of your poor Z are heartbreaking! I truly hope you are able to repair your Z and get it back on the road soon!
-
Original Key Blanks
I took a look at the owner's manual I have, presumably for a '73, although I couldn't find a date. Anyway, here's what it has to say about the KEY: ========== The key operates the various locks on your Datsun. Record key numbers so as to enable your NISSAN/DATSUN dealer to replace the lost key. Reversible feature. Either side up. - Ignition switch & steering lock - Door locks - Tail gate lock - Glove compartment lock Ignition key can be inserted and removed at the "LOCK" position only. If you open driver's door with the key left in the switch, warning buzzer will warn you of being robbed. ========== So, it seems that my car has had either the ignition cylinder changed, or the glove box lock, door locks and tail gate lock. I'd guess the ignition has been changed. The ignition key is a Datsun key with an "N" and a keycode stamped in it. The second key I have, for everything else, is a copy (marked DA-21). I didn't know that leaving my key in the car could warn me that I'm being robbed. Gotta love Nissyntax!
-
Got some rough Paint
If the paint on the fenders is cracked, checked, crazed, etc... you'll have a tough time getting it to look good again, too much damage has occurred. You could try wet sanding it a little bit with 1200 grit wet/dry sand paper, followed up with another round of polish and see if that gets rid of the roughness. Be careful, as you want to avoid taking off too much paint and revealing the primer. If the fenders are the only areas that are rough, perhaps you should have them painted. A good body shop should be able to match the paint and respray them for you. You might be able to save a little by doing the prep work yourself (sanding, filling an small imperfections, etc...). Or have a paint shop mix up a few rattle cans and spray it yourself. If the rest of the paint is faded, new paint will make the fenders stand out, though... Another option would be to remove as much of the exterior pieces as possible - side markers, door trim, bumpers, etc..., fix any small imperfections, sand the car down to prep for paint and have the whole car repainted by MAACO, Earl Scheib, etc... If you find a budget paint shop with a painter who has been there a while you can get a real nice paint job for the money. Preparation is the key. New paint, even the $20,000 variety won't fix problems in the sheetmetal.
-
Fuel in oil on new engine rebuild
I should have said bluish smoke for burning oil... Dry white smoke - running lean Wet, wispy white smoke - burning coolant due to a coolant leak Black smoke - burning rich
-
"Z" hubcap emblem polishing
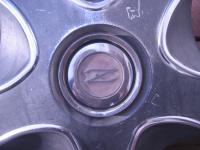
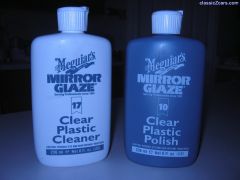
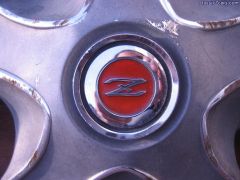
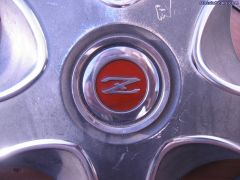
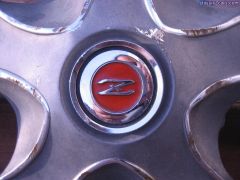
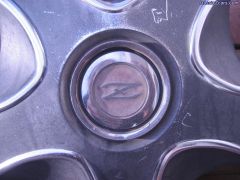
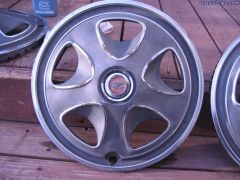
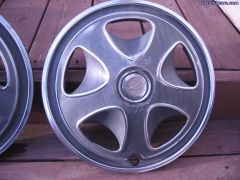
I refinished the "Z" hubcaps for my '73 a while back, but some of the center "Z" emblems were in less than perfect shape. One problem is emblems that are cloudy or hazy looking. I've used a couple of Meguiar's products on the front turn signal lenses, side markers and rear tail lamp lenses with great results (#17 Clear Plastic Cleaner & #10 Clear Plastic Polish). On a whim, I decided to try them on the "Z" hubcap emblems. Again the results were great! First step is to remove the emblem from the hubcap. I use a small pick to pry up the tabs on the retainers, then gently use pliers to remove them. Once off the hubcap, I used an old toothbrush and dish soap to thoroughly clean the emblem. Next, apply a bit of the Meguiar's #17 Clear Plastic Cleaner to a clean rag, and spend a few minutes cleaning the center of the emblem. This will take off the cloudiness & haziness. Finally, apply a bit of the Meguiar's #10 Clear Plastic Polish to a clean section of the rag and spend a few minutes polishing the emblem. This will give it a clear shine! I would imagine this process would work well to clean up the colored resin on the 260Z and 280Z fender emblems, too.
-
Meguiar's plastic cleaner & polish
-
Polished emblem
-
Polished emblem
- Polished emblem
- Close up of cloudy emblem
-
Z hubcap with cloudy emblem
- Z hubcap with cloudy emblem
-
Fuel in oil on new engine rebuild
If the compression readings were similar wet & dry then the valves are most likely leaking. Perhaps it is time to take off the head & have it rebuilt. You'll be able to inspect the cylinders & pistons with head off. The engine block seems to hold up well with high mileage. Were there any signs of the engine burning oil? Dark smoke out the tail pipe?
-
Reintroduction: My 260Z 2+2 +pics
Looks like your 260 2+2 is coming along quite nicely! One small word of advice: when you get around to painting the color coat, avoid using newspaper for masking. It contains a lot of paper fibers that can end up in the paint. Take a shopping trip to your local hardware store, you should be able to round up a good roll of proper masking paper, it's brown and heavier than the newspaper, too.
-
L 24 engine
The crossmember in my '73 looks like it is pre-drilled for the brackets. There is a hole to the outside of these, any thoughts on what they might be for? It also looks like there are mounting holes for the stand up oil cooler on the top edge of the crossmember.
-
Original Key Blanks
- sad story
George, I'm sorry to hear about the damage to your Z. Being an owner of both a Z car and a '64 Impala, I can all too vividly imagine your mishap. The bumpers on the Impala are as solid as a tank, especially compared to the thinner sheetmetal used on a Z car. If the damage is limited to the hood, and you can get a good match for the paint, it should be fairly easy and straightforward for a good body shop to repair. The hood on my '73 was dented along the front edge in a few spots. I had a local bodyshop fix it. I'm not sure exactly how they did it, but I think they must have used weld on studs to pull the dents out. Anyway, all it cost me was a case of beer (I'd already spent $600 having the rear wheel arches replaced by them).- '74 260Z engine after rebuild
- Original Key Blanks
My '73 240Z has a key for the ignition only, and a separate key for the doors & hatch.- Best sounding 240/280 exhaust
I had a Monza exhaust with the stock exhaust manifold on my 240Z for a little while. Installation was pretty simple and the fit was good. It used the existing hangers. I liked the look of the dual chrome tips on the rear muffler. It had a nice sports car sound without being too loud or resonant. I've since put on a MSA 3-2 header and 2-1/2" Turbo exhaust. It's a bit louder than the Monza and more resonant at higher RPM, but it sounds good, too. I'd say the MSA exhaust would be more of an attention getter with the pedal down.- no power over 4000 rpm
Check the fuel filters. There is one in the electric pump back by the tank that can get clogged with sediment from the tank. A clogged fuel filter is a potential cause of the problems you are having, especially no power at higher revs/speed. As Arne mentioned, it could also be due to the carbs being out of balance, but if the carbs were tuned recently, then hopefully they are ok. - sad story
Important Information
By using this site, you agree to our Privacy Policy and Guidelines. We have placed cookies on your device to help make this website better. You can adjust your cookie settings, otherwise we'll assume you're okay to continue.


