Everything posted by kenz240z
-
$%^&ing emissions!!
A coupleof years ago I bought a '75 Chevy convertible from a guy out in a small town in northeast Colorado. I brought it back to Longmont (about 25 miles north of Denver) and took it in for emissions testing. As far as HC%, CO%, CO2%, etc... everything passed. But, the tester failed it because: A. There wasn't a catalytic converter B. The fuel filler restrictor was oversized Never mind that the car passed the actual emissions test! Out in NE Colorado emissions tests aren't required, and the PO had a dual exhaust system put on the car. The original cat was removed, and none were installed on the new exhaust. As for the fuel restrictor, I can only speculate that it became enlarged by 30 years of jockeying the nozzle at the tank. It seems like most of the nozzles on the fuel pumps here have big, bulky attachments with little advertisements in them. The purpose of the fuel filler restrictor is to prevent putting leaded gas in the tank, as the nozzles apparently have a different diameter. Not sure where I could even get leaded gas around here... So, I had a muffler shop remove the dual exhaust, put in a y-pipe and a cat and a single exhaust. I was able to bend part of the fuel filler restrictor to reduce the diameter. I took the car back in, and it had to undergo the full test again. At least it passed the second time! When I bought my Z I took it to a Z mechanic nearby to prepare it for the emissions test. I then took it in for the test and it failed the CO%. So, I took it back to my mechanic. He ended up taking the car to a different testing facility and got it to pass.
-
How Do Cars Age?
I've seen that lady on Oprah - YIKES!!!! My wife watches Oprah before she goes to work, and I sometimes watch a bit with her. Anyway, it's too late for me, the wine women and song have long since taken their toll...
-
$%^&ing emissions!!
Here are some ideas I came across on another site for passing an emissions test. Some may not even be applicable for a Z car. I haven't had to use any of these methods, so I can't vouch for them...try at your own risk! >FWIW, a very interesting collection of ideas gathered from various sources and from people that had emissions challenged vehicles but found ways to pass the test ... ================ emissions components which may be inspected by officials for proper operation: EGR Valve, Air Pump, Charcoal Canister, EVAP System, Smog Pump, Oxygen Sensor, Intake Manifold, Exhaust Manifold, Fuel Pump, Turbo, Supercharger, Header, Camshaft, Fuel Filter, Air Filer, Oil Filter, Carburetor, Fuel Injector, Preheat Tube, Air Injection, Check Valve, Muffler, Solenoid, Fuel Mixture Solenoid, Catalytic Converter, CAT, Heat Riser, OBD II System, On Board Diagnostics Computer and Vacuum Lines. ================== GUMOUT, emissions Reducer, 12 oz bottle "at the pump pour the bottle then fill tank .. in this initial tank, emissions may increase as Gumout works to remove deposits and expel via the exhaust .. run until tank is near empty .. refill tank .. do not perform emissions test until 2nd or third tank where the emissions benefits will show ....." ============= make sure your gas tank is only 1/4 to 1/2 full and put 1/2 the bottle of methyl hydrate (fondue fuel) in the tank ============== Pour pure (90%+) isopropyl alcohol into your fuel tank, it will help to clean up your exhaust emmissions and get your car through the smog tests that most states currently use. Use two 16oz bottles for ten gallons of premium fuel. =============== pour two litres of methyl hydrate into 1/2 tank of fuel ================ pour two quarts of pure denatured alcohol into 1/4 tank of fuel =============== disconnect the harness from one injector. The engine will only run on 7 cylinders, but it will pump one cylinder worth of air into the exhaust on every cycle, which serves to dilute the mixture from the other cylinders. =============== Change oil and leave it a quart low. New oil seals better and low level minimizes the chance of splash onto the cylinder walls. Burnt oil is another source of HC. ================ clean the engine. Burnt oil is another source of HC. ================ Change the engine oil just before you go to test. Fresh 20/50 seals better than any oil with 50 or more miles on it. The idea is to reduce hydrocarbons (HC), ================ leave the tank half full or less. The evap system can be overloaded with a full tank, increasing HC. ================ Bring it in real hot from a highway run. The O2 and cat work best when hot and the throttle body is heated by engine coolant, pre-heating intake air. ================ Drive it on the freeway for about 10 miles before you go to the test in order to be sure that the engine is at full operating temperature ================ put in the highest octane gas you can find, change the oil, and retard the timing slightly (3 deg). ================ Just before the smog test fill up with good winter "Arizona" gas. i.e. unoxgenated gas with enough volatility to easily ignite. ("Winter Gas" is more volatile then "Summer Gas".) ================= Retard the ignition timing about 3 degrees to help reduce the NOX emissions. ================= take out air filter ================= Use a low-restriction air cleaner set. Hellings has one about 1/2" thick with metal wire for a filtering medium. It will only filter out large rocks, but it flows very freely. ================= Run the fuel tank down as far as possible and refill it just before the test. Fuel has a ‘half-life' and it does not burn as well if it has been in the tank for 90 days or more ================= Put in a new set of spark plugs, gapped. Convert from carbon core ignition wires to the solid core (metal) type. ================= Capped off PCV connection to manifold ================= make sure the tires are inflated to MAX for the dyno test. ================ fuel cap sealing correctly ================= blowby/crankcase fumes being re-ingested through the air cleaner and throwing the tailpipe readings way off. reroute the crankcase fumes out of the compartment via a "road draft tube" =================
-
How Do Cars Age?
Cars have the advantage...their parts can be rebuilt or replaced pretty easily.
-
Anyone ever refinish seat belt buckles?
I haven't seen any actual seatbelts that these guys have restored, but they claim to be able to recondition your seatbelts: http://www.ssnake-oyl.com/Ssnake-Oyl_Seat_Belt_Showroom20.html I've seen reviews of their work on other vehicles (Mustangs, Corvettes) and the reviews have been positive.
-
Jet Hot Headers
I'm not sure if the 6-2 header I got from MSA needed any work to make it fit better or not. I had the header shipped directly to the shop, since my Z was already there and the carbs, intake & exhaust manifolds were already removed. The 6-2 header was the one my mechanic recommended, and he does a lot of performance mods on Z cars, and builds racers, too. Hopefully he didn't steer me wrong! So far it appears to be holding up well.
-
OK....I'm slow....somebody explain this.
Bidding has ended on it. I wonder if the seller will relist it, and if so, for how much.
-
Jet Hot Headers
I've run into trouble with headers on my 240Z. I purchased a Pacesetter header from Victoria British that was supposed to work on a L24 engine; however, the header ports were round whereas the ports on the head were square. It would have worked, but my mechanic told me that the gasket would burn up after a few thousand miles. So, he suggested a 6 into 2 header from MSA. It had the proper port shape for the head on my L24. But, I didn't spend the extra money for the jet hot coating.
-
Removing crossmember with engine in-car
I think you should be able to do it. I'm guessing the front of your car is already up on stands, since you're refinishing the suspension parts. And, if you haven't done it yet, remove the disc brake calipers, remove the rotors & hubs, separate the tie rod ends from the steering arms, remove the strut assemblies, torsion bars, sway bar & end links, and transverse links. Now all that should be left is the front crossmember and the steering rack assembly. Unbolt the motor mounts from the supports on each side of the engine (2 bolts on each side). Position a floor jack under the bellhousing of the transmission. Jack up the transmission/engine only enough to raise the engine off the motor mounts a bit. Now, place a jack stand under the oil pan. Put a block of wood on top of the stand, between it and the oil pan so you don't damage the pan. Adjust the stand high enough so that when you lower the jack out of the way, the engine is still raised slightly off the motor mounts. With the engine supported, you can turn your attention to the front cross member. Place the floor jack under the center of the cross member, and raise it up so that it is touching the cross member, but don't over do it and raise the car off the jack stands. You want the floor jack to hold the cross memeber in place once it is unbolted. Remove the two bolts on each side of the cross member (on the outer edge of the frame rails). Now carefully lower the front cross member and roll it out from the car. Hopefully you have a good sized floor jack, not one of those little ones. I bought a nice one from Napa, a 3 1/2 ton jack and it has a removable rubber pad that fits on the jack head. It distributes the weight nicely and won't scratch a painted surface. I'd also recommend that you have a helper assist you with all of this. While you can do all this work by yourself, it might prove easier and safer to have an assistant.
-
Salt Lake City members
I will be in Salt Lake City today through Friday. I'd love to meet up with any fellow Z car nuts and talk Z's and check out any cool rides. Please PM me if you're interested
-
heater valve change .. drain Antifreeze???
Hi Bruce, When I changed the control valve in my '73 I drained the radiator. Even with the radiator drained, the heater hoses and heater core will still have a bit of coolant in them. Take out the carpeting and padding on the passenger side so coolant doesn't spill on them. Have plenty of rags or a catch can handy, although it's kind of a tight spot to work in. If you have any kind of fluid pump, you may be able to remove a heater hose on the engine side, snake a smaller tube down the hose into the valve and suck out most of the coolant.
-
It was worth all the trouble !!!!!
Ronnie, that is one fantastic looking Z you've got!
-
Brake line/Fuel line refinishing
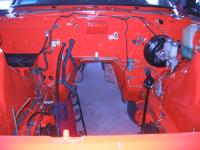
Hi Pete, I think true cadmium plating would hold up a lot better that the paint, which can be nicked or chipped. Here's the information on the Golden Cad System paint, it says it withstands temperatures up to 250 degrees F. http://www.eastwood.com/jump.jsp?itemID=728&itemType=PRODUCT&path=1%2C2%2C389%2C390%2C397&KickerID=126&KICKER For a show quality look in the engine bay I think true cad plating would look better. John, those lines from FedHill look pretty good, have you got any pics of them in a Z? Here's how things looked before I put the engine back in the car.
-
Well it's been fun guys but...
Hey Jared, Hopefully we'll see you next season. Of course, Minnesota only has two seasons: Winter and Road Repair! Merry Christmas to you and yours, and may the new year be filled with all things Z...
-
Brake line/Fuel line refinishing
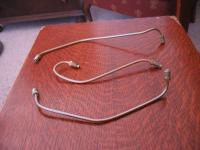
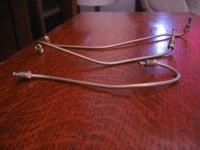
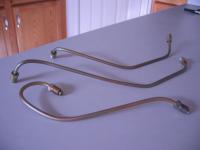
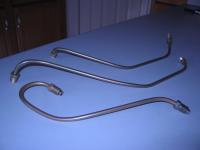
When I detailed the components in the engine bay of my 240Z I wanted to refinish the brake hard lines, fuel lines, hood prop, throttle linkage, washer nozzles etc... to duplicate the original cadmium plating these parts had; however it seemed cost prohibitive to get all the pieces replated, especially since my car is a weekend driver and not a show car. I ended up using a product from Eastwood (www.eastwood.com) called Golden Cad System paint that does a pretty good job of duplicating the cadmium finish at a much lower cost. The Golden Cad System consists of three colors of paint: a golden base coat, a green zinc coat, and a red zinc coat. I started by cleaning the parts thoroughly with paint thinner & steel wool. Once all the big chunks of crud were gone, I cleaned the parts again with wax & grease remover. That got them ready for the paint. First, each part was sprayed with a gold colored base coat. Next was a light coat of the green zinc tint and finally a light coat of the red zinc tint. Each coat was allowed to dry according to directions before the next coat was applied. All in all I am happy with the way the parts turned out. The parts look good and you can't really tell it's not really cadmium plated unless you look close. It definitely made a difference in how things look under the hood of my Z. :knockedou Here are a few photos of the small brake lines that were refinished.
-
"Cadmium" paint
Eastwood's Cadmium paint on brake lines & parts
-
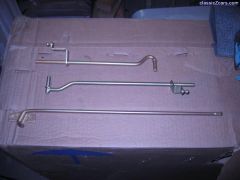 Refinished underhood items
-
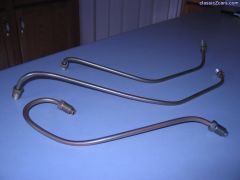 Refinished brake lines, camera flash on
-
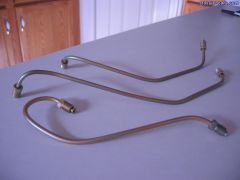 Refinished brake lines, camera flash off
-
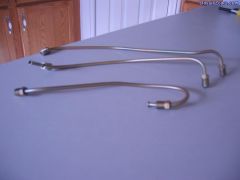 Refinished brake lines with camera flash off
-
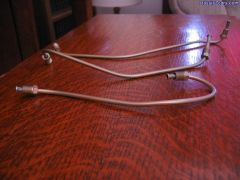 Refinished brake lines with camera flash off
-
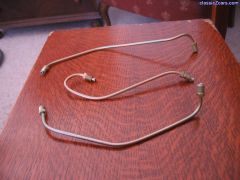 Refinished brake lines with camera flash off
-
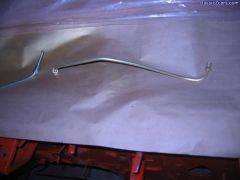 Refinished brake line
-
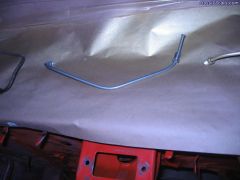 Brake line after cleaning, not painted yet
-
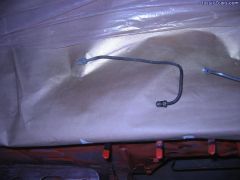 Brake line before cleaning
-
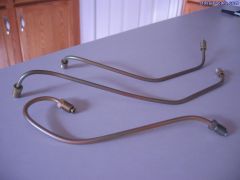 Refinished brake lines with camera flash off
-
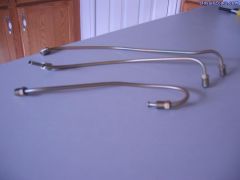 Refinished brake lines with camera flash off
-
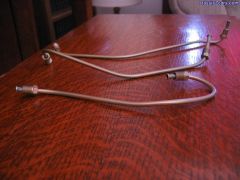 Refinished brake lines with camera flash off
-
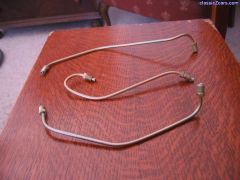 Refinished brake lines with camera flash off
-
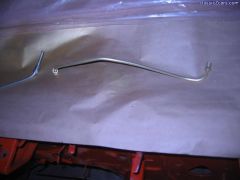 Refinished brake line
-
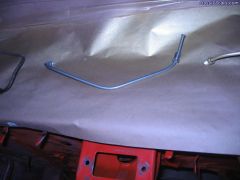 Brake line after cleaning, not painted yet
-
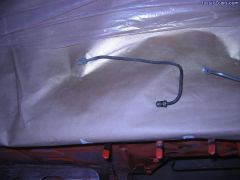 Brake line before cleaning
-
-
Refinished underhood items
From the album: "Cadmium" paint
Underhood items refinished with Eastwood's Golden Cad System paint. -
Refinished brake lines, camera flash on
From the album: "Cadmium" paint
Brake lines refinished with Eastwood's Golden Cad System paint. -
Refinished brake lines, camera flash off
From the album: "Cadmium" paint
Brake lines refinished with Eastwood's Golden Cad System paint. -
Refinished brake lines with camera flash off
From the album: "Cadmium" paint
Refinishing brake lines/fuel lines, and miscellaneous underhood parts with Eastwood's Golden Cad System paint. -
Refinished brake lines with camera flash off
From the album: "Cadmium" paint
Refinishing brake lines/fuel lines, and miscellaneous underhood parts with Eastwood's Golden Cad System paint. -
Refinished brake lines with camera flash off
From the album: "Cadmium" paint
Refinishing brake lines/fuel lines, and miscellaneous underhood parts with Eastwood's Golden Cad System paint. -
Refinished brake line
From the album: "Cadmium" paint
Refinishing brake lines/fuel lines, and miscellaneous underhood parts with Eastwood's Golden Cad System paint. -
Brake line after cleaning, not painted yet
From the album: "Cadmium" paint
Refinishing brake lines/fuel lines, and miscellaneous underhood parts with Eastwoods Golden Cad System paint. -
Brake line before cleaning
From the album: "Cadmium" paint
Refinishing brake lines/fuel lines, and miscellaneous underhood parts with Eastwood's Golden Cad System paint.


