Everything posted by kenz240z
-
Rear suspension upgrades
I'll echo 5thhorsemann, do the swaybar by itself first. Then decide on any future upgrades as recommended by Dave.
-
Unfinished projects
Leonard, as the saying goes, life is a journey. Often we get to cruising along and it takes a sharp jolt to wake us to the practical matters that we must face in life. I will keep you in my prayers and hope for a speedy recovery from your blood clot.
-
Refurbishing the Center Console
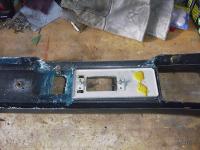
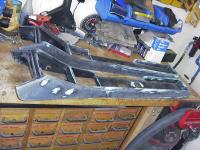
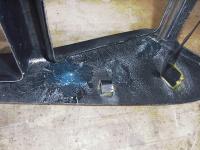
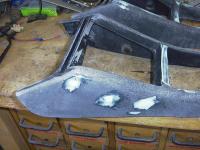
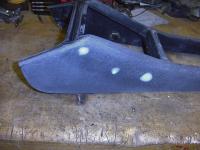
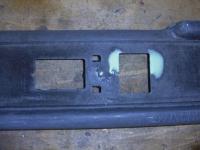
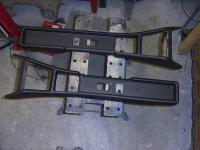
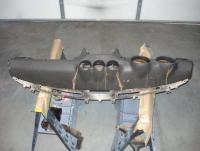
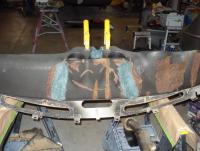
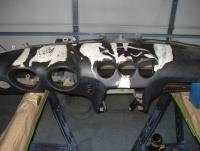
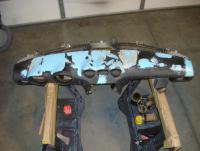
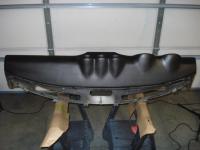
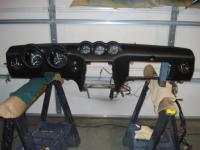
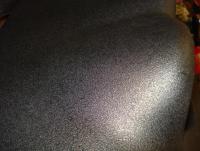
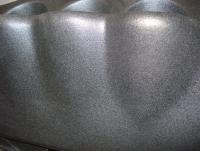
I finished repairing a couple of '71 center consoles. I used fiberglass with jelly resin to repair the cracks & holes that had been drilled. Simply mixed up the jelly, spread it onto a piece of fiberglass then applied the "patch" to the back side of the console where needed. I did sand the areas with 80 grit sand paper before applying the fiberglass patches. In addition to the major cracks & holes, there were a multitude of surface cracks. So, after the fiberglass had hardened, I sanded the entire console with 80 grit paper. I used a 2 part flexible bumper repair compound from NAPA (same stuff I used to fix the cracks in my dash) to fill in over the front side of the fiberglass patches and all the cracks. Once it hardened, I sanded the console smooth with 120 and 220 grit sand paper. The compound did a good job of filling the hair line cracks as well as everything else. I gave the console a quick bath with water & a little Dawn soap, then dried it real good with compressed air. Once it was completely dry I sprayed the console with Duplicolor truck bed liner (again, same stuff I used on the dash). The texture is not original, but both consoles turned out great. Plus, the console will match the dash in the car (and so will the spare console!).
-
No start & electrical issues
Time to break out the continuity tester and the DVM. For the no start situation, remove the starter lead from the solenoid and connect the continuity tester to it. Clamp the other end of the CT to a good ground. Turn the key and see if the CT lights up. If not, test the ignition switch itself. I can't recall which pin on the back of the switch goes to the starter, refer to the FSM. Not sure about the lack of dash lights or head lights. Test the fuses with a DVM. A bad fuse can look good to the eye. Also, make sure your grounds are good and all connectors are free of corrosion and tightly connected.
-
what would you do?
Eastwood has a product called Rust Encapsulator which can be sprayed on. It is their version of POR. I have used it on several cars now with good results. They have also have a product called Chassis Black that makes a great topcoat for suspension parts. Not too glossy and not too flat. www.eastwood.com As far as interior paint, I sprayed the visible interior areas on the 2 Z's that I painted a different color from the original. Basically the tool bin/spare tire well area. I didn't bother with anything that would be covered by interior panels, carpet, dash, etc...
- Crack in the Body
-
The 260 is painted !!
I thank your son for his service. I was in the National Guard for 6 years, but that has been awhile ago! I started as a track vehicle mechanic, but then joined the 43rd Army Band. Anyway, great looking car! Great to see another DIY'er giving a Z a new lease on life! I've got 3 240Z's. One is done, one is almost done (stock '71) and the 3rd is a '73 with a LT-1/T-56 swap (in progress)...
-
Type of Primer for Engine Compartment
I would recommend an epoxy primer. For best results, you will have to sand it again before you do the final prime/paint. I have only used PPG Omni line of paint and the fellow at the paint supply store told me not to spray etch primer over body filler. What I have done is this: sand to bare metal. Apply filler where needed. Sand to desired contour. Mask over the areas with filler. Spray the etch primer (it goes on very thin). Spray on high build primer. Sand smooth. Spray epoxy primer (goes on flat, no sanding needed). Spray top coat. It may also work to spray the bare metal with etch primer first, then sand down the areas where the filler needs to go.
-
The 260 is painted !!
That looks very nice! Good work! Is your son finished with AIT? What is his MOS?
-
started body work on my 280
That paint looks real nice. You're gonna have one sharp Z when you get it all put back together!
-
Not much power :(
I have a L28/5-speed from an '82 ZX in my '73. Running SU's instead of EFI. Diffy is a R-180 3.90 out of a mid-80's 4X4. My Z is quick off the line, but nowhere near my '97 Camaro Z28 with an LT-1/6-speed. The Camaro is fun for hot rodding around town and running errands. The Z is fun for spirited driving on the twisty roads in the nearby foothills & mountains. Guess which one leaves me with a bigger smile on my face... One cool thing about a Z is that you can soup it up with factory Datsun/Nissan parts, much like a Chevy. Replace the L24 with an L28, swap in a 5-speed, and for quicker launches swap in a 3.90 or 4.11 diffy.
-
240z ignition timing carb sync NEED HELP!!!
Another thing you might check is to make sure the bolt that secures the harmonic balancer to the front of the crank isn't loose. I had that happen to me once and it drove me nuts, because the car would run for a bit, then die on me. The gear that drives the distributor fits on the nose of the crank behind the harmonic balancer. Thus, it was able to slip forward and throw the timing out of adjustment...
-
Trans and diff gear oil
I can't remember the exact weights, but I used Redline gear oil in the diffy and Redline manual transmission fluid for the 5-speed in my Z.
-
Buick 340 v8 swap
The Buick 215 had an aluminum block, aluminum heads & aluminum intake. IIRC, Range Rover bought the "rights" to it and used it in their vehicles. Great little V8 with a front mounted dizzy. I briefly considered the Buick 215 as the engine for my V8 swap project, but ultimately decided on an LT1...
-
MSA A pillar trim, header trim and headliner
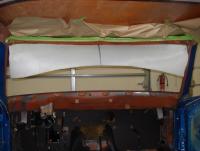
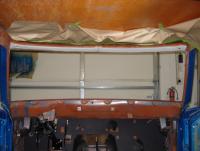
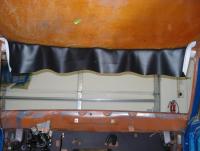
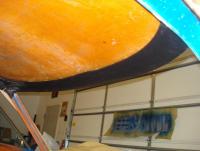
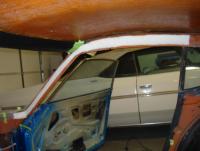
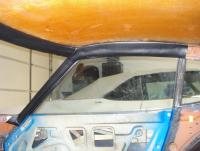
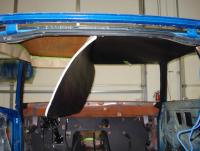
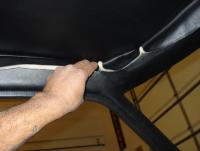
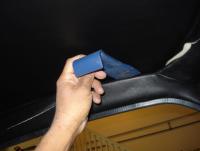
Last weekend my buddy Mike (Pop's Z) stopped over to help me install the MSA A pillar trims and windshield header trim in my '71. It is definitely a 2 person job. We found it best to have one person inside the car to pull & stretch the vinyl and the other person outside the car to pull & fold the vinyl along the outside edge of the window weld flange and door weld flanges. Fastening the vinyl to the inside weld flange with the pinch moulding takes a little practice. After a few initial tries, we got the hang of it and committed ourselves by spraying the foam and the vinyl with adhesive. Wick Humble's book on Z car restoration does a good job of describing the process for installing the trims and also the headliner. A few nights later I installed the MSA headliner by myself. I started by taping the headliner into position to make sure it was centered and that there was enough material on all 4 sides to tuck under the A pillar/header trim edges and also the rear edge (where the dome light is). I marked the center of the headliner at the front edge (where the rearview mirror will mount) and also at the rear edge (dome light opening) with pieces of tape. Then I sprayed a band of adhesive on the roof from front to back, about 3 or 4 inches wide. I sprayed a similar width on the backside of the headliner. After the adhesive tacked up I stuck the headliner to the roof starting at the front edge and smoothing it towards the rear edge. I double checked that the positioning was good by holding up the side "flaps" to insure the headliner was still centered. Then I proceeded to adhere each of the "flaps". I did not spray adhesive on the outer edge, about an inch or so, as that amount of material gets tucked up under the edges. Once the headliner was adhered to the roof I began to tuck as much of the extra material up under the edges with my fingers. Then I used a plastic trim tool to finish tucking the edges. A plastic putty knife or a plastic "bondo" spreader would also work for this. Here are a few photos:
-
started body work on my 280
Glad to see the great progress you are making and looking forward to the finished result. With your DIY skillz I predict another Z project (or two...) in your future! I've used the PPG Omni line on a few cars now, all with great results. The only thing I did different was to start by spraying MP176 etch primer on the bare metal. The 2nd step I sprayed the 2K primer/surfacer and sanded it down to get a nice, smooth & flat surface. 3rd step I sprayed it with epoxy primer. No sanding done after that, as it went on nice & smooth. 4th step sprayed the color coat. 5th step sprayed the clear coat. 6th step wet sanded the car with 1000/1500/2000 grit in stages. 7th step polished the CC to a nice shine with a Makita buffer, Shlegel wool buff and 3M Perfect It rubbing compound. Damn near looks like the paint is covered with glass! Too bad about your air compressor. At least they didn't take your Z!
-
front fender/wing bolts?
10 mm bolt head.
-
Dash Repair Process/Pictures
Thanks for the comments, everyone. Barring any direct blows to the dash, I think it will hold up well. I did use the spray can version of the Duplicolor truck bed liner and it went on kind of thick. Plus, I broke off quite a bit of the top of the dash by tapping with a hammer. The old vinyl was almost like an eggshell and it didn't take much pressure to crack it and peel it off. After I repaired all the cracks with the foam and bumper repair epoxy I initially sprayed it with the SEM texture, but wasn't happy with the way it turned out. I followed the directions and held the can 18" inches or so from the surface, but it went on real dry and most of the texture rubbed off. So I sanded the dash back down and sprayed the bed liner on. The bed liner route also saves a step, as it has a nice semi-gloss black finish that looks good for the dash. Thus, there is no need to spray it with the SEM trim black. Maybe with a bit more practice I could get the SEM texture to work. I'll be repairing another dash for my '73 240Z V8 project.
-
Dash Repair Process/Pictures
I recently repaired the dash in my '71 using the process initially described in this thread. I started by repairing the deepest cracks with fiberglass. I then filled the cracks and low spots with the spray foam and cut it down with a hacksaw. I began covering the cracks with the SEM bumper repair epoxy, but soon ran out. Too many cracks! I switched to the NAPA bumper repair kit. In my experience, I'd say the NAPA epoxy is easier to work with. The NAPA epoxy has a slower cure time, which allowed me to mix up bigger batches and cover more of the cracks at a time. Both products seem to provide a similar flexible coat when cured. I ended up spraying the dash with Duplicolor truck bed liner. It provided a grainy finish with a nice semi-gloss finish. There was no need to spray it with the SEM trim black afterwards. I think it turned out pretty good!
-
Complete starvation when cold
You mention that pulling the choke lever raises the idle speed, but have you verified that the fuel nozzles are also moving down when the choke lever is pulled? When the choke lever is pulled it does two things: pulls the fuel nozzles down about 1/4 inch for a richer mixture and also cracks the throttle valve. My guess (from here at the computer in Berthoud, CO) is the fuel nozzles are stuck and not being pulled down with the choke applied. When the engine is warm, pulling the choke, even with stuck fuel nozzles, would raise the idle due to cracking the throttle open - just like stepping on the foot feed a little bit. So this is no proof that the choke is working properly. Take another look and let us know what you find.
-
Annoying clutch pedal click/pop -- '78 280
Nothing a little welding and grinding can't fix. If I can pull a pedal from the pedal box (43, slightly overweight, bad back, stumpy fingers, etc..) anyone can do it, even you! But, who knows, maybe you can get a neighbor kid to do it... If you go the route of drilling a larger hole and using a larger pin, check Ace hardware. They carry several sizes that can be cut to length. Although, IMHO, it would be simpler to replace the pin, if it is worn, or weld & re-drill the hole in the pedal, if it is worn. In order to pull the pedal box, you will have to do more work than it would take to simply pull the offending pedal & pin. Sometimes less is more...
-
re-skinned door panels
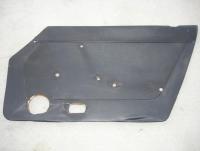
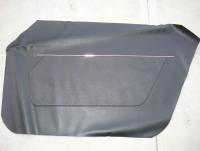
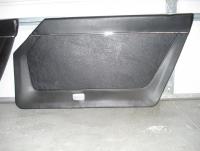
I recently purchased some new door panel skins from DatsunParts.com (http://www.datsunparts.com/2334). I had a local interior shop repair the old door panels and install the new skins. They turned out real nice!
-
Clip seals on inner fender?
Ditto what Dave says. Adhesive will not do. Those seals need to be clipped in place with the "S" shaped clips. You might even be able to make a set of clips out of sheet metal stock. Say 20 or 22 guage sheet metal that you should be able to get at the hardware store. Cut in into about a 1" square, the use needle nose pliers to roll each square into an "S" shape. Pinch one half of the "S" onto the top of the inner fender, and the rubber strip into the othe half of the "S".
-
My first 240z!
Great score, Tiffanie! My recommendation is to simply get the car in safe, driveable condition and enjoy it for awhile. Once you get it out on the open road any thoughts of parting with it will vanish, I'm sure. Take your time and decide what you want it to be: a nice driver, a show car or something in between. You could start with small things, a new carpet kit, maybe re-upholster the seats. Hopefully you can talk your dad into a little body & paint work! No matter what you decide to do, it sure looks like you have a real solid Z car to start with there!
-
Advice Removing Exterior Trim, Wratherstripping Prior to Paint?
If you have a factory service manual for your ZX, it should have information on removal/installation of the trim, emblems, bumpers, etc... Items like the bumpers will be bolted on. In general, embems & trim can be tricky because you need to determine how they are attached. Could be adhesive, retainer pins, screws or nuts. A good set of plastic pry tools is handy for popping off emblems & trim that are attached with adhesive or retainer pins. Be sure to double check for hidden screws or nuts so you don't accidently break something...


