Everything posted by kenz240z
-
R-T diff mount Group Buy
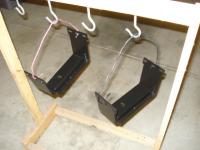
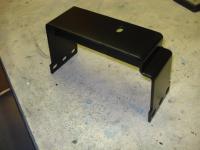
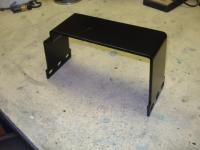
...for quality product! My mounts arrived in the mail yesterday. Got 'em painted and will pick up a pair of the generic bump stops that Darrel suggested. I'll get them installed this weekend if I can finish my honey-do's before I run out of daylight!
-
Pomorza's Z threat.
That emblem looks to be in real nice shape. Good score!
-
Body progress
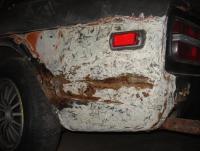
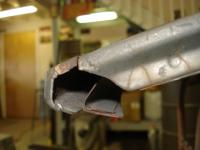
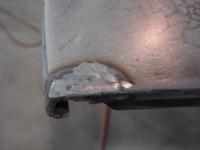
Good work, Slo! It is interesting fito find what lurks beneath the old paint on a Z car...I removed about 5 pound of filler from the left rear quarter on the '73 240Z I'm currently working on! Here's a photo of what it looks like after scraping off all the filler and pulling the wheel well lip out with a slide hammer. I'm gonna have to cut it out to properly re-work the shape of the indent behind the bumper. The top edge is pretty mangled...
-
Harbor Freight stud welder for dent pulling
Thanks, guys! I'm planning to start on the doors today. The ones on the car are rusted through and would take a lot of metal work to fix. Fortunately I bought a pair of seemingly solid doors through an ad on Craigslist. Koalia, one option would be to use trim adhesive to "glue" the hood emblem on. Another option would be to use double-sided trim adhesive tape.
-
Harbor Freight stud welder for dent pulling
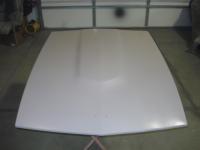
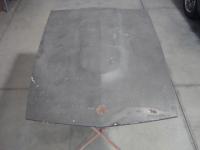
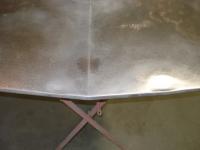
If you refer to the 1st photo of my initial post, you will notice that the paint on the hood was severely cracked. After I removed all 9 layers of paint & primer, I noticed that the metal was slightly rust pitted in the cracks, under the hood emblem and also in a couple of other spots. To neutralize the rust, I wiped the hood down with Rust Mort. Rust Mort is a SEM product with phosporic acid that converts the rust to a black "oxide" that can be painted over. The Rust Mort must be wiped off with water before it is painted. I used a damp cloth quickly followed by a dry towel. To help insure the rust won't come back, I applied a thin layer of PPG 176 etch primer. Once the etch primer was dry I sprayed the hood with PPG 182 high build urethane primer. I like to use this as the first primer coat because it goes on thick and will fill in small imperfections in the surface. Next step will be to sand most of the high build primer off with 80 grit paper on a long board, skim coat the low spots, sand the filler, then spray the hood with high build primer again and repeat the process. After a few iterations, the hood should be as smooth as I can get it. Then it will get sprayed with PPG epoxy primer, the base coat (cobalt blue for this car) and finally the clear coat.
-
Harbor Freight stud welder for dent pulling
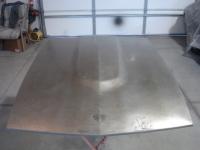
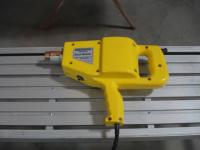
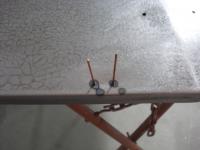
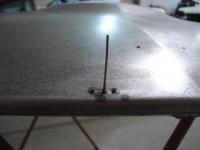
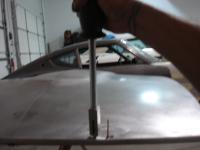
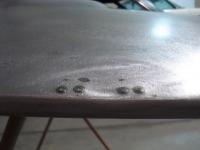
I've been doing the body work on my 240Z V8 project car. I started on the hood last weekend and after stripping off 9 layers of paint & primer, was pleased to discover the hood was free of any major damage. However, there were two dents on the top of the hood at the nose that were filled with copious amounts of body filler. There was also a crack on the drivers side front of the hood that required a quick repair with the MIG welder. I dimpled the crack with a body hammer then welded & filled it with the MIG. A little work with the grinder dressed the weld down and a small amount of filler will finish it up. Because there is a brace on the back side of the nose of the hood, I couldn't use a hammer & dolly to remove the dents. So I decided I'd put the stud welder I bought at Harbor Freight to work to pull the dents out. While I wasn't able to get the metal perfectly smooth, it will only require a skim coat of filler to smooth things out. Better than a thick wad of filler! There was a small dent to the left of center and a larger dent to the right of center on the front of the hood. The small dent took 3 studs to pull out. I started with a stud on the left edge of the dent, a little less than 1/4" inside the dent, and a 2nd stud on the right edge. The stud welder comes with a slide hammer for pulling on the studs. After a few blows on each stud, the dent was almost gone. A 3rd stud in the center finished it off. The big dent took quite a few studs, but was mostly gone after the first 4 studs were pulled. Eastwood sells several varieties of stud welders, but the HF one is cheaper. It comes with 3 different sized tips and 3 different size studs. I found the smallest studs to be the easiest to use. I used a pair of dykes to cut the studs off and then dressed them down with a grinder.
-
R-T diff mount Group Buy
Dave, please forgive me, but I sent you a Western Union money order. I stopped at the post office yesterday and asked to buy a postal money order and the clerk said, "We have Western Union, is that ok?" So I said "Ok." If there is an genuine honest ta goodness Postal money order, she didn't know what it is... I can send you a couple of bux in the mail to make up for your troubles cashing it, just let me know. Thanks!
-
R-T diff mount Group Buy
Hi Dave, Please put me down for 2 of the diffy mounts. One will be going into my '73 with a L28/5-speed and the other will be going into my V8 project Z with a 350 LT1/T56 6-speed and 3.9 R200. I'm heading to the post office now to get a money order and send it off. Thanks!
-
Help me ID these seats...
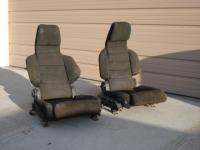
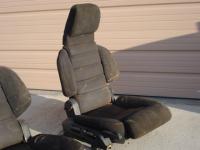
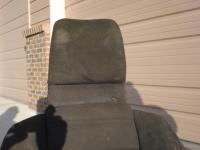
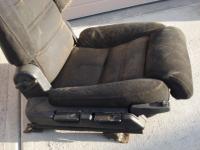
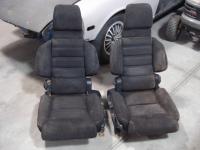
I picked these seats up at the salvage yard this afternoon. Found them in a '77 Porche 924, but they are not the original seats from that car. They did not use the stock seat mounts, instead there were holes drilled through the floor to mount these seats in the Porsche. I've searched the photo gallery and also online, but haven't found anything exactly like these. They say "TURBO" beneath the head rest. There are two dials on the side, one for lumbar support and the other pulls in the upper side supports. There is also an adjustable thigh support (moves up & down). I set them in my project 240Z and it looks like they will work, although I'll probably have to cut out the stock seat supports. These should bolt right to the floor with a little work. They are comfy to sit in!
-
Ignition Coil missing
Another option is the dizzy from a 280ZX, preferably with a e12-80 ignition module. If you go with a ZX dizzy you will want to use the ZX coil, too. Do a search and you should be able to find the information you need to do this swap.
-
fairly new owner
Lance, no need to part with the Z...one can never have too many cars! I've got 4 drivers ('73 240Z, '75 Chevy Caprice convertible, '91 Cadillac Allante convertible and '97 Camaro Z28) and 3 works in progress ('64 Chevy Impala 2 door coupe, '65 Buick Special convertible and '73 240Z V8 swap).
-
Thermostat housing
It would be a good time to replace anything else in the cooling system since you'll have the coolant drained. Are all your hoses ok? How old is the water pump? Any leaks from the radiator? Does the coolant flow through the intake on a '76? I'm a 240Z guy so forgive my ignorance on this... If so, are there any changes or repairs needed related to the intake manifold?
-
Mustache bar bushing replacement
I believe that Eastwood offers Rust Encapsulator and Chassis Black in spray cans, too.
-
Ztherapy excitement
Hi Steve, I've had an MSA 6-2 header in my '73 for about 3 years now. It is not coated with anything and not wrapped with anything. I've never had an issue with too much heat under the hood. I've got round top SU's and the stock heat shield.
-
5 Speed Rebuild
I echo Arne's thoughts on the matter... If you are mechanically inclined, you might consider cracking the tranny open yourself. Then you could inspect the internals and also give it a good cleaning. The seals are relatively cheep and are easy to install. Download the FSM for a ZX from carfiche.com and it will give you the details. I went through a few cans of brake cleaner and also pressure washed the case when I cleaned the 5-speed that I put in my car. It's real clean. I filled it with Redline transmision fluid before I installed it in the car. And here's a tip a friend shared with me to help with installation: cut the heads off a couple of old head bolts. File or grind the sharp edges off. Use a hack saw or die grinder with a thin stone to cut a notch into the end. Then you can use a flat blade screwdriver to put them in the block as guide pins to help get the tranny lined up. If you are mechanically disinclined, then never mind...take it to a shop.
-
Two questions
You might be able to remove the oil pan by removing the bolts that secure the motor mounts to the cross member. Then, jack up the engine so that you can fit a block of wood between each motor mount and the cross member. Be sure to use a block of wood between the jack & the oil pan when you raise the engine so that you don't dent the oil pan. That should give you enough clearance to remove the oil pan with the engine still in the car. Please note: I can't guarantee that this method works for a Z car...it does for a small block Chevy in a '64 Impala!
-
Mustache bar bushing replacement
I like to use Eastwood's Satin Black chassis paint. It gives a finish that is real close to stock in appearance. I use Eastwood's Rust Encapsulator as the primer (Eastwood's version of POR15).
-
Electronic Ignition Waveform -- abnormal?
Al, I'm kinda in the same spot as a BSEE. Started with a local telco after college doing translations so I got rusty on the EE stuff. I've been a RF engineer for 12 years now. I tend to work in the frequency domain these days... Sarah, have you tried using a timing light as Al mentioned? As a test, you might connect the timing light to the coil wire to check for irregularities. With respect to the injectors, you might consider getting a noid light to verify they are firing properly.
-
260Z rear bumper shock compression
Nice work. Man, I need to work on my welding skilz...
-
Electronic Ignition Waveform -- abnormal?
OK, just a few guesses here...have you checked the dizzy cap to make sure there is no carbon tracking inside that could cause a misfire? Have you verified that there are no issues with an injector that intermittently fails to fire? - disclaimer: I'm new to the world of fuel injection, so I'm grasping on this one...:stupid: Have you considered replacing the dizzy and module with a ZX dizzy/module? Forgive me if the '78 uses the same one...hey, I'm a 240Z kinda guy! Anyway, my thought is that you might try making one change at a time to see if you can narrow down the culprit. Not the best method of troubleshooting, as it would be nice to pinpoint the trouble based on the scope trace; however, that doesn't seem to be yielding anything definite yet. Oh, and, um, well it's been awhile since I put my EE hat on (No, not elementary education!!!), but it appears to me that a DC offset is present in the waveform...:ogre:
-
Second Z after 9 years
Welcome to the club. What year is your 240? Post some photos when you can!
-
Stock 71 240z engine pictures
You're gonna need a battery and a spark plug wire to the #5 plug
-
Stock 71 240z engine pictures
Pull the stock exhaust manifold from the engine and put a header on it...no holes to plug!:classic:
-
Pomorza's Z threat.
It figures, the water pump would go out after you replaced the radiator...:tapemouth That's how a lot of my car projects go, too . How did the skid plate turn out? Put that sucker in a blast cabinet and you can blast all the rust right off of it and have it down to good metal in a few minutes. I used to strip a lot of parts the hard way with sandpaper, wire brush & steel wool. I bought a Trinco blast cabinet earlier this year and man, has it saved me a lot of time preparing parts for refinishing! Keep up the good work, that's a nice Z car you have there!
-
920 Gold
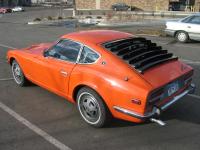
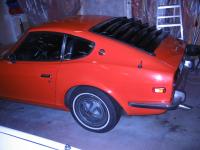
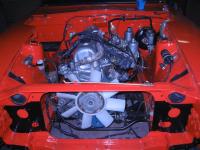
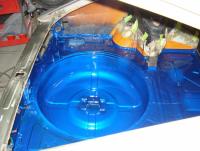
A quick point about color variations - the lighting will make a difference when comparing colors. Avoid comparing the color chips from the paint supplier's book to your sample while standing inside at the counter under the flourescent lights. For best results, do your color comparisons outside in the sunlight. Take a look at the two photos of my orange '73. The paint almost looks red under the flourescent lights in the garage. The primer can affect the color, so it's best to use a light primer with light color paints. Keep in mind that most paint systems allow you to tint the primer with the base color so that fewer color coats will be required for a basecoat/clearcoat paint job. With a bc/cc paint job you only need to spray enough color coat to achieve a uniform appearance. The clear coat seals it, adds depth & shine and provides a durable finish. You could tint the primer if you are using a single stage paint, although you need to apply enough coats to achieve a uniform color and a durable finish. Too thin could cause problems down the road. I agree with five&dime, there is nothing better than a bc/cc paint job that has been wet sanded perfectly smooth & buffed to a super high gloss. For those pursing a stock appearance this would be over-restoration on a Z car, considering the cars did not come from the factory with show quality paint. I've had no problem getting single stage paint from my local PPG supplier. And I've had very good luck with the PPG Omni value line of paints. The key, as theramz pointed out, is in the prep work. Expensive paint will be wasted on a car that has had poor body work and poor prep work. Don't paint your car black unless it is PERFECTLY straight or every ding, wave and ripple will stand out like a sore thumb. Lighter colors are more forgiving about the imperfections. I did my first Z in an orange basecoat/clearcoat, including the engine bay. I'm working on another Z that I plan to use bc/cc on the body exterior and will use a single stage in the same color for wheel wells, door/hatch jams, interior, underside of hood and engine compartment. I've already sprayed the interior and wheel wells. I've got a little body work to do before I can spray the body...


