xray
Free Member
-
Joined
-
Last visited
Everything posted by xray
-
 Add the cost of shipping such a bulky item, and you're really limited to folks in SoCal, where market prices for not just whole Zs, but reasonably "common" parts, are lower than the rest of the country. The fact they are 280z (not 240Z or even S1 240Z) seats further limits interested parties at that pricepoint. You may get more action on Craigslist or (eek) EBay, but prepared to negotiate down your price. Steve
 -
Have you checked the float level? I noticed you said you cleaned it, but if the float rides too low in the chamber you won't have enough fuel available for higher vacuum conditions... Re: fuel pressure... Tee in a fuel pressure gauge before each carb--should read 3-4 psi. Raising the dome pin on one carb essentially "deactivates it" and is more an indication of the A/F mix of the OTHER carb. Raising the front carb piston causes engine to die means the rear carb is probably too lean.
-
http://picasaweb.google.com/srcartermd/FloorpanRepair That's a link to pics of my car prior to and following floorpan repair. Once the bodyman/welder looked at it after some grinding he said there was no way to save the original sheet metal. BTW, they are in chronological order...I had to sand off the first layer of primer prior to coating it with POR-15, then reprimered before final prime and paint. Steve
-
here's a useful link I found doing a quick search...it may help you also. http://classiczcars.com/forums/showthread.php?t=23408&highlight=3-wire+tach and, http://classiczcars.com/forums/showthread.php?t=22273&highlight=3-wire+tach
-
They look like mine did, maybe a little worse at the seat brackets...If you think it's "not bad" just wait till you peel up the undercoating. Sad to say, but that asphalt stuff traps moisture very well. The rust near the drain holes is the tip of the iceberg, I fear.... You could try grinding it off, blasting it etc to see what's left, but I think you'll be spending a lot of time (and money) getting no further along than if you just replaced them. Non-galvanized, poorly primed metal can be a PITA, can't it? I'd like to say it affects only Zs, but all cars of this era (unless they are aluminum or fiberglass) suffer the same problem... ...Go to Zedd Findings and get one of Charlie Osborne's replacement sets. Find a good welder and have him/her install it, or DIY if you're able. Easily one of the best purchases I made for my Z. Good luck, Steve
-
I have heard that earlier 240Zs have two different tach wiring setups, but haven't heard the same said about 1973 models. My fiche shows 24855-N3301 for tachs dated 8/72-7/73 and 24855-N3600 for 8/73-8/74. While the part numbers supercede, I bet it's the same tach since (IIRC) the wiring changes between the two years are not substantial... Maybe PM one of the 260Z owners?
-
So I'm still sorting out/troubleshooting the car now that it's back on the road, and I think I'm having some braking issues... Basically, my car doesn't stop as well as I thought it would. Brakes engage at normal pedal height, but don't seem to want to brake hard and act "grippy." Pedal feel is good, not spongy. Car does not pull to the right or left on braking, and there's no shimmy, shaking or squealing. I just can't lock the brakes, and I think a panic stop for me would certainly involve hitting the object in front of me.:dead: I may have become used to 21st century braking systems, as my other car (BMW) seems to go 60-0 in 110 ft...The Z maybe 220 ft:eek: Here's what I've done: Booster holds good vacuum (18 inches)...all new tubing and check valve (properly oriented). The reaction disk has been properly positioned BMC new prior to purchase (now three years old) original brake switch New pads (carbon metallic from MSA) on known good OEM calipers All new brake lines New Brembo rear brake drums and all new hardware New performance street brake shoes (not track-level performance) http://www.thezstore.com/page/TZS/PROD/PBC03/24-5517 Restored e-brake mechanism (original cable) BMC bench bled, installed, system properly bled from rear to front. The ebrake cable is adjusted at the linkage so all slack is removed. Max travel at the ebrake handle is 5-6 clicks, as per FSM. The rear brake shoes were tightened to where the drum won't move, then backed off a couple of clicks on the star wheel. Problem #1 is as outlined above. Is this just me not used to my car's braking distance and effort? I seem to remember the car braking better before teardown and restore, but that's 3+years ago...Do the carbon-metallic pads/shoes require a warm-up period? I thought since they were "street" pads they would function cold as well as hot. Problem #2: I still cannot get my ebrake to keep the car from rolling down an incline. It will keep the car still on flat to verrrry slight inclines, but anything worse than that and the car rolls... I noticed today that when adjusting the brake shoes via the starwheel, the ebrake lever on the driver's side wheel cylinder did not have the same ratcheting action as the passenger side. It seemed to bind on the casting of the cylinder. Has anyone experienced this? Could this be the cause of the ebrake problem? Probelm #3: As an extension of #2 the "auto adjusting" nature of the rear brakes does not appear to function as indicated in the FSM. Any other thoughts? Thanks for any tips, Steve
-
http://www.geocities.com/inlinestroker/index.htm And, www.hybridz.org You may consider calling Rebello Racing for more info as well. Basically: F54 block P90 (or N42) head LD28 crank 9mm L24 rods KA24DE (or equivalent) pistons
-
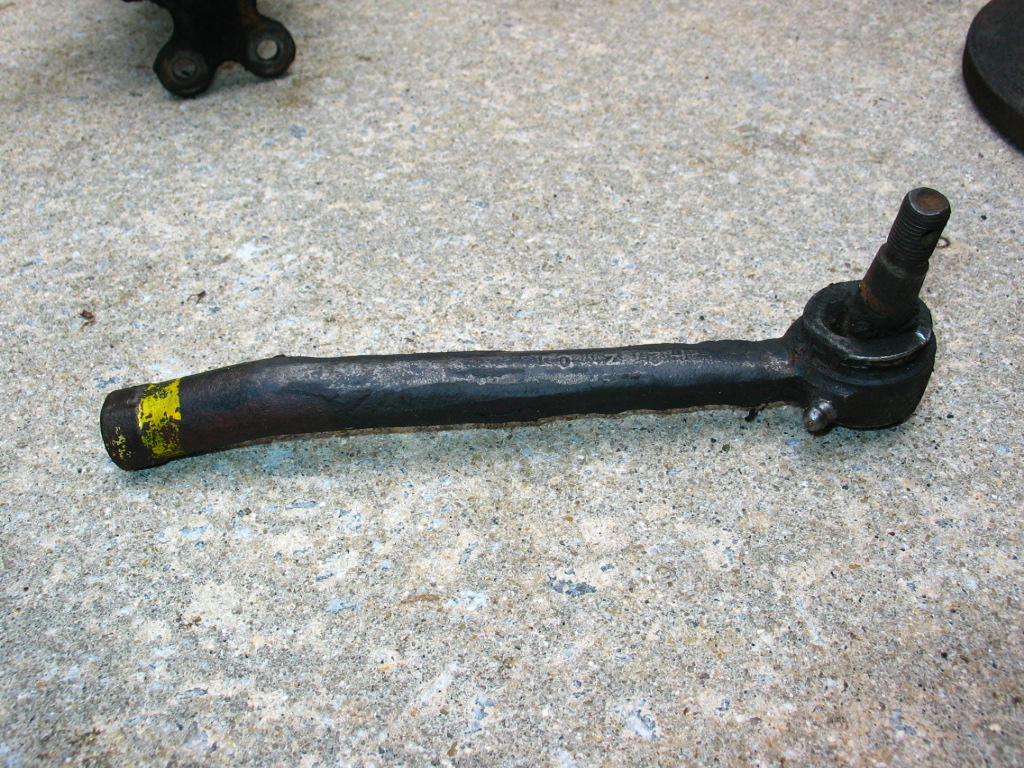
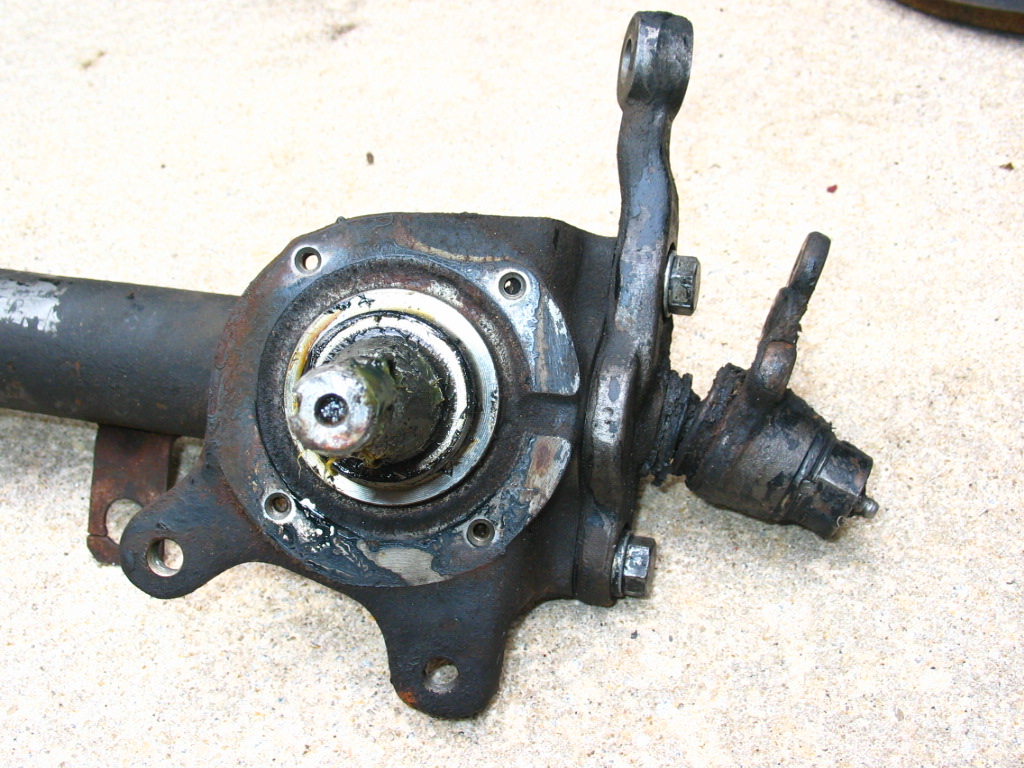
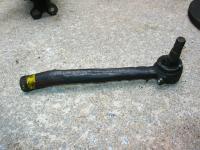
Nice! That first pic should have the caption that reads "Bad bushing! Bad bushing! " After driving my Z in just the shake-out phase only (35mph around the neighborhood) it's amazing the difference I feel in the car (all new ES bushings also). No wandering, no steering wheel shimmy...But, one does get greatly enhanced feedback from the road so prepare to have an "interactive" driving experience! Mine looked similar to yours, so I hope your results are as satisfying as mine are! Steve PS: BTW, I went with Illuminas and matching springs--love 'em so far! Which are you getting?
-
I wouldn't worry about the length, since all that is removed is about 1/4 or 3/8" (the length of the flare). There's aenough slack in the tube to make up the difference. The key is to make sure roundness is retained when cutting and reflaring. I would think any machine shop should have the tools available for cutting and reflaring, and the nut can be bought at NAPA (It's standard metric thread pitch found on the "Import" brake lines they sell) You could do it yourself with Harbor Freight's flaring tool...I did it when I was trying to DIY the brake tubes and felt pretty good about my flaring attempts...It was the bending that did me in. Be sure you keep the tube round and debur the edges prior to flaring. Good luck, Steve
-
Doh! Those are two very good reasons.... It might be better for forum searching if you took some pics and we discussed it in the thread, but PM if you feel better about it. Someone may have a similar problem in the future and may benefit from our sage advice and counsel...(sarcasm smilie?) Steve
-
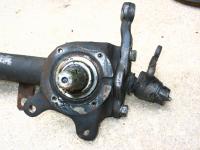
It's a great job for an amateur! It was the first task I did on my Z resto 2 1/2 years ago...pickle fork and 3-lb sledge does the trick. Put the fork between the knuckle and the tie rod end, aim, and whck with the sledge! You're replacing those tie rod ends and ball joints anyway (based on the looks of them, you should consider it....) and those rubber dust boots come with the tie rod end when you buy them. It is better to separate them while still on the car, but you might get away with using a vice. The only piece you need to preserve in that picture is the steering knuckle. Steve
-
That's a mistake on their part. I bought the brake line, fuel and clutch lines and except for the nut being 11mm the thread pitch and size was correct and uniform. You need to RMA or ask them to send a replacement tube. Period. Unless---you bought it from the dude who resells on Ebay?? Those lines are too dang $$$$ to tolerate poor assembly. Be careful you're not crossthreading though..That block is brass and could mar easily. Did you put the flare nut against the others to confirm it's the wrong size? My main issue with Classic Tube was the BMC to Prop Valve lines were for the OEM BMC, and mine is aftermarket. So I had to reuse the old ones until I get a new BMC that is OEM-correct (if that ever happens). The customer service is a bit gruff, but what do you expect for New York, right? Steve
-
Hard to say, especially from 3000 miles away. My impression has not changed--have you acted on my suggestions? Before going randomly over the car trying to chase down what ails it, you need to do some reading and learning about SUs, ignition timing and some searching on the forums for other threads where people have had similar problems. There are some good websites for the above subjects as well, so do that if you can't/won't buy the books. I recommend: ZTherapy's SU videotape "How To Build and Power Tune SU Carburettors" by Des Hammill "How To Build and Power Tune Distributor-Type Ignition Systems" by Des Hammill Buy a MityVac and read the manual. http://www.teglerizer.com/sucarbs/index.html http://zhome.com/ZCMnL/tech/su.html Good luck, Steve
-
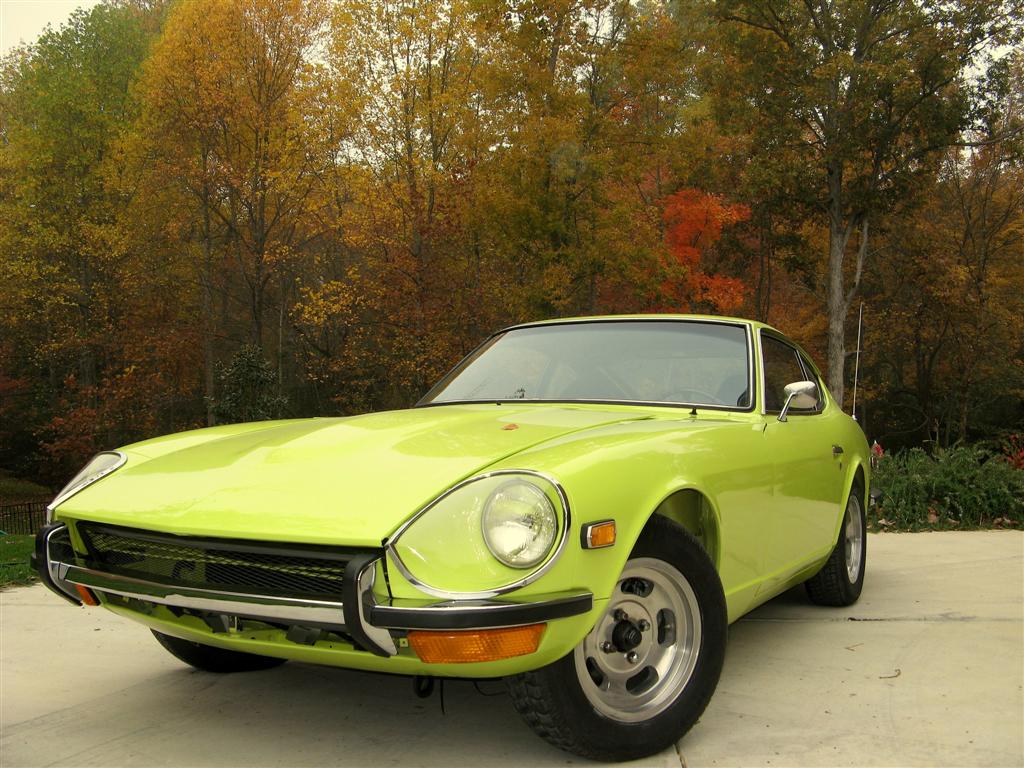
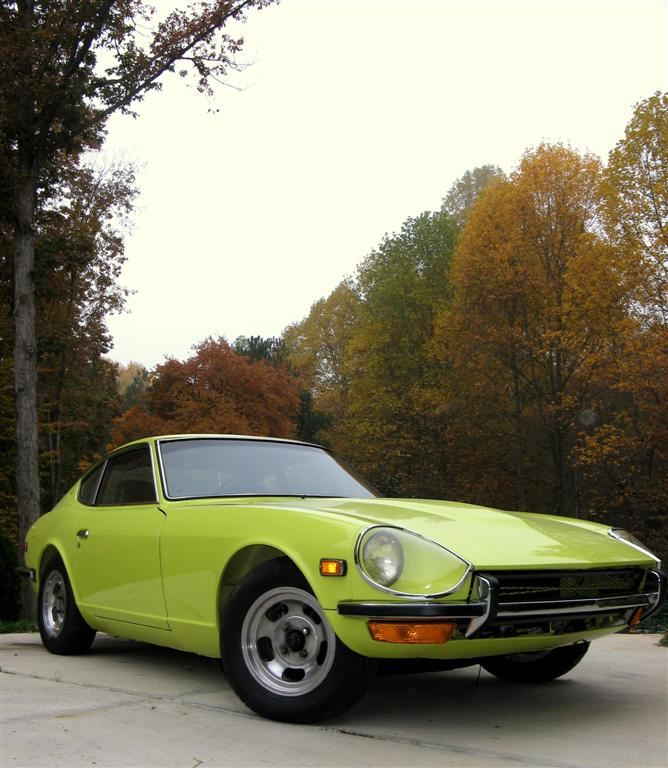
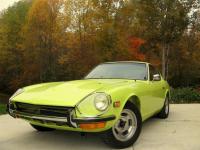
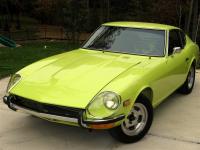
Thanks, guys... It's the stock 112 lime color. I was sort of bummed at the thought of being done with it, thinking I had idle hands and lots of free time with nothing pressing to do. Then realized that the brakes need adjusting, the carbs and timing need tweaking, I need new tires (correctly sized ones as the current ones are 185/70s and are three different brands!), still looking for carpet, and I want to install a secret audio system. So, the money pit continues....But, whenever I see the car it's yet another reminder of what hard work, tenacity and ultimately success look like..It's a good feeling.
-
Here's a couple of thoughts... When you floor the throttle, the butterfly opens max, and the piston rises to accommodate the change in air demand. Double check that there's oil in the damper (and that the piston spring is in there) so the piston doesn't rise too quickly and contribute to a lean condition. Along the lines of airflow and leaning out the mixture, if you have old carbs an air leak can occur at the throttle shafts. You can richen it all you want but fighting an intake vacuum leak is like chasing your tail. Check for other sites of potential vacuum issues Thirdly, IIRC the vacuum advance on your distributor is actuated when the car is rapidly put under load. This advances the timing until the mechanical advance can "catch up," so to speak...if you have a worn out vac advance, or the advance plate/bearings are stuck it will stumble when you go to WOT. Put 15-20 inHg on your vac advance and see if it holds the vacuum. If yes, then take off the distributor cap and see if the vac advance mechanism (attached to the vac advance diaphragm via a spring) is actually moving about 1/4" when placed under vacuum. As usual, the typical suspects of an old car apply...good spark, good timing, good fuel, good fuel delivery etc. Good luck, Steve
-
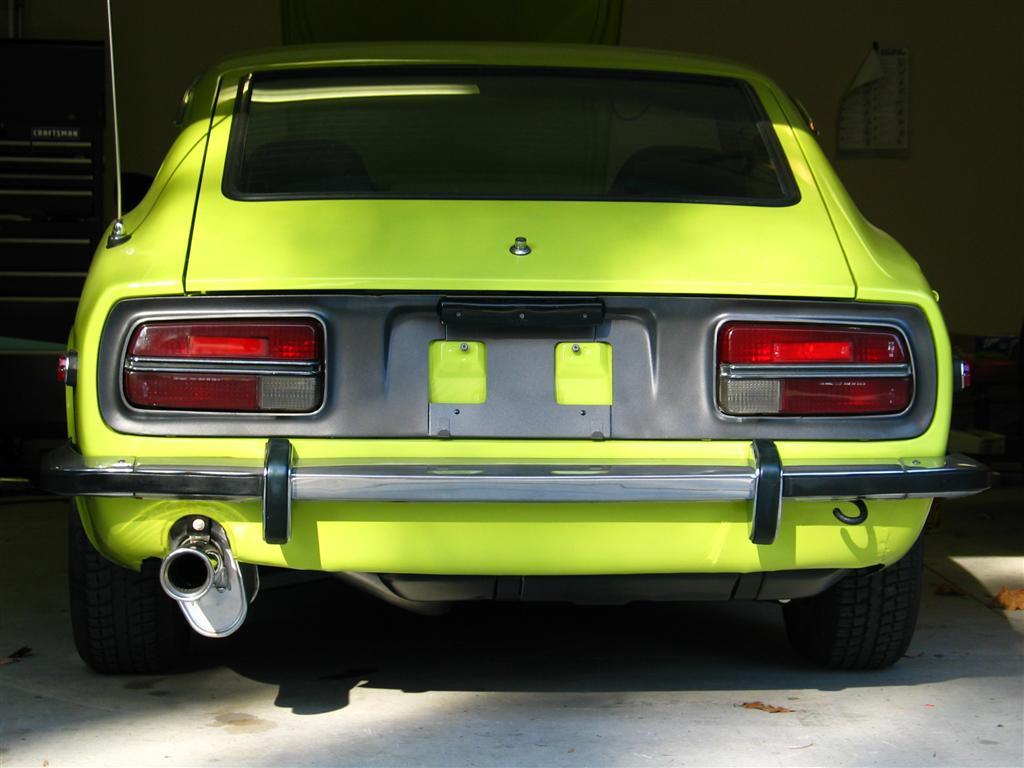
Some nice fall pics of my Z, finally on all fours and out of Restoration ICU...Still needs some rehabilitation after being bedridden for so long, but the fall colors seem to agree with him! Have a great Thanksgiving, everyone. Drive safely if you must..I'll be the grumpy dude stuck in the minivan on I-95. Steve

-
I think Nissan didn't actually make that part--wasn't it Nabco/Tokico that made it? (I guess it could be like a GM/Delphi relationship, though....)Anyway, it's just a piston with a rubber seal and a reservoir--not rocket science. Don't pay more than $30-40 for a master or $20 for a slave. try RockAuto.com also... My clutch MC looked new also, but the seal had dried and cracked and wouldn't generate pressure at the slave. Certainly replace the hose and slave, but if pedal still won't engage consider replacing the master. Steve PS...ACT makes good clutches too.
-
Jason, Not being judgmental but that stuff'll mess with you bigtime! Didn't Van Gogh drink that? You see what happened to him!:dead: Just tryin to look after a fellow Z'er...:nervous: For me, it's our house, saving/investing and kids. What's left over (after the Z) goes to my MRoady, tools and video games. Now that the Z is 99% done, I'll start saving up for my next project (after I'm done saving for the garage addition! Eek!)
-
yep...didn't lowball you here. Glad you got it sold!
-
...recheck the nuts holding the mustache bar to the body and bar to diff, too.
-
New diff mount? New arrestor strap? Did you also check driveshaft u-joints? How do you know your R200 is good? Did the clunk return after installing the new diff? The only thing I'm aware of which would cause urethane bushings to behave like that is for them to be poorly made. Otherwise, I've heard rear end clunks being from strut bolts, rear control arms and u-joints, but you seem to have eliminated that part of the equation...Do a search for "rear end clunk" and see what I've missed... If it's not that, then maybe something related more to your clutch is going to be responsible for the problem, since it's happening during shifts.
-
Jason-- I tried it both ways, then realized from the graphic on the box that Dynomax recorded airflow rates with inflow through the off-center opening and outflow through the center one. No idea if it makers a difference. Plus, the muffler exit sits more concentric within its opening, as you alluded to in your post.
-
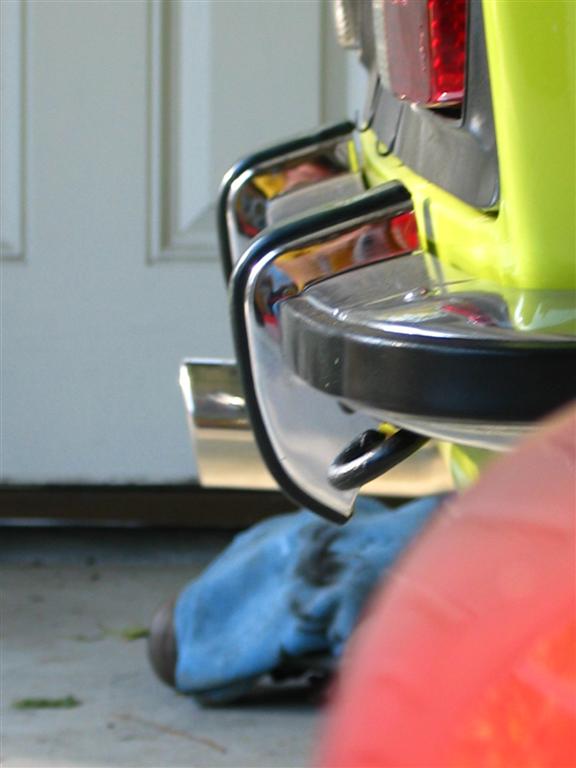
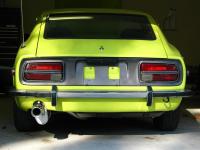
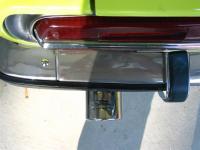
The tip that comes with the kit fits inside the muffler tip, and narrows its ID to about 2". I've been looking around for a suitable replacement that also has the length to get it out from under the car so exhaust fumes aren't sucked back into the cabin, and found this one at PepBoys, of all places. It's 3.5" OD with a resonator built in, but ID remains 2.5". It is 8" long, and extends about 2" past the bumper after installation. COsts about $25. JC Whitney offers a similar-sized one by Pacesetter, as part of their Monza lineup, but it costs a little more at $36 plus shipping. After install it quiets the muffler a little but still maintains an agressive tone. My wife thinks it sounds a little louder than my M roadster (stock exhaust) but has no "ricer" sound at all. My neighbor (not a car guy) thought it sounded "Awesome--the sound of accomplishment!"

-
1) They've been on that build for about a year, so it's not really a "new" article 2) Maybe you missed my thread. http://www.classiczcars.com/forums/showthread.php?t=28266&highlight=msa+header Someone brought attention to that CM issue in an earlier thread (which I can't find right at the moment), so I went and read the article, bought the issue and decided to give it a go.