xray
Member
-
Joined
-
Last visited
Everything posted by xray
-
 Great idea! I'd buy one and use it, for sure...
 -
Checked their website, no pics....Would you mind posting pics of yours for evaluation? What's the jute look like? Are there slots for the luggage straps cut into the rear deck carpet? Thanks, Steve
-
OK....you've GOT to tell the story behind that photo. I mean, how does it end? Butt really--how'd you get that pic?
-
I just recently installed all new weatherstripping to my Z (5/72 build) and had minimal problems with the aftermarket (Precision, I think) seals I bought from MSA. There is some "irregularity" to the free edges of the hatch/body inner seal, but it seals nicely and looks fine. I don't know about JCW, but the MSA prices were not unreasonable. Steve
-
I purchased the carpet from CDM recently. Well made, with thick padding, but cut pile...a big no-no for me. Still looking for good loop pile carpet. Banzai Motorworks advertises a carpet kit, so I may give him a call about a sample or something... Steve
-
I'm looking for the engine bay mounting hardware for the brake/fuel and clutch lines, the brackets, screws and rubber insulators....PM me! Steve
-
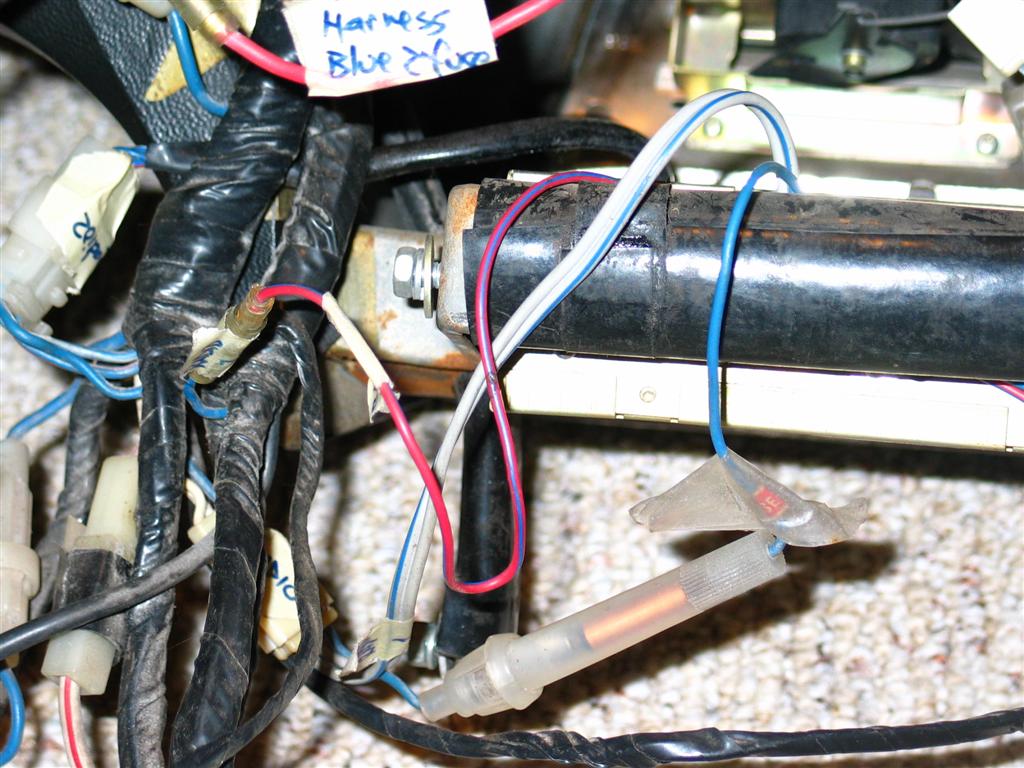
Enrique, Thanks for the pics..Mine is still taped to the harness with blue tape, but now I know what to plug into and where to wire the fuse... Steve
-
Wow....excellent stuff! I'm going to print out a copy and stash it with my Z folder.... My Fave quote from Mr. K (emphasis mine): "Most people, even today, believe that the German designer, Goertz, designed the Z car, but I actually created the car.I really liked the XKE because it was so slim and aerodynamic and had good legroom. I told Tokyo, "This is the kind of car we should build for America." I think today's Z is too fat. I really don't like a fat car (laughter). I like a slim car. " Thanks! Steve
-
Bo- Would you mind posting a pic of the fuse holder and its location? Mine is 5/72 also, and either it doesn't have one or I'm mis-identifying it.... Thanks, Steve
-
Hmmm..27-year old barn find in Maine means there IS rust in that car... Look at the drain holes on the floorboards...Exactly how mine looked, and right after the undercoating was off I was on the phone with Charlie Osborne.... Other than that, it looks good. Big points for the dash being uncracked...I hope it scores around 2-3k, being an East Coast car Steve Edit: Not too fired up about how the undercarriage looks, especially that pic fourth row on the right...Looks like a patch panel to me....Could prove problematic if that rust creeps up beyond the floor...
-
-
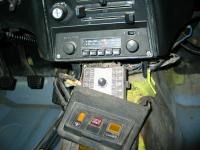
here are a couple pics of mine... When I removed the dash for replacement and subsequent refitting of the gauges and radio, I had to reposition the radio a number of times to get it to fit properly. Sorry I can't remember what caused the binding, but I remember distinctly being frustrated by something that seemed very easy at the time of removal.... Steve
-
Randy, If you can't turn off the radio at the radio power knob, have you tried cleaning the contacts?
-
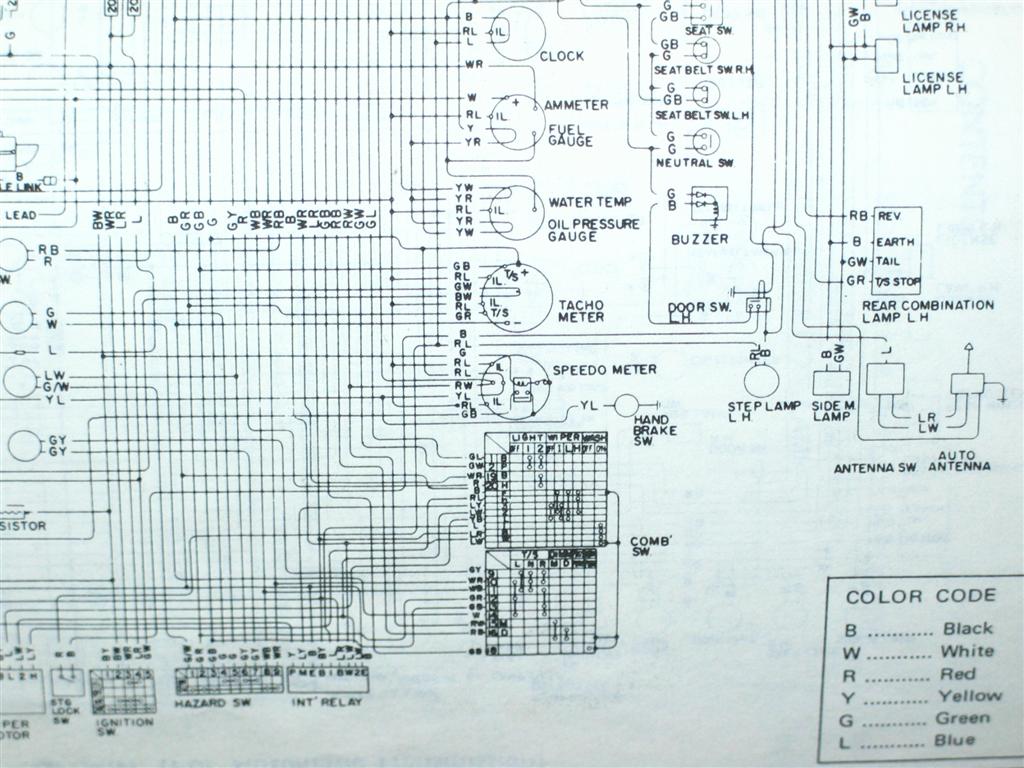
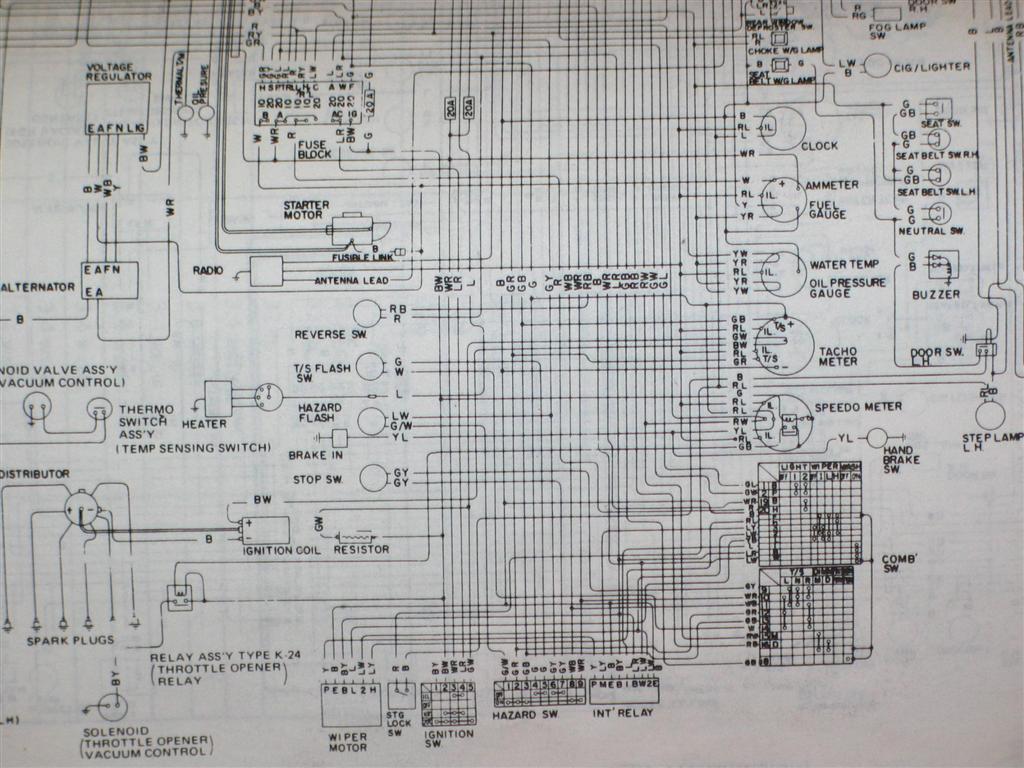
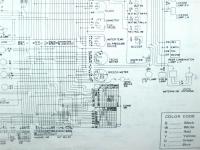
So I looked a little closer and have to amend what I said earlier. The blue wire from the back of the radio is NOT for the antenna switch (at least not on my radio). My radio (5/72 build) has a trio of wires coming from the front left of the radio right behind....the antenna switch! Blue (main power) with blue/red and blue/white for up/down circuit (section BE page 29 of the 1973 FSM). I'm no electrical guru (obviously) but it looks like the blue wire from behind the radio provides power while the red/blue wire provides dash illumination along with the other gauges.... Steve
-
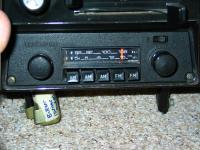
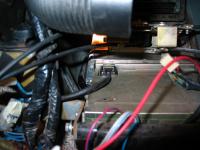
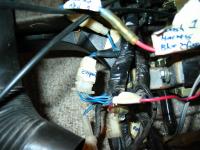
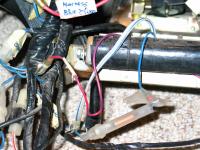
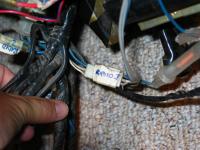
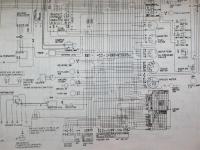
Hi Randy.... I enclosed a few pics of my radio (with dash extricated from my Z) as it attaches to the wiring harness of the dash. As you can see, two power wires exit, both blue. One, along with the speaker wires (gray and gray/blue) goes to the 20A spot on the fuse block as you can see on my 1973 FSM wiring diagram (page BE-5, for those following along at home...) and connects to the power asntenna. The second connects to the red/blue wire and has an inline 2A fuse. The red/blue wire appears to be along the same wiring backbone as the gauges and illuminator rheostat, probably providing power and lighting to the radio. I see no reference to a yellow wire, so I wonder if you need to dig a bit further into the harness? (yikes!) Big black wire is the antenna lead. It's been 18 months since my car last ran, so my memory is a bit foggy...I think my radio was powered regardless of the ignition switch position--is that what you mean by "won't turn off?" Good luck, Steve

-
...wouldn't upload with the rest

-
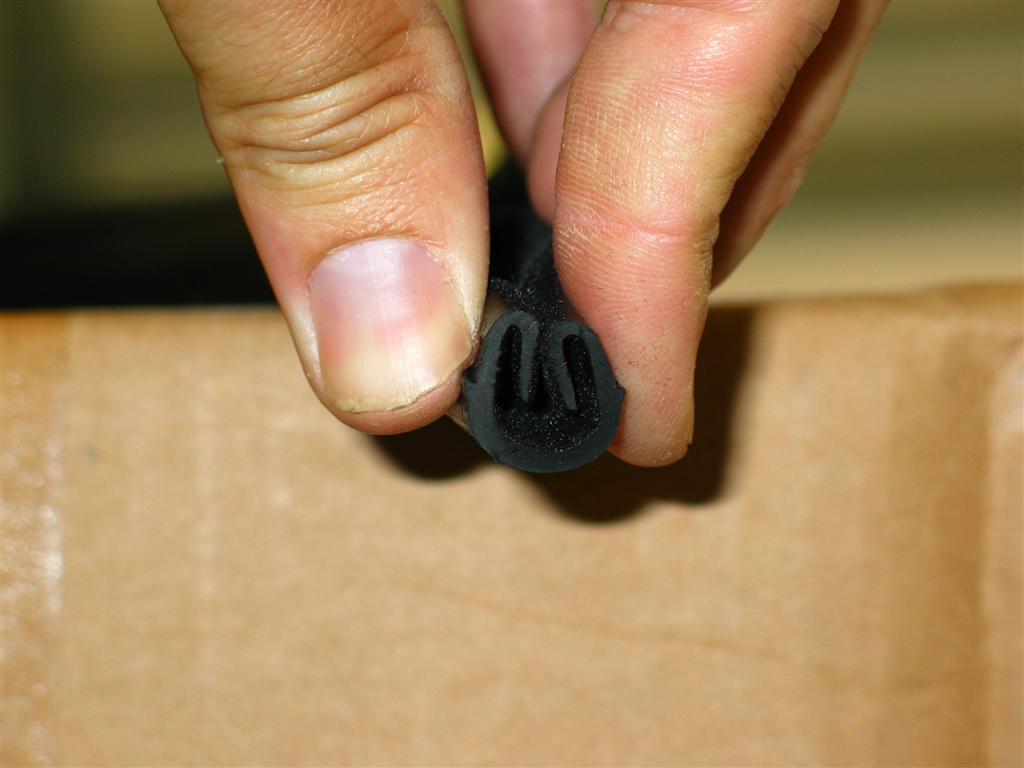
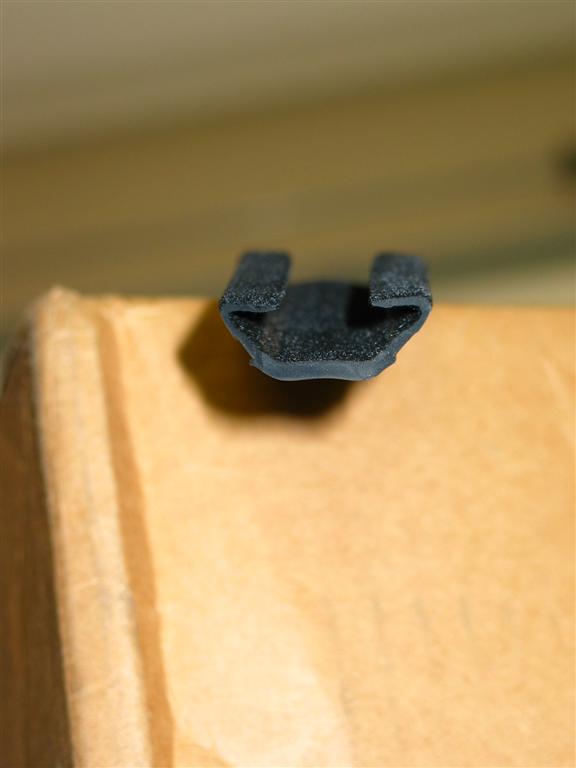
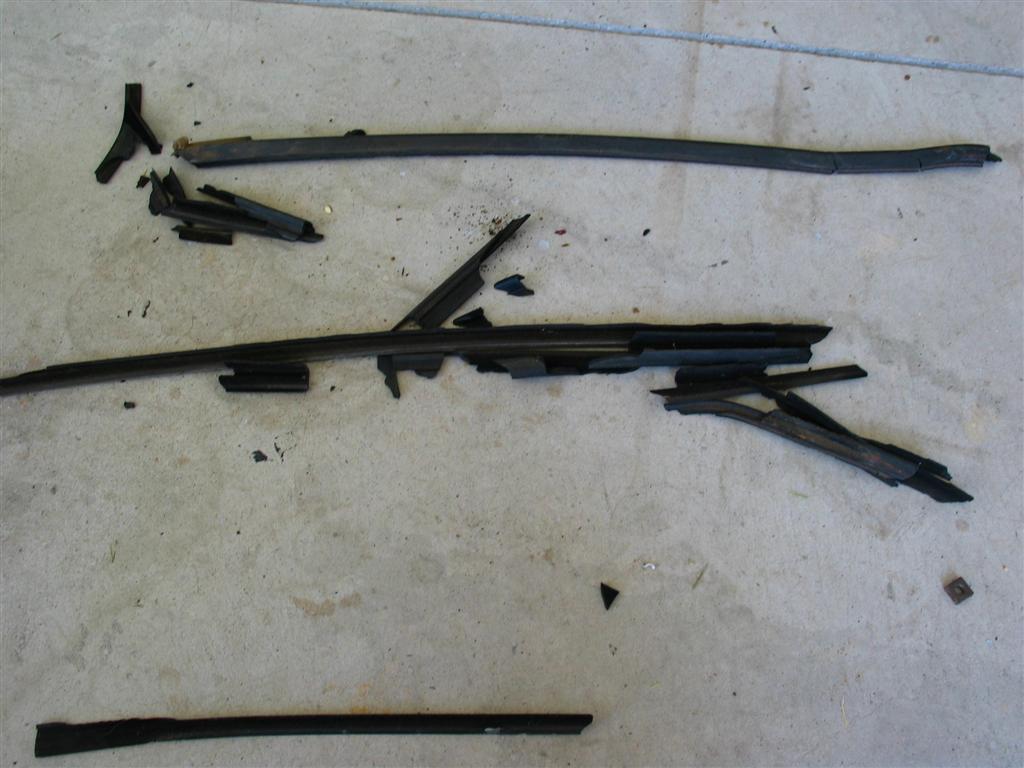
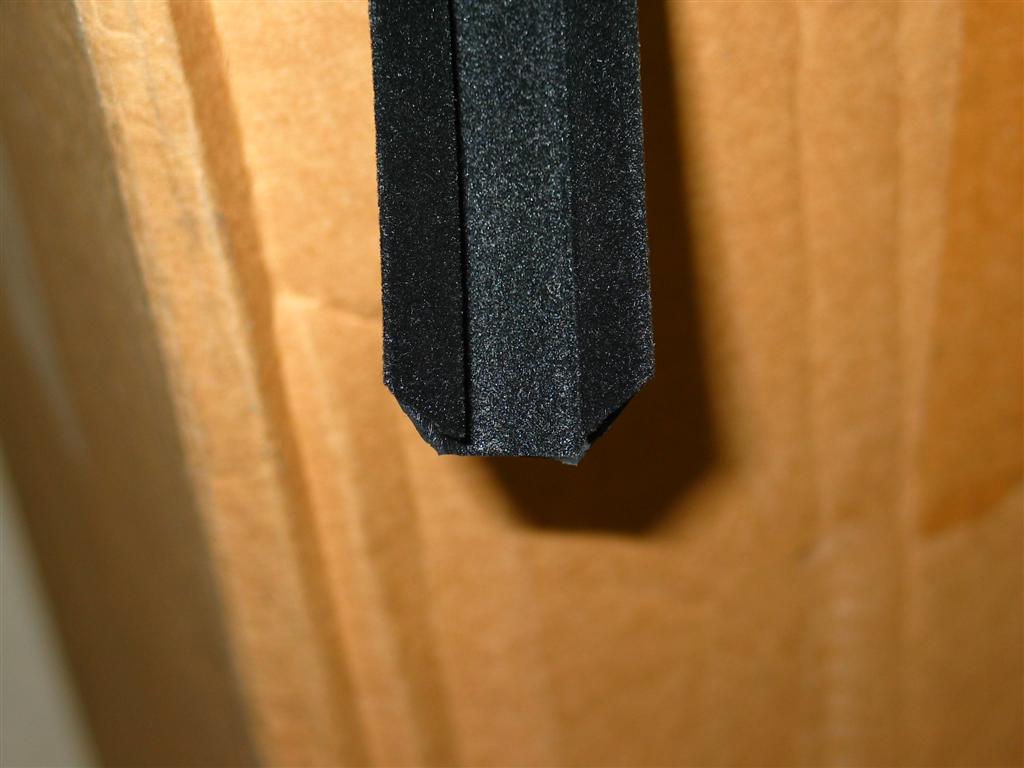
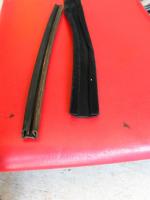
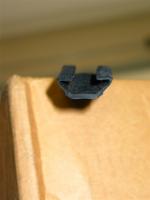
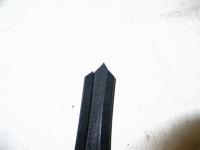
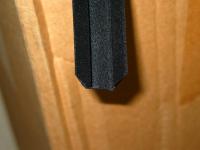
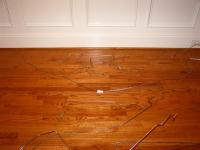
Just finished this part of my restoration, thought I'd add some pics to the thread since they seemed to be missing and some folks had requested them... First is a comparison between old and new. New is JC Whitney part #184874 Rubber Window Channel Felt. Dimensions are 9/16 x 17/32 x 17/32. (pic #2) I bought 2 @ 10.99 each. Each strip leaves about a foot left over, so I don't think you can get away with one piece for both sides. It's as easy as it gets to replace this stuff. Hack the old stuff out (pic 3)--it's got only a little adhesive on there which pried off with a flat blade screwdriver. Clean the metal with some solvent. Cut the felt to length. Use the lengths of the old felt to guide you. The leading edge requires the felt to be cut shorter than the frame because several screws protrude into it where it is secured to the door. Cut the corners of one end of each piece of the new felt at 45 degree angles (pic 4), then snip off the tip to make a squared end. (pic 5) That is the end which mates up with the other strip at the back angle of the window frame near the quarter window. Smear a little weatherstrip adhesive on the frame, some on the felt, then wait for it to set (1-2 minutes or so.) (Pic 6) I start with the shorter side that goes along the rear door, but it doesn't matter. Squeeze the folded ends of the new felt together, (pic 7) slide it into the frame, starting at the back corner that you beveled, then work your way to the end that is secured within the door. Same process for the leading edge of the frame. Takes maybe 30 minutes a side, depending on how much effort it requires to remove the old stuff. When reinstalling the frame, it is possible to bolt it in place with the window NOT in the channel...line up the back edge of the window in the channel flet when bolting in your window frame! Good luck Steve
-
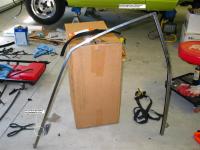
DKD021, A buddy of mine and I are going to get them back in place, since keeping them all together and properly oriented will likely be frustrating for one person. I'm going to do something similar to what you describe for the insulators. Most of mine look OK, but not great. There is no repro for them (after looking for the last year), and none of the Z junkyard shops have anything available when I contacted them. Ditto with the brackets for the firewall. Seems like it would be an easy piece to fabricate for those with contacts in the industry, but a couple of attempts in the past (by members of this board, IIRC) have been non-starters. What tubing are you using? Did you just clean up your originals? Go with Classic Tube, or a different vendor? Thanks, Steve
-
I'm no accountant....but I bet his bank account might not have the cashto spare, unless his parents kick in for it. Who knows--he/his family may be loaded. But if he doesn't have that cash for income taxes (that doesn't even include payroll tax--double that if he claims to be self-employed as a "consultant") his sweet 350's gonna be sold to be pay the IRS! *cue the libertarians* Steve
-
No problem. Not many folks seem to be in the need for tube replacement now, but if someone is in the future, hopefully a search will turn up this thread and pics and help someone else out!
-
The company is "Classic Tube," as stated in the title http://classictube.com/ Steve
-
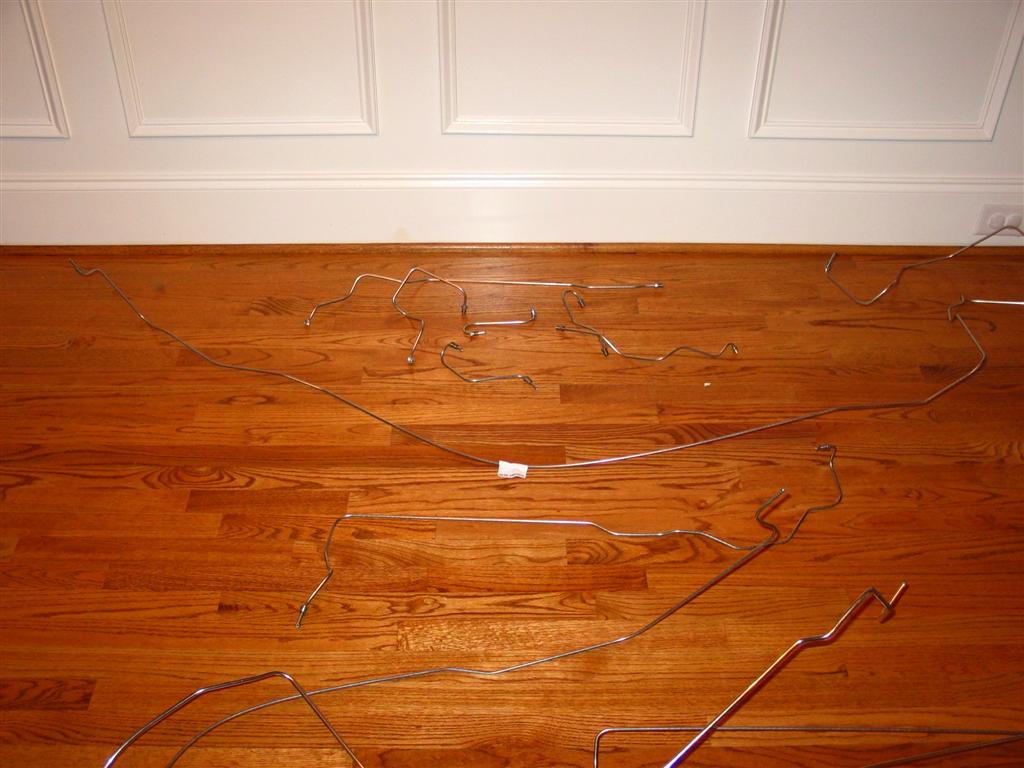
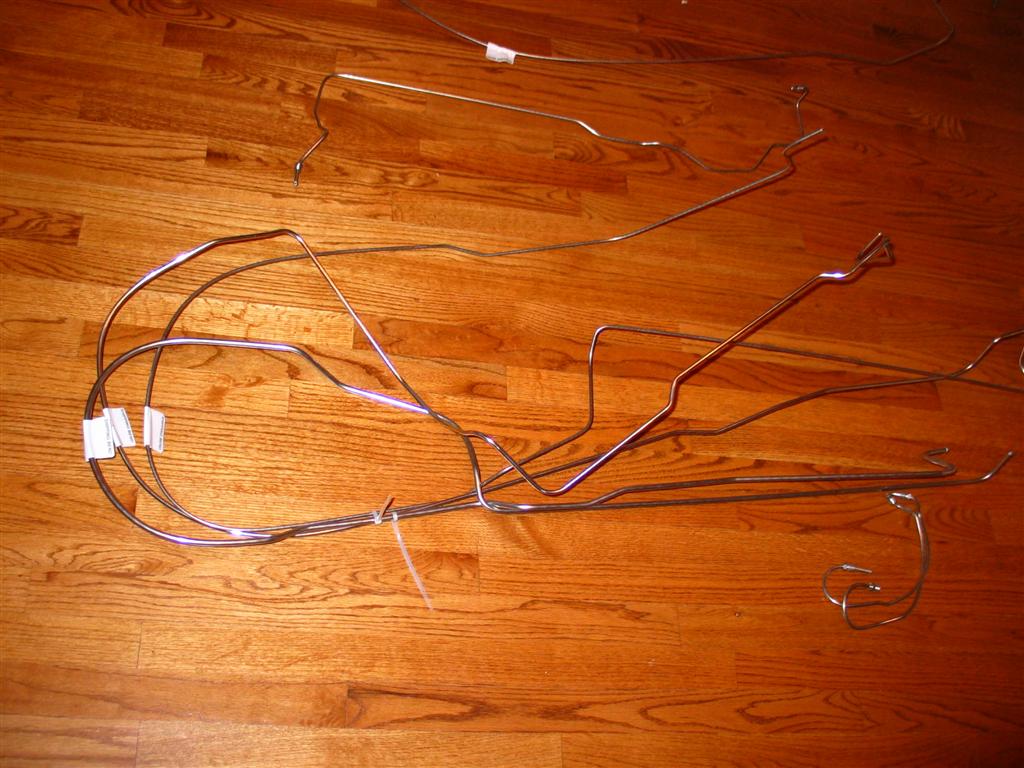
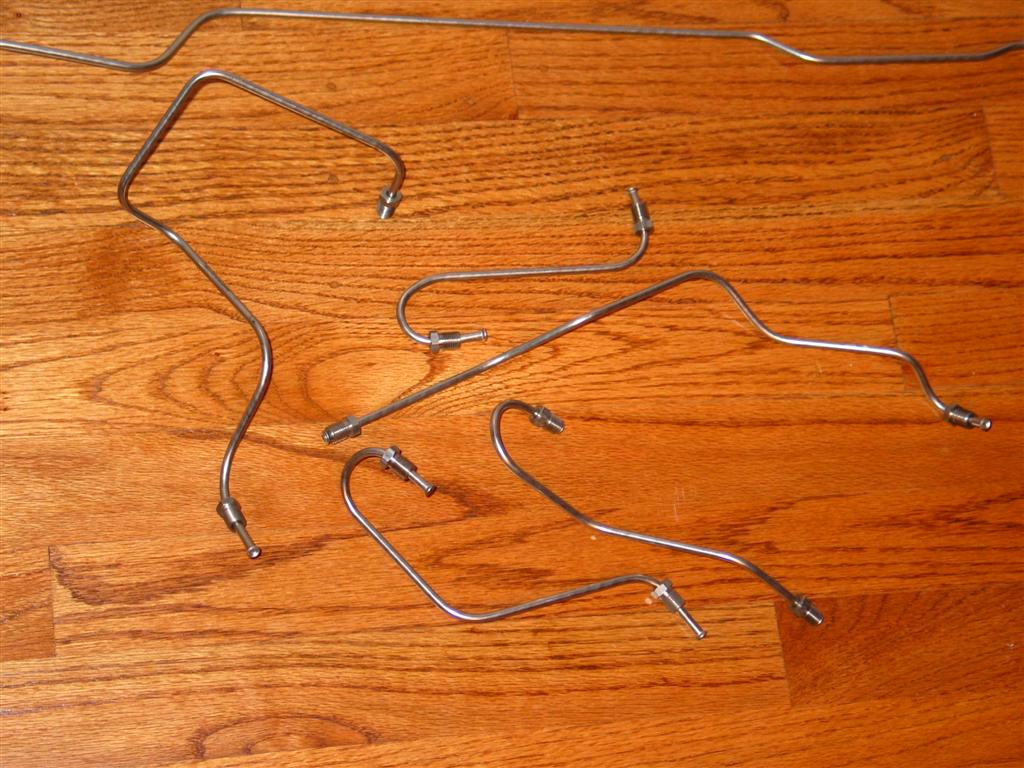
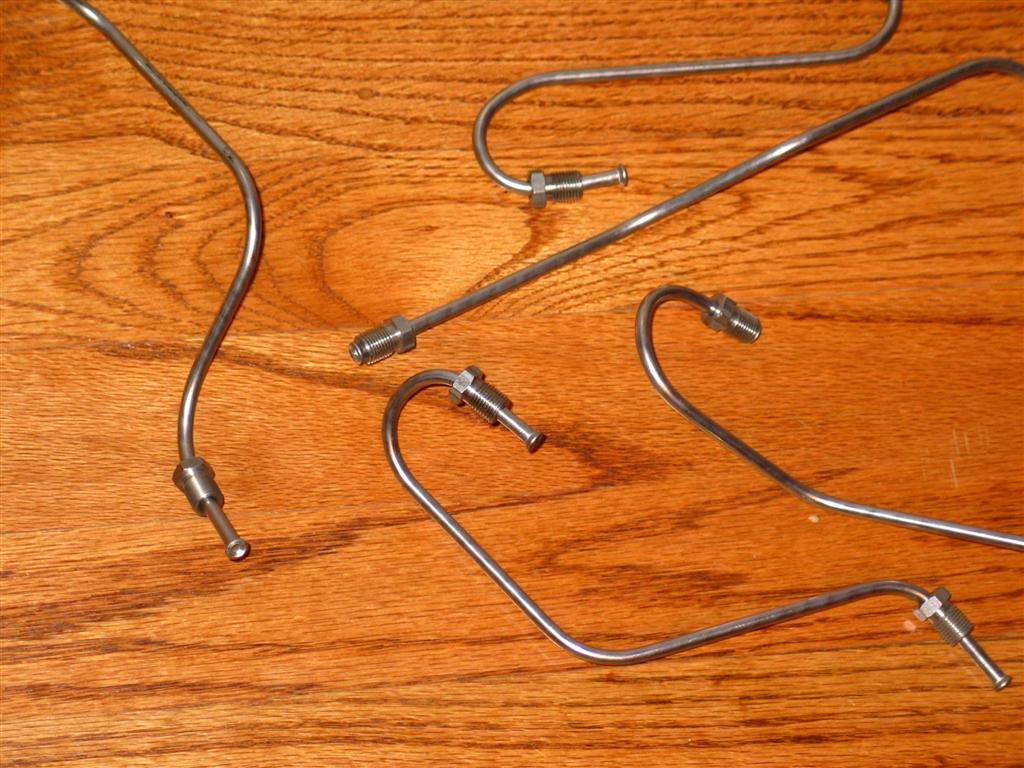
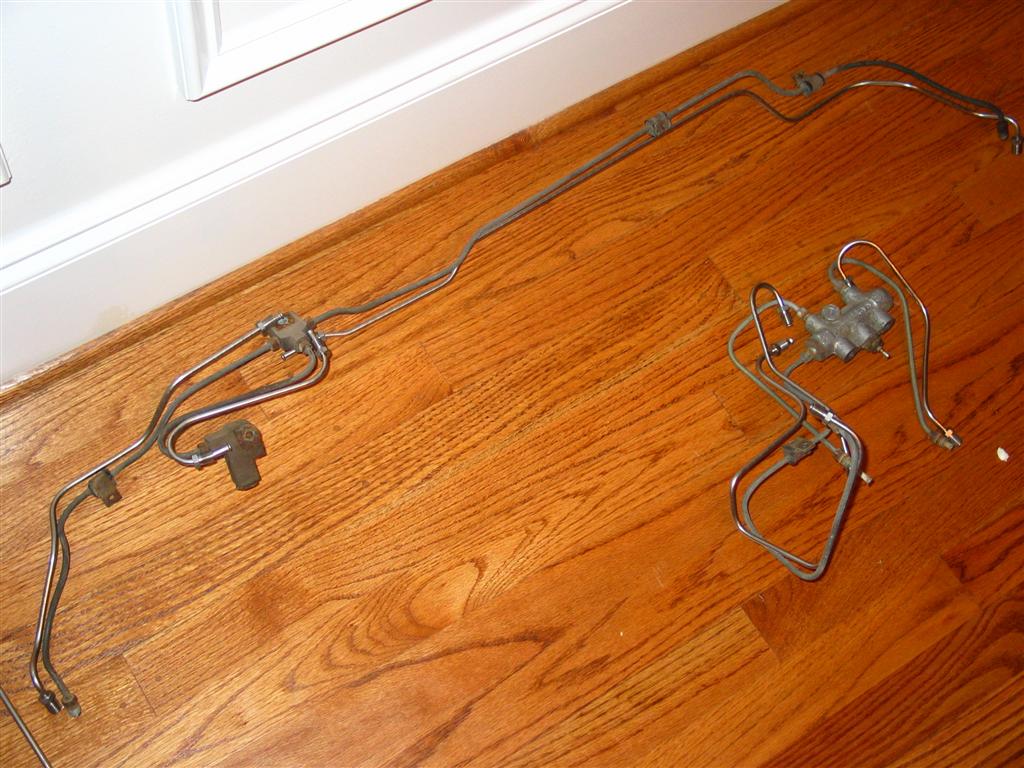
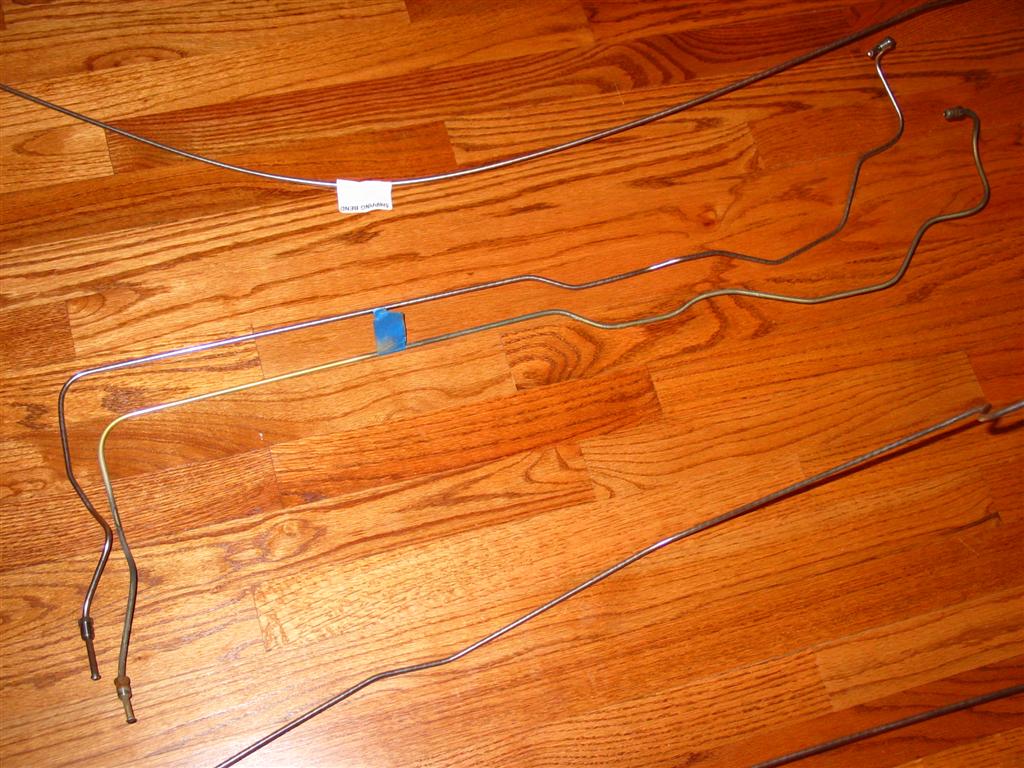
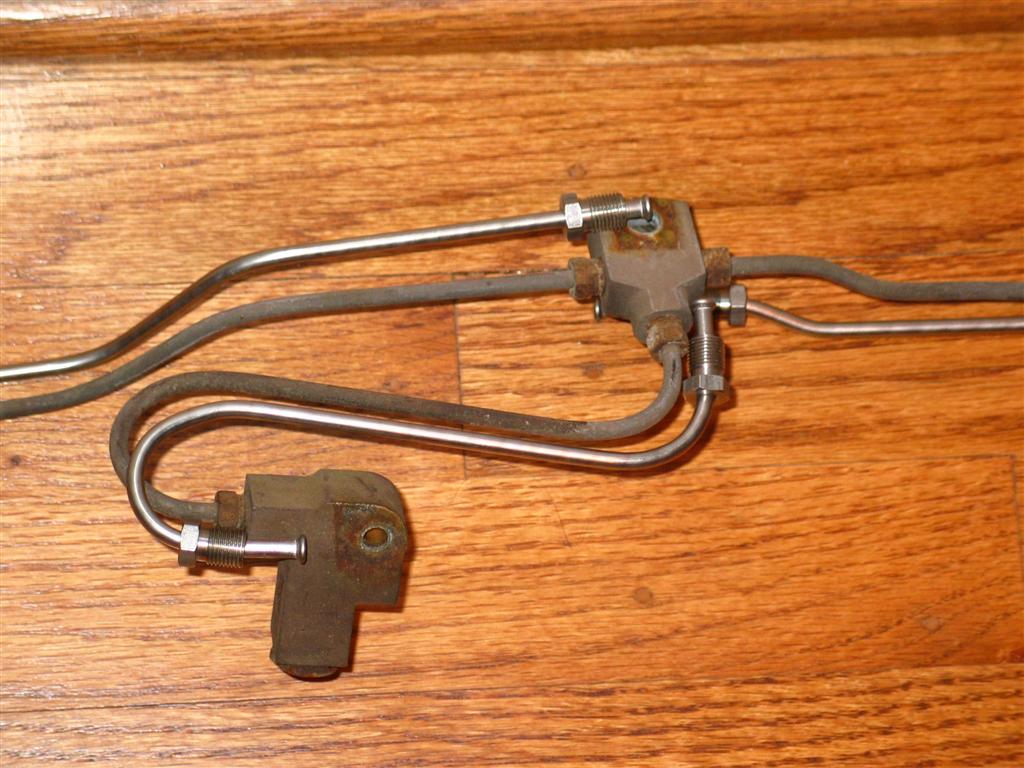
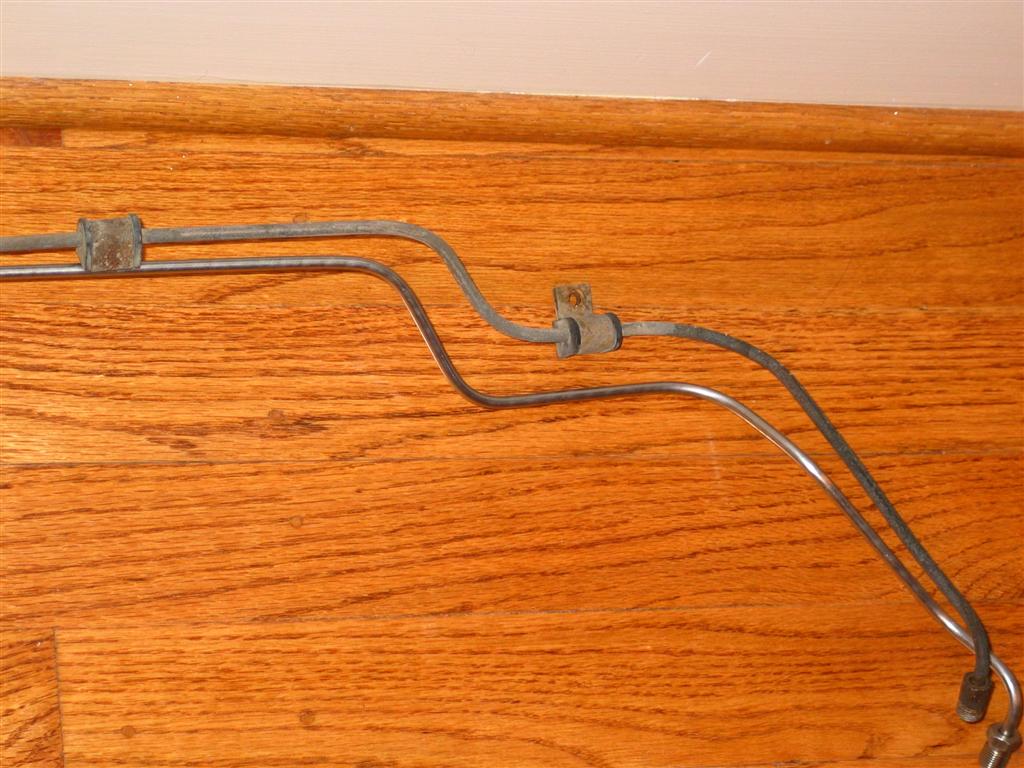
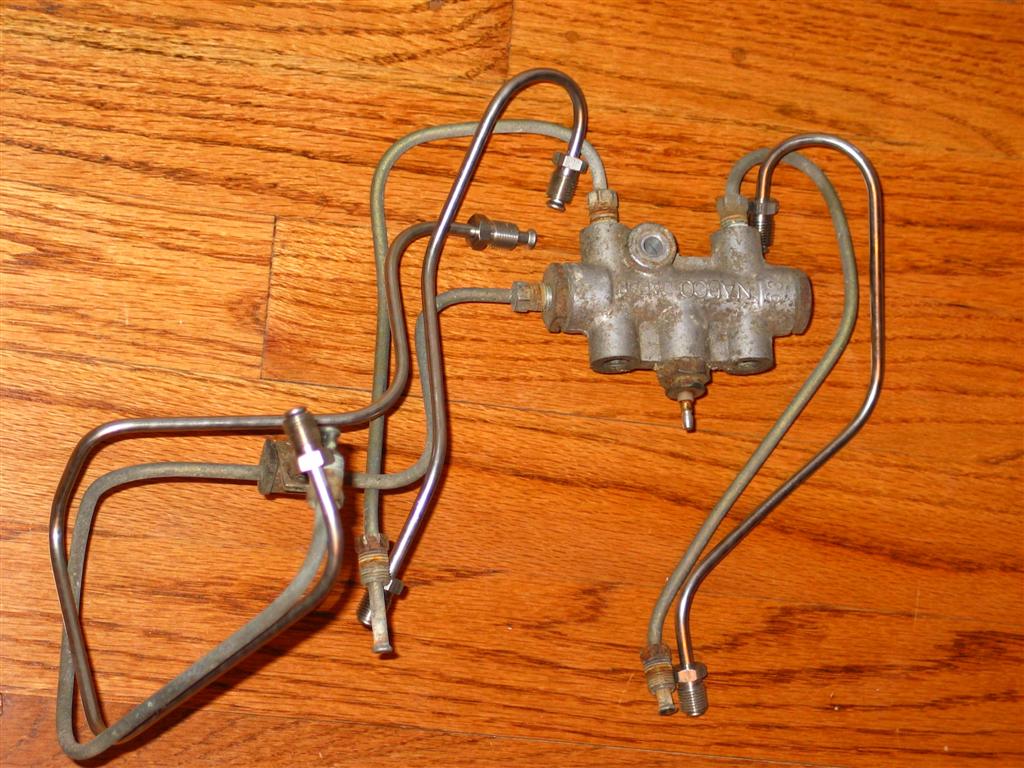
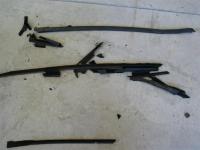
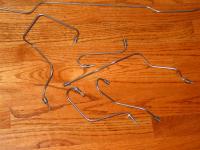
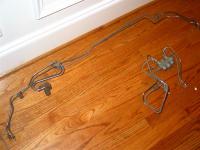
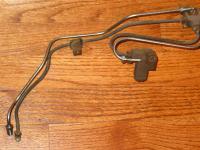
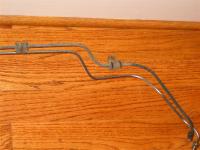
I just got in my replacement steel lines for the brakes, gas and clutch. After searching every source I could come up with, I had no success except at Classic Tube. Thinking I could bend them myself, I attempted to replicate some of the BMC to brake switch tubes as a test case. I spent several hours trying (and subsequently failing) to accurately bend to my satisfaction the short lengths available from NAPA for those lines. I tried sanding, priming and painting my old lines (Eastwoods CAD paint system), but they look very fake, and don't deal with the core issue--inner corrosion. Plus, the flares and nuts were rusted and would look pretty poor against a nice shiny engine bay. So, I purchased the stainless steel fuel set (supply, return and vapor), clutch line and brake set. Not cheap. But, the bends and overall appearance are definitely high quality. The hardware is a perfect match. Some of the bends look a little too "machine" bent (which they are) compared to the more "hands on" bending done in the 1970s, but with some minor tweaking they fit and look great! I know stainless isn't OEM, but it'll last longer than plating, won't corrode as quickly, and maintains (IMO) a better appearance overall. Here are some pics:


-
If you're not willing to pay the market price, you might be pleased with the work some .0000 steel wool and some Flitz or Autosol will do for them.
-
Keep a tabs on Ebay..they show up once or twice a month or so. Maybe you could do a custom search for "240z e88" and the Ebay site will email you updates when items are listed. Sorry your project is on standby. Steve
-
can you hear it? (rub rub rub) That's the taxman's hands rubbing together waiting to deliver some fun news come early 2008.... Wonder if he'll sell the Z to pay for the taxes!