xray
Free Member
-
Joined
-
Last visited
Everything posted by xray
-
 Looking very good! Finally some reward for the hard work!
 -
Smokes on start up? Please. No problem. Spongy brakes? Pshaw--child's play RUST? Hmmm...where there's smoke, there's fire. Whatever rust you see, the reality is ike 5-10 fold worse, as most Z cars rust from the inside, like within the front frame rails, quarter panels, rockers etc. Bottom fenders rust from debris caught up where the cowl drains into the inner fender...floorpans rust for a number of reasons including moisture trapped in between metal and asphalt sound deadener, leaky door seals and leaky heater tubes under the dash...Battery tray rusts from moisture/battery acid corrosion etc etc Need pics of engine bay, battery area specifically... The front framerail looks scariest to me. I wonder what hides under that undercoating? Is the T/C rod bucket going to fall off next? Better be good with a welder. The passenger floorpan is replaceable, and it looks like the seller knows it. If I had to guess, the seller has realized the extent of restoration involved and may be trying to bail. Seems upfront about it in the ad, although the car hasn't "started to rust"--more like "the rust has started to show." Can't blame him/her after seeing that frame rail... Caveat emptor. Examination in person is likely paramount. Pics only give a "tip of the iceberg" impression to me...Restorable? Sure! Just depends on how much $$$ you have. If you can get someone who likes welding a shot at it you may do fine. Everything else pictured looks good... Good luck. Edit: Zak's Z: I am not sure the dash is a cap...where do you see a seam? I looked closely at the pic with the driver's door open, and it looks like a real dash to me...
-
I'll go out on a limb here...I've seen this car before...I can't find the link, but this car was recently sold on Ebay from its owner in Arkansas...maybe the new buyer is trying to unload it? Tried and failed to export it? Who knows... His feedback is zero, so caveat emptor and all that. BTW, if I understand correctly, "LT" is Corvette drivetrain while "LS" is the Camaro
-
The short list... Ferrari Dino Austin Healey 3000 Jag E-type convertible Triumph TR6 Lotus Elise TVR Sagaris, T350 Aston Martin Vanquish Morgan Aero 8 ...and other unattainable vehicles
-
Ha ha...if it's over 45 outside and not too windy, I'll be playing! God Bless thermal underwear and windshirts.... Steve
-
Sorry for the snow up there...Here in NC it's 48 degrees and sunny. May hit high 60s by weekend. Still doesn't change the fact that my Z is on &*%@#&@^# jackstands and I have to spend my vacation scraping off undercoating (Grrrr...), but at least I can play some golf.
-
 May be redundant from the floorpan pic...I POR'ed, primed, undercoated, then will paint. That's how the factory did it based on my car and a few others I've seen. After looking at Ed's car in his gallery, I may leave it black...
 -
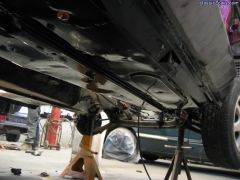 POR says that if you do it in the same session, primer isn't necessary. If you wait and come back (like I did 3 weeks later) they suggest using some 400-grit sandpaper then some primer. Taking no chances I just ordered the Tie Coat stuff. As far as undercoating, Ed said he used Herculiner, and I may go along the same route since it is a brush-on system. And it looks good in his gallery. I think AutoZone carries it--at least that's what the herculiner website says.... Good luck! Hope it turns out well. Steve
 -
Holy Crap. I hate hearing these stories--mainly because FGZ has a near-effortless solution---I have to shamelessly plug FirstGen Z for a moment. His spindle pin puller is nothing short of amazing. Absolutely best $$ spent on tools so far. Both pins came out easy--no swearing (a rarity in my garage), no beating/torching/begging/BFHing/machine shop/replacement. Screw it on, turn the nut, out comes the pin. Can't get easier than that. BTW, First Gen, you sell them for less than the cost of a spindle pin...
-
Excellent work! What are you using for undercoat? I put down some Tie Coat primer thinking that some undercoatings may not stick well to the POR...Steve
-
I like it! Looks just like mine...Keep up the good work! Steve
-
Kmack: While I don't have the instructions, I found labeled pics and diagrams in a thread devoted to Pertronix install. http://www.classiczcars.com/forums/showthread.php?t=10538&highlight=pertronix Unfortunately, Bambikiller recently (October 2005) deleted his posts (so he IS still lurking...), but the pics should explain what you need. His first post says you can PM him, so try that too... My 2 cents Steve
-
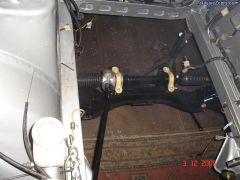
Bryan: I finished up my suspension redo recently also. Wow, what an improvement! Of course, it's been subsequently dismantled to begin underbody resto, but I had to drive it just once after finishing. I have to say my favorite part was burning out the remaining old rubber bushings. The image of the moustache bar burning on both ends was great--not to mention annoying my neighbors! Congrats on the milestone... S
-
"The Z really just needs someone to sit down and put some time in on it. The dollars are low. Get some rubber window and door gasket and hatch trim on, patch a few weak spots in the floors, replate the rear bumper, get a front bumper and a front grill for it." Could you elaborate on that point... Thanks Steve
-
bump. anyone have some ideas?
-
Pics would be great! I probably can't make it down there until after Thanksgiving--hope it's not too much trouble... Steve
-
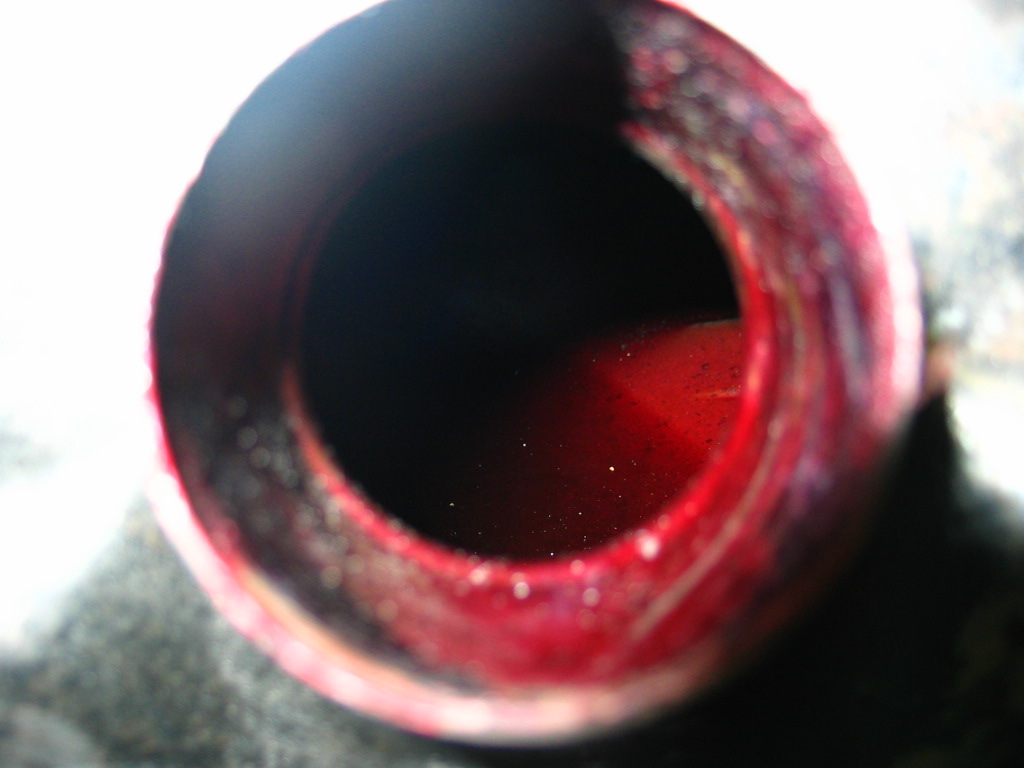
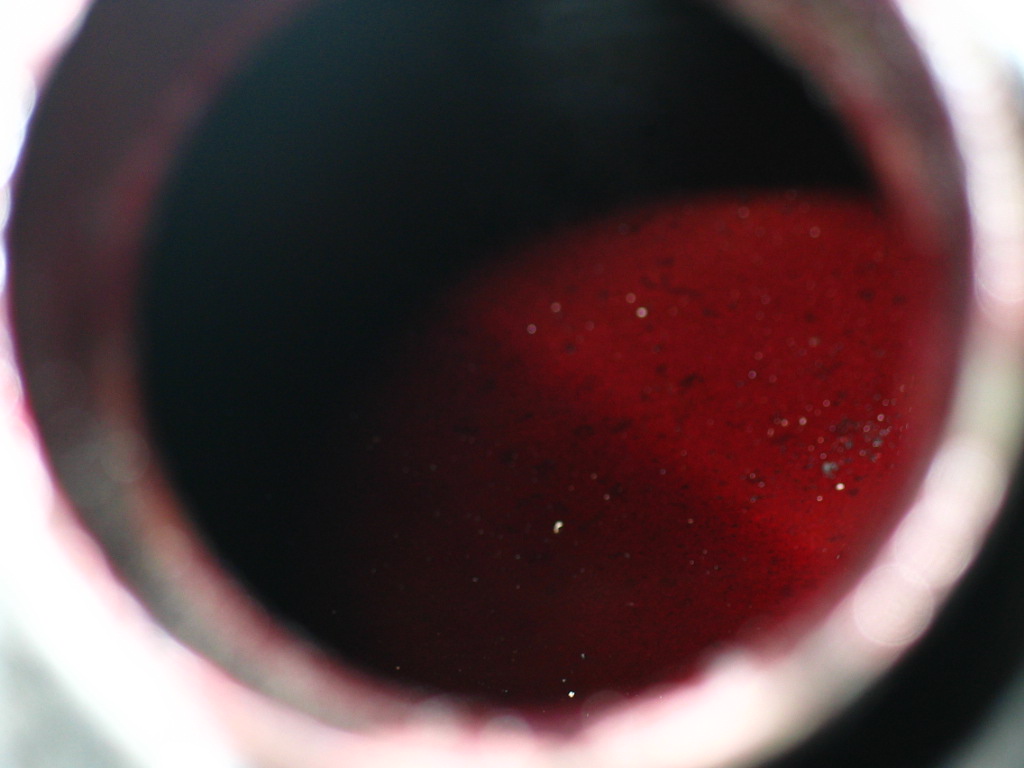
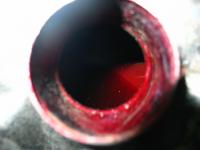
Hey all! Need some advice...After 2 tanks of gas I noticed my fuel was still real orangey-brown. Drained the tank (also orangey-brown gas), so I figured it was crud in my tank (and probably fuel ines) that was making the mess. So last week I pulled off my gas tank and have been working on getting it prepped for tank sealer. I noticed some magenta/red colored stuff along the sender hole, and when I peered into the tank via filler hole, this is what I saw... This red stuff is in filler-hole (passenger) side of the tank (a single baffle blocks left and right sides), and there's none of this stuff along the walls (that I can see) There is surface rust and varnish-type changes where this red stuff is not present Is this someone's previous botched fuel tank sealer job? Is this Red-Kote as previously mentioned in a recent post? How can/should I proceed? Fill it with stripper and hope it comes off? Send it to the radiator shop as is? Ignore it and overcoat it with POR's tank sealer? Any ideas/suggestions would be appreciated... Steve

-
How are the wiring harnesses, headlight extensions (particularly driver's side) and gas tank? How's the rear bumper? Is the engine bay worth picking over? Steve
-
Agree with Arne... Given your goals, however, I would strongly consider keeping your dished pistons and going turbo. Max hi comp L28 (that I've heard of) power is maybe 180 to the wheels before you get to 11:1 or 12:1 and race gas requirements...L28ET is the way to beat the street racers with 25+ year old technology. Good luck.
-
Sounds like a party...pm me with directions, and I'll be there Sunday or Monday morning. Need parts, but too many too list... How dismantled is the car? Steve
-
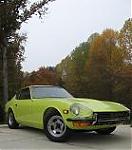
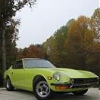
I get the feeling the pics don't give us the full picture of the car. Engine bay looks pretty clean (I think it's a smudgy camera lens on low-res setting). Rear spoiler not necessarily my style, but remember it's been modded and that restricts its appeal...Overall I bet it's a looker in person. Hope it sells high. As a slight tangent, I am a little bummed the car referenced below sold for what it did. Based on the pics, I would have hoped for 10k or better... EBay item #4588442627
-
I have dealt with him only once (bought a replacement oil pan), and despite it taking longer than I would have liked (2 weeks) it arrived in fine shape and without glitches... Take Zcar.com opinions with a grain of salt...
-
Definitely, but a "too loose" shoe is more easily fixed than a "too tight" one...at least for me Thanks for the advice! Steve
-
The shoes are different front vs rear (on the strut), but the same left vs. right. Rear shoe hooks into the e-brake flange (has square hole mounted on it), interfaces with the slot cut in the piston and is slightly longer than its mate which mounts in front and attaches to the adjusting wheel. Top return spring is green and has opposite-ended hooks in an S-type configuration. Bottom return spring has hooks on same side but bent 90 degrees so that they look like eyebrows when the spring is held horizontal. True, the lower return spring can be mounted anterior, but it is fully engaged and very tight, as my fingers will attest... FWIW, and messed around with the position of the cylinder in that slot, and that seemed to fix the problem. When turned, the drum slightly scuffs the shoes, and the drum spins as far as the axle without the drum attached... Of course, all of this is subject to change once the lines get hooked up and bled--who knows what problems still lurk! Steve
-
Thanks for the tips...The springs are well-engaged and were put back on the way I found them on disassembly (wheels spun fine with minimal engagement). I think the cylinders are on straight, but honestly not that sure. Because the other side was put on in an identical fashion I think it's an adjustment issue like you two are suggesting. I'll add that onto the "To Do" list for today! Steve