ZCurves
Free Member
-
Joined
-
Last visited
-
 Yep, still alive - Just Lurking. Thanks for checking on me!
 -
ZCurves changed their profile photo
-
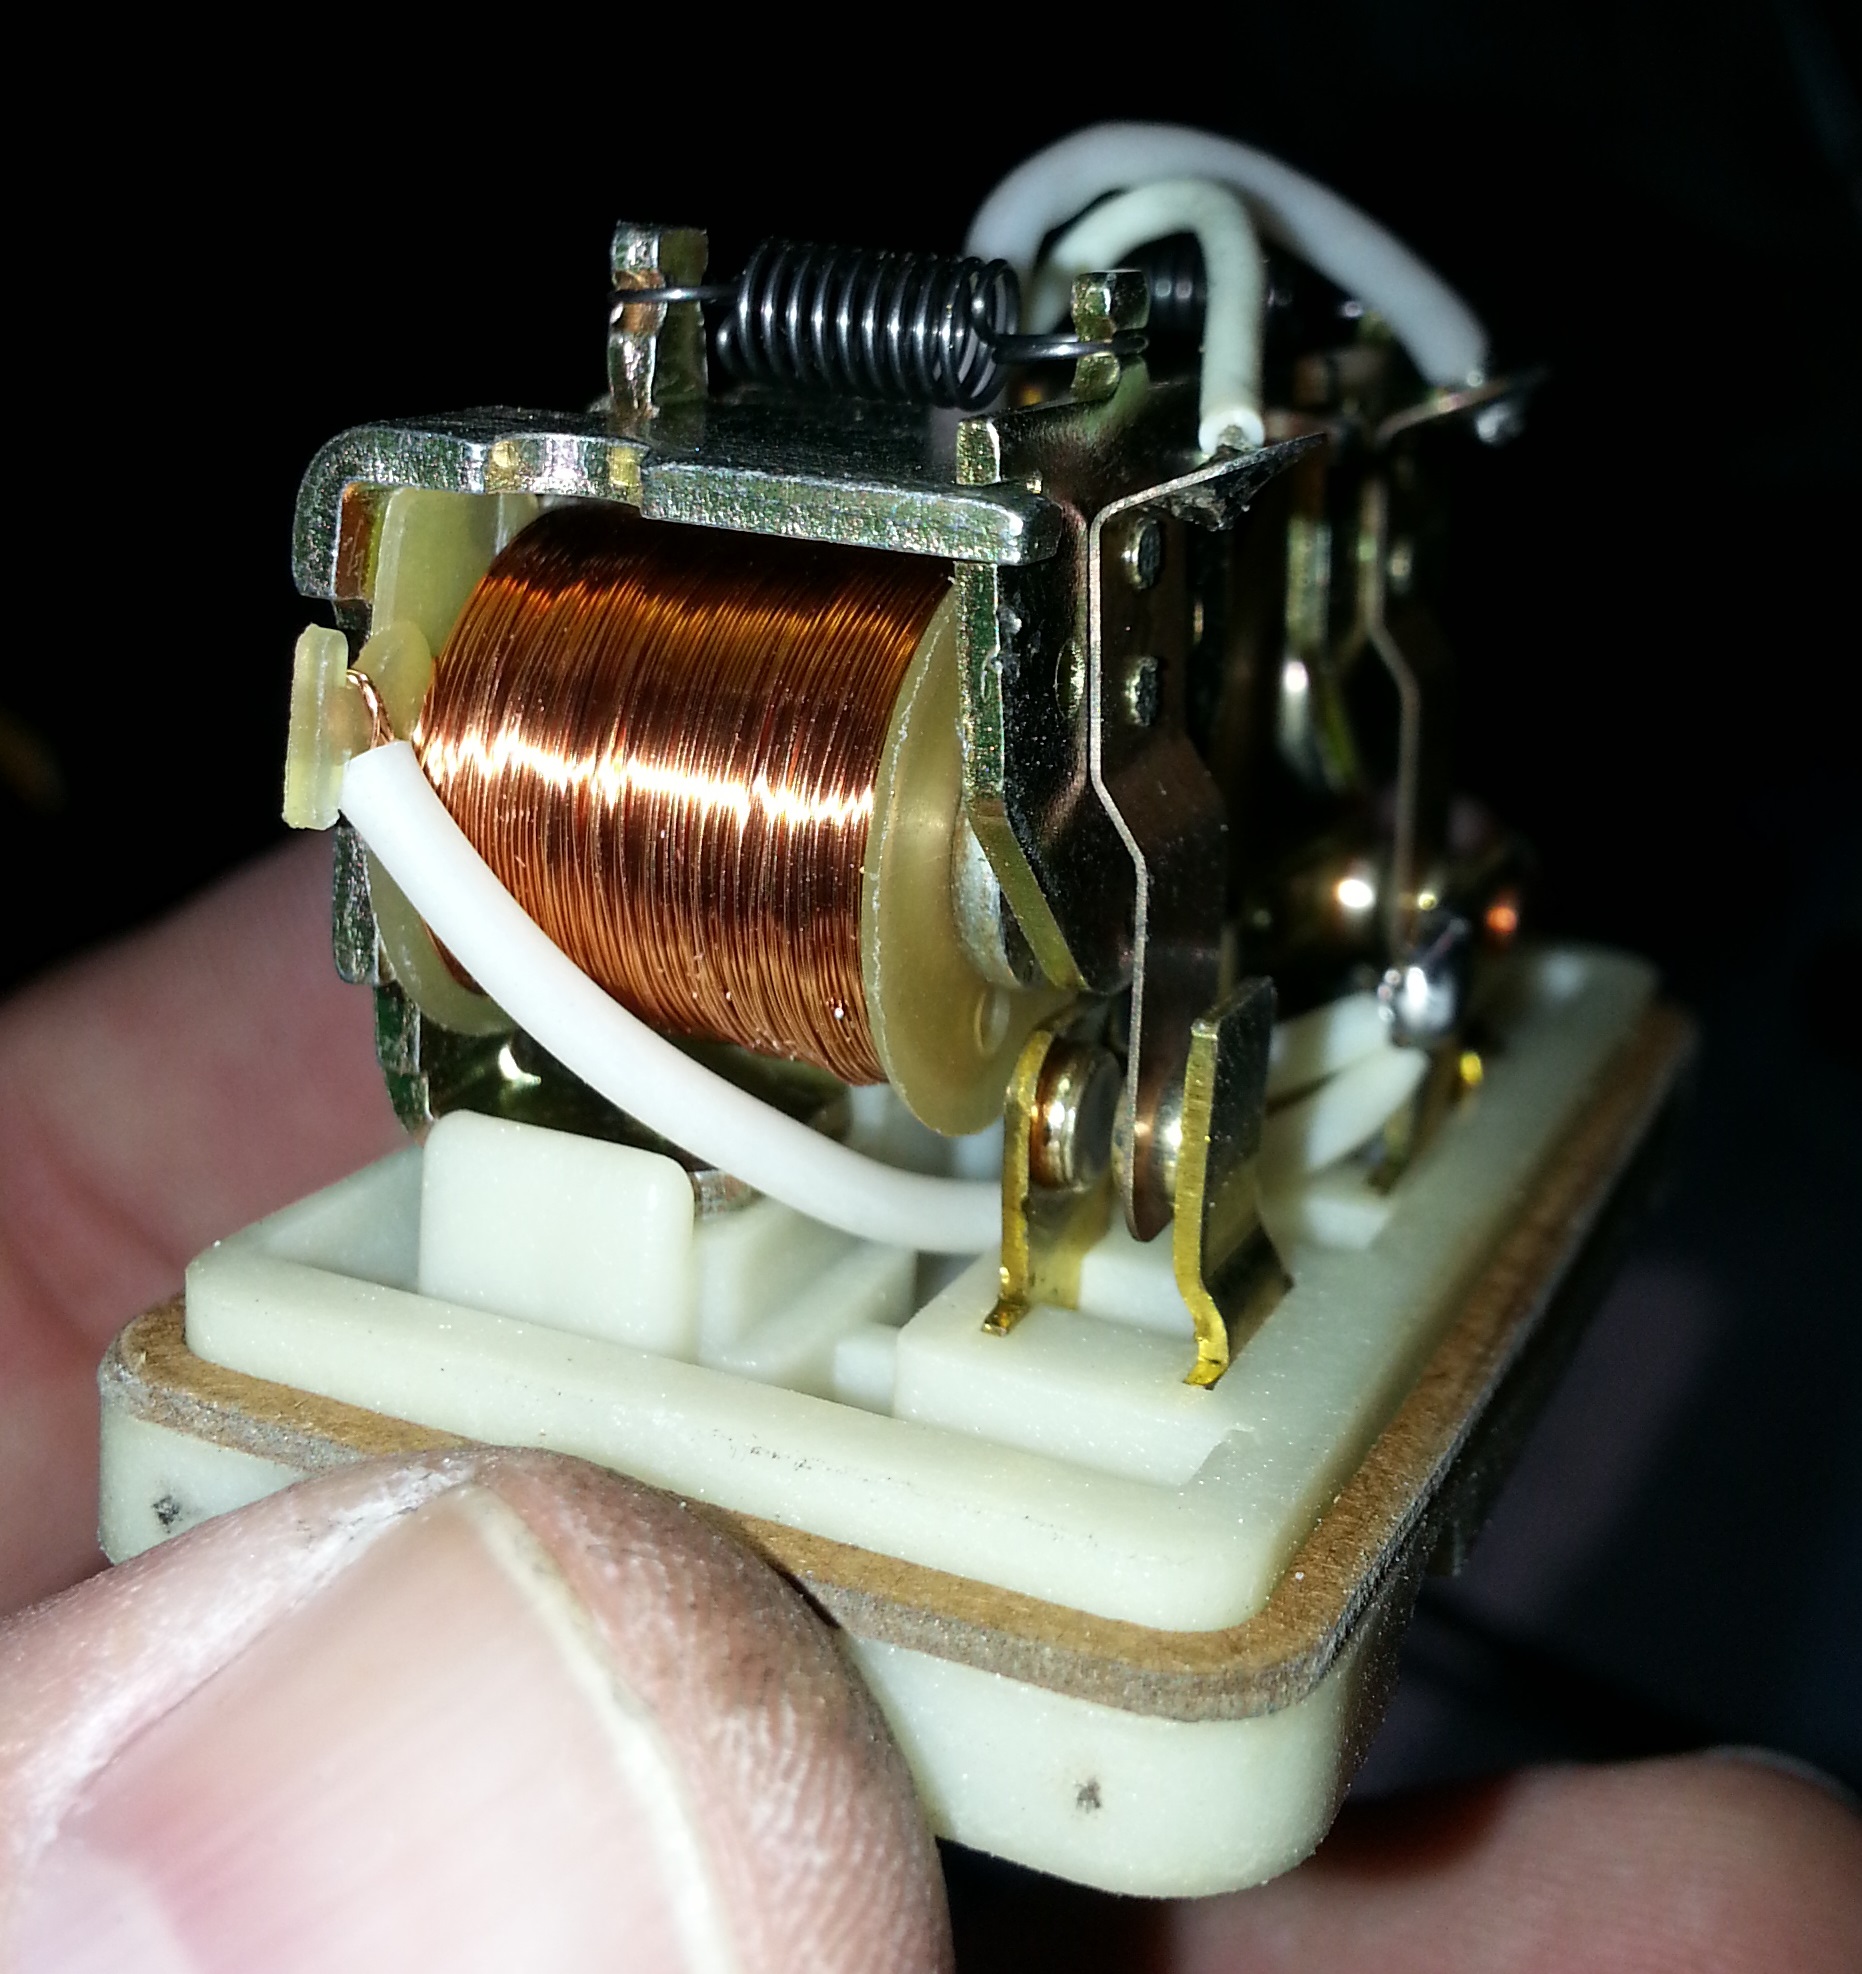
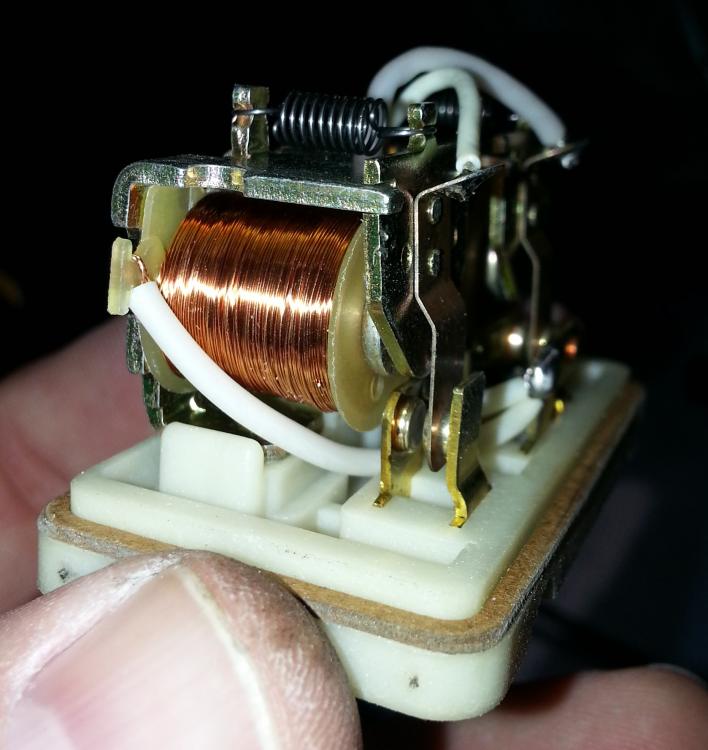
For me, It turned out (So far) that the particular relay was not the problem, but that fuel tank filter screen was clogged. This still presents a problem with these relays, because without a reliable source for new ones, more people will begin to suffer problems like this. These relays are actually two relays in one. The circuit and overall function could be split and used with separate relays. Basically, this relay checks to see if there is Oil Pressure before it allows the Fuel Pump to make contact and run. It really is not necessary - but is a good safety feature in terms of 1970's EFI. I am probably going to do a write up on how to either replace and keep the original functionality or eliminate the relay - mostly because of a lack of replacement parts.
-
Ok, if you are still needing some practical input.. I wrote on this exact topic several years ago - Unfortunately, I have had to do this a couple of times on several Z's over the years. Both times what I did was remove the exhaust manifold to make room. I then used a torch to heat the area on the Head near the broken stud - not the stud itself, just around it. Now for the 'fun' part - Using a small, very sharp chisel and a ball peen hammer - you begin tapping (with a corner of the chisel) counter clockwise until the stud begins to back out. Re-heat every once in a while. The stud will back out - You have to be real patient and take your time. Be careful not to nick the Head, let the chisel bite into the stud as you work it backwards. When you are done, be sure to blow out the bore with compressed air and use Anti-Seize on replacement stud.
-
I am going to have good weather this weekend. I am hopeful that I will have good news to report!!
-
CO and Zed Head, Your comments are why I have always liked our club - many members looking a problem from different angles... I may have become too focused on a potentially bad relay (which I will do a more thorough testing on). All of this started when I could not get the Z to start. The car will try to run with some starting fluid.. So, I started down the standard checklist to sort it all out. Checked all the Fuses, Fusible Links, Cold-Start Valve, Oil Pressure Switch, Check to see if I had a spark (Yes), tried a couple of Computer swaps (from known Good spares)- no difference. Checked the Fuel Pump and it would run in Start position (via the std. test) - BUT not the initial Buzz when key is initially turned prior to start. This is last one is what led me to deeper testing of the Fuel Pump Relay(s) - and led me here. After I resolve this relay issue, I will move to the AFM and TPS if I am not successful. Using the power of the many - there is bound to be something I missed and why I appreciate everyone giving me their 2 cents.
-
Thanks, I'll take a closer look.
-
Bada Bing!

-
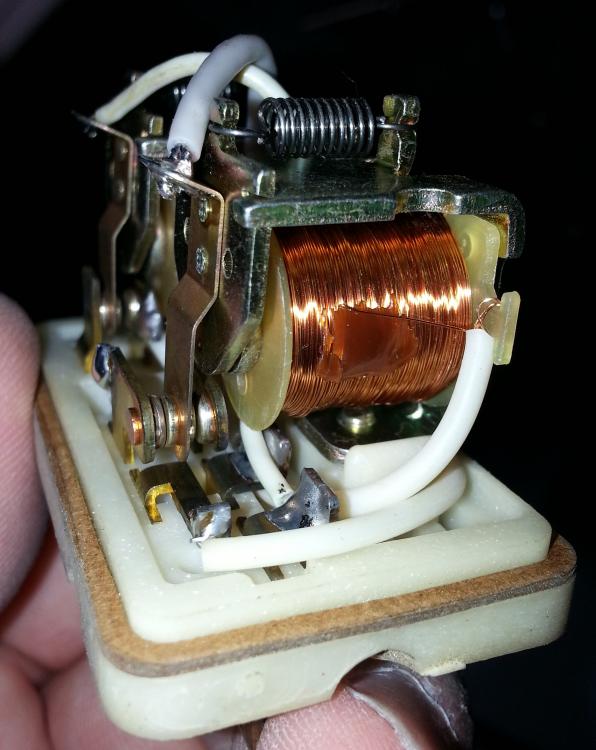
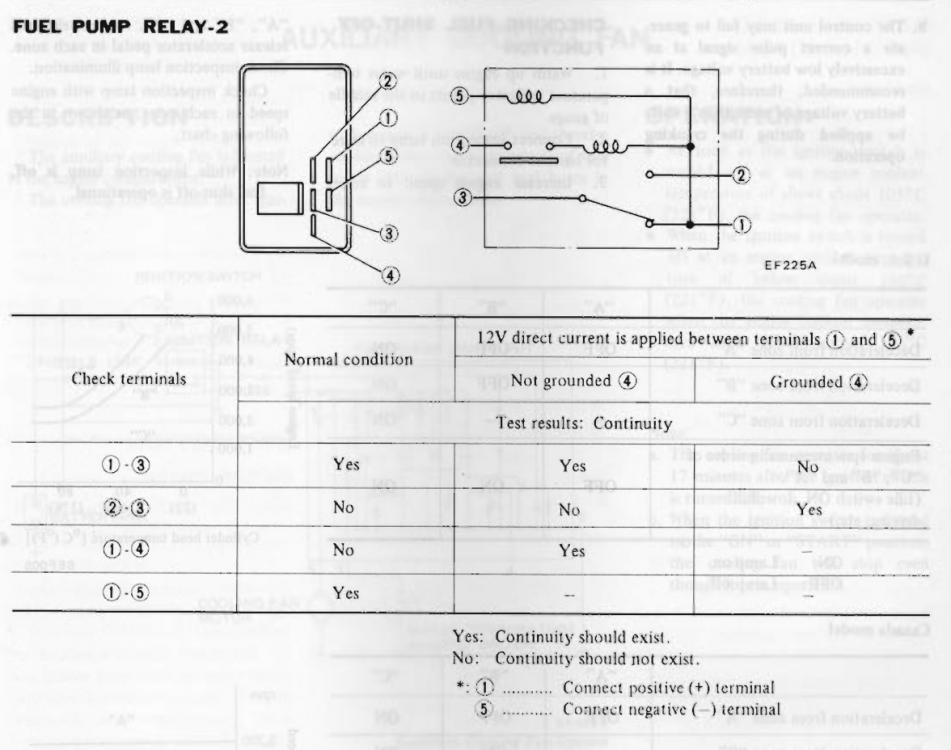
Yes I did, and the coils look fine - no corrosion. However, when I go through the test on the diagram from my original post, it fails on the third step.
-
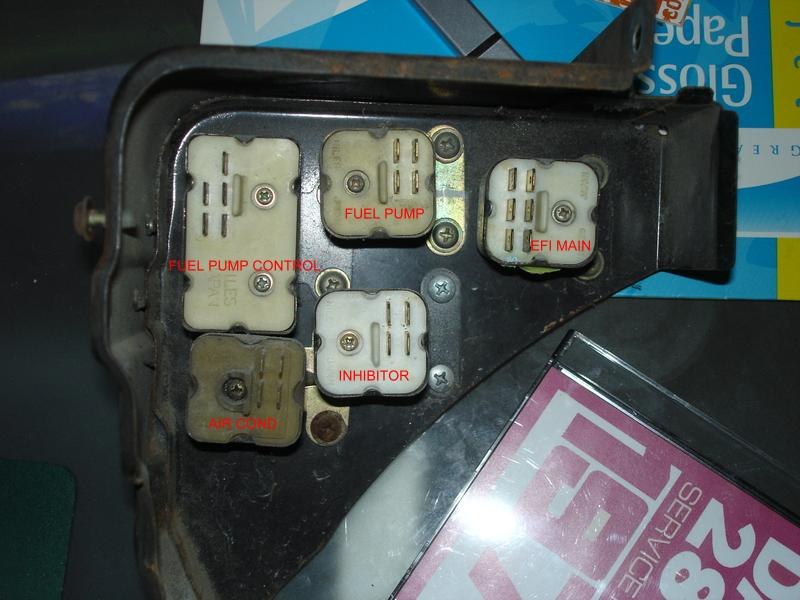
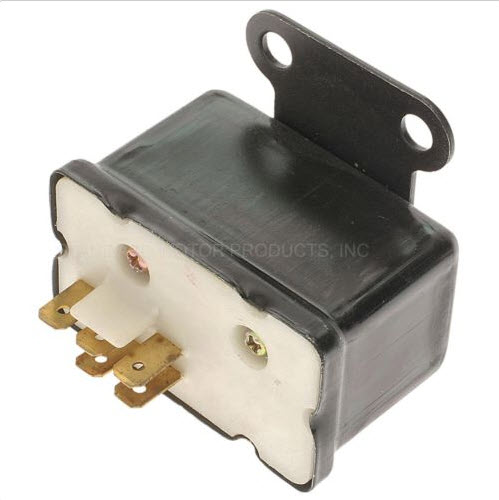
On the '78 Zcar, this relay is located in the engine compartment on the passengers side by the battery. It is under a black metal cover secured by four 10mm bolts (here is a pic I swiped from another member). The one I am looking for is the big one on the left. If the others look decent, you might grab those too! I sure do appreciate anyone willing to help me out! Thanks!
-
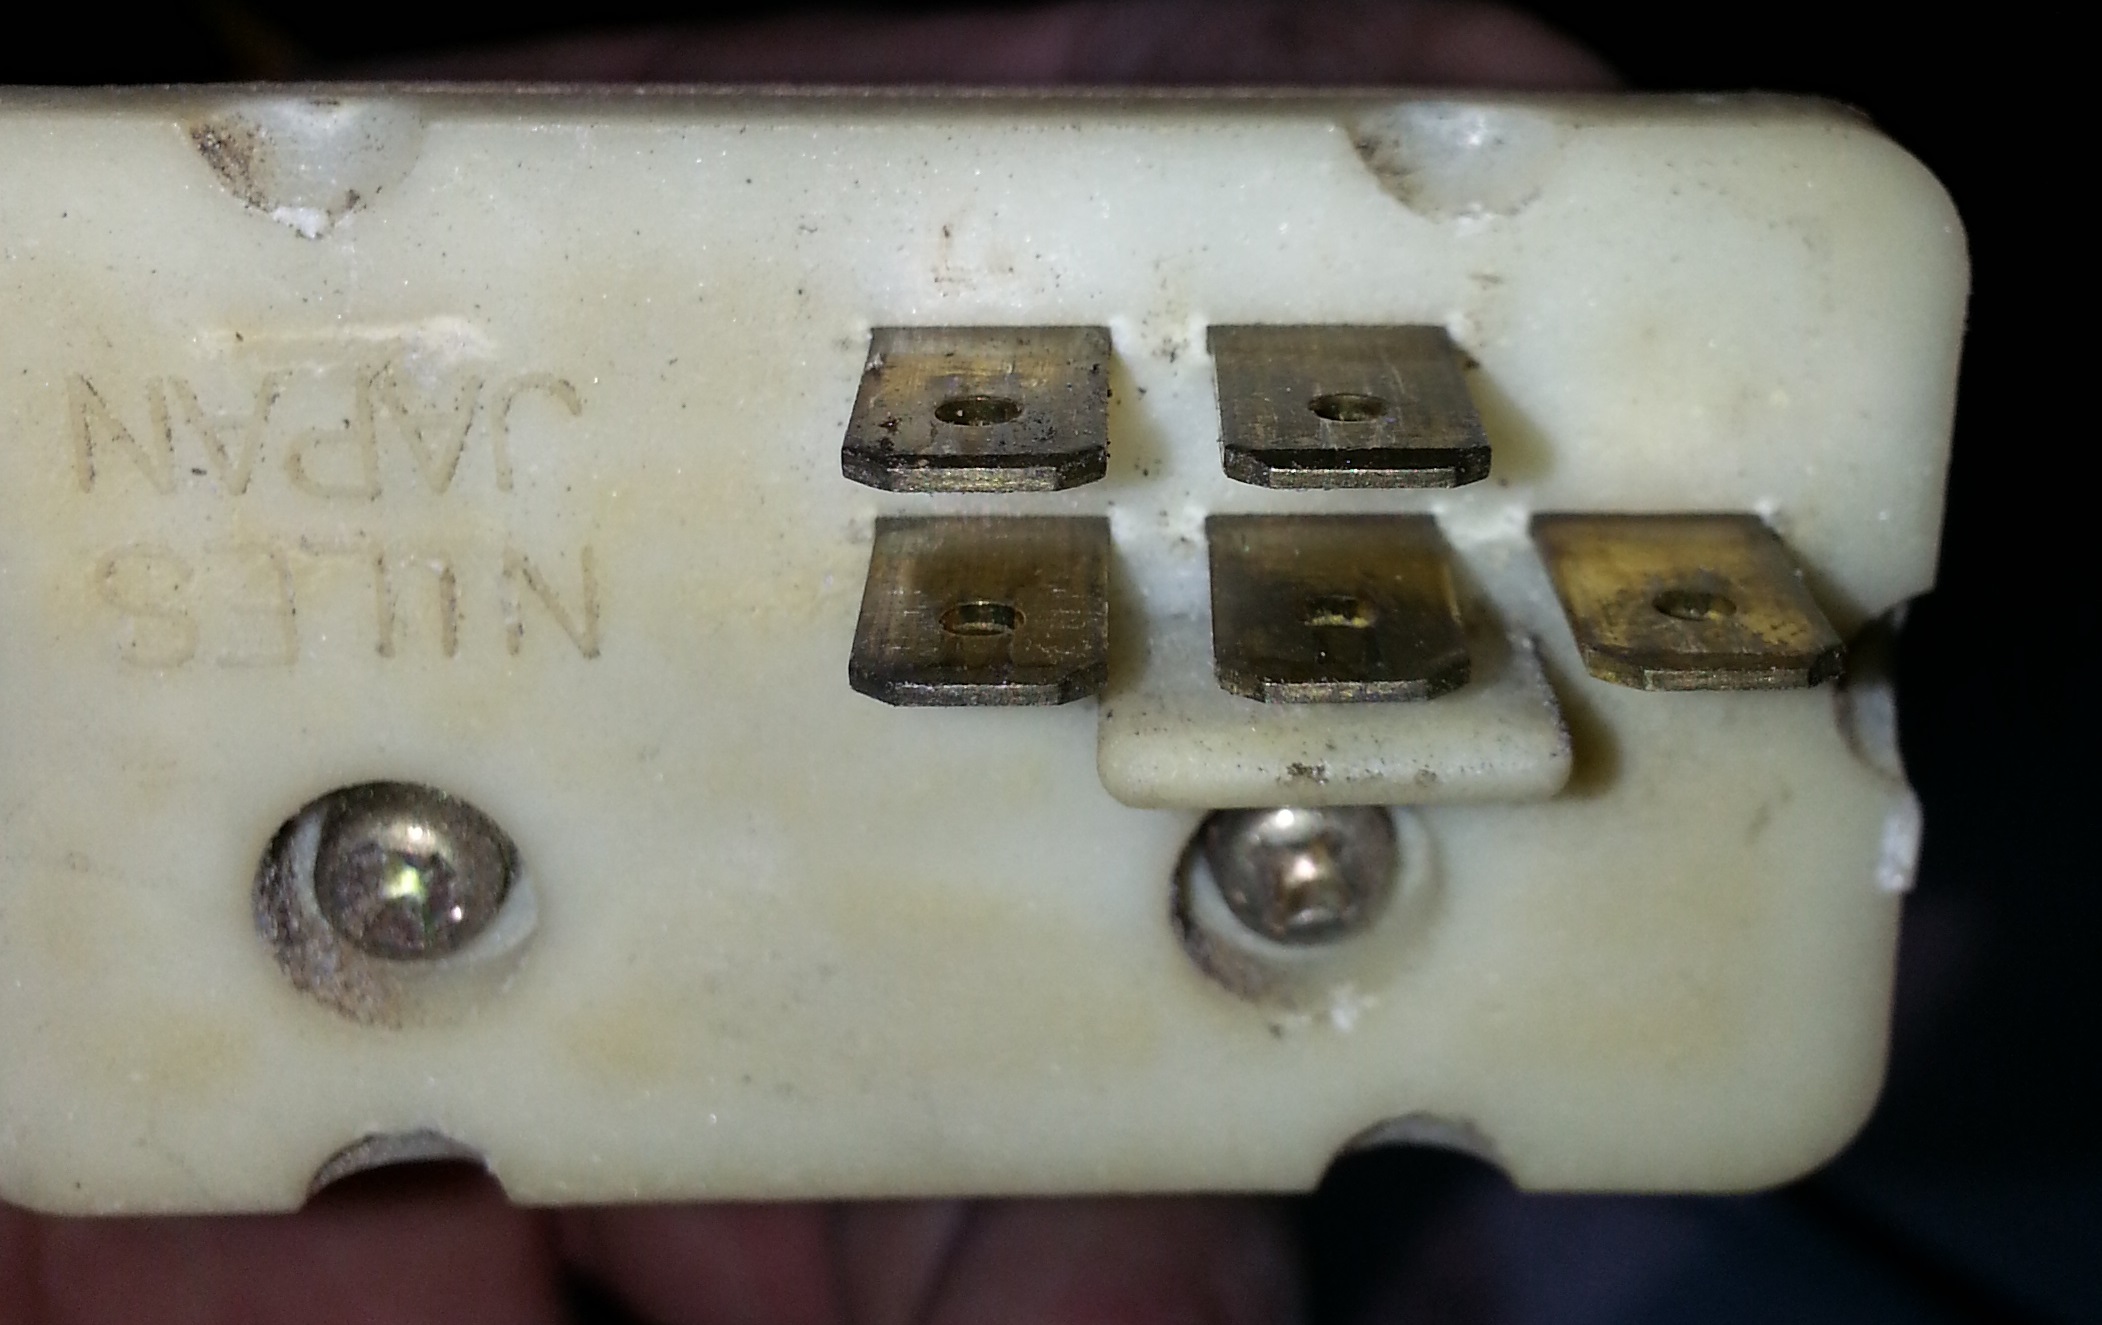
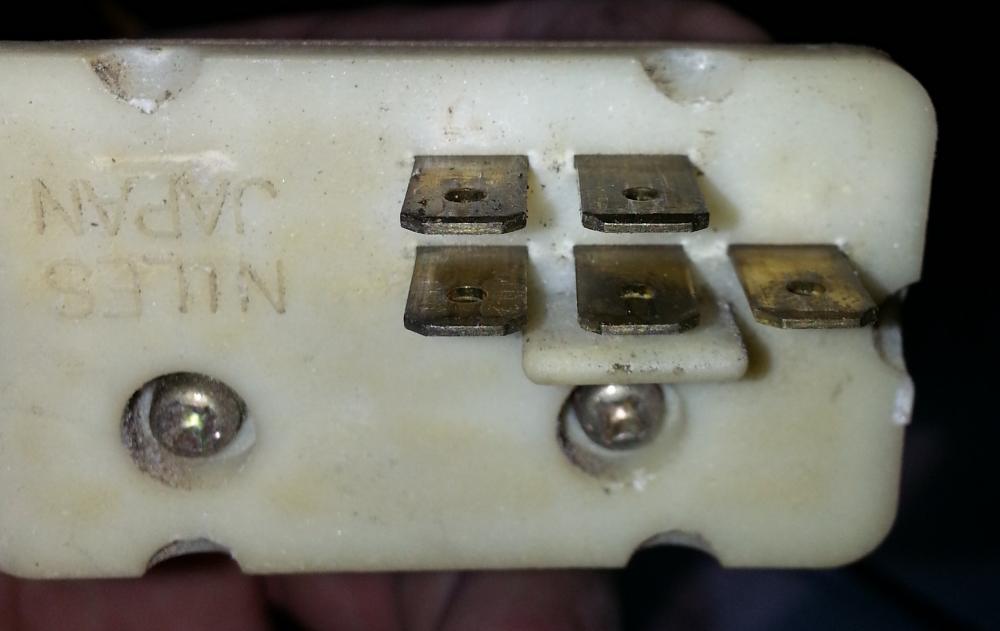
So I have been chasing a EFI issue with my '78 Z and found that the Fuel Pump Control Relay(pictured) is not testing as 'OK' per the FSM. Sad part is that they are NLA - even aftermarket. Furthermore, the part 'Shows up' all over the place(including eBay), but when you order they cancel because Standard Motor Products is no longer making them. When you search any of the numbers in the table below you get a hit, but come up short. So, my comrades, I am appealing to you all to see if you may have a good spare that you would sell or otherwise part with - I would sure appreciate it. I am also considering creating a 'New' solution using a couple of modern relays, so any thoughts on that topic would be welcomed too. Desc OE Part Nos. Alternative Part Nos. Fuel Pump Control 2523079901, 2523189966 STANDARD MOTOR PRODUCTS RY102, BWD R3274, AIRTEX 1R1302, CARQUEST 561762, WELLS 19920, AC Delco E1786
-
Welcome One Way! Glad you worked it out. Time for a rekey/new lock set. I noticed that you are new...I would like to suggest that you download a 78 Factory Service Manual (FSM) and the Fuel Injection Bible. You will definitely need these guides as you work through your new Z. http://www.classiczcars.com/files/category/4-manuals/http://atlanticz.ca/zclub/techtips/efisystem/280zfuelinjectionbook.pdfhttp://atlanticz.ca/zclub/techtips/reviving/index.htmlhttp://www.nicoclub.com/datsun-service-manuals
-
Dont forget to service/rebuild the vacuum selector solenoids on the pass side fender wall!!
-
Still have the starting problem - probably the Fuel Check Valve. I have fixed the rich running condition by changing out the injectors and installed a custom fuel rail. Isolating the injectors with bake-lite insulators and getting rid of all of the wonky fuel piping has definitely helped eliminate vapor lock. I believe that I posted all of the parts and work done. Final analysis is that the engine runs well and pulls hard - just have to get the fuel check valve replaced.
-
Don't forget to place a clear fuel filter between the tank and the fuel pump! No matter how clean you think you have the tank, there will always be some debris that will find its way out!!! A cheap see-thru filter will save you some grief - especially if you have a bunch of new components downstream.
-
Go with Siteunseen's advice. As for the Fan Clutch. A bad one will have some of the following characteristics. Total lockup - it should be still not fused.Greasy, oily appearance. This is usually associated with...Too much Axial play - like a whole lot.The fans have always made a lot of racket. You could always install an electric fan too. Finally, since you are replacing the Water Pump, I encourage you to change the Thermostat and check the hoses as well.