gnosez
Free Member
-
Joined
-
Last visited
Everything posted by gnosez
-
So the odometer works (mileage) but the speedo doesn't? Does it read accurately? There's only one drive link coming from the tranny so the issue is in the speedo itself. Time for a swap...
-
You will find a lot of info on this by doing a search over at hybridz.org And I strongly suggest you use the search function before posting the first time as they are less tolerant of folks not doing their homework before they ask questions. That said you will find them to be extremely knowledgeable about matters that relate to Z modifications beyond the norm. A 3.0L stoker for them is a very mild upgrade. I think you'll be spending a lot of time clicking on links to some great engine options and you might even change your mind on what to do with your Z as a result. Good luck with your build....
-
Yes, just like New Jersey.....
-
Mike - the same invite is extended to you as well to participate in our local Z club activities and to plug into the vast network of hands-on experience. In addition to the restorations, engine work and other projects on their own Zs, we look to provide a helping hand and a second opinion before you go off and spend serious money on something. Don't wait until your Z is ready to drive to contact us, we can help.
-
The club website is: www.zccne.org We will be posting a complete listing of all our club events in the next 10 days. You don't need a Z to come, we understand, sometimes they are up on jack stands. Feel free to contact me via email and we can talk about the club and your restoration efforts. It's likely we can save you both money and time.....
-
It would seem to me that you might want to tap into the years (last count it was well over 200) of experience the New England Z Car Club can offer you as you begin your restoration project. We are a ZCCA member club with over 25 members with most right here in MA. Our club holds events throughout the year (shows, road trips, social events) and many of our of members do some form of racing (autocross or road course). We know Zs and with money always an issue we can help you with your decision process as you move forward. It goes without saying that every member has some restoration project, big or small, going on at one time or another so we've been there and done that. A very short list of current 240 projects being done by our members include: 1) 1972 club race car - aerodynamic add-ons, custom strut bars, engine dyno 2) 1970 RB26TT swap, fuel cell, and a whole lot more 3) 1972 complete restoration from the shell up 4) 1972 re-fresh F/R suspension, new steering rack, 280ZX brake booster We hope to hear from you soon.....my email is: john@baddogparts.com
-
I just got one from CarSteeringWholesale which seems to be one of at least three companies all doing business under different names but showing the same parts and prices. It looks okay and the inners seem good. Worst case I will replace my inners from the existing rack (only one year old and OEM). My rack itself seems to have a slight hitch in it and that is unsettling at speed.
-
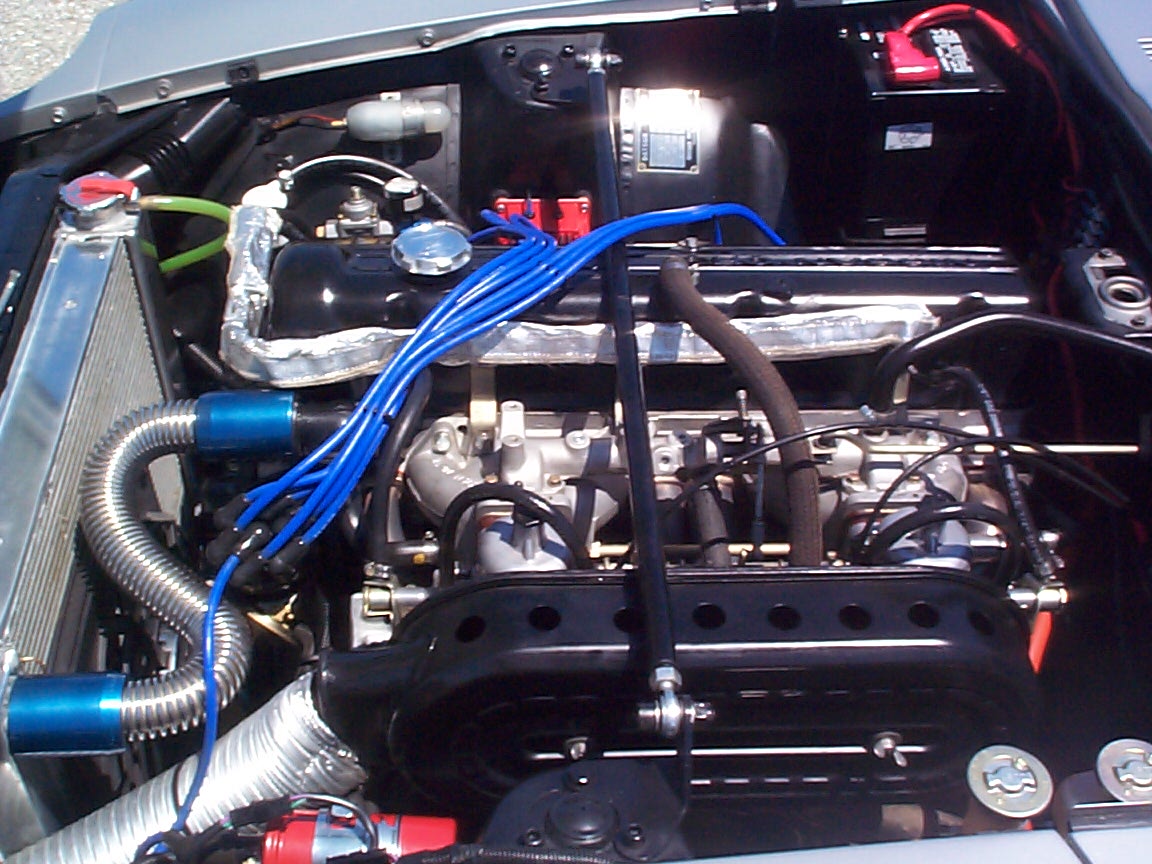
I'd put my money in an L28 to start with. No reason whatsoever to handicap yourself or your Z by starting out several CCs short of an L28. Match the head from your L24, do some head work, get bigger SUs (2-inch), add a header, a better distributor and an electric fan. I've done the 3.0L set-up and now have a 3.2L Rebello in my 240. It goes like stink....
-
I have attached a picture of the Rebello suggested stock air box mod and the fiberglass insert once sold in Japan (this is Alan's picture). It did two things; 1) reduced the air flow into the engine bay by directing it to the radiator and 2) it had an inlet for a ram air duct to the SUs or triples.
-
The best way would be to tune them on a dyno and have a fan blowing air directly into the intake tube/filter array. We'll be having a Z club dyno day sometime in late spring here in New Hampshire so that might be something to consider.
-
You can do it but it would help if you set the carbs to match the new A/F mixture you will see as a result of your mod. There's a picture of a 240 in Japan taken in the early '70s that has an aftermarket grille insert that directed air to just the radiator (with addition mods) and had an opening for SU induction hosing. I have a K&N cone filter attached to a hose running to the cold air box on my triple Mikunis. The cone sits in front of the radiator. Works nice. You could also drill 1-inch holes along the top of a stock air filter box, as per Dave Rebello's instruction to me a few years ago when I ran 2-inch SUs on my earlier set-up. That worked fine as well. The intake air isn't as cold but it let more air in without a whole lot of work on my part.
-
Unless you plan on restoring that Z to drive like a '70s American made vehicle I would suggest installing the poly. It will last longer than the OEM rubber bushings, give you better feedback and make your car handle like new for many years to come. The new rubber bushings will be a great improvement over the 35 year old ones you have now but will start to lose their response factor in a year of so of aggressive driving. I can understand why a muscle car shop would think that upgrading to poly would be cause for some concern since the change over from sloppy Mustang or Mopar to tight can really be felt now that poly is available for these cars as well. All that (non-rack and pinion) front end play would run right up your arms. Your Z, when new, was a whole hell of a lot tighter than any car made in America at the same point in time. I owned them new back in the '70s and the Z was on par with more expensive cars like Porsche and Jaguar, and head and shoulders above my "68 Mustang or '73 Cuda. But ride feel is a personal thing and while I sacrifice my fore arms for the feel I get when I drive my Z may not be your idea of how a Z should handle. What you want from your Z is the most important thing.
-
John - did you retain the rear sway bar as you moved the stiffness forward?
-
Wow, if I understand their website pricing, the cost of all four struts w/springs (and shocks?) comes to over $4,000. US. Is that right? Even with shipping and potential customs fees it might have been better to purchase a similar set-up from the US. There are several of us on the forum who would have done that for you. I routinely ship Z parts to Europe since we had more Zs here than anyway else in the world. I agree with getting more negative camber in the front to help with turn-in so go install those plates. Next get your car corner balanced. I posted my numbers here recently. This will get your Z more in line with what you want it to be. Remember to undo your sway bar(s) first. Then go over to www.hybridz.org and click on John Coffey's alignment "sticky". Take those figures to your alignment shop and get them to dial them in as close as possible. Good luck -
-
Prior to removing my rear suspension so that I can install Arizona Z Car's new rear control arms, I put my 240 up on scales to get a quick picture of how the car was set-up. All weights shown include me, a 7/8 tank of gas, full interior, spare tire, roll bar, front and rear struts bars, an R200 diff, upgraded front/rear brakes, a gnose, and the usual tools and spare parts. Here's my results: total wt: 2688 LF - 653 LR - 707 RF - 640 RR - 689 Left - 1350 (50.6%) Right - 1329 (49.4%) Front - 1292 (48.1%) Rear - 1396 (51.9%) Cross - 1348 (50.1%) Bite - 20 I'll post pics once I have the new control arms installed.
-
Sometimes it is necessary to elongate the bolt holes to get proper alignment of the diff mount to the diff itself. Do what you need to do to get it to fit....and yes the R200 mustache bar is reversed.
-
I mounted a standard 240 left side mirror on the right door and added a convex spot mirror that allows me to see just near everything I need to see on that side of the car. It is one that can be rotated to fine tune your perspective. Works and looks fine.....
-
Hey Paul - I think what you are looking at (or destroyed) is the internal bump stop that was built into the strut seat itself. The small round rubber doughnut spacer does not rotate in the rear(like the front ones do and that's why they use a bearing). Glad to see you are making progress on your 240 and we in the New England Z club hope to see you and your Z once the roads are snow, ice and salt free again in the new year.....
-
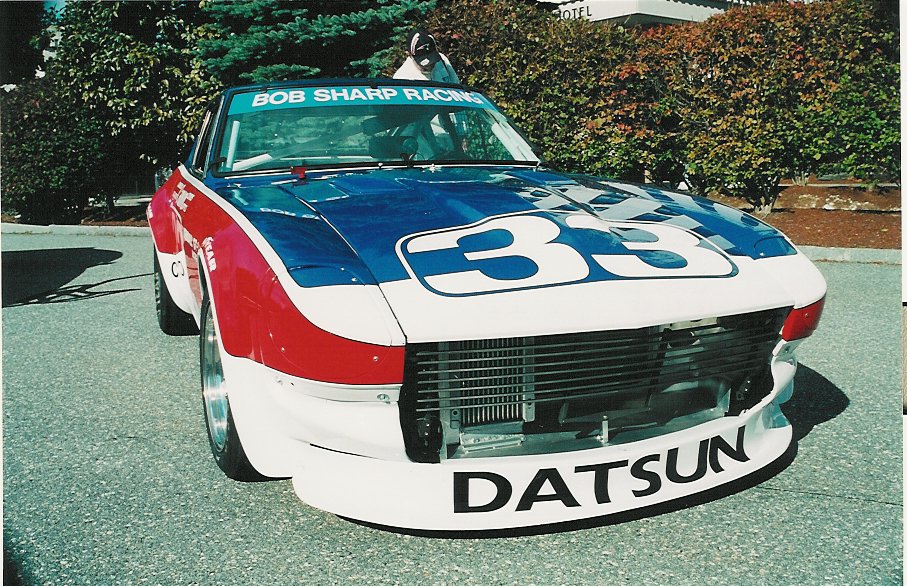
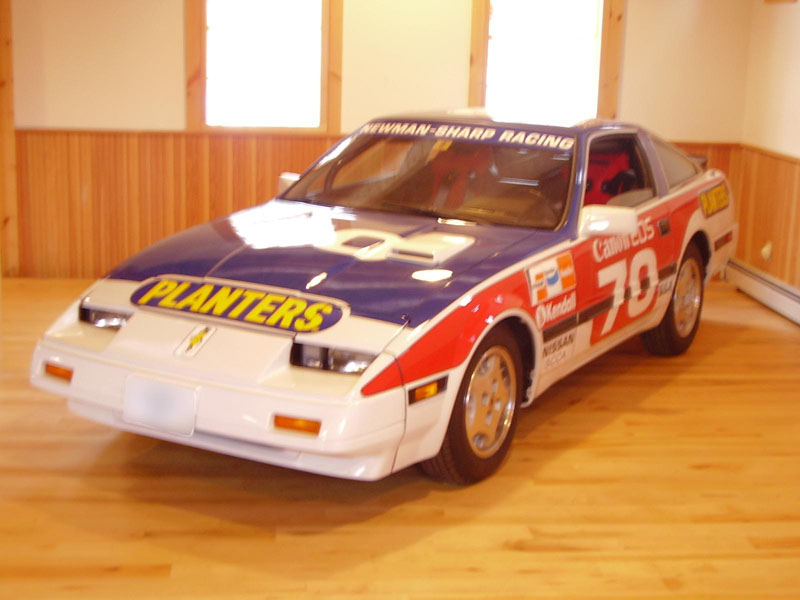
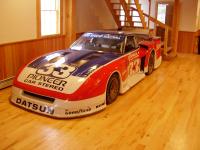
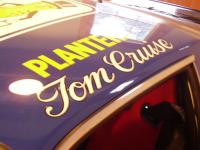
Carl - the first car (280Z) was sold to Adam Carolla it seems to join his BSR #33 610 and a 300ZX Newman car as well. The other cars (300Zx single, the 280ZX twin turbo and the 300ZX Cruise SCCA street production version) are still up here in NH, last time I checked. There is some question about the Cruise car being the one he drove as it seems there were several cars. This one was restored and the damage to it was extensive (it was dented everywhere but the roof), so it was out on a track at one point in its' life.
-
The restoration of the 280Z BSR car was close to $190k and that was to get it to racing spec. Prep costs for each race were in the $10-$20K range. The car is now in sunny California while it's stable mates are still in NH (I'm missing the single turbo 300ZX picture). Just having the money to buy the car is one thing, having enough to put it on a race track is another.


-
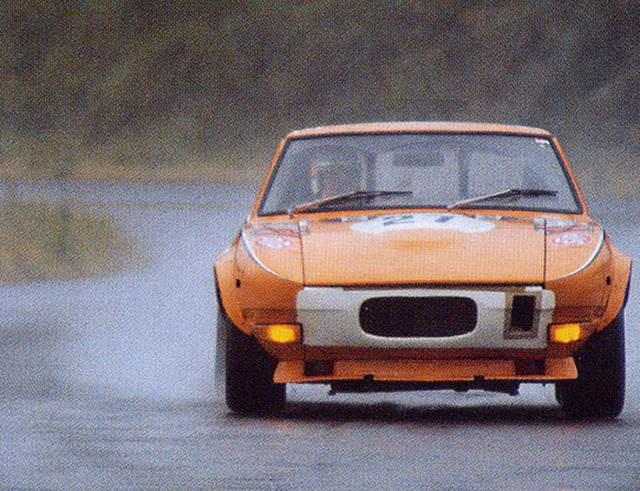
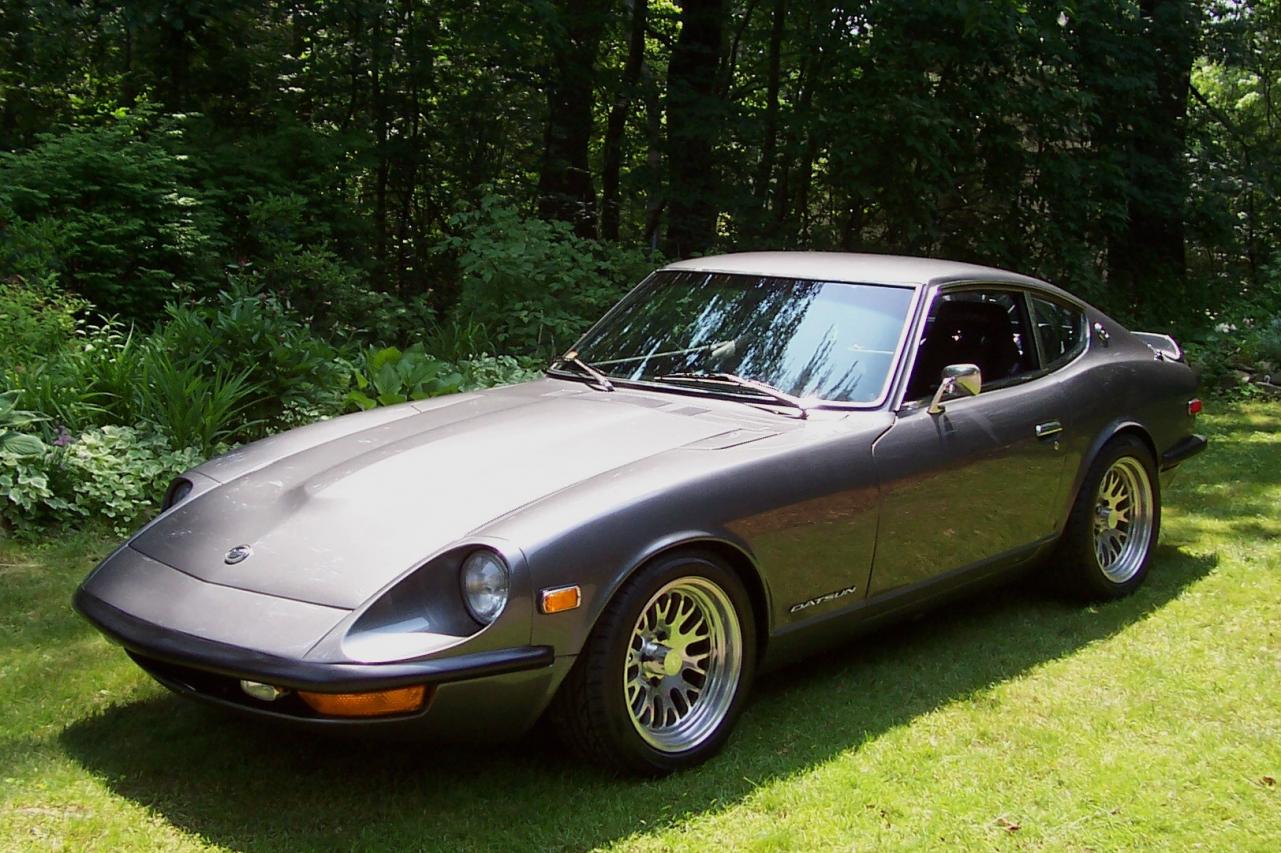
It was this picture that made me ( and I mean it was like a gun to my head, made me install a gnose on my 240)..... I didn't spend $50k under the hood but I do have a Rebello 3.2L w/44mm Mikunis and 314hp@crank sitting nice and pretty under there. From donor car to completion in 7 months. Now it's got 30,000 miles on it and a few road rash issues but it cleans up okay. This year it gets a set of Arizona Z rear control arms to help with the geometry of my lowered Z. The color on mine is Nissan Gunmetal Gray with about 20% more metal-flake added. Picture does not do the paint job service.

-
Congradulations, Carl for all the hard work and attention to detail!! I for one am glad that the optional photo with Carl topless was NOT included in my calendar.
-
Which air cleaner gaskets are you searching for? The ones that go between the SUs and the base of the filter holder or the one that seals the cover to the base of the filter holder? I believe I have both, new, OEM.
-
The issue here is to remember that any application of downforce at one end of the car will cause lift at the other end. Adding a front airdam means you need a equal downforce devise at the rear. Add a rear wing and your front airdam better provide more downforce than the wing. Balancing this all out makes for a more stable and fun car.
-
You could have any of the following issues causing your problem: 1) tire balance 2) alignment 3) loose steering rack 4) old suspension bushings 5) loose suspension 6) bad ball joints/tie-rods/shocks/spings 7) no front air dam 8) bad front tires 9) car not balanced Go through the list and check (and correct) as needed. The S30s need a front air dam to keep the tires in contact with the road at speeds in excess of 70mph. At speeds higher than that the the steering wheel will feel light, as you have all of about 2-inches of rubber touching the ground.