rocketdog
Free Member
-
Joined
-
Last visited
Everything posted by rocketdog
-
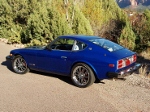
 Back in the late 70's I got transferred from San Francisco to Rock Springs, WY. My Z was only about 3 years old then. My buddy and I decided we'd go fishing up at this lake in the mountians. The map showed a "road". It was a two track with lots of big rocks only suitable for 4-wheel drive. Fueled with a few beers I drive the Z to the lake carefully dodging the bigger rocks. What a bunch of surprised looks from the other fisherman with their big honker, jacked up 4 wheel pickups when this Japanese sports car pulls up next to them! The Z still has the battle scars of scraped rails on the underside. Whenever I'm under the car fond memories come back.
 -
Got the floats all dialed in...fairly easy and quick job....if you have Keith's optical gauge. Took my first drive. YEE HAH! All the stumble at 1800 and 2700 rpm are gone. Who'd a thunk a simple thing as float level could make such a significant difference in driveablilty. Even in 4th you step on the gas at just below 1800 and the engine just smoothly picks up speed...same at 2700. No need to run at a lower gear just to keep higher revs and avoid those "spots". Much of the literature I've read does not put much emphasis on float level as it should. I think fokks tend to fiddle too much with jet sizes trying to solve the problem when a simple float adjustment does the trick.
-
I just got Keith's optical gauge and measured all carbs twice. They are all way low: the front and middle are 3mm-4mm low and the rear is 3mm low. My tomorrow's project will be futzing with the floats to get them where they should be. It'll be interesting to see any performance change.
-
Did you bleed the line? A couple of air bubbles will compress easily and give you the feel you are getting, plus the clutch won't disengage. I installed a new master a couple of years ago. Bleeding is a PITA if alone.....get someone to help and it will go fast.
-
summitracing.com has a few choices. Search under exhaust tips on the site. part EVT19 is one choice. Your setup is exactly what I have been running for a few years now.
-
Jeff, I lived in Pinckney, MI and worked in Ann Arbor from 1980 till 1993. Kept the Z garaged in winter to protect it from the salt. In 1972-1974 I lived in Port Huron and had a new '72 240, that lime-yellow. The salt ate it up and when I got transferred to San Francisco I traded it in for the new 260. The dealer didn't want the rust-infused Z on his lot....didn't get much $$ for it. Baby poo rust color on yellow. They still racing at Waterford Hills? Used to love going to those. Gary
-
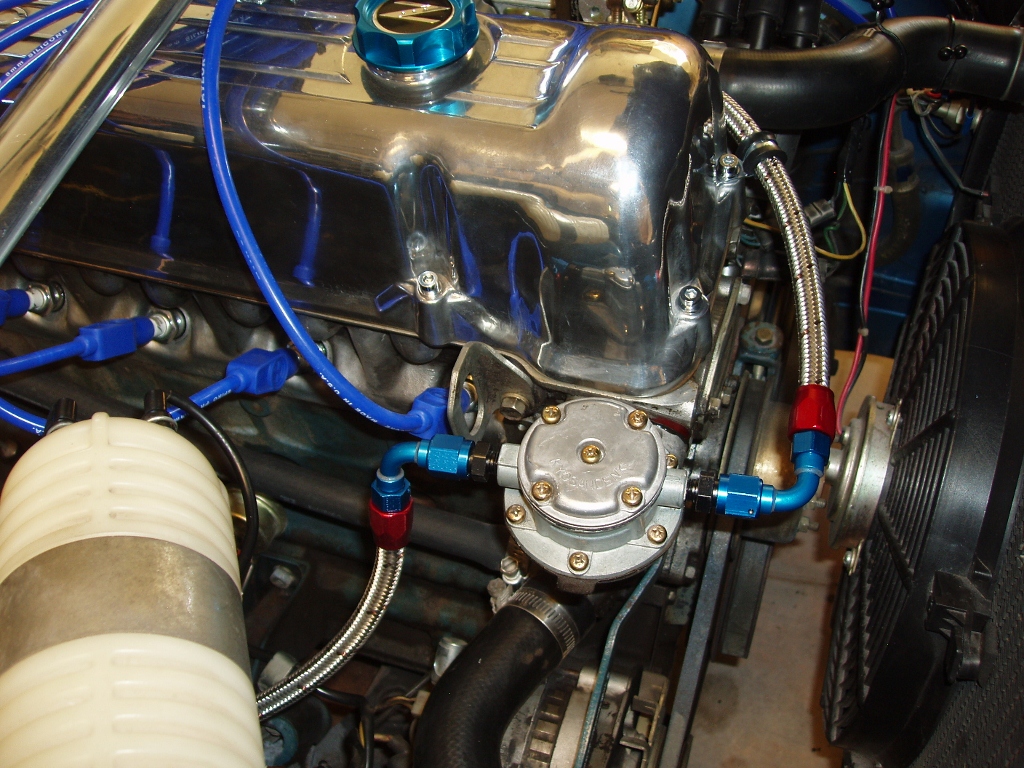
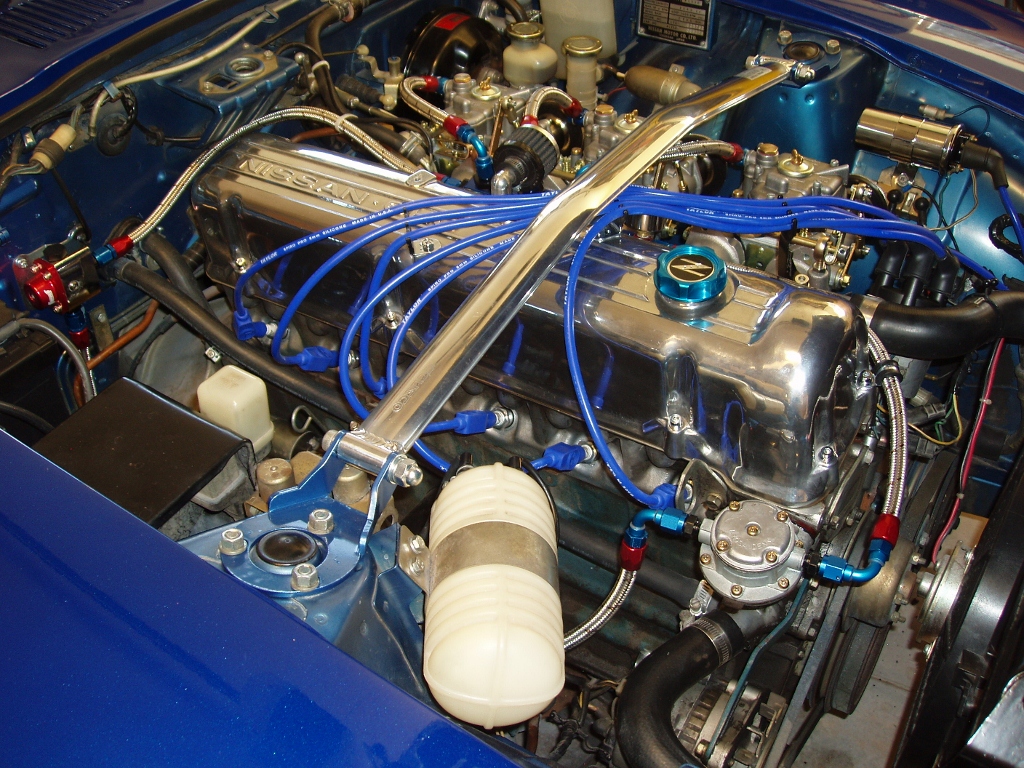
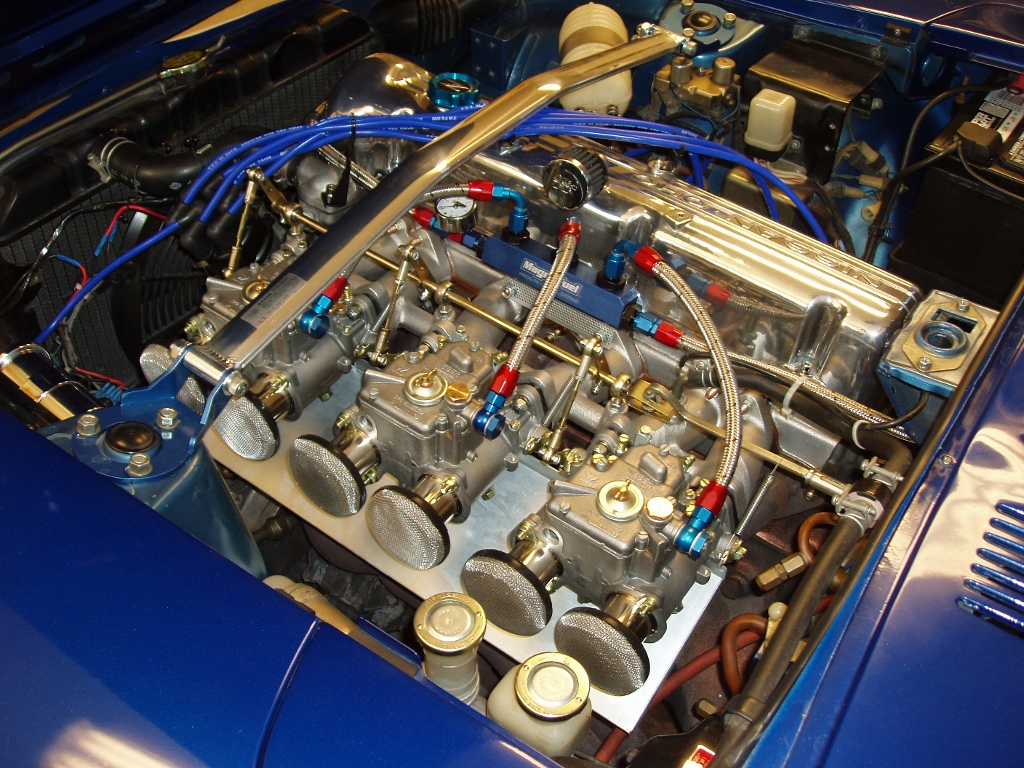
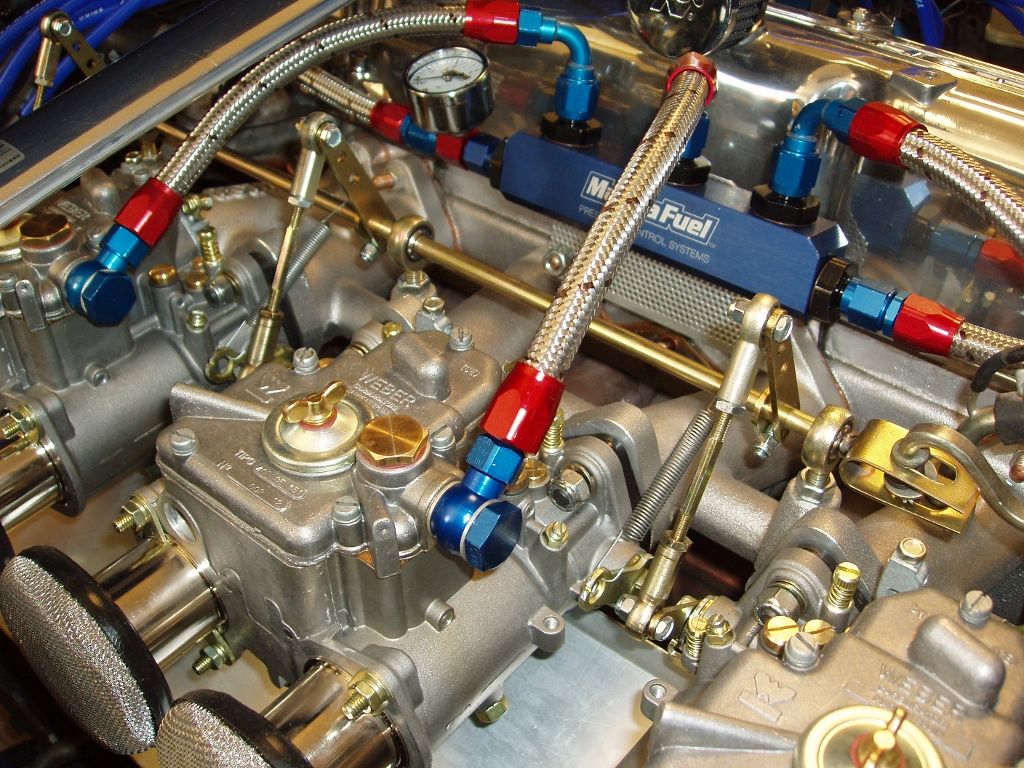
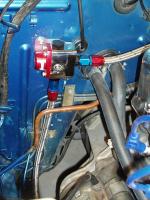
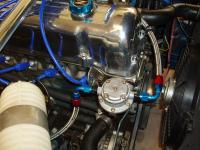
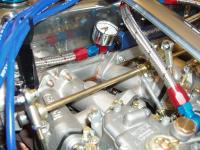
I always wanted to put triple Webers with braided SS fuel lines on my late 260Z (11/74) (original owner). I have been running ’72 SU’s since the early 80’s which eliminated the dreaded vapor lock of the flat tops. Mike W’s posts provide an excellent, detailed description, problem solving and great drawings with even part numbers spelled out. His posts inspired me to do it now. Fortunately when I bought them MSA had a sale on the Webers for $1495. (Interestingly MSA’s old blue catalogue from years ago had them listed for $2000!) The Webers are 40 DCOE 151 with Main jet 130mm; Air corrector Jet 170; Emulsion tube F11; Idle jet 55 F9. The package came with Cannon intake and throttle linkage to fit to stock Z throttle, some basic rubber fuel hose and a few hose clamps. The first thing I had to do is swap the throttle levers to the correct side. The kit came with additional throttle levers which I later ended up using to connect the return springs. When buying the kit MSA didn’t even suggest new manifold gasket and studs and the fat washers, which they should have. I had a “well, duh†moment when I started ripping the old stuff out and ordered them. Manifolds: Taking off old studs went easily. I sprayed them with PB Blaster several times over two days and using the double nut technique and once broken loose they were finger loosened. One problem I had was that the exhaust header (the original 6 to 2 Twice Pipes from the late 70’s) hit the lower steering assembly so I had to loosen much of the rubber knuckle joint bolts to give the header room to slide off the studs. Once everything is off I cleaned the whole area of 35 years of crud. Acetone works great for a lot of it. The new intake manifold is sleeker than the OEM and old dirt will show. I installed the carburetor mounting studs on the intake manifold using Loctite. One minor but significant item not mentioned in the directions is that the studs MUST protrude 1 ¼ inches from the intake surface otherwise there is not enough thread to mount the carbs with their spring washers. I had to redo all the studs after everything was installed…much easier on the bench. Test fitting the intake there were some minor points that hit the exhaust manifold and had to be ground off. Prior to spraying the copper gasket cement I masked off everything with blue painters tape and newspaper. VERY IMPORTANT…this stuff is just like spray paint and goes EVERYWHERE. Once on it ain’t coming off. The manifolds went on easily. Be sure to torque them per spec. Heat Shield: I had a heat shield fabbed from aluminum: 21" x 6" with a 3/4" lip in the back bent at 120 degrees so the shield drops down from the carbs at a 30 degree angle. I drilled out one hole for each carb to mount and cut out sections for the other 3 mounting studs. Don't need 6 nuts holding on a piece of aluminum. Had to do a little hand cutting with tin snips and wire cutters to get it to fit under the carbs. Used Mike W's idea of the shield, a washer, spring washer and nut. With the shield angled down a bit I could fairly easily reach the washers and nuts by feel and tighten with a ratchet extension. Installed the throttle linkage per their spec. Had to move where my stock linkage bolts to the firewall over about 1 1/2" so it is now a fairly straight shot to the carb linkage. Figure fewer angles the better. Fuel system: I wanted to use the OEM mechanical fuel pump with the stock electrical pump at the tank. The specs for the mechanical pump should be enough both in PSI and volume. I didn’t want to have to wire in a new electrical pump and emergency shut off. I purchased most of the 3/8†SS braided hose and Earl fittings from anplumbing.com. Everything is sized to a 6AN. Be prepared for sticker shock as many of the end fittings run from $8 to $21 each! The Magna Fuel Log I got from Summit as well as the fuel pressure gauge. Before ordering I drew out a diagram of what goes where and then made up a parts list…and checked it many times. The fittings are a classy red and blue aluminum and very high quality. Cutting and installing the SS lines was very easy. Follow the tutorial video on the AN website which uses a sharp chisel and 5# sledge to cut the line. I got a 2 ½†wide chisel from Ace and sharpened it very sharp. Since I didn’t have block of aluminum for a cutting block I used an 8â€x8†chunk of wood column I had and stood it on end on the concrete floor. Put the chisel on your mark; whack it a couple of times with the sledge and it cuts slicker than frog snot! Using a vise per the video to hold the fitting and a tiny screw driver to push errant SS fibers in is quick. Screwing on male fitting was easy. Each fitting end probably took only 5 minutes or so. Earls also has a connection for fitting to the 5/16†hard line fuel lines. Works exactly like your standard compression fittings in some of your house plumbing. Cutting the hard lines was tough because of tight space. You want a very straight section for the fitting to work. I used my tiny copper cutter which took a long time. I used a tiny round file to deburr the inside of the tube. I fabbed a piece of sheet steel to bolt the fuel log above the intake manifold. Since I decided to use the fuel return line I installed the pressure gauge on the fire wall and ran the return into the stock hard line. Finding the right fittings to replace the stock in and out nipples on the fuel pump was tough. Since it was Japanese I assumed it was metric. After many attempts I finally got a 1/8†NPT thread to 6AN to work, though it was tight and I had to remove the pump from the engine work carefully to get it to thread. Perhaps there is a “metric†NPT…anyway no leaks. Fire ‘em up! After adjusting the throttle linkage for equal action on each carb and assure pedal hits bottom right before full throttle, I set the idle and mixture screws to initial settings per spec. After cranking a bit to get fuel flowing the babies fired up. Lots of fine tuning, balancing followed to get them basically tuned. The initial drive was awesome for throttle response and power. Definitely feels 30% increase in power/torque. The usual hesitation spots at 1800 and 2700 rpm as others experienced and eventually worked out. I don’t have an oxygen sensor so tuning is by balance gauge, sound and seat of pants. After a bit more tweaking I took it for a longer drive. At 70 mph when you punch it, you can feel the pull. Before returning home I tried a full throttle through the gears. At high rev third the engine started stalling out and worse in forth. No power so limped along the side of the highway for a bit and then it started running well again. Fuel starvation. I never could get the fuel pressure gauge to register at all. I wondered if the fuel pump was worn out or perhaps the return line was too open (OEM had a restriction in the line). I assumed the pressure regulator would help manage the flow. I bought some more fittings from Earls and moved the pressure dial to right before the fuel log and plugged the fuel return at the log. Gauge now showed 4 ½ to 5 psi so fuel pump is putting out okay. I wanted pressure at 3+ psi to keep the Webers happy. Keeping the dial at the fuel log I reconnected the return line and was now only getting 2 psi at the carbs. No wonder fuel starvation. I tightened the pressure regulator screw in as far as I could and the PSI finally rose to 3psi. I retried the hard acceleration again and absolutely no problems, even after three consecutive runs. Living at 4000 feet one would think I need leaner jets, but currently I’m about 90% there with tuning. I richened the idle mixture screws less than ¼ turn and seemed to get rid of the 1800 rpm lag. Viewing the progression holes I am pretty much right on where the throttle plates should be. I’ve added a third return spring as idle wants to return only to about 1500 rather than the 8-900 I tuned it for. I need a better source for springs as choices around here are slim. Distributor: I wanted to have the mechanical advance option so purchased a Mallory Unilite from Summit. I wired it per directions using the stock ballast. I have a new Pretronics coil. No spark. After pouring through FSM and wiring diagrams, I ran a thread here and on Zcar.com looking for advice which I did get, but nothing worked. Calling MSA tech we tried a test which appeared to show the dizzy was defective. I returned it to Summit and got my money back. Reinstalling the OEM, she fired right up. That’s where I am now. Observations: A fun project. Webers are so adjustable that adds to the mystery and solutions. If going the SS braided hose for the bling be prepared to spend some $$. My final cost was around $500. I’m still puzzled about the fuel pressure regulator. A Summit regulator at $80 it’s pricey for what little if anything I’m getting out of it. I need to call Summit to see if it is working properly. When the dial is at the fuel log there’s 3 psi, but put it on the regulator it shows 0. I’ve driven in traffic in some hot weather (95) and the aluminum shield appears to be working. No vapor lock problems. The carbs are hot to touch, but apparently not too hot. I thought I would need to add the thermal blanket. The engine fires up quickly even when cold. With the SU’s and full choke I had to crank a while. The sound through the Dynomax Super Turbo muffler is awesome, much deeper than with SU’s.


-
I am returning the Mallory to Summit as apparently the module is defective. I talked with MSA tech and did a test on the module which concluded I got a POS. Too much hassle for the $$ spent and the OEM dizzy and ignition work fine. Thanks for all your input. Fortunately I can just replug the OEM wiring. Won't have the mechanical advance option and the vacuum advance is disconnected for Webers, but I'm not racing the thing. Now I can play with tuning the Webers for the 4000 feet where I live.
-
A PM from Mike W suggested removng the blue wire from the coil as that what worked for his late 260. Tried it with no success. Usually with electrical stuff like this it's something simple/stupid. I'm scouring the FSM electrical schematics to see if anything shows up.
-
Continuing: With ignition ON I am getting 12V to the coil and (+) ballast and about 6V through the ballast.
-
No spark! Fired up the Webers with the OEM dizzy and engine ran fine with the usual carb tuning and tweaky stuff. Put in the new Mallory dizzy w/ new spark plug wires. Connected according to diagram: Brown=ground, Green to (-) on coil, Red to ignition side of ballast. Left all other wires connected as found. There is no spark going from coil to dizzy. Suggestions?
-
Thanks for the feedback. The blue wire already is connected to the (-) side of coil. I followed it on the wiring diagram and as you say it is a branched circuit with one going to the ignition module and one to the tach, so I'll leave that in place. I haven't yet started up the engine with the new Webers and go through the tuning and synchronizing. I will leave the OEM dizzy on for now as don't need to potentially troubleshoot two major changes.
-
I'm installing a Mallory Unilite dizzy w/ mechanical advance to complement my new triple Webers. My OEM dizzy had two wires (blue and black) that apparently went to the electronic ignition module. The wiring diagram with the Unilite has the wires going directly to the coil/ballast. I'm having a brain fart here and but I think that the new dizzy doesn't need the OEM ignition module since it has it already built in and that I would wire it according to the diagram and abandon the old wiring. But.....the OEM ignition module affects other stuff too (tach, etc) and somehow needs to be wired in. I've search this site and others and cannot find an answer. Most searches come up with ADDING electronic ignition to a 240 w/points.
-
Got my manifolds all nicely installed and the steering knunkle back together that I had to take apart to make room for the exhaust header. Went to install the first carb and the studs on the manifold are too short. No way to put on the nut and spring washer. Did one bolt and the washer was squeezed flat and the Nyloc nut was only 1/2 on. Had to take all the LocTited studs off and redo them. Why didn't they say " Be sure to leave 1 1/4 inch stud exposed from the surface of the intake manifold."!!!???:mad: Much easier to work on the bench instead of bent over inside the engine bay. After that the carbs went in quickly. I had a heat shield fabbed from aluminum: 21" x 6" with a 3/4" lip in the back bent at 120 degrees so the shield drops down from the carbs at a 30 degree angle. I drilled out one hole for each carb to mount and cut out sections for the other 3 mounting studs. Don't need 6 nuts holding on a piece of aluminum. Had to do a little hand cuting with tin snips and wire cutters to get it to fit under the carbs. Used Mike W's idea of the shield, a washer, spring washer and nut. With the shield angled downa bit I could fairly easily reach the washers and nuts by feel and tighten with an ratchet extension. Installed the linkage per their spec. Had to move where my stock linkage bolts to the firewall over about 1 1/2" so it is now a fairly straight shot to the carb linkage. Figure fewer angles the better. First try the floored gas pedal equaled full open throttle. I'm done for about 2 weeks as have to attend to family stuff, plus I haven't yet ordered all my braided SS, AN fittings, regulator and all that fun stuff


-
Boy, Zedyone, you do have a fug snit between the air horns and the strut! Just tested the fit on my late 260 and there must be 6 inches to the strut. Got the manifolds installed today. New studs went in easy. Used that copper spray but masked everything off. Glad I did as it goes everywhere like spray paint. Manifolds fit pretty easily, just had to grind off a bit of one corner of the Cannon intake.
-
Small detail that you'll get to, but take some acetone and a rag and get that bright blue marking paint off the top of each carb. Comes off easily. Unsrewed my old manifold studs today...piece of cake... took only 1/2 hour. New ones arrive tomorrow. Started assembling the linkage onto new maifold and switching the sides on the carbs where the linkage connects. Have a sheetmetal company as one of my tenants who will fab a heat shield for me out of SS or aluminum...for free...which anyone can afford. Still planning out my SS braided lines and AN fittings. Can't wait to hear and feel the difference.
-
Looks great..........now I'm starting mine. Are you going with the stock distributer with vacuum disconnected? I'm lookng at the Mallory w/ mechanical advance ($400 from Summit; $500 from MSA) Got the SU's and header off. Sprayed PB Blaster on stud nuts and they came off very easy. Easy loosen w/socket then unscrewed w/ fingers. Had to disconnect the streering at the coupler to allow my header to slide enough to clear the studs. Have new studs on order but what's there look great. First time header was off since installed in 1978. I'm going with Mike W's Fuel Log w/ braided SS lines.
-
My Webers are due to arrive in a few days from MSA (even on SALE!). Been pondering this for some time and have stacks of copies of threads from this and other websites. Lots of good feedback, ideas, problems and solutions! It will be a fun project with no deadlines.
-
I think they misstated the engine as a 2.8L. To command $11K one would have to thoroughly look at it to make sure the 35K miles are right. It looks a bit more worn than the mileage would indicate. Rust, bondo, PO's poor mod attempts (electric locks?!), paint quality: masking was a bit poor+overspray. They could have least cleaned up the engine compartment. Nice wheels. Nice package anyway.
-
Mike. W, Thanks for the reply....and the pics. Lotsa SS braided under your hood! I'm also going to go with the screen/mesh air filters or socks on the air horns. Don't want to clutter up the look with big honker K&N's for the little I drive it. (I have Wieands, like Ramflo, on my SU's....checked this weekend and there is little foam filter left, apparently dried up (Arizona!) and got sucked in and cooked!) Fuel regulator: I've seen other posts that say you put it on the return line like you said, but that makes no sense except that it would create a restriction to assure the required preseeure at the carbs. I believe I read where the current OEM return lines have a restrictor in them, so that is my thought process...but ther only reason I can come up with. I've read about the fuel evaporation issue. My current SU's are intially hard start and that may be the issue. Once it has run you can restart with just a quick twist of the key. I'll check out Pierce Manifolds. MSA $$ went up since last fall when I was first looking. Interestingly though I have the old MSA "blue" catalogue and their price then was $2K, so their current price is still 25% less than that.
-
Great write up! I am planning to install triple Webers in my late 260. Currently running '72 round top SU's. Have a pile of threads from this and other websites on issues, problems and ideas....and lots of opinions. I will be doing the braided SS route but will probably install the Webers with regular rubber fuel lines first to make sure everything runs right. Fuel pump: Many posts say they use the existing OEM electrical and mechanical pumps with no problems with fuel delivery but install a pressure regulator to keep the Webers happy in the 3 psi range. I would like to do that and eliminate the need for extra wiring and emergency shutoff switch with a hardwired new electric pump. Comments? Fuel return line: Many posts say a fuel return line is a must to keep the fuel flowing and cool and pump from possibly cavitating. You set up does not have that shown and I notice that MSA's Weber package has only 2 T's and 1 L connectors on their carburetor pictures. A return line would mean a T connection on all three carburetors. Your comments? Distrubutor: After disconnecting the vaccum advance to the dizzy, did you change anything else with it? Vacuum tap: Apparently there is a place to tap into the front manifold for vacuum for the heater/AC controls. I know the back manifold has a tap for the brake booster. I haven't contacted MSA yet regading their Weber package and the specs they have on the system for jetting, etc. There are LOTS of opinions thoroughout the sites on this. My Z is a show car and the SS lines will be the ultimate bling.
-
You have provided great information! I'm collecting info on installing triple Webers 40 for my late 260. A show car. Original owner. Current have '72 round top SU's installed in the 80's. Want to go with braided SS fuel lines, but might start with basic rubber fuel lines just to get the mechanicals installed and running correctly. Your pdf, sources, and descriptions were great. I still have questions (mostly gleaned from other opinion posts on this and other sites) about 1) using existing mechanical fuel pump with the OEM electrical with a pressure regulator instead of a new electrical pump (with emergency shutoff) , 2) need for a return fuel line ( you don't show any) 3) heat shield fabrication, 4) air horn "socks" vs. hard filters (car show flash!)