madkaw
Free Member
-
Joined
-
Last visited
Everything posted by madkaw
-
 I would avoid buying the replacement panel from MSA and trying to replace. Try and get the panel straightened if at all possible. If needs to be replaced - buy one that has been cut off of a Z.
 -
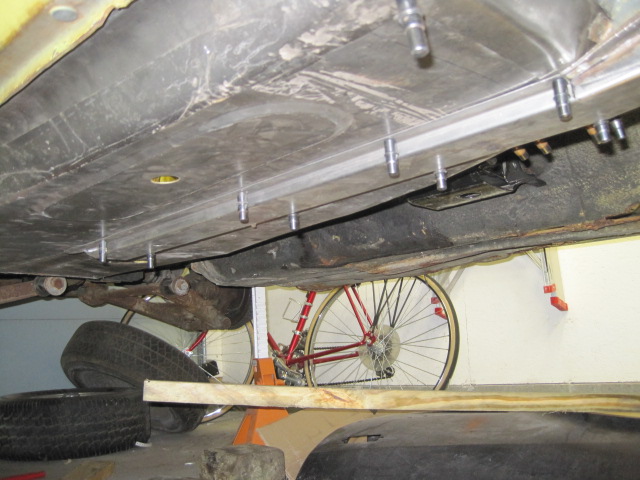
Trying to do some searching on proper moustache position for the diff based on model years. There has been a lot of threads on the diff whine -especially with the early models with the r180 diff. I guess I have read that the moustache bar was actually was flipped around to pull the diff back to line up the halfshafts(make them more perpendicular to the diff) to help with diff noise. Looking at the 8/71 in my garage the halfshafts do angle a lot from the diff -BACK- to the axles. It would seem that if the bar was flipped the angle would be much closer to 90 degrees. On my car 9/71, I can't recall what was the stock position. I do have a r180(subaru r180) in my car and I set mine up very close to 90 degrees, I am running a RT mount. No diff noise-but it is from a 2003 STI:) anyone have knowledge on such subject???
-
OMG yes-can you say VACUUM LEAK
-
I don't see a hose on your PCV-is that the way you are running it?
-
...and yours looks to have equal length primaries!!
-
Lesson to be learned here-check and double check the basics first before going crazy on the troubleshooting.
-
I usually don't have much good to say about MSA products, but the ceramic header got from them fit pretty well. The flange was the same thickness as the intake, and the coating seems to be holding up well. Also didn't have any clearance issues. Not equal length, but 300$.
-
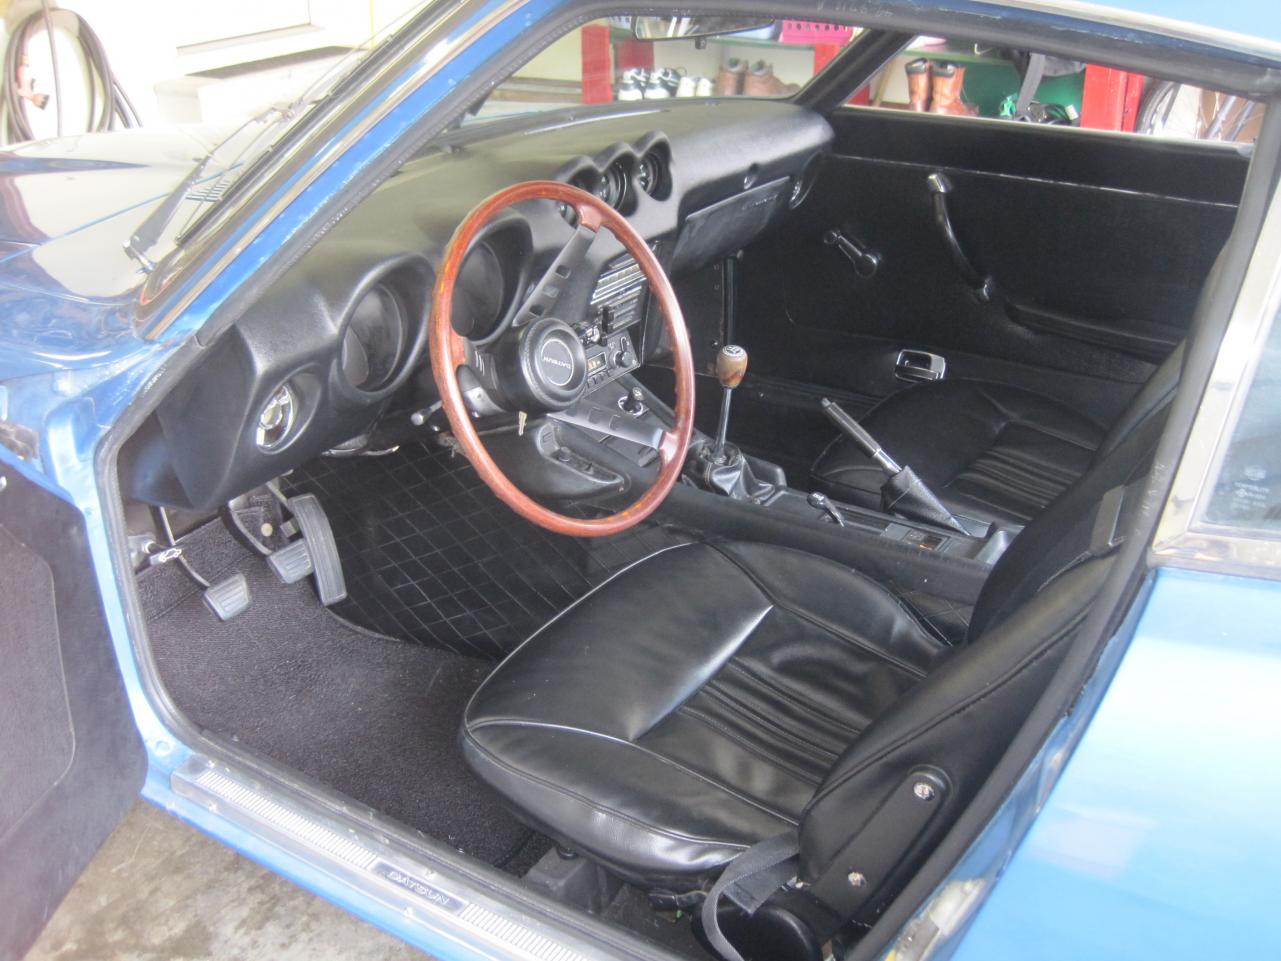
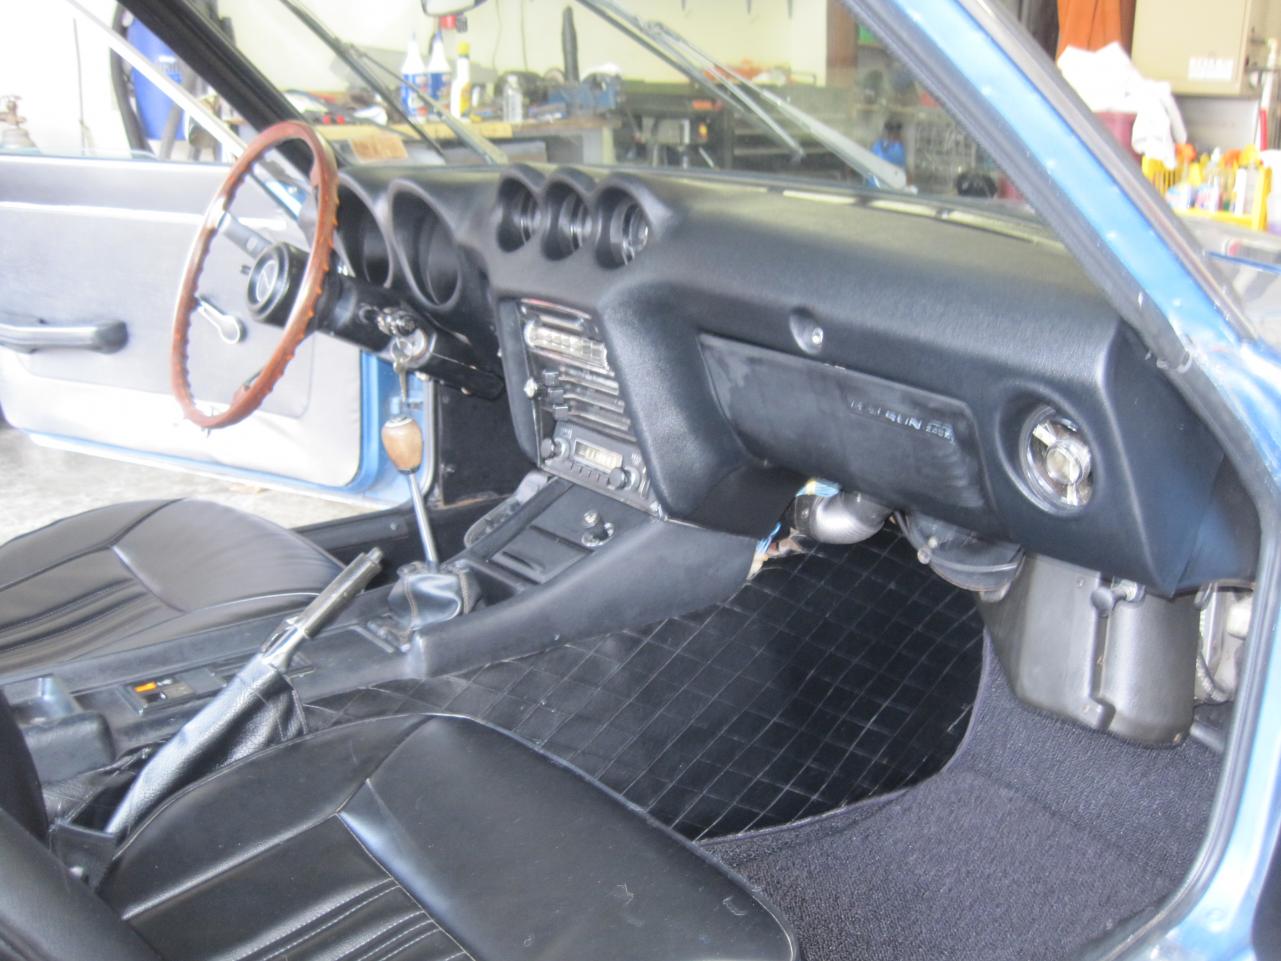
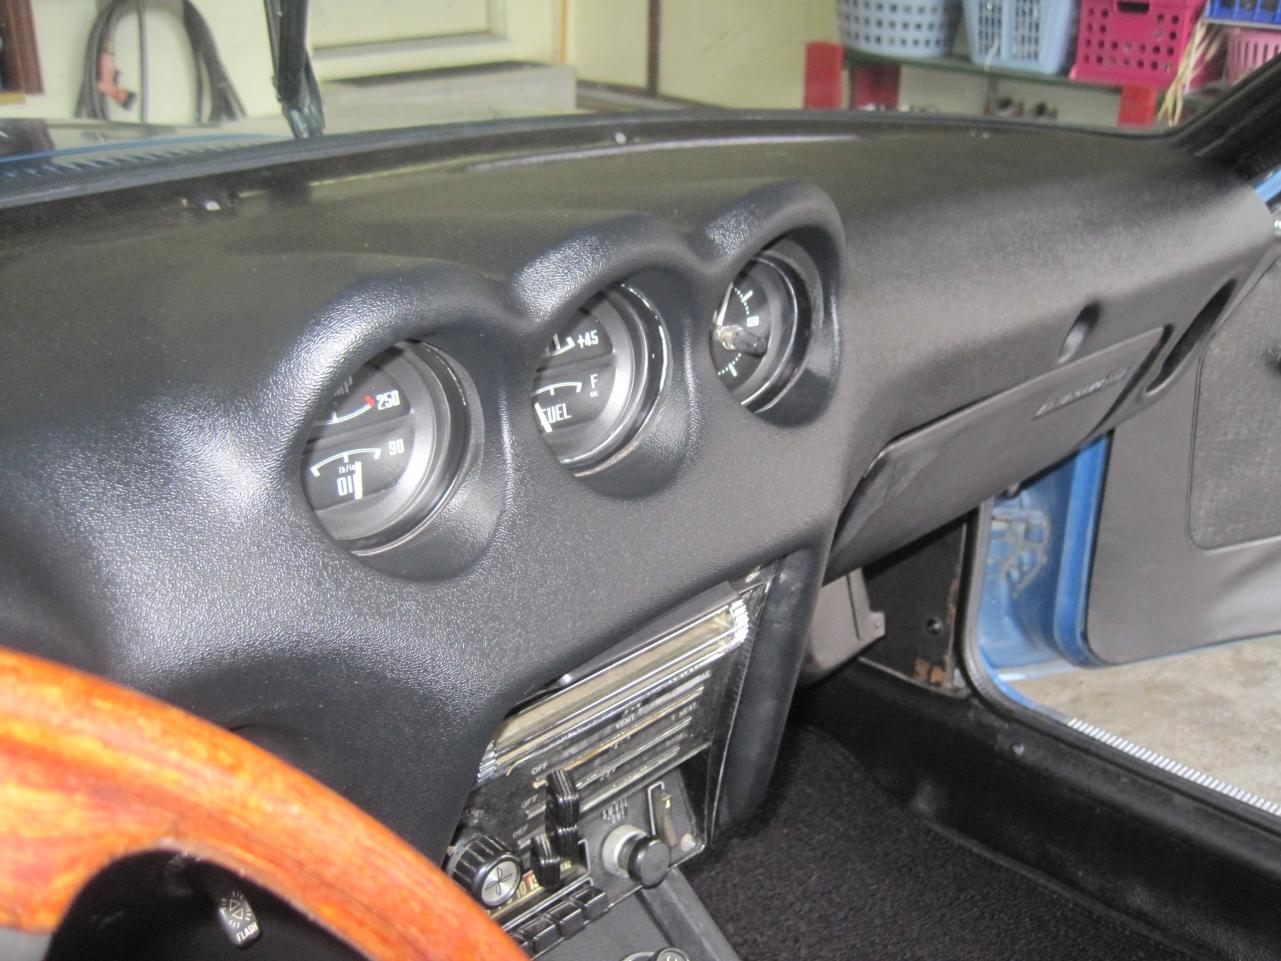
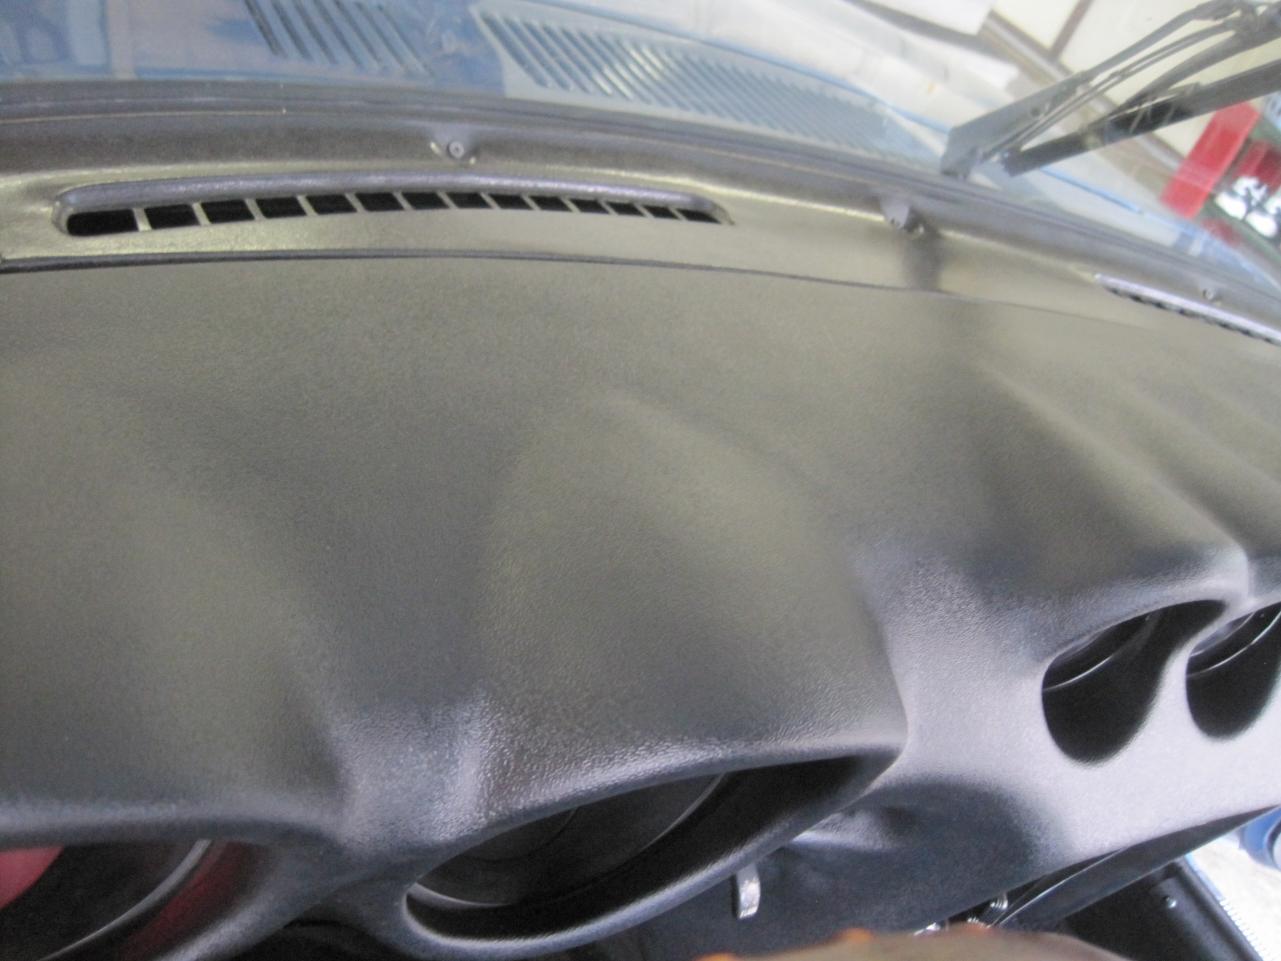
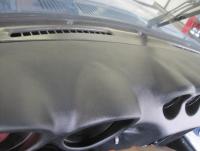
Removing the steering wheel, heater control panel helped make this easier, plus gave additional areas to help clamp in place. The Hazard switch is a PITA to get back in afterwards! Be prepared to use a heat gun to make this fit snug. Finding a good method to clamp down the top of cover is essential. Use the original defroster panel to put pressure on the lip of the cover. Once I had it snug up top, it seemed to fit better everywhere else. Don't try to apply pressure anywhere else on the top except for on the lip-the dash cover is not supposed to rest on the main surfaces. There is an air gap between most of the surfaces-that's why the instructions tell you to only glue the edges. The glove box door barely fits unless you use the heat gun to flatten the edges. Be super cautious with the heat gun. Set at lowest settings and stay at least 2-3 inches from the plastic. Touch the plastic thru process to see how hot it's getting. The plastic retains heat, so additional heatings will take less time. The dash cover sticks out enough that the clamshells(steering column) are hard to get back on. I actually had to trim the back edge of the top clamshell to get it to fit. This is not a 2 hour job, so figure on a very full day or two. I can see how there might be difficulty in getting the speedo out if the cover is not laying flat on the dash. I think with some heat, you can persuade the cover to lay flat out of the way.
-
I'd stay away from the 42 with flattops. Anything else will work- and there is no downside with the 79 liners
-
Not bad. Need to paint the glove box door

-
Also check the float bowl hoses. Reach under there and make sure the small hose that runs from the float bowl is not kinking in anyway. It will be hard to see so you will just have to feel your way around. I mention this because I ordered some from z therapy and the hoses seemed to want to kink easy -thus shutting off fuel.
-
This is good-process of elimination. This helps I narrow down things to give you more specific advice. Do you have a synchronizer for the carbs? Get the compression check done. Timing check too! You need to check timing at idle and at least 2500rpm to make sure your mechanical advance is working. Make sure you get a voltage check at the battery WITH the car running.
-
They got the plug out and replaced it under warranty. I had called the dealer who sold me the car and told him the story. He has seen and drove my Z - so he knew that I wasn't a car idiot. He marched over to service to tell them just that. As much as I enjoy doing this stuff, I will probably go back to the dealer for oil changes . It's a PITA to rotate tires and the dealer only charges 40.00 for oil change and rotation. The dealership has a good reputation around here. Plus the engine requires Dexos additive which is only in Mobil 1$$$$$ It's my DD - not my Z - so they can change the oil. I still have 3 other cars to maintain - that's enough:)
-
It's slim picking on the headers for these cars. I have read of fitment issues with the pricy Stahl headers also. MSA aren't equal length - mine weren't anyway, but price wasn't bad Good luck
-
Get on YouTube and search how to... You will be amazed
-
Get a timing light if you plan on having a hobby car. Borrow a vacuum gauge from autozone and check vacuum Get a 10$ multimeter and check voltage at the battery. Replacing parts is only half the battle Idles smoothly at what rpm?
-
Are you kidding me? Bought a 2012 Chevy Sonic Turbo and it was due for it's second oil change-which I wanted to do. I've done nothing but drive this car, which is weird for me being a car guy. So I thought I would change the oil and poke around. I could NOT get the oil plug off:mad: I have NEVER had a car that I couldn't get the plug out-never! It is a small drain plug that has a 10mm socket head. I managed to trip the head trying to break loose the nut . WTF I couldn't budge the thing. I even tried tapping the wrench with a dead blow to break it loose. What the hell did they use to put it on -an impact wrench? taking to the dealer to let them mess with it. It's just mind boggling that I am going through this to change oil. It makes me look like an idiot for stripping the head of the plug, but I know I was turning it the right way. By the way, the dealer did the first service.
-
You need to give more info. What else have you done as far as engine tune up since this car sat so long? Above scenarios are just revving the engine in the driveway or under load? Fuel system been cleaned? Compression test? Valves adjusted? Timing checked? Battery condition ? Alternator output?
-
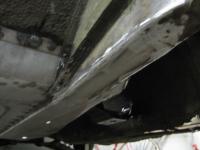
All in all, this job is a lot of work, but definetly doable by the DIY. I have read threads where members complain about the estimates a body shop gives to do this work, I hope this helps you to see that it is very time consuming--and time is money. It might be one of the better DIY jobs for the fact that if you aren't the prettiest welder, you can practice on the car in areas that most folks will never see!
-
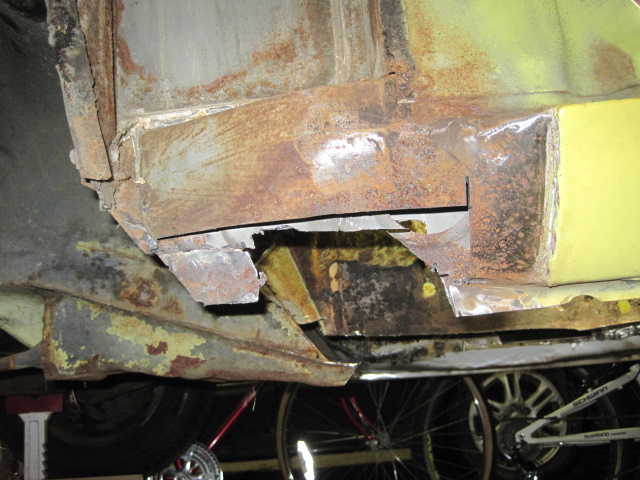
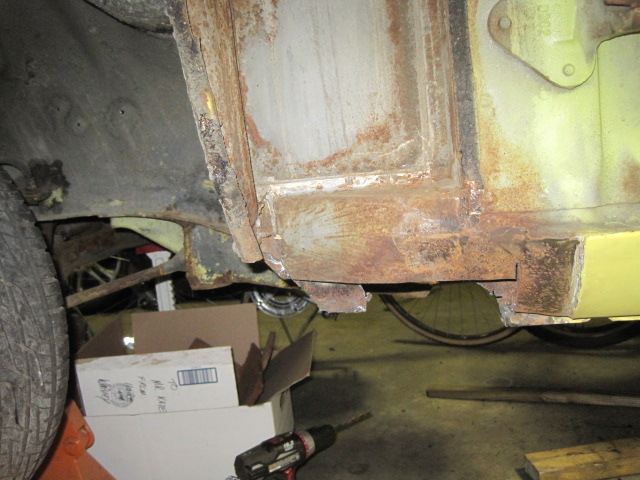
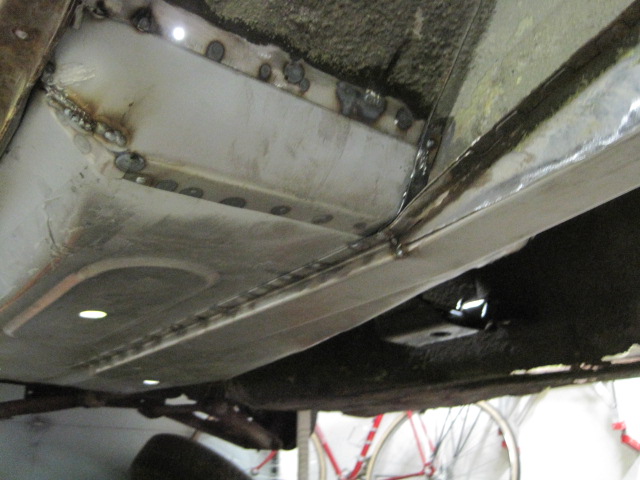
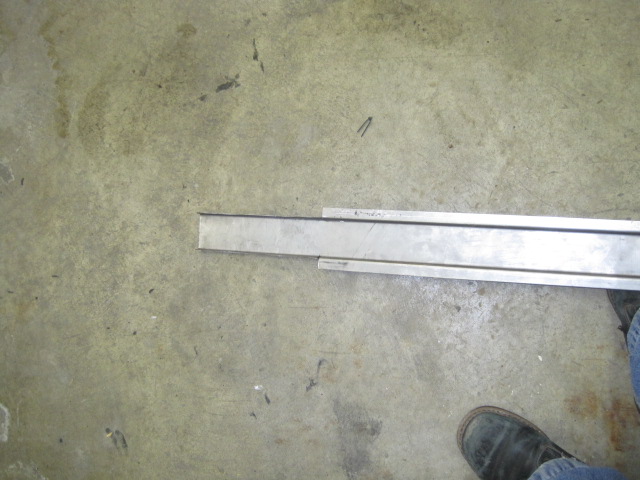
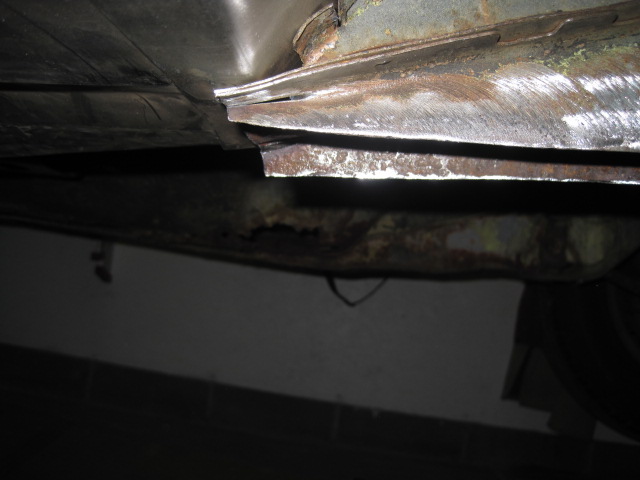
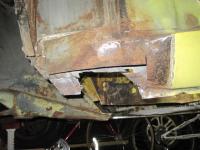
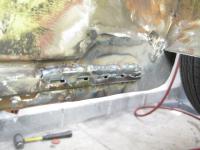
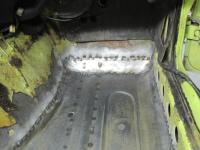
The driver's side floor is essentially the same, but I had additional rust damage to repair first. The rust ate the forward part of the inner rocker all the way thru to the outside of the rocker. The inner rocker needs to be repaired in order to restore the attaching point for the floor. I found some shelving rails that duplicated the rail on the inner rocker nicely and welded it into place after welding in some sheet to replace the inner rocker.
-
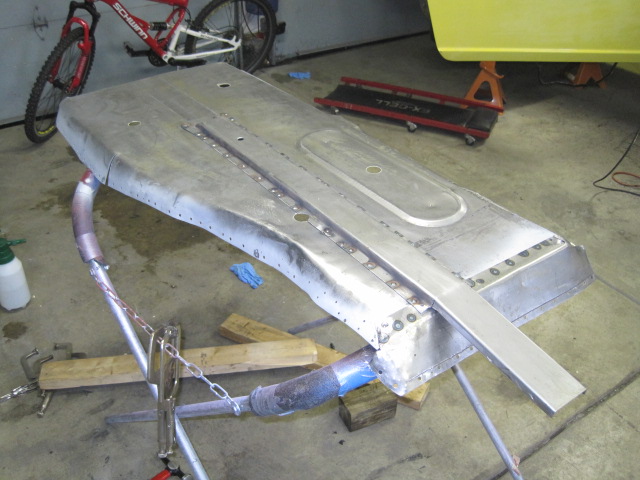
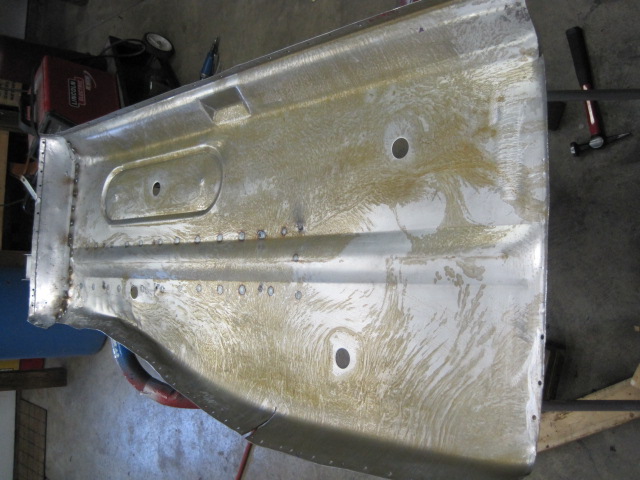
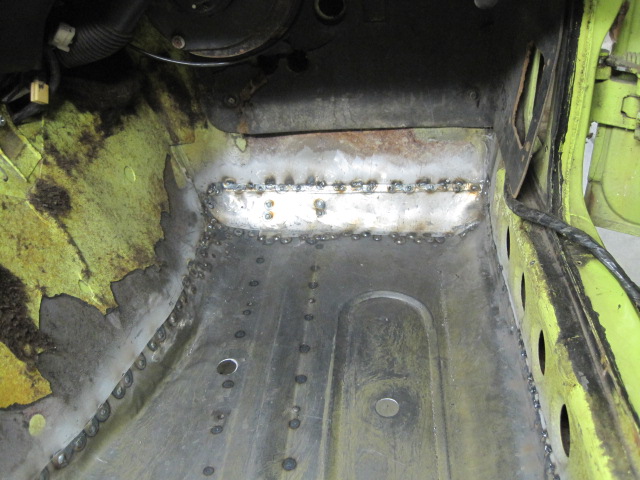
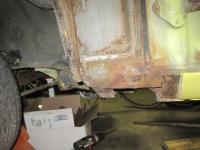
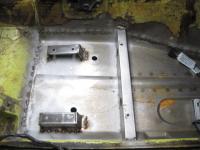
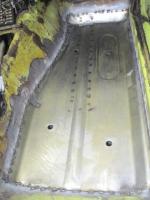
The seat rails are heavy duty and nothing like welding with new metal. It was easy to see from the removed spot welds on the inner rocker where the seat rails should be positioned. Now it was a matter of placing the rails on the floor and throwing in a seat to check alignment of the rails. I marked or outlined the rear rails so i could tack weld them to floor after removing the seat. You might be able to tack with the seat in. Make sure the rails on the seat are parallel and square when you are lining things up. The seat should drop in the holes easily when the rails are tacked in place. Once confirmed you can finish welding them in solid.
-
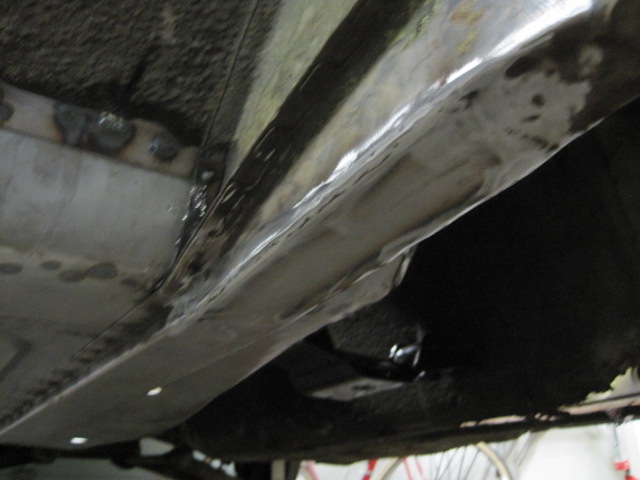
It worked out well, but if i remember correctly you lose a little length of the rail in the back if you try and cover the whole tension box. Maybe someone can measure for you or give you a reference point for where the stock frame rails sit-exactly. is it going to make a big difference strength wise if they are scooted forward a bit-doubtful, but you should measure. I will try and remember when i get back in town to look at the pristine 71 in my garage right now that has original floors.
-
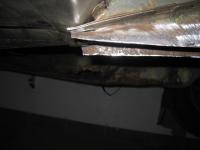
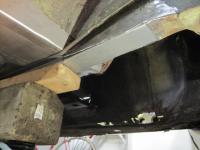
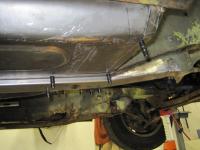
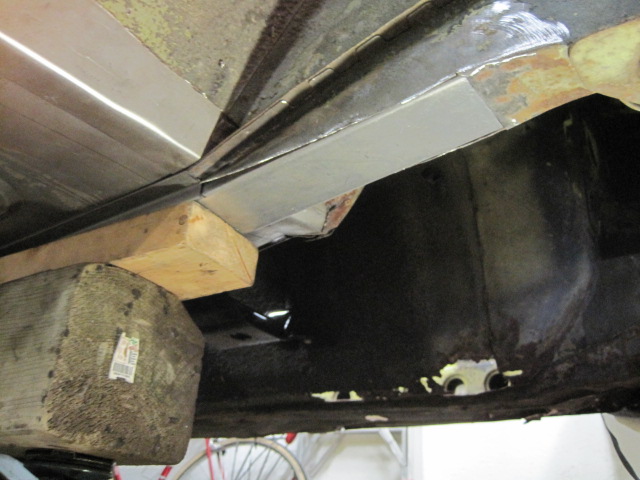
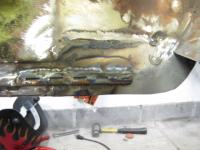
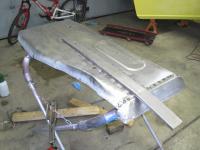
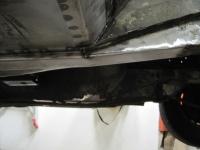
Well things were fitting good so it was time to make some things permanent. Since I wasn't going to be able to flip my car over to weld, i needed to be inventive to avoid welding on my back. This is where the Clecos are worth their weight in gold-IMHO I just pulled the complete assembly out and put it on a stand to weld my patch panel and frame rail-WHILE STANDING UP:classic: I had a flanging tool that also had a 3/16" hole punch on one side. I used the hole puncher to set up for plug welds on the panels. I like the idea of plug welds since you get the weld closer to the center of the project instead of just welding on the edge of everything. The plug welds duplicate the spot welds the best. I also used some stitch welds in between the plug weld for extra strength. I didn't see a reason to stitch weld the panels solid-IMHO. After the rail was welded to the floor it was time to put the assembly back in the car to finish welding it all together.

-
I don't think there is a set way of putting in floors -either from the bottom or the top-just get er done;) If i could have flipped my car over I think I would have gone your route. If you were also able to save the seat rails, then good for you, less work for later. Looks like your tension boxes have seen better days. I also had to repair inner rocker stuff which i will be psoting pics of shortly Looking Good!
-
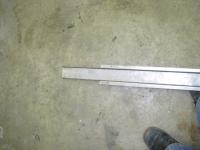
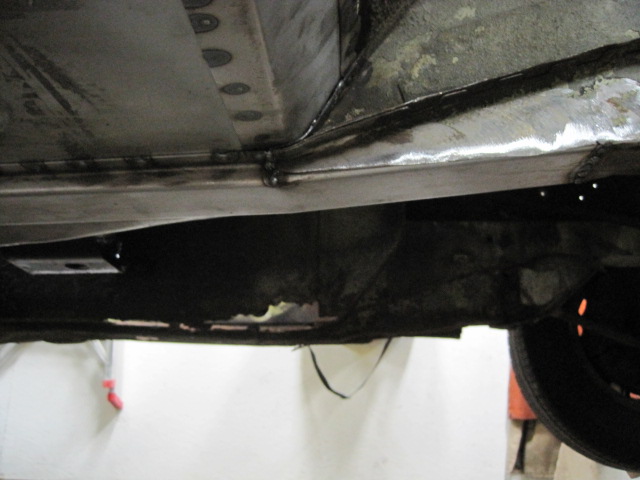
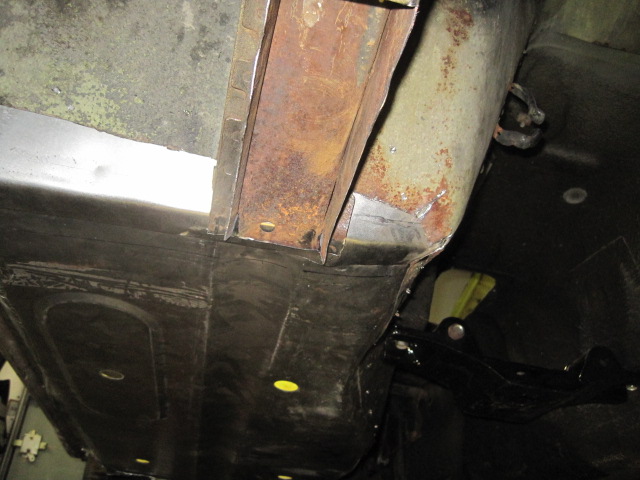
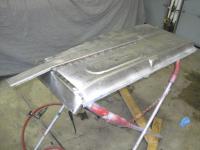
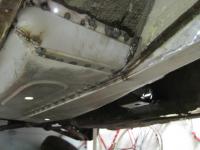
Now that the floor is in place, it's time to tie in the frame rail. Pretty much a no-brainer where it goes, but something to consider. The rails are a bit long which gives you an oppurtunity to fix the tension rod boxes if they are beat up-like mine. I cut out the bottoms of my tension boxes , then trimmed up and bent the frame rails to fit. once things lined up well-- it was Cleco time again. More pics