madkaw
Free Member
-
Joined
-
Last visited
Everything posted by madkaw
-
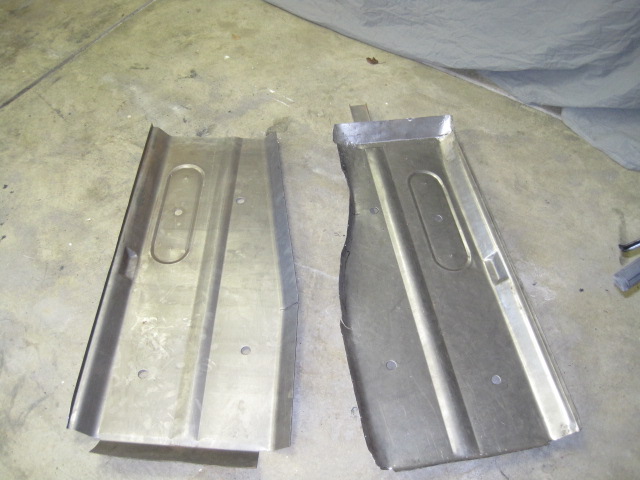
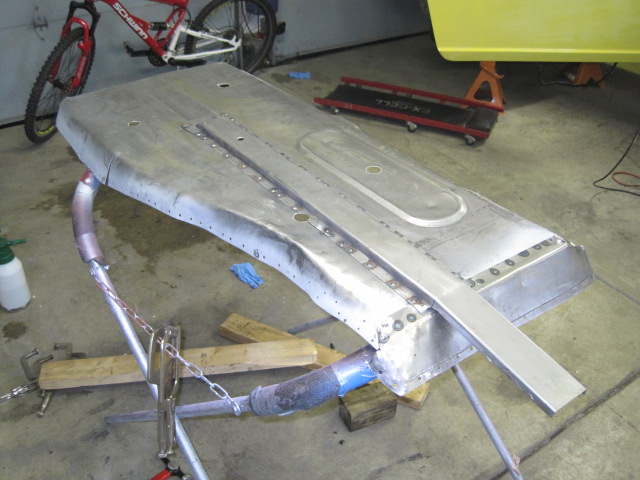
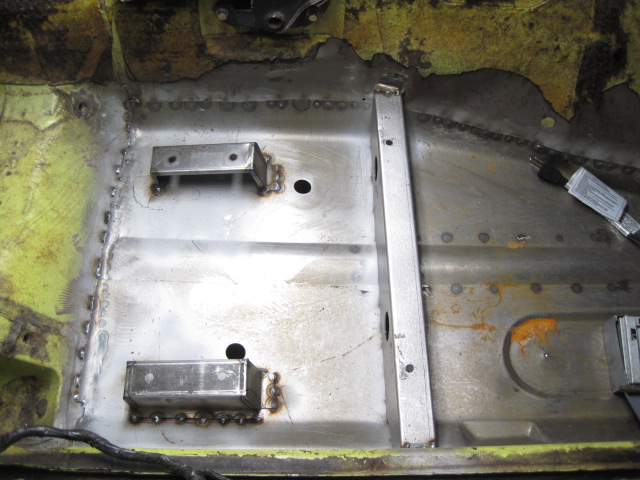
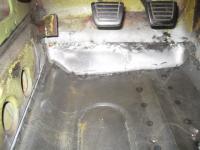
 Floor pan replacement is not an easy job. I think the above statement of close to 40 hours for a DIY'er is a good estimate. If you think the floor pans are going drop right in and fit right-guess again. The pans will have to be worked to follow the contour of tunnel. Plus, depending on the amount of rust, you might have to add to the panels because they seem to come up short of material on the front of the panel for severe rust. Now we also have the rails to content with. And unless you can rotate the car upside down, you will be welding on your back for a lot of this. Oh yeah, did we talk about seat rails yet? Can you save the old ones? Well you will have to remove them and clean them up to reweld to the floor. Or buy new ones and cold work them into place and tets fit seats and remove seats. I can see why an experienced shop would either not want to do this work or charge big$$$ They don't make much money and it's hard work. Not trying to scare you or persuade you as much as make you aware of what you could be in for

-
That is the fastest ,cheapest and best FIRST step you should take. It eliminates so much right off the bat!
-
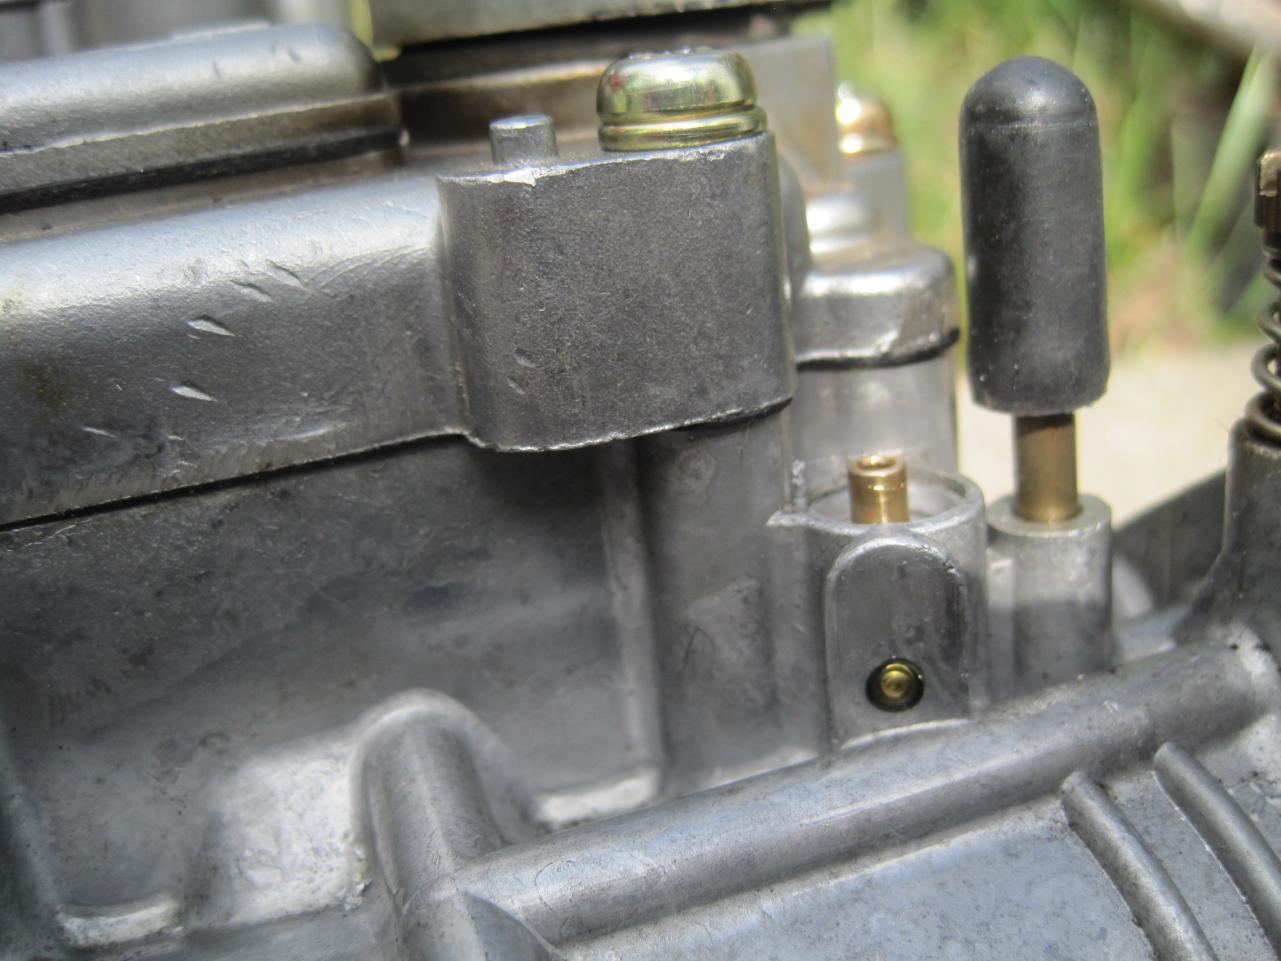
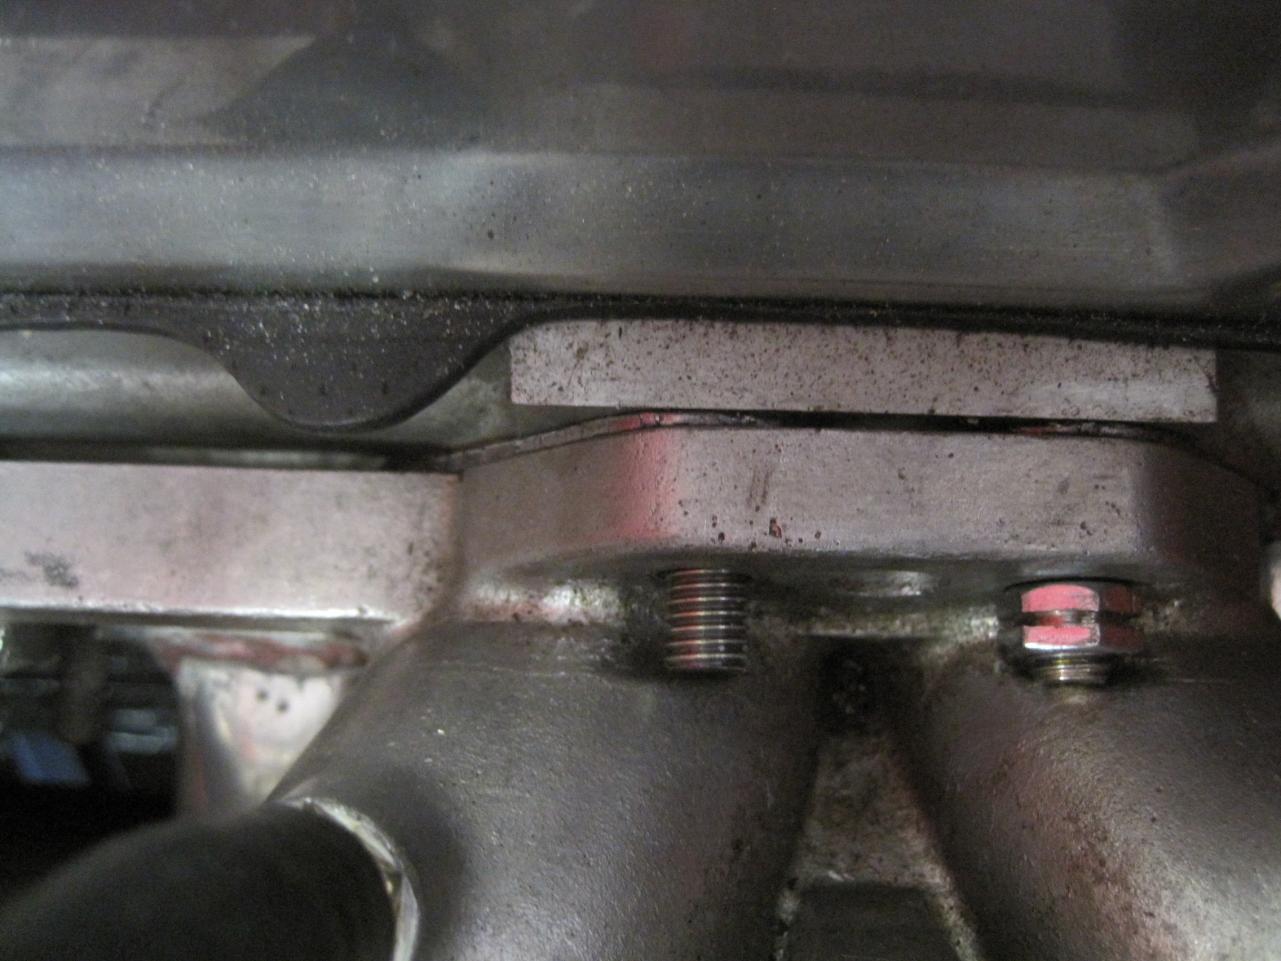
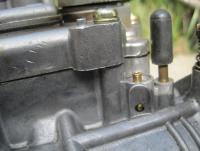
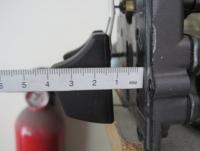
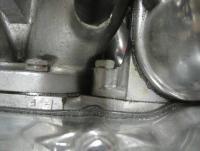
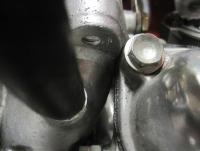
Well I have established for sure that not all of my accelerator pump nozzles are shooting fuel. I decided to remove everything to replace my intake gasket-since I reused my old one. The old gasket didn't show leaks under idle, but I needed to eliminate any possibilities or guessing. Since I removed the carbs from the intake i could have a clear view of what's going on. #1 cylinder had NO fuel coming out of the nozzle, while #2(same carb) shot out 3 feet in the air-and almost in my eye:stupid: The second carb was a little better, but small amounts of tip-in of the throttle showed that the nozzle wasn't 100%. You should see a bit of projectile fuel with the smallest of throttle movement. Any lack of fuel would show up as a dead spot in transition while driving. I pulled out the nozzles to check cleaniness and make sure all ports were clear. Todd also told me to make sure the packing washer is there under the nozzle when you remove it. Another note about nozzles are that they are keyed and will only fit in the carb body one way. They are keyed to make sure the squirter hole faces down the port. When you drop the nozzle back in the carb body-it should fit flush with the top. The picture is the nozzle IMPROPERLY installed-notice how it sticks out! I did drop the cover off the bottom of the carb that covers the diaphram of the accelerator pump, and it looked great. So for some reason I am not getting fuel into the nozzle cavity so it will squirt out. Steve, I tried pumping the "air" out by filling the body with fuel and operating the throttle-MANY TIMES! I could only get fuel to come out one of the nozzles, I must have a blockage somewhere or the check ball is stuck, not sure how to clear that up, but I haven't done any compressed air yet. After talking to Todd, I readjusted the floats. See the picture for proper adjustment. Todd said he likes to see 13mm between the lid(with gasket installed) and the top of the float. Measure at a point parallel with the brass tube in the background-roughly in the middle. The manual calls for 12mm-12.5mm.
-
Here you go Mike! http://forums.hybridz.org/index.php?app=core&module=attach§ion=attach&attach_id=2126
-
steve, I don't see how to richen up the idle without installing a bigger primary jets. I'd like to know what jets you are running? Did you work the accelerator pumps while on the car or off? At this point I am thinking of pulling off the carbs and holding the butterflies open to see the pumps working.
-
Just thought that I would mention that I found the MANUAL on this site and hybrid in PDF format. Just google and you will find it. I will post up the link when I can.
-
Well I wish I would be reporting that the Mikunis are up and running- but there not:( I will say that I have been talking to Todd at Wolfcreek and I am impressed. He might come off as gruff at first, but just think about all the dumb calls he gets. So if you plan on calling him for help or advice- be prepared to answer SPECIFIC questions and prepare to LISTEN. Right now I have a decent idle and the car will rev-up well, but it actually stalls during a slow transition from idle. I have to adjust out the primaries 3 turns to get the car to idle. I have 57.5 primaries in there now. 180 main air 140 main jet 45 acceler nozzles Todd recommended that I make sure the accelerator pumps are working. Sometimes it takes a while for them to prime. Also, check your floats by hanging them on their seats and measuring. I can't way to drive and test out my CAI!
-
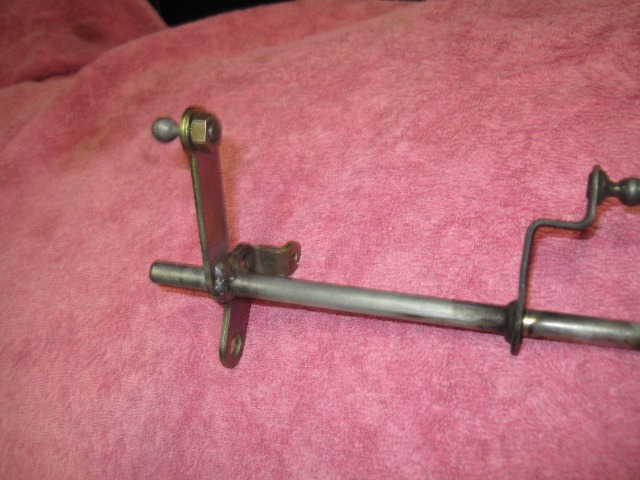
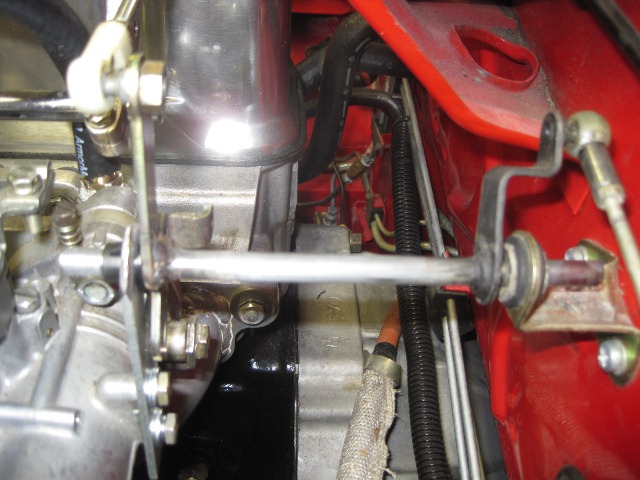
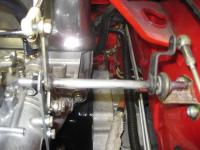
As far as linkage to operate the triples, the cable method would probably be best. It takes up less room and has less moving parts and people seem to be happy with the results--so that's why I did the rod linkage:) Actually the kit provided some pieces to utilize the stock Z linkage, but I couldn't figure it out or I think I am missing some parts. I just had to come up with something to bridge between the firewall and the Mikuni linkage. I scrounged around(never throw away anything;)) and found something that I could modify that had a ball end on it. The stock linkage for the carbs seems pretty stout. I have read of the Webers linkage being weak, but I don't see that with the Mikuni. Time will tell if my set-up will be smooth enough and strong enough. I haven't driven the car yet with the Mikuni's. The challenge for me is the enrichment linkage. I want to run the enrichment(chokes) for ease of starting and to keep from having to drown the carbs with fuel from the accelerator pumps to keep it running on a cold start. The problem is that I need to run a cable choke set-up and I'm running out of room with the linkage I have now. This is where the cable set-up would be beneficial in that I would gain room for the enrichment cable.

-
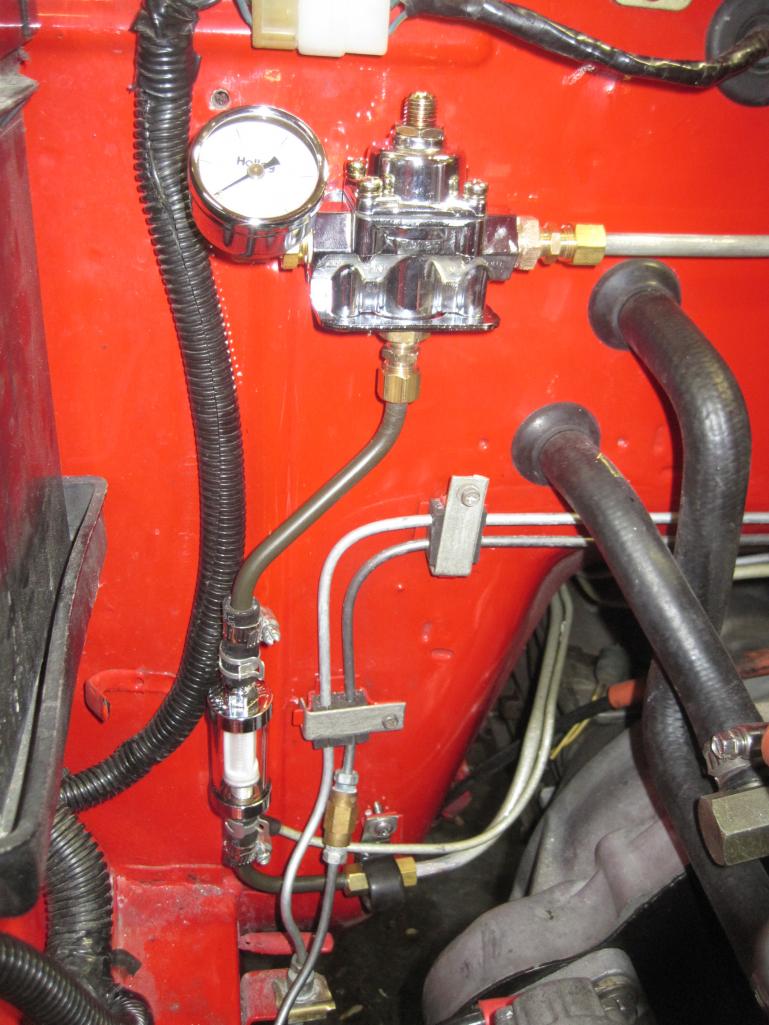
Looking for a cheap way to fuel these triples would have been to use the original mechanical pump and regulator. The kit I got actually had some kind of reducer bushing that went inline with the original fuel line to reduce pressure I believe. I will post up the instructions to help better understand. I went with the RX-7 pump, or a replacement pump for the RX-7. Rock-auto had them for a little as 40$ with everything you need-bracket, connecting hoses and clamps, and also an inline filter. I have read many good reports on them as being quiet and they also operate at the optimum pressure-2.5psi-4psi. I attached mine to the floor in the hatch area. My car is very different then most since I run a centered tank and dual exhaust. It was tight and mounted the pump with some rubber to hide the noise. The pump gives off a slight padder sound that you can't hear when the car is running. I believe the pump was a Tilex. The regulator is a Holley 1204. The fuel pressure guage is just a Summit guage, but it did come with a 90 degree fitting which was cool. Prepare to get adapter fittings for everything else on the regulator. The regulator comes 3/8NPT threads-which is way big for a 5/16" fuel line. I actually cut-off the original feed line and reused it by utilizing compression fittings. I flared the ends that hooked up to my filter so the hose had a good grip and didn't leak. I ran a clear filter to see how clean things are. I decided to NOT run return line. The kit I recieved had bango bolt fitting to run the fuel either way. So far no leaks!

-
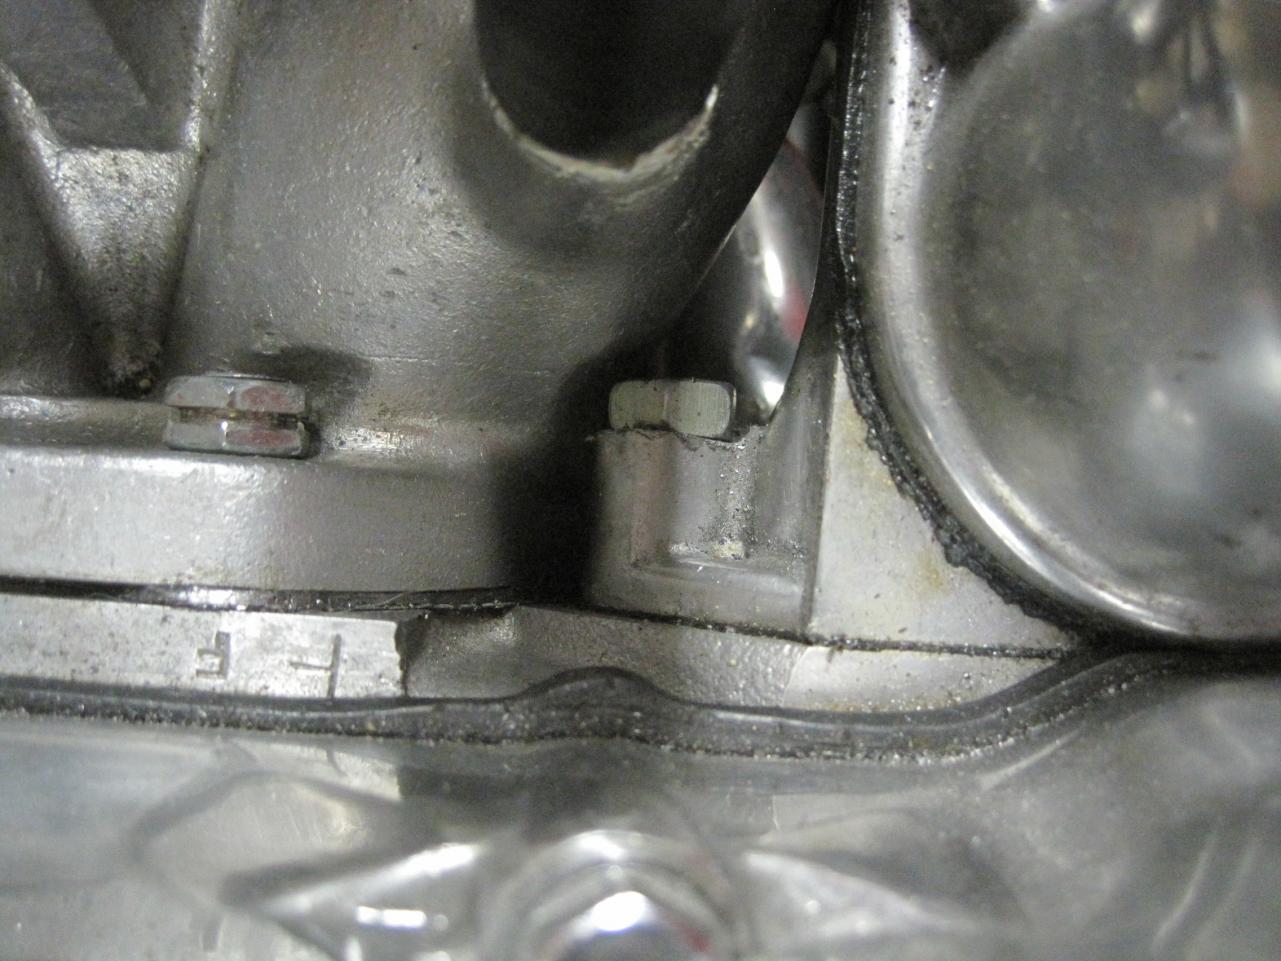
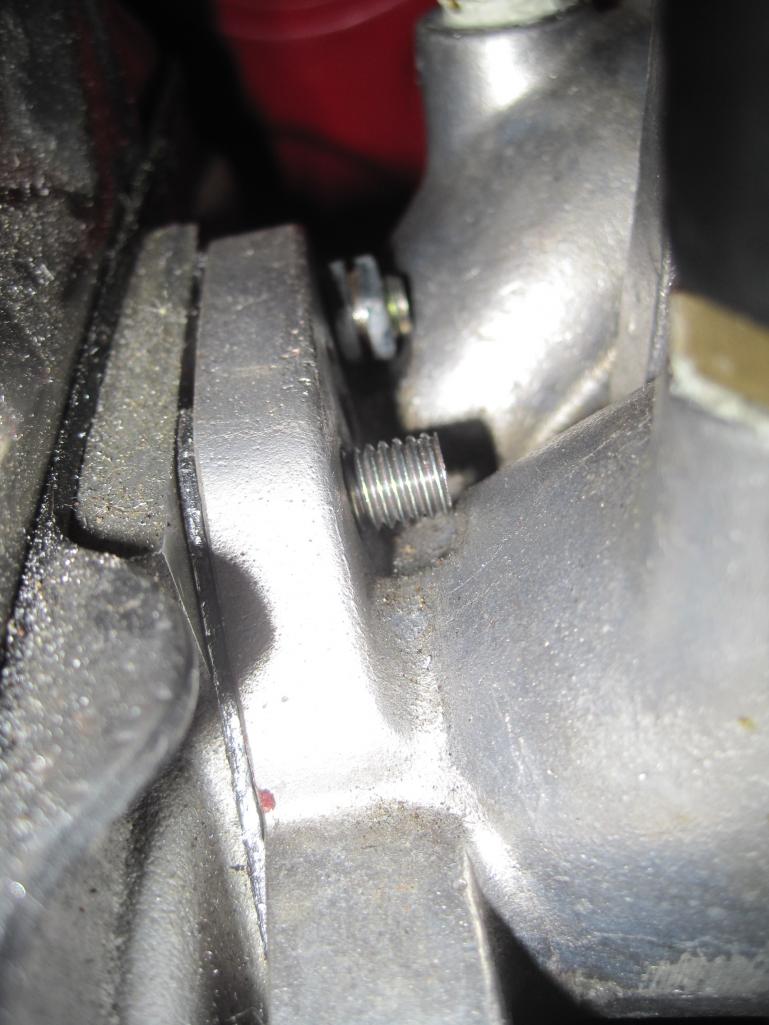
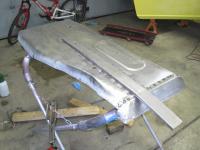
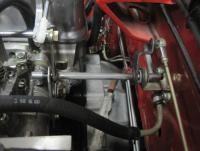
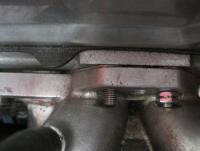
As I press on with my install of the Mikuni's I will try and document the process with pictures and also note things of interest or things to be aware of. First of I will make note of the Mikuni shorty manifold and the issues with it. Mitchell will testify that mounting it is a pain in the a$$. Because the runners turn sharply there is little room for the studs and nuts. If the studs are too long you will run into issues with them hitting the manifold and the manifold not seating properly. So the studs MUST be correct. I was supplied with studs with my kit, but they were so short I only got a few threads in some of the nuts. Since my SU's were mounted on studs, I just tailor fitting them by cuttting of threads until I got the proper length-again, a lot of work. Also, the Mikuni manifold comes in contact with the thermostat housing. It is subtle and could be over looked until you started it up and noticed the huge vacuum leak. The flange on the housing where the aft bolt runs thru is too thick and causes the bolt head to hit the manifold. I just ground down the flange thickness so the bolt would clear. I also had a small clearance issue with the "bowl" part of the housing, or widest part of the housing-it is also close clearance on the intake. The Mikuni manifold was the correct thickness to match the MSA header flange-so the washers work welll to secure everything. The Mikuni manifold is tapped on every runner for -whatever. One hole is larger, #6, so it is good for brake vacuum size hose. All the rest are 1/8"NPT. I decided to gang all the ports together into a vacuum log. Note: I had to chase all the holes with a tap to get the barb fitting to screw all the way in. Another note: the diameter of the ports on the intake runners are considerably smaller then the ports on the head . This is purposely done as anti-reversion. My manifold was built specifically for the Z car and I believe Mikuni knows what there doing. It does look way different then the SU manifold, but don't be tempted to port match the manifold to the gasket-unless you making a screamer. I thought I had a pic, but I can't find it right now.

-
Mitchell, What are your pilot screws set at- how many turns? Also, any regrets for not running the fuel enrichments(chokes)? Just started mine today and it didn't seem to want to do much as far as an idle until I engaged the enrichments( It was a cold start)
-
That's what I thought and that's what I'll do!! I will just hook it up to one end of the log.
-
So I guess most folks running the triples are just putting a breather filter on the crankcase tube? I was trying to science out a way to run the PCV with some vacuum, but I have noticed guys just doing away with this by putting a breather on the pipe. Any negative effects doing this? Since I am going to run a vacuum log I could put a PCV valve on the end of it to hook up to manifold vacuum, but rather not if I don't have too.
-
Walter, love to do that. Don't ever mind showing off the Z! As far as the Mikuni info, another member has volunteered to make a PDF file and host it. I am in the process of scanning the stuff and sending it to him now, so hopefully this will be available soon.
-
This thread is really getting me worked up to get my Mikunis going. Sounds like my shorty manifold was the only option if you want a cold air box since things are so tight with the Webers. I also wonder if the Mikunis will be easier to dial in since they have accelerator pumps. I hope you spend some money to dial your Webers in on a dyno, I think it would be worth the money, plus interesting reading for us!
-
So it's obvious that your SU's were junk- but I will still give you 50$ for them;)
-
Don't drain the gas- thats not it. Sounds like your new to wrenching on cars too. Put a voltmeter on the battery and measure volts while the car is running and not running. What did the spark plugs look like? A weak charging system might cause a weak spark but still run your pump. What do you know abou the engine- we need some history here to help diagnose your issue. Try to give specific information and as much as you can.
-
Looks like your first post- welcome to Classic Z Car. You might want to fill out your signature on your profile that briefly explains what year and model Z you have which will help us help you. Have you tested your charging system is putting 13+ volts to your battery? Sounds like your battery is getting weak which will causes issues with performance. Maybe you have a float sticking on your Mikuni's? Sometimes a little tap on the carb in the right spot might loosen things up. Some history on the car? Like carbs been rebuilt recently?
-
Not sure I know how to do a PDF file. I just barely get by with the computer stuff!! I do plan on taking pics of the manual and posting them also. Maybe with some guidance I can make a zip file with all the pages in one folder. Are the pages readable as I have presented them??
-
It's not only a higher compression, it has a good high quench area which makes good use of the compression. It does have the smaller valves, but that is easily fixed to improve flow. They have had issues with corrosion around the coolant passages and also cracking around the exhaust valves. The fact that it is rebuilt is good because the valve guides and seats have probably been upgraded, which it would need because of unleaded gas. I would make sure that the oil spray bar has been replaced-they are prone to breaking and then say goodbye to your cam. I would also recommend running some zinc additive to your oil now and then which is helpful to our solid lifter cams. I run an early e88 head, which for all purposes is identical to the e-31. It is a great running head and I have no issues with detonation running more then stock timing.
-
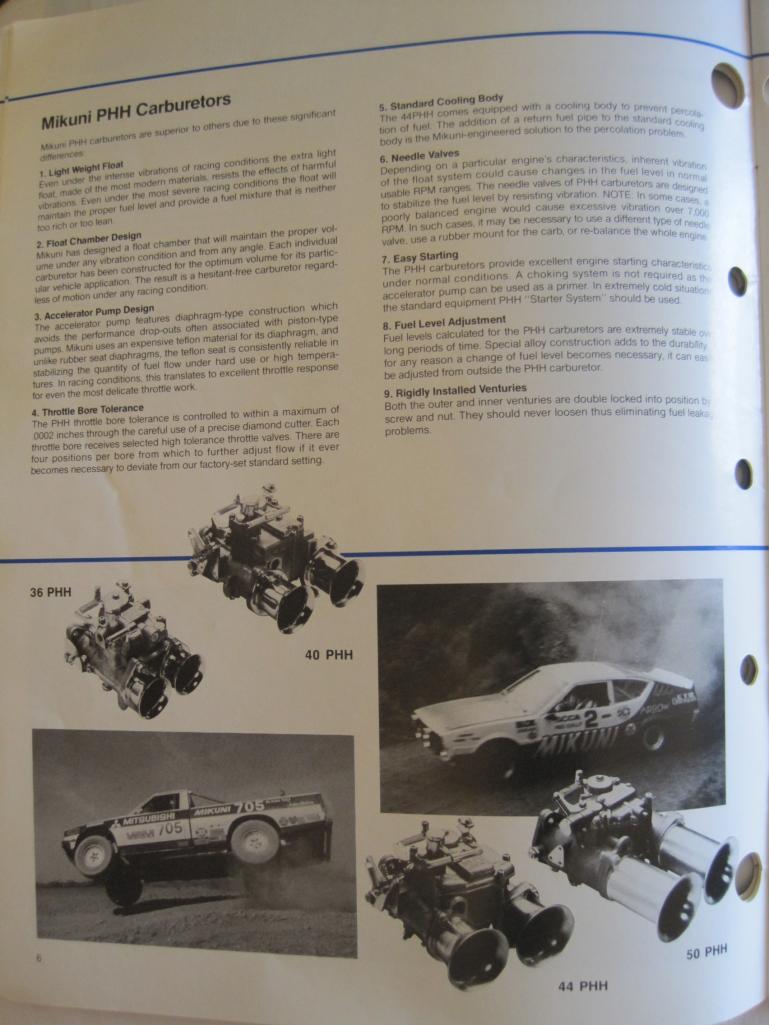
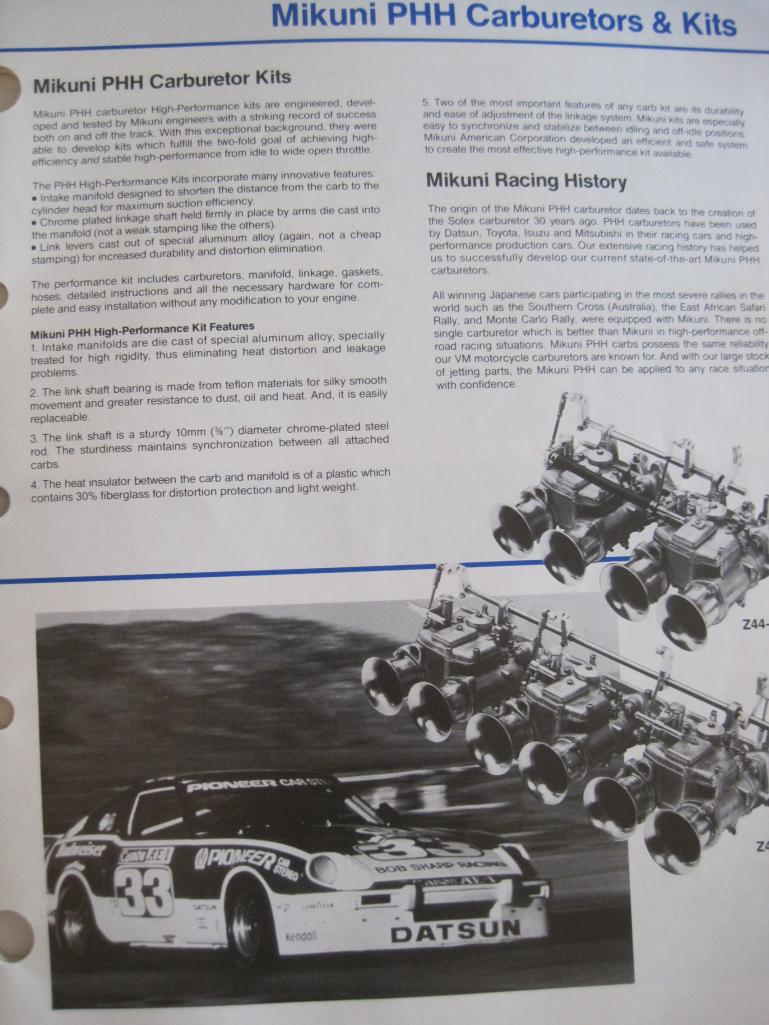
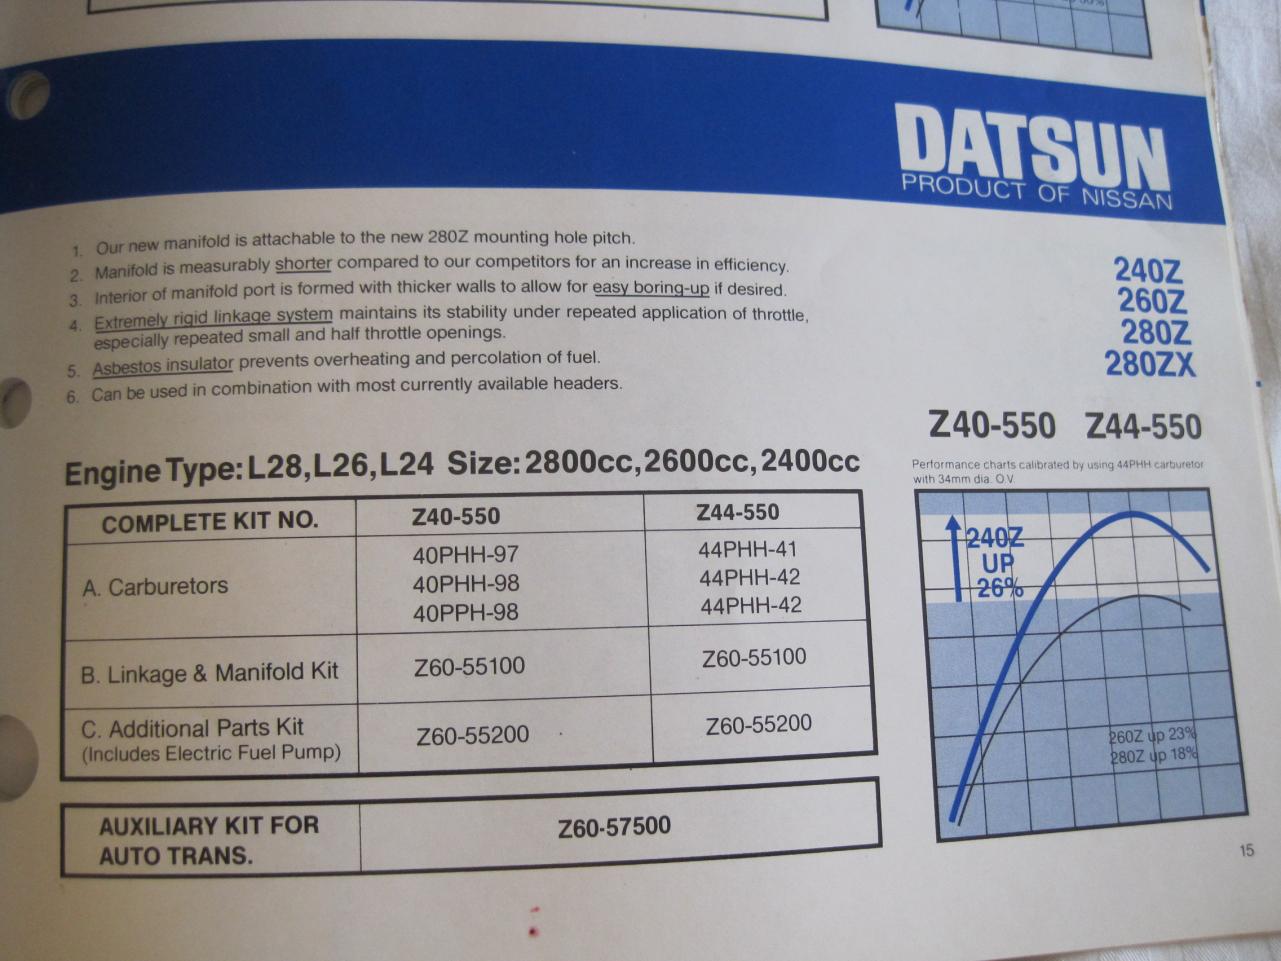
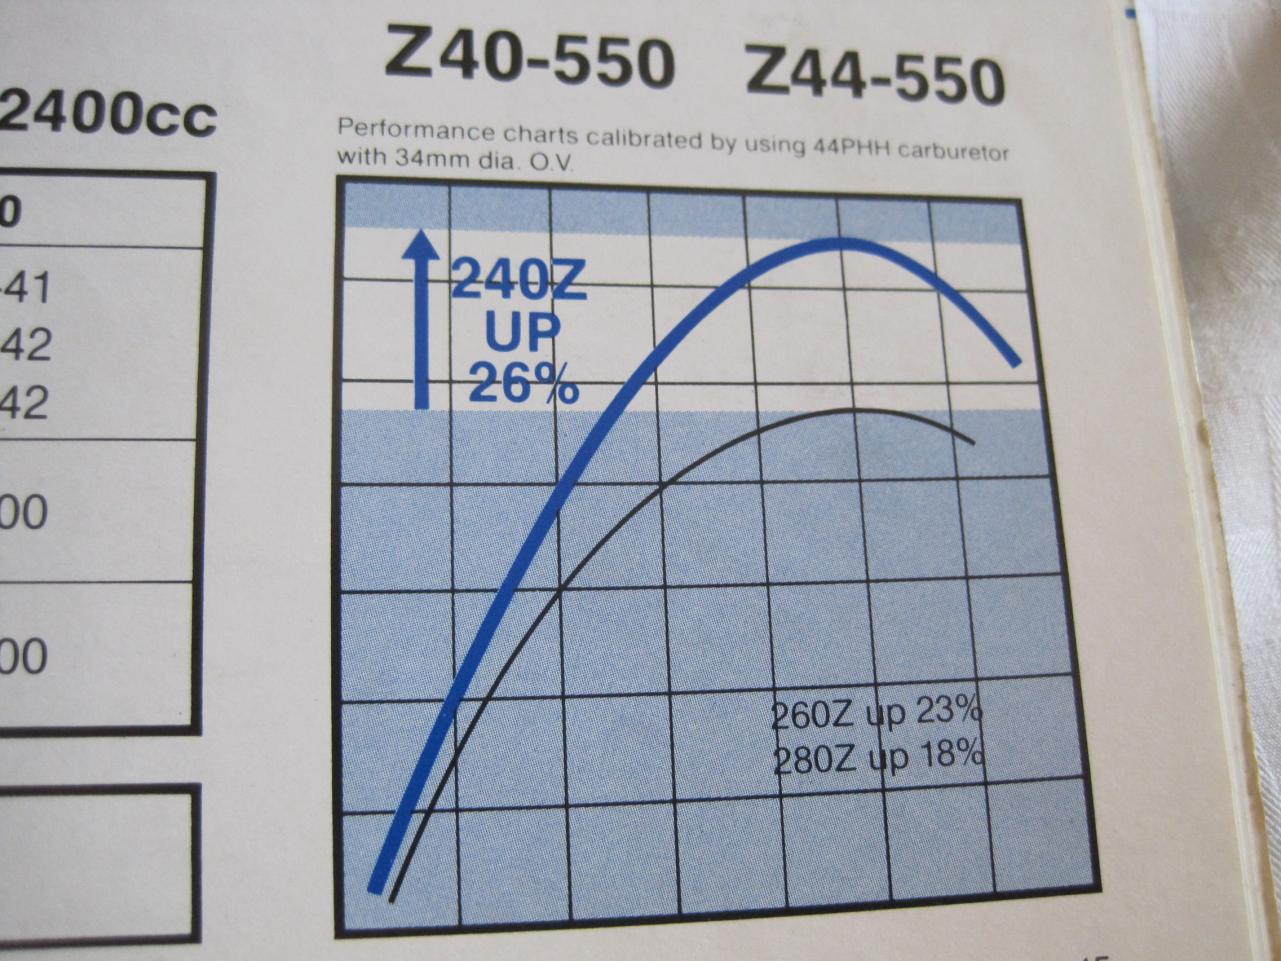
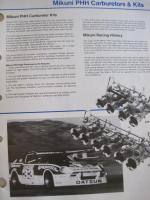
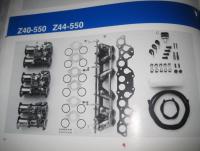
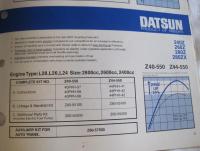
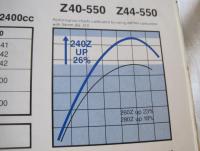
Well some of you that I am now proceeding with my Mikuni install.When I purchased these carbs I got lucky and recieved a very complete kit. These look new right out of the box-infact the carbs came in a Mikuni box:) I even recieved an original 1985 catalog and service manual. I decided to post up parts of these Mikuni publications on here for all to view. Between the two publications I have part numbers and illustrations of the carbs and their parts. Let me know if there is anything in particular that you might want to see. I know folks buy these carbs with the intent to rebuild, but not much to go on. I hope this thread and pics will help. I'll start out with the some stuff from the catalog

-
I have to post up my new love for a TV show-BBC Top Gear. Now it doesn't take too much to interest me as far as shows concerning cars. This show however, has given me a show that I can watch with my son and wife-and they like it too!! My wife is not a car lover like me, but does appreciate a nice car. My son is into the exotics and mostly euro type cars. We all appreciate a crazy fun and the BBC Top Gear covers all that for us. It's pretty exciting for me to cuddle up with the wife and watch a car show-it's almost weird!! If you have never watched an episode, I invite you to give it a shot, it's pretty damn good entertainment in my book.
-
Dave, it has to be satisfying to get to that point of refinement. In the process of all my mods on my car I have been watching for ways to gain that refinement. It sucks to have a sweet looking ride and then have to listen to those squeaks and rattles when you drive the car around. Thanks for pointing out some of your finds since they are probably common with a lot of these cars. It's a PITA to find some of these noises since they transmit to other areas of the car.
-
Under the glove box corner of the cabin. I think it is a seperate wire plug and it's green, just fish around all those wire bundles under the dash by the glove box, you will find it. I might wire my relay in tomorrow and I will take pics if I do. The UPS man showed up today with a Mikuni install kit:)
-
If your using a fuel pump relay then do you really need to find the exact route of that wire. If you find where it comes off the ignition switch and where it goes towards the back of the car then you have enough.