madkaw
-
Posts
4,338 -
Joined
-
Last visited
-
Days Won
18
Content Type
Profiles
Knowledge Base
Zcar Wiki
Forums
Gallery
Events
Downloads
Store
Blogs
Collections
Classifieds
Everything posted by madkaw
-
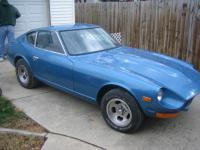
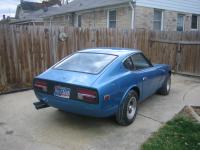
I guess I will end this thread with some more pics of the finished car-or atleast as I was finished with it. Jim has probably more money in this car then what he had planned. There is probably 8k$ in it now. Then if you figure interior and engine rebuild, I can see why the resto shops want so much to restore a car. At least the rest of stuff he can do and keep it on the road. So if anyone is looking for a "shop" in the midwest, drop me a line, I might be interested in helping you out. My car goes to the paint shop this winter so I will be itching to do something this winter. I would also like to thank all the CZCC members for their help on these forums-what did we do before the internet:D


-
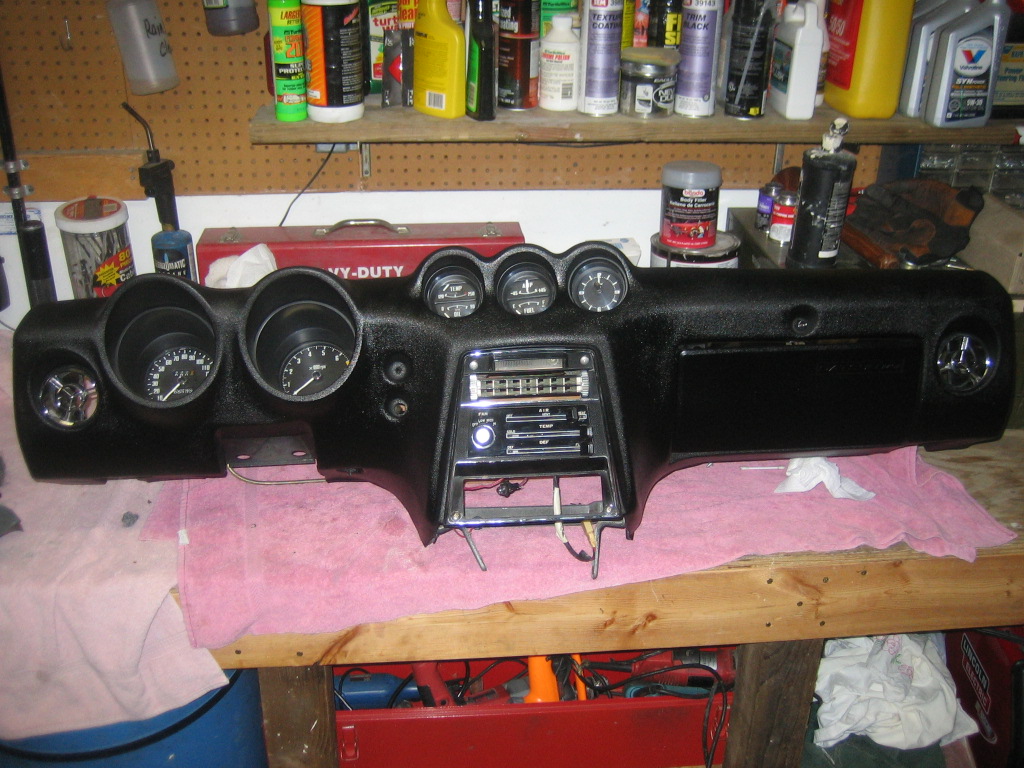
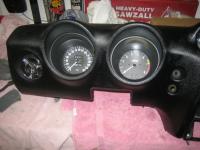
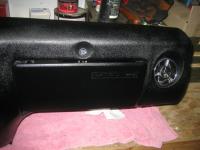
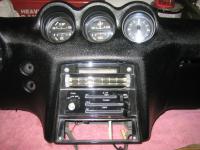
Pretty much have finished my dash resto and I am happy. I used the NAPA repair stuff and finished color was duplicolor vinyl black. The duplicolor has a lot of shine so I should only have to wipe off with rag when it gets dusty. Only thing I wish I did better was the sems texture paint. Don't try outside if there is any wind since you have to hold 20" from the object your painting. I was able to sand it until it looked pretty uniform. I will happy if it does't crack and if it does it will be cover time. I spent a lot of time polishing the chrome and I was pleasantly suprised how well the chrome came back to life. Use some 00steel wool and you will be amazed how well you can get the finish back. I also polished all the gauge plastic. Here are some pics

-
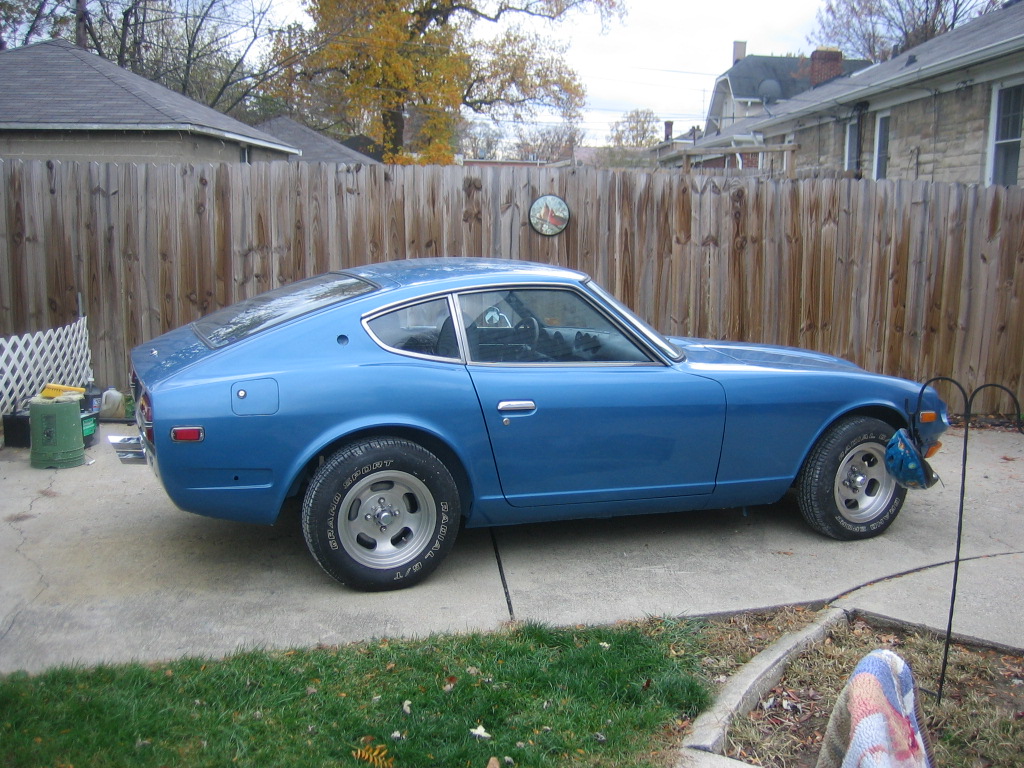
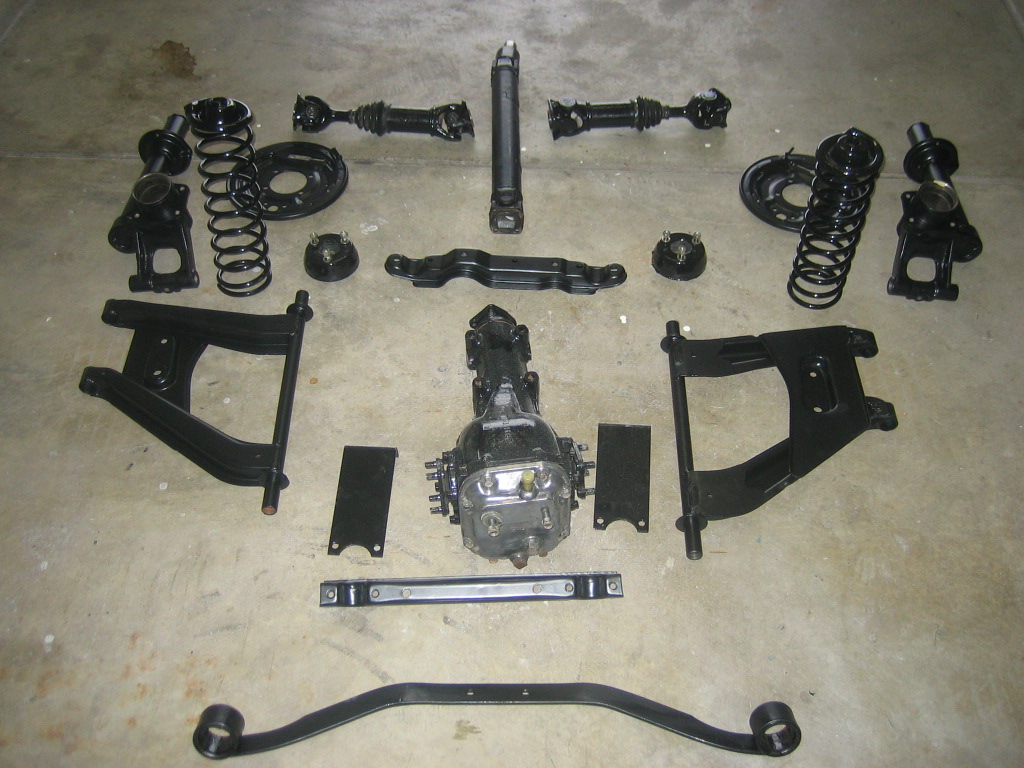
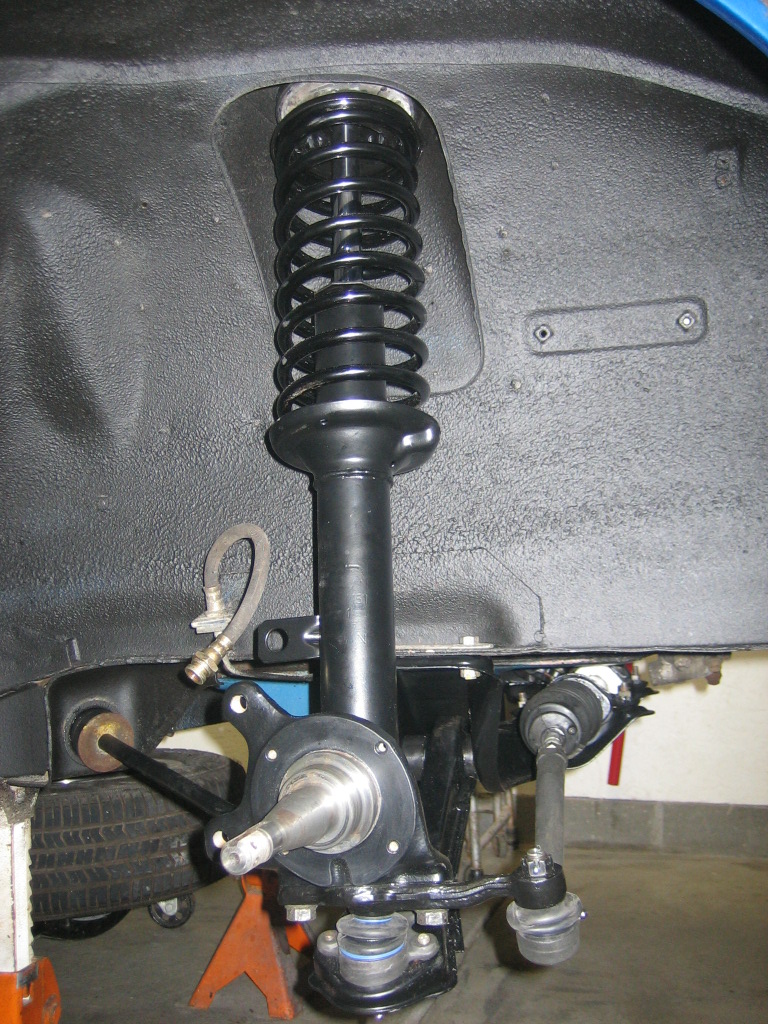
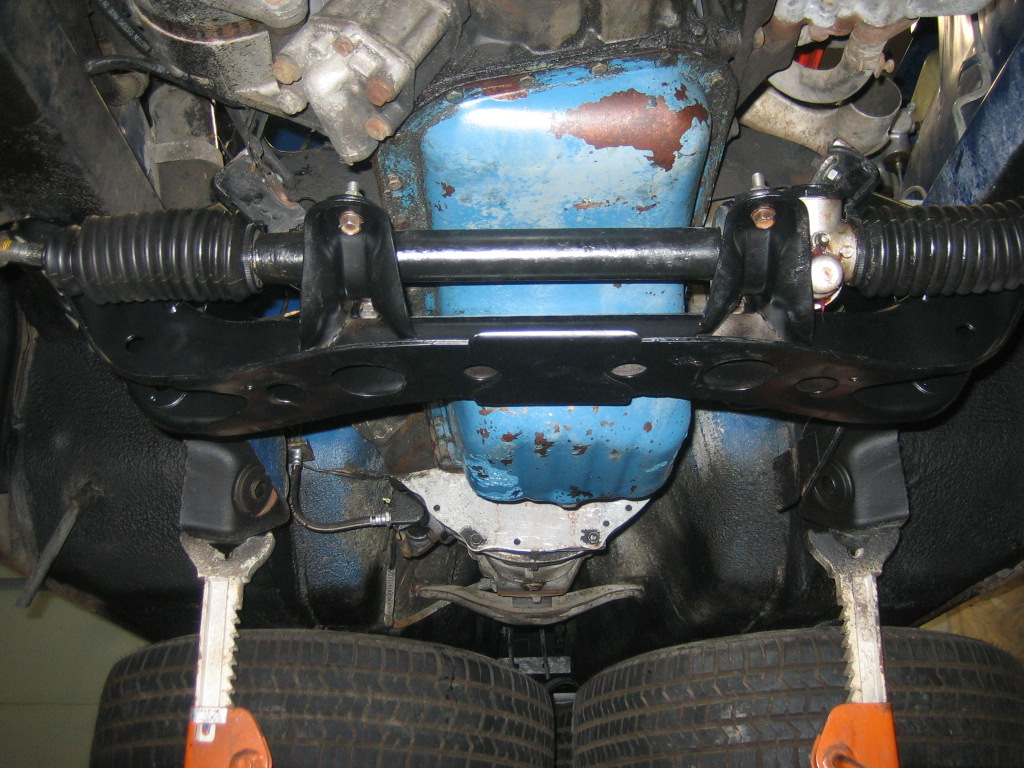
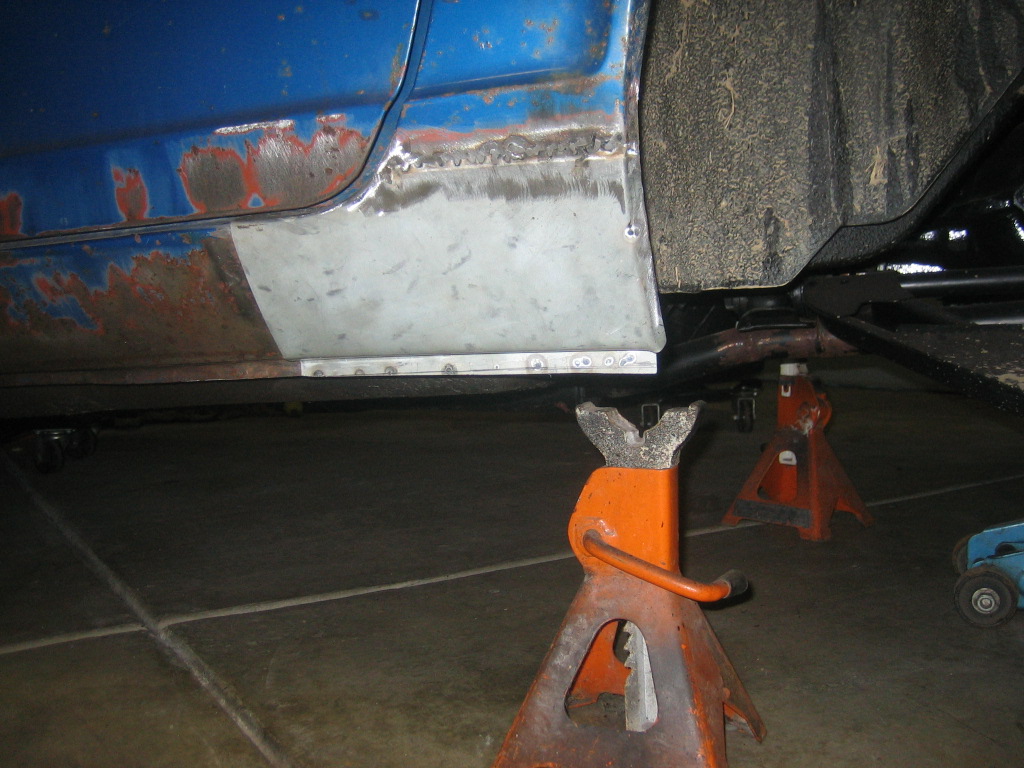
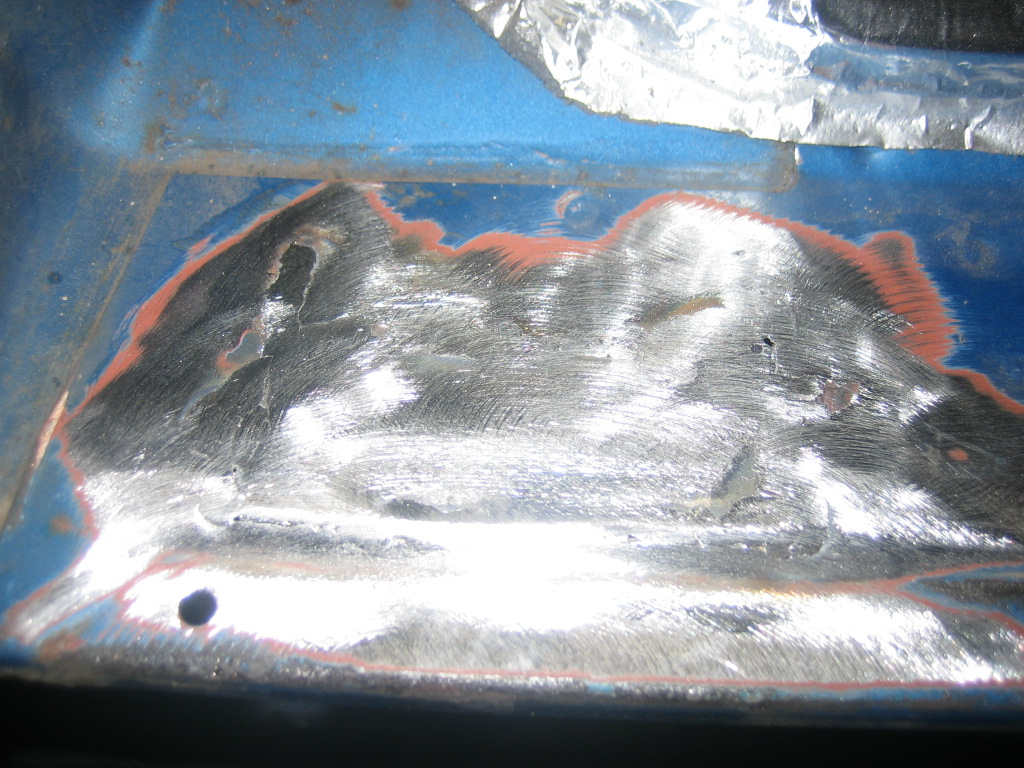
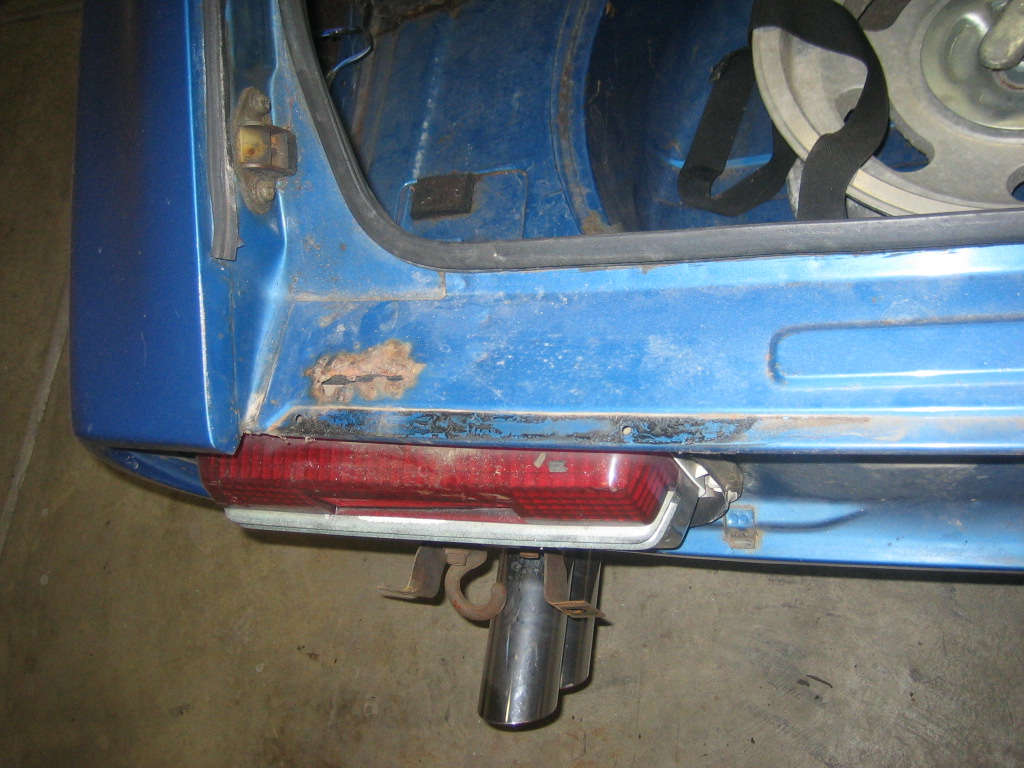
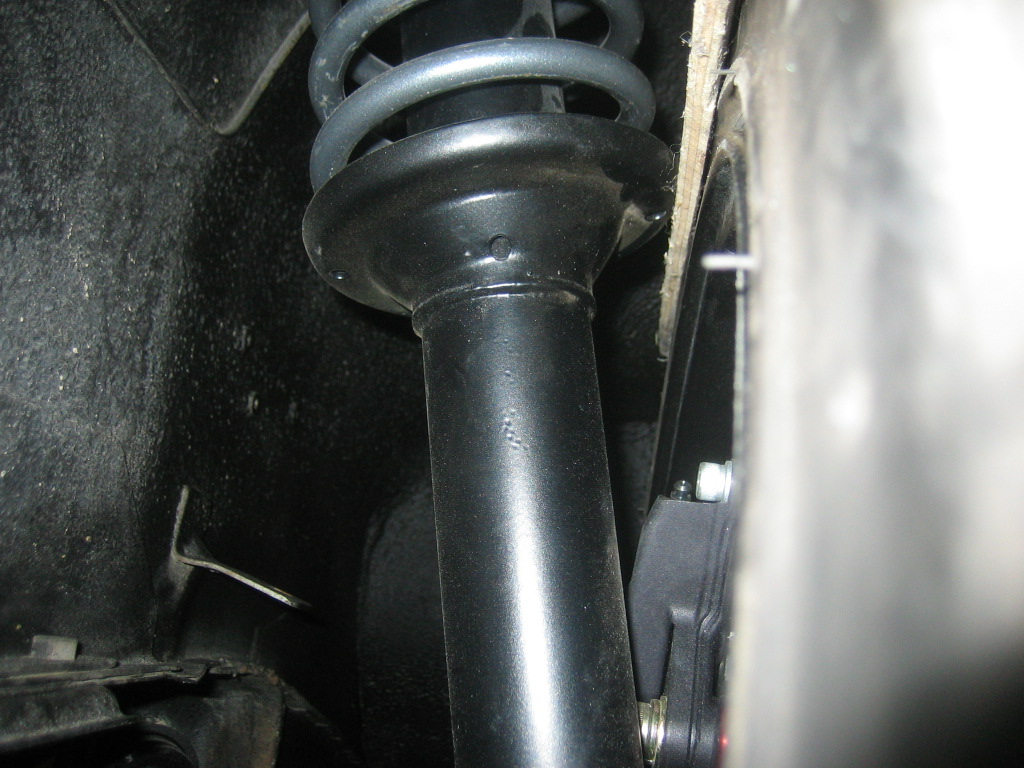
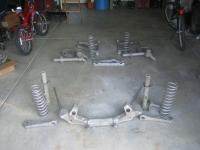
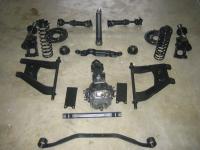
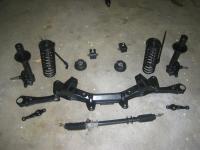
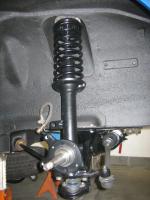
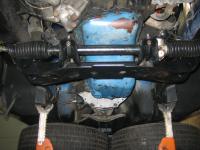
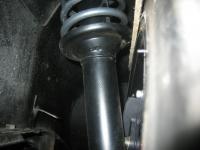
The stage was the suspension and steering. I put the car up as high as I could and started ripping everything out . meanwhile the owner ordered me an urethane kit and some KYB's. I told Jim that I could refinish the suspension bits in POR-15 or have the parts powder coated for a bit more. We decided to have the parts all powder coated. The guy that runs the powder coating shop has a 350z, so he really takes care of me. I replaced all the bushings, even the steering coupler with urethane. The rubber option was there, but was on back order so we decided not to wait. I believe I also changed out the ball joints and tie rod ends. My logic was that if the suspension is that far apart, I feel the ball joints should be replaced and also the rod ends. I also told the owner that if he sprung for the undercoating I would spray the underneath of the car while everything was out of the way. When it was all said and done, the car looked better from underneath then it did on top. What a difference once I got to drive it with the new suspension bits. I even got the front end aligned pretty close:classic: Now on to the body work. i needed to replace the the dog legs and the rear valence panel, and fix some rust damage under the hatch before it went to the painter. No real story here, but I will say the MSA rear valence panel was junk!! Unless you have an english wheel to finish out the curves on the panel, you are in for a lot of work. I would recommend a stock one cut off of another car if you can find a straight one. I had the car for about an year working on it part time. I was pretty proud of the amount of work I got done in that time for just hitting it when I had a few days or hours. I am fortunate that my job sometimes affords me blocks of time to do this. I can't imagine a more fun part time job! I would love to do this all the time- too bad most of the decent cars are out there on the west coast.


-
Carl, As far as "how much" is a low budget, I charge strictly on the hour to hour basis, so every job is different. Eventually I will show everything I did to his car in this thread, which involved about 100 hour worth of work. I only charge 25$ an hour, so even if I was slow, the customer still does alright. I only use this money for my car, not to make bills, so I'm not interested in braking my back or anyones bank. Hell, I have a daughter in college now, I don't have any extra money anymore:cry:, so I have to earn it. The exhaust was good to go , now rebuilding the carbs and cleaning the tank. The Z therapy video is a great tool to set up the carbs before installation. After i put the carbs on and put the gas tank back in and checked for fuel pressure, I attampted to start the car. The fired off so fast and easy it blew me away. I sent the video you see here right after that. That video was only the second time I started the car, notice the smoke. It started out as a blue smoke ,which was all the oil in the cylinders getting burned out, then it turned to a white smoke as time went on. I ran the car for a while to get some heat in the engine to hopefully get some better numbers on the next compression test, plus I planned to change the oil again to play it safe incase to many things loosened up after sitting so long. Fortunetly for Jim, the numbers did come up and got better after every run. Now it was time to see her roll down the road. I went thru the brakes from from front to back. I replaced the MC and the front calipers and brake lines and wheel cylinders and brake drums-the whole deal. I was able to sell Jim everything from my car which was in great shape since I was upgrading to Wildwoods all around. I couldn't even salvage the drums because someone had beat them(probaly trying to get them off) to the point they were unsafe. The car rolled fine , but the obviuos was true that the suspension was shot. http://s2.photobucket.com/albums/y9/_mad_kaw_/?action=view¤t=JimDerksZ072.flv
-
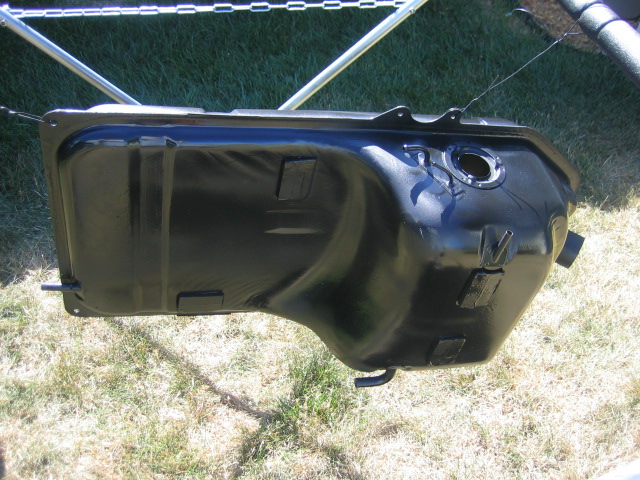
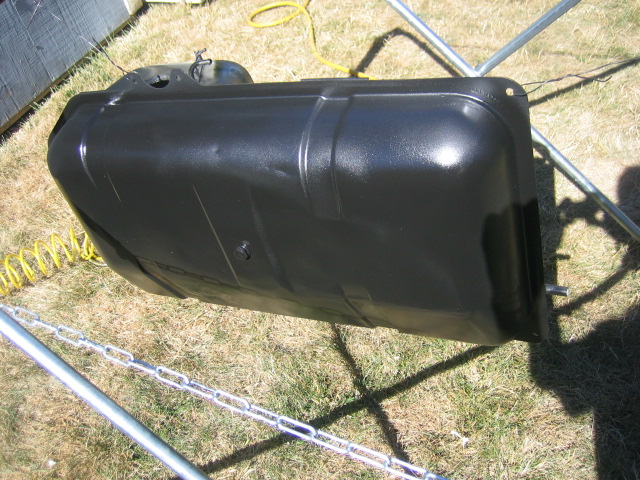
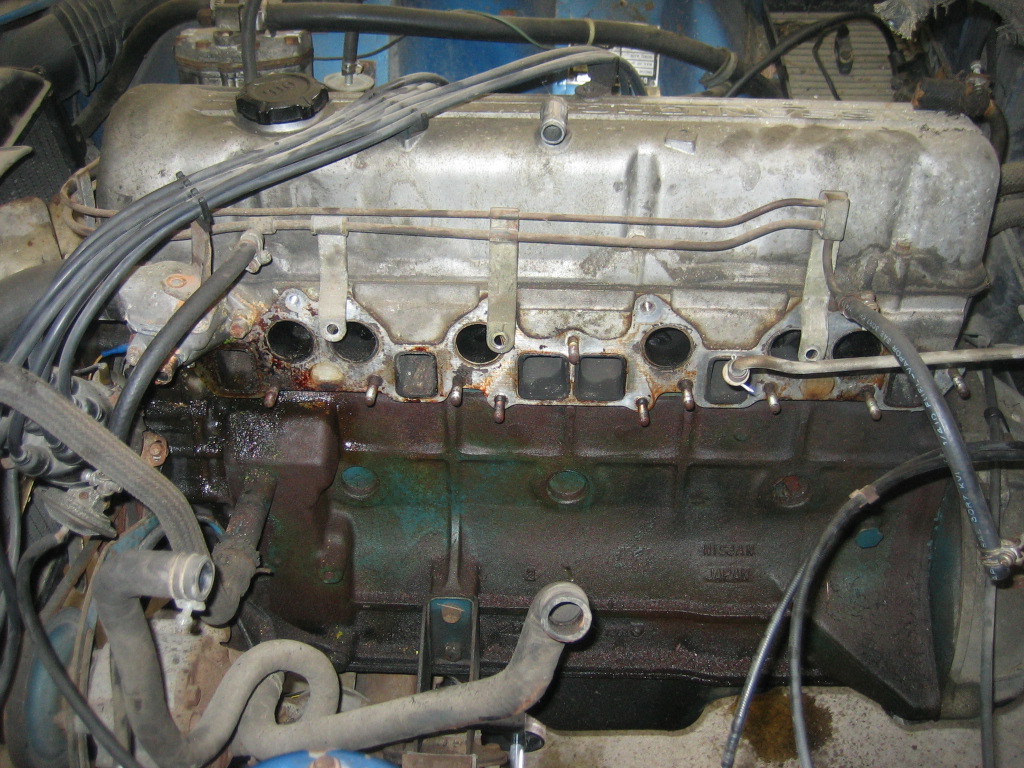
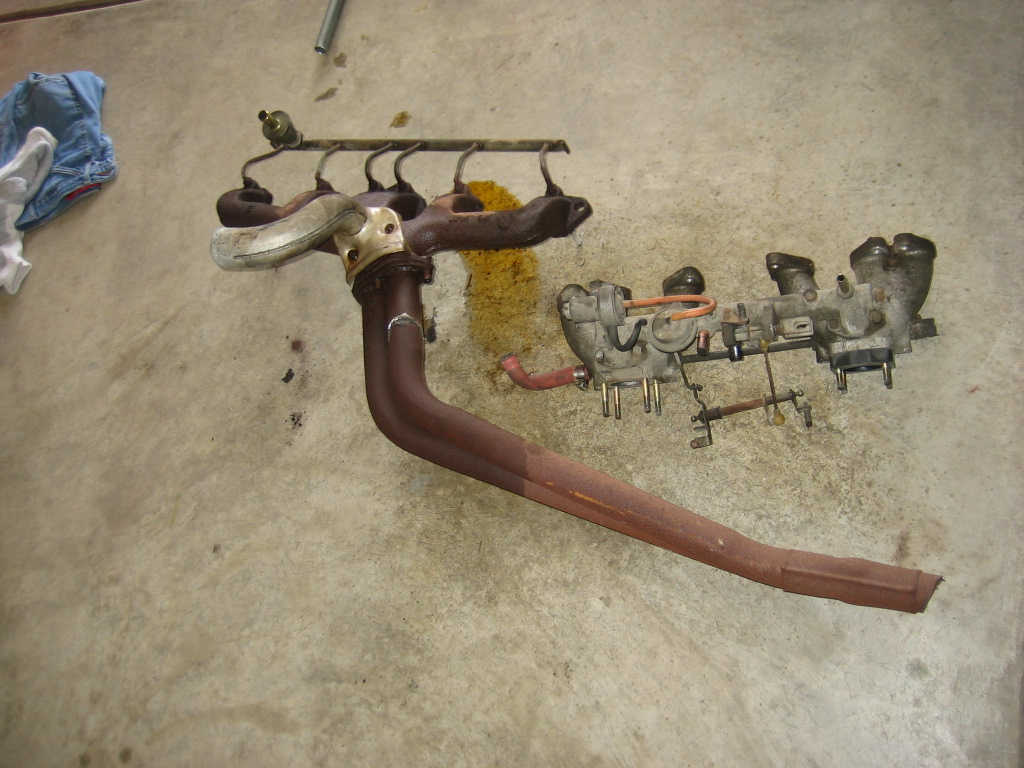
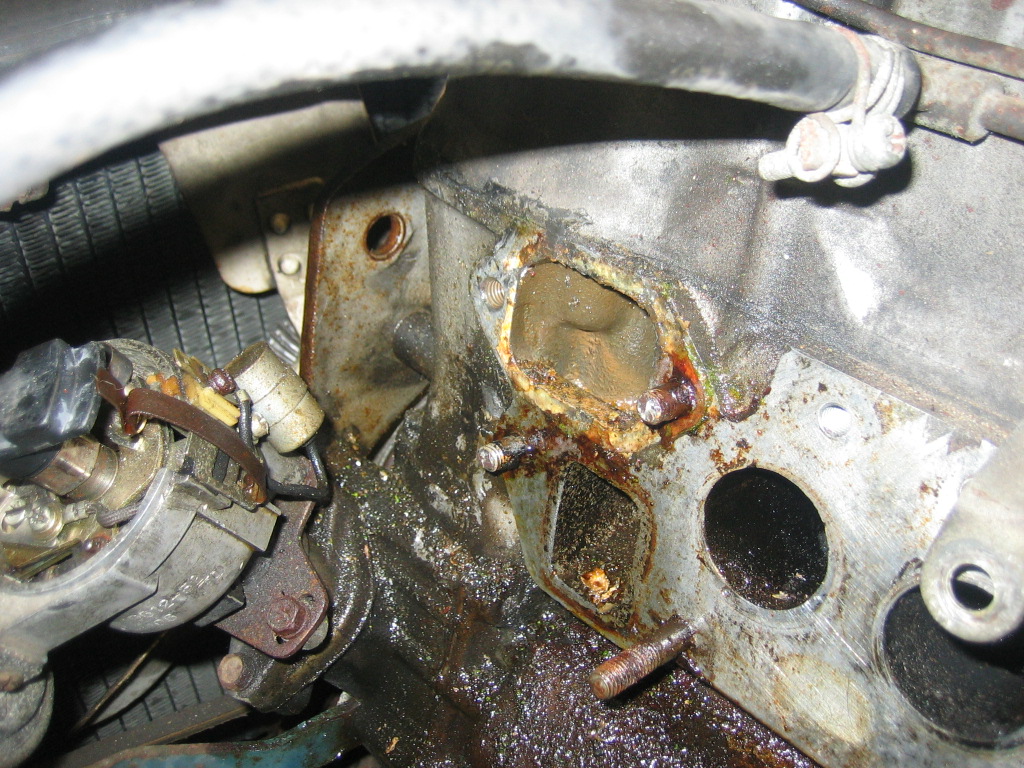
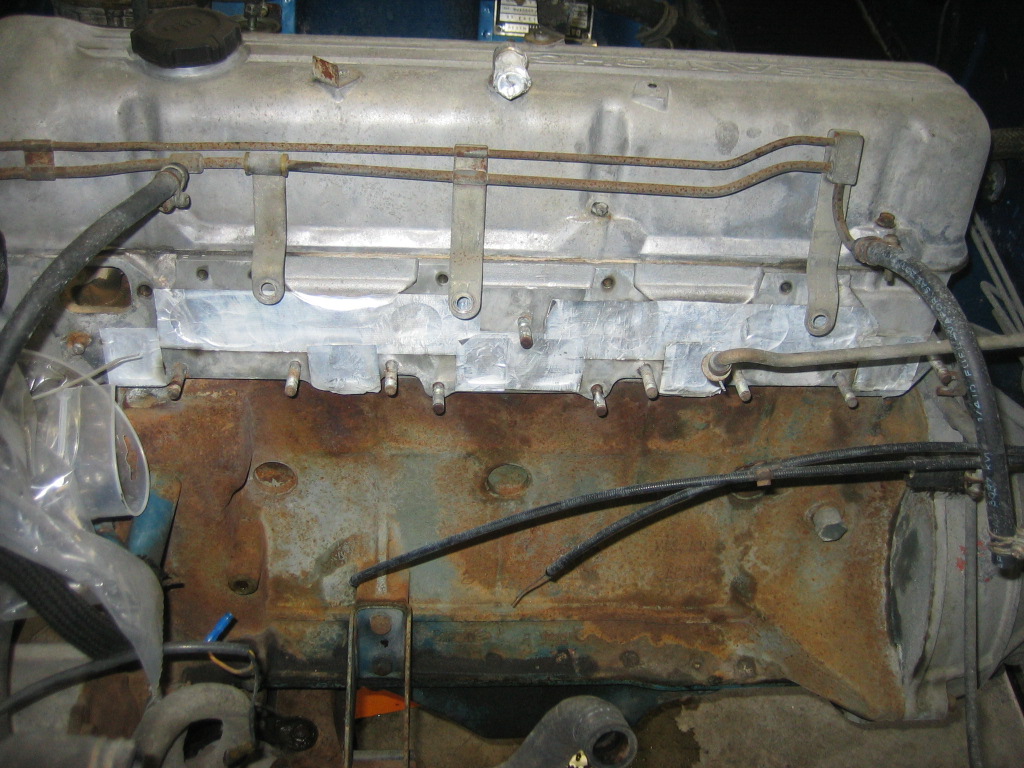
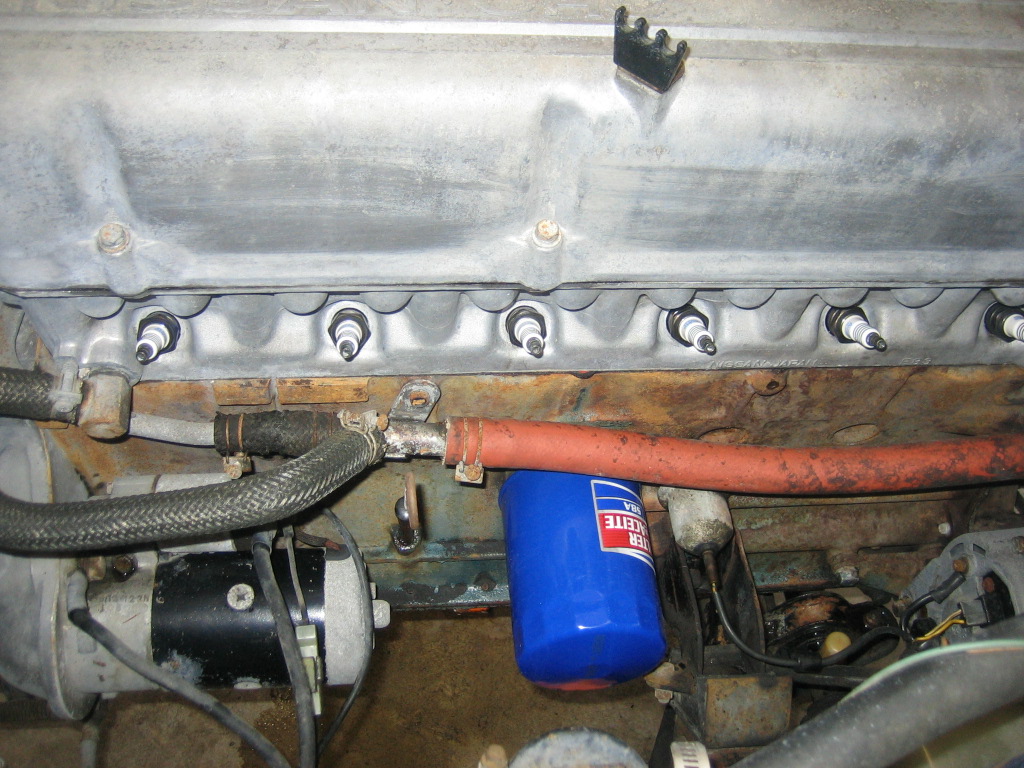
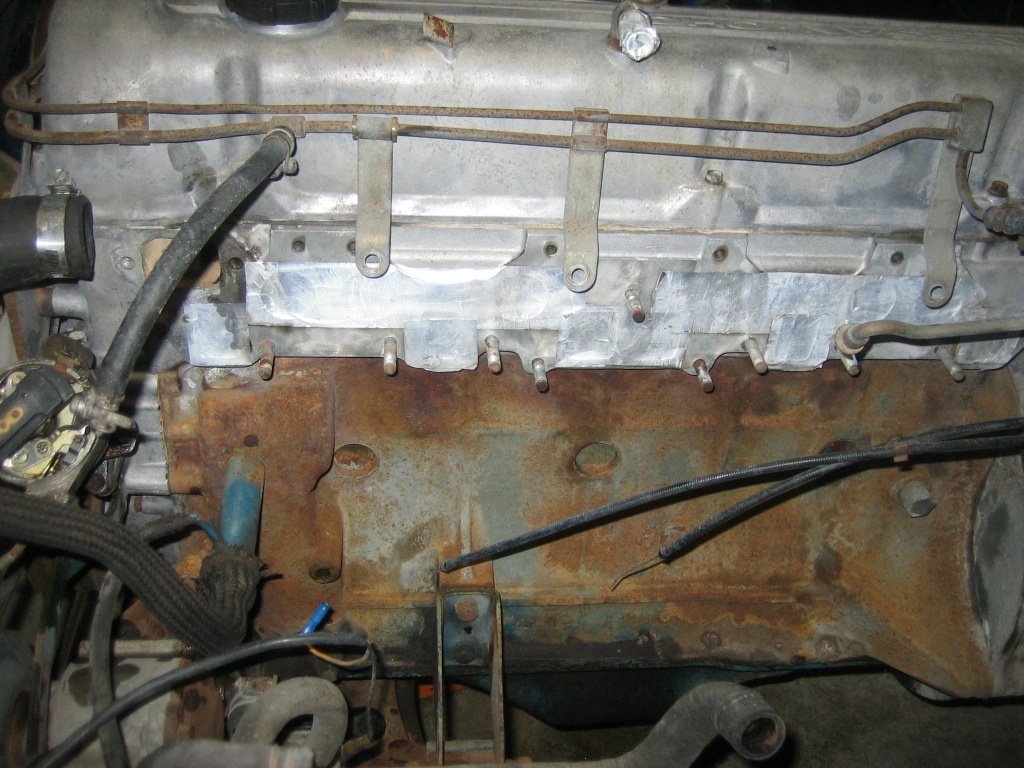
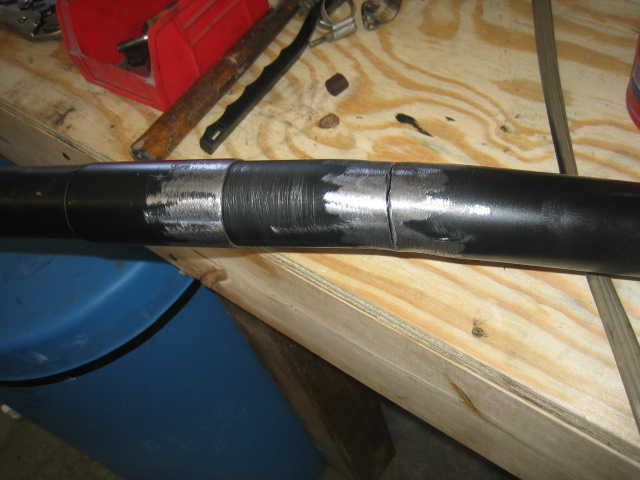
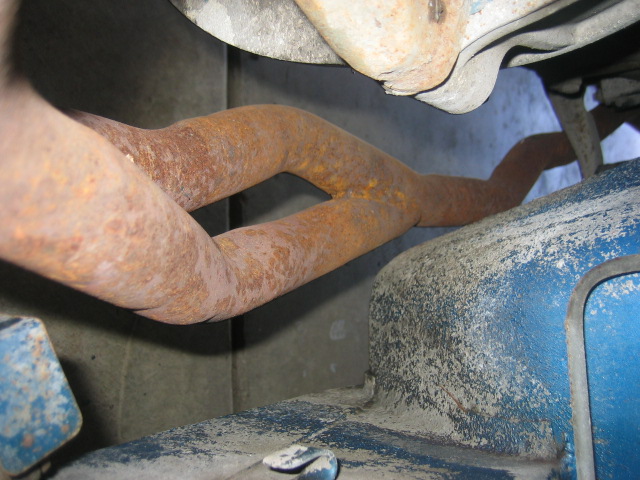
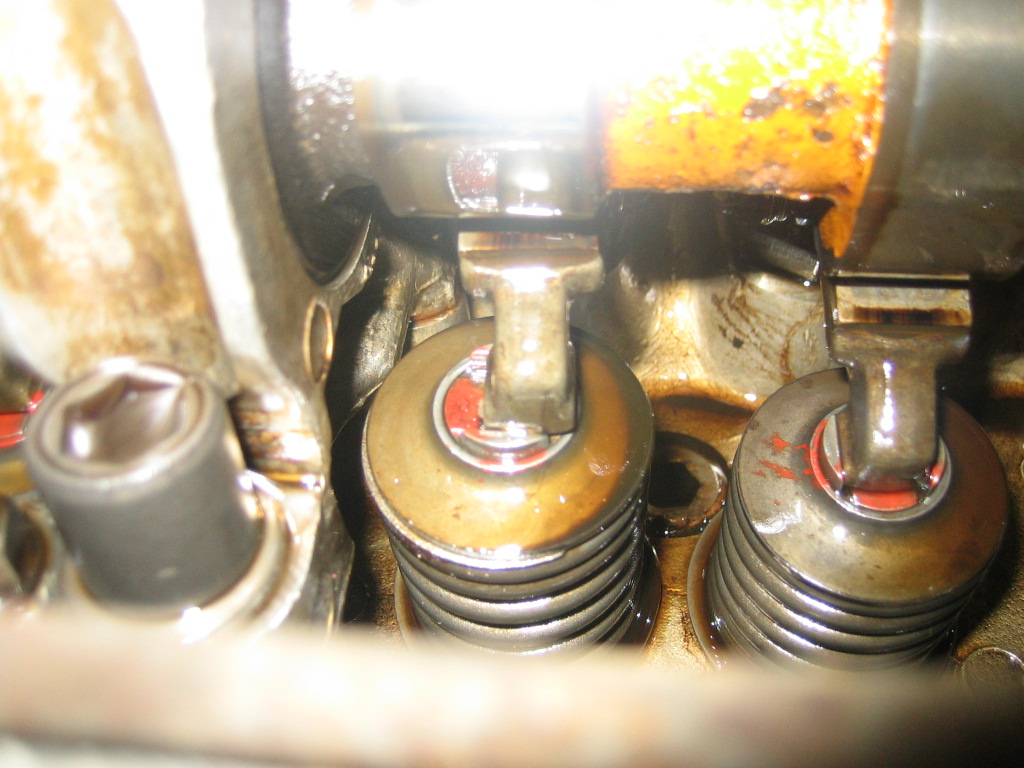
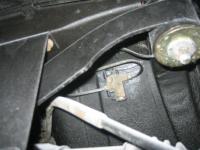
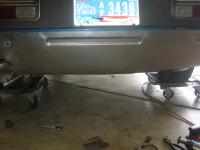
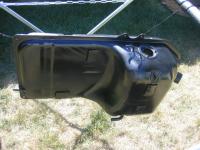
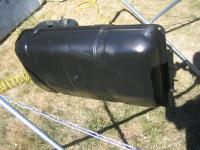
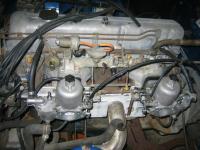
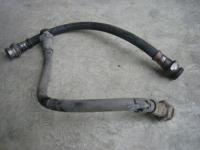
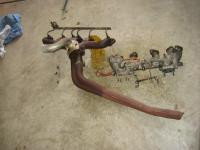
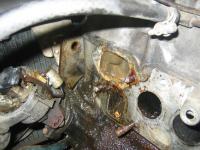
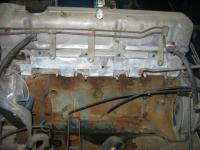
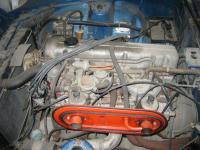
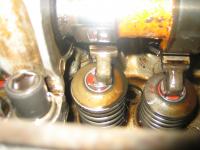
After getting the valve train in it's proper place the compression reading were from 90 to 140 and anywhere in between. I figured that wasn't too bad considering the 20 years idle. Well I needed to get this thing running to improve that situation. I had already ordered a SU carb kit from Z therapy and a video on 'everything you wanted know about SU's and were afraid to ask'. The carbs had come off and went to the carb solution, but what about the tank. Years of solidified gas in that tank along with the rust-I didn't even want to know.... WHAT, someone had thought enough to drain the tank-bone dry.:surprised It still needed to be cleaned , but the tank was very usable and it could have been much worse. Now onto the exhaust for an inspection there. Well the down pipe is shot and the rest behind that is... well ..kind of gone. Actually Jim had given me a bucket of parts with the car, along with a complete exhaust-minus the down pipe, that he had bought but never put on. Since the down pipe had to be replaced, it was time to strip everything off the head and replace that gasket to. I wasn't going to fight those rusted down pipe bolts on the car ,when I can pull it out where I can see it. Of course this meant some broken studs, and a little drilling and banging and a lot of PB blaster penetrant. As I was pulling that off, I noticed the bad corrosion around the thermostat housing, so it came off too, and more broken bolt removal. A side note: I told Jim that I was restoring my Z at the same time and that I would be modifying some items and upgrading others. I told him that some of my used was better then his stuff and I would sell those items to him cheap. Such as the down pipe, which was perfect on my car, but i was going with a header. In this way we helped each other out a little. Jim wanted to save where he could, he didn't necessarily want new. After getting the head stripped it was time to clean up things up a little. For 30+ years the engine was pretty clean, but I wanted it squeaky clean so I could trouble shoot any leaks-plus I don't like dirty engines After cleaning things up and fighting the old down pipe off the manifold, it was time to fit the exhaust. The exhaust wasn't to bad of a fit but did need modifying for a good fit. A cut here, a weld there and more fitting and what do you know, a slick little Ansa looking system.


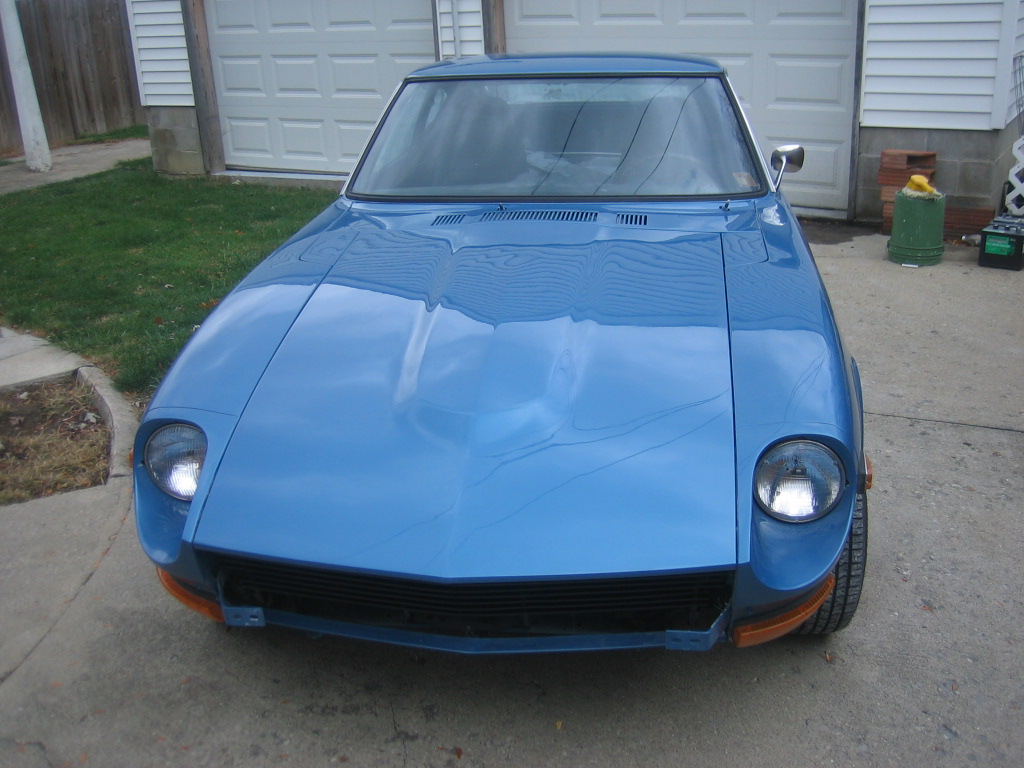
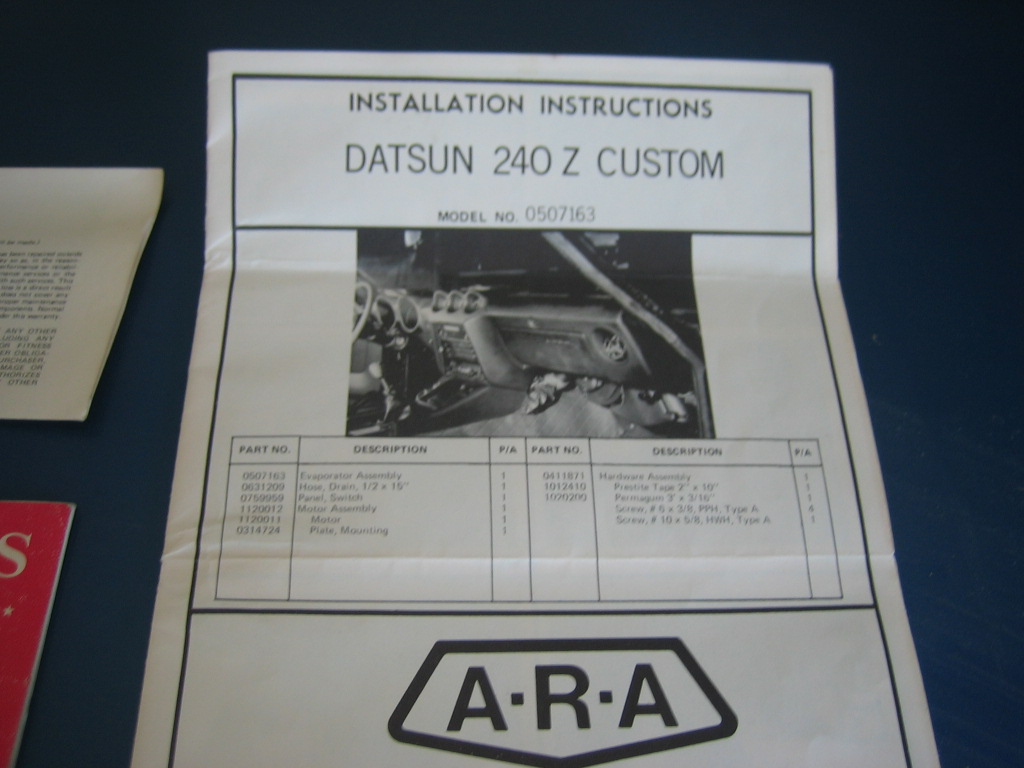
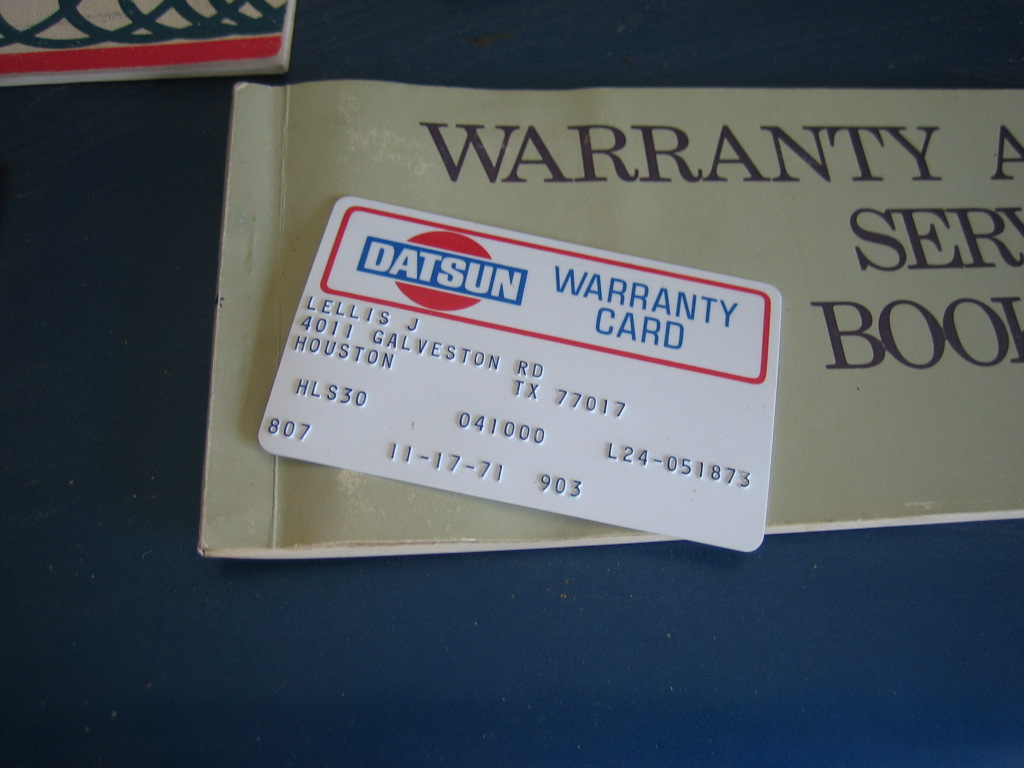
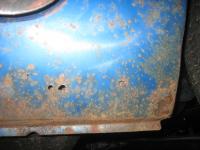
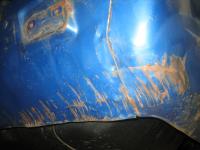
-
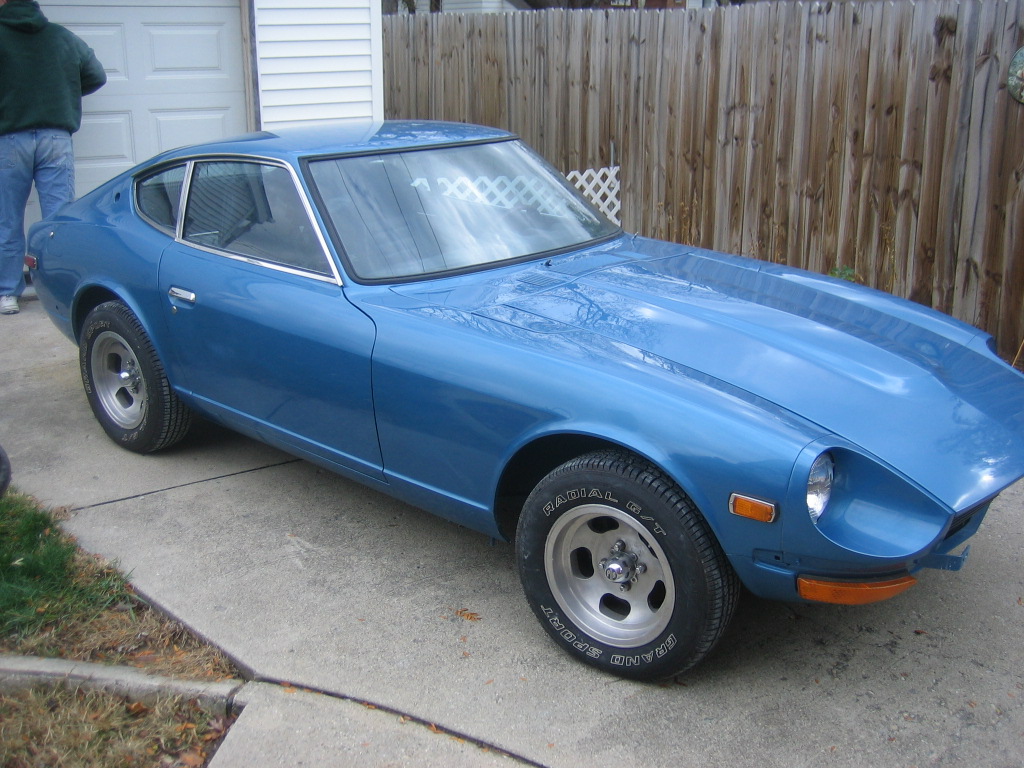
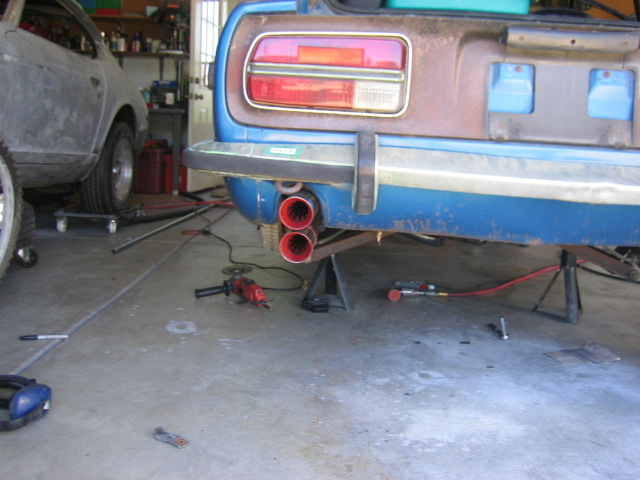
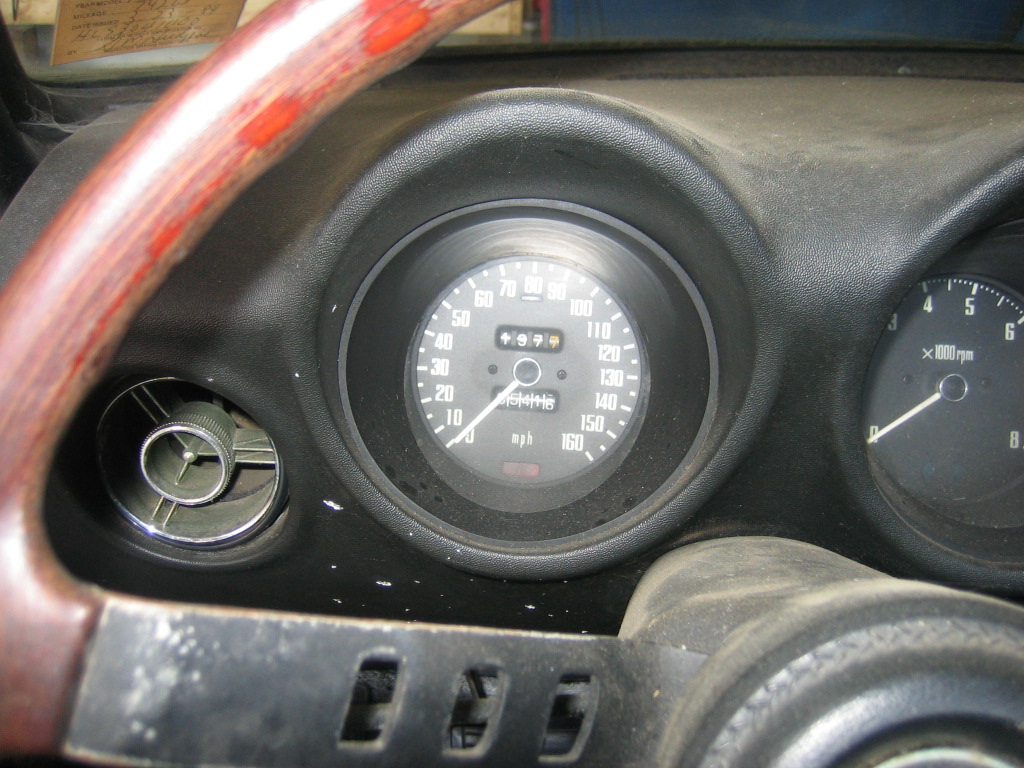
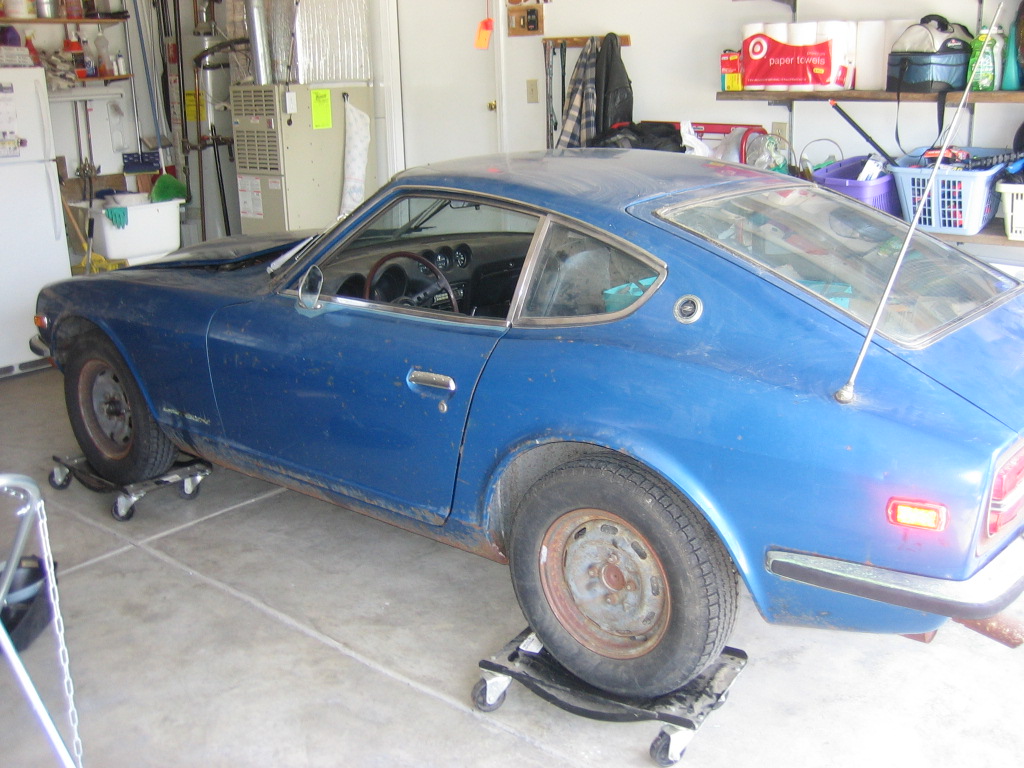
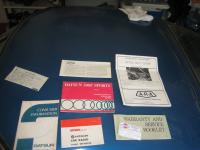
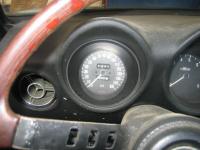
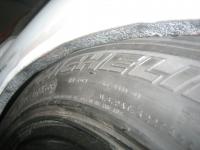
First off, I believe those are Ansa knock offs, but they do sound great. The car is loud because there is no insulation or carpet in the car, in fact when i drove last it had no seals either. I went to Evansville to see the car(about a 3 hour drive) before i made a deal with Jim. A great guy with a car that I thought had significant potential because it was so solid. I felt the need to go down there to see him before he brought the car to me ,since he and I were committing to a long expensive project. After meeting Jim ,and seeing in person a car nut, I decided that this would be a good customer. I actaully felt more obligated for him to meet me then the other way around since he was going to paying me via the mail. I wanted Jim to trust me and I told him I would send many pics. There are so many details I know i can never cover them all. The car came on a trailer on July 4th and it wouldn't even roll. It was a bitch pushing it UP my driveway. The car had never run since Derk had bought it and the registration was dated 1989. The body was dinged and dented at every corrner. but no collision damage. The body lines gaps were all good. The car was a Texas and CA car, so the under carriage was as solid as could be. The body panels had some kind of battery type corrosion that had eaten thru the paint and started on the metal. The engine turned over but no way it was going to start. The compression test showed bad news and you could imagine what the carbs were like. The suspension and anything rubber was dry rotted. I was suprised the tires held air as dry rotted as they were. The interior was amazingly original with the ashtray(this is a 8/71) in perfect condition. The glove box had all the original warrant stuff with a Datsun warranty card. I started with the engine because there had to be a starting point. Plus Jim was concerned we would have to rebuild.I told him that we should give her a go and see what we turn up. I was told that there had been some oil put in the cylinders and it was turned over every once in a while. I squirted her down some more and after buying a battery I spun her up and she turned over easy. Time for a CR test. 2 cylinder showed 0-no good. I took the valve cover off and just what i suspected, the valve stuch and the lash pad was off center. So i put the 2 that came off back on and retried the the CR. This post is gona get big so i'm going to break it up with all the details, to be continued......by the way, the speedo is 85k


-
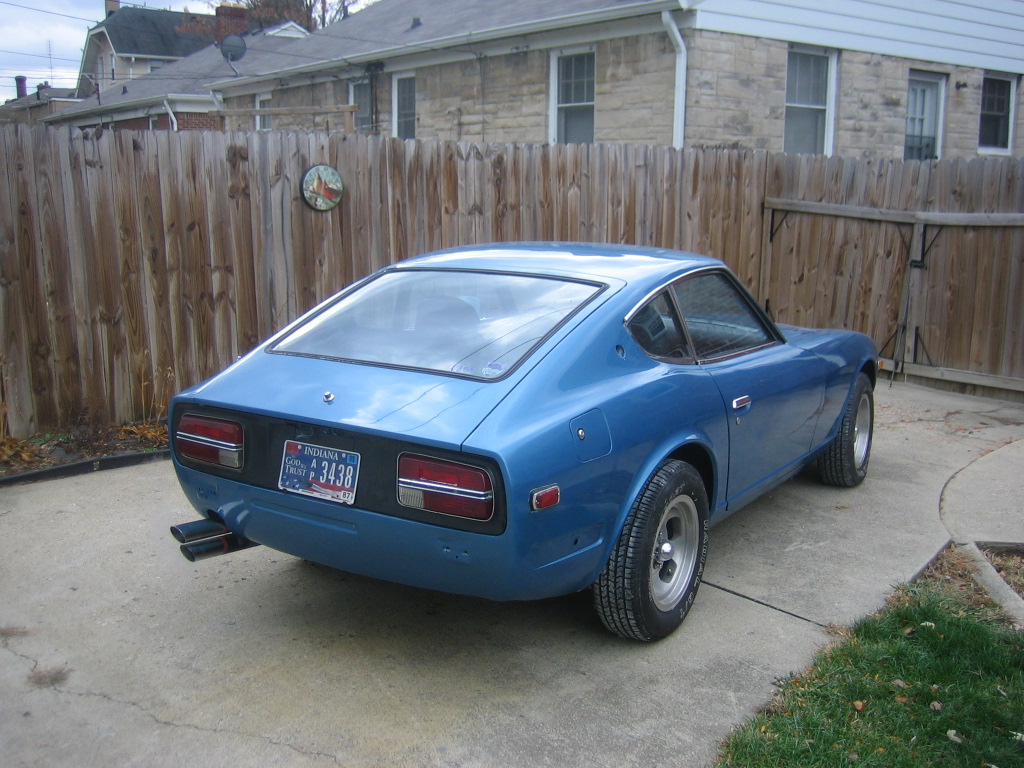
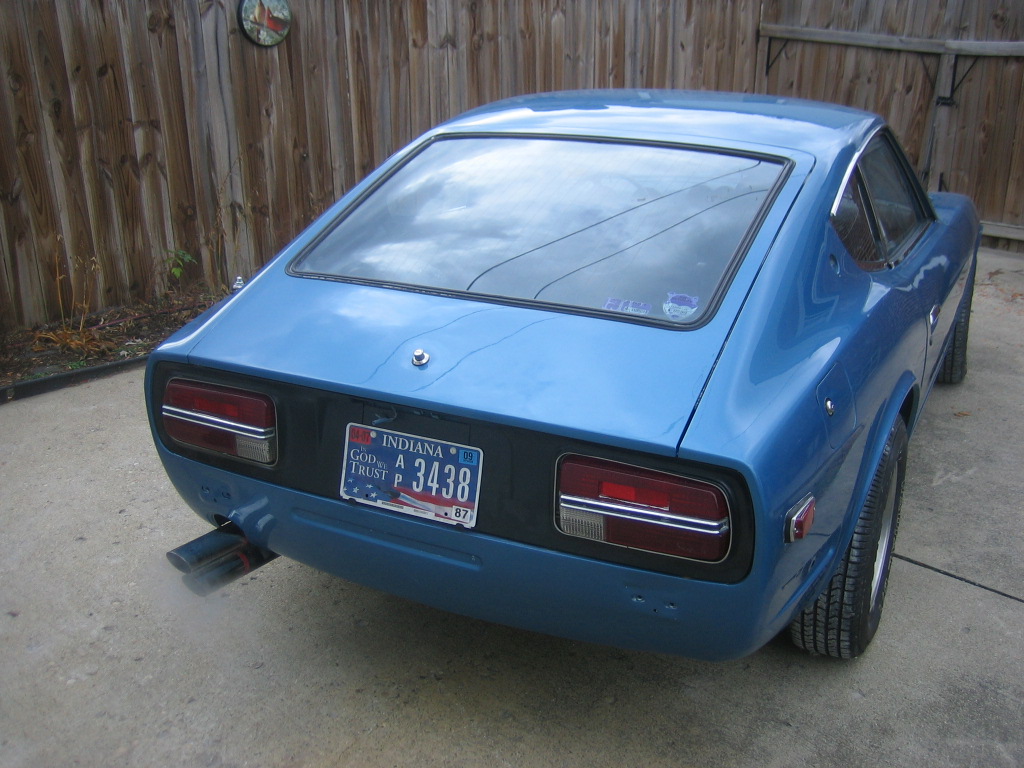
Well I dug this thread up just to get a grip on time and to revisit when I first made contact with Jim derk. I took delivery of Jim's car on July 4th ,2007, after working out some details on the work he wanted done to his car. It was a long road, but what a great guy to work with. I tried to keep Jim up to date to the minute of the progress on his car and sent him probably a 100 digital pics so he could visualize everything I was doing on his car(since he was too far away to just drop in). After the car had sat for 20 years, I was able to get his engine going again-strong as ever. It started out with 2 dead cylinders and low CRs,but after getting some valves back on track, we came up with 6 strong cylinders close to 170crs. The engine showed NO leaks when it left and I did NOT change any gaskets-amazing. I proceeded onto changing out all the worn out suspension bits and powder coating all the suspension parts. Next I fixed the rusted out stuff-there was very little of that-nice solid car. Then the car went to my buddies house for paint. For a low budget resto, I think Jim was happy. The car is far from a total restoration, but Jim has a good looking Z and hopefully a reliable ride. By the way, the shop will open for business after the New Year-I can't get enough of this Z stuff:classic:


-
Listen to the voice of wisdom(Carl), you will get fustrated with a total resto right off the bat. It is many years of work and $$$$$$$$. Welcome to the Z world.
-
Hey guys, sorry I didn't finish up the thread but we ended up purchasing the 903 blue poly which does have some metallic in it. We went to the paint shop and looked at the color and it definetly had some metal in it, though not as much as the 115 metallic. We should be painting tomorrow and I will post some pics. "it's always something"
-
Not trying to be a smart arse , but did you unpeen the nuts? If so I would take the tire off and use some bar like mentioned above. You can run a large crow bar in between the studs so the bar turns against the floor when you try to loosen the nut. PB Blaster is good stuff too.
-
Carl. the paint code is faded off the sticker. Thanks for the input guys. The car should be the 903 according to the research even though it looks more like a metallic. The 115 metallic blue only had a white interior -so I guess it will be an educated guess at this point. We even took one of the flip doors in to try and match the color, but that didn't work either.
-
The car is definetly metallic.,though it is not a heavy metallic, It has a black interior. According to Z car site the metallic(115) only came with a white interior. So is the 903 have any metallic at all. The car was made in 8/71 so it is on the border for the color change.
-
I did that and it is probably the 903, but the dupont jobber couldn't find a code for that paint
-
By the way the urgency is because we want to paint tomorrow and need to get the paint tonight.
-
Hey guys, I need help to make sure I buy the right color blue for this 8/71. Please look at the pic and verify for me the color and paint code

-
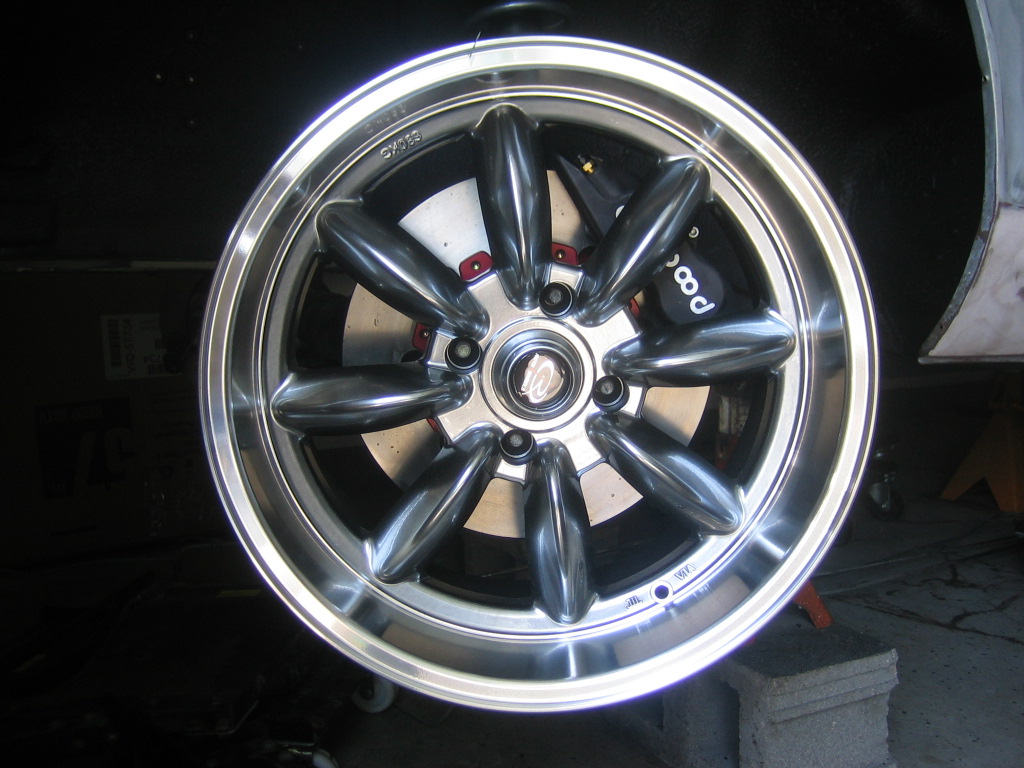
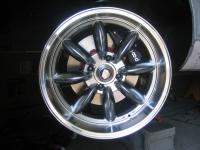
I just used a cut-off wheel and was able to stay to the outside of the spot welds on the lip. I believe the lips are the same size on our wheels as are the larger 9.5 in. wheels. I was hoping for the flatter spoke, but like I said the pictures on the web site were not defining. I think the wheel looks like the RB, but that's okay too!
-
Hey SR, I bought the same wheels for my 71. I put on 235/45/17 and they rubbed a little. I actually took my rear spring out and ran the full travel and I only had to trim from the 12-3 O'cloch position about 1/4" of metal and the wheel and tire would go all the way up into the well. I also want to know if you think you truly got the RBR design? Now I see the RBR's coming out on hybridZ group buy, they look different. I was anticipating a flatter spoke, but couldn't tell by the pic that Kim had on his site. Now that I see the new RBR's coming out in the 9.5" size, I feel decieved. I must have asked Kim 3 different times if these wheels were the RBR design. Do you have any thoughts on this?
-
Okay guys , I'm figuring it out now. "If the automatic car is a '71 (through 8/71 or so), you need a manual console from a '70 or '71 car." My car is a 9/71 which seems to be a transitional month. I believe that my car ,the attachment points on the tunnel towards the rear of the console are the same as the early 70-71 cars. The console I have now(manual with the ashtray behind the shifter)) is probably from a later model since the mounting points back by the armrest area don't line up. So I need to find an early console if i want to use the original mounting holes. And to throw another curve ball in the mix I have installed a 82 BWt-5 which moves the shifter further forward. So from your descriptions of the shifter holes I need to stick with the manual console inorder to minimize cutting of the console. Please correct if I am wrong with my conclusion, I am easily confused:stupid:
-
"If I recall Will (hls30.com) has a thread he wrote that details the differences" I've been looking for that thread but haven't found it yet. Thanks for the info
-
Carl, I will have to take some pics when I get home. As far as I know I am replacing a 71 automatic console with a console out of a 4 speed, also a 71. I thought the there would be subtle differences ,but I thought they would bolt down to the tunnel in the same place. My original auto console had two seperate choke levers and this one I have now has a single control. I guess I could have used the auto console for the 4 speed, but I thought I needed to find the 4-speed type console. There I go thinking again. I still have a lot to learn about these cars, but it's fun to be in school:)
-
I thought i had read a thread once that discussed all the differences between the different years and their center consoles, but i can't seem to find it now. Can anyone help the helpless. Specifically I have a 9/71 and the console I have does't seem to line up to the screw holes. It is most likely that the car was an automatic and I am trying to put a manual console in, but I know there has to be some info on this somewhere.
-

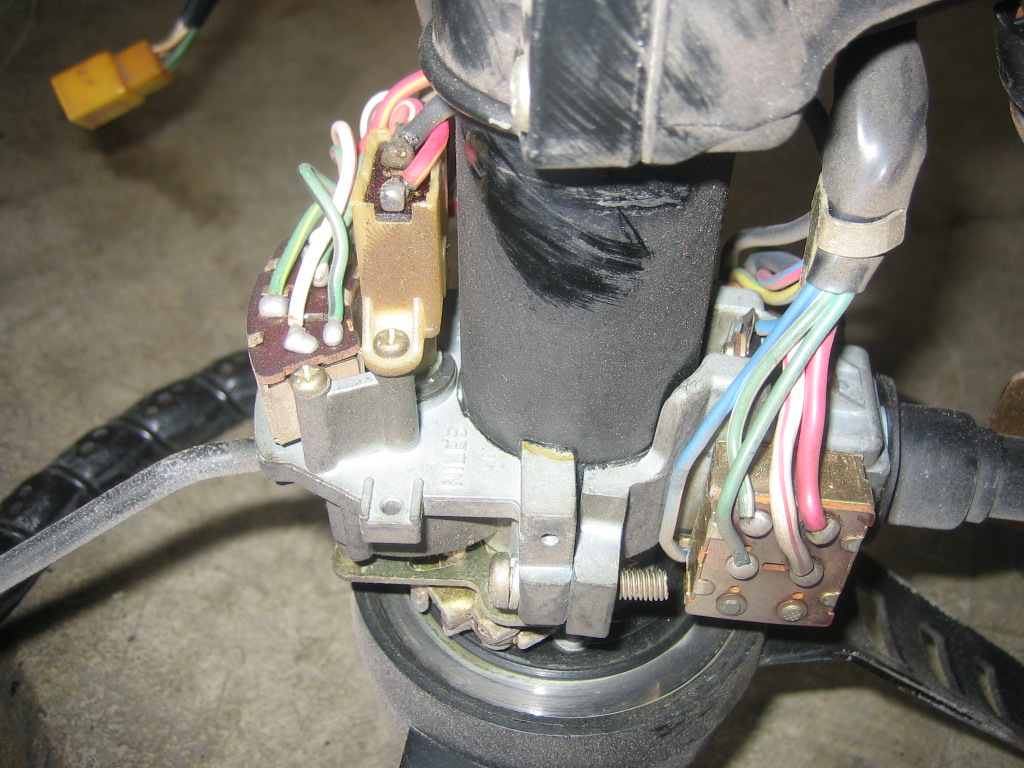
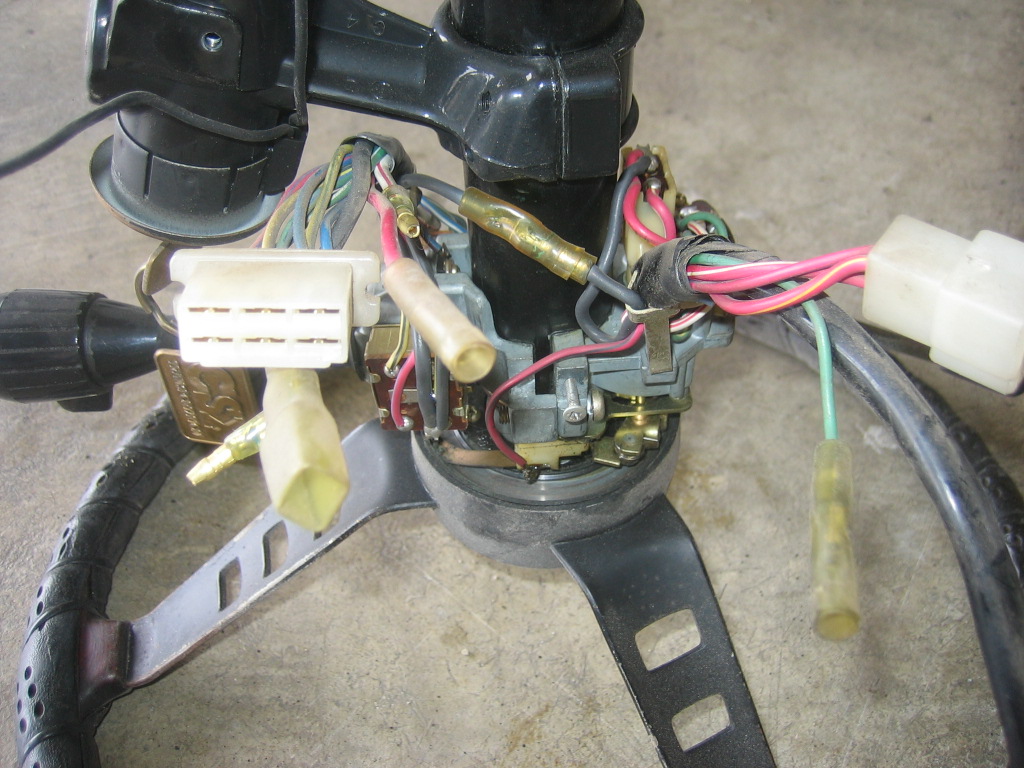
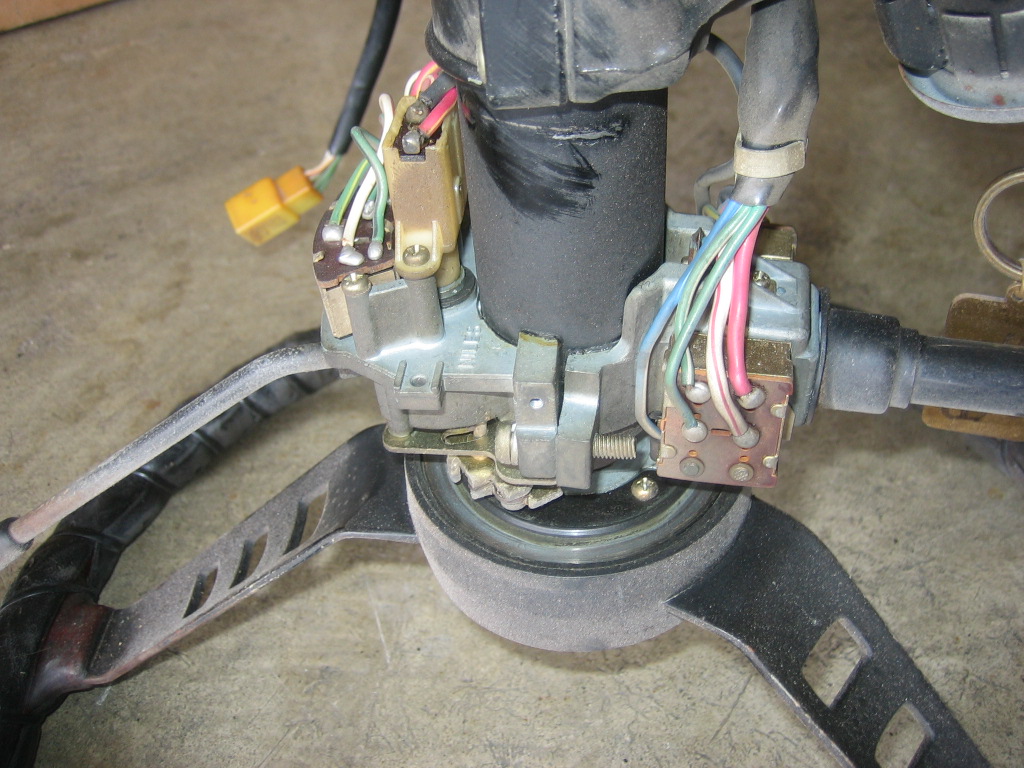
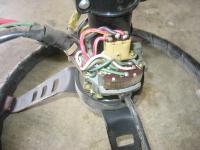
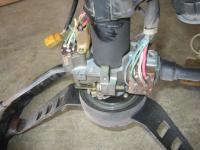
I need everyones input on this one (Combo and T/S switches)
madkaw replied to Zs-ondabrain's topic in Electrical
Dave, because of the urgency of this thread and the importance to the Z world i pulled my steering column out so i could take good pictures of the combo switch for you. (Well maybe it was already out:) This is definetly a 9/71, hope this helps .

-
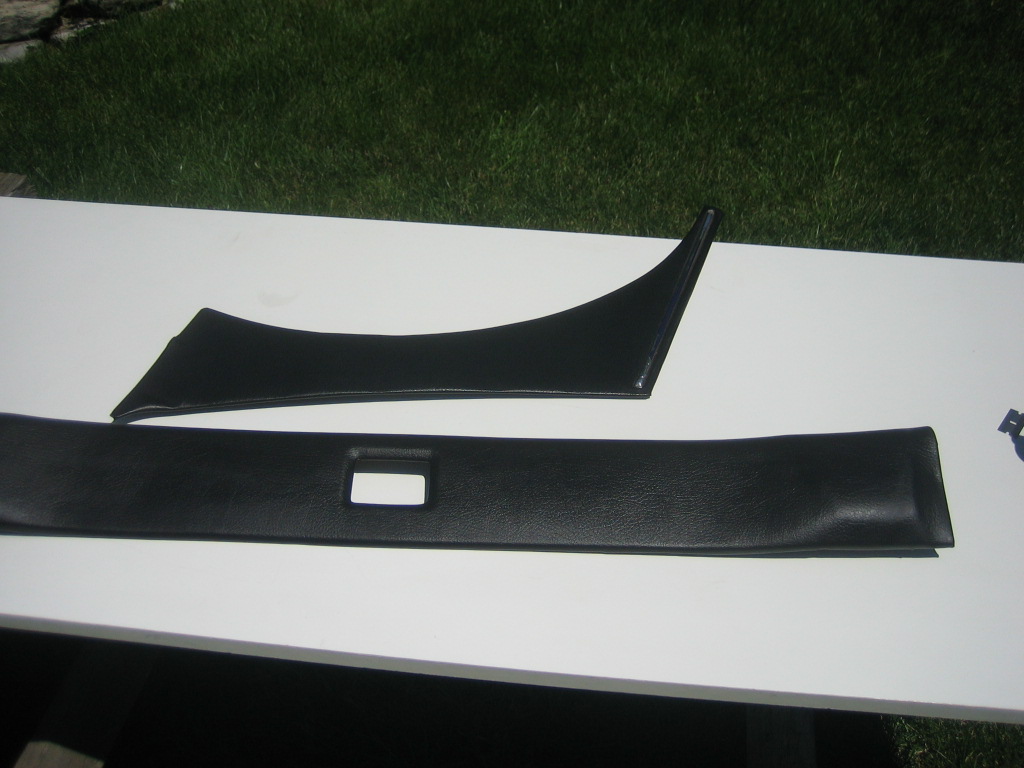
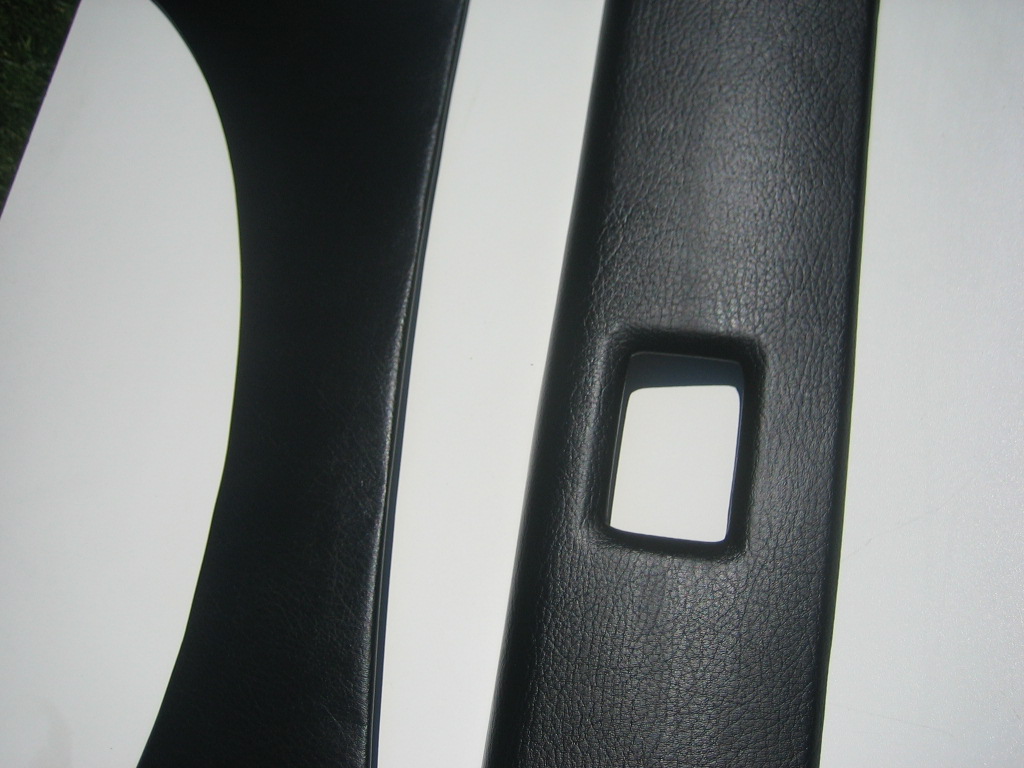
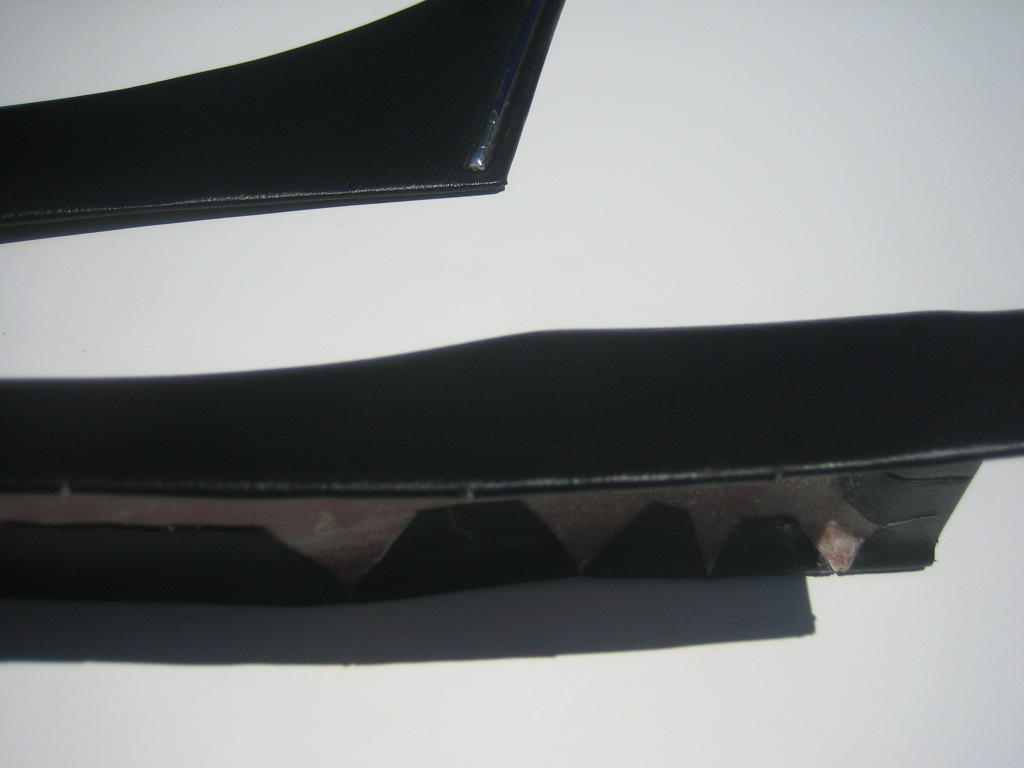
thanks guys! Like i said , that is the easy panel, the ones with the complex curves are going to be a challenge. Derek, the spray can glue isn't really good at this level of covering. You need a more accurate spray from an actuall gun made to shoot glue. It's only 30$ so i sprang for it. Aresol sprays to wide an erratic and causes a big mess if your not careful. I'll post as i go along here. I'm waiting on my gun and glue before I move on to bigger and badder things. I wish i was good enough to cover a dash:p This is a cool site for interior stuff http://www.yourautotrim.com/
-
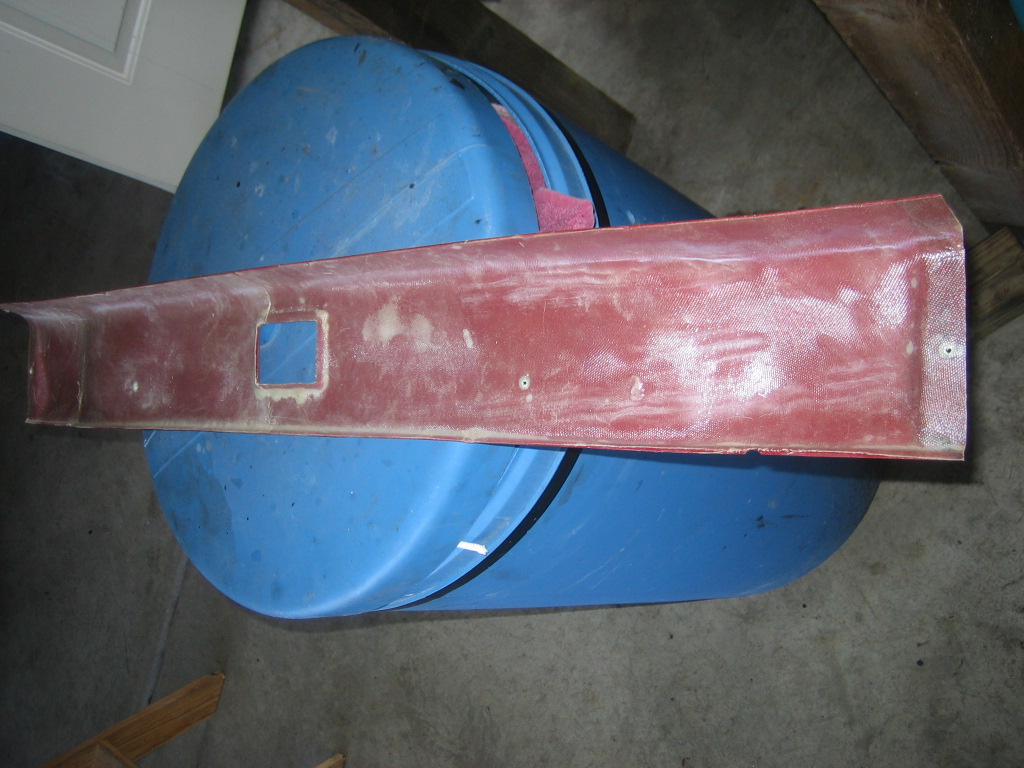
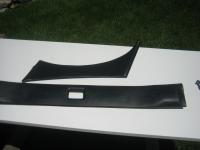
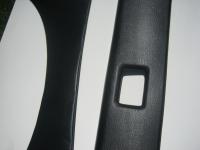
I've been wanting to do something different as far as attacking the flimsy interior plastic in the early Z. I could buy some new and spend 500$ for a complete new plastic interior or try something different and maybe better to some. I finally finished off one panel today. Basically I just fiberglassed the back side of all my panels to strenghthen them plus repair any cracks or broken pieces. Then I plan to vinyl cover the panels. I thought the vinyl would match the rest of the interior plus provide some noise suppression and the panels would be much stronger and last my life time. I picked out the easiest panel today to cover with the vinyl(which i found a perfect match at Joanne fabrics). I learned today that i will have to getter better tools for the job. 3m is great stuff but i need a better way to spray the panel. The aresol can sprays to wide which makes for sloppy work.I also cut the material too close to the panel in several spots which i tried to show in the pic, but I think I know how to remedy that. I also odered the specific glue to spray with my gun. So far i have $ invested: 30$ vinyl 60$ glue and spray gun( that's a gallon of glue) 40$ fiberglass resin and hardener 20$ fiberglass cloth As you can see i don't have a lot of money in it, but I didn't do this just to save money, I did this for the look also. I am not using the original vinyl, i will be carpeting everything else in the car. So there shouldn't be vinyl overload.I actually enjoy this kind of work too. Of course, once i get to doing the more complicated panels i might not like it as much


-
I PM'd you about the clutch pedal. I might also be able help you with your list of parts wanted My e-mail sfinnerty@indy.rr.com