madkaw
Free Member
-
Joined
-
Last visited
Everything posted by madkaw
-
 fun reading! L6 heads; pics and descriptions - L-Series - HybridZ L series dimensions - Stroke, Bore, Chamber cc's, etc - L-Series - HybridZ Custom Cylinder head building.. Whatâ??s involvedâ?¦ - L-Series - HybridZ
 -
81-83 ZX flat tops
-
Keep what you got and get a lighter flywheel for quicker response . Add that to triples and lower gears=fun! Seriously - most folks wouldn't be able to discern the difference in these engines(rod/stroke ratio), but a lightened flywheel would be more evident. Go over to Hybridz and look for at thread 200rwhp and street able
-
You might think about flat top pistons instead of the dished. Triple carbs or modified SU's will help reach your HP goal. There's no reason why you can't get 200 at the crank with modest upgrades. I think I have about 200 at the crank and it's fun. Don't forget about gearing and trans to add to the fun
-
That 400$ can be better spent. I doubt you are going to build a motor that would require more breathing than what the stock valves offer. Spend the 400$ at rebello porting the head
-
I am currently doing the exhaust fume chase myself . I'm thinking the grommets were the big source of my issue-any many others. I am trying the smoke test and it seemed that the smoke was drawn in that area. I guess I will see when i drive.
-
Congrats Len, Can't imagine you have time for anything!
-
Good find-!
-
Wow- what a trip! I've had those days before. Hope that 400$ gasket helps, but from what I read it's not the best solution. I think the 123 dizzy will fix the ping!! Keep us posted
-
Your guy says you have spark-how about a timing light instead. Coolant pressure check time for bad HG. Pulling one spark plug wire should be a VERY noticable difference in idle.
-
Welcome old gear head. Not sure how much you know about these engines, but if you are a gear head- you are going to like them. Don't hear much about these engines burning oil, but possible 500k miles will do it. We definetly want to see pics of the inside of that engine. Ask away your questions because you are right, right about this site and it's members are a great group
-
Does the noise have a cadence to it - as would something that rotates?
-
I'm assuming you are referring to the mirrors? I found the best deal by googling the mirrors and bought them on ebay
-
Lighter loading during acceleration is easier on spark and fuel. Could mean you are a little light on fuel levels in the bowls or your coil is holding up to heavy loading
-
You said 12 degrees mechanical, but you meant 24? The number don't add up. I got 22 by 10 degrees initial+ 12 mechanical= 22, how do you get your numbers. So your saying 37 degrees total IF you ran 17 initial. so 17 initial+ 12 mechanical= 29 total ????
-
Wow-just 22 degrees-all in- advance at WOT! -YUK! I would be looking at a different dizzy that doesn't 'come in' so quickly. What size are the chambers on the Y70 head?
-
So no vibrations felt or seen at these speeds. Subtle stuff like the rear view mirror getting blurry. I've been chasing a high speed vibration for a long time. You have eliminated a lot of the variables with tires-good. Still running the front diff mount + the RT mount, or just the RT mount? Have you taken a wrench and torqued on every bolt under the car-especially half shaft nuts? Have you physically grabbed everything that rotates and tried getting movement out of it? Talk more about the moustache bar-did they relocate it? Was this a Z shop? Where did you get a r180 with 3.90 gears? which 5 speed?
-
How much mechanical advance with that dizzy? What's your plugs look like? Tried tweeking the floats richer? Running vacuum advance?
-
What year engine? First thing I would do is go pertronix- just my opinion. Why deal with points. Checked timing at 3000rpm? Tried swapping out a dizzy?
-
Have you driven or ridden in a well sorted out early Z car with a L6? All these suggestions are useless( I know appreciated) without perspective. I recently gave a guy a ride who is building an LS1 Z. He had NEVER even ridden in a z before. He thought my 2.4 triples was quick. But what did he base his build on--nothing but what he read. Find a Z guy and take a ride. Hopefully a modified L28-it's fun and they came in these cars-
-
Remember when the teacher yelled out you in class and told you that "you will never amount to anything looking out the window and daydreaming"-well I'm doing alright-----woo wooo! I'm lucky to drive more horsepower then most people dream about. Video comes as soon as it gets on the ground.
-
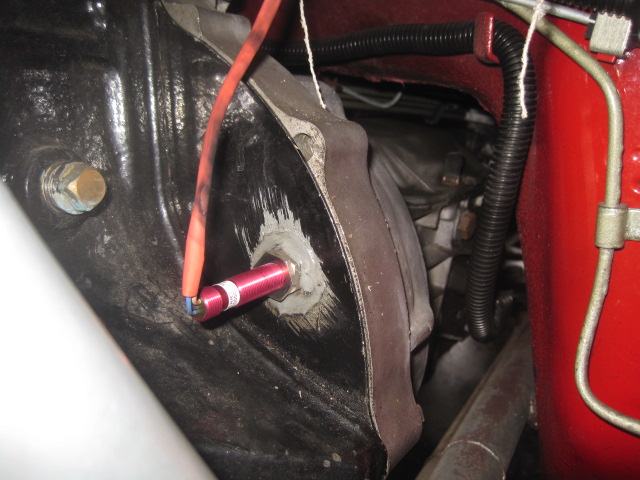
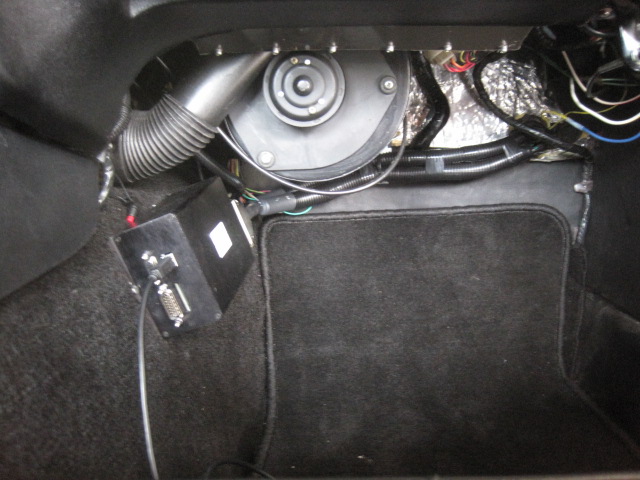
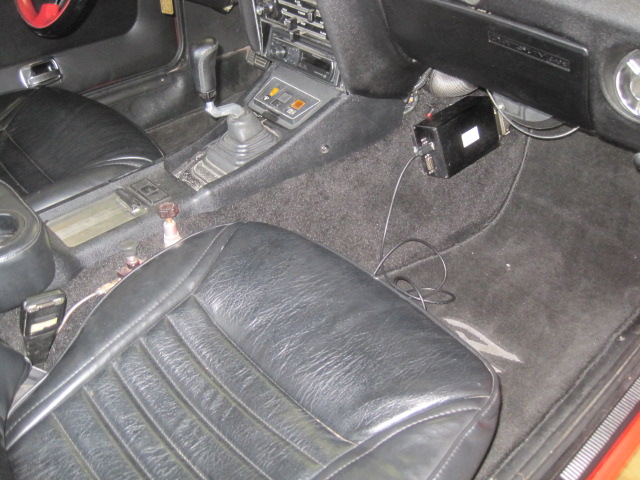
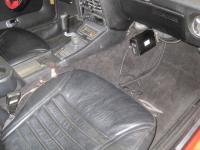
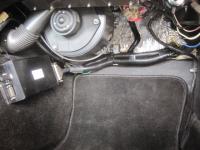
The biggest obstacle or decision is to decide in what manner you are going to tell the ECU where the engine is in it's rotation. Without this info the ECU can do nothing. Since a 71 electrical has no such provision, I improvised and followed an example I found on hybridz. Hall effect sensors are another great invention right up there with relays. I installed one as the pic shows and it's worked great so far and it was 20$. I had to modify my flywheel and that was cheap too. This gives me info on the crank, I will need to do something else similiar for the cam which will allow for full sequential- I included pics showing where I installed the 'box" and the wires. I now have the engine running, but haven't driven it yet. The engine starts and idles as good as it ever had. I have a generic timing map installed right now, but the engine seems to like it. Now the hardware is about done, it's time for tuning!!!!!!!

-
Gauge now works - I don't know why -sorry guys
-
I have a newer sensor that has a screw to clamp down an eyelet wire end. All is tight. So I can wire up an aftermarket ECU, but can't figure the temp sensor-I guess I need to get chasing wires.
-
Only thing that has changed is that I got rid of my dizzy and coil since going with Megasquirt. Voltmeter on the sensor wires gives an erratic volt reading. I tried looking at the schematic and it's not making sense. Maybe gauge when tits up, but the timing of this issue makes me think it's something I did. Any clues?