madkaw
Free Member
-
Joined
-
Last visited
Everything posted by madkaw
-
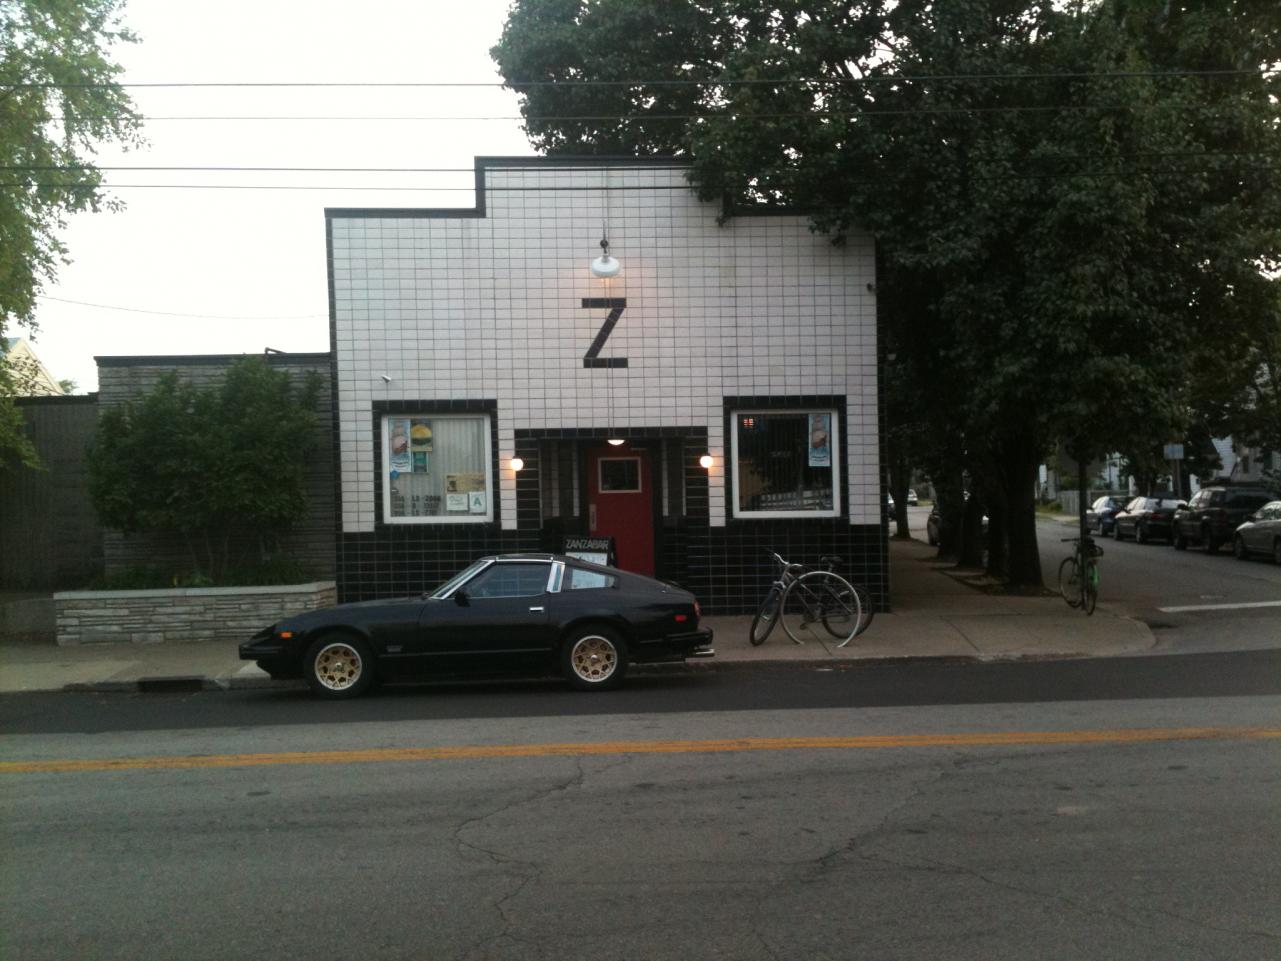
 So I have posted here that I bought my daughter a 1981 280zxt a couple of years ago. It turned out to be a fun car for here for a couple of years at college-even amongst all the fixes it endured. Her traveling became too far and often for the car to be her daily driver so we decided to part with it. She didn't mind too much since her replacement is a 2007 WRX, but it didn't compare to the fun of the T-top Z. I put the car on craigslist and had to endure the various low ballers and no shows. Then some guy says he wants to buy it and wanted to drive up from Louisville(about 2 hours) to come get it. He had been looking for that specific year,color. He told me he owned a bar in Louisville(ZANZABAR) and he would bring me a shirt---sure, I'll believe you when i see you. Anyway, he showed and loved the car, and brought me a shirt and drove off to Louisville. I'm still not buying the bar owner bit---but his cash spent just like money! He invited the family down for lunch if we were in the area. Just so happens my son was swimming in at a swim meet at Lakeside in Louisville, so we stopped in. Well the picture tells it all and the Z bar is definetly worth checking out if your in the area--very cool.
-
So I wish I had more powerful motor and and a better stereo and a rear main seal that doesn't leak, but when I drive around town and some young lad(reminds me of myself at that age) pulls up along side of me and gives me the thumbs up and yells--"That's sick dude", it does make me really proud of the old Z. It reminds me why I fell in love with the design---it's timeless in it's appeal. In the same drive around town I have some other gentleman closer to my age giving me the same thumbs up while he honks his horn. Earlier in the McDonalds some young girl is determined what kind of car that is, because it's so cool. "No it's not a vette, keep trying" I smile! So as I contemplate the prospect of buying a real supercar before I'm too old to enjoy, I wonder if I will get the same enjoyment from my car. So if I buy a 911 turbo, will people be trying to guess what cool car that is that I'm driving? I won't be able to say I did most of the work on the car. I surely won't be able to make improvements or 'fiddle' with the timing. Maybe I should just take those huge payments towards the 911 and use them to continue my Z journey. Boy-think about the SICK things I could do to my Z!!!!!!
-
I did read a lot of issues with guys not being able to run their caps with these wheels. I bought the wheels anticipating this, but I guess my Wildwoods allowed the cap to work-but I remember it was tight. Haven't lost a cap yet. So just buy some 1500$ brakes and your problems will be solved!!!!
-
I got to say Steve, you don't f#&k around -do you. You just started this thread over a month ago and your already this far! You need that wideband on this car. I have been trying to really study my wideband on my SU's so I will see the diffference when my triples go on. So someone enlighten me about this stud issue with the shorter manifold. I have the shorter manifold and don't intend on changing this because of my airbox. I have all new studs too:(
-
235 is probably what I should have stuck with, but I got greedy and thus RUBBING. My car is lowered by an inch also. I did try to remedy the rubbing by slotting the struts on the rear to bring the top in.It almost completely elimintated the rubbing. I did get my car aligned last week and checked out my rear camber and was pleaseantly suprised to find out that I was only 3/4 negative---so time to slot the holess some more to get rid of all the rubbing. The steering is a bit heavy with my 245's up front, but not too heavy, just during very low speed driving.
-
As far as checking total advance you need to go back to your marks on the pulley. The marks only go up to probably 20 degrees BTDC, so you will need to try and make additional marks up the scale trying to mark them the same distance apart as the first marks. It's kind of hard to get down there and do it accuratley, but as close as you can. Even if you don't get it perfect, it will let you know that your mechanical advance is doing it's job at higher rpm. You need to run up the engine to at least 3000rpm to measure full advance.
-
Sounds like a cool build and +1 for the l24 revers! I am curious that you didn't go bigger on the cam-if your really into revving. After reading many posts from folks like Jon Morteson and reading about racer brown cams it seems these engines really want the duration and lift from a bigger cam-and they still drive civil. As far as the SU/Mikuni debate, I am starting to agree that these engines-when modified-need the Mikunis to wake them up. i will soon be taking my L24 to the dyno again to see what i can get out of my SU's with my best tune, then the Mikunis(40's) go on and the comparision will begin. I want to see the numbers and don't want to rely on the butt dyno. keep us up to date!!!
-
Steve, being doing a lot of reading on AFR's and I think I'm going to swap out my SM needles with some stock needles. You might gain some flexibility with your tuning starting from a leaner point. I have a smaller bottom end, but probably a better flowing head, so it will interesting how it will effect the engine. I believe my AFR's are a bit rich when WOT at the upper rpms which would make the engine lethargic to rev. I plan on taking my car to the dyno again shortly and I will bring both sets of needles to see how the HP changes with the 2 set ups. Once I get the timing right for best power i will try and see what the best AFR is for my engine to make power. from what i read the number is NOT the same for every engine, but for the most part folks go too rich thinking it would make more power. I remember when I use to race go karts that had 3hp briggs and Straton engines. After some modifications we would get the most power out of those engines at a leaner state. In fact we use to run them at 7500-8000 rpms at around 450 degrees+ all day! They loved to rev at a leaner rate-the hotter the better----
-
I'll tell you what I know(or I think I know). The difference in rb and rbr is the spoke design. The RB's have a curved spoke, while the RBR's have a flatter spoke design. Look at Hybridz site and start looking at the guys running the 9.5 widths--those are RBR's and have a flatter spoke. Mine are the 8.5's and were stated as RBR's , but when i got them the spoke was curved like the RB's-which have grown on me and now I'm glad I got them. As far as size, you can fit 8.5's all the way around with some work. I'm running 245/45/17 on the 8.5 +4 and I had to roll the rear lips and also slot the strut holes by about 1/4" for the tires not to rub. The camber change is hardly noticable, but makes a huge change as far as rubbbing. Maybe with the 225 you will be alright. Hope that helps
-
Just an update. Now that i am actually driving the Z again, I can verify that the raw fuel smell is gone. It is obvious thta the pin hole i found was the culprit. How nice it is to throw the car into a corner and not have to worrry about fuel being in the wrong place.
-
sorry guys, but my dislexia had kicked in:stupid:. The car did idle at 17.5-infact I really hadn't touched the mixtures since the 3000 miles I put on it last year. maybe that's why i got almost 30mpg driving to Zcon. I did readjust the mixtures to about 14.5 at cruise and idle. I also realized that I didn't sync the carbs at 2000 rpm and they were way off. So I was running at 17.5 and running mostly on one carb---no wonder my MPG was so good!!!! I wish i had 2 sensors, but now I will need to pull the sensor from one side of the duals and hook it up on other side to compare.
-
Well I finally got my car together and get to play with my newly installed wideband. How sweet to dial in your idle based on your AFR. My car is idling right around 17.5. Cruise is around 16 and the AFR drops as I get into the throttle. I actually thought my car was running rich at idle with my SM needles, but I ended up turning out my mixture about a full turn to get the mixture correct. After setting idle correctly, everything else seemed to fall in line. I still have more experimenting to do, but this is fun.
-
After throwing the Z together last year for Zcon and driving it 3000 miles last summer, I realized i had things to improve on. 1)leaking rear mail 2) raw fuel smell 3)exhaust fumes 4) Install wideband sensor 5) fix rear tire rubbing 6) repaint exhaust 7)figure out whining noise rear end as you can see I had pretty big list to do over the winter. Well the good news is I drove the car today and I couldn't be happier. 1) jury is still out on the leak-not enough miles 2)raw fuel smell was a pinhole in my filler neck to the tank-welded it and fixd the problem 3)Found some pinholes in my exhaust and welded them-less exhaust in the car!!! 4)Intsalled wideband and now I truly know that my carbs are in tune!!!!!!!!!!!!!!!!!!!!!!!!!!!!!! 5) My 245/45/17's always rubbed on the rear-I did an old fashioned camber change(slotted strut holes by 1/4") no more rubbing-so far 6) Since I had the exhaust, I painted with heat paint 7)As far as the rear end, I swapped out diffs and the noise went away, but I found some halfshaft nuts -NOT tight, but not real loose either. So was the noise coming from my LSD, or the halfshafts-that will be the question. What a proud feeling to cruise in the car today knowing I was able to remmedy all these things over the winter-I am STOKED:beer:
-
http://www.amazon.com/CC3K-Carburetor-Parts-Cleaner-Basket/dp/B000ABGA4E The best way to get them clean, but DON'T let them soak to long-follow the instructions. If you soak them too long- any cladding on the linkage will disolve. Making them pretty is lots of elbow grease and Mother's polish-possible sandpaper---just how nice you want to make them..
-
Steve, it should fit fine. I believe they were all about the same on the s-30's. For sure the carby versions are the same.
-
Yes I would love to here why it would be a waste of time? I will say from the research I've done that it would be bi%ch to tune. getting a good vacuum signal to dial in a ECU is a bit tricky with TBI's.
-
Jerry, I would also would be interested in finding an EXPERIENCED diff shop to take my r200LSD. Please post the shops you recommend!!
-
My thoughts too! A fuel pressure guage will tell all. Another thing that suprised me with my ZXT was the amount of heat around the diff on these cars after being on the highway. I found the diff to be HOT to the touch-like you can't hold your hand on it. Now consider a rubber fuel line close to that heat, or even touching the diff like mine was, it gets really soft and could collapse.
-
Sarah, I had a similiar issue happen with my daughter's 280ZXT. It was really random, but the car would studder, then die pretty quickly. I went thru all the same steps as you and had a squeaky clean gas tank. I had also installed, what looked like a new fuel sending unit in the tank from another Z. I replaced my stock pump with a performance pump, but still acted up. Ome thing that did change with the other pump was the noise. I could hear the pump cavitating, or what i thought was a cavitating noise-so I broke down and bought a fuel pressure guage. WOW-I was showing 100psi on the return line. So I dived back in to find the blockage. It turned out that my brand new looking fuel sending unit had something clogged on the return side. I'd said something is causing your pump to cavitate. I believe there is a screen on the end of those pumps too.
-
Here's my 2 cents! You need to proper impedence coil for your pertronix. So as said earlier, certains coils require the ballast resistor and some don't. When I did mine I opted for a coil that eliminated the ballast. I also had a rev limiting problem, but it turned out to be the carb floats improperly adjusted. Your mechanical advance unit will also cause the same issue. Pull your dizzy out and get to the mechanical advance and make sure it moves freely and the springs are working.
-
ChaCha-have you seen this thread? http://www.classiczcars.com/forums/showthread.php?25528-my-version-of-twice-pipes&highlight=duals
-
My 17" clear wildwoods!
-
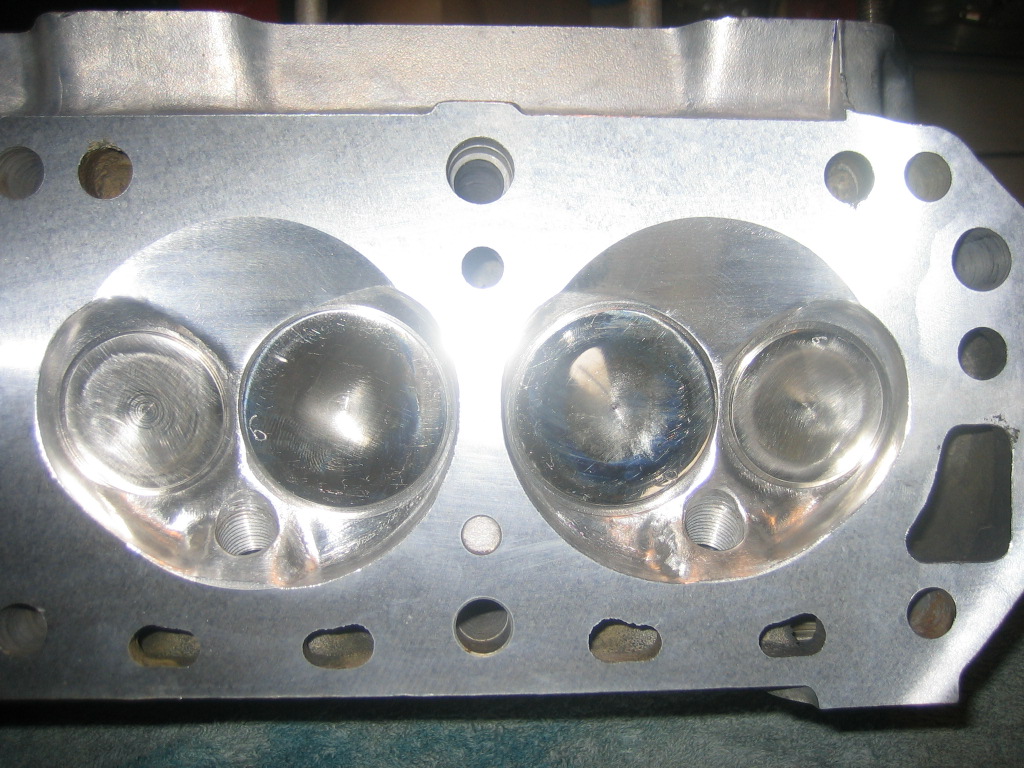
Look around, they are out there. Unfortunetly, your late e-88 head isn't one of the better heads ------without major work. I think that is amplified by the fact of that big flowing rebello bottom end. Hybridz has a great thread on just Z heads. I did my own polish and port and unshrouding which would help your e-88 greatly
-
110 octane cures all:cool: You just might always have detonation issues with that later e-88 head. With a WIDE open chamber design, it might not like timing. I feel fortunate that my early e-88(semi-closed) head has faired so well with timing advanced. Have fun tearing it up(the track)!
-
Steve, did you try anymore ignition advance?