madkaw
Community Member
-
Joined
-
Last visited
Everything posted by madkaw
-
Being optimistic that I will make it to the show, I have a few questions about how a big show like this works. I read the schedule of events and I see- Z car store hours- throughout the week-what does that mean? Is that just hanging out at the place, showing off your car? Do folks bring any kind of canopies to put there car under for sun shelter? Is there a market place to bring Z items to sell, or does everyone do there on thing if they want to sell some stuff-or is this not proper show manners? Hate to sound like such a newbie, but never have participated in anything this big:)
-
Well I left off with the dash lights giving me headaches. Well I realized after investigating that I put some of my dash lights in the wrong holes in the speedo. The bad part is there is no way to get in there and swap out with the defroster ducting in the way--soooo, out comes the dash. I also noticed that my ampmeter guage wires were not tight-bad scenerio that had to be fixed. so I lost a half a day, but all lights working-almost. I had traced all my wiring and have assigned all the loose ends to where they need to hook up to, except an ignition hot plug(green wire and black/white stripe), not sure what it hooked up to. All guages work-even the fuel guage(small triumph since this is a CJ5 tank and fuel sending unit), all lights work and my combination switch operates the way it should-any ideas on the plug? I recieved my airbox back from the powder coater, and of course it needed some tweeking too-can't anything just bolt on!!!!! The airbox would not slide on because of the M/C bleeder on the M/C just stuck out too far on my 15/16" upgrade. well I just had too cut off the end(1/4" worth) and it slid on. My new mufflers arrived to tame the wild beast. My twin magnaflows(all of 11" casing length) should fit in there nicely-after lots of work of course. Maybe this next week can think about plates and insurance and start breaking this baby in
-
I was told the BD(from their customer service) that they don't use precision. Then again-she wouldn't tell me who made their kits. I don't have any experience with the BD weatherstrip except fron t windshield weatherstrip and it looked like a nice piece.
-
I'm sure this has been discussed before, but i'm not to successful with my search. I noticed with my turn signals for my 71 had different bolt spacing for the mounting studs and one lens is longer then the other. So what year corresponds to what lens. One of my turn signal fits airdam perfectly(bolt spacing), the other side is more narrow on the spacing. I'd love to have a matching set, but not sure what year to get for the wider spacing.
-
Thanks Geezer for the info. I think if I hold on to any piece, it would be that incase I tear up my front air dam. I didn't see the fenders on there, they seem like very high quality. I bet they were expensive.
-
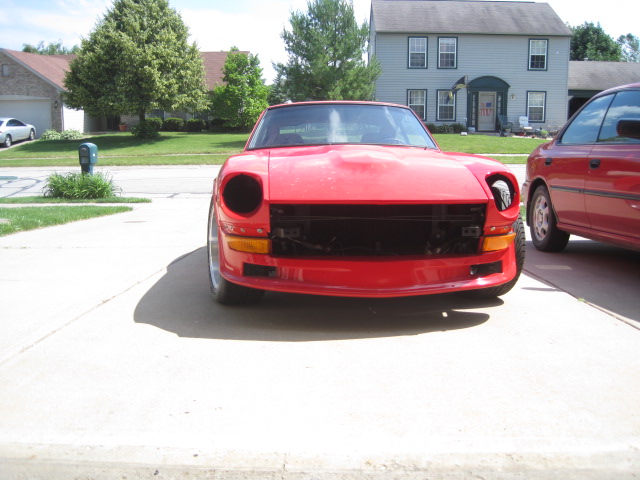
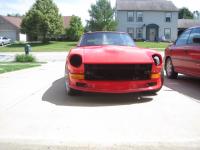
At the salvage yard today and scored BIG. Found an 72 that had fiberglass fenders and valence panel. The valence panel encompases the corner parking light panel and center panel all in one piece. This stuff is in amazing shape with maybe one small crack. Anyone hear of the manufacture Perfect Plastic Inc? These panels had a date of 1987 I believe. I will post some pics shortly.
-
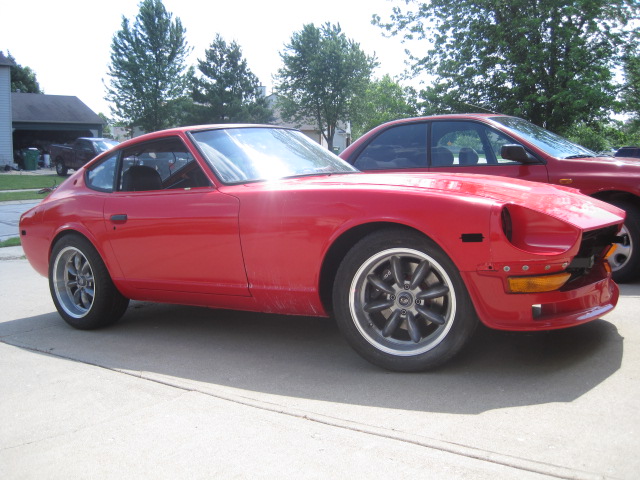
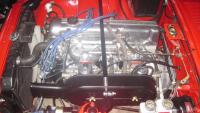
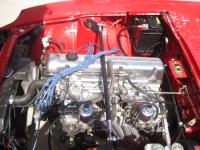
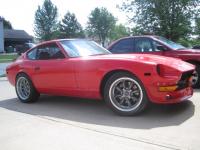
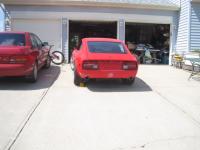
Well i'm stilling making headway, but it seems to be an hour at a time. The clock is ticking in the back of my mind constantly and reminding me to stay on task. The engine compartment is about complete except for tying up some loose ends with the headlight wiring. I am waiting on my airbox to get back from the powder coater. I have given up on having the triple Mikunis on the car before I go, I'm just going to run out of time. The wiring i still giving me fits, but I expected that. I am going from automatic trans to manual, plus retro fitting some newer model stuff on the car which adds to the mess. I can't get my dash lights to work and i am getting a headache from staring at the schematic. I do have all my exterior lights working, including reverse lights and turn signals. I got my spoiler buffed out and mounted up, so now she is looking pretty good. I still have to wet sand and buff out the entire car. I have a weeks vacation at the end of the month and i'm hoping to have things looking better by then-if not- I might have to consider not making it in time-but I'm keeping my hopes up.

-
Well it was late when i threw this link on here, but here is my LOUD exhaust. Maybe in a younger year I would drive this around, but the magnaflow mufflers are on order. I imagine it would sound awesome screaming around with my triple Mikunis on there:)
-
http://s2.photobucket.com/albums/y9/_mad_kaw_/z%20exhaust/?action=view¤t=Zcar001.flv
-
All right, another good looking Z in Indy!!! Have fun with the assembly.
-
Not sure what is stock size, but most battery wire at parts stores are about 4 guage. I can't imagine that you would need any heavier then 2 guage for such a short run of wire.
-
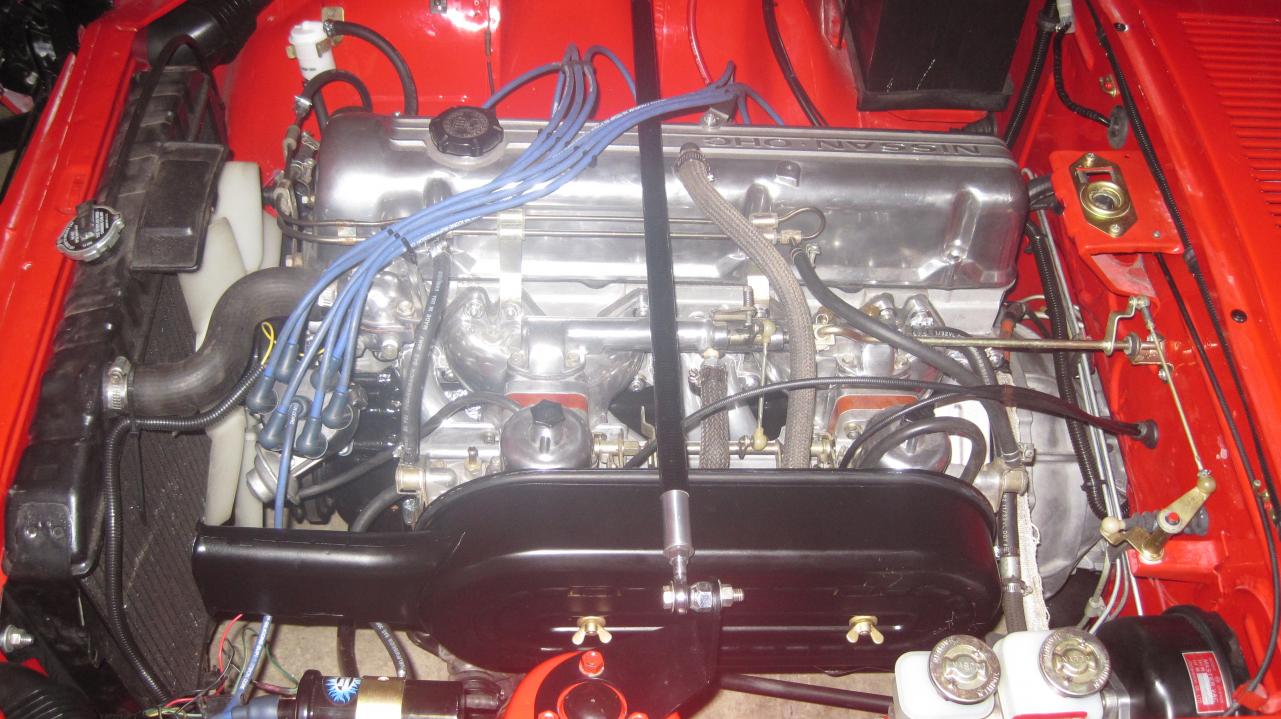
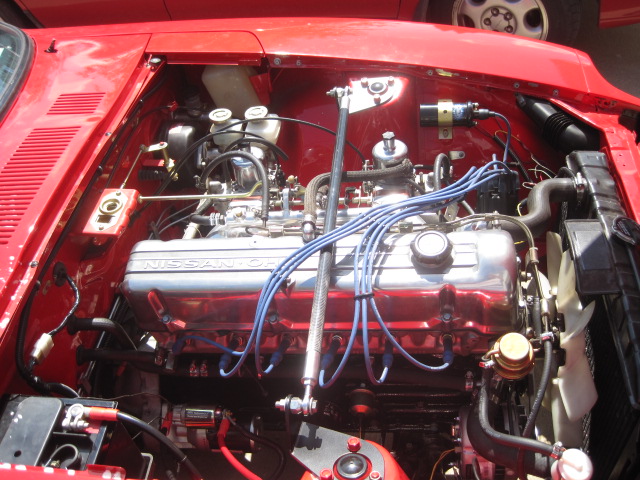
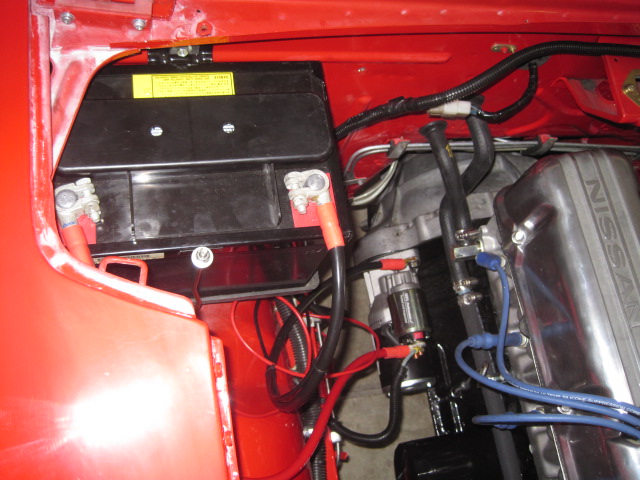
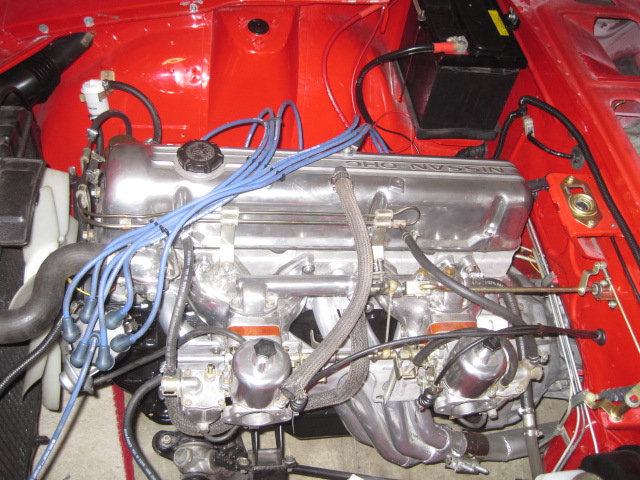
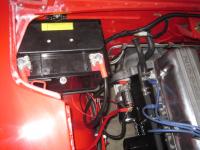
I forgot to add that I stuffed an extra 10 guage wire in each terminal before soldering. The terminal ends were for #1 wire, but I used # 2 thinking that was more then ample enough and that allowed a little room to squeeze an additional circuit wire in the terminal before soldering. On the ground side I ran the exra ground wire to the chassis ground just below and the hot wire I will save for additional circuit(s) later. The whole car is painted Mike, but the engine compartment looks the best right now. Soon I will have all the loom run and will take some more pics.
-
Tomohawk, I will verify for you that these terminal ends are properly sized and tapered for the posts. There is only one way they will fit on, so you have to get the proper angled terminal for the proper polarity. These are top quality ends and since they are not universal they snug down securley with very little torque. That is why i didn't get the cheapy ones at the parts store because they are universal.
-
Although it was only about a block, but it did move under it's own power instead of me pushing it around on dollies. Did I say this thing is LOUD-like hide the women and children loud. It did really feel SOLID going down the road and i couldn't hear any strange noises coming from anywhere -because it's so freakin LOUD. I will try and post a video this week. I have to do some double checking but I believe I will be ordering some magnaflows this week. They actually make something small enough for my cramped space. It took so long to get the pipes to sit right in the rear valance and i will have to start all over again:cry: Oh well, I only wasted 25$ on Both glasspacks, so i'm not out a bunch of $$$. I will be posting soon for some wiring help. I am getting down to the final stuff in and around the fuse box and accessories and i seem to have too many loose ends going on. Like the combination switch has a blue/white wire(male bullet end) that seems to go nowhere. The schematic shows wiper, but the wipers work fine. I also have extra wires since i went from automatic to manual-i.e. kick down seloniod. My biggest worries are that the dash lights don't work yet, do all the circuits have to be complete to get the dash lights to work-as in parlking light grounds?? I start a new schedule next week that should help me gain some time to finish this car up-but it will be down to the wire.
-
Nothing fancy and you can't tell what kind it is under that nissan cover:) I just made sure it was the right size, and this battery fits nicely with the frame and the cover. The terminal ends were about 6$ each incase you'all are wondering. Plus I also got the eyelet type ends for the starter side of the cable-also fusion type-about 3$ a piece.
-
I just had to share this product that I came across when planning my battery cables. I wanted to run as stock of a battery size as i could so I could use the original battery bracket and cover for my 71(just because I had one). Anyway, off the shelf battery cables have ends that hit the plastic battery cover and are usually pretty cheaply made. So, I went on a search for battery cable ends, but then realized that a crimper would then bee needed even if I found the right ones. Then i stumbled onto the Remy battery site and found these fusion battery terminal ends-what a great idea. They had 90 degree terminal ends and I could make the cables at home easily. http://www.remybattery.com/Departments/Cable--Accessories/Connectors--Lugs-and-Terminals/Fusion-Solder-Lugs-and-Terminals/Terminal-Clamps.aspx Were the cables cheap-well about 45$ to make including wire, but have you priced the kits on Summitt. bought the 2 guage wire from Napa and the terminal ends from Remy and had the cables done in 15 mintes and better then anything you can buy over the counter.
-
http://www.danielsternlighting.com/ This is a pretty good site for the DIYer. I think the schematic is easy to understand and he is helpful with any questions. I also decide to go with a ganged 6 circuit fuse block from these folks http://www.wiringproducts.com/contents/en-us/d136.html later on if I want to wire in a electric fan, I will have some extra circuits. It comes with a #8 stranded power wire that is 12" long so you can place the box whereever. I will wire the relays close to it for the headlights.(Once I get thru wiring hell in trying to remember where everything goes on my harness-I can't even get my dash lights to work yet:stupid:)
-
Chris, I have found some really small magnaflow mufflers on the Summitt racing site. They have a 10" case length and should fit straight in there, but they are about 75$ each, but cheaper then Borlas. I LOVE the sound of the magnaflow on my daughter's 280zxt, but the turbo will sound different. At cruise the muffler is perfect for me, a nice low rumble. maybe tomorrow I will do a video of the LOUD machine:)
-
I will posting my exhaust sound clip shortly since I finally got the car running. I can sum up the sound as LOUD:laugh: This thing is like race car loud, so I will be shopping for some real mufflers shortly. I might as well have run straight pipes since these glasspacks seem to do nothing to quiet down the motor. Hell-i checked to make sure the header was hooked up to the exhaust. Now this was in the garage so it might be better once the car rolls outside. I will post a video soon enough By the way chris, I got a new netbook and i thought I had a bug stuck in my screen-nice!
-
Gnose, thanks for the advice, I actually took an end off of an extra linkage and secured it to the end by drilling a hole thru the plastic and rod and using a cotter pin to hold it on. It wasn't the most desirable fix, but it worked in the pinch. My plastic really looked damaged and when i took it back to the plater he tried using a different method of cleaning up the metal next time before plating. He actually used a media blast instead of chemicals to prep the pieces before plating. The problem with this method is that the zinc doesn't shine as well, it turns out almost matte finish. I don't have any more pieces to do to try an perfect a method with the plater, but he was suggesting a nickle dipping before the zinc. In the end, I am going to live with what i have. D240zx2-thanks for the comments and I hope to see everyone there(IN MY CAR). The pressure is mounting.
-
Well this is a big step towards Zcon. After having this engine together for the past 3 years, I finally get to start it up. I finally got my battery cable ends in to make my custom battery cables so i could use the factory cover. I am glad I did it, because these cables are much better then anything I could find at the parts stores. After i got my timing issue resolved, it fires up right away, but it is freakin LOUD. I might have to rethuink the glass packs on my duals. It's going to sound loud sitting in the garage, but I think it will be too loud for a daily cruiser. I was glad to see all my guages were working except the fuel guage, but I expected that. Even the tach works after doing the zx dizzy mod. I guess my alternator I bought off of ebay is a dud, never again will I buy an item like that from ebay. What's sad is that it was a Z forum member that sold it. I should have another alternator by this evening, which should help the car run even better--- instead of straight off the battery. I also noticed when the car was running that the temp probably only got to 160 at best, but I might have put a 160 thermostat in. Now I need to finish up running the harness around the engine bay and work on my headlight relays. Then I can bleed the brakes and take this thing for a spin:D

-
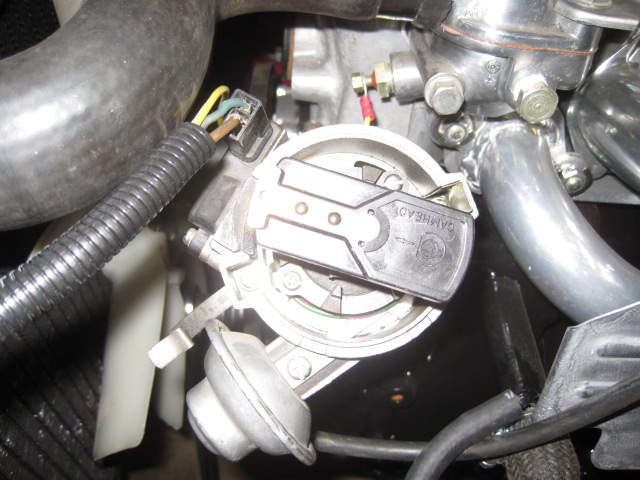
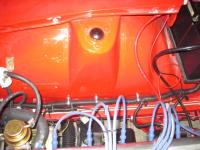
Arne, pulled and rotated shaft and it look much closer to the manual pic. Started right up and dialed in nicely-now got figure out why I'm not charging!
-
Okay guys, finally after years my new motor starts, but with some issues. I believe I got my dizzy off by one tooth, but need some verification of some stuff first. I had to rotate plug wires one plug to get it to run right enough to adjust timing, but still i'm not lined up with the adjustment slot to tighten down. The picture shows TDC position of rotor. It seems that i need to rotate the rotor CCW one tooth to get a perfect line up on the cap and be in the adjsutment slot range on base. So I need to drop the oil pump and rotate the shaft to acheive this-correct? It probably only needs to move 1/4" at best, will I achieve this in one tooth. I want to make sure before i drop the pump(changing the oil anyway). If my dislexia doesn't fool me, I believe i had to advance the timing to get it to run right.

-
Arne, I was thinking that the 2 black wires might be for the kickdown relay for the automatic-if there was one. This connectors are pretty worn from heat and dirt , so I'm thinking there location was somewhere down below and the only other thing I could think of wass the kick down relay. Sorry so-long to reply , but my laptop crapped out-as well as my washing machine, oven, and dryer earlier this month, I'm on a bad streak:cry:
-
is to have my car done and showing up down there with my family in wing formation. I have booked early, but getting worried the car won't be done in time:paranoid: