Everything posted by 240260280z
-
Rear main seal orientation
none of us can cast a stone at you.
-
Rear main seal orientation
- Rear main seal orientation
I have read advice to have the depth so that it does not run where the past lip touched. Here is an online pic for reference:- Rear main seal orientation
Here is front, rear is the same. Just remember "Flat out" or "Show no lip"and you got it "loaded and locked".- Mystery Parts...
Maybe a PO or shop put it in (along with other metal stuff) as an abrasive when cleaning the inside of the tank years ago. It could have hung up when they removed the abrasive years ago thus its reappearance now. Or maybe the PO's 5year old son/neighbour's son did it. (I stogged a potato in an exhaust pipe at 5.)- Installing Timing Chain When Rebuilding Motor on Stand
- Installing Timing Chain When Rebuilding Motor on Stand
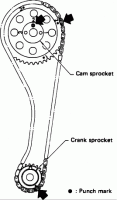
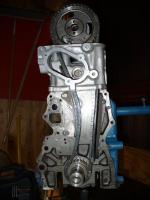
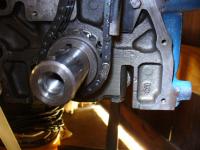
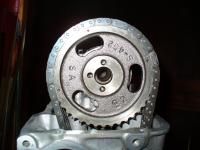
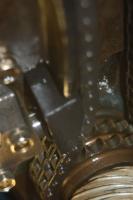
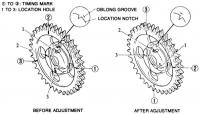
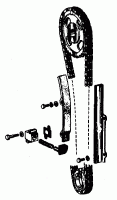
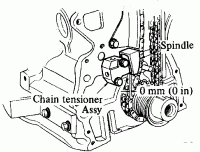
For the archives: When following the FSM instructions and installing a new timing chain, this works: 0. Configuration: Head is on block with two middle cam tower head bolts at 14ft-lbs; head assembled; Cam sprocket is torqued to 100ft-lbs, Crank sprocket and Woodruff key is in place. Cam is at #1 and crank is at TDC. 71 L24 block with N47 maxima head. 1. Do not install chain guides or tensioner. 2. Drop chain through hole in front of head. 3. Wrap chain around crank sprocket with bright link next to dimple. 4. Firmly pull the chain up and wrap around cam sprocket with bright link next to #1 dimple. FYI the timing chain guides and tensioner prevent the chain from reaching over the sprockets (if you start from the bottom or top). This tip should save you a few minutes of noodling around. FYI#2 the photos in the Haynes manual show the timing chain tensioner with ~ 1cm of outward extension. This is incorrect.It should have 0 extension (see below). To take out the slack, adjust the top of the right side guide (above the tensioner) (see last photo below[not l24/26/28 block]). Moving this guide will pull the tensioner in. As well, ensure the lower end of the same guide is "in the shadow of the tensioner" rather than driven out into the rotating chain.- No return spring boss on clutch slave -- OK?
I have read where some drill a hole in the newer slave cylinder where they can hook the spring thus maintaining the function. Read post #7 here: Early Clutch Slave Drilling Spring Hole- Oil Pump Reassembly
Everything seems to work fine. I rotated it after reassembly with a screw driver.- Please confirm the error of my ways:
Update: Finally getting ready to install the transmission and I popped it open to recheck the seal assuming I installed it incorrectly. It actually has a pressing surface on the back side for this purpose. The convoluted lip is facing in. Check twice, leak "nonce"- Oil Pump Reassembly
Thanks for the great photo. Mine looks like it may have been glued to both surfaces with kryptonite. Even after a night's soak in varsol it would not budge. I just used aviation form-a-gasket and reassembled. It should be a good test of the stuff.- Transmission to Engine and Starter bolts part numbers (71 L24/5spd manual)
M10X 1.5mm Just chased them. One was corroded and the head broke. I tried welding nuts to it but no luck. Took it to a shop and they had the same failures so I did not feel bad. The "old guy" attacked it differently and heated the bell housing... worked like a charm. I think the high current return to the starter through these bolts may accelerate the steel/aluminum/water electrolysis- Reassembling Head with Schneider Springs and Retainers
Thanks guys! I'll pick one up. For the record: The cam is Delta 270/280 Valve Lift: 0.450" Intake and Exhaust Measured. Exhaust Cam Lift: 0.315" Measured Geometry Multiplier:1.43 Springs:Schneider 68022 110lbs @ 1.6" Retainer: Schneider 73004 Lash: 0.162" I had a peek through the springs and it looks like I have ~ 2-3mm between the top of the stock valve seal and bottom of the retainer at full lift.- Oil Pump Reassembly
When I disassembled the oil pump, the gasket was essentially none-existent, a paper-like surface was stuck to both parts more-or-less like glue rather than gasket. It can not be removed by finger nail. What should I do for reassembly? I am thinking that I leave the paper surface and use Aviation Form A Gasket? I can cut a new paper gasket with an xacto but I wonder if it is worth stripping the old stuff as it is bonded so well? I will have to use a chemical gasket remover to kick start it.- Reassembling Head with Schneider Springs and Retainers
I have reassembled ~ 10 stock heads using my trusty Sears valve spring compressor however, the wider Schneider spring retainers prevent the tool from working next to the cam towers. The increased spring forces of the stronger springs also made in challenging. In the end I had to go backwards a few steps. Here is what I recommend for others who find this post in the future: 1. Remove cam towers 2. Remove rocker pivot bolts 3. Adjust the tool so that you do not have to change the vice handle tensioner: Set the pin so that you can press it against the valve face,at the other end you can then press the springs down with your thumbs to walk the fork over the spring retainer. 4. Have a magnet on hand to help move the keepers as needed. 5. WEAR EYE PROTECTION FYI finding a valve keeper launched towards the back of the room full of stuff is no fun....twice.- Red Loctite Check
Assembling engine. Just wanted a check on my assumptions where I should use red loctite: 1. Crank Bolt 2. Flywheel Bolts 3. Pressure Plate Bolts 4. Oil pick-up bolts 5. PCV-tube-mesh plate screws- 3 nuts onthe top of the struts; question
You can replace all 3 at once but if the wheel is off the ground, just replace one at a time to save a headache.- BCDD removal
BCCD also reduces high vaccum that will draw oil into the cylinders. (when throttle valve closes at high RPM's)- Did rear ebrake shoes on 2000 acura TL3.2
Yeah I hear ya. I did a water pump on a bimmer...lots of plastic bits and strange convoluted methodology to remove it. I also did the brakes... impressive but weird.... the pads have a huge thick chunk of material nearly twice as thick as Japanese pads (very nice) but having to hold the wheel up against the hub as you inserted the wheel bolts is no fun.- Heater Face Plate ready for restore!
Keep up the cool work!- Did rear ebrake shoes on 2000 acura TL3.2
Not recommended. You need 3 hands. It is one of the integrated shoes/pads/drum/rotor/hat. It is the strangest assembly of springs, clips, hard-to-get-to parts that I have ever worked on. Even stranger is that the adjuster sprocket and the bottom spring.They actually share the same point in space. I don't know who designed the brake mechanism however the many access holes in the hub seem to point to an attempted corrective action by the hub designer.- Z on Twilight Zone Episode
That's the mom from toy story moving the stiffs.- getting more HP in 78 280z
Research: http://www.google.ca/search?source=ig&hl=en&rlz=&q=240zvs.miata&btnG=Google+Search&aq=f&aqi=g-v1g-b5&aql=&oq=- Floor Pans... Getting screwed?
Wish I had that twirler when I did the brake and fuel lines!- Carroll Shelby dies at age 89
- Rear main seal orientation
Important Information
By using this site, you agree to our Privacy Policy and Guidelines. We have placed cookies on your device to help make this website better. You can adjust your cookie settings, otherwise we'll assume you're okay to continue.


