


240260280z
Free Member
-
Joined
-
Last visited
Everything posted by 240260280z
-
 Well she knows how to lean over the fender without resting on it.... sign of a true mechanic! Here is my attempt years ago: Well she can now drive a stick so my job is done.
 -
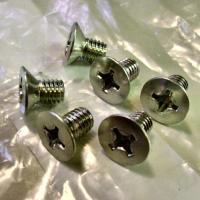
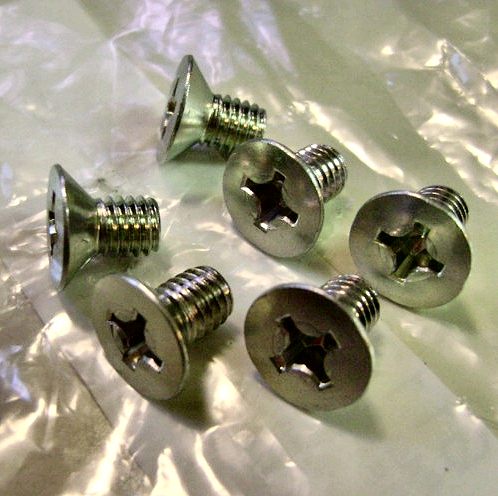
There are 2 long and 3 short counter-sunk screws that hold the dovetail and the latch mechanisim in the door... of the 3 screws that hold the mechanism, the screw closest to the car must be short or the locking mechanism will hang up on it... I found out.... slightly longer than stock ss screw caused me grief.
-
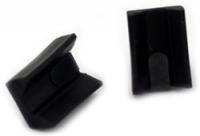
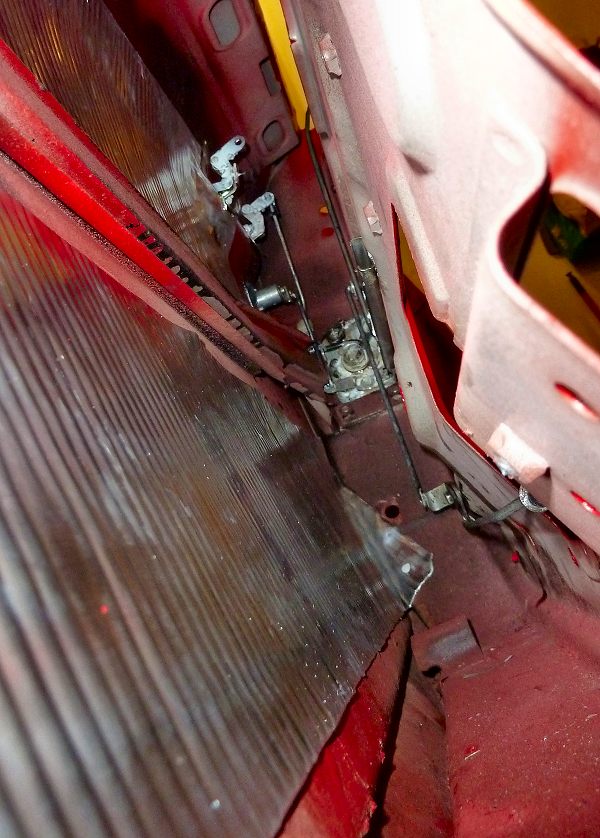
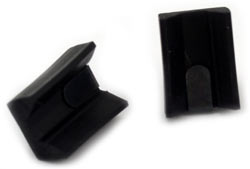
I thought the antenna drain grommet, inner fender seals and cowl drain grommets were well tucked away... but did you know a small rubber lives inside the door and is a rest for the window when fully lowered? Here it is and also where it goes: See the bracket/stand-offon the bottom of the door with the rectangular hole? That is where in mounts. Another shot: I saw a photo of a rubber wire-tied there but I cna not find it now.

-
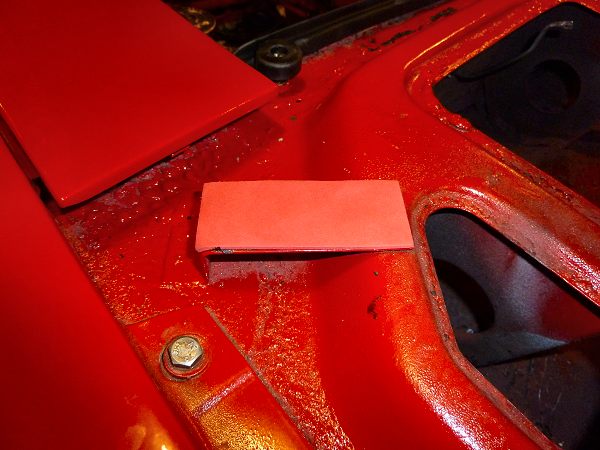
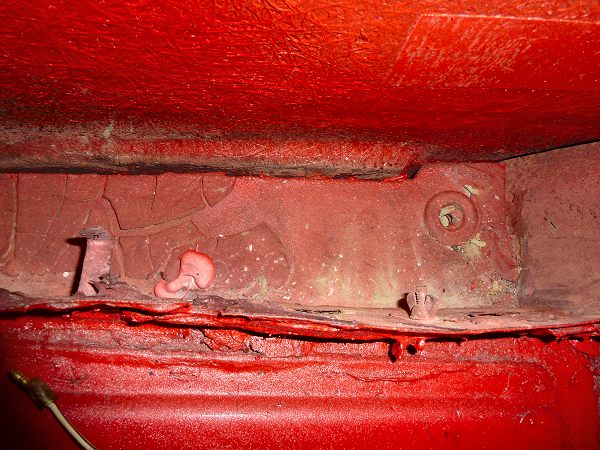
Sheet of red closed cell craft rubber 8 1/2" X 11" cut and glued to the bracket where the cowl sits... no rattle. You can buy black sheets and do the rectangles where the hood sits in the inspection lids.
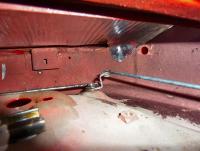
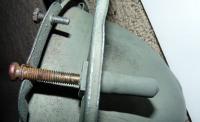
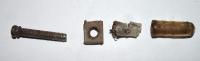
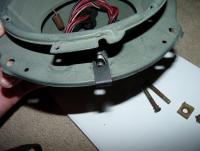
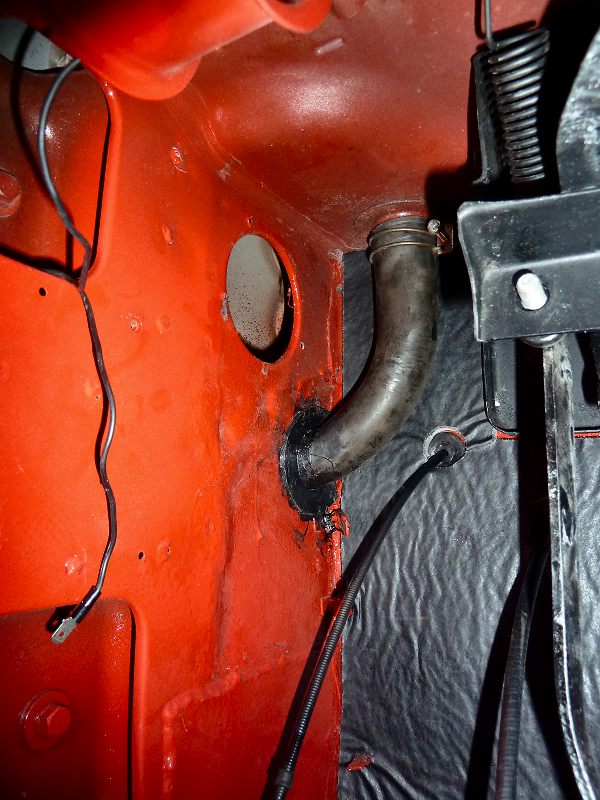
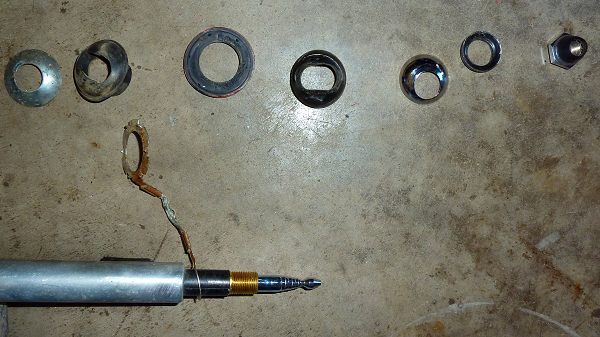
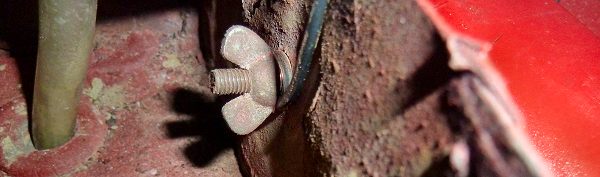
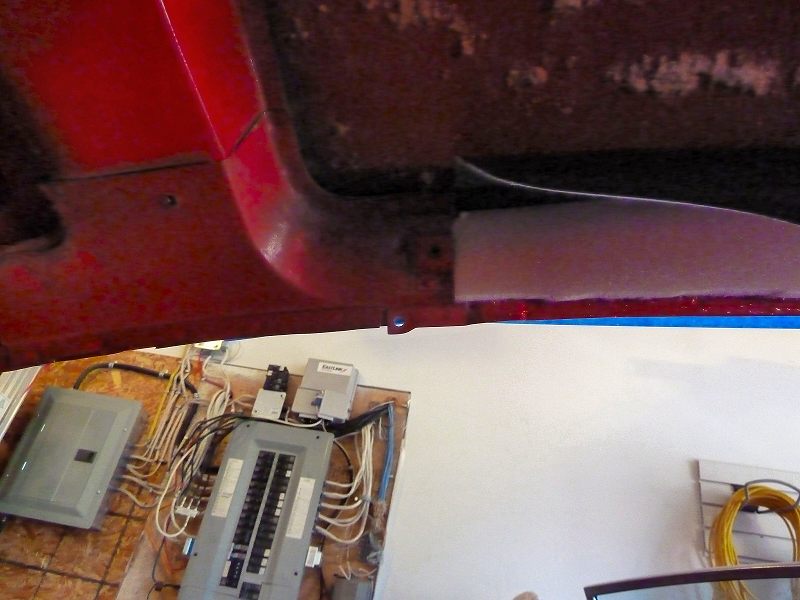
 The antenna on this 71 240z does not seem to be stock. Here are the parts (in sequence) when removing/installing The area between the rear quarter panel (fibreglass) and the rear deck: There is a wingnut and stud which I guess is where the original antenna is attached. There is also a drain hole for a tube coming out of the antenna (potential fume hole). Lots of painted ziebart in the bottom too Here is the tube in place. I used the wing nut to ground the antenna's ground lead.
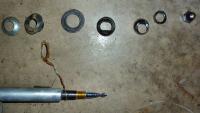

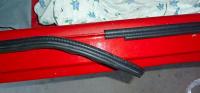
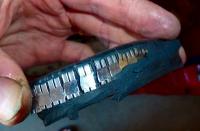
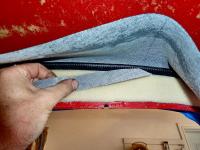
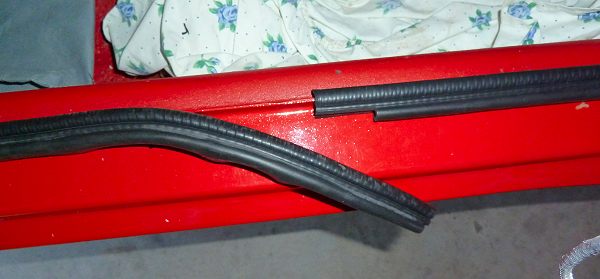
 Some photos of the Precision Weather Stripping for the Door. There are steel "U" ribs in the stripping that pinch the pinch weld. When you cut the stripping with a knife, try to cut between the "U" pieces. Here is a side view with some of the side rubber shaved to expose the chain of U clips.
 I have the same kit from P.A.
Sorry, I mean from starter and ground to the posts on the battery in the sock battery tray. I don't have a Z in front of me but I want to buy two cables to do the job. I don't want to buy cables too short or too long. These seem like a nice length:
What are the optimal lengths for the battery cables?
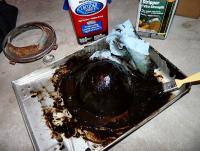
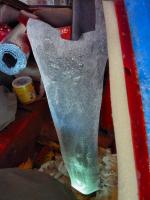
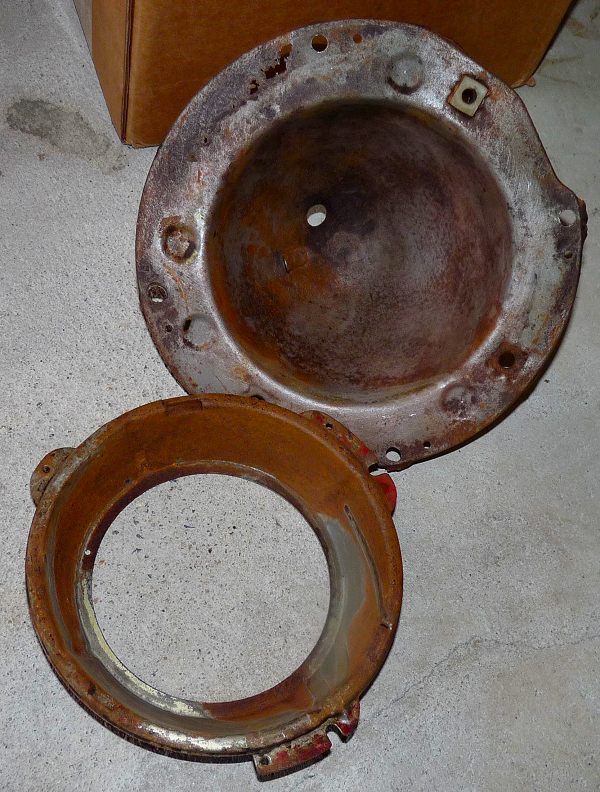
Looks great! I am just about to attack a mirror so I am grateful for your excellent post. btw, How did you get the stem so smooth after all that chalky corrosion in the first picture?
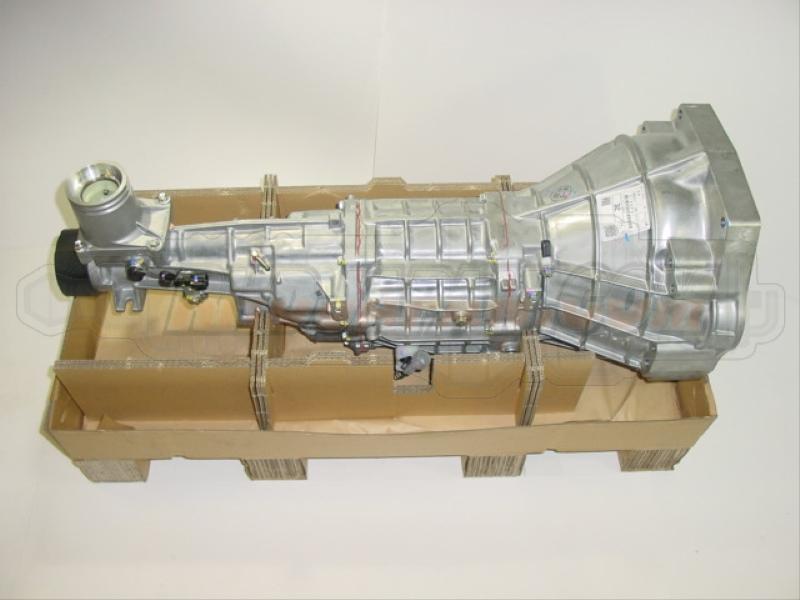
Here is the one I was thinking of: One for sale here: (Eastern Canada) Click [TABLE] <tbody>[TR] [TD]Transmission[/TD] [TD]1st[/TD] [TD]2nd[/TD] [TD]3rd[/TD] [TD]4th[/TD] [TD]5th[/TD] [TD]6th[/TD] [TD]Final[/TD] [/TR] [TR] [TD]NISMO Reinforced Cross[/TD] [TD]2.9071[/TD] [TD]1.9888[/TD] [TD]1.5373[/TD] [TD]1.2179[/TD] [TD]1.0000[/TD] [TD]0.8624[/TD] [TD]-[/TD] [/TR] [TR] [TD]Genuine 6-speed (FS6R92A)[/TD] [TD]3.6264[/TD] [TD]2.2000[/TD] [TD]1.5412[/TD] [TD]1.2132[/TD] [TD]1.0000[/TD] [TD]0.7674[/TD] [TD]3.6920[/TD] [/TR] [TR] [TD]Genuine 5-speed (FS5W71C )[/TD] [TD]3.3214[/TD] [TD]1.9023[/TD] [TD]1.3084[/TD] [TD]1.0000[/TD] [TD]0.8378[/TD] [TD]-[/TD] [TD]4.0830[/TD] [/TR] </tbody>[/TABLE]
I have the same kit from P.A.
Sorry, I mean from starter and ground to the posts on the battery in the sock battery tray. I don't have a Z in front of me but I want to buy two cables to do the job. I don't want to buy cables too short or too long. These seem like a nice length:
What are the optimal lengths for the battery cables?
Looks great! I am just about to attack a mirror so I am grateful for your excellent post. btw, How did you get the stem so smooth after all that chalky corrosion in the first picture?
Here is the one I was thinking of: One for sale here: (Eastern Canada) Click [TABLE] <tbody>[TR] [TD]Transmission[/TD] [TD]1st[/TD] [TD]2nd[/TD] [TD]3rd[/TD] [TD]4th[/TD] [TD]5th[/TD] [TD]6th[/TD] [TD]Final[/TD] [/TR] [TR] [TD]NISMO Reinforced Cross[/TD] [TD]2.9071[/TD] [TD]1.9888[/TD] [TD]1.5373[/TD] [TD]1.2179[/TD] [TD]1.0000[/TD] [TD]0.8624[/TD] [TD]-[/TD] [/TR] [TR] [TD]Genuine 6-speed (FS6R92A)[/TD] [TD]3.6264[/TD] [TD]2.2000[/TD] [TD]1.5412[/TD] [TD]1.2132[/TD] [TD]1.0000[/TD] [TD]0.7674[/TD] [TD]3.6920[/TD] [/TR] [TR] [TD]Genuine 5-speed (FS5W71C )[/TD] [TD]3.3214[/TD] [TD]1.9023[/TD] [TD]1.3084[/TD] [TD]1.0000[/TD] [TD]0.8378[/TD] [TD]-[/TD] [TD]4.0830[/TD] [/TR] </tbody>[/TABLE] In loverly etching primer... will be painted metallic grey like the powder coating
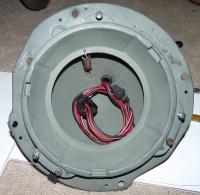
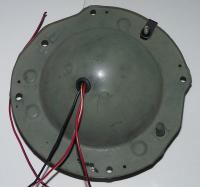

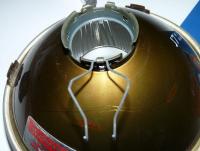
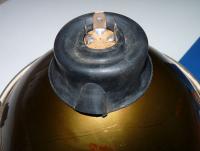

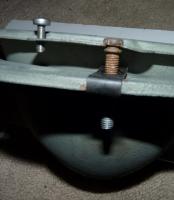
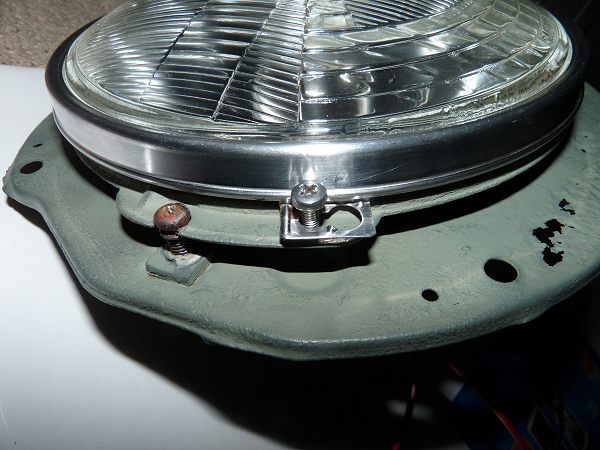
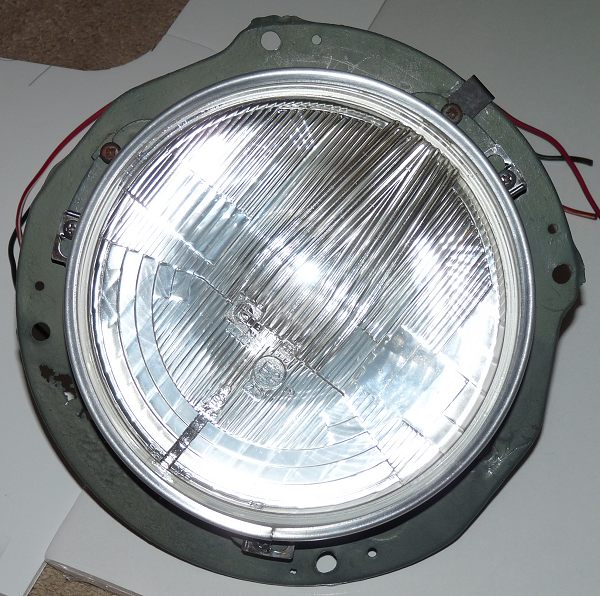
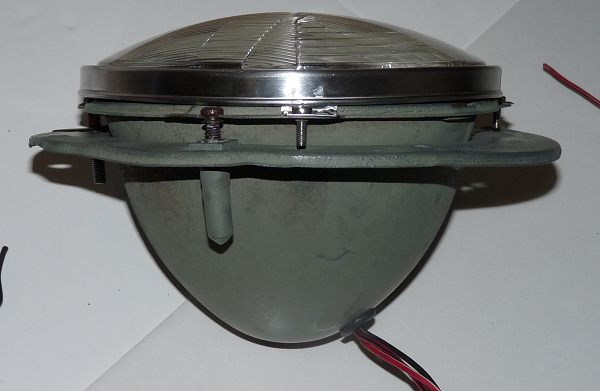
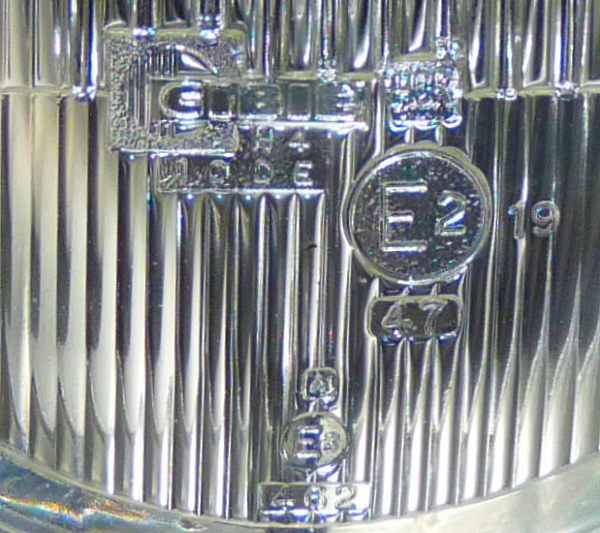
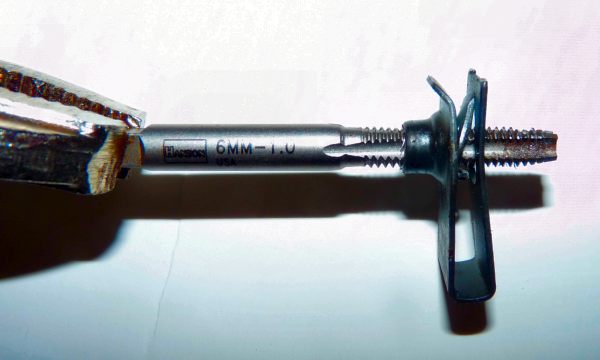
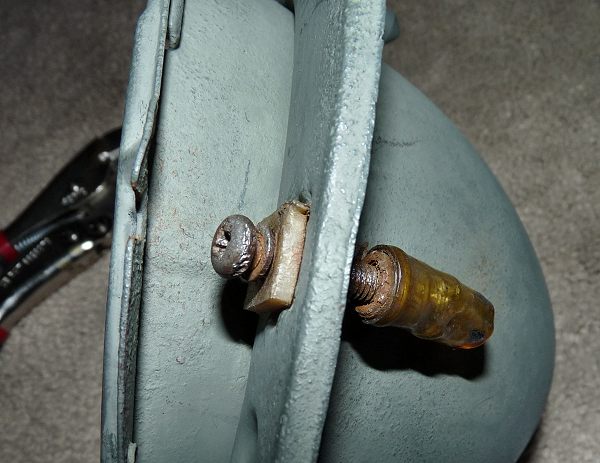
 Substitute for a failed nylon adjuster nut Here is the working one(covered in etching primer): As the screw turns the light casing moves. Lithium grease helps lube the plastic. I never chased the threads yet. Here is the broken one Details of the broken fastener Solution: Ace Hardware SAE nutsert and am M6 1.0mm tap. Taps easy... the one in foreground is tapped and is now metric Fits nicely Done!
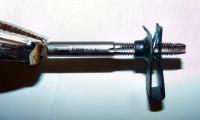

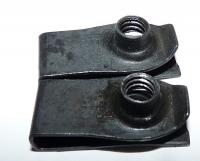
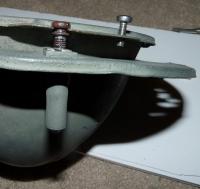
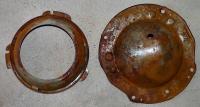
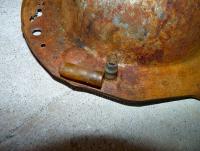
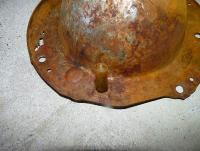
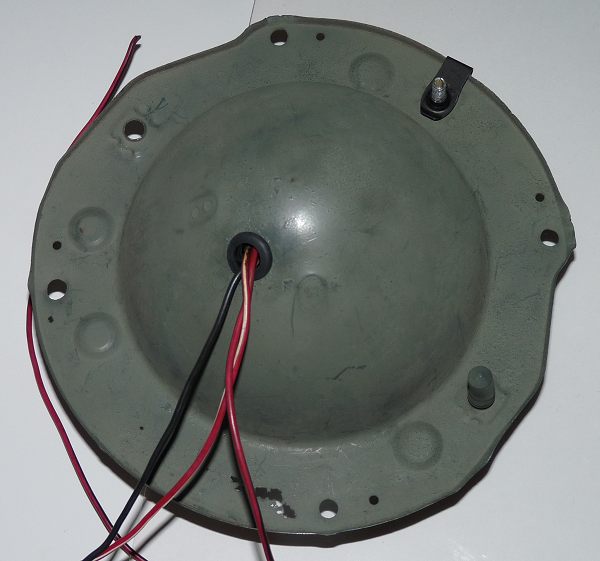
 40 year old Ziebart is a @#$% Wash with lacquer thinner, wipe out paint tray, redo.... many times. Finally.... rusty metal detail of plastic threaded insert. It has a clear rubber boot to keep the water out. boot in place
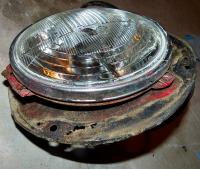
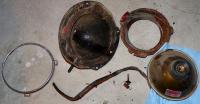

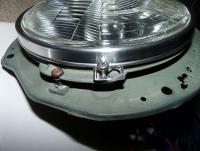
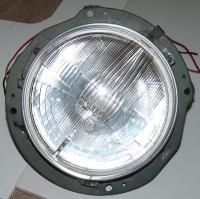
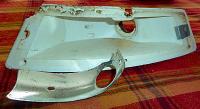
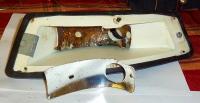
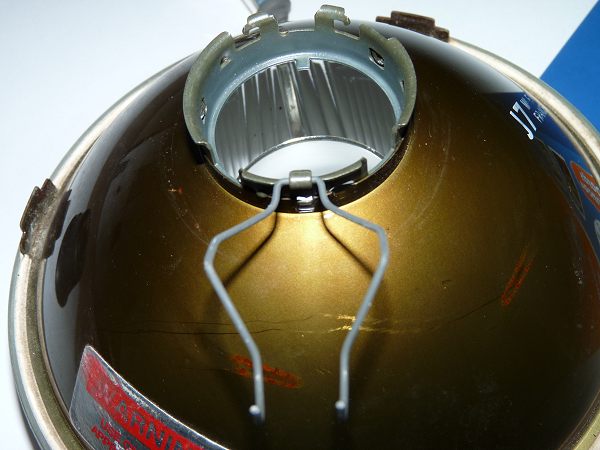
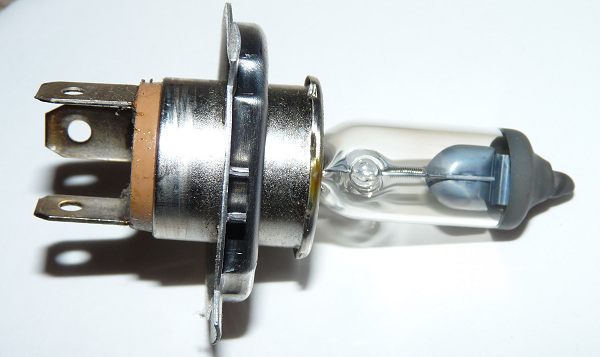
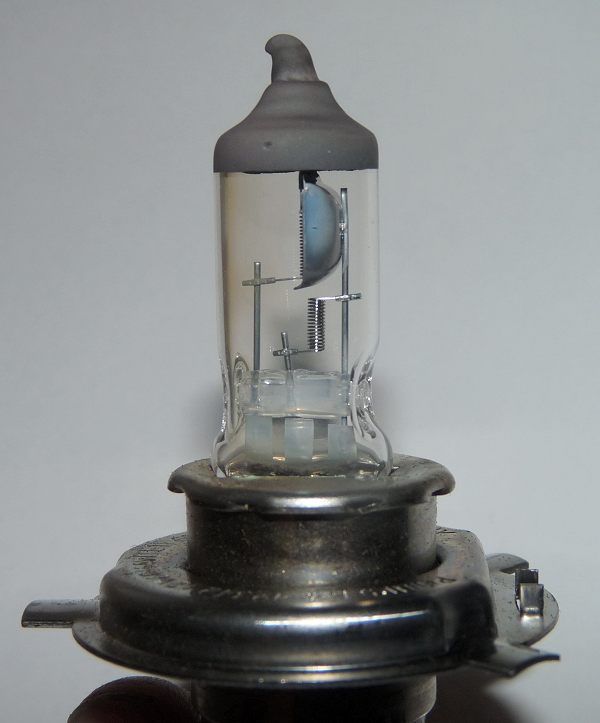
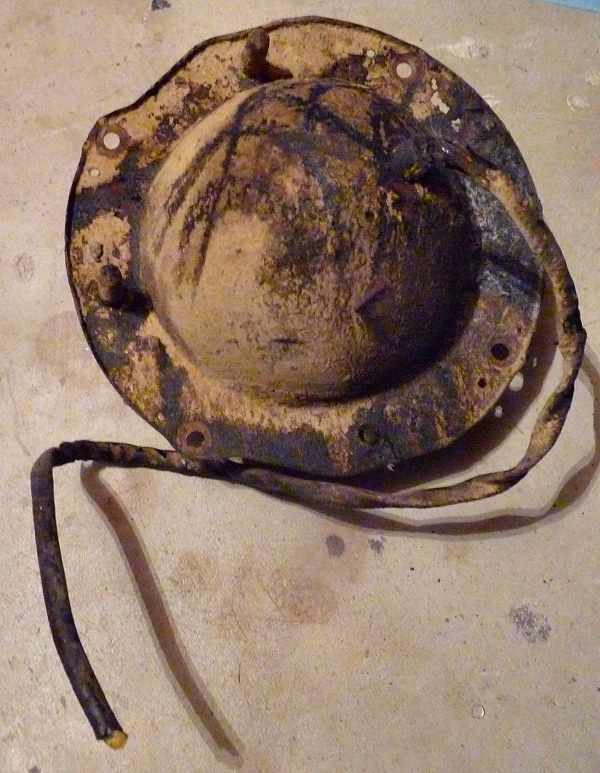
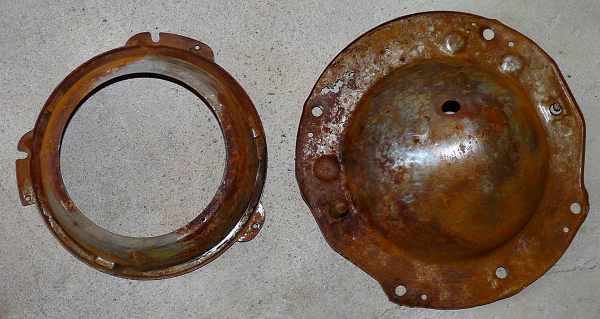
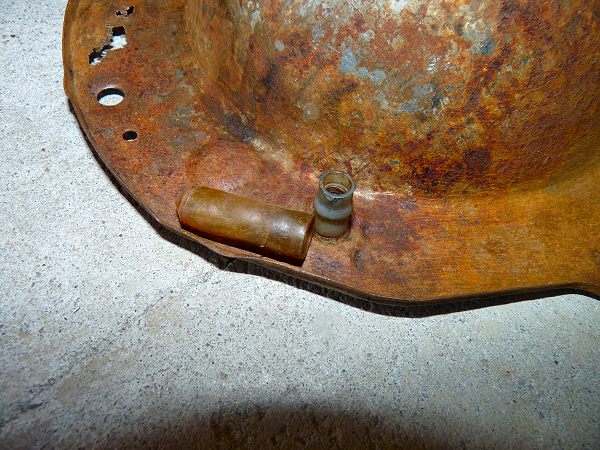
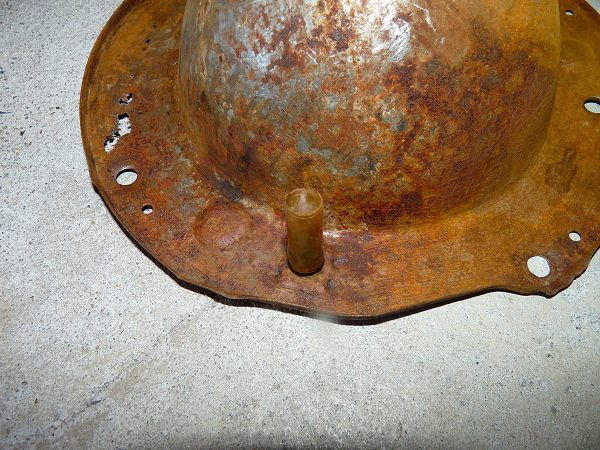
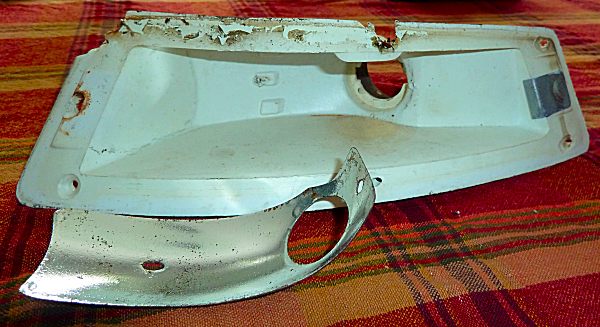
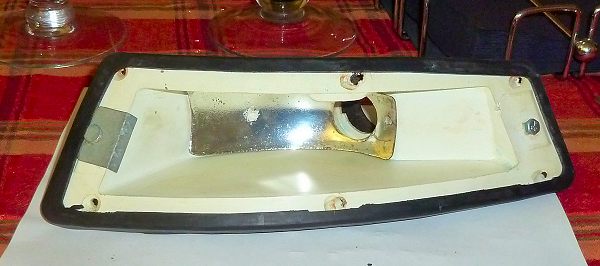
 The right turn indicator on the Jan 71 240z had allowed water to enter and the metal reflector was rotted with the chrome peeling off. Someone lost the 3mm screws over the years and had used wood screws. The amber plastic holes were toast. I managed to source a replacement from a friend however two of the 3mm screws had rotted away. This donor light did have an OK reflector and ok amber plastic however removing the 3mm screw remnants was like surgery. After removing what I could, I used a soldering iron to shape the amber plastic. Here are the two offending screws. Here is the donor with the plastic melted away to prevent damaging the amber part with the embedded rot. Note that I used the soldering iron to melt/shape/push the two plastic mounts for the reflector. Once the plastic was formed into a smaller-than-the-hole shape, the reflector simply popped off. Here is a reconstructive 3mm stud using JB Weld. The hole was useless so this was the only fix apart from melting amber plastic and tapping. Here is the original light with a new outer seal but with the offending reflector and the replacement reflector waiting in the wings...err front and centre. After some reforming the plastic stand-off's with the tip of the soldering iron, the new reflector is in place and secured by the same plastic. Note: forming the plastic with the iron requires a series of short, quick "pushes" with no long periods of the iron in one spot.

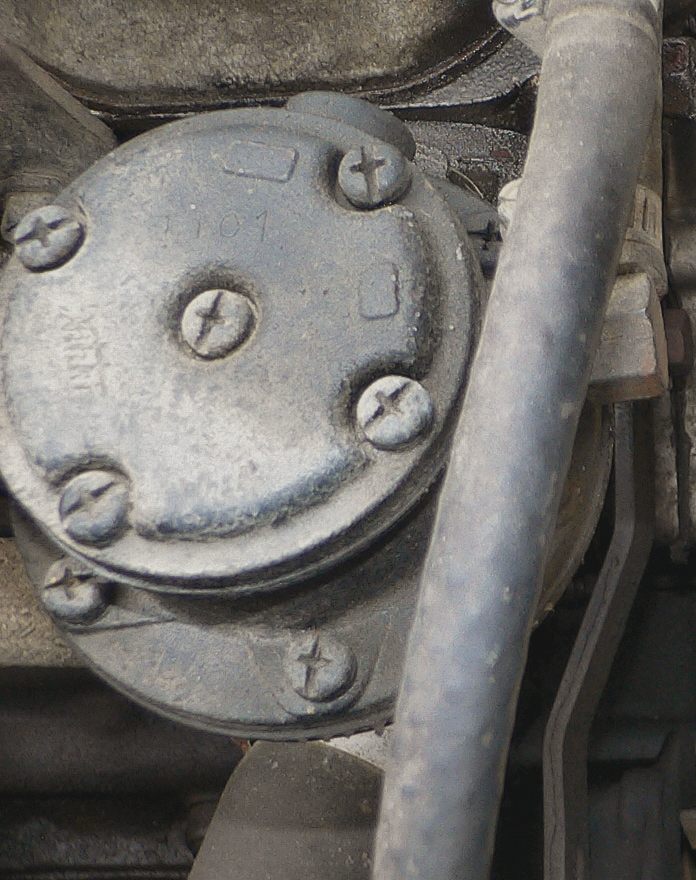
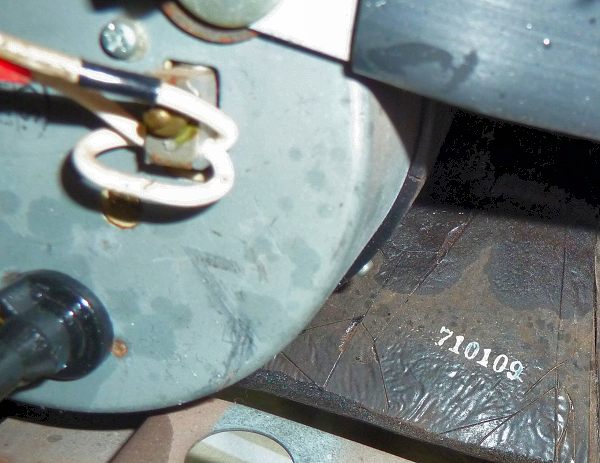
 1101 Jan 71 even better: the dash has a date of Jan 9, 1971 (a saturday)
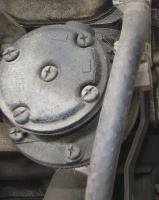
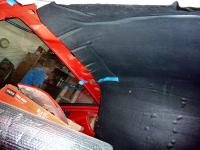
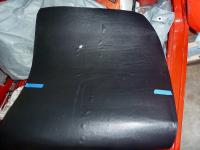
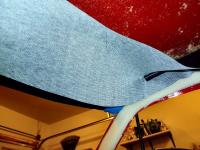
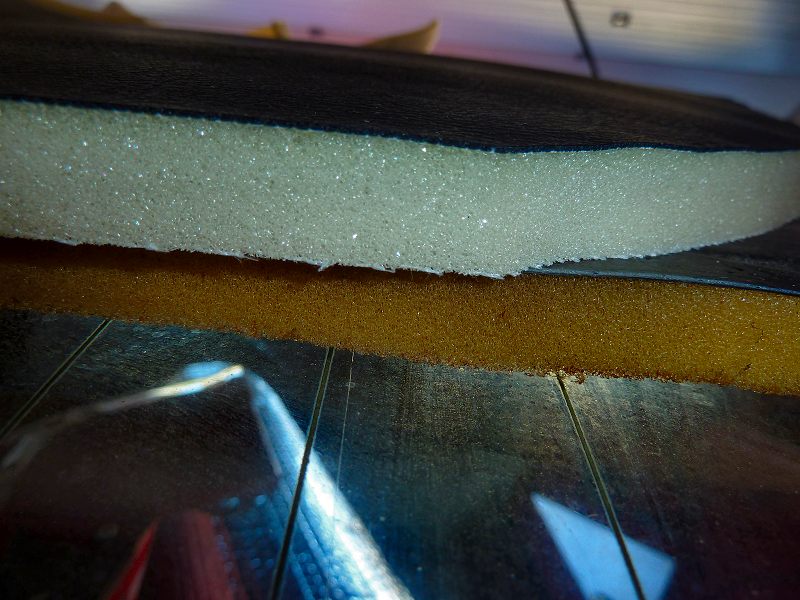
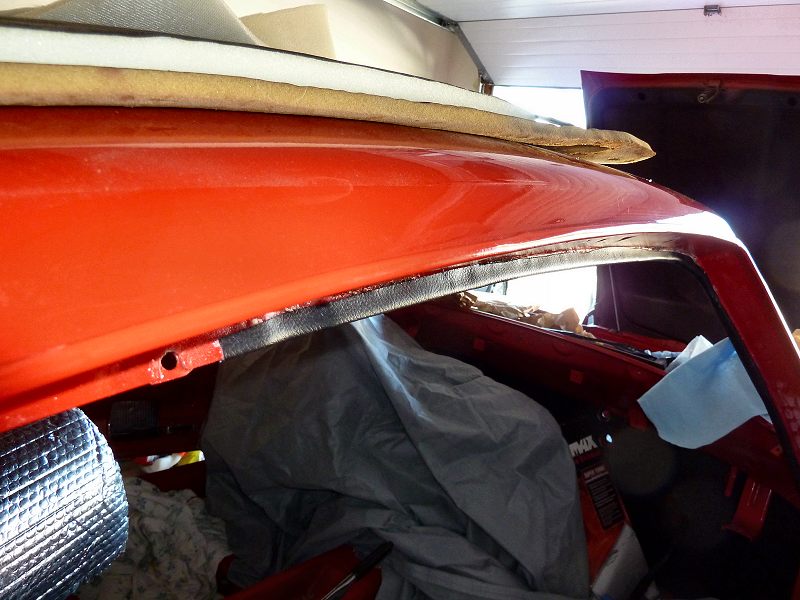
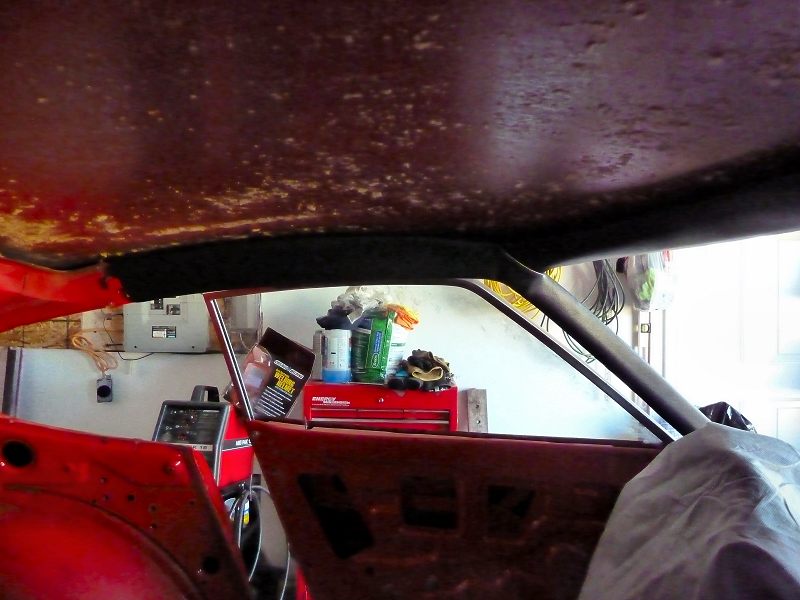
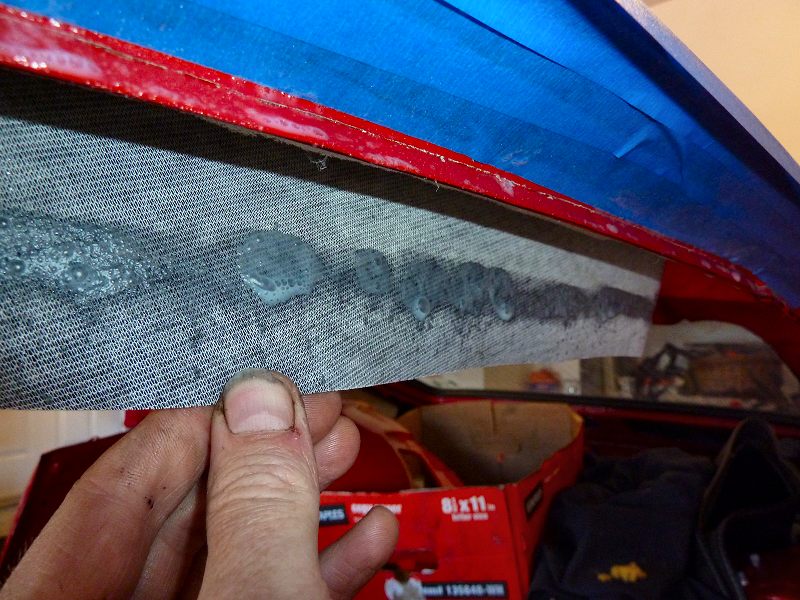
 Here is a comparison of the old, stinky, yellow roof liner / head liner below the new liner. An upholstery expert from our club mentioned that steam can sometimes revive foam. As Jim Karst mentioned in another post on this site, the new liner is quite stiff and, when stuffed into place, it does not need to be taped up when the glue is seting. I used tape to mark the middle of each end. This helps when aligning. Note the bubbles. I left this liner in the sun for a day in an attempt to remove them but no luck. I also hit them with heat from a hair dryer and again no luck... so after applying glue and sticking to the roof, they disappeared.... go figure. Here are photos of 1/2 of the liner glued in place. I did not seem to take photos after these (or maybe I missed them). Anyway to get one side into place, load the roof and fabric with glue but stay away from the edges as they will be stuffed under the metal surrounding the roof perimeter. The liner has to slide into this area so glue will just cause problems. Make sure the glue is 20min tacky before putting the first half of the liner up so that it stays. Once it is up, apply glue to the second half and give it 5 min to tack before putting in place. I used a paint stick to push the liner into the gap/cave/etc. You can see the bubbles disappearing magically in this photo.
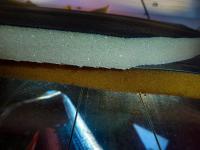


 I agree.The stock ones fit well. I have refreshed the covers in a 240z and 260z and they fit fine, however those in the BD kit fit poorly due to incorrect shape when sewn together. Now to finish this thread with the headliner.
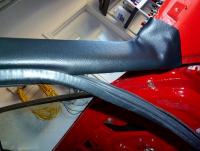
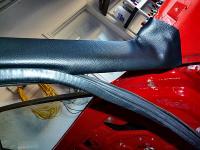
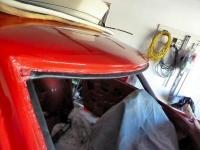
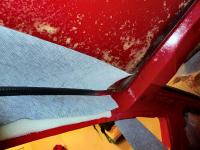
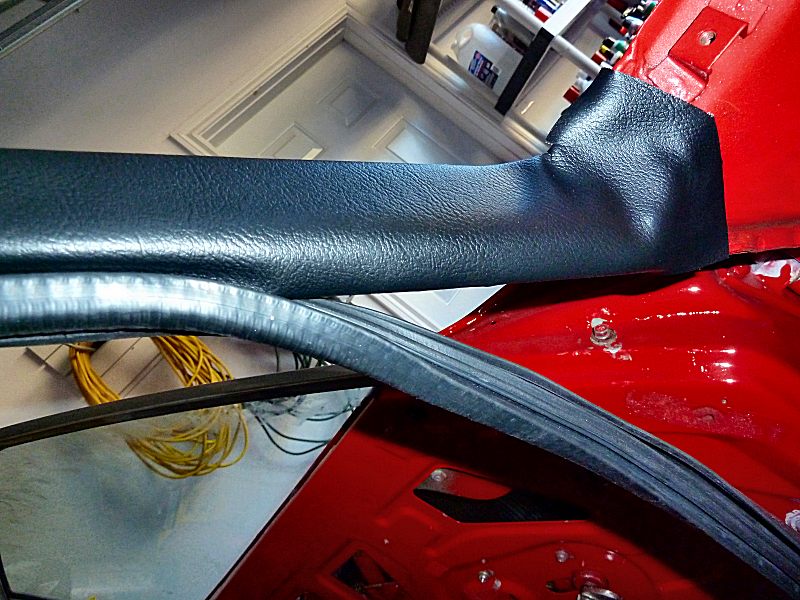
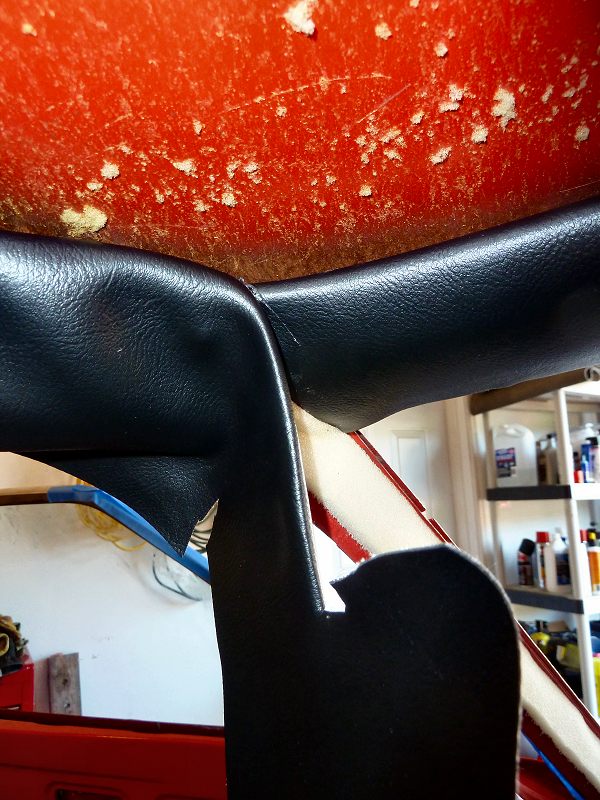
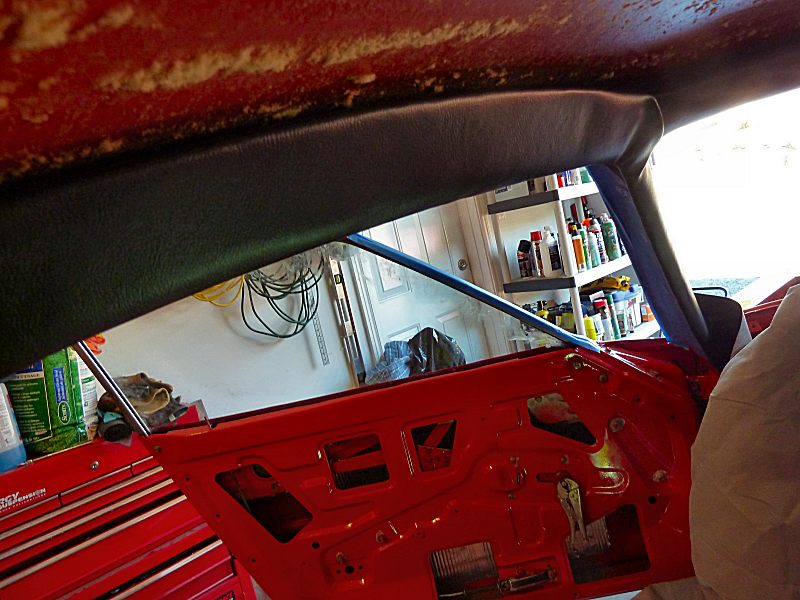
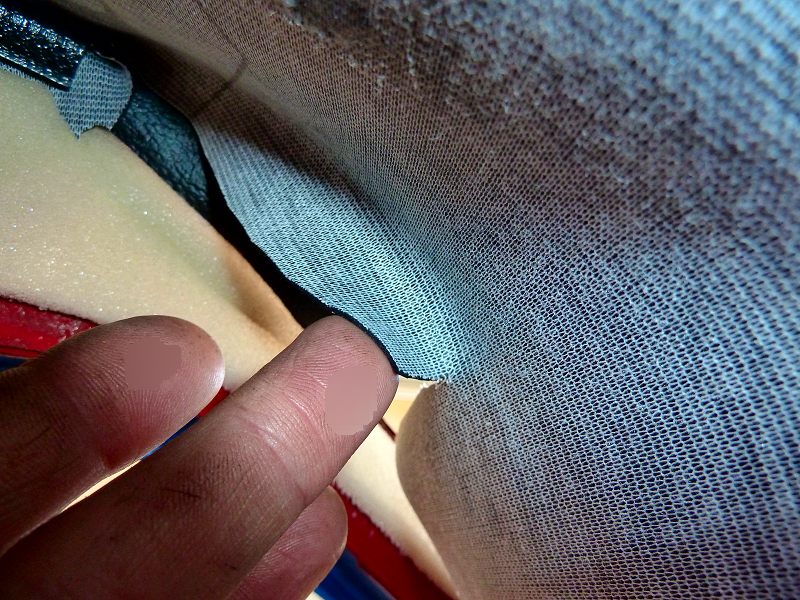
More photos of the trimmed vinyl at the door seal drip edge. Finished Here is a detail of the completed vinyl showing the amount at the dash corner. Also you can see how the door seal grabs the pinch weld...thus my comments above about not putting foam there. Here is how the window seal ties it all together. Too bad the flash makes the photo uglier than in person. Next up... the headliner
I agree.The stock ones fit well. I have refreshed the covers in a 240z and 260z and they fit fine, however those in the BD kit fit poorly due to incorrect shape when sewn together. Now to finish this thread with the headliner.
More photos of the trimmed vinyl at the door seal drip edge. Finished Here is a detail of the completed vinyl showing the amount at the dash corner. Also you can see how the door seal grabs the pinch weld...thus my comments above about not putting foam there. Here is how the window seal ties it all together. Too bad the flash makes the photo uglier than in person. Next up... the headliner

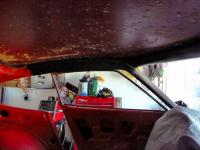
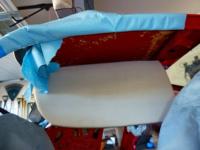
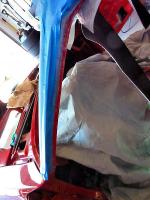
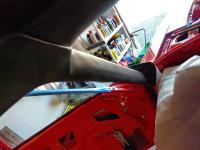
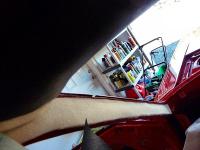
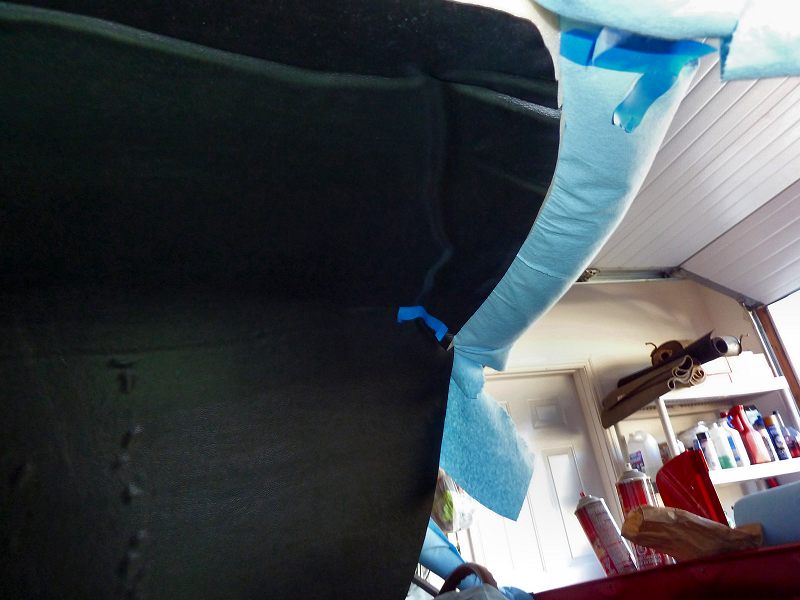
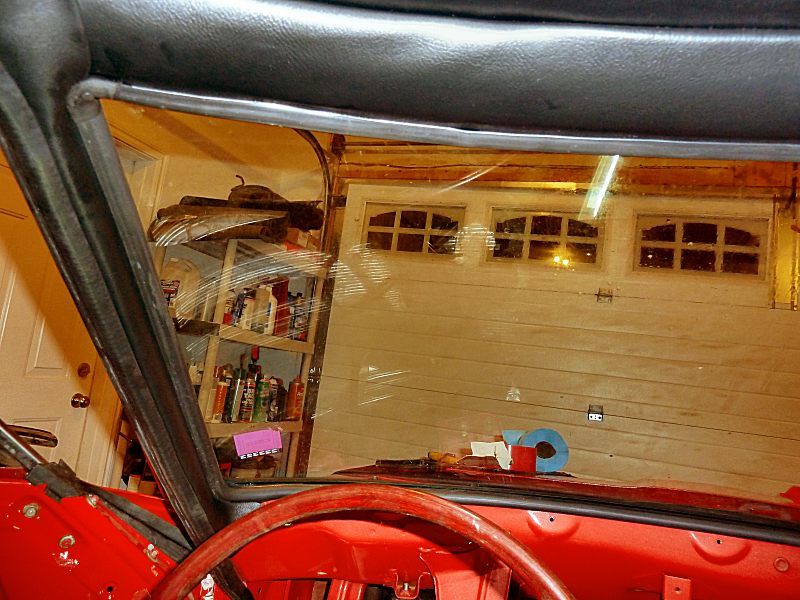
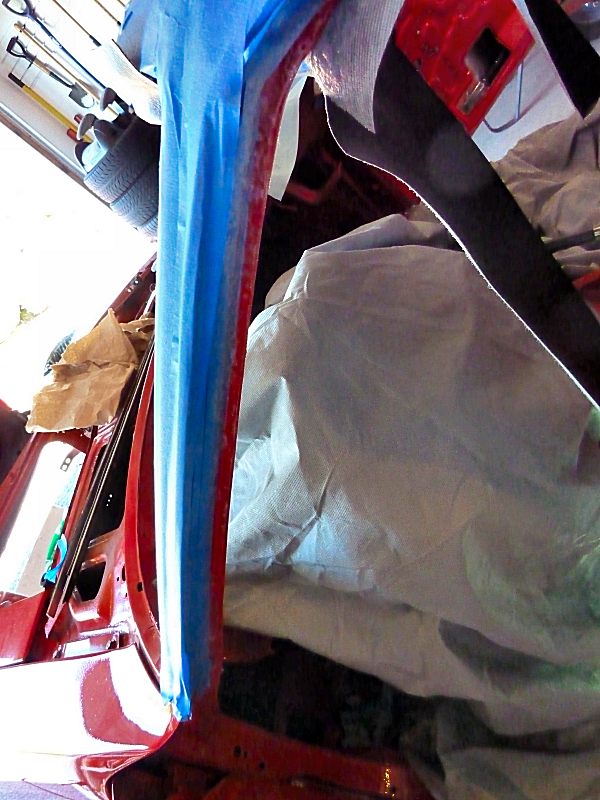
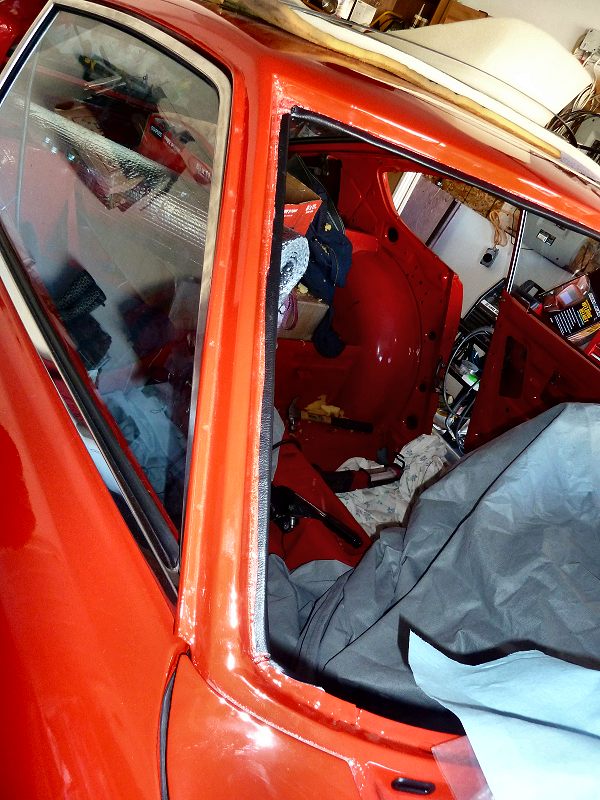
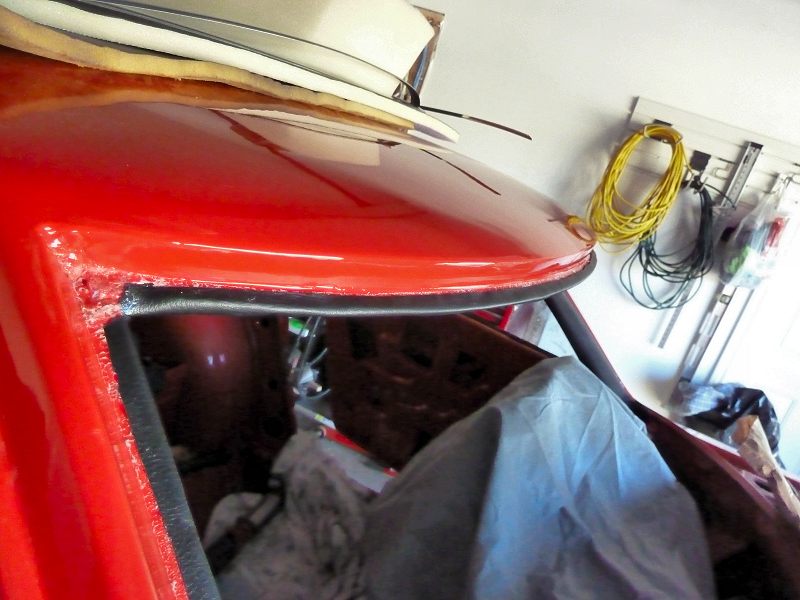
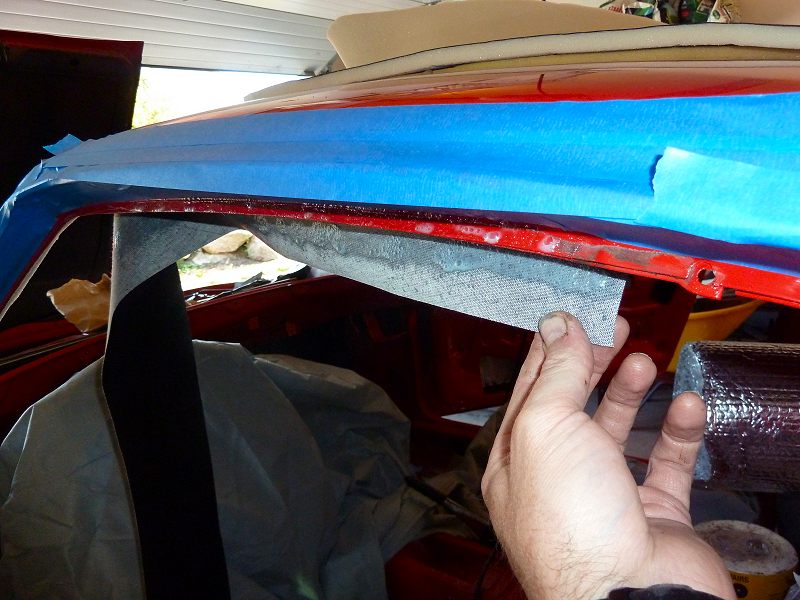
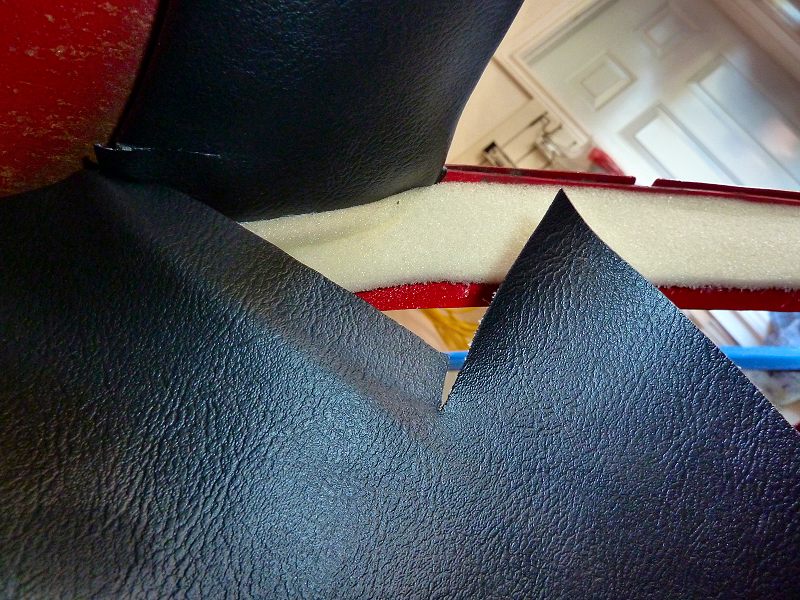
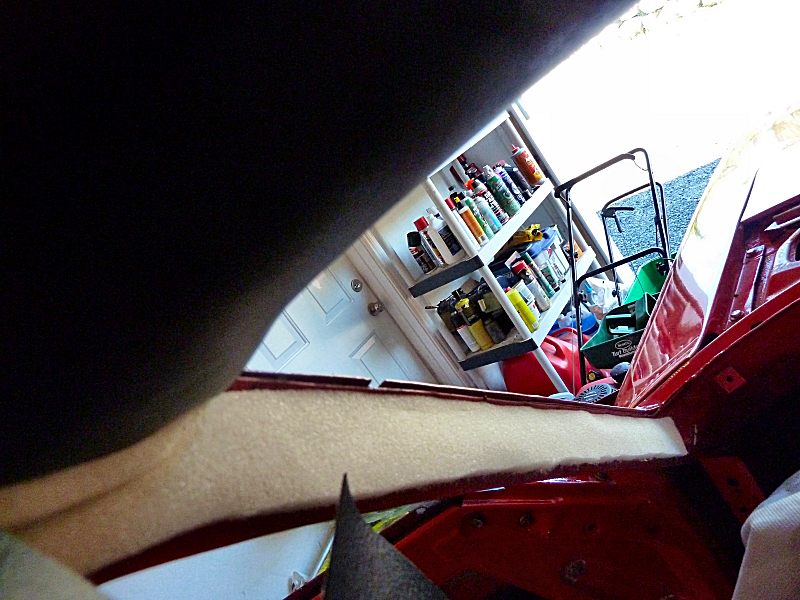
 When the pillar vinyl is ready to go, spay the pinch weld on both sides of the pillar (at door seal and windshield). The vinyl should be run as far down past the pillar as possible so that the dash and kick panel and window/door seals cover all body metal from being exposed. Masked Glued (See you can take your time and do these pieces in two steps) Masked at door seal side Detail of the cuts at the corner Glued and folded and ready to go. Tucked into place Look no slice. The final pulling has not been completed in the photo nor the cuts at the lower corner of the windshield made. Here is what the finished trim looks like around the windshield after the excess is cut and the glue sets. Another shot of the windshield pinch-weld. The rubber windshield seal with cover all of this

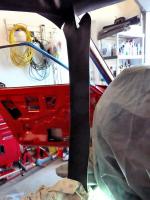

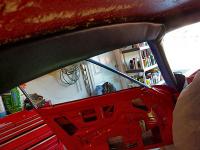

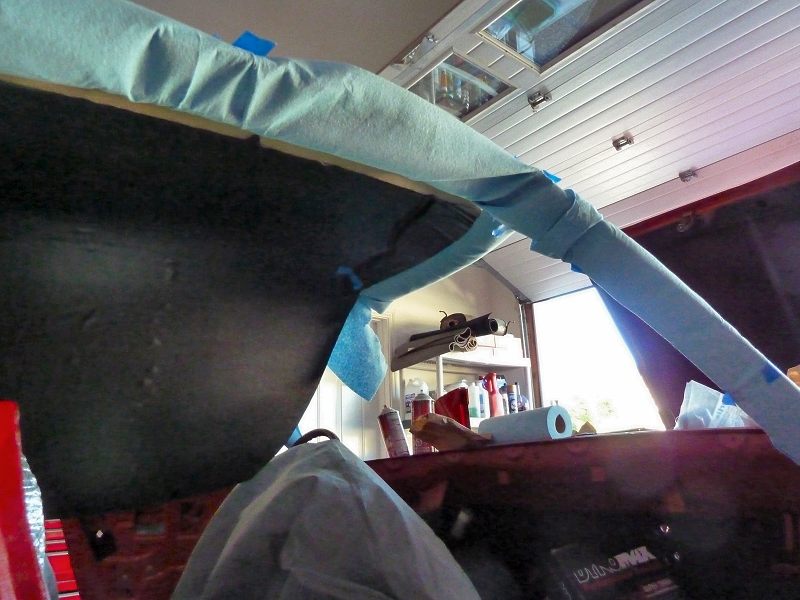
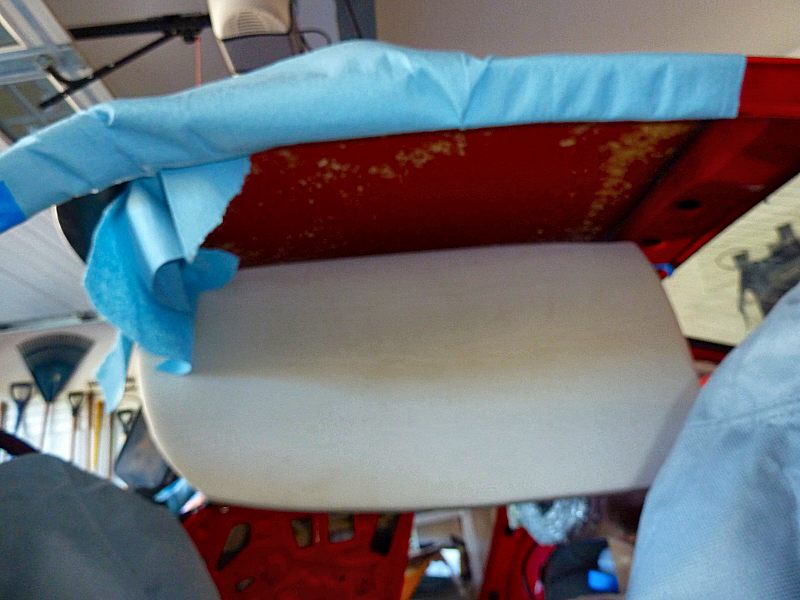
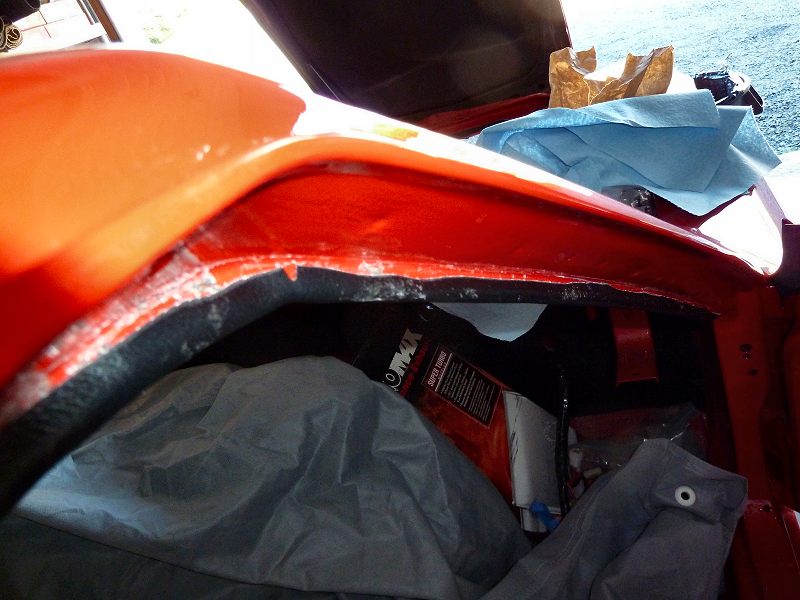
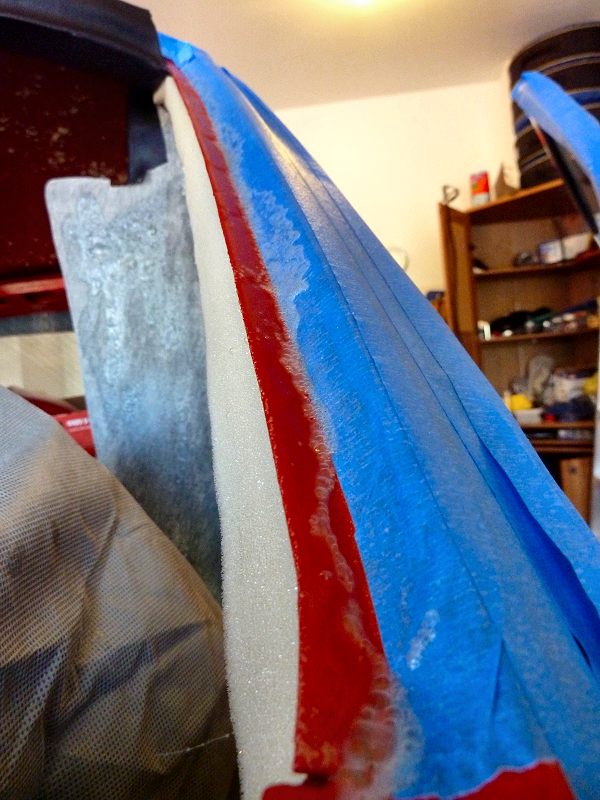
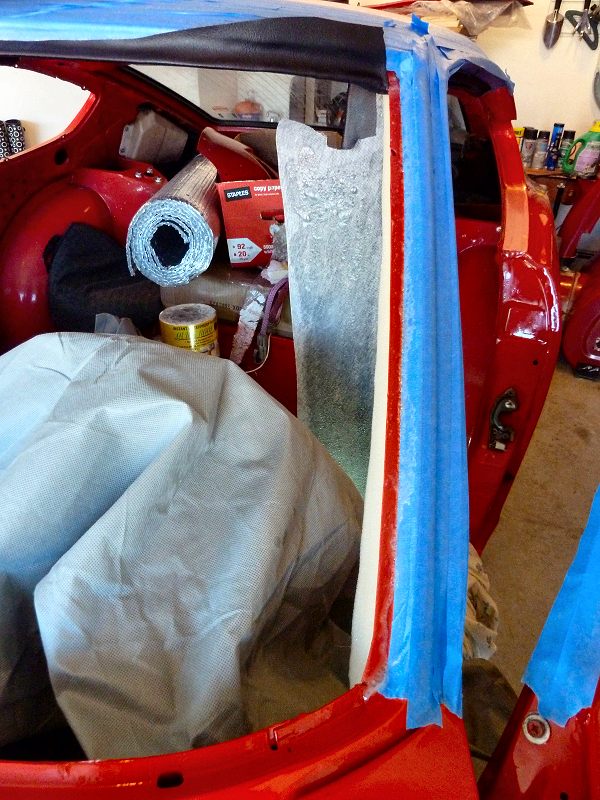
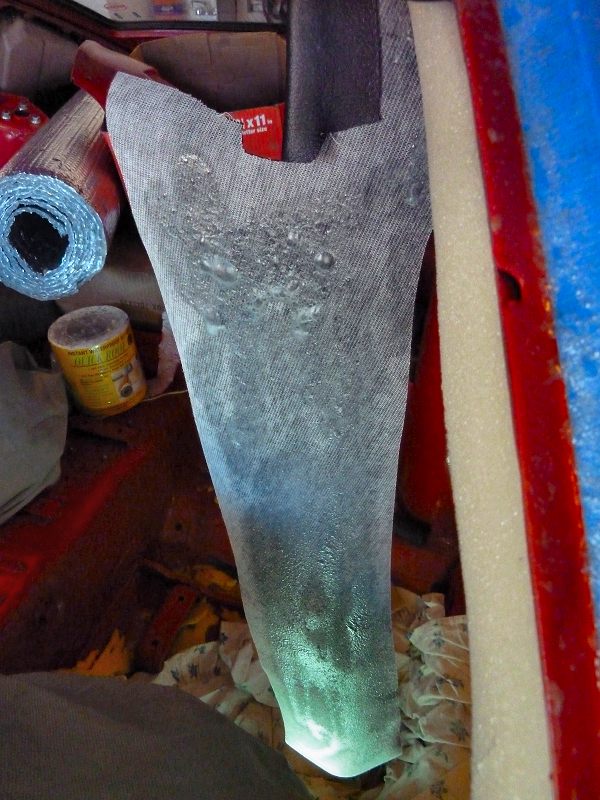
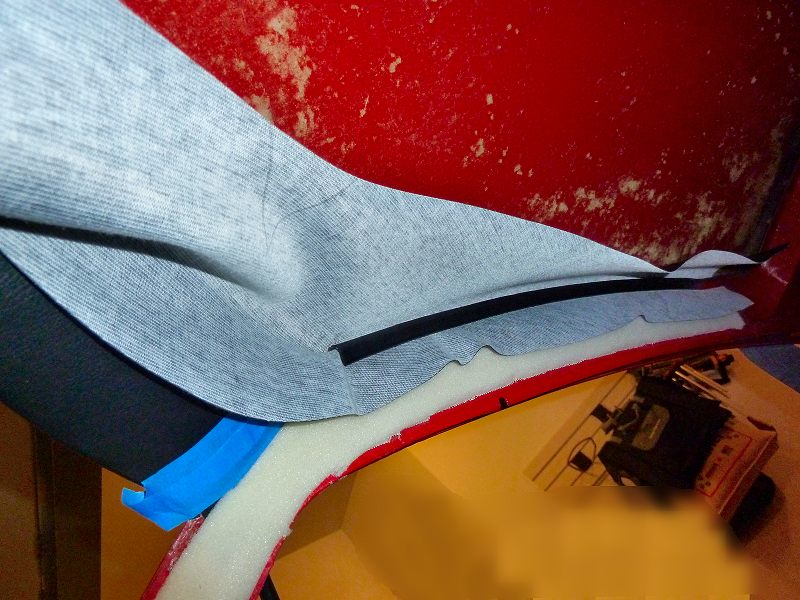
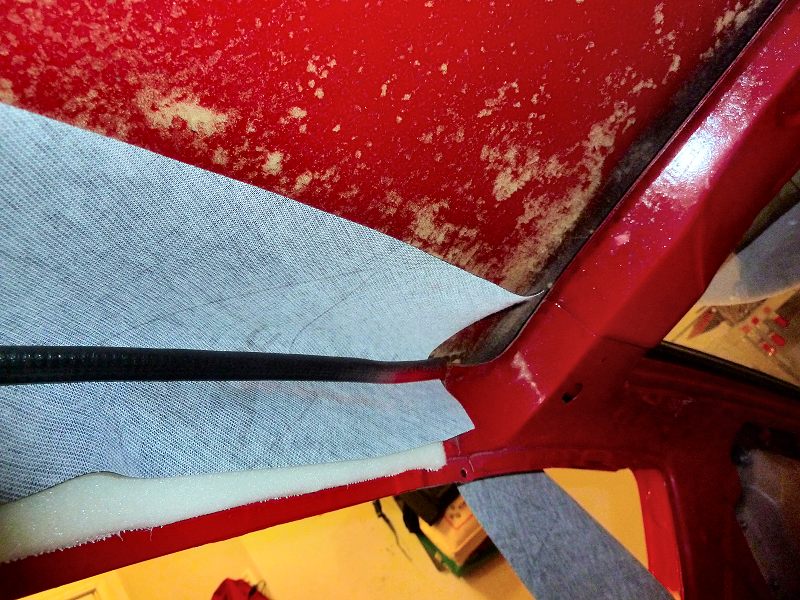
 Again the same procedure: Glue foam Cut foam Test fit vinyl "backwards" and hang it from the pinch weld using the trim stripping. Work from the coat hook forward and remove quarter windows. I forgot to mention above (AND CAN NOT EDIT GRRRRRRR): it is good to tap the trim stripping with a rubber hammer to seat it. Once happy with the fit, cut the excess material. Also you will have to get the corner cuts and folds tested right where the roof and A pillar meet. You can do this job in two steps: 1 along the roof and 2 along the pillar. Note how much masking is needed! I only applied glue to the outer pinch weld where the door seal goes as well as where the material will wrap. Let it tack for 15-20 min before pressing in place. Photos now on left side: Glue material only where the pinch weld will touch. Seat the trim stripping at the pinch weld and cut away the excess material underneath. Measure 10 times and cut once. Here is test fitting the fold and corner cut at the corner of the windshield. Note the incorrect cut I made in the header. I managed to glue it well underneath then hid it under the A pillar material's fold... I was lucky....learn from this and measure and test fit before cutting. Testing the fold even more A photo of the A pillar Foam and how far it goes. No need to put it near the pinch welds. Here is the starting point


Important Information
By using this site, you agree to our Privacy Policy and Guidelines. We have placed cookies on your device to help make this website better. You can adjust your cookie settings, otherwise we'll assume you're okay to continue.