


240260280z
Free Member
-
Joined
-
Last visited
Everything posted by 240260280z
-
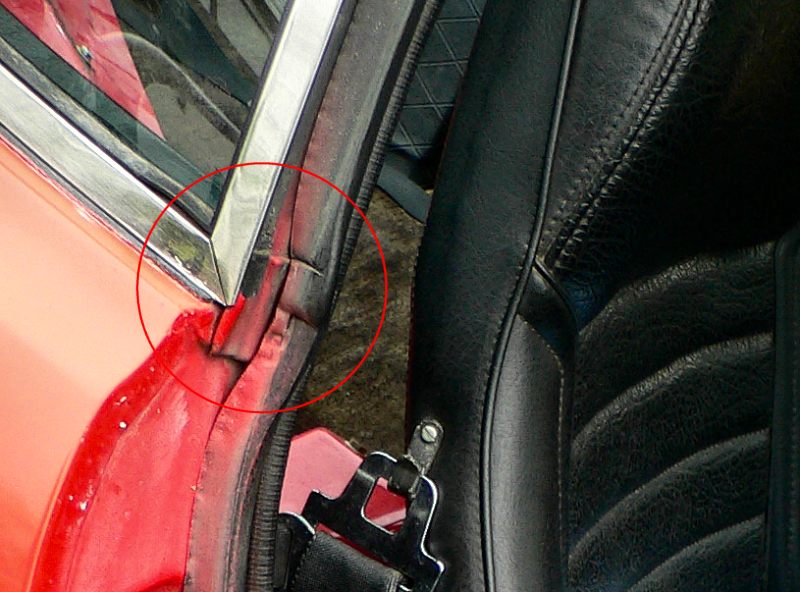
 Just a reminder that this area is not sealed well. I used open cell foam that crushes but sealant/caulking/silicone or closed cell foam or rubber matting may do better.
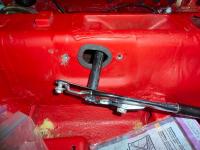
-
I used black "Fusion" plastic paint from walmart and it worked great to refresh existing black panels. I just checked their site and they sell a "butter cream" (link). At $5 per can,test one on the back side of a plastic panel then see what you think.
Taping up the plastic ducting joints with foil duct tape helps reduce the air leaks and gets more air out of the ducts. As well, others have upgraded the blower motor with one from a Honda Civic (link) to get more air flow.
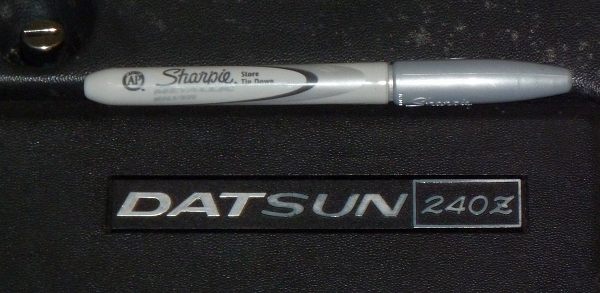
 I did one with the sharpie. From 6' away in a garage it is difficult to discern the difference and actually looks better (I even did a test and had two impartial Z friends state which side of a 1/2 touched-up strip looked better) but under sunlight I would guess that the chrome's shine would stand out more.
That is my boss... Mrs. Blue. She was a good sport pulling the rope as my brother and I set the window in place.
Thanks All! Dan that photo helps immensely. I have more wiring questions that I will send out in the next week.
Perfect! Thanks! I'll talk to Dan then get back to you. Thanks again for checking you hoard!
Letters "DAT" were touched up. It works OK on the silver door trim.
I did one with the sharpie. From 6' away in a garage it is difficult to discern the difference and actually looks better (I even did a test and had two impartial Z friends state which side of a 1/2 touched-up strip looked better) but under sunlight I would guess that the chrome's shine would stand out more.
That is my boss... Mrs. Blue. She was a good sport pulling the rope as my brother and I set the window in place.
Thanks All! Dan that photo helps immensely. I have more wiring questions that I will send out in the next week.
Perfect! Thanks! I'll talk to Dan then get back to you. Thanks again for checking you hoard!
Letters "DAT" were touched up. It works OK on the silver door trim.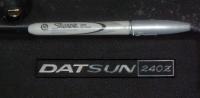 Excellent. PM me with your phone number and I'll ring you!
Thanks a million Dan! I took a closer look at Enrique's photo and it does show the lead from the body harness as you describe. I guess since it grounds the dome light in that same body harness, it now seems sensible.
Here is the left side. It is easy to find the leads to the door switch and step lights:
Excellent. PM me with your phone number and I'll ring you!
Thanks a million Dan! I took a closer look at Enrique's photo and it does show the lead from the body harness as you describe. I guess since it grounds the dome light in that same body harness, it now seems sensible.
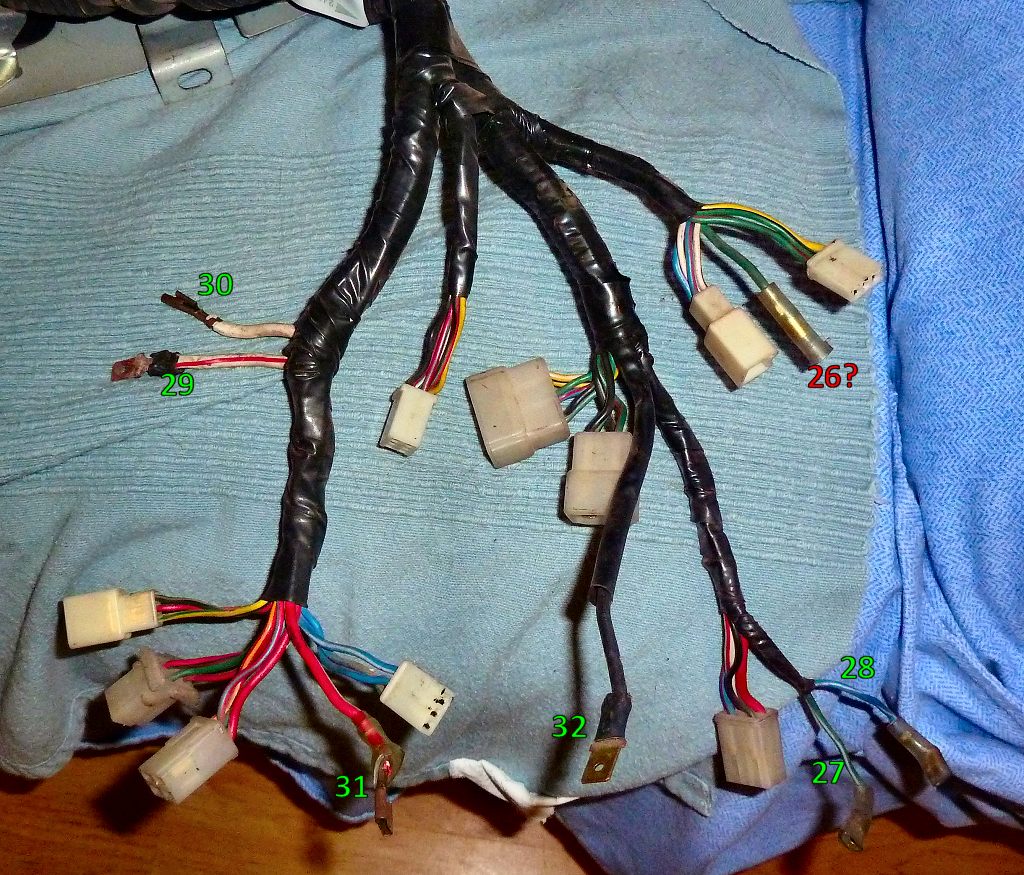
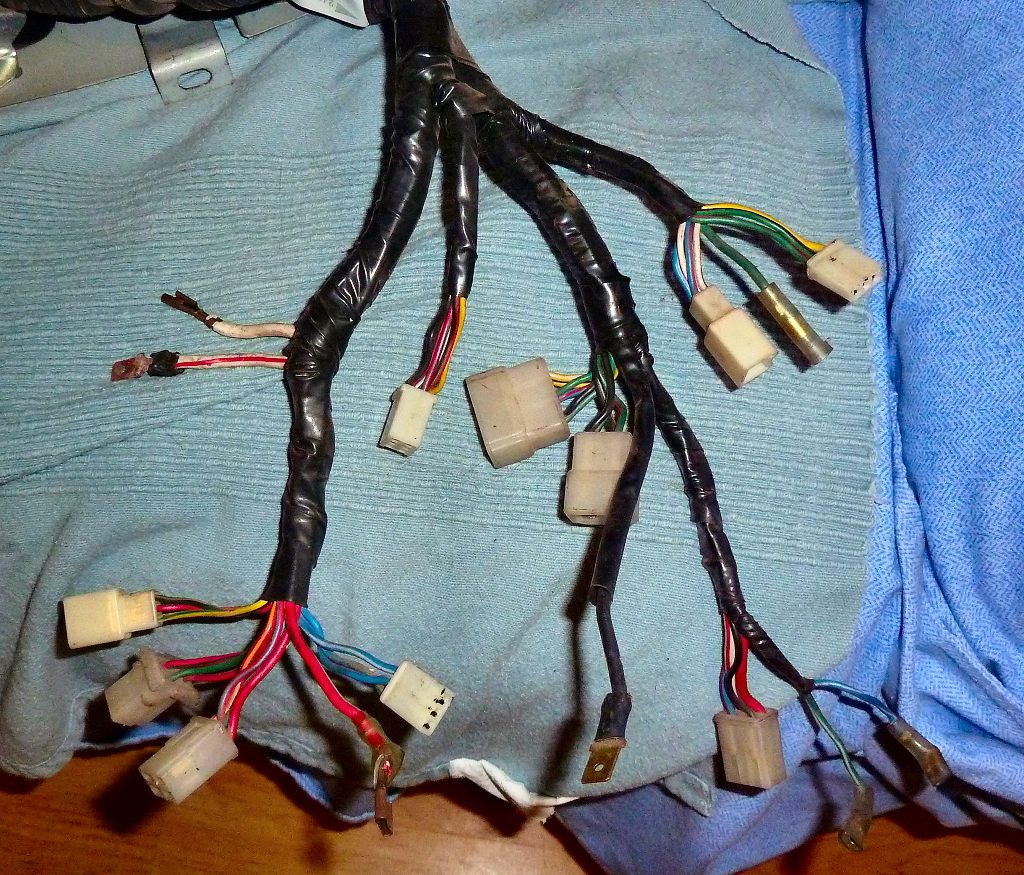
Here is the left side. It is easy to find the leads to the door switch and step lights: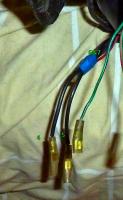 Is the green wire below the elusive #26 lead for the right door switch? I noticed that the leads to the Flasher #27 and #28 are different. Specifically#28 is supposed to be black with white stripe but I have a blue with white stripe. Seems like a B vs. L typo maybe?
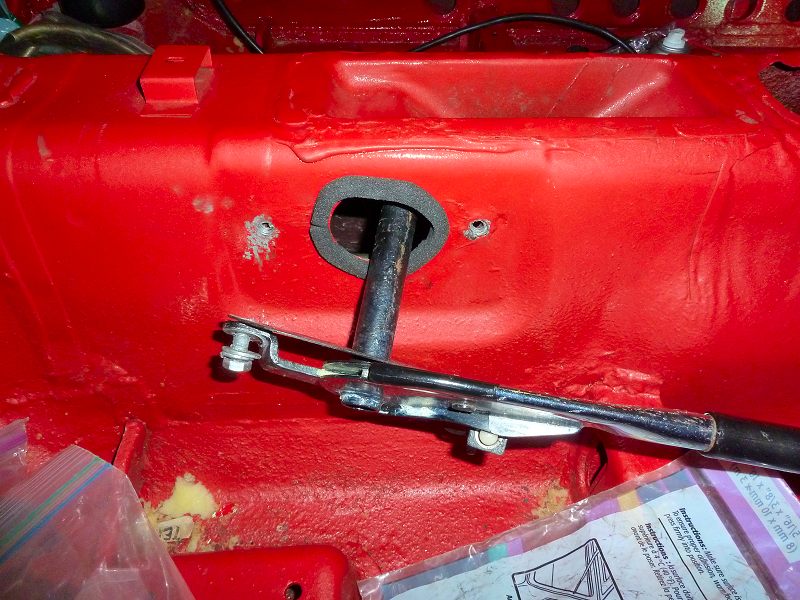
 Thanks Enrique. Do you have any further detail on the lead from the harness? I only have one black wire in that area and I think it is #32 (Alternator E Lead) due to its larger gauge. Here is a photo I took. (btw I can easily find he left side wires and step light wires (tied back)).
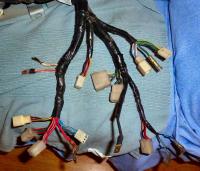 Sorry to hear that Greg. Are there any rules preventing you from adding new parts? For the stock system, you could try routing the left and right side vents' outlets into the defrost ducts under the dash. This will keep the air temperature humidity the same on both sides of the glass and minimize condensation. You could improve this by routing coolant hoses through the inner fender passages via metal pipes to warm the air passing through them like a radiator... a valve could control when you need the heat. The best air for defrosting is re-heated dry from an AC system and heater system so you need a cooler in front of a heater. Here is a $7 toaster solution for heating: http://www.amphibike.org/index.cgi?page=pages/3_wheels/mr2/ev_electronics/heater For AC and heat Maybe using a peltier cooler like the EV guys can do the cooling and heating... and the key data point for you is: 754W is 1 HP. http://www.diyelectriccar.com/forums/showthread.php/re-evdl-peltier-devices-and-cooling-14508.html
 exactly duffman.... "Answer the question" is one of the golden rules. I actually have both pages but they are missing key data. (as well where is #3 and #26?) I have many more questions but I thought I would start with an easy one If anyone knows how the right door switch attaches to a harness it would be most welcome. With respect to the above drawing, does 34 (blue) connect to 55 (red) so that power gets routed to the blower?
Where in the harness for a 240z 01 71 does the passenger door switch single lead connect?
exactly duffman.... "Answer the question" is one of the golden rules. I actually have both pages but they are missing key data. (as well where is #3 and #26?) I have many more questions but I thought I would start with an easy one If anyone knows how the right door switch attaches to a harness it would be most welcome. With respect to the above drawing, does 34 (blue) connect to 55 (red) so that power gets routed to the blower?
Where in the harness for a 240z 01 71 does the passenger door switch single lead connect? Thanks Arne, I just sent a PM.
Looking to buy the following wee parts to finish off a Jan 71 240z resto: center valence panel "chin" Why? Because the paint shop smashed it when towing the car on its dolly then they tried to fix with bondo. passenger door window scissor assembly Why? Because the lower wheel is missing. wedgie striker-guide-things on doors below the latch Why? Because they crumbled. metal panel clips for door and trim. Why? Because some were missing 240z drivers door mirror Why?Because it disappeared during the resto engine vent ducts Why,because they are rotten. yellow plastic marker light.Why, because I over tightened and cracked it keys cut ? (Where can I get blanks?) red touch up 905 paint ? (Where can I get this?) emissions vacuum switch (engine compartment on frame below coil) Why, because it is missing Driver door spring (in hinge) Why, because it is missing 1/2shaft hardware (nuts washers and bolts to hub flange and nuts and washed to differential flange ) Why, because I had to cut the rotten rusty originals off. Plastic Rivets
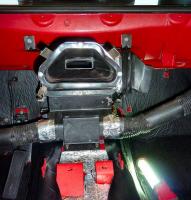
Bagged it air tight. The jan 71 240z has the hatch vents so I decided to refresh them and make it air tight. I used vapor barrier and tyvek tape. It finished nicely right up to the hatch seals. I'll post tons of tech tips and photos over the next two weeks.
Thanks Arne, I just sent a PM.
Looking to buy the following wee parts to finish off a Jan 71 240z resto: center valence panel "chin" Why? Because the paint shop smashed it when towing the car on its dolly then they tried to fix with bondo. passenger door window scissor assembly Why? Because the lower wheel is missing. wedgie striker-guide-things on doors below the latch Why? Because they crumbled. metal panel clips for door and trim. Why? Because some were missing 240z drivers door mirror Why?Because it disappeared during the resto engine vent ducts Why,because they are rotten. yellow plastic marker light.Why, because I over tightened and cracked it keys cut ? (Where can I get blanks?) red touch up 905 paint ? (Where can I get this?) emissions vacuum switch (engine compartment on frame below coil) Why, because it is missing Driver door spring (in hinge) Why, because it is missing 1/2shaft hardware (nuts washers and bolts to hub flange and nuts and washed to differential flange ) Why, because I had to cut the rotten rusty originals off. Plastic Rivets
Bagged it air tight. The jan 71 240z has the hatch vents so I decided to refresh them and make it air tight. I used vapor barrier and tyvek tape. It finished nicely right up to the hatch seals. I'll post tons of tech tips and photos over the next two weeks.
 Dan they are a work of art! Did you do the plating? It really sets them off.
THANKS..will do.
71 240z dry un-cracked dash... last cleaned in 96. What should I hit it with to clean and refresh?
I just used the closed cell 8.5" X 11" foam sheets that you can buy in dollar stores.
Dan they are a work of art! Did you do the plating? It really sets them off.
THANKS..will do.
71 240z dry un-cracked dash... last cleaned in 96. What should I hit it with to clean and refresh?
I just used the closed cell 8.5" X 11" foam sheets that you can buy in dollar stores.


Important Information
By using this site, you agree to our Privacy Policy and Guidelines. We have placed cookies on your device to help make this website better. You can adjust your cookie settings, otherwise we'll assume you're okay to continue.