


240260280z
Free Member
-
Joined
-
Last visited
Everything posted by 240260280z
-
 Installed rear brake hoses Installed gas filler surround and rubber flap Painted transmission Painted interior parts Primed front grill, rear licence plate holder and two tail light surrounds refreshed SU carb one more to go
 -
Modern cars seem to throw a so-called splitter below the airdam that runs flat back to the front axle (or to a rear difuser if the car has underside panels). The front of the splitter seems to protrude infront to the dam and catch downward spillage that creates down force. A rake in the car can also create downforce. http://www.modified.com/tech/0610sccp_automotive_aerodynamics_part_2/photo_11.html Here is a nice read: http://www.rapid-racer.com/aerodynamic-upgrades.php
Here is a 72: Here is 73:
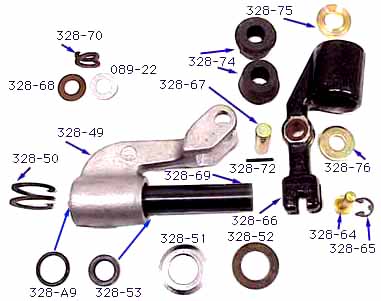
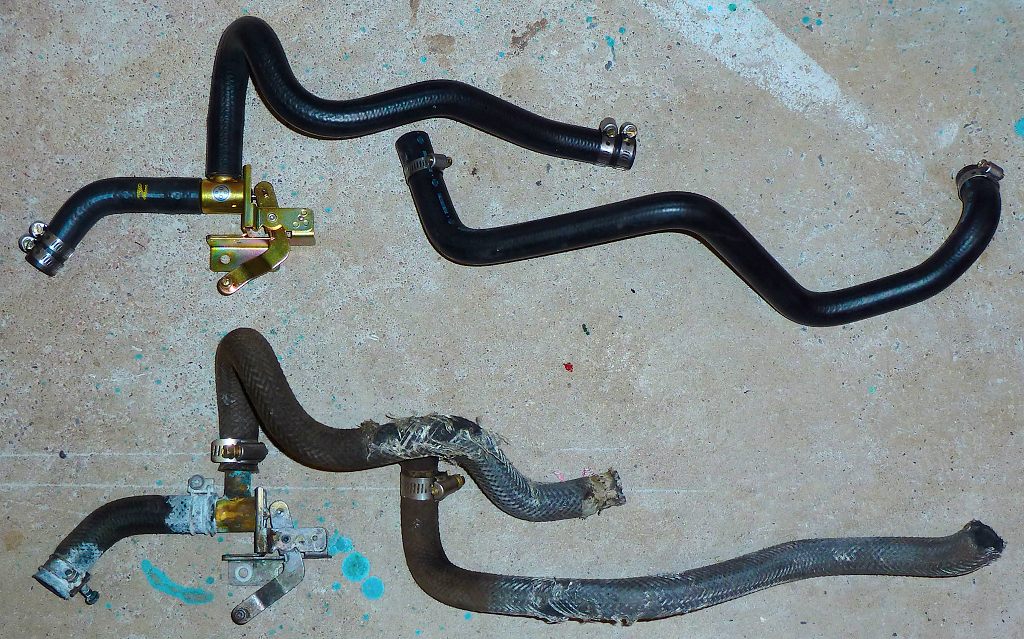
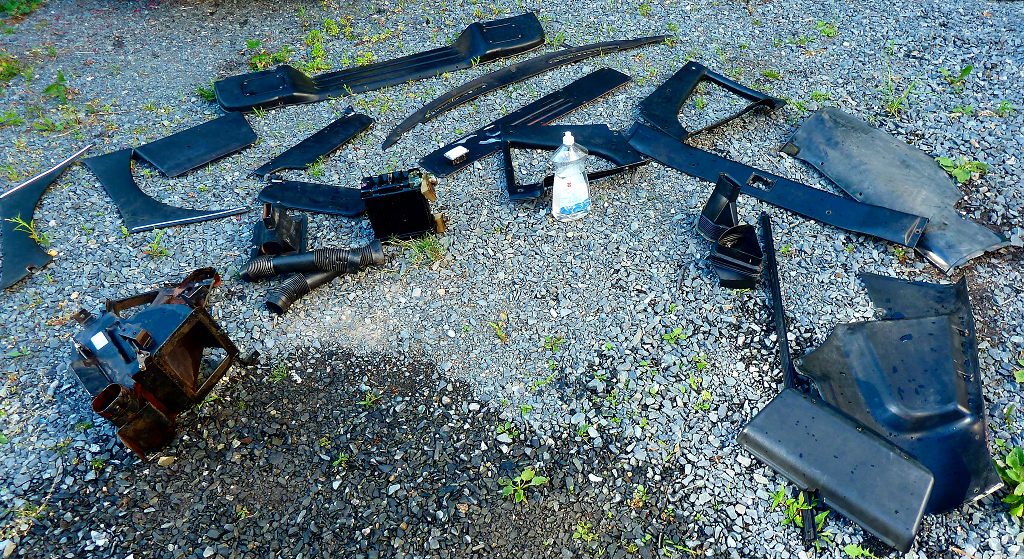
 Painted and Insulated Heater housing. Installed new hoses and valves Completed rear brake drum/shoe install (hunted missing parts from hundreds of baggies... ohh car restorations with every bolt off!) Fitted gas hoses to tank Sourced and cut rubber for attaching to tank straps chased all holes near front where bumper, grill light buckets go rebuilt/refreshed brake pressure loss switch installed cowl clip rubbers installed pedal rubbers installed master brake cylinder and chased the painted studs removing 40 year old ziebart from headlight assemblies
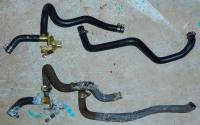 Check the yellow "S" (sense) wire and all connections between the battery and the alternator. This wire is what locks your alternator's voltage. Any poor contacts or lose parts or higher resistance fusible links/crimp connections will cause it to work incorrectly. The "L" (Lamp) wire I mentioned above is for initial excitation of windings in alternator when cranking. It does go through the battery warning light in the Voltage Gauge but it should not be an issue. I think I remember chasing it an putting a diode in it for a friends 260z that would not turn off in a past life... so long ago.
Excellent! Thanks again!
Hmmm I recall writing about an L signal that went through one of the gauges and was part of the reference signal for an alterntor to sense and lock to. 1 sec.
Does anyone know a source for replacing the climate control cables from the dash to the appropriate louvres and valves? (Jan 71 240z) Thanks!
I ended up filing the pins back ~ 2mm and it worked fine. The parts were from Black Dragon and the origin is India.
Fiat Green on a "Bob Sharp" car
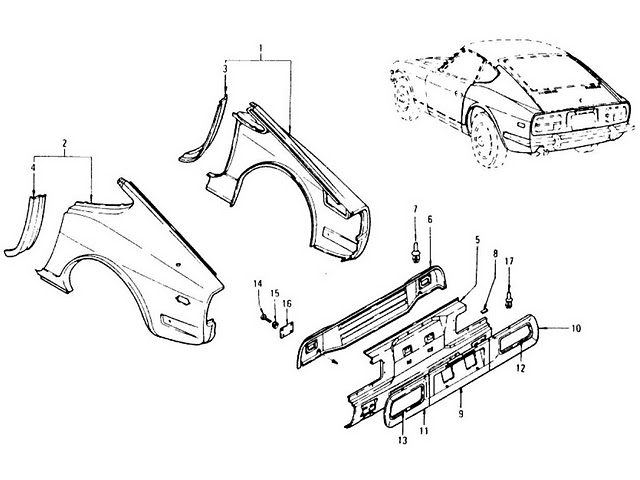
The rear quarter panels you need are: 78101-E8300 78100-E8800 Reference: http://www.carpartsmanual.com/datsunS30/DatsunFairladyZIndex/Body240Z/RearFenderRearPanelRearPanelFinisher/tabid/1760/Default.aspx This guy had a NOS in the attic on Jan 2011 in Dallas: http://www.zcar.com/70-83_tech_discussion_forum/240z_quarter_panel_price_question_895952.0.html Or if you have $1.3k: http://www.dealerdirectparts.com/product-p/78101-e8300.htm
Check the yellow "S" (sense) wire and all connections between the battery and the alternator. This wire is what locks your alternator's voltage. Any poor contacts or lose parts or higher resistance fusible links/crimp connections will cause it to work incorrectly. The "L" (Lamp) wire I mentioned above is for initial excitation of windings in alternator when cranking. It does go through the battery warning light in the Voltage Gauge but it should not be an issue. I think I remember chasing it an putting a diode in it for a friends 260z that would not turn off in a past life... so long ago.
Excellent! Thanks again!
Hmmm I recall writing about an L signal that went through one of the gauges and was part of the reference signal for an alterntor to sense and lock to. 1 sec.
Does anyone know a source for replacing the climate control cables from the dash to the appropriate louvres and valves? (Jan 71 240z) Thanks!
I ended up filing the pins back ~ 2mm and it worked fine. The parts were from Black Dragon and the origin is India.
Fiat Green on a "Bob Sharp" car
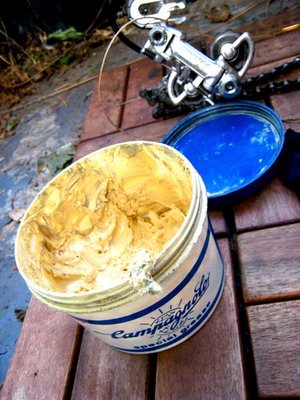
The rear quarter panels you need are: 78101-E8300 78100-E8800 Reference: http://www.carpartsmanual.com/datsunS30/DatsunFairladyZIndex/Body240Z/RearFenderRearPanelRearPanelFinisher/tabid/1760/Default.aspx This guy had a NOS in the attic on Jan 2011 in Dallas: http://www.zcar.com/70-83_tech_discussion_forum/240z_quarter_panel_price_question_895952.0.html Or if you have $1.3k: http://www.dealerdirectparts.com/product-p/78101-e8300.htm FSM says general purpose so that should be fine. I have noticed the white lithium grease in spray cans often dries out. Sometimes it is seen on engine parts and door hinges. This is most likely due to the aerosol additives and thinning agents. However, the stuff that comes in tubs does not seem to dry out at all. I have a tub from the '80's that I used to pack bottom bracket and wheel bearings on my old Marinoni racing bike and none of the grease on the inside or on the outside has dried. White lithium grease has been used for many years in bike bearings. Maybe the formula for additives varies or maybe it is not good in heated applications because the additives may boil off. I have even seen it in the boots of wheel cylinders w/o problems so that goes against my guess.
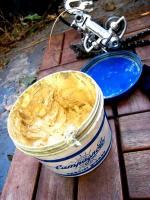 Thanks. I appreciate that. This is a free resto for a friend so I'll just drill out to go the easy route.
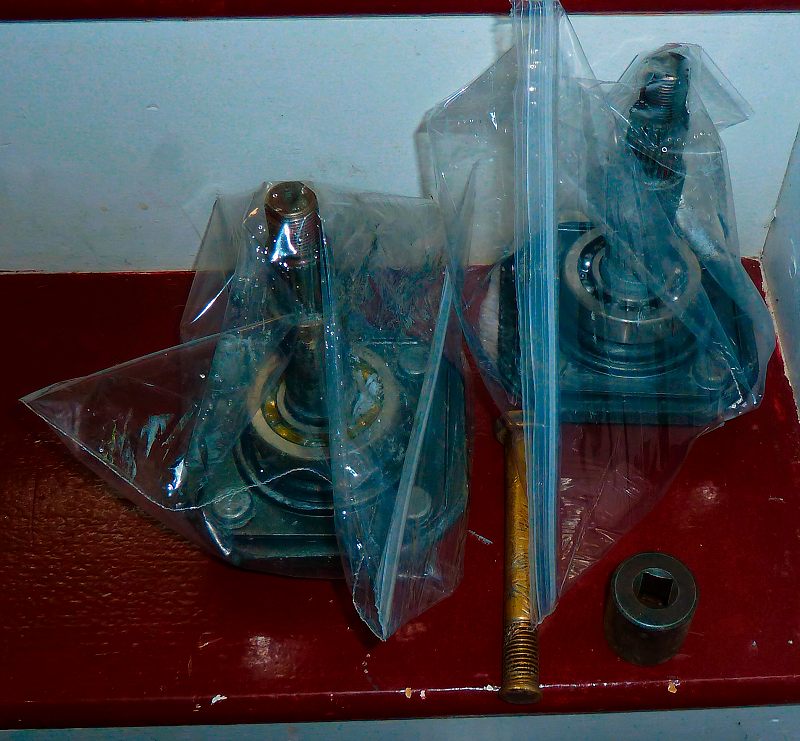
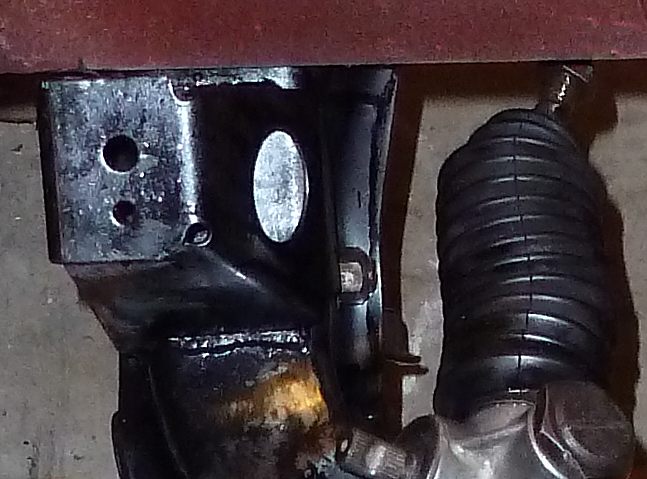
Each shock-mount has a pin and a bolt, each corresponding structure on the cross-member has a hole for the bolt and a hole for the pin. The problem is the pin in the shock-mount does not align with the hole, it is a few mm too far away from the bolt.
30min after reading this post I was driving past an on-coming mopar from late 60's/early 70's in that colour... beautiful! Go for it!
Boiled bearings and frozen hubs for breakfast.
Thanks. I appreciate that. This is a free resto for a friend so I'll just drill out to go the easy route.
Each shock-mount has a pin and a bolt, each corresponding structure on the cross-member has a hole for the bolt and a hole for the pin. The problem is the pin in the shock-mount does not align with the hole, it is a few mm too far away from the bolt.
30min after reading this post I was driving past an on-coming mopar from late 60's/early 70's in that colour... beautiful! Go for it!
Boiled bearings and frozen hubs for breakfast. My S2000 still has a metal clunk on the driver's side when going over bumps slowly. I changed the worn sway bar end links, fixed a loose side marker light in the fender and fixed all loose plastic under car panels. This improved things except for a quieter clunk. Last week I was tapping underside suspension parts with a rubber mallet and noticed when I hit the drivers side outer tie rod I had a metal clunk but not on the passenger side. It looks like a bad tie rod (not sure if inner or outer) however, the steering is rock solid and, with the wheel up in the air, I can not notice any slop when push-pulling at 3 &9 o'clock. Anyone ever have a similar gremlin with a tie rod?
I am in Nova Scotia this week enjoying temp in the 70's... I was in nj for the past 3 and is seemed like 100 every day and often very humid. Worked on my s2000 in a south facing garage...like a Finnish sauna.
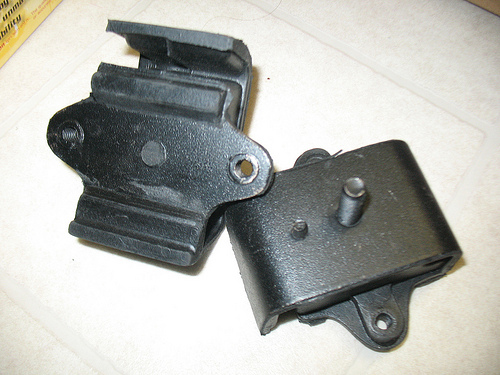
Thanks. I tried both parts on both sides...same problem. Same part numbers in catalogue and on the box they came in. The Nissan mating plates are left and right for anyone reading this thread in the future.
The forum engine truncated the message thus the missing bit Good catch Comrade.
Hmmmm the alignment pin below the bolt does not align with the holes in the front cross member. The pins are ~3mm too low. The catalog says 62-600 [70-83] and the car is a '71 so I don't understand. Before I slot the existing holes any insight?
My S2000 still has a metal clunk on the driver's side when going over bumps slowly. I changed the worn sway bar end links, fixed a loose side marker light in the fender and fixed all loose plastic under car panels. This improved things except for a quieter clunk. Last week I was tapping underside suspension parts with a rubber mallet and noticed when I hit the drivers side outer tie rod I had a metal clunk but not on the passenger side. It looks like a bad tie rod (not sure if inner or outer) however, the steering is rock solid and, with the wheel up in the air, I can not notice any slop when push-pulling at 3 &9 o'clock. Anyone ever have a similar gremlin with a tie rod?
I am in Nova Scotia this week enjoying temp in the 70's... I was in nj for the past 3 and is seemed like 100 every day and often very humid. Worked on my s2000 in a south facing garage...like a Finnish sauna.
Thanks. I tried both parts on both sides...same problem. Same part numbers in catalogue and on the box they came in. The Nissan mating plates are left and right for anyone reading this thread in the future.
The forum engine truncated the message thus the missing bit Good catch Comrade.
Hmmmm the alignment pin below the bolt does not align with the holes in the front cross member. The pins are ~3mm too low. The catalog says 62-600 [70-83] and the car is a '71 so I don't understand. Before I slot the existing holes any insight?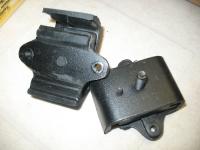
 The finishing.com site mentions temperature being important. Since most heat the electrolyte, the recent high humidity and high temps in NJ may not be the problem. Did you plate in a hotter than normal garage? Excessive Temperature: The "cloud point" is the temperature at which the primary organic additive, or wetter, is forced out of the bath. Unlike salt in water, chloride zinc additives are inversely soluble with heat. The higher the temperature, the lower the solubility. The cloud point can be influenced by the pH and the chloride concentration. In addition, as the bath ages and builds up impurities and brightener products, the cloud point can decrease. Proprietary brightener systems have cloud points from 90 to 165° F. It is prudent to find out which conditions are routine for your bath and utilize a brightener system with a higher cloud point if you are encountering oilout due to temperature and do not want to increase expenditures for cooling. The only other culprit I could think of would be an open liquid acid container or a lead acid battery. The fumes make items in the vicinity rust.
Important Information
By using this site, you agree to our Privacy Policy and Guidelines. We have placed cookies on your device to help make this website better. You can adjust your cookie settings, otherwise we'll assume you're okay to continue.
Account
Search
Configure browser push notifications
Chrome (Android)
- Tap the lock icon next to the address bar.
- Tap Permissions → Notifications.
- Adjust your preference.
Chrome (Desktop)
- Click the padlock icon in the address bar.
- Select Site settings.
- Find Notifications and adjust your preference.
Safari (iOS 16.4+)
- Ensure the site is installed via Add to Home Screen.
- Open Settings App → Notifications.
- Find your app name and adjust your preference.
Safari (macOS)
- Go to Safari → Preferences.
- Click the Websites tab.
- Select Notifications in the sidebar.
- Find this website and adjust your preference.
Edge (Android)
- Tap the lock icon next to the address bar.
- Tap Permissions.
- Find Notifications and adjust your preference.
Edge (Desktop)
- Click the padlock icon in the address bar.
- Click Permissions for this site.
- Find Notifications and adjust your preference.
Firefox (Android)
- Go to Settings → Site permissions.
- Tap Notifications.
- Find this site in the list and adjust your preference.
Firefox (Desktop)
- Open Firefox Settings.
- Search for Notifications.
- Find this site in the list and adjust your preference.