


240260280z
Free Member
-
Joined
-
Last visited
Everything posted by 240260280z
-
 Good info here: http://www.finishing.com/Library/chloride.html I tried a quick and dirty method: Degrease Acid wash Water rinse Electroplate in electrolyte For all those who are curious: Here is a DIY Zinc Plating site: http://www.thisoldtractor.com/gtbender/zinc.htm Here is more info and examples: http://www.medial.com/suzuki/zinc-plated/ http://www.vmax4.com/vbulletin/showthread.php?6172-Zinc-Plating... http://www.britishcarforum.com/bcforum/ubbthreads.php/topics/65506/2
 -
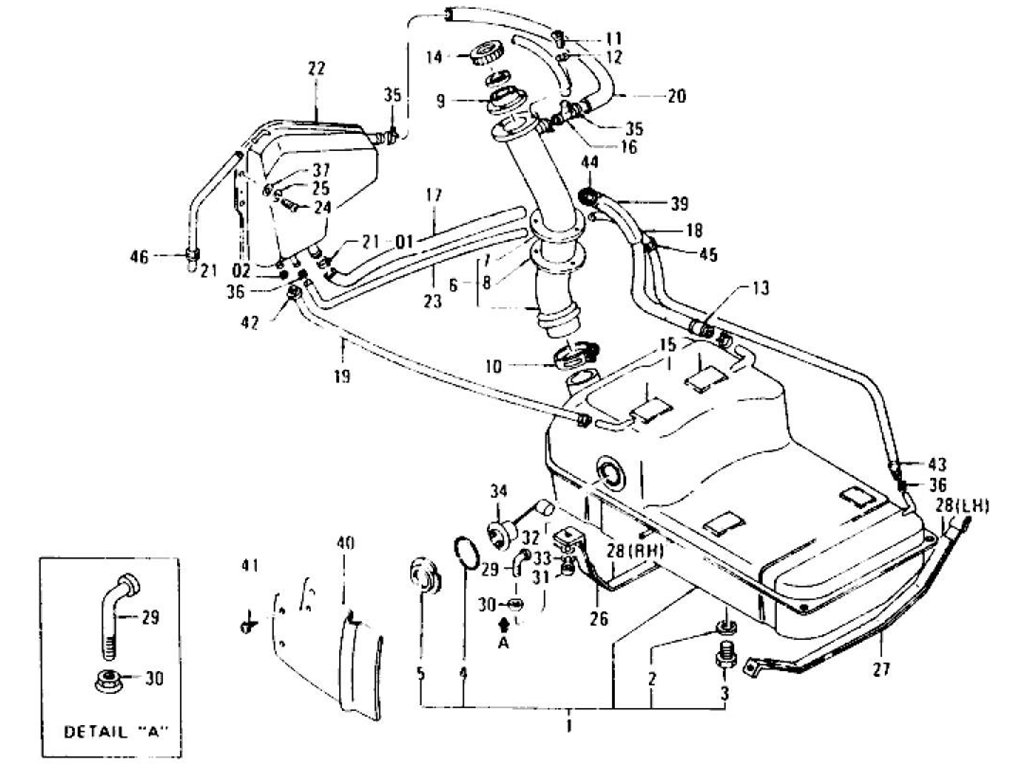
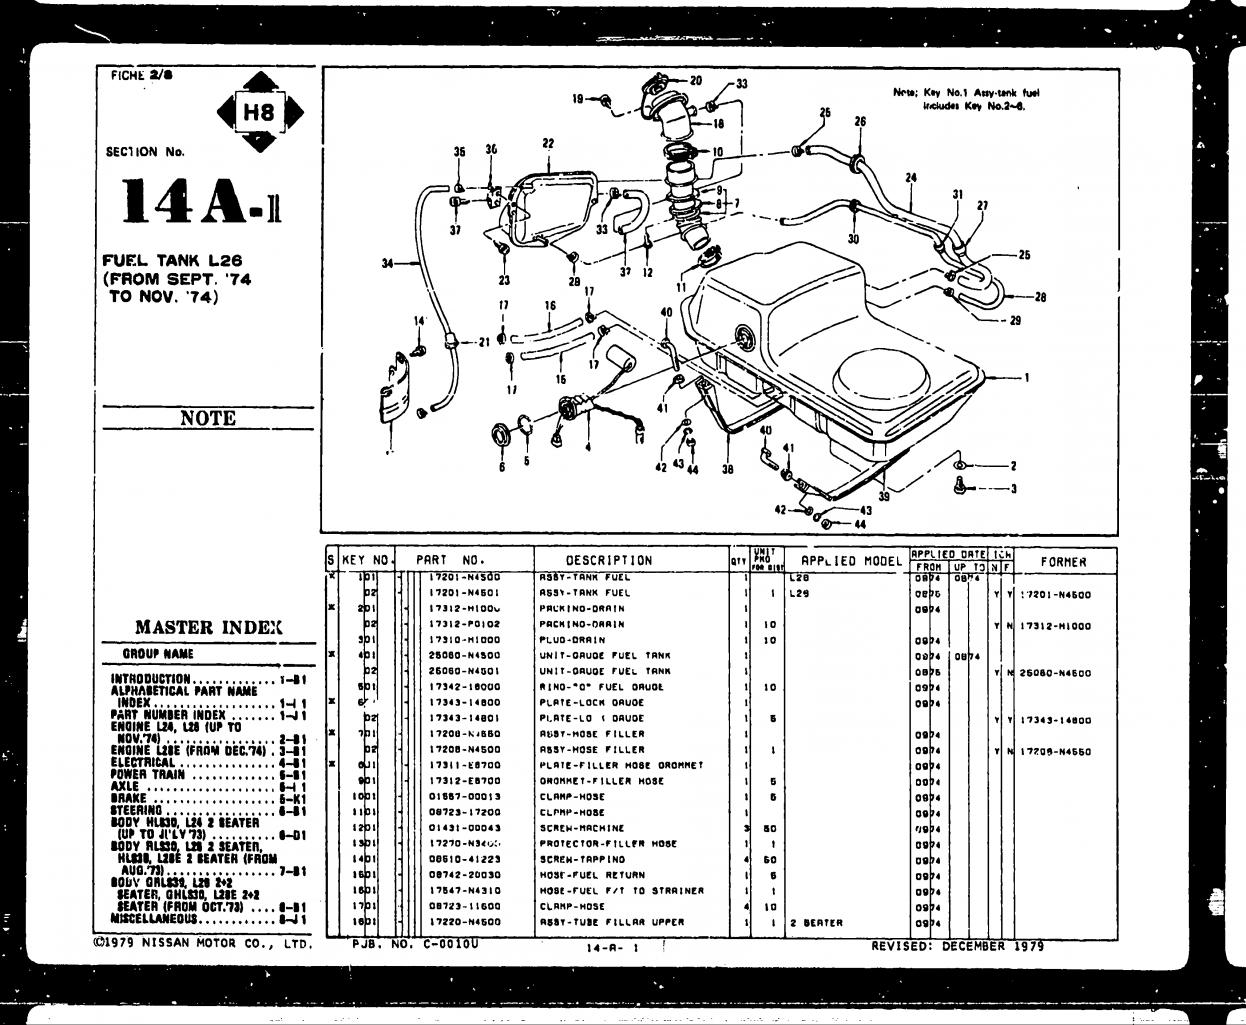
With respect to the advise above to use hydraulic hose, the stuff is too big to fit through the passages in the body and the 1/2" does not fit over the fittings. DON'T BOTHER WITH HYDRAULIC HOSES


-
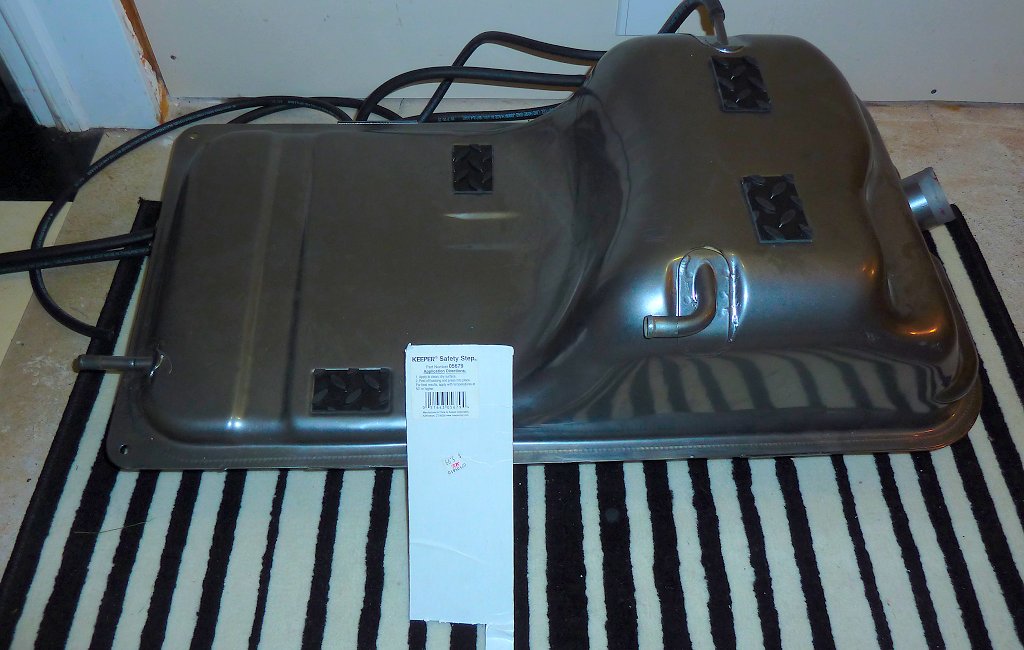
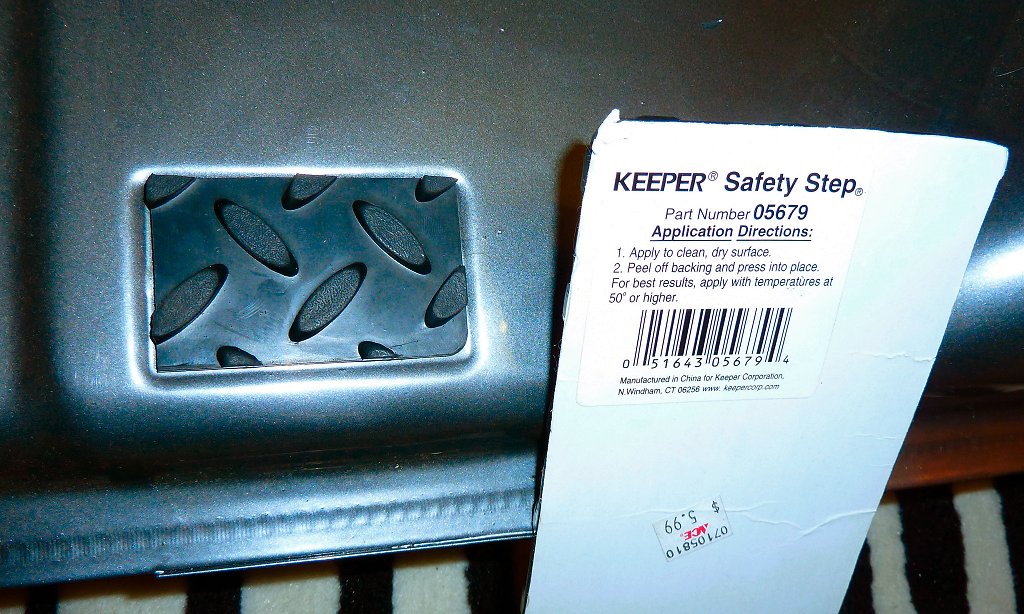
Well the nice thing about the tread is that it is peel and stick Yeah the powder coating required a clean tank. The heat from the p-c oven re-flowed some of the solder so I had to check for leaks. Fortunately all is well. I am just about to use thicker rubber sheeting from the hardware store for the tank straps. Arne's post on the evapor. tank hoses sure helped. This forum is great.
-
Hit the parts car and removed a lot of hardware. Picked up remaining hydraulic hose for the gas tank evap lines. Installed spindle pin and assembled strut housing to rear control arms. A file and a scissor jack were my helpers. Cleaned up a lot of over spray powder coating on rear hub races with my good friend Mr. Xacto and Mr. Scotchbrite. Assembled nice powder-coated rear dust shields with new brake cylinders. It is nice to work with not rusty, non-dirty, non-oily parts. I even chased all holes last month so everything went together quite well. Installed rear wheel studs and oil shields into hubs. Now they are in the freezer waiting to have boiled bearings pressed in in the morning. My goal is rear wheels, differential and gas tank in tomorrow then the engine reassembly starts.
-
I picked up a self-sticking rubber stair tread from ACE Hardware, cut it to size, and stuck it to the top of the powder coated tank:


-
White Lithium or General Purpose is fine: http://atlanticz.ca/zclub/techtips/steering/racktension/
-
Thanks Again!
-
This is what the jan 71 240z with fiberglass rear quarters came with: Should the black filler flange be on the back side of the metal (like on my 280z)?

-
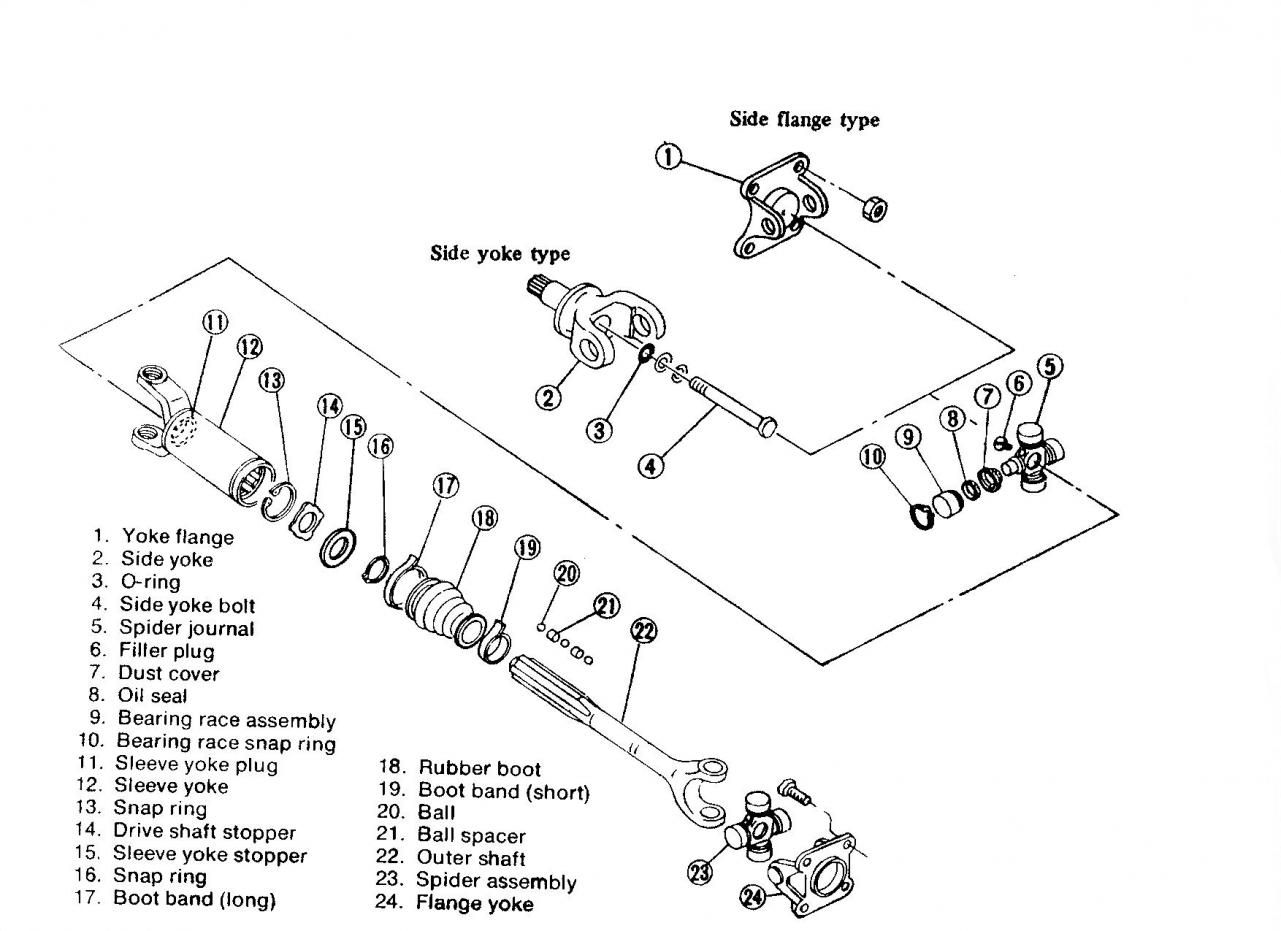
You could also swap out the differential side flange to a yoke type and do away with the need. Good time to change the u-joints

-
I just bought them here in Canada. Expensive. I recommend getting from a parts car.
-
http://tampa.craigslist.org/search/?areaID=37&subAreaID=&query=datsun&catAbb=sss
-
http://tampa.craigslist.org/hil/pts/2485134200.html
-
The transmission was not computer controlled. Dig into an FSM to see all the details you seek: http://hammondsplains.com/fsm/82fsm.zip
-
The one that I used many times did damage once, lost title papers once and had wheels stolen once so I can not recommend. Here is one I found in Oregon: http://www.americanautoshipping.com/contact-american-auto-shipping.asp
-
Last post works for me every time.
-
Thanks all. I am with Jon: It is illogical. However I will try the 0 toe-in with -2degree camber on the new set and see what gives. I did 7,000 miles since getting the car. First 2,000 from Nov-May mostly city with some highway the 5,000 miles in 2 last months: 4 X 16hour 1000 mile marathons and 2 X 500mi runs. I ran 30psi in the winter for traction then 28 for the last 3,000 miles after noting the start of centre wear. btw everything is stock on the car. I'll get the new tires put on and an alignment done in a couple of weeks and report back to the thread.
-
Yokohama AS430 on rear went bald in center after 7,000mi. I read some website content and some say it is due to too much rear toe -in and others say it is "too low" tire pressure (which conflicts with rule of thumb that excess tire pressure causes center wear). My initial tire pressure was 30psi when stock is 32. I dropped it to 28psi when I noticed the wear but it did not make a difference. Rear toe-in is 6mm Any comments?

-
If the car cranks then the starter is fine. If the car dies when driving and the tach immediately goes to Zero then it is ignition problem. The 4 areas to check are: 1) The condenser (capacitor) (In '72 FSM it is item 10 in drawing EE62) 2) The coil 3) wires in the ignition system 4) distributor mechanical parts (points) refer to the FSM. My old Toyota Tercel had a failing condenser in the distributor that would kill the spark randomly but it got worse and was temperature dependent. It was a $1 part. The coils is a $20-$60 part to replace. Adjusting points is free. Checking for loose wires is free.
-
-
That indicates the problem is with your ignition system. I am not sure what is on your Z. Do you have an electronic ignition system or an old points system? The problem could also be a relay in your ignition system but that seems less likely.
-
Does tach stop instantly when engine dies or does it mach engine speed and chug to a stop slowly?
-
Glad to help.
-
http://www.britishracecar.com/MichaelSnowdon-GRD-272.htm
-


Important Information
By using this site, you agree to our Privacy Policy and Guidelines. We have placed cookies on your device to help make this website better. You can adjust your cookie settings, otherwise we'll assume you're okay to continue.