240260280z
Member
-
Joined
-
Last visited
Everything posted by 240260280z
-
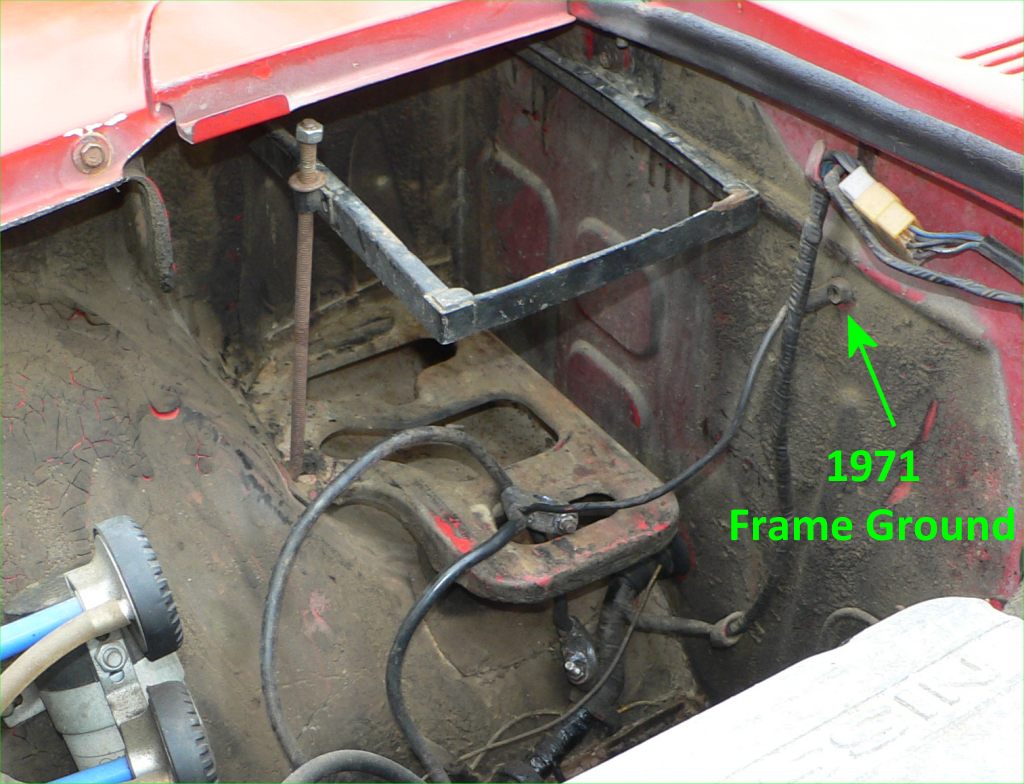
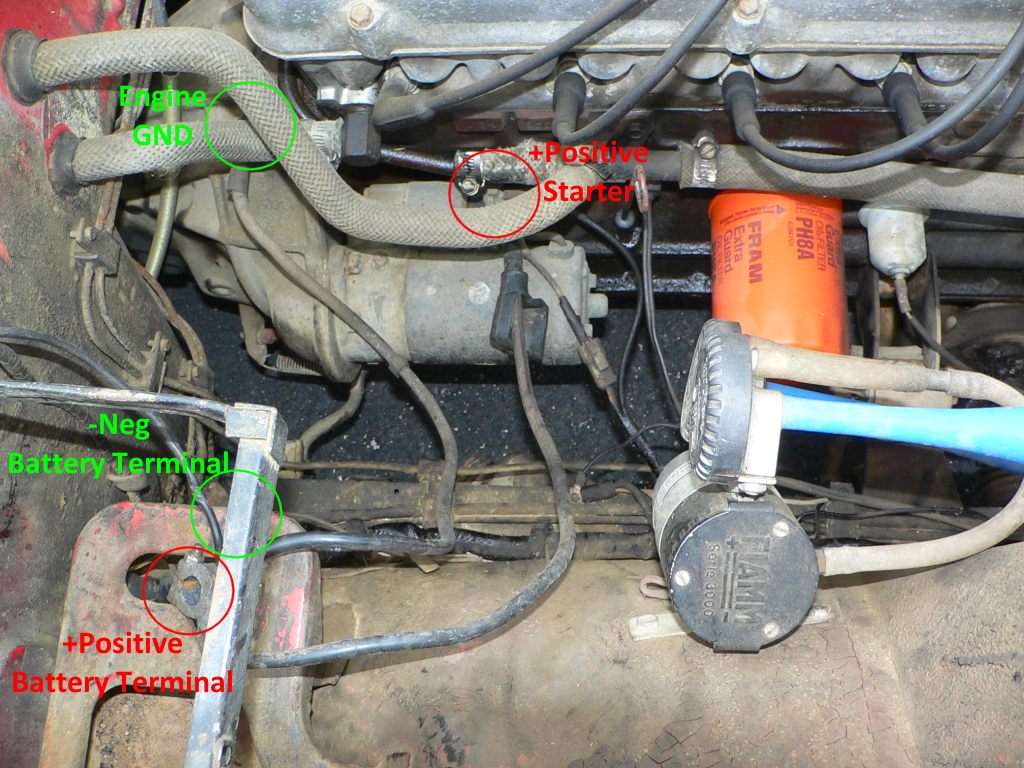
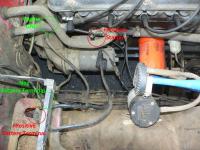
 Here are some photos showing the connections to refresh. A new pos and neg battery cable from autozone would be a good replacement upgrade. Note: The -neg terminal is on the battery tray and the +pos has fallen through it (see 2nd photo for this detail)
-
Maybe heat from exhaust passes through to dry behind bumper and slow rusting.
-
If the starter is only clicking: 1. There is not enough power to turn it 2. It is faulty For #1 a. you have to have a strong battery that is chargers. 12.6V should be OK b. all contacts/connections from the battery to the starter should be cleanr. This includes the contacts at the starter. c. The ground wires returning to the battery -Neg terminal and associated contacts/connections should be in good order. d. All wires to/from battery and starter should be in good order (no corroded, frayed or white/green flakey stuff). Once you get these minor issues resolved, you will have a fun ride.
-
I used a micrometer and measured 4 ball bearings and they all were 7/16" Here is a diagram of a halfshaft. The ball bearing is #20 I rang a bearing shop today and the only had hardness of 50 on a scale that went to 500. Did not ask the name of the scale.
-
Cut (with saw) 2 coils off front and two coils off back. Spring coefficient will go up 30% to 35% Reference: 0.5" drop = cutting upper and lower coil 1.5" to 2" drop = cutting upper two coils or lower two coils (recommended) 2" to 2.5" drop = cutting upper 2 coils and lower coil
-
I am refreshing the halfshafts from a 240z and would like to replace the 24 X 7/16" ball bearings. Would anyone know the hardness rating/grade of the originals? btw From my web searches it seems some halfshafts and drawings show 3 of the teflon/plastic spacers in each groove and others have only 2 spacers in each groove. My 71 240z halfshafts have 3 bearings and 2 spacers in each of the 4 grooves.
-
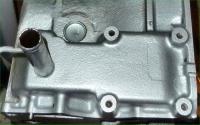
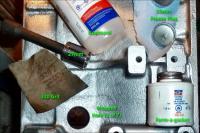
Just doing this job so I figured I would add to the site's content: The form-a-gasket is great stuff: Cleans up with alcohol and not as messy as RTV. I found that using a socket as a driver without the extension works best. FYI I used the Black Dragon kit that includes the 7 side freeze plugs, the front and back freeze plugs as well as the front oil passage plug. I have read that the brass "marine grade" plugs are best as they do not rust. Procedure I followed: 0. Engine in normal position. 1. Remove old freeze plug: Use 1/4" punch and hammer to drive in on the right side, grab edge with pliers and use claw on hammer against block to lever on pliers. 2. Engine at 90 degrees on stand so that working surface with plug holes is like a table. 3. Sand edge of hole and edge of plug with 320 grit. Wipe with alcohol. 4. Apply sealant to edge of hole and to edge of plug. 5. Sit plug on hole and align. 6 . Repeat with other plugs on same side. (this allows the first plug's sealant time to set. 7. Drive plugs in with 27mm socket. Plug edge is flush with motor. 8. Wipe up sealant with alcohol
-
Dang I would swap you for the N47. I have a P79 here as well as N47 E31's and some N42's.... but we are nearly on opposite sides of the planet Latitude: 44° 38', North. Longitude: 63° 35', West I am looking forward to hearing how your build goes. A guy going by Zolorin on Zcar.com did a similar awhile ago but I never followed closely.
-
It is sometimes called the "finisher". It is the fake leather panel at the bottom of the hatch on the inside of the car. Just remove it and seal the big hole(s) behind it. This helps a lot however there are other areas where fumes can come in. In your case the evaporating coolant can also come in through the front area where it is dripping on the hot block so maybe some grommet holes in the firewall could be checked. I am having fun with Avatars. Time for a new one.
-
If you change your oil regularly and keep the PCV system in good shape you should not require one.
-
Be sure to seal behind the interior panel at the bottom of the rear hatch on the inside. Some sealant and a piece of plastic film will do this nicely.
-
Just bought cans at autozone in NJ for friends here in Canada
-
Maxima N47 head will work nicely too.
-
Thanks. I measured with calipers' depth gauge feature. I simply put the head on the block with gasket and 1 exhaust valve. I pulled the valve up by hand and measured the top of valve to top of guide depth. I then let the valve drop and hit the head where I notched and measured the same points. The difference is the max lift to crashing. My concern is that the compression of the gasket will cut into the buffer space. I also used 1.5X as the lift multiplier from cam to valve (I measured both axis of valve lobe to get lift) but I saw several references that are less than 1.5X so that extra may help me a little if I over estimate. I am just not sure how much thermal expansion and valve over shoot will happen. I see 2mm as valve to piston clearance so I exceed that one. You are right about valve size. The intake is bigger; but the exhaust is the problem. Its margin is outside of the cylinder.
-
I have 2.1mm clearance with head gasket in place but not torqued and hand pulling valve to seat (no spring). I assume ~ 1.6 to 1.8mm clearance when torqued. Is this enough clearance between the exhaust valve and the notched block? Data: Head = Maxima N47 Block = 240z P90 Cam lift = 7.7mm Lift @ valve = 11.6mm (extrapolated @ 1.5X) Mock up measured valve lift to collision (no spring & HG not torqued): 13.7mm Just need to know so that I can wash the block and start rebuilding Thanks!
-
Just finishing machine work on a rebuild. I took a fun photo of the combustion chamber from where the crank sits: I am notching the block with a hand file as my better half drove to work with my die grinder in the back (My fault The head is a stock N47 from a Maxima. The block is an E31 from a Jan 1971 240z I figured I would add to this older post to help others who have recently searched as I have for these details Here is a nice picture from Madkaw: Key words: eyebrow, eyebrowing, eye-browing, notch, notching, notching block, datsun, zcar.

-
Just doing rebuild for first time and learning a lot. I just came across different ring sizes in the same package and it seems unusual. Is this a quality control issue or is it normal? (GRANT P1297.000 from Black Dragon) Here is what I measured in the set of new top rings (I measured ring gap in same cylinder & same depth): 2 X 0.53mm 2 X 0.50mm 2 X 0.45mm My cylinders measured with same ring are (Top Bottom): 1 0.44 0.44 2 0.44 0.44 3 0.43 0.43 4 0.44 0.44 5 0.44 0.44 6 0.53 0.47 With this set I should be able to achieve: 1. 0.41 2. 0.41 3. 0.43 4. 0.44 5. 0.36 6. 0.45 However the spec is 0.23 to 0.38mm so all but one cylinder will fail. The bores are in spec so it seems the "standard size" rings are too small to begin with. It seems like a manufacturing error to me? I will have to order a new set so should I choose oversize rings and file even though the bores are standard? Should I stay away from Grant? I talked to a friend at the local machine shop and he said that slightly larger ring gap is not significant for non-race applications. He said studies by Hastings have shown this. I also found a summary of a JE study with similar findings.... this counters the FSM so which trumps?
-
Well it is good that it leaks externally, not internally. Fear not. We will help you through this.
-
Block Rebuild: - removed bearings, seals, pistons, & crank (all Standard size) - chased all holes in block with taps - ball-honed cylinders to de-glaze - removed rings & cleaned pistons (some top and 2nd rings stuck) Checked old top ring in bore. 0.93mm gap! yikes!!!! Checked new top rings 0.40 to 0.50mm gap... outside of spec but better than originals. I don't think the factory did the 0.93 rings. Old rings have shiny outer edge, new rings are black steel (source Black Dragon)... I guess I should have ordered 1 size larger from BD and filed to get the gap within spec. Live and learn. Pistons are 83.0mm at skirt and ~82.4mm at top. (0.6mm taper excessive?) Bores check out with minimal taper. TIP: for the rear and middle main bearing caps, I threaded a bolt in the centre of the cap and used a block of wood across the engine block and a small crow bar to pry up the caps.
-
Thanks! I was thinking stainless steel mesh may be the way to go. The stuff that was in the L24 turned into iron crud/mud/crust above the bottom 3 folds. Fortunately I found a spare from an L28 block that I took apart and forgot about. I'll degrease and inspect.If it is no good then Nissan dealer is my friend.
-
Clever configuration! Goos Luck
-
You can roughly tune by plug colour too. It will get you close. Are they white now?
-
Just tore down a short block. The folded mesh material in the block where the tube to the PCV valve has rusted to mush. Is there a synthetic material substitute that can be used to replace it?
-
I like whatever foam/layering toyota uses with their seats in modern cars, GM and Hyundai are fatiguing. I rent a lot of cars and also do some very long commutes. I just drove 1000mi non-stop in my S2000 on Saturday so my butt speaks with authority.
-
http://www.reactionresearch.com/280yzgallery.html