


240260280z
Free Member
-
Joined
-
Last visited
Everything posted by 240260280z
-
 A couple of tuning tricks: Fuel Level: The fuel level should be 20mm down from the bottom of the gasket that seals the roof. ZKars found this detail out as the 23mm is actually from the inside roof. 0 Turn Calibration: When setting the needle in the piston, remove the piston, turn the jets all the way up until they stop. You should see them flush or slightly above the bridge. Next pull the needle out so that the shoulder is ~ 3mm below the bottom of the piston and adjust the needle holding screw so that you can barely push the needle in by hand. Now with the needle out 3mm, place the piston back and force it down so the that the shoulder on the needle mates firm against the top of the jet when the piston is pushed all they way down. Now tighten the needle in this location. This procedure accurately sets "0 turns" for each carb with the nozzle and the jet at 0 gap. Idle Fuel and Balance: When setting the idle, disconnect linkage to carbs (pop a ball and socket on the vertical rod between the carbs) use unisyn to balance air flow with engine hot and jets at 2.5 turns down. Next disable the back carb by sticking your finger in and lifting the piston. the car should stumble along just running on the front 3 cylinders. If not lower the front jet 1/2 a turn to give the front carb more fuel and try again. Do this until you can stumble along on the front carb while disabling the back. Now repeat by disabling the front carb with your finger and try to get the jet height right for the back so that the car stumbles along on just the back 3 cylinders. Now rebalance the air with the unisyn and do fine adjustments repeating the finger disabling. Congrats you just balanced the carbs at idle which means nothing as you do not drive at idle ... but it is a start. Off-Idle Fuel and Balance: Reconnect the push rod so that the linkage is now in place. Turn the fast idle screw on the top of the linkage near the centre so that the carbs are at 3000rpm. (It will sound very exciting.) Read the air flow to the front carb then match this to the back carb by adjusting the balance adjuster screw near the back carb (the screw is on the linkage between the carbs). Next note the RPMS then disable the rear carb and note the rpms of just running on the front. Repeat this but disable the front and note the rpms on the rear. Adjust the fuel jets so that the rpm drop is the same for both front and rear carb. Congrats, you just adjusted your car for driving. Tweaks Since you may have adjusted for a nice balance BUT you may be a bit rich or lean, drive the car and read the plugs. turn both jets up or down the same amount until the colour and performance looks good. Repeat the off-idle balance test. USING Wide band (reading all 6 cylinders together) When setting the jet height at idle and doing the disable trick, aim for ~ 14.5 at idle on both carbs and ~29 when running on just the front three and ~ 29 when running on the back three When setting the jet height off-idle and doing the disable trick, aim for <14 at 3000rpm on both carbs and ~26 when running on just the front three and ~ 26 when running on the back three. I can't recall the exact numbers but the point is that the reading for the front 3 and the back 3 should be the same to balance the fuel. Follow up with road tests to ensure a/f is normal for idle, cruise and driving under load. No worries if you have problems with your 2nd hand carbs, I can bring a set of carbs out or parts when I visit in June. Just let me know.
 -
yes try 2.5 turns. The plugs are not bad, just a little rich.
-
I like to clean the two posts then permanently solder a scavenged 6" pig tail to these posts. I then seal the posts. The end of the pigtail will have a water proof connector. The end of the harness that goes out through the hatch floor gets the other end of the water proof connector spliced, soldered, and sealed.
-
FYI Passini does not like the unwanted effects of balance tubes on intakes. "The small advantage a balance passage between the barrels of a DCOE carburettor might give at idling speed is more than offset by disadvantages at other times."
-
In another thread I posted an idea of running a cable from the fast idle lever in the cabin to the mechanical vacuum advance lever on the Z. the idea would be to pull the lever to reduce advance at start, then push it forward to increase advance once started. This would reduce the kick back on the piston when starting and the piston is moving to slow to reach TDC before the explosion pushes it.
-
Looking forward to seeing you again Bruce! Janet will be there and you will finally meet her. She was sick as a dog when she came to NJ.
-
Maybe just sit in the back seat?
-
Soldering aluminum pin gauges in situ then pulling may be a nice technique.
-
I'll be in Fiji for the next two weeks. I may have time in my trip to turn wrenches on a weekend or coffee on a weekday evening. Sadly I only pass through Australia where many Z friends live. Here is the only Z pic I can find in Fiji:
-
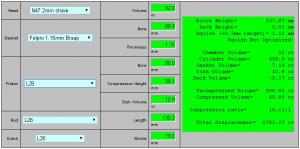
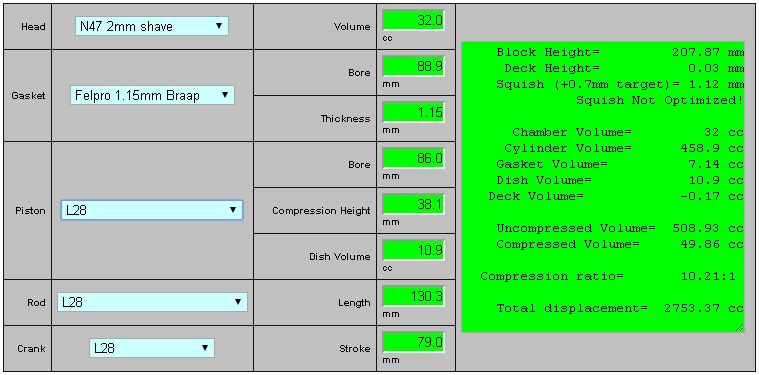
Yup 2mm shave of N47 gave 32cc & CR 10.2
-
Maxima chamber volume is large! Maxima N47 is 38.5cc My Nissan N47 on Blue is 32.0cc
-
I just re-assembled one for a friend. The spring was there but the 90 degree spring end that fits in the slot was long gone. I now wonder. What does the spring do? It was interesting that the spring in this 73 had a plastic ring around it. Here is what I am talking about sans ring
-
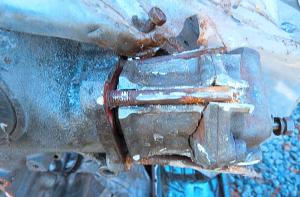
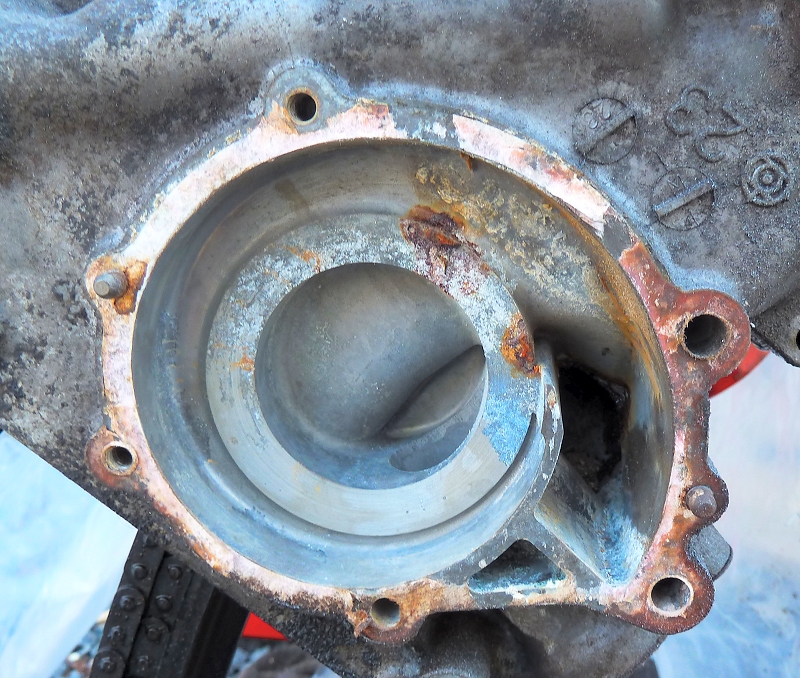
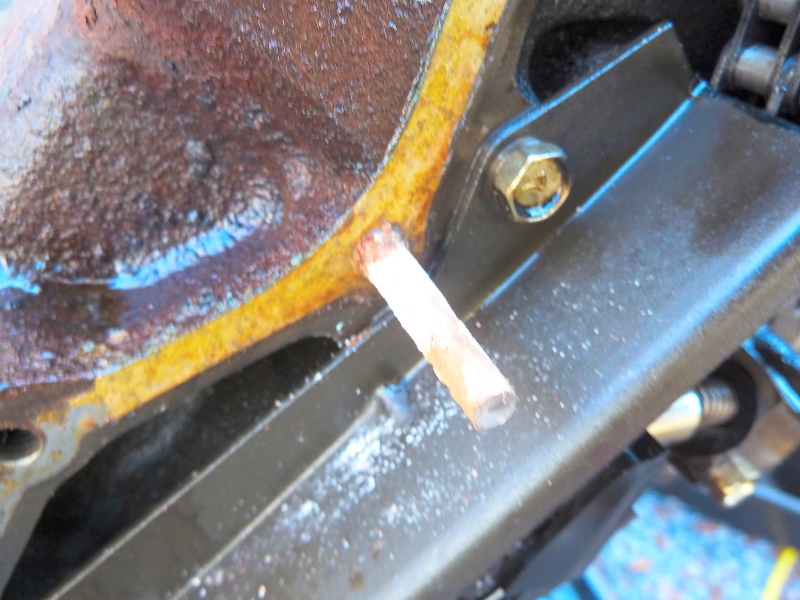
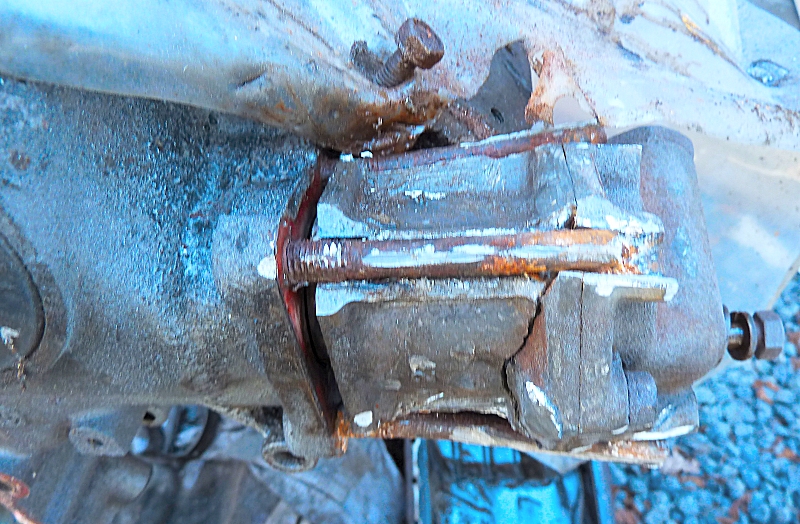
The chemical seizing was due to the cast holes in the timing cover that let water seep into the 3 bolt holes of the oil pump. The fourth oil pump bolt with no hole came out easy. The water pump and the scroll in the timing cover were minty as well as the head internals. the motor looked like it was just broken in. The only corroded bolt on the timing cover: Strange to see an N42/N42 combo in a 280zx with all the EFI and PS bolted to it.


-
-
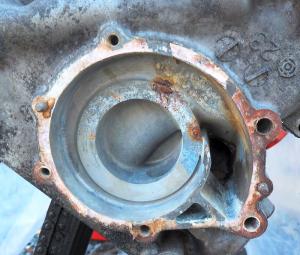
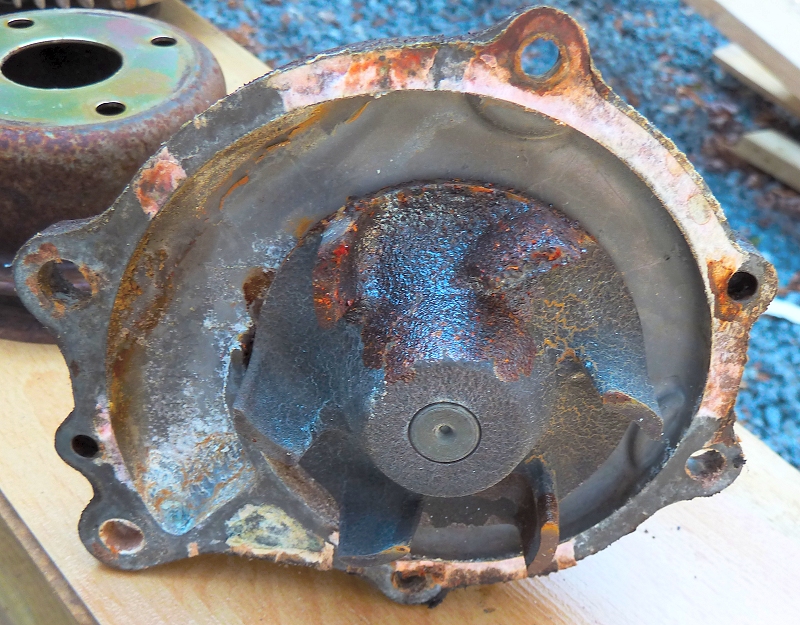
3 of the 4 bolts were seized. There are holes in the bottom of the timing cover that allow water to seep into the 3 bolts. It is ~ 4" of aluminum-steel electrolyses. When rebuilding use anti-seize and be sure to seal these holes. To remove the pump, I first tried penetrating oil and heat to no avail so I resorted to doing what I did in the past... angle grinder the length of the bolts. Worked like a charm.... sorry for the pump but the timing cover is A1. I also used a big cold chisel that made short work of the cast aluminum pump. Once the corroded bolts were exposed I could chip away the aluminum then bend the bolts out. The final job was to use a vice grip to twist out the bolts. The photo is hard to visually decode as the block is almost upside down and there is a sheet of plastic over the exposed bottom ( I stuck one oil pan bolt in to hold the plastic). The gasket also survived
-
Removed the oil pump:
-
-
Buy a smart car
-
There may be numbers on the side of the caps
-
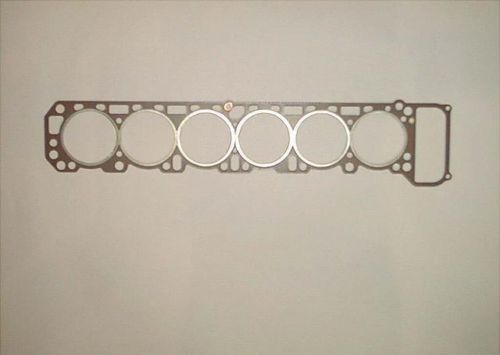
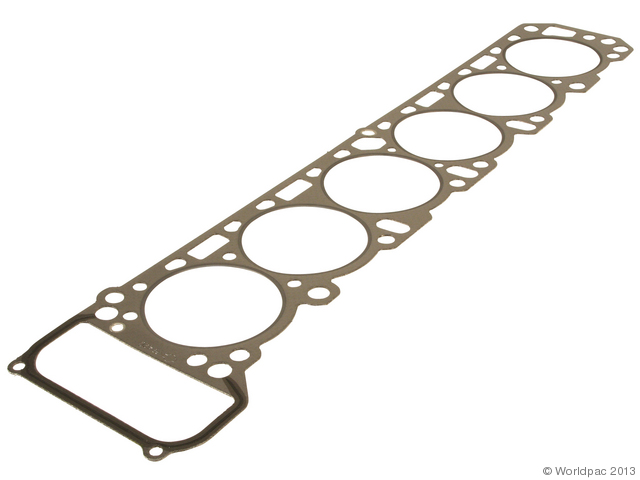
DOH! Found it: 1975-1978 Nissan 280Z Head Gasket Nippon Reinz W0133-1634713
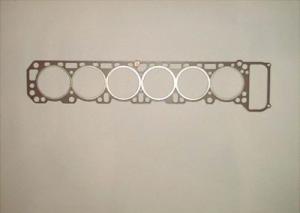
 It is from a 280zx w N42 Block Diameter is 89.4mm Squished height is 1.04mm I can faintly see 12 NR Z embosed between the timing chain hole and cylinder #1 The oil seal is copper. Sealing rings are steel. Seems like some faint baby blue colours I am guessing NRZ is Nippon-Reinz?
Looking forward to turning wrenches! Let me know if you need anything. I just pulled apart a weird early 280zx motor (with 1 piece fuel rail) that seems to have had an N42 head. I am guessing it was swapped at one time but on the outside it looks otherwise. I'll pull the head tonight and find out.
Looks like it is earlier than late Jan '71 A Series 1.
Fire up the grill, I'll be in Seattle in June for 2 weeks.
It is from a 280zx w N42 Block Diameter is 89.4mm Squished height is 1.04mm I can faintly see 12 NR Z embosed between the timing chain hole and cylinder #1 The oil seal is copper. Sealing rings are steel. Seems like some faint baby blue colours I am guessing NRZ is Nippon-Reinz?
Looking forward to turning wrenches! Let me know if you need anything. I just pulled apart a weird early 280zx motor (with 1 piece fuel rail) that seems to have had an N42 head. I am guessing it was swapped at one time but on the outside it looks otherwise. I'll pull the head tonight and find out.
Looks like it is earlier than late Jan '71 A Series 1.
Fire up the grill, I'll be in Seattle in June for 2 weeks.

Important Information
By using this site, you agree to our Privacy Policy and Guidelines. We have placed cookies on your device to help make this website better. You can adjust your cookie settings, otherwise we'll assume you're okay to continue.