


240260280z
Free Member
-
Joined
-
Last visited
Everything posted by 240260280z
-

-
I still stink like a "cedar plank" says my wife,,, off to the shower btw Jim... don't ever listen to my friend Ross! I have another story that is just as crazy involving, border guards, Cadillacs, criminals and Datsuns. And another involving fire ants and an old man who did not have bladder control and datsuns...I kid you not.
-
Looks like you are getting closer...keep going!
-
3/4 turn iS for old webers. sk/oer is ~2 turns.... same as newer webers.
-
Well if all else is ok then you may wish to play with the accelerator pump stroke. It is externally adjustable on your carbs. If the carbs spit during transition then try giving more fuel through the acceleration pump adjustments.
-
For 160 km I tended to the fire.... Yup. My good buddy Ross bought 'Tootsie" a 1979 Datsun camper truck with L20. We drove 180km to Springhill, Nova Scotia in my brother's Civic who was going to be the sag wagon on the return leg. Ross is the kind of guy who just does things spontaneously so he bought the camper a few days ago when passing through Springhill on business after only a short test drive and today was the day to drive it back. He asked me to help and said it stumbled a bit as the owner mentioned and that the manifold had a leak so I did a quick check and we were on our way. It was immediately apparent that the double barrel Hitachi carb had problems with the primary. It bucked like crazy until we got the secondary to open so I suggested that he keep the RPM's up. It backfired a bit on deceleration so when we stopped for gas 15 min into the trip home, I looked at the plugs and they were perfect. I also looked at the timing. I did not have a light but I noticed the distributor was clocked fully CW so I rolled it back to the centre location. It ran like crap so I put it back to full advance....interesting. After about 15 more min on the highway we smelled wood burning. Hmmmm no electrical smell nor oil smell and the motor was working fine, must be someone burning wood...... so we continue..... then the smoke came into the cab.... where the hell was it coming from? A quick look back into the camper part and it was coming from the floor. I pulled myself back into the camper section much like a Lancaster pilot going back to man the guns.... flames were coming out from under a bench next to the propane heater!!!! I flipped off the top and also in there was the battery and DC to AC converter under the bench. I looked for an extinguisher and shutoffs for power and gas but there were none. Ross was unable to see the flames and said that he wanted to try to make it up the big hill that we were on as he was worried about stopping. I dumbly said to try it as I looked for a way to put out the fire then came to my senses and convinced him so stop. As we stopped, I jumped out the back door and headed to the snow bank to get snow to put on the fire. My brother, driving behind us just saw me jump out the door along with a cloud of smoke. The snow managed to put out the flames so we had a good look under the bench seat and under the camper. There was nothing electrical nor a pilot light in the stove. We disconnected the gas to be safe. I noticed no exhaust was coming out of the tail pipe so I looked for holes and could see none. The muffler was a good 6 inches from the floor and was close to where the flames were but we could see no indication of heat . I even touched the front of the muffler and the pipe running into it and they were just warm. We figured a squirrel probably sealed it up and the crack in the manifold was where the true exhaust flow was. We disconnect the battery and piled some snow in the area under the bench seat (which had another boxed off section inside) then continued on. After another 5 min at high rpm, the smoke would return. I pushed some snow around to cool the wood then the smoke would stop..... sort of like tending to a wood stove X -1. After 30min of doing this, I decided to punch a hole in the interior boxed section so try and push snow into that cavity... bad idea. the hole allowed more air in and the smoke got worse.... so we stopped again and checked for a cause. Again the muffler was just warm and so far away from the floor that we figured it must be something else. Ross pulled off some foam under the camper and could see that it was black from heat. I still thought it may be the muffler so I punched some holes in it with the claw of a hammer so as to let exhaust flow out the front ahead of the suspected squirrel condo. We then piled lots of snow into the smoky area and it stopped and we were on our way. 5 min later more smoke. by this time we had a huge pile of snow in the seat/bench compartment so I just tended to the fire, by stogging the snow into the cavities until we were close to the city (destination)... HOWEVER Ross yells back to me that the clutch is gone.... so I suggested double clutching and that sort of worked. By this time the snow had melted so I climbed into the passenger seat (bomber style) as we were worried police may see me not fastened in as we were coming into city streets. The the clutch went again.... so we had to shift without the clutch for the upcoming 6 lights with the truck bucking like crazy in first gear on the primary carb barrel..... then the brakes went. So we did what any bomber pilot limping back to England after being shot up would do.... we continued on. I worked the stick as Ross worked the hand brake and we tried to hobble through the lights by timing the colours and bucking as people on the side walk pointed at us and laughed. We just had one light to go in first gear at 5000 rpm running on the secondary when there was a huge backfire and the engine stopped. So we coasted to the side of the road and figured that was it,,, just 2 km from home. So my brother stopped and we had a good look around. Not much to see. Time to throw in the towel.... so being an "right EEEgiot" I pulled the breather off the carb and noticed a puddle of fuel at the bottom of the primary... mystery partially solved. I then noticed the plug to the coil had come off. The huge backfire (like a direct flak hit) out of the corresponding huge crack in the manifold apparently was powerful enough to blow the adjacent plug wire off the coil. I put the wire back on and asked Ross to crank. Amazingly it started.... and the clutch worked,,,, and the brakes work (I credit this to prayer to my guardian angel). So we made it all the way back at high rpms with people still pointing and laughing... but we made it.... and that is all that matters. I looked again at the muffler and it was a bit discoloured near the rear section. It looked a bit oranger. So I threw snow on it and it sizzled,,,, but not on the front. It was in fact glowing orange!!! Mystery solved. So here is the guess: - Timing too retarded - Primary leaking fuel into the exhaust stroke that collects in the back of the muffler and burns slowly heating the metal floor directly above it...which heated the wood. I then took my brother to dinner where he laughed at my wood stove smell and said that it was funny seeing me open the door and jump out with the plumes of smoke. Any trip with my buddy Ross is an adventure!
-
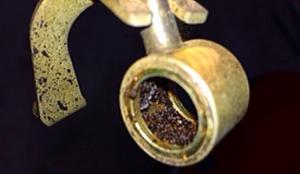
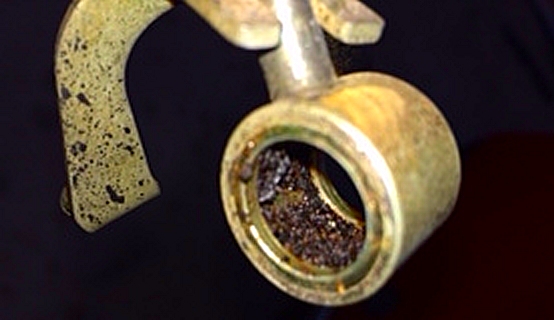
This is what came out of my friend's tank who suffered from debris causing his car to randomly die..... just a few flakes. Try not to be deceived. When your car dies, check immediately for spark and also check for fuel in the bowls.


-
I have read +60 to +80. It depends a bit on the emulsion tube.
-
Thanks mike! That WYSIWYG switch worked great. Also I dug deeper and the image quality issue is mine. I use a netbook and I have the scale for displaying this site at 60% thus all images are scaled down when viewed. No need to do anything but kick my behind when we eventually meet. Sorry for that!
-
We are all experienced enough to know that arguing on-line is a waste of time and usually makes us all look foolish... been there done that sadly. I think the best way to help others is to post accurate data based on scientific methods or many statistical observations when possible. If one has data to refute something just post it and be done with it. Try to add rather than take away. Let the readers of the future take what they want. We have nothing to prove. Live long and drive Z's Mr. Spock
-
http://villagenews.com/tag/car-show/
-
It's a Canadian thing... sort of like Tim Hortons: http://mrlube.com/en/about-mr-lube/history-of-mr--lube.aspx
-
My tool bars for editing never worked. They are greyed out. Attached images also get resized smaller and lower resolution. Often this kills technical drawings purpose.

-
I always wondered who Mr. Lube was.... now we know
-
Nope the chokes come out the front where the air horns are. I now have a lathe and plan to make some special chokes in the summer so I may be able to make you a set then if the experiments go well.
yes it is now below 3 ' deep. Hopefully it will be melted in a week. Temps forecast to be above freezing
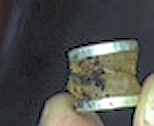
Debris that made it to the filters at the carb inlets.
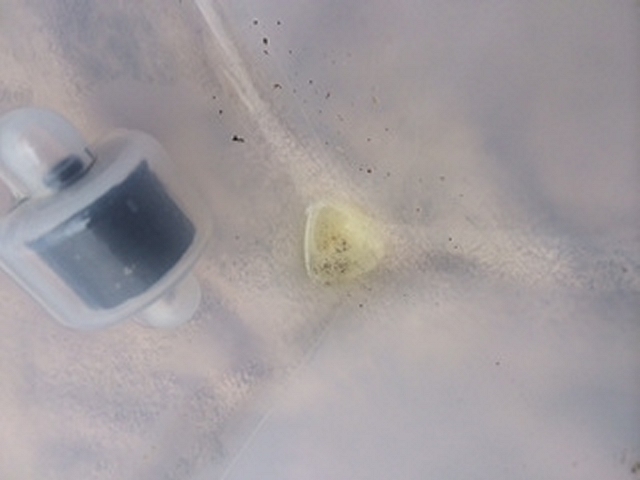
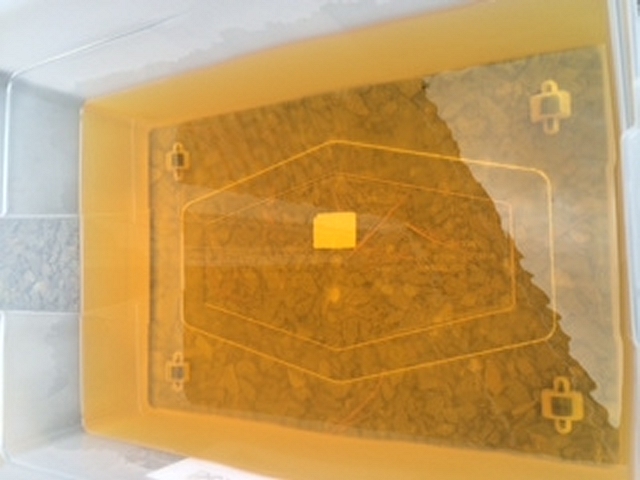
 Cliff's neighbour's kid used to dump gravel through the filler door when he wasn't around.
36mm Chokes will work great at WOT but may not promote air velocity at lower throttle driving and may delay the main circuit from starting. 2.8 litre main jets seem to range from ~125 as a starting point. I will be tuning a 2.8 liter DCOE40 for a friend this weekend and will have some data for you. It has 30mm chokes. Here is a great L28 triple carb read to get you going: http://datsunzgarage.com/weber/
Try to get them all the same as a starting point. The next step would be to have a look at idle jets (as fuel level and advance are known and ok). 1. Clean the plugs, turn the idle enrichment screws to 1 turn out and try and idle the car. (1 turn as I am assuming the idle jets are too big). 2. Balance the air then let it idle for 5 min then read the plugs to see if they look better. ----If so then your idle jets are too large. ----If not then turn the enrichment screws out to 1.5 turns and repeat 3. If you plugs look OK ~ 1.5 to 2.5 turns then your idle jets are reasonable. After the above tests we can move to main jetting.
I helped a friend with the same symptoms. Turned out to be debris in the tank moving around and plugging the pickup. Drain the tank and see what comes out. there is a drain plug bolt in the centre. Have a few pans ready to catch the gas and a large pail to transfer the gas to after one pan fills up. If you run the fuel down by driving it is less headache. btw the fact it happens when hot and cold indicates debris.
2004 instruction from the great Norm on Zcar.com ~2004 Directions on how to resurface rocker arms For those that would like to save some money and reuse your old Nissan rocker arms when installing new cams, I have posted the complete instructions below. If you are not a GOOD mechanic then you may be better off having a professional resurface your arms for you. Start with a flat surface and about five different grades of emery paper and a bottle of WD40 or liquid wrench and a bottle of Brake Cleaner. Start with 180 grit emery paper placed on a hard EVEN flat surface and liberally spray down the paper with liquid wrench or WD40 and then work the unworn raised end edges of the rocker arm pad down in a sideways motion until the edges are even with the rest of the rocker arm pad. DON'T go to far and create a dip. Check often on your progress and stop when the old ridge is even with the worn part of the contact pad . Use a different FRESH part of the emery paper EACH TIME you start with a different rocker arm. This will ensure uniformity. Do all twelve rocker arms in this fashion and spray all the rocker arms off completely with Brake cleaner to remove all emery grit and then switch to 220 grit sprayed liberally with liquid wrench or WD40. Next, in a rolling motion pull the rocker arm towards you across the 220 grit being sure that the entire surface of the rocker arm contact pad touches the emery paper at some time during the rolling motion.DO NOT go back and forth.Start at the same end each time and pull the rocker arm towards you. Use a different FRESH part of the emery paper EACH TIME you start with a different rocker arm. This will ensure uniformity. After a number of pulls after which all 12 rocker arm pad contact surfaces look new and even across the entire surface, switch to 320 grit and repeat cycle and then switch to 400 grit and finish off with 600 grit. Note: sometimes there will be pin holes on the rocker arm contact surfaces form past usage. DO NOT worry about getting these out as they will not harm the cam. Keep the emery paper sprayed down with liquid wrench or WD40 at all times and use a different FRESH part of the emery paper EACH TIME you start with a different rocker arm. This will ensure uniformity. . Also, smooth the rocker arm tips where they contact the lash pads in the same manner as described for the rocker arm contact patch and then fully clean the rocker arms with Brake cleaner until NO trace of grit remains anywhere! Smooth the sharp lengthwise edges of the rocker arm contact patch and the rocker arm tip that rides on the lash pad to eliminate stress risers so that there is a very , very slight rolled edge. This is done in the same manner as described above but while holding the arm at a 45 degree angle and is done just to take the sharp edge off. Don't let the now smooth rocker arm contact patch be marred. MAKE certain you FULLY clean EVERY little piece of grit from the rocker arms.Get a Bottle of Brake cleaner and hold the rocker lengthwise and soak it down until it is 100% clean. Failure to FULLY clean ALL GRIT from EVERY nook and cranny will result in cam damage! I used this exact method when I installed my new Crane cam over 80,000 miles ago and both cam and rocker arms still look good today.Make sure and use the cam break in lube and directions whenever installing a new cam. BTW, do not use Crane rocker arms as they are WAY inferior to Nissan and can break in half under extreme rpm.I know this from personal experience! Later,norm
Cliff's neighbour's kid used to dump gravel through the filler door when he wasn't around.
36mm Chokes will work great at WOT but may not promote air velocity at lower throttle driving and may delay the main circuit from starting. 2.8 litre main jets seem to range from ~125 as a starting point. I will be tuning a 2.8 liter DCOE40 for a friend this weekend and will have some data for you. It has 30mm chokes. Here is a great L28 triple carb read to get you going: http://datsunzgarage.com/weber/
Try to get them all the same as a starting point. The next step would be to have a look at idle jets (as fuel level and advance are known and ok). 1. Clean the plugs, turn the idle enrichment screws to 1 turn out and try and idle the car. (1 turn as I am assuming the idle jets are too big). 2. Balance the air then let it idle for 5 min then read the plugs to see if they look better. ----If so then your idle jets are too large. ----If not then turn the enrichment screws out to 1.5 turns and repeat 3. If you plugs look OK ~ 1.5 to 2.5 turns then your idle jets are reasonable. After the above tests we can move to main jetting.
I helped a friend with the same symptoms. Turned out to be debris in the tank moving around and plugging the pickup. Drain the tank and see what comes out. there is a drain plug bolt in the centre. Have a few pans ready to catch the gas and a large pail to transfer the gas to after one pan fills up. If you run the fuel down by driving it is less headache. btw the fact it happens when hot and cold indicates debris.
2004 instruction from the great Norm on Zcar.com ~2004 Directions on how to resurface rocker arms For those that would like to save some money and reuse your old Nissan rocker arms when installing new cams, I have posted the complete instructions below. If you are not a GOOD mechanic then you may be better off having a professional resurface your arms for you. Start with a flat surface and about five different grades of emery paper and a bottle of WD40 or liquid wrench and a bottle of Brake Cleaner. Start with 180 grit emery paper placed on a hard EVEN flat surface and liberally spray down the paper with liquid wrench or WD40 and then work the unworn raised end edges of the rocker arm pad down in a sideways motion until the edges are even with the rest of the rocker arm pad. DON'T go to far and create a dip. Check often on your progress and stop when the old ridge is even with the worn part of the contact pad . Use a different FRESH part of the emery paper EACH TIME you start with a different rocker arm. This will ensure uniformity. Do all twelve rocker arms in this fashion and spray all the rocker arms off completely with Brake cleaner to remove all emery grit and then switch to 220 grit sprayed liberally with liquid wrench or WD40. Next, in a rolling motion pull the rocker arm towards you across the 220 grit being sure that the entire surface of the rocker arm contact pad touches the emery paper at some time during the rolling motion.DO NOT go back and forth.Start at the same end each time and pull the rocker arm towards you. Use a different FRESH part of the emery paper EACH TIME you start with a different rocker arm. This will ensure uniformity. After a number of pulls after which all 12 rocker arm pad contact surfaces look new and even across the entire surface, switch to 320 grit and repeat cycle and then switch to 400 grit and finish off with 600 grit. Note: sometimes there will be pin holes on the rocker arm contact surfaces form past usage. DO NOT worry about getting these out as they will not harm the cam. Keep the emery paper sprayed down with liquid wrench or WD40 at all times and use a different FRESH part of the emery paper EACH TIME you start with a different rocker arm. This will ensure uniformity. . Also, smooth the rocker arm tips where they contact the lash pads in the same manner as described for the rocker arm contact patch and then fully clean the rocker arms with Brake cleaner until NO trace of grit remains anywhere! Smooth the sharp lengthwise edges of the rocker arm contact patch and the rocker arm tip that rides on the lash pad to eliminate stress risers so that there is a very , very slight rolled edge. This is done in the same manner as described above but while holding the arm at a 45 degree angle and is done just to take the sharp edge off. Don't let the now smooth rocker arm contact patch be marred. MAKE certain you FULLY clean EVERY little piece of grit from the rocker arms.Get a Bottle of Brake cleaner and hold the rocker lengthwise and soak it down until it is 100% clean. Failure to FULLY clean ALL GRIT from EVERY nook and cranny will result in cam damage! I used this exact method when I installed my new Crane cam over 80,000 miles ago and both cam and rocker arms still look good today.Make sure and use the cam break in lube and directions whenever installing a new cam. BTW, do not use Crane rocker arms as they are WAY inferior to Nissan and can break in half under extreme rpm.I know this from personal experience! Later,norm


Important Information
By using this site, you agree to our Privacy Policy and Guidelines. We have placed cookies on your device to help make this website better. You can adjust your cookie settings, otherwise we'll assume you're okay to continue.