


240260280z
Free Member
-
Joined
-
Last visited
Everything posted by 240260280z
-
 Do you know if the 73 will bolt in Series 1 or does it need the 4 holes wider? If I have to drill I'll try to find the biggest that will fit.
 -
Perfect Thanks!
-
Any ideas what master cylinder the part number fits? Box just says "Made in Japan for Japanese Vehicles" and "SP-4735" "Girling Service Part" "13 12 1980"
-
Thanks!
-
Is this your 71 or 73? I read that 73 booster is bigger?
-
Rusty Lug Nuts: What aftermarket brand has the best metal? I found that Canadian Tire nuts are junk and most that come on Z's we get from the south rust. The only ones that hold up are the Toyota stock ones that I bought from the dealer or that came on cars I bought... any recommendations?
-
Thanks! Any suggestions for a booster for a series 1?
-
-
Series 1 240z with Toyota pickup calipers? Currently the stock refreshed master vac and new master cylinder don't cut it.... not enough power assist and too much excursion. I am thinking an 83 280zx master with larger master vac that can fit w/o drilling firewall... but which one?
-
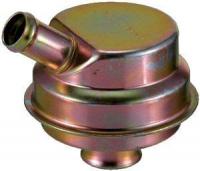
I am currently using a generic $6 crank case breather on the end of the PVC hose as an interim road-draft tube (I just put Webers on the car). It hangs down near the corner of the inner fender and the rad support for the moment
-
Record the manufacturer of the parts you added and their specs (size/weight/metallurgy/etc) Record standard motor dimensions Record and work done (balanced,bored, honed, new crank journal plugs, polished, glyptoled) Don't change anything that affects smog/safety inspections.
-
Regarding safety and glasses. A high school friend who became a mason got a face full of grinder output when he stuck his head around the corner of a building tower to talk to a co-worker. He got metal in his eyes and had stabbing pain when he put eye drops in that night.The next day his boss saw his swollen eyes and sent him to the doc. He said they effectively popped out his eyes on his cheeks to clean and remove the metal while awake....not sure how far they come out but you get the point. He was bandaged up in the hospital for over a week. always wear eye protection.
-
Check for Exedy or Centreforce dealers in Europe....hopefully in Finland!
-
That is a nice update.
-
That is a nice update.
-
Thanks. I'll report back to this thread when I disassemble.
-
Worked fine. But CO's mod is the right way to go.
-
I need three new 175 fuel bowl needle valves. Once I get them I can unload the three new 225's that are in the carbs and the three old 175's I also need 12 air horn tabs. I also have 3 extra long-flo filters
-
From what I recall: Electrical - Unplug EFI connections to fuel rail injectors Gas - disconnect inlet and outlet fuel lines to the rail Vacuum - disconnect small vacuum line to fuel pressure regulator (small can between injectors 3&4) hardware - remove all 12 fasteners securing the 6 fuel injectors to the intake runners - remove 2 or 4 fasteners holding fuel rail to intake
-
Can anyone give an overview of "Bob Sharp Racing Springs and Struts"? The IMSA 240z I picked up has them according to the PO but I have not had a chance to disassemble the car yet and see what lurks beneath. It certainly is lower than a stock Z.
-
I'm in.
-
This excellent post notes the difference in DCOE mixture screws and provides good advice.
-
Well my experience with triple weber 40DCOE151's so far is that I can make them run rich or lean by playing the mixture screw against the throttle plate opening. I read the blurb "DCOE INITIAL SETUP & TUNING" in the DCOE chapter in "WEBER CARBURETOR REPAIR AND TUNING BOOK" by Pat Braden. He suggests: 1. Once engine is warmed up and idling, set all mixture screws at same position out then synchro-balance airflow into all carbs (using throttle valve opening screws and air bypass screws). All 6 should flow the same. 2. Install air filters and connect tach 3. Reduce RPM to ~ 900 with the three throttle valve opening screws (for triples). 4. Turn out all mixture screws to find the point of fastest/smoothest idle. (If no peak RPM is found, repeat step 3 but use 850 or 800 rpm if possible). 5. Once the maximum RPM point is reached reduce RPM to ~ 900 (or whatever idle RPM you desire) with the three throttle valve opening screws. I sort of did this when I first set up the carbs but I was pig rich. Now that I have read a few articles, I will try again... when I get the car back from the "panel tweaker". I will also plot idle screw, throttle plate variations, A/F with 1100 rpm constant "for fun"... maybe a graph will talk to me. Especially if I also substitute throttle plate turns in with first pilot hole exposure.
-
See your weber carb post for details For this thread's completion: I set the three carbs to 24.5mm 24.5mm and 25.0mm. It eliminated the transition bog!!! Thanks!
-
Stephen, I followed in your footsteps the past few days! Thanks for your help. The car is coming along fine. I figured I'd just append my data and observations to this post for future enthusiasts following in our footsteps. Build: motor: L24 0.75mm overbore head: Maxima N47 with stock valves headwork: medium porting/shaping intake and exhaust cam and valve train: Delta 0.46' lift and 270/280ish Carbs: 40DCOE 151 Intake: Cannon Long Runner K&N filters Stock 240z mechanical pump dead headed. Carb Internals: Idle Circuit: Jet: 55F11 Main Circuit: Jet: 125 F11 170 Main Venturi: 30 Aux Venturi: 4.5 Acceleration Circuit: Spill valve: 50 Jet: 45 Starter Circuit: Jet: 85 F9 150 Needle Valve: 225 All new gaskets ZX distributor set 17degrees at 900rpm no vacuum advance Notes: - the long intake and big air filters barely fit....but they do! I have to pull the master brake cylinder out to measure the airflow into #5&6 when balancing with synchronometer - As Stephen mentions, the fuel level is crucial for smooth idle-to-main transitions. My default fuel depth was 29mm down from the main jet well's top. I noticed a bit of a transition bog. When I set the fuel to 24.5mm/24.5mm/25.0mm for the three carbs, the bog disappeared...but I got fuel dripping between the throat and the main venturi on a couple of the intakes. This did not happen at 29mm fuel depth. I will re-check the fuel depth but I think it is a combination of Aux Venturi to body sealing, the stock fuel pump pressure and the too-big 225 needle valves that came with the rebuild kit. I will experiment on resolving and report back. - initial setting of the carb's primary two interacting and adjustable parameters was my biggest hurdle (Thottle Valve opening and Idle Mixture Screw depth). From what I read, the importance of setting the "throttle valve as close to blocking the first progression hole" was the priority. I was able to view the "blocking" through the inspection port over the progression holes and easily make it the same for all 3 carbs . The problem is that I could easily block the first hole and have the left (with respect to (wrt) the car) edge of the throttle plate anywhere from the right side of the hole and beyond. I initially decided (incorrectly of course) that it was important to block as much of the first progression hole yet let a wee bit of air around so I set the throttle plate so that the left side of the plate was at the midpoint of the first progression hole... then the problem began... in order to get the car to run, I had to set the idle mixture ~3.5 turns out but it ran pig rich and it was hard to get the RPM's below 1100. It ran smooth and idled smooth and had lots of power but it was too rich and stinky and it would sometimes diesel after shutoff. It would not run at 2.5 turns out!!! After a lot of experiments I re-started from scratch, but this time, I set the idle Mixture Screws at 2 turns out then adjusted the Throttle Valve opening to get 900rpm idle. It worked much better. I am still playing around but it is how I would recommend others to do initial setup. I am now reading the plugs and not using the WB just like Stephen above with 2.25 turns out, the plugs are looking much better... a touch too lean but some brown on the porcelain. I have read that webers like richer and I experienced it so I will continue to experiment. The only "stumper" is that I did not expect the idle mixture screw and throttle valve to have such an effect on lean/rich... I thought it was the idle jet selection. I guess the pressure dynamics at the progression hole affects how much fuel comes out pre-idle mix screw. With more of the first progression hole exposed to manifold vacuum at idle, less fuel is needed from the mix-screw path...AND less fuel can reach it as it will leak out the exposed progression hole and not flow further to the mix screw. - setting the throttle push rod arm lengths.... don't do it on the carbs using the turn buckles!!! All throttle arms should be the same length. Set them on a bench using vernier calipers. Simply stick the tangs of the calipers in the heim joints balls and set the length then set the locknuts. The way to adjust the cannon throttle push rods is to loosen where they bolt to the main rod. You can tighten with the car idling and easily hear if you push them down and increase the idle. - I set the Air bypass Screws in all the way then adjusted as needed to get all of the carb throats to flow the same using the synchronometer. I think the value was 5.5 on the dial at 900 RPM. - There is a stop bolt under the acceleration pedal on a 240z. I set it so that the pedal stops before it pushes the throttle valves past their stop... otherwise at WOT you can run the risk of twisting the throttle shaft in the carbs (not a good thing... I had to replace one already due to corrosion...it requires drilling the shaft so again..do take care) - I had set the initial timing to 17degrees at 900rpm with vacuum advance disabled. I just set it to 15degrees as per Z garage's excellent weber advice. I will play more down the road. Going to 15 seemed to make no significant difference. http://datsunzgarage.com/weber/
