


240260280z
Member
-
Joined
-
Last visited
Everything posted by 240260280z
-
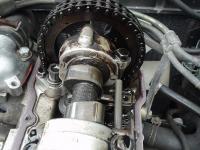
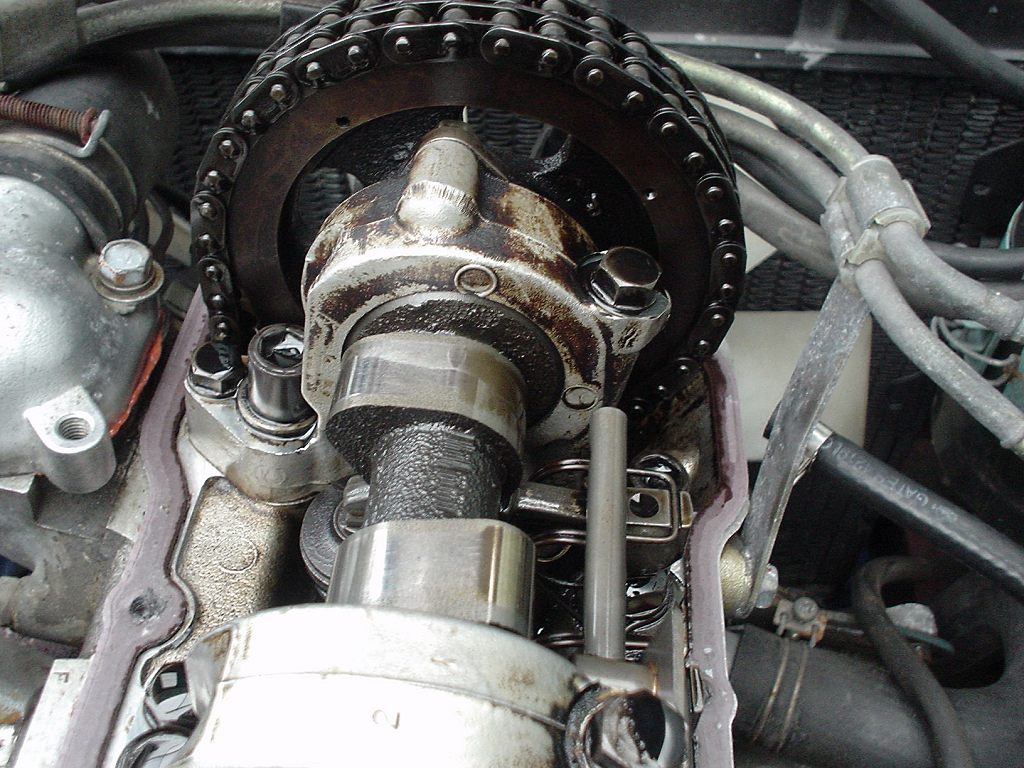
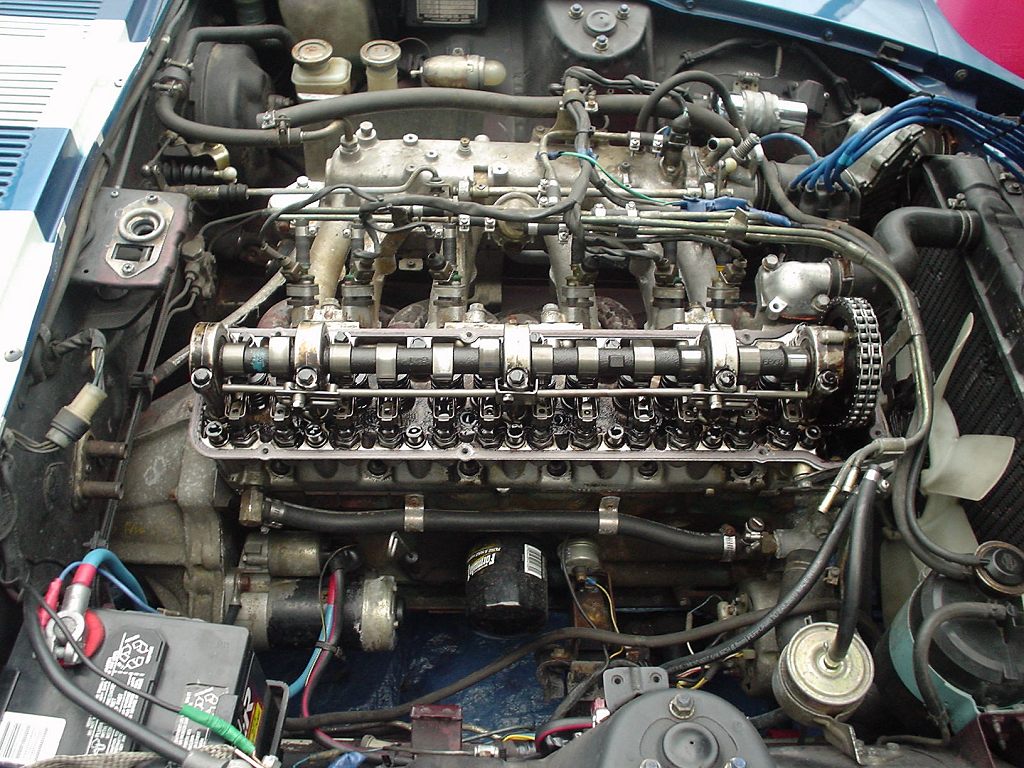
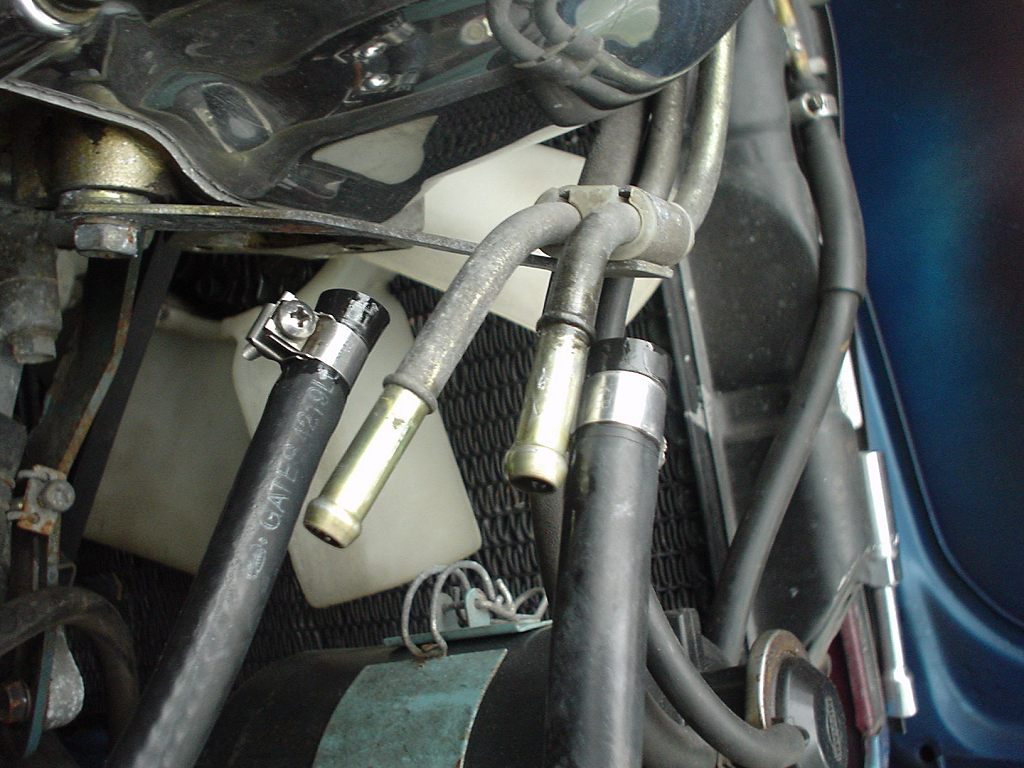
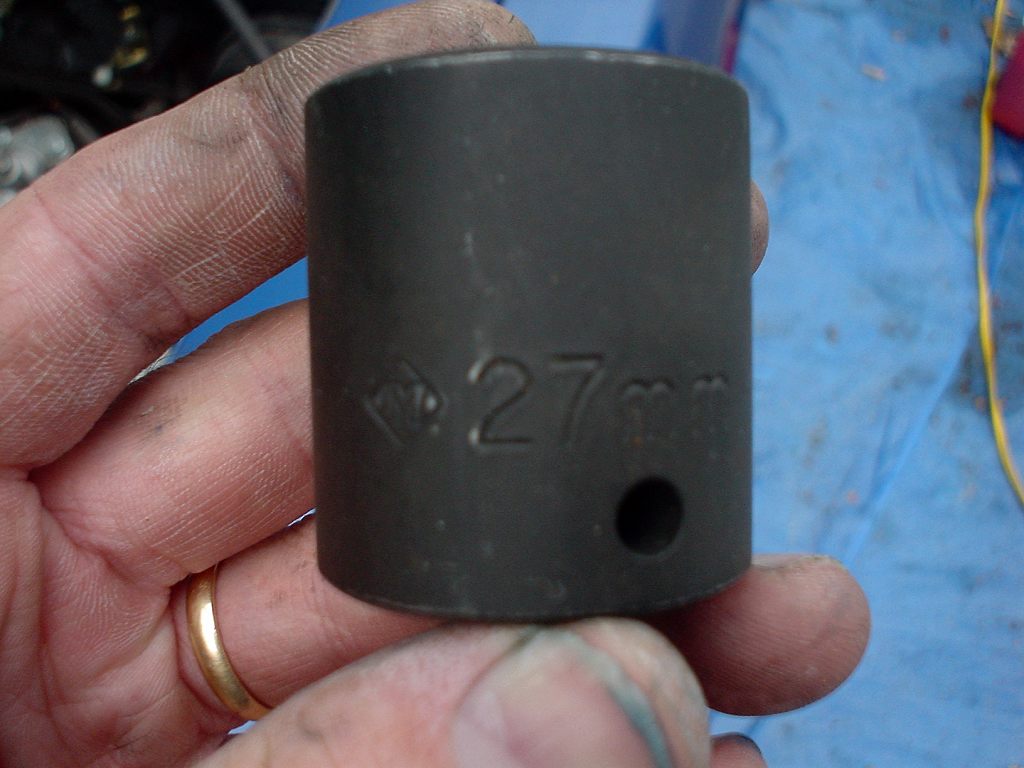
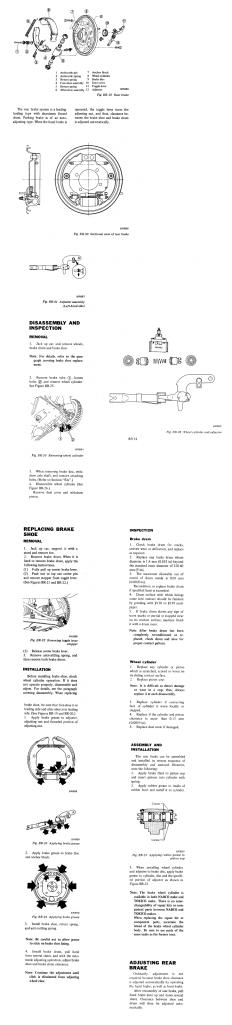
 \ 1 Disconnect spark plug wires and fold back out of the way. 2 Remove spark plugs. 3 Disconnect fuel lines (send and return) at fuel rail near front of the head. Observe all high pressure fuel safety precautions. 4 Disconnect valve cover vent hose. 5 Remove valve cover. 6 Put transmission in neutral. 7 Use short 27mm socket to turn engine at crank. (when viewed from standing in front of car, turn crank clock wise) 8 Turn until timing mark on damper is lined up with "0" mark on timing gauge. This is top dead centre * 9 In cylinder #1 at front on engine, the piston top should now be visible through spark plug hole (flashlight or pokey screw diver can verify) 10 Since the piston #1 can be at its highest position two times in the 4 cycles of the engine, we need to make sure the head's cam and piston is at the top of the compression stroke rather than at the top of the exhaust stroke. An easy way to tell is by looking at the cam lobes for cylinder 1. They should both be upward.


-
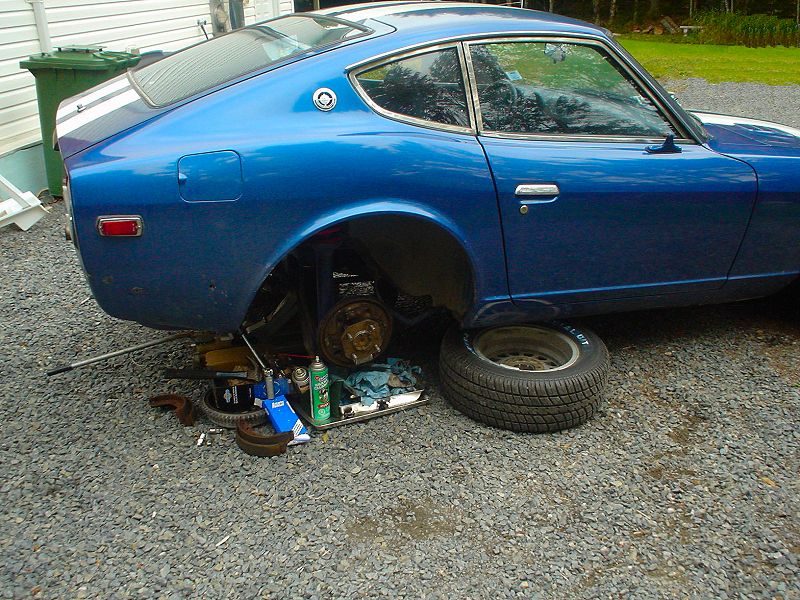
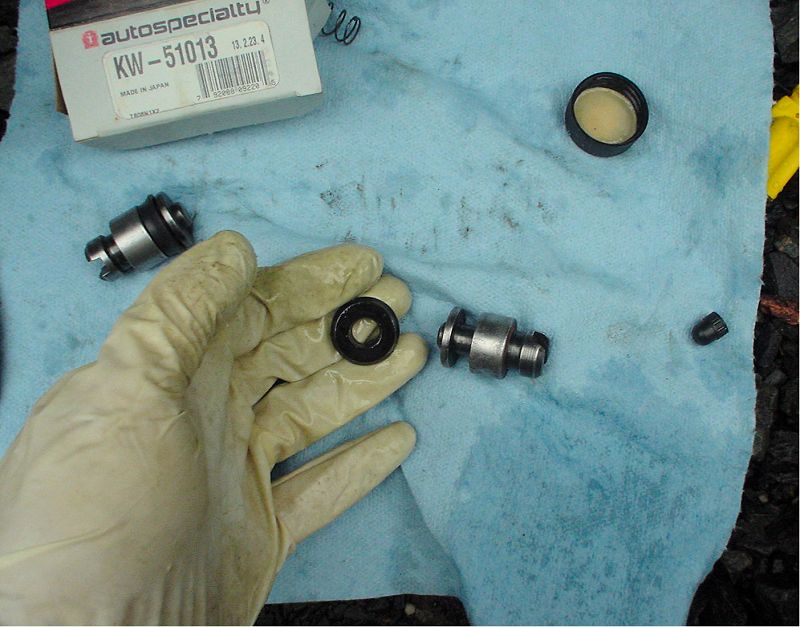
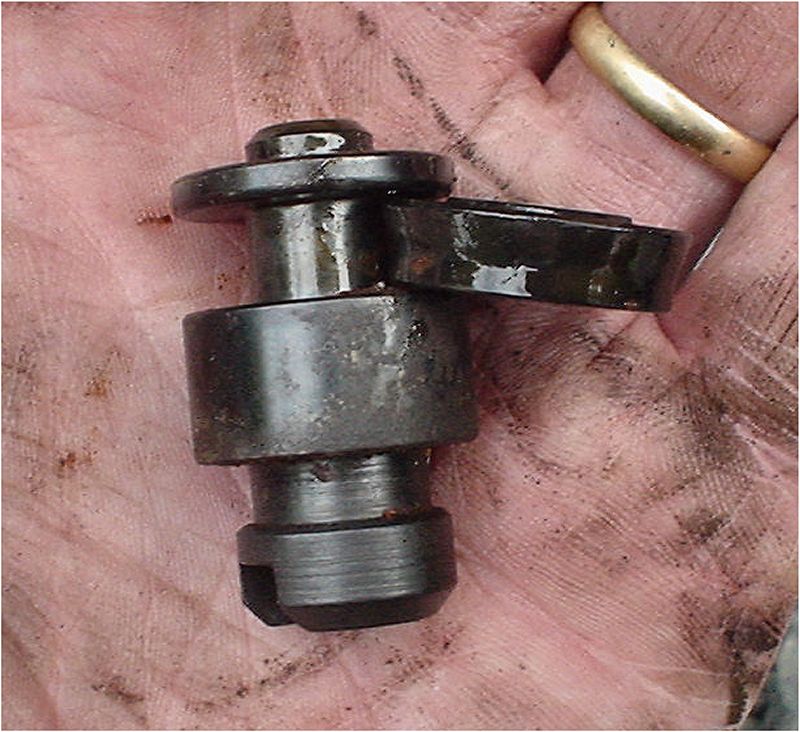
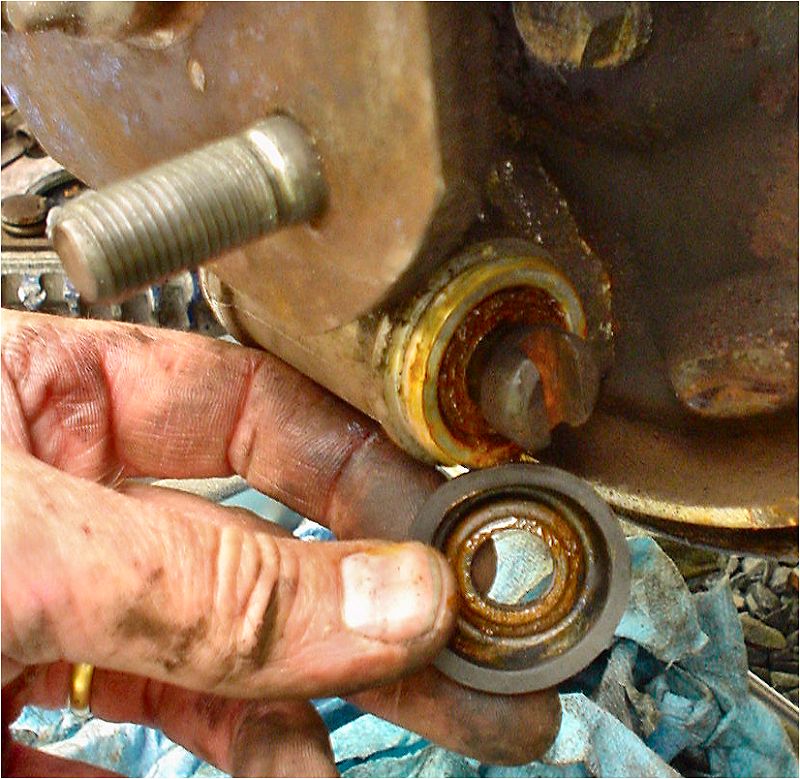
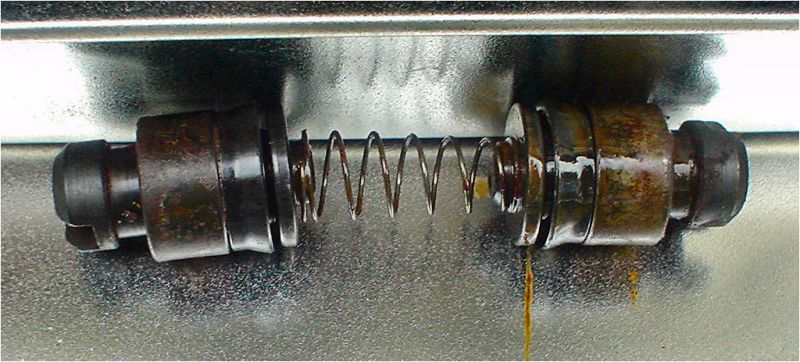
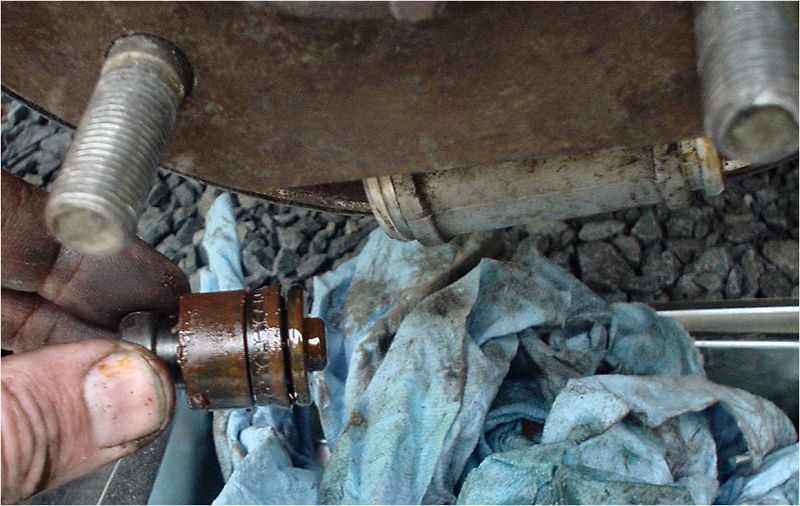
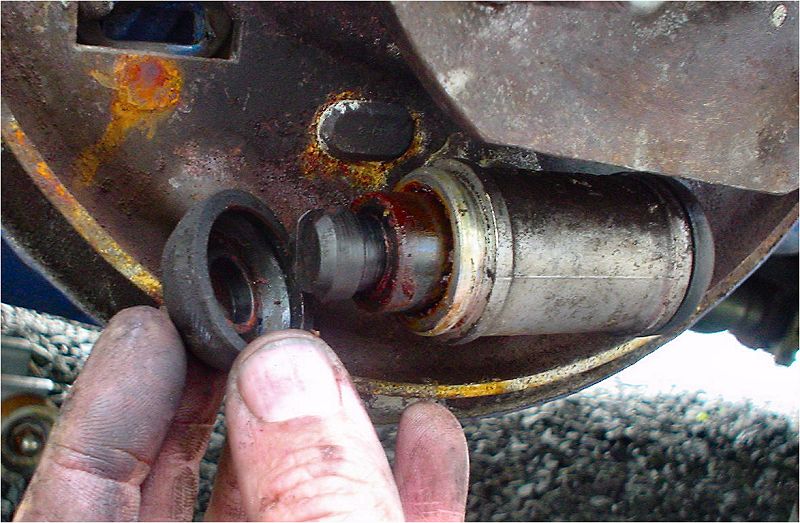
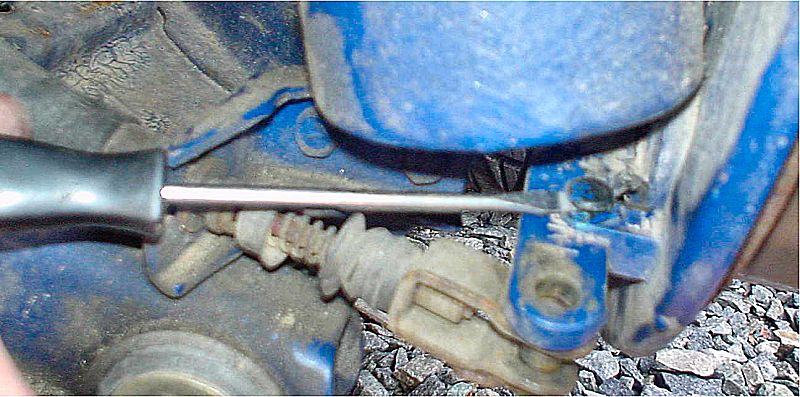
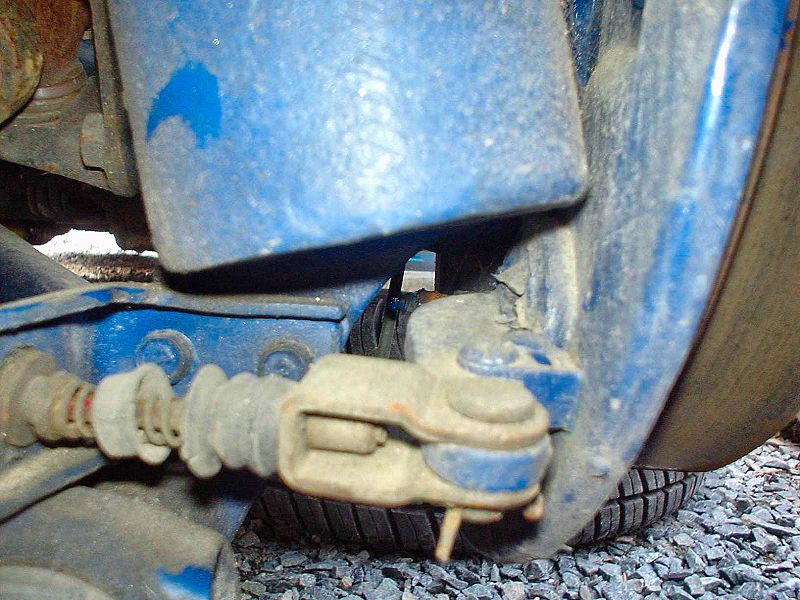
I just cleaned up photos giving step by step removal of 77 280z. I will post tomorrow...1am here now.
-
Looks like you can get one here: The site does not seem to have Z's so I entered a 280zx automatic (which I believe has an R180 differential) http://www.nissanpartszone.com/online/Page_Cart/ListShoppingCart.aspx?previousURL=(%2fPage_Product%2fPartDetail.aspx%3fModelName%3d280ZX|ModelYear%3d1979|ModelSeries%3dS130|FileType%3d268|SelectConditions%3d(1%3d2S%3b2%3dL28E%3b3%3dJ%3b4%3dAT%3b5%3dF3%3b6%3dC%3b7%3dFED%3b)|ShowConditions%3d(1%3d2S%3b2%3dL28E%3b3%3dJ%3b4%3dAT%3b6%3dC%3b7%3dFED%3b)|seeDesc%3dFalse|goBack%3dTrue|SectionNo%3dF|ComponentsNo%3d380|ComponentsIndex%3d15)
-
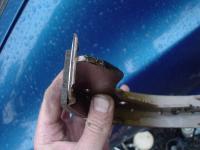
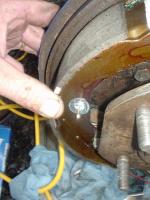
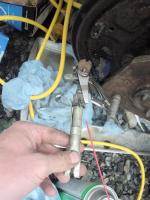
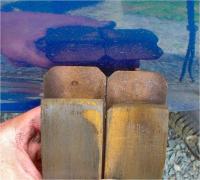
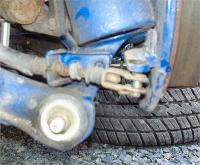
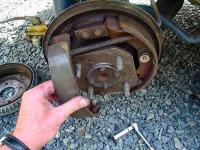
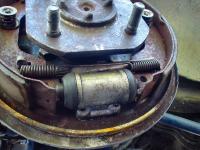
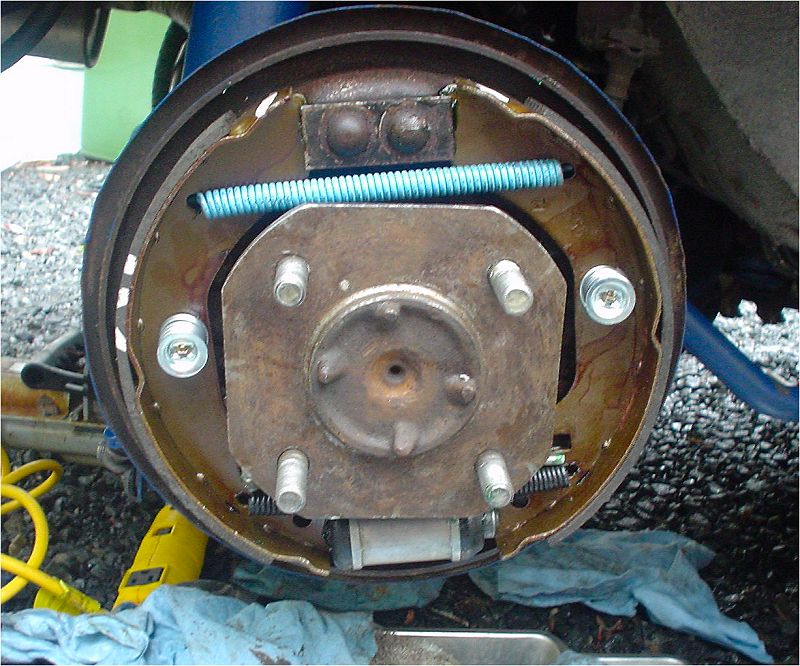
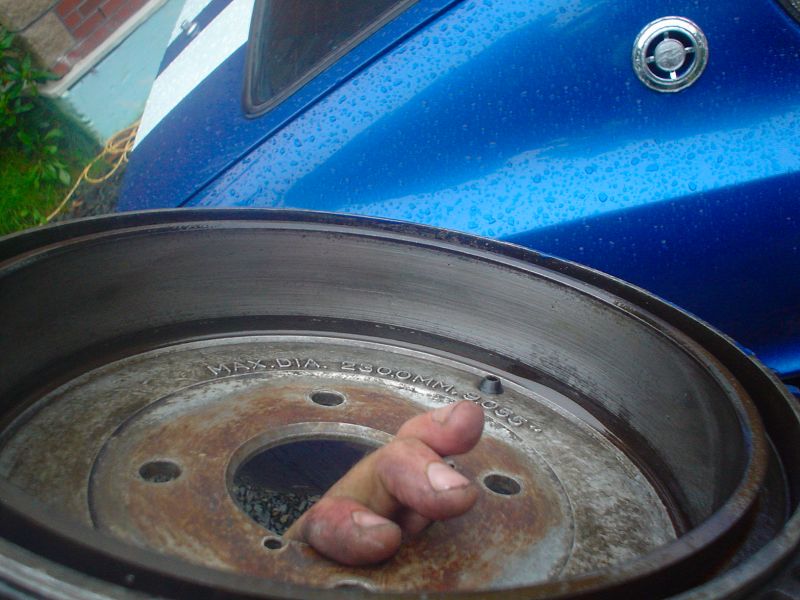
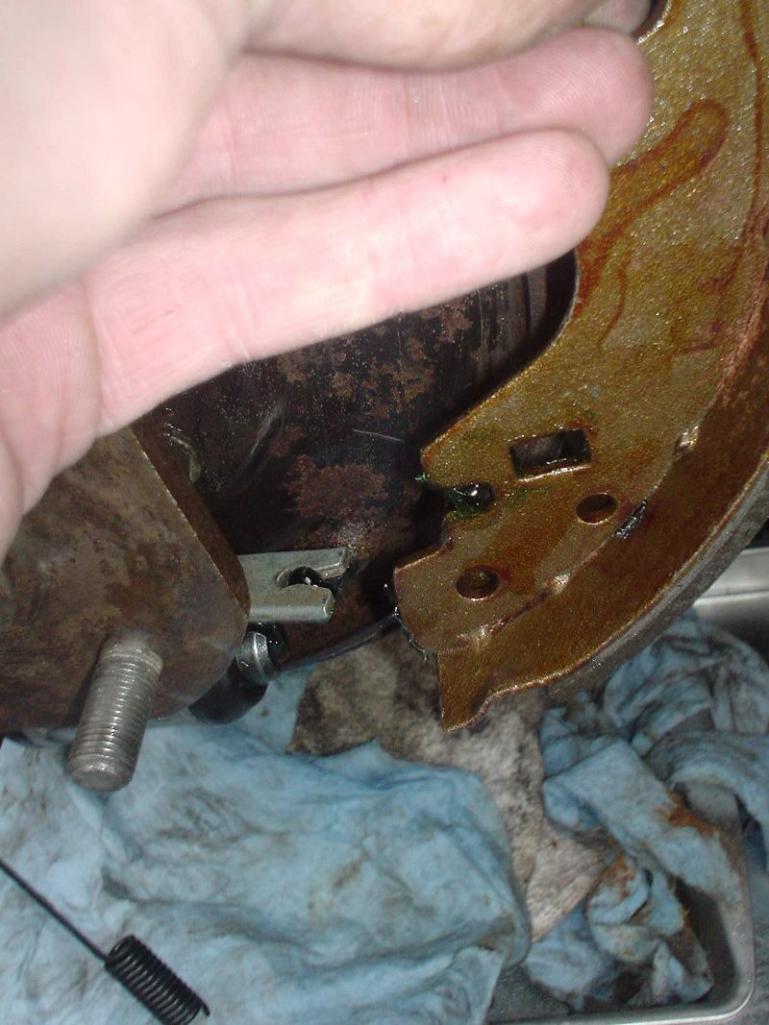
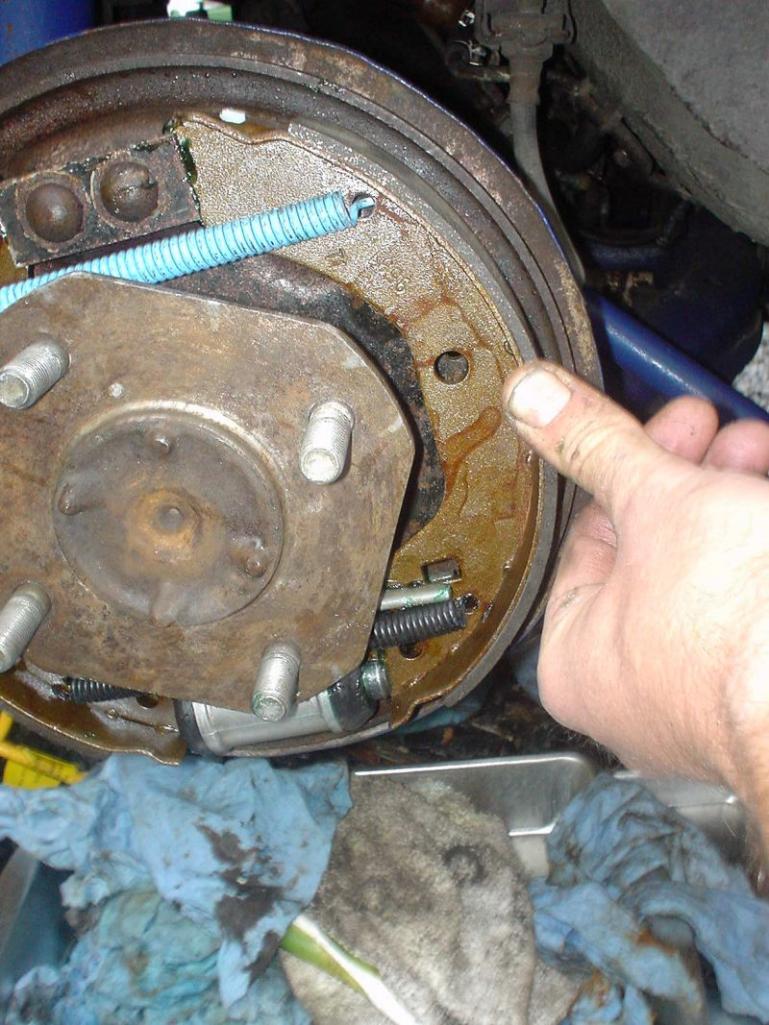
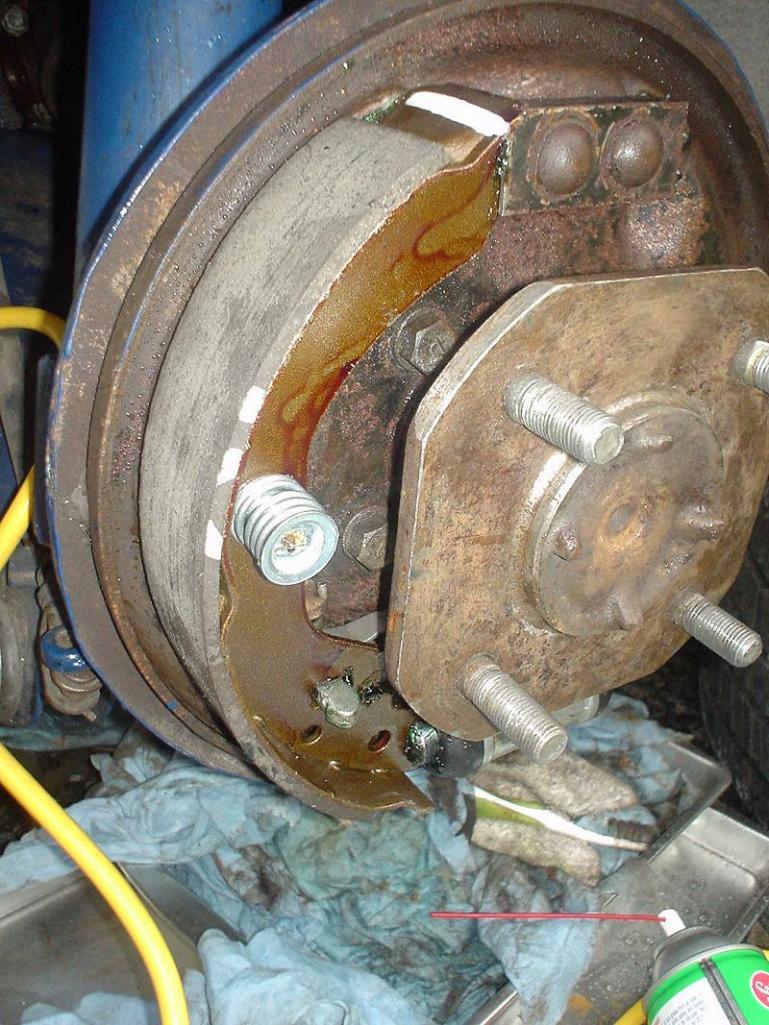
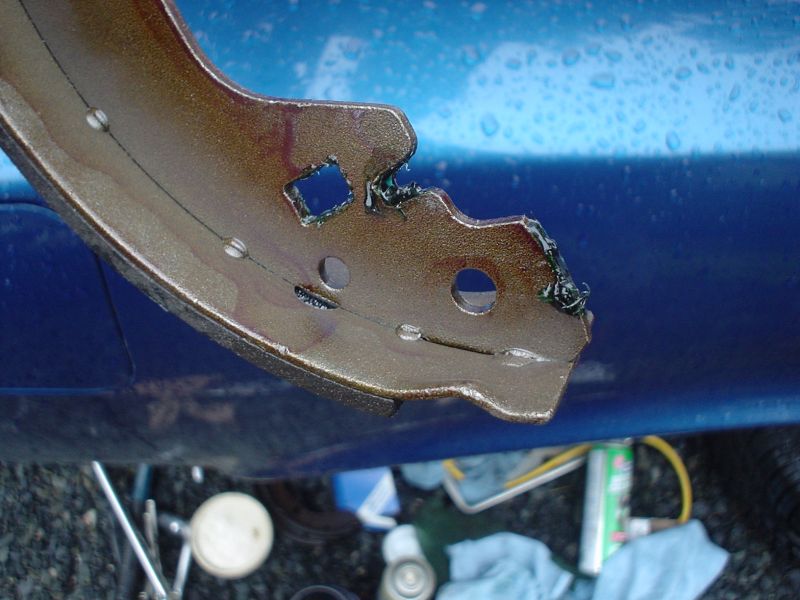
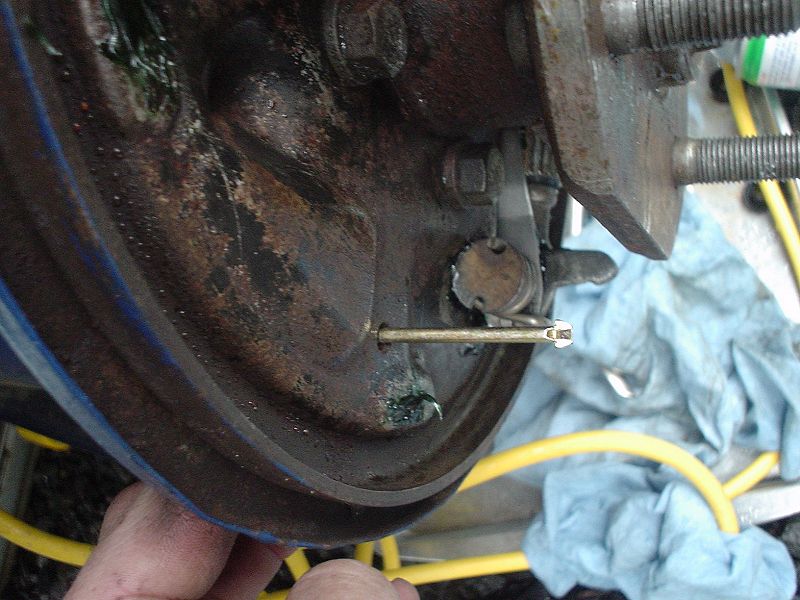
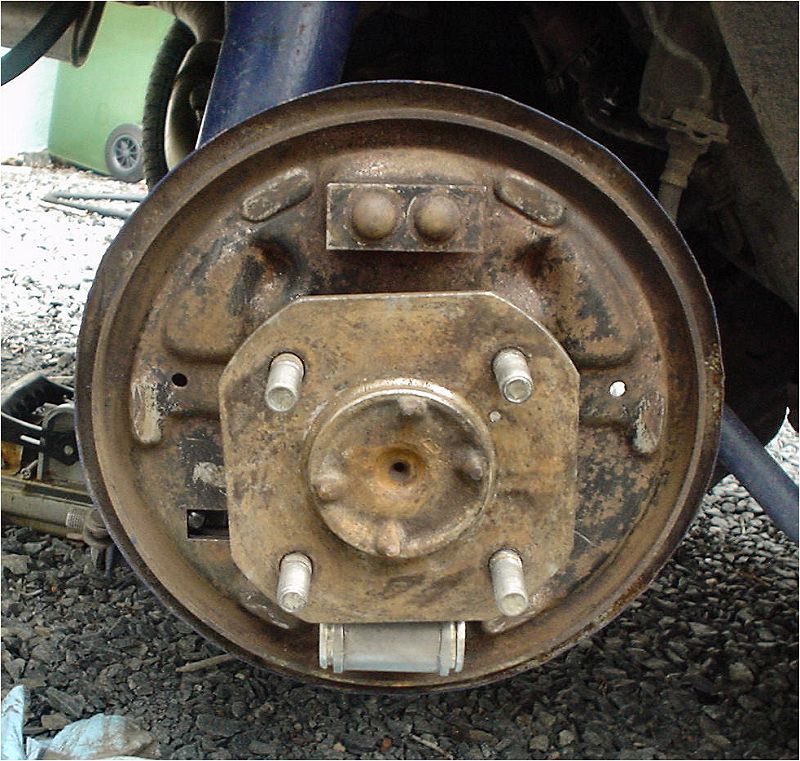
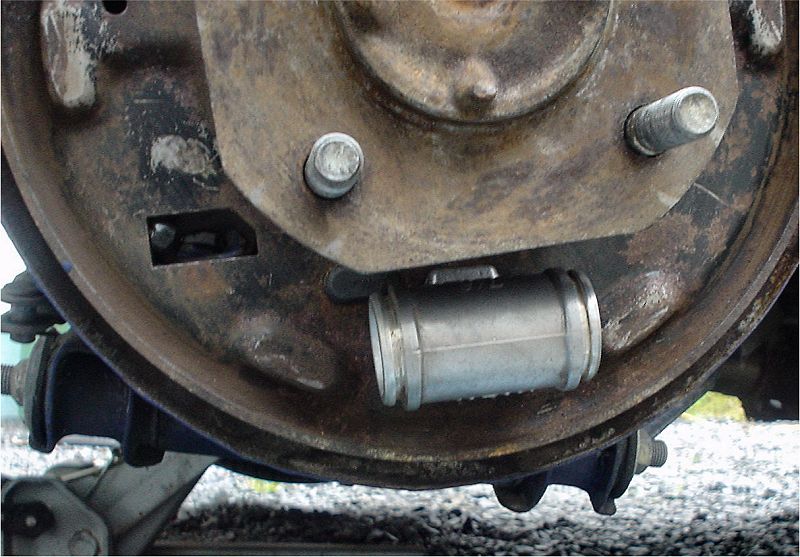
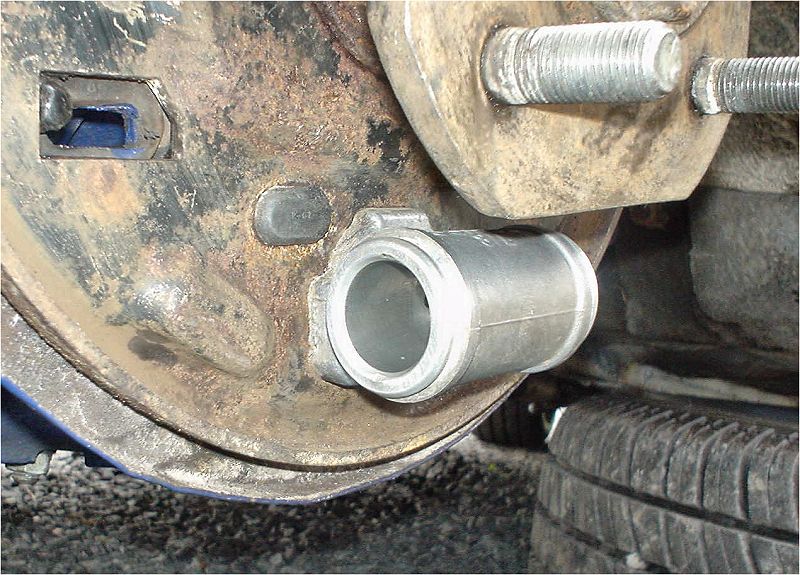
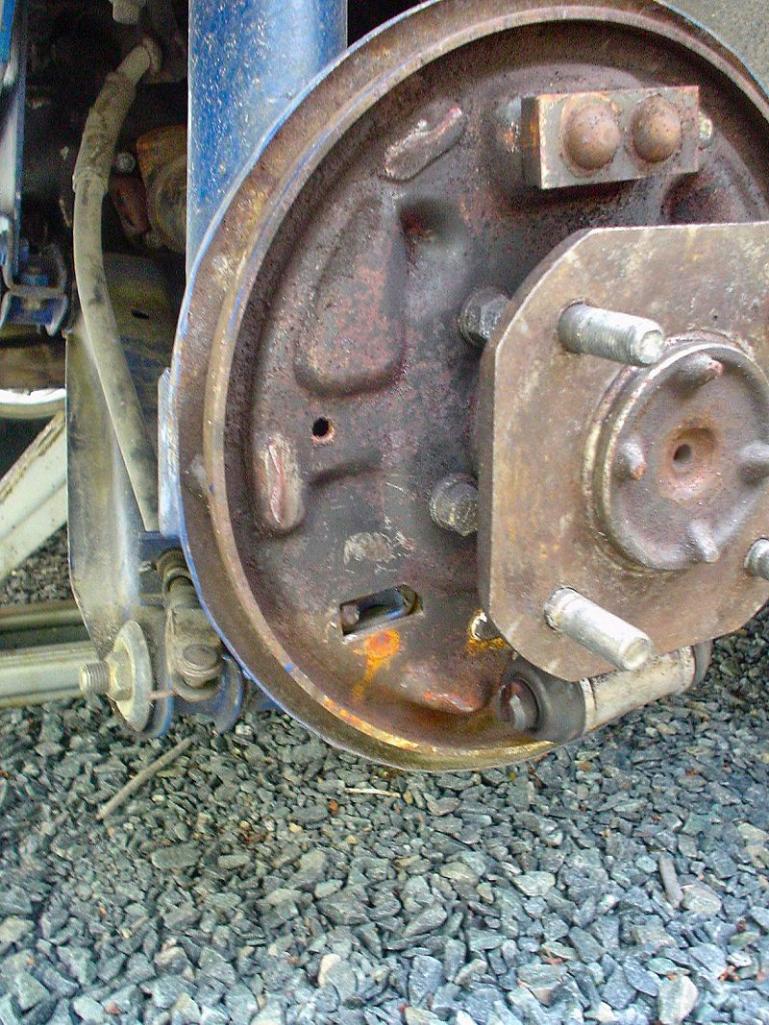
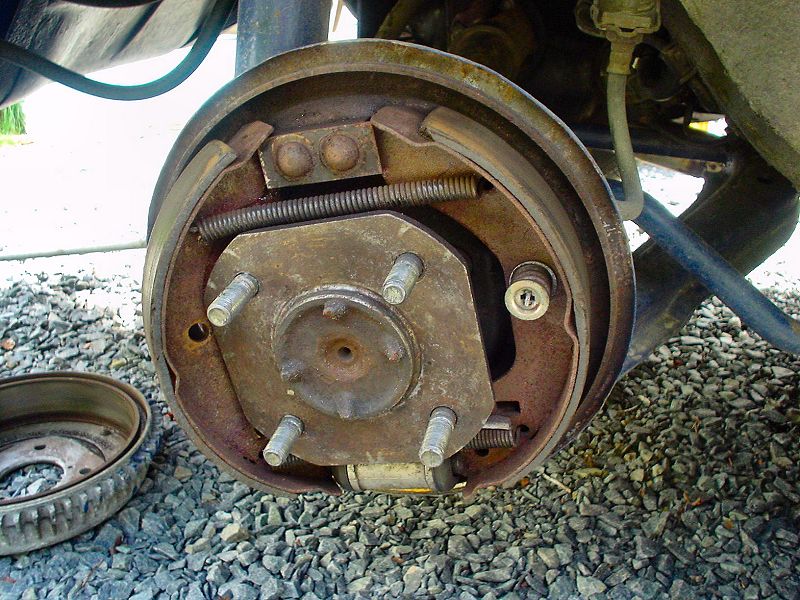
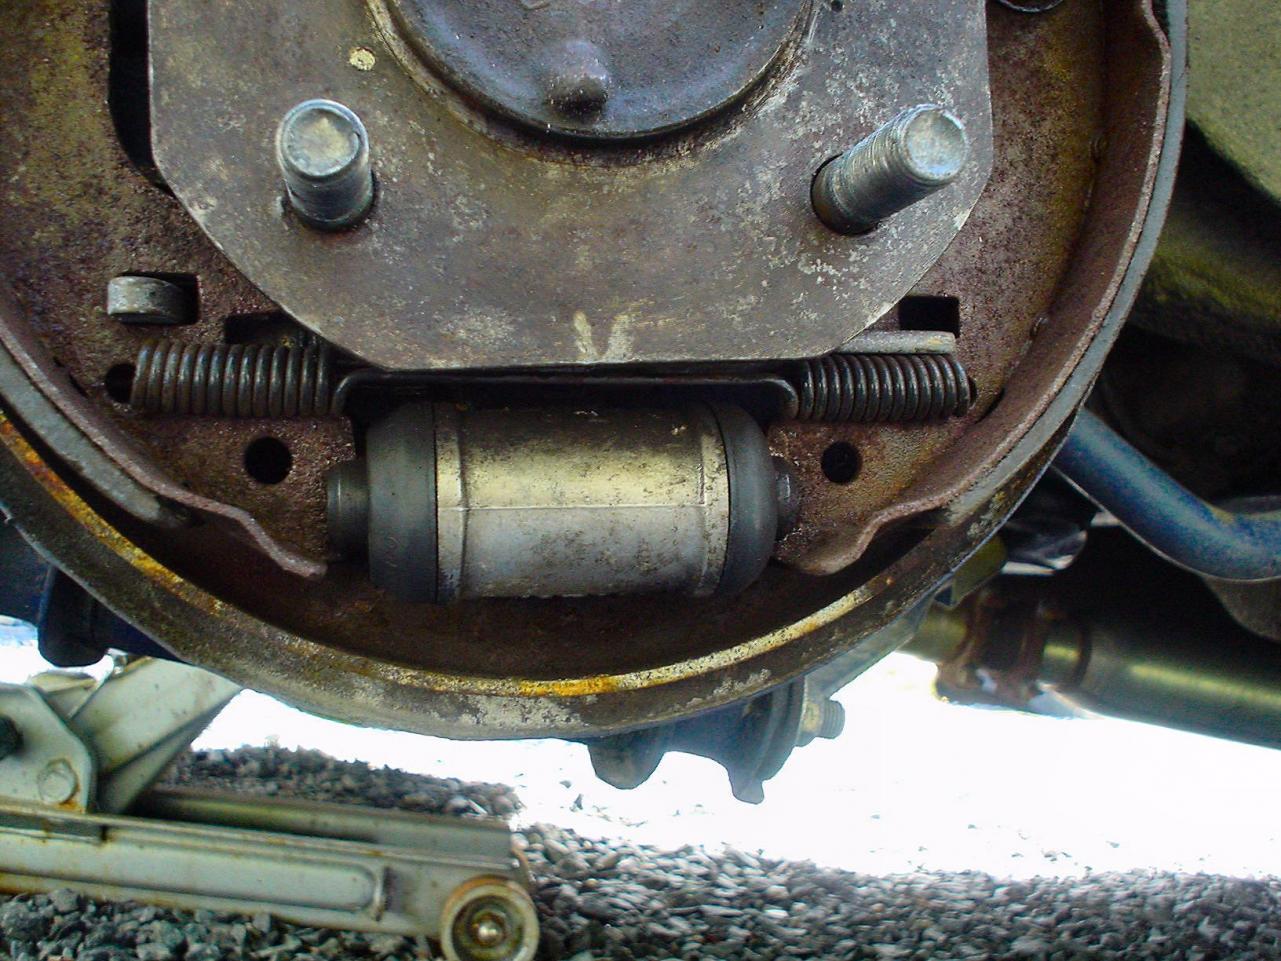
Note where the liner starts on the front and rear shoe. (The front shoe is on the left)

-
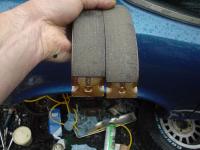
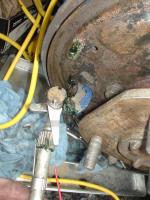
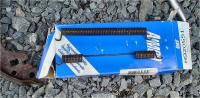
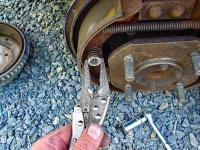
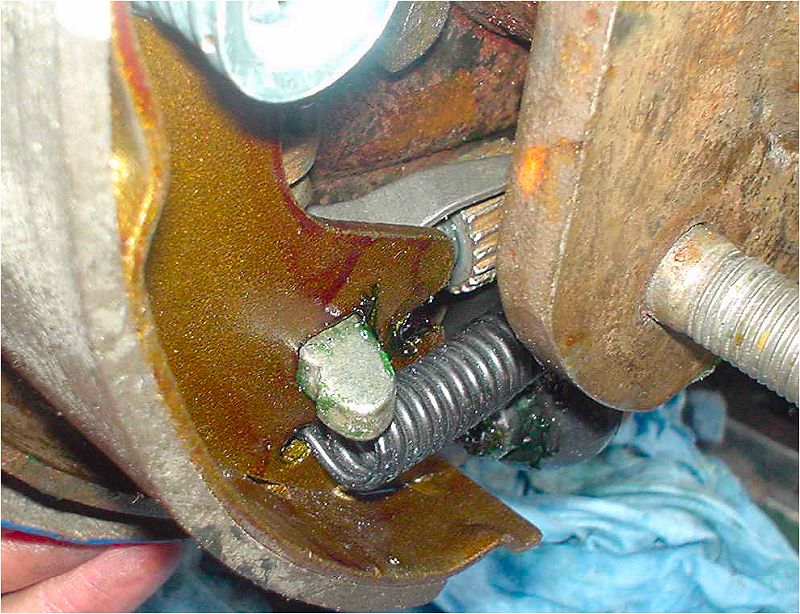
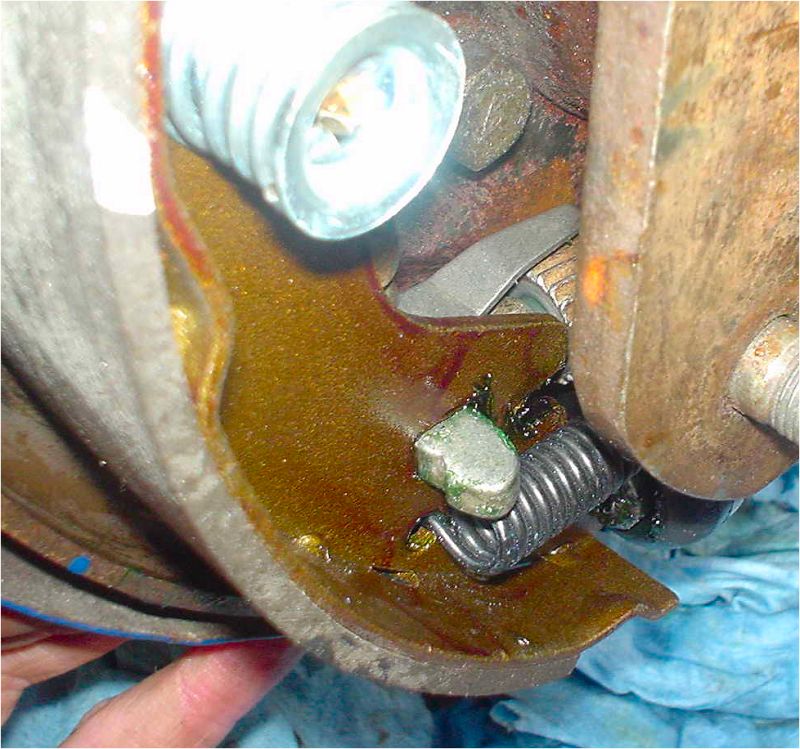
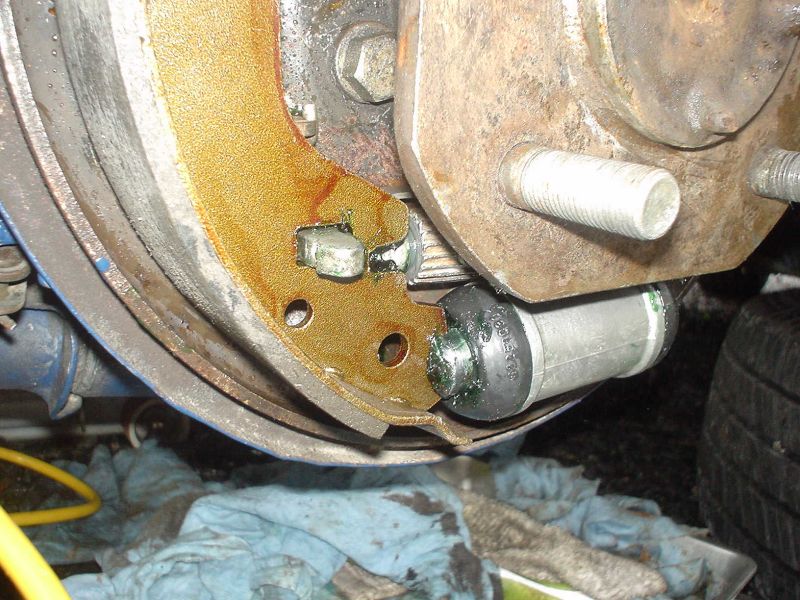
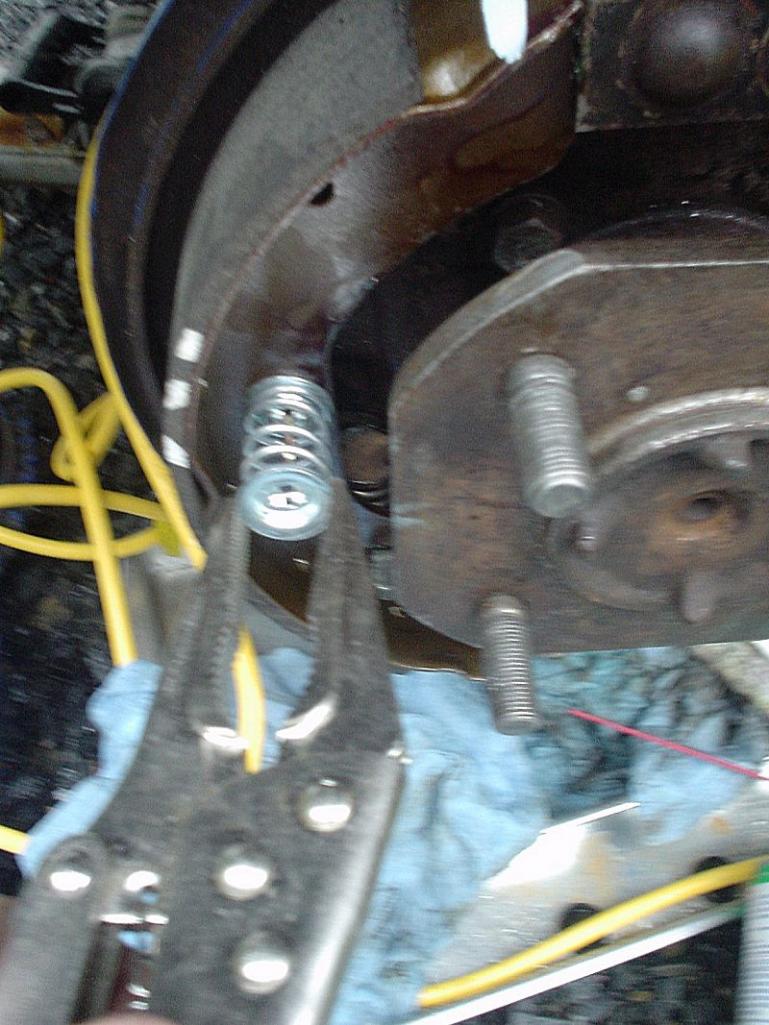
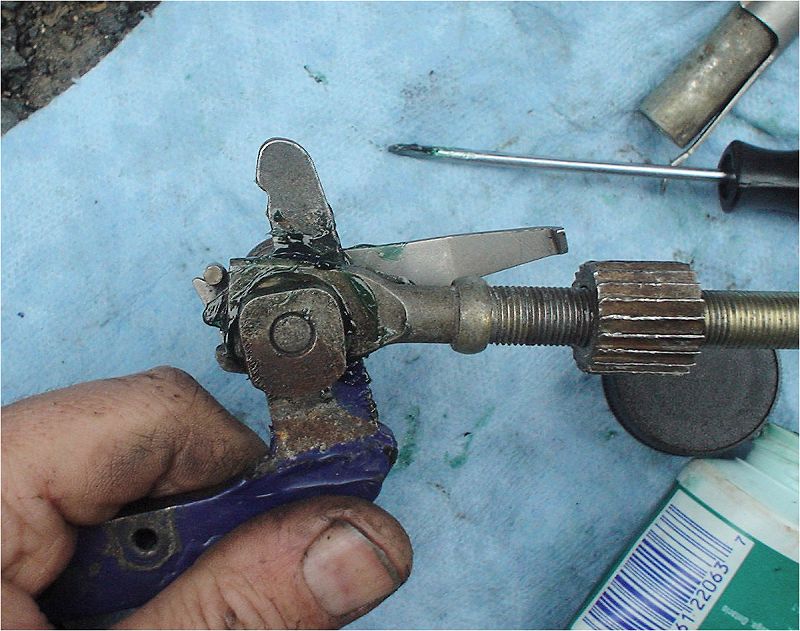
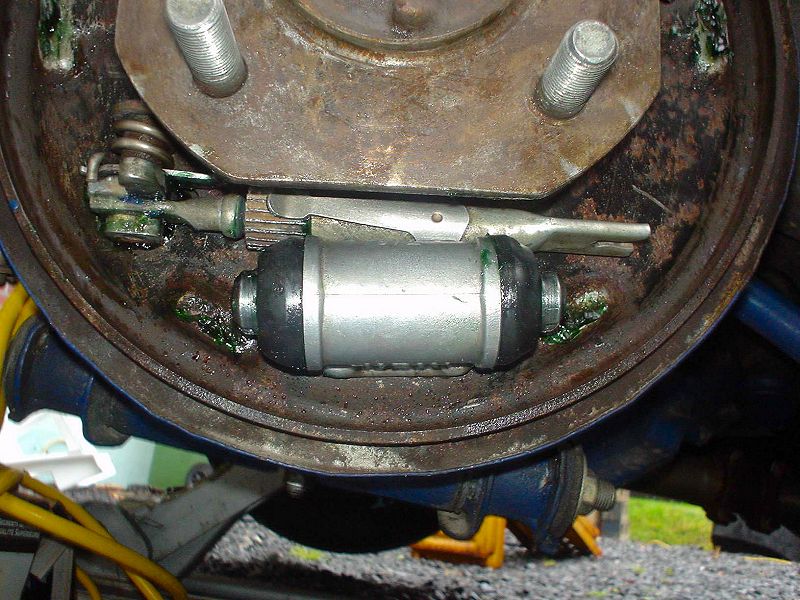
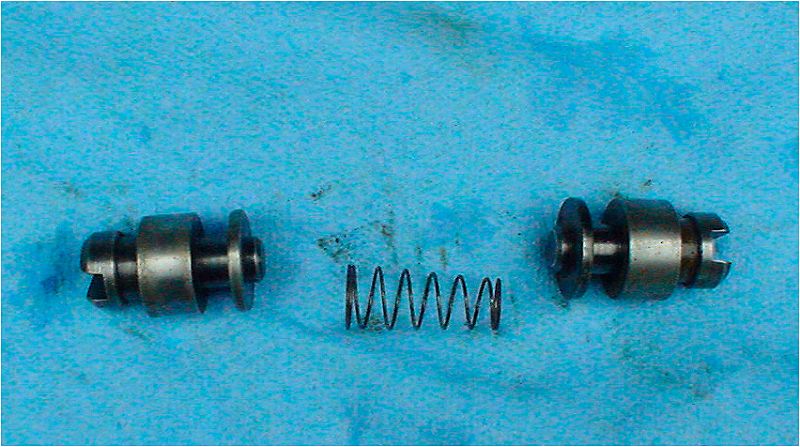
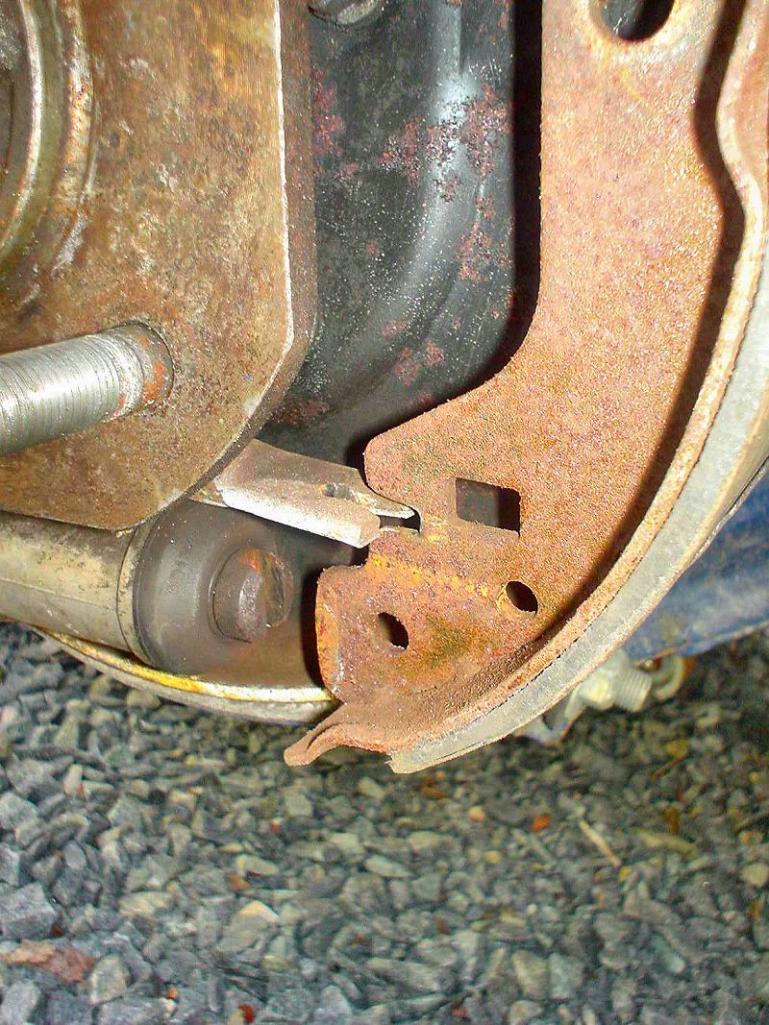
Front shoe on right and rear on left


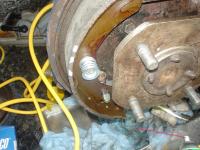

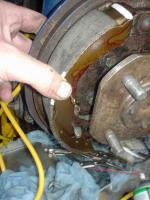
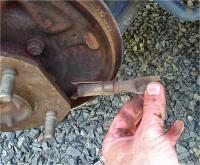
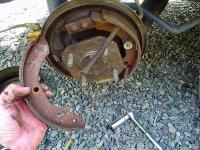
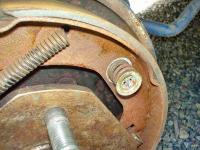
 Again there is a front (on right) and rear shoe (on left)
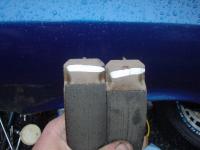

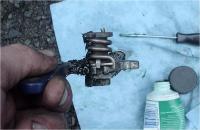
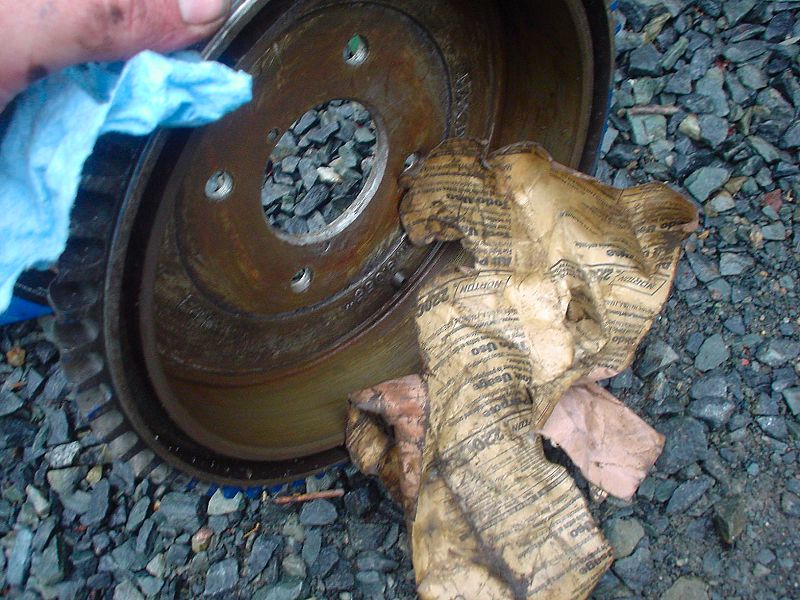
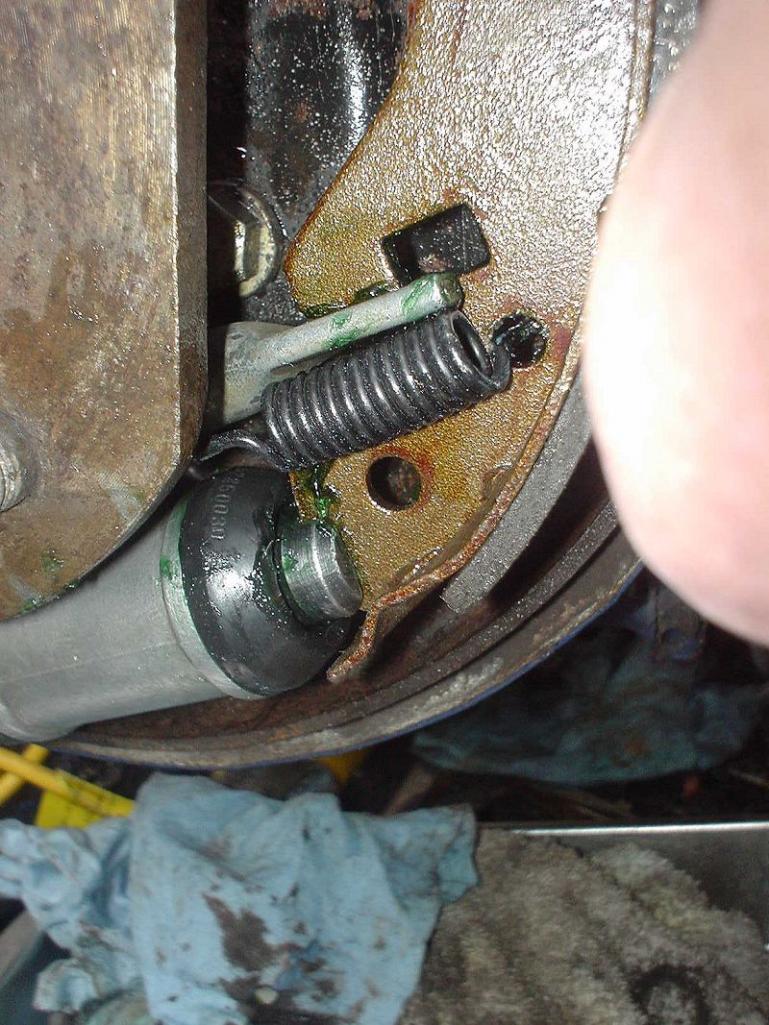
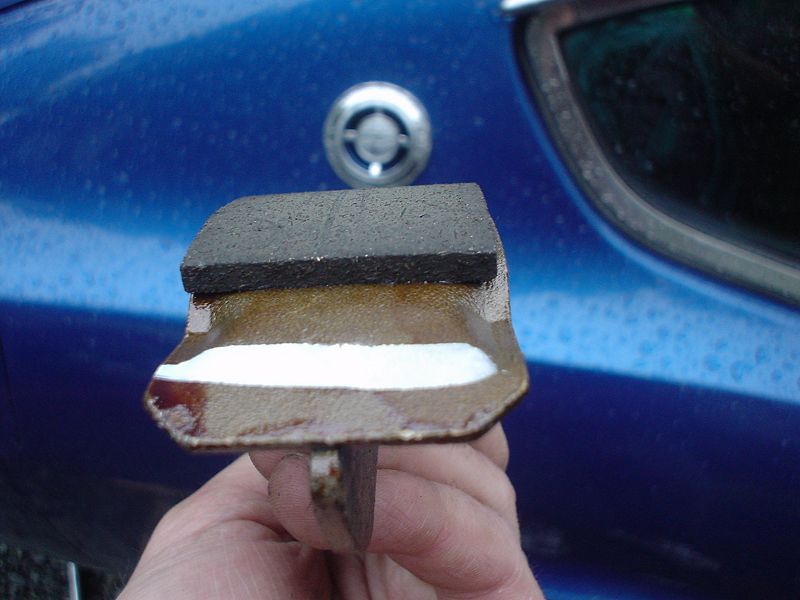
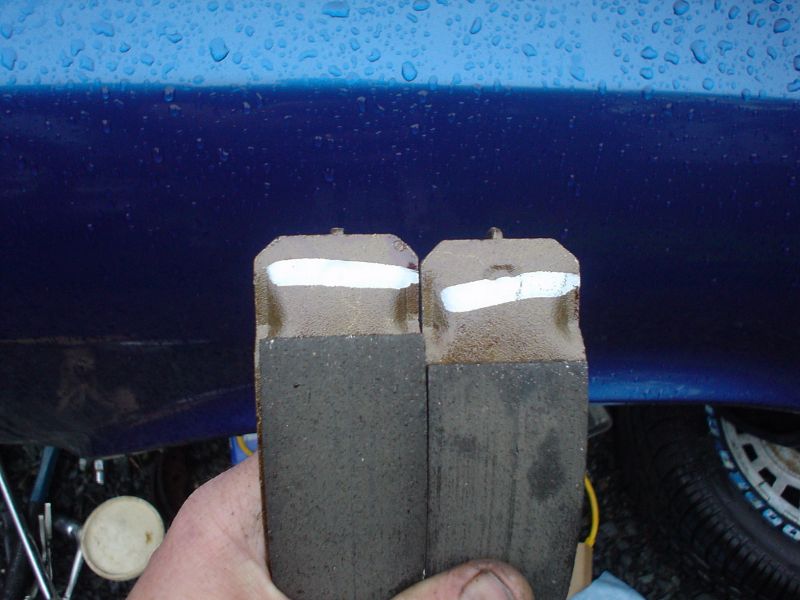
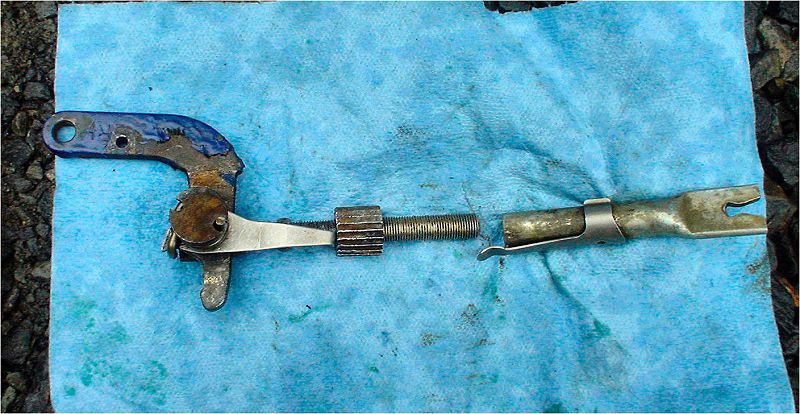
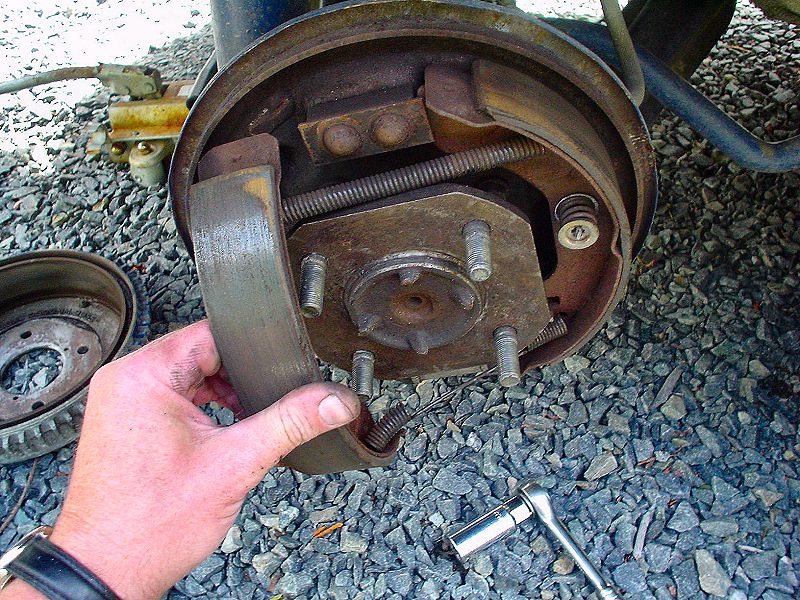
 Note: There is a front and a rear shoe. The difference is the distance from the liner to the end.
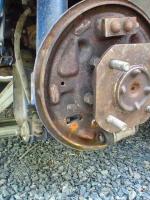


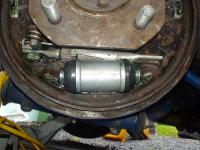
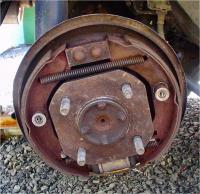
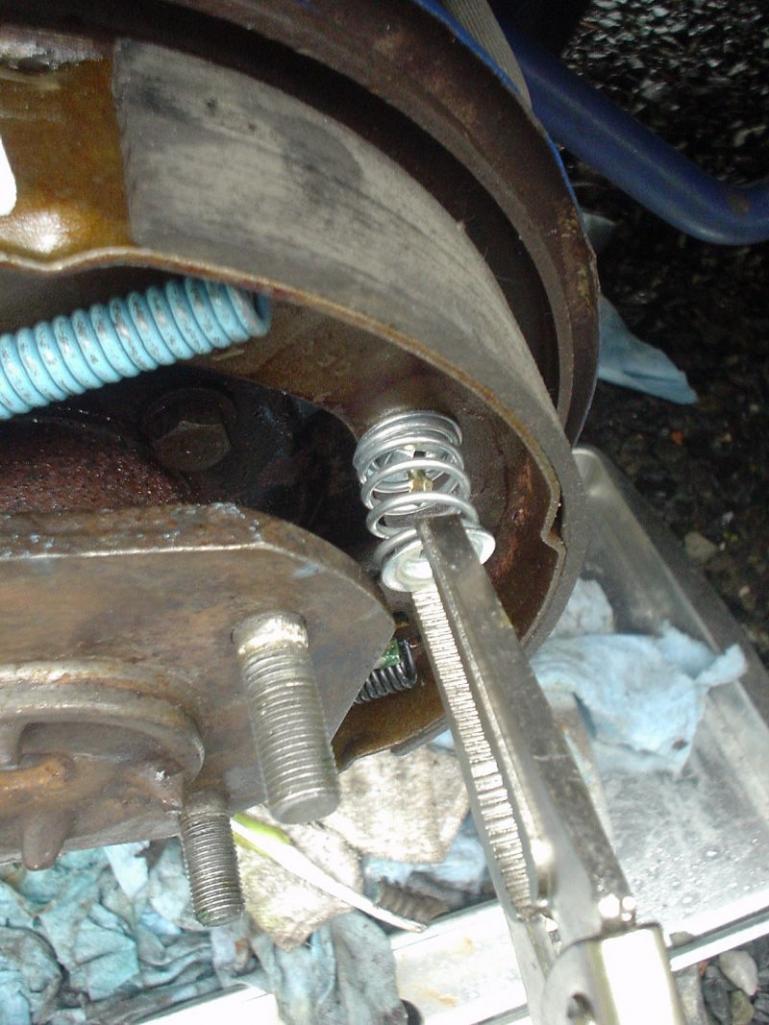
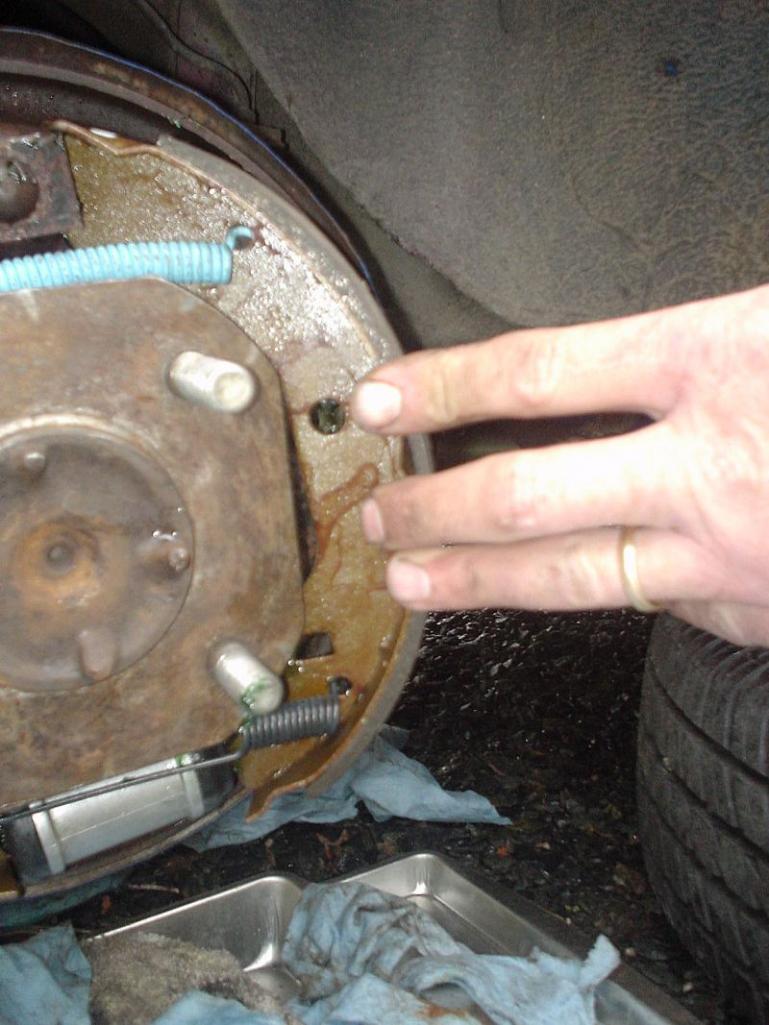
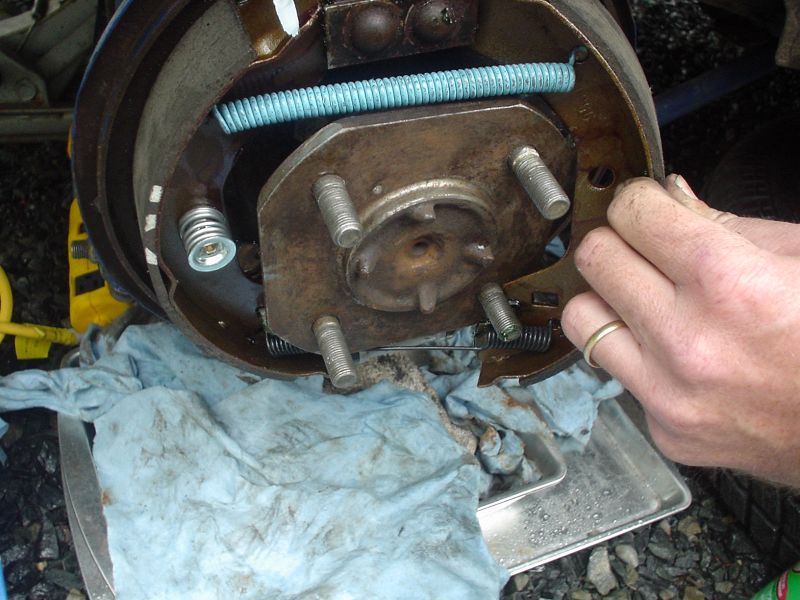
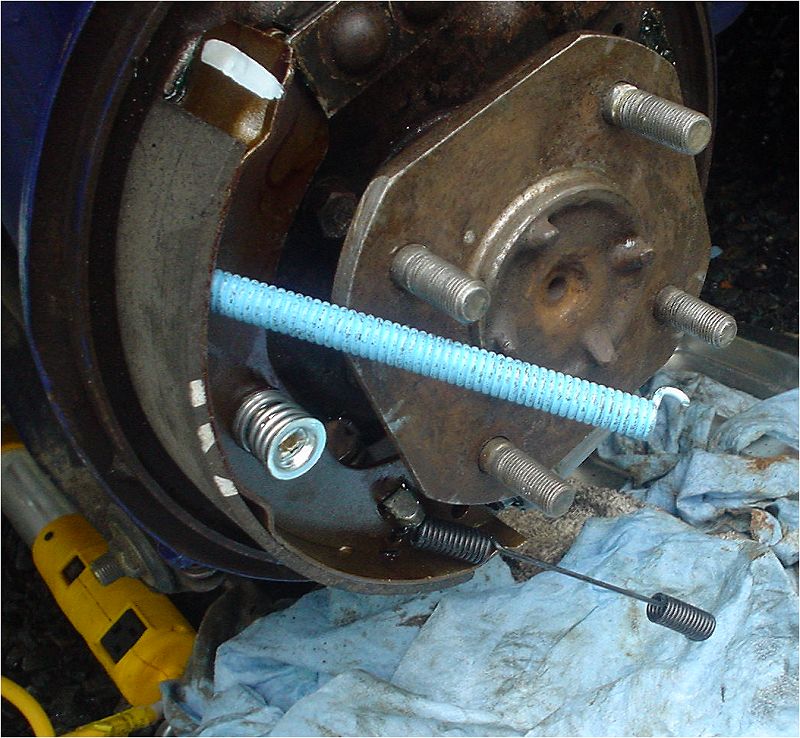
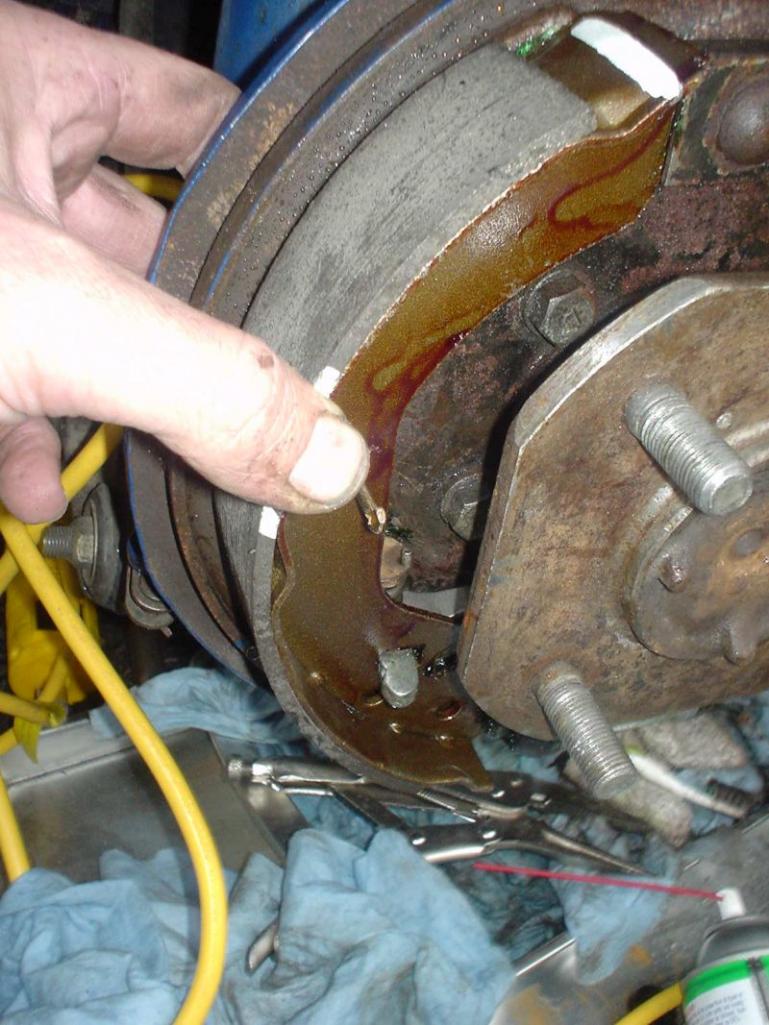
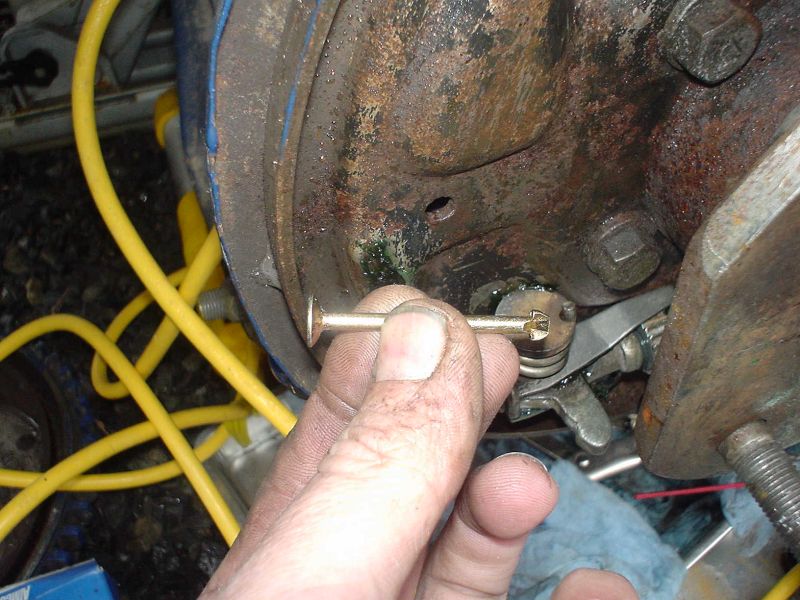
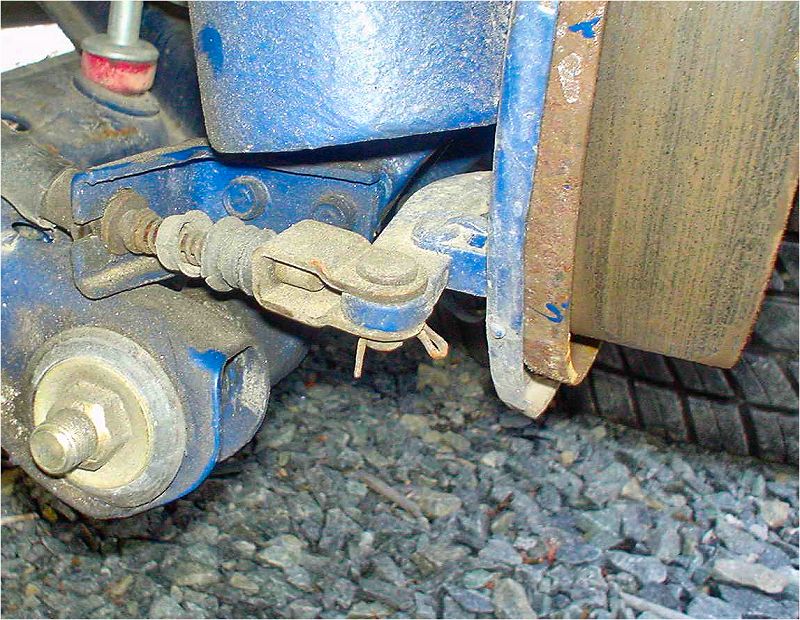
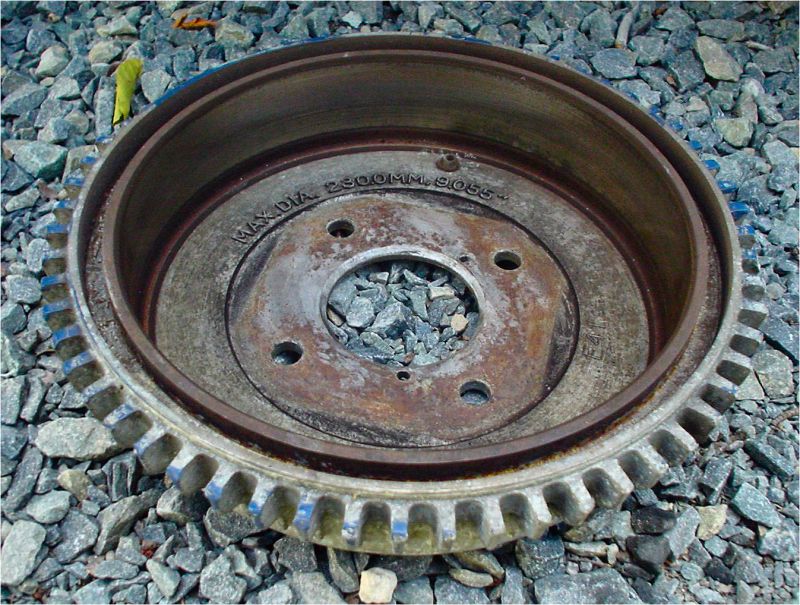
 More Pictures


 Pictures
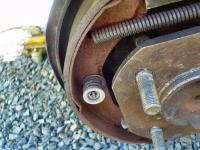


 Bussman: http://www1.cooperbussmann.com/pdf/01e5795a-2857-422e-85c0-62eb8b13d2c5.pdf This Z expert's site mentions the BRown / Red typo: http://www.datsunstore.com/product_info.php/cPath/37_157/products_id/904
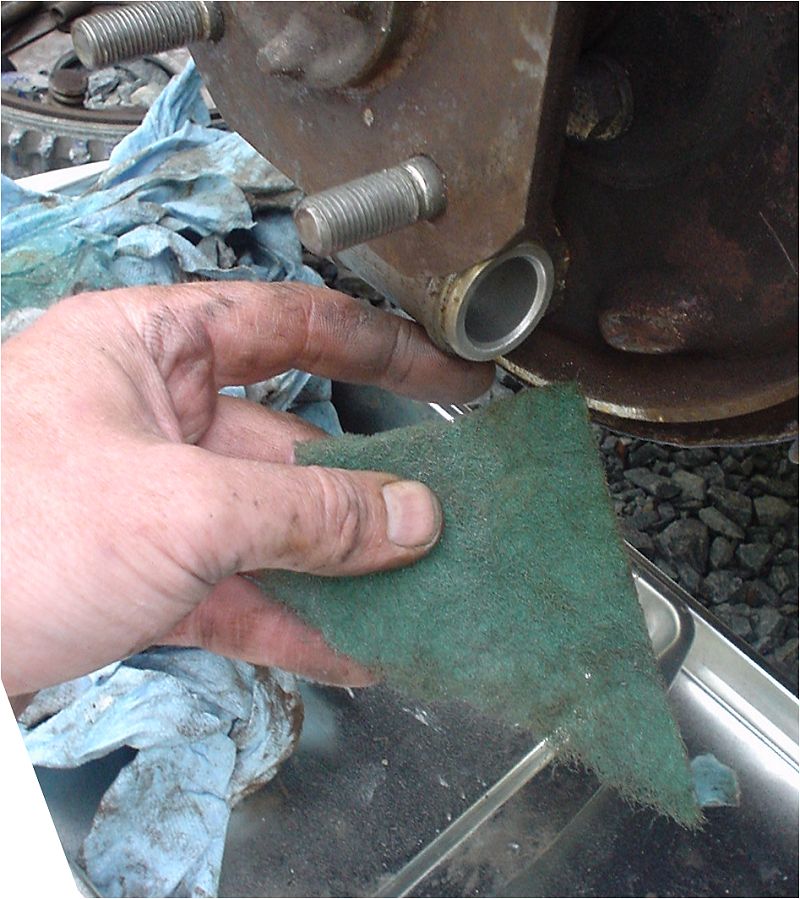
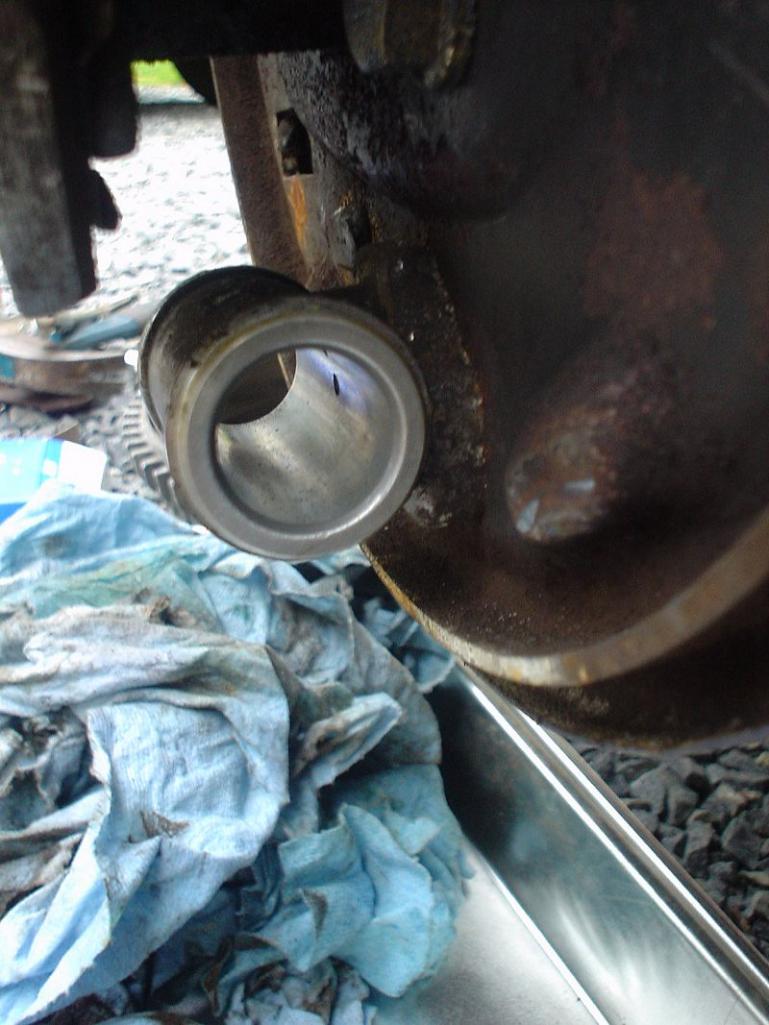
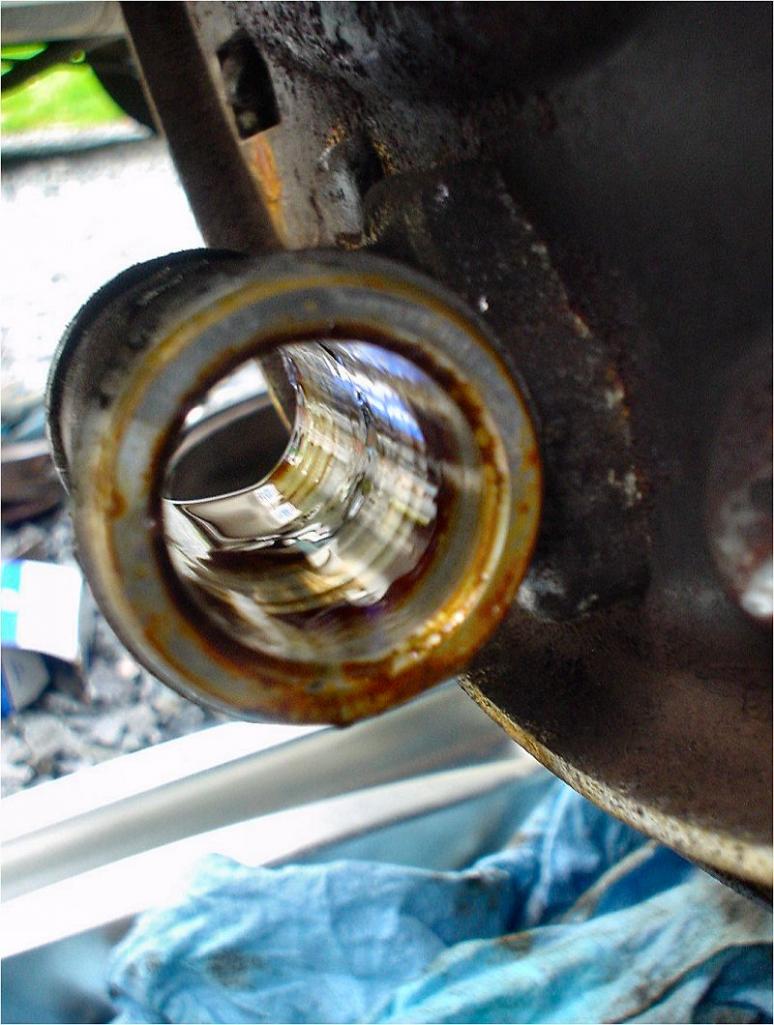
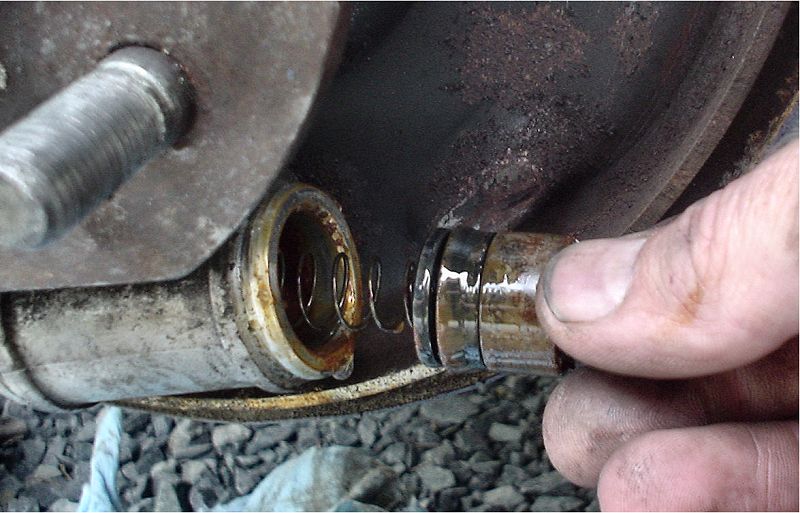
Machine shop with a lathe can build you one or You can use a metal foil tape to wrap the inner pipe to build up a spacing... It should not rattle after it degrades from the heat of welding and exhaust.
http://dirtys30.blogspot.com/2010/11/l28-teardown-complete.html
http://www.cardomain.com/ride/2969745/1977-datsun-280z/page-3
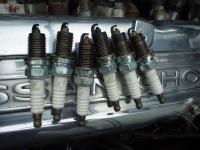
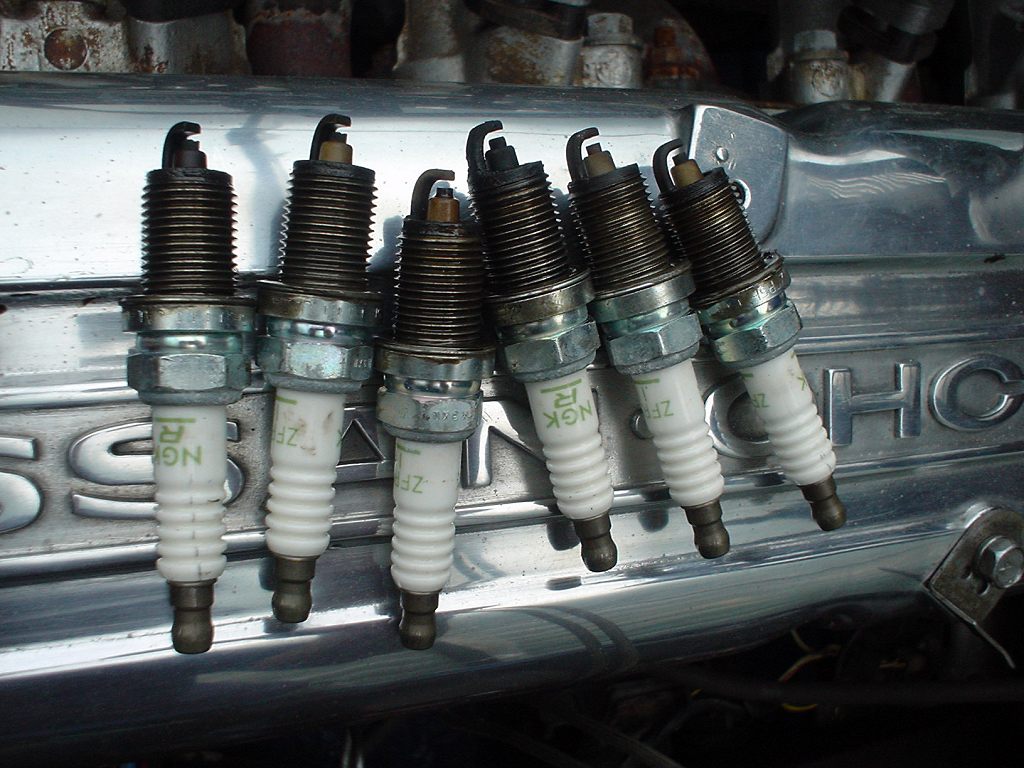
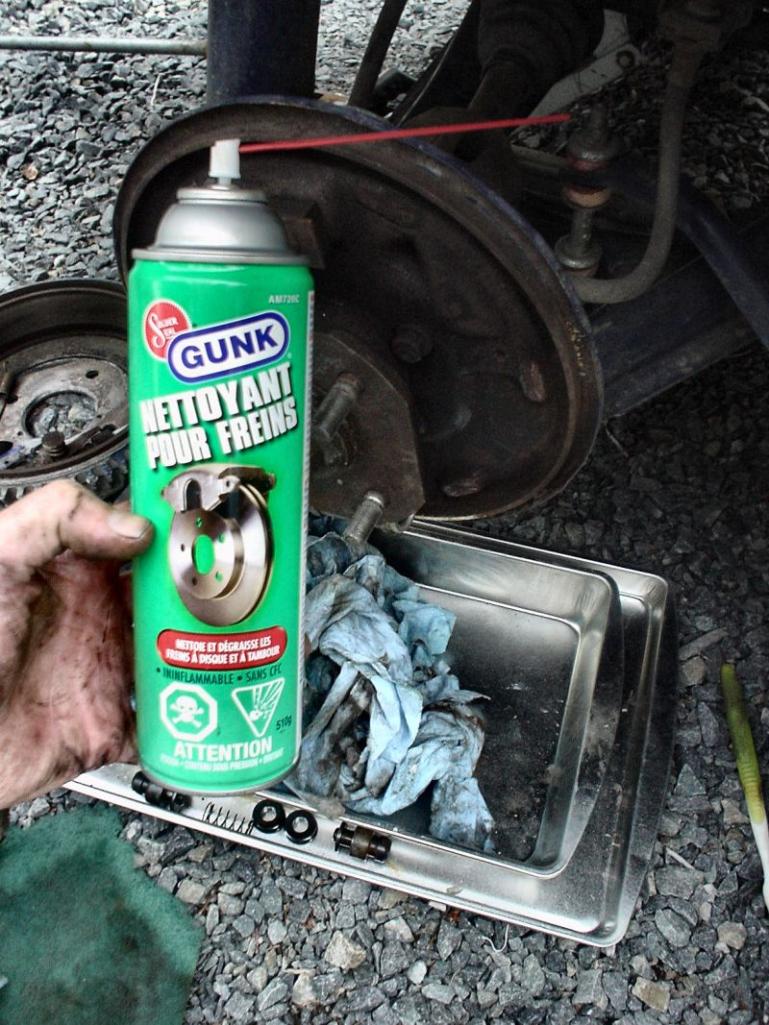
Pull plugs and show us a photo of them. Tips for removing head: Secure timing chain tensioner Put motor at "top dead centre" Remove 2 small bolts at front of head underneath first Use block of wood and hammer blows if head is stuck Clean all headbolt holes Buy headgasket that matches block If you have an oil bar, remove and flush it out by spraying carb cleaner through holes When reseating head, make sure cam is at tdc Check head for cracks http://atlanticz.ca/zclub/techtips/head/crackedhead/index.htm Check head for flatness spray foam (shaving cream or similar) in cylinders when cleaning block surface then vacuum it out with the trapped debris
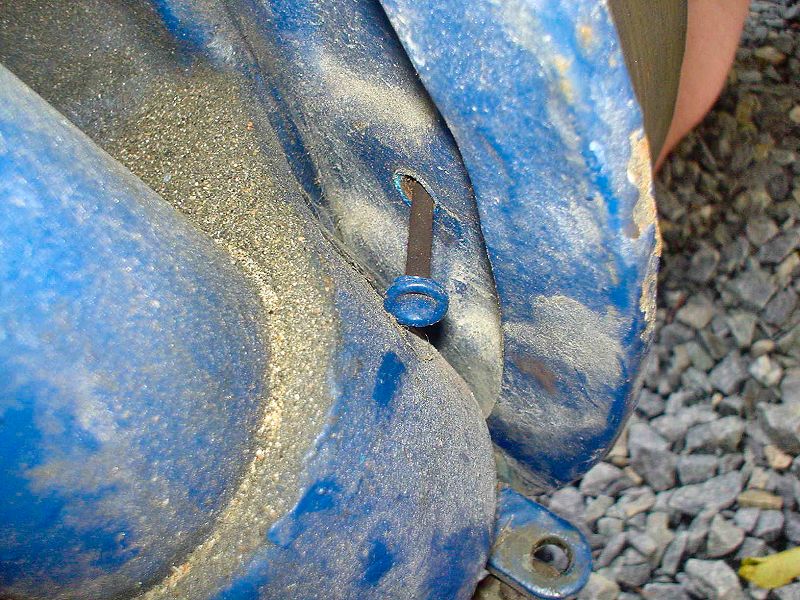
Dropping tank on '77: http://atlanticz.ca/zclub/techtips/fuel/gastank/index.htm
Can you insert long thin wooden shims/spacers/popsicle sticks between the two, weld, then pull out the spacers?
Found this on line:
Bussman: http://www1.cooperbussmann.com/pdf/01e5795a-2857-422e-85c0-62eb8b13d2c5.pdf This Z expert's site mentions the BRown / Red typo: http://www.datsunstore.com/product_info.php/cPath/37_157/products_id/904
Machine shop with a lathe can build you one or You can use a metal foil tape to wrap the inner pipe to build up a spacing... It should not rattle after it degrades from the heat of welding and exhaust.
http://dirtys30.blogspot.com/2010/11/l28-teardown-complete.html
http://www.cardomain.com/ride/2969745/1977-datsun-280z/page-3
Pull plugs and show us a photo of them. Tips for removing head: Secure timing chain tensioner Put motor at "top dead centre" Remove 2 small bolts at front of head underneath first Use block of wood and hammer blows if head is stuck Clean all headbolt holes Buy headgasket that matches block If you have an oil bar, remove and flush it out by spraying carb cleaner through holes When reseating head, make sure cam is at tdc Check head for cracks http://atlanticz.ca/zclub/techtips/head/crackedhead/index.htm Check head for flatness spray foam (shaving cream or similar) in cylinders when cleaning block surface then vacuum it out with the trapped debris
Dropping tank on '77: http://atlanticz.ca/zclub/techtips/fuel/gastank/index.htm
Can you insert long thin wooden shims/spacers/popsicle sticks between the two, weld, then pull out the spacers?
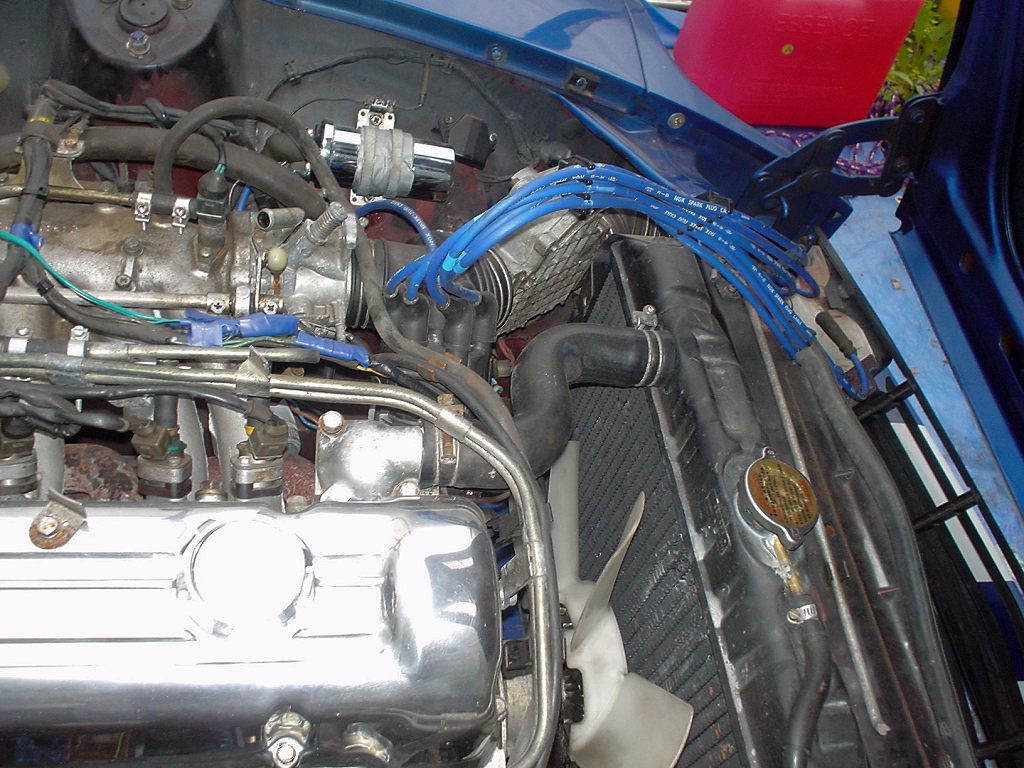
Found this on line: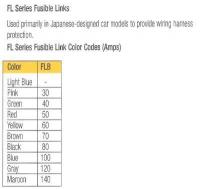 Sorry, I thought I had the 76 stock and upgrade details in the tech tip. Here is the appropriate section of the 76 schematic that I cleaned up (see attachment) It is close to the 77: and you can see 77 details here: http://www.atlanticz.ca/zclub/techtips/distributor/index.html Note the similarities in the coil wiring.... and ballast wiring:
 All 77's I have seen have 3 red and 1 black. Any original owners out there with 3 brown and 1 black?


Important Information
By using this site, you agree to our Privacy Policy and Guidelines. We have placed cookies on your device to help make this website better. You can adjust your cookie settings, otherwise we'll assume you're okay to continue.